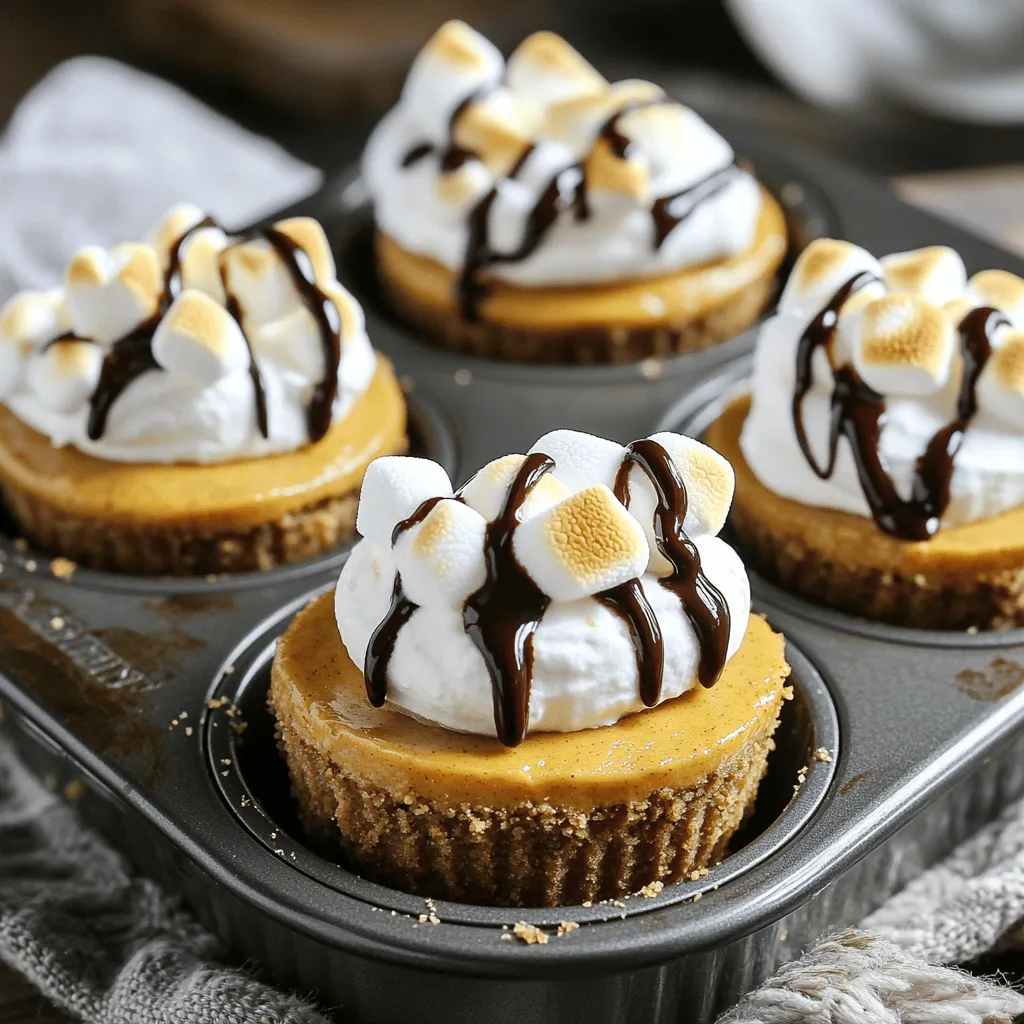
Get ready for a treat that combines fall flavors with classic comfort! These S’mores Pumpkin Cheesecake Cups are the perfect bite-sized dessert. Imagine creamy pumpkin cheesecake with a graham cracker crust, topped with toasted marshmallows. Whether you’re hosting a party or enjoying a cozy night in, this dessert is sure to impress. Let’s dive into the ingredients and steps to make these irresistible treats!
Ingredients
Required Ingredients for S’mores Pumpkin Cheesecake Cups
To create these tasty treats, gather the following ingredients:
– 1 cup graham cracker crumbs
– 4 tablespoons unsalted butter, melted
– 1 cup canned pumpkin puree
– 1 cup cream cheese, softened
– 1/2 cup granulated sugar
– 1/4 cup brown sugar
– 2 teaspoons vanilla extract
– 1 teaspoon pumpkin pie spice
– 2 large eggs
– 1 cup mini marshmallows
– 1/2 cup chocolate chips
– Whipped cream for topping
– Chocolate syrup for drizzling
These ingredients blend together to create a creamy, pumpkin-flavored cheesecake. The graham cracker crumbs act as a crunchy base. The pumpkin puree brings a rich flavor, while the cream cheese gives a smooth texture.
Optional Toppings and Variations
You can customize your S’mores Pumpkin Cheesecake Cups. Here are some ideas:
– Add crushed graham crackers on top for extra crunch.
– Use caramel sauce instead of chocolate syrup for a different taste.
– Swap mini marshmallows for larger ones or add peanut butter cups for fun.
These variations let you make the dessert your own. Experiment with toppings to find your favorite mix.
Tips for Choosing Fresh Ingredients
When selecting ingredients, freshness matters. Here are some tips:
– Look for canned pumpkin with no added sugars or spices.
– Choose cream cheese that is smooth and free from lumps.
– Check the expiration dates on all products before buying.
Fresh ingredients enhance flavor and texture. Always choose the best to make your S’mores Pumpkin Cheesecake Cups shine.
Step-by-Step Instructions
Prepping the Muffin Tin and Crust
First, set your oven to 325°F (163°C). Grab a muffin tin and line it with cupcake liners. In a medium bowl, mix the graham cracker crumbs with melted butter. Make sure it’s well combined. Spoon about 2 tablespoons of this mix into each muffin cup. Press down firmly. This forms a nice, sturdy crust for your cheesecake cups.
Making the Pumpkin Cheesecake Filling
Next, take a large mixing bowl. Beat the softened cream cheese with a hand mixer until it’s smooth. Add in the pumpkin puree, granulated sugar, brown sugar, vanilla extract, pumpkin pie spice, and eggs. Mix everything together until fully combined. Scrape the sides of the bowl as needed. The mixture should be creamy and smooth.
Baking the S’mores Pumpkin Cheesecake Cups
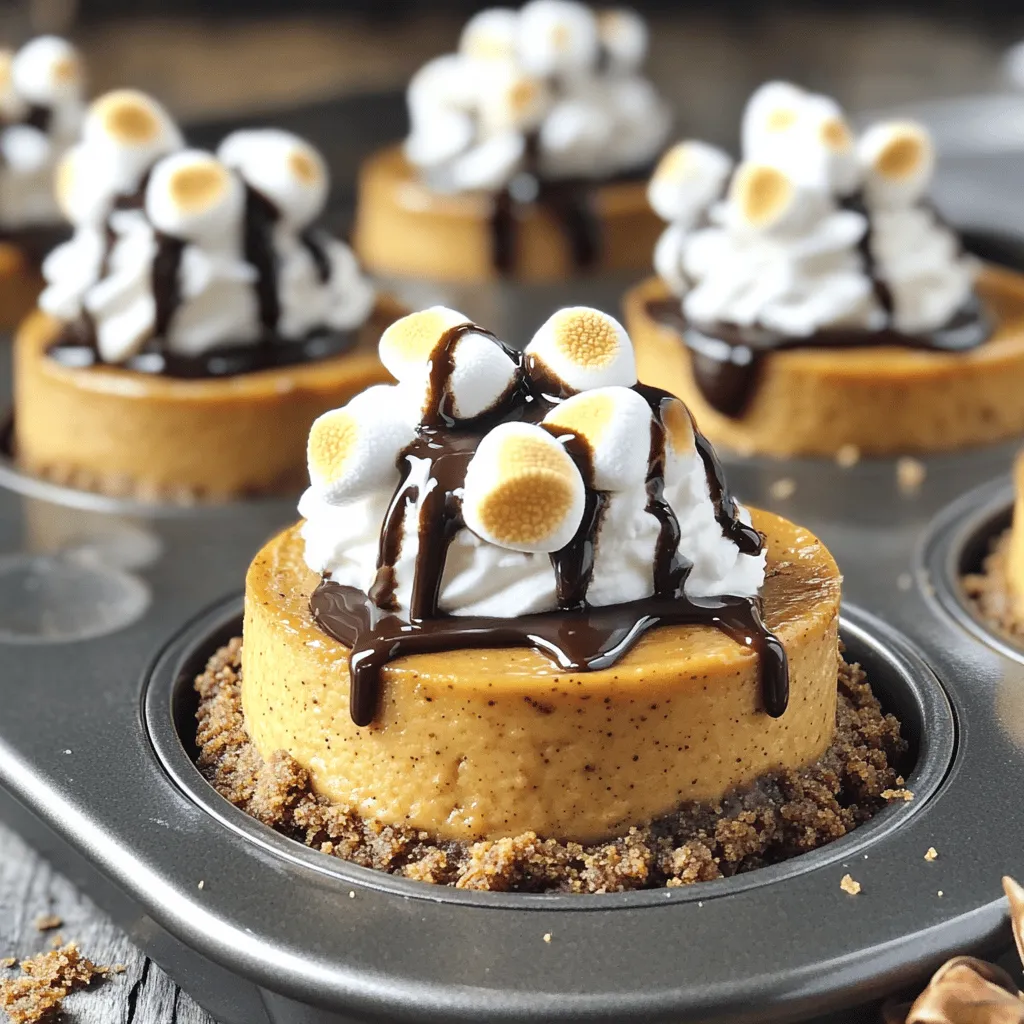
Now, pour the pumpkin cheesecake mixture over the crusts in the muffin tin. Fill each cup about three-quarters full. Place the muffin tin in the oven and bake for about 25 to 30 minutes. The filling should set and have a slight jiggle in the center. After baking, sprinkle mini marshmallows on top. Return the tin to the oven for an extra 2 to 3 minutes. The marshmallows should turn golden and gooey.
Cooling and Serving Suggestions
Once they’re done baking, take the cheesecake cups out of the oven. Let them cool at room temperature first. Then, place them in the fridge for at least 2 hours. This helps them set properly. When ready to serve, add a dollop of whipped cream on top. Drizzle with chocolate syrup and sprinkle more graham cracker crumbs for that extra touch. Enjoy your delicious treat!
Tips & Tricks
Perfecting the Pumpkin Cheesecake Texture
To get that perfect creamy texture in your cheesecake cups, mix the cream cheese first. Ensure it is soft before you add anything else. This makes mixing easier and smoother. After adding the pumpkin puree and sugars, mix well until there are no lumps. Don’t overbeat the eggs; just mix until they blend in. This helps keep a nice texture without air bubbles.
Secrets to Achieving Golden Brown Marshmallows
To get those beautiful golden marshmallows, watch them closely while they bake. After the cheesecake cups are done, sprinkle mini marshmallows on top. Then, return them to the oven for just 2-3 minutes. The goal is to melt them slightly and get that nice golden color. If they brown too fast, you can turn off the oven and let the residual heat finish the job.
How to Prevent Cracks in Your Cheesecake Cups
Cracks can be a real bummer, but there are ways to avoid them. First, make sure your ingredients are at room temperature. Cold ingredients can lead to uneven cooking. Bake at a low temperature, like 325°F, for even cooking. Once done, let them cool slowly in the oven with the door slightly open. This helps prevent sudden temperature changes, which cause cracks.
Variations
Chocolate Chip Pumpkin Cheesecake Cups
You can add chocolate chips for a fun twist. Just mix 1/2 cup of chocolate chips into the pumpkin cheesecake filling. This change gives your dessert extra sweetness and richness. The melted chocolate adds a nice texture too. You can also sprinkle some chocolate chips on top before baking for a more decadent treat.
Mini S’mores Cheesecake Bars
If you want to try a different shape, make mini s’mores cheesecake bars. Use a baking dish instead of muffin cups. Press the graham cracker mixture into the bottom and pour the filling on top. Bake it as you would the cups. Once cooled, cut into squares and top with mini marshmallows and chocolate syrup. These bars are perfect for sharing at parties.
Gluten-Free or Vegan Alternatives
You can make these cups gluten-free by using gluten-free graham crackers. For a vegan option, swap the cream cheese for a vegan cream cheese alternative. Use flax eggs instead of regular eggs. Mix 1 tablespoon of ground flaxseed with 2.5 tablespoons of water for each egg. This change keeps the texture creamy while making it plant-based. Always check labels to ensure all ingredients fit your dietary needs.
Storage Info
Best Storage Practices for S’mores Cheesecake Cups
To keep your S’mores Pumpkin Cheesecake Cups fresh, store them in a sealed container. I recommend using an airtight container. This helps keep the flavors strong and the texture smooth. Place a layer of parchment paper between layers if stacking them. This will prevent sticking.
How Long Do They Last in the Fridge?
When stored properly, these cheesecake cups last about 5 days in the fridge. Just make sure to keep them covered. If you notice any changes in color or smell, it’s best to toss them out. You want to enjoy them at their best!
Freezing Instructions and Tips
You can freeze the cheesecake cups for up to 3 months. First, make sure they are fully cool. Wrap each cup tightly in plastic wrap. Then, place them in a freezer-safe bag or container. When ready to eat, pull them out and let them thaw in the fridge. Avoid refreezing once they have thawed. Enjoy your tasty treats later!
FAQs
Can I make S’mores Pumpkin Cheesecake Cups ahead of time?
Yes, you can make these cups ahead. Prepare them up to 2 days in advance. Once baked, cool them, then chill in the fridge. This lets the flavors blend nicely. Just add toppings before serving to keep them fresh.
How can I adjust the sweetness of the cheesecake filling?
To adjust sweetness, change the sugar amounts. You can add less granulated sugar. If you want more sweetness, add a bit more brown sugar. Taste the mixture before baking to find the right balance for you.
What can I use instead of mini marshmallows?
If you don’t have mini marshmallows, use whipped cream. You can also try marshmallow fluff for a smooth texture. Another tasty option is small pieces of chocolate or even toasted coconut for a unique twist.
In this post, we covered how to make S’mores Pumpkin Cheesecake Cups. We detailed essential ingredients, offered baking tips, and shared fun variations. You learned how to select fresh ingredients and get that perfect texture. Remember, small tweaks can change your dessert game. Whether you try the gluten-free option or the mini bars, have fun creating. With proper storage, you can enjoy these treats for days. Embrace your creativity and make this dessert your own!