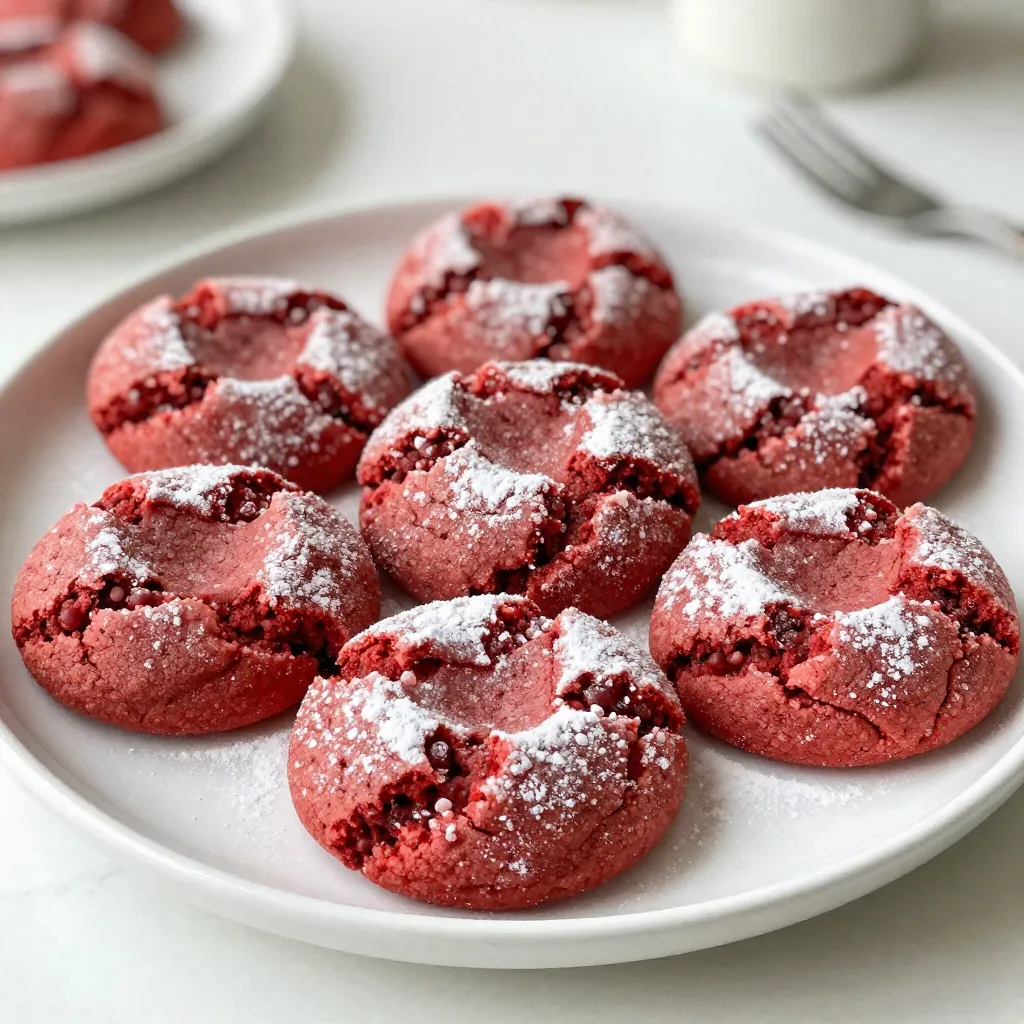
Are you ready to make some delightful Red Velvet Crinkle Cookies? These treats are not just eye-catching with their deep red color and snowy white dusting; they are also deliciously soft and chewy. I’ll guide you through easy steps, tips, and variations to create the perfect batch. Let’s dive in and explore this fun and tasty cookie recipe that will impress everyone!
Why I Love This Recipe
- Delicious Flavor: The combination of cocoa and red food coloring creates a unique and delightful treat that’s perfect for any occasion.
- Easy to Make: This recipe is straightforward and requires minimal effort, making it ideal for bakers of all skill levels.
- Stunning Presentation: The vibrant red color and powdered sugar coating make these cookies visually appealing and festive.
- Perfect Texture: The crinkly exterior and chewy interior provide a satisfying bite that everyone will love.
Ingredients
Complete List of Ingredients
To make Red Velvet Crinkle Cookies, gather these items:
– 2 cups all-purpose flour
– 1 tablespoon cocoa powder
– 1 teaspoon baking powder
– 1/2 teaspoon baking soda
– 1/4 teaspoon salt
– 1 cup granulated sugar
– 1/2 cup vegetable oil
– 2 large eggs
– 1 tablespoon red food coloring
– 1 teaspoon vanilla extract
– 1 cup powdered sugar (for coating)
Substitutions for Key Ingredients
You can swap some ingredients if needed. Here are good options:
– All-purpose flour: Use a gluten-free blend for gluten-free cookies.
– Vegetable oil: Canola oil or melted coconut oil works well.
– Eggs: Use flaxseed meal mixed with water for a vegan option.
– Red food coloring: Natural beet juice gives a nice color too.
Importance of Ingredients in Achieving the Right Texture
Each ingredient plays a key role in the cookie’s texture. Here’s how:
– All-purpose flour gives structure. Too much can make cookies tough.
– Cocoa powder adds flavor and a rich color. It balances the sweetness.
– Baking powder and baking soda help cookies rise. They create that crinkle effect.
– Granulated sugar adds sweetness and moisture. It helps cookies stay soft.
– Vegetable oil keeps cookies chewy. It helps them not dry out.
– Eggs add moisture and bind the dough. They help cookies rise.
– Red food coloring makes them visually appealing. It’s all about that signature look!
These ingredients combined create a delightful cookie that melts in your mouth.

Step-by-Step Instructions
Preparation Steps
First, gather all your ingredients. You need:
– 2 cups all-purpose flour
– 1 tablespoon cocoa powder
– 1 teaspoon baking powder
– 1/2 teaspoon baking soda
– 1/4 teaspoon salt
– 1 cup granulated sugar
– 1/2 cup vegetable oil
– 2 large eggs
– 1 tablespoon red food coloring
– 1 teaspoon vanilla extract
– 1 cup powdered sugar (for coating)
Start by preheating your oven to 350°F (175°C). Line a baking sheet with parchment paper. This helps the cookies not stick.
In a medium bowl, mix the flour, cocoa powder, baking powder, baking soda, and salt. Whisk well and set it aside. In a large bowl, combine the granulated sugar and vegetable oil. Whisk them together until they blend well. Add the eggs, red food coloring, and vanilla extract. Whisk again until the mix turns smooth and bright red.
Now, slowly add the dry flour mix to the wet ingredients. Stir until the dough is fully mixed. It may feel sticky, which is fine. Place the dough in the fridge for about 30 minutes. This makes it easier to roll.
Baking Steps
Once the dough is chilled, take it out. Use a tablespoon or cookie scoop to portion the dough. Roll each piece into a ball. Then, roll the ball in powdered sugar until it’s fully coated.
Place the dough balls on your baking sheet with 2 inches of space in between each one. Bake in your preheated oven for 10-12 minutes. The edges should be set, but the centers may look underbaked. This is normal and gives the cookies a soft texture.
Cooling and Serving Directions
After baking, take the cookies out of the oven. Let them cool on the baking sheet for 5 minutes. This helps them firm up a bit. Then, transfer them to a wire rack to cool completely.
For serving, I like to present the cookies on a nice plate. You can dust them with extra powdered sugar. Add some fresh berries or a scoop of vanilla ice cream for a fun twist!
Tips & Tricks
Achieving the Perfect Crinkle Effect
To get that signature crinkle on your cookies, chill the dough first. This step helps the cookies keep their shape when baking. After rolling the dough balls, coat them well in powdered sugar. This coating will crack as the cookies bake, giving you those beautiful crinkles. Bake them until the edges set but the centers remain soft. This timing helps enhance the crinkle effect.
Common Mistakes to Avoid
One common mistake is skipping the chilling step. If the dough is too warm, it spreads too much, losing its shape. Another mistake is not coating the dough balls enough in powdered sugar. Make sure they are fully covered for an even look. Lastly, avoid overbaking. Cookies that are too dry won’t have that chewy texture we love.
Best Practices for Cookie Dough Handling
When making the dough, use a sturdy bowl to mix your ingredients. Be gentle when combining the wet and dry ingredients to avoid overmixing. Overmixing can make the cookies tough. After chilling, scoop the dough quickly to keep it cool. Always wash your hands before handling the dough to keep it clean. Store any leftover dough in the fridge if you want to bake later.
Pro Tips
- Chill the Dough: Refrigerating the cookie dough for at least 30 minutes helps in handling the sticky mixture and results in a better shape during baking.
- Use Gel Food Coloring: For a more vibrant red color, opt for gel food coloring instead of liquid food coloring, as it provides a richer hue without altering the dough’s consistency.
- Don’t Overbake: Keep an eye on the cookies while baking. They should look slightly underbaked in the center; they will continue to cook as they cool on the baking sheet.
- Experiment with Flavor: Add a pinch of cinnamon or almond extract to the dough for an extra layer of flavor that complements the red velvet perfectly.
Variations
Adding Different Flavorings
You can make these cookies even more fun by adding other flavors. Try mixing in some mint extract for a fresh twist. Almond extract also pairs well with the rich red color. Just use a teaspoon of your chosen flavor. This small change can make a big impact.
Gluten-Free Adaptations
If you need gluten-free cookies, you can use a gluten-free flour blend. Many blends work well to keep the taste and texture great. Look for a blend with xanthan gum; it helps the cookies hold together. Check the package for the right amount to use.
Seasonal Add-Ins and Themes
You can change the cookies for any season. For fall, add a pinch of cinnamon or nutmeg. This gives them a warm, cozy flavor. In winter, try mixing in some crushed candy canes for a minty crunch. For Valentine’s Day, add heart-shaped sprinkles to make them festive. These ideas keep your cookies fun and fresh!
Storage Info
Best Ways to Store Red Velvet Crinkle Cookies
To keep your cookies fresh, place them in an airtight container. Line the bottom with parchment paper. This helps prevent sticking. You can store them at room temperature for up to five days. For longer freshness, the fridge works too. Just ensure they are sealed tightly to avoid drying out.
How to Freeze for Longer Shelf Life
Freezing these cookies is easy and a great way to save them. First, let the cookies cool completely. Then, place them in a single layer on a baking sheet. Freeze for about one hour. After that, move them to a freezer-safe bag or container. They can last for up to three months in the freezer. Remember to label the bag with the date.
Reheating Tips for Freshness
To enjoy your cookies warm, reheat them in the oven. Preheat the oven to 350°F (175°C). Place the cookies on a baking sheet. Heat them for about 5 to 7 minutes. This helps keep the texture soft and the flavors fresh. You can also use a microwave for quick reheating. Just heat for 10 to 15 seconds. Enjoy your delightful treat!
FAQs
What is the origin of Red Velvet Crinkle Cookies?
Red Velvet Crinkle Cookies come from the popular red velvet cake. This cake has roots in the Southern United States. The bright red color makes it stand out. People enjoy it for its rich flavor and soft texture. Bakers adapted this cake into cookie form. This led to the crinkle effect, which adds a fun look. The cookies are soft and chewy, with a hint of cocoa. They are perfect for any celebration or just a sweet treat.
Can I make these cookies without eggs?
Yes, you can make these cookies without eggs. Use a substitute for eggs to keep the texture. Common choices are unsweetened applesauce or mashed bananas. Use 1/4 cup of applesauce for each egg. This helps bind the ingredients together. You can also try flaxseed meal. Mix 1 tablespoon of flaxseed meal with 3 tablespoons of water. Let it sit for a few minutes to thicken. This mix works well in cookies and keeps them moist.
How can I make these cookies less sweet?
To make these cookies less sweet, reduce the sugar used in the recipe. You can cut the granulated sugar by 1/4 cup. This change won’t affect the texture much. Use a sugar substitute like stevia or erythritol for less sugar. Adjust the amount based on the product’s instructions. You can also add a bit more cocoa powder to balance the sweetness. This adds depth without making the cookies too sweet.
In this post, I discussed the key ingredients, steps, tips, and varieties for Red Velvet Crinkle Cookies. Each part plays a role in creating the perfect treat. Remember to choose the right ingredients for texture and flavor. Don’t forget the tips to avoid mistakes. You can swap ingredients to fit your taste. With these details, you can bake and enjoy your cookies to the fullest. Get ready to impress your friends and family with your baking skill