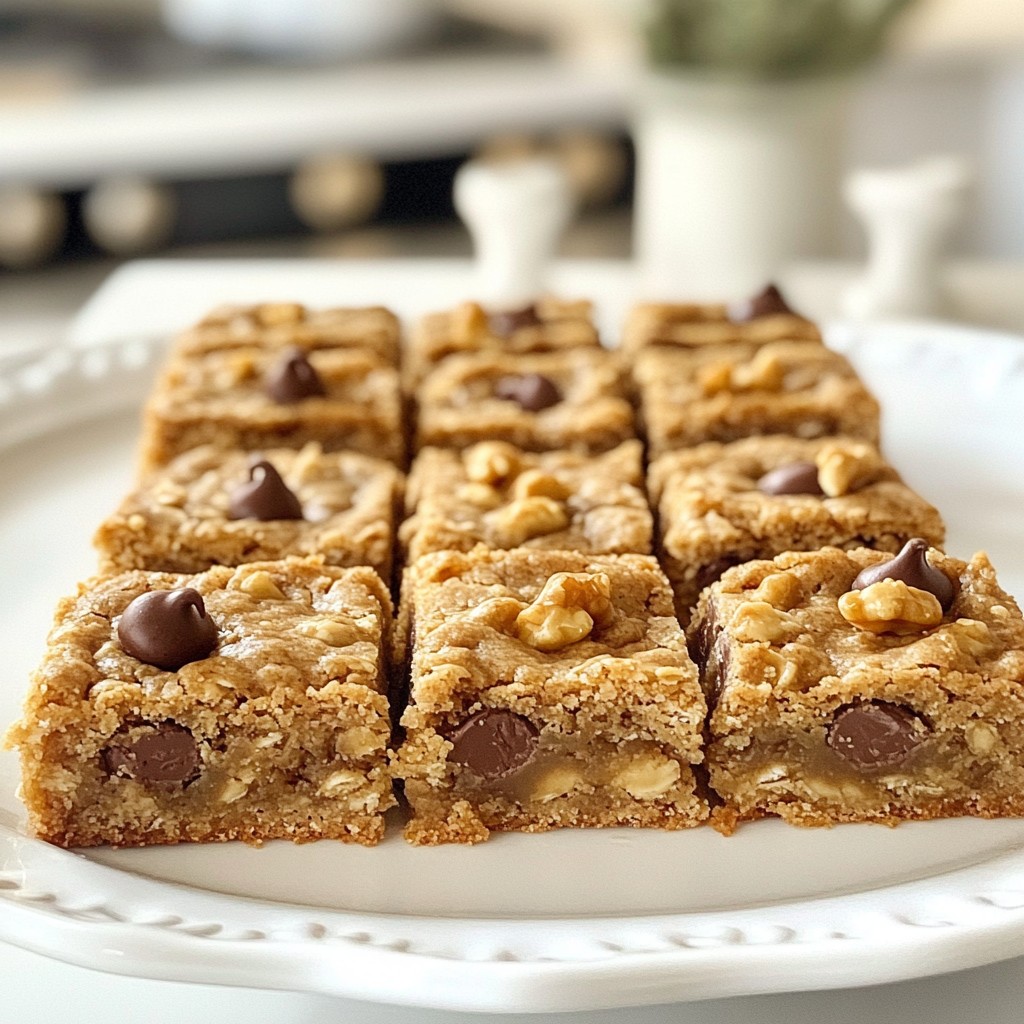
Looking for a quick and tasty snack? Try these Peanut Butter Oatmeal Cookie Bars! They’re easy to make and perfect for any occasion. Using simple ingredients like natural peanut butter, honey, and oats, you can whip them up in no time. Whether you're baking for a party, a lunchbox treat, or just a sweet craving, these bars satisfy every time. Let's dive into this delicious recipe together!
Why I Love This Recipe
- Healthy Ingredients: This recipe uses natural peanut butter and whole wheat flour, making it a nutritious option for snacks or breakfast.
- Quick and Easy: With a prep time of just 10 minutes, these bars are perfect for busy days when you need a fast, homemade treat.
- Customizable: You can easily adapt the recipe by adding your favorite mix-ins, such as chocolate chips or nuts, to suit your taste.
- Great for Meal Prep: These bars store well in an airtight container, making them an excellent option for meal prepping snacks for the week.
Ingredients
List of Ingredients
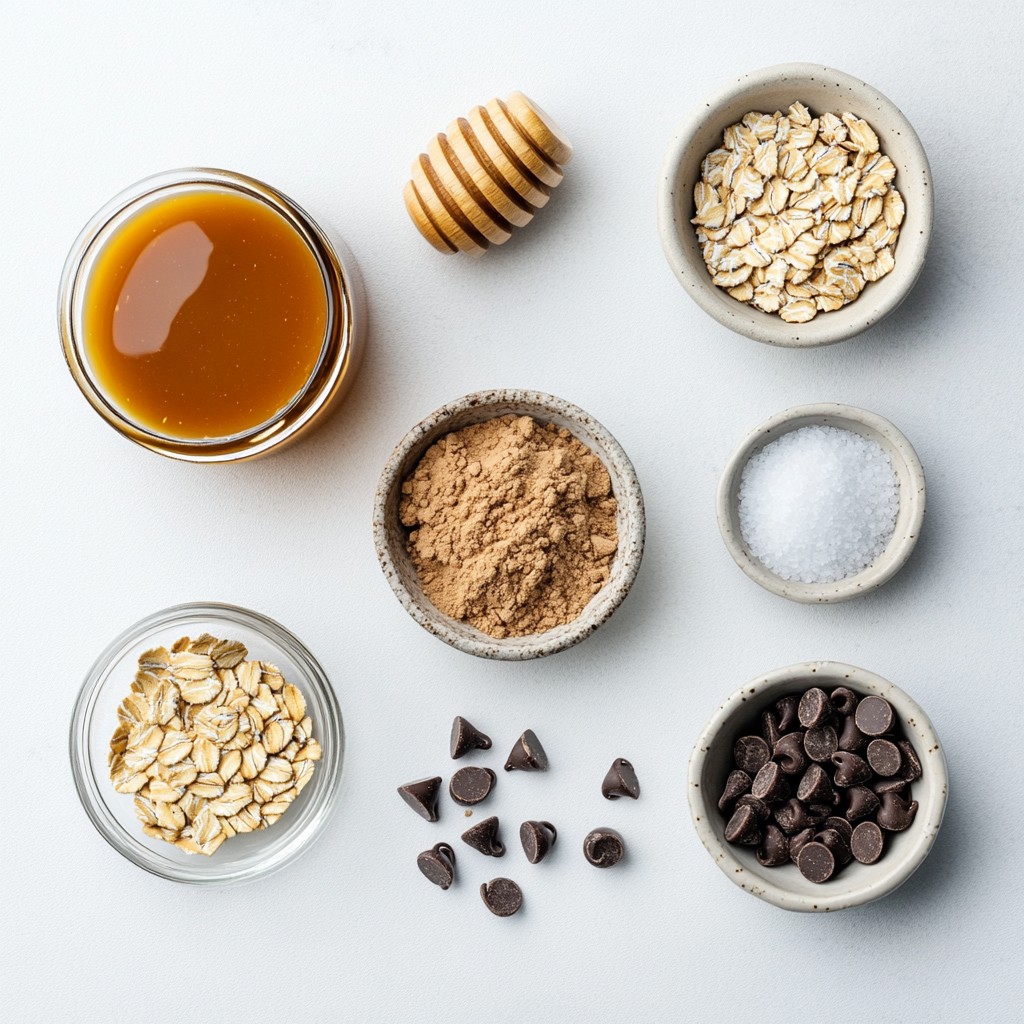
- 1 cup natural peanut butter
- 1/2 cup honey or maple syrup
- 1/4 cup brown sugar
- 1 cup rolled oats
- 1/2 cup whole wheat flour
- 1/4 teaspoon baking soda
- 1/2 teaspoon salt
- 1/2 cup semi-sweet chocolate chips (optional)
- 1/4 cup chopped nuts (walnuts or pecans, optional)
Optional Ingredients
If you want to spice up your bars, consider adding these:
- Semi-sweet chocolate chips
- Chopped nuts like walnuts or pecans
These extras give each bite a nice crunch and rich flavor.
Measurements and Substitutions
For different serving sizes, you can adjust the recipe. Here’s a quick guide:
- For 8 servings: Keep the original measurements.
- For 16 servings: Double the ingredients.
If you need vegan options, use maple syrup instead of honey. For gluten-free bars, swap whole wheat flour with oat flour. This way, everyone can enjoy these tasty treats!
Step-by-Step Instructions
Preparation Steps
1. Preheat the oven and prepare the baking pan. Start by setting your oven to 350°F (175°C). This helps the bars bake evenly. Next, grab an 8x8 inch baking pan. Line it with parchment paper. Make sure to leave some paper hanging over the edges. This makes it easy to lift the bars out later.
2. Mixing wet ingredients and dry ingredients. In a large bowl, add 1 cup of natural peanut butter, 1/2 cup of honey (or maple syrup), and 1/4 cup of packed brown sugar. Stir these until they become smooth and creamy. In another bowl, whisk together 1 cup of rolled oats, 1/2 cup of whole wheat flour, 1/4 teaspoon of baking soda, and 1/2 teaspoon of salt. This step keeps the dry and wet parts separate for now.
Baking the Cookie Bars
1. Combining the mixtures and spreading in the pan. Gradually add the dry mix to the wet mix. Stir gently until just combined. If you want to add texture, fold in 1/2 cup of semi-sweet chocolate chips and 1/4 cup of chopped nuts, like walnuts or pecans. Pour this mixture into your prepared pan. Use a spatula to spread it evenly. Press it down firmly to ensure it holds together while baking.
2. Baking time and visual cues for doneness. Place the pan in the preheated oven. Bake for about 20 to 25 minutes. Keep an eye on it. The edges should turn golden brown, and the center should feel firm to the touch. If it jiggles, give it a few more minutes.
Cooling and Serving
1. Removing from the oven and cooling process. Once baked, take the pan out of the oven. Let it cool for about 10 minutes in the pan. This helps them set up better. Then, carefully lift the bars out using the parchment paper overhang.
2. Cutting the bars into servings. Allow the bars to cool completely on a wire rack. When they are cool, use a sharp knife to cut them into squares or bars. Enjoy them as a quick breakfast, snack, or post-workout treat!
Tips & Tricks
Achieving the Best Texture
To avoid dry or crumbly bars, make sure to measure your ingredients correctly. Too much flour can dry them out. Mix the wet ingredients well before adding the dry ones. Stir gently until just combined. Don’t overmix. This keeps the bars soft and chewy.
Flavor Enhancements
You can add spices like cinnamon or vanilla extract for extra flavor. Try adding a pinch of nutmeg for warmth. For crunch, include chopped nuts like walnuts or pecans. Dried fruits such as raisins or cranberries also add sweetness and texture.
Equipment Recommendations
Use an 8x8 inch baking pan for even cooking. Line it with parchment paper for easy removal. A sturdy mixing bowl and a wooden spoon make mixing easy. For folding in chocolate chips or nuts, a spatula works best.
Pro Tips
- Use Natural Peanut Butter: For the best flavor and texture, choose a natural peanut butter that has no added sugar or oils.
- Experiment with Sweeteners: You can adjust the sweetness of these bars by using different ratios of honey or maple syrup to suit your taste.
- Chill for Extra Firmness: If you prefer a firmer bar, chill the mixture in the refrigerator for 30 minutes before baking.
- Customize Add-ins: Feel free to mix in your favorite add-ins like dried fruits, seeds, or different types of chocolate for a unique twist.
Variations
Different Sweeteners
You can switch up your sweeteners in these bars. Try using agave syrup or coconut sugar instead of honey or brown sugar. Agave syrup adds a mild flavor, while coconut sugar gives a nice caramel note. If you want a sugar-free option, use stevia or erythritol. These will keep your bars sweet without the sugar rush.
Dietary Modifications
Want to make these bars gluten-free? Use oat flour instead of whole wheat flour. Oat flour has a nice texture and works well in baking. If you need a nut-free option, swap the peanut butter for seed butter, like sunflower seed butter. This change keeps the flavor rich while avoiding nuts.
Flavor Combinations
You can get creative with flavors in these cookie bars. Add a few tablespoons of cocoa powder for a chocolate twist. If you prefer a sweeter taste, mix in vanilla extract. You can also fold in fruits like mashed bananas or applesauce. These fruits add moisture and natural sweetness to your bars. Enjoy experimenting with these fun variations!
Storage Info
Storing Leftovers
To keep your cookie bars fresh, store them in an airtight container. This keeps moisture in and prevents them from drying out. If you store them correctly, they can last up to one week.
Freezing Instructions
You can freeze these bars for longer storage. First, cut them into squares. Wrap each square in plastic wrap or foil. Then, place them in a freezer bag. They will stay fresh for up to three months. When you want to enjoy one, take it out and let it thaw at room temperature. For a warm treat, heat it in the microwave for about 10-15 seconds.
Serving Suggestions
These bars work well for snacks or meals. You can have them for breakfast with a side of fruit. They are also great as a midday snack with a glass of milk. Pair them with tea or coffee for a delicious boost. You can also add yogurt on the side for extra creaminess. Enjoy the bars however you like!
FAQs
How can I make these bars vegan?
To make these bars vegan, replace honey with maple syrup. Maple syrup gives a nice sweetness and works well with peanut butter. You can also choose a vegan butter or oil instead of any butter used in other recipes. This change keeps the texture smooth and tasty.
Can I use quick oats instead of rolled oats?
Yes, you can use quick oats. However, the bars will have a different texture. Quick oats are softer and can make the bars chewier. Rolled oats give a heartier feel and a more rustic look. If you want thicker bars, stick with rolled oats.
What can I do if the bars are too crumbly?
If the bars are crumbly, try adding a bit more peanut butter. This helps bind the mixture better. You can also add a splash of milk or a bit more syrup. Make sure to mix well and press the mixture firmly into the pan before baking. This should help achieve the right consistency.
In this post, we explored how to make delicious cookie bars with simple ingredients. You learned about key components like peanut butter, sweeteners, and fun mix-ins. I shared steps for baking, cooling, and cutting your bars. The tips helped you achieve the best texture and flavor. Don't forget the variations that allow for dietary needs. Lastly, I provided storage methods to keep your bars fresh. Enjoy creating your cookie bars and experimenting with flavors, keeping these tips in mind for great results!