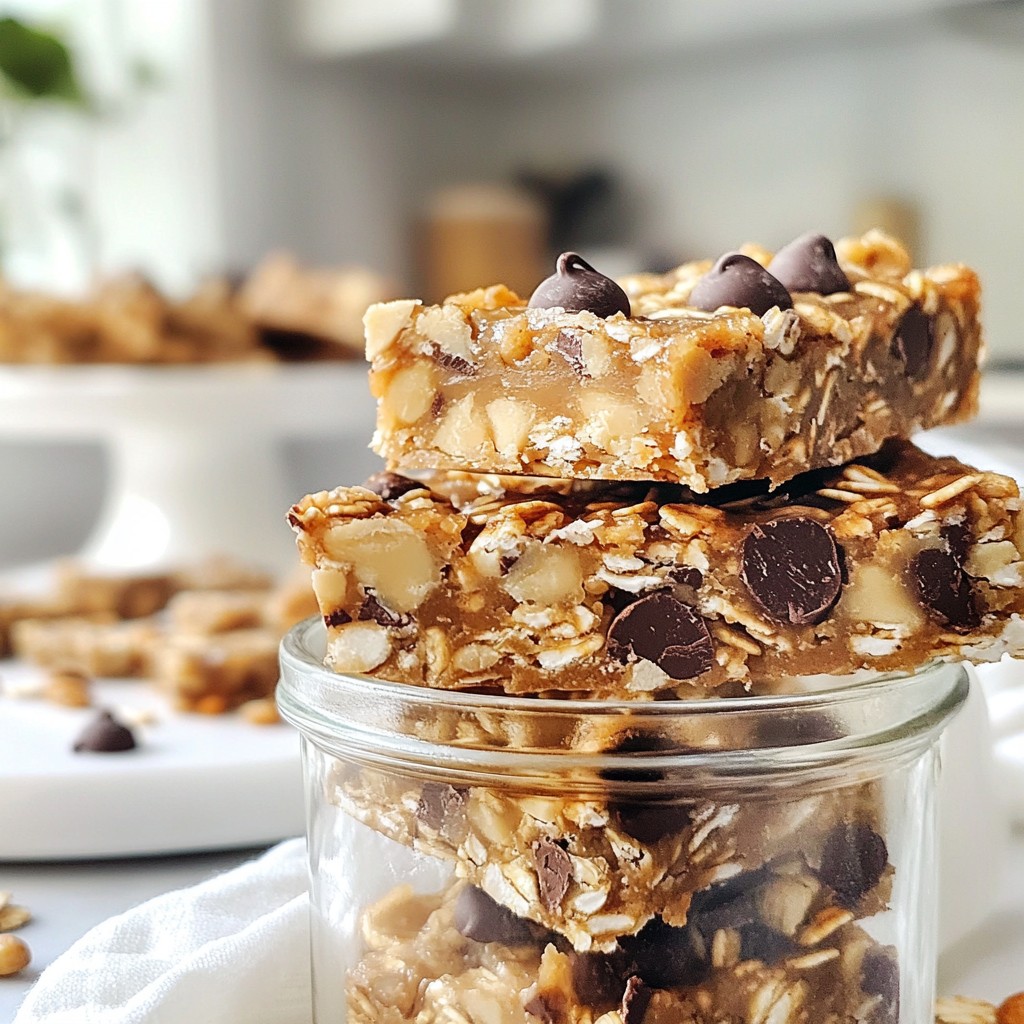
Are you ready for a tasty and healthy snack? My Peanut Butter Chocolate Chip Granola Bars are easy to make and packed with flavor! This treat combines wholesome ingredients, delicious chocolate, and the goodness of peanut butter. In this post, we'll explore the best ingredients, share step-by-step instructions, and reveal tips to make these bars perfect every time. Let’s dive in and create a snack you’ll love!
Why I Love This Recipe
- Nutritious and Filling: These granola bars are packed with healthy ingredients like oats and nuts, providing you with sustained energy throughout the day.
- Customizable: You can easily modify the recipe by adding your favorite nuts, seeds, or dried fruits to suit your taste preferences.
- Quick and Easy: With a prep time of just 10 minutes, these bars are perfect for busy mornings or a last-minute snack.
- Deliciously Indulgent: The combination of peanut butter and chocolate chips makes for a sweet treat that satisfies your cravings without the guilt.
Ingredients
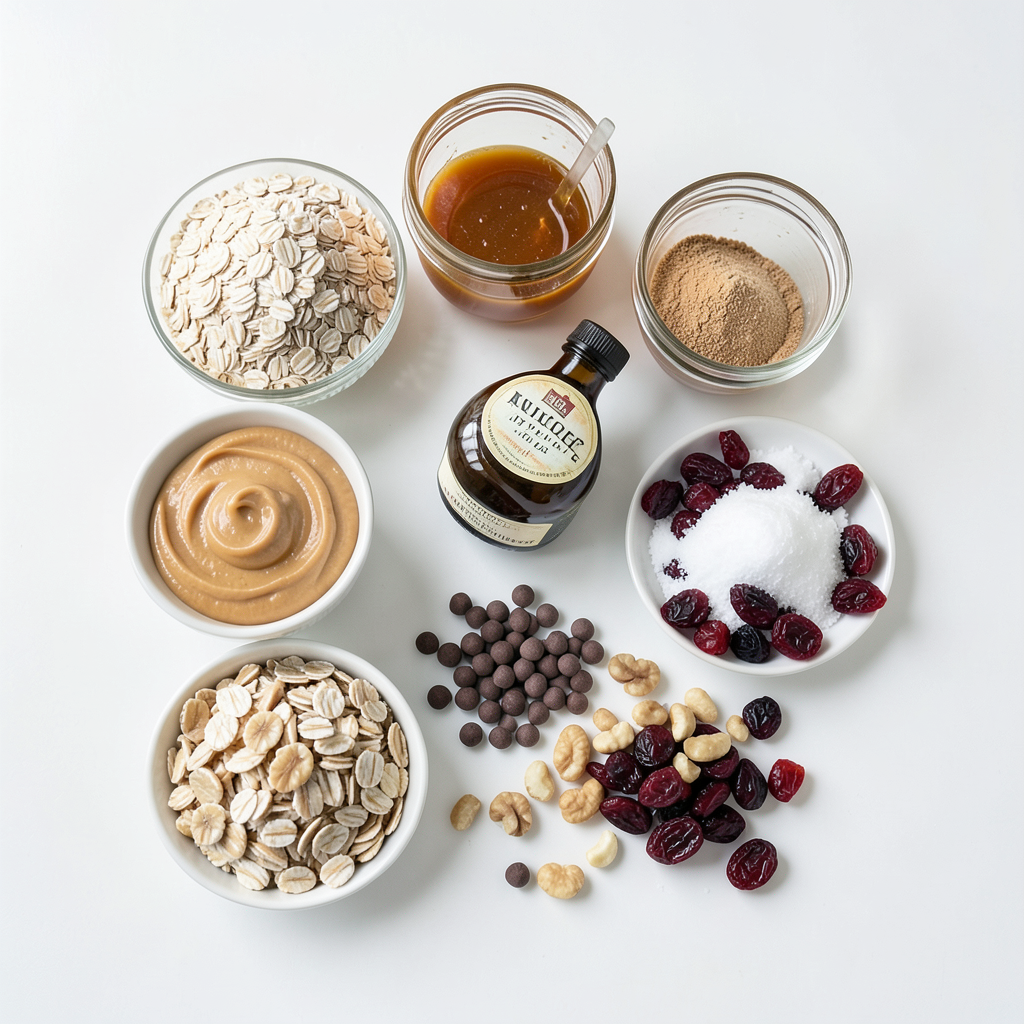
List of Ingredients
- 2 cups rolled oats
- 1 cup creamy peanut butter
- 1/2 cup honey (or maple syrup)
- 1/2 cup brown sugar
- 1/2 teaspoon vanilla extract
- 1/2 teaspoon salt
- 1/2 cup mini chocolate chips
- 1/2 cup chopped nuts (such as almonds or walnuts)
- Optional: 1/4 cup dried fruit (like cranberries or raisins)
Nutritional Benefits of Each Ingredient
- Rolled oats provide fiber, helping with digestion and keeping you full.
- Creamy peanut butter is rich in protein and healthy fats, which give energy.
- Honey (or maple syrup) adds natural sweetness and has antioxidants.
- Brown sugar gives a touch of caramel flavor and energy boost.
- Vanilla extract adds aroma and flavor without extra calories.
- Salt enhances flavors and balances sweetness in the bars.
- Mini chocolate chips offer a tasty treat while providing some iron.
- Chopped nuts add crunch and are a great source of healthy fats and protein.
- Dried fruit (if used) provides fiber and vitamins, boosting health benefits.
Suggested Substitutions for Allergies
- For nut allergies, try sunflower seed butter instead of peanut butter.
- Use agave syrup or brown rice syrup in place of honey for a vegan option.
- Swap out mini chocolate chips for carob chips for a different flavor.
- Omit nuts if you have a nut allergy, or use seeds like pumpkin or sunflower seeds.
- If you cannot eat gluten, ensure oats are certified gluten-free.
Step-by-Step Instructions
Preparation and Preheating Tips
First, preheat your oven to 350°F (175°C). This step helps the bars bake evenly. Next, grab an 8x8 inch or 9x9 inch baking pan. Line it with parchment paper. Leave some paper hanging over the edges. This makes it easy to lift the bars out later.
Combining Ingredients in the Right Order
In a big bowl, add 2 cups of rolled oats. Then, mix in 1/2 cup of chopped nuts and any dried fruit you want. Stir these dry ingredients together well. In a small saucepan, heat 1 cup of creamy peanut butter and 1/2 cup of honey over low heat. Stir until smooth. Remove it from heat, then mix in 1/2 cup of brown sugar, 1/2 teaspoon of vanilla extract, and 1/2 teaspoon of salt. Pour this peanut butter mix over the oats. Stir until everything is coated. Now, gently fold in 1/2 cup of mini chocolate chips.
Baking and Cooling Instructions
Transfer the mix into your prepared pan. Press it down firmly with a spatula or your hands. Make it even across the top. Bake in the preheated oven for 15-20 minutes. Look for lightly golden edges. Once done, take the pan out of the oven. Let it cool completely on a wire rack. When cool, lift the bars out using the parchment paper. Cut them into squares or rectangles. Store the bars in an airtight container at room temperature for up to one week. Enjoy your tasty treat!
Tips & Tricks
How to Achieve the Perfect Texture
To get the right texture in your granola bars, follow these steps:
- Use rolled oats, not instant oats. Rolled oats give a chewy feel.
- Make sure to melt the peanut butter and honey well. This helps blend the flavors.
- Press the mixture firmly into the pan. This helps the bars hold together.
- Bake until the edges are lightly golden. This adds a nice crunch.
Storing Tips for Optimal Freshness
To keep your granola bars fresh:
- Store them in an airtight container. This helps keep them from drying out.
- You can keep them at room temperature for up to a week.
- For longer freshness, refrigerate them. They will last longer this way.
- If you want, you can freeze them for up to three months.
Presentation Ideas for Serving
Make your granola bars look great with these fun ideas:
- Stack them in a glass jar for a nice display.
- Wrap each bar in wax paper. Tie with twine for a rustic touch.
- Serve them with coffee or tea for a tasty snack.
- Cut them into fun shapes with cookie cutters for kids.
Pro Tips
- Use Natural Peanut Butter: Opt for natural peanut butter without added sugars or oils for a healthier option and better texture.
- Customize with Mix-ins: Feel free to swap out the nuts and dried fruits for your favorites, like sunflower seeds or coconut flakes, to create a unique flavor.
- Press Firmly: Make sure to press the mixture firmly into the pan to ensure it holds together well once baked and cooled.
- Store Properly: For longer shelf life, consider refrigerating the bars. They can also be frozen for up to three months for a quick snack anytime.
Variations
Gluten-Free Options
You can easily make these granola bars gluten-free. Simply swap out regular oats for certified gluten-free oats. This change keeps the bars safe for those with gluten allergies. You can also check that your add-ins, like nuts and chocolate chips, are gluten-free. This way, everyone can enjoy this tasty treat!
Adding Different Flavor Profiles
Want to shake things up? Try adding coconut for a tropical twist. You can use shredded coconut or coconut flakes. Another idea is to swirl in extra peanut butter. It gives a richer taste and a fun look. You can also mix in spices like cinnamon for warmth or a dash of sea salt for contrast. Each choice can make your bars unique!
Kid-Friendly Additions
Kids love fun surprises in their snacks. You can add chocolate-covered raisins for a sweet touch. Dried fruit like cranberries or apricots can also be a hit. If your kids enjoy crunch, try mixing in some puffed rice or crispy cereal. These additions make the bars more exciting. Plus, they add extra nutrients!
Storage Information
How to Store Granola Bars
To keep your granola bars fresh, use an airtight container. This helps seal in moisture and flavor. Store them at room temperature for up to one week. If you want them to last longer, put them in the fridge. This keeps them fresh for about two weeks. For best results, place parchment paper between layers to prevent sticking.
Freezing Tips for Longer Shelf Life
Freezing granola bars is a smart choice for longer storage. Wrap each bar in plastic wrap or wax paper. Then, place them in a freezer-safe bag. Granola bars can stay fresh in the freezer for up to three months. When you’re ready to eat, just take out a bar and let it sit at room temperature for a few minutes.
Signs of Freshness vs. Expiration
Always check your granola bars for freshness. If they feel hard or crumbly, they may be stale. Look for any unusual smells or colors. Fresh bars should smell nutty and sweet. If you see mold or odd textures, it's time to toss them. Enjoy your granola bars when they are fresh for the best taste!
FAQs
Can I make these granola bars vegan?
Yes, you can make these bars vegan. Just replace honey with maple syrup. Use a plant-based peanut butter that has no added sugar. This simple swap makes the bars vegan-friendly while keeping them delicious.
How long do homemade granola bars last?
Homemade granola bars can last up to one week at room temperature. Store them in an airtight container to keep them fresh. If you want them to last longer, refrigerate them. This can help them stay good for up to two weeks.
Can I substitute honey with a different sweetener?
Yes, you can use maple syrup or agave nectar as a sweetener. These options add a nice flavor while keeping the bars sweet. Just keep the same amount as in the recipe. Adjust the sweetness to your taste if you like.
How to cut granola bars cleanly?
To cut granola bars cleanly, let them cool completely first. Use a sharp knife for straight cuts. If you want extra help, you can warm the knife slightly. This helps it glide through the bars without crumbling.
This blog post covered how to make healthy granola bars. We discussed key ingredients and their benefits. You learned easy swaps for allergies and how to bake them perfectly. I shared tips for the right texture and how to store them fresh. We also explored fun variations and answered common questions.
With these insights, you can make tasty granola bars that suit your needs. Enjoy creating special treats for yourself and your family!