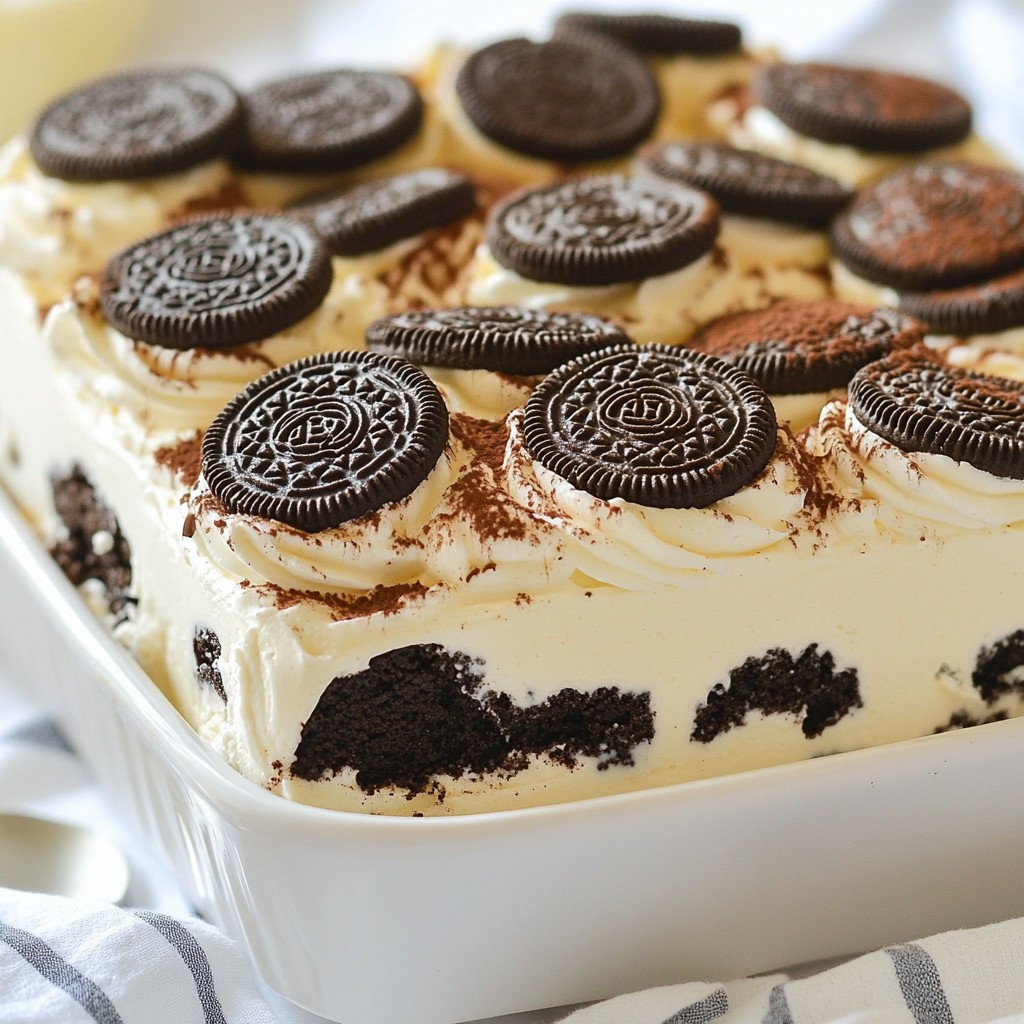
If you love chocolate and creamy desserts, then you’re in for a treat! This Oreo Icebox Cake is a delightful no-bake dessert that’s simple to make and perfect for any occasion. With just a few easy steps, you can create a layered cake that is rich, sweet, and downright irresistible. Ready to impress your friends and family? Let’s jump into this delicious recipe!
Why I Love This Recipe
- Decadent Layers: This cake features rich layers of cream and Oreo cookies, delivering a delightful combination of flavors and textures in every bite.
- No-Bake Convenience: With no baking required, this icebox cake is perfect for hot days or when you want a quick and easy dessert option.
- Make-Ahead Friendly: Prep this cake a day in advance and let it chill overnight, allowing the flavors to meld beautifully for a more delicious experience.
- Customizable Toppings: Finish with your choice of chocolate shavings or crushed Oreos, making it an aesthetically pleasing dessert that can be tailored to your taste.
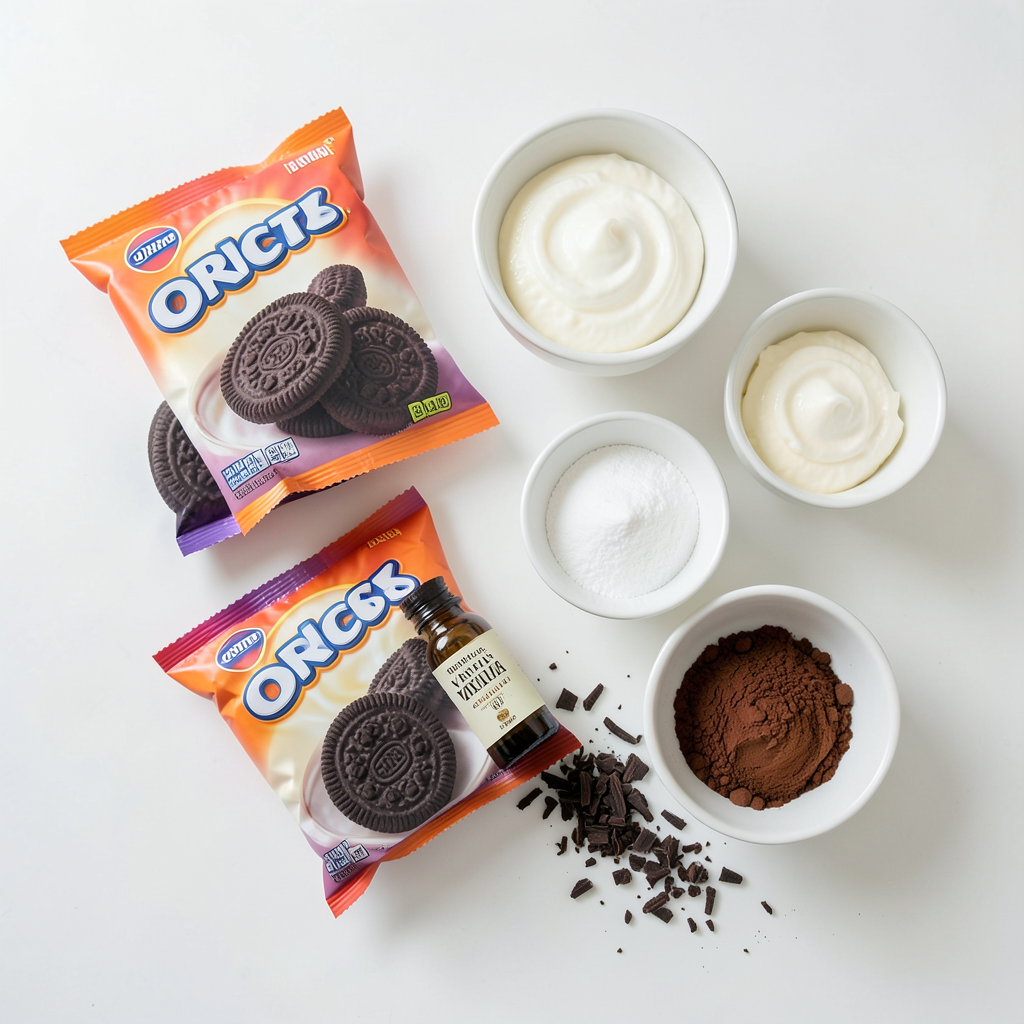
Ingredients
Here is what you need to make Oreo Icebox Cake:
- 2 packages (15.25 oz each) Oreo cookies
- 2 cups heavy whipping cream
- ½ cup powdered sugar
- 1 teaspoon vanilla extract
- 1 cup cream cheese, softened
- 1 tablespoon cocoa powder
- Chocolate shavings or crushed Oreos for garnish
These ingredients work together to create a rich and creamy dessert. The Oreo cookies give a nice crunch, while the whipped cream and cream cheese add a smooth texture. The powdered sugar and vanilla bring out sweet flavors. Cocoa powder and chocolate shavings make it look fancy. Even though this cake is easy to make, it has a wow factor that impresses everyone.
Step-by-Step Instructions
Preparing the Cream Mixture
To start, grab a large bowl and pour in the heavy whipping cream. Use a hand mixer to beat it until you see soft peaks form. This step is key for a fluffy texture. Next, slowly add in the powdered sugar and vanilla extract. Keep beating until you get stiff peaks. This means the cream holds its shape well. Set this mixture aside for now.
Mixing Cream Cheese
In another bowl, take your softened cream cheese. Beat it with your mixer until it becomes smooth and creamy. This step helps the cream cheese blend well. Now, gently fold in the whipped cream mixture. Be careful here; you don’t want to deflate that nice, airy whipped cream. Just mix until it’s all combined, and you have a lovely cream cheese blend.
Layering the Cake
Next, grab an 8-inch square baking dish. Spread a thin layer of your cream mixture on the bottom. This helps keep the Oreos in place. Now, dip each Oreo cookie into milk. This adds moisture and softens them. Lay the dipped Oreos evenly over the cream layer. Then, spread more cream on top of the Oreos. Repeat this process: cream, Oreos, cream, until you fill the dish. Finish with a final layer of cream on top.
Chilling and Garnishing
Now it's time to chill. Cover your baking dish with plastic wrap. Place it in the fridge for at least 4 hours, but overnight is best. This allows the cake to set and the flavors to meld. Before serving, dust the top with cocoa powder. You can also sprinkle some chocolate shavings or crushed Oreos for that extra touch. Cut it into squares and enjoy this tasty treat!
Tips & Tricks
Achieving the Perfect Whip
To make the best whipped cream, use cold tools. Chill your bowl and beaters before whipping. Start beating on low speed, then increase to medium. This helps form soft peaks quickly. Add the powdered sugar and vanilla once you see soft peaks. Keep beating until stiff peaks form.
To avoid deflating your whipped cream, fold gently. Use a spatula to mix the whipped cream with the cream cheese. Move the spatula from the bottom to the top. This keeps air in the mixture, making it light and fluffy.
Best Practices for Layering
When layering, use a spatula to spread the cream evenly. Aim for a smooth layer before adding Oreos. This keeps your cake looking neat and tasty. You can also try laying the Oreos in a pattern. This adds a fun design and helps with even distribution.
If you're feeling creative, consider alternative techniques. Instead of just layers, you can create swirls. Use a knife to swirl cream and Oreos together. This gives a unique look and flavor to each bite.
Presentation Tips
Garnishing your cake makes a big difference. Try dusting cocoa powder on top for a rich touch. You can also sprinkle chocolate shavings or crushed Oreos for added flair. These little details impress guests and make your cake stand out.
For serving, cut the cake into squares. Place each square on a colorful plate. Add a small scoop of ice cream on the side. This makes your dessert even more delightful and appealing.
Pro Tips
- Chill the Cream: For a fluffier texture, ensure your heavy whipping cream is very cold before beating.
- Milk Dip: Use whole milk or chocolate milk to dip the Oreos for added richness and flavor.
- Layering Technique: Be gentle when folding the whipped cream into the cream cheese to maintain its lightness.
- Make Ahead: This dessert tastes even better the next day, so consider making it a day in advance!
Variations
Flavor Alternatives
You can change the taste of your Oreo icebox cake by using different flavored Oreos. Try mint, peanut butter, or even birthday cake Oreos. These flavors can bring a fun twist to the classic recipe. You can also add fruit layers like sliced strawberries or bananas. This adds a fresh touch and balances the sweetness. A splash of fruit extract can work too. Think raspberry or lemon for a zing!
Ingredient Substitutions
If you want a dairy-free dessert, use coconut cream instead of heavy cream. This still gives you a rich texture. For cream cheese, consider using a dairy-free version made from nuts. You can swap powdered sugar for coconut sugar or a sugar alternative. This can help cut down on refined sugar while keeping it sweet.
Unique Twists
Want to mix things up? You can add layers of brownies or cheesecake to your icebox cake. This gives a fun texture and flavor combo. For the holidays, consider adding crushed peppermint or pumpkin spice. These seasonal variations can make your cake feel special. Each twist can give your Oreo icebox cake a new life and keep your guests excited!
Storage Info
Ideal Storage Conditions
To keep your Oreo icebox cake fresh, store it in the fridge. Use an airtight container or cover it tightly with plastic wrap. This helps prevent any unwanted odors from seeping in. Ensure the cake stays cold and away from direct light. If you follow these steps, your cake can last up to four days in the fridge.
Freezing Options
If you want to save some for later, you can freeze it. First, cut the cake into squares. Then, wrap each piece in plastic wrap. Place them in a freezer-safe bag or container. This method keeps the cake fresh for up to three months.
When you’re ready to enjoy it again, take out a piece and place it in the fridge overnight to thaw. Avoid using a microwave for best results, as it can change the cake's texture. Enjoy your delicious treat whenever you want!
FAQs
How long can you keep Oreo Icebox Cake in the fridge?
You can keep Oreo Icebox Cake in the fridge for up to five days. Make sure to store it in an airtight container. This keeps it fresh and prevents it from absorbing other smells in the fridge. The longer it sits, the more the flavors blend. This makes each slice taste even better.
Can I make it a day in advance?
Yes, making the cake a day in advance is a great idea! It allows the layers to set and flavors to blend. The cake becomes creamier and more delicious after chilling overnight. Plus, it saves you time on the day you plan to serve it. You can relax and enjoy the moment with your guests.
What’s the best way to serve Oreo Icebox Cake?
The best way to serve Oreo Icebox Cake is cold, straight from the fridge. Cut it into squares for easy serving. You can garnish each piece with chocolate shavings or crushed Oreos. Pair it with a scoop of vanilla ice cream for an extra treat. This adds a nice contrast to the creaminess of the cake.
You learned how to make a delicious Oreo Icebox Cake. We covered each step from mixing the cream to layering Oreos. Remember to chill the cake for the best taste. Use the tips to make it perfect every time. Don’t forget the variations for extra fun, too. This dessert is easy, tasty, and sure to impress. Enjoy making it for your friends and family. Simple ingredients and fun steps create a dessert everyone loves. Get ready to serve up smiles!