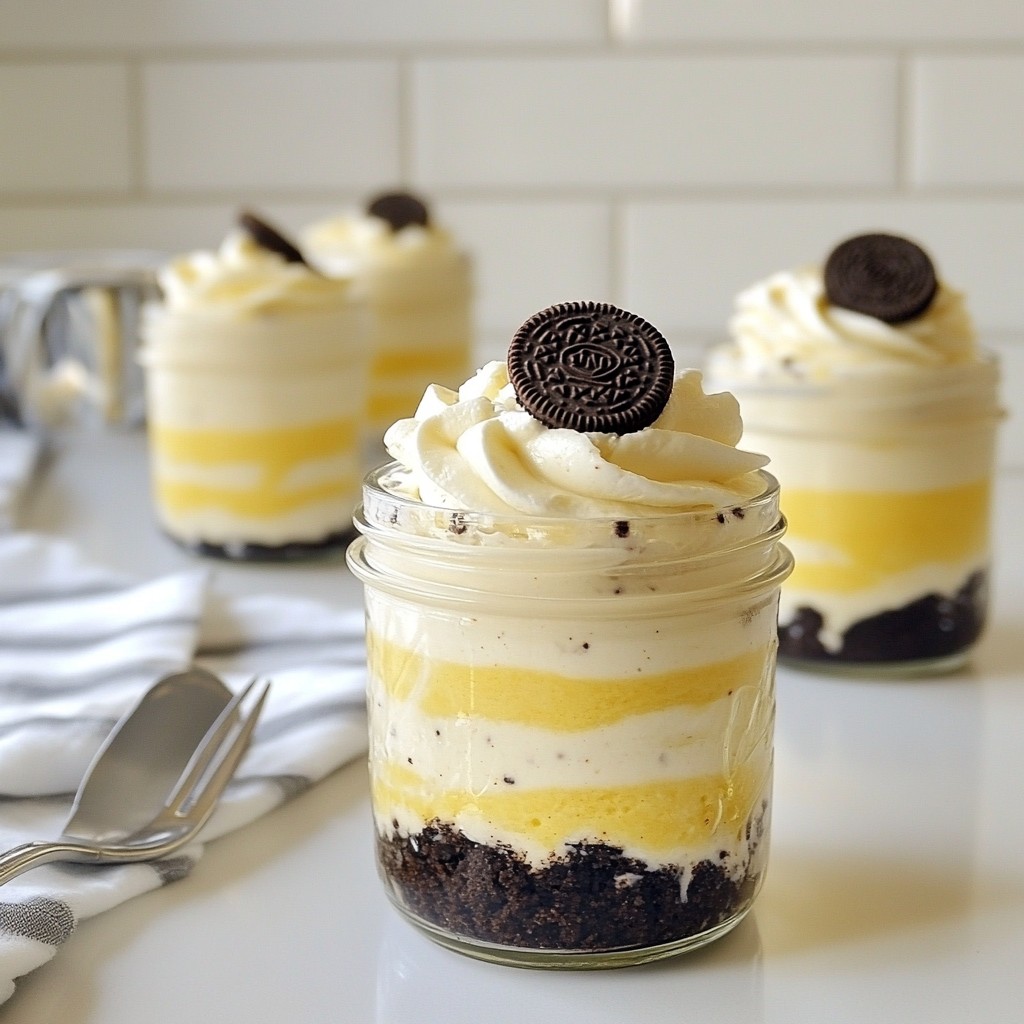
If you love quick and tasty desserts, you’re in for a treat! These No-Bake Oreo Cheesecake Jars are easy to make and a delight to eat. With just a few simple ingredients, you can whip up a creamy, sweet dessert that impresses everyone. Let me guide you through this fun recipe that’s perfect for any occasion. Grab your Oreos, and let’s dive in!
Why I Love This Recipe
- Easy to Make: This no-bake recipe is perfect for beginners and requires minimal effort, making it a go-to dessert for any occasion.
- Decadent Flavor: The combination of cream cheese and Oreos creates a rich and creamy cheesecake that will satisfy any sweet tooth.
- Customizable: You can easily adjust the layers or add toppings like chocolate sauce or fruit to personalize each jar to your liking.
- Perfect for Sharing: Served in individual jars, this dessert is not only adorable but also great for sharing with friends and family.
Ingredients
List of Required Ingredients
- 16 Oreo cookies, crushed
- 2 tablespoons unsalted butter, melted
- 1 cup cream cheese, softened
- 1 cup powdered sugar
- 1 teaspoon vanilla extract
- 1 cup heavy whipping cream
- Extra Oreo cookies for garnish
Tips for Ingredient Quality
Choosing the right type of cream cheese: Use full-fat cream cheese for the best flavor and texture. Look for a brand that is smooth and creamy. Avoid low-fat options, as they may not whip well.
Recommended brands of Oreo cookies: You can use classic Oreo cookies, but feel free to explore other flavors. Brands like Nabisco make solid options for your cheesecake. Stick to well-known brands for the best taste.

Step-by-Step Instructions
Preparation of Oreo Crust
To start, take 16 Oreo cookies and crush them into small bits. You can use a food processor or a zip-top bag and a rolling pin. Then, in a medium bowl, mix the crushed cookies with 2 tablespoons of melted unsalted butter. Stir well until the cookies are coated. This creates a tasty crust. Next, divide the crust mixture evenly into 4-6 small jars or cups. Press it down firmly to form a nice base. Set the jars aside while you make the cheesecake filling.
Making the Cheesecake Filling
Now, grab a large mixing bowl. Add 1 cup of softened cream cheese and beat it with an electric mixer on medium speed. Beat until it’s smooth and creamy, which takes about 2 minutes. Gradually add 1 cup of powdered sugar and 1 teaspoon of vanilla extract. Mix until everything is well blended. This gives your filling great flavor.
Next, take another bowl and whip 1 cup of heavy whipping cream. Use high speed until stiff peaks form. This means the cream should hold its shape. Gently fold the whipped cream into the cream cheese mixture. Keep folding until there are no streaks left. This makes your cheesecake filling light and fluffy.
Assembling the Jars
Now it’s time to layer the jars. Start by spooning the cheesecake filling over the Oreo crust in each jar. Use a spatula to smooth the top. Once all the jars are filled, cover them with lids or plastic wrap. Place them in the refrigerator for at least 4 hours, or until they are set. This chilling time helps the flavors meld together.
When you’re ready to serve, garnish each jar with an extra mini Oreo on top. This adds a fun touch and looks great!
Tips & Tricks
Achieving the Perfect Texture
Softened cream cheese is key for a smooth cheesecake. Cold cream cheese can make your filling lumpy. Take it out of the fridge an hour before you start. This helps it mix well and create a rich, creamy texture.
Whipping cream to stiff peaks is simple but important. Use a clean bowl and beaters. Start at low speed and gradually increase. When the cream thickens, stop to check. You want it to hold its shape, not be watery. This step adds fluffiness to your cheesecake.
Presentation and Serving Suggestions
Garnishing adds flair to your jars. A simple mini Oreo on top looks great. You can also sprinkle crushed Oreos around the jars. It gives a nice touch and makes them inviting.
Serve the jars cold for the best taste. They should chill for at least four hours. This lets the flavors meld together. If left too long, they can get too firm. A good rule is to serve them cold but not frozen. Enjoying them at the right temperature makes all the difference.
Pro Tips
- Use Room Temperature Ingredients: Allow your cream cheese and heavy cream to come to room temperature before mixing. This ensures a smoother texture and easier blending.
- Chill for Best Results: Let the cheesecake jars chill for at least 4 hours, or overnight if possible, to allow the flavors to meld and the filling to set properly.
- Experiment with Flavors: Feel free to add different flavor extracts, like almond or mint, to the cream cheese mixture for a unique twist on the classic Oreo flavor.
- Presentation Matters: For a beautiful finish, consider layering the crushed Oreos and cheesecake filling in a visually appealing way, and add fresh berries for color.
Variations
Flavor Alternatives
You can easily change the taste of your No-Bake Oreo Cheesecake Jars. Try adding chocolate or caramel sauce for a rich twist. Just drizzle it over the cheesecake filling before you chill the jars. This extra layer brings a new flavor that many will enjoy.
If you want to use different cookie flavors, you can! Gluten-free Oreos work great for those with dietary needs. You can also try other cookie types, like peanut butter or mint. Each choice gives a unique taste and makes this dessert fun.
Portion Size Adjustments
Scaling the recipe is simple. If you have a party, just double or triple the ingredients. This way, you can make enough jars for everyone. Serve them in small cups for easy sharing.
For mini dessert portions, use tiny jars or cups. These smaller servings are perfect for kids or when you want just a little treat. Plus, they look cute and can add a fun touch to any table.
Storage Info
Best Practices for Refrigeration
You can store your no-bake Oreo cheesecake jars in the fridge for up to five days. Make sure to seal them tightly with plastic wrap or a lid. This keeps the jars fresh and tasty. If you want to enjoy them later, you can freeze the jars. They last in the freezer for about two months. Just remember to let them thaw in the fridge before enjoying.
Reheating and Serving Continued
After refrigeration, these jars are ready to serve. Simply take them out and enjoy cold. If you want them a bit softer, let them sit at room temperature for 10 to 15 minutes. Always check for signs of spoilage. If you see any mold or if they smell off, it’s best to throw them away. Keeping an eye on your jars helps ensure a safe and delicious dessert.
FAQs
Can I make these jars ahead of time?
Yes, you can make these jars ahead of time. I suggest making them up to two days in advance. This helps the flavors blend well. Just keep them in the fridge until you are ready to serve. Chilling time is key for a great texture.
What can I substitute for cream cheese?
If you need a substitute for cream cheese, try Greek yogurt or mascarpone cheese. Both work well and keep a creamy texture. For a dairy-free option, use a vegan cream cheese. These alternatives can fit different dietary needs while still tasting great.
How do I fix a runny cheesecake mixture?
If your cheesecake mixture is too runny, you can fix it easily. First, make sure your cream cheese is soft but not too warm. If it still seems runny, add more powdered sugar to thicken it. Whipping the heavy cream longer can also help make it fluffier. Aim for stiff peaks, which gives the mixture a better consistency.
I covered how to make delicious Oreo cheesecake jars. You learned about the ingredients, tips for quality, and step-by-step instructions. We explored variations for flavor and serving sizes, plus smart storage tips. Now, you can impress friends with these tasty desserts. Enjoy making this simple treat with your own twist. Trust me, it’s worth the effort for a sweet bite!