Are you ready to indulge in a delightful treat? Mini Oreo cheesecakes are not just delicious; they are also easy to make! In this recipe, I’ll show you how to whip up these sweet bites that will impress anyone. From a simple crust to creamy filling, every step is fun and satisfying. Let’s dive in so you can enjoy these tasty treats today!
Why I Love This Recipe
- Deliciously Decadent: These mini cheesecakes are rich and creamy, offering a perfect balance of sweet and tangy flavors that will satisfy any dessert craving.
- Easy to Make: With simple ingredients and straightforward steps, this recipe is perfect for both novice bakers and experienced chefs looking for a quick treat.
- Perfect for Any Occasion: These mini cheesecakes are great for parties, celebrations, or just a cozy night in, making them a versatile dessert option.
- Customizable Toppings: Feel free to get creative with toppings! You can add fresh berries, chocolate sauce, or additional crushed Oreos for an extra special touch.
Ingredients
Main Ingredients for Mini Oreo Cheesecakes
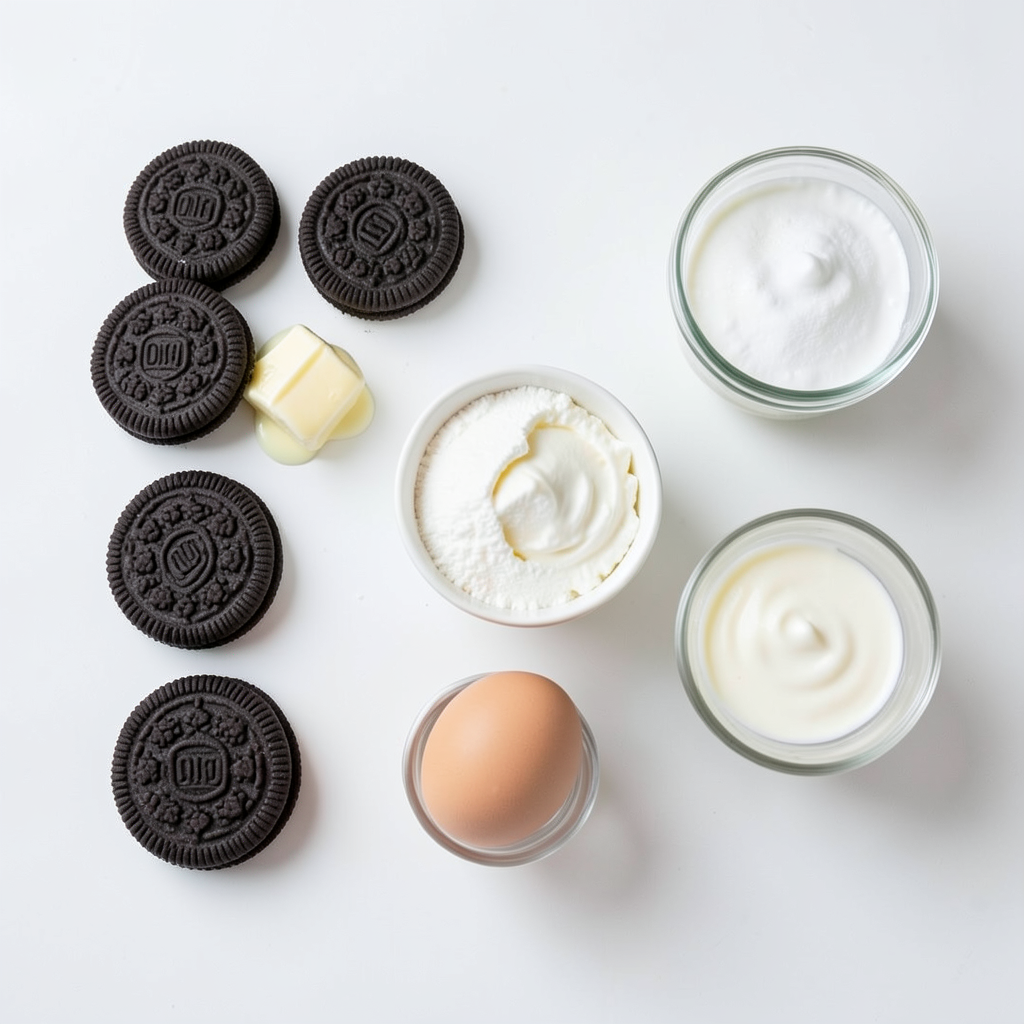
To make mini Oreo cheesecakes, you need these main ingredients:
- 12 Oreo cookies (plus extra for garnish)
- 2 tablespoons unsalted butter, melted
- 8 oz cream cheese, softened
- 1/2 cup granulated sugar
- 1 teaspoon vanilla extract
- 1/2 cup sour cream
- 1 large egg
- 1/4 cup heavy whipping cream
- 1 tablespoon powdered sugar for whipping cream
These ingredients create a rich and creamy cheesecake with a crunchy Oreo crust. The cream cheese gives it a smooth texture. The sugar adds the right amount of sweetness, while the sour cream balances the flavors.
Optional Toppings and Garnishes
You can enhance your mini cheesecakes with various toppings and garnishes. Here are some ideas:
- Extra Oreo cookie halves on top
- Chocolate sauce drizzled for a sweet touch
- Fresh berries for a fruity flavor
- Mint leaves for a fresh look
These options let you personalize your cheesecakes. You can mix and match to find your favorite combination!
Substitutions for Dietary Restrictions
If you have dietary restrictions, there are some easy swaps you can make:
- Use gluten-free cookies for a gluten-free version.
- For a dairy-free option, try vegan cream cheese and coconut whipped cream.
- You can replace the egg with 1/4 cup of applesauce or a flax egg for a vegan choice.
These substitutions help you enjoy the treat while sticking to your diet. Adjust the recipe to fit your needs and still have delicious mini cheesecakes!
Step-by-Step Instructions
Preheating the Oven and Preparing the Baking Tin
First, set your oven to 325°F (160°C). This step is key for even baking. While the oven heats, grab a muffin tin. You can line it with cupcake liners or spray it with non-stick spray. Both work well and help with easy removal later.
Creating the Oreo Crust
Next, it’s time for the crust. Take 12 Oreo cookies and crush them into fine crumbs using a food processor. If you don’t have one, a plastic bag and a rolling pin work too. In a small bowl, mix the crumbs with 2 tablespoons of melted butter. Spoon about 1 tablespoon of this mixture into each muffin cup. Press it firmly to form a nice crust. Bake this for 10 minutes, then let it cool a bit.
Mixing the Cheesecake Filling
While the crust cools, let’s make the filling. In a mixing bowl, combine 8 oz of softened cream cheese with 1/2 cup of granulated sugar. Beat this until it’s smooth and creamy. Then, add 1 teaspoon of vanilla extract, 1/2 cup of sour cream, and 1 large egg. Mix until just combined. Be careful not to over-mix, or your filling can become too airy.
Baking and Cooling the Cheesecakes
Now, pour the cheesecake mixture over the cooled crust. Fill each cup about 3/4 full. Bake these in your preheated oven for 18-20 minutes. The centers should be set but still slightly jiggly. After baking, turn off the oven and crack the door open. Let the cheesecakes sit inside for another 15 minutes. This helps prevent cracks.
Adding Whipped Cream and Garnishing
Once cooled, take the cheesecakes out and let them sit at room temperature for about 30 minutes. Then, chill them in the fridge for at least 3 hours. To serve, whip 1/4 cup of heavy whipping cream with 1 tablespoon of powdered sugar until soft peaks form. Top each cheesecake with a dollop of whipped cream and a half Oreo cookie for a delicious finish.
Tips & Tricks
Ensuring Perfectly Smooth Cheesecake Filling
To get a smooth filling, start with softened cream cheese. This makes mixing easy. Use a hand mixer or stand mixer to beat the cream cheese and sugar. Mix until there are no lumps. Add sour cream, vanilla, and egg. Mix until just combined. Over-mixing can add air, making cracks later.
Avoiding Cracks in the Cheesecakes
Cracks can happen during baking. To prevent this, bake at a lower temperature. I suggest 325°F. Bake until the centers are slightly jiggly. After baking, turn off the oven and crack the door. Let the cheesecakes cool in the oven for 15 minutes. This slow cooling helps them set without cracking.
Best Practices for Storing Cheesecakes
Store your mini cheesecakes in the fridge. Use an airtight container to keep them fresh. They can last up to five days. If you want to keep them longer, freeze them. Wrap each cheesecake in plastic wrap, then foil. They’ll stay good for up to three months. Thaw in the fridge before serving.
Pro Tips
- Chill for Best Texture: Allow the mini cheesecakes to chill for at least 3 hours. This helps them set properly and enhances their creamy texture.
- Don’t Overmix: When combining the cheesecake filling ingredients, mix just until combined to prevent incorporating too much air, which can lead to cracks.
- Use Room Temperature Ingredients: Ensure your cream cheese and egg are at room temperature before mixing. This creates a smoother filling and prevents lumps.
- Oven Door Trick: After baking, crack the oven door open for 15 minutes before removing the cheesecakes to help prevent cracking as they cool.
Variations
Alternative Cookie Crust Ideas
You can change the crust to fit your taste. Here are some ideas:
- Chocolate Graham Crackers: Use crushed chocolate graham crackers for a richer base.
- Peanut Butter Cookies: Swap in peanut butter cookies for a nutty flavor.
- Gingersnaps: These add a spicy kick to your cheesecakes.
Mix the cookie crumbs with melted butter just like you did with the Oreos. Press the mixture into the muffin cups.
Different Flavors of Cheesecake Filling
Want to try new flavors? You can easily switch things up. Here are some options:
- Mint Chocolate: Add 1 teaspoon of mint extract to the filling. Top with crushed mint Oreos.
- Fruit Flavors: Blend in fruit puree, like strawberry or raspberry, for a fresh taste.
- Chocolate Chip: Fold in mini chocolate chips for extra texture and sweetness.
These tweaks make your mini cheesecakes fun and unique!
Adjusting for Gluten-Free or Vegan Options
If you need gluten-free or vegan options, it's simple to adapt. For gluten-free:
- Use gluten-free cookies for the crust. Many brands offer tasty options.
- Check that your cream cheese is gluten-free.
For vegan versions:
- Replace cream cheese with vegan cream cheese.
- Use a flax egg instead of a regular egg (mix 1 tablespoon flaxseed meal with 2.5 tablespoons water).
- Choose coconut cream for a creamy texture.
These swaps keep your mini cheesecakes delicious for everyone!
Storage Info
Best Ways to Store Leftover Cheesecakes
You want to keep your mini Oreo cheesecakes fresh. First, let them cool completely. After cooling, place them in an airtight container. This will help keep them moist. Store the container in the fridge. They stay good for about five days. If you want to keep them longer, freezing is a great option.
Freezing Mini Oreo Cheesecakes
Freezing mini Oreo cheesecakes is easy. First, make sure they are fully chilled. Next, wrap each cheesecake in plastic wrap. This step prevents freezer burn. Then, place them in a freezer-safe bag or container. They can last up to three months in the freezer. When you are ready to eat them, just thaw them in the fridge overnight.
Reheating Tips for Cheesecakes
Reheating mini cheesecakes is simple. You can enjoy them cold straight from the fridge. If you prefer them warm, preheat your oven to 300°F (150°C). Place the cheesecakes on a baking sheet. Heat them for about 10 minutes. Keep an eye on them to avoid overcooking. Enjoy your tasty treat!
FAQs
How to Make Mini Oreo Cheesecakes Without Eggs?
You can make mini Oreo cheesecakes without eggs by using a mix of cornstarch and water. Use 2 tablespoons of cornstarch mixed with 3 tablespoons of water. This mix will help bind your ingredients. It works well to keep the filling creamy and smooth. Just follow the same steps, replacing the egg with this mixture.
Can I Use Low-Fat Ingredients for this Recipe?
Yes, you can use low-fat ingredients. Swap regular cream cheese for low-fat cream cheese. Use low-fat sour cream too. You can also replace heavy cream with a low-fat alternative. The taste may change a little, but they will still be tasty.
What is the Best Way to Serve Mini Oreo Cheesecakes?
Serve mini Oreo cheesecakes cold for the best taste. Top each one with a dollop of whipped cream. You can add a half Oreo cookie on top for decoration. Use a nice plate to make them look fancy. They are great for parties and special occasions!
How Long Can Mini Cheesecakes Be Stored in the Refrigerator?
Mini cheesecakes can be stored in the refrigerator for up to 5 days. Keep them in an airtight container. Make sure they are fully set before storing. If you want to keep them longer, you can freeze them for up to 3 months. Just thaw them in the fridge before serving.
You learned how to make delicious Mini Oreo Cheesecakes with simple steps. We covered ingredients, baking methods, and helpful tips to ensure success. I shared storage tips and fun variations to suit different tastes and diets. Remember, you can easily customize these treats to fit your needs. Enjoy every bite and share these treats with friends. Making Mini Oreo Cheesecakes can be easy and fun. Go ahead and try it!