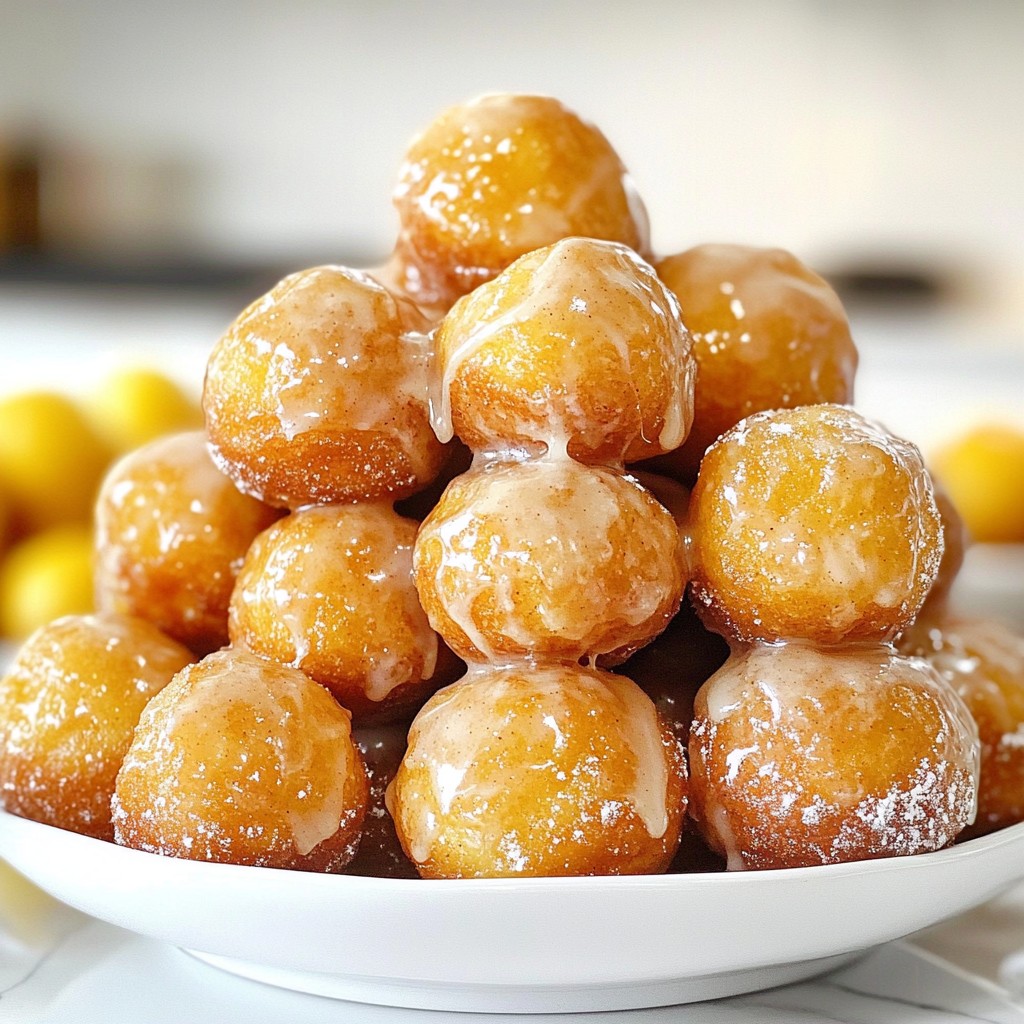
If you're craving a sweet treat that combines warm, fried goodness with the rich taste of maple, you’re in for a treat! Today, I’ll guide you through making Maple Glazed Donut Holes that are perfectly fried and incredibly delicious. With simple ingredients and easy steps, you’ll impress your family and friends. Let’s dive right into these delightful bites that promise to bring smiles to your table!
Why I Love This Recipe
- Easy to Make: This recipe is straightforward and requires minimal ingredients, making it perfect for novice bakers.
- Delicious Flavor: The combination of maple and spices creates a warm and inviting flavor that is perfect for any occasion.
- Customizable: You can easily add your favorite toppings or spices to the glaze, allowing for endless variations.
- Perfect for Sharing: These donut holes are bite-sized and fun to share with friends and family at gatherings or brunches.
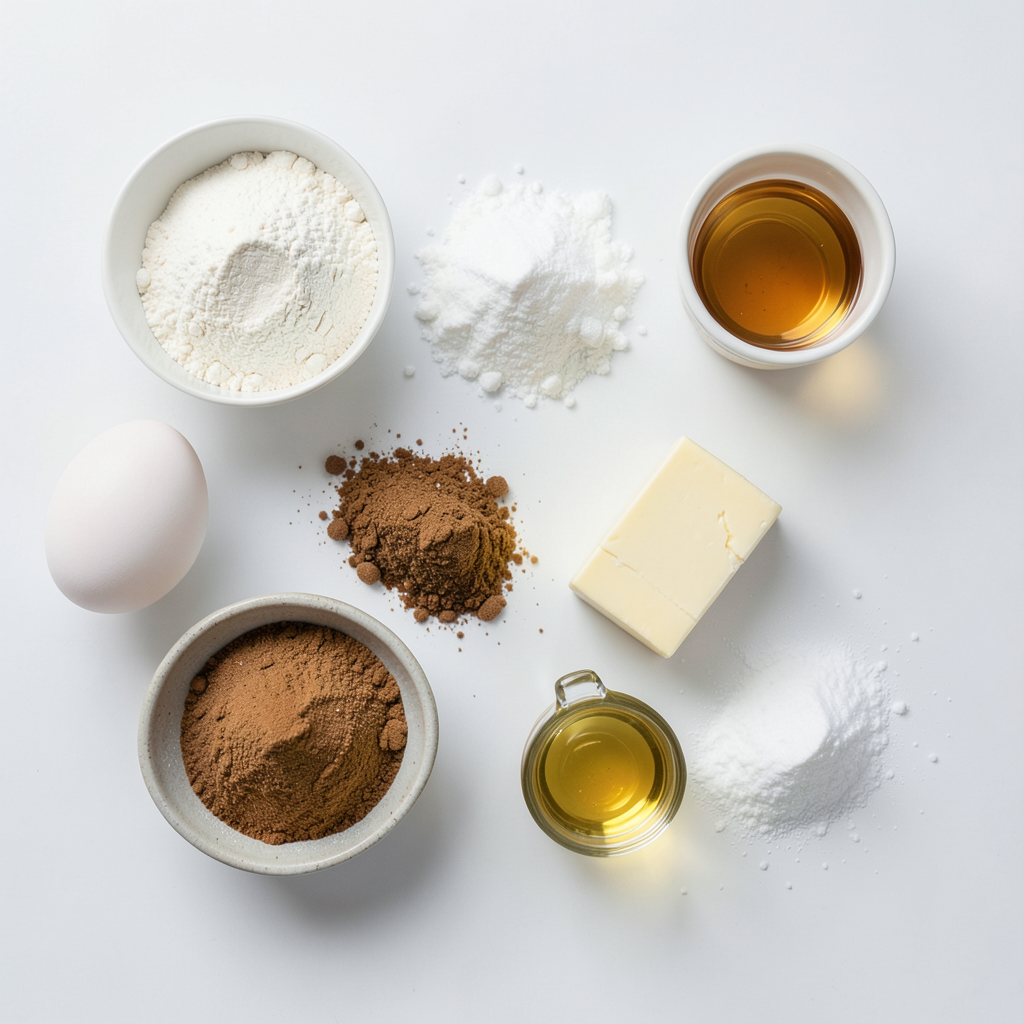
Ingredients
Dry Ingredients
- 1 cup all-purpose flour
- 1/4 cup granulated sugar
- 1 tablespoon baking powder
- 1/4 teaspoon salt
- 1/2 teaspoon ground cinnamon
- 1/4 teaspoon nutmeg
The dry ingredients form the base of your donut holes. All-purpose flour gives them structure. Sugar adds sweetness, while baking powder helps them rise. Salt brings out the flavor, and spices like cinnamon and nutmeg add warmth.
Wet Ingredients
- 1/4 cup milk
- 1 large egg
- 2 tablespoons unsalted butter, melted
- 1 teaspoon vanilla extract
The wet ingredients make your batter rich and delicious. Milk and egg provide moisture and help bind everything. Melted butter adds flavor and a lovely texture. Vanilla extract gives a warm aroma that makes these treats irresistible.
Oil and Glaze Ingredients
- Oil for frying
- 1 cup powdered sugar
- 2-3 tablespoons maple syrup
- 1 tablespoon milk (or as needed for consistency)
The oil is essential for frying. It creates a crispy outer layer. For the glaze, powdered sugar and maple syrup give a sweet finish. Adjust the milk to get the right glaze thickness. A thicker glaze coats better, while a thinner one drizzles nicely.
Step-by-Step Instructions
Preparing the Donut Batter
1. Mixing dry ingredients: In a large bowl, whisk together the all-purpose flour, granulated sugar, baking powder, salt, ground cinnamon, and nutmeg. This step is vital. It blends flavors and ensures your donut holes rise well.
2. Combining wet ingredients: In another bowl, mix the milk, large egg, melted butter, and vanilla extract. Stir until the mixture is smooth. This will add moisture and richness to your batter.
3. Folding wet and dry mixtures: Gradually pour the wet mix into the dry mix. Stir gently until just combined. Be careful not to over-mix. A few lumps are okay. Over-mixing can make your donut holes tough.
Frying the Donut Holes
1. Heating oil to the appropriate temperature: Heat oil in a deep frying pan or pot to 350°F (175°C). Use a thermometer for accuracy. The right temperature is key to frying golden, fluffy donut holes.
2. Dropping batter into oil: Once the oil is hot, use a small cookie scoop or tablespoon to drop batter into the oil. Fry in batches of 4-5. This prevents overcrowding, which can lower the oil temperature.
3. Frying time and turning for even cooking: Fry donut holes for about 3-4 minutes. Turn them occasionally. You want them golden brown all over. Use a slotted spoon to carefully remove them and place on a paper towel-lined plate to drain.
Making the Maple Glaze
1. Mixing glaze ingredients: In a bowl, combine powdered sugar, maple syrup, and milk. Use a whisk to mix until smooth. This glaze adds a sweet finish to your donut holes.
2. Adjusting consistency with milk: If the glaze is too thick, add more milk, one tablespoon at a time. You want a smooth and pourable glaze that coats the donut holes nicely.
Enjoy these steps, and you will create amazing maple glazed donut holes!
Tips & Tricks
Achieving the Perfect Glaze
To get the right glaze, I mix powdered sugar and maple syrup. Start with one cup of powdered sugar. Add two to three tablespoons of maple syrup. Then, add one tablespoon of milk. Stir it all together until it’s smooth. The glaze should be thick but still pourable. You can adjust the thickness by adding more milk if needed.
When dipping donut holes, wait until they are cool. Hold the donut hole by a finger. Dip it in the glaze, turning it for even coverage. Let the excess glaze drip off. Place the glazed donut hole on a wire rack. This helps the glaze set without making a mess.
Frying Techniques
To fry donut holes, heat your oil to 350°F (175°C). Use a deep frying pan or pot. This temperature ensures even cooking. If the oil is too hot, the outside will burn. If it’s too cool, the donut holes will soak up oil and become greasy.
Fry four to five donut holes at a time. This keeps the oil temperature steady. Turn the donut holes halfway through frying. This helps them cook evenly. Use a slotted spoon to remove them when golden brown. Place them on a paper towel-lined plate to drain.
Presentation Ideas
For serving, arrange the glazed donut holes on a nice plate. Drizzle some extra maple glaze on top for flair. You can also sprinkle chopped nuts or a dusting of powdered sugar. This adds color and texture. Serve them warm for the best taste. Donut holes are perfect for sharing at parties or casual get-togethers.
Pro Tips
- Fry in Batches: To ensure even cooking, fry donut holes in small batches. This prevents the oil temperature from dropping too much, which can result in greasy donuts.
- Check Oil Temperature: Use a thermometer to monitor the oil temperature. Keeping it at 350°F (175°C) is crucial for achieving that golden-brown color and perfect texture.
- Let Them Cool: Allow the donut holes to cool slightly after frying before dipping them in glaze. This helps the glaze adhere better and prevents it from melting off.
- Experiment with Flavors: Feel free to add different spices or extracts to the batter, such as cardamom or almond extract, for a unique twist on the classic flavor.
Variations
Flavor Additions
You can make your donut holes even more tasty by adding spices and extracts. Try adding a pinch of ground ginger or cardamom for warmth. A splash of almond extract can add a nice twist too.
You can also mix in chocolate or fruit flavors. For a chocolate version, fold in mini chocolate chips into the batter. If you love fruit, consider adding fresh blueberries or mashed bananas. Both options bring a new layer of flavor that’s hard to resist.
Glaze Alternatives
While maple glaze is delicious, you might want to try other flavors. A rich chocolate glaze is an excellent choice. Just melt chocolate with a bit of cream for a smooth dip.
You can also use vanilla glaze. Mix powdered sugar with milk and vanilla for a sweet finish. For something different, try topping with honey or caramel syrup. These alternatives will keep your donut holes exciting each time you make them.
Baking Option
Not in the mood for frying? You can bake the donut holes instead. Preheat your oven to 350°F (175°C). Use a mini muffin pan to shape the batter. This method is healthier and easier.
Adjust the baking time to about 10-12 minutes. Keep an eye on them. They should be golden brown on top. Once baked, dip them in glaze just like you would with fried ones. This way, you still enjoy the sweet treat without the oil!
Storage Info
Storing Leftover Donut Holes
You can store leftover donut holes at room temperature for one day. Keep them in an airtight container. If you want them to last longer, put them in the fridge. They can stay fresh for about three days in the fridge. However, the cold may change their texture slightly.
Reheating Instructions
To reheat donut holes, use the oven or an air fryer. Preheat the oven to 350°F (175°C). Place the donut holes on a baking sheet. Heat them for about 5-7 minutes. This method helps keep them warm and crisp. You can also use the microwave, but it may make them soft. If you use the microwave, heat them for 10-15 seconds at a time.
Freezing Tips
To freeze donut holes, let them cool completely first. Place them in a single layer on a baking sheet. Freeze them for 1-2 hours until firm. Then, transfer them to a freezer bag or container. They can stay in the freezer for up to three months.
When you're ready to eat them, thaw them in the fridge overnight. Reheat them in the oven or air fryer for best results. They will taste almost as fresh as the day you made them!
FAQs
Can I use whole wheat flour for this recipe?
Yes, you can use whole wheat flour. It will change the texture and flavor. I suggest mixing it with all-purpose flour. A 50/50 blend works well. This mix keeps the donut holes light while adding nutrition. Whole wheat adds a nutty taste. Adjust the liquid slightly as whole wheat absorbs more moisture.
How do I know when the donut holes are done frying?
Look for a golden brown color. The donut holes take about 3-4 minutes to fry. Turn them occasionally for even cooking. You can also check their size. They should puff up nicely. If they float to the top, they are close to being done. Use a slotted spoon to remove them and check for doneness.
Can I make the donut holes ahead of time?
Yes, you can make them ahead. Fry the donut holes, then let them cool completely. Store them in an airtight container. Keep them at room temperature for up to two days. If you want to keep them longer, freeze them. To reheat, just pop them in the microwave for a few seconds or in a warm oven. Glaze them right before serving for the best taste.
You learned how to make delicious donut holes from scratch, using simple ingredients. We covered both dry and wet components, plus oil and glaze needs. I shared tips on frying and perfecting the glaze. You can also experiment with flavors and baking methods. Store leftovers correctly to enjoy them later. Remember, making these treats can be fun and easy. You have skills now to impress family and friends with your homemade donut holes. Enjoy every bite!