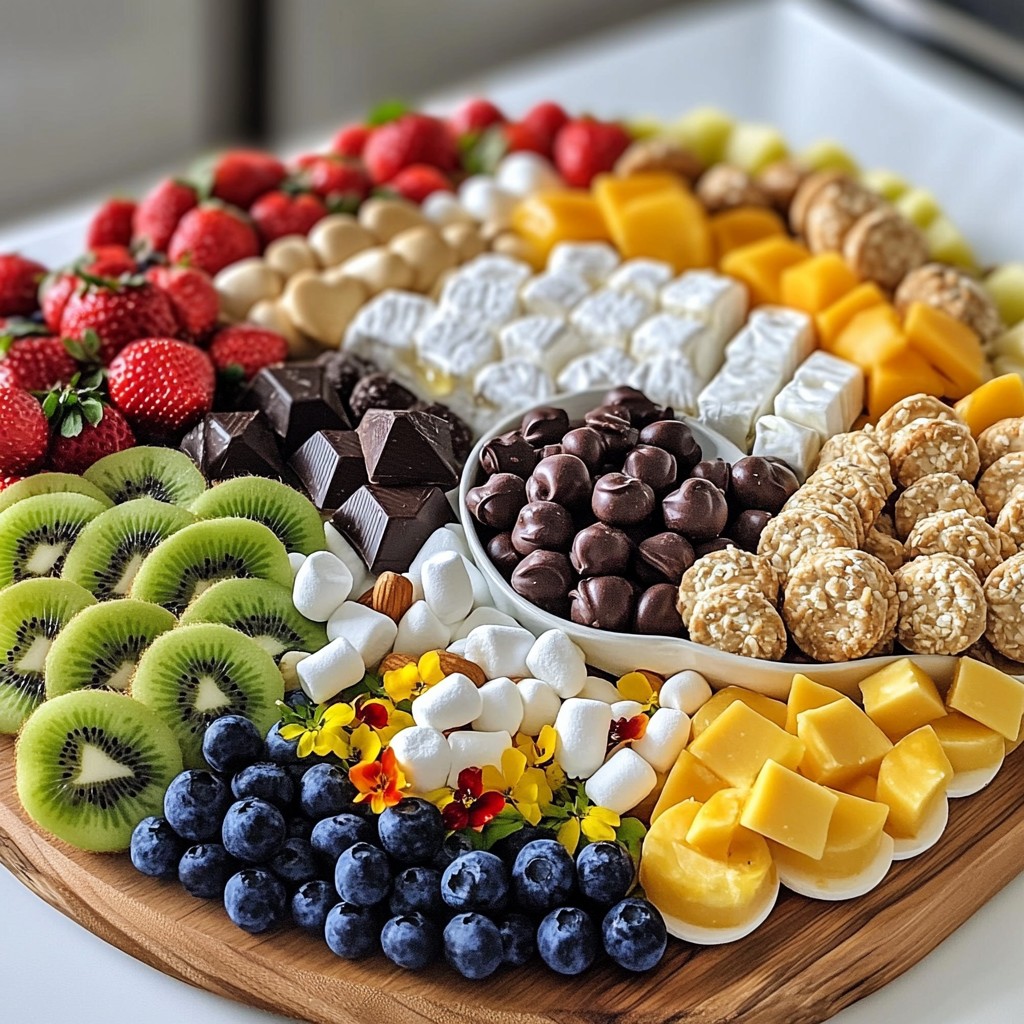
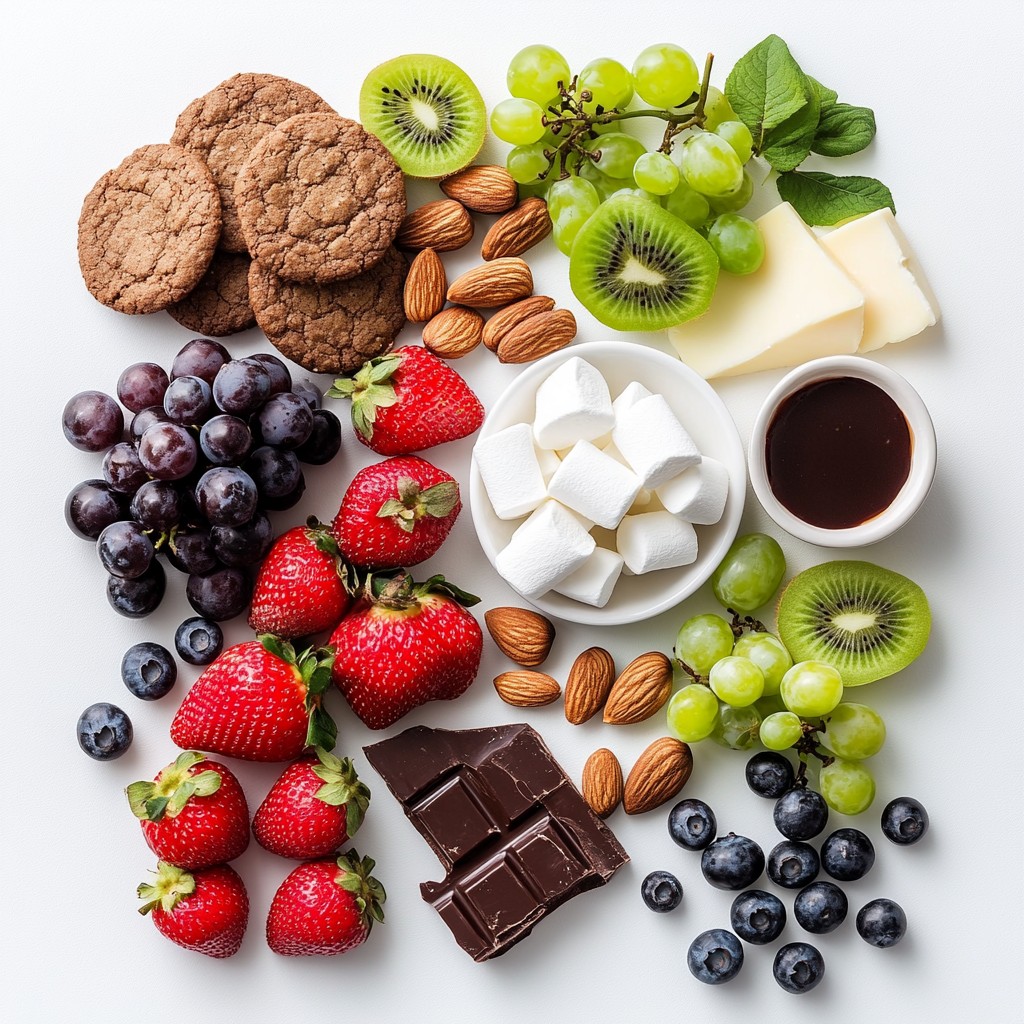
Looking to impress your guests with a fun, edible display? Dessert charcuterie boards are the perfect way to serve sweet treats and create a stunning centerpiece. I’ll show you how to mix cookies, fruits, nuts, and more into a delightful feast. Whether it’s for a party or a cozy night in, you’ll learn to design a board that not only tastes great but looks fantastic too. Dive in!
Why I Love This Recipe
- Delicious Variety: This dessert charcuterie board offers an array of sweet treats and flavors, ensuring there’s something for everyone.
- Visual Appeal: The colorful arrangement of fruits, cheeses, and sweets creates a stunning centerpiece that impresses guests.
- Interactive Experience: Encouraging guests to build their own dessert combinations makes for a fun and engaging experience.
- Quick Preparation: With just 20 minutes of prep time, this recipe is perfect for last-minute gatherings or casual get-togethers.
Ingredients
List of Assorted Cookies
For your dessert charcuterie board, choose 1 cup of assorted cookies. Options like chocolate chip, shortbread, and gingerbread work well. They add variety and texture. Aim for a mix of flavors and shapes to please everyone.
Fresh Fruits Selection
Next, include 1 cup of fresh fruits. Strawberries, grapes, kiwi, and blueberries are great choices. Cut larger fruits into slices for easy serving. Arrange them in colorful clusters for a bright look. Fresh fruit adds sweetness and balance.
Variety of Nuts
Add 1/2 cup of mixed nuts to your board. Almonds, walnuts, and pecans are tasty options. Place them in a small bowl or scatter them around. Nuts provide crunch and a savory contrast to sweet treats.
Types of Cheese
Use 1 cup of assorted cheeses to enhance flavors. Include cream cheese, mascarpone, and brie. Spread dollops of cream cheese and mascarpone, and slice brie for easy serving. Cheese pairs well with sweets, creating a delightful mix.
Additional Sweet Treats
Finally, include 1/2 cup of dark chocolate truffles and 1/2 cup of marshmallows. These treats add richness and fun. Consider drizzling honey or chocolate sauce for extra sweetness. Optional edible flowers can brighten your board and add charm.
Step-by-Step Instructions
Preparing the Board
Start with a large wooden board or platter. This will hold all your sweet treats. Clean the surface well to ensure it is ready for food.
Arranging the Cookies
Gather your assorted cookies. I love using chocolate chip, shortbread, and gingerbread. Place them in small clusters. Mix the types to make the board look nice and fun.
Displaying the Fresh Fruits
Next, wash your fresh fruits. I recommend strawberries, grapes, kiwi, and blueberries. Cut larger fruits, like kiwi, into slices. Arrange them in small sections on the board. Mix colors and sizes for a bright look.
Adding Nuts and Truffles
In one corner, add a small bowl of mixed nuts. Use almonds, walnuts, and pecans. Scatter a few nuts around the board too. This adds crunch and texture. Place dark chocolate truffles in another area. They are easy to grab and taste great!
Incorporating Marshmallows and Cheese
Now, it’s time for marshmallows. You can use mini or standard ones. Pile them up or put them in a cute dish. For cheese, take cream cheese, mascarpone, and brie. Spread small dollops or cut slices. Place these in different spots for guests to enjoy.
Drizzling Sauces and Garnishing
Drizzle honey or chocolate sauce over parts of the board. This adds sweetness and makes it look pretty. If you want, sprinkle edible flowers on top. They add a fresh touch. When ready, present your board to your guests and let them build their own dessert combos!
Tips & Tricks
Choosing the Right Board or Platter
Select a large wooden board or a nice platter. It should be big enough for all your treats. A flat surface makes it easier to arrange the sweets. Choose a color that matches your theme. You can use round or rectangular shapes based on your style.
Balancing Colors and Textures
Mix bright colors and different textures for a fun look. Use red strawberries, green kiwi, and blue blueberries. Place crunchy nuts next to soft marshmallows. This contrast keeps the eye moving. It makes your board look more inviting. Try to balance the sweet with some savory cheese too.
Portioning and Accessibility
Make it easy for guests to grab treats. Cut larger fruits like kiwi into small slices. Arrange cookies in small clusters for easy access. Use small bowls for nuts and sauces. This helps keep the board tidy. Guests can easily pick what they want without making a mess.
Tips for Edible Garnishes
Edible flowers add a special touch. They make your board look fancy and fun. Sprinkle them around the board for color. Use flowers that are safe to eat, like pansies or violets. They taste great and make a lovely decoration. Just remember to wash them well before using.
Pro Tips
- Choose a Theme: Coordinate your cookies and fruits with a color theme to enhance visual appeal.
- Cheese Variety: Include a mix of textures and flavors in your cheese selection to complement the sweetness of the desserts.
- Freshness Matters: Use the freshest fruits possible to ensure vibrant colors and flavors on your board.
- Presentation is Key: Arrange items in varying heights using small stands or bowls for a more dynamic display.
Variations
Seasonal Dessert Charcuterie Ideas
I love creating dessert boards that match the seasons. In spring, I use bright fruits like strawberries and raspberries. I add pastel-colored macarons for a sweet touch. For summer, I fill the board with juicy peaches and cherries. I often include refreshing sorbet in cute cups. In autumn, I like to use apples and pears, paired with caramel. I might add pumpkin spice cookies for a cozy feel. Winter calls for warm flavors, like gingerbread and peppermint. Hot cocoa cups can be a fun addition too!
Dietary Alternatives (Gluten-Free, Vegan, etc.)
Making dessert boards for everyone is easy. For gluten-free options, use rice crackers and gluten-free cookies. Fresh fruits are always safe and colorful. You can swap regular cheese for vegan cheese made from nuts. For a vegan dessert board, use dark chocolate that is dairy-free. Add nut butter and coconut yogurt for creamy textures. Try using vegan marshmallows to keep it plant-based. This way, everyone can enjoy a sweet treat!
Themed Boards for Events
I love themed boards for parties. For birthdays, I use bright colors and fun shapes. Think rainbow sprinkles and cake pops! For holidays, I pick items that match the theme. For Halloween, I use spooky cookies and candy corn. A Christmas board can have gingerbread houses and festive fruits. For movie nights, I might include popcorn-flavored treats alongside chocolates. These themes make the dessert board more fun and engaging!
Storage Info
Best Storage Practices for Leftovers
After enjoying your dessert charcuterie board, save leftovers to keep them fresh. Place cookies in an airtight container. This keeps them crunchy. For fruits, store them in a separate container in the fridge. Use a paper towel to absorb moisture. This helps them stay fresh longer. For cheese, wrap it tightly in plastic wrap or foil. This prevents it from drying out. Keep nuts in a cool, dry place to maintain their crunch.
Reassembling the Board for Serving
When you're ready to serve again, pull everything out. Arrange the cookies and fruits as you did before. This makes it look fresh and fun. Place cheese in separate spots for easy grabbing. Add any new ingredients if you have them. Drizzle honey or chocolate sauce again to make it look new. Encourage your guests to create new combinations!
Keep Freshness in Mind
Freshness matters for a great dessert board. Always check fruits for softness or spots. Discard any that look bad. If you cannot eat everything, plan to finish it within two days. Store items properly to keep them tasty. This way, every bite remains as delightful as the first.
FAQs
What desserts are best for charcuterie boards?
For dessert charcuterie boards, I love using a mix of sweet treats. You can include:
- Assorted cookies (like chocolate chip, shortbread, and gingerbread)
- Fresh fruits (such as strawberries, grapes, kiwi, and blueberries)
- Dark chocolate truffles
- Mini marshmallows
- A variety of cheeses (like cream cheese, mascarpone, and brie)
These desserts create a fun and colorful display. Choose treats that pair well together for the best taste.
How do I make a dessert board for a large gathering?
To make a dessert board for a large group, start with a big board. You can also use multiple smaller boards. Follow these steps:
1. Use more ingredients: Increase the amounts of cookies, fruits, nuts, and other treats.
2. Create sections: Divide the board into areas for each type of dessert. This helps guests see all options.
3. Add variety: Mix different flavors and textures. This keeps it exciting.
4. Encourage sharing: Place small serving utensils or bowls for sauces, so guests can easily grab what they want.
Can I prepare a dessert charcuterie board the night before?
Yes, you can prepare a dessert charcuterie board the night before. Here are some tips:
- Keep it fresh: Store fruits in airtight containers to prevent them from drying out.
- Assemble carefully: Place cookies and nuts in separate areas. This keeps them from getting soggy.
- Add sauces last: Wait to drizzle honey or chocolate sauce until just before serving. This keeps the board looking fresh and appealing.
What are some common pairings for dessert items?
Pairing dessert items can enhance the flavors. Here are some common pairings to try:
- Cheese and fruit: Cream cheese pairs well with fresh berries.
- Chocolate and nuts: Dark chocolate truffles and almonds make a great duo.
- Cookies and sauces: Shortbread cookies taste amazing with honey or chocolate drizzle.
- Fruits and marshmallows: Fresh strawberries and marshmallows can be a fun combo.
Encourage your guests to mix and match for their perfect bite!
Creating a dessert charcuterie board is fun and simple. You learned to select the right ingredients, like assorted cookies and fresh fruits. I showed you how to arrange them and add tasty garnishes. Remember to balance colors and textures for an eye-catching display.
In closing, a dessert board can fit any event or season. With these tips and tricks, you can impress friends and family. Enjoy the process and share your delicious creations!