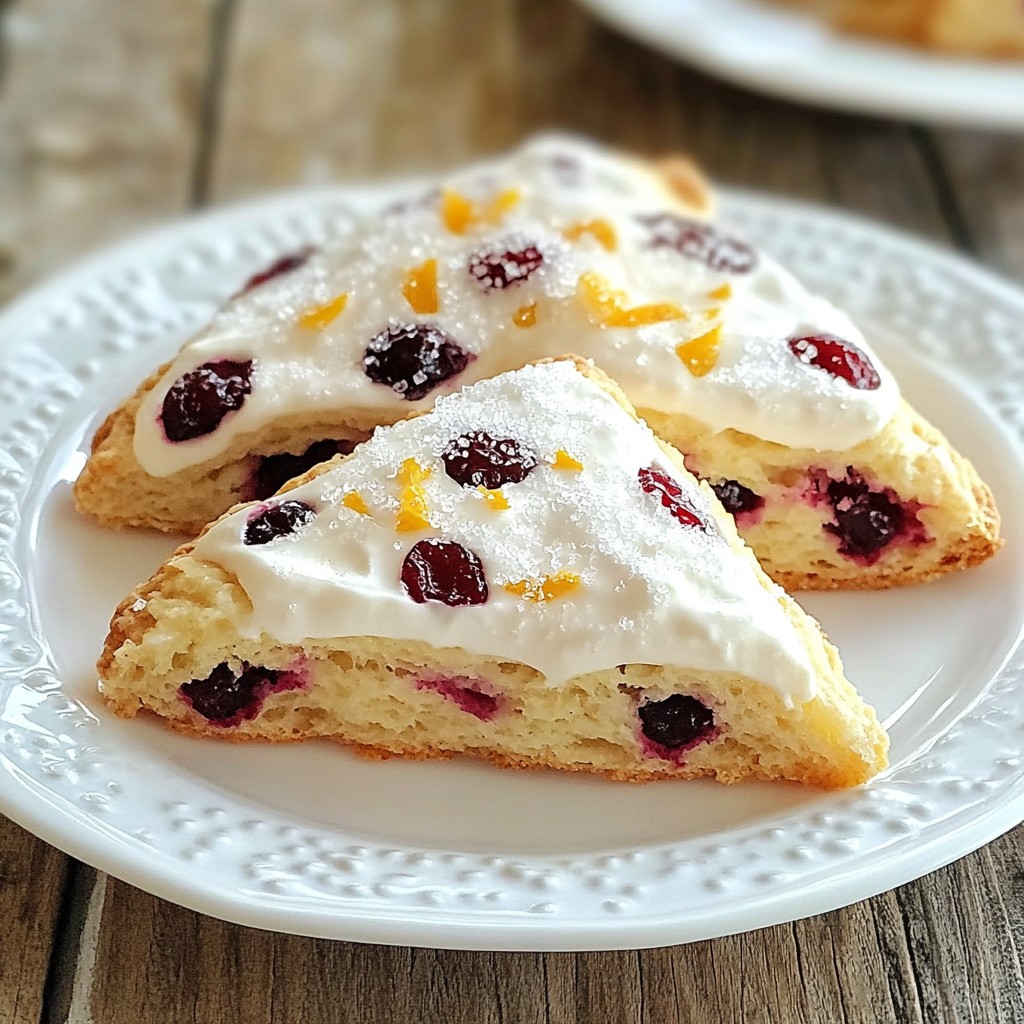
Are you ready to elevate your baking game? This easy recipe for Cranberry Orange Scones brings bright flavors and a delightful texture to your table. With simple ingredients and quick steps, you’ll whip up these tasty treats in no time. They’re perfect for breakfast, brunch, or a cozy afternoon snack. Let’s dive into this fun baking adventure that you’ll want to share with family and friends!
Why I Love This Recipe
- Delicious Flavor Combination: The tartness of cranberries combined with the bright citrus notes from the orange zest creates a delightful balance that’s perfect for any occasion.
- Easy to Make: This recipe is simple and quick, making it perfect for both novice bakers and experienced ones looking for a delicious treat without a lot of fuss.
- Perfect for Any Time: Whether it’s breakfast, a snack, or dessert, these scones are versatile and can be enjoyed with tea, coffee, or on their own.
- Beautiful Presentation: The golden-brown color and optional sparkling sugar topping make these scones visually appealing, perfect for impressing guests or treating yourself.
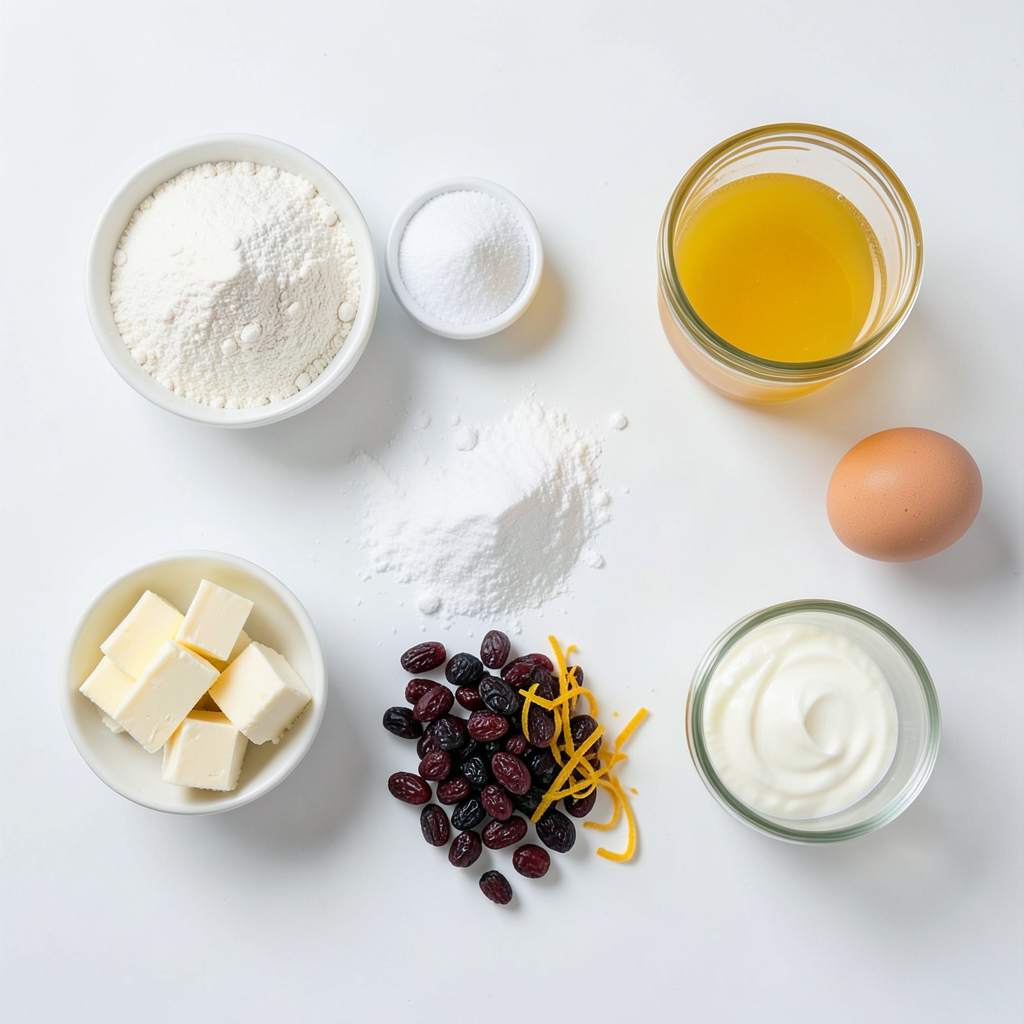
Ingredients
To make delicious cranberry orange scones, you need these simple ingredients:
- 2 cups all-purpose flour
- 1/2 cup granulated sugar
- 1 tablespoon baking powder
- 1/2 teaspoon salt
- 1/2 cup unsalted butter, cold and cubed
- 1/2 cup dried cranberries
- Zest of 1 orange
- 1/2 cup orange juice
- 1 large egg
- 1 teaspoon vanilla extract
- 1/4 cup heavy cream (for brushing)
- Optional: Sparkling sugar for topping
These ingredients come together to create scones that are both sweet and tart. The dried cranberries provide a chewiness that pairs well with the zesty orange. Using cold butter helps make the scones flaky. You can add the optional sparkling sugar for a fun finish. Each bite will bring you joy. Gather these items to start your baking adventure!
Step-by-Step Instructions
Preparation Steps
1. Preheat your oven to 400°F (200°C). This makes sure your scones bake evenly.
2. Line a baking sheet with parchment paper. This helps with easy cleanup and prevents sticking.
3. In a large bowl, whisk together the flour, sugar, baking powder, and salt. This blends all the dry ingredients well.
4. Add the cold, cubed butter to the bowl. Use your fingertips or a pastry cutter to mix it. You want the mixture to look like coarse crumbs.
Combining Wet Ingredients
1. In a separate bowl, whisk together the orange juice, egg, and vanilla extract. This adds flavor and moisture to the scones.
2. Once mixed, pour the wet ingredients into the dry mix. Stir gently until just combined. Don't overmix; a slightly sticky dough is perfect.
Forming and Baking the Scones
1. Turn the dough onto a floured surface. Shape it into a circle about 1 inch thick.
2. Cut the dough into triangles or use a round cutter for fun shapes.
3. Place the scones on your prepared baking sheet. Brush the tops with heavy cream. This gives them a nice shine.
4. If you like, sprinkle some sparkling sugar on top for a sweet crunch.
5. Bake for 15-20 minutes. They should be golden brown. A toothpick should come out clean when inserted in the center.
6. Once baked, let them cool on a wire rack for a few minutes. Enjoy them warm for the best taste!
Tips & Tricks
Tips for Perfect Scones
- Cold Ingredients: Always use cold butter and chilled liquids. This helps create flaky layers. Cold ingredients keep the butter from melting too fast. The result is a light and fluffy scone.
- Avoid Overmixing: Mix the dough gently. Overmixing leads to tough scones. You want a slightly sticky dough, not a smooth one. Just combine until you see no dry flour.
- Baking Time Adjustments: Every oven is different. Start checking the scones at 15 minutes. They should be golden brown and a toothpick should come out clean. If needed, add a few more minutes.
Serving Suggestions
- Pairing with Tea or Coffee: These scones are lovely with a warm cup of tea or coffee. The citrus flavor in the scones pairs well with both. Enjoy them in the morning or as an afternoon treat.
- Presentation Tips: Serve warm scones on a nice plate. Dust them lightly with powdered sugar for a charming touch. You can also drizzle a simple orange glaze over them for added sweetness.
Enhancing Flavor
- Adding Extra Spices or Zest: For more flavor, try adding cinnamon or nutmeg. You can also add more orange zest for a zesty kick. These small additions can elevate your scones.
- Drizzling with an Orange Glaze: To make a glaze, mix powdered sugar with a bit of orange juice. Drizzle this over the cooled scones. It adds a sweet and tangy finish that's irresistible.
Pro Tips
- Keep Ingredients Cold: Ensure your butter is very cold to create flaky layers in the scones.
- Don’t Overmix: Mix the dough just until combined to keep the scones tender and light.
- Use Fresh Orange Zest: For the best flavor, use freshly grated orange zest instead of pre-packaged zest.
- Experiment with Add-ins: Feel free to add nuts or chocolate chips for extra flavor and texture.
Variations
Fruit Alternatives
You can swap dried cranberries for fresh berries or other dried fruits. Blueberries or chopped strawberries work great. If you prefer tropical flavors, try dried mango or pineapple. Adjust the orange zest to match the fruit you choose. This simple change keeps the scones exciting and fresh.
Flavor Enhancements
Adding nuts or chocolate gives your scones a flavor boost. Chopped walnuts or pecans add crunch and richness. If you love chocolate, mix in some dark or white chocolate chips. These additions make your scones even more delicious and fun to eat.
Dietary Modifications
For gluten-free options, use a gluten-free flour blend. Make sure it has a binding agent, like xanthan gum. If you want to go vegan, replace the egg with a flax egg. Use plant-based butter and non-dairy milk instead of heavy cream. These swaps let everyone enjoy tasty scones.
Storage Info
How to Store Scones
To keep your cranberry orange scones fresh, store them in an air-tight container. This helps prevent them from drying out. Make sure to let the scones cool completely before sealing them. If you have leftover scones, they can stay fresh for about three days at room temperature.
Freezing for Later Use
If you want to enjoy your scones later, freezing is a great option. First, let the scones cool. Then, wrap each scone in plastic wrap. Place the wrapped scones in a freezer-safe bag. They can stay frozen for up to three months. When you are ready to eat, remove a scone and let it thaw at room temperature. You can warm it in the oven for a few minutes for that fresh-baked taste.
Freshness Tips
To maintain the best texture and flavor, try these tips:
- Store scones at room temperature, not in the fridge, to prevent them from getting soggy.
- For extra freshness, reheat them in the oven for a few minutes before serving.
- If you notice any moisture in the container, add a paper towel to absorb it. This keeps your scones dry and tasty.
FAQs
Can I use fresh cranberries instead of dried?
Yes, you can use fresh cranberries. They add a tart flavor. However, fresh cranberries are more moist. This can change the texture of your scones. If you use fresh cranberries, you may need to adjust the flour slightly.
How do I know when my scones are done baking?
Your scones are done when they turn golden brown. A toothpick inserted in the center should come out clean. You can also lightly press the top. If it springs back, they are ready.
What can I substitute for heavy cream?
You can use milk or a milk substitute. Half-and-half works well too. If you need a dairy-free option, use almond milk or coconut cream. Each option changes the scone's richness slightly.
Can I make the dough ahead of time?
Yes, you can make the dough ahead. Shape the scones and wrap them well. Keep them in the fridge for up to 24 hours. You can also freeze the shaped scones for up to a month. Just bake them straight from the freezer, adding a few extra minutes to the bake time.
How do I add a glaze to my scones?
To make a simple glaze, mix powdered sugar with orange juice. Stir until smooth. Drizzle it over your scones after they cool. You can also dust them with powdered sugar for a sweet finish.
Making these scones is fun and easy. You need basic ingredients like flour, sugar, and butter. Follow simple steps: mix, shape, and bake. Remember the tips for perfect scones to avoid mistakes. You can also explore different flavors and dietary options. Store them well to enjoy later. With practice, you’ll master this tasty treat. Enjoy pairing your scones with tea or coffee for a delightful snack.