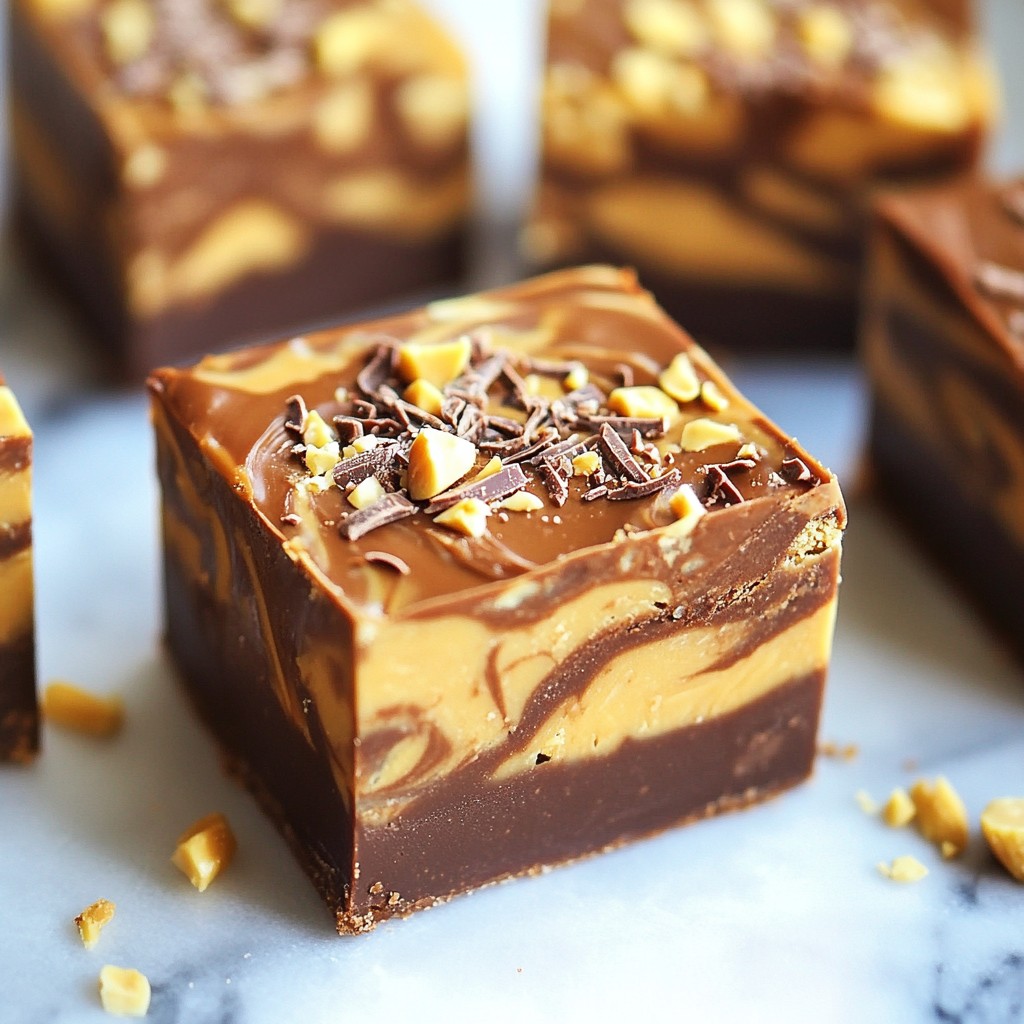
Are you ready to dive into a world of sweet bliss? Chocolate Peanut Butter Swirl Fudge is not just a treat; it’s a delight you can make at home. With a few simple ingredients and easy steps, you’ll whip up a rich, creamy dessert. Follow my guide and unlock tips to create the perfect swirl, ensuring your fudge is both beautiful and delicious. Let’s get started on this scrumptious adventure together!
Why I Love This Recipe
- Decadent Flavor: The combination of rich chocolate and creamy peanut butter creates an indulgent treat that satisfies any sweet tooth.
- Easy to Make: With just a few simple steps and minimal ingredients, this fudge can be whipped up in no time.
- Customizable: You can easily add your favorite mix-ins or toppings, like nuts or chocolate shavings, to make it your own.
- Perfect for Sharing: This recipe yields 16 squares, making it a great option for parties, gatherings, or just to enjoy with friends and family.
Ingredients
Complete List of Ingredients
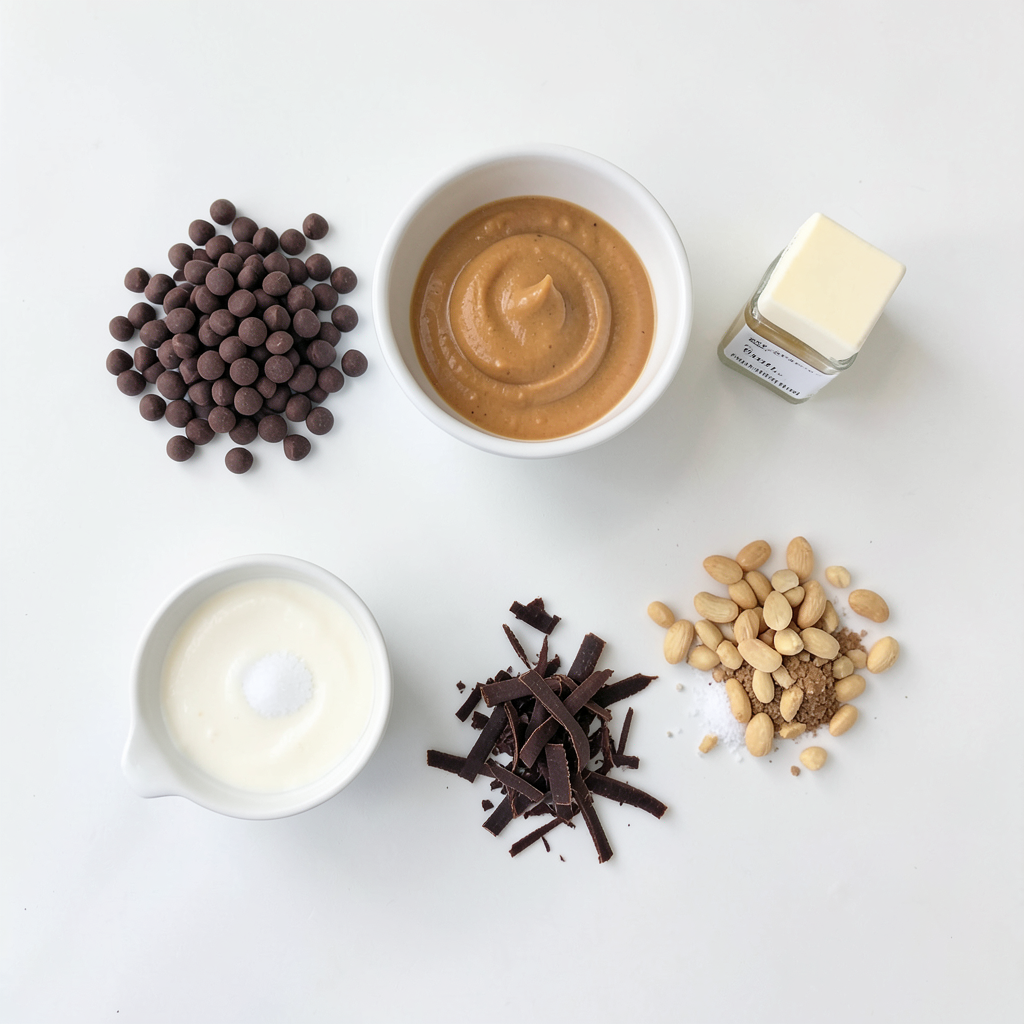
To make Chocolate Peanut Butter Swirl Fudge, gather these simple items:
- 1 cup semi-sweet chocolate chips
- 1/2 cup sweetened condensed milk
- 1/4 cup creamy peanut butter
- 1 tablespoon unsalted butter
- 1 teaspoon vanilla extract
- A pinch of salt
- Chopped peanuts and chocolate shavings for garnish (optional)
These ingredients create a rich and creamy fudge. Each item plays a key role in flavor and texture.
Ingredient Substitutions
You can swap some ingredients for different flavors or dietary needs. Here are some ideas:
- Use dark chocolate chips instead of semi-sweet for a richer taste.
- Almond milk can replace sweetened condensed milk for a dairy-free option.
- Natural peanut butter can work in place of creamy peanut butter. Just stir well before using.
- Coconut oil can replace unsalted butter for a vegan version.
These swaps still keep your fudge delicious while fitting your needs.
Measuring Tips for Accuracy
Measuring your ingredients accurately is key to great fudge. Here are some tips:
- Use dry measuring cups for solid ingredients like chocolate chips and peanut butter.
- Make sure to level off the top with a knife for accuracy.
- For sticky ingredients like peanut butter, spray the measuring cup with a bit of cooking spray first. This helps it slide out easily.
- For liquid ingredients, use a clear measuring cup and check at eye level.
Accurate measurements help ensure your fudge sets perfectly and tastes amazing.
Step-by-Step Instructions
Preparation of Baking Pan
First, you need an 8x8 inch square baking pan. Line it with parchment paper. Make sure to leave some paper hanging over the sides. This helps you pull the fudge out later. This step makes it easier and cleaner.
Melting Chocolate and Peanut Butter Mixtures
In a medium saucepan, add the semi-sweet chocolate chips, sweetened condensed milk, and unsalted butter. Set the heat to low. Stir the mixture as it heats up. Keep stirring until it melts completely and looks smooth. This will take a few minutes. Remove the pan from the heat once it’s ready. Add the vanilla extract and a pinch of salt. Mix well to blend all the flavors.
Swirling Techniques for Visual Appeal
Pour half of your chocolate mixture into the lined baking pan. Smooth it out to form an even layer. Now, in a small bowl, mix the peanut butter with a tablespoon of the chocolate mixture. Heat this in the microwave for 15-20 seconds. Stir until it’s smooth and creamy. Drizzle the peanut butter mix over the chocolate layer. Take a knife or skewer and swirl it gently into the chocolate. This creates a beautiful marbled look. Pour the rest of the chocolate mixture over the top. Smooth it out again, but don't lose the swirl. Finally, place the pan in the fridge for at least 2 hours. This helps the fudge set nicely.
Tips & Tricks
Ensuring a Smooth Fudge Consistency
To make sure your fudge is smooth, keep the heat low. Stir the chocolate and milk mix well. If you see lumps, keep stirring until they melt. Adding a bit of butter helps too. It makes the fudge creamy and rich.
Troubleshooting Common Issues
If your fudge is too soft, it might not have set enough. Try refrigerating it longer. If it’s too hard, you may have cooked it too long. To fix, you can melt it again and add a touch of milk. This helps bring back the right texture.
How to Achieve the Best Swirl
For the best swirl, warm your peanut butter slightly. This helps it mix better. Drizzle it gently over the chocolate layer. Use a knife or skewer to create a nice pattern. Don't over-swirl; you want to see both chocolate and peanut butter.
Pro Tips
- Use Quality Chocolate: For the best flavor, opt for high-quality semi-sweet chocolate chips. They will make a noticeable difference in the final taste of your fudge.
- Swirl Technique: When swirling the peanut butter, do not overmix. You want to create a marbled effect rather than fully incorporating the peanut butter into the chocolate.
- Let it Set: Ensure you allow the fudge to set in the refrigerator for at least 2 hours. This will help it firm up properly and make cutting easier.
- Storage Tips: Store any leftover fudge in an airtight container in the refrigerator, where it can last for up to one week. For longer storage, consider freezing the fudge.
Variations
Nut-Free and Alternative Ingredients
You can easily make this fudge nut-free. Replace peanut butter with sunflower seed butter. This swap keeps the taste rich and creamy. Use a nut-free chocolate chip brand to ensure safety. You can also try almond butter, if you have no nut allergies. The flavor changes but still stays delightful.
Adding Flavor Enhancements
To boost flavor, think about adding a dash of espresso powder. This small addition enhances chocolate depth. You can also add a pinch of cinnamon for warmth. If you like it sweet, try a splash of almond extract. Each option brings a new twist to your fudge.
Fudge Mix-Ins for Extra Texture
Mix-ins give your fudge extra crunch. Try adding mini marshmallows or crispy rice cereal for fun. You can also fold in some crushed graham crackers for a s'mores vibe. Want something fruity? Toss in bits of dried cherries or cranberries. Each mix-in creates a unique taste experience.
Storage Info
Proper Storage Methods
To keep your fudge fresh, store it in an airtight container. Line the container with parchment paper for easy removal. You can also wrap each piece in plastic wrap. This helps it stay moist and tasty. Avoid placing it in direct sunlight or near heat.
Shelf Life of Fudge
When stored correctly, Chocolate Peanut Butter Swirl Fudge lasts for about one week at room temperature. If you put it in the fridge, it can last up to two weeks. For longer storage, consider freezing it.
Reheating or Repurposing Leftovers
If you want to enjoy the fudge warm, gently heat it in the microwave for a few seconds. Be careful not to overheat it, or it may become too soft. You can also chop up leftover fudge and add it to ice cream. This gives your dessert a fun twist!
FAQs
How do I know when the fudge is set?
You can tell fudge is set when it feels firm to the touch. Press lightly on the surface. If it bounces back, it’s ready. The fudge should also look glossy. Refrigerate it for at least 2 hours. This helps it firm up nicely.
Can I freeze Chocolate Peanut Butter Swirl Fudge?
Yes, you can freeze this fudge. Wrap it tightly in plastic wrap. Then, place it in an airtight container. It can last for up to three months in the freezer. When you want to eat it, let it thaw in the fridge overnight. This keeps the texture smooth.
What are some serving suggestions for fudge?
You can serve fudge in many ways. Cut it into small squares for easy sharing. Top it with chopped peanuts or chocolate shavings for fun. Pair it with vanilla ice cream for a tasty treat. You can also enjoy it with coffee or milk for a cozy snack.
In this blog post, we covered how to make delicious Chocolate Peanut Butter Swirl Fudge. We explored the ingredients, including how to substitute them. We shared step-by-step instructions and tips for a smooth fudge. I also outlined variations you can try and how to store your fudge properly.
With these simple steps and tips, you can create tasty fudge that impresses anyone. Enjoy the process and share your yummy results!