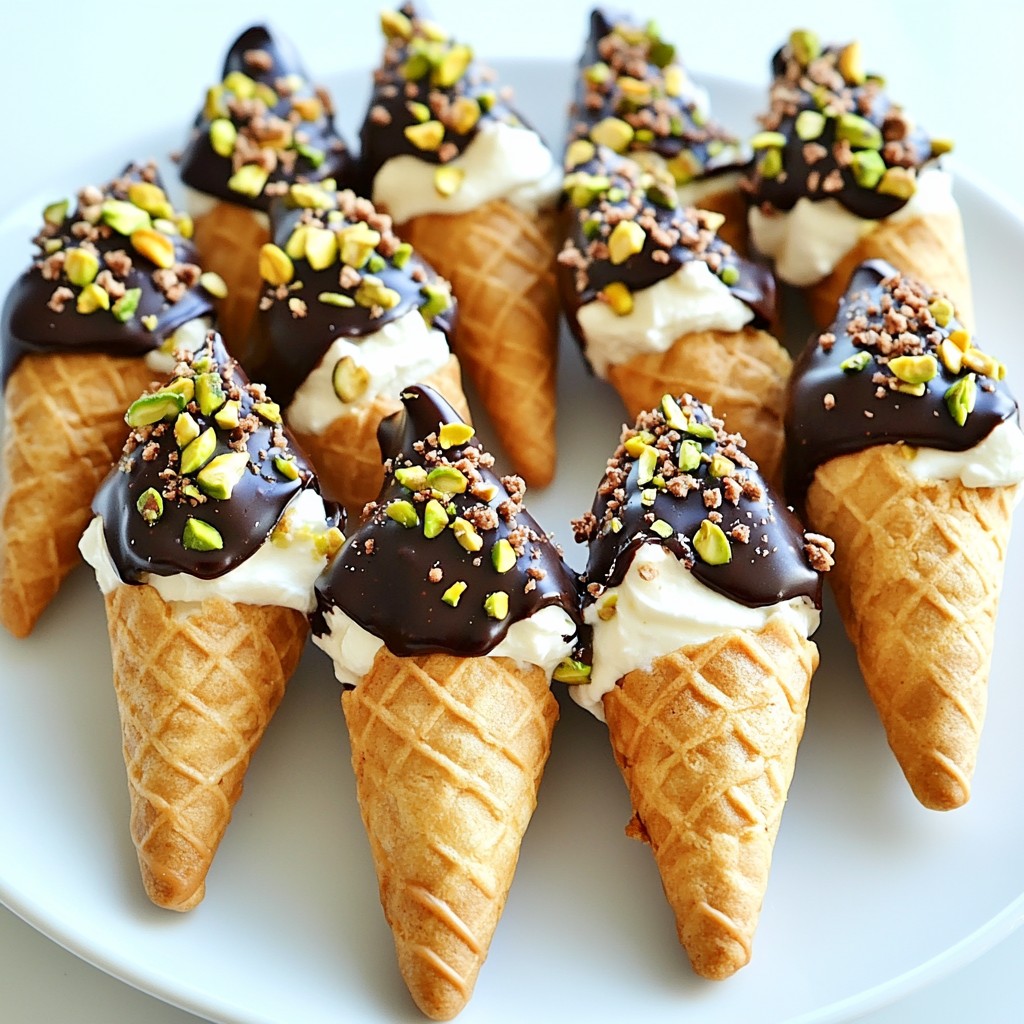
Are you ready to elevate your dessert game? Meet Chocolate Dipped Cannoli Cones, the sweet treat that combines the classic Italian dessert with a fun twist. With a creamy filling, crunchy shell, and a decadent chocolate coat, these cones will wow your taste buds. In this guide, I’ll share easy steps to make these delightful desserts, tips for perfecting your technique, and variations to suit any palate. Let’s dive in!
Why I Love This Recipe
- Decadent Chocolate Coating: The rich dark chocolate adds a luxurious touch that perfectly complements the creamy filling.
- Easy to Make: This recipe is simple and quick, making it perfect for a last-minute treat or a fun cooking project.
- Customizable Toppings: Whether you prefer pistachios, sprinkles, or other toppings, you can personalize each cone to your taste!
- Impressive Presentation: These cannoli cones are visually stunning, making them a great choice for parties and gatherings.
Ingredients
List of Ingredients
- 12 mini cannoli shells
- 1 cup ricotta cheese
- 1/2 cup mascarpone cheese
- 1/2 cup powdered sugar
- 1 teaspoon vanilla extract
- 1/2 cup mini chocolate chips
- 1 cup dark chocolate chips (for dipping)
- 1 tablespoon coconut oil (optional)
- Chopped pistachios or sprinkles for garnish (optional)
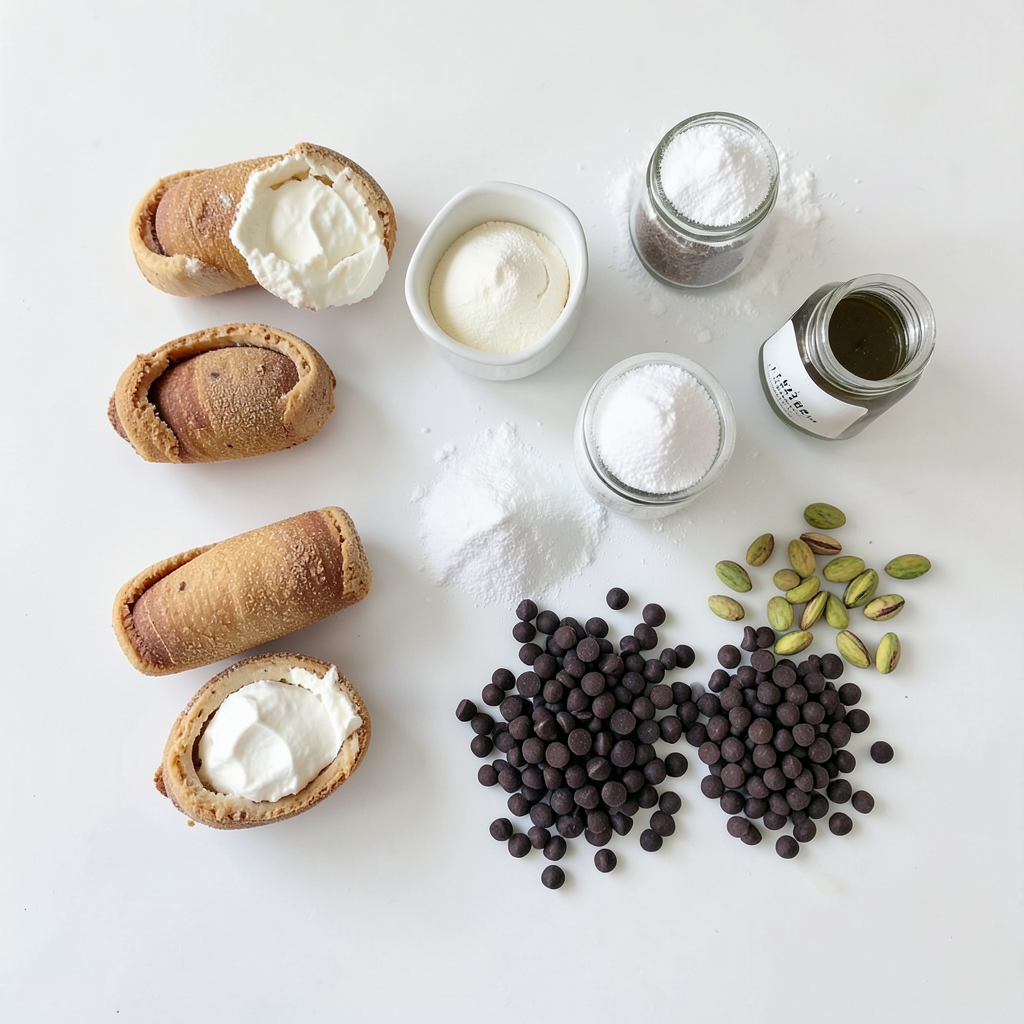
To make these chocolate dipped cannoli cones, gather all the ingredients first. This helps the process go smoothly. The mini cannoli shells serve as the base, holding all the creamy goodness. Ricotta and mascarpone cheeses blend for a soft filling. The powdered sugar adds sweetness, while vanilla enhances the flavor. Mini chocolate chips in the filling give delightful bursts of chocolate.
For dipping, dark chocolate melts beautifully. If you want a glossy finish, add coconut oil. This step is optional but gives a nice shine. Finally, you can top the cones with chopped pistachios or colorful sprinkles for a fun touch. These ingredients create a dessert that is as tasty as it is beautiful.
Step-by-Step Instructions
Preparing the Filling
First, take a mixing bowl. Combine ricotta cheese, mascarpone cheese, powdered sugar, and vanilla extract. Mix until smooth. You want a creamy texture, so blend well. This step creates a rich base for your cannoli cones.
Incorporating Chocolate
Next, gently fold in mini chocolate chips. This adds little bursts of chocolate. It makes every bite extra special. Be careful not to overmix. You want the chocolate chips to stay whole.
Filling the Cannoli Shells
Now, it's time to fill the shells. Use a piping bag or a spoon. Fill each mini cannoli shell with the cheese mixture. Make sure they are generously filled. This will create a tasty surprise when you bite in.
Melting the Chocolate
For the next step, melt dark chocolate chips. Use a microwave-safe bowl. Heat in 30-second intervals. Stir in between each interval. This helps the chocolate melt smoothly. If you like, add coconut oil for a shinier finish.
Dipping the Cannoli
Once the chocolate is melted, dip each filled cannoli cone. Let the excess chocolate drip off. Place them on a parchment-lined baking sheet. This keeps them from sticking and makes cleanup easy.
Garnishing
While the chocolate is still wet, add some fun! Sprinkle chopped pistachios or colorful sprinkles on top. This adds a nice crunch and makes your cones look pretty. It’s all about that visual appeal!
Chilling and Serving
Finally, transfer the filled cannoli cones to the fridge. Let them chill for about 30 minutes. This helps the chocolate set firmly. Once ready, arrange them on a serving platter. Enjoy your delicious chocolate dipped cannoli cones!
Tips & Tricks
Perfecting the Filling
To make the filling smooth, use fresh ricotta and mascarpone. Mix them well with powdered sugar and vanilla. This creates a sweet base for your cannoli. Add mini chocolate chips for bursts of flavor. These tiny treats elevate each bite. If you want a creamier texture, blend the filling longer.
Chocolate Dipping Techniques
For an even coat, dip the cannoli quickly in melted chocolate. Move it around to cover all sides. Gently shake off any extra chocolate. This prevents drips and clumps. You can also drizzle chocolate on top with a spoon for a fun design. Use a piping bag if you're feeling creative.
Presentation Ideas
Serve your cannoli cones on a colorful platter. Stack them for a fun display. You can also add fresh berries or mint leaves for color. If you garnish with chopped pistachios or sprinkles, do it while the chocolate is warm. This helps them stick better. Get creative with your plating to impress your guests!
Pro Tips
- Use High-Quality Chocolate: For the best flavor, choose high-quality dark chocolate that melts smoothly and has a rich taste.
- Chill Before Serving: Allow the filled cannoli cones to chill in the fridge for at least 30 minutes after dipping to ensure the chocolate sets perfectly.
- Experiment with Fillings: Feel free to get creative with your fillings by adding ingredients like orange zest or espresso for a unique twist.
- Presentation Matters: Arrange the cannoli cones on a colorful platter and consider adding fresh fruits or whipped cream for an appealing presentation.
Variations
Flavor Variations
You can add different extracts to change the taste. For example, use almond or orange extract. These small changes can make a big difference in flavor. You might also think about adding spices like cinnamon or nutmeg. They add warmth and depth to your filling. You can even fold in some fresh fruit puree for a twist. Imagine a raspberry or mango cannoli cone!
Chocolate Options
When it comes to chocolate, you have choices. You can use milk or white chocolate for dipping. Milk chocolate gives a sweeter taste, while white chocolate adds a creamy touch. If you want something rich, dark chocolate is perfect. You can mix different chocolates for a layered flavor. This little change makes each cone unique and fun!
Alternative Fillings
Don’t feel stuck with just ricotta and mascarpone. Try different fillings to switch things up. For example, you can use cream cheese for a tangy touch. Or, make a fruit filling with whipped cream and fresh berries. Nut butters, like almond or peanut butter, can also work well. The options are endless, so get creative with your candy-making!
Storage Info
Best Practices for Storing
To keep your chocolate dipped cannoli cones fresh, you need to store them correctly. If you have filled cannoli, place them in an airtight container. Line the container with parchment paper to avoid sticking. Store it in the fridge. For unfilled shells, keep them in a cool, dry place. Use a sealed bag or container to prevent moisture.
Shelf Life
Filled cannoli cones taste best within two days. After that, the shells may get soggy. Unfilled cannoli shells can last up to a week. Just keep them in a cool, dry spot. Chocolate can stay fresh for a long time if stored properly.
Freezing Options
You can freeze the unfilled cannoli shells. Wrap them tightly in plastic wrap, then place them in a freezer bag. When you want to use them, let them defrost in the fridge overnight. Do not freeze filled cannoli, as they will lose their crunch. Instead, make the filling and store it in the fridge for up to three days. Fill the shells just before serving for the best taste.
FAQs
What are cannoli cones made of?
Cannoli cones have a few main parts. The outer shell is crispy and holds the filling. You can use mini cannoli shells, which are fun and easy to fill. The filling is a mix of ricotta cheese, mascarpone cheese, powdered sugar, and vanilla extract. This blend makes it creamy and sweet. To add texture, mini chocolate chips are folded in. The final touch is a dip in melted dark chocolate, which gives a rich taste.
Can I make the filling ahead of time?
Yes, you can make the filling ahead. Store it in an airtight container in the fridge. It stays fresh for about two days. When you are ready to fill the cones, just give it a quick stir. This saves time and lets you enjoy the fun part later.
Where can I buy cannoli shells?
You can find cannoli shells at Italian markets or bakeries. Many grocery stores carry them too. If you prefer to make your own, you can use puff pastry or pie crust. Just shape them into cones and bake until golden. This way, you can customize the size and texture to match your taste.
How do I prevent the cannoli shells from getting soggy?
To keep the shells crisp, fill them just before serving. If you fill them too early, the moisture from the filling can make the shells soggy. You can also bake the shells until they are extra crunchy. Storing them in a cool, dry place helps keep their texture. Enjoy that perfect crunch!
You now have a delicious mini cannoli recipe to impress anyone. Start with classic ingredients and follow the steps carefully. Remember to experiment with flavors and chocolate types for a unique twist. Store your treats properly to keep them fresh longer. With these tips, you can create a delightful dessert that pleases all. Enjoy the process, and don’t be afraid to share your tasty creations!