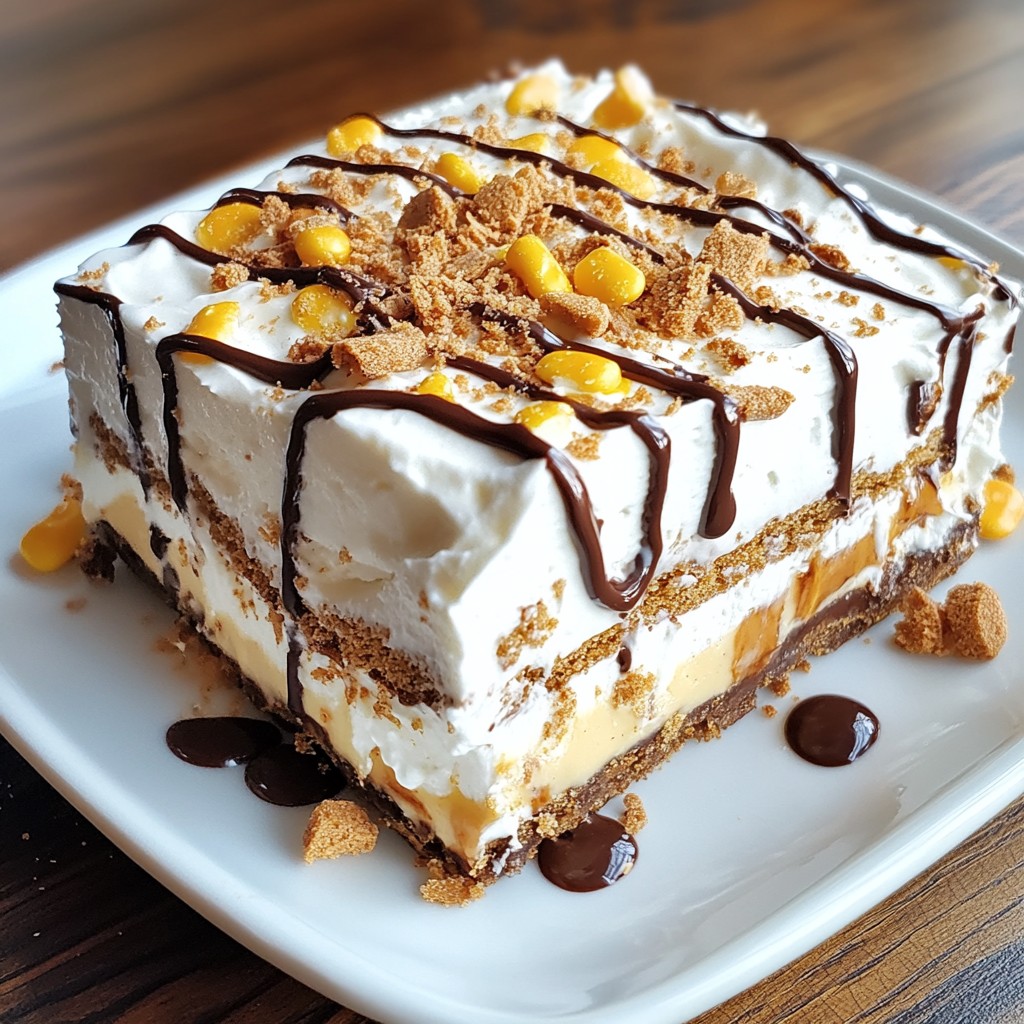
Are you ready to dive into a no-bake dessert that’s as easy as it is delicious? This Butterfinger Icebox Cake combines rich flavors and creamy textures to create a treat your taste buds will thank you for. With simple ingredients and quick steps, you’ll have a show-stopping dessert that requires no baking at all. Let’s explore how to whip up this delightful cake that’s perfect for any occasion!
Why I Love This Recipe
- Decadent Flavor: This icebox cake combines the rich taste of Butterfinger candy bars with creamy peanut butter, creating a dessert that is truly indulgent.
- No-Bake Convenience: This recipe requires no baking, making it perfect for hot days or when you want a quick and easy dessert option.
- Perfect for Gatherings: With its generous servings, this cake is great for parties or family gatherings, ensuring everyone gets a taste of its deliciousness.
- Easy to Customize: You can easily adjust the ingredients or add your favorite toppings, making it versatile for different tastes and occasions.
Ingredients
Main Ingredients
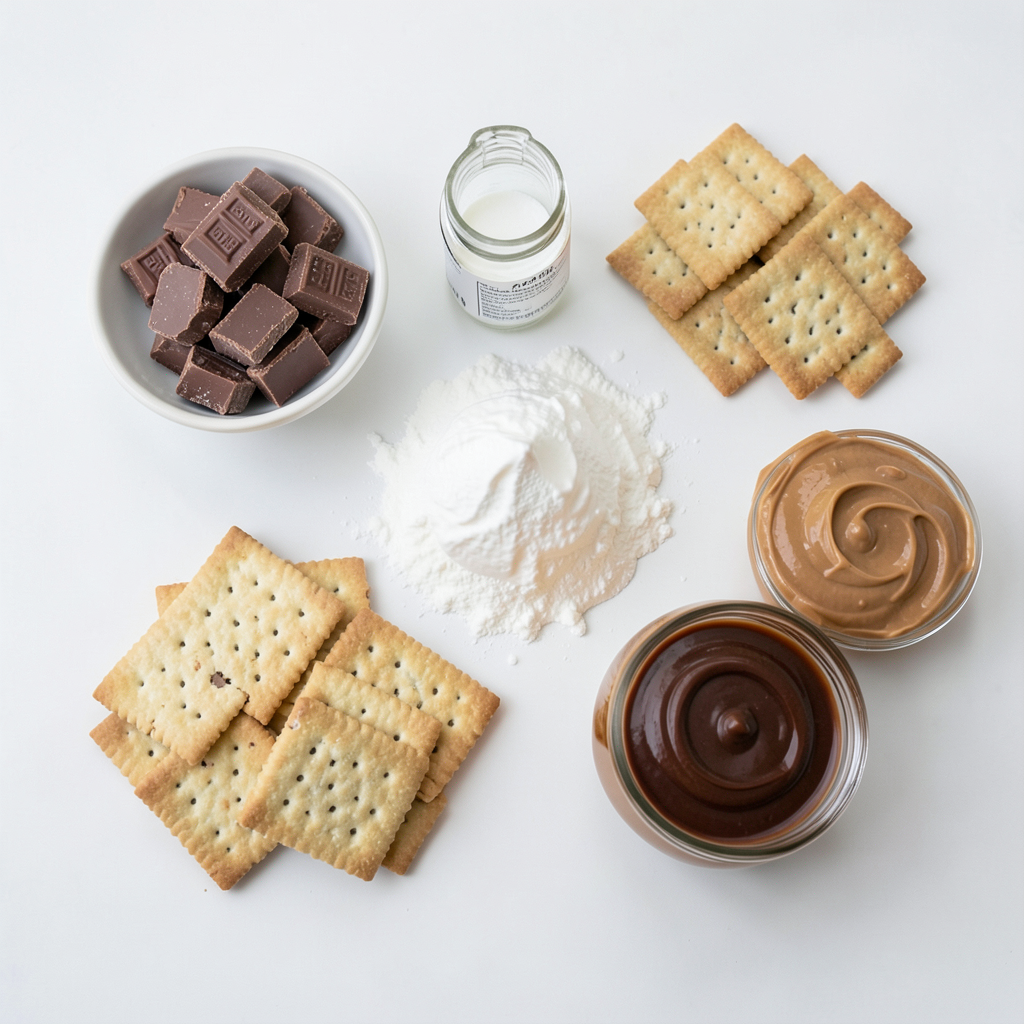
- 1 package of Butterfinger candy bars (about 8 bars), crushed
- 2 cups heavy whipping cream
- 1/2 cup powdered sugar
- 1 teaspoon vanilla extract
- 1 package of graham crackers (about 14 crackers)
- 1 cup creamy peanut butter
- 1/2 cup chocolate syrup (for drizzling)
To make Butterfinger Icebox Cake, you need a few key items. First, grab some Butterfinger candy bars. The crunchy, sweet bars add great flavor and texture. You’ll also need heavy whipping cream, which makes the cake light and fluffy. The powdered sugar helps sweeten the whipped cream.
Don’t forget the vanilla extract. It gives the cake a warm, rich taste. Graham crackers are the base of the cake. They provide a nice crunch between layers. Creamy peanut butter adds a delicious nutty flavor. Lastly, chocolate syrup is perfect for drizzling on top.
Optional Garnishes
- Reserved crushed Butterfinger
- Fresh mint leaves
For a fun touch, save some crushed Butterfinger for garnish. It adds extra crunch and looks pretty on top. Fresh mint leaves are also a great option. They give the cake a pop of color and a fresh taste. These garnishes make your cake even more inviting and special.
Step-by-Step Instructions
Preparation Steps
1. Whipping the cream: Start with a large bowl. Pour in 2 cups of heavy whipping cream. Use a hand mixer to whip on low speed. Gradually increase to high speed. Whip until soft peaks form. This means the cream holds a shape but is still smooth.
2. Mixing the Butterfinger and peanut butter: In another bowl, take 1 package of crushed Butterfinger candy bars. Mix in 1 cup of creamy peanut butter. Stir until they blend well together. Set this mixture aside for later.
Layering Process
1. Initial graham cracker layer: Grab your graham crackers. Take one cracker and spread a thin layer of whipped cream on one side. Place it, whipped side down, in a 9x13 inch baking dish.
2. Adding Butterfinger layer: Repeat this with more graham crackers. Add a layer of whipped cream on top of the last cracker. Then, spoon the Butterfinger and peanut butter mix on top. Spread it evenly with a spatula.
3. Final layering and chilling: Add another layer of graham crackers on the Butterfinger layer. Top it with more whipped cream. Keep layering until you use all the ingredients. Finish with a layer of whipped cream on top. Cover it with plastic wrap and let it chill in the fridge for at least 4 hours. For the best taste, let it sit overnight.
Before serving, drizzle chocolate syrup on top and sprinkle with reserved crushed Butterfinger. Enjoy your tasty creation!
Tips & Tricks
Successful Preparation Tips
- Achieving the perfect whipped cream: To get fluffy whipped cream, start on low speed. Gradually increase to high speed. Whip until soft peaks form, then add powdered sugar and vanilla. Continue whipping until you see stiff peaks. This ensures your cream holds its shape well.
- Choosing the right graham crackers: Use plain graham crackers for the best flavor. They should be fresh and crunchy. Look for brands that offer a nice balance of sweetness. This will enhance the taste of your Butterfinger Icebox Cake.
Serving Suggestions
- Presentation ideas: Cut your cake into neat squares. Place each square on a dessert plate. For a nice touch, add a sprig of fresh mint on top. This adds color and a fresh note to the dish.
- Pairing with beverages: This cake pairs well with milk or coffee. You can also serve it with a scoop of vanilla ice cream. The creamy ice cream complements the cake's rich flavors perfectly.
Pro Tips
- Chill Your Tools: For a fluffier whipped cream, chill your mixing bowl and beaters in the refrigerator before starting. This helps the cream whip better and faster.
- Layer Smart: Ensure each layer of graham crackers is fully covered with whipped cream and Butterfinger mixture to prevent dryness. This keeps your icebox cake moist and delicious.
- Mix It Up: Experiment with different candy bar toppings or add crushed nuts for added texture and flavor. Customize the recipe to suit your taste preferences!
- Let It Set: For the best flavor and texture, allow the cake to chill overnight. The longer it sets, the more the flavors meld together, creating a richer taste.
Variations
Flavor Modifications
You can change up the Butterfinger Icebox Cake in fun ways. Swap out Butterfinger bars for other candy bars. Try Snickers, Milky Way, or Reese's for a new twist. Each candy will bring a different taste and texture. You can also mix in fruits like bananas or strawberries. These add freshness and balance the sweetness. Adding nuts, like crushed peanuts or walnuts, gives a nice crunch. This adds flavor and a fun texture to your cake.
Dietary Adjustments
If you need gluten-free options, use gluten-free graham crackers. They work just as well and keep the cake tasty. For a dairy-free version, choose coconut cream instead of heavy whipping cream. This will still give you that creamy texture. Use a dairy-free candy bar to keep it all plant-based. Peanut butter is usually safe, but check the label if you have allergies. These adjustments let everyone enjoy this delicious treat!
Storage Info
Storing Leftovers
To keep your Butterfinger Icebox Cake fresh, store it in the fridge. Cover the dish with plastic wrap. It keeps the cake from drying out. You can enjoy it for up to five days. If you want to freeze it, slice it first. Wrap each slice in plastic wrap, then place them in a freezer bag. This way, you can enjoy a piece anytime!
Shelf Life
This cake lasts about five days in the fridge if stored well. If frozen, it can last for up to three months. Check for signs of spoilage before eating. If the cake smells off or has a change in texture, it’s best to toss it. Enjoy it fresh for the best taste!
FAQs
Can I make this cake ahead of time?
Yes, you can make this cake ahead of time. It tastes better after chilling. I recommend making it a day before you serve it. This gives the flavors time to mix. Plus, it makes your day of serving easier!
What can I use instead of heavy whipping cream?
If you need a substitute for heavy whipping cream, try using coconut cream. It adds a nice flavor and texture. You can also use whipped topping, but it may change the taste a bit. Almond milk mixed with cornstarch is another option, though it won't whip up as thick.
How can I make it less sweet?
To lower the sweetness, reduce the powdered sugar in the whipped cream. You can also add more peanut butter to balance the sweetness. Using dark chocolate syrup instead of regular syrup can help too. Always taste as you go to get it just right!
Can I substitute graham crackers?
Yes, you can substitute graham crackers with other cookies. Try digestive biscuits or vanilla wafers. For a gluten-free option, use gluten-free graham crackers. The taste will change a bit, but it will still be delicious!
This blog covered how to create a delicious dessert using Butterfinger and simple ingredients. You learned the main components, preparation steps, and how to layer them for a tasty treat. I shared tips for success and ideas for variations and storage. Remember, this recipe is flexible, so feel free to get creative. Enjoy making this dessert, and keep experimenting with flavors and garnishes for even more fun!