FREE DINNER EBOOK! Get your copy!
  • Cookie Policy
  • GDPR Policy
  • Disclaimer
  • Terms Of Use
  • Visit my other site: Fun Cookie Recipes
spicy fork kitchen
  • Home
  • Dinner
  • Desserts
  • Drinks
  • Appetizers
  • Contact
  • About
  • Privacy Policy
  • Home
  • Dinner
  • Desserts
  • Drinks
  • Appetizers
  • Contact
  • About
  • Privacy Policy
  • Cookie Policy
  • GDPR Policy
  • Disclaimer
  • Terms Of Use
Visit my other site: Fun Cookie Recipes

HOME / CATEGORIES /

Latest

For this soup, you will need 2 cups of mixed beans. I like to use cannellini, kidney, and black beans. Soak them overnight in water, then drain them. This step helps soften the beans and reduces cooking time. The soup needs fresh vegetables for flavor and texture. Use one large onion, diced. Next, add three cloves of garlic, minced. Dice two medium carrots and two stalks of celery. These vegetables create a rich base for the soup. Finally, you will want to add two cups of chopped kale for color and nutrition. To season the soup, use one tablespoon of Italian seasoning. This blend gives the soup its lovely flavors. If you like a bit of heat, add one teaspoon of red pepper flakes. Salt and pepper to taste will help enhance the flavors. Don’t forget one tablespoon of olive oil to sauté the veggies. Fresh basil leaves make a beautiful garnish, too. Start by gathering your vegetables. You will need one large onion, three garlic cloves, two carrots, and two celery stalks. Dice the onion and carrots into small pieces. Chop the celery into tiny bits too. Mince the garlic finely. This step adds great flavor to the soup. Next, heat one tablespoon of olive oil in a skillet over medium heat. Add the diced onion, carrots, and celery. Cook for about five minutes. You want the veggies to soften but not brown. Stir in the minced garlic and cook for another minute. This will make your kitchen smell amazing! Now, it is time to move everything to the slow cooker. Transfer the sautéed vegetables into it. Then, add two cups of mixed beans that you soaked overnight and drained. You can use cannellini, kidney, and black beans. Next, pour in a can of diced tomatoes along with their juice. Add four cups of vegetable broth and stir well. Sprinkle in one tablespoon of Italian seasoning and one teaspoon of red pepper flakes if you like heat. Mix everything well to combine all the flavors. Cover your slow cooker with its lid. If you set it on low, cook for six to eight hours. If you prefer a quicker method, set it on high for three to four hours. You want the beans to be tender and the soup to be flavorful. About 15 minutes before you are ready to serve, add two cups of chopped kale. This will add great color and nutrition to your soup. Let it wilt in the heat of the soup. Finally, season with salt and pepper to taste before serving it hot. Enjoy your warm, hearty soup! Soaking beans helps them cook evenly. It also makes them tender. Use cold water for soaking. Place the beans in a bowl and cover them with water. Let them soak overnight. This will save cooking time and improve texture. If you forget to soak them, you can use a quick soak. Boil the beans for two minutes, then let them sit for an hour. Spice levels can change your soup's flavor. If you like it hot, add more red pepper flakes. Start with a small amount and taste before adding more. You can always add spice, but you cannot take it away. For less heat, leave out the red pepper flakes. You can also add some cream or yogurt to cool it down. How you serve your soup matters. Use warm bowls to keep the soup hot. Drizzle with olive oil for a nice finish. Fresh basil leaves add color and flavor. Serve with crusty bread for a complete meal. This makes the soup feel special and inviting. Enjoy your beautiful creation! {{image_2}} You can add protein to your soup for extra flavor. Try diced chicken or turkey. Cook it in the slow cooker for three to four hours. You can also use sausage. Just slice it and add it to the mix. For a plant-based option, add tofu or tempeh. They soak up all the tasty flavors. This soup is easy to make vegan. Just use vegetable broth and skip any meat. You can also add more beans if you want. For gluten-free options, check the broth label. Most vegetable broths are gluten-free, but some are not. Always read the ingredients to be sure. Feel free to change the vegetables based on what is in season. In summer, you can add zucchini or bell peppers. In fall, try adding sweet potatoes or butternut squash. These swaps keep the soup fresh and exciting. You can also toss in some spinach or Swiss chard for more greens. After enjoying your soup, let it cool. Place the leftovers in an airtight container. Store the container in the fridge. The soup will stay fresh for 3 to 4 days. Reheat the soup on the stove or in the microwave. Stir it well before serving. This keeps the flavors mixed. You can also freeze your Tuscan bean soup. Use freezer-safe containers or bags. Make sure to leave some space for expansion. The soup can last for up to 3 months in the freezer. When you're ready to eat, thaw it overnight in the fridge. Reheat it gently on the stove. If stored properly, refrigerated soup lasts for several days. Frozen soup lasts much longer. It's smart to label containers with the date. This way, you know when to use it. Enjoy your soup at its best, fresh and tasty! Yes, you can use canned beans. Canned beans save time and effort. Choose low-sodium options for better flavor and health. Use about three cans of beans, drained and rinsed. This gives you a quick start to your soup. Just add them in when you mix the other ingredients. You will still get a tasty soup! To make your soup spicier, add more red pepper flakes. Start with one teaspoon for a mild kick. If you want more heat, add up to two teaspoons. You can also toss in some diced jalapeños. They add heat and flavor. Another option is to add hot sauce just before serving. Taste as you go to find your perfect spice level! This soup pairs well with crusty bread. A slice of fresh baguette or sourdough is perfect for dipping. You can also serve it with a simple salad. A green salad with lemon vinaigrette adds freshness. For a heartier meal, try grilled cheese sandwiches on the side. Enjoying this soup with these sides makes for a filling dinner! In this blog post, we explored making Slow Cooker Tuscan Bean Soup. We covered key ingredients like mixed beans, vegetables, and spices. I shared step-by-step instructions for prep and cooking. You learned tips for soaking beans and adjusting spices. We looked at variations, including protein options and seasonal swaps. Lastly, we discussed how to store leftovers for later use. Try this dish to warm up your meal plans. Enjoy the taste and benefits of homemade soup!

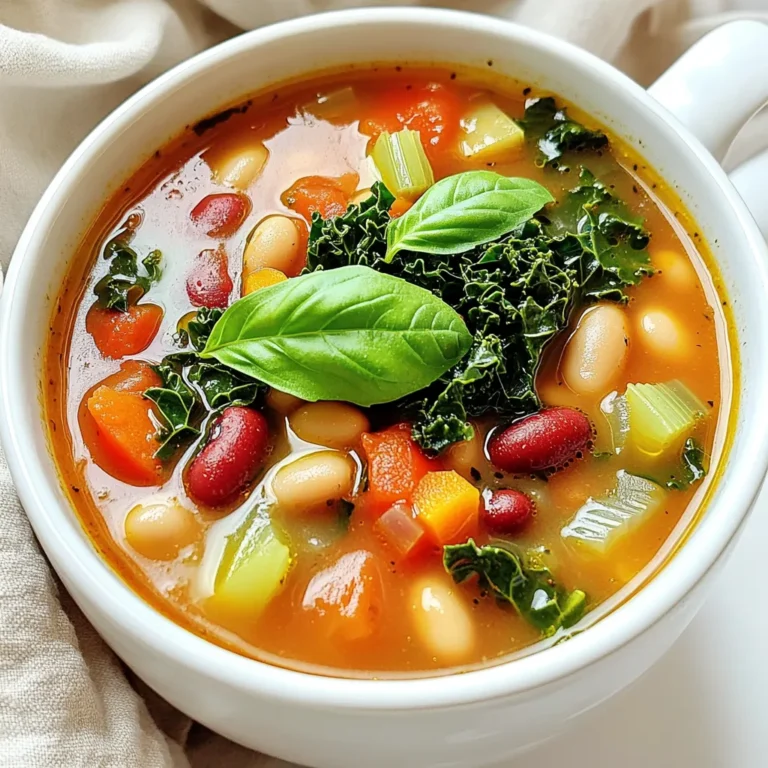
Savory Slow Cooker Tuscan Bean Soup Recipe to Enjoy

- 1 cup unsalted butter, melted - 1 cup packed brown sugar - 1/2 cup granulated sugar - 2 large eggs - 2 teaspoons vanilla extract - 2 cups all-purpose flour - 1 teaspoon baking powder - 1 teaspoon baking soda - 1 teaspoon ground cinnamon - 1/2 teaspoon salt Gathering the right ingredients makes all the difference in your baking. I love using unsalted butter because it gives me control over the saltiness. Brown sugar adds moisture and a deep flavor. Granulated sugar helps the blondies rise and gives them a nice texture. Two large eggs help bind everything together. Vanilla extract is a must for that warm, sweet taste. All-purpose flour is the base for the blondies. Baking powder and baking soda work together to make the blondies rise perfectly. Ground cinnamon adds that lovely spice. A bit of salt balances all the sweetness. When you combine these ingredients, you create a rich, chewy treat that everyone will love! {{ingredient_image_1}} - Preheat your oven to 350°F (175°C) and prepare a 9x13 inch baking pan. You can grease it or line it with parchment paper. This helps when you want to remove the blondies easily. - In a large mixing bowl, add 1 cup of melted unsalted butter, 1 cup of packed brown sugar, and 1/2 cup of granulated sugar. Whisk them together until smooth and well mixed. This step gives your blondies a rich flavor. - Next, add 2 large eggs one by one. Mix well after each egg. Then, stir in 2 teaspoons of vanilla extract. The vanilla adds a lovely aroma to your batter. - In another bowl, whisk together 2 cups of all-purpose flour, 1 teaspoon of baking powder, 1 teaspoon of baking soda, 1 teaspoon of ground cinnamon, and 1/2 teaspoon of salt. These dry ingredients are key to the structure of your blondies. - Gradually fold the dry ingredients into the wet mixture. Mix until just combined. Be careful not to overmix; this keeps the blondies soft. - Pour the batter into your prepared baking pan and spread it evenly. A spatula works great for this step. - In a small bowl, mix 2 tablespoons of granulated sugar with 1 teaspoon of cinnamon. Sprinkle this mixture evenly over the top of the batter. This adds a sweet, crunchy topping. - Bake in your preheated oven for about 20-25 minutes. To check doneness, insert a toothpick in the center. It should come out clean with a few moist crumbs. This shows your blondies are ready! Enjoy the process, and get ready for a delicious treat! To make the best blondies, avoid overmixing the batter. When you mix too much, your blondies can turn out tough. Mix just until you see no dry flour. This helps keep them soft and chewy. Check for doneness with a toothpick. Insert it into the center of your blondies. If it comes out clean with a few moist crumbs, they are ready. If it’s wet with batter, bake them a bit longer. Serve your blondies on a pretty platter. Add a sprinkle of cinnamon sugar on top for extra flair. You can also drizzle a simple glaze over them. Mix powdered sugar with a splash of milk to make it. This adds sweetness and a nice shine. Try adding fresh fruit or whipped cream on the side. This gives a nice contrast to the sweet, warm blondies. You can also cut them into fun shapes for a special touch. Enjoy getting creative with how you serve these treats! Pro Tips Use Room Temperature Ingredients: Allow your eggs and any other refrigerated ingredients to come to room temperature before mixing. This helps the batter mix more evenly and results in a better texture. Don’t Overmix the Batter: When combining wet and dry ingredients, mix just until incorporated. Overmixing can lead to tough blondies instead of soft and chewy ones. Cool Before Cutting: Allow the blondies to cool completely in the pan before cutting. This helps them to set and makes for cleaner squares when serving. Experiment with Mix-ins: Feel free to add chocolate chips, nuts, or dried fruit to the batter for added flavor and texture. Just be sure to adjust the baking time if needed. {{image_2}} You can add extra flavors to your blondies. Try mixing in chopped nuts or chocolate chips. Nuts like walnuts or pecans give a nice crunch. Chocolate chips add a rich sweetness that pairs well with cinnamon. You can also play with spices. Instead of just cinnamon, you might use nutmeg or ginger. These spices add warmth and depth to the flavor. Feel free to experiment until you find your perfect mix! If you need gluten-free blondies, use gluten-free flour. This swap keeps the texture light and fluffy. Many brands offer blends that work well in baking. For a vegan version, replace the eggs. You can use applesauce or flaxseed meal mixed with water. Both options bind the ingredients and keep your blondies tasty. Just remember to adjust baking times as needed. You can store your cinnamon sugar blondies easily. Keep them at room temperature for about three days. Place them in an airtight container. This keeps them soft and fresh. For longer storage, refrigerate them. Wrap the blondies in plastic wrap first. Then, place them in a container. This helps them last up to a week. If you want to store them for even longer, freeze them. Cut the blondies into squares. Wrap each piece in plastic wrap. Then, put them in a freezer-safe bag. They can stay in the freezer for up to three months. To keep your blondies fresh, avoid exposing them to air. Wrap them tightly in plastic wrap or foil. You can also use a resealable bag. If you layer the blondies, place parchment paper between the pieces. This prevents sticking. Always check for any signs of spoilage before eating. Store them in a cool, dry place. This helps maintain their wonderful taste and texture. Can I use salted butter instead of unsalted? Yes, you can use salted butter. Just skip the added salt in the recipe. This will keep the flavor balanced. How do I know when the blondies are done baking? Check for doneness at about 20-25 minutes. Insert a toothpick in the center. It should come out clean or with a few moist crumbs. If it’s wet with batter, bake a few more minutes. Can I make these blondies ahead of time? Absolutely! You can make them a day in advance. Just store them in an airtight container. They stay moist and tasty. What to do if blondies are too dry? If your blondies are dry, it may be due to overbaking. Next time, try reducing the baking time. You can also add a bit more butter or a touch of milk to the batter. Fixing undercooked blondies If your blondies are undercooked, simply return them to the oven. Bake in 2-3 minute intervals until a toothpick comes out clean. Let them cool a bit before checking again. These cinnamon sugar blondies are easy to make and taste amazing. We covered key ingredients, step-by-step instructions, and helpful tips. You can customize them with nuts or chocolate. Whether for a gathering or just a treat, these blondies fit all occasions. Remember, proper storage keeps them fresh longer. Enjoy making your perfect batch, and share your creations!

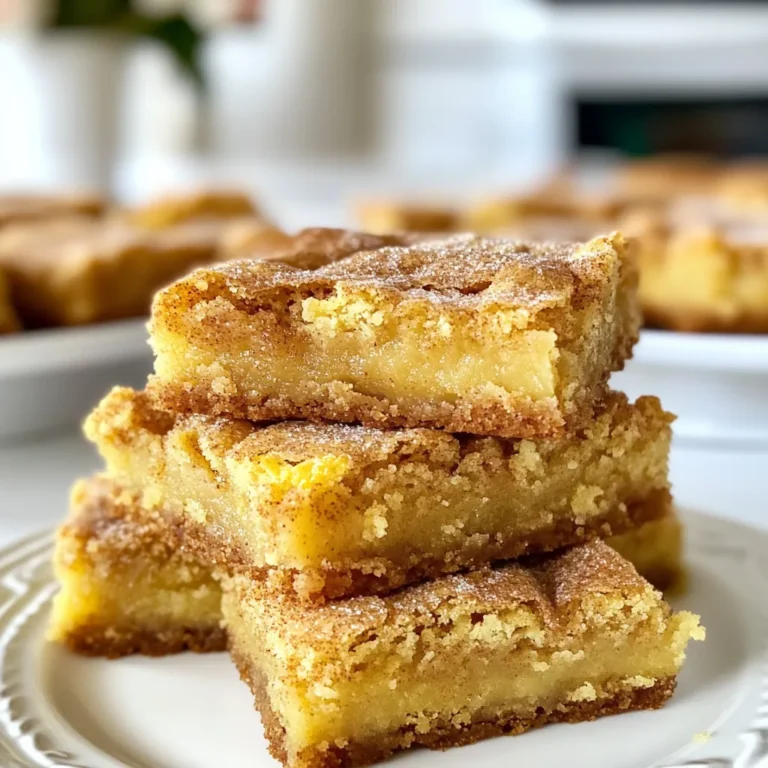
Cinnamon Sugar Blondies Delightful and Easy Treat

To make a tasty stove top meatloaf, gather these main ingredients: - 1 pound ground beef - 1 cup breadcrumbs - 1/2 cup milk - 1/2 cup onion, finely chopped - 2 cloves garlic, minced - 1 large egg - 2 tablespoons Worcestershire sauce - 1 tablespoon mustard (yellow or Dijon) - 1 teaspoon salt - 1/2 teaspoon black pepper - 1/2 teaspoon dried thyme - 1/2 cup ketchup (for topping) - Fresh parsley, chopped (for garnish) These ingredients create a juicy and flavorful meatloaf. The ground beef provides protein and a rich taste. Breadcrumbs help bind the meatloaf and keep it moist. You can change the flavor and texture of your meatloaf with these optional ingredients: - 1/2 cup grated cheese - 1/2 cup chopped bell pepper - 1/2 teaspoon smoked paprika - 1 tablespoon hot sauce - 1/2 cup finely chopped mushrooms Adding these items can give your meatloaf a fun twist. Cheese adds creaminess, while peppers and mushrooms boost flavor and nutrients. To make cooking easier, use these tools: - Large mixing bowl - Skillet with a lid - Measuring cups and spoons - Spatula or wooden spoon - Meat thermometer These tools help you mix the ingredients well and cook the meatloaf evenly. A meat thermometer checks that your meatloaf is safely cooked. {{ingredient_image_1}} To start, gather your ingredients. You need: - 1 pound ground beef - 1 cup breadcrumbs - 1/2 cup milk - 1/2 cup onion, finely chopped - 2 cloves garlic, minced - 1 large egg - 2 tablespoons Worcestershire sauce - 1 tablespoon mustard (yellow or Dijon) - 1 teaspoon salt - 1/2 teaspoon black pepper - 1/2 teaspoon dried thyme - 1/2 cup ketchup (for topping) - Fresh parsley, chopped (for garnish) In a large bowl, combine the ground beef, breadcrumbs, milk, and onion. Add the garlic, egg, Worcestershire sauce, mustard, salt, pepper, and thyme. Mix everything well. Use your hands to blend the mixture until it holds together. This step is very important for the meatloaf to form well when cooking. Shape the mixture into a loaf. Make it smooth and even. Set it aside while you heat the skillet. Heat a large skillet over medium heat. Add a small amount of oil to the pan. This helps to stop the meatloaf from sticking. Carefully place the meatloaf in the skillet. Cover the skillet with a lid. Cook the meatloaf for about 30 to 35 minutes. Turn the meatloaf every 10 minutes. This keeps it cooking evenly. After about 20 minutes, spread ketchup over the top. This adds a nice glaze and flavor. Use a meat thermometer to check the internal temperature. It should reach 160°F (71°C). Once it’s ready, remove the meatloaf from the pan. Let it rest on a cutting board for 5 to 10 minutes. This helps the juices settle inside. - Use Fresh Ingredients: Fresh garlic and onion enhance flavor. - Don’t Overmix: Mixing too much makes the meatloaf tough. - Check Temperature: Always use a meat thermometer for best results. - Rest Before Slicing: Letting it rest keeps the meatloaf juicy. These tips will help you make a delicious and tender meatloaf every time. Enjoy the process and savor each bite! When making meatloaf, avoid over-mixing the meat. This can make it tough. Use just enough force to combine the ingredients. Also, don't skip the resting time. Letting the meatloaf sit helps it stay juicy. Lastly, make sure to check the internal temperature. It should reach 160°F (71°C) for safe eating. Always use a non-stick skillet or add oil to prevent sticking. Keep the heat on medium to cook evenly. Covering the skillet helps trap steam and keeps the meatloaf moist. Turn the meatloaf gently to avoid breaking it apart. This way, you'll have a nicely shaped loaf. To boost the flavor, try adding spices like smoked paprika or cayenne pepper. Fresh herbs like thyme or rosemary can add a lovely aroma. Mixing in some grated cheese gives a nice creaminess. You can also top the meatloaf with BBQ sauce for a sweet twist. Each of these adds a unique taste that makes your meatloaf stand out. Pro Tips Use Lean Meat: Opt for lean ground beef to reduce the fat content, which can help prevent a greasy meatloaf. Add Vegetables: Incorporate finely diced bell peppers or carrots for added moisture and flavor. Rest Before Slicing: Let the meatloaf rest for at least 10 minutes after cooking to allow the juices to redistribute. Experiment with Seasonings: Feel free to adjust the seasoning or add herbs like rosemary or parsley for a unique twist. {{image_2}} You can make this meatloaf healthier by swapping some ingredients. Instead of ground beef, use ground turkey or chicken. These options are leaner and lower in fat. You can also replace breadcrumbs with oats or crushed whole-grain crackers. Both add texture and fiber. For milk, try almond milk or low-fat milk. This change keeps the meatloaf moist while cutting calories. Add fun flavors to your meatloaf to keep things exciting. For a BBQ twist, mix in your favorite BBQ sauce instead of Worcestershire sauce. This gives a sweet and tangy taste. If you like some heat, add red pepper flakes or chopped jalapeños to the mix. You could even try adding herbs like basil or cilantro for a fresh touch. Pair your meatloaf with tasty sides for a complete meal. Mashed potatoes or roasted veggies go well with it. You can also serve a fresh salad on the side for crunch. For condiments, ketchup is a classic choice, but try mustard or a spicy aioli for a twist. A dollop of sour cream can also add creaminess and flavor. To store leftover meatloaf, let it cool first. Wrap it tightly in plastic wrap or aluminum foil. You can also place it in an airtight container. This way, it stays fresh in the fridge for up to four days. Make sure to label the container with the date. When you're ready to eat, preheat your oven to 350°F (175°C). Place the meatloaf in an oven-safe dish. Add a splash of broth or water to keep it moist. Cover it with foil to prevent it from drying out. Heat for about 20 minutes or until warmed through. You can also use a microwave. Slice the meatloaf and place it on a microwave-safe plate. Heat in 30-second intervals until hot. For long-term storage, meatloaf freezes well. Cut it into slices before freezing. Wrap each slice in plastic wrap and then in foil. This helps prevent freezer burn. You can also use a freezer-safe bag. Remove as much air as possible before sealing. Meatloaf can last for up to three months in the freezer. When you're ready to eat, thaw it overnight in the fridge before reheating. Yes, you can make this meatloaf ahead of time. Prepare the meatloaf mixture and shape it into a loaf. Wrap it tightly in plastic wrap or foil and store it in the fridge. You can keep it for up to 24 hours. When you are ready to cook, just take it out and follow the cooking steps. If you want, you can also freeze it for later. Thaw it in the fridge overnight before cooking. To check if the meatloaf is fully cooked, use a meat thermometer. Insert the thermometer into the center of the loaf. The internal temperature should reach 160°F (71°C). If you don't have a thermometer, cut into the meatloaf. The inside should be brown and no longer pink. Juices should run clear, not red or pink. Yes, you can cook meatloaf without breadcrumbs. Use oats, crushed crackers, or even cooked rice instead. These options can help bind the meatloaf while adding a unique flavor. If you want a gluten-free option, use gluten-free breadcrumbs or crushed nuts. The key is to keep the right balance of moisture and texture. You learned about the key ingredients, steps, and tips for perfect meatloaf. I shared ways to avoid mistakes, enhance flavor, and customize your dish. You can even store leftovers for later. Remember, cooking is fun and often requires some trial and error. The next time you make meatloaf, use these tips for a great meal. Enjoy your cooking journey!

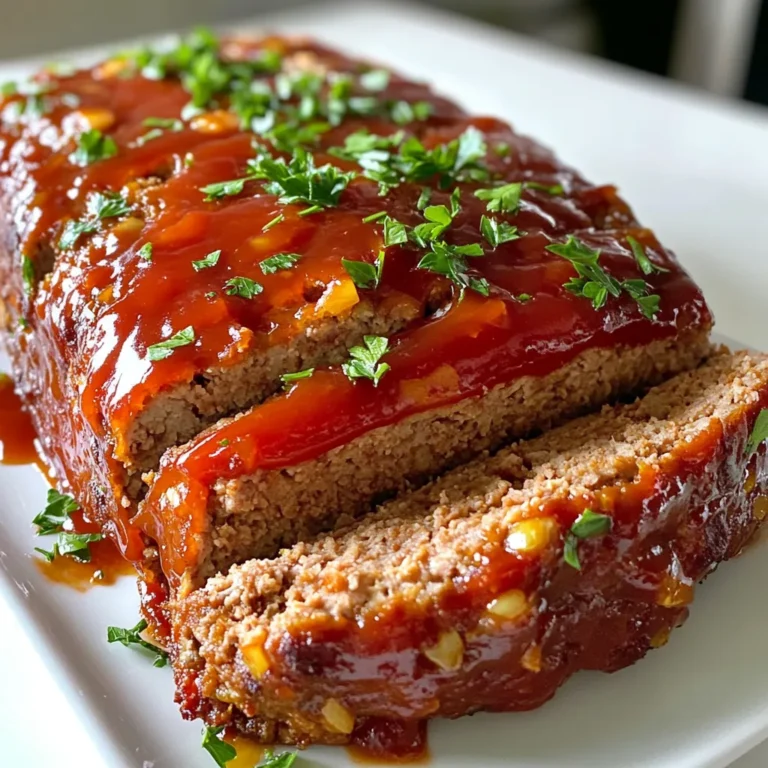
Simple Stove Top Meatloaf Tasty and Easy Recipe

- 1 lb boneless skinless chicken breasts - 1 cup wild rice, rinsed and drained - 4 cups low-sodium chicken broth - 1 medium onion, diced - 3 cloves garlic, minced - 2 carrots, sliced - 2 celery stalks, chopped - 1 teaspoon dried thyme - 1 teaspoon dried rosemary - 1 bay leaf - Salt and pepper to taste - 2 tablespoons olive oil - 1 cup heavy cream (or coconut cream for a dairy-free option) - Fresh parsley, chopped (for garnish) Gather all these ingredients. The chicken breasts are your main protein. The wild rice adds a chewy texture. The chicken broth offers a rich base. The onion and garlic create a fragrant aroma. Carrots and celery give color and crunch. For seasonings, thyme and rosemary bring warmth and earthiness. The bay leaf adds depth. Salt and pepper round out the flavor. Olive oil helps sauté your aromatics. Finally, the heavy cream or coconut cream makes it rich and velvety. Fresh parsley adds a pop of color and freshness. This blend of ingredients makes a hearty soup that warms the soul. - Prep the Chicken and Sauté Aromatics Start by heating two tablespoons of olive oil in a skillet over medium heat. Add one diced onion and three minced garlic cloves. Cook until the onion turns soft and clear, about five minutes. This adds great flavor. - Combine Ingredients in Slow Cooker In your slow cooker, mix the sautéed onion and garlic with one cup of rinsed wild rice, one pound of boneless, skinless chicken breasts, two sliced carrots, two chopped celery stalks, one teaspoon of dried thyme, one teaspoon of dried rosemary, and one bay leaf. Pour in four cups of low-sodium chicken broth. Season with salt and pepper. Stir everything well. - Set Slow Cooker and Cooking Duration Cover your slow cooker. Set it to low for six to eight hours or high for three to four hours. This slow cooking ensures the chicken and rice become tender and flavorful. - Shredding the Chicken After cooking, take out the chicken breasts. Use two forks to shred the chicken into bite-sized pieces. Return the shredded chicken to the slow cooker, mixing it back into the soup. - Add Cream and Heat Through Pour in one cup of heavy cream, or use coconut cream for a dairy-free option. Stir the mixture well. Let it heat on low for another 15 to 30 minutes. This step makes the soup rich and creamy. - Final Seasoning Adjustments Taste your soup. Adjust the salt and pepper as needed. Don’t forget to take out the bay leaf before serving. This gives the soup a final touch of flavor and freshness. - Importance of Sautéing Aromatics Sautéing onion and garlic boosts the flavor. The heat brings out their natural sweetness. You want them translucent before adding to the slow cooker. This step makes a big difference in taste. - How to Properly Shred Chicken Shredding chicken is easy. After cooking, use two forks to pull the meat apart. This gives you tender, bite-sized pieces. Return the shredded chicken to the soup for even flavor. - Recommended Seasoning Adjustments Taste your soup before serving. You can add more salt and pepper if needed. Fresh herbs can also lift the flavor. They add brightness and depth to your dish. - Best Practices for Using Fresh Herbs If using fresh herbs, add them at the end of cooking. This keeps their flavor fresh and bright. You can chop parsley for garnish too. It makes for a nice touch! - Using Pre-Cooked Chicken If you’re short on time, use pre-cooked chicken. Shred it and add it to the soup near the end. This cuts down on cooking time without losing flavor. - Incorporating Frozen Vegetables Frozen veggies save time on prep. Just toss them right into the slow cooker. They cook down nicely and blend well with the soup. This makes your soup even more nutritious! {{image_2}} If you want a dairy-free version, use coconut cream instead of heavy cream. This swap keeps the soup creamy while adding a hint of coconut flavor. For low-sodium options, choose a no-salt-added chicken broth. This change helps keep the soup healthy without losing taste. Wild rice is the star of this dish, but you can swap it with brown rice or quinoa. Both options cook well and add a nice texture. If you're looking to add more nutrition, toss in extra vegetables like spinach, kale, or even sweet potatoes. These vegetables boost vitamins and flavor without much effort. Spice it up by adding paprika or curry powder. These spices bring warmth and depth to your soup. You can also switch the broth. Try using vegetable broth for a lighter taste or mushroom broth for a rich, umami flavor. Experimenting with flavors lets you tailor the soup to your liking. To store your creamy chicken and wild rice soup, let it cool first. Place it in an airtight container. This keeps the soup fresh and tasty. You can keep it in the fridge for up to four days. When you eat leftovers, heat only the amount you want. This helps prevent spoilage. You can freeze portions of the soup for later use. Let the soup cool completely before freezing. Use freezer-safe containers or bags. Label them with the date. This way, you can enjoy it later. To thaw, place it in the fridge overnight. You can also use the microwave for quick defrosting. When reheating, warm it over low heat and stir often. In the fridge, the soup lasts about four days. If frozen, it can stay good for up to three months. Always check for signs of spoilage. Look for an off smell or any changes in color. If you see these signs, it's best to throw it away. Enjoy your soup fresh and safe! Yes, you can use chicken thighs. Thighs add more flavor and stay moist. They have more fat than breasts, which helps the soup taste richer. If you like a tender bite, thighs are a great choice. Just make sure they are boneless and skinless for this recipe. You can keep the soup in the fridge for about four days. Store it in an airtight container to keep it fresh. If you want to keep it longer, think about freezing it. This way, you can enjoy it later without losing flavor. Yes, you can make this soup in an Instant Pot! Start by sautéing the onion and garlic in the pot. Then add all other ingredients, except for the cream. Close the lid and set it to high pressure for 15 minutes. Once done, let it naturally release for 10 minutes. Shred the chicken, stir in the cream, and heat through. Enjoy a quick and tasty meal! This blog covered a delicious chicken soup recipe with wild rice. We talked about the main ingredients and how they work together. You learned step-by-step instructions to cook it in a slow cooker. Tips for perfect texture and flavor helped enhance your dish. Switching ingredients for dietary needs offers great variety. Finally, we discussed storage, so your soup stays fresh. Now you have all the tools to make this comforting soup at home. Enjoy every spoonful!

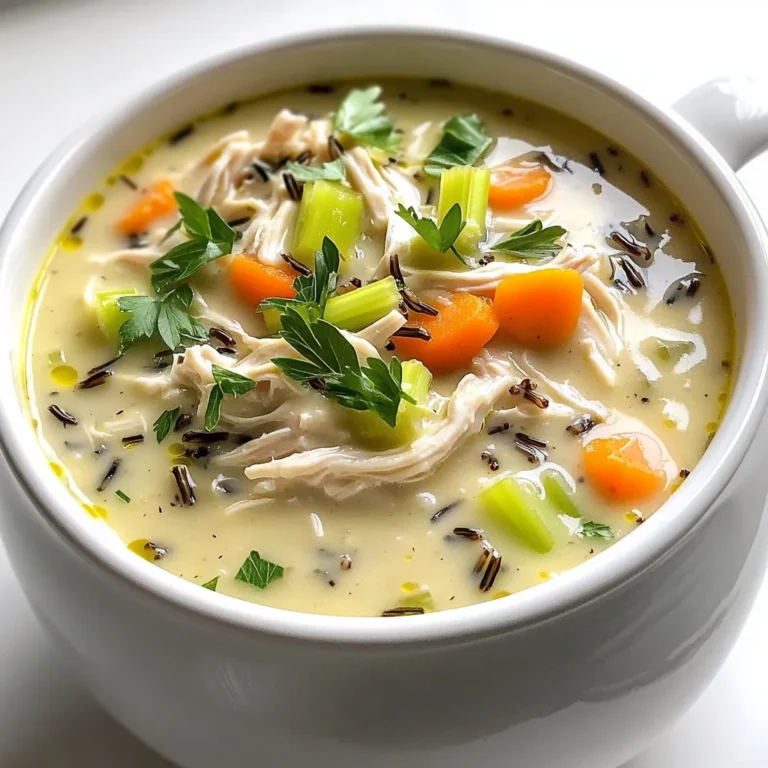
Creamy Chicken & Wild Rice Soup Slow Cooker Delight

For a tasty batch of Air Fryer Buffalo Cauliflower, you need these key items: - 1 medium head of cauliflower, cut into florets - 1 cup all-purpose flour - 1 teaspoon garlic powder - 1 teaspoon onion powder - 1 teaspoon smoked paprika - ½ teaspoon salt - ½ teaspoon black pepper - 1 cup buttermilk (or a dairy-free alternative) - ½ cup buffalo sauce (store-bought or homemade) - 2 tablespoons olive oil These ingredients work together to create a crunchy and flavorful snack. The cauliflower acts as a great base, while the batter adds texture. The buffalo sauce gives it that spicy kick that makes it hard to stop eating. You can add some extra flair with these optional items: - Fresh parsley for garnish - Extra buffalo sauce for drizzling - Celery sticks or carrot sticks for serving Fresh parsley adds a pop of color and freshness. The extra sauce can enhance the flavors even more. Serving with veggies like celery or carrots gives a nice crunch and balances the heat. If you have dietary needs, consider these substitutes: - Gluten-free flour for a gluten-free version - Almond milk or oat milk instead of buttermilk for dairy-free options - Cauliflower rice or broccoli florets for a different texture These alternatives let you enjoy this snack without worry. You can still achieve great flavor and texture no matter your dietary needs. Start by rinsing the cauliflower under cold water. Cut the head into bite-sized florets. Aim for florets that are similar in size. This helps them cook evenly. In a large bowl, mix 1 cup of all-purpose flour, 1 teaspoon of garlic powder, 1 teaspoon of onion powder, 1 teaspoon of smoked paprika, ½ teaspoon of salt, and ½ teaspoon of black pepper. Whisk until combined. Next, add 1 cup of buttermilk and stir until the batter is smooth. Preheat your air fryer to 400°F (200°C). Dip each floret into the batter, ensuring each piece is well-coated. Shake off any extra batter. Lightly spray the air fryer basket with cooking spray. Arrange the florets in a single layer. Cook for 12-15 minutes. Shake the basket halfway to ensure even cooking. The florets should turn golden brown and crispy. Once cooked, place the cauliflower in a large bowl. Pour in ½ cup of buffalo sauce and 2 tablespoons of olive oil. Toss the florets gently to coat them well in the sauce. Return the sauced cauliflower to the air fryer basket. Cook for an additional 3-5 minutes. This step helps the sauce stick to the florets. Your Air Fryer Buffalo Cauliflower is now ready to enjoy! To make your buffalo cauliflower extra crispy, follow these steps: - Use fresh cauliflower. Older florets can be soggy. - Cut the florets into even sizes. This helps them cook evenly. - Coat the florets well in the batter. A thick layer adds crunch. - Preheat your air fryer to 400°F (200°C). This step ensures a crisp finish. - Avoid overcrowding the basket. Cook in batches if needed. If you want to change the spice level, here’s how: - Use mild buffalo sauce for less heat. - Add honey or maple syrup to tame the spice. - Mix in a bit of ranch seasoning for a creamy flavor. - For more heat, add cayenne pepper to the batter. - Experiment slowly. Taste your sauce before tossing. To keep your buffalo cauliflower fresh, store it right: - Let the cauliflower cool before storing. - Place it in an airtight container. This prevents drying out. - Store it in the fridge for up to three days. - Reheat in the air fryer for crispness. Avoid the microwave. - Freeze leftovers in a freezer-safe bag for longer storage. {{image_2}} You can change up the flavor of buffalo cauliflower by using different sauces. Try a spicy garlic sauce for an extra kick. If you like sweet heat, use honey sriracha. For a tangy twist, go for a barbecue sauce. Each sauce adds a new twist to this tasty snack. You can mix and match to find your favorite. To make this dish vegan, replace buttermilk with a plant-based milk. Almond or oat milk works great. For gluten-free options, swap all-purpose flour with gluten-free flour. This keeps the recipe light while catering to different diets. You can enjoy the same crispy texture without any gluten. You can add more veggies to boost flavor and nutrition. Try adding chopped bell peppers or zucchini. They cook well in the air fryer and taste amazing with buffalo sauce. You can also mix in broccoli florets for extra crunch. This not only makes the dish more colorful but also adds more nutrients. After you enjoy your Air Fryer Buffalo Cauliflower, store leftovers in an airtight container. Keep it in the fridge for up to three days. Make sure it cools down before sealing. This helps keep the flavors fresh and the cauliflower crispy. Avoid stacking the florets too high to prevent them from getting soggy. When you want to enjoy your leftovers, reheating is simple. Preheat your air fryer to 350°F (175°C). Place the cauliflower in a single layer in the basket. Heat for about 5-7 minutes. This method restores crispiness better than a microwave. Check for warmth, and enjoy that tasty flavor again! Yes, you can freeze buffalo cauliflower! First, let the cooked cauliflower cool completely. Then, place it in a freezer-safe bag or container. It can last for up to three months in the freezer. When you're ready to eat, just reheat it in the air fryer. The texture will be a bit different, but it's still delicious! You cook buffalo cauliflower in an air fryer for 12 to 15 minutes. Preheat your air fryer to 400°F (200°C). Shake the basket halfway through to ensure even cooking. You want the florets to be golden brown and crispy. Yes, you can use frozen cauliflower florets. However, they may need a little extra cooking time. Thaw and drain them first for the best results. This helps the batter stick better and keeps them crispy. Air fryer buffalo cauliflower pairs well with several items. Try serving it with ranch or blue cheese dressing for dipping. It also goes great with celery and carrot sticks. You can add it to salads or tacos for a spicy kick. Yes, buffalo cauliflower is a healthy snack option. It is low in calories and high in fiber. Cauliflower is also full of vitamins and minerals. Just watch the buffalo sauce, as it can add extra sodium. To make homemade buffalo sauce, mix ½ cup of hot sauce with ¼ cup of melted butter. You can add garlic powder, cayenne pepper, or other spices for more flavor. Blend the ingredients well for a smooth sauce. Adjust the heat to your liking! In this post, we explored the key ingredients, step-by-step instructions, and helpful tips for making air fryer buffalo cauliflower. You learned how to achieve that perfect crispiness and customize the dish to suit your taste. Remember, you can mix sauces, adjust spice levels, and even add extra veggies for nutrition. With the right storage tips, you can enjoy this tasty dish later. Whether for a snack or a side, buffalo cauliflower is a fun, healthy choice. Go ahead and try this recipe for a delicious experience!

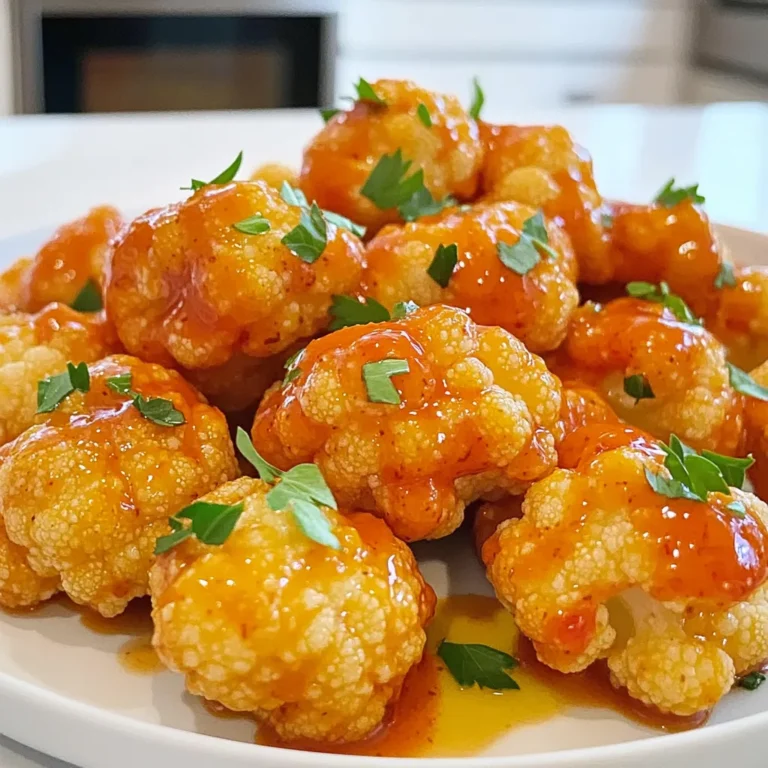
Air Fryer Buffalo Cauliflower Crispy and Flavorful Snack

- 1 cup unsalted butter - 1 cup chopped pecans - 2 cups all-purpose flour - 1/2 cup powdered sugar - 1 teaspoon vanilla extract - 1/2 teaspoon salt - 1/4 teaspoon cinnamon (optional) - Extra powdered sugar for dusting You can swap all-purpose flour with gluten-free flour. Almond flour or rice flour works well. For vegan options, use plant-based butter. Make sure it's unsalted to keep the flavor right. These swaps let you enjoy the cookies without missing out! Start by melting the unsalted butter in a medium saucepan over medium heat. Stir it constantly. Watch closely as it changes color. After about 5-7 minutes, it will turn golden brown. You will smell a nutty aroma when it’s ready. This step adds a rich flavor to the shortbread. Next, take your chopped pecans. Heat a small skillet over low heat. Add the pecans and toast them for about 3-4 minutes. Keep stirring to prevent them from burning. You want them fragrant and slightly golden. This step enhances their flavor and crunch. In a large bowl, mix your dry ingredients. Whisk together the all-purpose flour, powdered sugar, salt, and cinnamon. Make sure they are well combined. Then, pour in the browned butter and add the vanilla extract. Stir until a dough forms. Finally, fold in the toasted pecans gently. Divide the dough into two portions. Shape each into a log about 2 inches in diameter. Wrap each log in plastic wrap. Chill them in the fridge for at least 1 hour. This step is key to firming up the dough, which helps with slicing later. Preheat your oven to 325°F (160°C). After the dough is firm, remove it from the fridge. Carefully slice each log into 1/4 inch thick rounds. Place the slices on a parchment-lined baking sheet. Make sure to space them out for even baking. Bake the cookies for 15-20 minutes. They should be lightly golden around the edges. Keep a close watch to avoid overbaking. The cookies will firm up as they cool, so don’t worry if they seem soft when you take them out. Once baked, let the cookies cool on the baking sheet for a few minutes. Then, transfer them to a wire rack to cool completely. Once cool, dust them with extra powdered sugar for a lovely finish. This adds sweetness and a beautiful look. To keep your shortbread soft, avoid overmixing the dough. Overmixing makes cookies tough. After adding the wet and dry ingredients, mix until just combined. Make sure your butter is at the right temperature. Use softened butter, not melted. If you find your dough too crumbly, add a teaspoon of cold water. This helps bind it together without making it sticky. Want to spice things up? You can add a pinch of nutmeg or ginger for a warm note. If you love chocolate, mix in some cocoa powder. You might also try adding orange zest for a fresh twist. Just be careful with strong flavors; a little goes a long way. Taste the dough before baking. This way, you can adjust flavors to your liking. One big mistake is not chilling the dough. Chilling firms up the dough, making it easier to slice. If you skip this step, your cookies may spread too much in the oven. Another pitfall is not measuring ingredients properly. Use a kitchen scale for accuracy. Also, keep an eye on the oven. Each oven is different, so check your cookies a few minutes before the time is up. This helps avoid overbaking and keeps them golden, not brown. {{image_2}} To make this recipe gluten-free, swap the all-purpose flour. Use a 1:1 gluten-free flour blend. These blends work well in baking. I recommend using one with xanthan gum. This helps mimic the texture of regular flour. Follow the same steps as before. You will still get that rich flavor and crumbly texture. Want to add a twist? Try dipping your shortbread in chocolate. Melt 1 cup of dark or milk chocolate. You can do this in a microwave or on a stovetop. Dip one end of each cookie into the melted chocolate. Let excess chocolate drip off. Place the dipped cookies on wax paper to cool. This adds a sweet and rich layer to your treat. If you need a nut-free option, you can still enjoy these cookies. Simply leave out the pecans. For added flavor, try using sunflower seeds instead. They give a nice crunch without the nuts. You can also add mini chocolate chips for extra sweetness. These small changes keep your cookies tasty and safe for everyone. To keep your shortbread fresh, store it in an airtight container. This helps lock in moisture and flavor. Use parchment paper to separate layers if stacking. Keep the container in a cool, dry place, away from sunlight. This practice ensures that your cookies stay crisp and tasty for days. If you want to freeze your shortbread, first let it cool completely. Wrap each log of dough tightly in plastic wrap. Then, place the wrapped logs in a freezer bag. Squeeze out as much air as you can before sealing. This method keeps the cookies fresh for up to three months. When ready to bake, let the dough thaw in the fridge overnight. Then slice and bake as directed. Brown Butter Pecan Shortbread stays fresh for about one week at room temperature. If stored properly in an airtight container, it can last for up to two weeks. If you freeze the cookies, they can last for three months. Enjoy them as a sweet treat anytime! Brown butter is simply butter cooked until it turns golden brown. This gives it a rich, nutty flavor. To make brown butter, melt unsalted butter in a saucepan over medium heat. Stir it often until it changes color and smells nutty. This process takes about 5 to 7 minutes. Brown butter adds depth to our pecan shortbread and enhances its taste. You can use margarine instead of butter, but the taste will change. Margarine lacks the same rich flavor as butter. If you choose margarine, pick one that is high in fat for a better texture. The cookies may not be as crispy, but they will still be tasty and enjoyable. To make the cookies vegan, replace the butter with vegan butter. You can find many brands that work well. For the powdered sugar, check that it is vegan-friendly. Most brands are, but some use bone char in the processing. Following these tips will keep your cookies plant-based and delicious. Yes, you can use different nuts in this recipe. Walnuts, almonds, or hazelnuts can work well. Each nut brings its own flavor, so pick one you love. Toasting any nuts you choose will enhance their taste. Just be careful not to burn them while toasting. This guide shared all you need for perfect Brown Butter Pecan Shortbread. You learned about key ingredients, options for substitutions, and the step-by-step process to make them. We also covered tips for texture and flavor, along with variations to try. Storing and freezing methods help keep your cookies fresh. Enjoy baking, share your cookies, and experiment with flavors. These cookies are an excellent treat for any occasion. Keep these tips in mind, and you'll impress everyone with your baking skills.

Brown Butter Pecan Shortbread Sweet and Simple Treat

To make spicy miso ramen with jammy egg, gather these key ingredients: - 4 cups vegetable broth - 2 tablespoons white miso paste - 1 tablespoon red chili paste (adjust to taste) - 2 packs of ramen noodles (fresh or dry) - 2 soft-boiled eggs (jammy) - 1 cup baby bok choy, halved - 1 cup shiitake mushrooms, sliced - 1 small carrot, julienned - 1 tablespoon sesame oil These items form the heart of your dish. The miso paste and chili paste add depth and heat. The ramen noodles provide the perfect base, while the vegetables add texture and flavor. Next, enhance your ramen with these condiments and garnishes: - 2 green onions, sliced (for garnish) - Nori sheets (seaweed) for topping - Toasted sesame seeds for garnish - Chili oil for drizzling (optional) These toppings add color and crunch. The green onions bring freshness, while nori adds a savory umami taste. You can also play around with these optional ingredients: - Additional vegetables like spinach or bean sprouts - Different types of mushrooms - A splash of soy sauce for extra flavor Feel free to mix and match! These options let you customize the dish to your liking. To start, fill a pot with water and bring it to a boil. This step is key for perfect jammy eggs. Once the water boils, gently lower in the eggs. Boil them for 6 to 7 minutes. The time depends on how runny you want the yolk. After boiling, transfer the eggs to an ice bath. This stops the cooking process. Let them sit for a few minutes to cool. Once cool, peel the eggs carefully. Set them aside for later. Next, grab a large pot and heat sesame oil over medium heat. Add your sliced shiitake mushrooms and julienned carrot. Sauté them for about 3 to 4 minutes until they soften. This step builds a nice flavor base. After that, pour in 4 cups of vegetable broth. Stir in 2 tablespoons of white miso paste and 1 tablespoon of red chili paste. Mix well and bring the broth to a gentle simmer. Let it cook for about 10 minutes. This allows all the flavors to blend beautifully. While your broth simmers, prepare the ramen noodles. Cook them according to package instructions. Once done, drain them and set aside. After the broth has simmered for 10 minutes, add 1 cup of halved baby bok choy. Let it cook for 2 to 3 minutes until just tender. Now you have a tasty broth with vegetables ready to serve! In bowls, divide the cooked ramen noodles. Ladle the spicy miso broth over the noodles. Top each bowl with halved jammy eggs and your favorite garnishes. Enjoy your flavorful delight! To make a jammy egg, start with fresh eggs. Boil water in a pot. Once boiling, gently add the eggs. Boil them for 6-7 minutes. After that, quickly place them in an ice bath. This cools them down fast and stops the cooking. Let them sit in the ice bath for a few minutes. Peel them carefully for the best result. You can control the spice in your ramen. Start with one tablespoon of red chili paste. Taste the broth after it simmers. If you want more heat, add more chili paste. You can also drizzle chili oil on top when serving. This lets each person adjust their spice level to their liking. A well-presented bowl makes your ramen pop. Use wide, shallow bowls for a nice look. Start by adding the cooked ramen noodles. Pour the spicy miso broth over the noodles. Halve the jammy egg and place it on top. Garnish with sliced green onions and nori sheets. Finish with a sprinkle of toasted sesame seeds. A drizzle of chili oil adds flair and flavor. {{image_2}} To make a vegetarian version of spicy miso ramen, swap the vegetable broth for mushroom broth. It adds a rich flavor. You can also replace the miso with a vegan alternative. For protein, use tofu or tempeh. Marinate them in soy sauce and pan-fry until golden. You can still enjoy that warm, cozy bowl of ramen without any meat. If you want more protein, try adding grilled chicken, shrimp, or pork. You can marinate the meat in soy sauce and sesame oil. Cook it until it's tender and juicy. For a spicy kick, add sriracha or chili garlic sauce to your protein. This addition makes the dish more filling and satisfying. Feel free to mix up the veggies in your ramen. You can add spinach, bell peppers, or zucchini. These add color and crunch. Just make sure to cook them in the broth until tender. If you like more heat, toss in some sliced jalapeños. This will elevate your ramen to a new level of flavor. Store your spicy miso ramen in an airtight container. Make sure to separate the broth from the noodles. This way, the noodles won't get soggy. Keep the leftovers in the fridge. They will last for about three days. If you have jammy eggs left, store them in the shell to keep them fresh. When you're ready to eat, reheat the broth on the stove. Warm it over low heat until hot. It’s best not to boil it again. For the noodles, you can add them directly to the hot broth. This will heat them up quickly. If you saved the jammy eggs, you can warm them in hot water for a minute or two. To freeze your ramen, store the broth and noodles separately. Use freezer-safe containers or bags. The broth can stay fresh for up to three months. When you're ready to enjoy it, thaw the broth overnight in the fridge. Reheat as mentioned above. Cook new noodles fresh for the best taste and texture. A jammy egg is a soft-boiled egg with a creamy yolk. You cook it for about 6-7 minutes. This gives the egg a perfect, runny center. It adds richness to dishes like ramen. You can enjoy jammy eggs on toast or salads too. They are easy to make and very tasty. Yes, you can use store-bought broth for this recipe. It saves time and is very convenient. Choose a quality vegetable broth for the best flavor. Look for low-sodium options to control salt levels. Adding miso paste will enhance the taste as well. To adjust the spice level, modify the amount of red chili paste. Start with less, then taste and add more if needed. You can also add chili oil for extra heat. If you want less spice, you could skip the chili paste entirely. Balancing flavors is key to your perfect bowl of ramen. In this post, we explored ingredients, instructions, and tips for making a tasty dish. We covered the main components, condiments, and optional ingredients to add flavor. You learned how to prepare jammy eggs, make spicy miso broth, and cook noodles and veggies. Plus, we shared neat tricks for perfecting your dish. I hope you feel ready to try different variations and store leftovers with ease. Enjoy making this meal and share your tasty results!

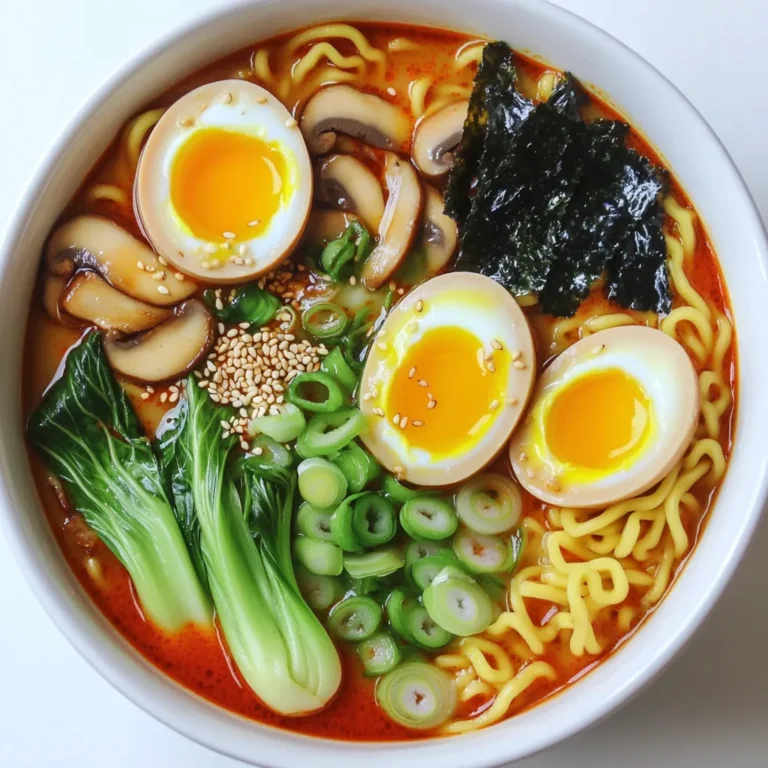
Spicy Miso Ramen with Jammy Egg Flavorful Delight

- 4 salmon fillets (about 6 ounces each) - 1 bunch asparagus (about 1 pound), trimmed - 4 tablespoons olive oil - 4 cloves garlic, minced - 1 tablespoon fresh lemon juice - 1 teaspoon dried thyme - 1 teaspoon dried oregano - Salt and pepper to taste - Fresh parsley, chopped (for garnish) - Lemon wedges for serving Gather your ingredients before you start cooking. This will help you stay organized. The salmon fillets should be fresh and firm. Look for bright, clear skin with no brown spots. The asparagus should be vibrant green and crisp. Trim the ends to ensure they cook evenly. For the garlic, fresh is best. Mince it finely to release its flavor. Olive oil adds richness and helps the herbs stick to the salmon. You can choose extra virgin olive oil for a bolder taste. When it comes to seasoning, fresh lemon juice brightens the dish. Dried thyme and oregano add a lovely herb taste. Don't forget salt and pepper to bring all the flavors together. Fresh parsley gives a pop of green and freshness as a garnish. For serving, lemon wedges are a must. A squeeze of lemon over the salmon and asparagus enhances the taste. This dish is simple yet impressive, perfect for any meal. - Start by preheating your oven to 400°F (200°C). This step ensures even cooking. - Next, line a baking sheet with parchment paper. This makes cleanup easy and keeps food from sticking. - In a small bowl, whisk together 3 tablespoons of olive oil, minced garlic, lemon juice, thyme, oregano, salt, and pepper. Mix until well combined. This garlic herb mixture adds great flavor. - Place the salmon fillets on one side of the prepared baking sheet. Arrange them evenly for best cooking. - Brush the garlic herb mixture generously over the salmon. Be sure to cover the tops well. - On the other side of the baking sheet, arrange the trimmed asparagus. Drizzle the remaining tablespoon of olive oil over the asparagus. - Sprinkle with salt and pepper, tossing to coat evenly. This helps the asparagus taste great. - Now, place the baking sheet in the preheated oven. Bake for 12-15 minutes. This timing allows the salmon to cook properly. - Check for doneness by seeing if the salmon flakes easily with a fork. The asparagus should be tender but still crisp. - Once done, remove the baking sheet from the oven. Garnish with chopped fresh parsley and serve with lemon wedges. These add a nice touch and fresh flavor. Using fresh herbs makes a big difference. Fresh thyme and oregano bring out the best in the salmon. They add bright notes that dried herbs can’t match. You can adjust the seasoning to your taste. If you like more salt, add a pinch. Prefer a bit of heat? A dash of red pepper flakes works well too. For perfect salmon texture, aim for a nice sear. Make sure your oven is hot enough at 400°F (200°C). This helps the fish cook evenly. If you want it flaky, check it at 12 minutes. It should flake easily with a fork. To keep asparagus crisp, don’t overcook it. Aim for a tender but still crunchy bite. Toss it with olive oil and season lightly. This ensures it stays vibrant and fresh. For serving, you can choose two styles. Serve directly from the sheet pan for a casual vibe. Or, plate it up for a more refined look. Garnish with lemon wedges and chopped parsley. This adds color and freshness to your dish. A pop of green and yellow makes your meal more inviting. {{image_2}} You can change up the veggies on the sheet pan. Try broccoli, green beans, or bell peppers. Each veggie adds its own taste. You can even mix them for a colorful feast. If you want a different fish, consider using trout or cod. Both are mild and cook well with the herbs. They will give you a new twist while keeping the dish light and healthy. For a flavor boost, add spices like paprika or cumin. These will add warmth and depth to the dish. You can also toss in fresh herbs like basil or dill for a vibrant taste. Citrus fruits work wonders too! Try adding orange or lime juice instead of lemon. This small change can brighten the dish and add a fresh zing. This dish is perfect for busy nights. You can make it in advance. Just prepare the salmon and veggies and store them in the fridge. When you’re ready to eat, bake it fresh. To cater to dietary needs, swap out the salmon for a plant-based option like tofu. Season it the same way for a tasty, vegan meal. You can also use gluten-free soy sauce if needed. To keep your garlic herb salmon and asparagus fresh, store them in shallow containers. Make sure to cover them well with a lid or plastic wrap. This helps prevent drying out. The dish lasts in the fridge for 2 to 3 days. After that, the quality may decline. You can reheat your leftovers in the microwave or the oven. For the microwave, place the food on a microwave-safe plate. Heat it in short bursts of 30 seconds. Check often to avoid overcooking. Using the oven keeps the salmon and asparagus crispy. Preheat your oven to 350°F (175°C). Place the food on a baking sheet and cover it with foil. Heat for about 10-15 minutes. This method helps maintain the texture and flavor. To freeze the dish, let it cool completely first. Place the salmon and asparagus in freezer-safe bags or containers. Remove as much air as possible to prevent freezer burn. The dish can be frozen for up to 3 months. When you are ready to eat, thaw the dish overnight in the fridge. Reheat it using the oven for the best results. This way, your meal retains its delicious taste and texture. Bake the salmon for 12-15 minutes at 400°F. This time makes the salmon tender. You want it to flake easily with a fork. If it looks slightly opaque, it's ready. You can check for doneness by inserting a fork into the thickest part. Yes, you can swap asparagus for other veggies. Broccoli, green beans, or Brussels sprouts work well. Just cut them to a similar size. This keeps cooking time even. Choose vegetables you enjoy for the best flavor. Several side dishes go well with salmon and asparagus. Try a fresh green salad for crunch. Quinoa or rice adds a nice touch, too. You might also serve roasted potatoes for heartiness. These options balance the meal and add variety. This blog post covered a delicious salmon and asparagus recipe. We explored key ingredients like salmon, garlic, and fresh herbs. You learned step-by-step instructions for prep, baking, and serving. I shared tips for the best flavor, cooking techniques, and presentation ideas. Variations offered alternatives and meal prep tips. Lastly, we discussed storing and reheating your dish. Enjoy making this dish, and remember to customize it to your taste. Cooking should be fun and rewarding, so get started and savor every bite!

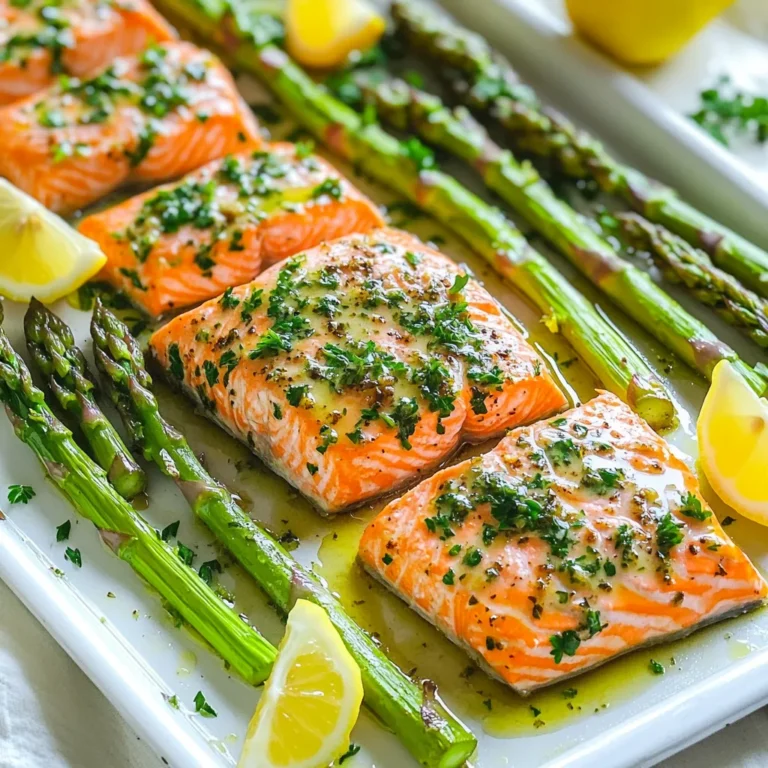
Garlic Herb Salmon & Asparagus Sheet Pan Delight

- 1 cup canned pumpkin puree - 1/2 cup vegetable oil - 1 cup brown sugar, packed - 1/2 cup granulated sugar - 2 large eggs - 1 teaspoon vanilla extract - 1 cup all-purpose flour - 1 teaspoon baking soda - 1/2 teaspoon baking powder - 1 teaspoon ground cinnamon - 1/2 teaspoon ground nutmeg - 1/4 teaspoon salt - 1 cup chocolate chips (semi-sweet or dark) - 1/2 cup chopped walnuts (optional) This list gives you everything you need to make these tasty pumpkin chocolate chip bars. Each ingredient plays a key role in flavor and texture. The canned pumpkin puree offers moisture and a lovely fall flavor. The oils and sugars create a rich, sweet base. The eggs help bind everything together, making the bars soft. For a twist, add walnuts. They add crunch and flavor but are optional. You can also swap chocolate chips for white chocolate or butterscotch chips for a different taste. Don't forget to have fun with these ingredients. Experimenting can lead to your perfect fall treat! 1. Preheat your oven and prepare the baking pan. Set your oven to 350°F (175°C). Grease an 8x8-inch pan. Line it with parchment paper, leaving a little overhang. This makes it easy to lift the bars later. 2. Mix the wet ingredients. In a large bowl, add 1 cup of canned pumpkin puree, 1/2 cup of vegetable oil, 1 cup of packed brown sugar, and 1/2 cup of granulated sugar. Stir these ingredients together until they blend well. 3. Combine the dry ingredients. In another bowl, whisk together 1 cup of all-purpose flour, 1 teaspoon of baking soda, 1/2 teaspoon of baking powder, 1 teaspoon of ground cinnamon, 1/2 teaspoon of ground nutmeg, and 1/4 teaspoon of salt. Make sure there are no lumps. 4. Fold in chocolate chips and nuts. Gradually mix the dry ingredients into the wet mixture. Stir gently until just combined. Be careful not to overmix! Then, fold in 1 cup of chocolate chips and 1/2 cup of chopped walnuts, if you choose to add them. 5. Bake and check doneness. Pour the batter into your prepared pan, smoothing the top with a spatula. Bake for 25-30 minutes. Check doneness by inserting a toothpick in the center. If it comes out clean, your bars are ready! After baking, let the bars cool for 10 minutes in the pan. Use the parchment paper to lift them out and place them on a wire rack to cool completely. Enjoy your delicious pumpkin chocolate chip bars! To make these Pumpkin Chocolate Chip Bars soft and chewy, avoid overmixing. When you mix the dry and wet ingredients, stir just until combined. Overmixing makes the bars tough. Using fresh ingredients matters a lot. Use fresh pumpkin puree and check the expiration date on your eggs. Fresh ingredients make for better flavor and texture. To test if your bars are done, insert a toothpick into the center. If it comes out clean or with a few moist crumbs, they are ready. If there’s wet batter, give them a few more minutes in the oven. These small tips help you bake the best Pumpkin Chocolate Chip Bars every time! {{image_2}} For gluten-free pumpkin chocolate chip bars, you can use almond flour or coconut flour. These flours change the texture, so you may need to adjust the liquid. Add an extra egg or some applesauce for moisture. These changes help keep your bars soft and tasty. To make these bars vegan, replace the eggs. You can use 1/4 cup of applesauce or a mashed banana for each egg. For chocolate, choose dairy-free chocolate chips. These swaps keep the flavors rich while making the recipe plant-based. You can make the bars even better by adding spices or extracts. Try adding a pinch of ginger or a splash of maple extract. For added crunch, mix in dried fruits like cranberries or seeds like pumpkin seeds. These small changes add fun flavors and textures to your bars. To keep your pumpkin chocolate chip bars fresh, store them in an airtight container. This helps lock in moisture and keeps them soft. You can keep them at room temperature for about 3 days. If you want to extend their life, refrigerate them. In the fridge, these bars can last up to a week. Freezing is a great way to save extra bars for later. First, let the bars cool completely. Then, cut them into squares. Wrap each square tightly in plastic wrap. After that, place the wrapped bars in a freezer-safe bag or container. They can stay frozen for up to 3 months. To thaw, simply take out a square and let it sit at room temperature for about 30 minutes. Enjoy your treat even when it’s not fall! Yes, you can use fresh pumpkin. Just cook it first. Steam or roast it until tender. Then, blend it until smooth. Make sure to measure one cup for your recipe. Fresh pumpkin can give a nice flavor twist. You can use melted coconut oil or applesauce. These options work well and keep bars moist. If using applesauce, reduce the sugar a bit. This helps balance the sweetness. To reduce sweetness, cut back on brown sugar. Use half a cup instead of one cup. You can also try using dark chocolate chips. They have less sugar than semi-sweet chips. In this article, we covered key ingredients, easy preparation steps, and tips for perfect pumpkin chocolate chip bars. You learned about gluten-free and vegan options to fit your needs. Storing these bars correctly helps keep them fresh longer. I hope these insights help you bake with confidence. Enjoy creating your own delicious treats!

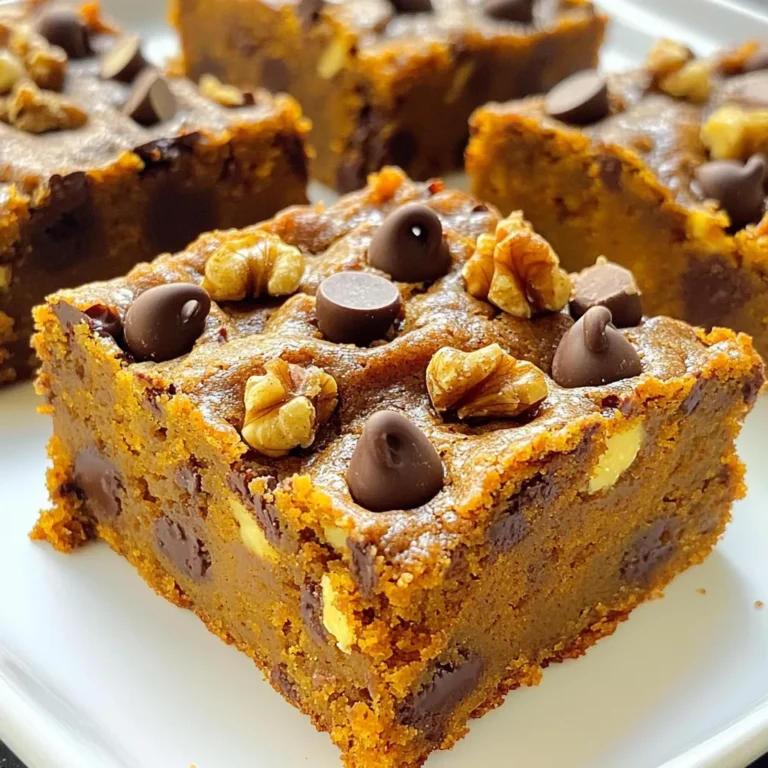
Pumpkin Chocolate Chip Bars Irresistible Fall Treat

- 4 cups fresh corn kernels (about 6-7 ears of corn, or you can use frozen corn) - 1 cup cream cheese, softened - 1 cup sour cream - 1 cup cotija cheese, crumbled (or feta) - 1/2 cup mayonnaise - 1 lime, juiced - 1 teaspoon chili powder - 1/2 teaspoon smoked paprika - 1/4 teaspoon cumin - Salt and pepper to taste - 1/4 cup fresh cilantro, chopped (optional for garnish) - Tortilla chips, for serving - Fresh corn: Around 6-7 ears give you about 4 cups. - Cream cheese: One cup, softened, makes it easy to mix. - Sour cream: One cup adds creaminess. - Cotija cheese: One cup, crumbled, brings great flavor. - Mayonnaise: A half cup gives a nice tang. - Lime: One lime, juiced, adds freshness. - Chili powder: One teaspoon adds spice. - Smoked paprika: A half teaspoon gives a smoky taste. - Cumin: A quarter teaspoon adds warmth. - Salt and pepper: To taste, for seasoning. - Fresh cilantro: About a quarter cup, optional for garnish. - Tortilla chips: For dipping. - You can use frozen corn if fresh is not available. Thaw it before using. - If you cannot find cotija cheese, feta cheese works well too. - For a lighter dip, use Greek yogurt instead of sour cream. - You can skip the mayonnaise if you want a more cheese-focused dip. - If you like it spicy, add diced jalapeños or more chili powder. {{ingredient_image_1}} First, you need to get your corn ready. If you use fresh corn, grill the ears over medium heat. Grill for about 10 to 12 minutes. Turn them so each side gets a nice char. This step adds great flavor. Let them cool down. Then, cut the kernels off the cob. If you have frozen corn, just thaw it. No grilling needed! Next, grab a large mixing bowl. Add the softened cream cheese, sour cream, and mayonnaise. Mix these until they are smooth and well blended. It should look creamy. Now, add your corn kernels to this mixture. Then, sprinkle in the crumbled cotija cheese. Squeeze in the lime juice. Add the chili powder, smoked paprika, and cumin. Stir everything together until it’s fully combined. Don’t forget to taste it! Add salt and pepper as needed to make it perfect. Once mixed, transfer your dip to a serving dish. Cover it and chill in the fridge for at least 30 minutes to 1 hour. Chilling helps the flavors blend. Before serving, you can sprinkle some chopped cilantro on top if you like. Serve it with tortilla chips for dipping. Enjoy your tasty Cheesy Mexican Street Corn Dip! To boost the flavors in your cheesy Mexican street corn dip, consider these tips. Use fresh lime juice for a zesty kick. It brightens the taste and adds freshness. Add a pinch of cayenne pepper for heat. This simple change can take your dip to the next level. You can also mix in some roasted garlic for depth. It adds a rich, savory note that pairs well with the corn. Getting the right texture is key. For a creamier dip, blend the cream cheese, sour cream, and mayonnaise well. Make sure there are no lumps. If you like it chunkier, leave more corn kernels whole. This will add texture and give it a nice bite. Consider folding in the cotija cheese gently. This keeps its crumbly texture, adding to the overall experience. When it’s time to serve, think about presentation. Use a colorful bowl to make your dip stand out. You can garnish it with extra corn kernels and cilantro for a fresh look. Surround the bowl with tortilla chips for easy access. Consider adding some sliced jalapeños on the side for those who want extra heat. Enjoy your dip at parties or family gatherings. It’s always a hit! Pro Tips Use Fresh Corn: If possible, opt for fresh corn on the cob for the best flavor and texture. Grilling the corn adds a delicious smoky note that enhances the dip. Chill Before Serving: Allow the dip to chill in the refrigerator for at least 30 minutes. This resting time allows the flavors to meld together, resulting in a more delicious dip. Customize the Spice Level: Adjust the amount of chili powder and smoked paprika according to your heat preference. For extra heat, consider adding diced jalapeños or a dash of hot sauce. Presentation Matters: Serve the dip in a colorful bowl and garnish with extra corn kernels and fresh cilantro. Adding a platter of tortilla chips around the dip makes it visually appealing and inviting for guests. {{image_2}} If you like heat, add diced jalapeños or hot sauce. Mix about one to two tablespoons of diced jalapeños into the dip. You can also drizzle hot sauce on top before serving. This gives a nice kick without losing the dip’s creamy texture. Pair it with tortilla chips for a spicy crunch. To make the dip vegetarian, just skip the meat. For vegan options, use vegan cream cheese and sour cream. Replace cotija cheese with a vegan cheese alternative. You can also use nutritional yeast for a cheesy flavor. This way, everyone can enjoy the dip without losing taste. While cotija cheese adds a unique flavor, you can try other cheeses. Feta cheese works well if cotija is hard to find. Creamy mozzarella gives a milder taste. For a rich flavor, use sharp cheddar. Mixing different cheeses can bring new depth to your dip. Just remember to balance strong flavors with creamy ones for the best result. To store leftovers of your cheesy Mexican street corn dip, place it in an airtight container. Ensure the lid is sealed tight to keep the dip fresh. Store it in the fridge. It can last up to three days. Always check for any signs of spoilage before eating. You can freeze this dip if you want to save it for later. First, let the dip cool completely. Then, transfer it to a freezer-safe container. Leave some space at the top, as the dip may expand when frozen. It can stay good for up to three months. When you're ready to enjoy it, thaw it in the fridge overnight. To reheat the dip, scoop it into an oven-safe dish. Cover it with aluminum foil to keep moisture in. Heat it at 350°F (175°C) for about 20 minutes. Stir occasionally to ensure even heating. You can also use the microwave. Heat it in short bursts, stirring in between. This method works well if you want a quick snack. Yes, you can use canned corn. It saves time and still tastes good. Just drain and rinse the corn before adding it to your dip. Fresh corn has a great crunch, but canned corn works well in a pinch. The dip stays fresh for about 3 to 5 days in the fridge. Keep it in a tight container to keep the flavors strong. If you notice any change in smell or texture, toss it out. Tortilla chips are a classic choice. They add a nice crunch. You can also serve it with fresh veggies like cucumber or bell peppers. For a fun twist, use pita chips or toasted bread. This article covered how to make Cheesy Mexican Street Corn Dip. We looked at ingredients, steps, and tips to create a tasty treat. You can try different flavors and add your twist with variations. I shared how to store leftovers and answer common questions. In the end, this dip is easy to make and fun to share. Enjoy your cooking and impress your friends with this delicious dip!

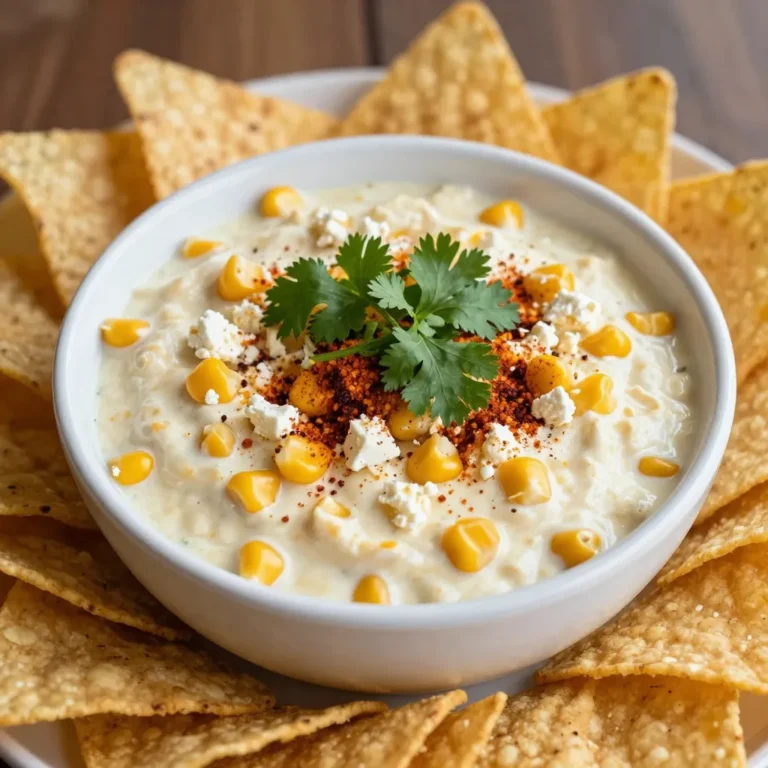
Cheesy Mexican Street Corn Dip Flavorful and Simple

PREV 1 … 8 9 10 … 86 NEXT
spicy fork kitchen

explore

DessertsDinnerAppetizersDrinks

Our Policies

  • Cookie Policy
  • Copyright Policy
  • Disclaimer
  • GDPR Policy
  • Terms Of Use
Back to Top
  • About
  • Contact Us
  • Privacy Policy
© 2025 spicy fork kitchen