FREE DINNER EBOOK! Get your copy!
  • Cookie Policy
  • GDPR Policy
  • Disclaimer
  • Terms Of Use
  • Visit my other site: Fun Cookie Recipes
spicy fork kitchen
  • Home
  • Dinner
  • Desserts
  • Drinks
  • Appetizers
  • Contact
  • About
  • Privacy Policy
  • Home
  • Dinner
  • Desserts
  • Drinks
  • Appetizers
  • Contact
  • About
  • Privacy Policy
  • Cookie Policy
  • GDPR Policy
  • Disclaimer
  • Terms Of Use
Visit my other site: Fun Cookie Recipes

HOME / CATEGORIES /

Latest

To make this tasty dish, you need key ingredients: - 2 cups cooked chicken, shredded - 4 large russet potatoes, peeled and cubed - 1 cup ranch dressing - 1 cup sour cream - 2 cups shredded cheddar cheese - 1 cup green onions, chopped (divided) - 1 teaspoon garlic powder - 1 teaspoon onion powder - Salt and pepper to taste - 1 cup panko breadcrumbs - 2 tablespoons olive oil These main ingredients bring rich flavors and textures to the casserole. The chicken and potatoes create a hearty base. The ranch dressing and sour cream add a creamy touch. The cheddar cheese gives it a melty, cheesy goodness. You can customize this casserole with fun extras: - 1 cup cooked bacon bits (optional, can be omitted) - Extra spices like paprika or chili powder for heat - Different cheeses like mozzarella or pepper jack - Veggies such as broccoli or bell peppers Feel free to mix and match. This is a great way to use what you have at home. Adding bacon bits gives a smoky crunch. Extra spices can elevate the flavor profile. To prepare your Loaded Potato Ranch Chicken Casserole, gather these tools: - Large pot for boiling potatoes - Mixing bowl for combining ingredients - 9x13 inch baking dish for baking the casserole - Small bowl for mixing breadcrumbs - Potato peeler and knife for prepping potatoes Having the right tools makes cooking easier. A good baking dish ensures even cooking. Use a mixing bowl that is big enough to hold all ingredients. {{ingredient_image_1}} First, preheat your oven to 375°F (190°C). Next, fill a large pot with water and add salt. Bring the water to a boil. Once boiling, add the peeled and cubed russet potatoes. Cook them for about 15 minutes. You want them to be fork-tender. After that, drain the potatoes in a colander and set them aside to cool. This step gives your casserole a creamy base. In a large mixing bowl, combine the shredded chicken, ranch dressing, and sour cream. Add 1 cup of shredded cheddar cheese. Then, toss in ½ cup of chopped green onions, garlic powder, onion powder, salt, and pepper. Mix everything well until it is fully blended. Now, gently fold in the cooked potatoes. Be careful not to mash them. You want nice chunks of potato in your casserole for texture. Transfer the chicken and potato mixture into a greased 9x13 inch baking dish. Spread it out evenly across the dish. In a small bowl, mix the panko breadcrumbs, the remaining cheddar cheese, and cooked bacon bits if you choose to use them. Drizzle in the olive oil and mix until the breadcrumbs are coated. Spread this breadcrumb mixture over the top of the casserole. Bake it in your preheated oven for about 25-30 minutes. Keep an eye on it until the top is golden and crispy. Once it's done, let it cool for a few minutes. Garnish with the remaining green onions before serving. To make the best Loaded Potato Ranch Chicken Casserole, use freshly cooked chicken for great flavor. Shred the chicken into small pieces for even mixing. Choose russet potatoes for their creamy texture. When boiling the potatoes, don’t overcook them; they should be fork-tender but not mushy. This step helps the potatoes hold their shape in the casserole. Mix the ranch dressing and sour cream well. This creates a creamy base that binds everything together. Use your favorite brand of ranch dressing for a flavor boost. Add garlic and onion powder for a nice kick. These spices enhance the overall taste and aroma. When mixing, fold in the potatoes gently. You want to keep them intact. A few chunks of potato add great texture. Top with panko breadcrumbs mixed with olive oil for crunch. Bake until the top is golden brown, about 25-30 minutes. Let it cool a bit before serving; this helps the layers set. You can make swaps to fit your diet. For a lighter option, use Greek yogurt instead of sour cream. This keeps the creaminess while lowering fat. If you need a dairy-free dish, try cashew cream in place of ranch and sour cream. For gluten-free needs, choose gluten-free breadcrumbs or skip the topping. You can add more veggies, like spinach or bell peppers, for extra nutrition. If you don't eat chicken, use shredded turkey or cooked lentils for protein. Avoid overcooking the potatoes; they should be tender but firm. If they are too soft, they will break apart when mixed. Don’t skip the step of mixing the ranch with the sour cream. This step ensures each bite is flavorful. Make sure to grease your baking dish well. A non-stick spray works best to prevent sticking. Also, let the casserole cool for a few minutes before serving. This helps the layers stay together when you scoop it out. Lastly, remember to taste and adjust seasoning before baking; a little salt can make a big difference! Pro Tips Choose the Right Potatoes: Russet potatoes are ideal for a creamy texture, but Yukon gold can also add a buttery flavor. Mix Ingredients Gently: When folding in the potatoes, be careful not to mash them to keep a nice chunky texture in the casserole. Breadcrumb Variations: For added flavor, try mixing in some grated Parmesan cheese with the panko breadcrumbs. Let it Rest: Allow the casserole to cool for a few minutes after baking; this helps it set up and makes serving easier. {{image_2}} You can easily make this dish vegetarian. Replace the chicken with 2 cups of cooked lentils or chickpeas. These options add protein and texture. You can also add more veggies, like broccoli or bell peppers. This will keep the dish colorful and tasty. Want to kick up the flavor? Try adding spices like paprika, cayenne, or chili powder. These spices add warmth and depth. You can also mix in fresh herbs, like thyme or parsley, for a fresh taste. For added crunch, consider mixing in some diced bell peppers or mushrooms. They will bring a nice texture to the casserole. Cheddar cheese is great, but you can switch it up. Use mozzarella for a milder taste or pepper jack for some heat. A blend of cheeses gives a richer flavor. Feel free to experiment with different cheese types. This way, you can find your perfect cheese mix for this dish. To keep your Loaded Potato Ranch Chicken Casserole fresh, cool it down first. Place it in an airtight container. Store it in the fridge for up to three days. If you want to enjoy it later, freezing is a great option. To freeze, let the casserole cool completely. Use a freezer-safe container or wrap it tightly in plastic wrap. You can store it for up to three months. Just remember to label it with the date. This way, you know when you made it. When you're ready to eat, you can reheat it from frozen or refrigerated. If frozen, thaw it overnight in the fridge. Preheat your oven to 350°F (175°C). Cover the casserole with foil to keep it moist. Bake it for about 25-30 minutes until heated through. If it’s in the fridge, it may only need 15-20 minutes. For a crispy top, uncover it for the last 5 minutes. Enjoy your tasty comfort meal! Yes, you can use rotisserie chicken. It saves time and adds flavor. Just shred the meat and mix it into the casserole. This option is great for busy days. Rotisserie chicken has a nice taste that blends well with ranch and potatoes. To make this casserole lighter, try these tips: - Use low-fat ranch dressing and sour cream. - Cut back on cheese, or use a lighter cheese. - Leave out the bacon bits. - You can add more veggies, like broccoli or spinach. These changes keep the taste but lower the calories. This casserole pairs well with many sides. Here are some ideas: - A fresh green salad adds crunch. - Steamed vegetables, like green beans, work great. - Garlic bread makes a nice addition. - You can also serve it with a light soup. These sides balance out the meal and add variety. You learned how to make a tasty Loaded Potato Ranch Chicken Casserole. We covered the main and optional ingredients, plus tools needed. I shared step-by-step instructions to guide you. Tips helped avoid common mistakes. You also found fun variations and storage tips. Keep this recipe in mind for busy days or family meals. With simple swaps, you can fit your needs. Enjoy cooking and sharing this dish!

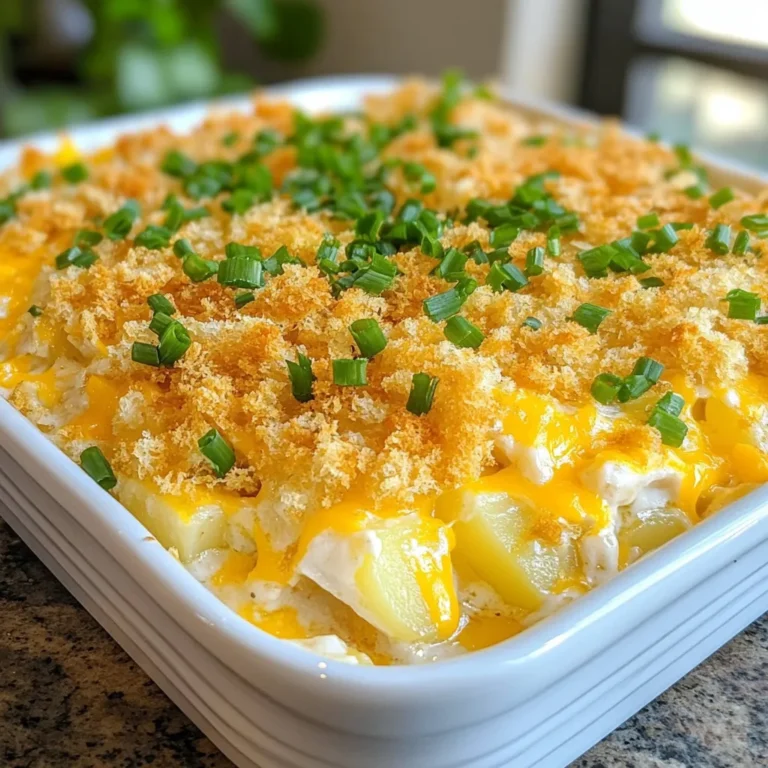
Loaded Potato Ranch Chicken Casserole Tasty Comfort Meal

To make these tasty Sheet Pan BBQ Chicken Nachos, gather the following ingredients: - 1 lb cooked chicken, shredded - 1 cup BBQ sauce (your favorite brand) - 1 bag tortilla chips (10-12 oz) - 1 cup shredded cheddar cheese - 1 cup black beans, rinsed and drained - 1 cup corn kernels (fresh, frozen, or canned) - 1 jalapeño, sliced (optional for heat) - 1/2 red onion, diced - 1 avocado, diced - Fresh cilantro, chopped (for garnish) - Sour cream (for serving) - Lime wedges (for serving) You can swap some ingredients to fit your taste or needs: - Instead of cooked chicken, use shredded rotisserie chicken. This saves time and adds flavor. - If you don't like BBQ sauce, try ranch dressing or salsa. Both add a nice kick. - No black beans? Use pinto beans or skip them for a lighter dish. - For cheese, feel free to use pepper jack for extra spice or a dairy-free option. Using good brands can make a big difference. Here are some I recommend: - BBQ Sauce: Look for Sweet Baby Ray’s or Stubb’s for rich flavor. - Tortilla Chips: Try Tostitos or Late July for a delicious crunch. - Cheese: For cheddar, I love Cabot or Tillamook. They melt well and taste great. These choices can help you create the best Sheet Pan BBQ Chicken Nachos. Enjoy cooking! {{ingredient_image_1}} First, grab your cooked chicken. Shred it into small pieces with a fork or your hands. In a medium bowl, mix the shredded chicken with BBQ sauce. Use your favorite brand for the best taste. Make sure all the chicken is well coated. This step adds rich flavor to each bite. Now, take a large sheet pan. Spread out the tortilla chips in a single layer. This helps each chip get the right amount of toppings. Next, add the BBQ chicken mixture on top of the chips. Then, sprinkle black beans and corn over everything. Add the diced red onion for some crunch. Finally, top it all with shredded cheddar cheese. If you like spice, add jalapeño slices on top. Preheat your oven to 400°F (200°C). Place the loaded sheet pan in the oven. Bake for about 10-15 minutes. Watch for the cheese to melt and bubble. It should turn slightly golden. This step makes the nachos gooey and delicious. Once done, carefully remove the pan from the oven. Let it cool for a minute, then add diced avocado and chopped cilantro for fresh flavor. To get crispy nachos, use sturdy tortilla chips. Thin chips can break easily and get soggy. Spread the chips evenly on the sheet pan, leaving space between them. This helps them cook well. Bake the nachos in a hot oven. A good temperature is 400°F (200°C). Keep an eye on them, so they don’t burn. Layering is key for great nachos. Start with a base of chips. Then, add the BBQ chicken. After that, sprinkle the black beans and corn. Next, add the diced red onion. Finally, top with shredded cheddar cheese. This order helps the cheese melt well and keep everything in place. Don’t add too many toppings at once; it can weigh down the nachos. Timing is important for baking nachos. Bake them for about 10 to 15 minutes. Check them at 10 minutes. You want the cheese to be bubbly and golden. If you like your nachos extra crispy, leave them in a bit longer. Just watch closely to avoid burning. Once baked, let them cool for a minute before serving. This keeps everything together and makes them easier to eat. Pro Tips Choose Quality BBQ Sauce: The flavor of your nachos heavily depends on the BBQ sauce you choose. Opt for a sauce that complements the chicken and enhances the overall taste. Layer Wisely: For the best nacho experience, layer your toppings evenly. This ensures every chip gets a taste of the deliciousness, preventing any dry bites! Customize to Taste: Feel free to add other ingredients like diced tomatoes, olives, or even jalapeño poppers to elevate your nacho game and cater to your guests' preferences. Serve Immediately: Nachos are best enjoyed right out of the oven. Serve them hot for that perfect melty cheese and crispy chip combination! {{image_2}} You can swap the chicken for a plant-based protein. Use chickpeas or lentils. They add protein and flavor. Just mix them with the BBQ sauce like you would with chicken. This way, you get a tasty, meatless dish that everyone can enjoy. Feel free to get creative with your toppings. You can add diced tomatoes or sliced olives for a burst of flavor. Try adding pickled jalapeños for a tangy kick. If you love greens, throw on some spinach or arugula. Each topping changes the flavor and keeps things fun. Want a spicy kick? Use different peppers to change the heat. You can try serrano or habanero peppers instead of jalapeños. Decrease or increase the amount based on your taste. If you prefer no heat, skip the peppers altogether. Your nachos will still taste amazing! To store leftover nachos, first let them cool. Once cool, place them in an airtight container. You can keep them in the fridge for up to three days. Make sure to cover them well to avoid drying out. If you want to keep the toppings fresh, store them separately. This keeps the chips from getting soggy. For the best taste, reheat nachos in the oven. Preheat your oven to 350°F (175°C). Spread the nachos on a baking sheet. Heat them for about 10 minutes or until warm. You can also use the microwave, but this may make the chips soft. If you use a microwave, heat in short bursts of 30 seconds. You can freeze nachos, but it’s best to freeze the toppings separately. Place the chips in a freezer bag and seal it tightly. Store the chicken, beans, and other toppings in separate bags. You can freeze them for up to three months. When you’re ready to eat, thaw the toppings in the fridge overnight. Then, bake the nachos again for a fresh taste. No, you should not use raw chicken. Raw chicken needs to cook longer than nachos bake. Using cooked chicken makes this dish easier and faster. You can use rotisserie chicken or leftovers. Just shred it and mix it with BBQ sauce. It saves time and keeps your nachos tasty. You can use many things if you don’t have BBQ sauce. Some good options include hot sauce or salsa for spice. You can also try honey mustard or teriyaki sauce for a different flavor. Each choice gives a unique taste to your nachos. Experimenting can lead to fun new flavors. To make nachos ahead, prep the ingredients but do not bake them. Mix the chicken with BBQ sauce and layer everything on the sheet pan. Cover it with plastic wrap and store it in the fridge. When ready, just pop it in the oven for about 15 minutes. This way, you enjoy fresh nachos without all the work at serving time. In this article, I covered everything you need for great nachos. I shared important ingredients, step-by-step instructions, and helpful tips for perfect results. You can also find ways to mix it up with variations and storage advice. Nachos can be quick, fun, and delicious. Whether you eat them for a snack or meal, you now have the tools to impress. Enjoy making your nachos your way!

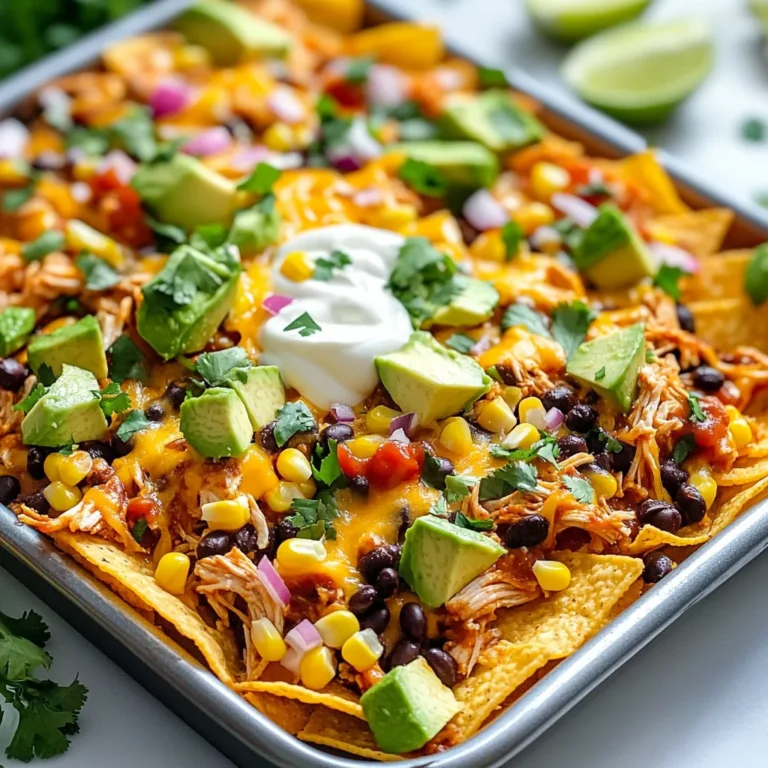
Sheet Pan BBQ Chicken Nachos Simple and Tasty Dish

For a delicious Chocolate Peanut Butter Smoothie Bowl, you'll need: - 2 ripe bananas, frozen - 1 cup unsweetened almond milk - 2 tablespoons natural peanut butter - 2 tablespoons cocoa powder - 1/2 teaspoon vanilla extract These main ingredients create a rich and creamy base. Frozen bananas add sweetness and a smooth texture. Almond milk keeps it light and dairy-free. Peanut butter gives it that nutty flavor, while cocoa powder adds the chocolatey goodness. You can sweeten your smoothie bowl with: - 1 tablespoon honey - 1 tablespoon maple syrup These sweeteners are optional. If you like it sweeter, add one. Honey and maple syrup mix well with the other flavors. You can skip them if you prefer a less sweet taste. The fun part is adding toppings. Here are some great ideas: - Sliced bananas - Granola - Chia seeds - Cacao nibs - Fresh berries These toppings not only look good but also add crunch and extra flavor. You can mix and match based on what you like. A drizzle of extra peanut butter or honey on top makes it even better! {{ingredient_image_1}} First, gather all your ingredients. You need: - 2 ripe bananas, frozen - 1 cup unsweetened almond milk - 2 tablespoons natural peanut butter - 2 tablespoons cocoa powder - 1 tablespoon honey or maple syrup (optional) - 1/2 teaspoon vanilla extract - Toppings: sliced bananas, granola, chia seeds, cacao nibs, and fresh berries Make sure your bananas are ripe. Ripe bananas add more sweetness. Slice your fresh bananas if you plan to use them as toppings. Next, place all your main ingredients in a blender. Add the frozen bananas, almond milk, peanut butter, cocoa powder, honey, and vanilla extract. Blend on high until the mix is smooth and creamy. You might need to stop and scrape down the sides. This helps mix everything well. If your smoothie is too thick, add a bit more almond milk. Blend again until you reach your desired thickness. Pour your chocolate peanut butter smoothie into a large bowl. Now, it’s time to get creative with toppings! Artfully arrange sliced bananas, granola, chia seeds, cacao nibs, and fresh berries on top. For an extra touch, drizzle more peanut butter or honey on top. Use a decorative spoon to serve. Scatter your toppings in a way that looks pretty. A sprinkle of cinnamon can make it even more appealing! To get a super creamy texture, use ripe bananas. Frozen bananas work best. They add a thick and smooth base. You can also add a splash more almond milk if needed. Blend until everything is silky. If you have leftovers, store them in a sealed container. Keep it in the fridge for up to two days. When you want to eat it, stir well. You might need to blend it again for a fresh taste. Pick a natural peanut butter for the best flavor. Look for one with no added sugar or oils. The best kinds only have peanuts and salt. This keeps the taste clean and healthy. Try different brands to find your favorite one. Pro Tips Use Frozen Bananas: Make sure your bananas are fully frozen for a creamier texture and a chilled smoothie bowl. Experiment with Toppings: Feel free to mix and match your favorite toppings like nuts, seeds, or different fruits for added crunch and flavor. Adjust Sweetness: Taste the smoothie before adding any sweetener; the bananas might provide enough natural sweetness on their own. Presentation Matters: Take your time arranging the toppings; a beautiful presentation enhances the enjoyment of the smoothie bowl. {{image_2}} You can switch almond milk for other types of milk. Try oat milk for a creamier texture. Coconut milk adds a nice tropical twist. Soy milk is great if you want extra protein. Each milk brings its own unique taste. Want to mix things up? Add a scoop of protein powder for a boost. You can blend in spinach for extra greens without changing the taste. A dash of cinnamon or nutmeg gives warmth. For a fruity twist, toss in a handful of berries or some mango. These add flavor and nutrients. Instead of regular granola, choose a low-sugar version. Top with fresh fruits like kiwi or pineapple for a bright touch. Chopped nuts add crunch and protein. Consider using yogurt for creaminess and probiotics. These swaps keep your smoothie bowl tasty and healthy. Each serving of the Chocolate Peanut Butter Smoothie Bowl has about 300 calories. This bowl can fill you up without weighing you down. Here’s how the calories break down: - Frozen bananas: 100 calories - Almond milk: 30 calories - Peanut butter: 190 calories - Cocoa powder: 25 calories - Honey or maple syrup: 60 calories (if used) - Bananas: These fruits provide potassium and vitamin C. They help with digestion and give you energy. - Almond milk: Low in calories, this milk is dairy-free and rich in vitamin E. - Peanut butter: Packed with protein and healthy fats, it keeps you full longer. - Cocoa powder: This adds antioxidants and can boost mood. - Chia seeds: If you add them, they offer fiber and omega-3 fatty acids. This smoothie bowl is vegan and gluten-free. It uses almond milk and natural ingredients. You can swap the peanut butter for sunflower seed butter for a nut-free option. Yes, you can use fresh bananas. However, frozen bananas give a creamier texture. They also chill the smoothie bowl. If you use fresh bananas, add some ice cubes to keep it cool. This recipe is already dairy-free since it uses almond milk. You can choose other non-dairy milks too. Options include oat milk, coconut milk, or soy milk. Each adds its own unique flavor. If you need a substitute for almond milk, try oat milk or coconut milk. Both will work well. You can also use soy milk or rice milk if you prefer. Each one gives a different taste. To make this bowl kid-friendly, let them choose toppings. Sliced strawberries, colorful sprinkles, or mini chocolate chips are great options. You can also blend in spinach or kale for added nutrients without changing the flavor. The best toppings include sliced bananas, granola, and chia seeds. You can add cacao nibs for a chocolate crunch. Fresh berries like strawberries, blueberries, or raspberries also add color and flavor. We covered all you need to know for a great Chocolate Peanut Butter Smoothie Bowl. You learned about the main ingredients, optional sweeteners, and tasty toppings. We discussed how to prepare, blend, and serve this treat. I shared tips for creaminess, storage, and choosing peanut butter. We also explored variations, nutrition facts, and common questions. Make this smoothie bowl your way, and enjoy every bite. Simple changes can boost flavor or health. Enjoy trying out your own ideas!

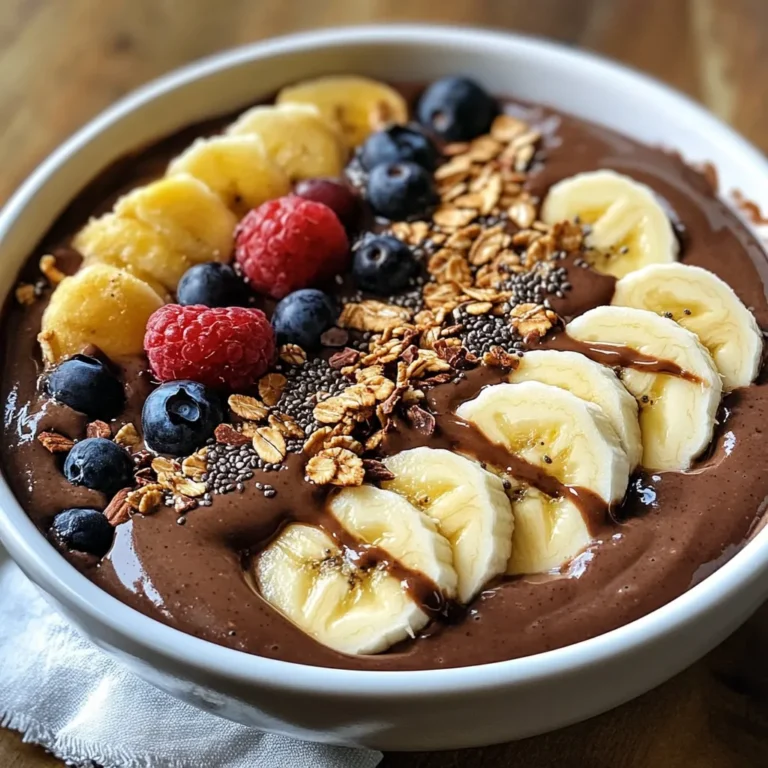
Chocolate Peanut Butter Smoothie Bowl Healthy Delight

- 2 boneless, skinless chicken breasts - 1 cup orzo pasta - 2 cups chicken broth - 1 tablespoon balsamic vinegar - 1 tablespoon olive oil - 1 red bell pepper, diced - 1 cup cherry tomatoes, halved - 2 cloves garlic, minced - 1 teaspoon dried Italian herbs - Salt and pepper to taste - Fresh basil leaves for garnish For this recipe, you can swap chicken for turkey if you prefer. You can also use whole wheat or gluten-free orzo. If you don’t have cherry tomatoes, regular tomatoes work too. When it comes to herbs, fresh basil adds a lovely touch. However, dried herbs are great for convenience. If you use dried herbs, remember they are more potent. Use less if you prefer a milder flavor. With these ingredients, you can create a hearty and tasty meal. Enjoy the mix of flavors and textures! {{ingredient_image_1}} To start, I heat the olive oil in a large skillet over medium-high heat. I season the chicken breasts with salt and pepper. Then, I place them in the skillet. Sear each side for about 5-7 minutes. Look for a nice golden brown color. Once done, I remove the chicken and set it aside. Tips for perfect searing: - Make sure the skillet is hot before adding chicken. - Don’t crowd the skillet; this helps the chicken brown well. To check for doneness, I use a meat thermometer. The chicken should reach an internal temperature of 165°F. This ensures it is safe to eat. Next, I add the diced red bell pepper and minced garlic to the same skillet. I sauté the veggies for about 2-3 minutes until the bell pepper is tender. This adds great flavor to the dish. Now, I stir in the orzo pasta and pour in the chicken broth. I also add balsamic vinegar and dried Italian herbs. Mixing everything well is key. I bring the mixture to a boil, then lower the heat to simmer. I cover the skillet and let it cook for about 10-12 minutes. The orzo should be tender, and most of the liquid will be absorbed. Cooking time and texture tips: - Stir occasionally to prevent sticking. - If the orzo seems too dry, add a splash of broth. Once the orzo is cooked, I slice the seared chicken into strips. I gently fold in the cherry tomatoes and sliced chicken into the skillet. I let it cook for an extra 2-3 minutes to warm the tomatoes through. To finish, I adjust the seasoning with a little more salt and pepper. I serve the dish warm, garnished with fresh basil leaves. The basil adds a nice touch and aroma to the dish. Enjoy your Balsamic Chicken Orzo! - Pre-chopping vegetables: Chop the red bell pepper and garlic ahead of time. This makes cooking quicker and easier. Keep them in a bowl in the fridge. - Using pre-cooked chicken options: You can buy cooked chicken. This cuts down on cooking time. Just heat it and add it to the dish when you fold in the orzo. - Recommended spices and herbs: Use dried Italian herbs for a nice blend of flavors. You can also add a pinch of red pepper flakes for heat. Fresh basil adds a burst of freshness. - Adding cheese or other toppings: Sprinkle some grated Parmesan or crumbled feta on top. This adds creaminess and richness to each bite. - Pairing suggestions with sides: Serve this dish with a simple green salad. A light vinaigrette complements the balsamic flavor well. You can also pair it with crusty bread for a hearty meal. Pro Tips Rest the Chicken: Allow the seared chicken to rest for a few minutes before slicing. This helps retain the juices and keeps the chicken moist. Customize the Veggies: Feel free to add or substitute other vegetables like zucchini or spinach for added flavor and nutrition. Enhance the Flavor: For a deeper flavor, consider marinating the chicken in balsamic vinegar and Italian herbs for at least 30 minutes before cooking. Perfect the Orzo: Stir the orzo occasionally while it simmers to prevent it from sticking together and ensure even cooking. {{image_2}} If you need a gluten-free option, use rice or quinoa instead of orzo. These grains will soak up the flavors well. You can also find gluten-free orzo at specialty stores. Check the ingredients to ensure they meet your needs. For a vegetarian version, swap the chicken for beans or lentils. These plant-based proteins add great texture and health benefits. You can use black beans or chickpeas for a tasty twist. Just make sure to adjust the cooking time since they need less time than chicken. Feel free to mix up the veggies in this dish. You can use zucchini, spinach, or mushrooms instead of red bell pepper. Each vegetable brings its own flavor and texture, making the dish unique each time. For flavor variations, try using apple cider vinegar or red wine vinegar in place of balsamic. Each vinegar adds a different taste profile. Experiment with these options to find what you like best. They can change the whole feel of the dish without much effort. To keep your Balsamic Chicken Orzo fresh, place it in an airtight container. Make sure to cool it down first before sealing. Store it in the fridge for up to three days. This will help maintain its flavor and moisture. If you want to keep it longer, consider freezing it. It can last up to three months in the freezer. Just remember, the sooner you store it, the better it will taste later. When you’re ready to enjoy your leftovers, reheating is key. The best method is to use a skillet on low heat. Add a splash of chicken broth or water to keep it moist. Stir it often to avoid sticking. You can also use the microwave, but cover the dish. Heat it in short bursts, stirring in between. This helps keep the flavors intact. Enjoy your meal just as much as the first time! You can serve this dish with a simple side salad. A fresh garden salad works great. You might also enjoy some crusty bread. It helps soak up the tasty sauce. Try pairing it with steamed vegetables too. Green beans or broccoli would be perfect. Yes, you can freeze the leftovers. Just let the dish cool first. Use an airtight container to store it. It will keep well for about three months. When you’re ready to eat, thaw it overnight in the fridge. Reheat it on the stove or in the microwave. The chicken is cooked when it reaches 165°F (75°C). Use a meat thermometer for the best results. You can also cut into the chicken. The meat should be white, with no pink inside. If it looks juicy and tender, it's ready to enjoy! This guide covered all you need for a tasty Balsamic Chicken Orzo. We explored ingredients, cooking steps, and helpful tips. I shared ways to adjust the recipe for different diets and preferences. Proper storage keeps your leftovers fresh and flavorful. Remember, cooking is all about trying new things. Enjoy your meal and let your taste be your guide.

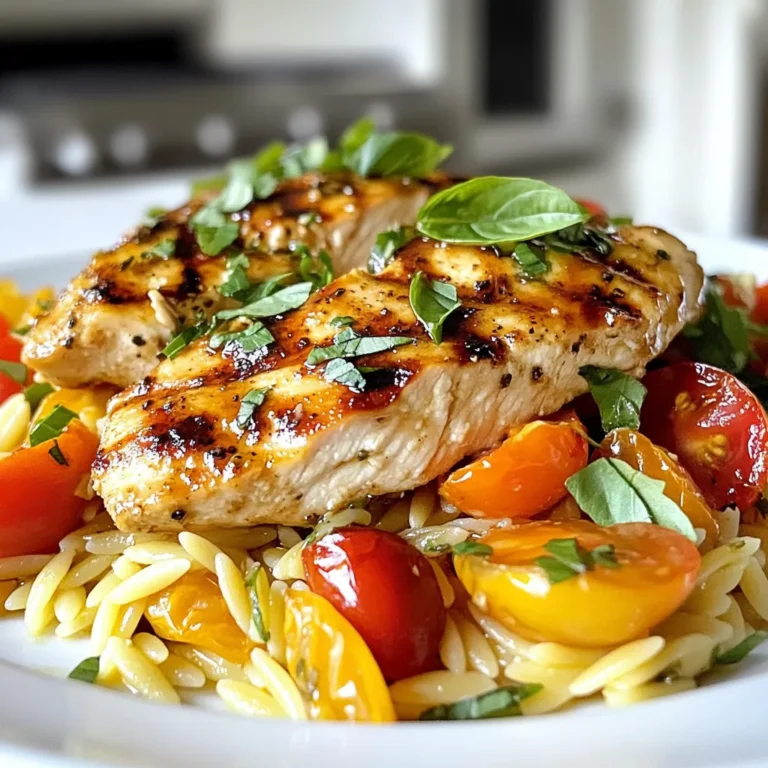
Balsamic Chicken Orzo One Pan Delightful Recipe

- 2 boneless, skinless chicken breasts - 1 cup canned black beans, rinsed and drained - 1 cup corn kernels (fresh or canned) - 1 red bell pepper, diced - 1 avocado, diced - 1 cup cherry tomatoes, halved - ½ cup red onion, finely chopped - 1 cup fresh spinach or mixed greens - ½ cup Greek yogurt - 2 tablespoons lime juice - 1 teaspoon cumin - 1 teaspoon chili powder - Salt and pepper to taste - Fresh cilantro for garnish - Chicken Breast: High in protein. It helps build muscles and keeps you full. - Black Beans: Great source of fiber. They aid digestion and help control hunger. - Corn: Provides vitamins. It adds energy and sweetness to the salad. - Red Bell Pepper: High in vitamin C. It boosts your immune system and adds crunch. - Avocado: Contains healthy fats. It supports heart health and makes the salad creamy. - Cherry Tomatoes: Packed with antioxidants. They add flavor and texture. - Red Onion: Offers anti-inflammatory benefits. It adds a sharp taste to the salad. - Spinach or Mixed Greens: Rich in iron and vitamins. They enhance overall health. - Greek Yogurt: A good protein source. It serves as a creamy base for the dressing. - Lime Juice: Adds flavor. It helps with digestion and enhances the dish. - Cumin and Chili Powder: Spices that add depth and warmth to the flavors. - Cilantro: Fresh herb that adds brightness. It also offers a unique taste. - Chicken: Use turkey or tofu for a different protein. - Black Beans: Swap for kidney beans or chickpeas if desired. - Corn: Use frozen corn for easy prep or skip it if you prefer. - Red Bell Pepper: Any color bell pepper works well. - Avocado: Try diced mango for sweetness or omit if allergic. - Greek Yogurt: Use sour cream or a dairy-free yogurt for a lighter option. - Lime Juice: Lemon juice can replace lime for a similar taste. - Cilantro: Parsley or basil can add freshness if you dislike cilantro. {{ingredient_image_1}} First, you need to cook the chicken breasts. Season them with salt, pepper, cumin, and chili powder. This adds flavor. You can choose to grill or pan-sear the chicken. Cook it over medium heat for 6-7 minutes on each side. You want it cooked all the way through. Once it's done, let it rest for a few minutes. Then, slice it into strips. This makes it easy to add to your salad. Next, let’s make the dressing. Grab a small bowl. Mix the Greek yogurt, lime juice, cumin, chili powder, and a pinch of salt and pepper. Stir until it’s creamy and smooth. This dressing will tie all the flavors together. It adds a nice zing to your salad. Now, it’s time to put everything together. In a large bowl, combine the black beans, corn, diced bell pepper, avocado, cherry tomatoes, red onion, and spinach or mixed greens. Gently toss these ingredients. You want them mixed well but not smashed. This colorful mix will make your salad pop. Add the sliced chicken on top of the salad mixture. Then, drizzle the yogurt dressing over everything. Toss gently to coat all the ingredients. Taste and adjust seasoning with salt and pepper if needed. For the finishing touch, sprinkle fresh cilantro on top. Serve it right away for the best taste and texture. Enjoy your Southwest Chicken Salad! To grill chicken well, start by seasoning. Use salt, pepper, cumin, and chili powder. This gives the chicken great flavor. Heat your grill or pan to medium. Cook the chicken for 6-7 minutes on each side. Check that it is fully cooked. It should reach 165°F inside. After cooking, let it rest for a few minutes. This step keeps the chicken juicy. Slice it into strips for the salad. Store any leftovers in an airtight container. This keeps the salad fresh. Place it in the fridge. It should last about 2-3 days. When reheating, avoid the microwave if you can. Instead, use a pan to heat it gently. This helps keep the chicken tender. If the salad is cold, add a bit of fresh dressing. This brings back the flavor. For the best taste, serve the salad right away. The fresh ingredients taste best when they are crisp. Add the dressing just before serving. This keeps the greens from getting soggy. Consider topping with fresh cilantro for a burst of flavor. You can also add lime wedges on the side for extra zest. Enjoy the colorful mix of flavors and textures! Pro Tips Marinate the Chicken: For an even deeper flavor, marinate the chicken breasts in lime juice and spices for at least 30 minutes before cooking. Use Fresh Ingredients: Whenever possible, opt for fresh vegetables and herbs to enhance the overall taste and nutritional value of your salad. Customize Your Greens: Feel free to mix different types of greens such as arugula or kale for added flavor and texture. Make Ahead: You can prepare the salad components in advance and store them separately in the refrigerator. Combine just before serving for optimal freshness. {{image_2}} To boost protein in your Southwest Chicken Salad, try adding more ingredients. Here are some tasty options: - Chickpeas: A cup adds about 15 grams of protein. - Quinoa: This grain packs 8 grams of protein per cup. - Tofu: A half-cup provides around 10 grams of protein. - Nuts or seeds: Almonds, walnuts, or pumpkin seeds can add 6-8 grams of protein. Mix and match these extras to find your perfect balance. Each addition not only adds protein but also enhances the texture and flavor. You can enjoy this salad even if you don’t eat meat. Here are some great swaps: - Grilled Portobello mushrooms: These mushrooms add a meaty texture and rich flavor. - Crispy chickpeas: Roast them with spices for a crunchy protein boost. - Vegan chicken: Many brands offer plant-based options that mimic chicken. - Hemp seeds: Sprinkle a few tablespoons on top for protein and healthy fats. These options keep the salad hearty and flavorful while meeting dietary needs. Want to switch up the taste? Here are some fun ideas to make your salad unique: - Spicy kick: Add jalapeños or a dash of hot sauce for heat. - Sweet twist: Toss in diced mango or pineapple for sweetness. - Herb swaps: Use dill, parsley, or basil for fresh flavor. - Cheese options: Crumbled feta or cotija cheese can add creaminess. Experiment with these ideas to find your favorite flavor combinations. Mixing flavors keeps each meal exciting! To keep your Southwest Chicken Salad fresh, store it in an airtight container. Make sure to cool it before sealing. Place it in the fridge within two hours of making it. This helps to keep the chicken juicy and the veggies crisp. If you can, eat it within three days for the best taste. You can freeze this salad if you want to save some for later. However, avoid freezing the avocado and dressing. They can change texture and taste. Instead, store the chicken and veggies in a freezer-safe bag. It’s best to eat it within three months. When you’re ready to eat, thaw it in the fridge overnight. - Cooked Chicken: Lasts about 3-4 days in the fridge. - Black Beans: Canned beans can last a long time, but once opened, use them within 3-4 days. - Corn: Fresh corn lasts about 2-3 days in the fridge, while canned corn also lasts about 3-4 days after opening. - Veggies: Most veggies, like bell peppers and tomatoes, last around 3-5 days in the fridge. - Greek Yogurt: Unopened, it can last weeks. Once opened, use it within a week. Knowing how to store your salad keeps your meal safe and tasty! To make this salad gluten-free, check the black beans and corn. Ensure they have no gluten in their labels. Greek yogurt is also gluten-free. Use fresh ingredients and avoid croutons or any wheat-based toppings. This way, you keep the flavor and make it safe for a gluten-free diet. You can use many dressings with this salad. A simple vinaigrette works great. Mix olive oil, vinegar, and a bit of honey. A lime-cilantro dressing adds zest. You can also use ranch or salsa for a fun twist. Each dressing brings a new flavor to the salad, making it exciting. Yes, you can prepare this salad ahead of time. Cook the chicken and let it cool. Mix the salad ingredients but keep the dressing separate. Store everything in airtight containers. When ready to eat, just add the dressing and mix. This keeps the salad fresh and crisp. This blog post offered a clear guide to making a delicious salad. We talked about the best ingredients, their benefits, and how to cook the chicken. I shared tips to grill chicken perfectly and keep leftovers fresh. You learned about tasty variations, substitutes, and how to store your salad properly. When you follow these steps, you create a meal that is both healthy and satisfying. Enjoy making your salad and make it your own!

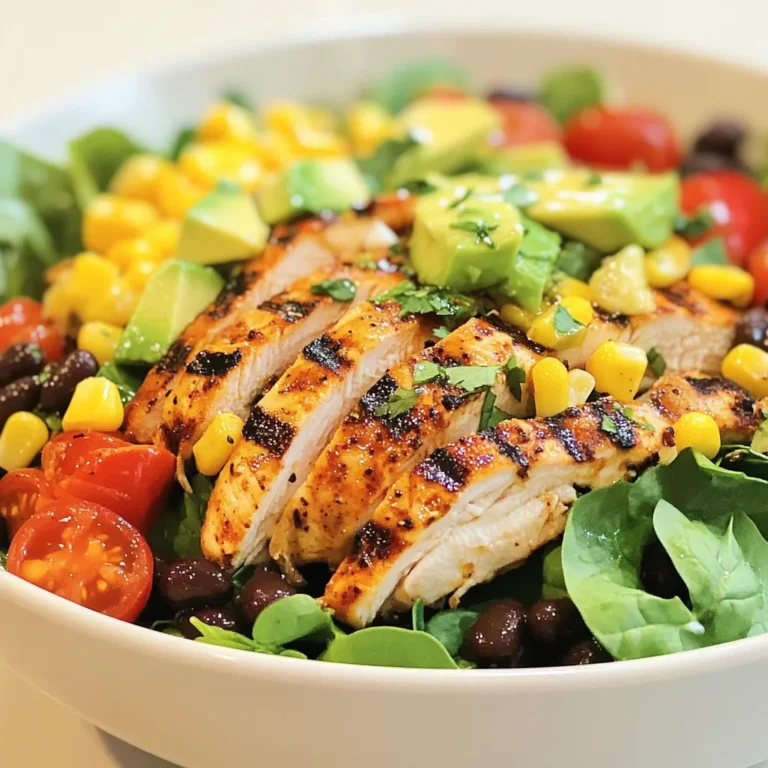
Southwest Chicken Salad High Protein Easy Recipe

When making Juicy Parmesan Crusted Chicken, you need simple and fresh ingredients. Here’s what you will need: - 4 boneless, skinless chicken breasts - 1 cup grated Parmesan cheese - 1 cup breadcrumbs (preferably panko) - 2 tablespoons Italian seasoning - 1 teaspoon garlic powder - 1 teaspoon onion powder - Salt and pepper to taste - 2 large eggs - 1 tablespoon Dijon mustard - ½ cup all-purpose flour - Olive oil for drizzling These ingredients work together to create a golden, crunchy crust and juicy chicken. Use fresh chicken for the best flavor. I always opt for panko breadcrumbs. They give that extra crunch we all love. The blend of Italian seasoning, garlic, and onion powder adds great taste. Don't skip the Dijon mustard; it helps the coating stick and adds a nice zing. Make sure to have all these ingredients ready before you start cooking. It makes the process smooth and fun! {{ingredient_image_1}} 1. Preheat your oven to 400°F (200°C). This hot oven helps the chicken cook and crisp up well. 2. Line a baking sheet with parchment paper. Lightly grease it with olive oil to prevent sticking. 3. In a shallow bowl, combine the dry ingredients. Mix together the grated Parmesan cheese, breadcrumbs, Italian seasoning, garlic powder, onion powder, salt, and pepper until well combined. 1. Take the chicken breasts and season them with a pinch of salt and pepper. This adds flavor to the meat. 2. Place the flour in a shallow dish. Dredge one chicken breast in the flour. Shake off any excess flour to keep it from being too thick. 3. In another bowl, whisk together the eggs and Dijon mustard until it is smooth. This mixture helps the coating stick. 4. Dip the floured chicken into the egg mixture. Be sure it is well coated. 5. Roll the chicken in the Parmesan and breadcrumb mixture. Press down lightly to make sure the coating sticks. 6. Repeat these steps for all chicken breasts until they are all coated well. 1. Arrange the coated chicken breasts on the prepared baking sheet. Make sure they have space between them. 2. Drizzle a little olive oil over each piece. This helps them crisp up nicely in the oven. 3. Bake in the preheated oven for 25-30 minutes. Check that the chicken is cooked through and the coating is golden brown and crispy. The internal temperature should reach 165°F (74°C). 4. Let the chicken rest for 5 minutes before serving. This helps keep it juicy inside. To get that perfect crunch, I always use panko breadcrumbs. Panko gives a lighter, airier texture that regular breadcrumbs can't match. It helps the chicken become crispier in the oven. Another key is olive oil. A light drizzle of olive oil helps the coating brown nicely. It also enhances the flavor. Don't skip this step! For added flavor, I recommend seasoning the chicken well. A pinch of salt and pepper goes a long way. You can also play with spices. Try adding smoked paprika or cayenne for a kick. Marinating the chicken can boost the taste even more. A quick soak in buttermilk or a mix of yogurt and herbs helps the chicken absorb flavors. Even 30 minutes makes a big difference. Always check the internal temperature of the chicken. It should reach 165°F (74°C) to be safe. Use a meat thermometer for best results. After baking, let the chicken rest for five minutes. This helps keep the juices inside. It makes every bite tender and juicy. Pro Tips Use Fresh Ingredients: Always opt for fresh, high-quality chicken and cheese to enhance the flavor and juiciness of the dish. Double Dip for Extra Crunch: For a thicker, crunchier coating, consider double dipping the chicken in the egg mixture and the breadcrumb mixture. Let It Rest: Allowing the chicken to rest for a few minutes after baking helps retain its juices, making it more tender and flavorful. Experiment with Seasonings: Feel free to customize the Italian seasoning with your favorite herbs or spices, such as paprika or chili flakes, for an extra kick. {{image_2}} You can easily change the taste of your Juicy Parmesan Crusted Chicken. Adding herbs gives fresh flavors. Try rosemary or thyme. Both herbs pair well with the chicken. Want a kick? Add red pepper flakes to the breadcrumb mix. Just a pinch can bring more heat. Adjust the amount based on your spice level. These simple changes can make your dish even more exciting. What should you serve with your chicken? A crisp salad makes a great side. You can also roast some vegetables. Think green beans or broccoli. These add color and nutrients to your meal. Sauces can take your chicken to the next level. Try marinara for a classic touch. Garlic butter is another tasty option. Both sauces complement the flavors well. They also add moisture to the chicken. If you need gluten-free options, choose gluten-free breadcrumbs. They work just like regular ones. You can still get that nice crunch without gluten. For a low-carb option, skip the breadcrumbs. Coat the chicken with crushed nuts or cheese instead. Almond flour or ground Parmesan can also work. These alternatives keep the dish tasty and healthy. To keep your juicy Parmesan crusted chicken fresh, store it in the fridge. Place the leftovers in an airtight container. This helps prevent moisture loss. Let the chicken cool for about 30 minutes before sealing it up. Cooling first keeps it from steaming and becoming soggy. When it comes to reheating, the oven is best. Preheat it to 350°F (175°C). Place the chicken on a baking sheet. Cover it with foil to keep it moist. Bake for about 15-20 minutes. If you use a microwave, heat it on low power. This helps it warm evenly. To keep the crust crispy, avoid the microwave if possible. You can freeze cooked chicken for later use. Wrap each piece tightly in plastic wrap, then place it in a freezer bag. Be sure to remove as much air as you can. For thawing, let it sit in the fridge overnight. You can also use it right from the freezer in soups or casseroles. You can use Pecorino Romano for a stronger flavor. Grana Padano offers a milder taste. Nutritional yeast is a great vegan option. If you want a softer cheese, try mozzarella. Each choice changes the dish's flavor slightly. Yes, you can prep the chicken ahead. Coat the chicken and place it in the fridge for up to 24 hours. This helps the flavors mix well. When ready, bake it straight from the fridge. Just add a few extra minutes to the cooking time. Cooked chicken lasts about 3 to 4 days in the fridge. Make sure to store it in an airtight container. If you want it to last longer, consider freezing it. Frozen chicken can stay good for up to 3 months. This recipe uses simple ingredients to create a tasty chicken dish. You learned how to prepare, bake, and enjoy your chicken with tips for perfect crispiness. Don't forget, variations let you explore new flavors. Store your leftovers right to keep them fresh. Use this guide to get a delicious meal on the table fast. Enjoy your cooking adventures, and remember, great chicken is just a recipe away!

Juicy Parmesan Crusted Chicken Easy and Flavorful Dish

To make a spicy grilled chicken wrap, you need the following main ingredients: - 2 boneless, skinless chicken breasts - 2 tablespoons olive oil - 2 teaspoons smoked paprika - 1 teaspoon cayenne pepper - 1 teaspoon garlic powder - 1 teaspoon onion powder - Salt and pepper to taste - 4 large whole wheat tortillas - 1 cup romaine lettuce, chopped - 1 cup cherry tomatoes, halved - 1/2 cup cucumber, thinly sliced - 1/2 cup Greek yogurt - 2 tablespoons tahini - Juice of 1 lemon - Fresh cilantro, for garnish Using the right measurements is key for flavor. I suggest: - 2 tablespoons of olive oil to keep the chicken moist. - 2 teaspoons of smoked paprika for a rich taste. - 1 teaspoon of cayenne pepper for heat, but adjust to your taste. - 4 large tortillas to wrap all your delicious fillings. You can add a few optional ingredients to boost taste even more: - Avocado slices for creaminess. - Jalapeños for extra spice. - Feta cheese for a tangy kick. - Fresh herbs like parsley for freshness. These additions can enhance your wrap and make it truly unique. Enjoy experimenting! {{ingredient_image_1}} To start, gather your ingredients. In a bowl, mix together: - 2 tablespoons olive oil - 2 teaspoons smoked paprika - 1 teaspoon cayenne pepper - 1 teaspoon garlic powder - 1 teaspoon onion powder - Salt and pepper to taste Whisk these well. Then, take 2 boneless, skinless chicken breasts and add them to the bowl. Make sure each piece is coated in the marinade. Cover the bowl and let it sit. For best flavor, marinate for at least 30 minutes. If you have time, overnight is even better! Next, it’s time to grill! Preheat your grill or grill pan to medium-high heat. This step is key. Once hot, place the marinated chicken on the grill. Cook each side for 6-7 minutes. Keep an eye on it. You will know it’s done when it has nice grill marks and is cooked through. After grilling, let the chicken rest for about 5 minutes. This keeps it juicy. Then slice it into strips. Now comes the fun part: assembling your wrap! Start with 4 large whole wheat tortillas. Lay one flat on a clean surface. Spread a generous spoonful of the yogurt-tahini sauce on the tortilla. For the sauce, mix: - 1 cup Greek yogurt - 2 tablespoons tahini - Juice of 1 lemon - Salt and pepper to taste On top of the sauce, add your fillings: - 1 cup romaine lettuce, chopped - 1/2 cup cucumber, thinly sliced - 1 cup cherry tomatoes, halved - Sliced grilled chicken Now, fold the sides in and roll tightly from the bottom up. This seals in all the tasty goodness. Slice the wrap in half diagonally and garnish with fresh cilantro for a pop of color. Enjoy your spicy grilled chicken wrap! Grilling chicken can be simple with a few tricks. Always use fresh chicken. This helps keep the meat juicy. Marinate the chicken for at least 30 minutes. If you have time, let it sit overnight. This gives more flavor. Preheat your grill to medium-high. A hot grill makes great grill marks and keeps the moisture inside. Cook the chicken for 6-7 minutes on each side. Use a meat thermometer to check for doneness. Aim for 165°F for safe eating. To boost flavor, try adding herbs and spices. Fresh herbs like cilantro or parsley can brighten the dish. You can also mix in a touch of honey or mustard in the marinade. This adds a sweet and tangy kick. For extra heat, add more cayenne pepper or even some chopped jalapeños. Use the yogurt-tahini sauce generously. It adds creaminess and balances the spice of the chicken. Make your wraps look appealing. Use a bright platter for serving. Place the wraps neatly side by side. Drizzle some extra sauce on the side for dipping. Add a few sprigs of fresh cilantro on top for color. You can also sprinkle some extra smoked paprika on the plate. This adds a nice touch and hints at the flavors inside the wrap. A colorful mix of veggies will catch the eye and make the meal more fun. Pro Tips Marination Magic: Allowing the chicken to marinate overnight will enhance its flavor and tenderness, making every bite succulent. Grill Timing: Ensure the grill is properly preheated before adding the chicken. This helps achieve those beautiful grill marks and a perfectly cooked interior. Freshness Factor: Using fresh ingredients, especially the vegetables, will elevate the taste and texture of your wrap, adding a delightful crunch. Wrap It Right: When wrapping, make sure to tuck the sides in tightly to prevent the fillings from spilling out, ensuring a neat and enjoyable eating experience. {{image_2}} You can swap chicken for many other proteins. Turkey is a great choice. It has a mild taste and works well with spices. Shrimp is another option. Just make sure to grill them quickly. For a heartier meal, try steak. Slice it thin after cooking. If you want to keep it simple, use canned tuna. To make this wrap vegan, replace the chicken with grilled tofu. Tofu absorbs flavors well, so marinate it like the chicken. You can also use tempeh or seitan for a protein boost. For the yogurt sauce, swap Greek yogurt for a plant-based yogurt. This keeps the creamy texture. You can mix up the sauce for more flavor. Try adding hot sauce for extra heat. A chipotle sauce adds a smoky touch. For a zesty kick, make a lime-cilantro dressing. Just mix fresh lime juice, cilantro, and a bit of olive oil. You can also use store-bought sauces for convenience. To store leftover wraps, wrap each one tightly in plastic wrap or foil. You can also place them in an airtight container. This keeps moisture in and prevents them from drying out. Store the wraps in the fridge for up to three days. If you want to freeze the wraps, let them cool first. Wrap each one in plastic wrap, then place them in a freezer bag. This helps avoid freezer burn. You can freeze the wraps for up to three months. When ready to eat, thaw them in the fridge overnight before reheating. To reheat the wraps, you have a few options. You can use a microwave, oven, or skillet. If using the microwave, heat on medium for about 1-2 minutes. If using the oven, preheat to 350°F and bake for about 10-15 minutes. For the skillet, heat over medium and cook for 3-4 minutes on each side until warm. Enjoy your spicy grilled chicken wrap again! To make the chicken less spicy, reduce or skip the cayenne pepper. You can also add more olive oil to balance the heat. Another option is to use smoked paprika alone for flavor without the spice. Marinating the chicken for a longer time can also help mellow out the heat. Yes, you can use different types of tortillas. Flour tortillas, corn tortillas, or even spinach wraps work great. Each type adds a unique taste and texture to your wrap. Choose one that you like best or that fits your dietary needs. Great side dishes include a fresh salad or some crunchy veggies. You might try serving with sweet potato fries or a side of fruit. A light soup can also complement the wrap nicely. These sides add balance and flavor to your meal. This blog post covered making spicy grilled chicken wraps, from choosing ingredients to storage tips. You learned how to marinate chicken, grill it perfectly, and assemble a tasty wrap. We shared best practices and variations, including vegan options. Remember, cooking should be fun and creative. Feel free to experiment with flavors and ingredients. These wraps are easy to make and great for any meal. Enjoy making your own delicious spicy grilled chicken wraps!

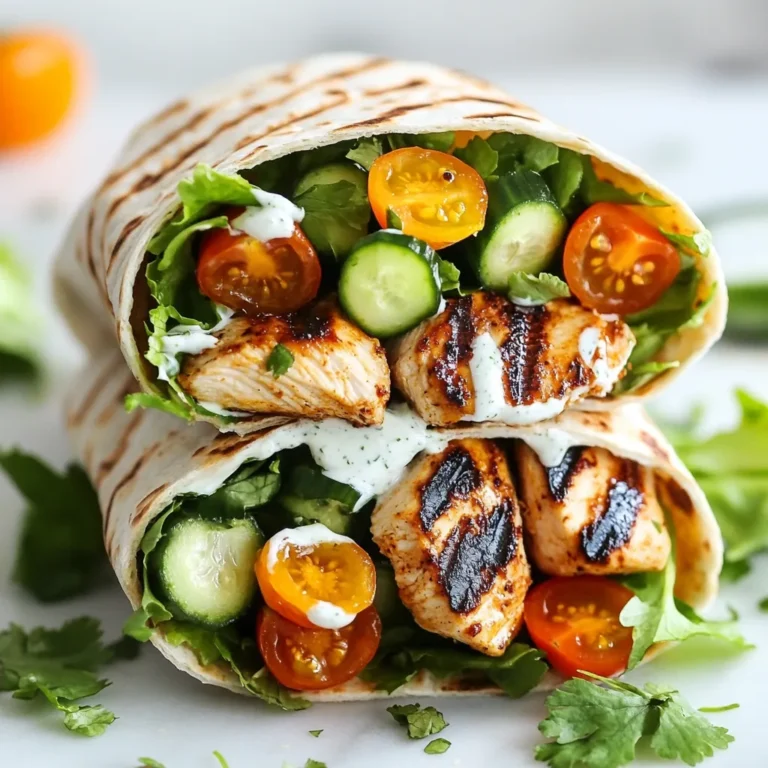
Spicy Grilled Chicken Wrap Flavorful and Easy Meal

- 8 ounces fusilli pasta - 2 cups broccoli florets - 1 pound boneless, skinless chicken breasts, diced - 1 cup heavy cream - 1 cup shredded cheddar cheese - 1 tablespoon olive oil - 1 teaspoon garlic powder - 1 teaspoon onion powder - 1 tablespoon ranch seasoning mix - Salt and pepper to taste - Fresh parsley for garnish Gather these ingredients before you start cooking. The pasta gives this dish its base. Fusilli holds sauce well, making it perfect for creamy dishes. Broccoli adds color and nutrition. Chicken is the main protein. Heavy cream makes the sauce rich. Cheddar cheese brings flavor and creaminess. For seasoning, olive oil helps cook the chicken. Garlic and onion powders add depth to the taste. Ranch seasoning mix gives a fun flavor twist. Use fresh parsley for a bright finish. Make sure to have salt and pepper ready to adjust the taste. Once you have all these items, you're set for a great family dinner! {{ingredient_image_1}} - Bring a large pot of salted water to a boil. - Add 8 ounces of fusilli pasta. Cook according to package instructions until al dente. - In the last 3 minutes of cooking, add 2 cups of broccoli florets to the pot. - Drain the pasta and broccoli, then set aside. - Heat 1 tablespoon of olive oil in a large skillet over medium heat. - Add 1 pound of diced boneless, skinless chicken breasts to the skillet. - Season with 1 teaspoon of garlic powder, 1 teaspoon of onion powder, 1 tablespoon of ranch seasoning mix, salt, and pepper. - Cook the chicken for about 5 to 7 minutes. Stir occasionally until it's no longer pink. - Reduce the heat to low. Pour in 1 cup of heavy cream, stirring to mix. - Allow the cream to heat for about 2 minutes. - Gradually add 1 cup of shredded cheddar cheese, stirring until melted and creamy. - Add the drained pasta and broccoli to the skillet with the chicken and sauce. - Toss everything together until well coated in the creamy ranch sauce. - Adjust seasoning with extra salt and pepper if needed before serving. To cook pasta al dente, follow these steps: - Use a large pot with plenty of water. - Salt the water well; it helps flavor the pasta. - Check the cooking time on the package. - Taste a piece a minute before the time is up. To prevent pasta from sticking: - Stir the pasta during the first few minutes. - Do not rinse it after draining. - Toss it with a bit of oil if needed. For added flavor, consider these pantry staples: - Grated Parmesan cheese. - Crushed red pepper flakes for heat. - Fresh garlic for more depth. If you want to substitute ranch seasoning: - Use a mix of dried herbs like dill and parsley. - Try a blend of garlic powder and onion powder. - Add a splash of lemon juice for brightness. Garnishing with parsley adds color and freshness. - Chop fresh parsley finely and sprinkle on top. - Use a small amount for a clean look. For serving suggestions, pair the pasta with: - A simple green salad for crunch. - Garlic bread to soak up sauce. - Sliced fruit for a light dessert. Pro Tips Cook the Pasta al Dente: For the best texture, make sure to cook the fusilli pasta until just al dente. This ensures it remains firm and doesn't become mushy when combined with the creamy sauce. Season the Chicken Well: Don’t be shy with the seasoning! The ranch seasoning mix is great, but adding salt and pepper enhances the overall flavor of the chicken. Use Fresh Broccoli: For a vibrant color and crunch, opt for fresh broccoli florets instead of frozen. They add a nice texture contrast to the dish. Adjust the Creaminess: If you prefer a richer sauce, consider adding a bit more heavy cream or cheese. You can also use a mix of cream cheese and heavy cream for an extra creamy texture. {{image_2}} If you want to switch up the protein, there are great options. You can use turkey instead of chicken. Just dice it like you would the chicken. For a vegetarian option, try chickpeas or tofu. Both add protein and soak up the sauce well. To make this dish dairy-free, try using plant-based creams. Almond or coconut cream works great. You can also use vegan cheeses. They melt nicely and keep the dish creamy. To lighten it up, reduce the heavy cream by half. This keeps the flavor without all the calories. Adding more veggies is a fun way to change this dish. Try bell peppers, spinach, or even peas. They add color and nutrition. If you like heat, add some crushed red pepper flakes. This will give the dish a nice kick. Adjust the amount to how spicy you like it. Store your Ranch Chicken and Broccoli Pasta in an airtight container. This keeps it fresh for later. You can keep it in the fridge for up to three days. Make sure it cools down before sealing the container. For best taste, eat it within that time frame. To keep the pasta fresh, don't mix it with the sauce if you plan to store it. Keeping them separate helps the pasta stay firm. If you mix them, the pasta can soak up too much sauce and become mushy. When you want to reheat your pasta, use the microwave or stovetop. If using the microwave, put a damp paper towel over the dish. This keeps moisture in and heats it evenly. Heat in short bursts, stirring often. If reheating on the stove, add a splash of milk or cream. This helps to loosen the sauce. Stir gently to avoid the sauce separating from the pasta. Heat it until hot but not boiling. To freeze your dish, let it cool completely. Then, place it in a freezer-safe container. You can also use freezer bags for easy storage. Press out as much air as you can before sealing. For the best thawing, place it in the fridge overnight. This keeps the texture nice. If you need it fast, you can also thaw in the microwave. Just be careful to stir often to prevent hot spots. You can tell if the chicken is cooked by checking its color and texture. The chicken should be white or light brown, with no pink inside. The juices should run clear when you cut into it. You can also use a meat thermometer. The safe internal temperature for chicken is 165°F. Yes, you can prep the ingredients ahead of time. Cook the pasta and broccoli, then store them in the fridge. You can also cook the chicken in advance. Keep the chicken in an airtight container. When you are ready to cook, mix everything together and heat it up. If you don’t have ranch seasoning, you can use other blends. Try Italian seasoning for a fresh taste. You can mix garlic powder, onion powder, and dried herbs for a similar flavor. Another option is to use taco seasoning for a fun twist. You can make this dish healthier by using whole wheat pasta. It adds fiber and nutrients. Consider using less cream or a lighter version. You can also add more vegetables, like bell peppers or spinach, to boost the nutrients. This recipe gives you a tasty dish with fusilli, broccoli, and chicken. You now know how to cook the pasta, prepare the chicken, and make a creamy sauce. Keep your dish flavorful and fresh with our tips. Don’t hesitate to try variations to suit your taste. Remember, you can use different proteins and cheeses. Storing the leftovers will keep your meal ready for later. Enjoy your cooking journey and impress your family with this easy recipe!

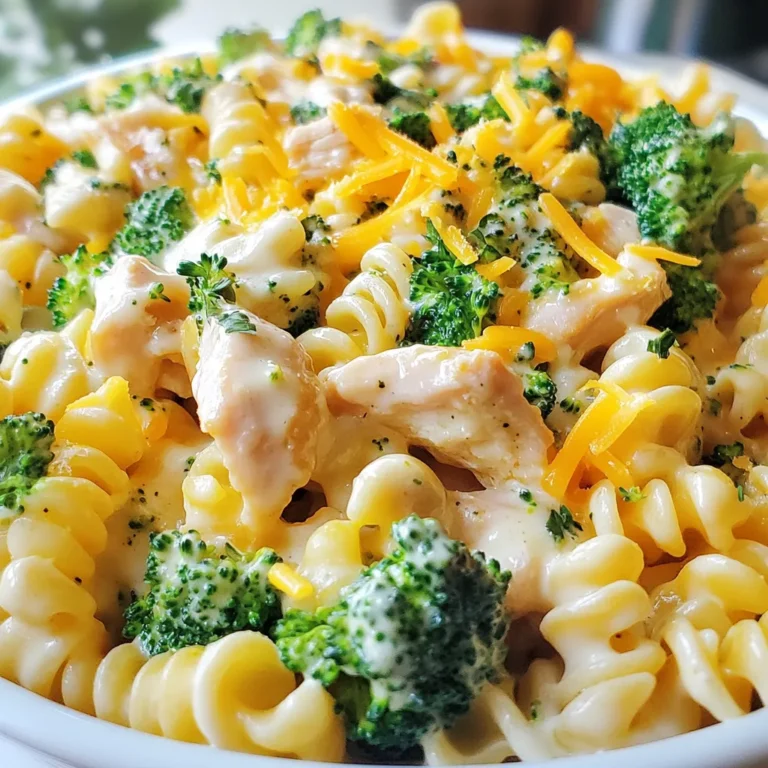
Ranch Chicken and Broccoli Pasta Easy Family Dinner

To make Knock You Naked Cookie Bars, you will need: - 1 ½ cups all-purpose flour - 1 teaspoon baking soda - ½ teaspoon salt - ½ cup unsalted butter, softened - ½ cup brown sugar, packed - ½ cup granulated sugar - 1 large egg - 1 teaspoon vanilla extract - 1 cup semi-sweet chocolate chips - 1 cup caramel sauce (store-bought or homemade) - 1 cup chopped pecans or walnuts (optional) If you need to swap out ingredients, here are some ideas: - Use gluten-free flour for a gluten-free option. - Coconut oil can replace unsalted butter. - Use coconut sugar instead of brown sugar for a different flavor. - If you don’t have chocolate chips, chop up a chocolate bar instead. - Maple syrup can stand in for caramel sauce in a pinch. Chopped nuts add a nice crunch, but they are not needed. You can leave them out or use any nut you like. If you want a richer flavor, try adding a pinch of sea salt on top of the bars before baking. This contrast makes the sweet taste pop. If you like extra gooeyness, increase the caramel sauce by a few tablespoons. {{ingredient_image_1}} First, I preheat my oven to 350°F (175°C). This step gets the oven ready and helps the bars bake evenly. Next, I grab a 9x13-inch baking pan. I grease it lightly with butter or line it with parchment paper. This makes it easier to remove the bars later. In a medium bowl, I whisk together 1 ½ cups of all-purpose flour, 1 teaspoon of baking soda, and ½ teaspoon of salt. This mix adds flavor and helps the bars rise. In a separate large bowl, I cream together ½ cup of softened unsalted butter, ½ cup of brown sugar, and ½ cup of granulated sugar. I beat this for about 2-3 minutes until it looks light and fluffy. Then, I add in 1 large egg and 1 teaspoon of vanilla extract. I mix these well until combined. Next, I slowly add the flour mix to the wet ingredients. I mix this on low speed until just combined. Finally, I fold in 1 cup of semi-sweet chocolate chips and, if I want, 1 cup of chopped pecans or walnuts. This gives the bars a crunchy texture. Now, it’s time to layer! I spread half of the cookie dough evenly in the prepared baking pan. I press it down gently to form a solid base layer. After that, I pour half of the caramel sauce over the cookie base. I use a spatula to spread it out evenly. Next, I take the rest of the cookie dough and dot it over the caramel layer. It doesn’t have to be perfect; a rustic look is fine! I then drizzle the remaining caramel sauce over the top. I bake the bars in the preheated oven for 25-30 minutes. I watch for the edges to turn golden brown and the center to set. After baking, I let the bars cool in the pan for at least 20 minutes. Then, I cut them into squares and enjoy! To get the best texture for your Knock You Naked Cookie Bars, focus on the butter. Make sure it is softened but not melted. This helps create a light and fluffy dough. Cream the butter and sugars well. Beat for about 2-3 minutes until it looks fluffy. When mixing in the flour, do it slowly. Mix just until combined. Overmixing can lead to tough bars. One common mistake is not measuring ingredients correctly. Use dry measuring cups for flour and sugar. Another mistake is baking for too long. Keep an eye on the edges. They should be golden brown, while the center remains soft. Cooling is also key; do not cut the bars too soon. Let them cool for at least 20 minutes to set properly. For a nice touch, dust the cooled bars with powdered sugar. It adds a lovely contrast. Arrange the bars on a decorative platter. You can also wrap them in parchment paper for a cute gift. If you want to add a special touch, drizzle extra caramel sauce on top before serving. This makes them even more tempting! Pro Tips Chill the Dough: For a thicker cookie bar, chill the dough for at least 30 minutes before baking. This helps prevent spreading and gives a chewier texture. Use Fresh Ingredients: Ensure your baking soda and baking powder are fresh for the best rise. Old ingredients can lead to dense bars. Caramel Options: If using homemade caramel, allow it to cool slightly before pouring over the cookie base. This prevents it from melting the dough too much. Storage Tips: Store these cookie bars in an airtight container at room temperature for up to a week. For longer freshness, refrigerate them! {{image_2}} You can change the flavor of your Knock You Naked Cookie Bars. Try adding peanut butter instead of some butter. It gives a rich taste. You can also use white chocolate chips for a sweeter twist. Add a pinch of cinnamon for warmth. A mix of dark chocolate and sea salt gives a nice contrast. For a gluten-free version, swap all-purpose flour with a gluten-free blend. Many brands work well in baking. To make these bars vegan, use coconut oil instead of butter. Replace the egg with a flax egg made of flaxseed meal and water. These swaps still give you tasty bars. You can add many toppings and mix-ins to your cookie bars. Try crushed pretzels for a salty crunch. Dried fruits like cranberries or apricots add natural sweetness. If you love coconut, sprinkle some shredded coconut on top. The possibilities are endless, so get creative! To keep your Knock You Naked Cookie Bars fresh, store them in an airtight container. Place a piece of parchment paper between layers. This helps prevent sticking. They stay good for up to a week. If you notice them getting dry, that’s a sign they need to be eaten soon! If you want to enjoy warm cookie bars, reheating is easy. Preheat your oven to 350°F (175°C). Place the bars on a baking sheet. Heat them for about 5-10 minutes. This warms them without making them hard. You can also use a microwave. Heat for about 10-15 seconds. Just be careful not to overheat! You can freeze these cookie bars for later. Cut them into squares before freezing. Wrap each square in plastic wrap. Place them in a freezer-safe bag. They can last up to three months in the freezer. When you’re ready to enjoy, let them thaw in the fridge. Or, heat them up as mentioned before. Enjoy the sweet taste anytime! Knock You Naked Cookie Bars are a sweet and gooey dessert. They have layers of cookie dough, melted chocolate, and rich caramel. Each bite offers a mix of flavors and textures. These bars are perfect for sharing or enjoying alone. The name comes from how good they taste! Yes, you can make these cookie bars ahead of time. They store well in an airtight container. If you want the best taste, eat them within a week. You can also freeze them for longer storage. Just thaw before serving to enjoy their full flavor. To make homemade caramel sauce, you need just a few simple ingredients. Start with sugar, butter, and cream. Heat sugar in a pan until it melts and turns golden. Then, add butter and stir until melted. Finally, add cream slowly and mix until smooth. Let it cool before using it in your dessert. Absolutely! You can use other nuts in your cookie bars. Almonds, hazelnuts, or even macadamia nuts work great. Just chop them up and add them to the dough. Feel free to experiment with your favorite nuts for a unique flavor twist! In this post, I covered everything about making Knock You Naked Cookie Bars. We talked about ingredients, step-by-step instructions, and tips for perfect texture. You learned about possible variations and how to store them. These cookie bars are fun to make and share. With the right techniques, you can create a tasty treat every time. Enjoy your baking and impress your friends with these delicious bars!

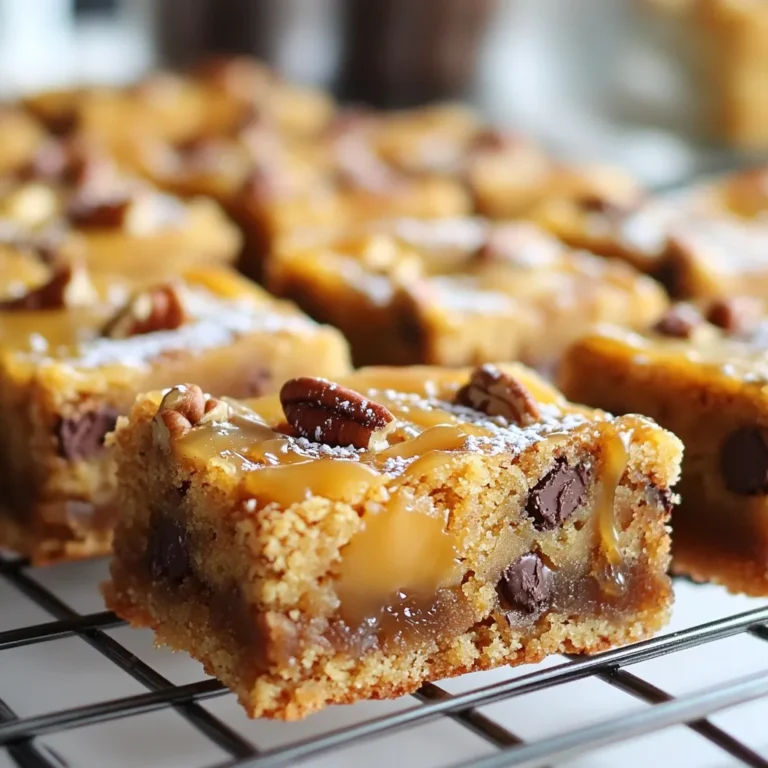
Knock You Naked Cookie Bars Irresistible Sweet Treat

To make creamy chorizo pasta, you need just a few key ingredients. Here’s what you’ll need: - 300g pasta (penne or fusilli work well) - 150g chorizo, sliced - 200ml heavy cream - 1 medium onion, finely chopped - 2 cloves garlic, minced - 1 teaspoon smoked paprika - 50g Parmesan cheese, grated - 1 cup spinach leaves - 2 tablespoons olive oil - Salt and pepper to taste - Fresh parsley for garnish You can use penne or fusilli for this recipe. Both shapes hold the sauce well, making each bite creamy and flavorful. Chorizo is a spicy, flavorful sausage. Slice it thinly before cooking. This helps it brown nicely and adds great flavor to the dish. You will need heavy cream for richness, onion and garlic for flavor, and spices like smoked paprika to enhance the taste. Spinach adds color and nutrition. Finally, Parmesan cheese brings a salty, cheesy finish. Each ingredient plays a role in making this dish rich and satisfying. Enjoy gathering them for your cooking adventure! {{ingredient_image_1}} To cook pasta until al dente, start with a large pot of salted boiling water. Add the pasta and stir it well. Follow the package instructions for the cooking time. Test the pasta a minute or two before the time is up. It should feel firm but not hard. When it’s ready, drain the pasta but save a cup of the water. This water is starchy and helps thicken your sauce later. Heat two tablespoons of olive oil in a large skillet over medium heat. Add the sliced chorizo and cook it for about 5 to 6 minutes. You want it to brown nicely. This browning creates a deep, rich flavor. Don’t rush this step; it adds great taste to your dish. Once your chorizo is brown, lower the heat. Pour in 200ml of heavy cream and stir. Add one teaspoon of smoked paprika, salt, and pepper to taste. Let this mixture simmer for about 5 minutes. It should thicken slightly. If it’s too thin, let it simmer a bit longer to reach the desired thickness. Add the cooked pasta and one cup of spinach leaves to the skillet with the sauce. Toss everything well so the pasta is evenly coated. If the sauce seems too thick, add a splash of the reserved pasta water. This will help achieve the perfect creamy texture. Stir in 50g of grated Parmesan cheese right at the end. This adds a nice richness to the dish. Taste your pasta and adjust the seasoning if needed. For garnish, sprinkle some fresh parsley on top before serving. An extra sprinkle of Parmesan never hurts either! To avoid overcooking pasta and chorizo, follow these steps: - Pasta: Cook it until al dente. This means it should still have a slight bite. Always check the time on the package. - Chorizo: Sauté it until it’s brown but not hard. About 5-6 minutes works well. To enhance flavor profiles, try these ideas: - Add a pinch of red pepper flakes for some heat. - Use fresh herbs like thyme or basil to brighten the dish. - Consider adding a splash of white wine before the cream for depth. Plating creamy chorizo pasta can be simple yet beautiful. Here’s how: - Use a large fork to twirl pasta onto the plate for a nice shape. - Create height by stacking the pasta in the center. For garnishing creatively: - Sprinkle fresh parsley on top for color. - Add extra Parmesan cheese for a touch of elegance. - Use a drizzle of olive oil for a glossy finish. Pro Tips Choose the Right Pasta: For this creamy sauce, opt for pasta shapes that can hold onto the sauce well, like penne or fusilli. Adjust the Creaminess: If the sauce is too thick, gradually add a splash of reserved pasta water until you reach your desired consistency. Enhance the Flavor: For extra depth, consider adding a pinch of red pepper flakes or a squeeze of lemon juice before serving. Fresh Herbs Make a Difference: Always finish with fresh parsley or basil for a burst of color and flavor that brightens the dish. {{image_2}} You can easily swap ingredients in creamy chorizo pasta. For cream, use coconut milk or cashew cream for a dairy-free option. You can also try using Greek yogurt for a lighter version. If you need cheese alternatives, nutritional yeast gives a cheesy flavor without dairy. For protein, chorizo is great, but you can use chicken or shrimp instead. Simply sauté them until cooked through. If you want a vegetarian dish, use mushrooms or lentils for a hearty texture. Adding vegetables can boost flavor and nutrition. Spinach is a great choice, but you can also use kale, zucchini, or bell peppers. Just toss them in during the last few minutes of cooking. To add more greens, try arugula or broccoli. They add a nice crunch and color. For extra flavor, consider sun-dried tomatoes or olives. They bring a delightful twist to the dish. To keep creamy chorizo pasta fresh, place it in an airtight container. This helps prevent the pasta from drying out. Make sure to refrigerate leftovers within two hours of cooking. The pasta will stay good for up to three days. When you’re ready to eat again, reheat the pasta on the stove. Add a splash of milk or cream to keep it creamy. Cook over low heat and stir often. You can also use a microwave. Heat in short bursts and stir in between. If you want to store creamy chorizo pasta for longer, freezing is a great option. First, let the pasta cool completely. Then, place it in a freezer-safe container. You can also use freezer bags. Squeeze out as much air as you can before sealing. This keeps the pasta from getting freezer burn. The pasta can stay frozen for up to three months. To thaw, move the pasta to the fridge overnight. When you’re ready to eat, reheat it on the stove. Again, add some milk or cream if it seems dry. Stir it often until heated through. Enjoy your creamy chorizo pasta anytime! To stop pasta from sticking, use plenty of water. Boil it well before adding pasta. Stir the pasta often while it cooks. After draining, toss it with a bit of olive oil. This helps keep it loose and ready for your sauce. If you don’t have chorizo, try using spicy Italian sausage. You can also use smoked sausage for a different twist. For a vegetarian option, use lentils or mushrooms. They will add a nice texture and flavor. Yes, you can make creamy chorizo pasta gluten-free. Just use gluten-free pasta. There are many options like rice or corn pasta. They cook just like regular pasta. Follow the package instructions for best results. This blog post covered how to make creamy chorizo pasta from scratch. We explored the essential ingredients and provided step-by-step instructions. I shared helpful tips for cooking and presenting the dish. We also discussed options for variations and proper storage. For a delightful meal, don’t shy away from making it your own. Adjust flavors, swap ingredients, and enjoy every bite. Follow these tips to create a dish that impresses and satisfies. Happy cooking!

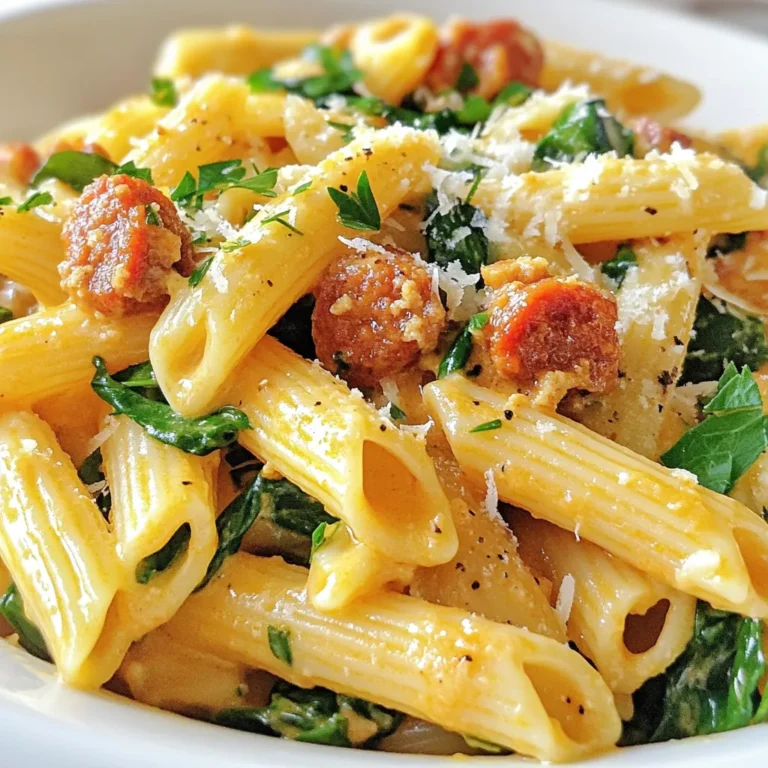
Creamy Chorizo Pasta Simple and Flavorful Delight

PREV 1 … 84 85 86 NEXT
spicy fork kitchen

explore

DessertsDinnerAppetizersDrinks

Our Policies

  • Cookie Policy
  • Copyright Policy
  • Disclaimer
  • GDPR Policy
  • Terms Of Use
Back to Top
  • About
  • Contact Us
  • Privacy Policy
© 2025 spicy fork kitchen