FREE DINNER EBOOK! Get your copy!
  • Cookie Policy
  • GDPR Policy
  • Disclaimer
  • Terms Of Use
  • Visit my other site: Fun Cookie Recipes
spicy fork kitchen
  • Home
  • Dinner
  • Desserts
  • Drinks
  • Appetizers
  • Contact
  • About
  • Privacy Policy
  • Home
  • Dinner
  • Desserts
  • Drinks
  • Appetizers
  • Contact
  • About
  • Privacy Policy
  • Cookie Policy
  • GDPR Policy
  • Disclaimer
  • Terms Of Use
Visit my other site: Fun Cookie Recipes

HOME / CATEGORIES /

Latest

- 2 cups cooked chicken breast, shredded - 1 cup corn kernels (fresh or canned) - 1 red bell pepper, diced - 1 avocado, diced - 1 cup cherry tomatoes, halved - 1 cup romaine lettuce, chopped - 1/2 cup red onion, finely chopped - 1/2 cup shredded cheese (cheddar or Monterey Jack) - 1/4 cup fresh cilantro, chopped - 1/2 cup BBQ sauce (homemade or store-bought) - 1/4 cup ranch dressing - Salt and pepper to taste The ingredients in this BBQ chicken chopped salad blend flavors and colors. Each item adds texture and taste. The shredded chicken brings protein, while BBQ sauce adds sweetness and smokiness. Fresh corn kernels give a sweet crunch. The red bell pepper adds bright color and crunch. Avocado brings creaminess, and cherry tomatoes add juiciness. Romaine lettuce forms a crisp base. The finely chopped red onion adds a bit of bite. Shredded cheese gives a rich finish. Fresh cilantro adds brightness and freshness. This mix creates a salad that is not only tasty but also appealing to the eye. Feel free to swap or add ingredients based on your taste! {{ingredient_image_1}} Start by mixing the shredded chicken with BBQ sauce in a large bowl. Use enough sauce to coat every piece. This adds flavor and makes the chicken juicy. I love using homemade sauce for a unique taste, but store-bought works great too. In another bowl, combine the romaine lettuce, corn, red bell pepper, avocado, cherry tomatoes, and red onion. Chop the lettuce into bite-sized pieces. Dice the red bell pepper and avocado. Halve the cherry tomatoes. This mix gives a nice crunch and freshness to the salad. Now it's time to bring it all together. Toss the BBQ chicken with the salad base until everything is mixed well. The chicken should be spread evenly throughout. Drizzle ranch dressing over the top, and toss lightly to coat. Season with salt and pepper to taste. Finish by adding shredded cheese and fresh cilantro for a bright touch. When picking BBQ sauce, think about flavor and texture. Homemade sauce gives you control over taste. You can add more spices or sweetness to fit your needs. Store-bought sauces are quick and easy. Look for ones with natural ingredients. Check the label to avoid added sugars and preservatives. Shredding chicken can be a breeze. Use two forks to pull apart the meat while it is still warm. This method works well for chicken breast. You can also use a stand mixer on low speed. Just place the cooked chicken in the bowl and mix for a few seconds. Both methods save time and effort. To keep your salad fresh, store it in an airtight container. Layer the ingredients wisely. Place the dressing on the bottom and the lettuce on top. This way, the greens stay crisp. If you add avocado, sprinkle some lemon juice over it. This helps prevent browning. Enjoy your salad within two days for the best taste. Pro Tips Use Leftover Chicken: This recipe is perfect for using leftover rotisserie chicken, saving you time and adding flavor. Customize Your Veggies: Feel free to add or substitute vegetables based on your preference, such as cucumbers, carrots, or any seasonal produce. Make It Spicy: For a kick, add sliced jalapeños or a dash of hot sauce to the salad before serving. Chill Before Serving: Let the salad chill in the fridge for about 15 minutes after mixing for the flavors to meld together beautifully. {{image_2}} You can switch up the protein in this BBQ chicken chopped salad. If you want something different, try grilled shrimp. Shrimp cooks fast and adds a nice taste. You can also use tofu for a meat-free option. Tofu soaks up flavors well and can make the salad filling. The veggies you use can change with the seasons. In summer, add fresh cucumbers or zucchini. They bring a cool crunch. In fall, try roasted sweet potatoes or beets. These add warmth and sweetness. For winter, consider hearty greens like kale or Brussels sprouts. They keep the salad fresh and vibrant. For dressings, you have fun options. Instead of ranch, try a zesty lime vinaigrette. It adds a bright kick. A honey mustard dressing is also great for a sweet touch. You could even mix BBQ sauce with Greek yogurt for a creamy twist. Each option brings a new flavor to the salad. To store leftovers in the fridge, place the salad in an airtight container. Make sure to keep the dressing separate. This helps maintain the salad's crunch. Use the salad within three days for the best taste. If you mix it with the dressing, it may get soggy. Freezing this salad is not ideal, but you can freeze some parts. Freeze the cooked chicken mixed with BBQ sauce. Store it in a freezer-safe bag or container. You can freeze corn and diced bell peppers too. Avoid freezing fresh veggies like avocado and lettuce, as they won't thaw well. When ready to serve, thaw the chicken in the fridge overnight. Heat it in the microwave or on the stove until warm. Combine the thawed chicken with fresh salad ingredients. Add dressing just before serving to keep everything crisp. Enjoy your BBQ Chicken Chopped Salad fresh and tasty! Yes, you can make this salad ahead of time. Just prepare the chicken and salad base. Keep them separate until you're ready to serve. This keeps the salad fresh and crisp. You can store the chicken in BBQ sauce in the fridge for up to three days. If you want a change, try Greek yogurt or blue cheese dressing. You can also use balsamic vinaigrette for a tangy twist. Each option adds its own unique flavor to the salad. Yes, this recipe is great for meal prep. You can easily divide it into lunch-sized portions. Just remember to keep the dressing separate until you’re ready to eat. This helps keep the salad crunchy and tasty. Cooked BBQ chicken lasts about three to four days in the fridge. Make sure it’s in an airtight container. Always check for signs of spoilage before using it. Enjoy your delicious BBQ Chicken Chopped Salad! This BBQ Chicken Chopped Salad is simple and tasty. You mix cooked chicken with BBQ sauce and combine it with fresh veggies like avocado and corn. You can switch up the proteins and dressings to your liking. Remember to store leftovers the right way to keep them fresh. Enjoy making this salad any time! It's a great way to eat healthy and satisfy your cravings with flavor.

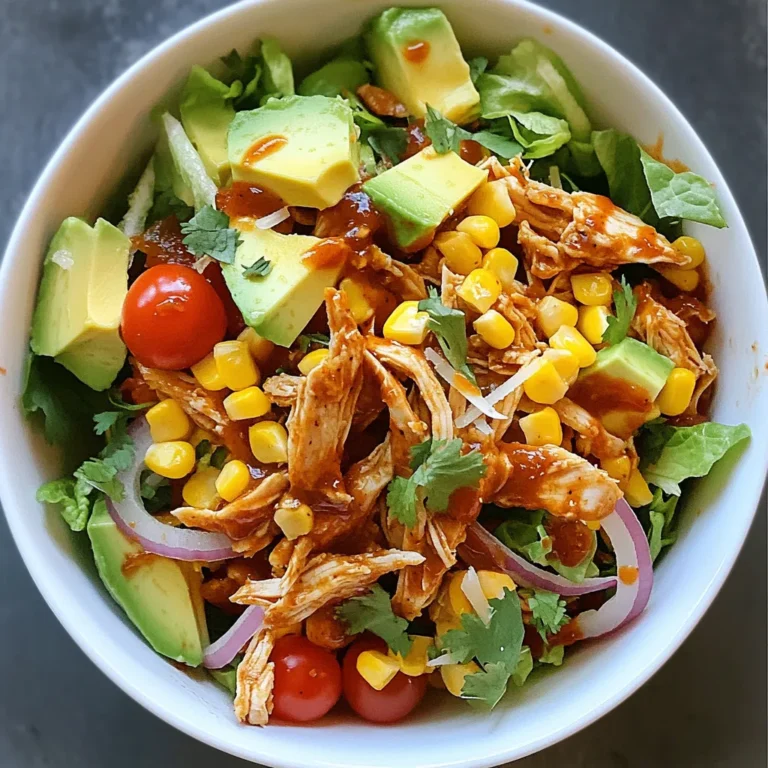
BBQ Chicken Chopped Salad Crisp and Flavorful Meal

- 1 cup purple grape juice - 1 cup tonic water - 1/2 cup coconut milk - 1 tablespoon butterfly pea powder - 1 tablespoon honey or agave syrup - Edible glitter (optional) - Fresh mint leaves - Ice cubes The main ingredients create the base of the Purple Galaxy Mocktail. Purple grape juice gives a rich color and sweet flavor. Tonic water adds a bubbly touch and a hint of bitterness. Coconut milk brings creaminess and balances the sweetness. The additional ingredients add fun and flair. Butterfly pea powder is what gives this drink its stunning blue hue. Honey or agave syrup adds sweetness and helps blend the flavors. If you want, sprinkle edible glitter for a magical, sparkling effect. For the perfect garnish, fresh mint leaves add a touch of green and a fresh scent. Ice cubes keep the drink cool and refreshing. {{ingredient_image_1}} - In a cocktail shaker, combine: - 1 cup purple grape juice - 1 tablespoon honey (or agave syrup) - 1 tablespoon butterfly pea powder - Shake well until the powder dissolves. The juice will look vibrant and lively. - Fill your glass with ice cubes. - Pour in the grape juice mixture, filling it about halfway. - Next, gently pour in 1 cup of tonic water. This creates lovely layers. - Carefully add 1/2 cup of coconut milk. It will float on top, giving that galaxy look. - If you want a sparkly finish, sprinkle on a bit of edible glitter. - For a fresh aroma, garnish with mint leaves. To create the stunning layers in your Purple Galaxy Mocktail, you need to pour slowly. This helps each ingredient stay separate. Start with the juice, followed by the tonic water. Pour it gently down the side of the glass. Using butterfly pea powder is key for that vibrant color. It can change shades when mixed with lemon juice. So, if you want to try a twist, add a splash of lemon juice. Just remember to mix it well before you pour. Choose tall clear glasses for the best effect. The colors look amazing when you can see all the layers. You can also use mason jars for a fun vibe. For snacks, think light and fresh. Cheese platters with fruits or veggie sticks with dip work well. These snacks are easy to grab while enjoying the drink. You can switch up the colors or flavors easily. Try using different juices like blueberry or raspberry for a new look. Add sparkling water instead of tonic for a different taste. To make your drink unique, use fun garnishes. Try edible flowers or colorful straws. These small changes can make your mocktail stand out at any party. Pro Tips Use Chilled Ingredients: For a refreshing mocktail, ensure that your grape juice, tonic water, and coconut milk are all chilled before mixing. This helps maintain the drink’s temperature without diluting it with ice. Layering Technique: To achieve the stunning layered effect, pour the tonic water slowly over the back of a spoon after adding the grape juice mixture. This gentle pour prevents the liquids from mixing too quickly. Customize Sweetness: Adjust the sweetness of your mocktail by varying the amount of honey or agave syrup based on your personal preference. Start with less and add more to taste if needed. Creative Garnishes: Enhance the visual appeal by experimenting with different garnishes like edible flowers or citrus slices along with the mint leaves. This adds color and freshness to your drink. {{image_2}} You can switch up your Purple Galaxy Mocktail by using different juices. Try blueberry juice for a sweeter taste. Pomegranate juice adds a tart kick and deep color. You can also use sparkling water instead of tonic. This will make the drink lighter and more refreshing. The bubbles will still give you that fun effect! If you want a vegan version, it’s easy! Just swap honey for agave syrup. Agave syrup is a great sweetener that works well. You can also use dairy-free options for coconut milk. Almond milk or oat milk can be good choices. Both will still taste creamy and delicious! You can give this mocktail a seasonal spin. For summer, make a berry galaxy mocktail. Use mixed berries for a fruity flavor. In winter, try a cozy galaxy drink. Add spices like cinnamon or nutmeg for warmth. You can even create a peppermint twist by using peppermint extract. The possibilities are endless! To keep your Purple Galaxy Mocktail fresh, store leftover ingredients properly. - Grape juice: Seal in an airtight container. It stays fresh for about 5-7 days in the fridge. - Coconut milk: Store in its original can or a glass jar. It lasts about 4-7 days once opened. - Butterfly pea powder: Keep this in a cool, dry place. It can last for months if stored right. Refrigerate any fresh mint leaves in a damp paper towel. Place them in a bag to keep them fresh for a few days. Yes, you can make the base of the mocktail ahead of time. Mix the grape juice, honey, and butterfly pea powder. Store it in the fridge for up to 24 hours. When you are ready to serve, add the tonic water and coconut milk. This keeps the layers looking stunning. To serve cold, keep your glassware in the fridge or use chilled glasses. Grape juice lasts about 5-7 days in the fridge once opened. Coconut milk, once opened, lasts about 4-7 days. Check for spoilage by looking for changes in color or smell. If it smells off or has a strange texture, it’s best to throw it out. Butterfly pea powder comes from the flowers of the butterfly pea plant. It has a bright blue color and adds a stunning hue to drinks. This powder is also rich in antioxidants. It can help reduce stress and improve skin health. You can use butterfly pea powder in many recipes. Mix it into drinks, desserts, or even savory dishes for a pop of color. Yes, you can make this mocktail ahead. Prepare the grape juice mixture and store it in the fridge. Just leave out the tonic water and coconut milk until you're ready to serve. This keeps the drink fresh and fizzy. You can mix and layer everything right before your guests arrive for the best look and taste. If you want a different taste, try using sparkling water or ginger ale. These options keep the drink fizzy but change the flavor. You can also try flavored sparkling water for a twist. Just make sure to choose options that fit your dietary needs. To make your Purple Galaxy Mocktail festive, add seasonal fruits. Fresh berries or citrus slices can add color and taste. You can also change the edible glitter to match party themes. For holidays, consider adding themed garnishes. Think candy canes for winter or flower petals for spring. These small touches make your drink fun and special. This blog post covered all you need to create a stunning galaxy mocktail. We explored key ingredients like purple grape juice, tonic water, and coconut milk. You learned step-by-step instructions for perfect preparation and garnishing. Tips on achieving the galaxy effect, serving suggestions, and customization options added extra flair. Incorporating these ideas will surely impress your guests. Enjoy your journey with flavors and presentations. Get creative!

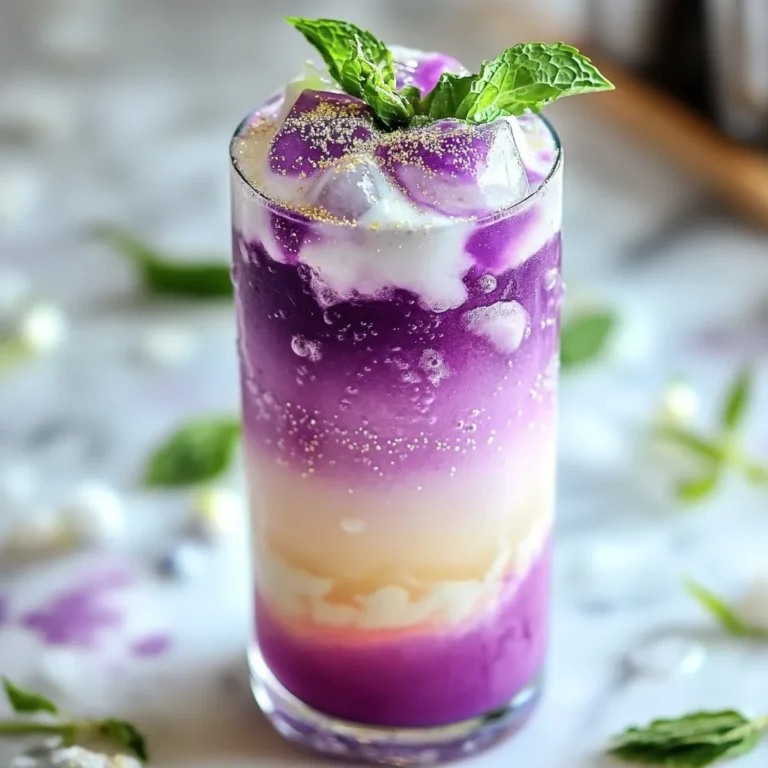
Purple Galaxy Mocktail Refreshing Drink for Parties

For this tasty dish, you need: - 4 boneless, skinless chicken thighs - 2 cups cherry tomatoes, halved - 1 large red bell pepper, chopped - 1 large zucchini, sliced - 1 large red onion, cut into wedges These fresh ingredients bring great color and taste. The chicken adds protein, while the veggies add vitamins and crunch. The marinade gives the chicken its bold flavor. You will need: - 1/4 cup olive oil - 2 tablespoons freshly squeezed lemon juice - 3 cloves garlic, minced - 1 tablespoon dried oregano - 1 teaspoon smoked paprika - Salt and pepper to taste Mix these ingredients well. They create a zesty and aromatic blend that soaks into the chicken. Finishing touches make your meal special. Consider adding: - 1/2 cup crumbled feta cheese - Fresh dill or parsley for garnish These garnishes add creaminess and a fresh pop of flavor. They also enhance the dish's look, making it more appealing. {{ingredient_image_1}} Start by preheating your oven to 425°F (220°C). This high heat helps cook the chicken and veggies evenly. Line a large sheet pan with parchment paper. This will make cleanup easy and keep your food from sticking. In a large bowl, whisk together the olive oil, lemon juice, minced garlic, oregano, smoked paprika, salt, and pepper. This mix adds great flavor to the chicken. It’s a simple but tasty marinade that brings out the best in the dish. Add the chicken thighs to the marinade. Make sure they are coated well. Let them soak in the flavor for about 15 to 30 minutes. If you’re short on time, even a quick soak will help. Place the marinated chicken thighs in the center of the sheet pan. Surround them with halved cherry tomatoes, chopped bell pepper, sliced zucchini, and onion wedges. This mix of colors and textures makes the dish look amazing. Drizzle any leftover marinade over the veggies. Season everything with some extra salt and pepper. Roast the pan in the oven for 25 to 30 minutes. Check that the chicken reaches an internal temperature of 165°F (74°C). The veggies should be tender and caramelized. Once the dish is done, take it out of the oven. If you like, sprinkle crumbled feta cheese on top. Garnish with fresh dill or parsley for a pop of color. Serve this warm and enjoy the burst of Mediterranean flavors. Use boneless, skinless chicken thighs. They stay juicy and tender. Always marinate the chicken for at least 15 minutes. This adds flavor. When cooking, make sure the chicken is spaced apart. This helps it cook evenly. Use a meat thermometer to check for doneness. The chicken should reach 165°F (74°C). You can mix and match your veggies. Cherry tomatoes, bell peppers, zucchini, and onions work well. Each vegetable cooks at its own pace. Cherry tomatoes may need less time, while zucchini takes a bit longer. Keep an eye on the veggies. They should be tender and slightly caramelized when done. Don't waste that tasty marinade! Use it to drizzle on veggies before roasting. It adds extra flavor. Just remember, if the marinade touched raw chicken, don't use it directly. Instead, set aside some before adding the chicken. This way, you can enjoy the rich taste without risk. Pro Tips Marinate for Maximum Flavor: Allow the chicken to marinate for at least 30 minutes, or up to overnight, to enhance its flavor and tenderness. Use Seasonal Vegetables: Feel free to swap in seasonal vegetables like asparagus or eggplant for a fresh twist on this dish. Check for Doneness: Always use a meat thermometer to ensure chicken reaches 165°F (74°C) for safe consumption. Customize Your Herbs: Experiment with different herbs like thyme or rosemary to give your sheet pan meal a unique flavor profile. {{image_2}} You can switch out the chicken thighs for chicken breasts if you prefer. Chicken breasts cook faster and are leaner. If you want a plant-based option, use chickpeas or firm tofu instead. Both options add protein and soak up flavor well. For veggies, feel free to swap cherry tomatoes for grape tomatoes or even use asparagus instead of zucchini. You can also change the red onion for yellow or white onions. This dish is mostly gluten-free as it stands. Just make sure to use gluten-free marinade ingredients if you buy premade. For a dairy-free option, skip the feta cheese, or use a dairy-free cheese alternative. Fresh herbs like parsley or dill add a nice touch without dairy. They give flavor while keeping the dish light and fresh. Want a bolder taste? Add spices like cumin or coriander for a warm flavor. You can also sprinkle some red pepper flakes for heat. If you love herbs, mix in fresh oregano or thyme for a fragrant twist. Don’t be shy! Experiment with spices to find your favorite blend. Each little change can bring a new vibe to this tasty dinner. To store leftovers, let the dish cool. Place the chicken and veggies in an airtight container. It keeps well in the fridge for up to three days. If you want to enjoy it later, make sure to separate the chicken from the veggies to keep them fresh. To reheat, preheat your oven to 350°F (175°C). Place the leftovers on a baking sheet. Heat for about 15-20 minutes until warm. You can also use a microwave. Heat in a microwave-safe dish for about 2-3 minutes. Cover it to keep the moisture in. You can freeze this dish for up to three months. Make sure it’s in a freezer-safe container. To thaw, place it in the fridge overnight. You can also use the microwave to defrost. Always reheat until the chicken reaches 165°F (74°C). You can serve this dish with several tasty sides. Fresh pita bread pairs well. A simple Greek salad adds crunch and freshness. Couscous or rice offer a hearty base too. You can also enjoy it with tzatziki sauce for a cool dip. Yes, you can use chicken breasts or even drumsticks. Just adjust cooking time for different cuts. Chicken breasts cook faster, so check them early. Drumsticks may need a bit longer to cook through. You can marinate the chicken the night before. Store it in the fridge with veggies. On the day of cooking, just arrange everything on the sheet pan and roast. This saves time and makes cooking easier. Marinating the chicken is key to keeping it juicy. The olive oil and lemon juice create a nice barrier. Cooking at high heat helps too, as it seals in moisture. Use a meat thermometer to check for doneness. Yes, you can make it ahead. Cook the chicken and veggies, then let them cool. Store in an airtight container in the fridge. When ready to eat, just reheat in the oven or microwave until warm. This article covers how to make a delicious sheet pan Greek chicken meal. You learned about the key ingredients, cooking steps, and variations you can try. We discussed ways to store and reheat leftovers, along with tips to keep your chicken juicy. Try this recipe for an easy, tasty meal. Feel free to mix in your favorite veggies or spices. Cooking can be fun and simple, and this recipe is proof of that! Enjoy your cooking adventure!

Sheet Pan Greek Chicken and Veggies Tasty Dinner Option

- 1 medium butternut squash, peeled and cubed - 2 medium sweet potatoes, peeled and cubed - 1 onion, chopped - 3 cloves garlic, minced - 2 tablespoons olive oil - 1 teaspoon ground cumin - 1 teaspoon smoked paprika - ½ teaspoon cayenne pepper (adjust to taste) - 4 cups vegetable broth - 1 can (13.5 oz) coconut milk - Salt and pepper to taste - Fresh cilantro for garnish - Optional: Lime wedges for serving To make Spicy Butternut Sweet Potato Soup, gather all these ingredients. Each one adds flavor and texture. The butternut squash and sweet potatoes bring sweetness. The onion and garlic provide a savory base. Olive oil helps in sautéing and adds richness. Spices like cumin and smoked paprika give warmth. Cayenne pepper brings heat, but you can adjust it. Vegetable broth gives depth and helps cook the veggies. Coconut milk adds creaminess and a hint of sweetness. Finally, fresh cilantro brightens each bowl. Having everything ready makes cooking smoother. You will enjoy the process and the warm flavors. Trust me; this soup will become a favorite! {{ingredient_image_1}} - Sautéing the onion and garlic Start by heating two tablespoons of olive oil in a large pot over medium heat. Once the oil is hot, add one chopped onion. Cook it for about five minutes until it becomes soft and clear. Next, add three minced garlic cloves. Cook for one more minute. This step builds a rich base of flavor. - Adding butternut squash and sweet potatoes Now, peel and cube one medium butternut squash and two medium sweet potatoes. Add these to the pot with the onion and garlic. Stir them well to mix everything together. The sweet and nutty flavors of the squash and potatoes will shine through. - Incorporating spices and broth Next, sprinkle in one teaspoon of ground cumin, one teaspoon of smoked paprika, and half a teaspoon of cayenne pepper. Mix everything well until the veggies are coated with spices. Now, pour in four cups of vegetable broth. Bring the mixture to a boil, then lower the heat to a simmer. Cover the pot and cook for 20 to 25 minutes. You want the squash and sweet potatoes to be soft. - Simmering the soup Keep the pot covered while it simmers. This helps the flavors meld together. Check the vegetables after 20 minutes. They should be tender and easy to pierce with a fork. - Blending the soup Once the veggies are tender, use an immersion blender to puree the soup until it’s smooth. If you don't have one, you can carefully transfer the soup to a blender in batches. Just be cautious with hot liquids. - Final seasoning and serving After blending, stir in one can of coconut milk. This adds creaminess and a hint of sweetness. Season with salt and pepper to taste. Heat the soup over low heat until warm. Serve it hot. Garnish with fresh cilantro and a lime wedge for a fresh kick. Enjoy! - Achieving the right texture: Blend the soup until smooth. If you like it chunky, blend only half. - Adjusting spice levels: Start with less cayenne pepper. You can always add more later. Taste as you go! - Enhancing flavor with herbs: Fresh cilantro works great as a garnish. Consider adding thyme or rosemary for depth. - Overcooking the vegetables: Check the butternut squash and sweet potatoes after 20 minutes. They should be soft but not mushy. - Incomplete blending for a smooth consistency: Make sure to blend long enough. A lumpy soup is not as nice to eat. Pro Tips Adjust the Spice Level: If you prefer a milder soup, reduce the cayenne pepper or omit it altogether. You can always add more spice later if needed! Use Fresh Ingredients: Fresh butternut squash and sweet potatoes will enhance the flavor of the soup. Opt for organic produce if possible. Variations on Garnish: Experiment with different garnishes like toasted pumpkin seeds or a swirl of yogurt for added creaminess and texture. Storage Tips: This soup stores well in the refrigerator for up to 5 days. For longer storage, freeze in airtight containers for up to 3 months. {{image_2}} You can change the recipe by using different vegetables. Consider using carrots or parsnips instead of sweet potatoes. These will still give you a nice, sweet flavor. You can try pumpkin as well for a unique twist. If you want a dairy-free option, coconut milk is great. However, you can also use almond milk or cashew cream for creaminess. Both will add a different flavor but keep the soup delicious. Spices can greatly change the taste of your soup. Try adding ginger for warmth. A pinch of cinnamon can also bring a lovely depth. You might want to experiment with curry powder for a new twist. For a protein boost, add cooked lentils or chickpeas. They blend well and make the soup heartier. You can also top the soup with grilled chicken or shrimp for extra protein. This will make your meal more filling. To store your spicy butternut sweet potato soup, first let it cool. Pour it into an airtight container. This keeps the soup fresh and prevents spills. Store it in the fridge for up to five days. When you want to reheat, pour the soup into a pot. Heat it over medium heat, stirring often. This keeps it from sticking. You can also use a microwave-safe bowl. Just heat it in short bursts, stirring in between. Freezing the soup is simple. First, let it cool completely. Pour the soup into freezer-safe bags or containers. Leave some space for expansion. Label each bag with the date and name, so you remember what it is. To thaw the soup, move it from the freezer to the fridge. Let it sit overnight. If you're in a hurry, run the sealed bag under cold water. When you are ready to reheat, follow the same steps as before. Enjoy your soup warm and fresh! Can I make Spicy Butternut Sweet Potato Soup in a slow cooker? Yes, you can! Start by sautéing the onion and garlic in a pan. Then, add them along with the butternut squash, sweet potatoes, spices, and broth to your slow cooker. Cook on low for 6-8 hours or high for 3-4 hours. Blend the soup at the end and stir in the coconut milk. How can I make this recipe vegan-friendly? This recipe is already vegan-friendly since it uses coconut milk and vegetable broth. Just make sure your vegetable broth is free from animal products. It’s a great option for plant-based diets! What can I serve with this soup? This soup pairs well with crusty bread or a fresh salad. You can also enjoy it with a dollop of vegan sour cream on top. For a fun twist, try adding some roasted chickpeas for crunch! This blog outlines a tasty Spicy Butternut Sweet Potato Soup. You learned about the key ingredients and the step-by-step instructions to make it. We discussed tips to perfect your soup and ways to avoid common mistakes. You can explore ingredient variations for a unique twist. Plus, we covered how to store and freeze leftovers effectively. In closing, this soup is easy and healthy. Enjoy making it and share with friends!

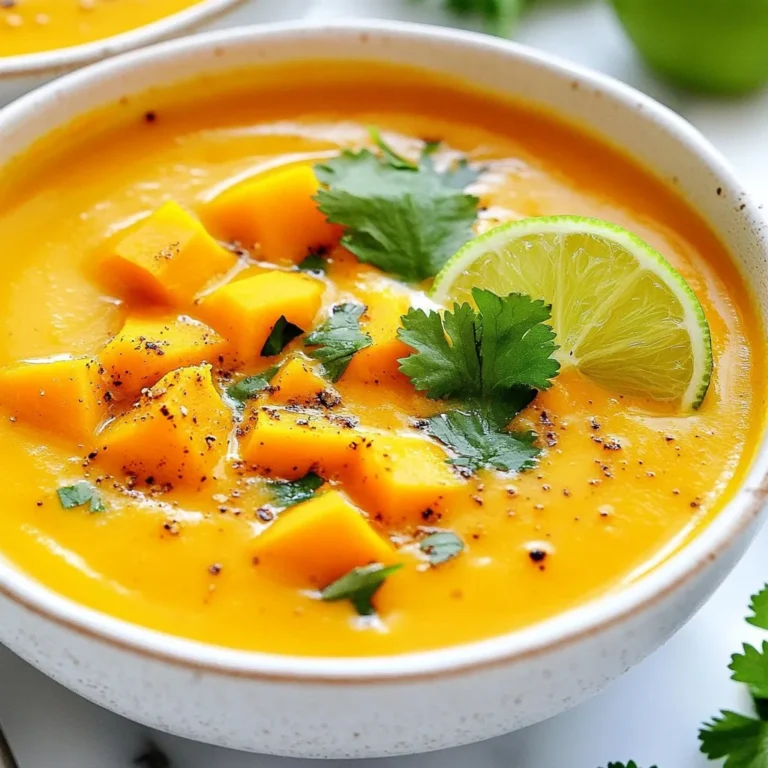
Spicy Butternut Sweet Potato Soup Flavorful and Easy

- 2 lbs beef chuck, cut into 1-inch cubes - 4 dried ancho chilies, stemmed and seeds removed - 2 dried guajillo chilies, stemmed and seeds removed - 1 onion, chopped - 4 garlic cloves, minced For this dish, I always choose beef chuck. It has good fat and flavor. The dried chilies give it a rich, deep taste. Ancho chilies are sweet, while guajillo chilies add some heat. - 1 teaspoon ground cumin - 1 teaspoon smoked paprika - 1 teaspoon oregano - Salt and pepper to taste These spices bring warmth and a bit of smokiness to the dish. Adjust the salt and pepper to your liking. I taste as I go to find the right balance. - Fresh cilantro, for garnish - Lime wedges, for serving - Corn tortillas, for serving Fresh cilantro adds a nice brightness. Lime wedges give a zing that cuts through the richness. Warm corn tortillas are perfect for scooping up the beef and sauce. {{ingredient_image_1}} Start by soaking the dried ancho and guajillo chilies. Use hot water for about 15-20 minutes. This softens them, making them easier to blend. Once they are soft, drain the chilies. Place them in a blender with one cup of beef broth, chopped onion, and minced garlic. Blend everything until it becomes a smooth chili paste. This paste is the heart of your dish, bringing rich flavor. Next, take your beef chuck, cut into 1-inch cubes. Season it well with salt and pepper. In a large pot or Dutch oven, heat the olive oil over medium-high heat. Brown the beef cubes in batches. Aim for a golden brown color on all sides. This step adds depth to the flavor. Once browned, remove the beef from the pot and set it aside. Now, it's time to cook the chili Colorado. In the same pot, pour in your chili paste. Cook it for about five minutes. Stir it often until it smells fragrant. Add ground cumin, smoked paprika, and oregano. Mix everything well to combine the spices. Then, return the browned beef to the pot. Pour in the remaining beef broth and bring it to a gentle boil. Reduce the heat to low, cover it, and let it simmer. Cook for 1.5 to 2 hours. This helps the beef become tender and soak up all the flavors. Stir occasionally to prevent sticking. Once done, taste and adjust the seasoning with more salt and pepper if needed. If the sauce is too thick, add a bit more beef broth. Serve hot, garnished with fresh cilantro and lime wedges, and enjoy with warm corn tortillas. Adjusting the seasoning is key. Taste your dish as it cooks. If it needs more salt or spice, add it gradually. This helps you find the right balance. To make a smooth chili paste, soak the dried ancho and guajillo chilies in hot water for 15-20 minutes. This softens them. After soaking, blend them with onion, garlic, and a cup of beef broth. Blend until it is silky and smooth. This paste is the heart of your flavor. Browning the beef is crucial. Use a large pot and heat olive oil over medium-high heat. Season the beef with salt and pepper. Cook in batches to avoid crowding. This helps the beef brown evenly. If you put too much in at once, it may steam instead of brown. To avoid sticking in the pot, stir occasionally. If you notice it sticking, lower the heat slightly. The goal is to create a nice fond on the bottom of the pot. This adds depth to the flavor when you add your chili paste. The sauce should be rich and thick. If it is too thick, add more beef broth. Stir it in until you get the right consistency. This keeps your dish saucy and perfect for tortillas. When to add more beef broth? If the sauce begins to dry out during cooking, check it. If it looks too thick, pour in some broth. You want the beef to simmer gently in a flavorful sauce. This makes it tender and delicious. Pro Tips Chili Soaking: Make sure to soak the dried chilies until they are fully softened for a smoother sauce. Beef Browning: Browning the beef in batches helps achieve a nice crust and enhances the overall flavor. Adjusting Consistency: If the sauce thickens too much, add small amounts of beef broth gradually to reach your desired consistency. Fresh Garnish: Garnish with fresh cilantro and lime for a burst of freshness that complements the rich flavors. {{image_2}} You can easily swap beef for other proteins. For a lighter taste, use chicken. Chicken thighs work well, as they stay moist during cooking. Just cook them in the same way as beef. Pork is another great option. Use pork shoulder cut into cubes. It will give you a rich flavor similar to beef. If you want a meatless meal, try lentils. Lentils cook quickly and absorb the spices well. Use about 2 cups of cooked lentils. Add them in at the end to heat through. To make your Beef Chile Colorado spicier, add more chilies. You can use hotter varieties like serrano or jalapeño. Just chop them finely and add them to the chili paste. If you want milder flavors, use less of the dried chilies. You can also remove the seeds from the chilies before blending. This will cut down on heat while keeping the flavor. You can swap spices based on what you have. If you lack smoked paprika, regular paprika works too. For a twist, try adding a pinch of cinnamon. It adds depth to the dish. Fresh ingredients give a brighter taste. Use fresh herbs instead of dried, like cilantro or oregano. If you have fresh chilies, they can replace dried ones. Just chop them and mix into the blend. Using these variations, you can make Beef Chile Colorado your own. Adjust the dish based on your taste and what you have on hand. To store leftover Beef Chile Colorado, let it cool first. Place it in an airtight container. Make sure to seal it well. You can keep it in the fridge for up to four days. This way, it stays fresh and tasty for your next meal. If you want to freeze Beef Chile Colorado, use a freezer-safe container. Leave some space at the top for expansion. It can last in the freezer for up to three months. When you are ready to eat it, thaw it in the fridge overnight. This keeps the flavor strong and the texture nice. To reheat, use a pot on low heat. Stir often to prevent sticking. You can also use the microwave. Heat in short bursts, stirring in between. Aim for an internal temperature of 165°F. This ensures it's hot but not overcooked. Enjoy the rich flavors just like the first time! Beef Chile Colorado is a rich and hearty dish from Mexico. The name means "red beef chili." This dish features tender beef simmered in a vibrant chili sauce made from dried chilies. The flavors come from the ancho and guajillo chilies, which add depth and warmth. It has a strong cultural significance in Mexican cuisine. Families often enjoy it during celebrations and gatherings. To make it milder, use fewer chilies or remove the seeds. You can also add a bit of sugar to balance the heat. For a spicier kick, add more guajillo chilies or use hotter chili varieties. Tasting as you go helps you find the right balance for your palate. Yes, you can use a slow cooker for Beef Chile Colorado. After blending the chili paste, brown the beef in a pan. Then, transfer everything into your slow cooker. Add the chili paste, beef broth, and spices. Cook on low for 6 to 8 hours. The beef will turn tender and flavorful, making it perfect for serving. Beef Chile Colorado pairs well with warm corn tortillas. You can also serve it with rice or beans. Adding fresh toppings like chopped cilantro and lime wedges enhances the dish. A side of guacamole or a fresh salad works great too. Enjoy the flavors together for a complete meal. Beef Chile Colorado is a rich, flavorful dish made with beef, chilies, and spices. The steps include preparing a smooth chili paste, browning the beef, and simmering it all for tenderness. You can customize it with swaps for proteins or spice level. Store leftovers properly for delicious meals later. With these tips and tricks, you can create an impressive dish for any gathering. Enjoy your cooking journey, and remember, the best flavors come from your own kitchen!

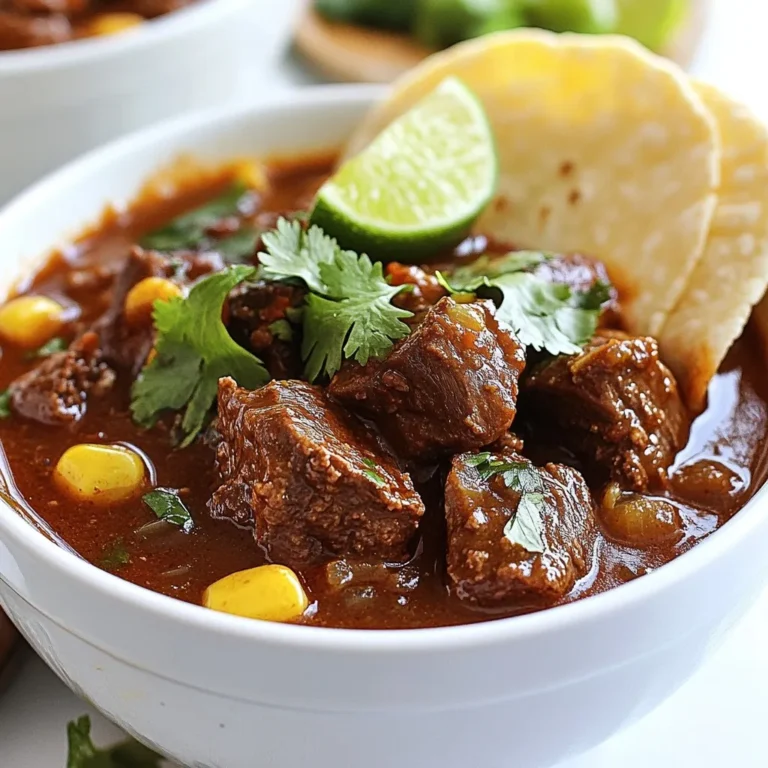
Beef Chile Colorado Tasty and Hearty Comfort Dish

- 10 cloves of garlic, peeled and crushed - 1 medium onion, diced - 4 cups vegetable broth - 1 tablespoon olive oil - 1 tablespoon fresh ginger, grated - 1 teaspoon turmeric powder - 1 teaspoon black pepper - 1 cup leafy greens (spinach or kale) - 1 tablespoon lemon juice - Salt to taste - Fresh parsley for garnish Garlic is the star of this soup. It helps fight off colds and boosts your immune system. You need ten cloves, so be ready to peel and crush them. The onion adds a nice depth of flavor. Use one medium onion, diced well. You will also need four cups of vegetable broth. This broth gives the soup its base. I like to use low-sodium broth for better control over salt. Add one tablespoon of olive oil to cook the onion. It adds richness and helps to sauté the onion. Next, fresh ginger is key. One tablespoon of grated ginger adds warmth and spice. Turmeric powder brings a lovely golden color and health benefits. You only need one teaspoon. Black pepper enhances the flavors, so add one teaspoon of that as well. Leafy greens are important too. I recommend one cup of spinach or kale for added nutrients. Squeeze in one tablespoon of lemon juice for brightness. Salt to taste rounds out the flavors, and fresh parsley is perfect for garnish. It makes your soup look vibrant and fresh. {{ingredient_image_1}} - Sauté Onion in Olive Oil Start by heating the olive oil in a large pot over medium heat. Once hot, add the diced onion. Cook for about 5 minutes until the onion is soft and clear. - Add Garlic and Ginger Next, stir in the crushed garlic and grated ginger. Cook for another 2 to 3 minutes. The smell will be amazing! Watch closely so the garlic does not burn. - Incorporate Spices Sprinkle in the turmeric powder and black pepper. Mix well and let it cook for about 1 minute. This step adds a warm flavor to the soup. - Simmer with Vegetable Broth Pour in the vegetable broth. Bring the soup to a gentle simmer. Let it cook for about 15 minutes. This helps all the flavors mix together nicely. - Add Leafy Greens After 15 minutes, toss in the leafy greens, like spinach or kale. Cook for another 5 minutes until they are soft and wilted. - Blend (Optional) If you want a smooth soup, use an immersion blender. Blend until you reach your desired texture. This step is optional; some like it chunky! - Serve and Garnish Finally, stir in the lemon juice and add salt to your taste. Serve the soup hot, and garnish with freshly chopped parsley for a pop of color and flavor. Enjoy your tasty and healthy garlic soup! Choosing the Right Garlic Pick firm, fresh garlic. The bulbs should feel heavy and tight. Avoid any with soft spots or green shoots. Fresh garlic gives the best taste and health benefits. Adjusting Consistency To make your soup thicker, blend it longer. For a thinner soup, add more broth. You can also add water if you prefer. Adjust to your liking! Enhancing Flavor Profiles Add a splash of soy sauce for umami. A bit of red pepper flakes can bring heat. Experiment with herbs like thyme or rosemary for added depth. Immune-Boosting Properties of Garlic Garlic helps boost your immune system. It has compounds that fight germs and viruses. Eating garlic may reduce your chances of getting sick. Benefits of Turmeric Turmeric contains curcumin, which helps reduce inflammation. It can also improve your immune response. Adding turmeric to your soup makes it even healthier. Advantages of Leafy Greens Leafy greens like spinach or kale are full of vitamins. They provide iron and calcium, which are good for your body. Plus, they add color and nutrition to your soup. Pro Tips Use Fresh Garlic: Fresh garlic has the most potent health benefits and flavor. Make sure to use fresh cloves rather than pre-minced garlic for the best results. Customize Your Greens: Feel free to substitute leafy greens based on your preference or what you have on hand. Swiss chard, collard greens, or even arugula can work beautifully! Enhance with Spices: To add extra depth to the soup, consider adding spices like cumin or coriander. This can elevate the flavor profile significantly. Storage Tips: Leftover soup can be stored in an airtight container in the refrigerator for up to 3 days. For longer storage, freeze in portions for a quick immune-boosting meal later! {{image_2}} You can change the flavor of your soup by using different broths. Chicken broth adds a rich taste. Beef broth gives a hearty base. Vegetable broth makes it lighter and vegan-friendly. Each type brings its own twist, so feel free to experiment. If you want to change the greens, try using Swiss chard or collard greens. Both add different flavors and textures. You can also use arugula for a peppery kick. Each green brings its own nutrients, making the soup even better for you. For extra protein, add cooked chicken or tofu. You can also use beans, like cannellini or chickpeas. This makes the soup more filling and adds more taste. Protein helps keep you full, making it a hearty meal. You can spice up your soup with different spices. Try adding a pinch of cayenne for heat. Smoked paprika adds a nice, smoky flavor. Each spice adds a unique twist to the dish. Don’t be afraid to play with flavors! Herbs can really boost the taste of your soup. Fresh thyme or rosemary can add depth. You could also try basil for a sweet note. Adding herbs gives your soup a fresh and vibrant taste. If you like a bit of heat, consider adding red pepper flakes. Fresh chili peppers can also work well. Just be careful with the amount; you can always add more later. A little heat can make your soup exciting and lively! To keep your garlic soup fresh, store it in the fridge. Use an airtight container to avoid spills and keep out air. This soup stays good for about 3 to 5 days. Make sure to let the soup cool before sealing it. When you’re ready to eat, simply reheat it on the stove. Stir it often to heat evenly. You can also microwave individual portions. Just cover the bowl to prevent splatters. Heat it for 1 to 2 minutes, checking to see if it’s hot enough. If you want to save some soup for later, freezing is a great option. Pour the cooled soup into freezer-safe containers. Leave some space at the top for the soup to expand. You can also use freezer bags, which save space. To thaw the soup, move it to the fridge for several hours or overnight. If you need it fast, you can use the microwave. Just be sure to stir it halfway through to heat it evenly. After thawing, reheat it on the stove as mentioned earlier. Enjoy your tasty garlic soup anytime! Garlic soup is rich in nutrients. Garlic helps fight germs and boosts your immune system. It has antioxidants that keep your body healthy. The soup also has ginger and turmeric, which reduce inflammation. Leafy greens add vitamins and minerals, making it a great choice for your health. Yes, you can make garlic soup ahead of time. It stores well in the fridge for up to three days. Just heat it gently before serving. The flavors may even taste better the next day. This makes it a great meal prep option for busy weeks. This garlic soup recipe is already vegan! It uses vegetable broth and no animal products. If you want to boost the flavor, try adding more herbs or spices. You can also add more veggies for extra nutrition. Enjoy a tasty vegan meal that is simple to make. Garlic soup pairs well with crusty bread. You can also serve it with a fresh salad. For a heartier meal, add a protein like chickpeas or lentils. Each option complements the flavors of the soup. Choose your favorite side to make it a complete meal. You’ve learned how to make a flavorful garlic soup packed with health benefits. We covered key ingredients like garlic, turmeric, and leafy greens. I shared steps to prepare the soup and tips to enhance its taste. You can explore variations and learn the best ways to store your leftovers. Remember, this soup is not just tasty; it also supports your health. Dive in, get creative with flavors, and enjoy your cooking adventure!

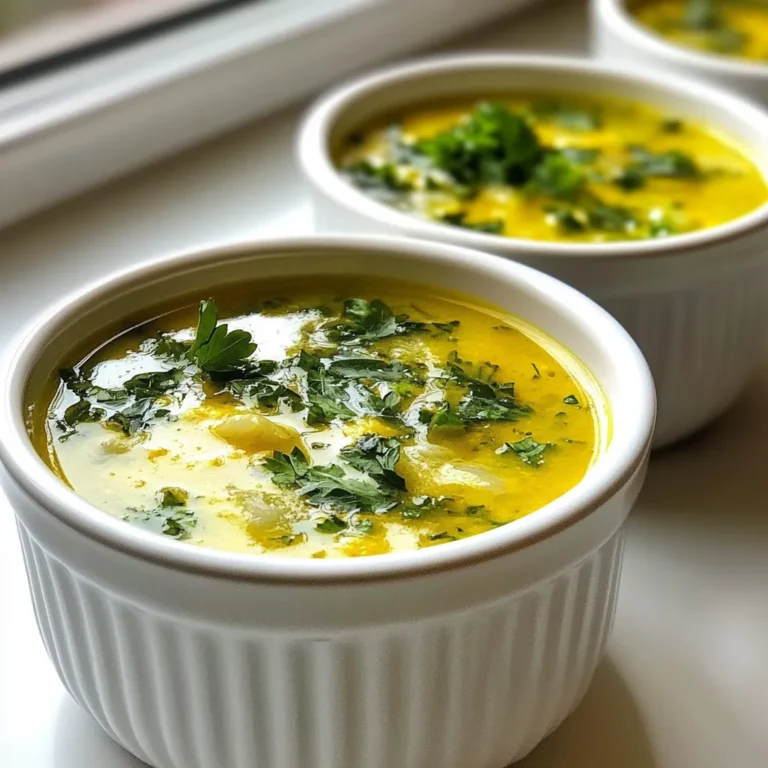
Immune Boosting Garlic Soup Tasty and Healthy Recipe

- 4 cups fresh sweet corn, kernels removed (or 2 cans of sweet corn, drained) - 1 medium onion, diced - 2 cloves garlic, minced - 1 medium potato, peeled and diced - 4 cups vegetable broth - 1 cup heavy cream (or coconut milk for a dairy-free option) - 2 tablespoons olive oil - 1 teaspoon smoked paprika - 1 teaspoon thyme (fresh or dried) - Salt and pepper to taste - Fresh chives or parsley for garnish You will need a large pot and a ladle. An immersion blender works best, but a regular blender is fine too. Make sure to have a cutting board and knife for chopping. A measuring cup and spoons will help with accuracy. This chowder serves 4-6. Each serving has about 350 calories. It has carbs from the corn and potato, plus healthy fats from the cream. The chowder is rich in vitamins A and C. It’s also a good source of fiber. If you use coconut milk, it becomes dairy-free but still creamy and delicious. This chowder is not only tasty but also a great way to enjoy fresh corn. The balance of flavors makes it a perfect dish for any season. {{ingredient_image_1}} Start by heating the olive oil in a large pot over medium heat. Once hot, add diced onion. Sauté the onion for about five minutes. It should turn soft and clear. Next, stir in minced garlic. Cook it for one to two minutes until it smells great. This step builds a solid base for your chowder. Stir in diced potato and corn kernels next. Add the vegetable broth, smoked paprika, thyme, salt, and pepper. Increase the heat to bring the mix to a boil. After it boils, reduce the heat to low. Let it simmer for 15 to 20 minutes. The potato should be tender when ready. This mix of flavors creates a rich and hearty chowder base. Using a ladle, scoop out half of the chowder. Blend it smooth with an immersion blender or a regular blender. This adds a creamy texture while keeping some corn pieces. Return the blended mix to the pot. Stir in the heavy cream, or coconut milk if you want a dairy-free option. Simmer for five more minutes to heat through. Finally, your chowder is ready to serve, warm and inviting. For the best sweetcorn chowder, fresh corn is key. Use four cups of sweet corn. You can cut it from cobs or use canned corn. If you pick canned corn, choose a brand with no added sugar. Fresh corn gives a sweeter taste and a nice texture. Look for bright yellow kernels that feel firm. If fresh corn is not in season, frozen corn is a good option. It keeps the sweet flavor and adds great texture. You can make your chowder taste just how you like it. For more flavor, add more smoked paprika or fresh herbs like thyme. If you want it creamier, add more heavy cream. For a lighter chowder, use coconut milk. Taste your chowder as it cooks. This way, you can adjust salt and pepper to fit your taste. If the chowder is too thick, add more vegetable broth. If it’s too thin, simmer it longer to reduce. To make this chowder dairy-free, swap heavy cream for coconut milk. It keeps the richness while adding a hint of sweetness. You could also use almond milk or oat milk. Just keep in mind that these may alter the flavor slightly. Always check the labels for added sugars or flavors. Using dairy-free options lets everyone enjoy this chowder, even those who are lactose intolerant. Pro Tips Choose Fresh Corn: For the best flavor, use fresh sweet corn when it's in season. If using canned corn, select high-quality brands for optimal taste. Add Depth of Flavor: Enhance the chowder by adding a splash of white wine after sautéing the onions and garlic. Let it reduce slightly before adding other ingredients. Texture Variation: For a chunkier texture, reserve some corn kernels before blending the chowder and stir them back in after blending. Vegan Option: To make this chowder vegan, substitute heavy cream with coconut milk and ensure the vegetable broth is free from animal products. {{image_2}} Want a kick in your chowder? Add some heat! To make a spicy sweetcorn chowder, mix in diced jalapeños or a dash of cayenne pepper. Start with one small jalapeño, seeds removed. This adds flavor and warmth. You can also sprinkle in some chili powder when cooking the base. Adjust the spice to your taste. The heat balances well with the sweet corn. It creates a nice depth in every spoonful. Bacon lovers will enjoy this twist. For a sweetcorn and bacon chowder, cook 4 strips of chopped bacon first. Let them crisp up in your pot. Remove the bacon and keep it for garnish. Use the bacon fat to sauté the onion and garlic. This adds a smoky flavor that pairs well with corn. Stir the bacon back in right before serving. Each bite will be rich and savory. The crispy bits offer great texture, too! Looking for something meat-free? You can easily make this chowder vegetarian. Just skip the bacon and use vegetable broth. To add more depth, use smoked paprika. This gives a nice, smoky taste without meat. You can also add more veggies like diced bell peppers or carrots. They add color and nutrients. For a creamy finish, stick with heavy cream or coconut milk. Both options keep it rich and satisfying. Enjoy a bowl that’s full of flavor and still plant-based! To store your sweetcorn chowder, let it cool first. Then, transfer it to an airtight container. This helps keep it fresh. You can store it in the fridge for up to three days. Make sure to label the container with the date. This way, you won’t forget how long it has been there. When ready to enjoy your chowder again, take it out of the fridge. Pour it into a pot over medium heat. Stir it often to help it heat evenly. If it seems too thick, add a splash of broth or water. Heat until it’s warm throughout, about five to seven minutes. You can also use the microwave. Place the chowder in a microwave-safe bowl and cover it. Heat in short bursts, stirring in between, until hot. You can freeze sweetcorn chowder for later. First, let it cool completely. Then, pour it into freezer-safe containers. Leave some space at the top for expansion. Seal tightly and label with the date. It will keep well in the freezer for up to three months. When you're ready to eat it, thaw it in the fridge overnight. Reheat as mentioned above for the best taste. Yes, you can use frozen corn. It saves time and is always sweet. Just add it to the pot the same way as fresh corn. No need to thaw first. This makes your chowder quick and easy. Frozen corn also tastes great in this recipe. To make your chowder thicker, you have a few options. First, blend more of the chowder. This adds creaminess without extra ingredients. Second, add a bit of cornstarch. Mix one tablespoon of cornstarch with cold water. Stir that into the chowder and heat until thick. Lastly, you can add more diced potatoes, as they will break down and thicken the soup. Sweetcorn chowder pairs well with many items. A fresh salad adds color and crunch. Crusty bread is perfect for dipping. You can also serve it with grilled cheese for a cozy meal. For a fun touch, serve it with some chili flakes for heat. Each option makes the chowder even more enjoyable! This blog covers the best sweetcorn chowder recipe, including all the key details. You learned about ingredients, equipment, and nutrition. I shared step-by-step instructions for perfect chowder, along with tips, tricks, and tasty variations. Storing and reheating leftovers was also discussed. Remember, sweetcorn chowder is easy to tweak to fit your taste. Try different spices or add your favorite mix-ins. Enjoy creating your own delicious version of this comforting dish!

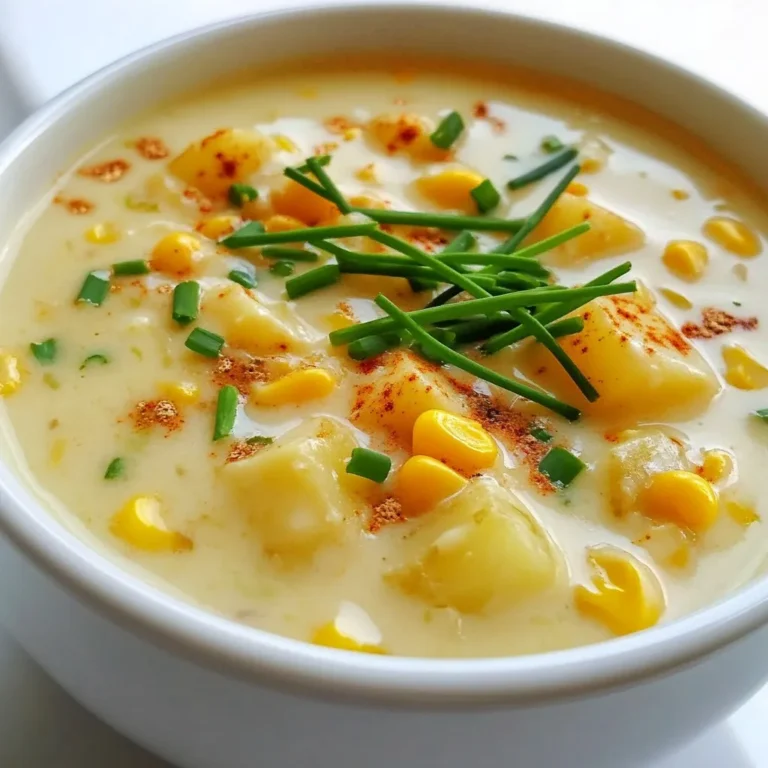
Best Sweetcorn Chowder Rich and Creamy Recipe

- 20 store-bought gyoza (potstickers) - 6 cups chicken or vegetable broth - 1 tablespoon sesame oil - 1 garlic clove, minced - 1-inch piece of ginger, minced - 1 cup bok choy, chopped - 1 cup mushrooms, sliced (shiitake or button) - 1 medium carrot, thinly sliced - 2 green onions, chopped - 2 tablespoons soy sauce - Salt and pepper to taste In this recipe, gyoza plays a key role. You can use store-bought gyoza for a quick meal. A rich broth adds warmth. I love using chicken broth, but vegetable broth works well too. Aromatics like garlic and ginger pack flavor. They create a nice base for the soup. Fresh vegetables add color and crunch. Bok choy gives the dish a healthy touch. Mushrooms add earthiness, while carrots bring sweetness. Green onions add a nice bite. Seasonings bring everything together. Soy sauce offers umami, while sesame oil adds a toasted flavor. Don’t forget to taste and adjust with salt and pepper. This simple step helps balance the flavors. - Fresh cilantro Fresh cilantro is a great garnish. It adds brightness and a fresh taste. If you enjoy it, sprinkle some on top before serving. It makes the soup feel even more inviting. {{ingredient_image_1}} 1. First, grab a large pot. Heat 1 tablespoon of sesame oil over medium heat. 2. Add 1 minced garlic clove and a 1-inch piece of minced ginger. 3. Sauté them until you smell their lovely scent, about 1 minute. 4. Now, pour in 6 cups of chicken or vegetable broth. Bring it to a gentle simmer. 5. Next, add 1 cup of sliced mushrooms and 1 medium carrot, thinly sliced. 6. Let these cook for about 5 minutes until they become tender. 1. Gently add 20 store-bought gyoza to the pot. 2. Cook them for 6-8 minutes. Ensure they are heated through and cooked thoroughly. 3. Stir gently to avoid breaking the gyoza. 1. Toss in 1 cup of chopped bok choy and 2 chopped green onions. 2. Stir in 2 tablespoons of soy sauce. 3. Cook for another 2-3 minutes until the bok choy wilts. 4. Taste the soup and adjust the seasoning with salt and pepper as needed. 5. When ready to serve, ladle the soup into bowls. 6. Garnish with fresh cilantro if you like. Enjoy your warm and inviting gyoza soup! To boost the flavor of your gyoza soup, consider adding spices. A pinch of red pepper flakes can add heat. If you like it tangy, try a splash of rice vinegar. You can also add soy sauce for an extra umami kick. Fresh herbs like basil or mint can give your soup a bright twist. Experiment by adding a dash of sesame seeds for crunch. Cooking gyoza correctly is key for a great soup. Avoid overcooking them by watching the time. Add the gyoza when the broth simmers gently. Allow them to cook for about 6 to 8 minutes. Check their texture; they should be tender but not mushy. If you see them opening up, it means they are overcooked. To serve the soup, ladle it into bowls with care. Make sure each bowl has gyoza and veggies. Top with fresh cilantro for color and flavor. You can add lime wedges on the side for a zesty finish. Serve with chopsticks or a soup spoon for easy eating. Enjoy your warm and inviting bowl of comfort! Pro Tips Use Frozen Gyoza: If you can't find fresh gyoza, frozen ones work perfectly. Just add them directly to the broth without thawing for an extra few minutes of cooking time. Customize Your Veggies: Feel free to add or substitute vegetables based on your preference. Spinach, kale, or bell peppers can offer a nice variation. Enhance Flavor with Spices: Consider adding a pinch of red pepper flakes or a dash of chili oil to give the soup a spicy kick! Serve with Extra Toppings: Top the soup with sesame seeds, sliced chili, or a drizzle of soy sauce for added flavor and an appealing presentation. {{image_2}} You can change the broth for your gyoza soup. Miso broth gives a rich flavor. It adds umami notes that warm the heart. Noodle broth is another tasty choice. It brings a lightness to the soup. Just choose what fits your taste! Not a fan of bok choy? You can use spinach or kale instead. Both options add nice color and nutrients. If you want a different taste, try snap peas or zucchini. These veggies bring crunch and freshness. Feel free to swap out mushrooms too. Bell peppers or asparagus can work well here. Want to boost the protein? Add cooked chicken or tofu. Both options give the soup more depth. Shrimp is also a delightful choice. Just toss them in with the gyoza. They cook fast and add a lovely touch. You can mix and match based on what you enjoy! To keep your gyoza soup fresh, store it in an airtight container. Make sure to cool the soup before sealing it. Refrigerate it within two hours of cooking. Proper refrigeration helps maintain the soup's taste and quality. Enjoy the leftovers within three days for the best flavor. Freezing gyoza soup is easy. First, let the soup cool completely. Then, pour it into freezer-safe bags or containers. Remove as much air as possible to prevent freezer burn. Label the bags with the date. The soup can stay fresh in the freezer for up to three months. When you are ready to enjoy it again, simply thaw it overnight in the fridge. To reheat gyoza soup, use a pot on medium heat. Stir the soup gently to heat it evenly. You can also use a microwave. If using a microwave, heat it in short intervals, stirring in between. This helps keep the gyoza and vegetables from getting mushy. Always check the temperature before serving. Enjoy your warm and comforting gyoza soup! Yes, you can use homemade gyoza. They add a personal touch. If you make them, ensure they are thin and well-sealed. This helps them cook evenly. Store-bought gyoza are convenient and save time. Choose what works best for you. Homemade gyoza can be a fun project. If you have time, give it a try! This recipe is not vegetarian or vegan. It uses chicken broth, which contains meat. To make it vegetarian, swap chicken broth for vegetable broth. For a vegan option, ensure your gyoza are also vegan. Many brands offer plant-based gyoza. Always check the labels to be safe. For this soup, any gyoza works well. I often use pork or chicken gyoza. They add rich flavor to the broth. You can also try vegetable gyoza for a lighter taste. Brands like Wei Chuan or Trader Joe's offer good options. Choose your favorite style to make this soup special! This blog post showed how to make a tasty gyoza soup. We discussed the key ingredients, step-by-step instructions, and helpful tips. Now you know how to enhance flavor and serve the soup. You can even try different broths and vegetables. Enjoy experimenting with variations and perfecting your recipe. Remember to store leftovers properly and reheat them gently. Now, you can create a warm, yummy meal that fits any taste. Happy cooking!

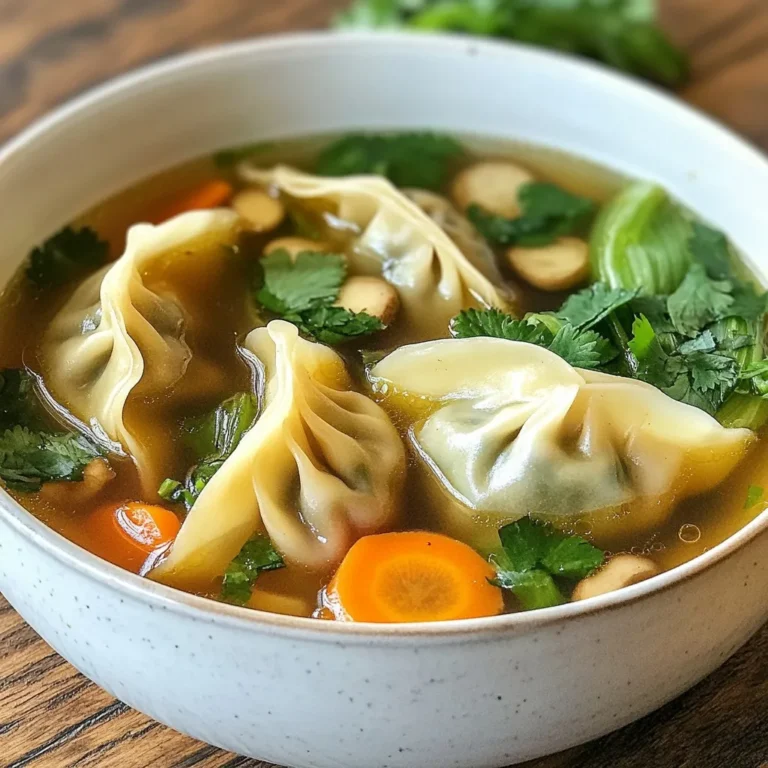
Comforting Gyoza Soup Warm and Inviting Recipe

- 2 cups all-purpose flour - 1 cup apple cider - 1/2 cup unsweetened applesauce - 3/4 cup brown sugar, packed - 1/4 cup granulated sugar - 1/2 cup vegetable oil - 1 large egg - 1 teaspoon vanilla extract - 1 tablespoon baking powder - 1 teaspoon ground cinnamon - 1/2 teaspoon ground nutmeg - 1/2 teaspoon salt - 1/2 cup chopped walnuts or pecans (optional) - 1/2 cup shredded apple (about 1 medium apple) The base of these muffins is all-purpose flour. It gives structure and helps the muffins rise. Apple cider adds moisture and a sweet, tangy flavor. Unsweetened applesauce keeps the muffins soft and light. Brown sugar gives a rich taste, while granulated sugar adds a little sweetness. Vegetable oil keeps the muffins moist and tender. The egg helps bind everything together. Vanilla extract adds a warm flavor. Baking powder is crucial for that perfect rise. Ground cinnamon and nutmeg bring warmth and spice, making these muffins feel cozy. You can add chopped walnuts or pecans for crunch. They add a nice texture and flavor. Shredded apple gives extra moisture and boosts the apple flavor. You can also consider adding raisins or dried cranberries for a chewy surprise. Choose what you like to make these muffins your own! {{ingredient_image_1}} First, preheat your oven to 375°F (190°C). This step is key. While it heats, line a 12-cup muffin pan with paper liners. If you don’t have liners, lightly grease each cup. In a large bowl, add 2 cups of all-purpose flour, 1 tablespoon of baking powder, 1 teaspoon of ground cinnamon, 1/2 teaspoon of ground nutmeg, and 1/2 teaspoon of salt. Whisk these ingredients together until well mixed. This helps the muffins rise well. In another bowl, whisk together 3/4 cup of packed brown sugar and 1/4 cup of granulated sugar. Add 1/2 cup of vegetable oil, 1 large egg, 1 teaspoon of vanilla extract, 1 cup of apple cider, and 1/2 cup of unsweetened applesauce. Mix until smooth. This mixture adds moisture and flavor. Now, slowly pour the wet ingredients into the dry ingredients. Stir gently until just combined. Don’t overmix; a few lumps are fine. Next, fold in 1/2 cup of shredded apple and 1/2 cup of chopped walnuts or pecans, if you like. This adds texture and taste. Divide the batter evenly among the muffin cups, filling each about 2/3 full. Bake in the oven for 15-20 minutes. To check if they're done, insert a toothpick in the center. It should come out clean. Let the muffins cool in the pan for 5-7 minutes before moving them to a wire rack. Enjoy your delicious apple cider muffins! To get soft, fluffy muffins, watch your mixing. Mix the wet and dry ingredients until just combined. A few lumps are okay. Overmixing can make muffins tough. Use room-temperature ingredients for the best rise. This helps the batter blend well. Storing muffins is easy. Keep them in an airtight container. They stay fresh for about three days at room temperature. For longer storage, put them in the fridge. Reheat in the microwave for 10-15 seconds. This brings back their soft texture. You can make these muffins ahead of time. Bake and cool them, then store as mentioned above. You can also freeze them. Wrap each muffin in plastic wrap and place in a freezer bag. They last up to three months in the freezer. Just thaw or reheat when you want to enjoy them! Pro Tips Use Fresh Apples: For the best flavor, use fresh, crisp apples for shredding. Varieties like Granny Smith or Honeycrisp work well! Don't Overmix: When combining the wet and dry ingredients, mix just until combined. Overmixing can lead to dense muffins. Check for Doneness: Insert a toothpick into the center of a muffin; if it comes out clean or with a few crumbs, they are ready! Storage Tips: Store leftover muffins in an airtight container at room temperature for up to 3 days or freeze for longer freshness. {{image_2}} You can change the sweet taste of your apple cider muffins. Try using honey or maple syrup instead of brown sugar. These sweeteners add a unique flavor. You can also use coconut sugar for a lower glycemic index. This makes the muffins a bit healthier. Adjust the amount of liquid to keep the batter right. If you use liquid sweeteners, reduce your apple cider slightly. Want to spice things up? Add fruits like cranberries or raisins to your batter. These add sweetness and a chewy texture. You can also mix in spices like ginger or cardamom for a warm flavor. If you like nuts, walnuts or pecans are great too. They add crunch and depth. Don’t forget about chocolate chips! They give a fun twist to these muffins. Making your muffins gluten-free is easy! Use a gluten-free flour blend in place of regular flour. Be sure it has a good mix of starches and proteins. For a vegan version, swap the egg for a flax egg. Just mix one tablespoon of ground flaxseed with three tablespoons of water. Let it sit for a few minutes until it thickens. You can also replace the vegetable oil with applesauce. This keeps your muffins moist and adds natural sweetness. To keep your apple cider muffins fresh, store them in an airtight container. This helps keep them soft and moist. You can place them at room temperature for up to three days. If you want to keep them longer, consider refrigeration. However, this might change their texture a bit. For best taste, enjoy them fresh! Freezing is a great option if you want to save muffins for later. First, let them cool completely. Then, wrap each muffin tightly in plastic wrap. Place the wrapped muffins in a freezer-safe bag or container. They can last up to three months in the freezer. When you want to eat one, just remove it and thaw at room temperature. Reheating your muffins brings back their warmth and flavor. If they are frozen, let them thaw first. You can then heat them in the oven at 350°F (175°C) for about 5-10 minutes. This makes them soft again. Alternatively, use the microwave for about 15-20 seconds. Enjoy your muffins warm for the best taste! Yes, you can use various types of apple cider. Each type brings its own flavor. For a sweeter taste, try sweet apple cider. If you want a sharper flavor, go for spiced cider. Just keep in mind that the flavor will change based on your choice. You can substitute oil with melted butter or unsweetened applesauce. Both options will keep the muffins moist. If you choose applesauce, the muffins may taste a bit sweeter. Butter gives a rich flavor, while applesauce adds fruitiness. To check if the muffins are done, use a toothpick. Insert it in the center of a muffin. If it comes out clean, the muffins are ready. If you see batter on the toothpick, they need more time. Usually, they bake for about 15-20 minutes. Apple cider muffins can be a healthy treat. They use applesauce and apple cider, which offer some nutrients. However, they do contain sugar and oil. To make them healthier, you can reduce the sugar or use whole wheat flour. Yes, you can make mini muffins! Just use a mini muffin pan instead of a regular one. Fill each cup about half full. Bake for about 10-12 minutes. Check them with a toothpick to see if they are done. You have learned about making apple cider muffins from the ground up. We covered the key ingredients that make these muffins tasty, and we explored various flavor options. I shared step-by-step instructions to guide you through baking them perfectly. Tips for storage and variations also help you make these muffins fit your needs. Remember, enjoy the process and the delicious results! Happy baking!

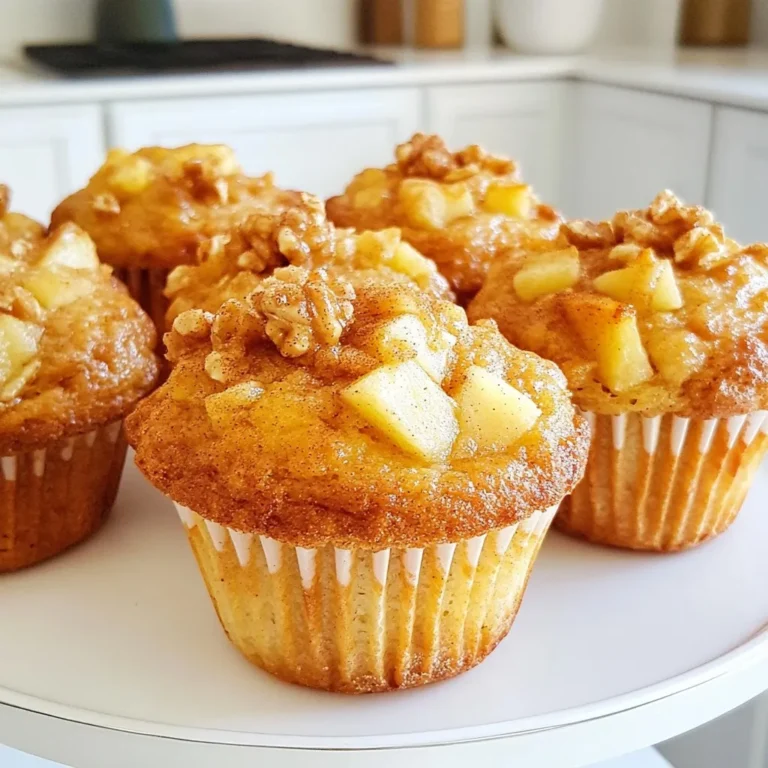
Apple Cider Muffins Savory and Soft Delight

- 1 lb boneless, skinless chicken thighs - 3 tablespoons olive oil - 2 tablespoons ground cumin - 2 tablespoons ground coriander - 1 tablespoon smoked paprika - 1 teaspoon turmeric - 1 teaspoon garlic powder - 1 teaspoon onion powder - ½ teaspoon cayenne pepper (adjust for spice) - Salt and black pepper to taste - Juice of 1 lemon - 2 cups cooked basmati rice - 1 cup cherry tomatoes, halved - 1 cucumber, diced - 1 small red onion, thinly sliced - ½ cup fresh parsley, chopped - ½ cup tahini sauce (store-bought or homemade) The key to great Chicken Shawarma Rice Bowls is the ingredients. You need fresh, flavorful items. First, use boneless, skinless chicken thighs. They stay juicy and tender. Next, the marinade is crucial. Olive oil blends well with the spices. Ground cumin and coriander give depth. Smoked paprika adds a nice smokiness. Turmeric brings a bright color. Garlic and onion powders enhance the flavors. Adjust cayenne to fit your spice level. For toppings, fresh vegetables are a must. Cherry tomatoes add sweetness. Cucumbers bring crunch. Red onion gives a sharp taste. Fresh parsley adds a burst of color. Lastly, don't forget the tahini sauce. It ties all the flavors together. You can use store-bought or make your own. This simple ingredient list will guide you to a delightful meal. Enjoy crafting your bowls with these fresh and vibrant ingredients! {{ingredient_image_1}} To make the chicken tasty, we need to marinate it. Here’s what you need: - 1 lb boneless, skinless chicken thighs - 3 tablespoons olive oil - 2 tablespoons ground cumin - 2 tablespoons ground coriander - 1 tablespoon smoked paprika - 1 teaspoon turmeric - 1 teaspoon garlic powder - 1 teaspoon onion powder - ½ teaspoon cayenne pepper (adjust for spice) - Salt and black pepper to taste - Juice of 1 lemon In a large bowl, mix the olive oil, spices, salt, and lemon juice. Make sure to stir well. Add in the chicken thighs and coat them evenly with the marinade. Cover the bowl and place it in the fridge. Marinate for at least 1 hour. If you have time, let it sit overnight. This adds great flavor! Now, let’s cook the chicken. You will need a grill pan or a skillet for this step. First, preheat your pan over medium-high heat. Once it’s hot, add the marinated chicken thighs. Cook them for about 6-7 minutes on each side. Look for nice charred marks. The chicken should be cooked through. After cooking, let it rest for 5 minutes. Then, slice the chicken into strips. Next, we'll prepare the base of our rice bowls. Start with 2 cups of cooked basmati rice. Scoop a generous amount into serving bowls. This rice makes a great base. Now it’s time to layer the ingredients. Top the rice with the sliced chicken. Add halved cherry tomatoes, diced cucumber, and thinly sliced red onion. For a fresh touch, sprinkle chopped parsley over the top. Finally, drizzle tahini sauce generously over each bowl. Add salt and pepper to taste. To make your chicken extra tasty, marinate it longer. A good rule is to marinate for at least 1 hour. However, letting it sit overnight in the fridge gives you the best flavor. Feel free to swap some spices. If you don't have smoked paprika, regular paprika works too. You can also try using fresh garlic instead of garlic powder. Each change adds a unique twist! To get those perfect grill marks, make sure your grill pan is hot. Place the chicken on the grill without moving it for the first few minutes. This helps create those nice lines. To check if the chicken is done, cut a piece open. The inside should be white and juices should run clear. If it looks pink, keep cooking it a little longer. When serving, add color and flavor with fresh herbs. A sprinkle of chopped parsley on top makes your bowl pop! You can also add slices of lemon for a bright touch. For sides, think about what pairs well. Fresh pita bread or a simple salad complements the bowls nicely. This adds more texture and flavor to your meal. Pro Tips Marinate Longer for Flavor: For the best flavor, marinate the chicken thighs overnight. This allows the spices to penetrate the meat deeply, resulting in a more flavorful dish. Let Chicken Rest: After cooking, let the chicken rest for about 5 minutes before slicing. This helps retain the juices, making the chicken more tender and succulent. Customize Your Toppings: Feel free to add your favorite toppings to the rice bowls, such as roasted red peppers, olives, or feta cheese for extra flavor and variety. Balance the Flavors: If you prefer a creamier texture, mix the tahini sauce with a bit of water or lemon juice to thin it out, creating a drizzle that complements the other ingredients beautifully. {{image_2}} You can switch chicken for other proteins. Beef works well if you want a richer taste. Tofu is great for a vegan choice. Just marinate it like chicken. It absorbs flavors nicely. If using beef, slice it thin for quick cooking. For tofu, press it first to remove moisture. Basmati rice is popular, but you can try brown rice. Brown rice adds fiber and a nutty taste. Quinoa is another excellent option. It cooks quickly and is gluten-free. Both of these alternatives offer a healthy twist. Spice it up by adding different spices. Hot sauce can bring heat. You can also top with yogurt for creaminess. Fresh herbs, like mint or dill, add bright notes. Consider adding nuts for crunch. Lastly, pickled vegetables bring tang to your bowl. To keep your Chicken Shawarma Rice Bowls fresh, let them cool first. Place the chicken and rice in an airtight container. Store in the fridge for up to three days. For longer storage, freeze the chicken and rice separately. They can last in the freezer for about three months. When ready to eat, thaw overnight in the fridge before reheating. Reheat the chicken in a skillet over medium heat. This keeps it juicy and flavorful. Stir occasionally for even heating. For rice, add a splash of water and cover. Heat on low until warm. If you like, you can microwave both, but watch closely to avoid drying them out. Enjoy your meal like it’s fresh! Chicken shawarma is a popular Middle Eastern dish. It features marinated chicken that is cooked on a rotating spit. This cooking method allows the meat to become tender and flavorful. Shawarma originated in the Ottoman Empire and has spread globally. Its unique blend of spices, like cumin and coriander, gives it a warm, rich taste. Yes, you can prepare this recipe ahead of time. Start by marinating the chicken. You can marinate it overnight for the best flavor. After cooking, let the chicken cool. Then, store it in an airtight container. You can also prepare the rice in advance. Keep it in the fridge for up to four days. This makes meal prep easy and quick. You can serve Chicken Shawarma Rice Bowls with various side dishes. Here are some ideas: - Hummus with pita bread - A fresh green salad - Yogurt sauce for dipping - Pickled vegetables for a tangy crunch For beverages, try serving sparkling water or a light lemon drink. These pair nicely with the rich flavors of the bowl. Enjoy the mix of tastes and textures! This blog post guides you through making delicious chicken shawarma rice bowls. We covered essential ingredients, marinating tips, cooking methods, and assembly steps. You learned how to store leftovers and reheat them without losing flavor. Finally, we explored variations to keep your meals exciting. Take these tips, try them out, and enjoy tasty meals. You will impress your friends and family with your skills. Enjoy the journey of cooking and flavor discovery!

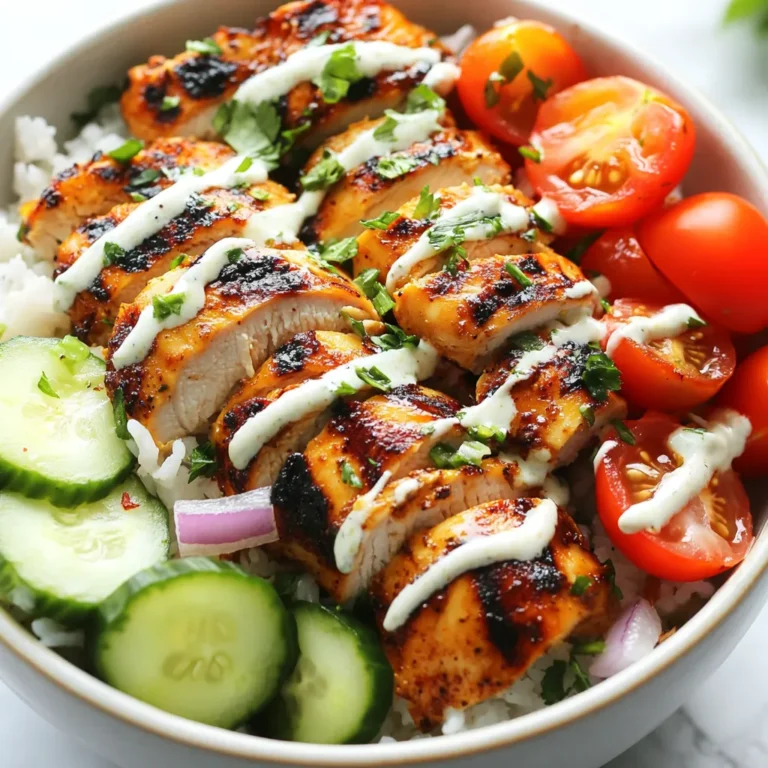
Savory Chicken Shawarma Rice Bowls Quick and Easy Recipe

PREV 1 … 83 84 85 86 NEXT
spicy fork kitchen

explore

DessertsDinnerAppetizersDrinks

Our Policies

  • Cookie Policy
  • Copyright Policy
  • Disclaimer
  • GDPR Policy
  • Terms Of Use
Back to Top
  • About
  • Contact Us
  • Privacy Policy
© 2025 spicy fork kitchen