FREE DINNER EBOOK! Get your copy!
  • Cookie Policy
  • GDPR Policy
  • Disclaimer
  • Terms Of Use
  • Visit my other site: Fun Cookie Recipes
spicy fork kitchen
  • Home
  • Dinner
  • Desserts
  • Drinks
  • Appetizers
  • Contact
  • About
  • Privacy Policy
  • Home
  • Dinner
  • Desserts
  • Drinks
  • Appetizers
  • Contact
  • About
  • Privacy Policy
  • Cookie Policy
  • GDPR Policy
  • Disclaimer
  • Terms Of Use
Visit my other site: Fun Cookie Recipes

HOME / CATEGORIES /

Latest

- 2 pounds Yukon Gold potatoes, peeled and cubed - 1 whole head of garlic - 4 tablespoons unsalted butter, softened - 1 cup heavy cream (or milk for a lighter option) - Salt, to taste - Freshly ground black pepper, to taste - 1 tablespoon fresh chives, chopped (for garnish) You can add ingredients to change the flavor. Here are some ideas: - Cream cheese for extra creaminess - Sour cream for a tangy taste - Parmesan cheese for a rich flavor - Fresh herbs like rosemary or thyme You will need a few tools for this recipe: - A large pot for boiling the potatoes - A knife for cutting garlic and potatoes - A potato masher for mashing - An oven for roasting the garlic - Aluminum foil to wrap the garlic - A mixing bowl to combine everything Gather these items before you start. It makes cooking easier and more fun! {{ingredient_image_1}} To start, grab a whole head of garlic. Preheat your oven to 400°F (200°C). Cut off the top of the garlic head. This exposes the cloves. Drizzle a little olive oil on top. Wrap the garlic in aluminum foil. Roast it for 30 to 35 minutes. The garlic should be soft and caramelized. Once done, let it cool for a bit. Squeeze out the roasted cloves from their skins. Set these aside for later. Next, take 2 pounds of Yukon Gold potatoes. Peel and cube them into small pieces. Put the cubed potatoes in a large pot. Cover the potatoes with cold water. Add salt to the water. This helps to flavor the potatoes. Bring the pot to a boil over medium-high heat. After boiling, lower the heat to a simmer. Cook the potatoes for about 15 to 20 minutes. They should be fork-tender when done. After cooking, drain the potatoes well. Return the drained potatoes to the pot. Use a potato masher to mash them until smooth. Then, add the roasted garlic you prepared earlier. Next, add 4 tablespoons of softened unsalted butter. Pour in 1 cup of heavy cream or milk. Mix everything well until you get a creamy texture. If you want it creamier, add more cream or milk. Now it’s time to season your mashed potatoes. Add salt and freshly ground black pepper to taste. Stir everything until well combined. The flavors should meld nicely. Transfer the mashed potatoes to a serving bowl. For a pop of color, sprinkle with chopped fresh chives on top. This not only looks good but adds flavor too. Enjoy your creamy dream dish! To make smooth mashed potatoes, follow these steps: - Use Yukon Gold potatoes. They are creamy and mash well. - Boil the potatoes until fork-tender. Don't undercook them, as this leads to lumps. - Use a potato masher or a ricer for even smoothness. Avoid using a food processor, as it can make the potatoes gummy. - Add the roasted garlic and cream while mashing. This helps distribute the flavors evenly. Roasting garlic adds a sweet, rich flavor to your mashed potatoes. Here’s how to do it right: - Use a whole head of garlic. Cut off the top to expose the cloves. - Drizzle with a bit of olive oil. This helps the garlic cook evenly and adds moisture. - Wrap it in aluminum foil. This keeps the heat in and prevents burning. - Roast at 400°F (200°C) for 30-35 minutes. Wait until the cloves are soft and caramelized. Salt is key for flavor, but too much can ruin your dish. Here are some tips: - Start with a generous pinch of salt while boiling the potatoes. - Add salt gradually when mixing in the cream and garlic. Taste as you go. - Use freshly ground black pepper for an extra kick. - Fresh herbs like chives can boost flavor without adding extra salt. Sprinkle them on top for a nice finish. Pro Tips Choose the Right Potatoes: Yukon Gold potatoes are ideal for mashed potatoes due to their creamy texture and buttery flavor, but you can also use Russet potatoes for a lighter mash. Don't Skip the Roasting: Roasting garlic enhances its sweetness and flavor. Make sure to let it cool before squeezing it out to avoid burns. Adjust Consistency: Feel free to add more cream or milk gradually until you reach your desired creaminess. For a richer taste, consider adding sour cream or cream cheese. Season Gradually: Start with a small amount of salt and pepper, tasting as you go. It’s easier to add more than to fix an overly salted dish. {{image_2}} You can make these mashed potatoes without dairy. Use coconut milk or almond milk instead of cream. This will give you a creamy texture without the lactose. The roasted garlic still shines through in each bite. Just follow the same steps and enjoy your tasty, dairy-free dish. Cheese can take your mashed potatoes to the next level. I love adding cream cheese or shredded cheddar for extra richness. Just mix in the cheese after mashing. This makes the dish even creamier and adds a nice flavor boost. It’s perfect for cheese lovers. Want to add some freshness? Try mixing in fresh herbs. Chopped parsley, rosemary, or thyme work great. Add them in when you combine the garlic and cream. This gives your mashed potatoes a bright taste. It’s a fun way to change things up while keeping it delicious. To store leftover mashed potatoes, place them in an airtight container. Make sure the lid seals tight. You can keep them in the fridge for up to three days. If you want to keep them longer, freezing is a great option. When you reheat mashed potatoes, do it slowly. You can use the stove or microwave. For the stove, add a splash of cream or milk to keep them creamy. Heat on low, stirring often. In the microwave, cover the dish with a lid or a microwave-safe wrap. Heat in short bursts, stirring between each burst. This helps them heat evenly. To freeze mashed potatoes, let them cool first. Spoon them into freezer-safe bags or containers. Make sure to remove as much air as possible. Label the bags with the date. You can freeze them for up to two months. When ready to eat, thaw them overnight in the fridge before reheating. Yes, you can use other potatoes. Russets work well too. They give a fluffy mash. Red potatoes are another option. They add a creamier texture. Just keep in mind the taste may change slightly. Yukon Gold potatoes are my personal favorite for their buttery flavor. To make this dish vegan, swap out butter and cream. Use vegan butter instead of regular butter. For cream, try coconut cream or almond milk. These keep the dish rich and creamy. You can also add nutritional yeast for a cheesy flavor. Absolutely! You can mix in cheese for added richness. Parmesan or cheddar are great choices. Fresh herbs like rosemary or thyme can boost the flavor. You could even add sautéed onions for sweetness. The options are endless, so be creative! Roasted garlic mashed potatoes are a comforting dish anyone can make. We explored key ingredients, cooking methods, and helpful tips to create the perfect texture. You learned how to store leftovers and reheat them for the best taste. Don't be afraid to try new variations to suit your taste. Enjoy experimenting with flavors and enjoy perfecting your recipe. Your roasted garlic mashed potatoes can impress any crowd. Happy cooking and enjoy your creamy, flavorful dish!

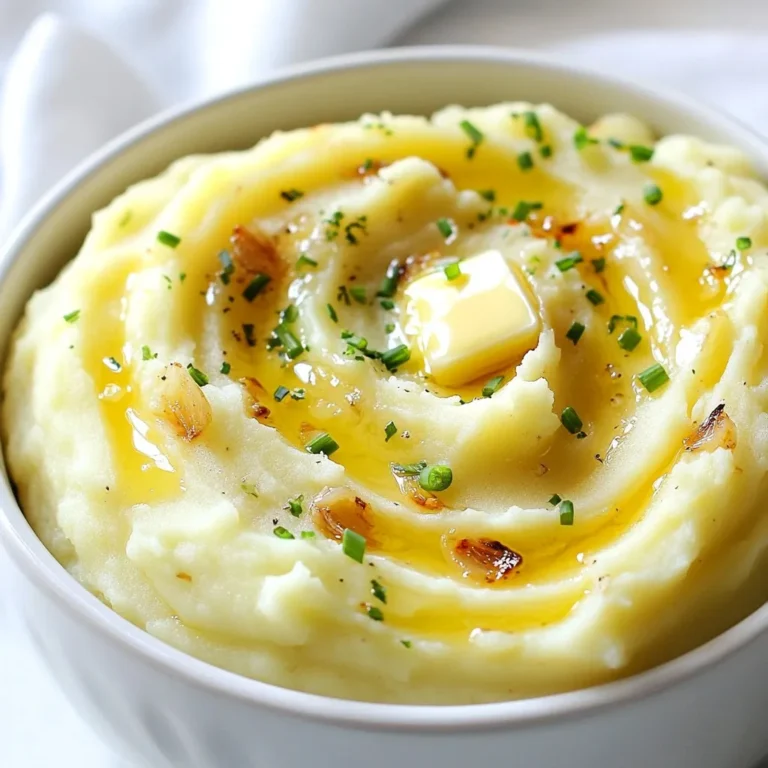
Roasted Garlic Mashed Potatoes Creamy Dream Dish

- 4 large potatoes, peeled and diced - 3 leeks, cleaned and sliced (white and light green parts only) - 1 medium onion, chopped - 3 cloves garlic, minced - 4 cups vegetable broth - 1 can coconut milk (full fat for creaminess) - 2 tablespoons olive oil - 1 teaspoon thyme (dried or fresh) - Salt and pepper to taste - Fresh chives or parsley for garnish To make a tasty Dairy Free Potato Leek Soup, you need simple ingredients. Start with four large potatoes. Their starch gives the soup a nice texture. Next, grab three leeks. Make sure to use only the white and light green parts. They add a mild onion flavor. You also need one medium onion and three cloves of garlic for depth. For the base, use four cups of vegetable broth. This keeps the soup light and full of flavor. A can of full-fat coconut milk makes it creamy. It gives that rich mouthfeel without dairy. You will also want two tablespoons of olive oil for sautéing. Don’t forget the thyme, salt, and pepper for seasoning. Finally, fresh chives or parsley will brighten up the dish when you serve it. These ingredients combine to create a warm and comforting soup. Each one plays a role in building flavor and texture. The coconut milk makes it particularly special. You can also play around with these ingredients based on what you have. {{ingredient_image_1}} To start, I heat the olive oil in a large pot over medium heat. I add the chopped onion and cook it until it turns translucent, about 5 minutes. This step builds a great base for the soup. Next, I add the sliced leeks and minced garlic. I sauté them for about 4-5 minutes. This softens the leeks and brings out their sweet flavor. The smell in the kitchen is amazing! Now, I add the diced potatoes to the pot. I stir everything together to mix the flavors. Then, I pour in the vegetable broth and stir in the thyme. I bring the mixture to a boil. Once boiling, I reduce the heat to low and let it simmer for about 20 minutes. I check the potatoes for tenderness. They should be soft enough to mash easily. Once the potatoes are tender, I use an immersion blender to purée the soup until it’s smooth. If you don’t have one, transfer the soup in batches to a regular blender. After blending, I stir in the coconut milk. This adds a rich creaminess to the soup. Then, I season it with salt and pepper to taste. I heat it through for an additional 5 minutes. Now, the soup is ready to serve! I like to garnish it with freshly chopped chives or parsley for a pop of color and flavor. Enjoy! To get that rich, creamy feel in your dairy-free potato leek soup, use full-fat coconut milk. This ingredient adds a smoothness that really comforts the soul. If you don’t like coconut, you can try using cashew cream or almond milk. These options still give you a nice texture, but they change the flavor a bit. When sautéing the onion and leeks, use medium heat. This helps to soften them without burning. Cook the onion until it turns clear; this usually takes about five minutes. Then add the leeks and garlic. You want them soft but not mushy, so keep an eye on the time. After you add the potatoes and broth, let everything simmer for about 20 minutes. This timing ensures the potatoes become nice and tender, making blending easier. While fresh chives or parsley are great choices for garnishing, don’t feel limited. You can also use basil or dill for a different taste. For extra texture, think about adding crunchy toppings. Toasted pumpkin seeds or crispy chickpeas can give your soup a fun twist. These add flavor and a nice bite to your creamy soup. Pro Tips Use Different Potato Varieties: Mixing starchy and waxy potatoes can enhance the texture and flavor of the soup. Adjust Coconut Milk Creaminess: For a richer flavor, consider using less vegetable broth or adding more coconut milk to your preference. Garnish for Freshness: Fresh herbs not only add color but also enhance the flavor of the soup. Experiment with basil or dill for a unique twist. Batch Cooking: This soup freezes well, so make a double batch and store portions in the freezer for a quick meal later. {{image_2}} You can make this soup more filling by adding protein. Beans or lentils work well. For beans, try white beans or chickpeas. They add creaminess and fiber. If you prefer lentils, use red or green lentils. They cook quickly and blend well into the soup. Switching up the herbs and spices can change the flavor of your soup. Fresh herbs like rosemary or dill can add a nice twist. If you prefer a bolder taste, try adding smoked paprika or cumin. Roasting vegetables before adding them to the soup can also enhance the taste. Consider roasted carrots or bell peppers for a sweet and smoky flavor. If you like your soup spicy, there are easy ways to add heat. Chili flakes or black pepper can give it a nice kick. You can also try adding jalapeños or hot sauce for more spice. Adjust the amount to suit your taste. Enjoy experimenting with these variations to make your Dairy Free Potato Leek Soup your own! To keep your soup fresh, let it cool first. Then, pour it into airtight containers. This helps prevent spills and keeps the soup tasty. Store it in the fridge for up to three days. If you plan to eat it later, freezing is a great option. You can freeze this soup for later. Use freezer-safe containers or bags. Leave some space at the top, as soup expands when it freezes. It will stay fresh for about three months. When you are ready to eat, thaw it in the fridge overnight. For best results, reheat on the stove. This keeps the soup's creamy texture. Stir it often to warm it evenly. If you are in a hurry, you can use the microwave. Heat it in short bursts, stirring in between to prevent hot spots. Yes, you can make this soup in advance. It tastes even better the next day. To store it, let it cool first. Place it in a sealed container. Keep it in the fridge for up to 3 days. If you want to freeze it, wait until it cools down. Use freezer-safe containers. The soup can last for up to 3 months in the freezer. When you want to eat it, thaw it in the fridge overnight. Reheat it on the stove or in the microwave. Add a splash of coconut milk for extra creaminess. Yes, this soup is gluten-free! All the ingredients are safe for those avoiding gluten. Potatoes, leeks, onion, garlic, and vegetable broth do not contain gluten. Just make sure the vegetable broth you choose is labeled gluten-free. Some brands may add gluten-containing ingredients, so check the label. This soup is a great option for gluten-free diets. Absolutely! This soup is versatile. You can use other vegetables based on your taste. Try carrots or celery for added flavor. Cauliflower can also give a nice texture. If you want a bit of sweetness, add some sweet potatoes. Just keep the cooking time in mind. Make sure the veggies are tender before blending. Feel free to mix and match based on what you have on hand. This makes the soup even more fun! This post covered how to make a delicious soup using simple ingredients. We discussed preparing vegetables, cooking techniques, and blending for creamy texture. I shared tips for enhancing flavor and suggested fun variations. Plus, I included storage advice for leftovers. Try out this recipe to discover how tasty homemade soup can be. Enjoy each bowl and make it your own!

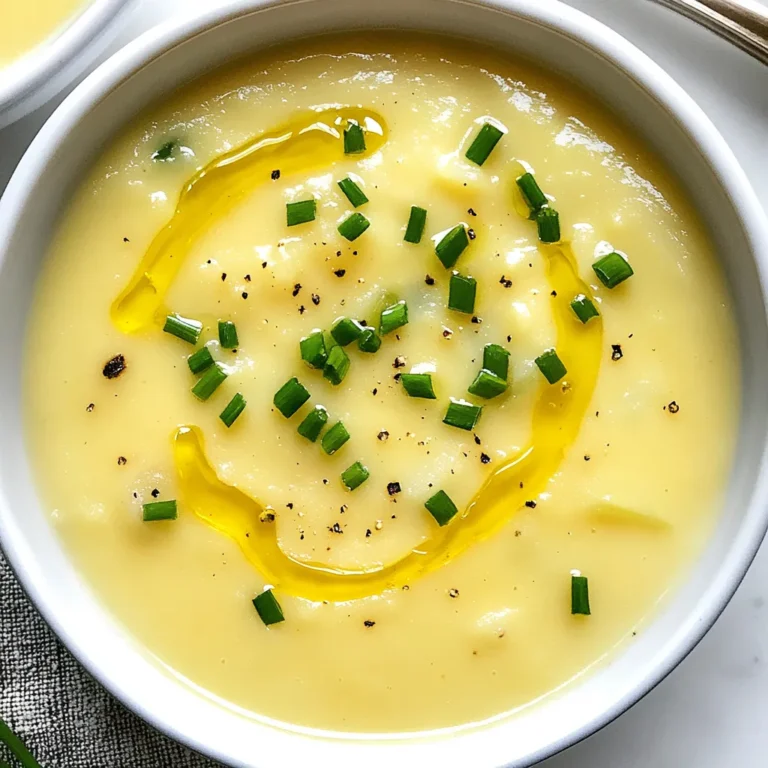
Dairy Free Potato Leek Soup Creamy and Comforting Delight

- 8 oz soba noodles - 2 tablespoons sesame oil - 1 tablespoon ginger, minced - 2 tablespoons soy sauce (or tamari for gluten-free) - 1 tablespoon rice vinegar - 1 tablespoon honey or maple syrup - 1 cup cucumber, julienned - 1 cup carrots, shredded - 1 red bell pepper, thinly sliced - 2 green onions, chopped - 1/4 cup fresh cilantro, chopped - 1 tablespoon sesame seeds - Optional: red pepper flakes for heat For this salad, I use 8 ounces of soba noodles. This is the perfect amount for four servings. The sesame oil gives a rich flavor. I add two tablespoons for a nice touch. One tablespoon of minced ginger adds amazing zest. The soy sauce and rice vinegar balance the taste well. I use two tablespoons of soy sauce. For sweetness, one tablespoon of honey or maple syrup works great. For the veggies, I need one cup each of cucumber and carrots. I add a red bell pepper for color. Two chopped green onions and a quarter cup of cilantro enhance the flavors. Finally, I sprinkle one tablespoon of sesame seeds on top for crunch. If you want some heat, add red pepper flakes. You can use tamari instead of soy sauce for a gluten-free version. Maple syrup can replace honey for a vegan option. If you don’t have soba noodles, you can use rice noodles. For a crunchier salad, try adding chopped nuts like peanuts or almonds. {{ingredient_image_1}} Start by boiling water in a pot. Add the soba noodles to the pot. Cook them according to the package instructions, usually about 5 to 8 minutes. When they are done, drain the noodles in a colander. Rinse the noodles under cold water to stop the cooking. This keeps them from getting mushy. Set them aside to cool while you make the dressing. In a large bowl, combine the sesame oil, minced ginger, soy sauce, rice vinegar, and honey. Use a whisk to mix them well. This dressing gives your salad a great flavor. You can taste it to see if you want to add more honey for sweetness or soy sauce for saltiness. If you like a bit of heat, this is a good time to add red pepper flakes. Once the noodles are cool, add them to the bowl with the dressing. Toss them gently to coat every noodle. Next, fold in the julienned cucumber, shredded carrots, sliced red bell pepper, chopped green onions, and fresh cilantro. Mix everything well, so the flavors blend together. Let the salad sit for about ten minutes. This helps the flavors meld nicely. Just before serving, sprinkle sesame seeds on top for some crunch. To make the best dressing, use fresh ginger. It adds a bright and zesty taste. Whisk together sesame oil, soy sauce, rice vinegar, and honey. This mix gives a sweet and salty balance. Adjust the honey to fit your taste. If you want it sweeter, add more honey. A touch of red pepper flakes can kick up the heat. For a crunchy bite, add more veggies like snap peas or radishes. The more colors, the more fun! You can also use toasted sesame seeds for extra flavor. Try mixing in some nuts for a unique twist. Chopped peanuts or almonds work great here. They add a lovely crunch and nutty flavor. Serve this salad cold for a refreshing dish. It pairs well with grilled chicken or shrimp. You can also use it as a side dish at a barbecue. If you have leftovers, store them in the fridge. Just remember to keep the dressing separate until you are ready to eat! Pro Tips Cool the Noodles: After cooking the soba noodles, rinse them under cold water to stop the cooking process and prevent them from becoming mushy. Customize Your Veggies: Feel free to substitute or add your favorite vegetables like bell peppers, snow peas, or edamame for extra flavor and nutrition. Make Ahead: This salad can be made in advance. Just keep the dressing separate until ready to serve for the freshest taste. Adjust the Sweetness: Taste the dressing before adding to the noodles and adjust the sweetness with more honey or maple syrup according to your preference. {{image_2}} You can easily boost the protein in your sesame ginger noodle salad. Tofu is a great option for a meatless meal. Choose firm tofu for the best texture. Just press it to remove extra water, then cube it. Sauté the cubes in a bit of sesame oil until golden brown. Chicken is another tasty choice. Cook it in a pan or grill it. Slice it thin before adding it to the salad. Shrimp also works well. You can boil or sauté shrimp for a quick protein fix. Just make sure they are pink and cooked through before adding them. Feel free to change up the veggies in your salad. If you don’t like cucumber, try bell peppers or radishes. Shredded cabbage adds crunch and flavor too. You can also use snap peas for a sweet touch. For a heartier mix, consider adding edamame or broccoli. Both veggies bring color and nutrition. Just steam or blanch them before adding to the mix. The key is to use fresh, colorful veggies for the best taste. To make this salad gluten-free, swap out regular soy sauce for tamari. Tamari is a gluten-free option that tastes great. Check your soba noodles too. Many contain wheat, so look for the 100% buckwheat kind. Rice vinegar is typically gluten-free, but always check labels. This way, you can enjoy the salad with peace of mind. Making these simple swaps keeps the flavors while meeting your dietary needs. Store your leftover sesame ginger noodle salad in an airtight container. Place it in the fridge. It will stay fresh for up to three days. Make sure to keep the salad covered. This helps keep it crisp and vibrant. You can eat this salad cold or at room temperature. If you prefer it warm, use a microwave. Heat it in short bursts of 20 seconds. Stir between each burst to avoid overheating. This way, the noodles warm up without getting soggy. I do not recommend freezing this salad. The fresh vegetables may lose their crunch. The noodles can become mushy after thawing. For best flavor and texture, enjoy it fresh or store it in the fridge. Sesame Ginger Noodle Salad is packed with good stuff. Soba noodles provide carbs for energy. They also have protein and fiber. The fresh veggies add vitamins and minerals. Cucumber helps with hydration and digestion. Carrots are great for your eyes. Ginger can aid in digestion and reduce inflammation. Sesame oil contains healthy fats, which are good for your heart. Overall, this salad is a tasty way to get nutrients. Yes, you can make this salad ahead of time. Prepare the salad and store it in the fridge. Just keep the dressing separate until you're ready to eat. This keeps the noodles and veggies crisp. You can mix in the dressing just before serving. The salad tastes even better after sitting for a bit as the flavors meld together. To change the heat level, add or skip red pepper flakes. Start with a pinch for mild spice. If you want more heat, add more flakes until it’s just right. You can also use fresh chili peppers for a fresh kick. If you find it too spicy, add a bit more honey or maple syrup to balance it out. This article covered making a tasty Sesame Ginger Noodle Salad. We went over all the ingredients you'll need, how to cook the noodles, and tips for making the best dressing. You learned how to combine everything and make great variations with proteins and veggies. Finally, we discussed how to store this dish for later. Enjoy your salad! With these steps, you can create a fresh meal anytime. Keep experimenting with flavors and enjoy the process.

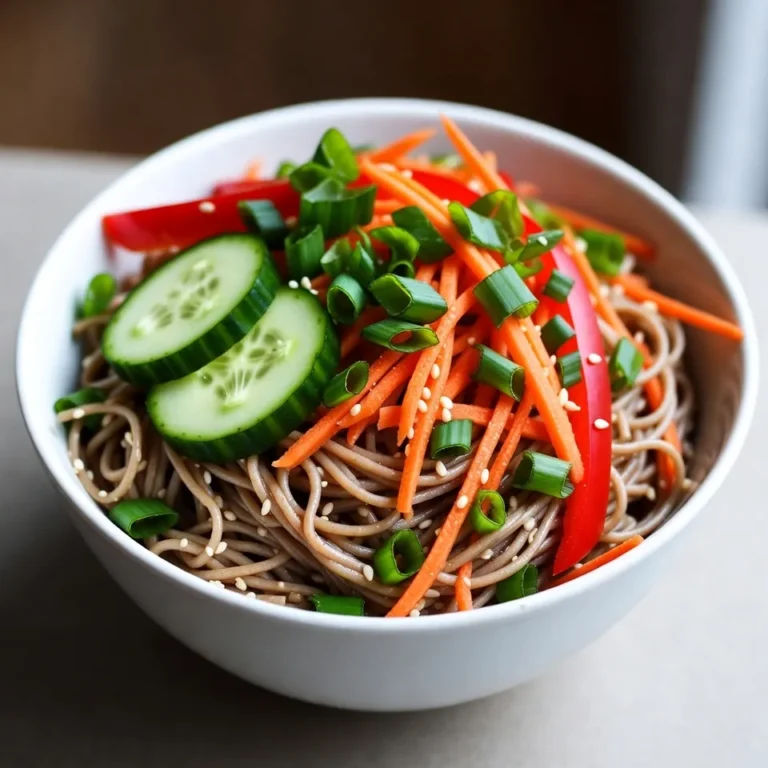
Savory Sesame Ginger Noodle Salad Fresh and Tasty Mix

- 4 boneless, skinless chicken breasts - 1 cup grated Parmesan cheese - 1/2 cup almond flour - 1 teaspoon garlic powder - 1 teaspoon onion powder - 1 teaspoon smoked paprika - 1/2 teaspoon black pepper - 1/2 teaspoon salt - 2 large eggs - 2 tablespoons Dijon mustard - 1 tablespoon olive oil - Fresh parsley, chopped (for garnish) This dish is great for those on a low-carb diet. Each serving has about: - Calories: 380 - Protein: 40g - Fat: 22g - Carbohydrates: 4g - Fiber: 1g This recipe contains dairy and eggs. If you have a dairy allergy, try using nutritional yeast instead of Parmesan. For a vegan option, use a plant-based egg replacer. Almond flour is gluten-free, but if you are allergic to nuts, you can use sunflower seed flour. Always check labels to ensure safety. {{ingredient_image_1}} Start by preheating your oven to 400°F (200°C). This helps the chicken cook evenly. Next, line a baking sheet with parchment paper. This keeps the chicken from sticking. Then, grab a shallow bowl. Combine 1 cup of grated Parmesan cheese with 1/2 cup of almond flour. Add 1 teaspoon of garlic powder, 1 teaspoon of onion powder, 1 teaspoon of smoked paprika, 1/2 teaspoon of black pepper, and 1/2 teaspoon of salt. Mix well to create a tasty crust. In another bowl, whisk together 2 large eggs and 2 tablespoons of Dijon mustard until they blend smoothly. This mixture helps the crust stick to the chicken. Take 4 boneless, skinless chicken breasts and dip each into the egg mixture. Make sure to let any extra egg drip off. After that, coat the chicken in the Parmesan crust mixture. Press gently to help it stick well. Once coated, place the chicken breasts on the lined baking sheet. Drizzle 1 tablespoon of olive oil over the tops. This adds moisture and flavor. Now, put the baking sheet in the oven. Bake the chicken for 25-30 minutes. The chicken should turn golden brown and look delicious. To check if the chicken is done, use a meat thermometer. Insert it into the thickest part of the chicken breast. The internal temperature should reach 165°F (75°C). If it’s not there yet, give it a few more minutes. Once done, take the chicken out of the oven. Let it rest for a few minutes before serving. This helps keep it juicy. Don’t forget to garnish with fresh parsley for a pop of color! To coat chicken well, start with dry hands. Use one hand for the egg mix and the other for the crust. This keeps things neat. Make sure you dip each piece fully in the egg first. Then, press it into the Parmesan mix firmly. This helps the crust stick better. For extra crunch, let the coated chicken rest for a few minutes before baking. Keeping chicken moist is key. Start by using skinless, boneless breasts for a lean option. Brining the chicken for a short time can help too. Use a simple mix of water and salt. Just soak it for 15–30 minutes. Lastly, drizzle olive oil on top before baking. This adds flavor and helps keep the chicken juicy. To boost the flavor, try adding herbs to the crust mix. Chopped fresh herbs like thyme or basil work great. You can also mix in some grated lemon zest for brightness. If you like spice, add cayenne pepper or hot sauce to the egg mix. These small changes can make a big impact on taste. Pro Tips Use Fresh Ingredients: Fresh chicken and high-quality Parmesan cheese will enhance the flavor and texture of your dish. Temperature Check: Ensure your chicken reaches an internal temperature of 165°F (75°C) for safe consumption and perfect doneness. Let It Rest: Allowing the chicken to rest for a few minutes after baking helps retain the juices, making it more succulent. Experiment with Spices: Feel free to customize the spice blend in the crust mixture to suit your taste preferences. {{image_2}} You can boost flavor with herbs and spices. Try adding Italian seasoning or fresh herbs like thyme or rosemary. A pinch of red pepper flakes gives a nice kick. You can also mix in some lemon zest for a bright taste. These additions keep the dish flavorful without adding carbs. Not a fan of chicken? You can use pork chops or turkey cutlets. Both work well with the Parmesan crust. If you prefer seafood, try this recipe with salmon fillets. The cooking time will change, but the flavor remains just as amazing. This recipe is flexible for various diets. To make it dairy-free, use a nut-based cheese. For a nut-free option, substitute with ground sunflower seeds. If you need a gluten-free version, ensure your Dijon mustard is gluten-free. You can easily adapt this recipe to fit your needs while keeping it delicious. After cooking, let the chicken cool to room temperature. Place the chicken in an airtight container. Store it in the fridge for up to 3 days. Make sure to cover the chicken to keep it fresh. If you want to keep it longer, consider freezing it instead. To freeze the chicken, wrap each piece tightly in plastic wrap. Then, place them in a freezer-safe bag. This way, you reduce freezer burn. You can store the chicken in the freezer for up to 2 months. When ready to eat, thaw it in the fridge overnight. To reheat, preheat your oven to 350°F (175°C). Place the chicken on a baking sheet. Cover it loosely with foil to keep it moist. Heat for about 15-20 minutes or until warmed through. You can also use a microwave, but the oven keeps the crust crispy. Enjoy your flavorful meal again! The cooking time for Parmesan crusted keto chicken is about 25 to 30 minutes. You want the chicken to bake until it is golden brown. Always check that the internal temperature hits 165°F (75°C) to ensure it's safe to eat. I do not recommend using regular flour. Almond flour keeps this dish keto-friendly. It also adds a nice nutty taste. If you need a substitute, consider coconut flour, but adjust the amount, as it absorbs more moisture. Yes, this dish is great for meal prep. You can make it ahead and store it in the fridge. Just reheat it when you're ready to eat. The flavors stay nice, and it holds up well. To know when the chicken is cooked, use a meat thermometer. Insert it into the thickest part of the breast. If it reads 165°F (75°C), the chicken is done. The meat should also look white and not pink. Many sides go well with Parmesan crusted keto chicken. Here are a few ideas: - Steamed broccoli - Cauliflower rice - Zucchini noodles - A fresh garden salad - Roasted Brussels sprouts These options will complement the dish nicely while keeping it low-carb. This article covered making Parmesan crusted keto chicken, from ingredients to storage tips. You learned how to choose the right ingredients, check for doneness, and enhance flavor. Exploring different variations ensures everyone can enjoy this dish. Remember to store leftovers correctly to maintain freshness. With these tips, you can create a tasty meal that fits your lifestyle. Enjoy your cooking and savor each bite guilt-free!

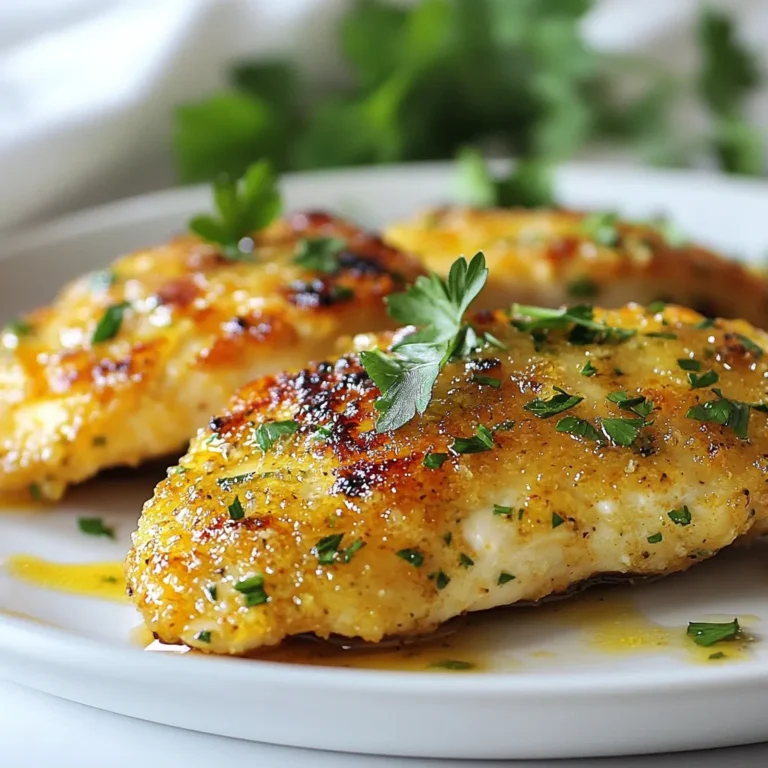
Parmesan Crusted Keto Chicken Flavorful and Simple Recipe

To make these tasty crispy cheesesteak chimichangas, you need a few key items. Gather these ingredients: - 1 lb flank steak, thinly sliced - 1 bell pepper, thinly sliced (any color) - 1 small onion, thinly sliced - 2 cloves garlic, minced - 1 tablespoon olive oil - 1 cup shredded provolone cheese - 4 large flour tortillas - Oil for frying These ingredients bring great flavor and texture to the dish. The flank steak gives a nice meaty base, while the bell pepper and onion add sweetness and crunch. Seasonings can make or break a dish. For these chimichangas, you will use: - 1 teaspoon Worcestershire sauce - 1 teaspoon smoked paprika - Salt and pepper to taste Worcestershire sauce adds depth. Smoked paprika gives a hint of smokiness, creating a cozy flavor. Adjust salt and pepper to suit your taste. Want to add more twist to your chimichangas? Consider these optional ingredients: - Hot sauce for a spicy kick - Fresh cilantro for brightness - Jalapeños for extra heat These extras can elevate your dish. Hot sauce gives a nice burn, while cilantro adds a fresh note. Feel free to mix and match to find your perfect balance! {{ingredient_image_1}} First, heat a large skillet on medium-high heat. Add one tablespoon of olive oil. When the oil is hot, add 1 pound of thinly sliced flank steak. Cook for about 4 to 5 minutes. Make sure to stir frequently. The steak should brown nicely. Next, add one thinly sliced bell pepper, one thinly sliced onion, and two minced garlic cloves. Cook these until soft, about 3 to 4 minutes. This mix smells great! Season with one teaspoon of Worcestershire sauce, one teaspoon of smoked paprika, and salt and pepper to taste. Stir well and cook for one more minute. Then, take it off the heat. Now, grab a large flour tortilla. Place about one-fourth of the steak and vegetable mixture in the center. Top this with one-fourth cup of shredded provolone cheese. Fold in the sides of the tortilla first, then roll it up tightly. Make sure everything is snug inside. Repeat this with the rest of the tortillas and filling. You want all chimichangas to look nice and neat. Next, heat oil in a deep skillet or fryer to 350°F (175°C). Fry the chimichangas in batches of 2 to 3 at a time. Turn them occasionally. This helps them cook evenly. Fry until they are golden brown and crispy, about 3 to 4 minutes. Once done, remove them and let them drain on paper towels. This keeps them crispy and not greasy. To get the best crunch, heat the oil to 350°F (175°C). This helps fry the chimichangas fast. Use enough oil to cover them. Fry in small batches for even cooking. Don’t overcrowd the pan. Let them drain on paper towels to keep them crisp. You can change the filling to fit your taste. Try chicken or turkey instead of flank steak. For a veggie twist, use mushrooms, zucchini, or black beans. Add spices like jalapeños for heat. You can also switch cheeses. Use cheddar or pepper jack for a different flavor. Avoid thick fillings. If the filling is too thick, it can burst out while frying. Don’t skip folding the sides in tightly. This helps seal the chimichangas. Also, don’t let them sit too long before frying. They should go straight into the hot oil for the best crunch. Pro Tips Choose the Right Cut: Flank steak is ideal for this recipe due to its flavor and tenderness when cooked quickly. You can also use sirloin or ribeye if you prefer. Don’t Overfill: Make sure to only add about 1/4 of the filling to each tortilla. Overfilling can make it difficult to roll them tightly and may cause them to burst while frying. Maintain Oil Temperature: Use a thermometer to ensure your oil stays at 350°F (175°C). If the oil is too cool, the chimichangas will absorb too much oil and become greasy. Let Them Drain: After frying, let the chimichangas drain on paper towels to remove excess oil. This will help keep them crispy and less oily when serving. {{image_2}} You can easily make a vegetarian version of chimichangas. Swap the flank steak for cooked mushrooms, zucchini, or lentils. These ingredients add rich flavor and texture. Use the same spices to keep that savory taste. Bell peppers and onions still work great here. You can also add some black beans for extra protein. This way, you have a tasty meal that pleases everyone. If you love heat, make your chimichangas spicy. Add diced jalapeños or serrano peppers to the filling. You can also mix in some hot sauce with the steak and veggies. For a smoky kick, try adding chipotle peppers in adobo sauce. This will give your chimichangas a nice, bold flavor. Serve with a spicy salsa to turn up the heat even more. While provolone cheese is great, you can try other cheeses too. Monterey Jack adds a nice creaminess, while pepper jack gives a spicy twist. Cheddar is another option for a sharp flavor. If you want something unique, use crumbled feta or queso fresco. Each cheese will change the taste but still keep it delicious. Choose what you like best for your chimichangas! To store leftover chimichangas, let them cool first. Wrap each chimichanga in plastic wrap or foil. Place them in an airtight container. They will stay fresh in the fridge for up to three days. If you want to keep them longer, consider freezing them. To freeze chimichangas, follow these steps: First, let them cool completely. Then, wrap each one in plastic wrap. After that, place them in a freezer-safe bag or container. They can last up to three months in the freezer. When ready to eat, just thaw them in the fridge overnight. For the best texture, reheat chimichangas in the oven. Preheat your oven to 350°F (175°C). Place them on a baking sheet and cover with foil. Heat for about 15-20 minutes. If you prefer a crispy finish, remove the foil for the last few minutes. You can also reheat them in an air fryer for a crispier result. A chimichanga is a deep-fried burrito. It has a crispy outer layer and a warm filling. This filling usually includes meat, beans, cheese, and vegetables. You can enjoy chimichangas with many dips, like salsa or guacamole. The fun part is how you can fill them with whatever you like. Yes, you can make chimichangas in the oven. This method is healthier than frying. To bake, preheat your oven to 425°F (220°C). Place the filled chimichangas on a baking sheet. Brush them lightly with oil for a golden color. Bake for about 20-25 minutes or until they are crispy. You can tell chimichangas are done by their color. They should be golden brown and crispy. If you use a thermometer, the inside should reach 165°F (74°C). When you cut one open, the filling should be hot and bubbly. Enjoy them fresh for the best taste! You learned how to make crispy cheesesteak chimichangas with tasty ingredients and step-by-step tips. We covered cooking methods, variations, and storage to boost your meal prep. Remember, the key is in using the right seasonings and avoiding common mistakes. Whether you prefer spicy or vegetarian versions, there's a chimichanga for everyone. Now, you can enjoy these delicious treats anytime. Enjoy your cooking journey and share your chimichanga wins!

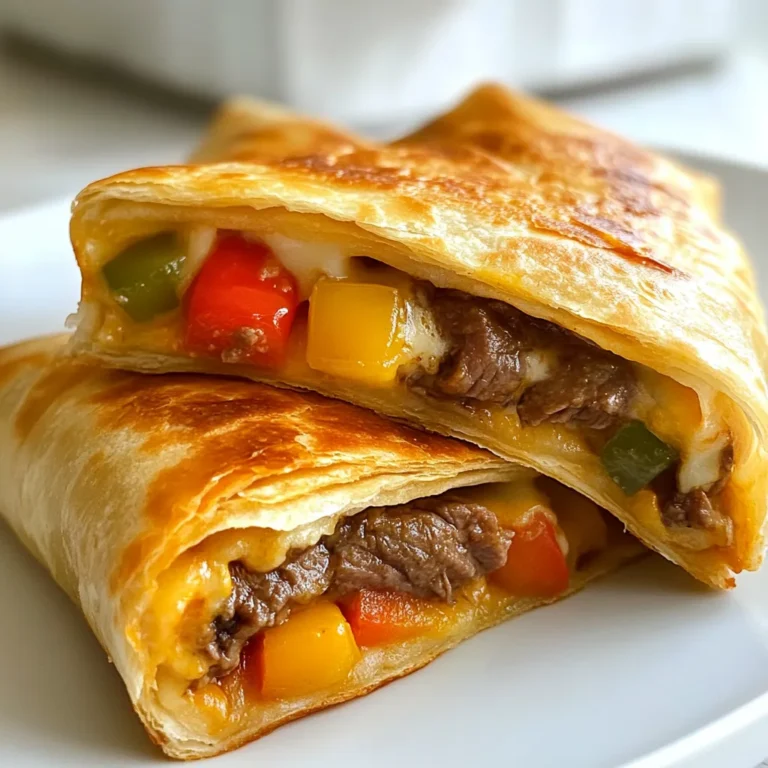
Crispy Cheesesteak Chimichangas Flavorful Easy Recipe

To make Spinach Ricotta Stuffed Shells, gather these items: - 20 jumbo pasta shells - 1 cup ricotta cheese - 1 cup fresh spinach, chopped - 1/2 cup grated Parmesan cheese - 1/2 cup shredded mozzarella cheese - 1 egg - 2 cups marinara sauce - 1 teaspoon garlic powder - 1 teaspoon Italian seasoning - Salt and pepper to taste - Fresh basil leaves for garnish If you need substitutions, here are some ideas: - Use cottage cheese instead of ricotta for a lighter option. - Swap fresh spinach for frozen spinach, but drain it well. - Replace Parmesan with any hard cheese like Pecorino Romano. - Use vegan cheese to make this dish plant-based. - For a gluten-free version, select gluten-free pasta shells. Each serving of these stuffed shells has: - Calories: 360 - Protein: 20g - Carbohydrates: 38g - Fat: 15g - Fiber: 3g - Sodium: 600mg This dish is rich in protein and provides good vitamins from spinach. Enjoy this hearty meal while balancing your diet! {{ingredient_image_1}} First, preheat your oven to 375°F (190°C). While it heats up, take a large pot and fill it with water. Add a good amount of salt to the water. Bring the water to a boil. Once boiling, add the jumbo pasta shells. Cook them according to the package directions until they are al dente. This usually takes around 10-12 minutes. When they are done, drain them and rinse them with cold water. This stops them from cooking more and helps them not stick together. Now it's time to make the filling. In a big mixing bowl, add one cup of ricotta cheese. Next, chop one cup of fresh spinach and toss it in. Add half a cup of grated Parmesan cheese and half a cup of shredded mozzarella cheese. Crack in one egg for binding. Sprinkle in one teaspoon of garlic powder and one teaspoon of Italian seasoning. Finally, add salt and pepper to taste. Mix everything together until it is smooth and well combined. This filling is key for great flavor. Grab your cooked pasta shells. Take one shell and fill it with about two tablespoons of the ricotta-spinach mixture. Be sure to fill them well, but don't overstuff them. Place each filled shell in a greased baking dish with the seam side up. Once you fill all shells, spread half of the marinara sauce evenly over top. Make sure the sauce covers all the shells. If you have extra sauce, add it to ensure they stay moist. Now they are ready for baking! To make stuffed shells, first, choose the right pasta. Jumbo shells work best. Cook them al dente to prevent sogginess. Rinse them in cold water to stop cooking. This keeps them from sticking together. Make sure to fill each shell with enough mixture. About two tablespoons per shell is ideal. Press the filling gently to pack it in well. To guarantee your cheese melts, use fresh cheese, like mozzarella and ricotta. Shredded cheese also melts better than blocks. Spread marinara sauce over the shells before baking. Cover the dish with foil for the first part of baking. This traps steam and helps the cheese melt. Remove the foil in the last minutes. This browns the cheese and adds flavor. Every oven heats differently. Start with the recommended time, but check your dish. If your oven runs hot, check early. If it runs cool, add a few minutes. Use a toothpick to test the shells. If the filling is hot and cheese is bubbly, they’re done. Always trust your instincts and adjust as needed for perfect results. Pro Tips Use Fresh Spinach: Fresh spinach provides a vibrant flavor and better texture compared to frozen spinach. If using frozen, ensure it's thoroughly drained and squeezed dry. Mix Cheeses for Flavor: Combining different types of cheese, like adding feta or a sharp cheddar, can enhance the flavor profile of the filling. Pre-bake the Shells: Consider baking the stuffed shells for a few minutes before adding sauce to get a slightly crispy texture on the pasta. Customize the Sauce: Feel free to add herbs or sautéed vegetables to your marinara sauce for additional depth and flavor. {{image_2}} You can mix up the filling if you want. Try adding cooked ground meat for extra flavor. You can also use different cheeses. For a twist, mix in feta or goat cheese. If you like a kick, add some crushed red pepper flakes. You can even use sautéed mushrooms or artichokes for a unique taste. The key is to keep the filling creamy and rich. If you need a gluten-free meal, swap the pasta. Use gluten-free jumbo shells, which are now easy to find. You can also use zucchini or eggplant slices instead of shells. These veggies hold the filling well and add fresh flavor. Just layer them in a baking dish like you would with pasta. To make this recipe vegan, replace the cheese and egg. Use plant-based ricotta, which is creamy and tasty. You can also use a flaxseed mix instead of the egg. Just mix one tablespoon of ground flaxseed with three tablespoons of water. Let it sit for a few minutes until it thickens. This way, you still get a rich filling without dairy. To store leftovers, let the stuffed shells cool first. Place them in an airtight container. You can keep them in the fridge for up to three days. Make sure to cover them with foil or plastic wrap to keep them fresh. When you’re ready to eat, preheat your oven to 350°F (175°C). Take the stuffed shells out of the fridge. Place them in a baking dish and add a bit of marinara sauce on top. Cover the dish with foil to keep moisture in. Bake for about 20 minutes, or until heated through. You can also use a microwave for faster reheating. Just cover them to avoid drying out. If you want to freeze the stuffed shells, place them in a single layer on a baking sheet. Freeze them for about an hour, then transfer to a freezer-safe bag. They can last up to three months in the freezer. To cook from frozen, bake at 375°F (190°C) for about 45-50 minutes, adding sauce as needed. Enjoy your meals later without much fuss! Spinach Ricotta Stuffed Shells last about 3 to 5 days in the fridge. Store them in an airtight container. Always check for any off smells before reheating. If they look or smell bad, it’s better to toss them. Yes, you can use fresh spinach! Just chop it finely and sauté it for a few minutes. This will help reduce water and keep your filling firm. Fresh spinach adds a nice flavor and vibrant color to your dish. Serve Spinach Ricotta Stuffed Shells with extra marinara sauce on top. Garnish with fresh basil for a pop of flavor and color. You can also add a sprinkle of Parmesan cheese for an extra cheesy touch. Pair with a side salad or garlic bread for a complete meal! This article covered how to make delicious spinach ricotta stuffed shells. We discussed the key ingredients and their substitutions. I shared tips for cooking and variations to suit your needs. You learned how to store leftovers for later. Remember, this dish is versatile and easy to make. You can adjust it based on what you have. Enjoy your cooking, and share these tasty shells with friends and family!

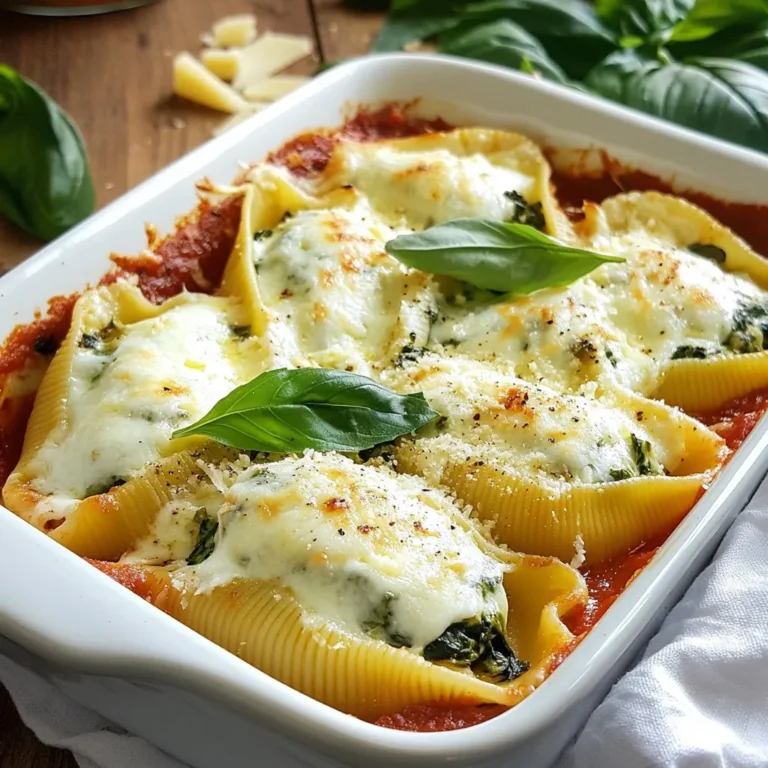
Savory Spinach Ricotta Stuffed Shells Easy Recipe

To make this rich and creamy fudge, gather these ingredients: - 2 cups granulated sugar - 1/2 cup unsalted butter - 1/2 cup heavy cream - 1 cup pure maple syrup - 1 teaspoon vanilla extract - 1/2 teaspoon salt - 1 cup pecans, chopped (lightly toasted for extra flavor) - 1/4 teaspoon ground cinnamon (optional for warmth) Choosing the right ingredients is key. Here are some tips: - Granulated Sugar: Go for a fresh bag. Old sugar may clump. - Unsalted Butter: Use real butter for flavor. Margarine changes taste. - Heavy Cream: Look for cream with a high fat content. It helps with the creamy texture. - Pure Maple Syrup: Always choose pure over imitation. It has a richer taste. - Pecans: Fresh, lightly toasted pecans add depth. Check for any bitterness. Want to make it a bit healthier? Here are some ideas: - Sugar Alternatives: Try coconut sugar or maple sugar for a different flavor. - Butter: Use coconut oil or a plant-based butter for a dairy-free option. - Cream: Substitute with coconut cream for a lighter version. - Nuts: Swap pecans for walnuts or almonds for varied textures and tastes. These tips make your Maple Pecan Fudge not just tasty but also a little more tailored to your needs. Enjoy crafting this delightful treat! {{ingredient_image_1}} To start, gather your ingredients. You will need: - 2 cups granulated sugar - 1/2 cup unsalted butter - 1/2 cup heavy cream - 1 cup pure maple syrup - 1 teaspoon vanilla extract - 1/2 teaspoon salt - 1 cup pecans, chopped (lightly toasted for extra flavor) - 1/4 teaspoon ground cinnamon (optional for warmth) Next, prepare your pan. Line an 8-inch square baking dish with parchment paper. Make sure to leave some overhang. This helps with easy removal later. Lightly grease the parchment to ensure the fudge lifts out easily. Now, it’s time to heat the mixture. In a medium-sized heavy saucepan, combine the sugar, butter, heavy cream, and maple syrup. Stir this mix over medium heat. Keep stirring until the sugar and butter melt completely. Once melted, bring the mixture to a gentle boil. Boil the mixture without stirring for about 5-7 minutes. Use a candy thermometer to check the temperature. You want it to reach the soft-ball stage, which is 238°F (114°C). This step is key for thick and creamy fudge. When it reaches the right temperature, remove the saucepan from heat. Stir in the vanilla extract, salt, and optional cinnamon. Mix well to blend all the flavors. Next, fold in the chopped pecans. Make sure they are evenly spread throughout the mixture. Pour the hot fudge into the prepared baking dish. Use a spatula to spread it evenly and smooth the top. Let the fudge cool at room temperature for at least 2 hours. If you want to speed things up, you can refrigerate it for about 1 hour. Once set, lift the fudge out of the pan using the parchment overhang. Cut it into small squares or rectangles. For a lovely presentation, arrange the squares on a decorative plate. Add a few whole pecans and drizzle some extra maple syrup on top. Enjoy your rich and creamy maple pecan fudge! Making fudge can be tricky. Here are some errors to watch for: - Not measuring ingredients: Use precise measurements for sugar and syrup. - Skipping the thermometer: A candy thermometer is key for the right texture. - Stirring too much: Once it boils, resist stirring to avoid grainy fudge. - Cooling too fast: Let it cool at room temp; don’t rush it in the fridge. Each of these mistakes can change your fudge's texture and taste. Avoid them for the best results. You can easily add unique flavors to your fudge. Here are some ideas: - Add spices: A dash of nutmeg or cardamom can add warmth. - Use flavored extracts: Try almond or maple extract for a twist. - Mix in chocolate: Add chocolate chips or cocoa powder for richness. - Top with sea salt: A sprinkle on top enhances the sweetness. These tips will help you create a fudge that delights your taste buds. Having the right tools makes a big difference. Here’s what you need: - Candy thermometer: Essential for checking the fudge's temperature. - Heavy saucepan: Choose one that heats evenly to avoid burning. - Spatula: A silicone spatula helps mix and pour without sticking. - Parchment paper: Line your pan for easy removal and cleanup. With these tools, you will make fudge like a pro. Pro Tips Use a Candy Thermometer: To ensure your fudge reaches the perfect consistency, use a candy thermometer and monitor the temperature closely during the boiling stage. Toast Your Pecans: Lightly toasting the pecans in a dry skillet enhances their flavor and adds a delightful crunch to your fudge. Cool Slowly: Allow your fudge to cool at room temperature before cutting. This will help it achieve a smooth texture and avoid cracking. Experiment with Flavors: Feel free to add other spices like nutmeg or ginger for a unique twist, or mix in chocolate chips for a richer taste. {{image_2}} You can switch out pecans for other nuts. Almonds, walnuts, or hazelnuts work well. Each nut brings a new taste. Almonds add a sweet crunch, while walnuts give a rich flavor. Hazelnuts can add a nice earthy note. Toast any nut you choose to bring out its flavor. Just be careful not to burn them. You can easily make this fudge vegan. Swap the butter for coconut oil or vegan butter. Use a plant-based cream like coconut or almond milk. Maple syrup is already vegan, so that’s perfect! This way, you can enjoy fudge without using any animal products. Seasonal flavors can make this fudge extra special. In fall, try adding pumpkin spice for warmth. In winter, a pinch of nutmeg can add cozy vibes. You can also mix in dried fruits like cranberries or apricots for a chewy texture. For a chocolate twist, fold in mini chocolate chips before it sets. To keep your maple pecan fudge fresh, store it in an airtight container. Ensure the container is clean and dry. Place a piece of parchment paper between layers of fudge if stacking. This method helps prevent sticking. Store the fudge at room temperature for up to one week. If your kitchen is warm, consider placing it in the fridge. Just remember that cold fudge may be harder to cut. Freezing your fudge is a great way to keep it longer. To freeze, first, let the fudge cool completely. Cut it into squares or rectangles. Wrap each piece in plastic wrap. Then, place the wrapped fudge in a freezer-safe bag or container. Make sure to remove as much air as possible. Fudge can last up to three months in the freezer. When you're ready to enjoy it, thaw the fudge in the fridge overnight. Check for signs of spoilage to ensure your fudge is still tasty. If you see mold or an off smell, throw it away. Fudge may also harden over time. While it’s safe to eat, the texture may change. If it feels dry or crumbly, it’s best to use it in recipes, like brownies or ice cream toppings. Always trust your senses; if it looks or smells off, don’t eat it. To cut fudge, use a sharp knife. First, let it cool completely. Then, lift it from the pan using the parchment paper. Place it on a cutting board. Cut the fudge into small squares or rectangles. For cleaner cuts, run the knife under hot water and dry it before each cut. Yes, you can make fudge without a candy thermometer. Watch for the soft-ball stage instead. To test this, take a small amount of fudge and drop it in cold water. If it forms a soft ball, it’s ready. This method needs practice, but it works well! Homemade fudge lasts up to two weeks when stored properly. Keep it in an airtight container at room temperature. If you want to store it longer, refrigerate it. Just make sure it’s well wrapped to prevent drying out. You can buy maple pecan fudge at specialty candy shops or local markets. Many bakeries offer homemade versions too. Online stores also sell fudge. Look for shops that focus on handmade or gourmet sweets for the best options. This blog post covered how to make delicious maple pecan fudge. We discussed the best ingredients, from flavors to healthy swaps. I shared step-by-step instructions to help you cook it perfectly. We also explored tips to avoid mistakes and enhance taste. Lastly, we looked at storage options to keep your fudge fresh. Now you have all the tools to create this sweet treat. Enjoy your fudge-making journey!

Maple Pecan Fudge Rich and Creamy Dessert Delight

- 4 medium sweet potatoes - 1 pound ground turkey - 1 teaspoon garlic powder - 1 teaspoon onion powder - 1 teaspoon smoked paprika - 1/2 teaspoon cumin - 1/2 teaspoon chili powder - Salt and pepper to taste - 1 cup black beans, drained and rinsed - 1 cup corn (canned or frozen) - 1 cup diced tomatoes (fresh or canned) - 1/4 cup chopped fresh cilantro - 1 avocado, diced (for topping) - Greek yogurt or sour cream (for serving) The sweet potatoes should be medium-sized, about 6-7 ounces each. Ground turkey comes in one-pound packs. For spices, one teaspoon is standard for most seasonings. Use half a teaspoon for stronger flavors like cumin and chili powder. The black beans and corn are measured in cups, which makes it easy. Fresh cilantro should be chopped finely, and the avocado is best when diced just before serving. Greek yogurt or sour cream adds creaminess and tang. If you want a vegetarian option, swap turkey for lentils or mushrooms. You can also use quinoa for added protein. For gluten-free folks, all ingredients are safe. If you're dairy-free, skip the Greek yogurt or use a plant-based alternative. If you dislike black beans, try kidney beans or chickpeas. {{ingredient_image_1}} First, set your oven to 400°F (200°C). Take four medium sweet potatoes and wrap each one in aluminum foil. This helps them cook evenly. Place the wrapped potatoes on a baking sheet. Roast them for about 45 to 60 minutes. Check if they are fork-tender. When done, remove them from the oven and let them cool for a few minutes. While the sweet potatoes cook, heat a large skillet on medium heat. Add one pound of ground turkey to the skillet. Cook it until it turns brown. Use a spatula to break it up into smaller pieces. This should take about 5 to 7 minutes. Then, mix in one teaspoon of garlic powder, one teaspoon of onion powder, one teaspoon of smoked paprika, half a teaspoon of cumin, half a teaspoon of chili powder, and salt and pepper to taste. Stir well to combine all the flavors. Next, add one cup of drained and rinsed black beans, one cup of corn, and one cup of diced tomatoes. Stir everything together and let it simmer for about 5 to 7 minutes until it’s heated through. Once the sweet potatoes are cool, take one and cut it in half lengthwise. Gently scoop out a bit of the flesh to make room for the turkey filling. Be careful not to break the skin. Fill each half with the turkey mixture. Top it with diced avocado and chopped fresh cilantro for a fresh taste. Serve your stuffed sweet potatoes warm, adding a dollop of Greek yogurt or sour cream on top. Enjoy this easy and tasty meal! Roasting sweet potatoes is easy and fun. First, choose medium-sized sweet potatoes for even cooking. Wrap each sweet potato in aluminum foil. This keeps them moist. Place them on a baking sheet to catch any drips. Roast them at 400°F for 45-60 minutes. Check if they are fork-tender. If not, give them more time. Let them cool slightly before cutting. This makes them easier to handle. To make the turkey filling pop, use spices wisely. Garlic powder and onion powder add depth. Smoked paprika gives a nice smoky flavor. Cumin and chili powder bring warmth and a hint of heat. Don’t forget salt and pepper to taste. Adding black beans and corn boosts the filling's texture. Diced tomatoes add freshness and moisture. Simmer everything together for 5-7 minutes. This helps meld the flavors well. Serve the stuffed sweet potatoes warm for the best taste. Cut them in half and scoop out a bit of the flesh. This creates space for the turkey filling. Top each half with diced avocado for creaminess. Fresh cilantro adds a bright touch. For extra creaminess, add Greek yogurt or sour cream. Arrange them on a wooden platter for a beautiful display. Enjoy this meal with family and friends. Pro Tips Perfectly Roasted Sweet Potatoes: To achieve a creamy texture, ensure that your sweet potatoes are fork-tender by roasting them until they are completely soft. Flavor Boost: For an added depth of flavor, consider adding a splash of lime juice to the turkey mixture before serving. Customizable Fillings: Feel free to mix in other vegetables or spices to the turkey filling based on your preferences; bell peppers or zucchini work well! Make Ahead: Prepare the turkey filling in advance and store it in the refrigerator. Then, simply reheat it before stuffing the sweet potatoes for a quick meal. {{image_2}} You can easily switch the ground turkey for a plant-based protein. Try lentils or chickpeas. They add great texture and protein. Make sure to season them well with garlic powder and smoked paprika. This keeps the flavor rich and satisfying. Toppings can take your stuffed sweet potatoes to the next level. I love adding diced avocado for creaminess. You can also sprinkle fresh cilantro for a burst of flavor. Try adding sliced jalapeños for heat or a squeeze of lime for brightness. Don’t forget Greek yogurt or sour cream for a cool finish! Seasoning can change the whole dish. Try using taco seasoning for a fun twist. You could also go for an Italian blend with oregano and basil. These spices can mix well with the turkey or any protein you choose. Experimenting with flavors makes cooking fun and creative! To store your turkey stuffed sweet potatoes, let them cool first. Place them in an airtight container. You can keep them in the fridge for up to three days. Label the container with the date. This helps you know how fresh they are. When you're ready to enjoy leftovers, preheat your oven to 350°F (175°C). Place the sweet potatoes on a baking sheet. Cover them with foil to keep them moist. Heat for about 20 minutes. You can also use a microwave for quicker reheating. Just place them on a microwave-safe plate and heat for 1-2 minutes. If you want to freeze your turkey stuffed sweet potatoes, wrap each one tightly in plastic wrap. Then place them in a freezer bag. Remove as much air as possible to prevent freezer burn. They can be frozen for up to three months. When you’re ready to eat, thaw them overnight in the fridge before reheating. Stuffed sweet potatoes can last about 3 to 5 days in the fridge. Make sure to store them in an airtight container. This helps keep them fresh and tasty. When you’re ready to eat, just reheat them in the oven or microwave. Yes, you can use chicken instead of turkey. Ground chicken works well in this recipe. Just cook it the same way as the turkey. The flavors will still be delicious and satisfying. You can serve many tasty sides with turkey stuffed sweet potatoes. Here are some ideas: - A fresh green salad with a light dressing - Simple steamed broccoli or green beans - Quinoa or brown rice for extra fiber - A dollop of salsa for extra flavor These sides add color and balance to your meal. Enjoy exploring different combinations! This article covered how to make delicious turkey stuffed sweet potatoes. We discussed the needed ingredients, their measurements, and easy swaps for dietary needs. I shared how to prep sweet potatoes, cook the turkey mix, and assemble your dish. You learned tips for roasting and enhancing flavors. We explored vegetarian options, toppings, and storage methods. In conclusion, stuffed sweet potatoes are tasty, healthy, and flexible. Customize them to fit your tastes. Enjoy your cooking journey and create meals you love!

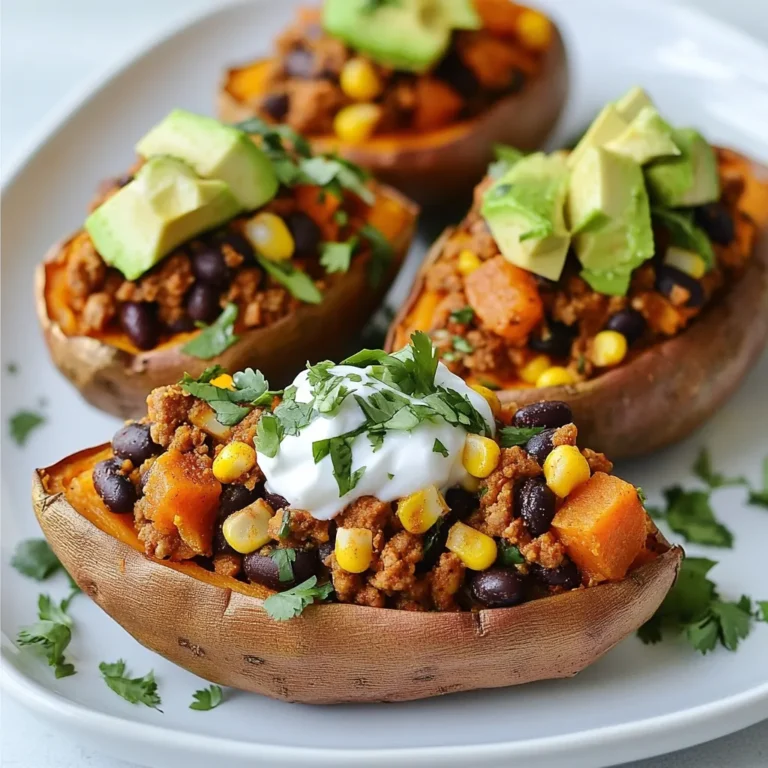
Turkey Stuffed Sweet Potatoes Flavorful and Easy Meal

Chicken and Marinade Components: - 4 chicken thighs, boneless and skinless - 1 cup buttermilk - 1 tablespoon fish sauce - 1 tablespoon lime juice - 1 tablespoon red curry paste For the chicken, I choose thighs. They stay juicy and tender. The marinade adds a burst of flavor. Buttermilk makes the chicken extra moist. The fish sauce brings umami, while lime juice adds brightness. Red curry paste adds a spicy kick. Breading and Frying Ingredients: - 1 cup all-purpose flour - 1/2 cup cornstarch - 1 teaspoon baking powder - 1 teaspoon garlic powder - 1 teaspoon onion powder - Salt and pepper to taste - Oil for frying The breading gives the chicken its crunch. I mix flour and cornstarch for a light texture. Baking powder helps it puff up. Garlic and onion powder add more flavor. Don’t forget salt and pepper to season well. You need oil for frying; it should be hot for the best results. Toppings and Serve Suggestions: - 4 soft brioche buns - 1 cup shredded cabbage - 1/4 cup fresh cilantro, chopped - 1/4 cup Thai sweet chili sauce - Lime wedges for serving Soft brioche buns are perfect for this sandwich. They soak up the sauce without getting soggy. Shredded cabbage adds crunch. Fresh cilantro gives a bright flavor. Thai sweet chili sauce is a must for sweetness and spice. Serve with lime wedges for extra zest. {{ingredient_image_1}} Preparing the Marinade Start by making the marinade. In a bowl, mix 1 cup of buttermilk, 1 tablespoon fish sauce, 1 tablespoon lime juice, and 1 tablespoon red curry paste. Whisk it all together until smooth. This mixture adds flavor and keeps the chicken juicy. Submerging the Chicken Thighs Add 4 boneless, skinless chicken thighs to the marinade. Make sure each piece is fully covered. This is key for tasty chicken. Recommended Marinating Time Cover the bowl and let it sit in the fridge. Marinate for at least 1 hour, but overnight is best. This gives the flavors time to soak in. Mixing the Dry Ingredients In another bowl, combine 1 cup all-purpose flour, 1/2 cup cornstarch, 1 teaspoon baking powder, 1 teaspoon garlic powder, and 1 teaspoon onion powder. Add salt and pepper to taste. Whisk it well. This mix will give the chicken a crispy coat. Frying the Chicken to Perfection Heat oil in a deep pan or fryer to 350°F (175°C). Remove the chicken from the marinade. Let the excess drip off. Dredge each piece in the flour mix, pressing lightly. This helps the coating stick. Fry the chicken for 5-7 minutes on each side. It should look golden brown. Check that it reaches 165°F (75°C) inside. Draining and Cooling the Fried Chicken When the chicken is done, transfer it to a wire rack lined with paper towels. This helps drain off any extra oil. Let it cool slightly before assembling the sandwich. Layering the Sandwich Components Grab 4 soft brioche buns. Spread 1/4 cup Thai sweet chili sauce on the bottom of each bun. Place a fried chicken thigh on top. Add a handful of shredded cabbage and a sprinkle of chopped cilantro. Essential Tips for Best Flavor For extra flavor, serve with lime wedges. The lime juice brightens the sandwich. You can also add pickled vegetables for crunch. Presentation Techniques Wrap each sandwich in parchment paper. This keeps it warm and looks nice. Serve with a small bowl of extra sweet chili sauce for dipping. Enjoy your meal! Achieving Crispy Skin and Juicy Meat To get that perfect crunch, use a mix of flour and cornstarch. This blend helps create a crispy coating that locks in moisture. Always marinate the chicken in buttermilk. This softens the meat and adds flavor. When frying, keep the oil at 350°F (175°C). This ensures even cooking. Use a meat thermometer to check that the chicken reaches 165°F (75°C). Avoiding Common Frying Mistakes Do not overcrowd the pan. Frying too many pieces at once cools the oil. This leads to soggy chicken. Let the chicken rest on a wire rack after frying. This helps keep the skin crispy by allowing excess oil to drip off. If you skip this, the steam makes the coating soft. Additional Thai Ingredients to Consider Add fresh herbs like Thai basil or mint for a fresh twist. You can also try using lemongrass in the marinade. It adds a bright, citrusy flavor. If you like spice, mix in some sliced chili peppers. They can pack a punch and enhance the taste. Substitutions for Allergens If you need gluten-free options, use a gluten-free flour blend. For those who avoid dairy, use non-dairy milk instead of buttermilk. Coconut milk works great and adds a nice flavor. If you're allergic to fish sauce, try soy sauce or tamari. These can still add depth to your marinade without the fishy taste. Pro Tips Marinate Longer for Flavor: For the best flavor, consider marinating the chicken thighs overnight. This allows the spices and buttermilk to deeply penetrate the meat, resulting in a more flavorful sandwich. Maintain Oil Temperature: Keeping the oil at a consistent temperature (around 350°F/175°C) is crucial for achieving a crispy coating. Use a thermometer to monitor the temperature and avoid overcrowding the pan, which can lower the oil temperature. Use Fresh Herbs: Adding fresh cilantro not only enhances the flavor but also brings a pop of color to your sandwich. Consider mixing in other fresh herbs like mint or basil for an interesting twist. Perfect Bun Choice: Opt for soft brioche buns as they complement the crunchy chicken perfectly. Toasting the buns lightly can also add an extra layer of texture and warmth to your sandwich. {{image_2}} - Gluten-Free Options: You can use gluten-free flour to make this sandwich. Almond flour or a pre-made gluten-free mix works great. Also, ensure your fish sauce is gluten-free. This way, everyone can enjoy this dish without worry. - Spicier Versions of the Marinade: If you love heat, add more red curry paste or some chopped fresh chilies to the marinade. You can also include a splash of sriracha for extra kick. This will give your chicken an exciting flavor and make it really pop. - Side Dishes that Pair Well: Serve your sandwich with crispy fries or a fresh salad. A side of sweet potato fries offers a nice balance to the spicy chicken. You can also try a light cucumber salad to cool it down. - Creative Upgrades for a Unique Twist: Want to change things up? Try adding pickled vegetables for a tangy crunch. You can also switch the brioche bun for a warm naan or a crispy baguette. Each option gives a fresh take on this classic sandwich. To keep leftover fried chicken tasty, follow these steps: - Best Practices for Refrigeration: First, let the chicken cool to room temp. Then, wrap it in foil or place it in an airtight container. This helps lock in moisture. Store in the fridge for up to 3 days. - Freezing Instructions for Longer Storage: If you want to save it more, freeze the chicken. Wrap each piece in plastic wrap and then foil to avoid freezer burn. Store in a freezer bag. It can last up to 3 months. Reheating fried chicken can be tricky. Here are some methods to keep it crispy: - Methods for Retaining Crispy Texture: Use an oven or air fryer. Preheat the oven to 375°F (190°C). Place the chicken on a wire rack over a baking tray. This allows hot air to circulate, keeping it crispy. Heat for about 10-15 minutes. - Avoiding Sogginess: Avoid microwaving the chicken as it makes it soggy. If you must, heat for a short time and use a paper towel to soak up moisture. The Thai Fried Chicken Sandwich is a tasty dish. It mixes crispy fried chicken with Thai flavors. This sandwich has roots in Thai street food. The use of fish sauce and red curry paste adds a unique twist. You get a savory, spicy, and sweet taste all in one bite. The sandwich often features fresh veggies, like cabbage and cilantro, for crunch. This dish is not just a meal; it's an experience. You can prep this sandwich before serving. Start by marinating the chicken. Let it soak in the buttermilk mixture for at least one hour. You can even marinate it overnight for more flavor. Next, fry the chicken just before you want to serve. If you need to, you can fry the chicken earlier. Keep it warm in a low oven. This way, it stays crispy. When ready to serve, just assemble the sandwich. Spread the sweet chili sauce on the bun. Add the fried chicken, cabbage, and cilantro. This makes for a quick and delicious meal. If you cannot use fish sauce, try soy sauce. It gives a similar salty flavor. You can also use coconut aminos if you want a sweeter taste. Another option is to mix tamari with a touch of lime juice. This can work well for those with dietary restrictions. Each substitute will change the flavor a bit, but the sandwich will still be good. You've learned how to make a Thai fried chicken sandwich from scratch. We covered key ingredients, marinating, frying, and assembling. Remember, the right techniques lead to crispy skin and juicy meat. Experiment with flavors and variations to make it your own. Store leftovers properly for the best taste later. This dish offers great taste and flair. Dive in, and enjoy every bite of your creation!

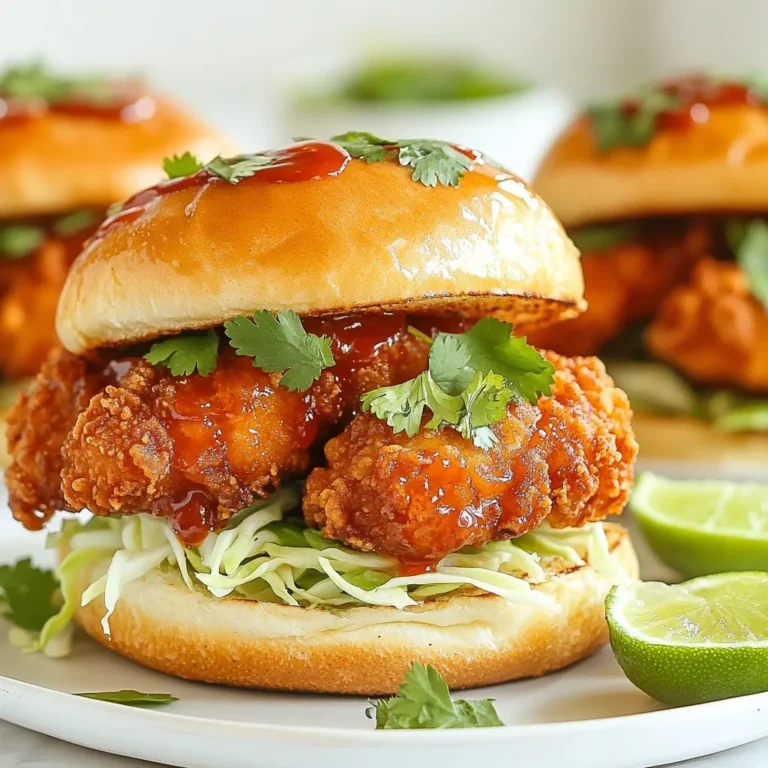
Thai Fried Chicken Sandwich Flavorful and Easy Recipe

To make Hamburger Supreme Casserole, gather these main ingredients: - 1 lb ground beef - 1 medium onion, chopped - 2 cloves garlic, minced - 1 can (15 oz) black beans, drained and rinsed - 1 can (14.5 oz) diced tomatoes with green chilies - 1 cup corn kernels (frozen or canned) - 1 teaspoon chili powder - 1 teaspoon cumin - 1/2 teaspoon salt - 1/4 teaspoon black pepper - 2 cups cooked pasta (elbow or penne work well) - 1 cup shredded cheddar cheese - 1 cup sour cream - 1/2 cup crushed tortilla chips (for topping) - Fresh cilantro or green onions for garnish (optional) You can enhance the flavor with these optional ingredients: - Jalapeños for heat - Bell peppers for sweetness - Additional spices like paprika or oregano - A splash of lime juice for brightness For the best results, consider these brands: - Ground beef: Certified Angus Beef - Black beans: Goya or Bush’s Best - Diced tomatoes: Hunt’s or Del Monte - Cheddar cheese: Tillamook or Kraft Using quality ingredients makes a big difference in taste. Choose the ones you love! {{ingredient_image_1}} Start by preheating your oven to 350°F (175°C). In a large skillet, cook 1 pound of ground beef over medium heat. Stir it often until it turns brown. Once browned, drain the excess fat. Add 1 chopped onion and 2 minced garlic cloves to the skillet. Cook these for about 5 minutes, until the onion looks clear. Next, stir in 1 can of black beans, 1 can of diced tomatoes with green chilies, and 1 cup of corn kernels. Sprinkle in 1 teaspoon of chili powder, 1 teaspoon of cumin, 1/2 teaspoon of salt, and 1/4 teaspoon of black pepper. Cook this mixture for another 5 minutes to let the flavors mix well. In a large bowl, mix the cooked pasta with the beef mixture and 1/2 cup of shredded cheddar cheese. Make sure everything blends nicely. Spread this mixture evenly into a greased 9x13 inch baking dish. In a small bowl, combine 1 cup of sour cream with the other 1/2 cup of shredded cheddar cheese. Spread this creamy mix over the pasta-beef layer. Finally, top with crushed tortilla chips for extra crunch. To make your casserole extra tasty, use fresh spices. Fresh ingredients always boost flavor. You can also use extra cheese for a richer taste. A sprinkle of fresh cilantro or green onions on top adds a nice touch too. Letting the beef and onion cook longer helps develop deeper flavors. Always taste your mixture before baking. Adjust the spice levels to your liking. Once you've prepared everything, bake your casserole in the preheated oven for 25-30 minutes. Look for bubbly cheese and a golden top. If it looks too dry, you can add a bit more sour cream before baking. After baking, let it cool for a few minutes before serving. This cooling time helps the layers set. Enjoy your Hamburger Supreme Casserole! You can prep this casserole a day before. Brown the beef and cook the onions and garlic. Mix everything according to the recipe, but don’t bake it yet. Cover it tightly and store it in the fridge. When you’re ready to eat, just bake it straight from the fridge. You may need to add a few extra minutes to the baking time. For a great cheese topping, use a mix of cheeses. Cheddar is a must, but you can add Monterey Jack or pepper jack for extra flavor. Make sure to spread the cheese evenly over the sour cream layer. This helps it melt properly. For added crunch, sprinkle a bit more crushed tortilla chips on top before baking. One common mistake is not draining the beef well. Leaving excess fat can make the casserole greasy. Another pitfall is undercooking the meat and veggies. Always cook until they are soft and the beef is brown. Lastly, don’t skip the garnishes! Fresh cilantro or green onions really enhance the dish. Pro Tips Layering Flavors: For a deeper flavor, consider adding a splash of Worcestershire sauce or hot sauce to the beef mixture while it's cooking. Cheese Variation: Mix different types of cheese such as Monterey Jack or Pepper Jack for a unique twist on the traditional cheddar. Make Ahead: Assemble the casserole the night before, cover it tightly, and refrigerate. Just bake it when you’re ready to serve! Garnish for Freshness: Fresh herbs like cilantro or parsley not only enhance the presentation but also add a burst of freshness to each bite. {{image_2}} You can change the protein in Hamburger Supreme Casserole to fit your taste. Ground turkey works well if you want a leaner meat. You could also use ground chicken for a lighter option. If you prefer plant-based meals, try using lentils or crumbled tofu. Both options give you a hearty texture without meat. Feel free to play with the veggies in your casserole. Bell peppers add color and crunch. Chopped spinach or kale can boost the nutrition. You might also add mushrooms for a rich flavor. Mix and match based on what you have at home. The more, the merrier! For a gluten-free version, use gluten-free pasta or skip it altogether. You can replace the pasta with zucchini noodles or cauliflower rice. Both options keep the dish hearty without the carbs. If you're watching your carbs, consider adding extra beans or veggies instead of pasta. Enjoy a delicious meal that fits your diet! After enjoying your Hamburger Supreme Casserole, let it cool first. Then, place the leftovers in an airtight container. This keeps the flavors fresh and prevents spills. Store it in the fridge for up to three days. If you want to keep it longer, consider freezing it. When you are ready to eat the leftovers, preheat your oven to 350°F (175°C). Place the casserole in an oven-safe dish. Cover it with foil to keep it moist. Heat for about 20 minutes, or until it is warm all the way through. You can also microwave individual servings. Just heat in short bursts, stirring in between. To freeze, make sure the casserole has cooled completely. Cut it into portions for easy thawing. Wrap each piece tightly in plastic wrap, then place them in a freezer bag. This helps avoid freezer burn. You can freeze the casserole for up to three months. When you are ready to use it, thaw it in the fridge overnight before reheating. Yes, you can make this casserole vegetarian. Instead of ground beef, use a meat substitute like lentils or mushrooms. You can also try using black beans or chickpeas for added protein. Just make sure to keep the spices the same for great flavor. If you need a substitute for sour cream, try plain Greek yogurt. It has a similar texture and taste. You can also use cottage cheese blended until smooth. Another option is to use cream cheese thinned with a little milk or lemon juice. You will know the casserole is ready when the cheese is melted and bubbly. The edges should be slightly golden. You can also check the center with a knife. If it comes out hot, it's done. Let it cool a bit before serving. This blog post covered ingredients, steps, tips, variations, storage, and common questions about Hamburger Supreme Casserole. You now have a clear guide to create a delicious dish. Remember, you can adjust flavors and ingredients to suit your taste. With practice, you’ll avoid pitfalls and build confidence in your cooking. Enjoy making this casserole for friends and family. It’s a great way to bring everyone together around the table. Happy cooking!

Hamburger Supreme Casserole Hearty Dinner Delight

PREV 1 … 82 83 84 … 86 NEXT
spicy fork kitchen

explore

DessertsDinnerAppetizersDrinks

Our Policies

  • Cookie Policy
  • Copyright Policy
  • Disclaimer
  • GDPR Policy
  • Terms Of Use
Back to Top
  • About
  • Contact Us
  • Privacy Policy
© 2025 spicy fork kitchen