FREE DINNER EBOOK! Get your copy!
  • Cookie Policy
  • GDPR Policy
  • Disclaimer
  • Terms Of Use
  • Visit my other site: Fun Cookie Recipes
spicy fork kitchen
  • Home
  • Dinner
  • Desserts
  • Drinks
  • Appetizers
  • Contact
  • About
  • Privacy Policy
  • Home
  • Dinner
  • Desserts
  • Drinks
  • Appetizers
  • Contact
  • About
  • Privacy Policy
  • Cookie Policy
  • GDPR Policy
  • Disclaimer
  • Terms Of Use
Visit my other site: Fun Cookie Recipes

HOME / CATEGORIES /

Latest

- 1 cup unsalted butter - 1 cup granulated sugar - 1/2 cup packed brown sugar - 1/4 cup pumpkin puree - 1 large egg - 1 teaspoon vanilla extract - 3 cups all-purpose flour - 1 teaspoon baking soda - 1 teaspoon cream of tartar - 1/2 teaspoon salt - 2 teaspoons ground cinnamon - 1 teaspoon ground ginger - 1/4 teaspoon nutmeg - 1/4 cup granulated sugar (for rolling) - 2 teaspoons ground cinnamon (for rolling) Using unsalted butter gives you control over the salt flavor. If you use salted butter, skip adding extra salt. Fresh pumpkin puree works best. You can use canned puree, but check the ingredients. It should only contain pumpkin. For the spices, fresh ground ones give more flavor. Store your spices in a cool place to keep them fresh. These ingredients blend beautifully to create soft, chewy, and flavorful cookies. Trust me, the flavor of brown butter makes a big difference. It adds a rich, nutty taste that pairs so well with pumpkin and spices. {{ingredient_image_1}} To start, melt the unsalted butter in a medium saucepan over medium heat. Stir it constantly. This helps prevent burning. After a few minutes, the butter will start to foam. Keep cooking until it turns a deep golden brown and smells nutty. This should take about 5 to 7 minutes. Remove the pan from heat and let the butter cool slightly. A well-browned butter adds a rich flavor to your cookies. In a large mixing bowl, add the brown butter along with the granulated sugar and brown sugar. Use an electric mixer to beat these together until they become smooth and creamy. Next, add the pumpkin puree, egg, and vanilla extract. Mix everything until it’s fully combined. The pumpkin puree is key. It makes the cookies soft and adds a lovely flavor. In another bowl, whisk together the all-purpose flour, baking soda, cream of tartar, salt, cinnamon, ginger, and nutmeg. Make sure to mix these dry ingredients well. This step is vital for even flavor. When you combine the dry mixture into the wet, do it slowly. Mix until just combined. Overmixing can make the cookies tough, so be gentle. After mixing, cover the dough with plastic wrap and chill it in the fridge. Aim for at least 1 hour but feel free to chill it for up to 24 hours. Chilling helps the flavors develop and makes the dough easier to scoop. If you’re not baking right away, just keep the dough wrapped in the fridge. When you're ready to bake, preheat your oven to 350°F (175°C). Line a baking sheet with parchment paper. In a small bowl, mix the granulated sugar and cinnamon for rolling. Scoop about 1 tablespoon of dough and roll it into a ball. Coat each ball in the cinnamon-sugar mixture. Place the dough balls on the baking sheet about 2 inches apart. Bake them for 10 to 12 minutes. You want the edges to be set, but the centers should still be soft. After baking, let them sit on the baking sheet for 5 minutes before moving them to a wire rack to cool. To make your Brown Butter Pumpkin Snickerdoodles even better, consider adding more spices. Try a pinch of allspice or clove for a warm kick. You can also mix in some dark chocolate chips for a rich contrast. These cookies pair well with warm beverages. A cup of chai tea or spiced apple cider complements the flavors nicely. If your cookies spread too much, try chilling the dough longer. This helps firm it up. If they turn out too hard, check your oven temperature. Maybe it runs hot, so reduce the baking time by a minute or two. For cookies that are too soft, bake them a bit longer until the edges are set. To keep your cookies fresh, store them in an airtight container. Place parchment paper between layers to avoid sticking. You can freeze the dough before baking. Scoop and roll the dough into balls, then freeze them on a baking sheet. Once frozen, transfer them to a bag. You can bake them straight from the freezer; just add a minute or two to the baking time. Pro Tips Brown Butter Perfection: Make sure to watch the butter closely while browning; it can go from perfect to burnt in a matter of seconds. Chill for Flavor: Chilling the dough not only makes it easier to handle but also enhances the flavor of the cookies, so don’t skip this step! Rolling Technique: Roll the cookie dough balls gently to ensure they’re smooth; this helps them bake evenly and gives a nice appearance. Soft Center Tip: To achieve that perfect soft center, take the cookies out of the oven when the edges are set but the center still looks slightly underbaked. {{image_2}} You can make these cookies even more fun by adding different ingredients. Consider mixing in: - 1 cup of chopped nuts, like pecans or walnuts - 1 cup of chocolate chips for a sweet twist - 1/2 cup of caramel bits for a chewy surprise If you need a gluten-free option, swap all-purpose flour with a gluten-free blend. For vegan cookies, use coconut oil instead of butter, and replace the egg with a flax egg (1 tablespoon ground flaxseed mixed with 2.5 tablespoons water). These swaps will help everyone enjoy these tasty treats! You can adapt these cookies for any holiday. For Halloween, add some orange and black sprinkles on top. For Thanksgiving, sprinkle some chopped pecans and drizzle with maple syrup before serving. In winter, add a hint of peppermint extract for a fresh twist. Each season brings a new reason to enjoy these snickerdoodles! Presentation can make a big difference. Here are some ideas: - Stack the cookies on a decorative plate and dust with powdered sugar. - Serve them warm with a scoop of vanilla ice cream on top. - Pair with hot apple cider or spiced tea for a cozy treat. These simple serving ideas will make your brown butter pumpkin snickerdoodles look as good as they taste! Yes, you can use salted butter. Just reduce the added salt in the recipe. Using salted butter will change the taste slightly. I prefer unsalted butter to control the salt levels. Look for the edges to be set and the centers soft. The cookies will firm up as they cool. They should not be too brown. Keep an eye on them around the 10-minute mark. Store the cookies in an airtight container. This keeps them fresh for up to a week. You can also add a slice of bread to keep them soft. For longer storage, freeze them in a zip-top bag. Yes, you can freeze the dough. Scoop it into balls and place them on a baking sheet. Freeze until firm, then transfer to a bag. You can bake them straight from the freezer. Just add a minute or two to the baking time. You can use lemon juice or white vinegar. Use the same amount as the cream of tartar called for in the recipe. This will help the cookies rise and keep their texture. One Brown Butter Pumpkin Snickerdoodle has about 120 calories. This cookie packs a nice flavor punch while being a treat you can enjoy. Each cookie contains: - Fat: 6 grams - Carbohydrates: 16 grams - Protein: 1 gram With these macronutrients, you get a sweet treat that is rich and satisfying. The butter gives it a nice fat content that helps with flavor and texture. The pumpkin puree adds moisture and a bit of fiber, which is a great bonus. If you want to make your cookies a bit healthier, here are some quick tips: - Reduce Sugar: Try cutting the sugar by 25%. The cookies will still taste great. - Use Alternative Sweeteners: You can use honey or maple syrup instead of granulated sugar. Just remember, these can change the texture slightly. - Replace Butter: Use coconut oil or applesauce for some of the butter. This can lower the fat content without losing taste. - Add Whole Wheat Flour: Swap out half of the all-purpose flour for whole wheat flour. This adds fiber and nutrients. These small changes can make your cookies a bit better for you without losing their yummy flavor. Enjoy baking and experimenting! In this blog post, I shared key steps for making delicious cookies, from ingredients to baking. You learned how to prepare brown butter for a rich flavor and the importance of chilling dough for the best texture. I provided tips to enhance flavors and troubleshoot common issues. Finally, I offered variations and serving suggestions for every occasion. Remember, with the right ingredients and techniques, you can create cookies that impress and satisfy. Happy baking!

Brown Butter Pumpkin Snickerdoodles Irresistible Treat

- 2 cups baby carrots, peeled - 2 cups green beans, trimmed - 3 tablespoons honey - 2 tablespoons unsalted butter - 1 tablespoon olive oil - Salt and pepper to taste - 1 teaspoon fresh thyme leaves (or ½ teaspoon dried thyme) - Zest of 1 lemon This recipe serves four. You will need two cups of baby carrots and two cups of green beans. The honey adds sweetness, while three tablespoons make this dish shine. Use two tablespoons of butter and one tablespoon of olive oil for a rich flavor. Season with salt and pepper to your taste. Fresh thyme adds a lovely herb note. Finally, the zest of one lemon brightens the dish. When choosing baby carrots, look for those that are bright orange and firm. Avoid carrots that feel soft or have blemishes. For green beans, pick ones that are vibrant green and snap when bent. They should be crisp, not limp. Fresh veggies will enhance your dish's taste and texture. If you can, buy local or organic for the best quality. {{ingredient_image_1}} First, fill a large pot with water and add salt. Bring the water to a boil. While waiting, peel your baby carrots. Trim the ends of your green beans. When the water boils, add the carrots. Cook them for about five minutes. This will soften them a bit. After five minutes, carefully add the green beans. Cook both for another three to four minutes. The veggies should be bright and a bit crisp. Drain them in a colander and then cool them in a bowl of ice water. This stops the cooking. Once cooled, drain them again and set them aside. Now, it's time to heat things up. Grab a large skillet and place it over medium heat. Add the unsalted butter and olive oil into the skillet. Wait until the butter melts and blends with the oil. Then, add your blanched carrots and green beans to the skillet. Sauté the vegetables for about two to three minutes. This warms them up and gets them ready for the glaze. Next, drizzle the honey over the vegetables in the skillet. Sprinkle fresh thyme leaves, salt, and pepper on top. Toss everything gently to coat the veggies in the honey. Cook for another two to three minutes. This allows the glaze to caramelize a bit. Just before serving, add lemon zest for a fresh kick. Toss again to mix everything well. Your honey glazed carrots and green beans are now ready to delight your taste buds! To get that shiny glaze, make sure you use high-quality honey. The honey will coat the veggies and add sweetness. When you drizzle it over the carrots and green beans, mix well. This helps the honey stick. Cook the mixture until the glaze starts to bubble. This means the sugars are caramelizing, giving it a rich taste. One common mistake is overcooking the vegetables. You want them tender but still bright and crisp. If you cook them too long, they may turn mushy. Make sure to use an ice bath after boiling. This stops the cooking fast and keeps the veggies fresh. Also, be careful with salt. Too much can overpower the sweet glaze. To take this dish to the next level, try adding a pinch of nutmeg. This spice adds warmth and depth. You can also use fresh herbs like parsley or dill for a fresh twist. If you like a bit of heat, sprinkle some red pepper flakes. A splash of balsamic vinegar can add a tangy note, making this dish even more exciting. Pro Tips Choose Fresh Vegetables: Opt for vibrant, fresh baby carrots and green beans to enhance the flavor and presentation of your dish. Perfect Glaze Consistency: Keep an eye on the honey glaze while cooking; you want it to caramelize slightly without burning, creating a beautiful shine. Enhance Flavor with Citrus: For an extra zing, consider adding a splash of fresh lemon juice along with the zest just before serving. Presentation Matters: Serve the vegetables on a large, colorful platter and garnish with extra thyme leaves or lemon wedges for visual appeal. {{image_2}} You can switch up the veggies in this dish. If you have other favorites, try them! You can use sliced bell peppers for a sweet crunch. Zucchini adds a nice bite and cooks quickly. Broccoli florets also work well, giving a nice green color. Just keep the cooking times in mind. Each veggie may need a different time to cook. If you want to change the sweet taste, there are great options. Maple syrup offers a unique flavor and is easy to use. Brown sugar can add a rich, deep sweetness too. You might even try agave nectar for a lighter touch. Just remember, each sweetener changes the taste a bit, so pick one you enjoy. You can easily change the taste of this dish. Adding garlic can give it a nice kick. If you love spice, try a pinch of red chili flakes. For a fresh twist, consider using fresh herbs like basil or parsley. Different spices, like cumin or coriander, can also add interesting notes. Mix and match until you find your perfect flavor! To keep your honey glazed carrots and green beans fresh, place them in an airtight container. Make sure the container is sealed well to avoid air. You can store them in the fridge for up to three days. If you plan to eat them later, let them cool before putting them in the container. When you are ready to enjoy your leftovers, you can reheat them easily. The best way is to use a skillet. Add a small amount of olive oil or butter to the skillet and heat on low. Add the vegetables and stir until warm. You can also use the microwave. Put the veggies in a microwave-safe bowl and cover with a lid or microwave-safe wrap. Heat in 30-second bursts, stirring in between, until hot. If you want to store these veggies for a longer time, freezing is a good option. First, let the carrots and green beans cool completely. Then, place them in freezer bags. Try to push out as much air as possible before sealing. Label the bags with the date. You can keep them in the freezer for up to three months. When you’re ready to enjoy them, thaw in the fridge overnight before reheating. Yes, you can use frozen vegetables. They save time and are often fresh. Just cook them for a shorter time. Follow the package instructions for cooking. Frozen carrots and green beans work well for this dish. To make this recipe vegan, swap the butter for a plant-based option. Use coconut oil or vegan butter instead. Honey can be replaced with maple syrup or agave. This keeps the flavor while making it vegan-friendly. These glazed vegetables pair well with many dishes. Try serving them with roasted chicken or grilled fish. They also complement rice or quinoa nicely. For a complete meal, add a salad on the side. This article covered how to make honey glazed carrots and green beans. You learned about the ingredients, their amounts, and how to pick fresh veggies. We explored the easy steps for prepping and cooking. Tips helped you avoid mistakes and achieve a perfect glaze. You can change up the recipe with different veggies and sweeteners. Finally, we discussed how to store and reheat leftovers. With these insights, you can enjoy this tasty dish anytime. Happy cooking!

Honey Glazed Carrots and Green Beans Delight Recipe

- 1 ¾ cups all-purpose flour - 1 teaspoon baking soda - ½ teaspoon baking powder - ½ teaspoon salt - 1 teaspoon ground cinnamon - ½ teaspoon ground nutmeg - ½ teaspoon ground ginger - ½ cup unsalted butter, softened - 1 cup granulated sugar - ½ cup brown sugar, packed - 2 large eggs - 1 cup canned pure pumpkin puree - 1 teaspoon vanilla extract - 1 cup chocolate chips (milk or dark) - ½ cup chopped walnuts (optional) Gathering the right ingredients is key to making a great chocolate chip pumpkin bread. First, I use all-purpose flour as the base. It gives the bread its nice structure. Baking soda and baking powder help it rise. Salt brings out the flavors, while spices like cinnamon, nutmeg, and ginger add warmth and depth. For the rich texture, I use softened unsalted butter. The mix of granulated sugar and brown sugar gives a sweet, caramel-like taste. Eggs help bind everything together, while pumpkin puree keeps the bread moist. The magic touch comes from vanilla extract and chocolate chips. I often choose dark chocolate for a bold taste. If you enjoy a bit of crunch, add chopped walnuts. They give a nice contrast to the soft bread. These ingredients work together to create a delicious fall delight that you will love. {{ingredient_image_1}} - Preheat the oven to 350°F (175°C). - Grease and flour a 9x5 inch loaf pan. Start by setting your oven. This step is key to baking your bread evenly. Greasing and flouring the pan ensures the bread does not stick. - Whisk together flour, baking soda, baking powder, salt, and spices. In a medium bowl, mix the dry ingredients. Use a whisk to combine them well. This helps distribute the baking soda and spices evenly. - Combine softened butter with granulated and brown sugars. In a large bowl, blend the softened butter with both sugars. Mix until it becomes light and fluffy. This usually takes about 3-4 minutes. - Add eggs, pumpkin puree, and vanilla extract into the batter. One at a time, add the eggs to your mixture. Mix well after each addition. Then add the pumpkin puree and vanilla. Stir until everything is combined. - Gradually mix dry ingredients with wet ingredients without overmixing. Now, slowly add the dry mix to the wet mix. Stir gently until just combined. Be careful not to overmix; this keeps the bread light. - Fold in chocolate chips and optional walnuts before baking. Finally, fold in your chocolate chips and walnuts if you want them. Make sure they spread evenly in the batter. Pour the batter into your pan and smooth the top. Then, bake for 60-70 minutes. Check with a toothpick to see if it’s done. To make sure your chocolate chip pumpkin bread turns out light and fluffy, avoid overmixing. When you add the dry ingredients to the wet, stir gently. This keeps the bread airy. Also, use room temperature ingredients. Soft butter and eggs mix better, giving you a smooth batter. To test if your bread is done, insert a toothpick in the center. If it comes out clean, your bread is ready. Remember, all ovens are different. You may need to adjust the baking time. Keep an eye on your bread as it bakes. Serving chocolate chip pumpkin bread can be as fun as making it. Slice the bread and arrange it on a nice platter. Dust it with powdered sugar for a sweet touch. You can also add a dollop of whipped cream on the side. This makes it look fancy and taste even better! Pro Tips Use Fresh Spices: For the best flavor, use fresh ground spices instead of pre-ground ones. This will enhance the taste of your bread significantly. Check Doneness with a Toothpick: Insert a toothpick in the center of the bread; if it comes out clean, your bread is ready. This ensures you avoid overbaking. Cool Properly: Let the bread cool in the pan for 10 minutes before transferring it to a wire rack. This prevents it from becoming soggy. Experiment with Add-ins: Feel free to add dried fruits or different nuts to the batter for a unique twist on flavor and texture. {{image_2}} You can make your chocolate chip pumpkin bread even better with nuts and spices. Adding nuts like pecans or almonds gives a nice crunch. They add flavor and texture to each bite. Just chop them up and fold them into the batter. You can also play with spices. Instead of just cinnamon, try cloves or allspice. These spices can add warmth and depth. A little extra spice can really change the flavor. If you need to make dietary changes, there are great options. You can use gluten-free flour instead of all-purpose flour. Look for a blend that works well for baking. This way, you can still enjoy this tasty bread. For vegan options, swap the eggs with flaxseed meal or applesauce. Use coconut oil or vegan butter in place of regular butter. These changes keep the bread moist and delicious without using animal products. Enhancing the flavor can make your pumpkin bread even tastier. You can add cranberries or raisins for a fruity twist. These ingredients bring sweetness and extra moisture. If you want to change the chocolate chips, try white chocolate or caramel. These swaps can give a whole new taste. They add a fun surprise to each slice, making it even more special. To keep your chocolate chip pumpkin bread fresh, store it at room temperature. Wrap the bread tightly in plastic wrap or aluminum foil. This method keeps the bread soft and moist. Make sure to place it in a cool, dry place away from sunlight. If you want to keep it longer, store it in the fridge. This will extend its life by several days. Just remember to wrap it well to prevent it from drying out. Freezing is a great option if you want to save some bread for later. First, slice the bread into individual pieces. This makes it easier to take out only what you need. Wrap each slice in plastic wrap, then place them in a freezer bag. Be sure to remove as much air as possible to prevent freezer burn. You can freeze the bread for up to three months. When you're ready to eat it, thaw the slices in the fridge overnight. After freezing, you can refresh your chocolate chip pumpkin bread. To do this, preheat your oven to 350°F (175°C). Place the slices on a baking sheet and warm them for about 10 minutes. This will bring back some of that fresh-baked taste. You can serve the bread chilled or at room temperature. For a special touch, add a dollop of whipped cream or a sprinkle of powdered sugar. Enjoy your tasty treat any way you like! Chocolate chip pumpkin bread can last for about 3 to 4 days at room temperature. Keep it in an airtight container to keep it fresh. If you refrigerate it, it can last up to a week. However, the bread may dry out a bit in the fridge. It’s best to enjoy it fresh! Yes, you can use fresh pumpkin! To prepare fresh pumpkin puree, start by cutting a pumpkin in half. Remove the seeds and strings. Roast the halves at 350°F (175°C) for about 45 minutes. Once soft, scoop the flesh out and blend it until smooth. This gives your bread a rich, fresh flavor. If you want to change things up, try using butterscotch chips or white chocolate chips. You can also add dried fruits like cranberries or raisins for a sweet twist. Nuts can add crunch, too. Think about using walnuts or pecans for extra flavor. Absolutely! To make gluten-free chocolate chip pumpkin bread, use a gluten-free all-purpose flour blend. Brands like Bob's Red Mill or King Arthur Flour work well. Just check that the blend has xanthan gum, which helps with texture. Enjoy the same great taste without the gluten! You now know how to make a delicious chocolate chip pumpkin bread. Remember to use fresh spices and room temperature ingredients for the best taste. Don't hesitate to try different variations and toppings to make it your own. Proper storage will keep your bread fresh, so follow those tips carefully. Baking is fun, and sharing this treat will bring joy to others. Enjoy your baking adventure and the tasty results!

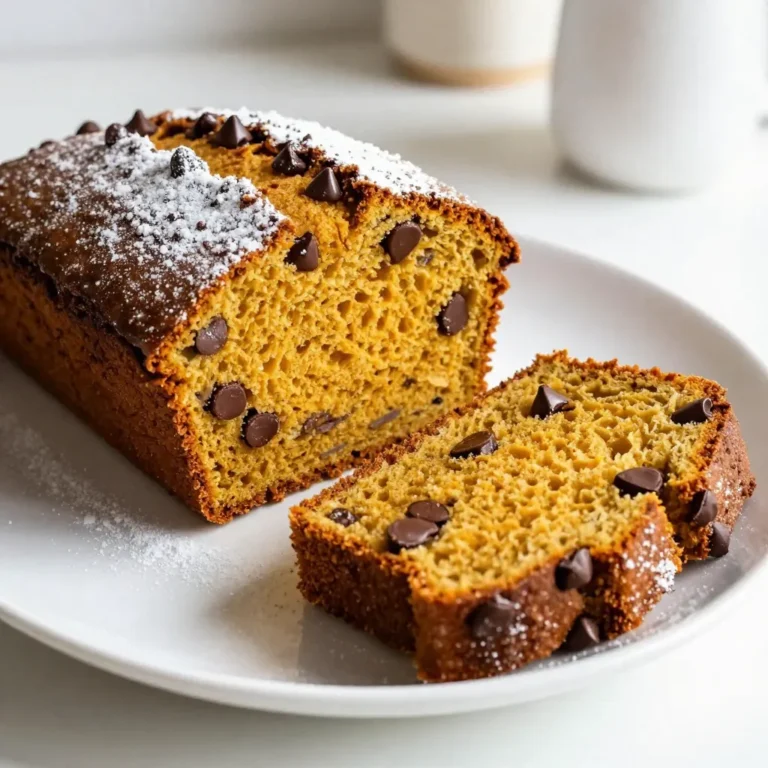
Chocolate Chip Pumpkin Bread Delicious Fall Delight

To make Easy Coffee Truffles, you will need a few simple ingredients. Here’s the list you will want to gather: - 8 oz (227g) dark chocolate, chopped - 1/2 cup (120ml) heavy cream - 2 tablespoons instant coffee granules - 1 teaspoon vanilla extract - Cocoa powder, for dusting - Finely chopped nuts (almonds or hazelnuts) for coating (optional) These ingredients come together to create a rich and tasty treat. The dark chocolate gives the truffles a bold flavor. The heavy cream adds creaminess, making each bite smooth. Instant coffee granules bring a strong coffee taste that pairs perfectly with chocolate. A hint of vanilla extract rounds out the flavor. If you want some crunch, consider adding chopped nuts. They add texture and a nutty taste that complements the chocolate. Use your favorite nuts, like almonds or hazelnuts, to make them your own. Gather these items, and you are ready to dive into making these delightful truffles! {{ingredient_image_1}} 1. In a small saucepan, heat the heavy cream over medium heat until it just begins to simmer. You want to watch closely to avoid boiling. 2. Once it simmers, remove the saucepan from heat. Stir in the instant coffee granules. Keep mixing until they dissolve fully. This step adds rich coffee flavor to your truffles. 1. Place the chopped dark chocolate in a mixing bowl. Pour the hot coffee-infused cream over it. Let it sit for about 2 minutes. This helps the chocolate soften and melt. 2. After 2 minutes, add the vanilla extract to the bowl. Stir the mixture until the chocolate is smooth and fully melted. The vanilla adds a nice depth to the flavor. 1. Cover the bowl with plastic wrap. Refrigerate for about 1-2 hours. This cooling makes the mixture firm enough to handle. 2. Once chilled, use a small scoop or spoon to take out the chocolate mixture. Roll it into small balls, about 1 inch in diameter. 3. Roll half of the truffles in cocoa powder. Roll the other half in finely chopped nuts for extra crunch and flavor. 4. Place the finished truffles on a baking sheet lined with parchment paper. Refrigerate them for another 30 minutes before serving. Enjoy your delightful coffee truffles! To get the best texture for your truffles, let the mixture chill properly. After mixing, cover the bowl and place it in the fridge for 1-2 hours. This time allows the chocolate to firm up. The mixture is ready when it holds its shape but is still soft enough to roll. Check by scooping a small amount. If it forms a nice ball, you are good to go. When rolling truffles, use clean hands to avoid melting the chocolate. Start by rolling the mixture into balls. For cocoa powder, place it in a shallow dish. Gently roll each truffle in the cocoa, making sure to coat it well. You can also use finely chopped nuts for a crunchy texture. A mix of both coatings adds fun and flavor. To present your truffles, arrange them on a pretty plate or in a decorative box. Dust them lightly with cocoa for a nice look. You can even sprinkle a few coffee beans around for a fancy touch. For drinks, serve with coffee or a rich dessert wine. The flavors will blend perfectly and impress your guests! Pro Tips Use Quality Chocolate: The flavor of your truffles heavily depends on the quality of chocolate you use. Opt for high-quality dark chocolate for the best taste. Chill the Mixture Properly: Make sure to refrigerate the chocolate mixture until it's firm enough to handle. This will make rolling the truffles much easier. Experiment with Coatings: Don't limit yourself to cocoa powder or nuts. Try rolling the truffles in coconut flakes, crushed coffee beans, or even powdered sugar for different flavors and textures. Store Correctly: Keep the truffles in an airtight container in the refrigerator. They can last up to two weeks, and the flavors often deepen over time. {{image_2}} You can boost the taste of your coffee truffles in fun ways. Try adding other flavor extracts. A drop of almond or hazelnut extract makes a big difference. You can also mix in some liqueurs for an adult twist. Coffee liqueur pairs well with the chocolate. Just remember to keep the balance right. Coating your truffles can be a creative process. You don’t have to stick with cocoa powder. Try using powdered sugar or matcha for a unique touch. Finely chopped nuts like almonds or hazelnuts add crunch. You can also roll them in colorful sprinkles or shredded coconut for a fun look. Want a healthier version? Use sugar-free chocolate to cut calories. This keeps the truffles rich without the added sugar. If you need a dairy-free option, look for coconut cream instead of heavy cream. This change still gives you that creamy texture. Enjoy your treats without the guilt! To keep your coffee truffles fresh, store them at room temperature. Place them in an airtight container. This keeps them from drying out. Avoid direct sunlight and heat. They will last about three days this way. For longer storage, refrigeration is best. Place the container in the fridge. This can help the truffles last up to two weeks. Just make sure to let them sit at room temperature for a few minutes before serving. This helps them regain their soft texture. You can also freeze your truffles for later enjoyment. Start by placing them in a single layer on a baking sheet. Freeze them for about one to two hours. Once they are firm, transfer the truffles to a freezer-safe bag. Be sure to remove as much air as possible to avoid freezer burn. When you are ready to enjoy them, take the truffles out. Let them thaw in the fridge overnight. This keeps them from becoming too soft. You can then serve them cold or let them sit out for a bit before eating. Yes, you can use milk chocolate. It will make the truffles sweeter and creamier. The coffee flavor may be less strong. If you like a sweeter treat, milk chocolate is a good choice. Just remember, the texture might change slightly. These truffles can last up to one week in the fridge. Store them in an airtight container. They can also sit at room temperature for a few days. Just keep them cool and dry to maintain their quality. Yes, you can make these truffles vegan. Use dark chocolate with no dairy. Replace heavy cream with coconut cream or almond milk. Adjust the amount based on thickness. Make sure to check labels for any dairy ingredients. If you lack heavy cream, use full-fat coconut milk. It adds a nice flavor and creaminess. Another option is to blend silken tofu for a lower-fat alternative. Both options work well in this recipe. Definitely! Skip the coffee granules to make coffee-free truffles. You can replace them with a splash of milk or a flavor extract. Options like almond or hazelnut extract add great taste without coffee. You can now make delicious coffee-infused truffles with ease. We covered key ingredients like dark chocolate, cream, and coffee. The step-by-step instructions guide you from heating cream to rolling the truffles. Use my tips to perfect your texture and explore fun variations. Think about storage options to keep them fresh. In the end, these truffles are tasty treats perfect for any occasion. Enjoy the process and share with others!

Easy Coffee Truffles Delightful and Simple Treat

- 2 lbs beef chuck roast - 4-6 hoagie rolls - 6 slices provolone cheese - 1 tablespoon olive oil - 1 medium onion, sliced - 3 cloves garlic, minced - 4 cups beef broth - 2 tablespoons soy sauce - 1 tablespoon Worcestershire sauce - 1 teaspoon dried thyme - 1 teaspoon black pepper When making Crockpot French Dip Sandwiches, you need the right ingredients. The beef chuck roast is key. It becomes tender and full of flavor as it cooks. Hoagie rolls hold all the goodness together. Provolone cheese melts beautifully on top. Next, we add flavor enhancers. Olive oil helps to cook the beef. Onions and garlic give a savory taste. The beef broth keeps everything moist and adds depth. Seasoning is vital too. Soy sauce and Worcestershire sauce give a rich umami kick. Thyme and black pepper round out the flavors. Each ingredient plays a big part in making your sandwich delicious. With these ingredients, you set the stage for a great meal. Each bite bursts with taste. Enjoy every step of the process! {{ingredient_image_1}} To start, heat 1 tablespoon of olive oil in a large skillet. The oil should be hot, but not smoking. Season the 2 lbs of beef chuck roast with salt and black pepper. Sear each side of the roast for about 4 to 5 minutes. This step is key! It locks in flavor and gives the beef a nice crust. For great taste, use fresh spices. When seasoning, add a bit of dried thyme and black pepper. This will enhance the beef's natural flavors. Don’t be shy! Make sure to coat all sides evenly. Place the sliced medium onion and minced garlic at the bottom of your crockpot. This creates a flavorful base. Lay the seared beef on top of the onions and garlic. This way, the juices from the meat will drip down, infusing the veggies. In a separate bowl, mix 4 cups of beef broth, 2 tablespoons of soy sauce, and 1 tablespoon of Worcestershire sauce. Add the dried thyme and black pepper. Stir well until combined. Pour this mixture over the beef in the crockpot. This broth is what makes your sandwiches juicy and tasty. You can choose to cook the beef on low or high. For the best results, I recommend cooking on low. This takes about 8 hours. If you're short on time, high heat cooks it in about 4 hours. Both ways will yield tender meat. Check the meat after the cooking time. It should shred easily with a fork. If it’s not tender yet, give it a little more time. Remember, the longer you cook, the more flavor you get! Searing the meat is key for great flavor. When you brown the beef chuck roast, it locks in juices and adds depth. Heat olive oil in a skillet until hot. Season the beef with salt and pepper, then sear it for 4-5 minutes per side. This step is worth it! You can customize seasonings to your taste. If you love herbs, add more thyme or even rosemary. Want it spicier? Toss in some red pepper flakes. Experiment with flavors to make it your own. Layering ingredients well makes a big difference. Start with a hoagie roll, then add a generous amount of shredded beef. Top it off with provolone cheese. This way, every bite has flavor! To melt the cheese, you can use a broiler. After you assemble the sandwiches, place them under the broiler for 1-2 minutes. Watch closely! The cheese will bubble and become gooey. Serve the broth in small bowls for dipping. It adds a rich flavor to each bite. If you have leftovers, store the broth in an airtight container in the fridge. It will keep well for 3-4 days. You can enhance the broth flavor, too. Try adding a splash of balsamic vinegar or more soy sauce. This will give it an extra kick. Enjoy your meal! Pro Tips Perfectly Sear the Beef: Make sure to preheat your skillet properly before searing the beef. A hot skillet creates a nice crust, enhancing the flavor of your dish. Layering Ingredients: Always place onions and garlic at the bottom of the crockpot. This prevents them from burning and allows them to infuse their flavor into the broth. Rest the Meat: After cooking, let the beef rest for a few minutes before shredding. This helps retain moisture and results in juicier meat. Customize Your Rolls: Consider toasting the hoagie rolls lightly before assembling the sandwiches. This adds extra texture and prevents them from becoming soggy when filled with beef and broth. {{image_2}} Alternative Cuts of Meat You can swap beef chuck roast for other cuts. Try brisket or flank steak. Both give good flavor. Each cut may change the texture a bit. Different Cheese Options Provolone is great, but you can use other cheeses, too. Mozzarella melts well. Swiss cheese adds a nice taste. Choose a cheese you love! Using Gluten-Free Rolls If you need gluten-free, use gluten-free rolls. Many stores offer tasty options. Check labels to make sure they are safe for you. Beef Broth Considerations Not all beef broth is gluten-free. Look for brands that say gluten-free. Making your own broth can also be a great option. Pairing with Side Dishes French dip sandwiches go well with sides like fries or chips. A warm bowl of soup can also be nice. Think about what you enjoy most! Adding a Salad for Balance A fresh salad adds color and crunch. Choose greens like romaine or spinach. Top with tomatoes, cucumbers, or carrots for extra flavor. Refrigeration Tips After enjoying your sandwiches, store any leftovers in an airtight container. Keep them in the fridge for up to three days. To keep the bread fresh, you can store the meat and rolls separately. This helps prevent sogginess. Freezing Instructions for Shredded Beef If you have more leftovers, you can freeze the shredded beef. Place it in a freezer-safe bag or container. It will last up to three months. If you want to reheat it later, just thaw it in the fridge overnight. Best Methods for Reheating Sandwiches The best way to reheat French dip sandwiches is in the oven. Preheat your oven to 350°F (175°C). Wrap the sandwich in foil to keep it from drying out. Heat for about 10-15 minutes or until warm. Ensuring Moisture During Reheating If you want to keep the beef moist, add a splash of beef broth before wrapping it in foil. This helps keep the flavor strong and the meat juicy. You can also dip the sandwich in broth while reheating for extra flavor. Can I use a different type of bread? Yes, you can! I love using hoagie rolls, but many breads work. Sub baguettes or ciabatta for a fun twist. Just make sure the bread can hold the juicy meat and broth. How long can I store the leftovers? Store leftovers in an airtight container. They last up to four days in the fridge. You can also freeze the shredded beef for up to three months. Just thaw before reheating. Can I make this recipe ahead of time? Absolutely! You can prepare everything the night before. Just store the beef mixture in the fridge. Cook it in the crockpot in the morning for a hot meal later. Is it possible to use a different protein? Yes, feel free to swap the beef for pork or chicken. Just adjust the cooking time. Chicken cooks faster, while pork may need extra time to get tender. Can I make it in an Instant Pot? Yes! Use the sauté function to sear the beef first. Then, add the broth and seasonings. Cook on high pressure for about 60 minutes for tender meat. What should I do if the meat isn’t shredding well? If the meat isn’t shredding, it may need more cooking time. Cook it longer until it’s tender enough to pull apart easily. Don't rush this step; the right texture is key to a great sandwich! This recipe for a flavorful beef sandwich is easy and fun to make. We discussed the key ingredients: beef chuck roast, hoagie rolls, and provolone cheese. Then, I shared steps for preparing the beef and using a crockpot. Tips for flavor and sandwich assembly can elevate your dish. Get creative with variations and watch the leftovers. Cooking doesn’t have to be hard. With these tips, you can enjoy a hearty meal your way. Dive into making this sandwich and savor every bite!

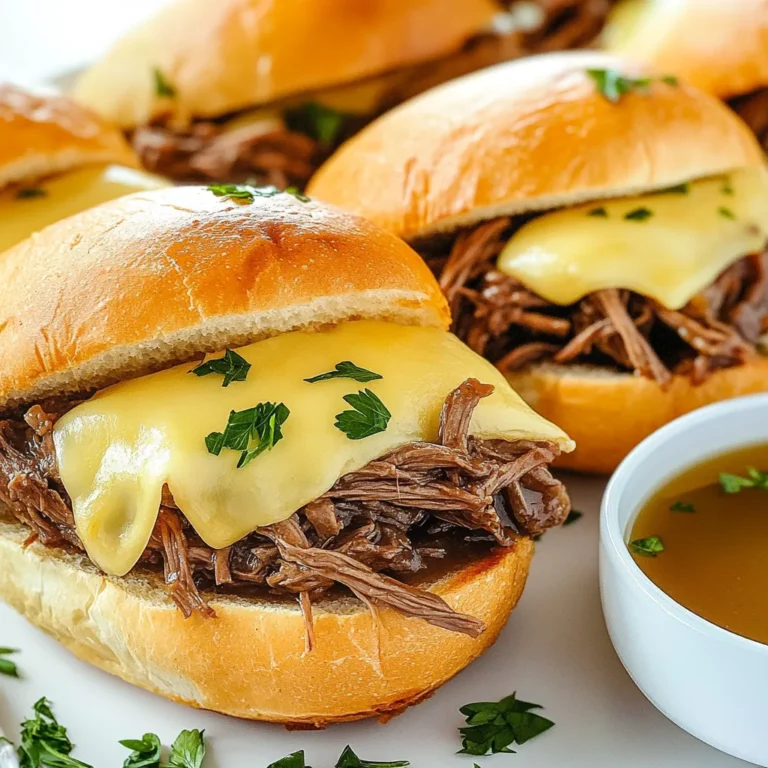
Crockpot French Dip Sandwiches Savory and Easy Meal

To make this warm and tasty dish, gather these main ingredients: - 2 cups cooked chicken, shredded - 1 cup frozen peas and carrots - 1 cup diced potatoes (pre-cooked) - 1 small onion, diced - 2 cloves garlic, minced - 1 can (10.5 oz) cream of chicken soup - 1 cup chicken broth - 1 teaspoon dried thyme - 1/2 teaspoon black pepper - 1/4 teaspoon salt - 1 cup cheddar cheese, shredded - 1 package (16 oz) refrigerated biscuit dough These items create a rich and creamy base, filled with chicken and veggies. To cook this casserole, you will need a few key supplies: - Large mixing bowl - 9x13 inch casserole dish - Measuring cups and spoons - Knife and cutting board - Spoon or spatula for mixing These tools help you mix and bake the casserole with ease. Seasoning is key to a great pot pie. Here are my top picks: - Dried thyme adds a warm, herby taste. - Black pepper gives a slight kick. - Salt enhances the overall flavor. Feel free to adjust these amounts to fit your taste. Mixing these flavors will take your casserole to the next level. {{ingredient_image_1}} First, preheat your oven to 375°F (190°C). Grab a large mixing bowl. Add the shredded chicken, frozen peas and carrots, and diced potatoes. Then, toss in the diced onion and minced garlic. Next, pour in the cream of chicken soup and chicken broth. Add the dried thyme, black pepper, and salt. Mix everything well until it is combined. This mixture forms the heart of your casserole. Now, take a greased 9x13 inch casserole dish. Pour the chicken mixture into the dish. Spread it evenly across the bottom. Next, sprinkle the shredded cheddar cheese over this mixture. This cheese adds a rich flavor and creamy texture. After that, take the biscuit dough. Cut each biscuit into quarters and scatter the pieces over the top of the casserole. This will create a nice, fluffy topping. It’s time to bake! Place the casserole in your preheated oven. Bake it for 25 to 30 minutes. You want to see the biscuits turn golden brown and the filling bubbling up. Once it’s done, remove the casserole from the oven. Let it cool for 5 to 10 minutes before you serve it. This cooling time helps the filling set a bit. Enjoy the warm and hearty goodness! To shred chicken fast, use two forks. Place the chicken on a plate. Hold one fork in each hand. Pull the chicken apart until it’s in small pieces. You can also use a stand mixer. Just place the chicken in the mixer bowl. Use the paddle attachment on low speed for about 30 seconds. This method works well if you have a lot of chicken to shred. For a flaky biscuit topping, start with cold dough. Keep the dough in the fridge until you are ready to use it. Cut the biscuits into quarters, but do not overwork the dough. When you scatter the pieces on top, leave some space in between. This allows steam to escape and helps them rise. Bake until the tops are golden brown for the best texture. One common mistake is overcooking the chicken. If you cook it too long, it becomes dry. Another mistake is not measuring the broth. Too much broth makes the filling too runny. Avoid leaving the casserole in the oven too long. This can burn the biscuit topping and dry out the filling. Finally, don’t skip letting the casserole cool before serving. This helps the filling set nicely. Pro Tips Use Rotisserie Chicken: For a quicker prep time, use store-bought rotisserie chicken instead of cooking your own. Customize Your Vegetables: Feel free to add or substitute your favorite vegetables, such as corn or green beans, to the filling for extra flavor and nutrition. Make It Ahead: Prepare the casserole in advance, cover, and refrigerate. Just bake it when you’re ready to serve! Experiment with Biscuits: Try using different flavored biscuit dough, like garlic or herb, for a unique twist on the classic recipe. {{image_2}} You can make this dish even better by adding more veggies. Try green beans, corn, or bell peppers. These options add color, taste, and nutrition. You can also mix in some mushrooms for a rich flavor. Just remember to chop them small so they cook well. If you want, you can use turkey instead of chicken. Leftover turkey works great in this recipe. For a vegetarian twist, swap the chicken for beans or lentils. You can also add extra veggies to keep it hearty. Just make sure to use vegetable broth for the best flavor. If you need a gluten-free dish, use gluten-free biscuits. There are many brands available that taste great. For a dairy-free version, try a dairy-free cream soup and cheese. Coconut milk can add creaminess without the dairy. Adjust the seasoning to match your taste. Store your chicken pot pie casserole in an airtight container. Let it cool down first. This helps keep flavors fresh. Place it in the fridge for up to three days. If you have more, consider freezing it for later. For the best taste, reheat the casserole in the oven. Preheat to 350°F (175°C). Cover the dish with foil to keep it moist. Bake for about 20 minutes or until hot. You can also use the microwave, but it may not keep the topping crispy. If you want to freeze the casserole, do this before baking. Place the prepared dish in the freezer. Make sure it is well covered. You can freeze it for up to three months. When ready to eat, thaw it overnight in the fridge. Then, bake as usual. Yes, you can use rotisserie chicken. It saves time and adds flavor. Just shred the chicken into bite-sized pieces. This will make your casserole even easier to prepare. The taste remains rich and satisfying. You can use homemade cream of chicken soup. Mix equal parts milk and flour, then add chicken broth and seasonings. You can also use cream of mushroom soup or any cream soup you like. This keeps the dish creamy and delicious without losing flavor. To avoid burning, check the casserole halfway through baking. If the biscuits look dark, cover them with foil. This will help them cook evenly. You can also place the casserole on a lower rack in the oven. This keeps the heat lower and prevents the tops from over-browning. This blog post guides you through making a classic chicken pot pie casserole. We covered key ingredients, essential supplies, and seasonings for taste. You learned step-by-step instructions for preparation, assembly, and baking. We shared tips for shredding chicken and avoiding common mistakes. You also explored fun variations and proper storage methods. Now you can cook this dish with confidence. So grab your ingredients and enjoy a warm, comforting meal. Your kitchen is ready for some delicious fun!

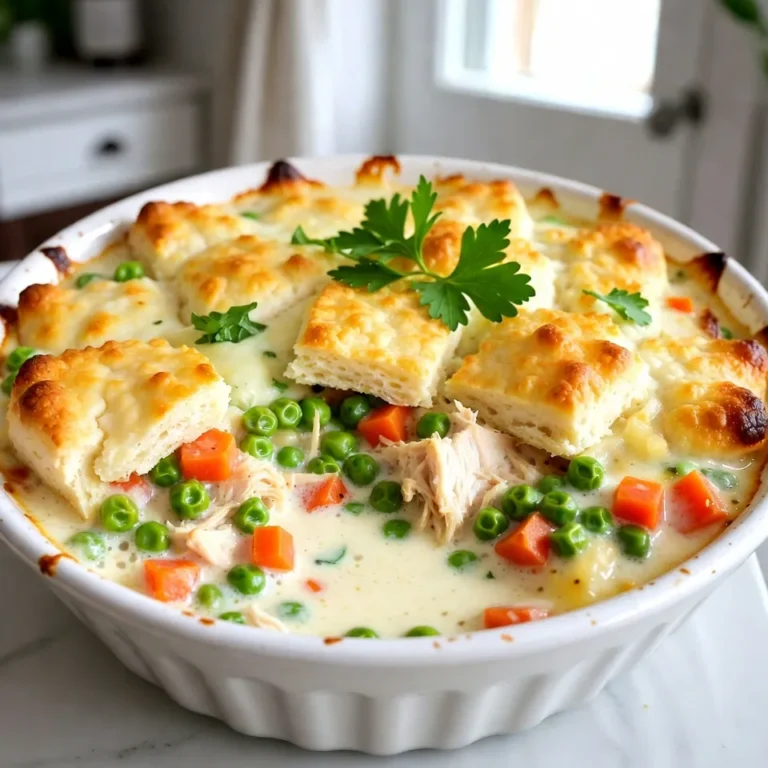
Classic Chicken Pot Pie Casserole Hearty and Comforting

For the best Crockpot Buffalo Chicken Dip, you need simple and tasty items. Here’s what to gather: - 2 cups shredded rotisserie chicken - 8 oz cream cheese, softened - 1 cup buffalo sauce (adjust to taste) - 1 cup Greek yogurt - 1 cup shredded cheddar cheese - 1/2 cup ranch dressing - 2 green onions, finely sliced - 1 tablespoon garlic powder - Salt and pepper to taste These ingredients combine to create a creamy, spicy dip that everyone loves. You can change some ingredients for different flavors. Here are some ideas: - Chicken: Use grilled chicken or canned chicken for a quick option. - Cheese: Try using pepper jack cheese for extra spice or mozzarella for a milder taste. - Buffalo Sauce: Use a milder sauce if you want less heat or a hotter sauce for more kick. - Yogurt: Swap Greek yogurt with sour cream if you prefer a richer taste. These swaps keep the dip exciting and fresh! When picking ingredients, quality matters. Here are my tips: - Shredded Chicken: Use rotisserie chicken for flavor and ease. Look for fresh ones without preservatives. - Cream Cheese: Choose full-fat cream cheese for creaminess. It melts better than low-fat varieties. - Buffalo Sauce: Go for a brand you like. The flavor of the sauce will shine through in the dip. - Fresh Green Onions: Pick green onions that are firm with bright green tops. This adds freshness to your dish. By selecting great ingredients, you set your dish up for success! {{ingredient_image_1}} Start by gathering your ingredients. You need: - 2 cups shredded rotisserie chicken - 8 oz cream cheese, softened - 1 cup buffalo sauce (adjust to taste) - 1 cup Greek yogurt - 1 cup shredded cheddar cheese - 1/2 cup ranch dressing - 2 green onions, finely sliced - 1 tablespoon garlic powder - Salt and pepper to taste In a medium bowl, mix the softened cream cheese, Greek yogurt, and ranch dressing. Stir until it’s smooth. Then, add the buffalo sauce and garlic powder. Mix well to combine these flavors. Now, take your crockpot and layer the shredded rotisserie chicken at the bottom. Pour that creamy buffalo mixture over the chicken. Spread it evenly. Next, top with the shredded cheddar cheese and half of the sliced green onions. Cover the crockpot with its lid and cook on low for 2 hours. Stir occasionally to help it heat evenly. You’ll know it’s ready when it’s heated through and bubbly. Once cooking is done, taste the dip. Adjust the seasoning with salt and pepper if needed. Give it a good stir to mix everything together. Before serving, garnish with the remaining sliced green onions. This adds color and freshness. Enjoy your dip hot, served with chips or veggies! To make your Buffalo chicken dip even tastier, use fresh ingredients. Fresh green onions add a nice crunch. You can also mix in some smoked paprika for a deeper flavor. If you like heat, add more buffalo sauce. Try different brands for unique tastes. A squeeze of lemon juice can brighten up the dip, too. One common mistake is overcooking the dip. Keep an eye on the time and stir often. This helps keep the dip creamy. Also, don’t skip the salt and pepper. They balance the flavors well. Some people forget to taste before serving. Always check the flavor and adjust if needed. Serve this dip hot with crunchy tortilla chips. Veggies like celery and carrots also work well. You can use pita chips for a different twist. For a fun touch, serve it in a bread bowl. Garnish the dip with extra green onions for color. Enjoy it at parties, game days, or cozy nights in! Pro Tips Adjust the Heat: If you prefer a milder dip, start with less buffalo sauce and gradually add more until it reaches your desired level of spiciness. Use Fresh Ingredients: For the best flavor, opt for fresh green onions and quality buffalo sauce. The freshness can elevate the overall taste of your dip. Perfect Pairings: This dip pairs wonderfully with celery sticks, tortilla chips, or even toasted baguette slices for a delightful crunch. Make-Ahead Option: You can prepare the dip a day in advance. Just store it in the fridge and heat it up in the crockpot for a quick and easy appetizer. {{image_2}} You can easily adjust the heat in your dip. For a spicy kick, use extra buffalo sauce. You can also choose a hotter sauce, like a ghost pepper sauce. If you prefer mild, reduce the buffalo sauce to half a cup. Mix in a bit of extra Greek yogurt to tone down the heat. This way, you keep the creamy texture, but lower the spice level. Cheese is the star of any dip. While cheddar cheese works great, feel free to mix it up. Try using pepper jack for a spicy twist. You can also use mozzarella for a milder taste. Adding cream cheese helps create a rich and smooth base. Mixing different cheeses gives your dip a unique flavor and texture. Experiment to find your favorite blend. If you want a healthier version, swap some ingredients. Use low-fat cream cheese and Greek yogurt. These cuts keep the flavor but reduce fat. You can also use grilled chicken instead of rotisserie chicken. This option is leaner and adds a nice smoky flavor. Serve with fresh veggies like carrots and celery for dipping. It’s a tasty and guilt-free snack! To keep your buffalo chicken dip fresh, store it in an airtight container. Let it cool to room temperature first. This helps avoid condensation, which can make the dip watery. Label the container with the date so you know when to use it. Leftovers are best if eaten within three to five days. When you're ready to enjoy leftovers, reheat them gently. You can use a microwave or stovetop. If using a microwave, heat in short bursts of 30 seconds. Stir in between to heat evenly. For the stovetop, place the dip in a small pot over low heat. Stir often until it’s warm. If the dip seems dry, add a splash of ranch dressing or buffalo sauce. If you want to save some for later, freezing is a great option. Transfer the dip into a freezer-safe container. Make sure to leave some space at the top. The dip can expand while freezing. It’s best to use it within two to three months. To thaw, place it in the fridge overnight. Reheat it gently as mentioned before. Yes, you can make this dip in advance. Prepare the dip, but do not cook it. Store it in the fridge for up to three days. When you're ready, just pour it into the crockpot and cook on low for two hours. This makes it great for parties or game day. You can serve Buffalo Chicken Dip with many tasty options. Here are some of my favorites: - Tortilla chips - Celery sticks - Carrot sticks - Sliced bell peppers - Crackers - Pita bread These choices add a nice crunch and balance the dip's creaminess. To adjust the spice level, you can change the amount of buffalo sauce. Start with half a cup for a mild dip. If you like it spicy, add more sauce until it meets your taste. You can also try adding a bit of hot sauce for extra kick. Enjoy finding your perfect heat! This blog post covered how to make the perfect Buffalo Chicken Dip. We discussed the best ingredients, step-by-step instructions, and helpful tips. You learned how to enhance flavor and avoid common mistakes. We also shared variations and storage info for leftovers. In closing, this dip is a crowd-pleaser. With these tips, you can impress your guests every time you serve it. Happy cooking!

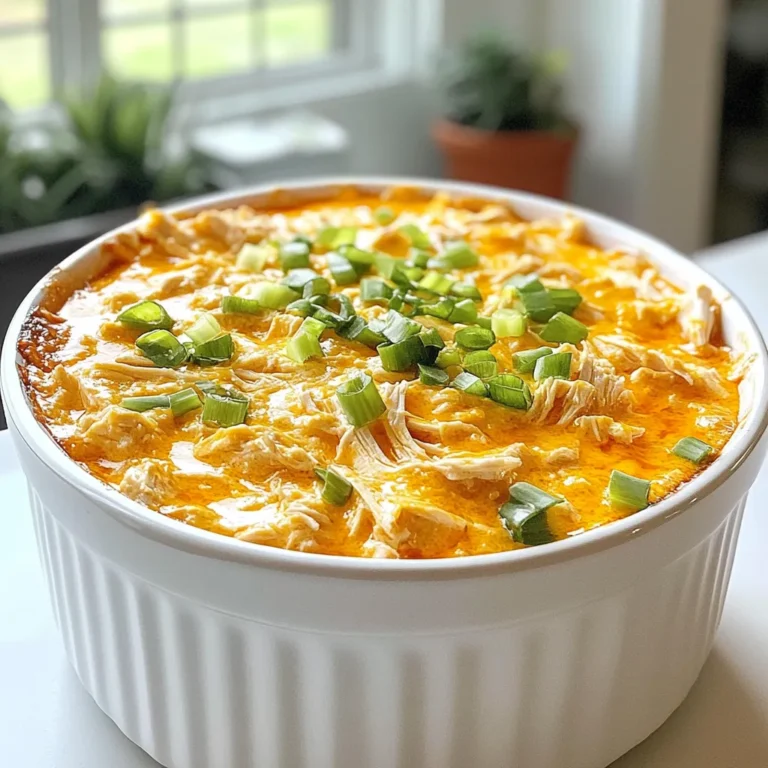
Crockpot Buffalo Chicken Dip Flavorful Crowd Pleaser

Here is a list of ingredients you will need for Creamy Cajun Chicken Pasta: - 2 boneless, skinless chicken breasts, sliced - 8 oz fettuccine pasta - 2 tablespoons Cajun seasoning - 1 tablespoon olive oil - 1 small onion, finely chopped - 3 cloves garlic, minced - 1 bell pepper (red or green), diced - 1 cup heavy cream - 1 cup chicken broth - 1 cup grated Parmesan cheese - Salt and pepper to taste - Fresh parsley, chopped, for garnish Each ingredient plays a key role. The chicken is the star, seasoned with Cajun spices. Fettuccine gives the dish a nice base. The cream and broth create a rich, smooth sauce. Onions, garlic, and peppers add flavor and texture. Parmesan ties everything together with its salty, nutty notes. Don't forget fresh parsley for a bright finish. Gather these ingredients before you start cooking. It makes the process smoother and more fun. This dish is not just quick; it bursts with flavors that will impress anyone at your table. {{ingredient_image_1}} To start, fill a large pot with water. Add a good amount of salt. Bring it to a boil. Once boiling, add 8 oz of fettuccine pasta. Cook the pasta for about 8 to 10 minutes until it is al dente. This means the pasta should still have a slight bite. When done, drain the pasta and set it aside. While the pasta cooks, season the sliced chicken breasts. Use 2 tablespoons of Cajun seasoning. Make sure each piece is well-coated. Heat 1 tablespoon of olive oil in a large skillet over medium heat. Add the chicken to the skillet and cook for 5 to 7 minutes. The chicken should turn golden brown and be cooked through. Once done, remove the chicken from the skillet and set it aside. In the same skillet, add the finely chopped onion and diced bell pepper. Sauté these for about 3 to 4 minutes until they soften. Next, add 3 minced garlic cloves and cook for another minute. This will make your kitchen smell amazing! Now, pour in 1 cup of chicken broth and bring it to a simmer. Slowly stir in 1 cup of heavy cream. Let it bubble gently for 2 to 3 minutes until it thickens slightly. Finally, mix in 1 cup of grated Parmesan cheese. Stir until it melts into a creamy sauce. Take the cooked chicken and fettuccine and add them to the sauce. Toss everything gently to coat the pasta and chicken in that rich, creamy sauce. Taste the dish and adjust the seasoning with more salt, pepper, or Cajun seasoning as needed. Once everything is mixed well, remove the skillet from the heat. Transfer the pasta to serving plates. For a lovely touch, sprinkle fresh chopped parsley on top. This not only adds color but also a fresh flavor. Enjoy your creamy Cajun chicken pasta! To thicken your sauce without lumps, follow these steps. Start with a cold liquid and slowly whisk it into the hot mixture. This helps blend it in smoothly. If your sauce seems too thin, let it cook a bit longer. The heat will naturally reduce it. Adjusting spice levels is simple. If you like it milder, use less Cajun seasoning. You can also add cream to tone down the heat. For a spicier sauce, add more seasoning or a dash of hot sauce. To check for doneness, use a meat thermometer. The chicken should reach 165°F. If you don't have a thermometer, cut into a piece. The meat should be white with no pink inside. For juicy chicken, don't overcook it. Cook until golden brown on the outside. Let it rest for a few minutes after cooking, so the juices stay inside. Choosing different types of pasta can change your dish. Fettuccine works well, but you can use penne or spaghetti too. Each type adds a unique texture. If you need gluten-free options, look for gluten-free pasta made from rice or corn. They cook differently, so check the package for instructions. Pro Tips Perfectly Cooked Pasta: Always cook the pasta al dente, as it will continue to cook slightly when tossed with the sauce. Adjusting Spice Levels: If you prefer a milder dish, reduce the amount of Cajun seasoning or use a mild variety. Cheese Variations: Experiment with different cheeses like Gouda or smoked cheddar for a unique flavor twist. Make it Ahead: You can prepare the chicken and sauce ahead of time and simply toss with freshly cooked pasta before serving. {{image_2}} You can boost the health of your creamy Cajun chicken pasta by adding vegetables. Seasonal vegetables work best. Try these options: - Zucchini, sliced - Cherry tomatoes, halved - Spinach or kale, chopped These veggies add color and nutrients. You can toss in leafy greens like spinach for extra flavor. Add them just before serving. This keeps them bright and fresh. If you want to switch things up, consider different proteins. Here are some tasty alternatives to chicken: - Shrimp, peeled and deveined - Tofu, cubed and pressed - Sausage, sliced or crumbled For a vegetarian or vegan meal, you can use tofu or tempeh. These options soak up the sauce well. They add protein without meat. To make your dish more exciting, consider adding extra spices. Here are some ideas: - Smoked paprika for depth - Cayenne pepper for heat - Black pepper for a kick Cajun blends can vary in heat. If you like it spicy, try a hotter mix. Adjust the amount of Cajun seasoning to match your taste. This way, you can enjoy the perfect level of heat. To store your leftover Creamy Cajun Chicken Pasta, let it cool first. Place it in an airtight container. This keeps the dish fresh and tasty. You can store it in the fridge for about 3 to 4 days. When you’re ready to eat, just reheat it on the stove or in the microwave. If you want to save some for later, you can freeze it. Portion the pasta into freezer-safe bags or containers. Be sure to remove as much air as possible to prevent freezer burn. It can last in the freezer for up to 2 months. When it’s time to enjoy it again, thaw it in the fridge overnight. Reheat it on the stove over low heat. Add a splash of chicken broth or cream if it seems dry. This will help restore its creamy goodness. To add some heat, try these tips: - Use more Cajun seasoning. Start with a half tablespoon more. - Add crushed red pepper flakes. A pinch can make a big difference. - Mix in diced jalapeños. These fresh peppers add a nice kick. - Use hot sauce. Drizzle your favorite brand over the top before serving. Yes! Here are some great dairy-free options: - Use coconut cream instead of heavy cream. It gives a rich texture. - Try almond milk or oat milk. They work well for a lighter sauce. - Nutritional yeast can replace Parmesan cheese. It adds a cheesy flavor without dairy. These sides pair well with your pasta: - Garlic bread is a classic choice. It’s great for soaking up sauce. - A simple green salad with vinaigrette adds freshness. - Roasted vegetables offer a nice crunch and flavor contrast. - Corn on the cob can be a fun and tasty side. Absolutely! Here’s how to prepare it ahead: - Cook and store the pasta separately. This keeps it from getting mushy. - Make the sauce and chicken in advance. Store them in airtight containers. - Combine everything when you are ready to eat. Heat it on the stove or in the microwave. This blog post covered how to make a delicious Creamy Cajun Chicken Pasta. You learned about the key ingredients, step-by-step cooking methods, and helpful tips for perfecting the dish. We also discussed variations and smart storage solutions. In summary, this recipe is both simple and tasty. It allows for creative spins, whether you add veggies or switch proteins. Now, you can impress your friends and family with a flavorful meal they'll love. Enjoy your cooking!

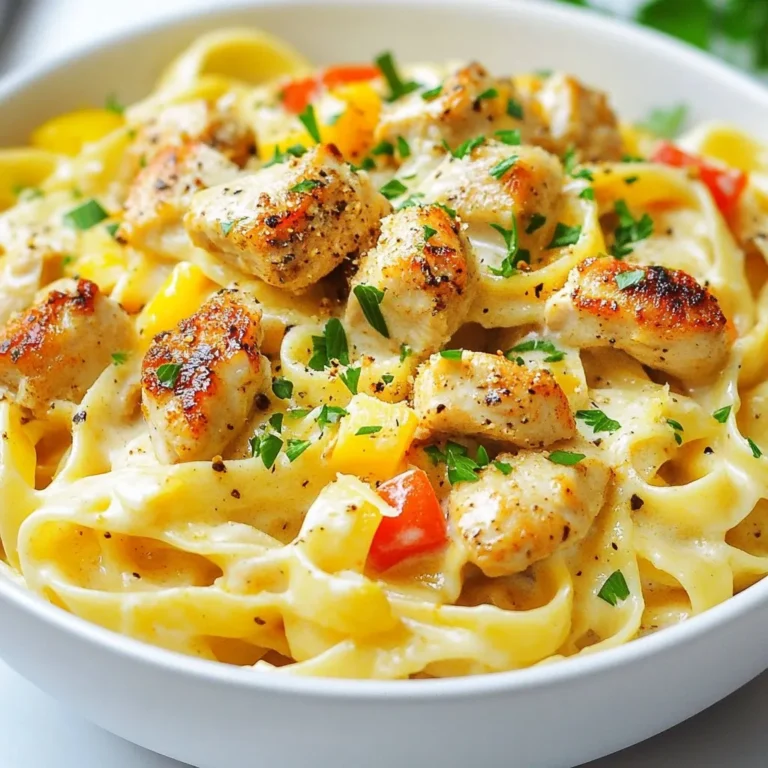
Creamy Cajun Chicken Pasta Flavorsome and Quick Meal

- 6 large croissants - 200g cooked ham, thinly sliced - 200g Swiss cheese, thinly sliced - 4 tablespoons Dijon mustard - 2 tablespoons unsalted butter, melted - 1 tablespoon fresh rosemary, chopped - Salt and pepper to taste - 1 egg, beaten (for egg wash) These ingredients create a tasty treat. You will need fresh croissants, ham, and Swiss cheese. The mustard adds a nice zing. The butter gives a rich flavor and helps the croissants shine. Fresh rosemary adds a lovely touch. Make sure to have salt and pepper to taste. The egg wash gives a beautiful finish during baking. Each ingredient plays a role in making this dish special. I recommend using high-quality ham and cheese for the best taste. You can use any kind of mustard you like. Dijon is a classic choice, but yellow mustard works fine too. The rosemary is optional, but it makes a big difference in flavor. Gather all these ingredients before you start. It makes cooking easier and more fun. You can also customize the ingredients based on your taste. Get ready to enjoy these savory baked ham and cheese croissants! {{ingredient_image_1}} 1. Preheat your oven to 375°F (190°C). This step ensures even cooking. 2. Cut each croissant in half horizontally. You will have a top and bottom piece. 3. Spread 1 tablespoon of Dijon mustard on the bottom half of each croissant. This adds a nice zing. 4. Layer the sliced ham evenly over the mustard. Use enough ham for a hearty bite. 5. Place slices of Swiss cheese on top of the ham. The cheese will melt beautifully. 6. Sprinkle fresh rosemary over the cheese. Add a pinch of salt and pepper to taste. This enhances the flavor. 1. Brush the tops of the croissants with melted butter. This gives them a nice golden finish. 2. Arrange the croissants on a baking sheet lined with parchment paper. This helps with easy cleanup. 3. Once all croissants are ready, brush them with the beaten egg. This creates a glossy look. 4. Bake in the preheated oven for 12-15 minutes. Watch for a golden brown color and melted cheese. 5. To achieve the perfect golden brown finish, keep an eye on them. Ovens can vary, so adjust as needed. - How to avoid soggy croissants: To keep your croissants crisp, use fresh ingredients. The Dijon mustard adds flavor but can make the croissant soggy if used too much. Spread a thin layer on the bottom only. Bake them right after you assemble them, so they do not sit too long. - Recommended cheese alternatives: Swiss cheese is great, but you can try cheddar or provolone. Each cheese gives a unique taste. For a creamy texture, use gouda or mozzarella. Mix different cheeses for a fun flavor twist. - Best mustard options for flavor: Dijon mustard adds a nice tang. You can also use whole grain mustard for a crunchier texture. Spicy brown mustard gives a kick. Experiment with your favorite mustard to find the best fit. - Ideal pairings for baked ham and cheese croissants: Serve these croissants with a light salad. A fresh green salad with vinaigrette balances the richness. Pair them with a bowl of soup for a comforting meal. - Creative ways to present the dish: Cut the croissants in halves or quarters for easy sharing. Place them on a colorful platter. Add some fresh herbs or cherry tomatoes for a pop of color. - Storing leftovers and reheating tips: Keep any leftovers in an airtight container. They will stay fresh for up to three days. To reheat, use the oven at 350°F (175°C) for about 10 minutes. This keeps the croissant crispy. Avoid the microwave, as it may make them soggy. Pro Tips Use Fresh Croissants: For the best flavor and texture, use freshly baked croissants. They will be flaky and buttery, making your Cheesy Ham Delight even more delicious. Experiment with Cheese: While Swiss cheese is traditional, feel free to mix in other cheeses like Gruyère or Cheddar for a different flavor profile. Each cheese brings its own unique taste. Add Veggies: For extra nutrition and flavor, consider adding sliced tomatoes or spinach to your croissants. They add a fresh element that complements the richness of the ham and cheese. Make Ahead: You can prepare the croissants and assemble them a few hours in advance. Just cover them and refrigerate until you're ready to bake. This makes for a quick and easy meal! {{image_2}} You can get creative with different meats for your croissants. Instead of ham, try turkey or chicken. They add a nice twist and keep it tasty. You can even use prosciutto for a gourmet feel. Cheese is another area to explore. While Swiss cheese works great, you can use cheddar, gouda, or even pepper jack. Each cheese brings a unique flavor, so have fun with it! Adding vegetables can boost flavor and nutrition. Spinach, bell peppers, or caramelized onions work well. Just sauté them first to enhance their taste. These additions make your croissants even more delightful. If you need gluten-free options, look for gluten-free croissants. Many stores sell these now. They taste just as good with the same filling. For vegetarian adaptations, skip the meat. Use extra cheese and add vegetables. Artichokes or mushrooms can create a hearty filling. They add depth without the meat. If you want low-carb modifications, use lettuce wraps instead of croissants. This change cuts carbs but still delivers great flavor. You can layer the ham and cheese in the lettuce for a fresh bite. To keep your baked ham and cheese croissants fresh, store them in an airtight container. This prevents moisture loss and keeps them soft. If you plan to eat them within three days, keep them in the fridge. They will stay fresh for about two to three days. For longer storage, you can freeze the croissants. Wrap each one tightly in plastic wrap and then place them in a freezer bag. They can last up to three months in the freezer. When you’re ready to enjoy them, simply thaw overnight in the fridge. When reheating, the oven is the best choice. Preheat your oven to 350°F (175°C). Place your croissants on a baking sheet. Heat them for about 10 to 15 minutes. This method keeps them crispy. You can use the microwave, but it may make them soggy. If you must, heat them for about 30 seconds. Then check if they are warm enough. If not, heat in short bursts. Always aim to keep them crisp and tasty! Can I prepare these croissants in advance? Yes, you can prepare these croissants ahead of time. Assemble them, but do not bake. Cover them tightly with plastic wrap and store in the fridge. Bake them when ready, adding a few extra minutes to the baking time. What can I serve with these croissants? These croissants pair well with a fresh salad or soup. Try a light green salad with vinaigrette. A bowl of tomato soup also complements the flavors nicely. You can even serve them with a side of pickles for a tangy crunch. How do I know when the croissants are done baking? Look for a golden brown color on top. The cheese should be melted and bubbly. If you tap the bottom of a croissant, it should sound hollow. This means they are ready to enjoy! What to do if the cheese doesn't melt properly? If the cheese does not melt, you might need to increase the baking time. Make sure your oven is at the right temperature. If you still have issues, you can broil the croissants for a minute or two. Watch closely to avoid burning. How to fix a dry croissant sandwich? To fix a dry croissant, add a bit more butter before baking. You can also drizzle some olive oil on top. If serving leftovers, try warming them with a moist paper towel in the microwave for a minute. Adjusting for different oven types and temperatures Ovens can vary in heat. If you have a convection oven, lower the temperature by about 25°F. Keep an eye on the croissants as they bake. Adjust baking times as needed based on how your oven behaves. To make baked ham and cheese croissants, gather simple ingredients like croissants, ham, and cheese. Preheat your oven and assemble them with mustard and rosemary. Bake until golden brown for that perfect finish. Remember to avoid soggy croissants by following my tips. Try different meats or cheeses for variety. In short, these croissants are easy and fun to make. Enjoy them fresh, and don’t forget to store leftovers correctly. Now, get started on your delicious croissant creation!

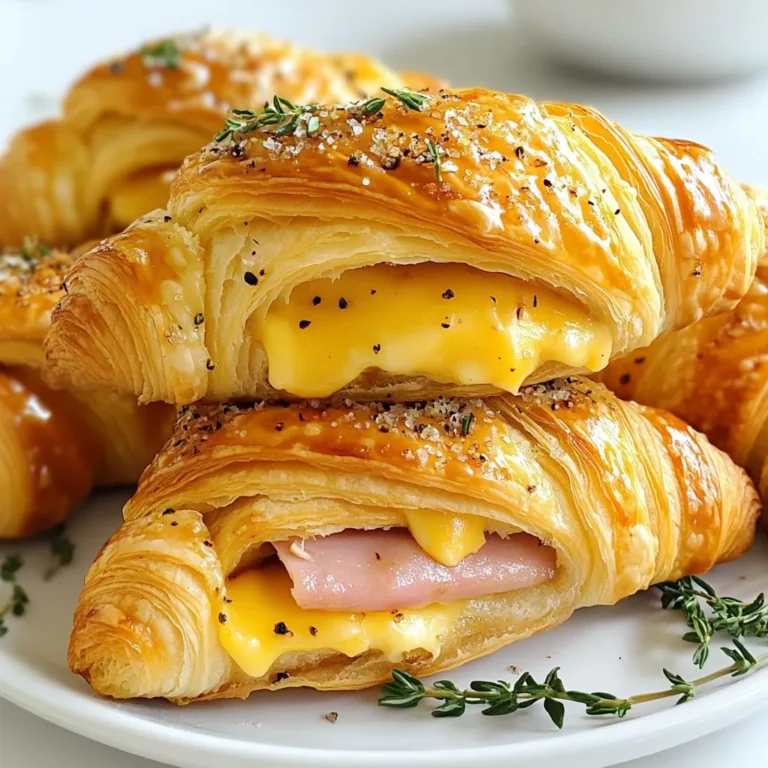
Baked Ham and Cheese Croissants Simple and Tasty Treat

- 8 oz spaghetti or your choice of pasta - 4 tablespoons unsalted butter - 4 cloves garlic, minced - Zest and juice of 1 large lemon - 1/2 teaspoon red pepper flakes (optional) - 1/4 cup grated Parmesan cheese - Salt and black pepper to taste - Fresh parsley, chopped for garnish For this recipe, you need 8 ounces of pasta. This amount works well for 2 to 4 servings. Use a food scale or measuring cup for accuracy. You should have 4 tablespoons of butter, which adds richness. Make sure to mince 4 cloves of garlic for a strong flavor. The zest and juice from one lemon bring brightness and freshness. Red pepper flakes give a slight kick, but they are optional. You will also need 1/4 cup of grated Parmesan cheese for creaminess. Finally, use salt and black pepper to enhance the taste. Fresh parsley adds a nice touch to the dish. I suggest using spaghetti for this dish. It works great with the sauce and flavors. However, you can also try fettuccine or linguine. Both types hold the sauce well. If you prefer whole wheat or gluten-free pasta, feel free to use those options. Just be sure to adjust the cooking time as needed. {{ingredient_image_1}} First, gather your ingredients. You need: - 8 oz spaghetti or your choice of pasta - 4 tablespoons unsalted butter - 4 cloves garlic, minced - Zest and juice of 1 large lemon - 1/2 teaspoon red pepper flakes (optional) - 1/4 cup grated Parmesan cheese - Salt and black pepper to taste - Fresh parsley, chopped for garnish Next, fill a large pot with water and add salt. Bring it to a boil. While you wait, chop the garlic and parsley. Zest the lemon and then juice it. This way, you have everything ready. Once the water boils, add your pasta. Cook it according to the package until it is al dente. This usually takes about 8-10 minutes. Before draining, save one cup of pasta water. This water helps make the sauce creamy. In a large skillet, melt the butter over medium heat. After it melts, add the minced garlic. Sauté it for one to two minutes. You want it fragrant, not brown. Next, stir in the lemon zest and juice. If you like some heat, add the red pepper flakes too. Cook for another minute. Now, add the drained pasta to the skillet. Toss it in the lemon garlic butter. Gradually pour in the reserved pasta water. Mix until you have the sauce you like. Then, stir in the grated Parmesan cheese. Season with salt and black pepper. To plate, use a fork or tongs to twist the pasta onto plates. This gives it a nice shape. Sprinkle extra grated Parmesan on top for a cheesy finish. Finally, add the chopped parsley for color and freshness. Serve right away. Enjoy your lemon butter garlic pasta! When cooking pasta, always use a large pot. Fill it with water to allow the pasta to move freely. Bring the water to a rolling boil before adding salt. The salt enhances the flavor of the pasta. Cook the pasta until it is al dente, which means firm to the bite. This helps it hold its shape and texture. Remember to reserve some pasta water before draining. This water is starchy and helps the sauce cling to the pasta. To boost flavor, use fresh garlic instead of dried. Fresh garlic gives a stronger taste. You can also try adding lemon zest before cooking. This adds a bright note that pairs well with the butter. If you like heat, sprinkle in red pepper flakes. They give a nice kick. Finally, fresh parsley adds color and freshness. Toss it in right before serving for the best effect. One common mistake is overcooking the pasta. This makes it mushy and less enjoyable. Another mistake is not adding enough salt to the water. Pasta needs salt to taste good. Also, don’t forget to mix the pasta with the sauce well. If you simply place sauce on top, it does not coat evenly. Lastly, avoid letting the pasta sit too long before serving. It can dry out or stick together. Pro Tips Use Fresh Ingredients: Fresh garlic and lemon zest will enhance the flavor of your pasta significantly compared to dried alternatives. Adjust the Heat: If you prefer a milder dish, reduce or omit the red pepper flakes. For more heat, add more according to your taste. Reserve Pasta Water: Always reserve some pasta cooking water. It helps to adjust the sauce's consistency and makes it cling better to the pasta. Garnish for Freshness: Fresh parsley adds a pop of color and a fresh flavor. Don’t skip this step for a beautiful presentation! {{image_2}} You can add protein to your Lemon Butter Garlic Pasta for extra flavor and nutrition. Chicken works great. Cook it in the skillet before adding garlic. Slice it thin after cooking for easy mixing. Shrimp is another good choice. Sauté the shrimp until pink and tender. Both options make the dish heartier. If you prefer a vegetarian dish, skip the meat but keep the flavor. You can add veggies like spinach or cherry tomatoes. Toss them in the skillet with the garlic. They will cook quickly and add color. You can also use chickpeas for protein. They mix well and add a nice texture. Use seasonal ingredients to change up the dish. In spring, try fresh asparagus or peas. In summer, add zucchini or bell peppers. Fall brings great options like butternut squash. These swaps keep each meal fresh and exciting. You’ll enjoy the burst of flavors with every season. Store any leftover Lemon Butter Garlic Pasta in an airtight container. Let the pasta cool first. Place it in the fridge for up to three days. You can freeze the pasta if you want to keep it longer. Place the cooled pasta in a freezer-safe bag. Remove as much air as possible. It can stay good for up to three months. To reheat, you can use a microwave or a skillet. If using a microwave, add a splash of water. Heat in short bursts to avoid drying it out. If using a skillet, add a little butter over low heat. Stir gently until warmed through. You can use Pecorino Romano cheese. It has a salty taste and good texture. Nutritional yeast also works well for a dairy-free option. It adds a cheesy flavor without the cheese. Yes, you can! Use gluten-free pasta made from rice or chickpeas. It cooks just like regular pasta. Make sure to check the package for cooking times. Add more red pepper flakes to the dish. Start with one teaspoon and taste as you go. You can also use diced fresh chili peppers for a fresh kick. This post covered all key steps to make delicious pasta. We talked about ingredients, cooking methods, and the best types of pasta to use. Don't forget to apply the tips and tricks to avoid common mistakes. You can customize your dish with proteins or seasonal veggies. Store leftovers properly to enjoy later. Remember, cooking is all about having fun while learning. Happy cooking!

Lemon Butter Garlic Pasta Fresh and Flavorful Dish

PREV 1 … 81 82 83 … 86 NEXT
spicy fork kitchen

explore

DessertsDinnerAppetizersDrinks

Our Policies

  • Cookie Policy
  • Copyright Policy
  • Disclaimer
  • GDPR Policy
  • Terms Of Use
Back to Top
  • About
  • Contact Us
  • Privacy Policy
© 2025 spicy fork kitchen