FREE DINNER EBOOK! Get your copy!
  • Cookie Policy
  • GDPR Policy
  • Disclaimer
  • Terms Of Use
  • Visit my other site: Fun Cookie Recipes
spicy fork kitchen
  • Home
  • Dinner
  • Desserts
  • Drinks
  • Appetizers
  • Contact
  • About
  • Privacy Policy
  • Home
  • Dinner
  • Desserts
  • Drinks
  • Appetizers
  • Contact
  • About
  • Privacy Policy
  • Cookie Policy
  • GDPR Policy
  • Disclaimer
  • Terms Of Use
Visit my other site: Fun Cookie Recipes

HOME / CATEGORIES /

Latest

To make roasted red pepper hummus, you will need: - 1 cup canned chickpeas, drained and rinsed - 1 large roasted red pepper, peeled and seeded - 2 tablespoons tahini - 2 tablespoons olive oil - 2 tablespoons lemon juice - 1 garlic clove, minced - 1/2 teaspoon ground cumin - Salt, to taste - Water, as needed for consistency - Fresh parsley, for garnish - Paprika, for garnish - Chickpeas: High in protein and fiber, they help keep you full. - Roasted Red Pepper: Rich in vitamins A and C, they add flavor and color. - Tahini: Offers healthy fats and boosts calcium intake. - Olive Oil: Provides heart-healthy monounsaturated fats. - Lemon Juice: Adds vitamin C and brightens flavors. - Garlic: Contains antioxidants and may boost immunity. - Cumin: Offers digestive benefits and a warm flavor. - Salt: Enhances taste but should be used in moderation. - Parsley: Adds vitamins and a fresh touch. - Paprika: Gives color and a mild flavor. - Choose canned chickpeas that are low in sodium for a healthier option. - Look for roasted red peppers in jars with no added sugars. - Select tahini made from pure sesame seeds for better flavor. - Use extra virgin olive oil for its rich taste and health benefits. - Pick fresh lemons that feel heavy for their size; they are juicier. - Choose firm garlic cloves for the best flavor and freshness. - Opt for whole spices, like cumin seeds, and grind them for a stronger taste. - Get fresh parsley that looks vibrant and smells fragrant. - Check for high-quality paprika for a rich color and flavor. {{ingredient_image_1}} To make roasted red pepper hummus, start with the ingredients. Gather your canned chickpeas, roasted red pepper, tahini, olive oil, lemon juice, and garlic. Place them into your food processor. Add in the ground cumin and a pinch of salt. Next, blend this mixture on high speed. You want it to be smooth and creamy. If it feels too thick, that's okay! Just add water, one tablespoon at a time. Blend again until you reach your desired texture. Once it's creamy, taste the hummus. You may want to add more salt, lemon juice, or cumin to enhance the flavors. After adjusting, transfer the hummus to a bowl. Drizzle some olive oil on top and sprinkle with paprika. This not only adds flavor but also makes it look nice. The key to great hummus is how you blend it. Start on high speed to break down the chickpeas and other ingredients. This helps create that smooth texture we all love. If you find it still clumps, add a little water. Keep blending! Each time you add water, blend again. This will help mix everything together well. If you want an ultra-smooth hummus, you can blend even longer. Just make sure to stop and scrape down the sides of the bowl to catch any bits that didn't mix. Tasting is vital! After blending, always taste your hummus. If it needs more flavor, add salt, lemon juice, or cumin. I often start with a little and add more as needed. Remember, you can always add, but you can't take away! If you want to spice things up, consider adding a pinch of cayenne pepper or extra garlic. For a fresh twist, try adding fresh herbs like cilantro or parsley. Feel free to experiment until you find your perfect blend! To make your hummus smooth, use canned chickpeas. They blend easier than dried ones. Start by adding all your ingredients to a food processor. If the mixture is thick, add water slowly. Use one tablespoon at a time. Blend until you reach a creamy texture. This may take a few minutes. Keep tasting and adjust as needed. To boost flavor, use fresh garlic and high-quality olive oil. Roasted red peppers add a sweet taste. Don't skip the lemon juice; it balances flavors. Cumin gives a warm, earthy note. Adjust salt to your taste. Adding a pinch more can make a big difference. Feel free to experiment with spices until it feels right. Serve your hummus with fresh veggies like carrots and cucumbers. Pita chips or warm pita bread are great, too. For a fun twist, try it on sandwiches. You can also use hummus as a dip for snacks. Garnish with parsley and paprika for a bright look. This makes it more appealing to serve at parties. Pro Tips Roast Your Peppers: For a deeper flavor, consider roasting your own red peppers over an open flame or in the oven until the skins are charred. This enhances the smokiness of the hummus. Chill Before Serving: Allow your hummus to chill in the refrigerator for at least an hour before serving. This helps the flavors meld together beautifully. Experiment with Spices: Feel free to add other spices such as smoked paprika or cayenne pepper for a kick, or even some fresh herbs like basil for a unique twist. Perfect Pairings: Serve your hummus with a variety of dippers such as pita chips, veggie sticks, or even spread it on sandwiches for added flavor. {{image_2}} Want a kick? Add heat with spices! Use cayenne pepper or red pepper flakes. Start with a pinch. Blend it in with your other ingredients. Taste as you go to find your perfect spice level. This version adds a fun twist to the classic flavor. Fresh herbs can elevate your hummus. Try adding basil or cilantro. Just chop them finely and mix them in. You can also use dried herbs like oregano or thyme. This gives your hummus a fresh and vibrant taste. For extra crunch and nutrition, add nuts or seeds. Pine nuts or sunflower seeds work well. Toast them lightly for a richer flavor. Blend them in for a creamy texture. This adds a unique twist and boosts protein. To keep your roasted red pepper hummus fresh, use an airtight container. Make sure it seals tightly. This will help keep out air and moisture, which can spoil your hummus. Before storing, let the hummus cool completely if you made it warm. You can also drizzle a thin layer of olive oil on top. This adds flavor and helps keep it fresh. When stored properly in the fridge, roasted red pepper hummus can last about 5 to 7 days. Always check for signs of spoilage. If it smells off or has a strange color, it’s best to throw it away. Label your container with a date. This helps you remember when you made it. You can freeze roasted red pepper hummus for up to 3 months. Portion it into smaller containers or ice cube trays. This way, you can thaw just what you need. To thaw, place it in the fridge overnight. Stir well before serving, as the texture may change slightly after freezing. You can serve roasted red pepper hummus with many tasty items. Some great choices include: - Pita bread - Fresh veggies like carrots and cucumbers - Crackers - Tortilla chips - Grilled meats, like chicken or shrimp These pairings add crunch and flavor. You can dip, spread, or enjoy them in wraps. This hummus also makes a great topping for salads or grain bowls. Yes, you can use fresh red peppers. However, the taste will change. Roasting brings out a sweet, smoky flavor. To use fresh peppers, you need to grill them or bake them until soft. This will help mimic the taste of roasted peppers. Yes, roasted red pepper hummus is vegan-friendly! It contains no animal products. The main ingredients are chickpeas, tahini, and olive oil. All these items are plant-based. This makes hummus a great choice for vegans and those who love healthy snacks. Roasted red pepper hummus is simple to make. We covered the key ingredients, their nutrition, and tips for selection. You learned step-by-step cooking methods and how to blend for the best texture. I shared ways to enhance flavor, serve, and store your hummus. Different variations offer new tastes to try. This hummus is healthy, tasty, and vegan-friendly. Enjoy making it and impress your friends with your new skills!

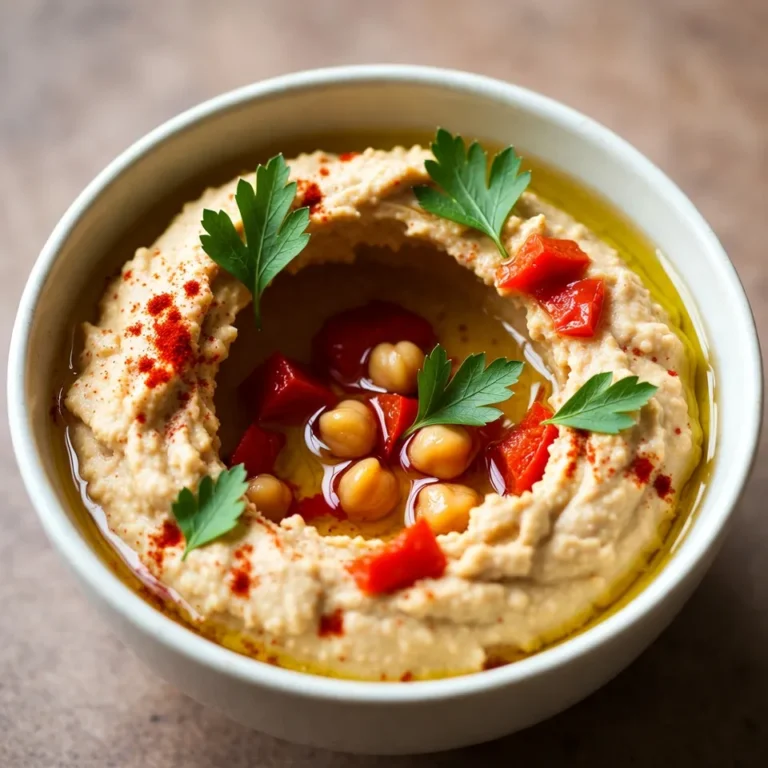
Roasted Red Pepper Hummus Delicious and Nutritious Snack

To make Funfetti Birthday Cake Cookies, you need simple and fun ingredients. The base is a mix of butter, sugars, and eggs. The flour, baking powder, and baking soda give the cookies their structure. Sprinkles add color and joy, while white chocolate chips add sweetness. Each ingredient plays a big role in taste and texture. - 1 cup unsalted butter, softened - 1 cup granulated sugar - 1 cup light brown sugar, packed - 2 large eggs - 1 teaspoon vanilla extract - 3 cups all-purpose flour - 1 teaspoon baking powder - 1 teaspoon baking soda - 1/2 teaspoon salt - 1 cup sprinkles (rainbow or themed colors) - 1 cup white chocolate chips You can change some ingredients if needed. If you want a dairy-free option, use vegan butter instead of regular butter. For the eggs, try using flax eggs. Mix 1 tablespoon of ground flaxseed with 2.5 tablespoons of water for each egg. If you don’t have white chocolate chips, you can use regular chocolate chips or nuts. You can even skip the sprinkles if you want a simpler cookie. Adjusting ingredients can still keep the cookies tasty! {{ingredient_image_1}} First, I set my oven to 350°F (175°C). This temperature works great for cookies. I take a baking sheet and line it with parchment paper. This step helps prevent sticking and makes cleanup easy. Next, I grab a large mixing bowl. I add 1 cup of softened unsalted butter, 1 cup of granulated sugar, and 1 cup of packed light brown sugar. I mix these until they are light and fluffy. Then, I add 2 large eggs, one at a time. I also pour in 1 teaspoon of vanilla extract. I mix well after each egg to keep everything smooth. In another bowl, I measure out 3 cups of all-purpose flour. I add 1 teaspoon of baking powder, 1 teaspoon of baking soda, and 1/2 teaspoon of salt. I whisk these dry ingredients together until they blend well. This step makes sure the leavening agents work evenly in the cookies. Now, I slowly add the dry mix to the wet mix. I mix just until combined. Then, I fold in 1 cup of sprinkles and 1 cup of white chocolate chips. I use a cookie scoop to drop rounded balls of dough onto the prepared baking sheet. I leave space between each cookie so they can spread while baking. I pop the sheet in the oven and bake for 10-12 minutes. I watch for the edges to turn lightly golden. The centers may look a bit underbaked, but they will set as they cool. After baking, I let the cookies cool on the sheet for 5 minutes. Then, I move them to a wire rack to cool completely. To get the best cookie texture, start with softened butter. Softened butter makes the dough creamy and smooth. This helps the cookies rise and spread just right. Mix the butter and sugars well until they look fluffy. This aeration gives the cookies their lightness. When adding flour, mix gently until combined. Over-mixing can make cookies tough. The dough should be thick but not dry. Fold in the sprinkles and chocolate chips carefully to avoid breaking them. Store your leftover cookies in an airtight container. This keeps them fresh and soft. You can use wax paper to separate layers. It helps avoid sticking. If you want them to last longer, place them in the fridge. You can also freeze cookies for later. Just make sure they cool completely first. Then, wrap them in plastic wrap and place them in a freezer bag. They can last up to three months this way. One common mistake is using cold butter. Cold butter does not mix well, and your cookies may turn out flat. Another mistake is not measuring the flour correctly. Too much flour can lead to dry cookies, while too little can make them too gooey. Baking on a hot baking sheet can also affect your cookies. Always let the sheet cool before adding more dough. Lastly, check your oven temperature with a thermometer. Ovens can vary, and a wrong temp can ruin your cookies. Pro Tips Chill the Dough: For thicker cookies, chill the dough in the refrigerator for 30 minutes before baking. This helps control spreading and results in a chewier texture. Use Parchment Paper: Lining your baking sheet with parchment paper not only prevents sticking but also promotes even baking, giving you perfectly golden edges. Mix Sprinkles Carefully: Gently fold in sprinkles to prevent them from breaking apart and losing their vibrant color. This keeps your cookies looking festive! Experiment with Flavors: Feel free to mix in different types of chocolate chips or flavored extracts to customize your cookies. Almond extract can add a lovely twist! {{image_2}} If you want to make these cookies gluten-free, swap the all-purpose flour for a gluten-free blend. Look for a mix that includes xanthan gum for the best texture. For a vegan version, replace the butter with coconut oil or a vegan butter substitute. Use flax eggs instead of regular eggs. Combine 1 tablespoon of flaxseed meal with 2.5 tablespoons of water for each egg. You can change the taste with different chips or sprinkles. Try dark chocolate chips for a richer flavor. Butterscotch chips add a warm sweetness. For sprinkles, mix themed colors for holidays or events. You can even use chocolate sprinkles for a fun twist. Get creative, and let your taste guide you! Decorating these cookies can make them stand out. For birthdays, top with a drizzle of melted chocolate or a sprinkle of extra colorful sprinkles. Use cookie icing to write names or messages. You can also sandwich two cookies with frosting for a fun treat. These ideas make every occasion more festive! To keep your Funfetti Birthday Cake Cookies fresh, store them in an airtight container. This prevents air from making them dry. Place parchment paper between layers of cookies. This helps to keep them from sticking together. Store the container at room temperature, away from heat and light. Cookies stay soft and tasty this way. You can freeze these cookies for later enjoyment. First, let the cookies cool completely. Then, place them in a single layer on a baking sheet. Freeze until solid. Once frozen, transfer them to a freezer-safe bag. Remove as much air as possible. They keep well for up to three months. When you are ready to enjoy them, thaw at room temperature. These cookies last about one week at room temperature. If you store them in the fridge, they can last up to two weeks. Freezing extends the shelf life to three months. Always check for any signs of spoilage before eating. Enjoy your cookies while they are fresh for the best taste! You can tell if your cookies are done by looking at the edges. They should be lightly golden. The centers might look a bit soft, but that’s okay. They will firm up as they cool. If you want a firmer cookie, bake them a minute longer. Keep an eye on them after 10 minutes to avoid overbaking. Yes, you can make the dough ahead of time! This makes it easy to bake fresh cookies later. Just make the dough, cover it, and store it in the fridge. You can keep it there for up to three days. When you’re ready to bake, scoop the dough onto a baking sheet and bake as usual. If you don’t have sprinkles, you can use chopped nuts, mini chocolate chips, or dried fruit. These options add flavor and fun texture. You can also use colored sugar or other themed decorations. Just make sure to keep the amount the same for best results. You learned about the key ingredients for funfetti birthday cake cookies and how to use them. I shared step-by-step instructions to make perfect cookies every time. Tips helped you achieve the best texture and avoid mistakes. We explored variations to cater to different diets and tastes. Finally, I covered how to store and freeze cookies for later enjoyment. Now, you can create tasty funfetti cookies for any occasion. Happy baking!

Funfetti Birthday Cake Cookies Irresistible Treat Recipe

- 6 large russet potatoes, peeled and diced - 1 medium onion, finely chopped - 3 cloves garlic, minced - 4 cups vegetable broth For the base of this soup, I use russet potatoes. They are starchy and creamy when cooked. The onion adds a sweet flavor, while the garlic gives a nice kick. Vegetable broth brings everything together and keeps it rich. - 1 cup cream cheese, softened - 1 cup shredded cheddar cheese - 1 cup sour cream - 2 tablespoons ranch seasoning mix The cream cheese makes the soup creamy. Shredded cheddar cheese adds a sharp taste. Sour cream gives a nice tang. The ranch seasoning mix brings all the flavors together and adds a special touch. - Cooked crispy turkey bacon - Chopped green onions - Additional cheddar cheese Toppings are key to making this soup fun. Crispy turkey bacon adds crunch. Chopped green onions give color and freshness. Extra cheddar cheese melts beautifully on top and makes it even tastier. Combining these ingredients is what makes the Crock Pot Crack Potato Soup so creamy and satisfying. {{ingredient_image_1}} - First, prepare the potatoes, onion, and garlic. Peel the russet potatoes and dice them into small pieces. Chop the onion finely and mince the garlic cloves. This makes the soup more flavorful. - Next, layer the ingredients in your crock pot. Start with the diced potatoes. Then, add the chopped onion and minced garlic. These layers create a nice base for your soup. - For cooking times, set your crock pot to low for 6-8 hours or high for 4-5 hours. This will make the potatoes soft and tender. Check for doneness by poking them with a fork. - When it comes to mashing potatoes, use a potato masher or an immersion blender. Mash them slightly to make the soup creamy. Leave some chunks for texture. This gives it a hearty feel. - To combine the dairy ingredients, stir in the softened cream cheese, shredded cheddar cheese, and sour cream. Add the ranch seasoning mix as well. Mix until everything is well combined and melted. - For a beautiful finish, garnish the soup before serving. Use extra cheddar cheese, crumbled bacon, and chopped green onions. This adds color and taste. Ladle the soup into bowls and enjoy! To make your soup creamy, mash some of the potatoes. Use a potato masher or an immersion blender to blend just enough. This leaves some chunks for a hearty feel. If you want a thicker soup, add more cream cheese or sour cream. For a chunkier texture, mash less. Choose the right potatoes for your soup. Russet potatoes work best because they break down well. If you use red or yellow potatoes, they stay firmer. This gives a different texture but is still tasty. Boost flavor by adding spices and herbs. Garlic powder, onion powder, or even smoked paprika can add depth. Fresh herbs like thyme or parsley can brighten the soup. You can also experiment with pepper or cayenne for some heat. If you want to skip ranch seasoning, try Italian seasoning or a bit of cayenne. These options add their unique twist. You can also make your own blend with garlic powder, onion powder, and dried herbs. Prep your ingredients ahead of time. You can peel and dice the potatoes the night before. Store them in water in the fridge to keep them fresh. Chop the onion and garlic ahead too. This way, you save time on cooking day. Use leftovers wisely. This soup is great the next day. Simply heat it on the stove or in the microwave. You can also freeze it for later. Just let it cool, then store it in airtight containers. It stays fresh for up to three months in the freezer. Pro Tips Perfect Potato Texture: For the best texture, choose russet potatoes as they break down beautifully and create a creamy base for your soup. Flavor Boost: Enhance the flavor by sautéing the onions and garlic in a bit of butter before adding them to the crock pot for a deeper taste. Cheese Choices: Feel free to experiment with different types of cheese, like pepper jack or gouda, for a unique twist on the classic flavor. Make It Ahead: This soup stores well in the fridge for up to 3 days, making it a great option for meal prep or leftovers! {{image_2}} You can switch the cream cheese and cheddar if you want. Use Greek yogurt instead of cream cheese for a lighter twist. If you need a lactose-free option, try using a dairy-free cream cheese. For cheddar, vegan cheese works well too. Just remember to check the melting ability of your choice. Want more protein? Add cooked chicken or sausage to the soup. They make it heartier and more filling. If you prefer a meatless version, try adding beans or lentils. They will give you a great texture and keep it satisfying. Feel free to mix in seasonal veggies for extra flavor. In spring, add peas or asparagus. In fall, consider carrots or sweet potatoes. Each season brings new tastes, so adapt your soup to match what's fresh and available. Enjoy the change with every bowl! To store leftovers, wait for the soup to cool. Transfer it to airtight containers. I recommend using glass containers to avoid stains. Make sure to leave some space at the top for expansion. This soup stays fresh in the fridge for up to three days. If you want to freeze this soup, pour it into freezer-safe bags. Label each bag with the date. Lay the bags flat in the freezer to save space. When you are ready to eat, thaw it overnight in the fridge. To reheat, warm it on the stove or in the microwave. Stir well to ensure even heating. You can keep the soup in the fridge for about three days. If frozen, it lasts for about three months. Look for signs of spoilage like off smells or changes in color. If it looks or smells weird, toss it out. Yes, you can make this soup in advance. It stores well in the fridge. To prep, just follow the full recipe. After cooking, let the soup cool. Pour it into a container and seal it. It will stay fresh for about three days. For a quick meal, you can reheat it on the stove or microwave. Yes, you can make this recipe gluten-free with easy swaps. Use gluten-free vegetable broth instead of regular broth. Check your ranch seasoning mix to ensure it's gluten-free. Most brands have options that fit this need. This way, everyone can enjoy the soup without worry. Many sides pair well with this tasty soup. Here are some suggestions: - A simple green salad for freshness - Crusty bread for dipping - Grilled cheese sandwiches for a classic pair - Steamed veggies for added nutrition Each of these adds a nice touch to your meal. This blog post shared a simple recipe for Crock Pot Crack Potato Soup. We covered the key ingredients, preparation steps, and cooking tips to help you succeed. Remember, you can customize it with different cheeses, proteins, or seasonal veggies. Whether you enjoy creamy or chunky soup, you can find your perfect texture. Store leftovers correctly, and this soup can last for days. Now, it’s your turn to try this easy recipe and enjoy a hearty meal!

Crock Pot Crack Potato Soup Creamy and Satisfying Dish

- 1 lb ground beef - 8 oz egg noodles - 2 tablespoons vegetable oil - 1 medium onion, finely chopped - 3 garlic cloves, minced - 1 inch ginger, grated - 2 green bell peppers, sliced - 1 cup broccoli florets - 1 cup snap peas These ingredients create a solid base for your dish. Ground beef gives it richness. Egg noodles provide a hearty texture. Fresh vegetables add color and crunch. - 3 tablespoons soy sauce - 1 tablespoon hoisin sauce - 1 tablespoon sesame oil - 1 tablespoon brown sugar - 1 teaspoon crushed red pepper flakes (optional) The sauce pulls it all together. Soy sauce adds umami. Hoisin sauce brings sweetness. Sesame oil provides a nutty flavor. Brown sugar balances the salty notes. If you like heat, add red pepper flakes! With these ingredients, you build a flavorful meal that is quick and easy to make. {{ingredient_image_1}} Start by cooking the egg noodles. Follow the package instructions carefully. This usually takes around 5-7 minutes. Once cooked, drain the noodles and set them aside. Make sure to toss them with a little oil to prevent sticking. In a large skillet or wok, heat the vegetable oil over medium-high heat. You want the oil to shimmer but not smoke. Next, add your chopped onion. Sauté for about 2-3 minutes until it turns translucent. This helps release its natural sweetness. After that, add minced garlic and grated ginger. Stir the mixture for about 1 minute. You’ll start to smell a wonderful aroma. Push the onion mixture to one side of the skillet. Now, add the ground beef to the empty side. Cook the beef until it is browned and fully cooked. This should take about 5-7 minutes. Use a spatula to break it apart as it cooks. Once the beef is ready, stir in sliced bell peppers, broccoli florets, and snap peas. Cook everything for an additional 4-5 minutes. The vegetables should be tender but still crisp. This adds great texture to your dish. In a small bowl, whisk together the soy sauce, hoisin sauce, sesame oil, brown sugar, and any red pepper flakes if you like some heat. Pour this sauce over the beef and vegetables. Stir well to coat everything evenly. Now, add the cooked egg noodles to the skillet. Toss everything together. Make sure the noodles are heated through and mixed well with the sauce. This should take about 2 minutes. Finally, remove the skillet from heat. Adjust the seasoning with extra soy sauce if needed. Enjoy your flavorful Mongolian Ground Beef Noodles! Adjusting Seasoning Taste your dish as you cook. If it seems bland, add more soy sauce. A touch more hoisin sauce can boost the sweet flavor. If you want more heat, sprinkle in some crushed red pepper flakes. Adjust until it feels just right for you. Balancing Sweet and Savory The key to great flavor is balance. You want both sweet and savory notes. If your dish is too sweet, add a splash more soy sauce. If it’s too savory, mix in a little brown sugar. This way, you create a rich, layered taste that delights your palate. Using a Wok vs. Skillet A wok is ideal for cooking at high heat. It allows for even cooking and great stir-frying. If you don’t have one, a large skillet works too. Just make sure it has high sides to contain the ingredients. Both methods will yield tasty results. Tips for High-Temperature Cooking Preheat your pan before adding oil. This helps to sear the beef quickly. Make sure not to overcrowd the pan. Cook in batches if needed. This keeps the beef juicy and tender while giving it a nice brown color. Enhancing Presentation Presentation matters! Serve the noodles in big bowls. This makes it look inviting. A sprinkle of sesame seeds adds a nice crunch. It also gives a lovely visual touch. Best Herbs and Toppings Chopped green onions make a great topping. They add freshness and color. You can also try cilantro for a different flavor. A squeeze of lime can brighten the dish even more. Use what you love! Pro Tips Use Fresh Ingredients: Fresh vegetables add vibrant flavor and nutrition to the dish. Whenever possible, choose seasonal produce for the best taste. Adjust Spice Levels: If you enjoy more heat, feel free to increase the amount of crushed red pepper flakes or add sliced fresh chili peppers to the mix. Meal Prep Friendly: This dish can be made ahead of time and stored in the refrigerator for up to 3 days. Simply reheat on the stove or in the microwave when ready to serve. Pair with Sides: Serve your Mongolian Ground Beef Noodles with a side of steamed rice or a fresh salad to round out the meal. {{image_2}} You can swap ground beef for other meats. Ground turkey or chicken works great. They are leaner but still tasty. You can use the same method as with beef. For a vegetarian option, try using lentils or mushrooms. Lentils add protein and fiber. Mushrooms give a nice texture and earthy flavor. Both choices keep the dish hearty. While egg noodles are traditional, you can switch to rice noodles. They soak up flavors well and are gluten-free. Simply cook them as per package directions. Zucchini noodles are another fun choice. They are low-carb and add freshness. Just spiralize the zucchini and toss them in at the end. This keeps them crisp. Feel free to add seasonal veggies. Carrots, bell peppers, and spinach all work well. They boost nutrition and color in the dish. If you like heat, add crushed red pepper flakes or sliced jalapeños. This adds spice without overwhelming the flavors. You can adjust based on your taste. To keep your Mongolian ground beef noodles fresh, cool them before storing. Let the dish sit at room temperature for about 30 minutes. Once cool, place it in an airtight container. Store in the fridge for up to three days. Be sure to label the container with the date. This way, you know when to eat it! You can freeze the noodles for later. First, let the dish cool completely. Then, divide it into portions for easy thawing. Use freezer-safe containers or bags. Remove as much air as you can to avoid freezer burn. Your noodles can stay good in the freezer for up to three months. When ready to enjoy, simply thaw overnight in the fridge. Reheating leftovers is simple! You can use the microwave or stovetop. If using the microwave, place the noodles in a bowl and cover it with a damp paper towel. Heat in 1-minute intervals, stirring in between. On the stovetop, add a splash of water to a skillet. Heat over medium-low until warmed through. Avoid overheating to keep the noodles from getting mushy. Mongolian Ground Beef Noodles come from Mongolian cuisine. This dish does not actually hail from Mongolia. It draws inspiration from East Asian flavors. It mixes savory beef with fresh vegetables and noodles. Culturally, it reflects the blend of nomadic traditions and modern cooking. Mongolian food often features hearty ingredients. It adapts to local tastes in many countries. This dish is loved by many due to its rich flavors and ease of preparation. Yes, you can make this dish ahead of time. It’s great for meal prep and saves time on busy days. You can cook the noodles and beef separately. Then, store them in airtight containers in the fridge. When you are ready to eat, just combine and heat them up. This dish will taste great for up to three days in the fridge. For best results, keep the sauce separate until serving. This keeps the noodles from getting soggy. To add more heat, you have many options. Start by adding more crushed red pepper flakes. You can also use a spicy sauce, like sriracha or chili paste. Another option is to add fresh chili peppers while cooking. If you prefer a smoky flavor, try using chipotle peppers. Adjust the heat to match your taste. Always taste as you go to find your perfect level of spice! This blog post covered all the key steps to make Mongolian Ground Beef Noodles. We reviewed the main ingredients, sauce options, and detailed cooking methods. I shared tips for flavor and cooking techniques. You also learned how to customize the dish with different proteins and noodles. Don't forget to store leftovers properly to enjoy them later. This easy recipe gives you room to play with flavors and ingredients. Now, it’s time to start cooking! Enjoy this tasty meal with your loved ones.

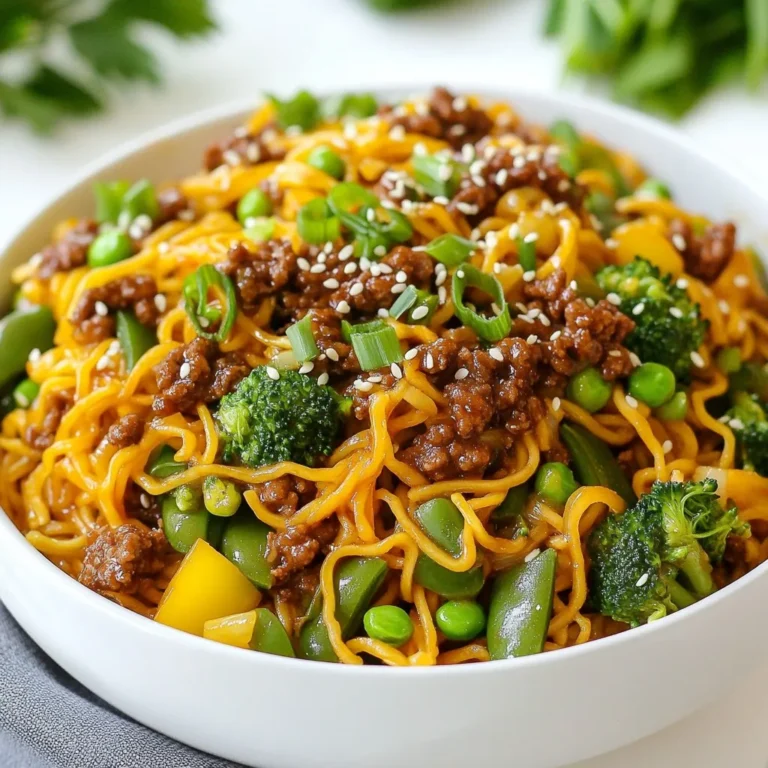
Mongolian Ground Beef Noodles Flavorful Meal Made Easy

- 1 cup quinoa, rinsed - 2 cups vegetable broth or water - 1 medium sweet potato, peeled and cubed - 1 cup Brussels sprouts, halved - 1 red bell pepper, diced - 1 zucchini, sliced The base of this dish is quinoa and a colorful mix of vegetables. Quinoa gives the bowl protein and fiber. The sweet potato adds a touch of sweetness. Brussels sprouts, bell pepper, and zucchini bring crunch and flavor. - 2 tablespoons olive oil - 1 teaspoon ground cinnamon - 1 teaspoon smoked paprika - Salt and pepper to taste Seasonings are key for flavor. Olive oil helps veggies roast well. Cinnamon adds warmth, while smoked paprika gives a nice depth. Salt and pepper enhance all the tastes. - ½ cup dried cranberries - ¼ cup pumpkin seeds - Fresh parsley or arugula, for garnish Garnishes make the dish pop. Dried cranberries add sweetness and chew. Pumpkin seeds add crunch and healthy fats. Fresh parsley or arugula adds a fresh touch and color. {{ingredient_image_1}} Preheating the Oven Start by preheating your oven to 425°F (220°C). This high heat helps the veggies become tender and caramelized. Tossing the Vegetables with Oil and Spices In a large bowl, combine these ingredients: - 1 medium sweet potato, peeled and cubed - 1 cup Brussels sprouts, halved - 1 red bell pepper, diced - 1 zucchini, sliced - 2 tablespoons olive oil - 1 teaspoon ground cinnamon - 1 teaspoon smoked paprika - Salt and pepper to taste Mix well until all the veggies are coated in the oil and spices. This step adds great flavor. Roasting Instructions Spread the tossed vegetables evenly on a baking sheet. Place them in the preheated oven and roast for about 25-30 minutes. Flip halfway through to ensure even cooking. The veggies should be tender and have a nice brown color. Bringing Broth or Water to a Boil While the veggies roast, grab a medium saucepan. Pour in 2 cups of vegetable broth or water and bring it to a boil. Using broth adds more flavor to the quinoa. Cooking and Fluffing the Quinoa Once the liquid is boiling, add 1 cup of rinsed quinoa. Cover the saucepan and reduce the heat to low. Let it cook for about 15 minutes until all the liquid is absorbed. After cooking, remove it from heat and let it sit for 5 minutes. Fluff the quinoa with a fork and season with a bit of salt. Layering Quinoa and Roasted Veggies Start with a base of quinoa in each bowl. Then, add a generous portion of the roasted veggies on top. The colors will look amazing together. Adding Toppings and Garnishes To finish, sprinkle ½ cup of dried cranberries and ¼ cup of pumpkin seeds over each bowl. This adds texture and a burst of flavor. For a fresh touch, garnish with parsley or a handful of arugula. Enjoy your delightful autumn meal! Cooking Temperature and Time Adjustments Roasting at 425°F (220°C) works best for these veggies. This high heat helps them cook quickly and brown nicely. If your oven runs hot, reduce the temp slightly. If you want softer veggies, roast them for a bit longer. Just keep an eye on them! Achieving Optimal Caramelization To get that sweet caramel flavor, space the veggies out on the baking sheet. If they are too close, they will steam instead of roast. Flip them halfway through cooking for even browning. Look for a golden color; that means they are ready! Rinsing Tips for Fluffier Quinoa Always rinse quinoa before cooking. This removes a bitter coating called saponin. Use a fine mesh strainer to wash it under cold water. Give it a good shake to drain excess water. This simple step makes a big difference! Common Mistakes to Avoid Don’t skip the resting step after cooking quinoa. Let it sit covered for 5 minutes. This helps it absorb steam and become fluffy. Also, avoid cooking it in plain water. Using vegetable broth adds rich flavor to your quinoa! Ideal Pairings and Accompaniments These bowls shine on their own but pair well with a light salad. Try a simple arugula salad with lemon vinaigrette. You can also serve them with a dollop of yogurt or a sprinkle of feta for extra creaminess. Meal Prep Recommendations These bowls are great for meal prep. Store the quinoa and veggies in separate containers. You can mix and match them throughout the week. Just reheat the veggies in the oven to keep them crispy. This way, you enjoy fresh flavors every day! Pro Tips Choose Fresh Veggies: Opt for seasonal, fresh vegetables for the best flavor and nutrition in your quinoa bowls. Customize Your Spices: Feel free to experiment with different spices like cumin or coriander to add a unique twist to your roasted veggies. Perfectly Cooked Quinoa: Rinse quinoa thoroughly before cooking to remove its natural bitterness and achieve a fluffier texture. Meal Prep Friendly: These bowls are perfect for meal prep; store the quinoa and veggies separately for easy reheating throughout the week. {{image_2}} You can switch up the veggies in this recipe to fit your taste. For fall, try using root vegetables like carrots or parsnips. These add a nice sweetness and texture. You can also add kale or butternut squash for extra color and flavor. If you want to change the protein, consider adding chickpeas or black beans. These give a hearty feel and add protein to your meal. You could also grill some chicken or tofu for a different twist. This recipe is easy to adapt for vegan and gluten-free diets. Quinoa is naturally gluten-free, so it's a great base. Just make sure your broth is also gluten-free. For seasoning, try using garlic powder, onion powder, or herbs like thyme and rosemary. These can add a robust flavor without changing the dish too much. You can also enhance the dish with nutritional yeast for a cheesy flavor. This is a popular choice for those who follow a vegan diet. To keep your Autumn Glow Roasted Veggie Quinoa Bowls fresh, store leftovers in airtight containers. Make sure to separate quinoa from the veggies if you want to keep them crisp. You can keep the bowls in the fridge for up to 3 days. For the freshest taste, use the veggies first. If they sit too long, they may lose their nice texture. Quinoa can last a bit longer in the fridge, up to 5 days, but the sooner you eat it, the better. When you’re ready to enjoy leftovers, reheating the roasted veggies is key. The best method is to use the oven. Preheat it to 350°F (175°C) and spread the veggies on a baking sheet. Heat for about 10-15 minutes. This keeps them crisp and brings back that roasted flavor. If you’re in a hurry, you can use the microwave. Place the veggies in a bowl and cover it with a damp paper towel. Heat in short bursts, checking often. This avoids overcooking. For the quinoa, keep it light and fluffy. Add a splash of water or broth before reheating. Use the microwave or stove. Heat gently to avoid drying it out. Fluff with a fork before serving to keep it airy. Can I use other grains besides quinoa? Yes, you can use other grains. Brown rice or farro work well. They add different textures and flavors. Just adjust cooking times based on the grain you choose. How can I make this dish spicier? To add heat, try using cayenne pepper or chili flakes. You can also add a splash of hot sauce. Mix these into the veggie toss for an even spice. Is it possible to prepare this in advance? Absolutely! You can roast the veggies and cook quinoa ahead. Store them in the fridge for up to three days. Reheat them when ready to serve. Caloric Content and Macronutrients Each bowl has about 400 calories. It includes 12 grams of protein, 15 grams of fat, and 60 grams of carbs. This dish is filling and nutritious. Health Benefits of Major Ingredients - Quinoa: Packed with protein and fiber. It helps keep you full longer. - Sweet Potatoes: Full of vitamins A and C. They support your immune system. - Brussels Sprouts: Rich in antioxidants. They help fight inflammation. - Cranberries: Great for heart health. They are high in vitamins and minerals. - Pumpkin Seeds: A good source of healthy fats and minerals like magnesium. This post covers how to make tasty quinoa and veggie bowls. We talked about the main ingredients, from quinoa to seasonings. I shared steps for preparing the veggies and cooking the quinoa perfectly. You learned tips for serving and storing your bowls too. Keep exploring and trying new flavors. Customizing bowls can be fun and easy. Enjoy your cooking journey!

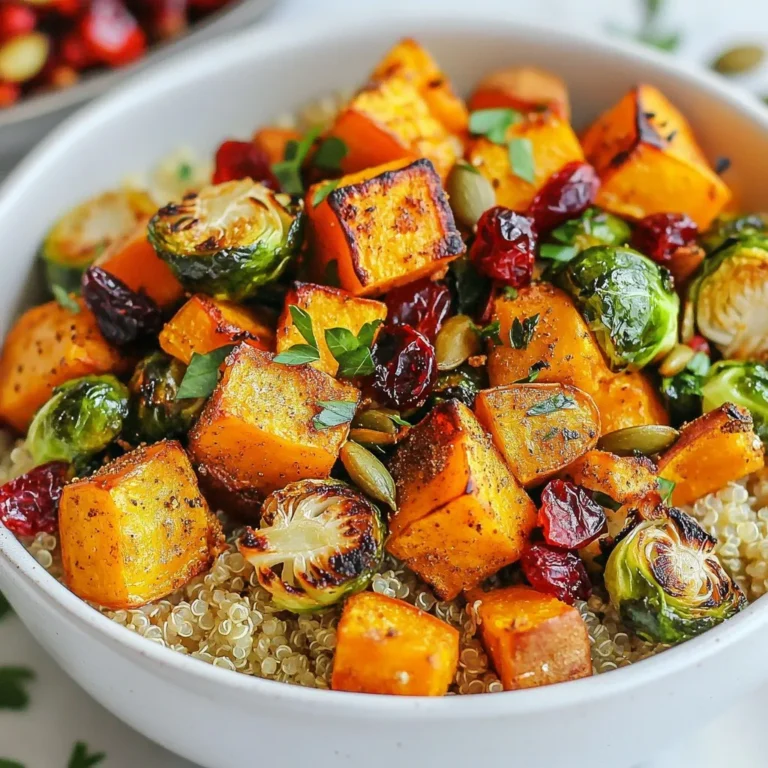
Autumn Glow Roasted Veggie Quinoa Bowls Delight

- 1 cup rolled oats - 2 cups almond milk (or any preferred milk) - 1/4 cup natural peanut butter - 2 tablespoons chia seeds These main ingredients form the base of your peanut butter protein overnight oats. Rolled oats provide fiber and keep you full. Almond milk makes it creamy and adds flavor. Natural peanut butter gives you protein and healthy fats. Chia seeds add texture and boost nutrition. - 1 tablespoon maple syrup (optional, for sweetness) - 1/2 teaspoon vanilla extract - A pinch of salt The optional ingredients enhance the taste. Maple syrup adds sweetness, while vanilla extract gives a nice aroma. A pinch of salt balances the flavors and makes everything pop. - Sliced bananas - Chopped nuts - Berries Toppings make your oats fun and colorful. Sliced bananas add natural sweetness. Chopped nuts bring crunch and healthy fats. Berries add a burst of flavor and bright color. You can mix and match to suit your taste! {{ingredient_image_1}} To start, grab a large mixing bowl. In this bowl, combine the rolled oats, almond milk, and natural peanut butter. Next, add the chia seeds, protein powder, maple syrup, vanilla extract, and a pinch of salt. Make sure you mix everything well. Whisk the ingredients until they blend smoothly. This step is key to avoid clumps and ensure a creamy texture. Now that your mixture is ready, it’s time to store it. Divide the mixture evenly into jars or containers. I like to use glass jars with lids; they work great. Once you fill the jars, seal them tightly. Place the jars in the refrigerator. Let them chill overnight, or for at least four hours. This helps the oats soak up the liquid and become soft. In the morning, take out your jars of oats. Open a jar and give the oats a good stir. This helps mix the flavors. If you find the mixture too thick, simply add a splash of milk. This will give you your desired consistency. Finally, top your oats with sliced bananas, chopped nuts, or berries. Enjoy your tasty and nutritious meal! To get the right texture in your oats, adjust the liquid. If you want thicker oats, use less almond milk. For a creamier mix, add more milk. I find that using two cups of almond milk works well for most. Mixing is key. I like to whisk the oats and milk together first. This helps them blend nicely. Make sure the peanut butter is smooth to avoid clumps. You can also stir well after soaking to get everything mixed. You can make your oats even better by adding other ingredients. Try adding cocoa powder for a chocolatey taste. You can also mix in spices like cinnamon or nutmeg for warmth. If you want to switch from peanut butter, almond or cashew butter works great. Each nut butter gives a different flavor. You can even try sunflower seed butter if you have a nut allergy. Making these oats in bulk saves time. You can double the recipe and store extras. This way, you have a quick breakfast ready for busy days. For storage, use jars with tight lids. Glass jars are great because they keep the oats fresh. They will stay good for about four days in the fridge. Just remember to add toppings right before eating. Pro Tips Adjust the Sweetness: Depending on your preference, you can add more or less maple syrup to achieve your desired level of sweetness. Experiment with Milk: Feel free to use different types of milk such as oat milk, soy milk, or even coconut milk for varying flavors. Add More Protein: If you're looking for an extra protein boost, consider adding more protein powder or incorporating Greek yogurt as a topping. Mix in Spices: Enhance the flavor by adding spices like cinnamon or nutmeg to the oat mixture before refrigerating. {{image_2}} You can switch up the protein in your overnight oats. If you prefer plant-based options, try using pea protein or hemp protein. These choices work well with oats. They add a nice boost without the dairy. For non-dairy protein powders, look for ones made from rice or soy. They mix easily and taste great. You can pick a flavor that suits your taste too. This way, you keep your oats tasty and healthy. Want to jazz up your oats? Try a chocolate peanut butter version! Just mix in cocoa powder or chocolate protein powder. This gives a rich flavor. You’ll feel like you are having dessert for breakfast. Fruit-infused variations are also fun. You can add mashed bananas or chopped apples to the mix. Berries work well too. They add a sweet and tangy taste, plus a pop of color. If you need gluten-free oats, you can use certified gluten-free rolled oats. They taste just as good and are safe for those with gluten issues. If you want to cut down on sugar, use sugar-free sweeteners like stevia or monk fruit. These options give you sweetness without the calories. You can enjoy your oats guilt-free while still making them delicious. Peanut butter protein overnight oats stay fresh for up to five days in the fridge. Store them in airtight containers to keep them from drying out. Glass jars or plastic containers work well. Divide the oats into portions for easy grab-and-go breakfasts. You can freeze prepared oats if you want to save some for later. Just scoop the mixture into freezer-safe containers. Leave a little space at the top for expansion. To thaw, move the oats to the fridge the night before you want to eat them. This keeps the texture nice. When you're ready to enjoy your oats, you can reheat them in the microwave. Use a microwave-safe bowl and heat in short bursts. Stir after each burst to avoid hot spots. If the oats feel too thick, add a splash of almond milk to maintain that creamy texture. Yes, you can easily make these oats vegan. Here are some simple swaps: - Use plant-based milk like almond, soy, or oat milk. - Replace natural peanut butter with almond or sunflower seed butter. - Use a vegan protein powder instead of regular protein powder. - Skip the maple syrup if you prefer a less sweet taste. These swaps keep the recipe tasty and healthy. Peanut butter protein overnight oats can last in the fridge for up to 4 to 5 days. Be sure to store them in airtight containers. This keeps the oats fresh and tasty. If you notice any odd smell or change in texture, it’s best to throw them out. Absolutely! You can use other nut butters. Here are some great options: - Almond butter for a milder taste. - Cashew butter for a creamy texture. - Sunflower seed butter if you want a nut-free option. Each nut butter brings its unique flavor, so feel free to experiment! You learned how to make tasty peanut butter protein overnight oats. We covered the key ingredients, helpful steps, and smart storage tips. Remember to play with flavors and toppings to find what you love. You can also try different proteins to suit your needs. These oats are easy to make and great for any diet. Enjoy them for breakfast or a snack. Get creative and make it your own!

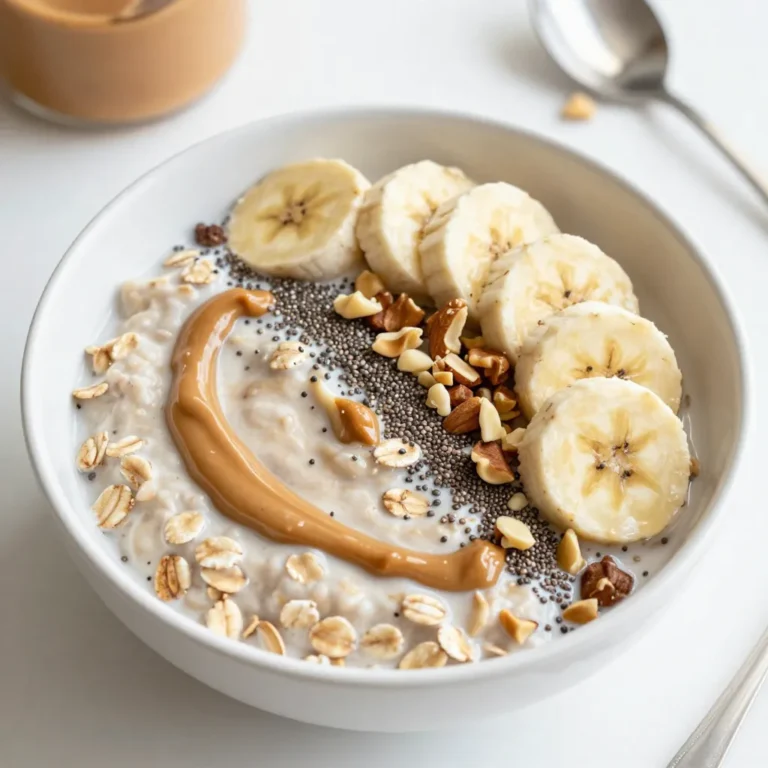
Peanut Butter Protein Overnight Oats Nourishing Recipe

For our easy orange chicken, you need: - 1 lb boneless, skinless chicken thighs, cut into bite-sized pieces - 1/2 cup cornstarch - Salt and pepper to taste Start with the chicken thighs. They are juicy and tender. Cut them into small pieces for even cooking. Season them with salt and pepper. Toss the chicken in cornstarch. This gives a crispy texture when frying. Next, let’s gather the sauce ingredients. You will need: - 1/2 cup orange juice (freshly squeezed for best flavor) - Zest of 1 orange - 1/4 cup honey - 2 tablespoons soy sauce (low sodium preferred) - 1 tablespoon rice vinegar - 2 cloves garlic, minced - 1 teaspoon fresh ginger, minced This sauce brings bright flavors. Fresh orange juice makes it vibrant. The honey adds sweetness, while soy sauce gives depth. Garlic and ginger add warmth and spice. Finally, for garnishing, grab: - 1 tablespoon sesame seeds - 2 green onions, thinly sliced These toppings add crunch and color. Sesame seeds give a nutty flavor. Green onions add freshness and a pop of green. Together, they make your dish look and taste amazing! {{ingredient_image_1}} To start, use one pound of boneless, skinless chicken thighs. Cut them into bite-sized pieces. Place the chicken in a medium bowl and season it with salt and pepper. This adds flavor right from the start. Then, toss the chicken pieces in half a cup of cornstarch. Make sure they are all coated. This step gives the chicken a crispy texture when fried, which is key for a great dish. Now, let’s make the orange sauce. In a small bowl, combine half a cup of freshly squeezed orange juice with the zest of one orange. The zest adds a bright flavor. Add a quarter cup of honey to this mix, which gives a sweet touch. Next, include two tablespoons of low-sodium soy sauce and one tablespoon of rice vinegar. This balance of sweet and savory is important. Finally, add two cloves of minced garlic and one teaspoon of minced ginger. Whisk everything together until well combined. This sauce brings all the flavors together. Heat a quarter cup of vegetable oil in a large skillet or wok over medium-high heat. Carefully add the chicken pieces in a single layer. Fry them until they turn golden brown and are cooked through, about five to seven minutes. If your skillet is small, cook in batches. Once cooked, transfer the chicken to a plate lined with paper towels to drain any extra oil. Next, pour the orange sauce mixture into the skillet and bring it to a gentle simmer. Let it cook for about two to three minutes until it thickens slightly. Now, add the cooked chicken back into the skillet. Toss it well to coat the chicken in the sauce. Cook for an additional two minutes to heat through. Remove from heat, and you’re ready to serve. Garnish with sesame seeds and thinly sliced green onions for a fresh look. Enjoy your easy orange chicken with honey! To get that perfect crunch, start with cornstarch. Dust the chicken pieces well. This coating helps lock in moisture. When frying, use hot oil. Heat the oil to medium-high. If it’s too cold, the chicken will steam. Fry in batches to avoid crowding. Each piece needs space to crisp up. Drain the chicken on paper towels. This removes excess oil and keeps it crunchy. Balance is key in this dish. Use fresh orange juice for bright flavor. The zest adds depth, so don’t skip it. Honey brings sweetness, but adjust to taste. If it’s too sweet, add a splash of rice vinegar. Soy sauce adds saltiness. Taste the sauce before adding the chicken. Adjust flavors to your liking. A little garlic and ginger can elevate the taste, too. Serve your orange chicken over rice. Jasmine rice works great for this. You can drizzle extra sauce on top for added flavor. Garnish with sesame seeds and green onions. This adds a nice crunch and color. For a complete meal, include stir-fried vegetables. Broccoli, bell peppers, or snap peas add nutrition and vibrancy. Enjoy this dish with family or friends for a delightful meal! Pro Tips Use Fresh Ingredients: Freshly squeezed orange juice and zest will elevate the flavor of your dish. Avoid bottled juices for the best taste. Adjust Sweetness: Taste the sauce before adding the chicken. If you prefer a sweeter sauce, feel free to add more honey to suit your taste. Perfectly Crispy Chicken: Make sure the oil is hot enough before adding the chicken. This ensures a crispy coating and prevents the chicken from becoming soggy. Garnish for Flavor: Don’t skip the sesame seeds and green onions. They add a nice crunch and fresh flavor that complements the dish beautifully. {{image_2}} You can make this dish lighter. Instead of chicken thighs, use chicken breasts. They are leaner and still tasty. For frying, try using an air fryer. It cooks the chicken with less oil. You can also swap honey for agave syrup. It gives a similar sweetness with fewer calories. Want to mix things up? Try adding different juices. Pineapple juice gives a tropical twist. Lemon juice adds a nice zing. You can also switch soy sauce with tamari for a gluten-free option. Add a pinch of chili flakes for heat or fresh cilantro for a fresh taste. You can cook this dish in several ways. Besides frying, try baking the chicken at 400°F for a healthier option. Just coat the chicken in cornstarch and bake for about 20 minutes. Another method is to grill the chicken. It adds a smoky flavor and keeps it juicy. Each method changes the taste and texture, so feel free to experiment! You can store leftover orange chicken in the fridge. Place it in an airtight container. This keeps the chicken fresh for up to three days. When you are ready to eat, make sure to check for any off smells or changes in color. If it looks good, it should taste just as great! Freezing is a great option for longer storage. You can freeze the orange chicken for up to three months. Let the chicken cool completely before placing it in a freezer-safe bag. Remove as much air as you can to prevent freezer burn. Label the bag with the date. This helps you keep track of how long it’s been frozen. To reheat, you have a few options. You can use the microwave, but stovetop is best for keeping the chicken crispy. For the stovetop, heat a skillet over medium heat. Add a splash of water or broth to keep it moist. Then, add the chicken and cook until heated through. Stir often to avoid burning. If you use the microwave, heat in short bursts, checking often to prevent overcooking. Enjoy your delicious orange chicken again! Yes, you can use orange juice from concentrate. It saves time and effort. However, freshly squeezed orange juice gives a brighter taste. If you choose concentrate, make sure to mix it well. This way, you will still enjoy a tasty orange chicken. To add spice, you can mix in red pepper flakes. Start with a pinch and taste it. You can also add some sriracha or chili paste to the sauce. These will bring nice heat and flavor to your orange chicken. Just remember to balance the spice with sweetness. Orange chicken pairs well with many side dishes. Here are some great options: - Fluffy white rice - Steamed jasmine rice - Stir-fried vegetables - Fried rice - Noodles These sides will complement the sweet and tangy flavors of orange chicken. Choose your favorites for a complete meal! This blog post covered how to make orange chicken with tasty ingredients and easy steps. You learned about the right chicken and seasonings, how to make the sauce, and what garnishes to use. I shared tips for crispiness and flavor balance, along with serving ideas. Don't forget the variations and storage tips! Now, enjoy making this dish your own, and have fun experimenting. With a little practice, you'll impress everyone with your orange chicken skills.

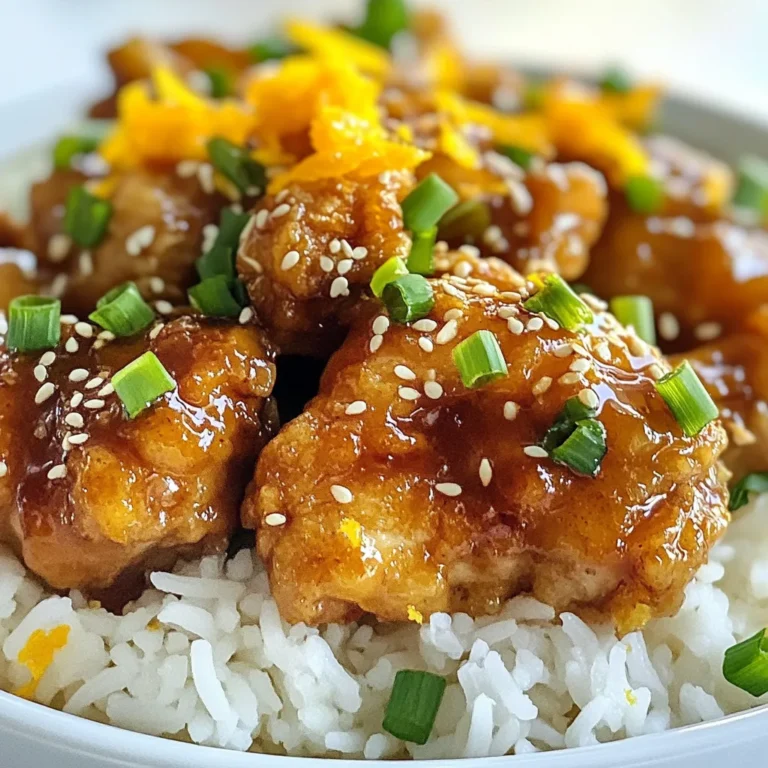
Easy Orange Chicken with Honey Flavorful Delight

For this Lemon Blueberry Yogurt Loaf, you need these key items: - 1 cup plain Greek yogurt - 1 cup granulated sugar - 3 large eggs - Zest of 1 lemon - 1/4 cup freshly squeezed lemon juice - 1/2 cup vegetable oil - 2 cups all-purpose flour - 1 teaspoon baking powder - 1/2 teaspoon baking soda - 1/4 teaspoon salt - 1 cup fresh blueberries (plus extra for garnish) - 1 teaspoon vanilla extract Each ingredient plays a vital role. The Greek yogurt gives a lovely moisture and tang. The sugar balances the tartness of lemon and blueberries. Eggs add structure and richness. To make your loaf even more special, consider these optional items: - Powdered sugar for a glaze - More fresh blueberries for decoration - Extra lemon zest for added flavor These garnishes make your loaf extra pretty and tasty. A light glaze can add sweetness, while fresh berries enhance the look. You might not have every ingredient at home. Here are some swaps: - Use low-fat yogurt if you want fewer calories. - Swap vegetable oil with melted butter for a richer flavor. - You can replace all-purpose flour with gluten-free flour for a gluten-free option. These substitutions can help fit your diet or what you have in your pantry. Just remember, each change can slightly alter the loaf's taste and texture. {{ingredient_image_1}} First, set your oven to 350°F (175°C). This makes sure the loaf bakes evenly. Next, take a 9x5-inch loaf pan and grease it well. You can use cooking spray or butter. This step helps the loaf come out easily after baking. In a big bowl, add 1 cup of plain Greek yogurt and 1 cup of granulated sugar. Whisk them together until the mix is smooth. Then, add in 3 large eggs one by one. Make sure to whisk well after each egg. Now, mix in the zest of 1 lemon, 1/4 cup of freshly squeezed lemon juice, and 1/2 cup of vegetable oil. Stir everything until it's well combined. In a different bowl, take 2 cups of all-purpose flour. Add 1 teaspoon of baking powder, 1/2 teaspoon of baking soda, and 1/4 teaspoon of salt. Use a whisk to mix these dry ingredients together. This step helps to distribute the baking soda and baking powder evenly. Now, slowly add the dry mix to the wet mix. Stir gently until just combined. Be careful not to overmix; this keeps the loaf light. Next, fold in 1 cup of fresh blueberries along with 1 teaspoon of vanilla extract. Gently mix, being careful not to smash the berries. Pour the batter into your greased loaf pan. Spread it out evenly. Place the pan in your preheated oven. Bake for 50-60 minutes. To check if it's done, insert a toothpick into the center. If it comes out clean, the loaf is ready. Once baked, take the pan out of the oven. Let the loaf cool in the pan for about 10 minutes. After that, transfer it to a wire rack to cool completely. For a special touch, you can make a light lemon glaze with powdered sugar and lemon juice. Drizzle this over the loaf before serving. Slice it and enjoy your delicious Lemon Blueberry Yogurt Loaf! To keep your Lemon Blueberry Yogurt Loaf moist, use Greek yogurt. It adds protein and moisture. Also, don’t skip the oil; it helps keep the loaf soft. The lemon juice adds a nice zing and moisture, too. Ensure you measure all liquids accurately. This will help create the best texture. Overmixing can make your loaf tough. Mix your wet and dry ingredients until just combined. You want to see some flour bits. Gently fold in the blueberries to prevent them from breaking. If you see streaks of flour, that’s okay. It will bake perfectly. Once your loaf cools, wrap it tightly in plastic wrap. This keeps air out and moisture in. Store it at room temperature for up to three days. If you want to save it longer, freeze slices. Just wrap each slice separately. When you want a slice, take it out and let it thaw. Enjoy it fresh! Pro Tips Use Room Temperature Ingredients: Make sure your eggs and yogurt are at room temperature for better emulsification and a smoother batter. Don’t Overmix the Batter: To keep your loaf light and fluffy, mix until just combined. Overmixing can lead to a dense texture. Fresh vs. Frozen Blueberries: If using frozen blueberries, do not thaw them beforehand to prevent bleeding into the batter. Add them straight from the freezer. Check for Doneness: Ovens can vary, so start checking the loaf at the 50-minute mark to avoid overbaking. {{image_2}} You can make this loaf healthier. For a low-sugar option, swap regular sugar for a sugar substitute, like stevia or monk fruit. These options can cut calories while keeping sweetness. For a gluten-free version, use gluten-free flour blends. They work well in most recipes. Just ensure it has a good mix of starches and fibers for the best texture. You can add fun flavors by mixing in nuts or spices. Chopped walnuts or almonds bring a nice crunch and richness. Try adding a teaspoon of cinnamon or nutmeg to the dry ingredients for warmth. You can even mix in a splash of almond extract for a twist. Each option gives this loaf a unique touch, making it your own! If you want a sweet finish, consider adding a frosting. A simple lemon glaze is easy to make. Just mix powdered sugar with lemon juice until it’s smooth. Drizzle it over the cooled loaf for a fresh kick. You can also use cream cheese frosting for a rich flavor. It pairs nicely with the tartness of the lemon and blueberries. To keep your Lemon Blueberry Yogurt Loaf fresh, store it in an airtight container. This keeps moisture in and prevents it from drying out. You can also wrap it in plastic wrap for extra protection. Place the loaf at room temperature for up to three days. If you want to keep it longer, the fridge is a good option. Just know that it may lose some moisture when chilled. If you want to save some for later, freezing is great. First, let the loaf cool completely. Wrap it tightly in plastic wrap, then cover it with aluminum foil. This protects against freezer burn. You can freeze the loaf for up to three months. When you are ready to enjoy it, move it to the fridge overnight to thaw. Reheating the loaf can bring back its deliciousness. Preheat your oven to 350°F (175°C). Place the loaf in the oven for about 10-15 minutes. This warms it through and revives that fresh-baked taste. If you prefer, you can also use a microwave. Heat it for about 15-20 seconds, but be careful not to dry it out. Enjoy your warm slice! Yes, you can use frozen blueberries. They work well in this loaf. Just toss them in flour before mixing to avoid sinking. This keeps them evenly spread in the batter, making every slice delightful. The loaf is done when a toothpick inserted in the center comes out clean. Look for a golden-brown top. The edges may pull away from the pan slightly, which is a good sign of doneness. Absolutely! This loaf stays fresh for several days. You can bake it a day or two in advance. Just store it well to keep it moist. I recommend a light tea or a refreshing lemonade. Both drinks match the lemony flavor nicely. A glass of cold milk also complements it well, balancing the sweetness. Yes, you can use regular yogurt or dairy-free alternatives. Just make sure they are plain. The texture may change slightly, but the flavor will still be great. You now know how to make a tasty Lemon Blueberry Yogurt Loaf. We covered important ingredients, step-by-step instructions, and tips for success. You learned ways to customize the loaf and how to store it properly. Try different flavors and garnishes to find your favorite. With this guide, you can bake like a pro and enjoy every slice. Happy baking!

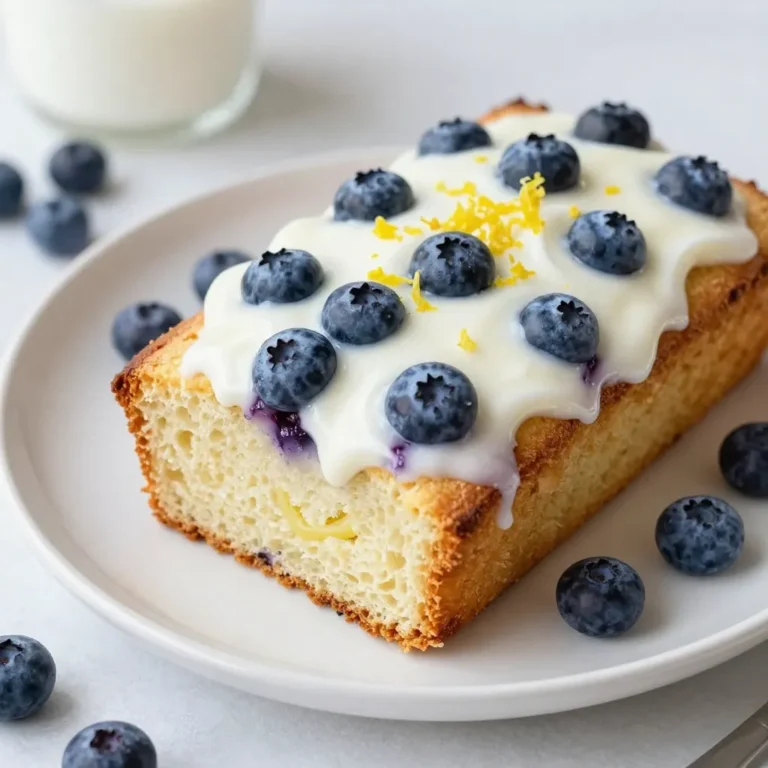
Lemon Blueberry Yogurt Loaf Easy and Flavorful Treat

To make this Apple Pie French Toast Casserole, gather these simple items: - 1 loaf of brioche bread, cut into 1-inch cubes - 4 large eggs - 2 cups whole milk - 1/2 cup heavy cream - 1/2 cup brown sugar - 1 teaspoon vanilla extract - 2 teaspoons ground cinnamon - 1/4 teaspoon ground nutmeg - 1/4 teaspoon salt - 2 cups apples, peeled, cored, and diced (about 2-3 medium apples) - 1 tablespoon lemon juice - 1 cup chopped pecans (optional) - Powdered sugar for dusting - Maple syrup for serving Accurate measurements ensure your casserole turns out great. Use dry measuring cups for the sugar and flour. Liquid measuring cups work best for milk, cream, and eggs. When measuring brown sugar, pack it firmly into the cup. This method gives you the right sweetness. Remember to peel and core your apples before dicing them. This step keeps the texture nice and even. You can mix things up with these swaps: - Brioche Bread: Use challah or even French bread for a different taste. - Whole Milk: Substitute with almond milk or oat milk for a lighter option. - Heavy Cream: Swap in coconut cream for a dairy-free version. - Brown Sugar: Use maple syrup or honey for a natural sweetener. - Apples: Try pears or peaches instead of apples for a unique flavor. - Pecans: Walnuts or almonds can add a nice crunch as well. These substitutions keep your dish delicious while allowing for personal flavor preferences. {{ingredient_image_1}} Start by preheating your oven to 350°F (175°C). Grease a 9x13-inch baking dish lightly. In a big bowl, whisk the eggs, milk, heavy cream, brown sugar, vanilla extract, cinnamon, nutmeg, and salt. Mix them well until they blend into a smooth mix. Next, grab another bowl. Toss the diced apples with lemon juice. This keeps them fresh and bright. Now, add the cubed brioche bread and the apple mix to the egg mix. Fold gently so the bread gets coated. If you like a little crunch, fold in the chopped pecans. Pour the entire mixture into your greased baking dish. Spread it out evenly. Cover the dish with aluminum foil and place it in the preheated oven. Bake for 30 minutes. After that, take off the foil and bake for another 15 to 20 minutes. Look for a golden top and a set casserole. Once baked, let it cool for a few minutes. This helps it set more. Slice the casserole into pieces. Dust the top with powdered sugar before serving. Drizzle with maple syrup for that sweet finish. Enjoy this warm, either in the dish or on a serving platter! To get the best texture in your casserole, use brioche bread. It soaks up the egg mixture well. Cut the bread into 1-inch cubes for even cooking. Let the bread sit in the mixture for at least 30 minutes. This helps it absorb the flavors fully. If you want a crisp top, bake it uncovered for the last 15 minutes. You’ll get a nice golden crust that contrasts with the soft inside. One common mistake is not using enough eggs. Eggs help bind the bread and apple mix. Another issue is overcooking the casserole. Keep an eye on the time, and check for a golden top. Be careful not to use too many apples. They can make the dish too wet. If you use too much lemon juice on the apples, it can overpower the dish. Just a tablespoon is enough to keep them fresh. Serve the casserole warm for the best taste. If you want to impress, dust it with powdered sugar. A drizzle of maple syrup adds sweetness. You can also add whipped cream on top for a rich finish. For a crunchier bite, sprinkle some chopped pecans. This adds a nice texture and pairs well with the apples. Serve straight from the baking dish or on a platter for a family style meal. Pro Tips Use Day-Old Bread: For the best texture, use day-old brioche bread. It will absorb the egg mixture better and hold its shape during baking. Mix in Spices: Enhance the flavor by adding a pinch of ginger or allspice to the egg mixture. This will give your casserole an extra layer of warmth and spice. Let It Soak: If time allows, cover the assembled casserole and refrigerate it for a few hours or overnight. This will help the bread soak up the custard for a creamier texture. Serve with Toppings: Elevate your presentation by serving with a dollop of whipped cream, caramel sauce, or a sprinkle of chopped nuts on top of each slice. {{image_2}} You can mix up the flavors in your Apple Pie French Toast Casserole. Try adding spices like ginger or cardamom for a warm twist. You can also use different extracts, like almond or maple, instead of vanilla. For a deeper flavor, consider adding a splash of bourbon or rum to the egg mixture. This adds a rich layer that pairs well with apples. If you need a gluten-free option, use gluten-free bread. Look for dense varieties to hold up during baking. For a vegan version, substitute the eggs with flaxseed meal mixed with water. Use almond milk and coconut cream instead of whole milk and heavy cream. This keeps the dish creamy and tasty without any animal products. While apples are the star, you can switch things up with other fruits. Pears offer a sweet, juicy option with a similar texture. You can also use berries like blueberries or raspberries for a burst of color. For a tropical twist, try diced pineapple or mango. Each fruit brings its own flavor and charm to the casserole. Once you finish your Apple Pie French Toast Casserole, let it cool. Then, store any leftovers in an airtight container. This keeps it fresh for about three days. If you plan to eat it soon, you can leave it in the baking dish, just cover it tightly with plastic wrap. To reheat, preheat your oven to 350°F. If the casserole is in the baking dish, cover it with foil. Bake for about 15 to 20 minutes until it's warm. You can also use a microwave. Heat individual portions for about 30 to 45 seconds. Just check to make sure it's hot all the way through. You can freeze this casserole for later. First, let it cool completely. Then, cut it into portions and wrap each piece in plastic wrap. Place the wrapped pieces in a freezer-safe bag. This way, it can last up to three months. To eat, thaw it overnight in the fridge, then reheat as mentioned above. The best bread for French toast casserole is brioche. This bread is soft and rich. It absorbs the egg mixture well. You can also use challah or French bread. They both work nicely, too. Just cut the bread into 1-inch cubes for even baking. Yes, you can make it ahead of time! Prepare the casserole the night before. Just mix the bread, egg mixture, and apples. Cover it and place it in the fridge. Bake it the next morning. This saves time for busy mornings or special brunches. You will know it is done when the top is golden brown. The edges should look set, and the center should not jiggle. You can insert a knife in the middle. If it comes out clean, the casserole is ready. Let it cool for a few minutes before cutting. This blog post covers all you need for a great Apple Pie French Toast Casserole. We listed key ingredients and offered handy measurement tips. You learned how to prep, bake, and add those final touches. Our tips helped ensure the perfect texture and avoid common mistakes. We explored fun variations and dietary options for everyone. Lastly, we covered storage and reheating methods. With this guide, you can create a tasty dish that delights all. Enjoy the sweet experience of making this easy and delicious casserole.

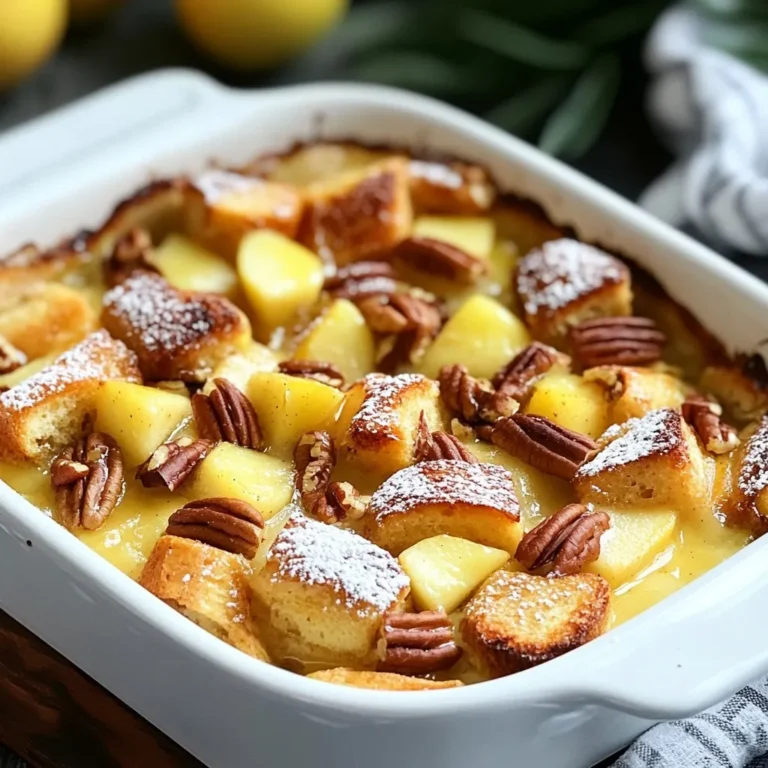
Apple Pie French Toast Casserole Rich and Simple Bake

- 1 cup cornmeal - 1 cup all-purpose flour - 1 tablespoon baking powder - 1/2 teaspoon salt - 1/4 teaspoon black pepper - 1 cup buttermilk (or milk with 1 tablespoon vinegar) - 1 large egg - 1/4 cup honey - 1/4 cup unsalted butter, melted - 1 cup shredded sharp cheddar cheese - 1-2 jalapeños, deseeded and finely chopped (adjust to taste) - 1/2 cup corn kernels (fresh or frozen) The ingredients for Cheddar Jalapeño Cornbread Muffins bring a lot of flavor. The cornmeal and flour form the base. They give the muffins a nice, fluffy texture. Baking powder helps them rise, while salt and black pepper add a savory touch. Buttermilk gives moisture and a slight tang. You can use regular milk with a bit of vinegar if you prefer. Honey adds sweetness, balancing the heat from the jalapeños. The melted butter makes the muffins rich and moist. Sharp cheddar cheese brings a bold flavor. I recommend using freshly shredded cheese for the best taste. Jalapeños give the muffins a spicy kick. Make sure to deseed and chop them finely for even heat. You can adjust the amount based on your spice preference. Finally, corn kernels add sweetness and texture, making each bite delightful. With these ingredients, you create a muffin that is both hearty and flavorful. {{ingredient_image_1}} 1. Preheat your oven to 375°F (190°C). Grease a muffin tin or use liners. 2. In a large bowl, mix together the dry ingredients: - 1 cup cornmeal - 1 cup all-purpose flour - 1 tablespoon baking powder - 1/2 teaspoon salt - 1/4 teaspoon black pepper 3. In another bowl, combine the wet ingredients: - 1 cup buttermilk (or milk with 1 tablespoon vinegar) - 1 large egg - 1/4 cup honey - 1/4 cup melted butter 1. Pour the wet mix into the dry mix. Stir gently until just combined. 2. Fold in the goodies: - 1 cup shredded sharp cheddar cheese - 1-2 finely chopped jalapeños (adjust to taste) - 1/2 cup corn kernels (fresh or frozen) 1. Fill each muffin cup about 3/4 full with the batter. 2. Bake for 18-20 minutes until golden brown. Check with a toothpick. 3. Let them cool in the pan for 5 minutes. Move to a wire rack to cool completely. For a tasty touch, serve warm with butter or extra cheddar on top! To make the best Cheddar Jalapeño Cornbread Muffins, focus on not over-mixing. Mix just until the dry and wet ingredients combine. Over-mixing makes muffins tough. For doneness, use a toothpick. Insert it into the center of a muffin; if it comes out clean, they are ready. The best way to enjoy these muffins is warm. Add a pat of butter on top for extra flavor. You can also sprinkle more cheddar cheese, which melts beautifully. For a kick, place a jalapeño slice on the side. If you don't have buttermilk, mix milk with one tablespoon of vinegar. This works just as well. For cheese, try pepper jack for more heat, or a milder cheese if you prefer less spice. You can also adjust the number of jalapeños based on your spice level. Pro Tips Use Fresh Jalapeños: Fresh jalapeños will give your muffins a vibrant flavor and a better texture than dried or pickled ones. Don’t Overmix: To ensure light and fluffy muffins, mix the batter just until combined. Overmixing can lead to dense muffins. Adjust Sweetness: If you prefer a less sweet cornbread, reduce the honey by half. You can always add more sweet toppings if desired. Experiment with Cheese: Try different types of cheese like pepper jack or gouda for a unique twist on flavor. {{image_2}} You can make these muffins even spicier! Try adding different types of peppers. Consider using serrano or poblano peppers for a twist. You can also add spices like cayenne or smoked paprika. Just a pinch can boost flavor without overpowering the dish. Start small and taste as you go. This way, you find the right heat level for your taste buds. Cheddar cheese brings a great flavor, but other cheeses can work too. You might try pepper jack cheese for an extra kick. Feta cheese adds a nice tang, while gouda gives a smoky touch. Mixing cheeses can create a deeper flavor profile. Combine sharp cheddar with a milder cheese for balance. This adds complexity to every bite. Need a gluten-free option? Substitute the all-purpose flour with a gluten-free blend. Look for one that works well in baking. For those going vegan, you can replace buttermilk with plant-based milk mixed with vinegar. Use flaxseed meal instead of the egg for binding. These changes keep the muffins delicious and accessible to everyone. To keep your Cheddar Jalapeño Cornbread Muffins fresh, store them in an airtight container. This helps prevent them from drying out. You can place the muffins at room temperature for up to two days. If you want them to last longer, consider freezing them. To freeze cornbread muffins, wrap each muffin in plastic wrap. Then, place them in a freezer bag or airtight container. They can stay good for up to three months. When you're ready to enjoy, just take out the muffins and let them thaw at room temperature. Reheating your muffins can bring back their warm, fresh taste. The best way to reheat them is in the oven. Preheat your oven to 350°F (175°C). Place the muffins on a baking sheet and heat for about 10 minutes. This method keeps the muffins soft and helps them regain their crisp tops. If you're in a hurry, you can also use the microwave. Heat each muffin for about 20-30 seconds. To keep them moist, cover the muffins with a damp paper towel. This prevents them from getting dry. Enjoy your muffins warm for the best flavor! You can pair these muffins with chili for a hearty meal. They also go well with soups, especially tomato or chicken soup. For a lighter option, try them with a fresh salad. Adding butter or honey on top enhances the flavor. Cornbread muffins last about three days at room temperature. Store them in an airtight container to keep them fresh. If you want them to last longer, freeze them. They can stay in the freezer for up to three months. Yes, you can use frozen corn kernels. Just make sure to thaw and drain them before adding. This helps avoid excess moisture in the muffins. Fresh corn gives a nice crunch, but frozen corn works well too. To adjust the spice level, change the number of jalapeños. If you want less heat, use just one or remove the seeds. For more spice, add extra jalapeños or use a spicier pepper like serrano. You can also add a pinch of cayenne for a kick. Yes, you can make these muffins ahead of time. Bake them and let them cool. Then store them in an airtight container. You can reheat them in the oven or microwave before serving. This makes meal prep easy and fun! These Cheddar Jalapeño Cornbread Muffins are easy to make and fun to enjoy. We covered the ingredients, preparation steps, and tips to get them just right. Remember, mix gently and check for doneness. You can also make delicious variations or store them for later. With these delicious muffins, you can impress anyone. So go ahead, try the recipe, and get creative with flavors. You won’t regret it!

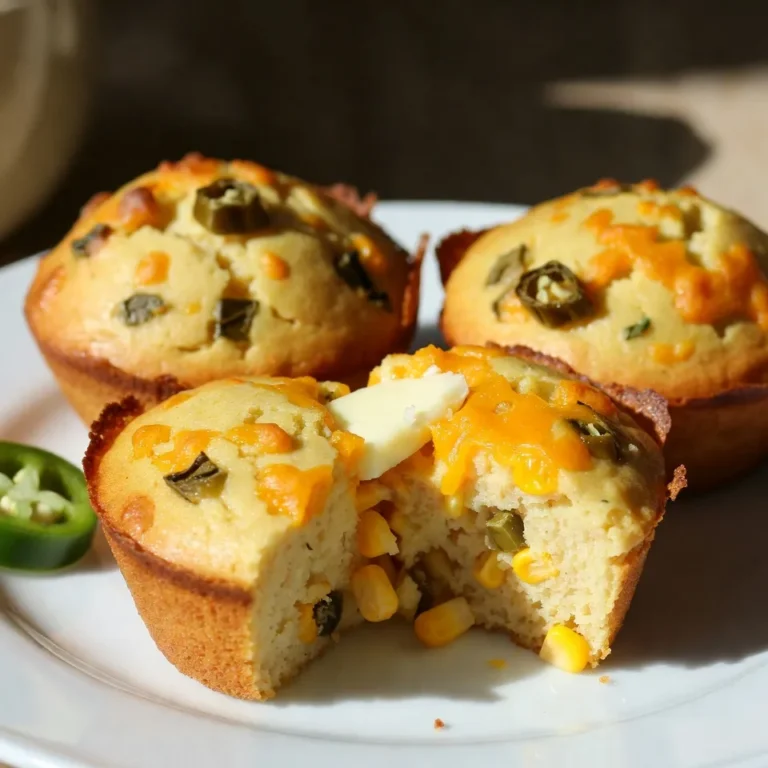
Cheddar Jalapeño Cornbread Muffins Flavorful Delight

PREV 1 … 79 80 81 … 86 NEXT
spicy fork kitchen

explore

DessertsDinnerAppetizersDrinks

Our Policies

  • Cookie Policy
  • Copyright Policy
  • Disclaimer
  • GDPR Policy
  • Terms Of Use
Back to Top
  • About
  • Contact Us
  • Privacy Policy
© 2025 spicy fork kitchen