FREE DINNER EBOOK! Get your copy!
  • Cookie Policy
  • GDPR Policy
  • Disclaimer
  • Terms Of Use
  • Visit my other site: Fun Cookie Recipes
spicy fork kitchen
  • Home
  • Dinner
  • Desserts
  • Drinks
  • Appetizers
  • Contact
  • About
  • Privacy Policy
  • Home
  • Dinner
  • Desserts
  • Drinks
  • Appetizers
  • Contact
  • About
  • Privacy Policy
  • Cookie Policy
  • GDPR Policy
  • Disclaimer
  • Terms Of Use
Visit my other site: Fun Cookie Recipes

HOME / CATEGORIES /

Latest

- 4 cups all-purpose flour - 1 tablespoon salt - 1 packet (2 ¼ teaspoons) instant yeast - 1 ½ cups warm water (110°F) - ¼ cup olive oil (plus more for drizzling) - 2 tablespoons fresh rosemary, chopped - 1 tablespoon coarse sea salt (for topping) - Optional: Cherry tomatoes, halved Every great focaccia starts with simple ingredients. This dough needs flour, salt, and yeast. I love using all-purpose flour for its great texture. The salt helps with flavor. Instant yeast is perfect because it works fast. Warm water activates the yeast, making the dough rise. Olive oil adds richness and flavor. Fresh rosemary brings a lovely aroma. You can also add halved cherry tomatoes for a burst of sweetness. Gather these ingredients, and you are ready to make rustic rosemary focaccia. Each one plays a key role in creating the final taste. You will enjoy the warm, inviting aroma while it bakes. It’s a simple recipe that anyone can try! {{ingredient_image_1}} First, grab a large mixing bowl. Pour in 1 ½ cups of warm water. Add in one packet of instant yeast. Let the mix sit for about 5 minutes. You want it to get frothy. Next, add 4 cups of all-purpose flour and 1 tablespoon of salt. Also, pour in ¼ cup of olive oil. Stir until a rough dough forms. Now, transfer your dough to a lightly floured surface. Use your hands to knead the dough for about 5 to 7 minutes. You want it to feel smooth and elastic. If it sticks, sprinkle a little more flour as you go. Next, place the kneaded dough in a greased bowl. Cover it with a damp cloth. Let it rise in a warm spot for about 1 hour. The dough should double in size during this time. Once the dough has risen, punch it down to release the air. Turn it out onto an oiled baking sheet or a large rimmed baking pan. Gently stretch and press the dough to fill the pan evenly. Use your fingertips to make dimples all over the dough surface. Drizzle olive oil over the dough. Sprinkle chopped rosemary and coarse sea salt on top. If you want, press halved cherry tomatoes into some of the dimples for extra flavor. Let the dough rest for another 30 minutes while you preheat the oven. Set your oven to 425°F (220°C). Bake the focaccia for 20 to 25 minutes. It should look golden brown and crisp on the outside. Once done, remove it from the oven and let it cool slightly before slicing. Kneading the dough helps develop gluten. This gives your focaccia its chewy texture. Use your palms to push down on the dough, then fold it over. Do this for about 5 to 7 minutes. You want the dough to feel smooth and elastic. Resting the dough is just as important. After kneading, place it in a greased bowl. Cover it and let it rise in a warm spot. This helps the dough grow and become airy. Aim for about 1 hour. You’ll notice it doubles in size. Fresh rosemary makes a big difference. It adds a bright flavor and a nice aroma. You can chop it fine or leave it in larger pieces. Either way, it will taste great. If you don’t have rosemary, try other herbs. Oregano or thyme can work well. You can even use garlic for a different twist. Just remember to keep the flavors balanced. For a great presentation, slice the focaccia into squares. Serve it warm on a nice plate. Drizzle a bit of olive oil or balsamic reduction on top. You can also garnish with fresh rosemary for a pop of color. Pair your focaccia with dips. Olive oil for dipping is classic. Hummus or a garlic spread also works well. You can serve it as a snack or a side dish. Enjoy it with friends or family! Pro Tips Use Fresh Rosemary: Fresh rosemary adds a vibrant flavor to your focaccia. Make sure to chop it finely to release its essential oils and enhance the aroma. Temperature Matters: Ensure the water is at the right temperature (around 110°F) to activate the yeast effectively, which results in a better rise. Experiment with Toppings: Feel free to get creative with toppings! Try adding olives, garlic, or different herbs for a unique twist on traditional focaccia. Let it Rest: Allowing the dough to rest after shaping helps to develop the flavor and makes the focaccia lighter and airier. {{image_2}} You can mix up your focaccia by adding olives or garlic. Olives add a salty punch. Garlic gives a warm, rich flavor. Both options make your focaccia more exciting. You can also use different herbs. Try thyme, oregano, or basil for unique tastes. Each herb brings its own charm. If you want gluten-free focaccia, you can use a gluten-free flour blend. This will change the texture but still taste great. For vegan adjustments, skip the honey and use plant-based oil. This makes the recipe suitable for everyone. You can also use aquafaba as an egg substitute if needed. Seasonal vegetables are a fun way to top your focaccia. Think zucchini, bell peppers, or spinach for color and flavor. You can also add cheese on top. Feta, mozzarella, or goat cheese work well. These toppings can make your focaccia a meal on its own. Just be creative and enjoy the process! To store leftover focaccia, wrap it in plastic wrap. This keeps it soft and fresh. You can also place it in an airtight container. Store it at room temperature for up to three days. If you want to keep it longer, consider freezing it. For freezing, let the focaccia cool completely. Then, wrap it tightly in plastic wrap. This prevents freezer burn. Place the wrapped focaccia in a freezer bag. It can last up to three months in the freezer. To enjoy it later, just take it out and let it thaw at room temperature. Reheat focaccia for the best flavor and texture. Preheat your oven to 350°F (175°C). Place the focaccia on a baking sheet. Heat it for about 10-15 minutes. This warms it through and makes it crispy again. You can also microwave it for a quick fix, but it may not be as crispy. The best flour for focaccia is all-purpose flour. It gives a soft and chewy texture. You can also try bread flour for a chewier bite. Both options work well. Yes, you can use active dry yeast. Just dissolve it in warm water first. Let it sit for about 5-10 minutes until it froths. Then, follow the rest of the recipe as usual. Focaccia is done when it turns golden brown. You can also tap the bottom. If it sounds hollow, it’s ready. A crispy crust means you hit the mark! Yes, you can make focaccia a day ahead. After baking, let it cool completely. Store it in an airtight container. Reheat it in the oven for best results before serving. Making focaccia from scratch is simple and fun. We covered essential ingredients, mixing and kneading techniques, as well as baking tips. Fresh rosemary and optional toppings can enhance the flavor. Remember to store leftovers properly for later enjoyment. With this guide, you can create perfect focaccia every time. Enjoy experimenting with flavors and variations to suit your taste. Your homemade bread will impress friends and family. Get started, embrace the process, and savor your delicious creation!

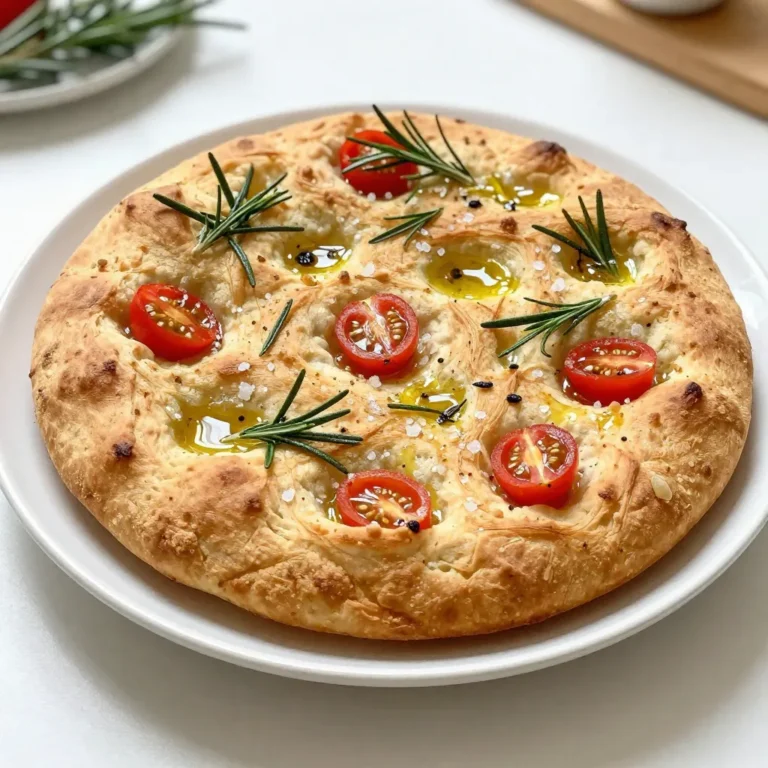
Rustic Rosemary Focaccia Flavorful and Simple Recipe

- 1 pound ground beef (or turkey) - 1 cup fresh spinach, chopped - 1 cup mozzarella cheese, shredded - 2 cloves garlic, minced - 1/2 cup bread crumbs - 1/4 cup grated Parmesan cheese - 1 large egg - 1 teaspoon dried oregano - 1 teaspoon salt - 1/2 teaspoon pepper - 1/4 cup fresh basil, chopped (optional) - 2 tablespoons olive oil (for frying) - Marinara sauce (for serving) When measuring ingredients, accuracy is key. Use a kitchen scale for the meat. This ensures you have the right amount. If you prefer turkey, it works just as well as beef. You can also swap mozzarella cheese for provolone. This adds a different twist. For bread crumbs, you may use crushed crackers. They can bring a nice crunch and flavor too. Fresh ingredients shine in this recipe. Fresh spinach adds bright color and nutrients. It wilts down nicely during cooking. Fresh basil, if you use it, gives a burst of flavor. Dried ingredients like oregano work well too. They have a strong taste and save time. Just remember, dried herbs are more potent than fresh. Use about one-third of the amount if you switch. {{ingredient_image_1}} To start, gather all your ingredients: ground beef or turkey, chopped spinach, shredded mozzarella, minced garlic, bread crumbs, grated Parmesan, egg, dried oregano, salt, pepper, and fresh basil. In a large bowl, mix the ground meat, spinach, mozzarella, and garlic. Add the bread crumbs, Parmesan, egg, oregano, salt, and pepper. If you like, toss in fresh basil for extra flavor. Use your hands or a spatula to combine everything well. Make sure to mix until it feels uniform. Next, heat a large skillet over medium heat and add olive oil. While the skillet warms, shape the mixture into 1-inch meatballs. Place them gently into the hot skillet, ensuring you don’t overcrowd them. Cook the meatballs for about 6 to 8 minutes. Turn them carefully to brown all sides evenly. To check if they are cooked, use a meat thermometer. They should reach an internal temperature of 160°F (70°C). Once done, remove them from the skillet and drain on paper towels if needed. To make sure your meatballs are just right, always check the internal temperature. If you don't have a thermometer, cut one open. Look for no pink inside, and the juices should run clear. Cooking time may vary based on your stove and skillet. Always keep an eye on them to avoid burning. Using fresh ingredients helps enhance the flavor and texture. Enjoy the process, and don’t rush! To keep meatballs moist, use ground beef or turkey with some fat. I prefer ground beef with 80% lean meat. This fat helps keep the meatballs juicy. Also, don’t overmix the meat mixture. Just mix until everything is combined. Adding cheese and spinach adds moisture, too. Start with a hot skillet and add olive oil for browning. Shape your meatballs into even sizes, about 1 inch wide. Place them in the skillet, but don’t overcrowd. This helps them brown well. Turn them gently every few minutes. Cook until all sides are brown and the meatballs reach 160°F. These meatballs taste great with marinara sauce. You can serve them on spaghetti or in a sub. Try adding a sprinkle of extra mozzarella on top. Fresh basil adds a nice touch, too. Pair with a side salad or garlic bread for a complete meal. Enjoy your tasty dinner! Pro Tips Use Cold Ingredients: Keep the ground meat and cheese cold before mixing; this helps the meatballs hold their shape while cooking. Don't Overmix: Mix the ingredients just until combined to keep the meatballs tender. Overmixing can make them tough. Test for Flavor: Before frying all the meatballs, cook a small patty to taste and adjust seasoning if necessary. Keep Them Uniform: Use a cookie scoop for even-sized meatballs to ensure they cook evenly. {{image_2}} You can switch the ground beef for ground turkey or chicken. Both options keep the meatballs juicy. If you want to avoid meat, try ground pork or a plant-based meat alternative. For cheese, mozzarella works great, but you can use cheddar or gouda for a different taste. To make these meatballs vegetarian, replace the meat with cooked lentils or chickpeas. Use a flax egg instead of a regular egg for binding. For vegan cheese, look for brands that melt well. Nutritional yeast can add a cheesy flavor too. You can boost flavor by adding crushed red pepper for heat or lemon zest for brightness. Fresh herbs like parsley or thyme can bring in new tastes. For a twist, try adding chopped sun-dried tomatoes or olives. These add a nice burst of flavor and color. You can store leftover meatballs in an airtight container. Let them cool first. Place them in the fridge. They will stay fresh for about three days. If you want to keep them longer, freezing is a better option. Always label your containers with the date. To freeze meatballs, let them cool completely. Arrange them in a single layer on a baking sheet. Freeze for about one hour until firm. Then, transfer the meatballs to a freezer bag. Remove air before sealing. They can last up to three months in the freezer. When ready to use, thaw them in the fridge overnight. You can reheat meatballs in several ways. The oven works well. Preheat to 350°F (175°C) and bake for about 15 minutes. You can also use the microwave. Place them on a plate and cover with a damp paper towel. Heat in 30-second intervals until warm. For a stovetop method, add a little sauce to a pan and warm them over low heat. Always check that they are heated through before serving. Yes, you can make these meatballs ahead of time. Prepare the meatball mixture as directed. Then, shape the meatballs and place them on a tray. Cover the tray and store in the fridge for up to 24 hours. You can also freeze them for later use. Just freeze them on the tray first, then transfer to a bag. When ready, cook them from frozen, adding a few more minutes to the cooking time. This saves time on busy nights. You can serve these meatballs with many tasty sides. Marinara sauce is a classic choice, perfect for dipping. Pasta is another great option; it soaks up the sauce well. You could also pair them with garlic bread for a complete meal. A light salad adds freshness and balances the meal. If you want something different, serve them in a sub roll for a meatball sandwich. The options are endless! To check if the meatballs are fully cooked, use a meat thermometer. Insert it into the center of a meatball. The internal temperature should reach 160°F (70°C) for beef or turkey. If you don't have a thermometer, cut one meatball in half. The inside should be no longer pink and juices should run clear. Cooking time is about 6-8 minutes, but checking is key for safety and taste. In this blog post, I covered key ingredients, step-by-step instructions, and helpful tips for perfect meatballs. You learned about fresh versus dried ingredients and how to ensure your meatballs stay moist. With various options for proteins and flavors, you can easily customize your dish. Don’t forget to use proper storage and reheating methods to enjoy leftovers. Meatballs can be fun and easy to make. Try these ideas, and enjoy cooking!

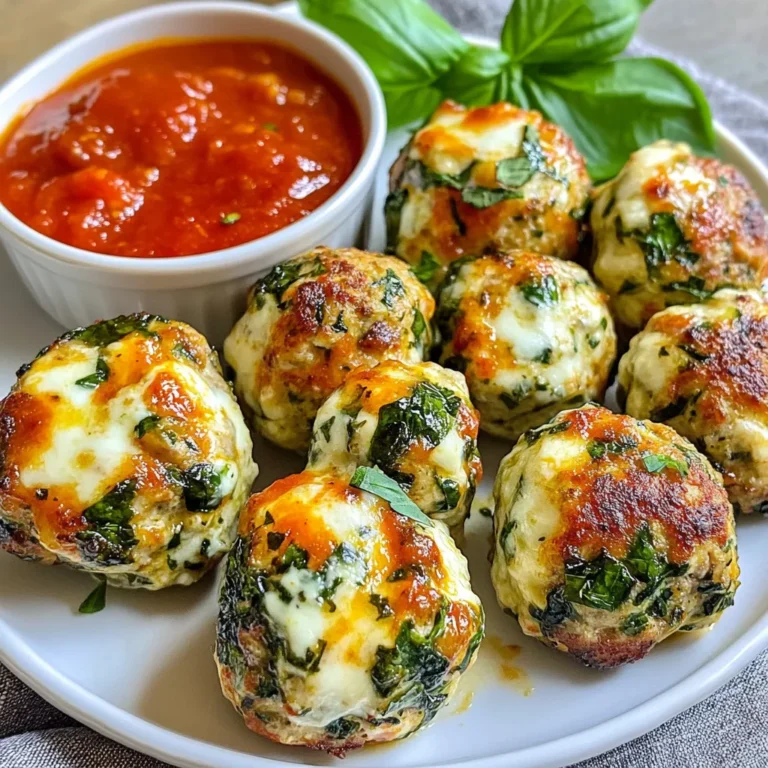
Spinach Mozzarella Garlic Meatballs Tasty Dinner Option

- 1 lb chicken thighs, diced - 1 lb andouille sausage, sliced - 1 medium onion, chopped - 1 red bell pepper, chopped - 1 green bell pepper, chopped - 3 cloves garlic, minced For this jambalaya, I love using chicken thighs. They stay juicy and tender. Andouille sausage adds a nice kick. The bell peppers and onion bring great flavor and color to the dish. - 1 can (14.5 oz) diced tomatoes, undrained - 3 cups chicken broth - 1 ½ cups long-grain rice - 2 tablespoons Cajun seasoning - 1 teaspoon dried thyme - 1 bay leaf - Salt and pepper to taste The canned tomatoes and chicken broth form the base of this dish. Long-grain rice helps absorb all those great flavors. Cajun seasoning gives it that signature taste. Don’t forget the thyme and bay leaf for added depth. - 1 cup frozen peas - 2 green onions, sliced (for garnish) - Fresh parsley, chopped (for garnish) Garnishes make your dish pop. Sliced green onions and parsley add freshness. Toss in some peas for a splash of color and sweetness. These small touches make your jambalaya truly shine! Start by mixing your proteins. In your slow cooker, add 1 pound of diced chicken thighs and 1 pound of sliced andouille sausage. This combo brings great flavor and texture. Next, add your veggies. Toss in 1 chopped onion, 1 chopped red bell pepper, and 1 chopped green bell pepper. Don’t forget 3 minced garlic cloves for that aromatic boost. These fresh ingredients make your dish bright and lively. Now it’s time for the rice and liquids. Pour in one can of undrained diced tomatoes. Then, add 3 cups of chicken broth. This mix will make your jambalaya rich and tasty. Stir in 1 ½ cups of long-grain rice, along with 2 tablespoons of Cajun seasoning, 1 teaspoon of dried thyme, and 1 bay leaf. Add salt and pepper to taste. Stir well to ensure even flavor throughout the dish. You can choose your cooking method. If you set your slow cooker to low, let it cook for 6-7 hours. If you're short on time, use the high setting for 3-4 hours. About 30 minutes before serving, stir in 1 cup of frozen peas. This adds color and sweetness. You’ll remove the bay leaf before serving. Fluff your jambalaya with a fork and let it rest for 5 minutes. Then, enjoy your delicious meal! To boost flavor, adjust your Cajun seasoning. If you like spice, add more. For less heat, cut back. Using fresh herbs can lift your dish. Fresh parsley adds a bright taste. Dried herbs are fine, too, but they might not pop as much. If your jambalaya turns out too liquidy, try this. Remove the lid for the last 30 minutes. This helps the liquid evaporate. If your rice isn't cooking well, check the broth amount. Use the right rice type, too. Long-grain rice works best. To avoid overcooking, set your slow cooker to low. This gives flavors time to meld. Check the cooking time: 6-7 hours on low is best. Use the high setting for 3-4 hours. Always check the rice for doneness before serving. {{image_2}} Making it gluten-free To make this jambalaya gluten-free, choose gluten-free sausage. Look for brands that do not contain wheat products. You can also use gluten-free broth. Most rice is gluten-free, but always check labels. Vegetarian or vegan adaptations For a vegetarian or vegan version, swap out the meat. Use firm tofu or tempeh instead of chicken and sausage. Add more vegetables like zucchini or mushrooms. Use vegetable broth instead of chicken broth for flavor. Alternative proteins You can swap chicken thighs and andouille sausage for shrimp or fish. This will give a lighter taste. You can also use plant-based sausage for a vegan option. Different vegetables and spices Feel free to experiment with veggies. Try adding celery, okra, or corn. You can also mix in spices like smoked paprika or cayenne for a unique twist. Mild vs. spicy jambalaya If you prefer a milder jambalaya, cut back on the Cajun seasoning. You can also leave out the spicy sausage. Taste as you go to find the right balance. Adding hot sauce or chili peppers For those who love heat, add hot sauce or chili peppers. Try slicing jalapeños or adding crushed red pepper flakes. Adjust the heat level to suit your taste buds! Store your jambalaya in the fridge. Use airtight containers. This keeps it fresh. It is best to eat leftovers within three days. Cool the dish before sealing it. This helps avoid sogginess. Reheat jambalaya on the stove for best results. Use a pot over low heat. Stir often to heat evenly. Add a splash of broth if it seems dry. Avoid using the microwave as it can make the rice mushy. You can freeze jambalaya for longer storage. Let it cool fully before freezing. Use freezer-safe bags or containers. Remove as much air as possible. To thaw, place it in the fridge overnight. Reheat on the stove, adding broth if needed. Enjoy your meal later with great flavor! Yes, you can prepare Cajun Jambalaya ahead of time. Here are some best practices for meal prep: - Chop and Store: Dice the chicken, sausage, and veggies the night before. Keep them in the fridge. - Mix Dry Ingredients: Combine the rice, spices, and seasonings in a bowl. Store this mix separately. - Layer in Slow Cooker: On cooking day, layer your ingredients in the slow cooker. This saves time. - Cook Later: Set your slow cooker to cook when you need it. Enjoy fresh jambalaya! You can serve several tasty side dishes with Slow Cooker Cajun Jambalaya. Here are some suggestions: - Cornbread: A classic choice that pairs well with the dish. - Coleslaw: Offers a crisp and refreshing contrast to the spicy jambalaya. - Green Salad: A light salad with greens balances the rich flavors. - Fried Plantains: Sweet and savory, plantains add a unique twist. If you want to tone down the spice in your jambalaya, try these tips: - Use Mild Sausage: Choose a mild sausage instead of andouille. - Reduce Cajun Seasoning: Start with less Cajun seasoning and adjust to your taste. - Add More Rice: Increase the rice amount. This helps dilute the heat. - Serve with Dairy: Serve with sour cream or yogurt to cool the spice. Slow Cooker Cajun Jambalaya is a delicious, hearty meal. We covered the key ingredients, like chicken, sausage, and spices. I shared step-by-step cooking instructions. You learned tips to enhance flavor and fix common issues. Variations for dietary needs and heat levels were also discussed. Remember, this dish is versatile, so feel free to adapt. Enjoy making it your own! Your perfect jambalaya awaits!

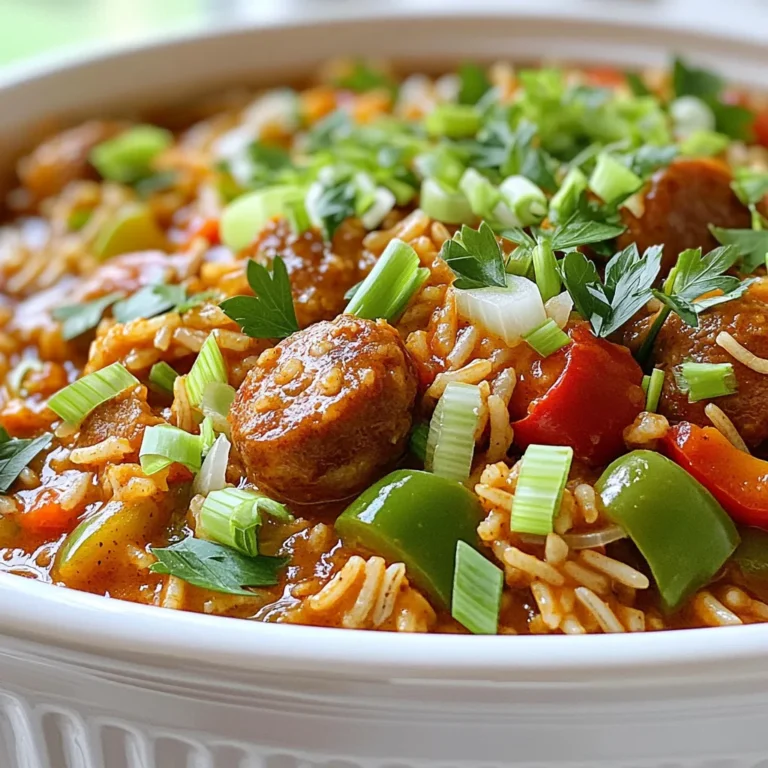
Slow Cooker Cajun Jambalaya Flavorful One-Pot Meal

- 4 chicken thighs, bone-in and skin-on - 1 cup broccoli florets - 1 cup baby carrots, halved - 1 bell pepper, sliced (any color) Chicken thighs give this dish richness and flavor. I love using bone-in and skin-on thighs for extra juiciness. The skin crisps up in the oven, adding great texture. Pair them with vibrant veggies like broccoli, baby carrots, and bell pepper. These add color and nutrients. Plus, they cook nicely alongside the chicken. - 1/4 cup honey - 4 cloves garlic, minced - 2 tablespoons soy sauce (reduced sodium for a healthier option) - 1 tablespoon apple cider vinegar - 1 teaspoon fresh ginger, grated - 1/2 teaspoon sesame oil (optional) The honey garlic sauce is the star here. It brings sweet and savory notes together. Honey adds sweetness while garlic provides depth. I use soy sauce for umami, and apple cider vinegar adds a tangy kick. Fresh ginger enhances the flavor. If you want, sesame oil gives a nice finish, but it’s not a must. - Sesame seeds - Green onions For a finishing touch, use sesame seeds and chopped green onions. They add crunch and a pop of freshness. These garnishes make the dish look stunning on the table. They also enhance the flavor, making every bite even better. 1. Preheat your oven to 400°F (200°C). This helps cook the chicken right. 2. Line a large baking sheet with parchment paper. It makes cleanup easy. 3. In a small bowl, whisk together the honey, minced garlic, soy sauce, apple cider vinegar, grated ginger, and sesame oil. Mix until smooth and set this sauce aside. 1. Place the chicken thighs on one side of the baking sheet. Drizzle them with olive oil. 2. Season the chicken with salt and pepper. This adds flavor. 3. On the other side of the baking sheet, arrange the broccoli, baby carrots, and bell pepper. Drizzle with olive oil and season with salt and pepper. 4. Pour the honey garlic sauce over the chicken. Make sure every piece gets coated. Save a little sauce for later. 1. Bake in the preheated oven for 25-30 minutes. The chicken should reach 165°F (75°C) when done. The veggies should be tender. 2. Halfway through, toss the vegetables. This ensures even cooking. 3. Once the chicken is cooked, remove it from the oven. Let it rest for a few minutes. 4. Drizzle the reserved honey garlic sauce over the chicken and veggies for extra flavor. Enjoy! To ensure even cooking, space the chicken thighs and veggies nicely on the sheet pan. This allows heat to flow around them. Halfway through the baking, toss the veggies gently. This helps them cook uniformly. To check chicken doneness, use a meat thermometer. The chicken should reach 165°F (75°C). If you don’t have a thermometer, cut into the thickest part. The meat should look white, not pink. You can adjust the sweetness by adding or reducing honey. If you want more spice, add red pepper flakes or a dash of hot sauce. For soy sauce, try coconut aminos or tamari for a gluten-free option. You can also use teriyaki sauce for a different flavor. A sturdy, rimmed baking sheet works best for this dish. It holds the juices well and prevents spills. Using parchment paper is key for easy cleanup. It also helps the chicken and veggies crisp up nicely. Plus, it stops food from sticking to the pan. {{image_2}} You can change up the veggies. Try zucchini, asparagus, or even sweet potatoes. Each choice gives a new taste. If you want to swap the chicken thighs, use chicken breast. Breasts cook faster, so check for doneness sooner. Want to boost flavor? Add spices or herbs. Consider paprika, thyme, or rosemary. They add warmth and depth. For a spicy kick, toss in red pepper flakes or a splash of hot sauce. This gives your dish a nice heat without overpowering it. Pair your meal with rice or grains like quinoa. They soak up the sauce well. For a fun twist, serve the chicken in wraps or lettuce cups. You could also add a side salad for crunch and freshness. To store leftovers, let the dish cool first. Place the chicken and veggies in an airtight container. You can keep them in the fridge for up to four days. When you reheat, use the oven or a microwave. If using an oven, set it to 350°F (175°C). Heat for about 15 minutes or until warm. For a microwave, heat in 1-minute bursts until hot. If you want to freeze this dish, let it cool fully. Use a freezer-safe container or heavy-duty freezer bags. Make sure to remove as much air as possible. You can freeze it for up to three months. When you’re ready to eat, thaw it in the fridge overnight. For a quick thaw, place the sealed bag in cold water for an hour. In the fridge, your leftovers last about four days. In the freezer, you can keep them for around three months. Always check for signs of spoilage before eating. If it smells off or looks strange, it’s better to toss it. Can I use boneless chicken thighs? Yes, you can use boneless chicken thighs. They will cook faster. You might want to check the chicken earlier to avoid overcooking. What can I use instead of honey? If you need a substitute for honey, try maple syrup or agave nectar. Both will give a nice sweetness. Adjust the amount based on your taste. Can I cook this on the grill? Absolutely! You can grill the chicken and veggies. Just marinate them in the honey garlic sauce first. Cook on medium heat until the chicken is done, about 6-7 minutes per side. Is there a vegetarian option? Yes, you can make a vegetarian version. Use tofu or tempeh instead of chicken. Coat them in the same honey garlic sauce and roast with the veggies. Is this recipe gluten-free? The recipe is not gluten-free because it contains soy sauce. You can use a gluten-free soy sauce to make it suitable for a gluten-free diet. What’s the calorie count per serving? Each serving of this dish has about 350 calories. This can vary based on the amount of sauce and veggies you use. This dish combines simple ingredients like chicken thighs and fresh vegetables with a tasty honey garlic sauce. You learned how to prepare, bake, and even store leftovers. We also explored different cooking tips and ingredient swaps to suit your taste. Incorporate your favorite flavors and experiment with this recipe. Cooking is fun, and everyone can enjoy a delicious meal. Now, you have the tools to get started. Happy cooking!

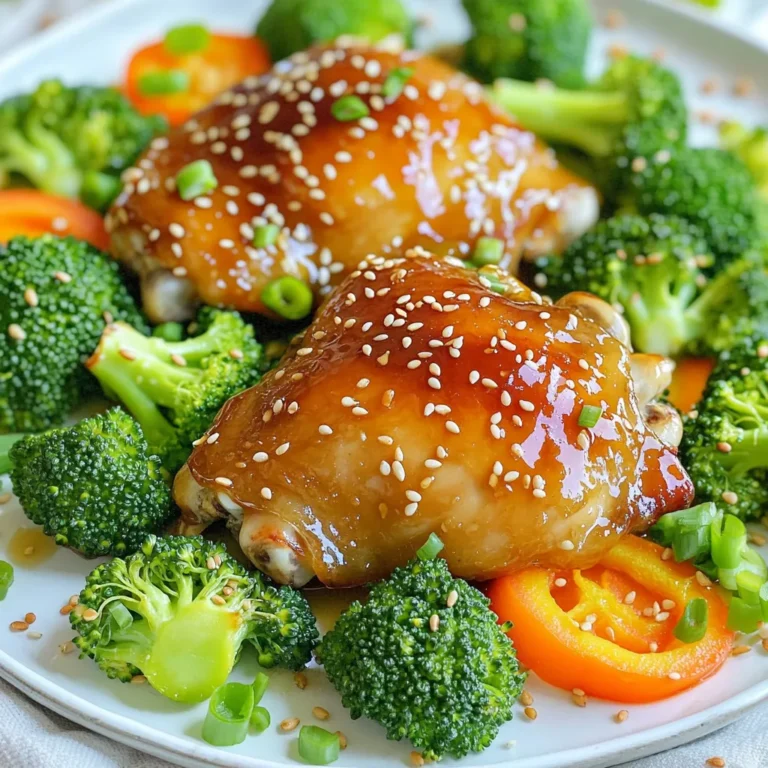
Sheet Pan Honey Garlic Chicken Flavorful One-Pan Meal

To make chai spice oatmeal bars, gather these simple and wholesome ingredients: - 2 cups rolled oats - 1 cup almond flour - 1/2 cup honey or maple syrup - 1/2 cup unsweetened applesauce - 1/4 cup coconut oil, melted - 1 teaspoon vanilla extract - 1 tablespoon chai spice mix (a blend of cinnamon, cardamom, ginger, and nutmeg) - 1/2 teaspoon baking soda - 1/4 teaspoon salt - 1/2 cup raisins or chopped nuts (optional) These ingredients work together to create a healthy snack that is both tasty and nutritious. The rolled oats provide fiber and energy, while almond flour adds protein and healthy fats. Honey or maple syrup acts as a natural sweetener, and applesauce keeps the bars moist. The chai spice mix gives the bars a warm and aromatic flavor. It combines spices that not only taste good but also have health benefits. Baking soda helps the bars rise, and a touch of salt balances the sweetness. You can customize your bars with the optional raisins or nuts for added texture. As you prepare, think about how each ingredient plays a role in the final taste and texture. Enjoy the process of mixing these ingredients into something delicious and healthy! - Preheat your oven to 350°F (175°C). - Line an 8x8 inch baking dish with parchment paper. Leave some paper hanging over the edge. This helps you lift the bars out later. - In a large bowl, combine 2 cups of rolled oats and 1 cup of almond flour. - Add 1 tablespoon of chai spice mix, 1/2 teaspoon of baking soda, and 1/4 teaspoon of salt. - Stir the dry mix well until all ingredients blend together. - In another bowl, whisk together 1/2 cup of honey (or maple syrup), 1/2 cup of unsweetened applesauce, and 1/4 cup of melted coconut oil. - Add 1 teaspoon of vanilla extract to this mixture. Make sure it's all mixed well. - Pour the wet mix into the dry ingredients. Stir gently until just combined. - If you like, fold in 1/2 cup of raisins or chopped nuts for extra flavor. - Transfer the mixture to the lined baking dish. Press it down firmly to make it even. - Bake in the oven for 25-30 minutes. The edges should look golden brown. - Once baked, let it cool in the pan for about 15 minutes. - Use the parchment paper to lift the bars out. Let them cool completely on a wire rack. To get the best texture in your bars, you must press the mixture firmly into the pan. This step helps the bars hold together nicely after baking. If you skip this, your bars may crumble when you cut them. After baking, check doneness with a toothpick. Insert it into the center; if it comes out clean, your bars are ready! Pair these delicious chai spice oatmeal bars with toppings like yogurt or fresh fruit. They also go well with a cup of chai tea. For a lovely presentation, arrange the bars on a nice platter. Add a sprinkle of extra chai spice on top for a special touch. Chai spices, like cinnamon and ginger, are great for digestion and can boost your mood. Oats are high in fiber, which helps keep you full and supports heart health. Almond flour adds protein and healthy fats, making these bars a smart snack choice. {{image_2}} You can switch up the sweetener in this recipe. Honey and maple syrup work well. If you want a less sweet option, try using coconut sugar or agave syrup. Each sweetener brings its own taste. Experimenting helps you find your favorite. You can add fun ingredients to change the flavor. Try mixing in chopped nuts like walnuts or pecans for crunch. Dried fruits like cranberries or apricots add sweetness and chewiness. If you love chocolate, chocolate chips make a great addition. Just fold them in gently before baking. If you need gluten-free bars, you can change the almond flour. Use oat flour instead for a similar taste and texture. You can also try coconut flour, but use less, as it absorbs more moisture. These swaps keep the bars tasty and safe for those with gluten sensitivities. To keep your Chai Spice Oatmeal Bars fresh, store them in an airtight container. Layer them with parchment paper to prevent sticking. This method helps maintain their soft texture. Place the container in a cool, dry spot. Avoid direct sunlight and humidity. For long-term storage, you can freeze the bars. First, let them cool completely. Then, wrap each bar tightly in plastic wrap. After that, place the wrapped bars in a freezer bag. This will keep them fresh for up to three months. When you're ready to eat, thaw them in the fridge or at room temperature. These bars stay fresh for about one week at room temperature. If stored in the fridge, they can last up to two weeks. Freezing extends their shelf life to three months, keeping them tasty and ready for a quick snack. Enjoy these bars anytime you need a healthy treat! No, steel-cut oats do not work well in this recipe. They are too coarse and take longer to cook. Rolled oats absorb moisture better and provide the right texture. Stick with rolled oats for the best results. When the edges turn golden brown, your bars are done! You can also test doneness with a toothpick. Insert it into the center; if it comes out clean, your bars are ready to cool. Yes, you can easily make these bars vegan. Replace honey with maple syrup. Ensure the almond flour is certified vegan, and use a plant-based oil if needed. This keeps your bars both tasty and vegan-friendly. If you don’t have almond flour, try oat flour or coconut flour. Both are good options. Oat flour will keep the flavor similar, while coconut flour adds a light sweetness. Just remember, coconut flour absorbs more liquid, so you may need to adjust the wet ingredients. This recipe makes 12 bars. It's perfect for snacking throughout the week. You can cut them smaller for bite-sized treats or larger for a satisfying snack. This blog post shared a simple recipe for healthy oatmeal bars. You learned about each ingredient's role and how to mix them. I discussed tips for perfect texture and the best ways to store your bars. These oatmeal bars are easy to make and adjustable for various diets. They support a healthy lifestyle while offering great taste. Enjoy making these bars and sharing them with others!

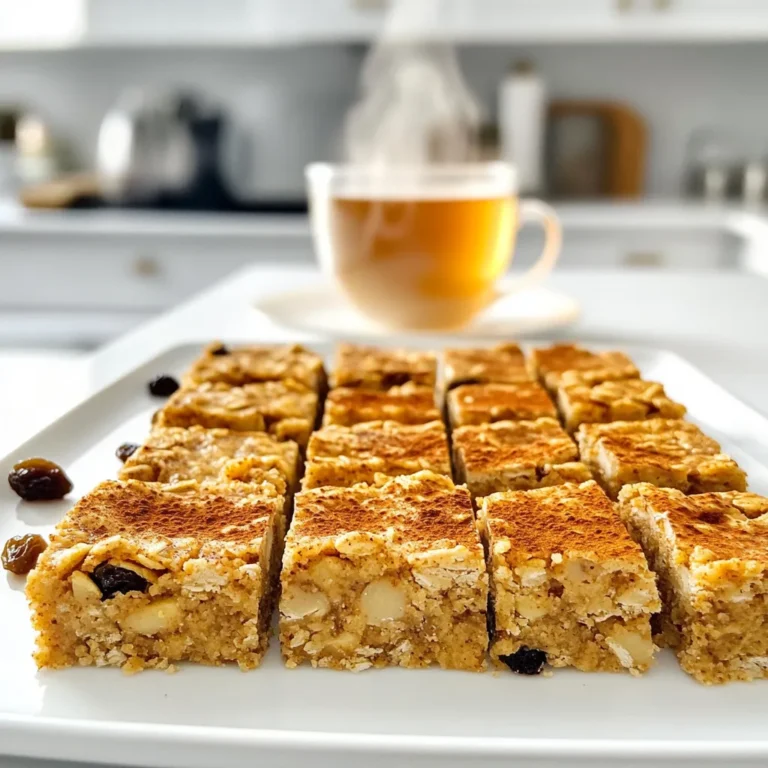
Chai Spice Oatmeal Bars Flavorful and Healthy Snack

- 1 pound ground turkey (or chicken) - 1/2 cup breadcrumbs - 1/4 cup green onions, finely chopped - 1/4 cup grated carrots - 1 egg, beaten - 2 tablespoons soy sauce - 1 tablespoon ginger, minced - 1 tablespoon garlic, minced - 1 tablespoon sesame oil - 1/4 cup teriyaki sauce - Sesame seeds for garnish - Fresh cilantro for garnish When you decide to make air fryer teriyaki meatballs, gather these ingredients first. Ground turkey or chicken forms the base. I love using ground turkey since it’s lean and flavorful. The breadcrumbs help bind the meatballs together. You can use regular or whole wheat breadcrumbs. Next, green onions add a nice taste. They bring a fresh crunch to the meatballs. Grated carrots add sweetness and moisture. They also give your meatballs a pop of color. To amp up the flavor, soy sauce is key. It adds a salty depth. Minced ginger and garlic bring warmth and zest. Sesame oil gives a nutty flavor that rounds out the dish. Finally, teriyaki sauce adds sweetness and that signature glossy finish. For garnishes, sprinkle sesame seeds on top for a nice crunch. Fresh cilantro adds a bright, herbal note. These simple ingredients come together to create tasty, juicy meatballs you’ll love. 1. In a large mixing bowl, add the ground turkey, breadcrumbs, and green onions. 2. Next, include the grated carrots and beaten egg. 3. Pour in the soy sauce, minced ginger, minced garlic, and sesame oil. 4. Mix everything well until it’s fully combined. This ensures each meatball is tasty. 5. Now, shape the mixture into small meatballs, about 1 inch wide. You should get around 20 meatballs. 1. Preheat your air fryer to 375°F (190°C). This takes about 5 minutes. 2. Place the meatballs in the air fryer basket. Make sure they are in a single layer. 3. Avoid letting the meatballs touch each other. This helps them cook evenly. 4. Cook the meatballs for 10 to 12 minutes. Shake the basket halfway through to help with crisping. 1. Once the meatballs are golden brown, carefully take them out of the air fryer. 2. In a small saucepan, heat the teriyaki sauce over medium heat. Let it simmer gently. 3. Toss the cooked meatballs in the warmed sauce until they are fully coated. 4. Serve the teriyaki meatballs on a platter. Garnish with sesame seeds and fresh cilantro for a lovely touch. To get those meatballs nice and crispy, you need to space them out. When placing the meatballs in the air fryer basket, make sure they do not touch. This allows hot air to circulate around each meatball. I usually preheat the air fryer for about five minutes at 375°F (190°C). This step helps the meatballs cook evenly. To check for doneness, look for a golden brown color. You can also use a meat thermometer. The internal temperature should reach 165°F (74°C) for ground turkey or chicken. This ensures they are safe to eat. If you want to switch up the meat, you can use ground beef or pork instead of turkey. These options will bring a different flavor to your meatballs. For a vegetarian twist, try using lentils or black beans. Just mash them up and follow the same steps. For gluten-free options, look for gluten-free breadcrumbs. You can also use crushed rice or oats as a substitute. This keeps the dish tasty while fitting different diets. To make these meatballs even more flavorful, consider adding spices or herbs. You might try adding some chili flakes for heat or finely chopped basil for freshness. These small changes can really make a difference. If you like your teriyaki sauce sweeter, you can add a bit of honey or brown sugar. Taste the sauce before tossing in the meatballs. Adjust the sweetness until it suits your taste. This way, you get the perfect balance of flavors. {{image_2}} You can change the meat in this recipe. Ground turkey is popular, but ground beef or pork works too. They add rich flavors. Just remember, adjust cooking times for different meats. If you want a lighter meal, try using ground chicken. For those who follow a plant-based diet, you have options! Use lentils or chickpeas to create a meatball mix. You can also use plant-based ground meat. Combine it with the other ingredients for a tasty vegan twist. You can easily switch up the flavors in your teriyaki meatballs. If you want something new, try different sauces. Swap teriyaki for a sweet chili sauce or hoisin sauce. Each choice brings a unique taste. Want some heat? Add chili flakes into the meatball mixture. You can also drizzle hot sauce over the finished meatballs. This heat can balance the sweetness of the teriyaki sauce. These meatballs are great as appetizers! Serve them with toothpicks and a side of extra teriyaki sauce. Guests will love dipping them. You can also make a delicious rice bowl. Just place the meatballs on a bed of rice. Add steamed veggies for color and crunch. This makes a filling meal that’s easy to prepare. To keep your air fryer teriyaki meatballs fresh, store them properly. Place the meatballs in an airtight container. They will stay good in the fridge for up to four days. If you want to keep them longer, consider freezing them. For freezing, lay the meatballs on a baking sheet first. This prevents them from sticking together. Once frozen, transfer them to a freezer bag. They can last up to three months in the freezer. The air fryer is the best way to reheat these meatballs. Preheat the air fryer to 350°F (175°C). Place the meatballs in the basket and heat for about 5-7 minutes. This keeps them crispy and warm. You can also reheat them in the microwave. Just place them on a plate and heat for 1-2 minutes. But be careful, as they may become soggy. Air fryer teriyaki meatballs have a decent shelf life. In the fridge, they last about four days. If frozen, you can store them for three months. Always check for signs of spoilage. If the meatballs smell bad or look off, it’s best to toss them. Keeping an eye on your leftovers helps ensure safe eating. Yes, you can use frozen meatballs in the air fryer. Just adjust the cooking time. Frozen meatballs usually need a few extra minutes. Start with about 12-15 minutes at 375°F (190°C). Check for doneness before serving. To thaw frozen meatballs, you can leave them in the fridge overnight. This will make them easier to cook evenly. If you're in a hurry, you can also microwave them for a minute or two. Just make sure to shape them after thawing. To prevent meatballs from sticking, keep your hands wet while shaping them. This helps the mixture slide easily. Use a light touch when forming the balls. Make them about 1 inch wide, so they cook evenly. After shaping, place the meatballs on a plate. Chill them for about 10 minutes before cooking. This helps them hold their shape in the air fryer. Yes, you can make teriyaki sauce at home! You need simple ingredients like soy sauce, honey, and ginger. Here’s a quick recipe for you: - 1/2 cup soy sauce - 1/4 cup honey or brown sugar - 1 tablespoon ginger, minced - 1 tablespoon garlic, minced - 1 tablespoon rice vinegar (optional) Mix these ingredients in a small saucepan. Heat over medium until it simmers. Stir for a few minutes until it thickens. This sauce is great on many dishes, too! This post covered how to make tasty air fryer meatballs, from the key ingredients to cooking tips. I shared ideas for variations and ways to store and reheat them. With these simple steps, you can whip up a delicious meal fast. Experiment with flavors and enjoy your creations. You'll love the ease of air frying. Get ready to impress your family and friends with these tasty bites!

Air Fryer Teriyaki Meatballs Tasty and Easy Recipe

Let’s gather everything you need for the Sparkling Apple Cider Mocktail. This drink is simple and fun to make. Here’s your list of ingredients: - 2 cups apple cider - 1 cup sparkling water - 1 tablespoon lemon juice - 1 tablespoon maple syrup (optional) - 1/2 teaspoon ground cinnamon - Apple slices and cinnamon sticks for garnish - Fresh mint leaves (optional) Each ingredient plays a key role in making this drink tasty. Apple cider gives it a sweet, rich flavor. The sparkling water adds fizz, making it exciting to drink. Lemon juice brings a bright touch. Maple syrup can add sweetness if you like it that way. Ground cinnamon gives a warm hint, reminding us of cozy times. The apple slices and cinnamon sticks make it look pretty. Fresh mint leaves can add a fresh taste if you want. When you gather these ingredients, you set yourself up for a delicious experience. Trust me, this mocktail is a treat for both your eyes and taste buds! 1. Combine the apple cider, lemon juice, and maple syrup In a large pitcher, pour in 2 cups of apple cider. Add 1 tablespoon of lemon juice. If you like sweetness, include 1 tablespoon of maple syrup. Stir well to mix. 2. Mix in the ground cinnamon Add 1/2 teaspoon of ground cinnamon. Stir again until the cinnamon blends in well. This spice gives the drink a warm flavor. 3. Add sparkling water just before serving Just before you serve the drink, pour in 1 cup of sparkling water. This adds a nice fizz. Gently stir to combine without losing the bubbles. Now your Sparkling Apple Cider Mocktail is ready to enjoy! To make the best sparkling apple cider mocktail, you want even mixing. Start by combining the apple cider, lemon juice, and maple syrup in a large pitcher. Stir it well. This ensures that the flavors blend nicely. Add the ground cinnamon next. Stir again until it spreads evenly throughout the drink. This step is key. It gives the mocktail a warm, cozy flavor. When you add sparkling water, do it just before serving. This keeps the fizz fresh. Pour it in slowly, then gently stir. You don’t want to lose the bubbles! Garnishes can make your drink pop. Use fresh apple slices to add color. A cinnamon stick gives a nice touch and adds flavor. You can also add mint leaves for a fresh smell. It makes the drink feel special. If you want to get creative, try other fruits like pomegranate seeds or orange slices. These add a fun twist and make the glass look appealing. {{image_2}} You can make your sparkling apple cider mocktail even more fun by adding different flavors. Berries are a great choice. Try using fresh strawberries, blueberries, or raspberries. Just mash them slightly before adding to your drink. This gives your mocktail a burst of flavor and color. You can also mix in other fruit juices. Orange juice or cranberry juice can give a nice twist. Just keep the apple cider as your base. This will keep the drink refreshing. Another fun idea is to infuse the drink with herbs. Rosemary or thyme can add a unique taste. Simply add a few sprigs to the pitcher while mixing. Let it sit for a few minutes to release the flavors. Then remove the herbs before serving. Seasonal themes can make your mocktail special for any occasion. In fall, you can add pumpkin spice to your drink. Just a pinch will bring warm flavors. You can also use sliced apples that have been lightly sautéed in cinnamon. For the holidays, think about adding spices like nutmeg or cloves. This gives your mocktail a cozy feel. You can even create a holiday punch by using a larger batch. Add some ginger ale for extra fizz. These variations keep your sparkling apple cider mocktail exciting. Enjoy experimenting with these ideas! To keep your sparkling apple cider mocktail fresh, use a clean glass jar or pitcher. Make sure the container has a tight lid. This helps to prevent spills and keeps the drink tasting good. To keep the fizz intact, avoid shaking the mocktail. Instead, gently stir before serving. If you have leftovers, add the sparkling water just before you drink. This keeps the bubbles strong and lively. You can store the mocktail in the fridge for up to three days. After this time, the taste may change. If you notice a flat or stale flavor, it is best to toss it out. Look for changes in color or smell. If the mocktail looks cloudy or smells off, do not drink it. Enjoy your drink fresh for the best taste! Can I make this mocktail ahead of time? Yes, you can make this mocktail ahead of time. Just mix the apple cider, lemon juice, and maple syrup in a pitcher. Keep it in the fridge. Add the sparkling water just before serving. This keeps the fizz fresh and fun! Is it possible to make this recipe without lemon juice? Yes, you can skip the lemon juice. However, it adds a nice tart flavor. If you want a bit of zest, try using lime juice instead. This will still give it that refreshing kick. What can I substitute for maple syrup? You can use honey or agave syrup instead of maple syrup. Both options add sweetness. If you want to avoid added sugar, you can leave it out. The cider is sweet enough on its own! How do I make it less sweet? To make it less sweet, reduce the amount of apple cider or syrup. You can also add more sparkling water. This balances the sweetness and gives it a nice fizz. Adding a squeeze of lemon or lime juice can help too! You can make a delicious, fizzy apple cider mocktail with just a few simple steps. We covered key ingredients, preparation tips, and fun variations to try. Remember to stir carefully to keep the fizz alive. You can store leftovers in the fridge for a short time, but enjoy it fresh for the best taste. This drink is versatile and perfect for any season. Experiment with flavors and garnishes to make it your own. Enjoy your mocktail creation!

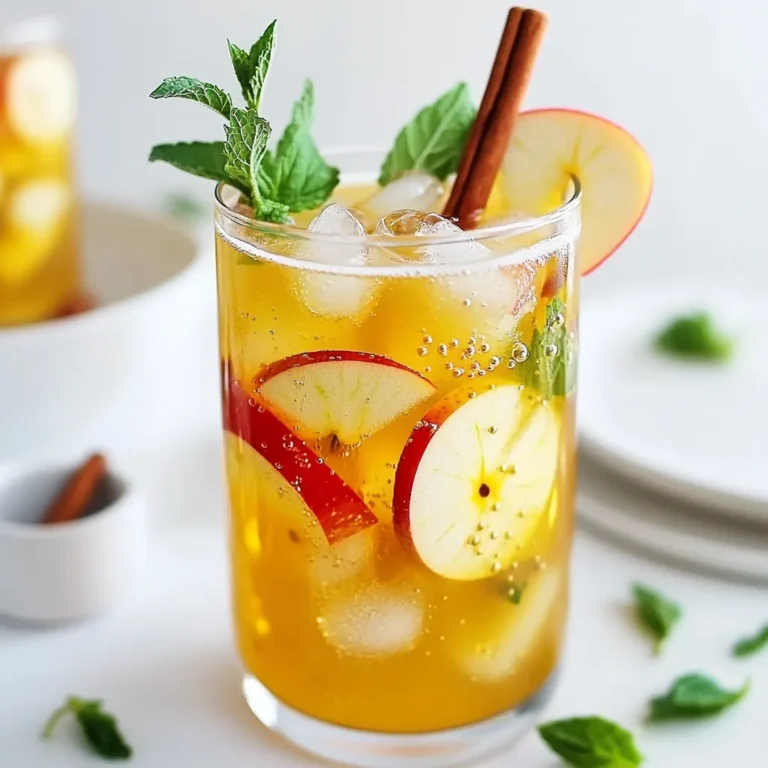
Sparkling Apple Cider Mocktail Refreshing and Easy Drink

- 1 cup mascarpone cheese - 1 cup heavy whipped cream - 1/2 cup pumpkin puree - 1/2 cup powdered sugar - 1 teaspoon vanilla extract - 1 teaspoon ground cinnamon - 1/2 teaspoon ground nutmeg - 1/4 teaspoon ground ginger - 1 cup strong brewed coffee, cooled - 12 to 15 ladyfinger cookies - Cocoa powder for dusting - Crushed graham crackers (optional, for garnish) Mascarpone cheese gives the dessert a rich and creamy texture. Its smoothness is perfect for blending with pumpkin. Pumpkin puree adds flavor and color. It brings a warm, cozy taste. The heavy cream makes the mixture light and fluffy. It makes each bite feel special. Spices like cinnamon, nutmeg, and ginger bring warmth. They remind us of fall and holiday treats. The coffee gives depth. It pairs well with the sweet layers. Ladyfingers are essential; they soak up the coffee and add structure. If you can’t find mascarpone, cream cheese works well. Just make sure to soften it first. Heavy cream can be replaced with whipped topping for a lighter feel. For a dairy-free option, use coconut cream. Instead of ladyfingers, try sponge cake or even cookies. If you want less sugar, use a sugar substitute. You can also skip the cocoa powder for a lighter look. Crushed graham crackers add crunch, but they’re optional. Start by mixing the mascarpone cheese and pumpkin puree in a bowl. Add the powdered sugar, vanilla extract, ground cinnamon, ground nutmeg, and ground ginger. Use a whisk and blend until the mixture is smooth and well combined. This pumpkin mixture should be creamy and flavorful. In a separate bowl, pour in the heavy cream. Use a mixer to whip it until you see stiff peaks. This means the cream will hold its shape well. Gently fold the whipped cream into the pumpkin mixture. Mix carefully to keep the light texture. Prepare your coffee in a shallow bowl and let it cool. Dip each ladyfinger into the coffee quickly. Make sure they soak but do not get soggy. In serving cups, layer the dipped ladyfingers at the bottom. Next, add a layer of the pumpkin mascarpone mixture on top. Repeat these layers until the cups are full, finishing with the pumpkin mixture. Cover the cups with plastic wrap and place them in the fridge. Let them chill for at least 4 hours, but overnight is best. This time helps the flavors blend and the dessert to set. Just before you serve, dust the tops with cocoa powder and add crushed graham crackers for extra flair. To create a stunning dessert, layering is key. Start with a layer of ladyfingers. Dip each ladyfinger in coffee quickly. You want them moist but not soggy. Place them at the bottom of your serving cups. Next, add a generous layer of the pumpkin mascarpone mix. Use a spatula to spread it evenly. Repeat the process until you fill the cups. Always finish with the pumpkin mixture on top. This makes for a beautiful presentation. Whipping cream can be tricky. Start with cold heavy cream. Use a chilled bowl to help it whip faster. Beat the cream on medium speed until stiff peaks form. This means the cream holds its shape well. Gently fold in the whipped cream into the pumpkin mix. Take your time, and be gentle. You want a light, airy texture. This makes the dessert feel rich without being too heavy. Presentation matters for any dessert. Dust the tops with cocoa powder for a nice touch. Add crushed graham crackers on top for crunch. For a fun twist, place a small pumpkin-shaped chocolate on each cup. This adds a festive feel. You can also sprinkle a bit of cinnamon for color. Serve these cups chilled, and watch your guests smile! {{image_2}} You can switch up flavors in your No Bake Pumpkin Tiramisu Cups. For a chocolate twist, add cocoa powder to the mascarpone mix. This gives a rich taste. You can also use vanilla bean instead of vanilla extract for a fresher flavor. If you want a fruit flavor, try adding a layer of fruit puree, like raspberry or strawberry. The tartness will balance the sweetness. To make this dessert lighter, use low-fat mascarpone cheese. You can swap heavy cream for coconut cream. It still whips well and adds a nice flavor. Instead of powdered sugar, try using a natural sweetener like honey or maple syrup. This makes it a bit healthier without losing taste. You can adjust your No Bake Pumpkin Tiramisu Cups for different seasons. In spring, try using lemon zest and juice for a fresh taste. In summer, swap pumpkin for fresh berries or peaches. For winter, use peppermint extract in place of vanilla. This gives a festive, holiday vibe. Each season brings a new twist to this classic dessert! To keep your No Bake Pumpkin Tiramisu Cups fresh, cover them well. Use plastic wrap or a lid for each cup. This helps prevent them from drying out. Store the cups in the refrigerator. Make sure they are on a flat shelf. Avoid placing them near strong-smelling foods, as they can absorb odors. When stored properly, these tiramisu cups last up to four days in the fridge. After that, the flavors may fade. The texture is best within the first two days. Enjoy them sooner for the best taste and creaminess. You can freeze the tiramisu cups if you want to keep them longer. However, I recommend freezing them before adding cocoa powder or graham crackers. To freeze, cover each cup tightly and place them in the freezer. When you’re ready to eat, thaw them overnight in the fridge. Avoid microwaving them, as that can change the texture. Always add cocoa powder and garnishes just before serving for the best look and taste. Yes, you can try cream cheese. It will change the taste a bit. Make sure to blend it well to keep the texture smooth. You can also mix half mascarpone and half cream cheese for a nice balance. To make it festive, add fun toppings. Use whipped cream, sprinkles, or even candy corn. You can also place a small pumpkin-shaped chocolate on top for a cute look. A dusting of cinnamon adds warmth and a nice aroma. Absolutely! This dessert tastes even better after chilling. Make it one or two days in advance. Just cover the cups with plastic wrap. Let it set in the fridge until you are ready to serve. If you can’t find ladyfingers, use sponge cake or pound cake. You can even use graham crackers for a different texture. Just dip them in coffee like you would with ladyfingers. This will still give you that lovely layered effect. This article covered how to make No Bake Pumpkin Tiramisu Cups. We discussed key ingredients and substitutions, then walked through easy steps for preparation and assembly. Tips for better layering, whipping cream, and serving ideas can enhance your dessert. You can also explore variations to fit your taste and learn how to store leftovers properly. Making this treat can be fun and simple. Enjoy the process and share it with others!

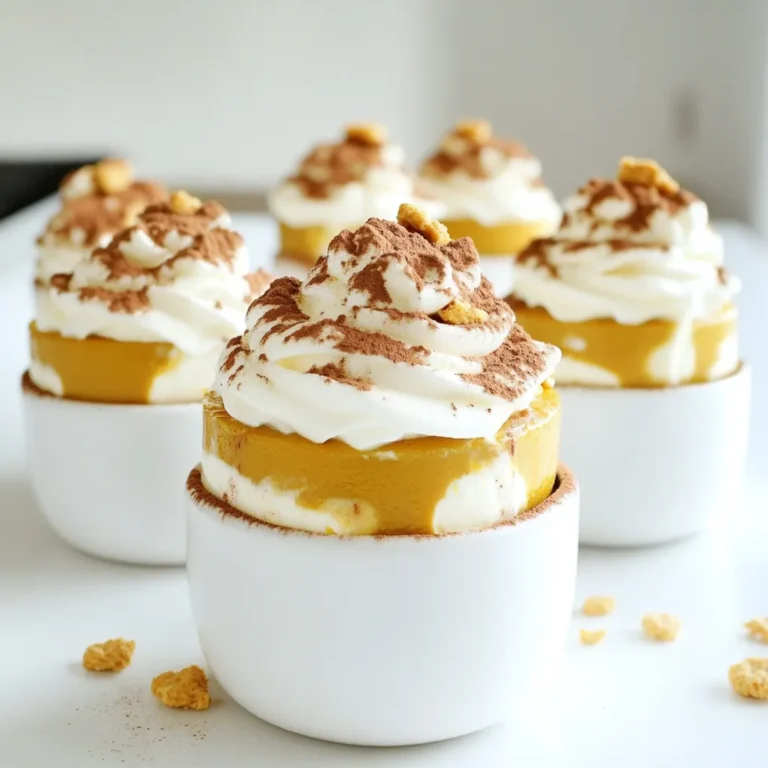
No Bake Pumpkin Tiramisu Cups Tasty and Easy Dessert

To make One Pot Buffalo Chicken Pasta, you will need: - 1 lb (450g) boneless, skinless chicken breasts, cubed - 12 oz (340g) penne pasta - 1 tablespoon olive oil - 1 medium onion, diced - 3 cloves garlic, minced - 2 cups chicken broth - 1 cup buffalo sauce (mild or spicy, based on preference) - 1 cup heavy cream - 1 cup shredded cheddar cheese - 1 cup shredded mozzarella cheese - Salt and pepper to taste These ingredients work together to create a rich and creamy dish. The chicken adds protein, while the pasta helps to soak up all the tasty flavors. The buffalo sauce gives this meal a kick, and the cream makes it smooth. For an extra touch, consider these garnishes: - 2 green onions, sliced - Fresh parsley, chopped These garnishes add color and freshness to your dish. Green onions provide a mild crunch. Parsley brightens the overall look and taste. While cheddar and mozzarella are classic, you can mix it up. Try these cheese options: - Pepper jack for extra heat - Gouda for a smoky flavor - Parmesan for a nutty twist Each cheese brings its own unique flavor. Feel free to experiment and find your favorite combination. Start by heating olive oil in a large pot over medium heat. Add the diced onion and sauté it for about 2-3 minutes. You want the onion to soften. Next, stir in minced garlic and cubed chicken. Cook this mixture for 5-7 minutes. Keep stirring until the chicken turns brown and is fully cooked. Now, pour in the chicken broth and buffalo sauce. Bring this mixture to a boil. Then, stir in the penne pasta. Reduce the heat to a simmer and cover the pot. Cook for about 12-15 minutes. Stir occasionally to stop the pasta from sticking. The pasta should be al dente and soak up most of the liquid when done. Once the pasta is cooked, carefully stir in the heavy cream along with the shredded cheddar and mozzarella cheeses. Cook for an additional 2-3 minutes. This will let the cheese melt and make the pasta creamy. Finally, season it with salt and pepper to taste. Serve it in bowls and garnish with sliced green onions and chopped parsley. Enjoy this creamy and flavorful dish! To boost the flavor, choose a good buffalo sauce. A brand you love can make a big difference. You can also mix in a little garlic powder or onion powder. This adds more layers to the taste. If you have time, let the chicken marinate in the sauce for 30 minutes before cooking. This step helps the chicken soak up all the tasty flavors. If your pasta is too dry, add a splash of chicken broth while cooking. This will help keep it creamy. For pasta that sticks together, stir it more often. If you find it too salty, add a bit more cream to balance it out. Always taste as you go! This way, you can adjust the seasoning to your liking. To make it spicier, use extra buffalo sauce or add a pinch of cayenne pepper. If you want it milder, use a mild buffalo sauce or add more cream. You can also mix in some cooked veggies like bell peppers to offset the heat. Adjusting spice levels is easy, so make it just how you like! {{image_2}} You can change the type of pasta if you want. Use rotini, farfalle, or even gluten-free pasta. Each type offers a new twist on texture and taste. Just remember to adjust the cooking time based on the pasta you choose. If you pick a larger shape, it may need a bit more time. If you want to switch up the protein, you have options. Turkey works great; just cube the meat like chicken. You can also use shredded rotisserie chicken for a faster meal. If you like seafood, shrimp adds a nice flavor. Cook shrimp until it turns pink before adding the broth. To make this dish vegan, swap the chicken for chickpeas or tofu. Use vegetable broth instead of chicken broth. Replace heavy cream with coconut cream or cashew cream for richness. You can also use vegan cheese to keep it creamy and flavorful. The taste will still shine through, even without meat! To store your One Pot Buffalo Chicken Pasta, let it cool first. Place it in an airtight container. Make sure to seal it well. You can keep it in the fridge for up to three days. Label the container with the date. This helps you remember when you made it. When you're ready to eat the leftovers, take them out of the fridge. You can reheat the pasta in the microwave or on the stove. If using the microwave, heat it in short bursts. Stir in between to make sure it warms evenly. If reheating on the stove, add a splash of chicken broth. This keeps the pasta creamy and tasty. If you want to save some for later, freezing is a great option. Portion the pasta into freezer-safe containers. Leave some space at the top, as the pasta will expand when frozen. You can freeze it for up to two months. When you're ready to eat, let it thaw in the fridge overnight. Then, reheat it as mentioned before. This way, you can enjoy a quick meal anytime! Yes, you can make One Pot Buffalo Chicken Pasta ahead of time. After cooking, let it cool and place it in an airtight container. Store it in the fridge for up to three days. When you are ready to eat, reheat it on the stove over low heat. Add a splash of chicken broth to help revive the creaminess. This dish tastes great even after a day or two. One Pot Buffalo Chicken Pasta is filling, but you might want some sides. Here are a few ideas: - Simple green salad: A fresh salad can balance the richness. - Garlic bread: This adds a nice crunch and flavor. - Veggies: Serve some steamed broccoli or carrots for extra nutrition. - Fruit salad: A sweet fruit salad can cleanse the palate. Yes, you can make this dish in a slow cooker. Start by cooking the chicken and onion in a pan. Then, place them in the slow cooker with the broth, buffalo sauce, and pasta. Cook on low for about 4 hours. Finally, stir in the cream and cheeses until melted. This method makes it easy to enjoy a warm meal without much work. One-Pot Buffalo Chicken Pasta is easy to make and full of flavor. We covered the key ingredients, cooking steps, and some tasty tips. Experiment with different cheeses and pasta to find your favorite twist. The dish is great for meal prep, plus it stores well for later. You can even adapt it for vegetarians or other diets. Enjoy this fun, spicy meal with friends or family. You’ll love how quick and tasty it is!

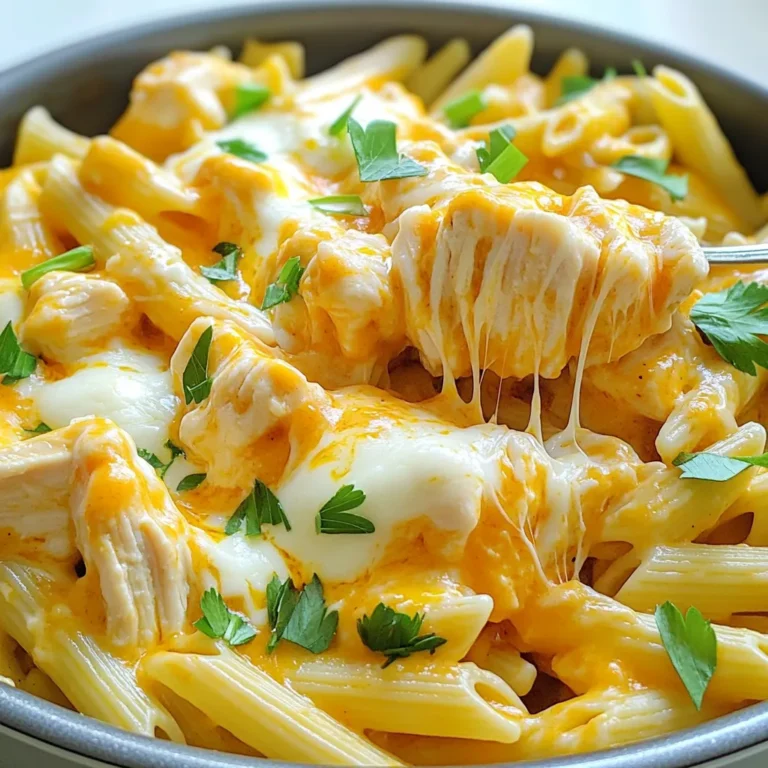
One Pot Buffalo Chicken Pasta Creamy and Flavorful

Here’s what you need for Maple Pecan Granola Clusters: - 2 cups rolled oats - 1 cup pecans, chopped - 1/2 cup almonds, chopped - 1/4 cup pumpkin seeds - 1/3 cup maple syrup - 1/4 cup coconut oil, melted - 1 tsp vanilla extract - 1/2 tsp salt - 1/2 tsp cinnamon - 1/2 cup dried cranberries or raisins (optional) You can swap some ingredients to fit your taste or needs. For instance: - Use walnuts instead of pecans for a different nut flavor. - Substitute sunflower seeds for pumpkin seeds if preferred. - Replace maple syrup with honey or agave syrup for a sweet touch. - Use olive oil instead of coconut oil if you want a lighter flavor. - Skip the dried fruits or add chocolate chips instead for a treat. Each ingredient in this recipe brings value: - Rolled oats are great for fiber. They help keep you full. - Pecans add healthy fats and antioxidants. They support heart health. - Almonds are rich in protein and vitamin E. They boost skin health. - Pumpkin seeds are high in magnesium. They help with muscle function. - Maple syrup offers natural sweetness and minerals like zinc. - Coconut oil provides healthy fats that can boost energy. - Cinnamon may help lower blood sugar and has anti-inflammatory effects. - Dried cranberries or raisins add sweetness and fiber. These ingredients work together to make a tasty and healthy snack. First, gather your ingredients. You need rolled oats, chopped pecans, chopped almonds, and pumpkin seeds. In a big bowl, mix these dry items together. Stir them well to ensure they blend nicely. In another bowl, whisk together maple syrup, melted coconut oil, vanilla extract, salt, and cinnamon. Make sure the mix is smooth and well combined. This blend adds flavor and sweetness. Now, preheat your oven to 325°F (160°C). Line a baking sheet with parchment paper to prevent sticking. Pour the wet mix over the dry ingredients in your big bowl. Stir until every oat and nut is coated. Spread this mixture on the baking sheet, pressing it down to create clusters. Bake for 20-25 minutes. Stir halfway through to ensure even baking. Watch closely, as you want it golden brown, not burnt. Once baked, take it out and let it cool completely on the baking sheet. This step is key because the granola hardens as it cools. After it's cool, break it into clusters. If you like, mix in dried cranberries or raisins at this point. Store your granola in an airtight container at room temperature. It will stay fresh for up to two weeks. Enjoy your crunchy and nutritious snack! To get those crunchy clusters, press the granola mixture down. When you spread it on the baking sheet, make sure to compact it. This helps form the clusters as it bakes. Use enough maple syrup and coconut oil to coat the oats and nuts well. This moisture helps them stick together. Bake until golden brown, but keep an eye on it. Stir halfway through to avoid burning, but don’t stir too much. You want to keep those clusters intact! One mistake is not using enough liquid. If you skip the maple syrup or oil, your granola won't stick. Another mistake is overbaking. Keep it in the oven until it looks golden, but not dark. If you stir too much, you'll break apart the clusters. Also, don’t skip cooling on the baking sheet. The granola hardens as it cools, making it crunchy. Want to boost the flavor? Add a pinch of nutmeg for warmth. You can also use different nuts like walnuts or pecans for variety. Try mixing in some chocolate chips after baking for a sweet treat. For extra sweetness, toss in dried fruit like cranberries or raisins. This adds a nice chewiness and balances the crunch. You can even sprinkle some sea salt for a sweet and salty combo! {{image_2}} You can swap out nuts and seeds in this recipe. Try using walnuts for a different flavor. Pistachios add a pop of color and taste. For seeds, sunflower seeds work great too. These options keep your granola interesting and tasty. Mix and match to find your favorite combo! While maple syrup gives a lovely flavor, you can try other sweeteners. Honey is a great choice if you want a floral note. Agave nectar is another sweet option, with a mild taste. If you prefer a low-calorie sweetener, consider using stevia. Each sweetener changes the flavor slightly, so choose what you like best! Add-ins can elevate your granola clusters. Try mixing in some dark chocolate chips for sweetness. Coconut flakes add a tropical twist. You can also add spices like nutmeg for warmth. For toppings, fresh fruit like bananas or berries pairs well. These additions make your granola even more delicious! To keep your maple pecan granola clusters fresh, store them in an airtight container. A glass jar or a plastic bin works well. Make sure the lid is tight to keep air out. This helps to keep the granola crunchy and tasty. These granola clusters stay fresh for up to two weeks at room temperature. If you want them to last longer, consider freezing them. Just remember, over time even stored granola will lose some crunch. To freeze your granola clusters, first let them cool completely. Once cooled, place them in a freezer-safe bag. Remove as much air as possible before sealing. Your clusters can last up to three months in the freezer. When you’re ready to eat, just thaw them at room temperature. To make granola clusters stick, you need to use enough liquid. In this recipe, maple syrup and melted coconut oil help bind the oats and nuts. When mixing, make sure to coat everything well. Press the mixture firmly on the baking sheet. This helps form clusters during baking. Maple pecan granola clusters are great on their own. You can also enjoy them with yogurt or milk. They add crunch to smoothie bowls or oatmeal. You could sprinkle them over ice cream for a sweet treat. Try adding fresh fruits like berries or banana slices for extra flavor. Yes, this recipe is gluten-free. The main ingredient, rolled oats, can be gluten-free. Always check the label to ensure they are certified gluten-free. Most brands now offer gluten-free oats. This way, you can enjoy your granola without any worries. This blog post covered how to make delicious granola clusters. We explored all the ingredients, tips for perfecting your batch, and smart variations. Remember to watch for common mistakes and use great storage methods to keep your clusters fresh. Granola clusters can be fun to make and easy to mix up. I hope you feel ready to try your own recipe. Enjoy every crunchy bite!

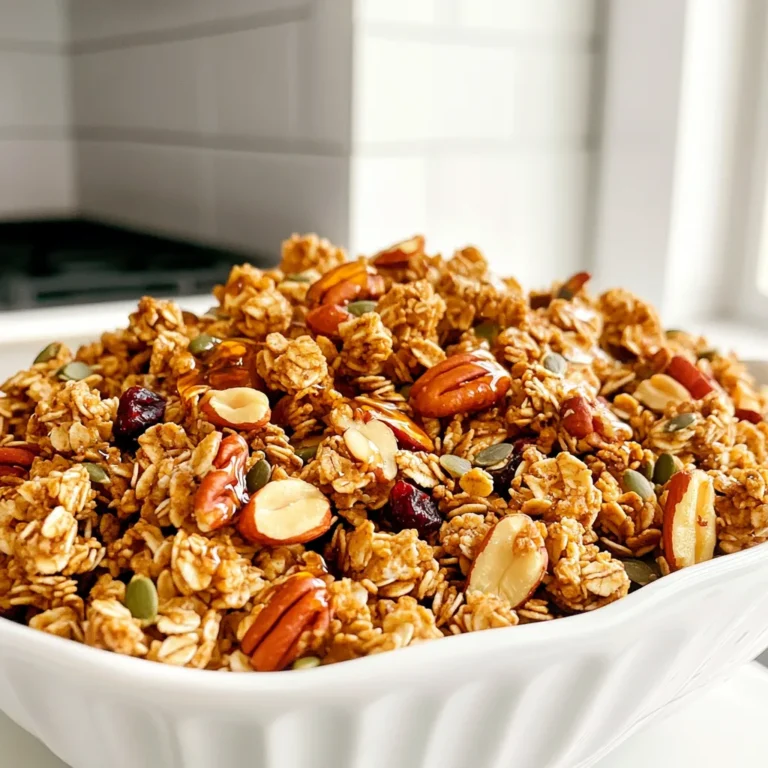
Maple Pecan Granola Clusters Crunchy and Nutritious

PREV 1 … 7 8 9 … 86 NEXT
spicy fork kitchen

explore

DessertsDinnerAppetizersDrinks

Our Policies

  • Cookie Policy
  • Copyright Policy
  • Disclaimer
  • GDPR Policy
  • Terms Of Use
Back to Top
  • About
  • Contact Us
  • Privacy Policy
© 2025 spicy fork kitchen