FREE DINNER EBOOK! Get your copy!
  • Cookie Policy
  • GDPR Policy
  • Disclaimer
  • Terms Of Use
  • Visit my other site: Fun Cookie Recipes
spicy fork kitchen
  • Home
  • Dinner
  • Desserts
  • Drinks
  • Appetizers
  • Contact
  • About
  • Privacy Policy
  • Home
  • Dinner
  • Desserts
  • Drinks
  • Appetizers
  • Contact
  • About
  • Privacy Policy
  • Cookie Policy
  • GDPR Policy
  • Disclaimer
  • Terms Of Use
Visit my other site: Fun Cookie Recipes

HOME / CATEGORIES /

Latest

To make a tasty chocolate chip pumpkin bread, you will need: - 1 cup canned pumpkin puree - 1/2 cup vegetable oil - 1 cup brown sugar, packed - 1/2 cup granulated sugar - 2 large eggs - 1 teaspoon vanilla extract - 1 1/2 cups all-purpose flour - 1 teaspoon baking soda - 1/2 teaspoon baking powder - 1/2 teaspoon salt - 1 teaspoon ground cinnamon - 1/2 teaspoon ground nutmeg - 1/4 teaspoon ground ginger - 1 cup semi-sweet chocolate chips - Optional: 1/2 cup chopped nuts (walnuts or pecans) If you need to swap some items, here are some ideas: - Use applesauce instead of vegetable oil for a lighter loaf. - Replace brown sugar with coconut sugar for a different taste. - You can use almond flour instead of all-purpose flour for a gluten-free option. - If you do not have chocolate chips, try using dried fruit like cranberries. Choosing good ingredients makes a big difference. Here are some helpful tips: - Look for 100% pure pumpkin puree, not pumpkin pie filling. - Check oils to ensure they are fresh and free from additives. - Use fresh eggs for the best flavor and texture. - Choose spices that are aromatic and not stale. Fresh spices enhance your bread’s taste. - For chocolate chips, select high-quality brands for rich flavor. {{ingredient_image_1}} To start, I preheat my oven to 350°F (175°C) and grease a 9x5 inch loaf pan. This helps the bread slide out easily once it bakes. Next, I grab a large mixing bowl. I combine the canned pumpkin puree, vegetable oil, brown sugar, and granulated sugar. I mix these until smooth. Then, I add the eggs, one at a time. Mixing well after each egg ensures a nice, fluffy batter. After that, I stir in the vanilla extract for a warm flavor. In a separate bowl, I whisk together the dry ingredients. This includes the all-purpose flour, baking soda, baking powder, salt, cinnamon, nutmeg, and ginger. I make sure these blend well. Gradually, I add this dry mix to the wet mixture. I stir gently until just combined. Overmixing can make the bread tough. Finally, I fold in the semi-sweet chocolate chips and, if desired, the chopped nuts. This adds a delightful crunch and flavor. Now that my batter is ready, I pour it into the prepared loaf pan. I smooth the top with a spatula for an even bake. I place the pan in the oven and bake for 55 to 65 minutes. I check for doneness by inserting a toothpick in the center. If it comes out clean, the bread is done. Once the bread is baked, I remove it from the oven. I let it cool in the pan for about 10 minutes. This helps it set before I transfer it to a wire rack for complete cooling. For serving, I slice the bread and enjoy it warm. A pat of butter makes it even better. I also like to dust it with powdered sugar for a sweet touch. If I want a pretty crust, I sprinkle more chocolate chips on top before baking. This adds a nice visual and extra flavor. When making chocolate chip pumpkin bread, some mistakes can spoil your fun. Here are key points to remember: - Overmixing the batter: Stir just until combined. Overmixing makes the bread tough. - Using cold eggs: Always use room temperature eggs. They mix better with other ingredients. - Not greasing the pan: A greased pan helps the bread come out easily. Don’t skip this step! - Not checking doneness: Use a toothpick to test if it’s done. If it comes out clean, it’s ready. To get that soft and moist texture, follow these tips: - Use canned pumpkin puree: It gives moisture and flavor. Avoid fresh pumpkin as it can be too watery. - Measure flour correctly: Use the spoon-and-level method. Too much flour can make the bread dry. - Don’t skip the oil: The vegetable oil keeps the bread moist and tender. - Let it cool: Cooling helps the flavors develop. Wait at least 10 minutes before slicing. You can take your chocolate chip pumpkin bread to the next level with these add-ins: - Chopped nuts: Walnuts or pecans add crunch and depth. Use about 1/2 cup. - Dried fruit: Raisins or cranberries can add sweetness. Try 1/2 cup for a fruity twist. - Spices: Add cloves or allspice for more warmth. Just a pinch can make a big difference. - Extra chocolate: Sprinkle chocolate chips on top before baking. This gives a lovely finish. Feel free to mix and match these ideas to make the recipe your own! Pro Tips Use Fresh Spices: For the best flavor, use freshly ground spices instead of pre-ground ones. This will enhance the aromatic qualities of your pumpkin bread. Check for Doneness: Instead of relying solely on the baking time, use a toothpick to check the center. It should come out clean or with a few moist crumbs. Cool Properly: Allow the bread to cool in the pan for about 10 minutes before transferring it to a wire rack. This helps prevent it from becoming soggy. Storage Tips: Store any leftovers in an airtight container at room temperature for up to 3 days, or refrigerate for longer freshness. {{image_2}} If you want a nut-free option, just skip the nuts. You can still enjoy the rich flavors of chocolate and pumpkin. The bread will stay moist and fluffy without them. This makes it perfect for kids or those with nut allergies. Just follow the same recipe and leave out the 1/2 cup of chopped nuts. The chocolate chips will add enough texture and sweetness. To make this bread gluten-free, swap the all-purpose flour with a gluten-free blend. Look for a blend that includes xanthan gum. This helps bind the ingredients. You can also use almond flour as an alternative. Keep the other ingredients the same to keep the flavor intact. The bread will still rise well and taste delicious. Want to spice things up? You can add extra spices like cloves or allspice. This gives the bread a warm, cozy flavor. For a hint of spice, use 1/4 teaspoon of ground cloves or allspice. Mix them in with the other dry ingredients. You can also add a pinch of cayenne for a little heat. This way, you can create a unique twist that suits your taste. To keep your chocolate chip pumpkin bread fresh, store it in an airtight container. You can leave it at room temperature for up to three days. If you want it to last longer, keep it in the fridge. Just make sure it’s wrapped well to avoid drying out. Freezing is a great way to save your bread. First, let the bread cool completely. Then, wrap it in plastic wrap or aluminum foil. Place it in a freezer-safe bag. It can last up to three months in the freezer. When you’re ready to enjoy it, just thaw it in the fridge overnight. To reheat your bread, slice it first. You can use a microwave or an oven. For the microwave, heat each slice for about 15-20 seconds. If you prefer the oven, set it to 350°F (175°C) and warm the slices for about 10 minutes. This will help restore its soft texture and melt the chocolate chips again. Enjoy your warm, tasty treat! Chocolate Chip Pumpkin Bread lasts about 4 to 5 days at room temperature. Store it in an airtight container. If you want it to last longer, keep it in the fridge. This way, it can stay fresh for a week. You can also freeze it for up to three months. Just wrap it well in plastic wrap and foil. Yes, you can make this recipe without eggs. Use 1/4 cup of unsweetened applesauce for each egg. This will keep the bread moist and help it rise. You can also try using a flax egg. Mix 1 tablespoon of ground flaxseed with 2.5 tablespoons of water. Let it sit for 5 minutes before adding it to the mix. Both options work well and keep the bread tasty. If you don't have pumpkin puree, you can use mashed banana or applesauce. Both will give a nice flavor and moisture. Sweet potato puree is another great option. Just ensure that whatever you use is smooth. This keeps the texture of the bread nice and soft. Yes, this recipe is great for beginners. The steps are simple and clear, making it easy to follow. You only need basic skills like mixing and pouring. Plus, the ingredients are common and easy to find. You'll feel proud when you bake this delicious bread! In this blog post, we explored how to make delicious chocolate chip pumpkin bread. We looked at the key ingredients, substitutions, and how to choose the best ones. I shared step-by-step instructions on making, baking, and serving the bread. You learned tips to avoid common mistakes and enhance flavors. We also discussed variations like nut-free and gluten-free options. Lastly, I covered storage and reheating tips. Now, you can enjoy this treat anytime with confidence!

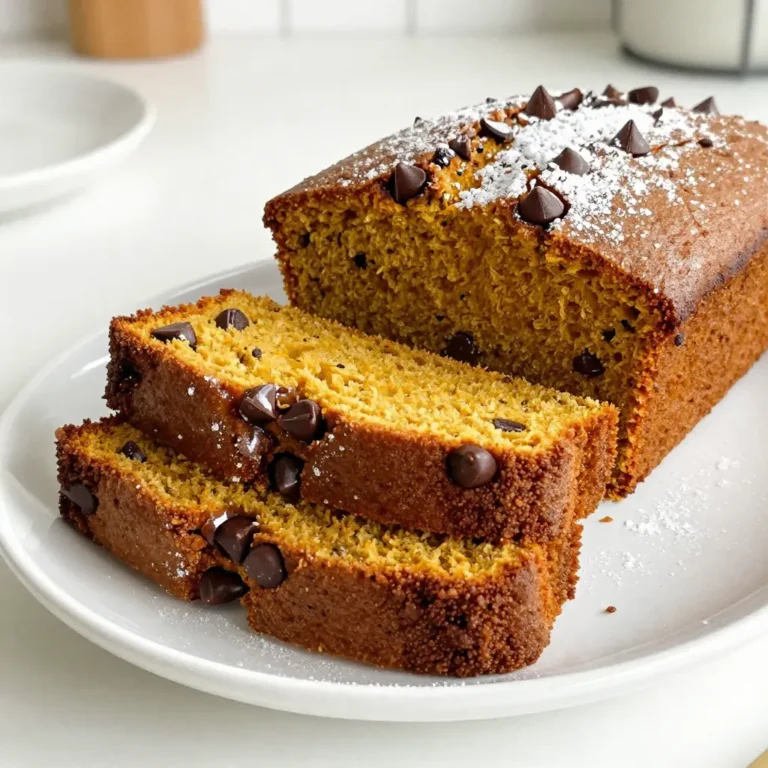
Chocolate Chip Pumpkin Bread Savory and Simple Recipe

- 1 pound baby carrots, peeled - 2 tablespoons olive oil - 1/4 cup grated Parmesan cheese - 2 teaspoons dried thyme - 2 teaspoons dried rosemary - 1 teaspoon garlic powder - Salt and pepper to taste - Fresh parsley, chopped Using fresh, vibrant ingredients makes a big difference. Start with baby carrots for their sweet flavor. Peeled and ready to go, they roast up soft and tender. The olive oil helps the carrots crisp up nicely and adds rich flavor. Next, the star of the dish: Parmesan cheese. It gives a salty, nutty taste that pairs perfectly with the herbs. Dried thyme and rosemary bring earthy notes, while garlic powder adds a punch of flavor. Don’t forget to season with salt and pepper! They enhance every bite. Finally, fresh parsley adds a pop of color. It also brightens the dish and balances the rich flavors. These simple ingredients come together to make a tasty side dish that you can serve with almost anything. {{ingredient_image_1}} First, preheat your oven to 425°F (220°C). This step gets the oven hot and ready. While it warms up, take 1 pound of baby carrots and peel them if needed. Next, place the peeled carrots in a large bowl. Pour in 2 tablespoons of olive oil. Toss the carrots well, making sure they are coated evenly. This oil helps the carrots roast nicely and adds flavor. Now it’s time to add flavor. Sprinkle 1/4 cup of grated Parmesan cheese over the carrots. Then, add 2 teaspoons of dried thyme, 2 teaspoons of dried rosemary, and 1 teaspoon of garlic powder. Don't forget salt and pepper to taste! Toss the carrots again until they are fully coated. This seasoning mix makes the carrots tasty and aromatic. Spread the seasoned carrots in a single layer on a baking sheet lined with parchment paper. This helps with easy cleanup too! Place the baking sheet in the oven. Roast the carrots for 25-30 minutes. Check them halfway through and stir for even cooking. You’ll know they are done when they are tender and golden brown. For a nice touch, remove the carrots from the oven and garnish with fresh chopped parsley before serving. To get the best roasted carrots, set your oven to 425°F (220°C). This high heat helps the carrots cook evenly and brown nicely. Next, spread the carrots out in a single layer on the baking sheet. If they touch, they will steam instead of roast. Keep them spaced for that perfect crispness. You can add more herbs to boost the flavor. Try fresh thyme or rosemary for a stronger taste. You can also use herbs like oregano or basil. If you want to change the cheese, consider using Pecorino Romano or feta. Each will give a unique twist to your dish. These roasted carrots pair well with many main dishes. They go great with chicken, fish, or steak. You can also serve them with grains like quinoa or rice. For presentation, arrange the carrots on a nice platter. Sprinkle some fresh parsley on top for color. This adds a pop and makes your dish look even more appetizing. Pro Tips Choose Fresh Carrots: Look for bright, firm baby carrots that have a vibrant color to ensure the best flavor and texture. Don’t Skip the Parchment: Lining your baking sheet with parchment paper not only makes cleanup easier but also helps prevent the carrots from sticking. Adjust Seasonings: Feel free to modify the herbs according to your taste; adding a pinch of chili flakes can give a spicy kick! Serve Warm: These roasted carrots are best served warm, so enjoy them fresh out of the oven for maximum flavor! {{image_2}} You can switch up the baby carrots for other root veggies. Try using parsnips or sweet potatoes. Both add a unique taste. You can also mix different types of carrots, like rainbow carrots for color. This creates a fun look on your plate. The sweet flavor stays the same, which is great. Want to make it spicier? Add chili flakes for a kick. Just a pinch can make a big difference. If you love cheese, try different types. Pecorino Romano or even goat cheese can work well. Each cheese brings its own flavor, so feel free to experiment. If you need a vegan option, skip the cheese. Use nutritional yeast for a cheesy taste. It’s packed with nutrients too. For gluten-free needs, this recipe is already safe. Just ensure your cheese is gluten-free, and you’re set. Enjoy the dish without worry! To keep your leftover Parmesan herb roasted carrots fresh, follow these steps: - Place the carrots in an airtight container. - Store them in the fridge for best results. - They stay good for about 3 to 5 days. For freezing, make sure the carrots cool first. - Use a freezer-safe container or bag. - They can last up to 3 months in the freezer. When reheating, you want to avoid sogginess. Here’s how: - Preheat your oven to 350°F (175°C). - Place the carrots on a baking sheet. - Heat for about 10 to 15 minutes. This keeps them crispy and flavorful. You can also use the microwave for a quick fix. - Heat them in a bowl for 1 to 2 minutes. Just watch out for mushiness. Roasted carrots have a decent shelf life in the fridge. - They stay fresh for about 3 to 5 days. Check for spoilage by looking for: - A sour smell - Slimy texture - Dark spots on the surface If you see any of these signs, it's time to toss them. You know the carrots are done when they are tender and golden brown. You can poke them with a fork. If they slide off easily, they are ready. You should also see a nice caramelization on the edges. This adds flavor. Stir the carrots halfway through cooking for even results. Yes, you can use regular carrots. Just cut them into smaller pieces, about the same size as baby carrots. This helps them cook evenly. Regular carrots may take a little longer to roast, around 30 to 35 minutes. Keep an eye on them to avoid overcooking. These carrots pair well with many main dishes. They complement roasted chicken or pork nicely. You can also serve them with grilled steak or fish. For sides, consider mashed potatoes or a fresh salad. Enjoy the colors and flavors together on your plate! This blog post covered how to make simple and tasty Parmesan Herb Roasted Carrots. You learned about the right ingredients, from baby carrots to herbs and cheese. I shared step-by-step instructions to ensure great results, plus tips to enhance flavor. You also found variations, storage info, and answers to common questions. Roasted carrots can be a fantastic side dish. Try these ideas today. Enjoy cooking and experimenting with flavors. You might discover new family favorites!

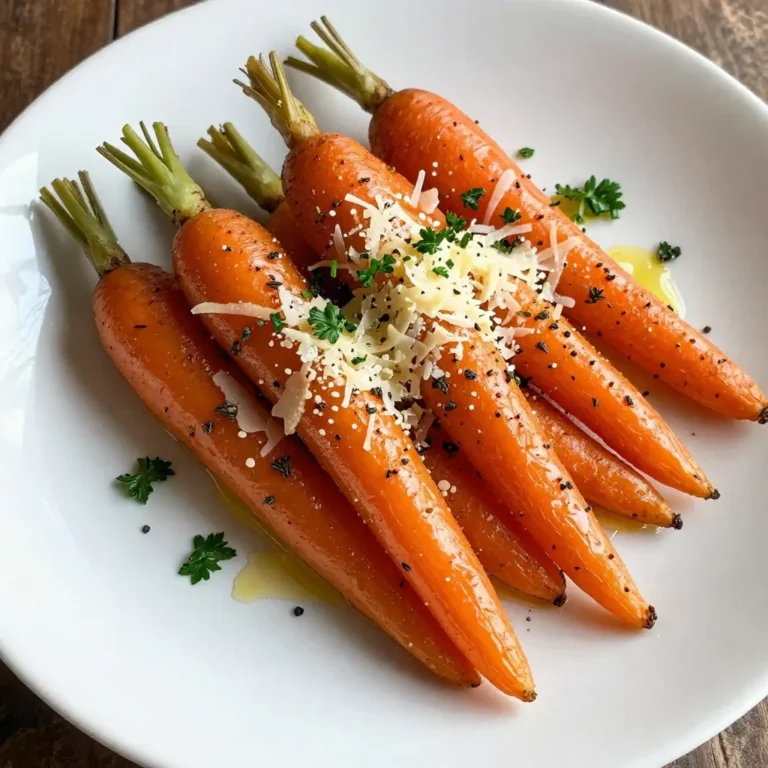
Parmesan Herb Roasted Carrots Flavorful and Easy Side

- 8 oz penne pasta - 2 cups cooked chicken, shredded - 1 medium onion, chopped - 2 cloves garlic, minced - 1 cup carrots, diced - 1 cup frozen peas - 1 cup celery, diced The main star of this dish is the penne pasta. It has a great shape to hold the creamy sauce well. You can use any cooked chicken you have on hand. Shredded chicken works best. Next, add fresh veggies like onion, garlic, carrots, celery, and peas. These bring color and flavor to the dish. - 2 tablespoons olive oil - 2 cups chicken broth - 1 cup heavy cream - 1/4 cup all-purpose flour - 1 teaspoon dried thyme - 1 teaspoon dried rosemary - Salt and pepper to taste For the sauce, you'll need olive oil, chicken broth, and heavy cream. These create a rich and creamy base. Flour helps thicken the sauce. Dried herbs like thyme and rosemary add a nice touch. Don't forget salt and pepper to make it pop. - Fresh parsley, chopped (for garnish) - Additional spices or cheese Garnishes can take your dish to the next level. Fresh parsley adds color and freshness. You can also sprinkle on cheese or extra spices if you like. These little touches make your meal look and taste even better. {{ingredient_image_1}} To cook penne pasta properly, follow the package instructions. Start with a large pot of salted water. Bring it to a boil. Add the penne and stir it gently. Cook until it is al dente, which means it should still have a slight bite. Drain the pasta in a colander. To prevent sticky pasta, rinse it under cold water after draining. This removes excess starch. You can also toss it with a little olive oil to keep it separated. For the chicken and vegetables, heat olive oil in a large skillet over medium heat. Add chopped onion and sauté it until it becomes translucent, about three to four minutes. Stir in minced garlic and cook for one minute until it smells good. For shredding cooked chicken, use two forks to pull it apart. This makes it easy and quick. Once the onion and garlic are ready, add diced carrots, celery, and shredded chicken. Cook for about five minutes until the veggies soften. To make the sauce, sprinkle flour over the chicken and vegetables and stir to coat. Cook for two minutes to remove the raw flour taste. Gradually pour in chicken broth while stirring. This helps to avoid lumps. Add dried thyme and rosemary, then season with salt and pepper. Bring this mixture to a simmer. Let it thicken for about five minutes. After thickening, reduce the heat. Stir in heavy cream and add frozen peas. Cook for another two to three minutes until everything is hot. Now for the final assembly! Add the cooked penne pasta to the skillet with the sauce. Mix it well so the pasta gets coated. Taste the dish and adjust seasonings as needed. Serve hot, and enjoy your Chicken Pot Pie Pasta! To get the best creaminess in your Chicken Pot Pie Pasta, choose a heavy cream with at least 36% fat. This gives your sauce a rich and smooth texture. Look for brands that are organic for better flavor. You can also try a few techniques. Start by adding the heavy cream slowly. Stir it in gently to mix it well. This helps keep your sauce velvety. If you want it even creamier, add a bit of cream cheese. It melts well and adds a nice tang. When you're short on time, every minute counts. Start by chopping your vegetables ahead of time. You can do this the night before. Store them in the fridge to keep them fresh. For cooking, use a large skillet. This helps everything cook faster. If you're in a hurry, use pre-cooked chicken. This saves you time on cooking and shredding. Chicken Pot Pie Pasta is great on its own, but you can make it even better. Pair it with a simple salad. A light green salad with vinaigrette works well. For something fun, bake it in a casserole dish. Top it with breadcrumbs or cheese for a crispy layer. This adds texture and makes it look fancy. Enjoy your meal with family and friends! Pro Tips Use Rotisserie Chicken: For a quicker preparation, consider using store-bought rotisserie chicken. It saves time and adds a flavorful touch. Vegetable Variations: Feel free to swap in your favorite vegetables, such as bell peppers or green beans, to customize the dish to your liking. Thicken with Cornstarch: If you prefer a thicker sauce, mix 1 tablespoon of cornstarch with 2 tablespoons of water and add it to the simmering broth. Make it Ahead: This dish can be prepared ahead of time. Simply reheat it on the stove, adding a splash of chicken broth to loosen the sauce. {{image_2}} You can make Chicken Pot Pie Pasta healthier in a few simple ways. First, swap regular penne pasta for whole-grain pasta. This change adds fiber and nutrients. You can also use low-fat cream instead of heavy cream. It still tastes great but lowers the fat content. Moreover, adding more vegetables is a fantastic option. Consider using spinach, bell peppers, or zucchini. These veggies boost vitamins and add color to your dish. To change the flavor of your Chicken Pot Pie Pasta, try adding fresh herbs. Basil or oregano can lift the taste. Just sprinkle in a teaspoon or two while cooking. You can also experiment with different proteins. Instead of chicken, try turkey or even tofu for a vegetarian touch. Each protein brings a unique taste and texture. This way, you can make the dish your own. One-pot Chicken Pot Pie Pasta is a great option for easy cleanup. You can cook everything in one pot. Start by cooking the pasta in the same pot as the sauce. This method saves time and makes the pasta soak up the flavor. Keep in mind that you may need to adjust cooking times. Ensure the pasta is tender and the sauce is thick. Stir often to prevent sticking. This style makes dinner simple and quick! To keep your Chicken Pot Pie Pasta fresh, follow these steps: - Refrigeration: Place leftovers in an airtight container. This helps keep the dish moist. Store it in the fridge for up to three days. - Freezing: For longer storage, freeze the pasta. Use a freezer-safe container or bag. Make sure to remove as much air as possible. It can last up to three months in the freezer. Thaw it overnight in the fridge before reheating. You have two main ways to reheat Chicken Pot Pie Pasta: - Stovetop: Heat a skillet over medium heat. Add a splash of chicken broth or water to prevent sticking. Stir the pasta for about 5 to 7 minutes until warm. - Microwave: Place the pasta in a microwave-safe bowl. Add a little broth to keep it moist. Cover with a lid or plastic wrap. Heat in 1-minute intervals, stirring in between, until hot. Before serving, always check the temperature. It should be hot all the way through. If it looks dry, add more broth or cream to restore its creaminess. You can use several options instead of heavy cream. Here are some ideas: - Half-and-half: This has less fat but can still give a nice creaminess. - Milk with butter: Mix 3/4 cup milk with 1/4 cup melted butter for a quick fix. - Coconut milk: This adds a touch of sweetness and works well in many recipes. - Greek yogurt: It’s thick and creamy, plus it adds protein. These substitutes can lighten the dish while still keeping it tasty. Yes, you can prepare this dish ahead of time! Here are some tips: - Cook the pasta: You can cook it a day before and store it in the fridge. - Make the sauce: Prepare the sauce and store it separately. It keeps well for a few days. - Combine before serving: Mix the pasta and sauce just before you eat. This way, everything stays fresh. Leftovers from Chicken Pot Pie Pasta can last in the fridge for about 3-4 days. To keep them safe: - Store in airtight containers: This helps prevent spoilage. - Reheat thoroughly: Make sure to heat it until it's steaming hot. - Check for smell or change in texture: If anything seems off, it’s best to throw it out. By following these steps, you’ll enjoy this comforting dish for days! In this article, we explored how to make a delicious Chicken Pot Pie Pasta. You learned about main ingredients, pantry essentials, and optional garnishes that add flair. We went step-by-step through cooking pasta, preparing chicken, and creating a creamy sauce. Tips for perfecting creaminess and speeding up your meal prep were also shared. Finally, we discussed variations and storage for leftovers. Experiment with flavors and enjoy this recipe. Happy cooking!

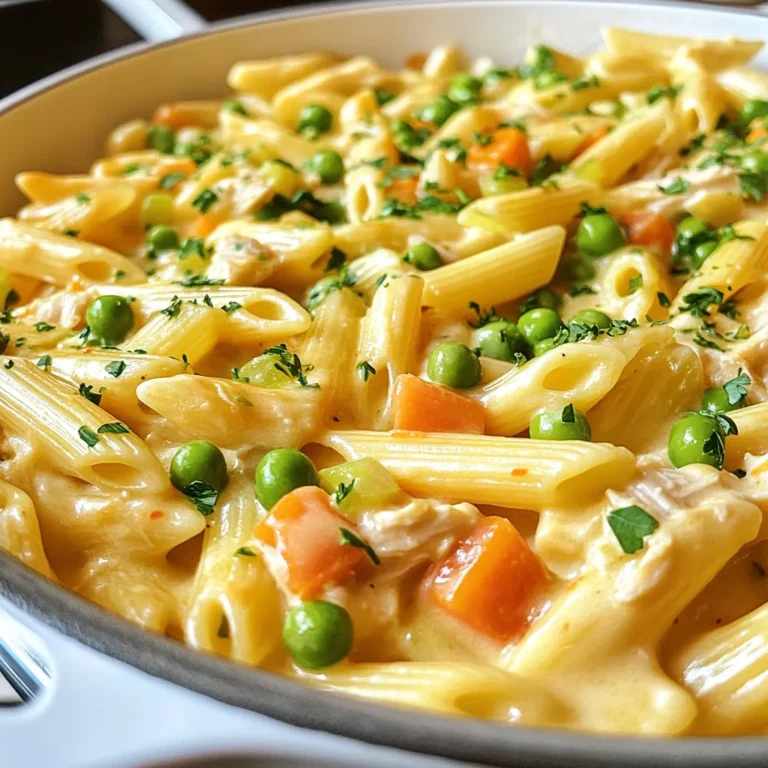
Chicken Pot Pie Pasta Comfort Food Recipe Delight

- 12 ounces rigatoni pasta - 1 pound Italian sausage (sweet or spicy, casings removed) - 1 tablespoon olive oil - 3 cloves garlic, minced - 1 cup heavy cream - 1 cup vegetable broth - 2 cups fresh spinach, roughly chopped - 1 cup grated Parmesan cheese - Salt and pepper to taste - 1 teaspoon red pepper flakes (optional) - Fresh basil for garnish Gathering the right ingredients is key for the creamy sausage rigatoni. First, choose 12 ounces of rigatoni pasta. This pasta shape holds the sauce well. Next, pick 1 pound of Italian sausage. You can go for sweet or spicy, depending on your taste. You will need 1 tablespoon of olive oil to cook the sausage. Then, grab 3 cloves of minced garlic for flavor. For the creamy texture, get 1 cup of heavy cream and 1 cup of vegetable broth. These two will make the sauce rich. Don’t forget 2 cups of fresh spinach. It adds color and nutrition. You will need 1 cup of grated Parmesan cheese. This cheese adds a nice salty taste. Lastly, season with salt, pepper, and red pepper flakes if you like a kick. Fresh basil makes a great garnish, giving your dish a bright finish. Now that you know what to gather, you can prepare for a delicious meal! {{ingredient_image_1}} 1. Start by boiling a large pot of salted water. 2. Once boiling, add 12 ounces of rigatoni. 3. Cook the rigatoni according to the package instructions until it's al dente. 4. Before draining, reserve 1 cup of pasta water. 5. Drain the rigatoni and set it aside for later. 1. In a large skillet, heat 1 tablespoon of olive oil over medium heat. 2. Crumble 1 pound of Italian sausage into the skillet. 3. Cook the sausage for about 5-7 minutes until brown and fully cooked. 4. Stir frequently to break the sausage into smaller pieces. 5. Next, add 3 cloves of minced garlic. 6. Sauté the garlic for 1 minute until it smells good, but do not let it burn. 7. Pour in 1 cup of heavy cream and 1 cup of vegetable broth. 8. Stir everything together and let it simmer for 3-5 minutes. 1. Add 2 cups of roughly chopped spinach to the skillet. 2. Cook the spinach for 2-3 minutes until it wilts. 3. Stir in 1 cup of grated Parmesan cheese until it melts and the sauce is creamy. 4. If the sauce feels too thick, add some reserved pasta water until it’s just right. 5. Toss the cooked rigatoni into the skillet with the creamy sauce. 6. Mix well to coat the pasta evenly. 7. Finally, season with salt, pepper, and red pepper flakes if you want a kick. 8. Serve right away, garnished with fresh basil for a lovely touch. To make your sauce creamy, you can try different cheese options. Parmesan cheese works well, but you can also use mozzarella or cream cheese for a different taste. Each cheese adds its own flavor and texture. If your sauce is too thick, add some reserved pasta water. Start with a small amount and stir it in. This helps reach your desired sauce thickness without losing creaminess. Different types of sausage can change the flavor of your dish. Sweet Italian sausage gives a mild taste, while spicy sausage adds a kick. You can also mix types to find your favorite blend. Incorporating herbs and spices can elevate the dish. Fresh basil adds a nice aroma and taste. You might also try oregano or thyme for added depth. Red pepper flakes can add heat if you like a spicy flavor. Pair your creamy sausage rigatoni with a fresh salad or garlic bread. A simple green salad with lemon dressing balances the richness of the dish. Garlic bread adds crunch and flavor. For wine, a light red like Pinot Noir complements the sausage well. If you prefer white, a Chardonnay can balance the creaminess. Choose a wine that suits your taste. Pro Tips Use Quality Sausage: Choose a high-quality Italian sausage for the best flavor. Fresh sausage will have a richer taste compared to pre-packaged options. Don’t Overcook the Pasta: Ensure the rigatoni is cooked al dente for the perfect texture. It will continue to cook slightly when mixed with the sauce. Adjust Creaminess: If the sauce is too thick, gradually add reserved pasta water until you achieve your desired consistency. Fresh Spinach Substitute: You can use kale or swiss chard instead of spinach for a different flavor and texture in your dish. {{image_2}} You can make this dish vegetarian by swapping out the sausage. Mushrooms or lentils work great here. - Mushrooms: Use about 8 ounces of chopped mushrooms. Brown them in olive oil until soft. - Lentils: Use 1 cup of cooked lentils. Stir them in with the garlic for flavor. Both options add a nice texture and taste while keeping the dish hearty. If you need a gluten-free meal, choose gluten-free pasta. Many brands offer great options that mimic the texture of regular pasta. - Look for brown rice or chickpea pasta. These varieties hold up well in sauces. - Cook according to package instructions, just like regular rigatoni. You won’t lose any of the delicious flavors with this swap. To make this dish dairy-free, you can use non-dairy milk and cheese substitutes. - Non-Dairy Milk: Almond milk or oat milk can replace heavy cream. Use about 1 cup. - Cheese Substitute: Nutritional yeast is a great option for a cheesy flavor. Use about ½ cup. These swaps keep the creamy texture while being friendly to dairy-free diets. To store leftovers, first cool the dish to room temperature. Place it in an airtight container. This method keeps your creamy sausage rigatoni fresh for up to three days in the fridge. When you want to enjoy it again, just remember to check for any signs of spoilage. If you want to freeze this dish, portion it into smaller containers. Let it cool completely first. Creamy sauces can separate when frozen, so add a little extra broth or cream before freezing. This helps maintain the creamy texture. You can freeze it for up to three months. Just label your containers with the date to keep track. When you’re ready to eat your frozen rigatoni, thaw it in the fridge overnight. Reheat it gently on the stove over low heat. Stir in a splash of broth or cream to revive the creamy sauce. If you prefer the microwave, use a microwave-safe dish. Heat in short bursts, stirring in between, until warm. Avoid high heat to keep the texture nice and creamy. This recipe takes about 40 minutes in total. You will spend around 10 minutes prepping the ingredients and 30 minutes cooking. The steps are quick and easy, so you won't be in the kitchen long! Yes, you can prepare this dish ahead of time. Cook the rigatoni and the sauce, but do not mix them yet. Store the pasta and sauce in separate containers in the fridge. You can keep them for up to 3 days. When you're ready to eat, simply reheat them and combine. If you need a substitute for heavy cream, you have options! Use half-and-half for a lighter sauce. You can also mix equal parts of milk and Greek yogurt for a creamy texture. Another choice is coconut milk, which adds a nice flavor. Each option will give you a tasty sauce! You now have a simple and tasty rigatoni dish recipe. We covered every aspect, from ingredients to cooking steps. You learned tips for creaminess and flavor enhancements. Plus, we explored variations for different diets. Remember, this dish can fit anyone's taste. Store leftovers properly to enjoy later. With these steps, you can make a meal that impresses. Now, get cooking and enjoy this delightful rigatoni!

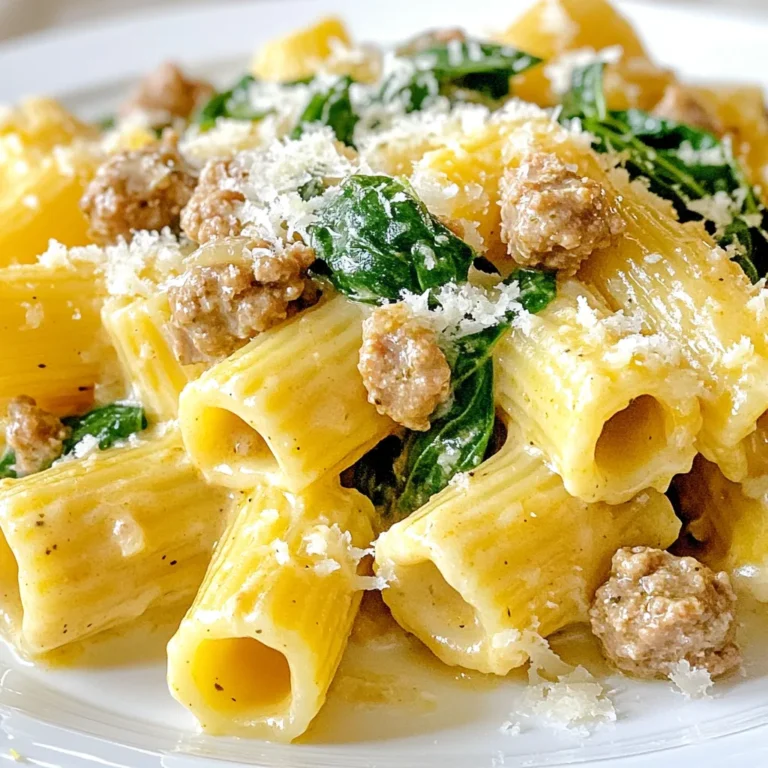
Creamy Sausage Rigatoni with Spinach Tasty Dinner Dish

To make Sticky Beef Noodles, gather the following ingredients: - 300g beef steak (sirloin or flank), thinly sliced - 250g egg noodles (or your choice of noodles) - 2 tablespoons soy sauce - 1 tablespoon oyster sauce - 1 tablespoon hoisin sauce - 1 tablespoon brown sugar - 1 tablespoon sesame oil - 2 garlic cloves, minced - 1 teaspoon ginger, grated - 1 red bell pepper, sliced - 1 cup sugar snap peas - 2 green onions, chopped - Sesame seeds for garnish You can add your favorite vegetables or proteins to this dish. Try: - Broccoli or bok choy for extra greens - Chicken or tofu for a different protein option - Fresh herbs like cilantro for a fresh taste - Chili flakes to add a kick of heat Each ingredient adds flavor and health benefits. Here are some highlights: - Beef: A good source of protein and iron, which helps build muscle. - Egg noodles: Provide carbohydrates for energy and are quick to cook. - Garlic: Known for its immune-boosting properties and heart health benefits. - Red bell pepper: Packed with vitamin C and antioxidants, good for skin health. - Sugar snap peas: Low in calories, high in fiber, and support digestion. - Ginger: Aids digestion and has anti-inflammatory properties. Using fresh ingredients not only boosts flavor but also adds nutrition to your meal. {{ingredient_image_1}} To make Sticky Beef Noodles, start with the egg noodles. Cook them as the package says. When they are soft, drain and rinse them in cold water. This stops the cooking. Set the noodles aside. Next, mix your sticky sauce. In a bowl, combine soy sauce, oyster sauce, hoisin sauce, brown sugar, and sesame oil. Stir well to blend. Now, heat oil in a large skillet or wok on medium-high heat. Add minced garlic and grated ginger. Sauté for 30 seconds until you smell the aroma. Add the thinly sliced beef to the skillet. Stir-fry it for about 2-3 minutes. The beef should brown but not fully cook. Then, toss in the sliced red bell pepper and sugar snap peas. Stir-fry both veggies for about 2 minutes. They should be tender-crisp, bright, and colorful. Pour the sticky sauce over the beef and veggies. Stir to coat everything well. Let it simmer for about 2 minutes. This thickens the sauce and makes it sticky. Finally, add the cooked noodles into the skillet. Toss them with the beef and sauce until all ingredients mix well. Heat everything through. Serve hot, and top each bowl with chopped green onions and sesame seeds for extra flavor. To keep the beef tender, slice it thinly against the grain. This helps break down tough muscle fibers. Marinate the beef in the sticky sauce for 15 minutes before cooking. This adds flavor and helps tenderize the meat. Make sure not to overcook the beef in the skillet. Remove it while it still has some pink inside; it will continue cooking as you add it to the noodles. To get the best noodle texture, watch the cooking time. Follow the package instructions closely. Once cooked, rinse the noodles in cold water. This stops cooking and keeps them from getting mushy. When you add them to the skillet, toss them gently with the sauce. This helps coat each noodle without breaking them apart. Making Sticky Beef Noodles can be simple, but some mistakes can happen. Here are key points to keep in mind: - Overcooking the beef: Cook the beef for just 2-3 minutes. This keeps it tender. - Not rinsing noodles: Always rinse your noodles after cooking. This stops them from sticking. - Skipping the sauce mix: Combine the sauces well before adding them to the pan. It ensures even flavor. - Using too much heat: Medium-high heat is best. Too high can burn garlic and ginger. - Ignoring the veggies: Add them at the right time. You want them tender but still crisp. Using the right tools makes cooking easier and more fun. Here’s what I recommend: - Large skillet or wok: This allows you to stir-fry evenly. - Sharp knife: Makes slicing beef and veggies quick and safe. - Cutting board: A stable surface is key for cutting. - Measuring spoons: Use these for accurate sauce measurements. - Tongs or spatula: Helps in tossing the noodles with beef and sauce. Sticky Beef Noodles taste great on their own, but you can make meals even better. Here are some ideas: - Serve with a side salad: A fresh salad adds crunch and balances the rich flavors. - Pair with spring rolls: They add a nice texture and complement the dish. - Top with fresh herbs: Adding cilantro or basil can brighten the dish. - Serve with chili sauce: A little heat can enhance the flavor for spice lovers. - Enjoy with a cold drink: I recommend iced tea or lemonade to cool down the meal. Pro Tips Slice Against the Grain: When slicing beef, always cut against the grain for a more tender bite. This helps break down the muscle fibers and results in a more enjoyable texture. Prep Ahead: To save time, you can marinate the beef in the sticky sauce for at least 30 minutes before cooking. This enhances flavor and tenderness. Vegetable Variations: Feel free to swap in your favorite vegetables. Broccoli, carrots, or bok choy are great alternatives that add color and nutrition. Adjust the Sweetness: If you prefer a sweeter sauce, increase the amount of brown sugar. Conversely, for a saltier flavor, add a bit more soy sauce. {{image_2}} You can change the beef in this recipe. Use chicken, tofu, or even shrimp. If you pick chicken, use boneless thighs or breasts. Cut them into thin slices. For tofu, grab firm tofu and press it to remove extra water. Then, slice it into cubes. Cook the protein just like the beef. You can mix in many veggies for a fresh twist. Try broccoli, carrots, or bok choy. These add crunch and color. You can also use mushrooms or zucchini. Just chop them into bite-sized pieces. The key is to stir-fry them until they are tender but still bright. Want some heat? Add red pepper flakes or sliced chili peppers. You can stir them in with the garlic and ginger for a spicy kick. If you prefer mild flavors, skip the spicy extras. The dish is still full of taste with just the sauces. You can also serve chili sauce on the side for those who want it spicy. To store leftover Sticky Beef Noodles, place them in an airtight container. Make sure to cool the noodles to room temperature first. You can keep them in the fridge for up to three days. If you want to save them longer, freezing is a good option. When reheating, I suggest using a skillet. Heat it on medium with a splash of water or oil. Add the noodles and cover the skillet. This helps steam the noodles, keeping them moist. Stir occasionally until they are hot. If you use a microwave, place noodles in a bowl and cover it. Heat in short bursts, stirring in between. If you want to freeze your Sticky Beef Noodles, divide them into portions. Use freezer-safe bags or containers. Remove as much air as possible to avoid freezer burn. They can last up to three months in the freezer. When ready to eat, thaw them overnight in the fridge before reheating. The best noodles for Sticky Beef Noodles are egg noodles. They have a nice chewy texture. You can also use rice noodles or udon noodles. Each type brings its own flavor. Choose what you enjoy best! Yes, you can make Sticky Beef Noodles ahead of time. Cook the noodles and beef separately. Store them in airtight containers. When you want to eat, just reheat them. Add a little water or sauce to help with moisture. This way, your meal stays tasty. Sticky Beef Noodles come from Asian cuisine. Many people think they started in China. Different regions have their own versions. Chefs use local ingredients and flavors. This dish blends savory sauces with tender beef and fresh veggies. It’s loved worldwide for its rich taste. In this blog post, we explored how to make Sticky Beef Noodles. We covered the full list of ingredients, tasty variations, and helpful cooking tips. Remember to pay attention to the texture of the noodles and the tenderness of the beef. Avoid common mistakes for the best results. This dish is not only flavorful but also allows for many personal twists. Enjoy your cooking journey, and don't hesitate to try new combinations that fit your taste!

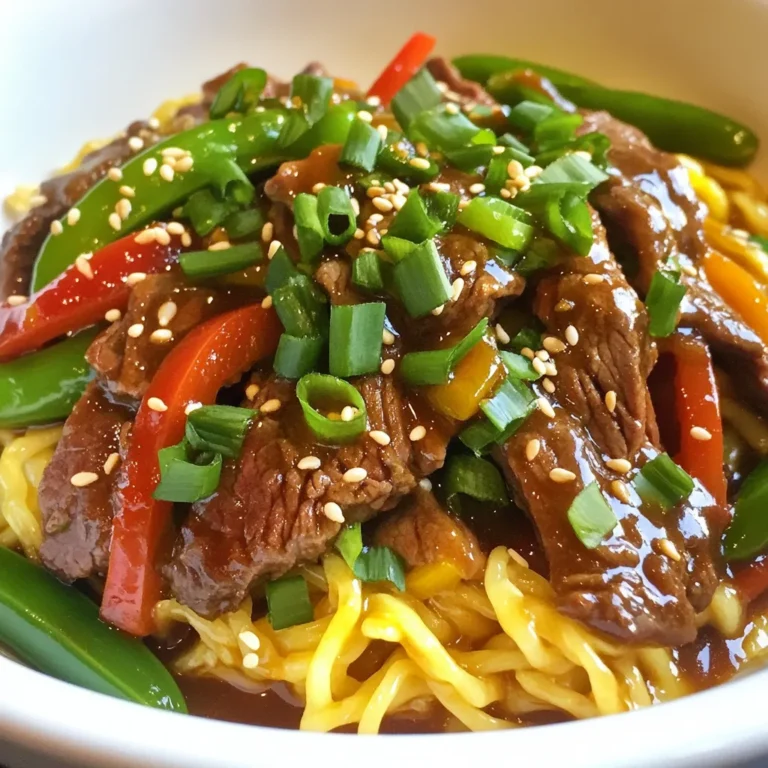
Sticky Beef Noodles Flavorful and Easy Home Recipe

To make a delicious Thai peanut noodle salad, you need some key ingredients. Here’s what you will need: - 8 oz rice noodles - 1 cup shredded red cabbage - 1 cup shredded carrots - 1 red bell pepper, thinly sliced - 1 cucumber, julienned - 1/2 cup fresh cilantro, chopped - 1/4 cup green onions, thinly sliced - 1/2 cup unsalted peanuts, roughly chopped - 1 tablespoon sesame oil These ingredients bring bright colors and crisp textures to your salad. The veggies add crunch, while the noodles give it a hearty feel. The peanut sauce is the star of this dish. Here’s what you need to create it: - 1/2 cup creamy peanut butter - 2 tablespoons soy sauce - 2 tablespoons maple syrup - 1 tablespoon lime juice - 1 tablespoon sesame oil - 1 teaspoon freshly grated ginger - 1 teaspoon sriracha (adjust to taste) - 2-3 tablespoons water (to thin if necessary) This sauce is rich and creamy with a hint of sweetness and spice. It ties all the ingredients together. Garnishes add a nice touch to your salad. Here are a few you might like: - Chopped peanuts for crunch - Fresh cilantro for extra flavor - A drizzle of sesame oil for richness Using these garnishes enhances both the look and taste of your dish. Try to make it visually appealing! {{ingredient_image_1}} First, boil a large pot of water. Add the rice noodles to the boiling water. Cook them until they are al dente, which takes about 4 to 6 minutes. Stir gently to prevent sticking. Once cooked, drain the noodles. Rinse them under cold water to stop the cooking process. Set the noodles aside. Next, grab a large mixing bowl. Add the shredded red cabbage, shredded carrots, and sliced red bell pepper. Toss in the julienned cucumber, chopped cilantro, and sliced green onions. Mix well to combine all the colorful veggies. This step adds crunch and freshness to your salad. Now, let’s make the peanut sauce. In a separate bowl, whisk together creamy peanut butter and soy sauce. Add maple syrup and lime juice to the mix. Then, stir in sesame oil, grated ginger, and sriracha. If your sauce is too thick, add water one tablespoon at a time until it reaches a smooth consistency. In the large bowl with vegetables, add the cooked rice noodles. Pour the peanut sauce over the noodles and veggies. Gently toss everything together until it is well coated. This step is key for evenly mixing the flavors. Divide the salad into bowls or plates. For a crunchy texture, sprinkle chopped peanuts on top. You can also drizzle with extra sesame oil if you like. Garnish with additional cilantro and a sprinkle of sesame seeds for a beautiful touch. Enjoy your vibrant and flavorful Thai Peanut Noodle Salad! To make a great peanut sauce, start with creamy peanut butter. Whisk it well with soy sauce, maple syrup, lime juice, and sesame oil. Fresh ginger adds a nice kick. If you like it spicy, add sriracha. If the sauce is thick, add water slowly until it’s smooth. This sauce makes the salad pop with flavor. You can change the salad to fit your taste. Add more veggies like snap peas or radishes. You can also swap in different herbs like mint or basil. If you want more crunch, add different nuts. You can even mix in grilled chicken or shrimp for extra protein. The fun part is making it your own. When serving, think about the look. Use a big bowl and toss the salad gently. This helps keep the noodles and veggies intact. Top with chopped peanuts for crunch. For an extra touch, drizzle more sesame oil and add fresh cilantro. This makes the dish colorful and inviting. Pro Tips Cook Noodles Perfectly: Make sure to follow the package instructions for the rice noodles to achieve the ideal al dente texture. Overcooking can lead to mushy noodles. Veggie Variations: Feel free to mix in other vegetables like bell peppers, snap peas, or edamame for added color and nutrition. This salad is versatile! Adjusting Spice Level: Customize the heat of the peanut sauce by adjusting the amount of sriracha. Start small and add more as needed to suit your taste. Chill Before Serving: For the best flavor, let the salad chill in the refrigerator for about 30 minutes before serving. This allows the flavors to meld beautifully. {{image_2}} You can easily make this salad vegetarian or vegan. Use rice noodles, which are plant-based. The peanut sauce is already vegan with peanut butter and maple syrup. To add more plant power, toss in chickpeas or edamame. These will boost protein and flavor without losing the essence of the dish. If you need a gluten-free option, stick with rice noodles. They are naturally gluten-free. For the sauce, make sure to use gluten-free soy sauce or tamari. This way, you can enjoy the same great taste without any gluten. Adding protein can make this salad heartier. For a vegetarian choice, include tofu. Simply cube it and sauté until golden. If you prefer meat, grilled chicken works great. Slice it thin and mix it in. Both options will enhance the dish and make it a complete meal. To store your Thai Peanut Noodle Salad, place it in an airtight container. Make sure to let it cool to room temperature first. This helps keep it fresh. The salad will last in the fridge for about three days. Keep the peanut sauce separate if you can. This will help the noodles stay firm. When you want to eat the salad again, you can enjoy it cold. If you prefer it warm, heat it gently. Use a pan over low heat. Add a splash of water to keep it moist. Stir until heated through. Be careful not to overcook it, as that can make the noodles mushy. Meal prep makes life easier! Cook the rice noodles and chop the veggies in advance. Store them separately. You can also make the peanut sauce ahead of time. Keep everything in the fridge. When you are ready to eat, mix them together. This way, your salad stays fresh and tasty! If you don't have peanut butter, you can try almond butter or sunflower seed butter. Both give a nice creamy texture. You can also use tahini, which is made from sesame seeds. It will change the flavor a bit, but it works well in a pinch. The salad will stay fresh for about three days in the fridge. Keep it in an airtight container. The noodles may soak up some sauce, so you might want to add a bit more sauce before serving again. Yes, you can make this salad ahead of time. You can prepare the noodles and the sauce in advance. Just store them separately. Mix them together when you're ready to eat. This keeps everything fresh and crunchy. Yes, this recipe can be gluten-free. Just use gluten-free soy sauce or tamari. The rice noodles are naturally gluten-free, so you can enjoy this dish without worry. This blog post showed you how to make a tasty Thai peanut noodle salad. We covered the main ingredients, the peanut sauce, and optional garnishes. You learned step-by-step instructions, tips for perfecting the dish, and variations to suit your needs. In my final thoughts, enjoy this recipe's fun flavors. Don’t shy away from customizing it. Remember, it's all about making it your own!

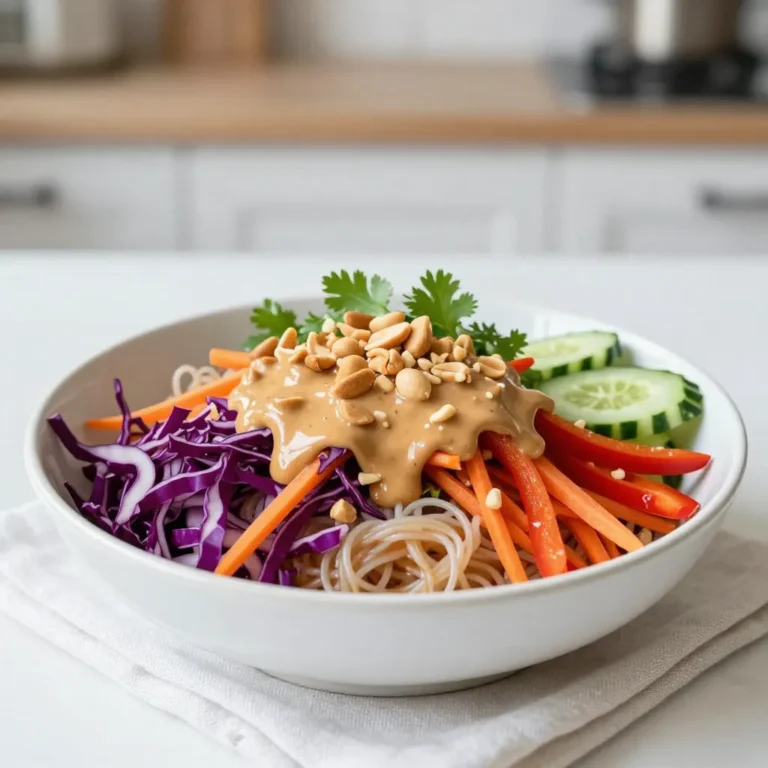
Thai Peanut Noodle Salad Vibrant and Flavorful Dish

To make crispy sweet potato hash browns, you need the following: - 2 large sweet potatoes, peeled and grated - 1 cup shredded sharp cheddar cheese - 1/2 cup green onions, finely chopped - 1/4 cup all-purpose flour (or almond flour for a gluten-free option) - 1 large egg, beaten - 1 teaspoon garlic powder - 1/2 teaspoon smoked paprika - Salt and pepper to taste - 3 tablespoons olive oil or coconut oil for frying If you want to swap out some ingredients, here are some ideas: - Sweet Potatoes: You can use regular potatoes, but sweet potatoes add more flavor. - Cheese: Use mozzarella or pepper jack for a different taste. - Flour: Almond flour is great for a gluten-free option. You can also try oat flour. - Egg: If you need a vegan option, use a flax egg (1 tablespoon ground flaxseed mixed with 3 tablespoons water). When choosing sweet potatoes, look for these signs of freshness: - Firmness: Pick sweet potatoes that feel firm. Avoid any that are soft or have spots. - Skin: Choose those with smooth skin. Wrinkles can mean they are old. - Color: Look for vibrant, deep orange or purple colors. This shows good quality. - Size: Medium-sized sweet potatoes are often sweeter and more tender than larger ones. These tips can help you make the best sweet potato hash browns. Enjoy the cooking process! {{ingredient_image_1}} Start by peeling the sweet potatoes. Use a box grater or food processor to grate them. Grating helps them cook evenly. Next, put the grated sweet potatoes into a clean kitchen towel. Squeeze out the extra moisture. This step is very important. Less moisture means crispier hash browns. In a large bowl, combine the grated sweet potatoes with shredded cheese, chopped green onions, and flour. Add the beaten egg, garlic powder, smoked paprika, salt, and pepper. Mix well until everything is combined. Use your hands to form small patties. Each patty should be about the size of your palm. This size allows them to cook evenly and get crispy. Heat one tablespoon of olive oil in a large skillet over medium heat. Carefully place the patties in the hot oil. Be sure not to overcrowd the pan. Cook each side for about 4 to 5 minutes. You want them to be golden brown and crispy. Once they are done, transfer the hash browns to a paper towel-lined plate. This helps drain out any extra oil. Repeat with the rest of the mixture, adding more oil as needed. Serve warm and enjoy! To get crispy sweet potato hash browns, moisture control is key. After grating the sweet potatoes, place them in a clean kitchen towel. Squeeze out as much water as you can. This step helps the hash browns crisp up nicely. The less moisture, the better the texture. You can cook sweet potato hash browns in two ways: pan-frying or baking. - Pan-Frying: This method gives the hash browns a golden crust. Use olive oil or coconut oil for frying. Heat the oil in a skillet over medium heat. Cook the patties for about 4-5 minutes on each side. - Baking: For a healthier option, you can bake the hash browns. Preheat your oven to 425°F (220°C). Place the formed patties on a baking sheet lined with parchment paper. Brush them lightly with oil. Bake for about 20-25 minutes, flipping halfway through to get both sides crispy. If you have leftovers, store them properly for the best taste. Let the hash browns cool completely. Place them in an airtight container. You can keep them in the fridge for up to 3 days. For longer storage, freeze them in a single layer on a baking sheet. Once frozen, transfer them to a freezer bag. They will stay fresh for about 2 months. When ready to eat, reheat in the oven or on a skillet for the best texture. Pro Tips Drain Excess Moisture: Squeezing out as much moisture as possible from the grated sweet potatoes is essential for achieving that perfect crispy texture. Use a Non-Stick Skillet: A non-stick skillet can help prevent the hash browns from sticking, making it easier to flip and achieve a golden browning on both sides. Experiment with Cheese: While sharp cheddar adds a great flavor, feel free to experiment with other cheeses like pepper jack or gouda for a unique twist. Keep the Heat Steady: Maintaining medium heat is key. Too high and they may burn on the outside while remaining raw inside; too low and they won't crisp up. {{image_2}} You can change the flavor of your sweet potato hash browns by using different cheeses. Try using mozzarella for a mild taste. For a more robust flavor, use feta or pepper jack. Mixing cheeses can add depth. Just remember to keep the cheese shredded for easy melting. This will help create that crispy, cheesy crust that we all love. Adding veggies is a great way to boost nutrition. You can mix in grated zucchini or finely chopped bell peppers. Spinach or kale also works well. Fresh herbs like parsley or cilantro add a bright touch. Just make sure to chop them finely. This keeps your hash browns from getting too wet. The key is to balance flavors and textures while keeping them delicious. If you want a gluten-free version, use almond flour instead of regular flour. This keeps the texture right while making it gluten-free. For vegan options, skip the egg and add a bit of flaxseed meal mixed with water. This acts as a binding agent. You can also use nutritional yeast for a cheesy flavor without dairy. These changes keep your hash browns tasty and suitable for everyone, no matter their diet. You can store leftover sweet potato hash browns in the fridge. Place them in an airtight container. They will stay fresh for about 3 to 5 days. Make sure they cool down before you store them. This helps keep them crispy. If you want to save some for later, freezing is a great option. First, let the hash browns cool completely. Then, place them in a single layer on a baking sheet. Freeze them for about 1 to 2 hours. Once frozen, transfer them to a freezer-safe bag. They can last up to 2 months in the freezer. Just label the bag with the date. To reheat your hash browns, the oven works best. Preheat your oven to 400°F (200°C). Spread the hash browns on a baking sheet in a single layer. Bake for about 10 to 15 minutes until they are hot and crispy. You can also use a skillet. Heat a little oil, then add the hash browns. Cook on medium heat for about 5 minutes on each side. This gives you that nice crunch again. To make sweet potato hash browns crispy, remove excess moisture. After grating the sweet potatoes, place them in a clean kitchen towel and squeeze out the water. This step is key. A drier mixture fries better. When cooking, use enough oil in the skillet. Don’t overcrowd the pan; it can lead to steaming instead of frying. Fry each side until golden brown, which takes about 4-5 minutes. Yes, you can make sweet potato hash browns without eggs. Instead of using an egg, you can use a flaxseed meal or chia seed mixture. Mix 1 tablespoon of flaxseed meal or chia seeds with 2.5 tablespoons of water. Let it sit for a few minutes until it becomes gelatinous. This will help bind the sweet potato mixture together. Sweet potatoes are packed with nutrients. They are high in fiber, which helps digestion. They also contain vitamins A and C, which are good for your skin and eyes. Sweet potatoes have antioxidants, which protect your cells. Additionally, they are lower on the glycemic index compared to regular potatoes. This means they can help control blood sugar levels. Eating sweet potatoes can be a healthy choice in many dishes. This blog post covered the best ways to make sweet potato hash browns. We explored ingredients, cooking steps, and useful tips for great texture. You learned about variations and storage too. Sweet potatoes are versatile and tasty, making them a fun choice. Use these tips to enjoy delicious meals. With simple changes, you can customize this dish to your taste. Keep experimenting for the best results!

Sweet Potato Hash Browns Crispy and Delicious Recipe

- 4 boneless, skinless chicken thighs - 1 cup pineapple juice - 1/4 cup soy sauce You want tasty chicken, so I use boneless, skinless chicken thighs. They cook well and stay juicy. Pineapple juice adds sweetness and tartness. It also helps tenderize the chicken. Soy sauce gives the dish a nice salty kick. These three work together to create a flavorful base. - 2 tablespoons honey - 2 cloves garlic, minced - 1 tablespoon grated fresh ginger Honey adds a rich sweetness to the marinade. It balances the saltiness of the soy sauce. Garlic brings depth and aroma. Fresh ginger adds a zing that brightens the dish. All these flavors mix well and enhance the chicken. - 1 tablespoon cornstarch (optional, for thickening) - 2 green onions, chopped (for garnish) - Sesame seeds (for garnish) - Salt and pepper to taste Cornstarch is optional. If you want a thicker sauce, use it. Green onions give a fresh crunch and color. Sesame seeds add a nutty touch and nice texture. Don’t forget salt and pepper to season the chicken before grilling. These final touches make your dish pop! {{ingredient_image_1}} To start, combine the marinade ingredients. In a large bowl, mix 1 cup of pineapple juice, 1/4 cup of soy sauce, 2 tablespoons of honey, 2 minced garlic cloves, and 1 tablespoon of grated ginger. Whisk until everything blends well. Next, add the 4 chicken thighs to the bowl. Make sure the chicken is fully submerged in the marinade. Cover the bowl and place it in the fridge. Marinate for at least 1 hour. If you can, let it sit overnight. This gives the chicken time to soak up all those great flavors. Now, it's time to prepare the grill. If you have a gas grill, turn it on and set it to medium-high heat. For charcoal grills, light the coals and let them ash over. Aim for a medium heat level. The ideal grilling temperature is about 375°F to 450°F. This range helps get nice grill marks and cook the food evenly. First, let’s cook the pineapple rings. Place them on the grill for about 3 to 4 minutes per side. You want to see those lovely grill marks, and the pineapple should caramelize a bit. After that, take the marinated chicken thighs out of the marinade. Let the extra marinade drip off, and season the chicken with salt and pepper. Place the chicken on the grill. Cook it for about 6 to 8 minutes per side. The chicken is ready when it reaches 165°F (75°C) inside. This process ensures you get tender, juicy chicken that pairs perfectly with the sweet pineapple. - How to achieve perfect grill marks: Start with a clean grill. Preheat it to medium-high heat. Place the chicken on the grill and don’t move it for 4-5 minutes. This helps create those lovely grill marks. Flip once and let it cook for another 6-8 minutes. - Avoiding dry chicken: Marinate the chicken for at least one hour. This keeps the chicken juicy. Also, don’t overcook it. Use a meat thermometer to check the internal temperature. Aim for 165°F (75°C) for perfectly cooked chicken. - Methods for thickening teriyaki sauce: You can use cornstarch mixed with water. This is a quick way to thicken your sauce. Another option is to simmer it until it reduces. Both methods give you a rich, sticky sauce. - When to apply thickener: If you want a thicker sauce, do this while the chicken grills. Pour the leftover marinade into a saucepan. Bring it to a boil before adding the cornstarch mixture. Simmer it for a few minutes until it thickens. - Serving suggestions for a gourmet look: Use a nice platter for serving. Arrange the grilled chicken and pineapple neatly. Add extra pineapple rings and drizzle the thickened sauce over the top. It looks fresh and inviting. - Pairing options for a complete meal: Serve this dish with steamed rice or a vibrant salad. You can also add a refreshing drink, like iced tea or a fruity soda, to enhance the meal experience. Pro Tips Marinate Longer for Flavor: For the best flavor, marinate the chicken thighs overnight. This allows the flavors to penetrate deeper into the meat, resulting in a more delicious dish. Use Fresh Pineapple: Fresh pineapple not only enhances the flavor but also contains enzymes that help tenderize the chicken. This will give you a juicier and more flavorful result compared to canned pineapple. Check Grill Temperature: Ensure your grill is preheated to the right temperature. A medium-high heat is ideal for grilling chicken, as it helps achieve a nice char while keeping the inside juicy. Rest the Chicken: After grilling, let the chicken rest for a few minutes before slicing. This allows the juices to redistribute, making the chicken more tender and flavorful. {{image_2}} You can switch proteins for this dish. Chicken thighs are great, but tofu works well for a vegetarian option. If you prefer pork, use pork chops or tenderloin. Both choices absorb flavors nicely. You can also play with fruits. While pineapple is sweet and tangy, mango adds a tropical twist. You might try peach slices for a juicy bite. Each fruit brings its own flavor and charm to the dish. To make your teriyaki sauce, combine soy sauce, honey, garlic, and ginger. You can also try making a homemade version. Use equal parts soy sauce and honey, and add garlic and ginger to taste. If you like spice, add red pepper flakes or sriracha for heat. For a gluten-free option, replace soy sauce with tamari. This keeps the flavor but fits special diets. This dish pairs well with many sides. Steamed rice is a classic choice. It soaks up the sauce and balances the sweet and savory flavors. You can also serve it with a fresh salad for crunch. For drinks, a light beer or iced tea complements the dish. A fruity cocktail also works well, adding a fun twist. These pairings enhance the meal and make it even more enjoyable. To store leftover grilled pineapple teriyaki chicken, let it cool first. Place it in an airtight container. This helps keep the chicken fresh. You can store it in the fridge for up to four days. Always remember to check for any bad smells before eating. You can freeze cooked chicken and pineapple for later. First, let them cool completely. Then, put them in freezer bags or containers. Make sure to squeeze out excess air to prevent freezer burn. This dish can last in the freezer for up to three months. When you’re ready to eat, thaw it in the fridge overnight. Reheat in a skillet over medium heat until warm, or use a microwave. For meal prep, cut the chicken and pineapple into portions. This makes it easy to grab and go. You can also mix the chicken with rice or veggies for a complete meal. Freezer-friendly options include marinating extra chicken to grill later. Just remember to label your bags with dates for easy tracking. You should marinate the chicken for at least 1 hour. This helps the chicken absorb all the tasty flavors. For even better results, marinate it overnight. The longer it sits, the more flavor it gets. Just remember, too long may make it mushy. Yes, you can use chicken breasts. They cook faster than thighs, so keep that in mind. Breasts have less fat, which means they may dry out quicker. Make sure to check the temperature often. Cook them for about 5-7 minutes per side. Fresh pineapple is best for this recipe. It adds a bright, juicy flavor. Canned or frozen pineapple can work but may lack that fresh taste. If you use canned, drain it well. Fresh pineapple also caramelizes nicely on the grill. To check if your chicken is cooked, use a meat thermometer. Insert it into the thickest part of the thigh or breast. The safe cooking temperature is 165°F (75°C). This ensures it is safe to eat and juicy. If you don’t have a thermometer, cut into the chicken. It should be white, with no pink inside. This recipe post covered everything you need for a tasty grilled chicken dish. We explored key ingredients, from chicken thighs to fresh ginger. I shared steps for marinating, grilling, and perfecting your sauce. You learned tips to avoid dry chicken and make your meal look gourmet. In the end, this dish is easy to customize and perfect for sharing. Try different flavors and sides to make it your own. Enjoy cooking and impress your family and friends!

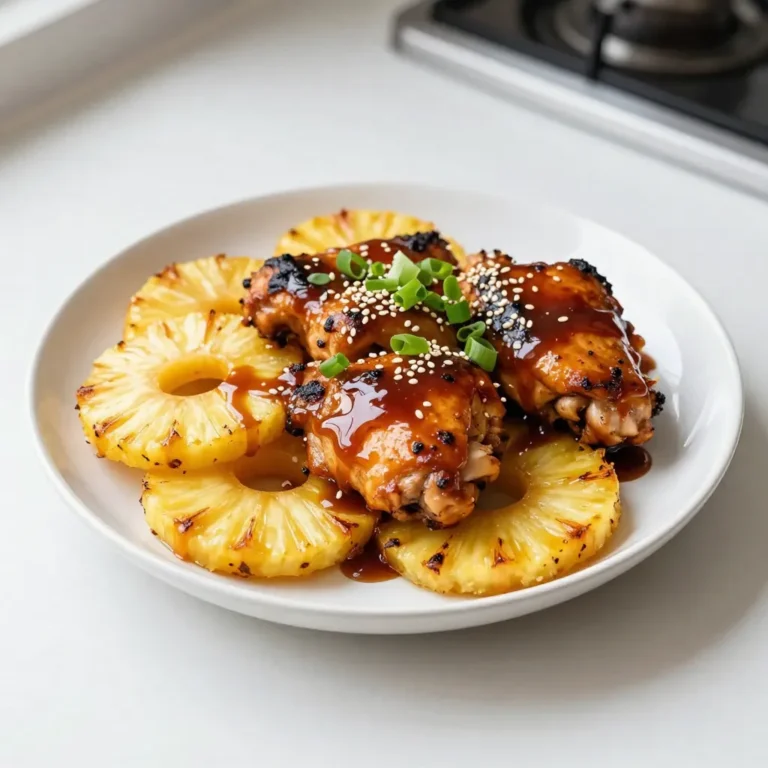
Grilled Pineapple Teriyaki Chicken Flavorful Delight

To make a rich and tasty Butternut Red Pepper Soup, gather these fresh ingredients: - 1 medium butternut squash, peeled and cubed - 2 red bell peppers, roasted and peeled - 1 medium onion, diced - 2 cloves garlic, minced - 4 cups vegetable broth - 1 teaspoon ground cumin - 1 teaspoon smoked paprika - 2 tablespoons olive oil - ½ cup coconut milk (optional for creaminess) - Fresh cilantro or parsley for garnish These ingredients work together to create a warm and comforting soup. The butternut squash gives it a sweet base, while the red bell peppers add a pop of color and flavor. Garlic and onion bring depth to the taste, and spices like cumin and smoked paprika give it a unique twist. I love using coconut milk for that extra creaminess, but you can skip it if you prefer. Fresh herbs on top make the soup look beautiful and add a nice finish. With this list, you are ready to create a delicious bowl of Butternut Red Pepper Soup! {{ingredient_image_1}} Start by preheating your oven to 400°F (200°C). Peel the butternut squash and cut it into cubes. In a bowl, toss the cubes with one tablespoon of olive oil, salt, and pepper. Spread them out on a baking sheet. Roast the squash for 25 to 30 minutes. You want it tender and caramelized. This step adds sweetness to the soup. While the squash roasts, take two red bell peppers. Place them on another baking sheet in the oven. Roast the peppers for about 20 to 25 minutes. You should see the skin charred. Once done, take them out and put them in a bowl. Cover the bowl with plastic wrap. Let them sit for 10 minutes to soften the skin for easy peeling. In a large pot, heat one tablespoon of olive oil over medium heat. Add the diced onion and stir it until it turns translucent, about 5 to 7 minutes. Next, add the minced garlic, ground cumin, and smoked paprika. Cook this mixture for 1 to 2 minutes. The spices will fill your kitchen with a warm aroma. After the butternut squash is done and the red peppers are peeled and seeded, add them to the pot with the onion and garlic. Pour in the vegetable broth and bring everything to a simmer. Let it cook for about 10 minutes. This helps blend the flavors together nicely. Turn off the heat and take the pot off the stove. Use an immersion blender to puree the soup until it is smooth. If you want a creamier soup, stir in the coconut milk. Mix well and taste. Adjust the salt and pepper to your liking. Ladle the soup into bowls. To add a fresh touch, garnish with chopped cilantro or parsley. This adds color and flavor. Enjoy the warmth and richness of this creamy butternut red pepper soup! To make the best Butternut Red Pepper Soup, start with roasting. Roasting brings out the natural sweetness in the butternut squash and red peppers. It also adds depth to the soup. Aim for a golden brown color when roasting. Use a hot oven, around 400°F (200°C). Spread the veggies evenly on a baking sheet. This helps them cook well and caramelize nicely. For a creamier texture, add coconut milk. It gives the soup a rich, velvety feel. When blending, use an immersion blender for control. Blend until smooth and creamy, but leave some chunks if you like texture. If you want more creaminess, you can add more coconut milk or even a splash of cream. Just adjust the seasoning afterward. Spices make a big difference in this soup. Ground cumin and smoked paprika add warmth and a hint of smoke. They enhance the sweetness of the peppers and squash. Don’t forget to taste as you cook. Adjust salt and pepper to bring out the best flavors. Fresh herbs like cilantro or parsley on top add a burst of freshness. They brighten the dish and make it look lovely. Pro Tips Roast for Flavor: Roasting the butternut squash and red peppers enhances their natural sweetness and adds a depth of flavor to the soup. Use Fresh Herbs: For a burst of freshness, consider adding herbs like thyme or rosemary while sautéing the onions. Adjust Consistency: If you prefer a thicker soup, reduce the amount of vegetable broth. For a thinner soup, add more broth or water. Garnish Wisely: A sprinkle of toasted pumpkin seeds or a drizzle of balsamic reduction can elevate the presentation and flavor of your soup. {{image_2}} You can change this soup based on what you have. Try adding carrots or sweet potatoes for extra sweetness. For a heartier soup, add cooked lentils or beans. Feel free to swap the vegetable broth for chicken broth if you prefer. If you want a burst of flavor, add a splash of lemon juice before serving. This recipe is vegan if you skip the coconut milk. You can use almond milk or oat milk for creaminess. If you enjoy dairy, add heavy cream or sour cream instead of coconut milk. This adds richness and a smooth texture to the soup. Want to spice things up? Add a pinch of cayenne pepper or crushed red pepper flakes. Start with a small amount, then taste and adjust. If you prefer mild soup, leave out any hot spices. This recipe is flexible so you can customize it to fit your taste. To store leftovers of your Butternut Red Pepper Soup, let it cool first. Pour it into an airtight container. Keep it in the fridge for up to five days. Make sure the lid is tight to keep the soup fresh. Label the container with the date you made it. This helps you track how long it has been stored. If you want to keep the soup longer, freezing is a great option. Pour the cooled soup into freezer-safe bags or containers. Leave some space at the top, as soup expands when frozen. Label the bags or containers with the date. You can freeze the soup for up to three months. When you are ready to eat it, you can defrost it overnight in the fridge. To reheat your soup, you have a few choices. The best way is to use a stove. Pour the soup into a pot and heat over medium heat. Stir often to prevent sticking. It should take about 10 minutes to warm up. If you use a microwave, place the soup in a microwave-safe bowl. Heat it in short bursts, stirring in between, until hot. Enjoy your creamy soup warm! Yes, you can use frozen butternut squash. It saves time and still tastes great. Just thaw it and add it directly to the pot. It may need a bit more cooking time. The soup lasts about 5 days in the fridge. Store it in an airtight container. This keeps it fresh and tasty for your next meal. I love pairing this soup with crusty bread or a fresh salad. Grilled cheese also works well for a cozy meal. You can add a dollop of yogurt for a creamy touch. Yes, this soup is gluten-free. All the ingredients are safe for those with gluten sensitivities. You can enjoy it worry-free! Absolutely! This soup tastes even better the next day. Make it ahead of time and reheat when you need it. Just store it in the fridge for up to 5 days. Butternut red pepper soup is easy to make and packed with flavor. We covered key ingredients like squash and bell peppers. I shared step-by-step instructions for preparation, blending, and serving. You learned useful tips for better texture and flavor. I also discussed fun variations and proper storage methods. In my view, this soup is a must-try recipe. It is versatile and comforting. Enjoy it alone or with your favorite sides!

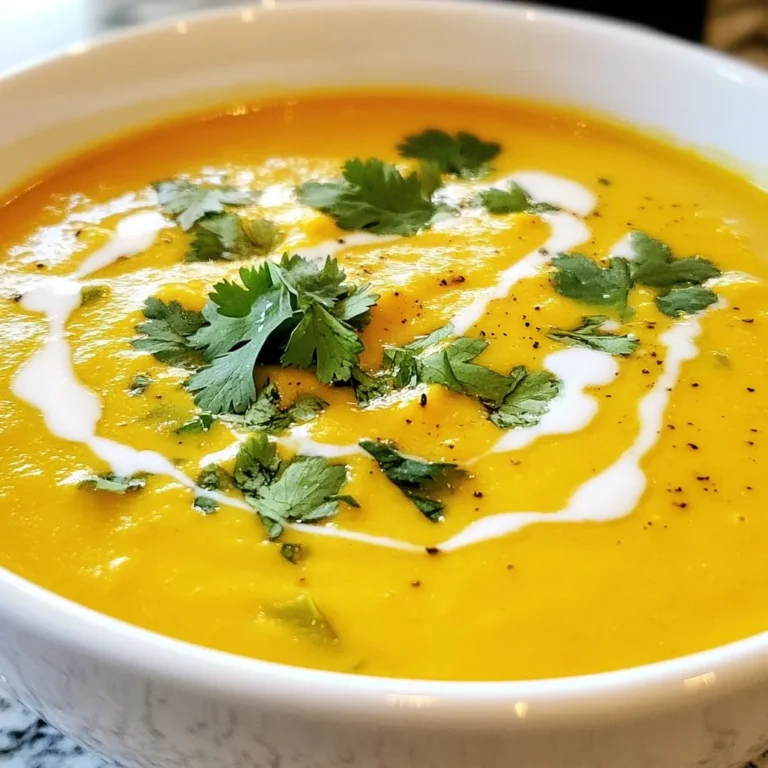
Butternut Red Pepper Soup Creamy and Flavorful Recipe

- 1 lb white fish fillets (cod or tilapia) - 1 cup breadcrumbs - 1/2 cup cornmeal - 1 teaspoon paprika - 1 teaspoon cumin - 1/2 teaspoon garlic powder - 1/2 teaspoon salt - 1/4 teaspoon black pepper - 2 tablespoons olive oil (for frying) - 1 avocado, sliced - 1 cup red cabbage, shredded - 1/2 cup cherry tomatoes, halved - 1 lime, juiced - Fresh cilantro for garnish - Optional toppings: sour cream, salsa, or hot sauce To create my crispy fish taco bowls, I start by choosing the right fish. Cod or tilapia works best due to their mild taste. I take one pound of fish fillets and cut them into bite-sized pieces. This makes them perfect for tacos. Next, I prepare the coating. I mix one cup of breadcrumbs with half a cup of cornmeal. I add one teaspoon each of paprika and cumin for flavor. These spices give the fish a tasty, warm kick. I also toss in half a teaspoon of garlic powder, half a teaspoon of salt, and a quarter teaspoon of black pepper. This mix enhances the fish's taste. I heat two tablespoons of olive oil in a skillet. The oil needs to be hot before I add the fish. I fry the fish pieces for three to four minutes on each side. They should turn golden brown and crispy. Once done, I place them on a paper towel to absorb extra oil. For toppings, I slice one ripe avocado, shred one cup of red cabbage, and halve half a cup of cherry tomatoes. I squeeze fresh lime juice over the bowl for brightness. Fresh cilantro adds a nice touch. I sometimes include optional toppings like sour cream, salsa, or hot sauce for extra flavor. These ingredients come together to form a delightful dish. Each bite offers crispy fish, fresh veggies, and zesty lime. It is simple yet full of flavor. {{ingredient_image_1}} - Preheat your oven to 375°F (190°C). - Pat the fish fillets dry and cut into bite-sized pieces. First, make sure your oven is hot. This will help the fish cook well. Drying the fish helps the coating stick better. Cutting it into small pieces makes it easy to eat. - Combine breadcrumbs, cornmeal, and spices in a large bowl. - Dip and coat each fish piece in the mixture. In a large bowl, mix breadcrumbs, cornmeal, paprika, cumin, garlic powder, salt, and black pepper. This mix gives great flavor. Now, take each fish piece and dip it in the mix. Press it gently to coat well. - Heat olive oil in a skillet and fry fish pieces until golden brown. - Drain on a paper towel-lined plate. Next, heat olive oil in a skillet over medium-high heat. Once it's hot, add the fish pieces. Fry them for about 3-4 minutes on each side. They should turn a nice golden brown. After frying, place them on a paper towel to drain excess oil. - Start with a base of cooked brown rice or quinoa. - Top with crispy fish, avocado, cabbage, and tomatoes. Now, take a serving bowl and add a base of cooked brown rice or quinoa. This will be the hearty part of your bowl. Next, place the crispy fish on top. Then, add slices of avocado, shredded cabbage, and halved cherry tomatoes. - Squeeze lime juice over the bowl. - Garnish and serve immediately. Finally, squeeze fresh lime juice over your bowl. This adds a zesty kick. You can also garnish with cilantro for extra flavor. Serve it right away for the best taste! To get that perfect crispy fish, start with dry fish. Pat it with paper towels to remove moisture. This helps the coating stick well. For frying, heat olive oil until it's hot but not smoking. This will give your fish a golden crust. Fry fish in a single layer. This way, they cook evenly. Cook for 3-4 minutes on each side. Watch closely to avoid burning. If the fish is thick, check for doneness with a fork. The fish should flake easily. If you can't find cod or tilapia, try other white fish. Options like haddock or pollock work well too. For a gluten-free version, use crushed cornflakes instead of breadcrumbs. Almond flour can also be a good substitute. You can even coat the fish in cornmeal alone for a different texture. Making your dish look good is easy! Start with a colorful base of brown rice or quinoa. Layer the crispy fish on top. Add bright red cabbage and yellow cherry tomatoes. Sliced avocado adds a nice creamy touch. For a final pop, sprinkle fresh cilantro on top. A wedge of lime on the side brightens the plate. Consider using vibrant bowls to make it even more appealing. Pro Tips Choose Fresh Fish: Always opt for the freshest fish available for the best flavor and texture. Look for clear eyes and a fresh smell when selecting your fillets. Perfectly Crispy Coating: For an extra crispy texture, let the coated fish pieces rest for about 10 minutes before frying. This helps the coating adhere better during cooking. Customize Your Toppings: Feel free to experiment with different toppings like diced mango, pickled onions, or jalapeños for an added burst of flavor and color to your bowls. Meal Prep Friendly: These bowls can be prepped in advance! Store the fried fish and toppings separately in the fridge, and assemble just before serving for a quick meal. {{image_2}} You can switch up the protein in your taco bowl. Shrimp cooks quickly and has a sweet flavor. Simply season and fry them like the fish. Chicken also works well. Grill or fry it until golden. For a vegetarian option, try grilled vegetables. Bell peppers, zucchini, and onions add great taste. Tofu is another tasty choice. Marinate it, then grill or fry for a nice texture. Spices can change the whole dish. Add chili powder for heat or smoked paprika for depth. A marinade with lime and garlic will give fish a fresh twist. For a fruity touch, use salsas. Mango or pineapple salsa brings sweetness and freshness. They balance the crispy fish perfectly. Think beyond rice! Quinoa offers a nutty flavor and more protein. Cauliflower rice is a low-carb choice. You can also add beans like black beans or pinto beans. Lentils are great for extra protein and fiber. Mix and match to suit your taste! To keep your crispy fish taco bowls fresh, store leftovers in the fridge. Place the fish, rice or quinoa, and toppings in separate containers. Use airtight containers to prevent moisture loss. This helps keep everything tasty and crisp. Recommended storage containers include glass or BPA-free plastic. They seal well and help maintain flavor. Avoid using aluminum foil as it does not seal properly. To reheat the fish and keep it crispy, use an oven or air fryer. Preheat the oven to 375°F (190°C). Place the fish on a baking sheet and heat for about 8-10 minutes. If using an air fryer, set it to 350°F (175°C) and heat for 5-7 minutes. Avoid microwaving the fish as it can make it soggy. For rice or quinoa, add a splash of water and heat in the microwave. Cover with a damp paper towel to keep moisture in. You can freeze the crispy fish, but do it safely. Place the fish in freezer-safe bags. Remove as much air as possible before sealing. This helps prevent freezer burn. As for the bowls, it’s best to freeze components separately. Freeze the fish, rice or quinoa, and toppings in their own bags. This way, you can reheat them without losing texture or flavor. Yes, you can use frozen fish for crispy fish taco bowls. Just make sure to thaw it first. Place the frozen fish in the fridge overnight or use the microwave for quick thawing. Fresh fish offers a better texture and flavor, but frozen works well too. If you use frozen fish, cook it until it reaches 145°F. This ensures it is safe to eat. Crispy fish taco bowls are tasty on their own, but sides enhance the meal. Here are some great options: - Black beans: They add protein and fiber. - Corn salad: Sweet corn complements the fish's flavor. - Cilantro lime rice: This adds a fresh touch. - Guacamole: Creamy and delicious, it pairs perfectly. A serving of crispy fish taco bowls has about 500-600 calories. This depends on your toppings and sides. The fish, rice, and toppings add flavor and nutrients. If you're mindful of calories, use less oil and skip heavy toppings. Yes, you can prepare some ingredients in advance. Cook the rice or quinoa and store it in the fridge. Also, chop veggies like cabbage and tomatoes ahead of time. However, fry the fish just before serving to keep it crispy. This ensures you enjoy the best flavors and textures. This blog post explored crafting delicious crispy fish taco bowls. We covered essential ingredients like fish, spices, and garnishes. You learned step-by-step instructions, from preparing the fish to adding toppings. I shared tips on cooking techniques and storage for leftovers. These bowls are customizable with various proteins and bases. You can enjoy them fresh or reheat them later. Dive into your own fish taco bowl adventure and make it your own!

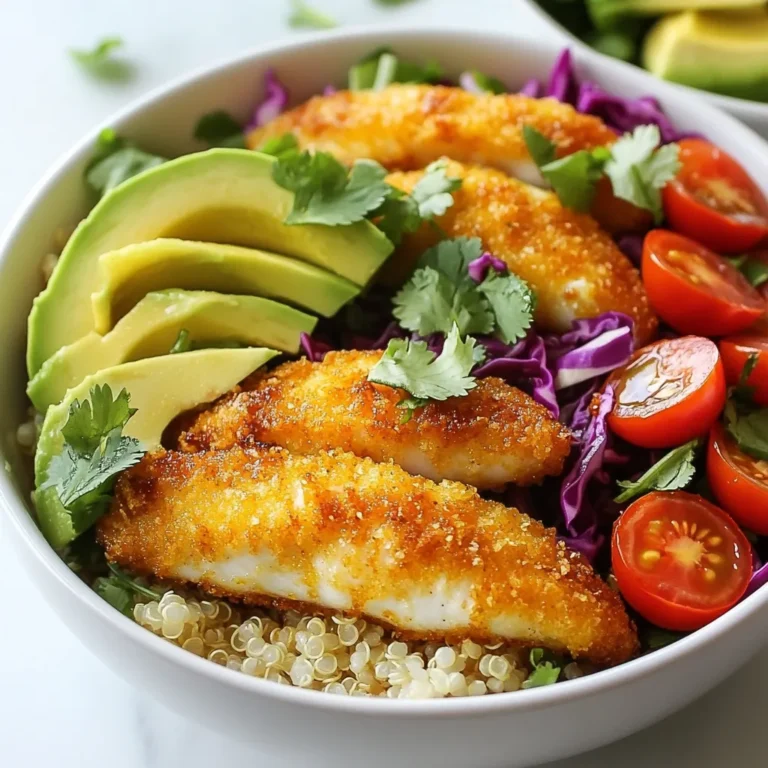
Crispy Fish Taco Bowls Flavorful and Simple Delight

PREV 1 … 78 79 80 … 86 NEXT
spicy fork kitchen

explore

DessertsDinnerAppetizersDrinks

Our Policies

  • Cookie Policy
  • Copyright Policy
  • Disclaimer
  • GDPR Policy
  • Terms Of Use
Back to Top
  • About
  • Contact Us
  • Privacy Policy
© 2025 spicy fork kitchen