FREE DINNER EBOOK! Get your copy!
  • Cookie Policy
  • GDPR Policy
  • Disclaimer
  • Terms Of Use
  • Visit my other site: Fun Cookie Recipes
spicy fork kitchen
  • Home
  • Dinner
  • Desserts
  • Drinks
  • Appetizers
  • Contact
  • About
  • Privacy Policy
  • Home
  • Dinner
  • Desserts
  • Drinks
  • Appetizers
  • Contact
  • About
  • Privacy Policy
  • Cookie Policy
  • GDPR Policy
  • Disclaimer
  • Terms Of Use
Visit my other site: Fun Cookie Recipes

HOME / CATEGORIES /

Latest

- 2 cups cooked ham, diced - 1 cup dry white beans (such as navy or great northern), soaked overnight and drained - 1 medium onion, chopped - 2 carrots, diced - 2 celery stalks, diced - 3 cloves garlic, minced - 6 cups chicken broth - 2 bay leaves - 1 teaspoon dried thyme - 1 teaspoon smoked paprika - Salt and pepper to taste - 2 tablespoons olive oil For this soup, I love using cooked ham. It adds great flavor and richness. The dry white beans give the soup its heartiness. Soaking the beans overnight makes them tender and easy to cook. I always use fresh vegetables: onions, carrots, and celery. They bring sweetness and texture to the dish. Garlic adds a nice kick, and I often use chicken broth for a savory base. Spices like thyme and smoked paprika enhance the flavor profile. Don’t forget salt and pepper to taste. They are key for balancing the dish. A bit of olive oil helps sauté the veggies and adds a hint of richness. - Fresh parsley, chopped (for garnish) - Additional toppings I enjoy adding fresh parsley on top for a burst of color and flavor. It brightens the soup and makes it look lovely. You can also add other toppings, like croutons or a sprinkle of cheese. These can add extra texture and taste. {{ingredient_image_1}} Start with the onion. Chop it into small pieces. Use a sharp knife for safe cutting. Next, take two carrots and dice them into tiny cubes. Then, grab two celery stalks and do the same. The more even the pieces, the better they cook. Soaking the beans is very important. Take one cup of dry white beans. Place them in a bowl and cover with water. Let them soak overnight. This step helps the beans cook faster and become tender. In a large pot, heat two tablespoons of olive oil over medium heat. Add the chopped onion, carrots, and celery to the pot. Sauté these for about five minutes. You want them to soften but not brown. Now, stir in three minced garlic cloves and cook for one more minute. The smell will be amazing! Then, add two cups of diced ham. Mix it well with the vegetables. Pour in six cups of chicken broth. Don’t forget to add the soaked and drained beans. Toss in two bay leaves, one teaspoon of dried thyme, and one teaspoon of smoked paprika. Season with salt and pepper to taste. Stir everything together to combine the flavors. Bring the soup to a boil. Then, reduce the heat to low. Cover the pot and let it simmer for about one and a half to two hours. This slow cooking allows the beans to become tender. After cooking, taste the soup and adjust the seasoning if needed. Remove the bay leaves before serving. Garnish each bowl with fresh, chopped parsley for a bright touch. Enjoy your hearty ham and bean soup! To get the right thickness for your soup, adjust the broth and beans. If you want a thicker soup, use less broth. You can also mash some beans after cooking. This adds creaminess and keeps the soup hearty. If you prefer a thinner soup, simply add more broth. Always stir well after adjusting to mix everything evenly. To boost flavor, add spices and herbs. I recommend thyme and smoked paprika. Thyme brings out the ham's taste, while smoked paprika adds a rich, smoky note. You can also try adding a pinch of cayenne pepper for heat. Fresh herbs like parsley make a great finishing touch. They add color and a burst of freshness. Timing is key to your beans. If you soak your beans overnight, they will cook faster. Check the beans after about an hour of simmering. Taste them to see if they are tender. If they are not, give them more time. Just be careful not to let them get mushy. Keeping an eye on them helps preserve their shape and texture. Pro Tips Soak Your Beans: Soaking the beans overnight helps them cook more evenly and reduces cooking time. Add Flavor with Broth: Using chicken broth instead of water adds a rich flavor to the soup. Adjust Seasoning: Taste the soup before serving and adjust the seasoning as needed to enhance the flavors. Storage Tips: This soup keeps well in the refrigerator for up to 3 days and freezes nicely for future meals. {{image_2}} You can switch up the beans in this soup for fun. While dry white beans are great, you might like black beans or pinto beans. These will add a new flavor twist. If you want a richer taste, try kidney beans. Just remember to soak them overnight, just like white beans. Adding more veggies makes this soup even better. You can use seasonal veggies like spinach or kale for a fresh touch. Potatoes or sweet potatoes add heartiness. Zucchini is also a great choice and cooks quickly. Don’t be shy; mix and match your favorites! If you want to cook this soup differently, a slow cooker works well. Just add all the ingredients, set it on low, and let it cook for 6-8 hours. For a faster option, the Instant Pot is perfect. Set it to manual for about 30 minutes. Both methods create a tasty, rich soup. You can store ham and bean soup in the fridge. Use an airtight container. It will stay fresh for about three to four days. If you plan to eat it later, cool it down first. This keeps the soup from getting too hot in the fridge. Always label your container with the date. This helps you track how long it's been stored. Freezing is a great option for longer storage. Let the soup cool completely before freezing. Use freezer-safe containers or bags. Leave some space at the top of the container. This allows the soup to expand as it freezes. When you want to eat it, take it out and thaw it in the fridge overnight. You can also use the microwave for quicker thawing, but be sure to stir it well. Reheating ham and bean soup is easy. You can use a pot on the stove or the microwave. If using the stove, heat it on medium-low. Stir often to avoid burning. If using the microwave, heat in short bursts. Stop and stir in between to ensure even heating. Always taste and adjust the seasoning if needed. Enjoy the rich flavors once again! Yes, you can use canned beans! Use about three cups of canned beans for this recipe. Rinse the beans to remove extra salt and liquid. This saves time and makes cooking easier. Just add them to the soup in the last 30 minutes of cooking. This way, the beans warm up without getting too soft. Ham & bean soup will last about three to four days in the fridge. Store it in an airtight container. Make sure it cools to room temperature before you put it in the fridge. If you notice any off smells or changes in color, it’s best to throw it away. Safety first! You can enjoy ham & bean soup with many sides! Here are a few ideas: - Crusty bread or rolls for dipping. - A fresh green salad for a crunchy contrast. - Cornbread for a sweet touch. - Pickles or relishes for a tangy bite. These sides make your meal even better and more filling! This blog post covered the essential aspects of making ham and bean soup. We discussed key ingredients, including ham, beans, and vegetables, and shared simple steps for preparation and cooking. I also provided tips for perfecting your soup’s consistency and flavor. Additionally, we explored variations and storage methods to ensure you enjoy this dish multiple times. In conclusion, making ham and bean soup is easy and satisfying. Experiment with flavors and ingredients to find your perfect bowl. Enjoy the process and the delicious results!

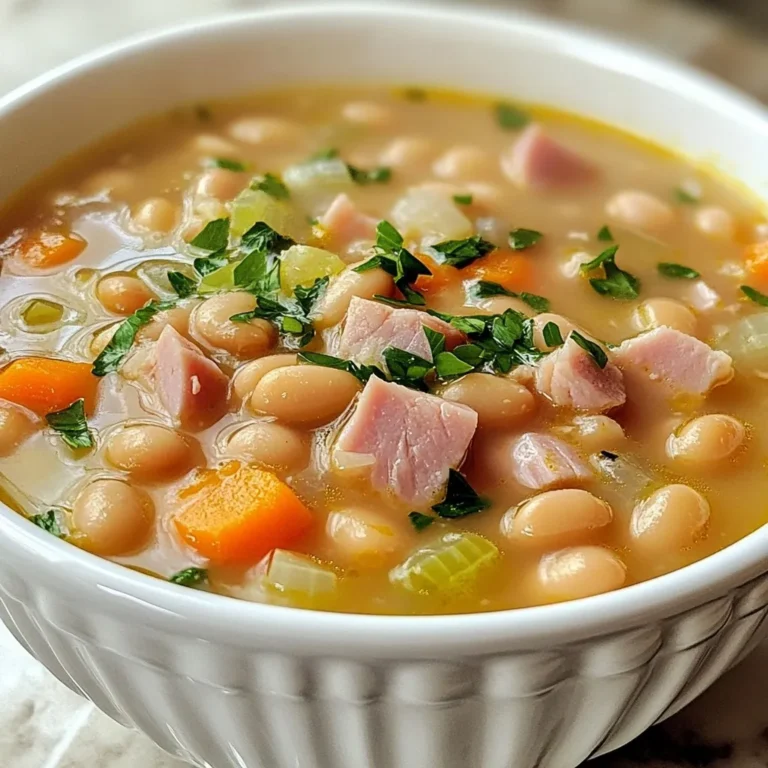
Ham & Bean Soup Rich in Flavor and Nourishment

- 12 ounces fresh cranberries - 1 cup granulated sugar - 1 cup orange juice - Zest of 1 orange - 1/2 teaspoon cinnamon - 1/4 teaspoon ginger powder - Pinch of salt - 1 cup water - Optional: 1/4 cup chopped walnuts or pecans Gather these ingredients before you start. Fresh cranberries are key for a bright flavor. I like to rinse them well to remove any debris. The orange juice adds sweetness and a nice tang. If you can, use fresh-squeezed juice. It makes a big difference! The zest of one orange brings a burst of citrus. The spices, cinnamon and ginger, add warmth and depth. You only need a pinch of salt to bring all the flavors together. The water helps cook the cranberries and forms the sauce base. If you want a crunch, add the nuts at the end. They add great texture and flavor. Make sure you have all these ingredients ready. It makes the cooking process smooth and easy. {{ingredient_image_1}} To start, take a medium saucepan. Add the fresh cranberries and one cup of water. Set the heat to medium and bring this mix to a boil. Once it boils, reduce the heat to let it simmer. This helps the cranberries soften. Next, add one cup of granulated sugar and one cup of orange juice to the pot. If you can, use fresh juice for the best taste. Don't forget to add the zest of one orange. Stir the mixture well so that everything blends nicely. Now, it’s time to add some flavor. Sprinkle in half a teaspoon of cinnamon and a quarter teaspoon of ginger powder. Add a pinch of salt to balance the sweetness. Stir again to mix the spices evenly throughout the sauce. If you like a bit of crunch, you can fold in a quarter cup of chopped walnuts or pecans. This step adds a nice texture and flavor. You should do this during the last two minutes of cooking. After about 10 to 15 minutes, check your sauce. The cranberries should burst, and the sauce should thicken. Remove the saucepan from the heat and let it cool to room temperature. Once it cools, transfer the sauce into an airtight container. Make sure to refrigerate it for at least two hours. For the best taste, let it chill overnight. This helps all the flavors come together beautifully. Using fresh orange juice makes a big difference. It adds bright taste to your sauce. Store-bought juice is fine, but fresh juice shines. Always choose fresh if you can. Resting time is key for flavor. Let your sauce cool and sit in the fridge. This allows flavors to mix well. Aim for at least two hours, or overnight if you can wait. To check if your sauce is thick enough, look for a few burst cranberries. The sauce should coat the back of a spoon. If it runs off too quickly, let it simmer longer. If your sauce is too thick, add a little water. Stir well until it reaches your desired texture. If it’s too thin, cook it longer to reduce it. Serve your sauce in a nice bowl. Add an orange slice on the rim for color. You can also sprinkle some chopped nuts on top. This adds texture and a festive look. Try placing the sauce on a decorative plate. You can use leaves or small flowers for a special touch. This makes your dish stand out. Pro Tips Freshness Matters: Always use fresh cranberries for the best flavor and texture. Frozen cranberries can be used in a pinch, but they may lead to a less vibrant sauce. Adjusting Sweetness: If you prefer a less sweet sauce, reduce the sugar to 3/4 cup or even 1/2 cup. You can always add more sugar later if needed. Flavor Enhancements: Experiment with additional spices like nutmeg or allspice for a unique twist on the classic cranberry sauce. Storage Tips: This sauce can be made up to a week in advance. Just store it in an airtight container in the refrigerator for maximum flavor retention. {{image_2}} You can enhance your cranberry sauce with extra flavors. Try adding spices like nutmeg or cloves. These spices add warmth and depth. Just a pinch can make a big difference. You can also mix in fruits like apples or pears. These fruits add sweetness and a nice texture. Chop them small and add them when you stir in the sugar. If you want a crunchy twist, you can use different nuts. Walnuts or pecans are great, but you can also try sunflower seeds. They add a delightful crunch. Just fold them in during the last few minutes of cooking. This keeps them fresh and tasty. If you prefer less sugar, there are easy swaps. You can replace granulated sugar with honey or maple syrup. Both options give a nice flavor. Adjust the amount to your taste. Remember that honey is sweeter than sugar. So, use less honey than sugar in the recipe. To keep your cranberry sauce fresh, use airtight containers. This helps keep the sauce from drying out or absorbing other smells. You can store the sauce in the refrigerator for up to two weeks. If you want to keep it longer, freezing is a great option. Freezing the cranberry sauce extends its life significantly. You can freeze it for up to six months without losing flavor. Just make sure to leave some space in the container, as it will expand when frozen. Label your containers with the date to keep track of freshness. To safely thaw frozen sauce, move it to the fridge overnight. This keeps it at a safe temperature. If you're in a hurry, you can also thaw it in a microwave on low power. When reheating, do it gently over low heat. Stir often to keep the texture smooth and avoid burning. If it thickens too much, add a bit of water or orange juice to loosen it up. Yes, you can make cranberry sauce ahead of time. I recommend making it at least one day before you plan to serve it. This gives the flavors time to blend. If you're short on time, make it up to three days in advance. Just store it in the fridge in an airtight container. Homemade cranberry sauce can last about one week in the fridge. If you freeze it, it can last for three months. Make sure to use a good airtight container when storing. This keeps it fresh and tasty. Cranberry sauce pairs well with many dishes. Here are some ideas: - Roast turkey or chicken for a classic pairing - Pork chops for a sweet contrast - Grilled cheese for a fun twist - Vanilla ice cream for a perfect dessert These combinations make your meal special and full of flavor. This blog post explored the simple steps to make your own cranberry sauce, including all the ingredients needed and how to prepare them. I shared tips to enhance flavor, achieve the right texture, and suggested creative variations. Remember, making cranberry sauce at home gives you control over taste and freshness. You can customize it to suit your meals and preferences. Enjoy the process and celebrate the delicious results! Happy cooking!

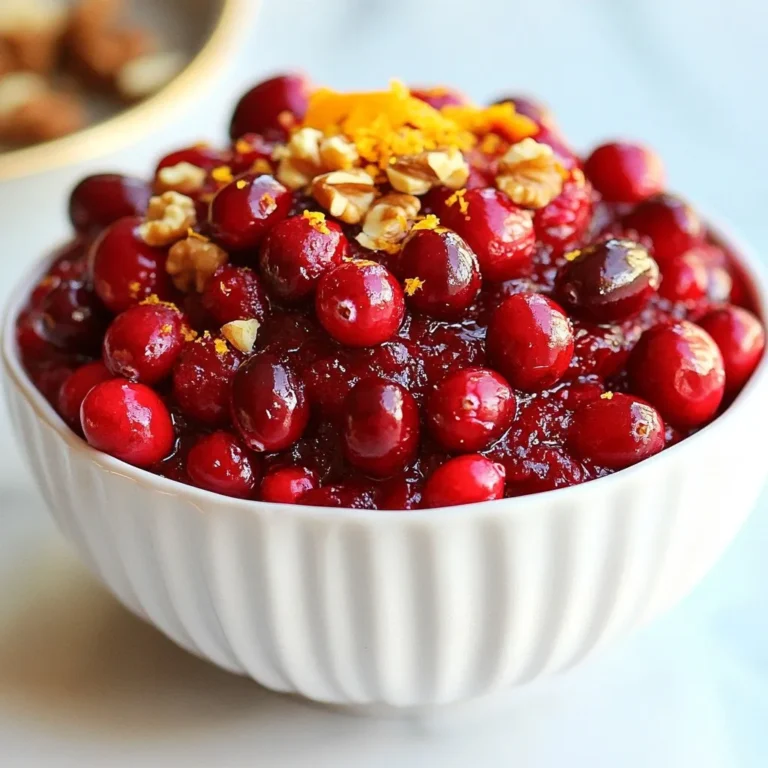
Make-Ahead Cranberry Sauce Simple and Tasty Recipe

To make this tasty dip, you need a few key items: - 8 oz cream cheese, softened - 1/2 cup powdered sugar - 1 tsp vanilla extract - 1/2 cup sour cream - 1 cup caramel sauce, divided - 1 medium apple, finely diced (Granny Smith or Honeycrisp work best) - 1/2 tsp cinnamon These ingredients come together to create a rich and creamy base. The cream cheese gives the dip its smooth texture. The powdered sugar adds sweetness, while the vanilla extract enhances the flavor. Sour cream adds a nice tang, balancing the sweetness. You can add a few more ingredients for added crunch and taste: - 1/4 cup chopped walnuts or pecans These nuts provide a delightful crunch. They also add a nutty flavor that complements the apple and caramel. If you prefer a nut-free option, feel free to skip this ingredient. To enjoy your dip, you will need some tasty dippers: - Sliced apples - Graham crackers Sliced apples are perfect for dipping. They bring a fresh taste and nice crunch. Graham crackers add a sweet touch and are very popular. You can even mix and match your dippers for fun and variety. {{ingredient_image_1}} Start by getting a large mixing bowl. Place 8 oz of softened cream cheese inside. Use a hand mixer to beat it until it is smooth and creamy. This step is key for a great dip base. Next, slowly add in 1/2 cup of powdered sugar. Keep mixing until everything is well blended. Then, pour in 1 tsp of vanilla extract and 1/2 cup of sour cream. Mix again until the dip looks silky and smooth. Now, stir in 1/2 cup of caramel sauce, but save some for later. Add in a medium apple, finely diced, and 1/2 tsp of cinnamon. Gently fold these in until they are mixed well. If you want a crunch, fold in 1/4 cup of chopped walnuts or pecans. Transfer your dip to a serving bowl. Drizzle the remaining caramel sauce on top. This makes it look tasty and inviting. Serve with sliced apples and graham crackers for dipping. Enjoy this simple and delicious treat! To make the creamiest dip, start with softened cream cheese. This helps it blend well. Use a hand mixer to beat the cream cheese until it is smooth. Gradually add the powdered sugar and mix until combined. Then, pour in the sour cream and vanilla extract. Mix again until the dip is silky and smooth. This method ensures a perfect texture. For a beautiful display, use a shallow bowl. Transfer the dip into the bowl. Drizzle the remaining caramel sauce on top. This adds a nice touch. Arrange sliced apples and graham crackers around the bowl for easy dipping. To make it pop, sprinkle a little cinnamon on top. This will catch the eye of your guests. You can switch out ingredients for different flavors. If you want a nutty taste, try adding chopped pecans or walnuts. For a sweeter touch, use flavored caramel sauces like sea salt or chocolate. If you prefer a fruity note, mix in diced pears or berries. These changes can make your dip unique and exciting. Pro Tips Choose the Right Apple: For the best flavor balance, opt for tart apples like Granny Smith or sweet ones like Honeycrisp. They add a nice contrast to the creamy dip. Chill Before Serving: Let the dip chill in the fridge for at least 30 minutes before serving. This allows the flavors to meld together beautifully. Make it Nut-Free: If you're serving guests with nut allergies, simply omit the walnuts or pecans. The dip will still be delicious! Presentation Matters: For an attractive display, use a shallow bowl and drizzle extra caramel sauce on top. Garnish with a sprinkle of cinnamon for added visual appeal. {{image_2}} If you want to skip the nuts, that’s easy! Use seeds instead. Sunflower seeds or pumpkin seeds add crunch without the nut flavor. If you prefer a nutty taste, try almonds or cashews. These nuts blend well with the dip's creaminess. You can change up the caramel sauce for fun flavors. Try salted caramel for a sweet and salty mix. For a spicy kick, use a cinnamon caramel sauce. Chocolate caramel sauce can make this dip extra rich and sweet. Each twist adds a unique taste to your dip. This dip is perfect for fall. You can add pumpkin puree for a festive touch. A pinch of nutmeg can give it a warm flavor. Dried cranberries or raisins can add a pop of color and sweetness. These changes make the dip special for autumn gatherings. To store leftover cheesecake dip, place it in an airtight container. Make sure to seal it tightly. Keep it in the fridge. This way, the dip stays fresh and tasty for later. When you want to enjoy it again, take it out of the fridge. Let it sit at room temperature for about 30 minutes. This helps it soften. If you want to warm it up, you can heat it in the microwave. Use short bursts of 10-15 seconds. Stir between each burst to avoid overheating. The cream cheese dip can last about 3-5 days in the fridge. The apples may brown slightly, but they should stay okay. If you see any changes in smell or texture, it’s best to toss it. Always check the date on your ingredients too. This helps keep your dip safe and delicious. Yes, you can make this dip ahead of time. Prepare it a few hours earlier. Just cover it tightly and place it in the fridge. This dip gets better as the flavors mix. You can serve this dip with sliced apples and graham crackers. Other great options are pretzels and vanilla wafers. These pair well with the sweet and creamy taste. This dip lasts about 3-5 days in the fridge. Store it in an airtight container. If it separates, just stir it gently before serving again. Yes, you can use low-fat cream cheese. The dip will still taste great. It may be a bit less rich but still creamy and delicious. Yes, you can make a vegan version. Use coconut cream instead of cream cheese. For sweetness, use maple syrup or agave nectar. This keeps the creamy texture and flavor. Caramel Apple Cheesecake Dip is a fun and tasty treat. We covered the essential and optional ingredients for rich flavor. You learned step-by-step instructions for a smooth mix and final touches for serving. We shared tips for the creamiest dip and how to present it beautifully. Variations can fit any occasion, and knowing how to store it helps reduce waste. Remember, this dip is easy to make and enjoy. You can create it your way!

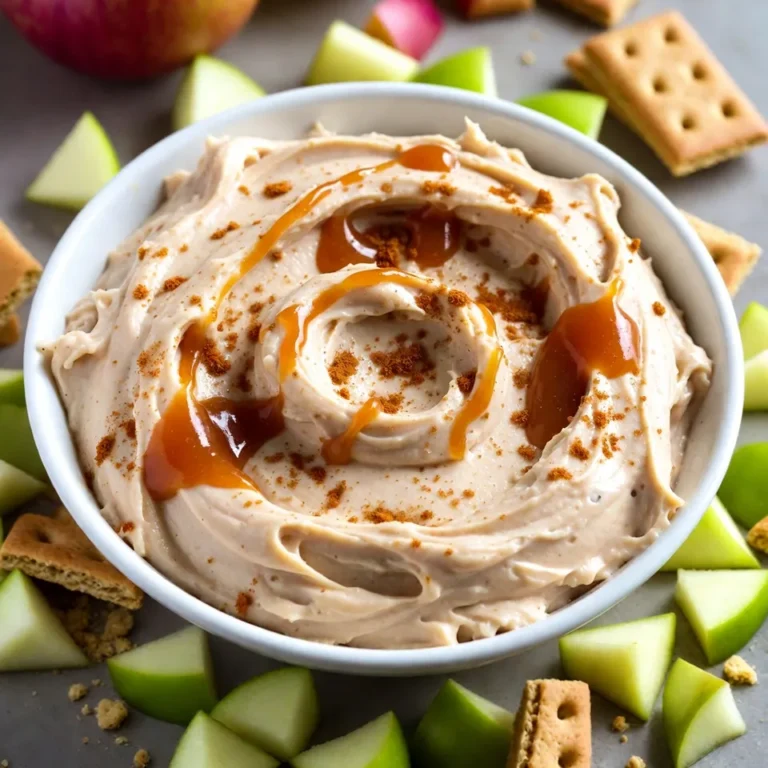
Caramel Apple Cheesecake Dip Tasty and Simple Treat

- 1 sheet of puff pastry, thawed - 2 large onions, thinly sliced - 1 cup Gruyère cheese, grated - 2 tablespoons olive oil - 1 tablespoon balsamic vinegar - ½ teaspoon sugar - Salt and pepper to taste - 2 large eggs - 1 cup heavy cream - Fresh thyme leaves for garnish The main ingredients for this tart are simple yet rich in flavor. Puff pastry forms a light and flaky base. The onions, when caramelized, bring a deep, sweet taste. Gruyère cheese melts beautifully and adds a nutty richness. The aromatics and seasoning elevate the dish. Olive oil helps soften the onions. Balsamic vinegar adds a hint of tang. A bit of sugar helps with the caramelization process. Salt and pepper balance the flavors. The liquid ingredients bind everything together. Eggs provide structure, while heavy cream adds creaminess. Fresh thyme leaves give a touch of green and earthiness, enhancing the dish's overall taste. {{ingredient_image_1}} To caramelize onions, start by slicing two large onions thinly. Heat two tablespoons of olive oil in a large skillet over medium heat. Add the onions along with a pinch of salt. Cook the onions for about 15 to 20 minutes, stirring occasionally. You want them to turn soft and golden brown. After they reach that lovely color, stir in one tablespoon of balsamic vinegar and half a teaspoon of sugar. Cook for an additional five minutes, which will enhance the sweetness. Remove them from the heat and let them cool. Now, let’s get to the puff pastry! Thaw one sheet of puff pastry if it’s frozen. On a lightly floured surface, roll it out to fit your tart pan, about 10 inches wide. Place the pastry in the pan and remember to poke holes in the bottom with a fork. This step helps to prevent bubbling while it cooks. Next, spread the caramelized onions evenly over the puff pastry. Now, sprinkle one cup of grated Gruyère cheese on top of those sweet onions. In a mixing bowl, whisk together two large eggs and one cup of heavy cream. Season this mixture with salt and pepper. Pour it over the cheese and onions in the tart shell. Preheat your oven to 400°F (200°C). Place the tart in the oven and bake for about 25 to 30 minutes. You’ll know it’s done when the filling is set and the pastry turns golden brown. Once baked, let it cool slightly before slicing. Enjoy the rich, savory flavors! To get the best flavor from your onions, slice them thinly. Thin slices cook evenly and caramelize well. Use medium heat to cook the onions slowly. This helps them turn golden brown and sweet. Stir them often, but not too much. Let them relax in the pan for a while. A common mistake is cooking at high heat. This can burn the onions and ruin the flavor. Another mistake is not using enough oil. Oil helps the onions cook evenly and adds taste. To make your tart look fancy, serve it on individual plates. Cut the tart into nice slices and place on each plate. Add a small sprig of thyme on top for color. For sides, a light salad works well. A salad with a simple vinaigrette complements the tart's rich flavors. You can also serve it with a light soup for a complete meal. Want to add more flavor? Try adding fresh herbs like rosemary or basil to the onions. These herbs bring a new twist. You can also mix different cheeses. Cheddar or feta can give a nice taste. For something different, try adding sautéed mushrooms or spinach. These add more texture and flavor to the tart. Pro Tips Choose the Right Onions: For the best flavor, use sweet onions such as Vidalia or Walla Walla, as they will caramelize beautifully and enhance the tart's taste. Perfect Puff Pastry: Ensure your puff pastry is chilled before rolling it out; this helps achieve a flaky and crispy texture when baked. Custom Cheese Blend: While Gruyère is delicious, consider mixing it with other cheeses like Fontina or a sharp cheddar for added depth of flavor. Garnishing Tips: Fresh herbs like chives or parsley can also make a beautiful garnish, adding a pop of color and fresh flavor to your tart. {{image_2}} You can try other cheeses instead of Gruyère. Cheddar gives a sharp taste. Fontina offers a creamy texture. Goat cheese adds tanginess. Mixing cheeses creates a unique flavor. For example, blend Gruyère with goat cheese for a rich taste. Adding more vegetables makes the tart even better. Spinach adds freshness, while mushrooms offer earthiness. Try roasted red peppers for sweetness. Seasonal variations keep the dish exciting. In fall, squash can be a great choice. In spring, asparagus brightens the flavor profile. You can make mini tarts or tartlets for fun servings. Use a muffin tin for smaller sizes. This way, each guest enjoys their own tart. Adjust cooking time to about 15-20 minutes. Watch for a golden color to know they’re done. To keep your Caramelized Onion Gruyère Tart fresh, store it in the fridge. Let it cool first. Then, place it in an airtight container. If you don’t have one, cover it tightly with plastic wrap. This will help keep the tart moist and tasty. When you’re ready to enjoy leftovers, use the oven for the best crispness. Preheat your oven to 350°F (175°C). Place the tart on a baking sheet. Heat for about 15-20 minutes or until it’s warm. Check the center with a knife to ensure it’s hot throughout. You can freeze the tart if you have extra. Wrap it tightly in plastic wrap and then in foil. This helps prevent freezer burn. For thawing, move it to the fridge overnight. After thawing, reheat it in the oven as mentioned above to bring back the crispness. Yes, you can use homemade puff pastry. It may taste fresher than store-bought. Making your own can be fun and rewarding. To make puff pastry at home, follow these tips: - Use cold butter for flakiness. - Roll and fold the dough multiple times. - Chill the dough between folds for better results. This tart pairs well with light side salads. A simple green salad with vinaigrette works great. You can also serve it with dips like tzatziki or hummus. For drinks, consider serving: - A crisp white wine like Sauvignon Blanc. - Sparkling water with lemon for a refreshing option. The tart lasts about 3-4 days in the fridge. Store it in an airtight container for best quality. Signs of spoilage include: - Unpleasant smell. - Mold on the surface. - Changes in texture, such as sogginess. This blog post covered the steps to make a delicious Caramelized Onion Gruyère Tart. We discussed main ingredients like puff pastry and Gruyère cheese, along with tips for perfect caramelized onions. I shared how to assemble and bake the tart, as well as ways to enhance its flavors. In closing, enjoy experimenting with variations, serving ideas, and storage tips. The result is a tasty dish you can share and savor. Happy cooking!

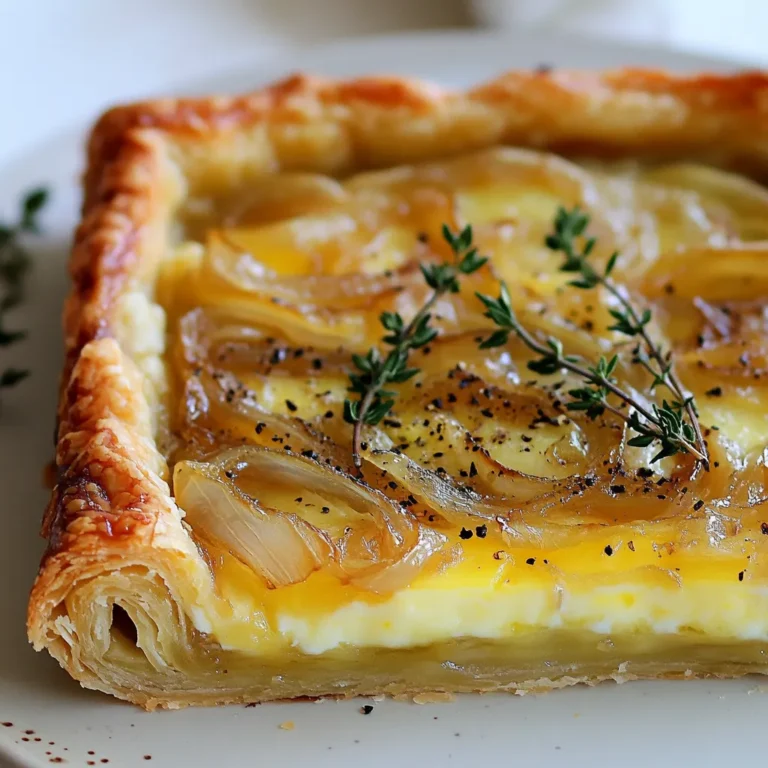
Caramelized Onion Gruyère Tart Tasty and Savory Dish

- 2 boneless, skinless chicken breasts - 1 cup mushrooms, sliced (button or cremini) - 1/2 cup grated Parmesan cheese - 2 tablespoons olive oil - 1 tablespoon butter - 1/4 cup heavy cream - 3 cloves garlic, minced - 1 teaspoon dried thyme - Salt and pepper to taste - Fresh parsley, chopped (for garnish) The main ingredients in Parmesan Garlic Mushroom Chicken include tender chicken breasts, flavorful mushrooms, and rich Parmesan cheese. The chicken provides a great base for this dish, while the mushrooms add earthy notes. Parmesan cheese brings a creamy, salty flavor that enhances everything. For cooking essentials, I recommend olive oil and butter. They work together to create a lovely sear on the chicken. Heavy cream adds richness to the sauce, while garlic and thyme boost the flavor profile. When seasoning, use salt and pepper to enhance the dish. Fresh parsley adds a pop of color and freshness when you serve it. You can easily find all these ingredients at your local store, making this recipe simple and fun to prepare. {{ingredient_image_1}} First, season the chicken breasts. I use salt, pepper, and dried thyme. Make sure to coat both sides well. This step is key. It brings out the chicken's flavor. Next, heat a large skillet over medium-high heat. Add olive oil to the pan. Once hot, place the chicken breasts in the skillet. Sear each side for 5-6 minutes. Look for a golden-brown crust. This gives a nice texture. After cooking, remove the chicken and set it aside. In the same skillet, melt butter. Add sliced mushrooms right away. Cook them for about 5 minutes. You want them browned and tender. Then, add minced garlic for the last minute. This way, it won’t burn. Garlic adds a lovely aroma. Now, lower the heat to medium-low. Pour in heavy cream and mix well. Gradually stir in grated Parmesan cheese. Keep stirring until it melts and becomes smooth. This creates a rich sauce that coats the chicken. Return the chicken to the skillet. Spoon the mushroom sauce over it. Let it simmer for 2-3 minutes. This allows the flavors to blend nicely. The chicken absorbs that creamy goodness. For a great presentation, plate the chicken with sauce on top. Garnish with fresh parsley. It adds color and freshness. For sides, consider a simple salad or steamed veggies. They complement the dish well. For this dish, boneless, skinless chicken breasts work best. They cook quickly and stay juicy. If you prefer, chicken thighs can add more flavor and tenderness. To keep the chicken moist, brine it in salt water for about 30 minutes before cooking. This simple step helps lock in moisture. Button and cremini mushrooms are great choices for this recipe. They add a rich, earthy flavor. When shopping, look for firm, plump mushrooms. Avoid any that are slimy or have dark spots. To clean them, wipe with a damp cloth or paper towel. Rinse briefly under cold water if needed, but dry them quickly. Parmesan cheese is the star here, adding a salty, nutty taste. If you want to switch it up, try pecorino Romano for a sharper flavor. For a dairy-free option, use nutritional yeast or a vegan cream cheese. Both provide a creamy texture without dairy. Pro Tips Use Fresh Herbs: Fresh thyme can enhance the flavor profile significantly compared to dried thyme. Add it just before serving for the best aroma. Perfect Chicken Searing: Ensure the skillet is hot enough before adding the chicken to achieve a nice golden crust. Avoid crowding the pan to maintain high heat. Adjust Creaminess: For a lighter sauce, reduce the amount of heavy cream or substitute with half-and-half. This will still give you a creamy texture without overwhelming richness. Garnish Wisely: Fresh parsley not only adds color but also a fresh flavor. Consider adding a squeeze of lemon juice over the dish before serving to brighten it up. {{image_2}} You can easily add spinach or kale to this dish. These greens cook down well and add nutrients. Toss in a handful during the last minute of cooking. You can also use seasonal vegetables like zucchini or bell peppers. These add color and crunch to your meal. If you want to switch things up, try turkey or pork. Both meats work well with this recipe. Just adjust the cooking time to ensure they are fully cooked. For a vegetarian option, use firm tofu. Press it to remove extra water, then cut it into cubes. Sauté the tofu until golden brown before adding the sauce. You can change the taste by adding spices or fresh herbs. Consider adding a pinch of red pepper flakes for heat. Fresh basil or oregano can brighten the dish. If you want more creaminess, add extra cream or cheese. For a sharper flavor, use aged Parmesan or Pecorino Romano. To keep your Parmesan Garlic Mushroom Chicken fresh, store leftovers properly. Place the chicken in an airtight container. Use a container that seals well to avoid air exposure. You can also cover the dish tightly with plastic wrap. This keeps moisture in and flavors intact. You can freeze Parmesan Garlic Mushroom Chicken for later. First, let it cool completely. Then, place the chicken and sauce in a freezer-safe container. Seal it tightly to avoid freezer burn. When you're ready to eat, thaw the chicken in the fridge overnight. To reheat, warm it in a skillet over medium heat. Stir gently until heated through. Stored in the fridge, your dish lasts about 3 to 4 days. In the freezer, it stays good for up to 3 months. Always check for signs of spoilage. If you see any mold, or if it smells off, do not eat it. Trust your senses; they help keep you safe. Yes, you can use chicken thighs. Thighs have more fat, which gives them extra flavor. They also stay tender and juicy. However, you need to adjust the cooking time. Thighs may take a few minutes longer to cook. Always ensure they reach an internal temperature of 165°F for safety. You can use half-and-half or milk with a bit of butter for a lighter option. If you want a dairy-free choice, try coconut milk or almond milk. Both will give creaminess without the dairy. They may alter the flavor slightly but still taste great. To prep ahead, season the chicken and slice the mushrooms in advance. You can cook the chicken and mushrooms but leave the sauce for later. When ready to eat, just combine everything in a skillet. This will save time on busy days. This dish pairs well with a side of rice or mashed potatoes. You can also serve it with steamed veggies like broccoli or green beans. A fresh salad can add crunch and balance the meal. Choose sides that complement the creamy sauce. Yes, you can add heat easily! Mix in red pepper flakes while cooking the mushrooms. You can also use hot sauce or add diced jalapeños for a kick. Adjust the spice level to fit your taste. This guide covers everything you need to make a delicious Parmesan Garlic Mushroom Chicken. You learned about essential ingredients, cooking steps, and helpful tips. I shared variations, storage info, and frequently asked questions. You can easily adjust the dish to match your taste. Remember, cooking is about creativity and fun. Enjoy experimenting with flavors and sharing your meals with loved ones. Happy cooking!

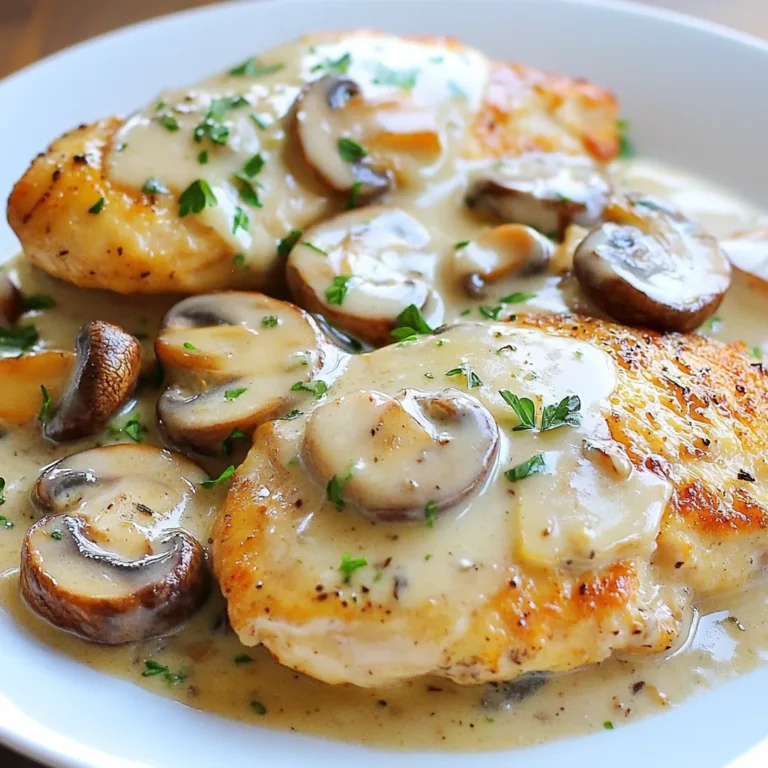
Parmesan Garlic Mushroom Chicken Simple and Tasty Meal

- Chicken and Pasta - 2 boneless, skinless chicken breasts - 8 ounces fettuccine or penne pasta - Sauce Ingredients - 1 tablespoon olive oil - 3 cloves garlic, minced - 1 cup cherry tomatoes, halved - 1 cup heavy cream - ½ cup chicken broth - Seasoning and Garnishes - 1 teaspoon Italian seasoning - 1 teaspoon crushed red pepper flakes (adjust to taste) - ½ cup grated Parmesan cheese - Fresh basil leaves for garnish - Salt and pepper to taste Gather these items before you start cooking. Fresh ingredients make a big difference. You will love how the chicken and pasta combine with the creamy sauce. Each ingredient plays a role in creating rich flavors. The cherry tomatoes add sweetness, while the garlic gives depth. Don’t skip the Parmesan; it brings everything together. Ready your fresh basil for the top. It adds a nice finish and aroma. This dish is about balance, so don’t forget to season well. Taste as you go. Adjust spices to your liking. Enjoy the process and have fun with it! {{ingredient_image_1}} - Cooking Instructions: Start by boiling a large pot of salted water. Add 8 ounces of fettuccine or penne pasta. Cook it according to the package instructions until it is al dente. This usually takes around 8-10 minutes. Drain the pasta and set it aside. Don’t forget to save a little pasta water for later. - Tips for Perfect Texture: To get the best texture, make sure the water is boiling before adding the pasta. Stir it a few times while cooking to prevent sticking. If you want to avoid mushy pasta, taste it a minute or two before the time is up. - Seasoning Tips: While the pasta cooks, season 2 boneless, skinless chicken breasts with salt and pepper on both sides. This simple seasoning makes a big difference in flavor. - Searing Technique: Heat 1 tablespoon of olive oil in a large skillet over medium-high heat. Add the chicken breasts and sear them for about 5-7 minutes on each side. Look for a golden brown color. Once cooked, remove the chicken from the skillet and let it rest for a few minutes before slicing. - Combining Ingredients: In the same skillet, lower the heat to medium. Add 3 cloves of minced garlic and sauté for about 30 seconds until you smell its aroma. Then, toss in 1 cup of halved cherry tomatoes and cook for 3-4 minutes until they soften. - Cooking to Desired Thickness: Pour in ½ cup of chicken broth and bring it to a simmer. Add 1 cup of heavy cream and 1 teaspoon of Italian seasoning. Stir it well and let the sauce simmer for about 5 minutes. It should thicken up nicely. - Mixing Method: Add the cooked pasta and sliced chicken into the skillet with the sauce. Stir everything together well. This helps the pasta soak up all those tasty flavors. - Adjusting Sauce Consistency: If the sauce seems too thick, splash in some reserved pasta water. This will help loosen the sauce and make it creamier. - Presentation Tips: Use wide bowls for serving. This gives a nice look and allows for easy eating. You can also add extra grated Parmesan on top for a rich finish. - Garnishing Ideas: Finish it off with fresh basil leaves. They add a bright color and fresh flavor. For those who love a kick, sprinkle some extra crushed red pepper on top. Ensuring Juicy Chicken To keep your chicken juicy, avoid overcooking it. Sear the chicken until golden, around 5-7 minutes per side. Use a meat thermometer to check the internal temperature. It should be 165°F. Let the chicken rest for a few minutes before slicing. This helps the juices stay inside. Enhancing Flavor Profile To boost the flavor, use fresh garlic and ripe cherry tomatoes. Fresh herbs like basil add a bright taste. Don’t skip the Italian seasoning; it gives a nice depth. Adjust the crushed red pepper to your taste for some heat. Overcooking Pasta Always cook pasta until it's al dente. This means it should be firm when bitten. Overcooked pasta can become mushy and ruin the dish. Check the package instructions and taste a piece before draining. Underseasoning Sauce Taste your sauce before serving. It should have a good balance of flavors. If it’s bland, add more salt and pepper. A touch of lemon juice can also brighten the flavors. Don't be afraid to season! Healthier Alternatives For a lighter option, use whole wheat pasta. You can also swap heavy cream for coconut milk or Greek yogurt. This still gives a creamy texture but lightens the dish. Vegetarian Versions To make it vegetarian, replace chicken with sautéed mushrooms or tofu. Use vegetable broth instead of chicken broth. You can still enjoy the creamy sauce with all the flavors! Pro Tips Perfectly Cooked Pasta: Always cook your pasta al dente for the best texture. It will continue to cook slightly when mixed with the sauce. Flavorful Chicken: Marinate your chicken in olive oil, garlic, and Italian herbs for an hour before cooking to enhance the flavor. Make It Creamy: For an extra creamy sauce, add a bit more heavy cream or a splash of cream cheese when combining the sauce with the pasta. Serve Hot: Always serve this dish immediately after preparation while it's hot, to maintain the creamy texture and enhance the flavors. {{image_2}} Different Pasta Types You can use any pasta you like for Marry Me Chicken Pasta. Fettuccine and penne work well. You can also try farfalle or rotini. Each pasta shape holds the sauce differently. This makes the dish unique every time you cook it. Adding Veggies Adding veggies is a great way to boost flavor and nutrition. Spinach, zucchini, or bell peppers blend well. You can sauté them with the garlic and tomatoes. This adds color and makes your dish more vibrant. Spice It Up Want more heat? Add extra crushed red pepper flakes. You can also use cayenne pepper for a kick. Adjust the amount based on your taste. This allows you to enjoy the dish just how you like it. Adding Cheese Variations Parmesan cheese is a classic choice. However, you can mix in mozzarella or fontina for creaminess. A sprinkle of goat cheese on top adds tanginess. These options add depth to the dish and keep it exciting. Quick Weeknight Dinner This dish is perfect for busy nights. It cooks in about 30 minutes. You can have a tasty meal ready in no time. Just follow the easy steps, and you’ll impress your family. Romantic Dinner Ideas Marry Me Chicken Pasta is also great for date night. Serve it with a side salad and a nice wine. The creamy sauce and tender chicken create a cozy feel. It’s sure to make the evening special. To keep your Marry Me Chicken Pasta fresh, first cool it to room temperature. Then, place it in an airtight container. - Refrigeration Instructions: Store the pasta in the fridge for up to three days. Make sure the lid is tight to keep moisture in. - Freezing Tips: If you want to freeze it, use a freezer-safe container. It can last for up to three months. When you are ready to eat the leftovers, you can reheat them easily. - Best Methods for Reheating: The microwave works well for quick reheating. Alternatively, use a skillet on low heat for even warming. - Avoiding Dryness: Add a splash of chicken broth or cream when reheating. This keeps the dish moist and creamy. Knowing how long your Marry Me Chicken Pasta lasts helps you plan meals. - How Long It Lasts in the Fridge: It stays good in the fridge for three days. - How Long It Lasts in the Freezer: In the freezer, it can last for three months. Just remember to label your container with the date! Marry Me Chicken Pasta is a creamy dish with chicken and pasta. The name hints at its rich, delicious flavor. Some say it may win hearts at the dinner table. This dish combines chicken, pasta, and a creamy sauce. It often includes garlic, tomatoes, and Parmesan cheese. The dish is both comforting and fancy. It fits well for dates or family dinners. Yes, you can prepare Marry Me Chicken Pasta in advance. Cook the pasta and chicken, then store them separately. You can make the sauce ahead too. Keep everything in airtight containers. When ready to eat, simply reheat them together. Adding a little reserved pasta water helps the sauce. This saves time on busy nights. Many sides work well with Marry Me Chicken Pasta. Here are some great options: - Garlic bread - A fresh green salad - Roasted vegetables - Steamed broccoli - Caesar salad These sides balance the rich flavors of the pasta. They also add freshness to your meal. You can easily adjust the spice in Marry Me Chicken Pasta. If you want it mild, skip the crushed red pepper flakes. For a bit of heat, add a small amount. Taste as you go to avoid too much spice. You can also add more red pepper flakes if desired. Just remember, you can always add, but you cannot take away! This article explored the tasty world of Marry Me Chicken Pasta. We reviewed the key ingredients, step-by-step instructions, and helpful tips. We also looked at fun variations and how to store this dish properly. In summary, you can create a delicious meal that impresses anyone. Remember to try new ingredients and adjust flavors to fit your taste. With these tips, you will enjoy making this dish over and over. Happy cooking!

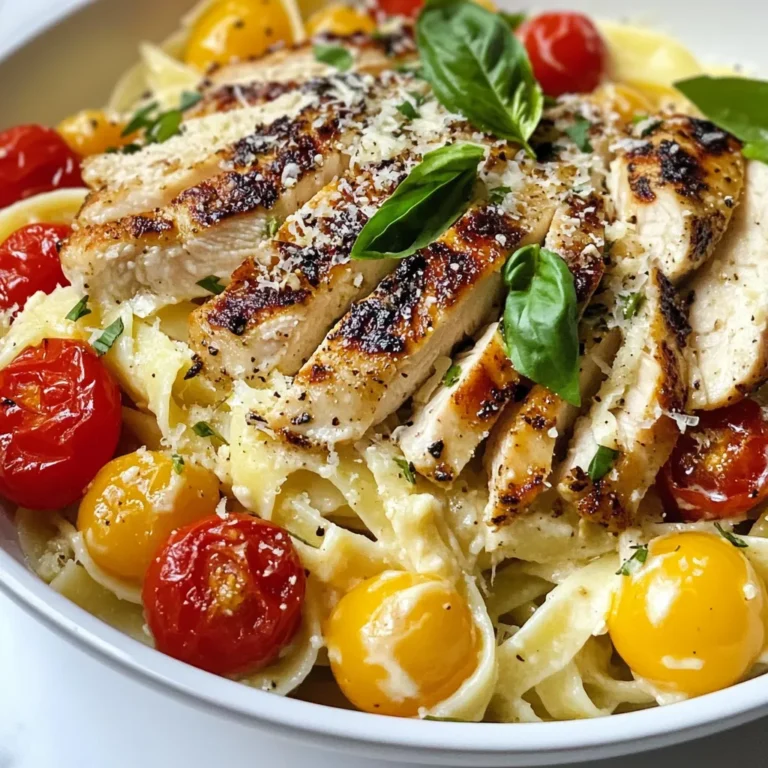
Marry Me Chicken Pasta Flavorful and Easy Recipe

Here’s what you need for Lemon Herb Grilled Shrimp Skewers: - 1 lb large shrimp, peeled and deveined - 3 tablespoons olive oil - 2 tablespoons fresh lemon juice - Zest of 1 lemon - 2 garlic cloves, minced - 1 teaspoon dried oregano - 1 teaspoon dried thyme - Salt and pepper to taste - Skewers (wooden or metal) - Fresh parsley, chopped (for garnish) If you don’t have some ingredients, here are some easy swaps: - Shrimp: Use scallops or firm fish. - Olive oil: Canola or avocado oil works too. - Fresh lemon juice: Use lime juice for a twist. - Dried herbs: Fresh herbs can replace dried ones; just use more. - Garlic: Garlic powder can work if you’re in a pinch. To make this dish, you will need a few tools: - Mixing bowl for the marinade - Whisk to blend the ingredients - Skewers for grilling - Grill or grill pan for cooking - Tongs to flip the skewers - Serving platter for presentation With these ingredients, substitutions, and tools ready, you can prepare a tasty dish that everyone will love. {{ingredient_image_1}} Start with one pound of large shrimp. Make sure they are peeled and deveined. This means you remove the shell and the dark vein on the back. Rinse the shrimp under cold water. Pat them dry with a paper towel. If you are using wooden skewers, soak them in water for at least 30 minutes. This step helps prevent burning on the grill. In a mixing bowl, add three tablespoons of olive oil. Next, squeeze in two tablespoons of fresh lemon juice. Add the zest of one lemon for extra flavor. Mince two garlic cloves and add them to the bowl. Then, sprinkle in one teaspoon of dried oregano and one teaspoon of dried thyme. Season with salt and pepper to taste. Whisk everything together until well mixed. Now, add the shrimp to the marinade. Toss them gently to coat all sides. Let the shrimp soak in the marinade for at least 15 minutes. This step allows the shrimp to absorb those lovely flavors. Preheat your grill to medium-high heat. While the grill heats up, thread the marinated shrimp onto the skewers. Leave a little space between each shrimp. This helps them cook evenly. Once the grill is ready, place the skewers on it. Grill the shrimp for about 2 to 3 minutes on each side. You know they are done when they turn pink and opaque. Carefully remove the skewers from the grill. Place them on a serving platter and garnish with chopped parsley for a fresh touch. Marinating shrimp is key to great flavor. Use fresh lemon juice, olive oil, garlic, oregano, and thyme. Mix these in a bowl. Toss the shrimp into the marinade. Make sure each shrimp gets coated well. Let them sit for at least 15 minutes. This time helps the shrimp soak up all the tasty flavors. For more flavor, you can marinate longer, but don’t go over an hour. Grilling shrimp takes some care. Start by preheating your grill to medium-high heat. This ensures the shrimp cook evenly. When threading shrimp onto skewers, leave a little space between each one. This helps heat reach all sides. Grill the shrimp for 2-3 minutes on each side. Watch for color change; they should turn pink and opaque. Overcooking can make shrimp tough, so stay close! When the skewers are done, move them to a serving platter. A sprinkle of fresh parsley adds color and taste. You can serve these skewers with rice or a fresh salad. They also pair well with dips like garlic sauce or lemon aioli. For a fun twist, add grilled vegetables for extra flavor. Enjoy your flavorful feast! Pro Tips Pre-soak Wooden Skewers: Soaking wooden skewers in water for at least 30 minutes prevents them from burning on the grill, ensuring they hold your shrimp securely while cooking. Marinate Longer for Flavor: For a deeper flavor, consider marinating the shrimp for 30 minutes to an hour. This allows the herbs and spices to penetrate the shrimp better. Use High Heat: Grilling at medium-high heat ensures that the shrimp cook quickly, keeping them juicy and preventing them from becoming rubbery. Garnish Just Before Serving: Add freshly chopped parsley right before serving for a vibrant color and fresh flavor, enhancing the overall presentation of your dish. {{image_2}} To add some heat, mix in red pepper flakes. I suggest starting with half a teaspoon. This gives the shrimp a nice kick without being too spicy. You can also use a spicy sauce in the marinade for an extra layer of flavor. Try sriracha or chili garlic sauce for a fun twist. Adjust the amount based on your heat preference. Adding vegetables makes these skewers colorful and tasty. Bell peppers, zucchini, and cherry tomatoes work well. Cut the veggies into similar sizes as the shrimp. Marinate them with the shrimp for the best flavor. Thread the shrimp and veggies onto the skewers, alternating between them. This adds a delightful crunch while grilling! You can easily cook these skewers in the oven or on the stovetop. For the oven, preheat it to 400°F (200°C). Place the skewers on a baking sheet lined with foil. Cook for about 8-10 minutes, flipping halfway. For skillet cooking, heat a bit of oil in a pan over medium-high heat. Cook the shrimp for about 2-3 minutes on each side until pink. Both methods yield juicy, flavorful shrimp! Store your leftover shrimp skewers in an airtight container. Place them in the fridge. They stay fresh for up to three days. Make sure to cool them down before storing. This keeps the shrimp safe to eat. To reheat, you can use the grill or a skillet. Heat the grill to medium. Place the skewers on the grill for about two minutes. You can also heat them in a skillet on medium heat. Cook each side for about two to three minutes. If you want to freeze marinated shrimp, do it before cooking. Place the shrimp and marinade in a freezer bag. Squeeze out as much air as you can before sealing. They will last in the freezer for up to three months. When you’re ready to cook, thaw them in the fridge overnight. You should marinate the shrimp for at least 15 minutes. This time lets the shrimp soak up the flavors of the olive oil, lemon juice, garlic, and herbs. If you have more time, you can marinate them for up to an hour. This longer time deepens the taste. Yes, you can use frozen shrimp. Just make sure to thaw them first. Place them in the fridge overnight or run them under cold water for a quick thaw. Once thawed, peel and devein them if needed. This way, they will absorb the marinade well. Many side dishes go well with the shrimp skewers. Here are some ideas: - A fresh green salad with lemon vinaigrette - Grilled vegetables like zucchini and bell peppers - Rice or quinoa for a filling option - Garlic bread for a tasty bite Shrimp cook quickly, so watch them closely. They are done when they turn pink and opaque. Each side usually takes about 2-3 minutes on the grill. If you see them curling tightly, they are likely cooked through. Yes, you can prepare the skewers in advance. Marinate the shrimp and thread them onto the skewers. Store them in the fridge for up to 2 hours before grilling. This helps save time and keeps the flavors fresh. In this post, I covered everything you need for perfect lemon herb shrimp skewers. We looked at key ingredients and easy substitutions. I shared step-by-step instructions and grilling tips. You learned how to store leftovers and reheating methods. Finally, I included variations to keep things fresh. Remember, practice makes perfect. With these tips, you can create tasty skewers every time. Enjoy sharing your delicious results with family and friends!

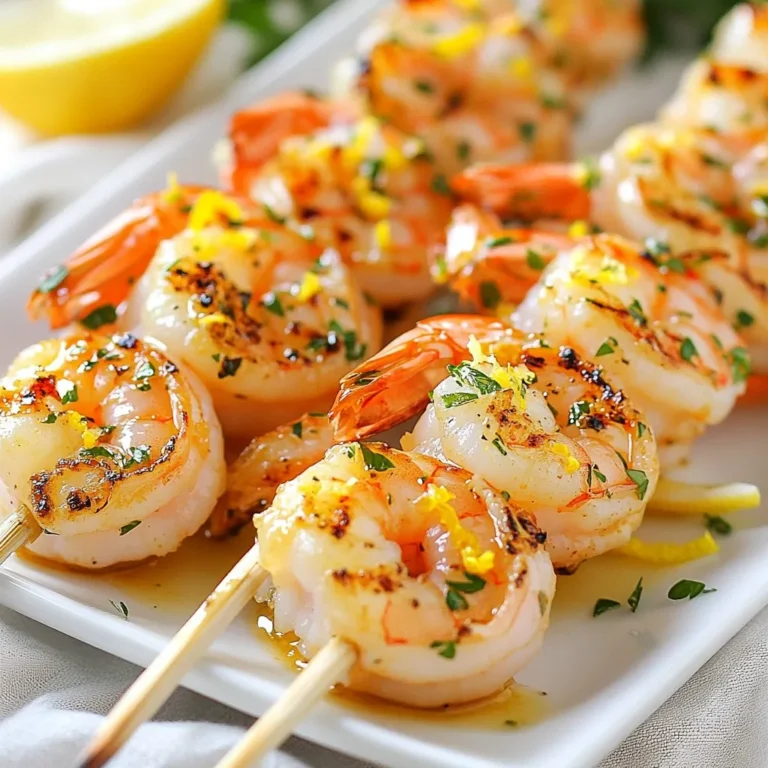
Lemon Herb Grilled Shrimp Skewers Flavorful Delight

To make the Texas Roadhouse Butter Chicken Skillet, gather these ingredients: - 1 lb chicken breast, cut into bite-sized pieces - 3 tablespoons unsalted butter - 1 teaspoon garlic powder - 1 teaspoon paprika - 1 teaspoon onion powder - 1 teaspoon dried oregano - 1 teaspoon salt - 1/2 teaspoon black pepper - 1 cup heavy cream - 1/2 cup shredded cheddar cheese - 1/2 cup chopped fresh parsley (for garnish) - 2 cups cooked rice or quinoa (for serving) If you need substitutes, here are some ideas: - Use olive oil instead of butter for a lighter option. - Swap chicken breast for thighs for richer flavor. - Greek yogurt can replace heavy cream for a tangy twist. - For a dairy-free option, try coconut milk and dairy-free cheese. To cook this dish, you will need: - A large skillet for even cooking. - A sharp knife to cut the chicken. - A wooden spoon or spatula for stirring. - Measuring spoons for accuracy in spices. - A heatproof serving dish or bowl to present the meal. These tools will help you create a delicious Texas Roadhouse Butter Chicken Skillet. Enjoy cooking! {{ingredient_image_1}} To start, gather your ingredients. You need chicken, butter, and spices. I like to cut the chicken into bite-sized pieces. This helps it cook evenly. Heat a large skillet on medium-high heat. Add the butter and let it melt. Once it sizzles, add the chicken pieces. Sprinkle garlic powder, paprika, onion powder, oregano, salt, and black pepper over the chicken. Stir everything together. Cook the chicken for about 5-7 minutes. You want it golden brown and cooked all the way through. Stir often to avoid burning. Next, lower the heat to medium-low. Pour in the heavy cream and stir well. The cream will combine with all the spices and chicken. Let it simmer for 3-4 minutes. This thickens the sauce nicely. After that, add the shredded cheddar cheese. Stir until it melts into a creamy sauce. Taste the sauce and adjust the seasonings if needed. Serve the butter chicken over cooked rice or quinoa. This makes a hearty meal. Don't forget to garnish with fresh parsley for a nice pop of color. To cook chicken perfectly, make sure your skillet is hot before adding the meat. If the skillet is not hot, the chicken will steam instead of sear. Cut the chicken into uniform pieces. This ensures they cook at the same rate. Stir the chicken frequently. This helps it brown evenly and prevents sticking. Use a meat thermometer if you're unsure. Chicken should reach an internal temperature of 165°F. For a great creamy sauce, start with heavy cream. Pour it in after the chicken is cooked. Stir it gently to combine. Let it simmer for a few minutes. This allows the flavors to blend. Add the cheese after the cream thickens slightly. Stir until the cheese melts completely. This gives the sauce its rich texture. If the sauce is too thick, you can add a splash of chicken broth or water. Taste and add more spices if you want. To amp up the flavor of your Texas Roadhouse Butter Chicken Skillet, use fresh herbs. Fresh parsley adds a bright taste that dried herbs can't match. You can also add a squeeze of lemon juice. This will lift the dish and provide a nice balance to the creaminess. If you prefer some heat, try adding red pepper flakes. This small tweak makes a big impact on flavor. One common mistake is overcooking the chicken. Aim for golden brown pieces, not dry chunks. Stir the chicken often for even cooking. Another mistake is not letting the cream simmer long enough. This step thickens the sauce and enhances the flavors. Be careful not to skip the cheese. It adds a rich texture and depth to your dish. To reheat leftovers, use a skillet over low heat. This will help maintain the dish's creamy texture. Add a splash of milk or cream if it seems thick. Stir gently until warmed through. You can also microwave it. Use a microwave-safe dish and cover it with a lid. Heat in short bursts, stirring in between to avoid hot spots. Pro Tips Use Fresh Herbs: Fresh parsley adds a vibrant flavor and color to the dish. For a twist, try adding fresh cilantro or basil as well. Adjust the Spice: If you like more heat, consider adding a pinch of cayenne pepper or a dash of hot sauce to the chicken while cooking. Perfect Creaminess: To achieve the best creamy texture, allow the heavy cream to simmer gently without boiling, which helps it thicken beautifully. Leftover Magic: This dish makes for great leftovers. Store any extra in an airtight container and reheat on low heat, adding a splash of cream to refresh it. {{image_2}} To spice things up, add some heat. Use 1-2 teaspoons of cayenne pepper or chili powder. You can also add diced jalapeños for extra flavor. The heat will balance well with the creamy sauce. Serve it with a side of cooling yogurt or sour cream to tone it down. This adds a fun kick for those who love spice. You can easily make this dish vegetarian. Replace the chicken with firm tofu or chickpeas. Both options soak up flavor well. Use the same spices and cream for a rich taste. Cook the tofu until golden brown, just like the chicken. This way, you keep the dish creamy and delicious without meat. Serve this dish over various grains. Quinoa, couscous, or even mashed potatoes work great. You can also try it with pasta for a fun twist. For a light option, serve it with a fresh salad. A side of garlic bread pairs well too, soaking up all that yummy sauce. To keep your Texas Roadhouse Butter Chicken Skillet fresh, let it cool first. Place it in an airtight container. Store it in the fridge. It will stay good for up to three days. Make sure to label the container with the date. If you want to save it for later, freezing is a great option. Transfer the cooled dish into a freezer-safe container. It can last up to three months in the freezer. When you're ready to eat, thaw it in the fridge overnight before reheating. Reheat your butter chicken skillet on the stove for the best results. Use medium heat and stir often. If it seems too thick, add a splash of water or cream. You can also microwave it for quick reheating. Just cover it to keep moisture in, and heat in short bursts. Texas Roadhouse Butter Chicken Skillet is a rich, creamy dish. It features tender chicken in a buttery sauce. The sauce has garlic, spices, and cheese for added flavor. You cook it all in one skillet, making it easy and quick. It's perfect for a family dinner or a cozy night in. The dish is served over rice or quinoa, which soaks up all the sauce. You will love the blend of flavors. Yes, you can make this recipe ahead of time. Prepare the chicken and sauce, then store it in the fridge. Keep it in an airtight container for up to two days. When you are ready to eat, just reheat it in the skillet. Add a splash of cream if the sauce thickens too much. This method saves time on busy nights and still tastes great. You can serve Texas Roadhouse Butter Chicken Skillet with several sides. Here are some great options: - Cooked rice - Quinoa - Steamed vegetables - Garlic bread - Salad These sides complement the rich flavors of the chicken. The rice or quinoa absorbs the sauce well. You can mix and match to fit your taste. Enjoy the meal with family and friends! This blog post covered everything you need for a great Butter Chicken Skillet. We looked at the key ingredients and helpful substitutions. I detailed a step-by-step cooking guide, plus tips to avoid mistakes. I also shared variations and safe storage methods for leftovers. Cooking this dish can be fun and rewarding. With the right tools and tips, you’ll impress everyone at your table. Trust your skills and enjoy each bite of your meal.

Savory Texas Roadhouse Butter Chicken Skillet Recipe

- 4 boneless, skinless chicken breasts - 1 can (13.5 oz) coconut milk - Zest of 2 limes - Juice of 2 limes - 3 garlic cloves, minced - 1 tablespoon ginger, grated - 1 tablespoon brown sugar - 1 teaspoon salt - 1 teaspoon black pepper - 1 tablespoon olive oil - Fresh cilantro, for garnish To make coconut lime chicken, start with fresh chicken breasts. They are the star of this dish. The marinade gives the chicken its tasty flavor. You will need a can of coconut milk. This rich ingredient adds creaminess. The zest and juice of two limes bring tanginess. The garlic and ginger add depth. Brown sugar balances the flavors, while salt and pepper enhance them. Don’t forget the olive oil! It helps with cooking and adds richness. Finally, fresh cilantro makes the dish pop. It adds color and freshness. Gather all these ingredients, and you are ready to create a delicious meal! {{ingredient_image_1}} To start, I whisk together the marinade ingredients. In a large bowl, combine the coconut milk, lime zest, lime juice, minced garlic, grated ginger, brown sugar, salt, and black pepper. This mixture creates a sweet and tangy flavor that will soak into the chicken. Next, I place the chicken breasts into the bowl. I ensure each piece is fully coated in the marinade. Then, I cover the bowl and put it in the fridge for at least one hour. If you have more time, let it marinate overnight. This extra time helps the flavors blend deeply into the chicken. Now it's time to cook! I preheat my grill or skillet over medium-high heat. I add a tablespoon of olive oil to the pan or grill. This oil helps prevent sticking and adds flavor. After the grill is hot, I take the chicken out of the marinade. I let any extra marinade drip off before placing it on the grill. I cook each side for about 6-7 minutes. I aim for an internal temperature of 165°F (74°C). This temperature ensures the chicken is safe to eat and juicy. To get nice grill marks, I avoid moving the chicken too much while it cooks. Once the chicken is cooked, I remove it from the heat and let it rest for about 5 minutes. This resting time helps the juices settle back into the meat. After resting, I slice the chicken and drizzle some of the reserved marinade over it. I always use marinade that has not touched raw chicken. Finally, I garnish the dish with freshly chopped cilantro. This adds a lovely color and a burst of fresh flavor. To get the best flavor from your coconut lime chicken, marinate it for at least one hour. For even more taste, let it sit overnight. This gives the chicken time to soak up all the yummy coconut and lime flavors. You can adjust the marinade to fit your taste. Want it sweeter? Add more brown sugar. Enjoy more zing? Squeeze in more lime juice. You have two great options for cooking: grilling or using a skillet. If you grill, you get those nice grill marks. This makes your chicken look great and adds flavor. If you choose a skillet, use medium-high heat and add olive oil. Both methods will keep your chicken juicy. Always check the chicken’s internal temperature. It should reach 165°F (74°C). This means it’s safe to eat. Now that your chicken is ready, think about sides. Coconut lime chicken pairs well with rice, beans, or a fresh salad. These sides add color and nutrition to your meal. For presentation, slice the chicken into strips. This makes it easy to serve and looks nice on the plate. Drizzle some reserved marinade over the top for extra flavor. Finish with fresh cilantro for a burst of green. It’s not just tasty; it looks great too! Pro Tips Marinate Longer for More Flavor: For the best flavor, marinate the chicken overnight. This allows the coconut and lime flavors to deeply penetrate the meat. Check for Doneness: Use a meat thermometer to ensure your chicken reaches an internal temperature of 165°F (74°C) for safe consumption. Rest the Chicken: Letting the chicken rest for 5 minutes after cooking helps retain its juices, resulting in a more succulent bite. Customize Your Marinade: Feel free to add additional spices or herbs to the marinade, like chili flakes for heat or lemongrass for an extra citrusy flavor. {{image_2}} You can change the protein in this dish. Shrimp works great. It cooks fast and tastes amazing. For a plant-based option, use tofu. Cut it into cubes and marinate just like the chicken. If you want a dairy-free option, use coconut milk as your base. It adds creaminess without any dairy. You can also try nut-based milk if you like. To make the taste pop, add spices. Try cayenne pepper for heat or cumin for warmth. Fresh herbs like basil or mint can also make a big difference. Want to switch up the citrus? Use oranges or lemons. They add a nice twist to the dish. Each option brings a new flavor experience. You can bake this chicken in the oven too. Preheat to 400°F (200°C). Place the marinated chicken on a baking sheet. Bake for 25-30 minutes, or until cooked through. If you prefer a slow cooker, place the chicken and marinade inside. Cook on low for 4-6 hours. This method makes the chicken super tender and full of flavor. After enjoying your coconut lime chicken, store any leftovers right. Keep the chicken in shallow containers. This helps it cool fast. Cover the containers tightly with lids or plastic wrap. You can also use freezer bags. Make sure to squeeze out the air to avoid freezer burn. To keep your chicken moist, use gentle heat. The stovetop is best for reheating. Just add a splash of water or broth in the pan. Cover it to lock in steam. This way, the chicken stays juicy. The microwave is quicker but can dry out the chicken. If you use it, heat in short bursts. Check often to avoid overcooking. You can freeze raw or cooked chicken. If freezing raw, wrap it tightly in plastic. This helps prevent freezer burn. For cooked chicken, let it cool first. Then, place it in airtight containers. When you’re ready to use it, thaw safely in the fridge overnight. Never thaw at room temperature. This keeps bacteria from growing. Can I use frozen chicken for this recipe? Yes, you can use frozen chicken. Just remember to thaw it first. Thawing helps the chicken soak up more flavor from the marinade. Place the frozen chicken in the fridge overnight or use the microwave's defrost setting. What should I serve with coconut lime chicken? Coconut lime chicken pairs well with many sides. I recommend serving it with rice or a fresh salad. You can also add grilled veggies for a colorful plate. The bright flavors of lime and coconut complement these options nicely. How can I tell if the chicken is fully cooked? You can check if the chicken is done by using a meat thermometer. It should read 165°F (74°C) in the thickest part. If you don’t have a thermometer, check if the meat is no longer pink inside. Juices should run clear. Can I make this recipe ahead of time? Yes, you can make this dish ahead of time. Marinating the chicken overnight enhances the flavor. You can also cook the chicken in advance and store it in the fridge. Just reheat it gently when you're ready to serve. This guide covered all you need to cook a great coconut lime chicken. We talked about choosing the right ingredients and making the marinade. I shared steps for grilling or cooking on a skillet, along with tips for juicy chicken. You learned about storing leftovers and quick reheating methods. Try the variations for new flavors. With practice, you’ll master this dish. Enjoy making it your own.

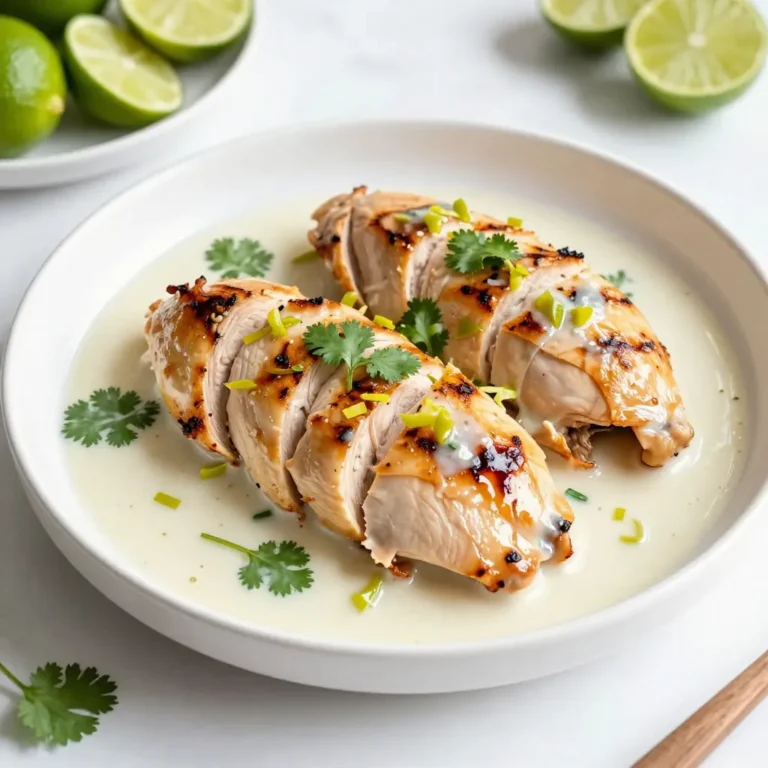
Coconut Lime Chicken Deliciously Grilled Recipe

To make this cozy soup, gather the following ingredients: - 4 large russet potatoes, peeled and diced - 1 medium yellow onion, chopped - 3 cloves garlic, minced - 3 medium carrots, diced - 1 stalk celery, diced - 4 cups vegetable broth - 1 cup unsweetened plant-based milk (like almond or oat milk) - 2 tablespoons nutritional yeast - 1 teaspoon dried thyme - 1 teaspoon smoked paprika - Salt and pepper to taste - 2 tablespoons olive oil - Fresh parsley, chopped (for garnish) These ingredients come together to create a rich and hearty flavor. The potatoes give the soup body, while the veggies add sweetness and nutrition. Nutritional yeast brings a cheesy taste, making the soup feel indulgent without dairy. If you need alternatives, here are some options: - Use sweet potatoes instead of russet potatoes for a sweeter flavor. - Swap yellow onion for a red onion or shallots for a milder taste. - Try garlic powder if fresh garlic is not available. - You can use any non-dairy milk, like soy or coconut, if you prefer. - If you want a creamier texture, add cashew cream instead of plant-based milk. These substitutes can help you make the soup work with what you have on hand. They also let you adjust the flavor to your liking. When selecting your produce, keep these tips in mind: - Choose firm potatoes with smooth skin and no blemishes. - Look for onions that feel heavy and have dry, papery skin. - Pick carrots that are bright in color and firm to the touch. - Select celery with crisp stalks and bright green leaves. Fresh produce enhances the taste of your soup. By picking quality ingredients, you ensure a delicious and satisfying dish. {{ingredient_image_1}} To start, gather your ingredients. You will need potatoes, onion, garlic, carrots, and celery. These give the soup a nice, hearty flavor. 1. Heat 2 tablespoons of olive oil in a large pot over medium heat. 2. Add the chopped onion and cook for about 5 minutes. The onion should be soft and see-through. 3. Next, add 3 minced garlic cloves. Cook them for about a minute until they smell great. 4. Now, stir in 3 diced carrots and 1 stalk of diced celery. Cook for another 5 minutes. This step helps the veggies soften. Once your base is ready, it's time to add the main ingredients. 1. Add 4 large diced russet potatoes to the pot. 2. Pour in 4 cups of vegetable broth. This makes your soup rich and tasty. 3. Add 1 teaspoon of dried thyme and 1 teaspoon of smoked paprika for flavor. 4. Season with salt and pepper to taste. 5. Bring everything to a boil. Then, reduce the heat and let it simmer for 20-25 minutes. You want the potatoes to be tender. After cooking, it’s time to blend the soup. 1. Use an immersion blender to puree the soup. 2. Blend until you reach your desired smoothness. You can make it creamy or leave it a bit chunky. Now, let’s finish it up and make it delicious. 1. Stir in 1 cup of unsweetened plant-based milk and 2 tablespoons of nutritional yeast. This gives the soup a creamy texture and a nice nutty taste. 2. Heat the soup for another 5 minutes. Taste it and adjust the seasoning if needed. 3. Serve the soup hot. Garnish with chopped fresh parsley for a burst of color and flavor. Enjoy your warm and comforting vegan German potato soup! To get the best texture in your soup, blend it well. Using an immersion blender lets you control how smooth it gets. For a creamy soup, blend until it’s silky. If you prefer some chunks, blend just half. You can also mash some potato pieces with a fork for added texture. Adding herbs and spices makes the soup taste great. Thyme gives a nice earthy flavor. Smoked paprika adds warmth and depth. You can also try bay leaves or dill for new tastes. Always taste the soup as you go. Adjust salt and pepper based on your liking. Fresh parsley on top adds a pop of color and freshness. Store leftover soup in an airtight container in the fridge. It can last for about three days. To reheat, warm it on the stove over low heat. Stir often to avoid burning. If the soup gets too thick, add a splash of vegetable broth or plant-based milk. Always taste again and adjust seasoning before serving. Pro Tips Use a Variety of Potatoes: Mixing different types of potatoes can add depth of flavor and texture to your soup. Adjust Creaminess: For a creamier soup, add more plant-based milk or blend your soup longer until smooth. Flavor Boost: Consider adding a splash of lemon juice or apple cider vinegar before serving for a bright finish. Garnishing: Fresh herbs like dill or chives can elevate the presentation and flavor of the soup. {{image_2}} You can add protein to this soup for more nutrition. Lentils are a great choice. They cook quickly and blend well. You can also use chickpeas or white beans. Just rinse them and add them to the pot with the potatoes. This will give the soup a nice texture and flavor. If you love heat, try adding some spice! You can add red pepper flakes or chopped jalapeños. Just sauté them with the onions and garlic. For a smoky flavor, try adding chipotle powder. This will change the soup into a warm, spicy delight. This soup is naturally gluten-free, but check your broth. Use a gluten-free vegetable broth. If you want it nut-free, choose oat milk or rice milk. Both will keep the creamy taste without nuts. Enjoy a hearty bowl without worry! German potato soup has roots that go back many years. This dish is a staple in many German homes. Traditionally, it was made with simple, local ingredients. Potatoes were cheap and filled many bellies. The soup brought families together, especially during cold months. Each region in Germany has its own twist on the recipe. In a typical German potato soup, you will find: - Potatoes - Onions - Carrots - Celery - Broth These ingredients combine for a rich, hearty flavor. Some recipes even add sausage or bacon. However, for a vegan twist, we use plant-based milk and nutritional yeast. These give our soup a creamy texture without any animal products. Today, veganism plays a big role in German cooking. More people are choosing plant-based diets for health and environment. Vegan German potato soup fits into this trend perfectly. It offers the same comforting taste as traditional recipes. Plus, it respects animal rights and promotes sustainability. More chefs are exploring vegan options, making old dishes fresh and exciting. Yes, you can freeze this soup. It keeps well in the freezer. Let the soup cool first. Store it in a freezer-safe container. It will last for about three months. When you want to eat it, thaw it overnight in the fridge. Then, reheat on the stove until warm. This soup pairs well with many sides. You can serve it with crusty bread for dipping. A crisp green salad adds a nice touch. Try some roasted vegetables for extra flavor. You can also enjoy it with vegan sausage for a hearty meal. To make the soup creamier, add more plant-based milk. You can also use a full-fat coconut milk for richness. Blending the soup longer can help too. If you want, add a little cashew cream for a nutty taste. These tips will give your soup a smooth and creamy texture. This blog post covered how to make Vegan German Potato Soup. I shared important ingredients, step-by-step cooking tips, and variations to try. You learned about the cultural history and significance of the dish. In the end, enjoy experimenting with flavors and textures in your soup. With these tips and tricks, you can create a tasty and cozy meal that fits any diet. Embrace this recipe and make it your own!

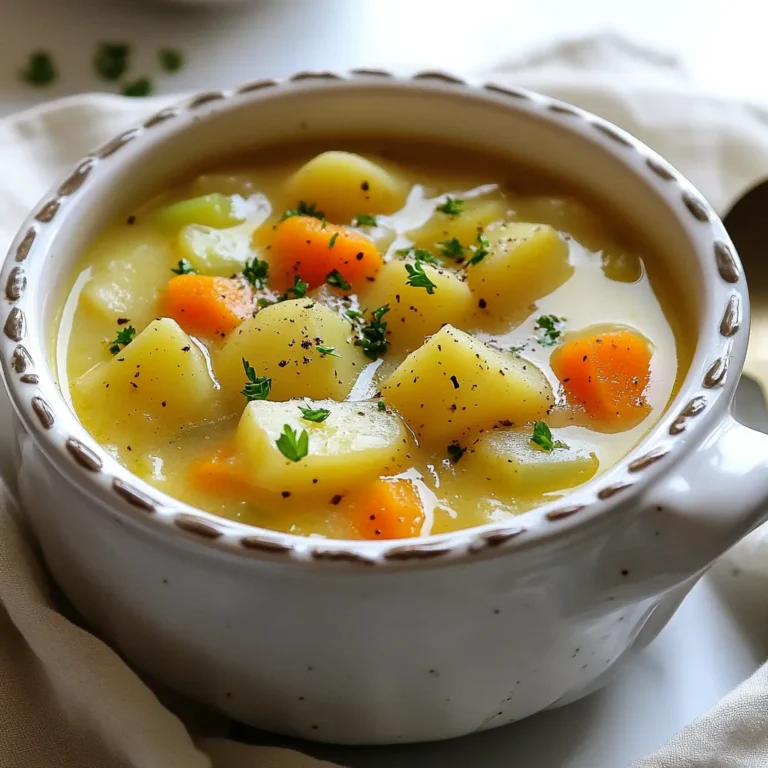
Vegan German Potato Soup Comforting and Warm Dish

PREV 1 … 76 77 78 … 86 NEXT
spicy fork kitchen

explore

DessertsDinnerAppetizersDrinks

Our Policies

  • Cookie Policy
  • Copyright Policy
  • Disclaimer
  • GDPR Policy
  • Terms Of Use
Back to Top
  • About
  • Contact Us
  • Privacy Policy
© 2026 spicy fork kitchen