FREE DINNER EBOOK! Get your copy!
  • Cookie Policy
  • GDPR Policy
  • Disclaimer
  • Terms Of Use
  • Visit my other site: Fun Cookie Recipes
spicy fork kitchen
  • Home
  • Dinner
  • Desserts
  • Drinks
  • Appetizers
  • Contact
  • About
  • Privacy Policy
  • Home
  • Dinner
  • Desserts
  • Drinks
  • Appetizers
  • Contact
  • About
  • Privacy Policy
  • Cookie Policy
  • GDPR Policy
  • Disclaimer
  • Terms Of Use
Visit my other site: Fun Cookie Recipes

HOME / CATEGORIES /

Latest

- 2 cups cooked chicken, shredded - 2 ears of fresh corn, kernels removed - 1 red bell pepper, diced - 1 small red onion, diced - 1 cup cherry tomatoes, halved - 1 avocado, diced - 1/2 cup crumbled cotija cheese - 1/4 cup mayonnaise - 2 tablespoons lime juice - 1 tablespoon chili powder - Salt and pepper to taste - Fresh cilantro, for garnish - Tortilla chips, for serving The main ingredients make this bowl bright and tasty. I love using fresh corn because it brings great sweetness. The red bell pepper adds a nice crunch and color. Shredded chicken gives protein and makes it filling. - Sliced jalapeños for heat - Sour cream for creaminess - Extra lime wedges for zest - Avocado slices for richness - More cotija cheese for flavor These toppings can take your bowl to the next level. If you like spice, add jalapeños. Sour cream creates a nice contrast. A squeeze of lime brightens the dish. This dish is packed with nutrients. Each serving has about: - Calories: 450 - Protein: 30g - Fat: 20g - Carbs: 40g - Fiber: 8g The Street Corn Chicken Bowl is balanced and satisfying. It combines protein, healthy fats, and fiber. You can enjoy a hearty meal without guilt. {{ingredient_image_1}} Start by taking two ears of fresh corn. Remove the kernels and place them in a large bowl. Next, chop one small red onion and add it to the bowl. Then, halve one cup of cherry tomatoes and toss them in too. In a smaller bowl, mix together 1/4 cup of mayonnaise, 2 tablespoons of lime juice, 1 tablespoon of chili powder, and a pinch of salt and pepper. Pour this creamy mix over the corn, onion, and tomatoes. Toss it well to coat everything evenly. Set this mixture aside to let the flavors blend. Now, heat a skillet over medium heat. Add 2 cups of shredded chicken to the pan. Sprinkle some salt, pepper, and a little chili powder over the chicken. Stir and sauté it for about 3 to 5 minutes until it’s heated through. This step makes the chicken tasty and warm for your bowl. Grab your serving bowls. Start by placing a layer of the cooked chicken at the bottom of each bowl. Next, take the street corn mixture and divide it evenly on top of the chicken. For a fresh touch, add diced avocado and crumbled cotija cheese on top of each bowl. Finally, garnish with fresh cilantro for a burst of color and flavor. Serve with tortilla chips on the side. Enjoy your delicious Street Corn Chicken Bowl! To get the best flavor from your street corn, use fresh corn. Fresh corn gives a sweet taste. Cut the kernels off with a sharp knife. Mix the corn with diced red onion and cherry tomatoes. For the dressing, combine mayonnaise, lime juice, chili powder, salt, and pepper. The lime juice adds a zesty kick. Toss everything well to coat. Let it sit to blend the flavors. For juicy chicken, use cooked chicken that is shredded. Heat it slowly in a skillet. Add a pinch of salt, pepper, and a sprinkle of chili powder. This adds taste without overpowering the dish. Cook for about 3-5 minutes. Make sure it is heated through but not dry. Keep an eye on it to avoid overcooking. Serve the chicken in a bowl as the base. Top it with the street corn mix. Add diced avocado for creaminess. Crumbled cotija cheese gives a salty taste. Garnish with fresh cilantro for color and flavor. Serve tortilla chips on the side for crunch. You can also pair it with a side salad or rice for a complete meal. Pro Tips Fresh Corn is Best: Using fresh corn kernels will enhance the sweetness and crunch of your dish compared to canned or frozen corn. Customize the Heat: Adjust the amount of chili powder based on your spice preference; you can even add diced jalapeños for an extra kick! Rest the Chicken: Allow the seasoned chicken to rest for a few minutes after cooking to keep it juicy and flavorful. Perfect Avocado: To ensure your avocado is ripe, gently press the skin; it should yield slightly but not be too soft. {{image_2}} For a tasty vegetarian option, swap the chicken for black beans or chickpeas. These beans add protein and fiber. You can also add grilled zucchini or bell peppers for extra flavor. Keep the street corn mixture the same for that fresh taste. You can change the protein in your bowl. Try shrimp, beef, or tofu. Each option brings its own flavor. Season the shrimp with lime and chili for a zesty kick. For beef, use ground meat or steak strips. Tofu can be marinated for added taste. Want to add some zing? Mix in fresh lime zest or jalapeños. You could also try a sprinkle of smoked paprika for depth. For a sweet twist, add diced mango or pineapple. These fruits brighten the dish and pair well with the corn. To keep your Street Corn Chicken Bowl fresh, place leftovers in an airtight container. Make sure to cool the bowl to room temperature first. Store it in the fridge for up to three days. The flavors will blend nicely, but the texture may change a bit. When you’re ready to enjoy your leftovers, heat them gently. Place the bowl in the microwave for about one to two minutes. Stir halfway to ensure even warming. You can also reheat it on the stove over low heat. Just add a splash of water to keep it moist. If you want to freeze your Street Corn Chicken Bowl, it’s best to store components separately. Place the chicken and street corn mixture in freezer-safe bags. You can freeze them for up to three months. When you’re ready to eat, thaw them overnight in the fridge. Then, reheat and add fresh toppings like avocado and cilantro. A Street Corn Chicken Bowl is a tasty dish inspired by street food. It combines juicy chicken with fresh corn, veggies, and spices. You mix corn kernels, diced onion, and tomatoes with a creamy sauce made of mayonnaise, lime juice, and chili powder. This mix sits on top of shredded chicken, making it a hearty meal. You then finish it with avocado and cotija cheese for extra flavor. It's colorful, tasty, and great for sharing! Yes, you can make parts of this dish ahead of time. You can cook the chicken and prepare the street corn mix in advance. Just store them in separate containers in the fridge. When you're ready to eat, simply assemble the bowl. This saves time and makes it easy to enjoy a quick meal. If you can't find cotija cheese, don't worry! You can use feta cheese or queso fresco instead. Both options have a similar crumbly texture and salty taste. They will still give your bowl that creamy touch. You can also try using shredded cheese like Monterey Jack for a different flavor. The spice level of this dish can be adjusted to your taste. The chili powder adds some heat, but it's mild. If you want more spice, you can add jalapeños or extra chili powder. For less heat, you can use less chili powder or skip it altogether. This way, you can make it just right for you and your guests! The Street Corn Chicken Bowl blends fresh flavors into a tasty meal. We covered the main ingredients, toppings, and the nutrition each serving offers. I walked you through preparing the street corn, cooking the chicken, and assembling your bowl. With helpful tips and suggested variations, you can make this dish your own. Store leftovers properly for future enjoyment. This meal is easy to love and share. Enjoy your cooking and let the flavors shine!

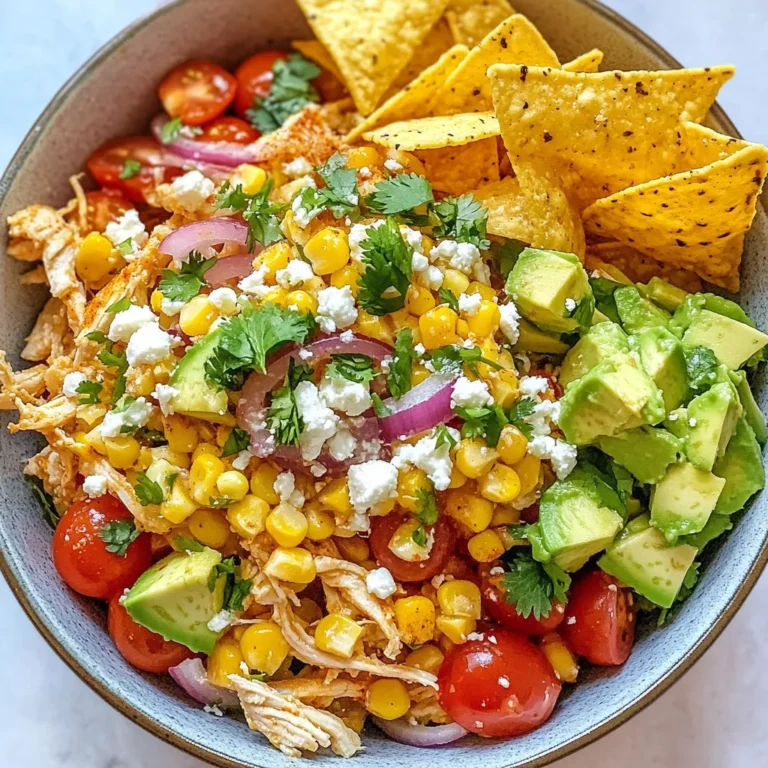
Savory Street Corn Chicken Bowl Recipe to Try Today

- 2 boneless, skinless chicken breasts, diced - 1 tablespoon olive oil - 1 medium onion, chopped - 2 cloves garlic, minced - 8 ounces cremini mushrooms, sliced - 4 cups low-sodium chicken broth - 2 cups baby spinach - 1 medium carrot, diced - 1 teaspoon dried thyme - 1 bay leaf - Salt and pepper to taste - Fresh parsley, chopped (for garnish) I love using fresh ingredients in this soup. The chicken breasts provide lean protein. Olive oil adds healthy fats and enhances flavors. Onions and garlic give it a tasty base. The cremini mushrooms add a nice earthy touch. Carrots add a hint of sweetness and color. Spinach brings a pop of green and nutrients. Thyme and bay leaf round out the flavors. Salt and pepper help bring it all together. Chicken is an excellent source of protein. It helps build muscle and keeps you full. Mushrooms offer vitamins and minerals like B vitamins and selenium. They also boost your immune system. Spinach is rich in iron, which promotes good blood health. Carrots are high in beta-carotene, which is good for your eyes. - Large pot - Cutting board and knife - Measuring spoons and cups A large pot is key for this soup. It allows for even cooking and enough space. A cutting board and knife help you prep your ingredients quickly. Measuring spoons and cups ensure you get the right amounts. With these tools, you’ll be set to make this clean chicken mushroom soup! {{ingredient_image_1}} 1. Heat the olive oil in a large pot over medium heat. 2. Add the chopped onion and minced garlic. Sauté them until the onion turns translucent, about 3 to 4 minutes. The smell will be amazing! 3. Now, add the diced chicken breasts to the pot. Cook them until they are no longer pink, about 5 minutes. Stir often for even cooking. 1. Next, add the sliced cremini mushrooms and diced carrot to the pot. Keep sautéing for another 4 to 5 minutes until the mushrooms wilt. 2. Pour in the low-sodium chicken broth. Then, add the dried thyme, bay leaf, salt, and pepper. Bring the mixture to a boil. 1. Once it reaches a boil, reduce the heat and let it simmer for about 15 minutes. This helps the flavors blend well. 2. After 15 minutes, stir in the baby spinach. Let it wilt for about 2 minutes. 3. Remove the bay leaf before serving. Taste and adjust seasoning with salt and pepper if needed. 4. Ladle the soup into bowls and garnish with fresh parsley for a lovely finish. Enjoy your warm bowl of goodness! Start by sautéing your aromatics. This means cooking the onion and garlic in olive oil until they soften. This step adds depth to your soup. The heat releases their flavors, making the whole dish taste better. After sautéing, always taste your soup. Adjust the seasoning with salt and pepper as needed. This ensures your soup has balanced flavor. Use medium heat when cooking the chicken. This helps it cook evenly and stay juicy. Keep an eye on the chicken; cook it until it's no longer pink. If you cook it too long, it can become dry and tough. Stir frequently to help it cook evenly. Serve your soup with crusty bread or a side salad. This adds texture and makes the meal more filling. For a fresh touch, garnish your soup with chopped parsley. You can also sprinkle on other spices, like paprika or pepper, for added flavor. Pro Tips Use Fresh Ingredients: Fresh vegetables and herbs will enhance the flavor of your soup, making it more vibrant and delicious. Adjust Thickness: If you prefer a thicker soup, consider adding a cornstarch slurry or pureeing a portion of the soup before serving. Make It Ahead: This soup stores well in the refrigerator for up to 3 days and can also be frozen for later use, making it perfect for meal prep. Experiment with Seasoning: Don't hesitate to adjust the spices and herbs according to your taste; adding a splash of lemon juice can also brighten up the flavors. {{image_2}} You can make this soup even better by changing a few ingredients. For mushrooms, try shiitake or portobello. Each type has a unique taste. If you want to switch the chicken, turkey works well too. For a plant-based option, use tofu or chickpeas. Both options offer protein while keeping the soup light. Making this soup fit your diet is easy. To make it gluten-free, just choose gluten-free broth. For a dairy-free option, skip any cream and stick with the broth. If you want to lower carbs, add more veggies. Try cauliflower or zucchini instead of carrots. They will still taste great! To boost flavors, think about adding fresh herbs. Basil or rosemary can add a nice twist. You can also add spices like paprika or a dash of hot sauce. These small changes can make a big difference in taste. Don’t be afraid to experiment with your favorites. The soup is your canvas! To store leftover clean chicken mushroom soup, let it cool first. Then, transfer it to an airtight container. This method helps keep it fresh. You can store it in the fridge for up to four days. Always check for signs of spoilage before eating leftovers. To freeze the soup for later, follow these steps: - Let the soup cool completely. - Pour it into freezer-safe containers or bags. Leave some space to allow for expansion. - Label the containers with the date. This helps you track how long it’s been in the freezer. When you want to eat it, thaw the soup overnight in the fridge. You can also use the microwave for quick thawing. Reheat the soup on the stove over medium heat until it’s hot. To keep the soup tasting fresh after storage, follow these tips: - Avoid adding fresh herbs before storing. Add them just before serving. - If the soup thickens in the fridge, add a little broth or water when reheating. - Reheat gently to prevent overcooking the chicken. These steps will help maintain the rich flavors of your clean chicken mushroom soup. Enjoy every delicious spoonful! Clean eating means choosing whole, unprocessed foods. It focuses on fresh ingredients and avoids added sugars and unhealthy fats. You want to eat foods that nourish your body. This way, you get vitamins and minerals in each meal. Clean eating includes fruits, vegetables, whole grains, and lean proteins. It’s about enjoying meals that are both good for you and tasty. Yes, you can make this soup ahead of time. It’s perfect for meal prep. After cooking, let the soup cool. Then, store it in an airtight container in the fridge. This soup stays good for 3 to 4 days. You can also freeze it for later. Just put it in freezer-safe bags. When you’re ready to eat, thaw it overnight in the fridge. Reheat on the stove until it’s hot. You can easily change this soup to fit your taste. Try using different mushrooms, like shiitake or button mushrooms. You can swap chicken for turkey or even tempeh for a plant-based option. Add herbs like basil or rosemary for extra flavor. Want some heat? Toss in red pepper flakes. You can also mix in other veggies, such as peas or corn. Make this soup your own! This chicken mushroom soup uses fresh ingredients for great flavor and nutrition. I shared steps for making it simple and tasty. Remember to use the right tools and make adjustments to suit your taste. Experiment with variations to keep it exciting. Store leftovers well for future meals. You can enjoy this soup anytime, making it a great choice for busy days. Your kitchen can be a joyful place with recipes like this at hand. Enjoy cooking and sharing your delicious soup!

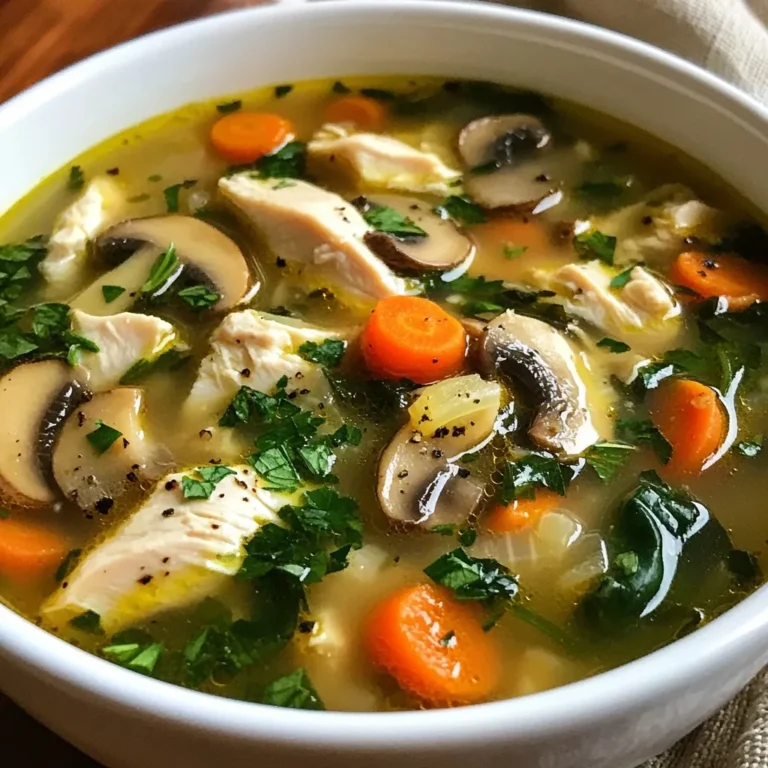
Clean Chicken Mushroom Soup Nourishing and Simple Dish

For this tasty dish, you will need: - 1 lb shrimp, peeled and deveined - 2 tablespoons olive oil - 4 cloves garlic, minced - 1 cup heavy cream - 1/2 cup chicken broth (low sodium) - 1 teaspoon paprika - 1/2 teaspoon red pepper flakes (optional) - 1 cup baby spinach - Salt and pepper to taste - 2 tablespoons fresh parsley, chopped (for garnish) These ingredients come together to create a rich, creamy sauce that complements the shrimp perfectly. The garlic gives it a strong flavor, while the heavy cream adds smoothness. You can serve your shrimp with: - Zucchini noodles - Cauliflower rice Both options keep the dish low-carb and add a nice texture. You can choose either based on your mood or what you have at home. Each serving has: - Calories: 350 - Protein: 25g - Carbs: 5g - Fat: 30g These numbers make this dish great for a keto diet. It keeps you full without adding too many carbs. Enjoy this meal while staying on track with your diet! {{ingredient_image_1}} Start by heating 2 tablespoons of olive oil in a large skillet over medium heat. Then, add 4 cloves of minced garlic. Sauté the garlic for 1-2 minutes. You want it fragrant and lightly golden. Be careful not to burn it; that can ruin the dish! Next, increase the heat to medium-high and add 1 pound of peeled and deveined shrimp to the skillet. Cook the shrimp for about 2-3 minutes on each side. They should turn pink and opaque. Once done, take the shrimp out and set them aside on a plate. In the same skillet, pour in 1/2 cup of chicken broth. Bring the broth to a simmer while scraping any browned bits from the pan. This adds great flavor! Now, reduce the heat to medium. Stir in 1 cup of heavy cream, 1 teaspoon of paprika, and some salt and pepper to taste. If you like a little heat, add 1/2 teaspoon of red pepper flakes. Let the mixture simmer for about 4-5 minutes until it thickens slightly. This is your creamy sauce! Once the sauce thickens, add 1 cup of baby spinach. Cook until the spinach wilts, which should take about 2 minutes. Now, it’s time to bring back the shrimp. Add the cooked shrimp to the skillet, stirring them into the creamy sauce. Make sure the shrimp are well coated and heated through. Finally, serve your creamy garlic shrimp over zucchini noodles or cauliflower rice for a tasty low-carb meal. Enjoy your cooking adventure! To cook shrimp just right, heat your skillet first. Use medium-high heat for best results. Add olive oil, then minced garlic. Sauté until the garlic smells great, about 1-2 minutes. Next, add the shrimp. Cook them for 2-3 minutes on each side. They should turn pink and opaque. Don’t crowd the pan; cook in batches if needed. This keeps them juicy and tender. Zucchini noodles or cauliflower rice work well here. They soak up the creamy sauce nicely. You can also try steamed broccoli or sautéed asparagus. These options keep it low-carb and add color. For a crunch, consider a fresh salad with greens and a light vinaigrette. These sides enhance the meal and make it more enjoyable. To boost creaminess, use heavy cream. This gives a rich texture and flavor. If you want a lighter version, try coconut cream or a mix of cream and broth. You can also add cream cheese for extra thickness. Stir it in while the sauce simmers. For a touch of richness, a bit of butter can elevate the dish. Mix it in right before serving for a silky finish. Pro Tips Fresh Shrimp is Best: Always opt for fresh shrimp when possible, as it enhances the flavor and texture of the dish compared to frozen shrimp. Control the Heat: Be cautious with the heat when cooking garlic; it can burn quickly. Cook on medium heat to achieve perfect sautéing without bitterness. Thickening the Sauce: If you prefer a thicker sauce, let it simmer a bit longer after adding the cream, stirring frequently to avoid sticking. Garnish for Presentation: Don’t skip the garnish! Fresh parsley not only adds color but also a fresh flavor that complements the dish beautifully. {{image_2}} You can boost your dish with more veggies. Try adding bell peppers or mushrooms. They add flavor and crunch. You can also use broccoli or asparagus for a nice touch. Simply sauté them before adding the shrimp. This makes your meal colorful and healthy. If you want to switch up the protein, consider chicken or scallops. Both work well with the creamy sauce. Cook them the same way as the shrimp. You could also use firm tofu for a vegetarian option. Just ensure it soaks up the delicious sauce. For those who love heat, add more red pepper flakes. You can also use cayenne pepper for an extra kick. If you like it milder, skip the red pepper flakes. Experiment with fresh herbs like basil or thyme for added flavor. Each change brings a new twist to this classic dish. To store leftovers, let the dish cool down first. Place it in an airtight container. You can keep it in the fridge for up to three days. This helps keep the flavors fresh and tasty. When you are ready to eat, reheat the shrimp on the stove. Place it in a skillet over low heat. Stir gently until it warms up. You can also use the microwave in short bursts, but keep an eye on it to prevent overcooking. If you want to freeze the dish, place it in a freezer-safe container. Make sure to leave some space for expansion. It can last in the freezer for up to one month. To eat, thaw it overnight in the fridge before reheating. This keeps the shrimp tender and the sauce creamy. Yes, Keto Creamy Garlic Shrimp is great for meal prep. You can cook it ahead of time and store it in the fridge. It stays tasty for about three days. Just make sure to store it in an airtight container. When you're ready to eat, just reheat it on the stove over low heat until warm. Yes, you can use frozen shrimp. Just thaw them first before cooking. To thaw, place the shrimp in cold water for about 15 minutes. Make sure they are peeled and deveined. This will save time and still give you a delicious dish. For serving, zucchini noodles and cauliflower rice are the best low-carb options. Zucchini noodles are light and have a nice texture. Cauliflower rice is hearty and fills you up. Both pair well with the creamy sauce. You can also try spaghetti squash or sautéed greens for more variety. This blog post shared how to make Keto Creamy Garlic Shrimp. You learned about the key ingredients and optional sides to enhance your dish. We covered step-by-step instructions and offered tips for perfect shrimp. You can add vegetables or other proteins for variety. We also discussed storage and answered common questions. Now, you have all the tools needed to create a tasty, low-carb meal. Enjoy cooking and savoring your new dish!

Keto Creamy Garlic Shrimp Flavorful and Easy Recipe

- 2 lbs beef chuck, cut into 1-inch cubes - 1 large onion, finely chopped - 3 cloves garlic, minced - 1 tablespoon ginger, grated - 1 can (14 oz) diced tomatoes - 1 cup coconut milk - 2 tablespoons curry powder - 1 tablespoon garam masala - 1 teaspoon turmeric - 1 teaspoon cumin - 1 teaspoon coriander - 1/2 teaspoon chili powder (adjust to taste) - Salt and pepper to taste - 2 tablespoons vegetable oil - Fresh cilantro for garnish The main star of this dish is the beef chuck. It’s tender and full of flavor. When you cut it into 1-inch cubes, it cooks evenly. The next key players are the onion, garlic, and ginger. They add depth and warmth to the dish. Spices are crucial in Indian cooking. Curry powder, garam masala, turmeric, cumin, and coriander bring the dish to life. Each spice adds its unique taste and aroma, creating a rich profile. For liquid, diced tomatoes and coconut milk work wonders. They make the curry creamy and help meld the spices. The coconut milk adds sweetness, balancing the heat from the chili powder. Don't forget salt and pepper. They enhance all the flavors. Lastly, fresh cilantro adds a pop of color and freshness when you serve the curry. {{ingredient_image_1}} 1. Sautéing onions and aromatics Start with a large skillet. Heat the vegetable oil on medium-high. Add the finely chopped onion. Cook it for about 5 minutes until it turns soft and clear. This brings out the sweet flavor. Next, stir in the minced garlic and grated ginger. Cook them for 1-2 minutes. You want to smell that nice aroma. 2. Browning the beef Now, add the beef cubes to the skillet. Brown them on all sides, which takes about 5-7 minutes. This step adds a great depth of flavor. Season the beef with salt and pepper while it cooks. Make sure to get a nice color on the meat. 3. Combining ingredients in the slow cooker Once the beef is browned, transfer it to the slow cooker. Add in the sautéed onions, garlic, and ginger. Pour in the can of diced tomatoes and the cup of coconut milk. Sprinkle the curry powder, garam masala, turmeric, cumin, coriander, and chili powder on top. Stir everything well to mix the spices with the meat. 4. Cooking time and temperature settings Cover the slow cooker with its lid. You can set it to cook on low for 7-8 hours. If you are short on time, set it to high for 4-5 hours. Check that the beef is tender when it's done. The longer it cooks, the better the flavors blend. Don’t forget to taste and adjust the seasoning before serving! - Adjusting spice levels: To make your curry spicier, add more chili powder. For a milder dish, reduce the chili powder. Always taste as you go. - Thickening the curry: If you want a thicker curry, mash some beef pieces with a fork. You can also add a little cornstarch mixed with water. - Tasting and seasoning adjustments: Always taste your curry before serving. Add more salt or spices if needed. A squeeze of lime can brighten flavors too. - Best sides to pair with curry: Serve your curry with warm naan bread or fluffy basmati rice. Both soak up the sauce well and enhance the meal. - Garnishing ideas: Top your curry with fresh cilantro for color and flavor. Lime wedges on the side add a zesty touch. Pro Tips Choose the Right Cut: For the best flavor and tenderness, use beef chuck or brisket, as they become more flavorful and tender when slow-cooked. Enhance the Flavor: Consider adding a splash of lime juice or a tablespoon of tamarind paste for an extra layer of tangy flavor to your curry. Let It Rest: After cooking, allow the curry to rest for about 10-15 minutes before serving. This helps the flavors to settle and intensify. Make it Your Own: Feel free to customize the spice levels by adjusting the chili powder or by adding other spices like cinnamon or cardamom for a unique twist. {{image_2}} You can switch the beef for other proteins. Chicken works great, too. Lamb adds a rich flavor, while chickpeas or lentils serve as good vegetarian options. Each choice brings its own taste and texture. Feel free to mix in different veggies. Carrots, peas, or bell peppers all add color and crunch. These veggies can make the dish more nutritious and fun to eat. If you seek non-dairy options, use almond or soy milk instead of coconut milk. This change still keeps the dish creamy and delicious. Always check for dietary needs, too. Gluten-free eaters can enjoy this curry without worry. To add more depth, you can include extra spices. Try cardamom or cinnamon for a warm, sweet aroma. A bay leaf or two can also enhance the overall flavor. Experimenting with sauces can change the profile of your curry. A splash of soy sauce or Worcestershire sauce can add umami. For a tangy twist, a tablespoon of lime or lemon juice works wonders. Feel free to play around until you find your perfect blend! To store your Slow Cooker Indian Beef Curry, let it cool first. Place it in an airtight container. This keeps it fresh longer. If you want to freeze it, use freezer-safe bags. Squeeze out the air to avoid freezer burn. For reheating, you can use the microwave or stovetop. If using the microwave, heat it in short bursts. Stir in between to heat evenly. On the stovetop, warm it over low heat. Add a splash of water or coconut milk if it seems too thick. Your curry lasts about 3 to 4 days in the fridge. Make sure to check for any signs of spoilage before eating. In the freezer, it can last up to 3 months. This makes it perfect for meal prep or busy days when you want a quick meal. Just remember to label your containers with dates for easy tracking! How long can I cook it in the slow cooker? You can cook your curry in the slow cooker for 7-8 hours on low. If you are in a hurry, you can cook it for 4-5 hours on high. The beef must be tender. Can I use frozen beef? Yes, you can use frozen beef. Just remember to thaw it before cooking. This helps with even cooking and flavor. Is this recipe spicy? This recipe can be adjusted for spice. The chili powder adds heat. You can add more or less based on your taste. How do I make it ahead of time? You can prepare the curry a day ahead. Cook it, let it cool, and store it in the fridge. Reheat before serving for the best flavor. Can I use a different cooking method? Yes, you can cook this curry on the stovetop. Just simmer it in a pot for about 1.5 to 2 hours. Stir often to keep it from sticking. What should I serve with Indian beef curry? Pair your curry with warm naan or fluffy basmati rice. Both soak up the sauce well and add to the meal’s enjoyment. You've now learned how to make a delicious slow cooker Indian beef curry. From choosing the right beef chuck and fresh veggies to mastering spices, every step counts. I've shared tips to enhance flavor and texture, plus fun variations to keep it exciting. Don’t forget to store leftovers properly to enjoy later. This dish is easy to make, and your family will love it. Enjoy the rich flavors and the warm feeling of a home-cooked meal. It's worth every minute spent in the kitchen.

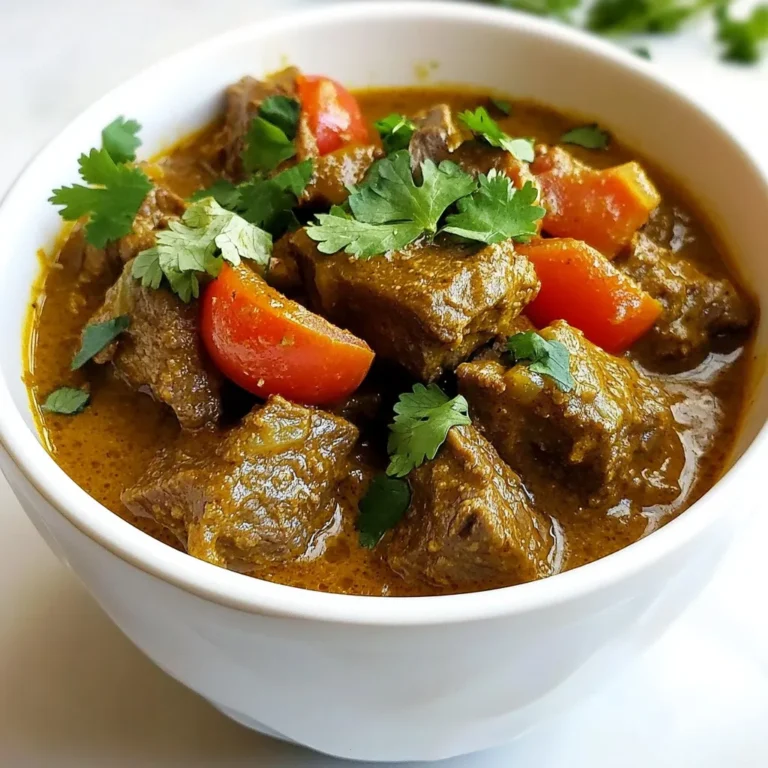
Savory Slow Cooker Indian Beef Curry Easy Recipe

- 2 cups Biscoff cookies, crushed - 1 cup cream cheese, softened - 1/2 cup powdered sugar - 1 teaspoon vanilla extract - 1 cup white chocolate chips - 1 tablespoon coconut oil - Additional crushed Biscoff cookies for coating The base of these truffles is simple. The Biscoff cookies bring a sweet, spiced flavor. Softened cream cheese gives the truffles a rich, creamy texture. The powdered sugar adds sweetness, while vanilla extract enhances the flavor. White chocolate chips and coconut oil create a smooth coating. You can add a pinch of salt to balance the sweetness. A bit of cinnamon will give a warm spice kick. For a nutty taste, consider using ground almonds or hazelnuts. If you want a fun twist, try adding a splash of coffee or espresso. - Large mixing bowl - Parchment-lined baking sheet - Microwave-safe bowl - Fork for dipping - Refrigerator for chilling These tools will help you make your truffles easily. A mixing bowl is key for combining ingredients. The baking sheet holds the truffles while they chill. The microwave-safe bowl is perfect for melting chocolate. A fork helps you coat the truffles evenly. Lastly, the fridge cools and sets your treats. {{ingredient_image_1}} Start by gathering your ingredients. You need crushed Biscoff cookies, cream cheese, powdered sugar, and vanilla extract. In a large mixing bowl, combine these four ingredients. Mix them well until a dough forms. It should feel soft and sticky. If it feels dry, add a touch more cream cheese. This mixture is the heart of your truffles. Once the mixture is ready, it’s time to shape the truffles. Use your hands to roll the mixture into small balls. Aim for a bite-sized shape, about one inch in diameter. Place each ball on a baking sheet lined with parchment paper. Make sure they are spaced apart. After shaping all the truffles, chill them in the fridge for about 30 minutes. This helps them firm up, making them easier to coat later. Next, you’ll melt the white chocolate for coating. Grab a microwave-safe bowl and add your white chocolate chips and coconut oil. Heat the mixture in the microwave in 30-second bursts. Stir it after each interval until the chocolate is smooth. Be careful not to overheat it, as chocolate can burn quickly. Now it’s time to coat the truffles. Take the chilled truffles out of the fridge. Dip each one into the melted white chocolate. Use a fork to help coat them evenly. Allow any extra chocolate to drip off. While the coating is still wet, sprinkle crushed Biscoff cookies on top. This adds a nice touch and extra flavor. Once coated, place the truffles back on the parchment sheet. Chill them again for about 15 minutes to let the chocolate set. For presentation, arrange your truffles on a decorative plate. Add a sprinkle of crushed Biscoff cookies around them for a pretty display. When making Biscoff Cookie Truffles, there are a few mistakes to watch out for. First, don’t skip softening the cream cheese. Cold cream cheese makes mixing hard. Second, avoid overmixing the dough. If you mix too much, the truffles may become tough. Lastly, don’t rush the chilling time. Chilling helps the truffles hold their shape. For the best texture, aim for a smooth dough. Mix the crushed Biscoff cookies and cream cheese until just combined. When rolling the balls, keep them small and uniform. This helps them set better. After rolling, chill them for at least 30 minutes. This step is key for a firm truffle. You can enhance the flavor of your truffles in fun ways. Try adding spices like cinnamon or nutmeg to the dough. These spices blend well with Biscoff cookies. You could also swap white chocolate for dark or milk chocolate for a richer taste. For crunch, add nuts or sprinkles on top. Each variation gives a new twist to your truffles. Pro Tips Chill for Better Coating: Allow the truffles to chill in the refrigerator for at least 30 minutes before dipping. This helps them maintain their shape and makes coating easier. Perfect Melting Technique: When melting white chocolate, use a microwave in short bursts to prevent burning. Stir well between intervals for a smooth consistency. Customize Your Coating: Feel free to experiment with different toppings like chopped nuts, sprinkles, or coconut flakes for added flavor and texture. Storage Tips: Store truffles in an airtight container in the refrigerator for up to two weeks to keep them fresh and delicious. {{image_2}} You can easily switch up the chocolate. Instead of white chocolate, try dark or milk chocolate. Both add a rich taste. Dark chocolate gives a deep flavor that balances the sweetness. Milk chocolate is creamy and sweet. Just melt it the same way as white chocolate. Your truffles will look and taste great! Want to mix it up? Add spices or extracts to the filling. A dash of cinnamon or nutmeg can make a warm flavor. You could also use almond or peppermint extract for a twist. Just remember, a little goes a long way. Mix it into the cookie dough for a fun new taste! Add some crunch for texture! Chopped nuts, like almonds or pecans, can enhance your truffles. You can also mix in crushed pretzels for a salty bite. This adds a nice contrast to the sweet filling. Just fold them in with the cookie mixture before rolling into balls. Enjoy the extra crunch! To keep your Biscoff Cookie Truffles fresh, store them in an airtight container. Line the container with parchment paper to avoid sticking. Place a layer of truffles in the container, then add more layers with parchment between them. This helps keep their shape and flavor. When stored properly in the fridge, Biscoff Cookie Truffles last about one week. If you want them to last longer, consider freezing them. They will still taste great for up to three months in the freezer. To freeze your truffles, first chill them in the fridge until set. Then, place them in a single layer on a baking sheet and freeze for about two hours. Once firm, transfer them to a freezer-safe bag or container. Label the bag with the date so you can keep track of freshness. When you want to enjoy them, let them thaw in the fridge overnight. Yes, you can make Biscoff cookie truffles ahead of time. They stay fresh in the fridge for up to a week. Just store them in an airtight container. If you want to keep them longer, freeze them for up to three months. Thaw them in the fridge before serving. Yes, there are gluten-free options! Look for gluten-free Biscoff cookies. Many brands offer gluten-free versions. Make sure to check the labels when buying. The rest of the ingredients, like cream cheese and white chocolate, are usually gluten-free. You can find pre-made Biscoff cookie truffles at some specialty stores or online. Websites like Amazon or gourmet shops often stock them. Check local bakeries too, as some may sell these tasty treats. If you want an alternative to cream cheese, try mascarpone cheese. It has a similar texture and taste. You can also use Greek yogurt for a lighter option. Just make sure it's thick enough to hold the truffles together. You can get creative with toppings for your truffles! Try using chopped nuts, sprinkles, or drizzles of chocolate. You can also roll them in cocoa powder or crushed cookies for extra flavor. Mix and match to find your favorite combination! Biscoff cookie truffles are easy and delicious treats. We covered essential ingredients and optional add-ins that boost flavor. I shared step-by-step guides to make and coat your truffles. Avoid common mistakes for the best texture, and explore fun variations to keep it exciting. Store your truffles properly to enjoy them longer. With these tips, you can impress your family and friends with amazing truffles. Enjoy the process and have fun creating your own sweet masterpieces!

Biscoff Cookie Truffles Simple and Yummy Treat

To make this roasted winter vegetable salad, you need a few key veggies. Here’s what you will need: - 2 cups butternut squash, peeled and cubed - 2 cups Brussels sprouts, halved - 1 cup carrots, sliced - 1 red onion, cut into wedges These vegetables bring color and nutrition to your dish. Butternut squash adds a sweet flavor. Brussels sprouts offer a nice crunch. Carrots add a hint of earthiness, and red onion gives a bit of zing. You can make this salad even better with some tasty extras. Here are some optional add-ins: - 1/4 cup feta cheese, crumbled - 1/4 cup toasted walnuts, chopped Feta cheese brings a creamy texture and a salty bite. Walnuts add a nutty crunch that contrasts well with the soft roasted veggies. The right seasoning makes a big difference in flavor. Here’s what you need: - 2 tablespoons olive oil - 1 teaspoon dried thyme - 1 teaspoon smoked paprika - Salt and pepper to taste - 2 tablespoons balsamic glaze Olive oil helps the veggies roast perfectly. Thyme and smoked paprika add warmth and depth. Salt and pepper enhance all the flavors, while balsamic glaze gives a sweet and tangy finish. Now you're all set to create a delicious and healthy roasted winter vegetable salad! {{ingredient_image_1}} First, you need to preheat your oven to 400°F (200°C). This step is key for roasting. A hot oven helps the vegetables cook evenly. Next, you’ll prepare the vegetables. Take 2 cups of butternut squash and peel it. Then cube it into bite-sized pieces. Halve 2 cups of Brussels sprouts and slice 1 cup of carrots. Cut 1 red onion into wedges. Place all these veggies in a large mixing bowl. Now, we roast the vegetables. Drizzle 2 tablespoons of olive oil over them. Add 1 teaspoon of dried thyme and 1 teaspoon of smoked paprika. Don’t forget to season with salt and pepper to taste. Toss everything well to coat. Spread the seasoned mix onto a large baking sheet in a single layer. Roast in the oven for 25 to 30 minutes. Stir them halfway through. Look for that tender texture and slight caramelization. Once done, let them cool for a few minutes. This step ensures the salad has the best taste. Roasting vegetables brings out their natural sweetness. Start by preheating your oven to 400°F (200°C). Cut your veggies into even pieces to ensure they cook at the same rate. Spread them out on a baking sheet. If they are too close together, they will steam instead of roast. Give them space to caramelize properly. Stir the veggies halfway through cooking. This helps them brown evenly. You can boost the taste of your roasted winter vegetable salad with simple tricks. Use fresh herbs like rosemary or parsley for a bright touch. Adding a splash of lemon juice just before serving brightens the flavors. For a smoky kick, try using smoked salt instead of regular salt. Toss in some garlic for extra depth. Experiment with different types of vinegar, like apple cider, for a twist. Serve your salad warm or at room temperature. Use a large wooden bowl for a rustic look. Top it with crumbled feta and chopped walnuts for crunch. Drizzle balsamic glaze over the top for a tangy finish. This adds a lovely shine and flavor. Pair this salad with grilled chicken or quinoa for a complete meal. Enjoy the vibrant colors and flavors on your plate! Pro Tips Use Fresh Vegetables: Opt for seasonal, fresh vegetables for the best flavor and nutrition. Don’t Overcrowd the Baking Sheet: Give the vegetables enough space on the baking sheet to ensure they roast rather than steam. Experiment with Spices: Feel free to add your favorite herbs or spices to customize the flavor profile of the salad. Make it a Meal: Add protein such as grilled chicken or chickpeas to make this salad a satisfying main dish. {{image_2}} While butternut squash, Brussels sprouts, and carrots shine in this salad, you can mix it up! Consider using sweet potatoes for a creamy texture. They add a nice sweetness. Parsnips or turnips also bring a unique flavor. They roast well and add depth. You can even try cauliflower for a crunchy twist. Just chop it into bite-sized pieces and follow the same roasting steps. The key is to choose vegetables you enjoy. If you want a vegan or dairy-free salad, skip the feta cheese. Instead, add chickpeas for protein. They will make the salad hearty. You can also use avocado slices for a creamy feel. They provide healthy fats and a rich flavor. A sprinkle of nutritional yeast can give a cheesy taste without dairy. Just make sure to check your balsamic glaze for hidden dairy ingredients. Balsamic glaze adds a nice tang, but other dressings can shine too. Try a simple lemon vinaigrette. Mix lemon juice, olive oil, salt, and pepper for a fresh taste. A tahini dressing works well too. It’s creamy and adds a nutty flavor. For a spicy kick, consider a sriracha dressing. Just mix sriracha with olive oil and a bit of honey or maple syrup. Each dressing brings its own vibe to the salad. Feel free to experiment and find your favorite! If you have leftovers, store them in an airtight container. Place the cooled salad in the fridge. It will stay fresh for up to three days. Keep the feta and walnuts separate for the best texture. To reheat, place the salad in a microwave-safe dish. Heat on medium for about one to two minutes. Stir halfway to ensure even warming. You can also reheat in the oven. Preheat to 350°F (175°C) and warm for 10-15 minutes. Freezing is not ideal for this salad. The texture of roasted vegetables changes when frozen. If you must freeze, omit the feta and walnuts. Place the cooled vegetables in a freezer bag. They can last up to three months. Thaw in the fridge before reheating. Yes, you can use frozen vegetables. Frozen veggies are convenient. They work well in this salad. Just remember to thaw them first. Pat them dry to avoid excess water. This keeps your salad crisp and fresh. To make the salad heartier, try adding some protein. Grilled chicken or chickpeas fit well. You can also mix in quinoa or farro for more texture. These additions turn a light salad into a filling meal. Just toss them in after roasting the veggies. Yes, this salad is naturally gluten-free. All the ingredients are safe for gluten-free diets. Just be sure to check the balsamic glaze. Some brands may add gluten. If in doubt, make your own glaze by reducing balsamic vinegar. This way, you have full control over the ingredients. This blog post covered the essentials for making a tasty roasted vegetable salad. You learned about the best veggies, how to prepare them, and key tips for perfect roasting. I shared ways to enhance flavors and different serving ideas. You can also explore variations with alternative vegetables and dressings. Finally, I explained how to store your leftovers or freeze them for later. Use this guide to make vibrant salads that everyone will love! Enjoy your cooking adventure!

Roasted Winter Vegetable Salad Flavorful and Healthy

- 12 store-bought wonton wrappers - 1 cup ground chicken or turkey - 1 tablespoon green onion, finely chopped - 1 teaspoon ginger, minced - 1 teaspoon soy sauce - 1 teaspoon sesame oil - 4 cups chicken broth - 1 cup bok choy, chopped - 1 cup mushrooms, sliced (shiitake or button) - Salt and pepper to taste - Fresh cilantro for garnish (optional) - Chili oil for drizzling (optional) Wonton wrappers are the star of this dish. They hold the filling and cook quickly. I prefer store-bought wrappers for ease, but you can make your own if you want to. Ground chicken or turkey offers a mild flavor. You can also use pork or shrimp for a different taste. Green onion adds a fresh, crisp note. Ginger gives warmth and depth to the filling. Chicken broth forms the soup base. It brings all the flavors together. Bok choy and mushrooms add great texture and nutrition. You can use shiitake or button mushrooms, depending on what you like. If you can’t find wonton wrappers, try dumpling wrappers. They work well, too. If you want a meat-free option, replace ground meat with tofu or mushrooms. Use vegetable broth instead of chicken broth for a lighter soup. If you lack bok choy, spinach or kale can substitute. Feel free to adjust seasoning. If you don’t have sesame oil, olive oil will work in a pinch. Lastly, cilantro and chili oil are optional but add a nice touch. {{ingredient_image_1}} To make wontons, start by mixing the filling. In a bowl, combine 1 cup of ground chicken or turkey, 1 tablespoon of finely chopped green onion, 1 teaspoon of minced ginger, 1 teaspoon of soy sauce, 1 teaspoon of sesame oil, and a pinch of salt and pepper. Mix until everything blends well. Next, take a wonton wrapper. Place about 1 teaspoon of the meat mixture in the center. Moisten the edges with water. Fold the wrapper over to form a triangle. Press the edges to seal tightly. Repeat this for all the wrappers until your filling is gone. In a large pot, pour in 4 cups of chicken broth. Heat the pot on medium until the broth boils. Once boiling, gently drop the wontons into the broth. Cook them for about 4-5 minutes. You will know they are ready when they float to the top. After the wontons are cooked, add 1 cup of chopped bok choy and 1 cup of sliced mushrooms. Cook for an additional 2-3 minutes. This will make the vegetables tender and flavorful. Now it's time to serve your soup. Taste the broth and add more salt or pepper if needed. Ladle the hot soup into bowls. For a fresh touch, garnish with cilantro. If you like some heat, drizzle chili oil on top. Enjoy your warm and cozy wonton soup! To wrap wontons well, use a clean, flat surface. Place a wonton wrapper in front of you. Spoon about 1 teaspoon of filling in the center. Moisten the edges with a little water. Fold the wrapper over to form a triangle. Press the edges firmly to seal. You can also create a little pouch by bringing the two corners together. This makes them pretty and fun to eat. Practice makes perfect, so don't worry if they aren't perfect at first! To make your wonton soup even better, consider these tips. Add fresh herbs like cilantro or basil for a burst of flavor. A splash of lime juice can also brighten the soup. For a little heat, drizzle some chili oil on top. You can also add garlic or more ginger for extra zest. Experiment with different mushrooms to find your favorite. Shiitake and button mushrooms both add great taste. You can make wonton soup ahead of time, which is super helpful! Prepare the wontons and place them on a baking sheet. Cover them and freeze until firm. Once frozen, transfer them to a freezer bag. You can cook them from frozen when you're ready. Just add them directly to boiling broth. The soup will still taste fresh and delicious. If you make the broth ahead, store it in the fridge. Reheat it before adding the wontons and veggies. This saves time on busy nights! Pro Tips Make it Your Own: Feel free to experiment with different proteins like shrimp or tofu for the filling. You can also add vegetables like grated carrots or chopped spinach for extra nutrition. Seal the Wontons Properly: Ensure that you seal the wontons tightly to prevent them from opening during cooking. Use a little water on your fingers to help create a better seal. Freshness is Key: For the best flavor, use fresh ginger and green onions. They enhance the overall flavor profile of the soup and add a refreshing taste. Customize Your Broth: You can enhance the chicken broth by adding a splash of rice vinegar or a dash of fish sauce for a deeper umami flavor. {{image_2}} You can easily make a vegetarian version of wonton soup. Swap out the meat for a mix of vegetables. Use ingredients like finely chopped carrots, bell peppers, and tofu. The filling can be just as tasty without meat. Use the same wonton wrappers. Follow the same steps for wrapping and cooking. The broth stays the same, or you can use vegetable broth. This gives it a rich flavor. For those who love heat, try the spicy version. Add chili paste or Sriracha to the meat mixture. You can also drizzle chili oil on top when serving. This adds a nice kick. If you want more spice, sprinkle red pepper flakes into the broth. Adjust the spice level to your taste. It’s a great way to warm up on a chilly day. The broth is key to a great soup. While chicken broth works well, you can try other options. Use beef broth for a richer taste. If you prefer a lighter option, use seafood broth. For a vegan choice, stick with vegetable broth. Each option gives a different flavor. Don't be afraid to mix and match. It’s all about what you enjoy most! After enjoying your soup, store leftovers in an airtight container. Place it in the fridge. It lasts up to three days. The wontons may soften but will still taste great. Keep the soup and wontons separate if possible. This helps maintain their texture. When stored together, the wontons soak up the broth. If you have extra wontons, freeze them for later. Arrange them in a single layer on a baking sheet. Make sure they don’t touch each other. Freeze for about one hour. Once frozen, transfer them to a zip-top bag. They will keep well for up to three months. This way, you can enjoy wontons anytime. To reheat your soup, warm it on the stove. Use low heat to avoid burning. If you freeze wontons, cook them straight from the freezer. Add them to the boiling broth. They will need a few extra minutes to cook. Always check if they float to know they are done. Enjoy your warm soup with fresh toppings! Yes, you can use homemade wonton wrappers. Making them is fun and simple. Just mix flour and water to form dough. Roll it out thin and cut into squares. Fill them as you would with store-bought wrappers. Fresh wrappers can taste even better! Wonton soup lasts about 3 to 4 days in the fridge. Store it in an airtight container. If you keep the wontons separate, they stay fresh longer. Add them just before serving to keep them tender. You can use pork or beef for your wonton soup. Shrimp is also a popular choice. If you prefer plant-based options, try tofu or mushrooms. Each protein adds a unique flavor, making your soup special. We've covered all you need for a great wonton soup. We explored key ingredients, shared cooking steps, and offered helpful tips. You learned about tasty variations and how to store leftovers. Wonton soup can suit any taste, whether you prefer it spicy or vegetarian. In the end, making this dish can bring warmth and joy to your table. Enjoy creating and sharing this comforting recipe with loved ones.

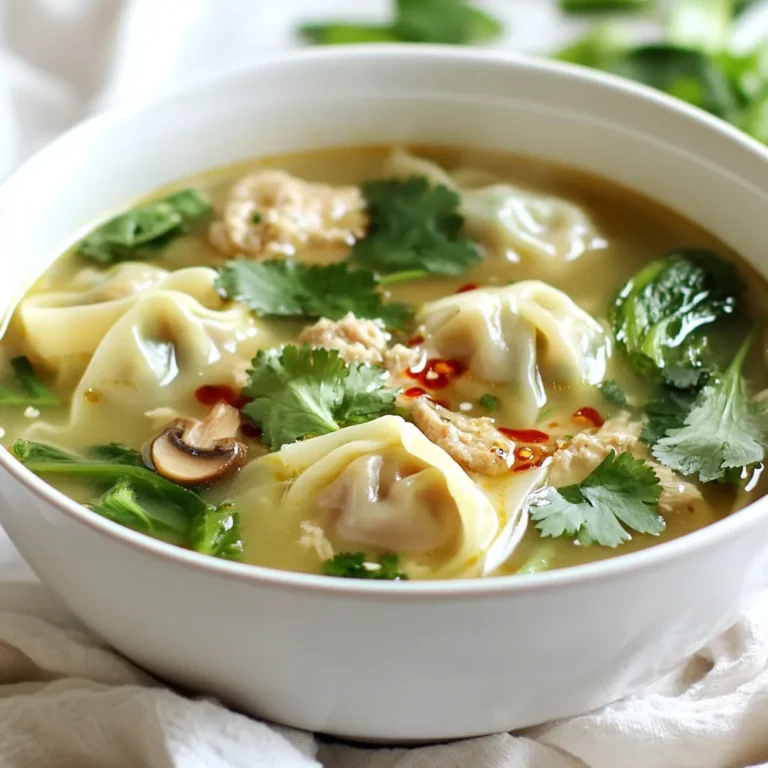
Easy Wonton Soup Quick and Flavorful Family Meal

- 1 pound fresh strawberries, washed and dried - 8 ounces dark chocolate, chopped - 4 ounces white chocolate, chopped (for drizzling) - 1 tablespoon coconut oil (optional, for smoother chocolate) - Sprinkles or crushed nuts (for garnish, optional) - Lollipop sticks or wooden skewers You need fresh strawberries for this recipe. Look for bright red berries. Wash and dry them well. Any water will make the chocolate slide off. Next, you will use dark chocolate. Choose high-quality chocolate for the best taste. Chopping it helps it melt evenly. If you like a smooth finish, add coconut oil. It makes the chocolate creamy and easy to coat. You will also need white chocolate for drizzling. This adds a lovely touch to your pops. Lastly, gather lollipop sticks or wooden skewers. They will help you hold your strawberry pops. Consider adding sprinkles or crushed nuts. They give extra crunch and color. Get creative with your toppings! Enjoy making these sweet and simple treats! {{ingredient_image_1}} First, you need to dry the strawberries completely. Any moisture will stop the chocolate from sticking. Use a clean kitchen towel or paper towels to pat them dry. Next, take your lollipop sticks and insert them into each strawberry. Push the stick halfway into the fruit. This will help hold the strawberry while you dip it. Now, let’s melt the dark chocolate. In a microwave-safe bowl, combine the chopped dark chocolate with coconut oil. The coconut oil is optional, but it helps make the chocolate smooth. Heat the bowl in the microwave in 30-second intervals. Stir in between each interval. Keep doing this until the chocolate is melted and smooth. It’s time to dip! Hold each strawberry by the stick and dip it into the melted dark chocolate. Make sure it is fully coated. Let any extra chocolate drip off before placing it on a parchment-lined baking sheet. Next, melt the white chocolate in another bowl using the same microwave method. Once melted, use a fork or a piping bag to drizzle white chocolate over the chocolate-covered strawberries. While the white chocolate is still warm, add sprinkles or crushed nuts for a fun touch. Finally, refrigerate the strawberries for about 30 minutes until the chocolate sets. Enjoy your sweet treat! To get that perfect chocolate coating, you must dry your strawberries well. Any moisture can stop the chocolate from sticking. I recommend using a clean towel to gently pat them dry. For extra smoothness, try adding one tablespoon of coconut oil to your dark chocolate. This simple step helps the chocolate flow better and gives a shiny finish. Want to add some flair? Drizzling white chocolate on top is a fun way to do it! For this, you can use a fork or a piping bag. If you don’t have a piping bag, a plastic sandwich bag works too. Just snip a tiny corner off and drizzle away! Keep your hands steady, and let your creativity shine. When it comes to serving, think about how to make your pops look amazing. You can place them on a nice platter or stick them in a jar for a fun display. If you’re gifting these treats, clear bags tied with a ribbon look lovely. They make the perfect treat for parties, events, or just because! Pro Tips Dry Thoroughly: Make sure to dry the strawberries completely; moisture will cause the chocolate to slide off. Use Quality Chocolate: Choose high-quality chocolate for the best flavor and texture in your pops. Chill Before Coating: Consider chilling the strawberries before dipping to help the chocolate set faster. Experiment with Toppings: Get creative with toppings! Try different sprinkles, crushed nuts, or even coconut flakes for variety. {{image_2}} You can choose different types of chocolate for your pops. Dark chocolate is rich and bold. It brings out the sweet taste of the strawberries. Milk chocolate is creamier and sweeter. It is a great choice for kids. White chocolate adds a lovely sweetness and a nice contrast. Each type offers a unique flavor. You can try one or mix them for fun! Want to make your chocolate pops stand out? Try infusing chocolate with extracts. Vanilla gives a warm, sweet taste. Peppermint adds a cool, fresh note. Both choices enhance the chocolate flavor. You can also add spices for a twist. A pinch of cinnamon adds warmth. Sea salt can balance the sweetness and add depth. Garnishes add a fun touch to your pops! You can use many types of sprinkles. Colorful sprinkles brighten up the dessert. Crushed cookies like Oreos add crunch and flavor. Chopped nuts give a nice texture and healthy boost. Let your creativity shine with your choices! To keep your chocolate-covered pops fresh, store them in an airtight container. Place parchment paper between layers to prevent sticking. Keep the container in a cool, dry place. Avoid putting them near heat or sunlight. The ideal temperature is between 60-70°F. Humidity should be low to avoid moisture. Chocolate-covered strawberry pops stay fresh for about 3 to 5 days. After that, they may start to lose flavor and texture. Signs of spoilage include a dull appearance or a sticky surface. If the strawberries smell sour, it's time to toss them. Yes, you can freeze chocolate-covered strawberries! Wrap each pop in plastic wrap. Then, place them in a freezer-safe bag. They can stay frozen for up to 2 months. To thaw, move them to the fridge overnight. This keeps the chocolate smooth while preventing moisture. Enjoy your sweet treat whenever you want! You can use frozen strawberries, but fresh ones are best. Frozen berries have extra water from freezing. This water makes it hard for the chocolate to stick. If you use frozen strawberries, thaw them first. Pat them dry with a paper towel. This helps the chocolate coat better. Dark chocolate is my favorite for this treat. It has rich flavor and melts well. You can also use milk chocolate if you prefer it sweeter. White chocolate works great for drizzling. Make sure to use good quality chocolate. It will melt smoothly and taste better. Chocolate-covered strawberry pops last about 2 to 3 days in the fridge. Keep them in an airtight container. This helps keep them fresh. You might notice the chocolate can get a bit dull over time. It’s best to eat them soon for the best taste! You can create delicious chocolate-covered strawberry pops using simple ingredients. We discussed the right steps for preparation, including drying your strawberries and melting chocolate smoothly. I shared tips for decoration and ideas for serving. Remember, you can mix and match flavors and toppings to make them your own. Lastly, store your treats properly to keep them fresh. Enjoy making these fun snacks, and get creative with your variations!

Chocolate Covered Strawberry Pops Sweet and Simple Treat

- 1 large head of broccoli, chopped into small florets - 1 medium onion, diced - 2 cloves garlic, minced - 4 cups vegetable broth - 2 cups shredded sharp cheddar cheese - 1 cup heavy cream These main ingredients make your soup creamy and tasty. The broccoli adds nutrition and color. The onion and garlic bring in great flavor. The vegetable broth forms the soup base. Sharp cheddar cheese adds a rich and cheesy taste. Heavy cream gives it a smooth texture. - 2 tablespoons olive oil - 1 teaspoon thyme (fresh or dried) - Salt and pepper to taste - Croutons for garnish Optional ingredients can enhance your soup. Olive oil helps cook the onions well. Thyme adds a nice herbal note. Salt and pepper are key for flavor balance. Croutons make a crunchy topping. You can mix and match these ingredients to suit your taste. {{ingredient_image_1}} First, let’s chop the broccoli. Take one large head of broccoli and cut it into small florets. This helps the broccoli cook evenly and blend well. Next, dice one medium onion into small pieces. Then, mince two cloves of garlic. This adds great flavor. Now, you have a choice of tools for blending. An immersion blender is great for this soup. You can blend it right in the pot. It’s easy and quick. If you use a regular blender, be careful. Blend in small batches to avoid spills. Start cooking by heating two tablespoons of olive oil in a large pot over medium heat. Add the diced onion and sauté it for about five minutes. The onion should look clear and soft. Then, add the minced garlic and one teaspoon of thyme. Cook for another one to two minutes. This brings out the flavors. Next, add the chopped broccoli and four cups of vegetable broth to the pot. Bring it to a boil, then lower the heat. Let it simmer for about 15 to 20 minutes. You want the broccoli to be tender. After cooking, blend the soup until it is smooth. If you used an immersion blender, you’re all set. If not, pour the soup into a regular blender in batches. When smooth, return the soup to the pot. Stir in one cup of heavy cream and two cups of shredded sharp cheddar cheese. Keep mixing until the cheese melts completely. Finally, add salt and pepper to taste. If the soup seems thick, add more broth or water to thin it. Let it simmer for five more minutes to warm everything through. Enjoy this creamy goodness! To boost flavor, pick sharp cheddar cheese. Sharp cheddar adds depth and tang. It makes the soup rich and tasty. I recommend using freshly shredded cheese. Pre-shredded cheese contains additives that can affect melting. Proper seasoning also matters. Start with salt and pepper. Taste as you go. If you want more flavor, add a pinch of garlic powder. You might also try a dash of hot sauce for heat. For a creamier soup, use heavy cream. It adds richness and smoothness. Stir it in slowly while heating the soup. This method keeps the cream from curdling. To achieve a smoother texture, use an immersion blender. Blend until it reaches your desired consistency. If you don't have one, pour the soup into a regular blender. Blend in batches to avoid spills. If the soup feels too thick, add more vegetable broth. Thin it out until it’s just right. Pro Tips Use Fresh Broccoli: Fresh broccoli will give the best flavor and texture to your soup. Look for bright green florets and firm stalks. Cheese Choices: While sharp cheddar is traditional, feel free to mix in other cheeses like Gruyère or Monterey Jack for a unique flavor profile. Adjust Creaminess: If you prefer a lighter soup, you can substitute half of the heavy cream with milk or use a lower-fat cream alternative. Garnish for Texture: Adding croutons not only enhances the presentation but also provides a delightful crunch that balances the creaminess of the soup. {{image_2}} You can easily adjust this soup for different diets. If you want a vegan option, use dairy-free cheese. Coconut cream can replace heavy cream for a rich texture. Both options make a creamy soup without dairy. For gluten-free needs, check your broth and cheese. Most vegetable broths are gluten-free. Just ensure the cheese is also free from gluten. You can add many flavors to this soup. Fresh herbs like basil or parsley brighten the taste. A sprinkle of paprika adds a warm kick. You might also try spices like cumin or coriander for unique flavors. Incorporating other vegetables can boost nutrition too. Carrots and celery can add sweetness. Cauliflower blends well and keeps the soup creamy. Peas can add a pop of color and flavor. Mix and match to create your perfect bowl! To store leftover soup, let it cool first. Pour it into a container with a tight lid. This helps keep it fresh. You can store it in the fridge for up to four days. When you are ready to eat, reheat it on the stove. Stir it often to avoid burning. You can also use a microwave. Just heat it in short bursts, stirring in between. To freeze broccoli cheddar soup, let it cool completely. Pour it into freezer-safe bags or containers. Leave some space at the top, as it will expand. This soup stays good in the freezer for up to three months. When you want to eat it, take it out and place it in the fridge overnight to thaw. For quick thawing, you can use the microwave. Reheat it gently on the stove, stirring well before serving. You can use both fresh and frozen broccoli. Fresh broccoli offers a crisp taste. Frozen broccoli is convenient and still tasty. Both options work well in this soup. To add spice, try adding red pepper flakes or cayenne pepper. You can also use a splash of hot sauce. Start small and adjust to your heat level. This soup pairs well with crusty bread or a fresh salad. Grilled cheese sandwiches also make a nice side. You can add croutons for extra crunch. The soup lasts about 3-4 days in the fridge. Store it in an airtight container. Reheat gently on the stove or in the microwave. Yes, you can make this soup in a slow cooker. Sauté the onions and garlic first. Then, add all ingredients to the slow cooker and cook on low for 6-8 hours. Blend as usual before serving. This blog post covered how to make a delicious broccoli cheddar soup. We explored key ingredients like broccoli, garlic, and sharp cheddar. You learned step-by-step instructions for cooking and blending the soup. I shared tips for enhancing flavor and texture. Plus, we discussed variations for different diets and flavor profiles. Remember, easy storage tips keep your soup fresh. Enjoy making this tasty soup your way. Experiment with flavors to find your favorite!

Easy Broccoli Cheddar Soup Simple and Creamy Recipe

To make a delicious Vegetarian Stuffed Pepper Casserole, we need some simple ingredients. Here’s what you will gather: - 4 large bell peppers (red, green, yellow, or orange) - 1 cup quinoa, rinsed - 2 cups vegetable broth - 1 can (15 oz) black beans, drained and rinsed - 1 can (15 oz) diced tomatoes (with juices) - 1 cup corn kernels (fresh or frozen) - 1 teaspoon cumin - 1 teaspoon smoked paprika - 1 teaspoon garlic powder - 1 teaspoon onion powder - Salt and pepper to taste - 1 cup shredded cheese (cheddar or a dairy-free alternative) - Fresh cilantro or parsley for garnish These ingredients blend together to bring out bold flavors. The bell peppers serve as a colorful base. Quinoa adds a nice texture and protein. Black beans and corn give extra flavor and nutrients. The spices like cumin and smoked paprika create warmth and depth. Garlic and onion powder add savory notes. Finally, cheese ties everything together with a creamy finish. Using fresh herbs for garnish adds a nice touch. They bring brightness to the dish. You can choose different colors of bell peppers. Each color adds its own flavor and visual appeal. Now that you know the ingredients, you can start gathering them. The preparation is fun and rewarding. Let's create something tasty together! {{ingredient_image_1}} - Preheat your oven to 375°F (190°C). - Cut the tops off the bell peppers. Remove the seeds and dice the tops. Set them aside. - In a medium saucepan, combine 1 cup of quinoa with 2 cups of vegetable broth. - Bring the mix to a boil. Reduce the heat, cover, and simmer for 15 minutes until the quinoa is fluffy. - In a large bowl, combine the cooked quinoa, 1 can of black beans, 1 can of diced tomatoes, and 1 cup of corn. - Add the diced bell pepper tops, 1 teaspoon of cumin, 1 teaspoon of smoked paprika, 1 teaspoon of garlic powder, and 1 teaspoon of onion powder. - Season with salt and pepper to taste. Mix everything until well combined. - Spread a thin layer of the filling mixture in the bottom of a large casserole dish. - Fill each bell pepper with the quinoa mixture and place them upright in the dish. - Pour any leftover quinoa mixture around the peppers in the casserole dish. - Cover the dish with aluminum foil and bake for 30 minutes. - After 30 minutes, remove the foil. Sprinkle 1 cup of shredded cheese on top and bake for another 10-15 minutes until the cheese is melted and bubbly. To ensure quinoa is perfectly cooked, rinse it before use to remove bitterness. Cook it in vegetable broth for extra flavor. Bring the broth to a boil, then lower the heat and cover it. Let it simmer for about 15 minutes until fluffy. This will give your casserole a nice base. For flavor enhancements, spices are key. I use cumin and smoked paprika to add warmth. Garlic powder and onion powder boost the taste too. Adjust the amounts to suit your palate. A pinch of salt and pepper ties it all together. Don’t be afraid to taste as you go! For presentation, serve the casserole in the baking dish. This keeps it warm and inviting. If you want to impress, plate individual stuffed peppers on a bed of the quinoa mix. This adds color and looks fun. Drizzle some olive oil on top for a shiny finish. A sprinkle of fresh herbs can add charm and flavor. To complete your meal, pair it with a simple side salad or crusty bread. A light vinaigrette works well with the dish’s rich flavors. You could also serve it with a dollop of yogurt or sour cream for a creamy contrast. Fresh herbs like cilantro or parsley brighten up the dish. Chop them finely and sprinkle on top just before serving. A drizzle of olive oil can add a nice touch too. You might also consider adding toppings for extra flavor. Try sliced avocado for creaminess or jalapeños for a kick. Crushed tortilla chips can add crunch. Don’t hesitate to get creative with your garnishes! Pro Tips Choose Colorful Peppers: Using a mix of bell pepper colors not only enhances the visual appeal but also adds a variety of flavors to the casserole. Cook Quinoa Properly: Ensure the quinoa is rinsed thoroughly before cooking to remove any bitterness. This will enhance the overall flavor of the dish. Customize the Filling: Feel free to add other vegetables like zucchini or mushrooms to the filling for added texture and nutrition. You can also substitute the black beans with chickpeas for a different taste. Make it Ahead: This casserole can be prepared a day in advance. Just assemble it and store it in the fridge. When ready to serve, bake it directly from the fridge, adding a few extra minutes to the cooking time. {{image_2}} You can easily change the ingredients in this dish. For beans, try kidney or pinto beans instead of black beans. They add a great taste and texture. If you want to swap grains, use rice or couscous instead of quinoa. This gives you more options and keeps the dish exciting. Want a kick? Add jalapeños or a splash of hot sauce. This will raise the spice level and give your casserole a fun twist. If you prefer cheese, you can switch it up too. Try mozzarella, pepper jack, or a dairy-free cheese. Each choice gives a different flavor, making every meal unique. If you need a gluten-free version, check all your ingredients. Make sure they are gluten-free. You can also use gluten-free grains like rice or quinoa. This way, everyone can enjoy this tasty dish without worry. To keep your Vegetarian Stuffed Pepper Casserole fresh, follow these tips: - Cool down the casserole to room temperature before storage. - Use airtight containers to prevent moisture loss and keep flavors intact. - Store in the fridge for up to 4 days. When you're ready to enjoy leftovers, here’s how to reheat: - Oven method: Preheat to 350°F (175°C). Place casserole in an oven-safe dish. Cover with foil. Heat for about 20-25 minutes until warmed through. - Microwave method: Use a microwave-safe plate. Heat in 1-2 minute intervals, stirring in between, until hot. This helps keep the texture of the peppers and the flavor of the dish. Want to save some for later? Freezing is a great option: - Cool the casserole completely before freezing. - Wrap tightly in plastic wrap, then aluminum foil to prevent freezer burn. - Freeze for up to 3 months. When you’re ready to eat, thaw overnight in the fridge. Reheat using the oven or microwave, as noted above. Enjoy your flavorful dish anytime! You can store the casserole in the fridge for up to four days. Make sure to keep it in an airtight container. This keeps the flavors fresh and tasty. Yes, you can prep this casserole a day ahead. Cook the quinoa and mix the filling. Store the filling in the fridge. When ready, stuff the peppers, bake, and enjoy. This saves time and makes dinner easy. This casserole pairs well with a green salad or garlic bread. You could also serve it with rice or a simple yogurt dip. These sides add flavor and texture to your meal. Yes, this recipe is easy to make vegan. Just swap the cheese for a dairy-free option. Check that the vegetable broth is vegan too. This way, everyone can enjoy a delicious meal. This blog post covered making a delicious Vegetarian Stuffed Pepper Casserole. We explored the ingredients, preparation, cooking, and serving methods. I shared tips, variations, and storage information to ensure success with this dish. Try different spices or veggies to match your taste. This casserole is versatile and good for meal prep. Enjoy great flavor and healthy eating with every bite!

Vegetarian Stuffed Pepper Casserole Flavorful Dish

PREV 1 … 75 76 77 … 86 NEXT
spicy fork kitchen

explore

DessertsDinnerAppetizersDrinks

Our Policies

  • Cookie Policy
  • Copyright Policy
  • Disclaimer
  • GDPR Policy
  • Terms Of Use
Back to Top
  • About
  • Contact Us
  • Privacy Policy
© 2026 spicy fork kitchen