FREE DINNER EBOOK! Get your copy!
  • Cookie Policy
  • GDPR Policy
  • Disclaimer
  • Terms Of Use
  • Visit my other site: Fun Cookie Recipes
spicy fork kitchen
  • Home
  • Dinner
  • Desserts
  • Drinks
  • Appetizers
  • Contact
  • About
  • Privacy Policy
  • Home
  • Dinner
  • Desserts
  • Drinks
  • Appetizers
  • Contact
  • About
  • Privacy Policy
  • Cookie Policy
  • GDPR Policy
  • Disclaimer
  • Terms Of Use
Visit my other site: Fun Cookie Recipes

HOME / CATEGORIES /

Latest

To make Cajun Shrimp Alfredo Pasta, you need these key items: - 8 oz fettuccine pasta - 1 lb large shrimp, peeled and deveined - 2 tablespoons Cajun seasoning - 3 tablespoons olive oil, divided - 3 cloves garlic, minced - 1 cup heavy cream - 1/2 cup grated Parmesan cheese - 1/4 cup fresh parsley, chopped - Salt and pepper to taste - Lemon wedges for garnish These ingredients create a vibrant dish packed with flavor. The fettuccine serves as a great base, while the shrimp brings a nice texture. The Cajun seasoning adds a kick that makes each bite exciting. You can easily change a few items if needed: - For the fettuccine, try penne or linguine. Both hold sauce well. - If you want to switch shrimp, use chicken or scallops. They work nicely in this dish. - For dairy-free options, use coconut cream and nutritional yeast instead of heavy cream and cheese. This still gives a creamy feel without dairy. Making these swaps can help you enjoy this dish in various ways. You can cater to different diets without losing the great flavor! {{ingredient_image_1}} First, cook the fettuccine pasta until it is al dente. This usually takes about 8-10 minutes. Make sure to check the package for exact timing. Once done, drain the pasta. Remember to save ½ cup of the pasta water. This water will help make your sauce creamy later. Next, toss the shrimp with Cajun seasoning in a bowl. Ensure each shrimp is coated well. In a large skillet, heat 2 tablespoons of olive oil over medium-high heat. Add the shrimp and sauté for 2-3 minutes on each side. You want them to turn pink and opaque. Once cooked, set the shrimp aside on a plate. In the same skillet, reduce the heat to medium and add the last tablespoon of olive oil. Add minced garlic and sauté for about 1 minute until it smells great. Pour in the heavy cream and bring it to a gentle simmer. Stir in the grated Parmesan cheese until it melts and becomes creamy. If the sauce looks too thick, add some reserved pasta water to reach your preferred consistency. Now, return the cooked shrimp to the skillet. Mix them into the creamy sauce. Next, add the cooked fettuccine and toss everything together gently. Make sure the pasta is well coated with the sauce. Season with salt and pepper to taste. Finally, stir in chopped parsley for a fresh touch. Serve right away and enjoy! How to prevent shrimp from overcooking To keep shrimp tender, cook them for just 2-3 minutes per side. They should turn pink and opaque. Remove them as soon as they reach this point. Overcooking makes shrimp rubbery. Choosing the right shrimp Use large shrimp for this dish. They hold up well in the sauce and have great flavor. Look for fresh shrimp that are firm and smell like the ocean. Frozen shrimp work too; just thaw them first. Adjusting Cajun seasoning levels Start with 2 tablespoons of Cajun seasoning. Taste the shrimp after cooking. If you want more heat, add a little more seasoning. You can always sprinkle more on top before serving. Adding extra spices for depth Consider adding a pinch of smoked paprika or cayenne pepper. These spices add a nice kick and depth to the dish. Just a little goes a long way. Experiment to find your perfect blend. Tips for achieving the desired thickness For a rich sauce, use heavy cream. If it gets too thick, add some reserved pasta water. This also helps the sauce cling to the pasta better. Stir well to mix. How to fix a thin sauce If your sauce is too thin, try simmering it a bit longer. This will help it thicken. You can also add more cheese for creaminess. Stir in grated Parmesan until it melts and blends in. Pro Tips Perfectly Cooked Shrimp: Be careful not to overcook the shrimp; they should be pink and opaque. Remove them from the heat as soon as they reach that point to avoid a rubbery texture. Homemade Cajun Seasoning: For a fresher flavor, consider making your own Cajun seasoning blend using paprika, cayenne, garlic powder, onion powder, and dried herbs. Adjusting Sauce Consistency: If your sauce is too thick, add the reserved pasta water gradually until you achieve the desired creaminess without compromising flavor. Garnish for Visual Appeal: A sprinkle of freshly chopped parsley not only adds a pop of color but also enhances the dish's flavor profile, making it more appetizing. {{image_2}} You can switch up the protein in this dish. Chicken works great. Cut it into bite-sized pieces and season just like the shrimp. Sausage is another tasty choice. Use smoked sausage for a nice smoky flavor. If you prefer a vegetarian option, try using mushrooms or tofu instead of meat. These options add flavor and keep it filling. If you need gluten-free pasta, use rice or quinoa pasta. They cook well and taste good with the sauce. For those who want vegan options, replace heavy cream with coconut milk or cashew cream. Nutritional yeast can replace Parmesan cheese. This keeps the dish creamy and flavorful while meeting your dietary needs. Want to add some veggies? Spinach or bell peppers work well here. Toss in fresh spinach right before serving for a pop of color and nutrition. You can also sauté bell peppers with the garlic for extra flavor. Try different cheese types in the sauce, like gouda or cheddar, for a unique twist. Each cheese adds a new layer of taste. To keep your Cajun Shrimp Alfredo Pasta fresh, store it in an airtight container. Refrigerate it within two hours after cooking. This helps prevent bacteria growth. Use the following tips for best results: - Cool the dish first: Let it sit for about 30 minutes before sealing. - Separate pasta and sauce: If possible, store the pasta and sauce in separate containers. This keeps them from getting too soggy. When you reheat your pasta, keep it moist to avoid dryness. Here are methods that work well: - Stovetop: Heat a skillet over low heat. Add a splash of water or cream. Stir often until warmed through. - Microwave: Place the pasta in a microwave-safe dish. Cover it with a damp paper towel. Heat in short bursts of 30 seconds, stirring in between. To refresh the flavors, you can add a little extra Cajun seasoning or fresh parsley while reheating. Yes, you can freeze Cajun Shrimp Alfredo Pasta. However, the texture may change slightly. Follow these steps for best results: - Cool completely: Allow the dish to come to room temperature. - Use freezer-safe containers: Divide into portions for easier thawing later. To thaw and reheat: - Thaw overnight in the fridge: This is the best way to keep the texture. - Reheat on the stovetop: Add a bit of cream or water to help the sauce regain its creamy texture. Enjoy your meal again with these simple storage and reheating tips! Cajun Shrimp Alfredo Pasta is a creamy dish with bold flavors. It brings together shrimp, pasta, and a rich sauce. I love how the Cajun seasoning adds a kick to the creaminess of Alfredo. This dish usually features fettuccine pasta, but you can use any pasta you like. It’s perfect for dinner or a special occasion. Common serving styles include plating the pasta and topping it with shrimp and sauce. You can garnish it with fresh parsley and lemon for extra zest. Many people enjoy it with a side salad or garlic bread. To make Cajun Shrimp Alfredo Pasta spicier, consider adding more Cajun seasoning. You can also use hot sauce or crushed red pepper flakes for an extra kick. Adjust the spice level to fit your taste. If you want a different flavor, try adding chipotle sauce for a smoky taste. Mixing in a dash of cayenne pepper gives a nice heat without changing the dish too much. Just remember to taste as you go, so you don’t overpower the other flavors. Yes, you can make Cajun Shrimp Alfredo Pasta ahead of time. To meal prep, cook the pasta and shrimp but skip the sauce. Store the pasta and shrimp in separate containers. You can prepare the sauce fresh when you’re ready to eat. The best storage method is to keep everything in airtight containers in the fridge. This keeps the flavors fresh. When reheating, add a splash of cream or pasta water to the sauce to restore its creaminess. Cajun Shrimp Alfredo Pasta is a tasty dish with simple steps. You learned about the key ingredients, like fettuccine and shrimp, and how to cook them right. I shared tips for flavor, texture, and storage to help you succeed. Experiment with different proteins or veggies for fun twists, too. This dish is great for any meal. With a few simple tweaks, you can make it your own. Enjoy your cooking adventure and the delicious results!

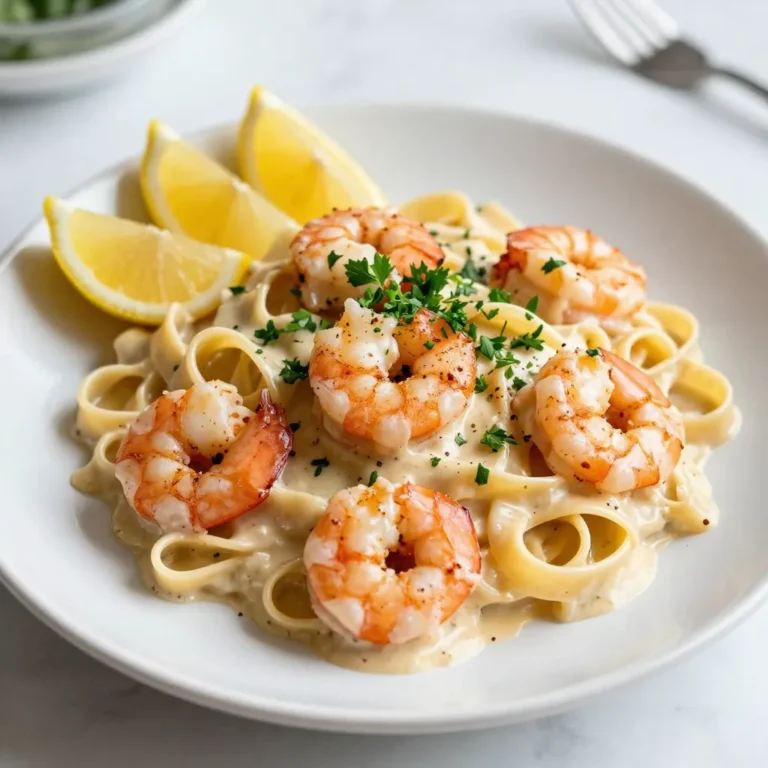
Cajun Shrimp Alfredo Pasta Flavorful and Simple Recipe

- Zucchini: 4 medium zucchinis - Chicken: 2 cups cooked chicken breast, shredded - Buffalo Sauce: ½ cup (adjust to taste) - Cream Cheese: 1 cup, softened - Cheddar Cheese: 1 cup, shredded - Green Onions: ½ cup, sliced - Seasonings: Salt and pepper, to taste - Olive Oil: For brushing Using the right ingredients is key to making tasty Buffalo Chicken Stuffed Zucchini. First, choose 4 medium zucchinis. They are the perfect size for stuffing. You will need 2 cups of shredded chicken. This can be from a rotisserie chicken or any cooked chicken breast you have. The buffalo sauce brings the heat and flavor. Start with ½ cup, but you can add more if you like it spicy. Next, cream cheese adds a creamy texture. You need 1 cup, and it should be softened for easy mixing. For a cheesy finish, use 1 cup of shredded cheddar cheese. It melts nicely on top. You will also need ½ cup of sliced green onions for a fresh taste. Don’t forget the basics! Add salt and pepper to enhance the flavors. Lastly, brush the zucchinis with olive oil. This helps them cook well and adds a nice flavor. {{ingredient_image_1}} To start, slice the zucchinis in half lengthwise. Use a spoon to scoop out the seeds and create boats. Aim for about half an inch of flesh left to hold the filling. Brush the insides of the zucchinis lightly with olive oil. This adds flavor and helps them cook better. Season with salt and pepper to taste. This simple step enhances the overall taste of your dish and balances the flavors. In a mixing bowl, combine the shredded chicken, buffalo sauce, cream cheese, half of the cheddar cheese, and half of the green onions. Mix well until everything is combined. The cream cheese gives a creamy texture, while the chicken adds protein. The buffalo sauce brings heat and flavor. Be sure to adjust the buffalo sauce to your liking. This ratio helps each bite stay juicy and flavorful. Preheat your oven to 375°F (190°C). This temperature allows the zucchinis to cook without burning. After preheating, place the zucchinis on a baking sheet, cut side up, and bake for 10 minutes. This softens them just right. After 10 minutes, remove them from the oven. Fill each zucchini boat with the buffalo chicken mixture, packing it gently. Sprinkle the remaining cheddar cheese on top. If you like blue cheese, add that too. Return the baking sheet to the oven and bake for another 15-20 minutes. Your goal is to melt the cheese and make it bubbly. Enjoy the aroma as they bake! You can change the flavor by adjusting the buffalo sauce. If you love heat, add more sauce. If you prefer mild, use less. You can also mix in spices like garlic powder or paprika. These add depth and twist to the dish. Watch the baking time. Overbaking can make the zucchini soggy. Bake them just until tender. You can also grill or air fry the stuffed zucchinis. Grilling adds a smoky flavor, while air frying makes them crispy. Both options are quick and fun! Pair your stuffed zucchinis with a fresh salad or some crunchy veggies. They balance the heat well. For a nice touch, garnish with extra green onions or a drizzle of ranch dressing. This makes your dish look great and taste even better! Pro Tips Adjust the Spice Level: If you prefer a milder flavor, reduce the amount of buffalo sauce or mix in some ranch dressing for creaminess. Use Leftover Chicken: This recipe is a great way to use up leftover rotisserie chicken or any cooked chicken you have on hand. Experiment with Toppings: Feel free to add other toppings like diced tomatoes, jalapeños, or avocado for added flavor and texture. Make it Ahead: You can prepare the stuffed zucchinis in advance and store them in the refrigerator. Just bake before serving! {{image_2}} You can change the meat if you want. Ground turkey works well. For a vegetarian option, try tofu. It soaks up the sauce nicely and gives a great texture. You can also use tempeh for a heartier bite. Sauces can add a twist to your dish. Instead of buffalo sauce, use barbecue sauce for a sweet flavor. Ranch dressing or hot sauce can also be fun alternatives. Mix and match to find your favorite taste! If you want low-carb or keto meals, skip the cream cheese and use a cream cheese alternative. You can replace the chicken with shredded cauliflower. This keeps the dish light and tasty. For vegetarians or vegans, swap the chicken with chickpeas or lentils. Cream cheese can be replaced with cashew cream. It adds a rich flavor and texture that everyone will love. Adjusting the recipe is easy. If you need more servings, double the ingredients. Use eight zucchinis instead of four. This is great for parties or family meals. For meal prep, make a big batch and store them in the fridge. They taste great reheated. Each stuffed zucchini makes a perfect portion. You can store leftovers in an airtight container. Make sure to cool the zucchinis first. They last up to three days in the fridge. When you want to reheat, place them in an oven at 350°F (175°C). Heat for about 10 to 15 minutes, or until warm. This keeps the cheese nice and gooey. You can also use a microwave, but the oven gives a better texture. If you want to freeze stuffed zucchinis, wrap them well in plastic wrap. Place them in a freezer-safe bag or container. They stay fresh for up to three months. When you're ready to eat, take them out and thaw overnight in the fridge. For best taste, bake them in the oven after thawing. Reheat at 350°F (175°C) for about 20-25 minutes. This way, they stay flavorful and delicious. You can enjoy this dish with several sides and drinks. Here are some great options: - Salad: A fresh green salad pairs well and adds crunch. - Rice: Try serving with white or brown rice for a filling meal. - Veggies: Roasted or steamed vegetables complement the flavors nicely. - Bread: Garlic bread or rolls can round out the meal. - Drinks: Pair with iced tea, lemonade, or a light beer. To spice up your stuffed zucchini, consider these tips: - Increase Buffalo Sauce: Add more buffalo sauce to the filling. - Hot Sauce: Mix in your favorite hot sauce for an extra kick. - Spicy Cheese: Use pepper jack cheese instead of cheddar. - Chili Flakes: Sprinkle red chili flakes on top before baking. Yes, you can use raw chicken, but it requires more care. Here’s what to do: - Cook the Chicken First: Sauté or boil the chicken until fully cooked. - Shred After Cooking: Let it cool, then shred it for the filling. - Timing: Cook zucchini for about 10 minutes. Then, add the filling and bake until chicken reaches 165°F (74°C). This blog post covered how to make Buffalo Chicken Stuffed Zucchini. You learned about the ingredients needed, the step-by-step process, and key cooking tips. We also explored variations for different diets and ways to store leftovers. Buffalo chicken stuffed zucchini is fun to make and delicious to eat. I hope you enjoy making your own version. Happy cooking!

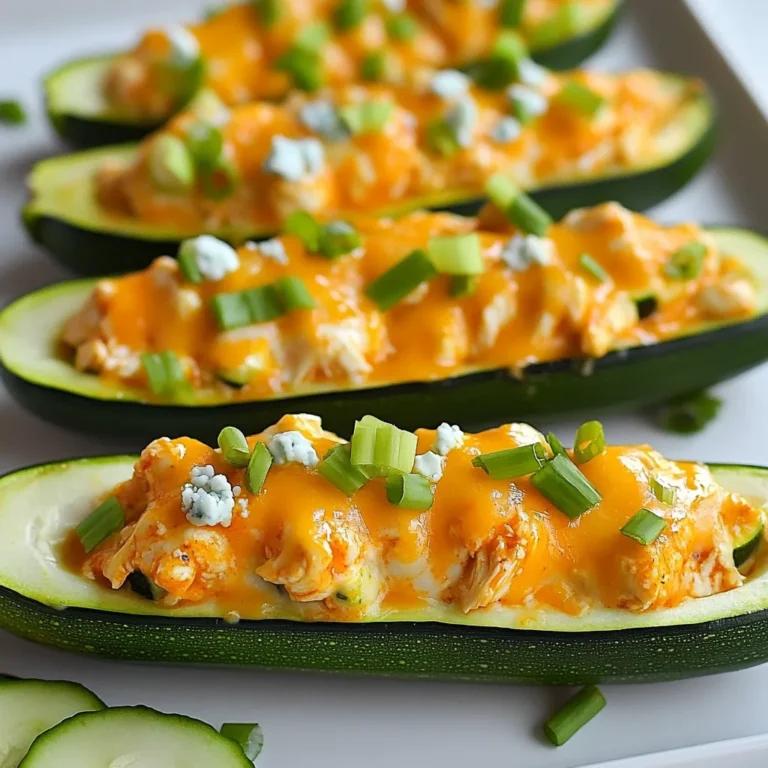
Buffalo Chicken Stuffed Zucchini Flavorful and Simple Dish

- 1 pound ground chicken - 1/2 cup breadcrumbs - 1/4 cup green onions, finely chopped Ground chicken is the star of this dish. It gives the meatballs a light texture. Breadcrumbs help bind the mixture while keeping it moist. Green onions add a fresh crunch and a mild onion flavor. - 1 tablespoon garlic, minced - 1 tablespoon ginger, minced - 1 tablespoon soy sauce (low sodium) - 1 tablespoon sesame oil - 1 teaspoon red pepper flakes Garlic and ginger bring warmth and depth. They add a zesty kick that pairs well with chicken. Soy sauce and sesame oil give umami and richness. Red pepper flakes add heat, making these meatballs exciting. - 1/4 cup sweet chili sauce - 1/4 cup hot sauce (adjust to preference) - Sesame seeds for garnish - Fresh cilantro for garnish Sweet chili sauce gives a nice sweetness to balance the heat. Hot sauce can be adjusted based on your spice level. Sesame seeds add crunch, while cilantro adds a fresh touch. Garnishing makes the dish pop visually and adds flavor. {{ingredient_image_1}} First, you need to preheat the oven to 400°F (200°C). This step is crucial for a good bake. While the oven heats, line a baking sheet with parchment paper. This helps prevent sticking and makes clean-up easy. In a large mixing bowl, combine the ground chicken, breadcrumbs, and chopped green onions. Next, add minced garlic and ginger. These add great flavor. Then, pour in soy sauce and sesame oil. Don't forget the red pepper flakes for some heat. Add a pinch of salt and pepper too. Mix everything well, but be careful not to overmix. This keeps your meatballs tender. Now comes the fun part! Using your hands, shape the mixture into small meatballs, about 1 inch in size. Place them on the lined baking sheet. Make sure they have space between them. Bake these meatballs in the oven for 20 minutes. They should be cooked through and a little golden on the outside. To get tender meatballs, mix gently. Overmixing can make them tough. Combine the ground chicken, breadcrumbs, and spices just until blended. For baking time, check them after 20 minutes. If they look golden and firm, they are done. If you want them a bit firmer, add 3 more minutes. Choose your hot sauce wisely. A mild sauce adds flavor without too much heat. If you like it spicy, go for a stronger sauce. You can also tweak the spices. Want more heat? Add extra red pepper flakes. Prefer a sweeter taste? Increase the sweet chili sauce. Taste as you mix! Make your dish look great. Serve meatballs on a large platter or in bowls. Drizzle with extra sauce for a shiny finish. Sprinkle sesame seeds and chopped green onions on top. Add fresh cilantro for a bright touch. This will make your meal look as good as it tastes! Pro Tips Keep the Meatballs Tender: Avoid overmixing the ground chicken mixture to ensure your meatballs stay soft and juicy. Adjust the Heat: Customize the level of spiciness by adjusting the amount of red pepper flakes and hot sauce in the recipe. Perfect Sauce Coating: Toss the meatballs in the sauce right after they come out of the oven for the best flavor absorption. Garnish for Flavor: Add fresh cilantro and sesame seeds just before serving to enhance both the presentation and taste. {{image_2}} You can switch ground chicken for ground turkey or beef. Both options work well. Ground turkey gives a lighter flavor. It is also lean and healthy. Ground beef adds richness. It brings a heartier taste to your meatballs. Just keep the same measurements. The cooking time remains the same too. You can change the spice levels with different sauces. For a mild flavor, use less hot sauce. You can also pick milder sauces like sriracha or chili garlic sauce. If you want more heat, add extra red pepper flakes. Mix in more hot sauce to really turn up the heat. Adjust the flavors to suit your taste buds. If you need gluten-free options, swap regular breadcrumbs for gluten-free ones. There are many great choices at the store. You can even make your own with gluten-free bread. Just toast and crumble it. This way, your meatballs stay tasty and safe for everyone. To keep your meatballs fresh, use airtight containers. Glass or plastic containers work well. Make sure they are clean and dry before adding the meatballs. You can also use a resealable plastic bag for easy storage. Just remove as much air as you can before sealing it. When reheating, aim to keep the meatballs juicy. The best way is to use the oven. Preheat it to 350°F (175°C). Place the meatballs on a baking sheet and cover them with foil. This helps keep the moisture in. Heat for about 10-15 minutes. You can also use a microwave. Place the meatballs in a bowl with a splash of water. Cover with a damp paper towel and heat for 1-2 minutes. Freezing your meatballs is easy and great for meal prep. First, let the meatballs cool completely. Arrange them in a single layer on a baking sheet. Freeze them for about 1-2 hours. Once frozen, transfer them to a freezer-safe bag or container. Label it with the date. You can also freeze the sauce separately to keep the flavors fresh. When ready to use, thaw overnight in the fridge or reheat directly from frozen. Yes, you can make Firecracker Chicken Meatballs ahead of time. You can prepare the meatballs and store them in the fridge. Just keep them in an airtight container. They will stay fresh for up to three days. You can also freeze them for later. After shaping the meatballs, place them on a tray. Freeze them for about an hour, then transfer to a freezer bag. When you're ready to cook, bake them straight from the freezer. This keeps them tasty and easy to enjoy later. You can change the spice level by adding or reducing hot sauce. If you like it spicy, add more red pepper flakes or hot sauce. If you prefer milder meatballs, use less hot sauce. You can also use a milder hot sauce. Taste the mixture before baking to adjust it. This way, you can make the meatballs just how you like them. Firecracker Chicken Meatballs pair well with many sides. Consider serving them with steamed rice or quinoa. These options soak up the sauce nicely. You can also add a fresh salad for a crunch. Veggies like cucumber, carrots, or bell peppers work great. For something warm, serve them with stir-fried vegetables. This adds color and flavor to your meal. This article covered how to make tasty Firecracker Chicken Meatballs. We looked at key ingredients like ground chicken, garlic, and soy sauce. I shared tips for baking, flavoring, and interesting variations. You can adjust spice levels and choose different proteins. Remember to store any leftovers properly for the best taste. Try these meatballs for a fun meal that everyone will enjoy. Cooking can be simple and satisfying! Enjoy experimenting with flavors and sharing your results.

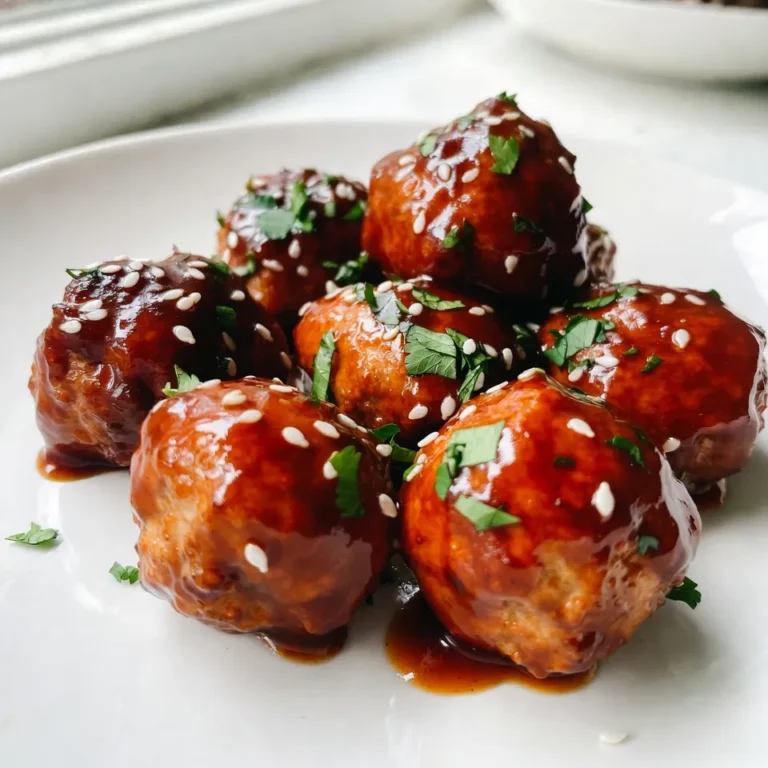
Firecracker Chicken Meatballs Flavorful and Easy Recipe

To create Cheesy Jalapeño Popper Pinwheels, you need a few key ingredients. Each one adds a special flavor to the dish. Here’s what you need: - Tortilla wrap: A large 10-inch tortilla works best. It holds the filling well. - Cream cheese and cheese types: You’ll need 4 oz of softened cream cheese, 1/2 cup shredded cheddar cheese, and 1/2 cup shredded mozzarella cheese. These cheeses blend smoothly for a rich taste. - Jalapeños and spices: Use 1/4 cup of diced pickled jalapeños. Adjust the amount based on how spicy you want it. Add 1 teaspoon garlic powder, 1 teaspoon onion powder, and 1/2 teaspoon smoked paprika. These spices enhance the flavors. - Optional ingredients: You can add 1/4 cup of cooked, crumbled bacon if you like. For a vegetarian option, just skip the bacon or add more jalapeños. With these ingredients, you can make a snack that is creamy, spicy, and packed with flavor. Each bite will leave you wanting more! {{ingredient_image_1}} First, gather your ingredients. In a medium bowl, mix the softened cream cheese, shredded cheddar, and mozzarella. Blend them until smooth. This step is key to getting a creamy filling. Next, add the diced jalapeños, crumbled bacon, garlic powder, onion powder, smoked paprika, salt, and pepper. Stir well to combine. The jalapeños add a nice kick, while bacon brings a savory touch. Adjust the jalapeños to your taste for the perfect heat. Now, take your tortilla wrap and lay it flat on a clean surface. Spread the cheesy jalapeño mixture evenly over the tortilla, leaving a half-inch border at the edges. Make sure to cover every inch for a great taste in every bite. Starting from one end, carefully roll the tortilla into a tight log shape. Keep the filling inside as you roll. A tight roll helps the pinwheels hold together well. Chilling the rolled pinwheel is important. Wrap it tightly in plastic wrap and refrigerate for at least 30 minutes. This helps firm it up, making slicing easier. After chilling, remove the wrap. Use a sharp knife to slice the log into 1-inch pinwheels. Aim for uniform slices for a nice presentation. Arrange your pinwheels on a platter and garnish with chopped cilantro for a fresh look. Enjoy! To make tasty Cheesy Jalapeño Popper Pinwheels, adjust the jalapeño heat to fit your taste. If you like it mild, use fewer jalapeños. You can also choose milder pickled jalapeños. For extra heat, use fresh jalapeños or add more pickled ones. Spice variations can add fun twists. Try adding a bit of cayenne pepper for a kick or some taco seasoning for a different flavor. Each spice change can take your pinwheels to a new level. When it's time to slice your pinwheels, use a sharp knife. This keeps the edges clean and neat. A dull knife can squish the pinwheels, making them look messy. Slice them into uniform pieces for a nice look. Aim for 1-inch pieces to make them easy to grab. You can also wet the knife with water between slices to help it glide through the filling. This little trick keeps everything intact and pretty. Pro Tips Chill for Better Slicing: Refrigerating the rolled pinwheel for at least 30 minutes not only helps firm up the filling, but it also makes slicing much easier and neater. Customize Your Heat: Adjust the amount of jalapeños based on your spice preference. For a milder version, use fewer jalapeños or substitute with sweet bell peppers. Add Variety: Feel free to experiment with different cheeses or add-ins like diced red bell peppers, green onions, or different spices to customize the flavor to your liking. Perfect Presentation: For a beautiful presentation, slice the pinwheels with a sharp knife and arrange them in a circular pattern on your serving platter, garnished with fresh cilantro. {{image_2}} You can make Cheesy Jalapeño Popper Pinwheels vegetarian. First, replace the bacon with more jalapeños. This gives you extra spice and crunch. You can also use different cheese blends. Try pepper jack for a kick or goat cheese for creaminess. Both options keep the flavor strong. You can add more flavor to your pinwheels. Fresh herbs like cilantro or chives brighten the taste. Spices like cumin or chili powder can also boost the flavor. Another fun idea is to use flavored tortillas. Garlic or spinach tortillas add a pop of color and taste. These small changes make your pinwheels unique and exciting. To keep your Cheesy Jalapeño Popper Pinwheels fresh, wrap them well. Use plastic wrap or an airtight container. This prevents them from drying out. Store them in the fridge for the best taste and texture. If you want to freeze them, slice the pinwheels first. Lay them flat on a baking tray. Freeze until solid, then transfer to a freezer bag. This method makes it easy to grab just what you need later. In the fridge, these pinwheels last about 3 to 5 days. After that, they may lose freshness. To tell if they’ve gone bad, check for any off smells or mold. If they feel slimy, it's best to toss them. Fresh, tasty snacks should always be safe to eat! Yes, you can make Cheesy Jalapeño Popper Pinwheels ahead of time. To do this, prepare the pinwheels and wrap them tightly in plastic wrap. Store them in the fridge for up to two days before serving. This allows the flavors to blend nicely. Just remember to slice them right before you serve. Serving these pinwheels can be fun and creative. Arrange them on a large platter in a circular pattern. Garnish with fresh cilantro for color. You can also place a small bowl of ranch or sour cream in the center for dipping. This adds extra flavor and makes it visually appealing. Absolutely! You can customize the heat level of your pinwheels. If you want less heat, use fewer jalapeños or remove the seeds. For more spice, add extra jalapeños or some hot sauce. You can also try using spicy cheese blends for added flavor. Adjust it to your taste! You learned about making Cheesy Jalapeño Popper Pinwheels. We covered ingredients, steps, and helpful tips. From mixing cheese to chilling and slicing, each step matters. I shared ways to adjust spice levels and create variations. You can easily store these pinwheels for later. Try these fun snacks at your next gathering. Your friends will love them. Keep experimenting with flavors to find what you enjoy best. Happy rolling!

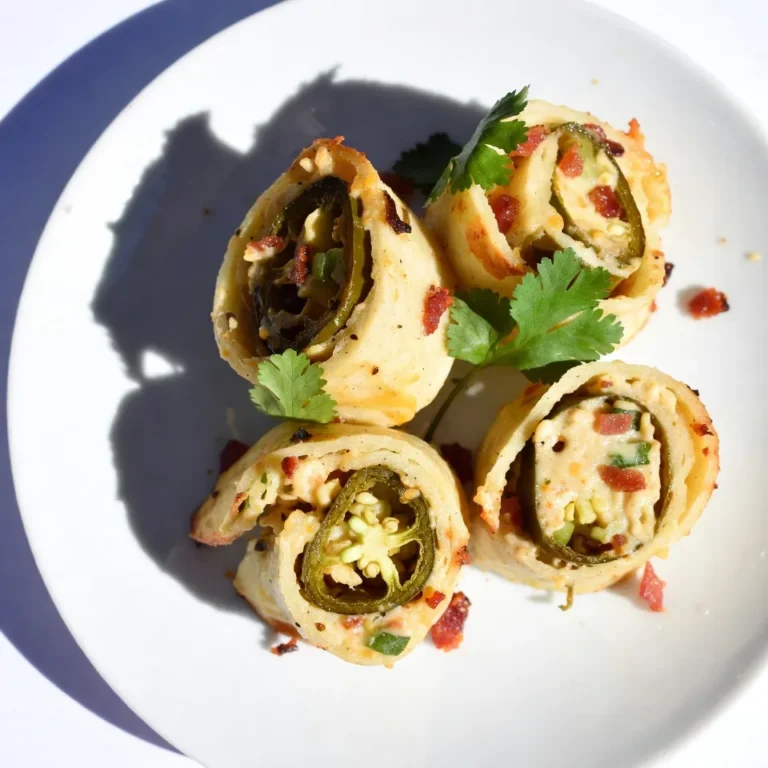
Cheesy Jalapeño Popper Pinwheels Flavorful Snack Treat

- 4 large bell peppers (any color) - 1 cup cooked brown rice - 1 cup black beans, rinsed and drained - 1 cup corn (frozen or fresh) - 1 cup cherry tomatoes, halved - 1 small red onion, finely chopped - 2 cloves garlic, minced - 1 teaspoon ground cumin - 1 teaspoon smoked paprika - 1 cup shredded cheese (mozzarella or cheddar) - 2 tablespoons olive oil - Salt and pepper to taste - Fresh cilantro for garnish Stuffed peppers are a great dish. They look fun and taste amazing. You can use any color of bell pepper. Each color has a slightly different taste. I love red peppers for their sweetness. The filling is where the magic happens. You start with cooked brown rice. It gives the dish a nice base. Black beans add protein. They also bring a soft texture. Corn adds sweetness and a pop of color. Cherry tomatoes bring juiciness. I use red onion for its mild taste. Garlic adds flavor depth. Cumin and smoked paprika are key spices. They give warmth and a smoky note. Cheese is the final touch. It melts beautifully over the top. I recommend mozzarella or cheddar for a creamy finish. Don’t forget the olive oil! It helps with cooking and adds richness. Season with salt and pepper to balance the flavors. Finally, fresh cilantro brightens each bite. It adds a fresh feel to this vibrant meal. {{ingredient_image_1}} - Preheat your oven to 375°F (190°C). - Cut the tops off the bell peppers. Remove the seeds and membranes inside. Lightly brush the outside with olive oil. Place them upright in a baking dish. - In a large skillet, heat the remaining olive oil over medium heat. - Add the chopped onion and sauté for about 3-4 minutes until it is soft. - Stir in the minced garlic and cook for one more minute until it smells nice. - Add the cooked brown rice, black beans, corn, cherry tomatoes, ground cumin, smoked paprika, salt, and pepper. Mix everything well. Let it cook for 5-7 minutes. This helps the flavors blend. - Carefully spoon the veggie and rice mixture into each bell pepper. Pack it in gently but firmly. - Top each filled pepper with the remaining shredded cheese. - Cover the baking dish loosely with aluminum foil. Bake for 25 minutes. Then, remove the foil and bake for an extra 10 minutes. This makes the peppers soft and the cheese bubbly. - Take the dish out of the oven. Let it cool a bit before serving. Garnish with fresh cilantro for extra flavor. How to choose the best bell peppers When selecting bell peppers, look for firm ones with smooth skin. Choose bright colors that feel heavy for their size. Avoid any with soft spots or wrinkles. They should be fresh and crisp, which means they will taste better. Timing and temperature for perfect cooking Set your oven to 375°F (190°C) for the best results. Bake the peppers for 25 minutes covered with foil. After that, take off the foil and bake for another 10 minutes. This way, the peppers cook well and the cheese melts perfectly. Cheese options and substitutions For the cheese, I love using mozzarella or cheddar. Both melt nicely and add great flavor. If you want a dairy-free option, try nutritional yeast or vegan cheese. You can also use feta for a tangy twist. Presentation tips To make your dish eye-catching, serve stuffed peppers on a rustic board or colorful plate. Drizzle a bit of extra virgin olive oil on top for shine. Finish by sprinkling fresh cilantro for a pop of color and flavor. Side dishes that pair well Stuffed peppers go well with a fresh salad or a side of quinoa. You can also serve them with crispy tortilla chips and salsa for some crunch. These sides add texture and balance to your meal. Pro Tips Choose Colorful Peppers: Using a mix of colored bell peppers not only makes the dish visually appealing but also adds a variety of flavors and nutrients. Customize Your Filling: Feel free to add other ingredients like quinoa, spinach, or different beans based on your dietary preferences or what you have on hand. Make Ahead: You can prepare the filling a day in advance and stuff the peppers just before baking for a quick and easy weeknight meal. Experiment with Cheese: Try different types of cheese, such as feta or pepper jack, for a unique twist on the flavor profile of your stuffed peppers. {{image_2}} You can make stuffed peppers for different diets easily. For a vegetarian option, simply skip the black beans or cheese. Instead, add more veggies or grains. You can use mushrooms, zucchini, or spinach for added flavor and texture. If you want a vegan stuffed pepper, use dairy-free cheese or leave out the cheese altogether. Add nuts or seeds for protein. Chopped walnuts or sunflower seeds can give it a nice crunch. You can also use a plant-based cheese made from nuts. Spices and herbs can change the taste of your stuffed peppers. Try adding chili powder for heat or oregano for a Mediterranean touch. Fresh herbs like basil or parsley can give a bright flavor. You can also switch up the filling. Instead of rice, use quinoa or lentils. Quinoa adds a nutty taste and is high in protein. Lentils bring a hearty texture and can absorb flavors well. Mixing these options keeps the dish exciting. To keep your stuffed peppers fresh, place them in an airtight container. Make sure they cool down first. Store them in the fridge for up to four days. If you want to enjoy them later, consider freezing. To freeze stuffed peppers, wrap each one in plastic wrap. Then, place them in a freezer bag. They can stay frozen for up to three months. When you are ready to eat them, take them out and let them thaw in the fridge overnight. To reheat, place the peppers in a baking dish. Cover with foil and heat at 375°F (190°C) for about 25 minutes. If you prefer a crispy top, remove the foil during the last 10 minutes. Enjoy your tasty stuffed peppers just like the day you made them! Can I use other types of rice? Yes, you can use other types of rice. White rice, jasmine, or wild rice all work well. Just cook them before mixing them with the veggies. How do I make stuffed peppers spicy? To add spice, include chopped jalapeños or red pepper flakes in the filling. You can also use spicy cheese or hot sauce for an extra kick. What can I use instead of cheese? If you want to skip cheese, try using avocado or a nut-based cheese. You can also add more veggies for creaminess. Can stuffed peppers be made ahead of time? Absolutely! You can prepare the filling a day in advance. Just stuff the peppers before baking for the best taste. What accompanies stuffed peppers for a complete meal? Serve stuffed peppers with a fresh salad or some crusty bread. You can also add a side of guacamole or salsa for extra flavor. Stuffed peppers are a delicious, versatile dish. You learned about key ingredients like bell peppers, black beans, and spices. I shared easy steps to prep, cook, and bake them. You also picked up tips on perfecting your stuffed peppers and serving them well. Remember, you can try different flavors and diets too. Whether you store them for later or serve them fresh, stuffed peppers are a win. Enjoy customizing this meal to fit your taste!

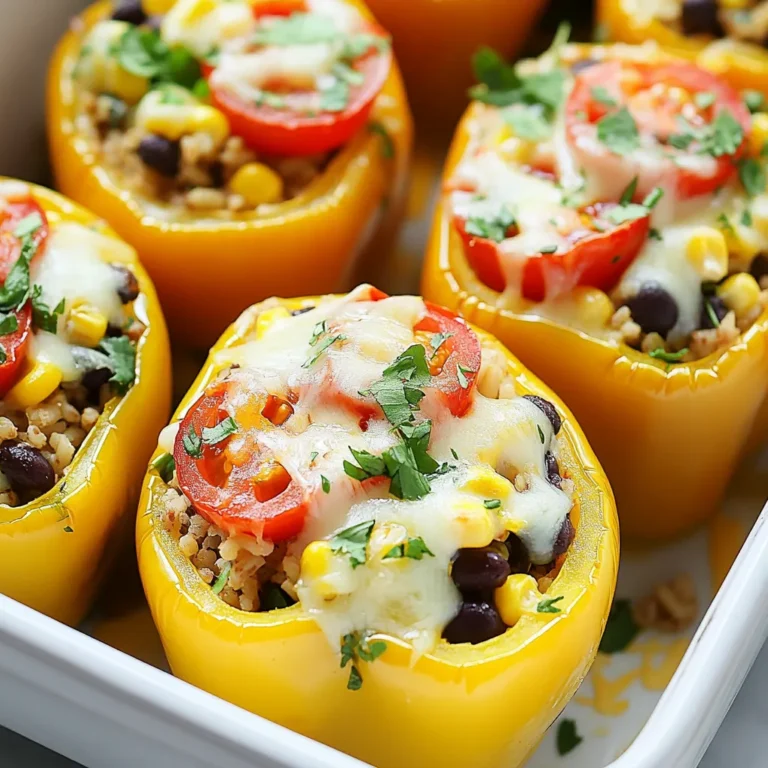
Stuffed Peppers Rice Veggies Flavorful Meal Idea

- 1 lb boneless, skinless chicken breasts - 6 cups chicken broth - 1 cup orzo pasta The star of this dish is the chicken. I recommend using boneless, skinless breasts for easy cooking and shredding. The broth adds rich flavor and warms the soup. Orzo pasta brings a fun twist and gives the soup a nice texture. - 1 large onion, finely chopped - 1 medium carrot, diced - 2 cloves garlic, minced - 1 cup fresh spinach, chopped - 1 teaspoon dried oregano - Salt and pepper to taste Onion and carrot add sweetness and crunch. Garlic gives depth and warmth to the flavor. Spinach adds color and nutrients. Oregano, salt, and pepper season the soup, making every bite tasty. - 3 large eggs - 1/3 cup fresh lemon juice - 2 tablespoons olive oil - Fresh dill or parsley for garnish Eggs and lemon juice create a creamy, tangy finish. Olive oil brings richness and helps cook the veggies. Fresh herbs like dill or parsley add a bright touch right before serving. These ingredients unite to make a soup that comforts and delights. {{ingredient_image_1}} Sautéing Vegetables First, grab a large pot and heat two tablespoons of olive oil over medium heat. Add one finely chopped onion, one diced carrot, and two minced garlic cloves. Sauté these veggies for 5 to 7 minutes. You want them soft and fragrant. This step builds a great base for your soup. Adding Chicken Broth Next, pour in six cups of chicken broth. Bring it to a simmer. The warmth will bring out the flavors of the veggies and prepare the soup for the chicken. Simmering Once the broth simmers, drop in one pound of boneless, skinless chicken breasts. Let the chicken cook for about 15 to 20 minutes. Make sure it’s fully cooked before you move to the next step. Shredding the Chicken Remove the chicken from the pot and let it cool for a bit. After that, use two forks to shred the chicken into bite-sized pieces. This makes it easy to eat and mix back into the soup. Cooking the Orzo Return the shredded chicken to the pot along with one cup of orzo pasta. Cook for another 10 minutes or until the pasta is al dente. Stir occasionally to prevent the pasta from sticking. Tempering Eggs and Lemon Juice In a separate bowl, whisk together three large eggs and 1/3 cup of fresh lemon juice. To avoid scrambling the eggs, temper the mixture by slowly adding a ladle of hot broth from the soup. Stir constantly while adding the broth. Final Seasoning and Mixing Gradually stir the tempered egg mixture back into the soup. Then, add one cup of chopped spinach and one teaspoon of dried oregano. Season with salt and pepper to taste. Allow the soup to heat through for another 2 to 3 minutes. This melds all the flavors beautifully. Serve your Greek lemon chicken soup hot, garnished with fresh dill or parsley for an extra burst of flavor! Adjusting Lemon Juice Lemon juice brightens the soup. Start with 1/3 cup, then taste it. If you want more zing, add more juice. Use fresh lemons for the best taste. Enhancing with Fresh Herbs Fresh herbs make a big difference. I love using dill or parsley. They add color and flavor. Chop them finely and sprinkle on top before serving. Shredding Chicken Tips Shredding the chicken is easy. After cooking, let it cool just enough to handle. Use two forks to pull it apart. Aim for bite-sized pieces for even cooking. Avoiding Scrambled Eggs To keep the eggs smooth, temper them first. Mix the eggs with lemon juice. Then slowly add hot soup broth while stirring. This keeps the eggs from scrambling. Serving Suggestions Serve the soup hot in deep bowls. This keeps it warm longer. Pair it with crusty bread for dipping. It’s comforting and filling. Garnishing Tips A sprinkle of fresh herbs on top is key. It adds color and freshness. You can also add a slice of lemon on the side for extra flair. Pro Tips Use Fresh Ingredients: Always opt for fresh vegetables and herbs for the best flavor. Fresh spinach and freshly squeezed lemon juice make a significant difference in this dish. Perfectly Cooked Chicken: Make sure to monitor the chicken closely while cooking. Overcooking can result in dry chicken, so remove it from the pot as soon as it’s no longer pink inside. Tempering Eggs: When adding the egg mixture to the soup, always temper it first. This prevents the eggs from scrambling and ensures a smooth, creamy texture in your soup. Garnish for Flavor: Don’t skip the fresh dill or parsley garnish. It not only enhances the presentation but also adds a fresh flavor that complements the lemony broth beautifully. {{image_2}} You can switch out orzo for other small pasta. Try ditalini or acini di pepe. They work well and add different textures. You can even use rice for a gluten-free option. Make this soup meat-free by skipping the chicken. Use vegetable broth instead of chicken broth. Add more veggies like zucchini, bell peppers, or mushrooms for depth. Chickpeas also add protein and heartiness. Spices can change the flavor profile. Add cumin for warmth or smoked paprika for depth. You can also add vegetables like peas or corn for sweetness. Each addition brings a new layer of taste. The lemon is key to this soup. You can add lemon zest for extra brightness. For a tangy twist, try using lime juice instead. This can give the soup a fresh kick. Use authentic Greek ingredients for a true taste. Feta cheese adds creaminess and tang. Kalamata olives give a briny flavor. Fresh herbs like mint or thyme can also enhance the dish. Different regions may have their own versions. In some areas, people add potatoes for heartiness. Others may include local spices or herbs to make it unique. Don't be afraid to experiment! To keep your Greek lemon chicken soup fresh, store it in the fridge. Place it in an airtight container. It will last for about three to four days. Let the soup cool before sealing it. This helps keep the flavors intact. You can freeze this soup for later enjoyment. Allow it to cool completely. Then, pour it into freezer-safe containers. Leave some space at the top for expansion. The soup can last up to three months in the freezer. When you’re ready to eat it, move the soup to the fridge to thaw overnight. Reheat it on the stove over medium heat. Stir it often until it's hot. Avoid boiling it, as this can change the texture. Check your soup for freshness. If it smells sour or has an off color, it’s time to toss it. Look for signs of freezer burn if frozen. This can happen if it’s not sealed well. Always trust your senses to ensure you enjoy delicious soup! Can I use chicken thighs instead of breasts? Yes, you can use chicken thighs. They add more flavor and stay moist. Just cook them the same way as the breasts. Adjust the cooking time if the thighs are larger. How do I make this soup gluten-free? To make this soup gluten-free, swap orzo with gluten-free pasta. Look for rice or corn-based pasta. Ensure all other ingredients, like broth, are gluten-free too. How can I make the soup creamier? To add creaminess, stir in some heavy cream or coconut milk. You can also add a bit of cream cheese. Blend a small portion of the soup and mix it back in for a smooth texture. What can I add for extra protein? You can add chickpeas or beans for more protein. Tofu is a great option too. Shredded rotisserie chicken can work well if you're in a hurry. How do I know when the chicken is done? The chicken is done when it reaches an internal temperature of 165°F. It should be white and no longer pink inside. Use a meat thermometer for accuracy. How long can I simmer the soup? You can simmer the soup for 30 minutes. This allows all the flavors to meld together. If you simmer too long, the pasta may become mushy, so keep an eye on it. This soup features simple, tasty ingredients like chicken, orzo, and veggies. We walked through easy steps to make it, from sautéing vegetables to adding the right herbs. With some handy tips, you can tweak the flavors and impress everyone. Remember, you can adjust for diet needs or personal taste. Store it well for later enjoyment. Cook with confidence and have fun experimenting!

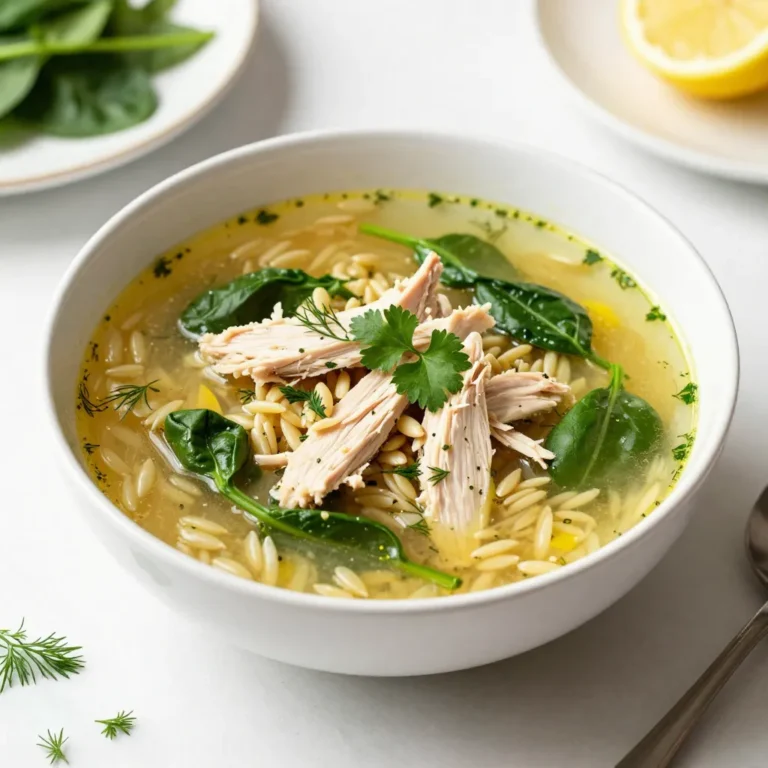
Greek Lemon Chicken Soup Flavorful Comfort in a Bowl

- 1 cup ricotta cheese - 1/2 cup powdered sugar - 1 teaspoon vanilla extract - 1 teaspoon lemon zest - 1/2 teaspoon ground cinnamon - 1 cup all-purpose flour - 1/2 teaspoon baking powder - 1/4 teaspoon salt - 1/2 cup mini chocolate chips (plus extra for topping) - 1 egg, beaten (for egg wash) - 1/4 cup chopped pistachios (for garnish) Ricotta cheese is the star of these cookies. Its creamy texture makes the dough moist and tender. Ricotta also adds a mild flavor that blends well with the sweet and zesty notes in the recipe. This cheese is a great source of protein and calcium, making your cookies a bit more nourishing. You can find ricotta in most grocery stores. Look for whole milk ricotta for the best taste and texture. If you need to convert the ingredients, here are some quick tips: - 1 cup is equal to 16 tablespoons. - 1/2 cup equals 8 tablespoons. - 1 teaspoon equals 5 milliliters. - 1/2 teaspoon equals 2.5 milliliters. These conversions can help you adjust the recipe to make more or fewer cookies. Happy baking! {{ingredient_image_1}} Start by preheating your oven to 350°F (175°C). This is important for even baking. Next, line two baking sheets with parchment paper. This step keeps the cookies from sticking. In a large bowl, mix together 1 cup of ricotta cheese, 1/2 cup of powdered sugar, 1 teaspoon of vanilla extract, 1 teaspoon of lemon zest, and 1/2 teaspoon of ground cinnamon. Stir until the mixture is smooth and creamy. In another bowl, whisk together 1 cup of all-purpose flour, 1/2 teaspoon of baking powder, and 1/4 teaspoon of salt. Now, slowly add the dry mix to the ricotta blend. Stir gently until just combined. Be careful not to overmix. Finally, fold in 1/2 cup of mini chocolate chips. This adds a sweet surprise in each bite. Use a tablespoon to scoop small balls of dough. Place them on the prepared baking sheets, leaving space between each. Press down each ball slightly to flatten. Brush the tops with a beaten egg for a shiny, golden finish. For extra sweetness, sprinkle a few more mini chocolate chips on top. Bake the cookies in your preheated oven for 12 to 15 minutes. Keep an eye on them; they should be lightly golden at the edges. Once baked, carefully remove the cookies from the oven. Let them cool on a wire rack. This step helps them firm up. Just before serving, sprinkle chopped pistachios on top for a crunchy touch. Enjoy your easy cannoli cookies with a cup of coffee or tea. They are perfect for sharing or enjoying alone! To make perfect cannoli cookies, use fresh ricotta cheese. It adds a creamy texture and rich flavor. Make sure to mix the ricotta with powdered sugar, vanilla, lemon zest, and cinnamon until smooth. This blend creates a delightful filling. When you add the flour, do it slowly. Stir gently to keep the dough light and airy. When folding in chocolate chips, do so with care. This helps keep them evenly distributed. One common mistake is overmixing the dough. This may lead to tough cookies. Another is not flattening the cookie balls enough. Flat cookies bake more evenly and look nicer. Also, don’t skip the egg wash on top. It gives the cookies a nice, golden color. Lastly, keep an eye on baking time. Too long in the oven can dry them out. These cannoli cookies shine when served warm. Try pairing them with a scoop of vanilla ice cream or a drizzle of chocolate sauce. For a fun twist, serve with a side of espresso or coffee. You can also add a sprinkle of powdered sugar for extra sweetness. If you want a crunch, top each cookie with chopped pistachios before serving. Pro Tips Use Fresh Ricotta: For the best flavor and texture, use fresh ricotta cheese. It will make your cookies creamier and more delicious. Don't Overmix: When combining the dry ingredients with the ricotta mixture, mix just until combined. Overmixing can lead to dense cookies. Chill the Dough: If you find the dough too sticky, chill it in the refrigerator for 15-20 minutes. This will make it easier to scoop and shape. Experiment with Flavors: Feel free to add different flavorings such as almond extract or orange zest for a unique twist on these cookies. {{image_2}} You can easily change the flavor of your cannoli cookies. For chocolate lovers, add cocoa powder to the dough. Use 2 tablespoons of unsweetened cocoa powder with the dry ingredients. This gives a rich chocolate taste. If you prefer a lighter flavor, try using almond extract instead of vanilla. Just one teaspoon adds a wonderful twist. You can also mix in different extracts, like hazelnut, for even more fun. Want to make these cookies gluten-free? Swap the all-purpose flour for a gluten-free blend. Make sure it contains xanthan gum for the best texture. If you need a dairy-free option, use a dairy-free ricotta. There are many brands that offer good substitutes. Also, check the chocolate chips. Choose dairy-free ones to keep it fully dairy-free. These simple swaps make it easy for everyone to enjoy! Decorating your cannoli cookies is easy and fun. Besides chocolate chips, you can use crushed nuts, like almonds or walnuts. The crunch adds great texture. Drizzle melted chocolate over the cooled cookies for a fancy touch. You can also sprinkle powdered sugar on top for a sweet finish. For a burst of color, add colorful sprinkles or edible glitter. Let your creativity shine with these tasty options! To keep your cannoli cookies fresh, place them in an airtight container. Make sure they cool completely before storing. This prevents moisture from making them soggy. If you use a paper towel at the bottom, it helps absorb extra moisture. Store them at room temperature for best taste. You can freeze cannoli cookies for later enjoyment. First, let them cool completely. Then, place each cookie in a single layer on a baking sheet. Freeze them for about one hour. Once frozen, transfer the cookies to a freezer-safe bag. This helps avoid sticking together. They can last in the freezer for up to three months. Cannoli cookies taste best within a week. After that, they may lose their charm. Keep them in a cool, dry place. If you see any signs of moisture or change in texture, it is best to discard them. Always check for freshness before eating. This way, you can enjoy every bite! To keep your cannoli cookies fresh, store them in an airtight container. This helps prevent them from getting dry. Place a piece of bread inside the container. The bread keeps the cookies soft. You can also put parchment paper between layers. This way, the cookies won't stick together. Keep them at room temperature for up to three days. If you want to keep them longer, refrigerate them for up to a week. Yes, you can use mascarpone cheese. It has a similar texture and taste. Cream cheese is another option, but it may change the flavor slightly. If you want a lighter taste, use cottage cheese. Just make sure to blend it well. You can also mix cheeses for a unique flavor. Each option brings a different twist to your cookies. You can make the dough a day before baking. Just wrap the dough tightly in plastic wrap. Keep it in the fridge until you're ready to bake. When you are ready, scoop and shape the cookies. Bake them fresh for the best taste. If you want, you can also bake them early. Store the baked cookies in an airtight container. They will stay fresh for a few days. This article covered all you need for making delicious cannoli cookies. We discussed essential ingredients, step-by-step instructions, and helpful tips to make the best cookies. I also shared variations for flavors and dietary needs. Remember to store your cookies properly to enjoy them longer. With these tips, you can create tasty treats that impress friends and family. Enjoy baking and let your creativity shine!

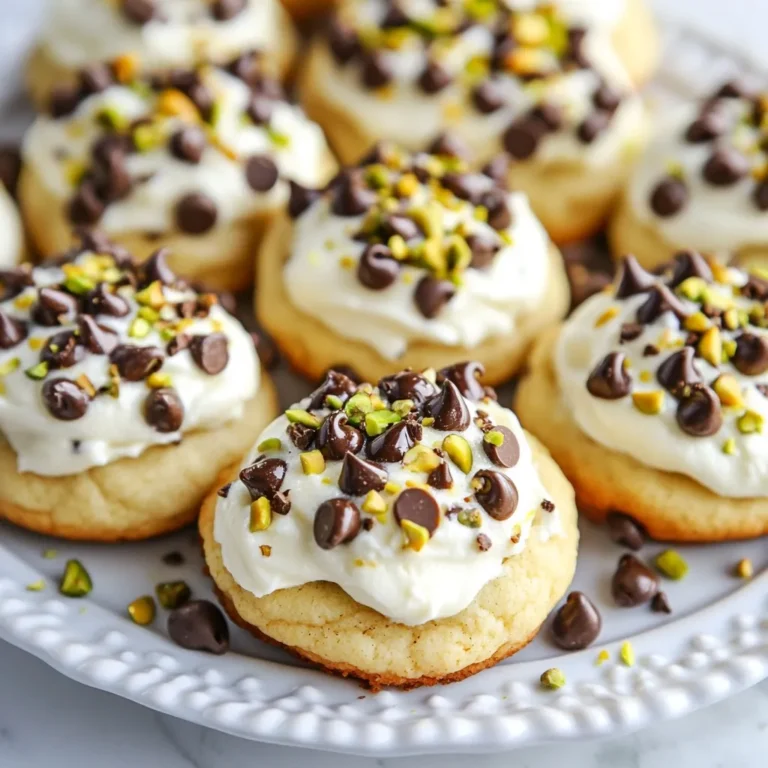
Easy Cannoli Cookies Simple and Delicious Treat

- 2 chicken breasts, boneless and skinless - 2 cups broccoli florets - 1 cup brown rice, uncooked - 2 tablespoons olive oil - 2 cloves garlic, minced - 1 teaspoon paprika - 1 teaspoon Italian seasoning - Salt and pepper, to taste - 1/4 cup low-sodium chicken broth - Juice of 1 lemon - 1/4 cup feta cheese, crumbled (optional) - Fresh parsley, chopped, for garnish - Extra olive oil and lemon juice Start by mixing olive oil, garlic, paprika, Italian seasoning, lemon juice, salt, and pepper in a bowl. This mixture adds great flavor. Coat the chicken breasts well with the marinade. Let them sit for at least 30 minutes. For even more flavor, marinate for up to 2 hours in the fridge. While your chicken marinates, cook the brown rice. Use chicken broth instead of water for better taste. Follow the package instructions and once cooked, set it aside. This step ensures the rice is packed with flavor. Preheat your grill to medium-high heat. Take the chicken out of the marinade and grill it for about 6-7 minutes on each side. The chicken is ready when it reaches a safe internal temperature of 165°F (75°C). After grilling, let the chicken rest for a few minutes, then slice it into strips. While the chicken rests, steam the broccoli florets. Use a pot with a small amount of water and steam for about 3-5 minutes. The broccoli should be tender but still bright green. Season it with a pinch of salt and pepper for a simple flavor boost. To build your bowls, start with a base of brown rice. Then layer the grilled chicken strips and steamed broccoli on top. For added flavor and color, sprinkle crumbled feta cheese and chopped fresh parsley over each bowl. Drizzle a bit of olive oil or lemon juice before serving to enhance the taste even more. {{ingredient_image_1}} - You can make these bowls ahead of time. - Cook the chicken and broccoli, then store them in the fridge. - Prepare your rice in bulk and keep it sealed. - Use airtight containers for freshness. - These bowls last about 3 to 4 days in the fridge. - Try different seasonings like cumin or chili powder. - Add a splash of soy sauce for a twist. - For a homemade sauce, mix yogurt with herbs and lemon. - A store-bought teriyaki or barbecue sauce works well too. - Swap chicken for tofu for a vegan meal. - Shrimp is also a great choice. - Use chickpeas if you want a plant-based option. - These swaps keep the dish tasty and filling. - Use quinoa for a nutty flavor and more protein. - Cauliflower rice adds a lighter touch. - White rice is classic and easy to find. - Each grain changes the bowl's texture and taste. - Add bell peppers for crunch and color. - Carrots bring sweetness and a nice bite. - In summer, try adding zucchini or corn. - In fall, butternut squash adds a warm flavor. Each serving of Grilled Chicken Broccoli Bowls has around 400 calories. This dish provides a good mix of macronutrients. The main sources include: - Protein from chicken: This helps build and repair muscles. - Carbohydrates from brown rice: These give you energy. - Fiber from broccoli: This supports digestion and keeps you full. Broccoli is a superfood packed with vitamins. It has vitamin C, which helps your immune system. It also has fiber, which aids digestion. Lean chicken is a great source of protein. It contains less fat than other meats, making it a healthy choice. Whole grains like brown rice offer lasting energy. They help keep blood sugar stable and are more nutritious than white rice. So, these ingredients work together to create a healthy meal. Pro Tips Marinate for Maximum Flavor: Allow the chicken to marinate for at least 2 hours for the best flavor infusion. Perfectly Cooked Rice: Rinse the brown rice before cooking to remove excess starch and achieve a fluffier texture. Grill Marks Matter: For perfect grill marks, avoid moving the chicken too much while grilling. Let it sear properly on each side. Brighten Up Your Dish: Add a sprinkle of lemon zest on top before serving for an extra burst of freshness. {{image_2}} Store your Grilled Chicken Broccoli Bowls in an airtight container. This keeps the food fresh. Place them in the refrigerator within two hours of cooking. They will last for up to four days. When you're ready to eat, simply reheat the bowl in the microwave. Heat it for one to two minutes. Stir halfway through for even heating. Make sure the chicken reaches 165°F (75°C) before eating. You can freeze the assembled bowls for longer storage. Wrap each bowl tightly in plastic wrap. Then, place it in a freezer-safe bag. This helps avoid freezer burn. They can stay fresh for up to three months. To thaw, move the bowl to the fridge overnight. For quick thawing, use the microwave on defrost. Once thawed, reheat as mentioned before. Enjoy your meal as if it was freshly made! You can marinate chicken for about 30 minutes to 2 hours. This time helps the chicken soak up all the flavors. If you marinate it longer, it will taste even better. Just avoid marinating for more than 24 hours, as it can change the chicken's texture. Yes, you can cook the chicken without a grill. You can use a pan on the stove or an oven. For pan-searing, heat a little olive oil over medium heat. Cook the chicken for about 6-7 minutes on each side until it’s done. If using the oven, bake at 400°F (200°C) for about 20-25 minutes. Great side dishes for these bowls include: - Mixed green salad with a light dressing - Roasted sweet potatoes for a sweet touch - Quinoa for extra protein and texture - A simple yogurt sauce for creaminess These sides add more flavor and color to your meal. Grilled chicken broccoli bowls are a simple and tasty meal. You learned about the key ingredients, from chicken breasts to brown rice and veggies. I explained how marinating boosts flavor and shared tips for cooking each component. Variations let you customize your meal, and I provided helpful storage advice. Remember, this dish is flexible and healthy, making it perfect for any day. Enjoy cooking and experimenting with your own versions!

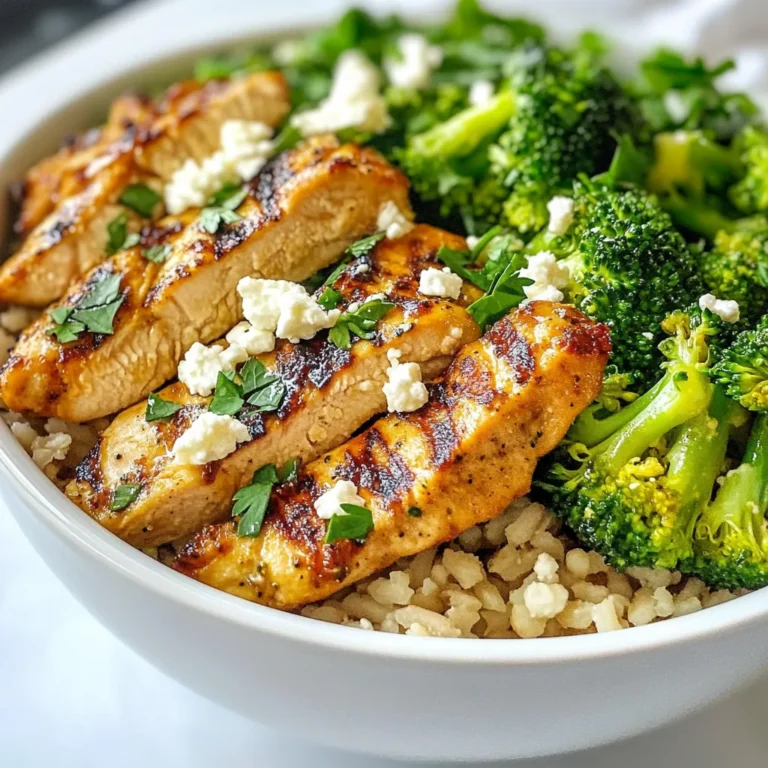
Grilled Chicken Broccoli Bowls Tasty and Easy Recipe

- 4 medium-sized beets, washed and scrubbed - 2 tablespoons olive oil - 1 teaspoon sea salt - 1 teaspoon black pepper - 1 tablespoon fresh thyme leaves (or 1 teaspoon dried thyme) - 2 cloves garlic, minced - Zest of 1 lemon - 2 tablespoons balsamic vinegar (optional, for drizzling) You can swap ingredients based on what you have. Use any cooking oil if you lack olive oil. For thyme, try rosemary or oregano instead. If you don’t have lemon, lime zest works too. You can leave out balsamic vinegar if you prefer a plain taste. Fresh ingredients make a big difference. Fresh beets bring out bright colors and flavors. When using fresh herbs, you enhance the dish’s taste. Fresh garlic gives a strong aroma that makes your kitchen smell great. Using fresh items can make your meal more enjoyable and healthy. {{ingredient_image_1}} First, wash and scrub your beets well. This removes dirt and helps keep them clean. Next, cut the beets into equal-sized wedges. Aim for about eight wedges per beet. This way, they roast evenly. Place the beet wedges in a large bowl. Add two tablespoons of olive oil, one teaspoon of sea salt, and one teaspoon of black pepper. Toss them well so every wedge is coated. Next, add one tablespoon of fresh thyme leaves, two cloves of minced garlic, and the zest of one lemon. Toss again to combine all the flavors. Now, preheat your oven to 400°F (200°C). Line a baking sheet with parchment paper. Spread the coated beet wedges in a single layer on the sheet. This helps them roast without steaming. Place the baking sheet in the oven and roast for 30 to 40 minutes. Halfway through, stir the beets. This helps them cook evenly and caramelize better. To check if the beets are done, use a fork or knife. Insert it into a wedge; it should slide in easily. If they are still firm, roast them a bit longer. Once tender, remove the beets from the oven. Let them cool for a few minutes. If you want, drizzle some balsamic vinegar over them and toss gently. Enjoy your simple roasted beets warm or at room temperature! For roasted beets, simple seasonings work best. I love using sea salt and black pepper. Fresh herbs like thyme add a nice touch. You can also try rosemary or parsley for new tastes. Mixing in garlic gives a rich flavor that pairs well with beets. Don't forget a splash of lemon zest to brighten up the dish! Want to elevate your roasted beets? Drizzle some balsamic vinegar before serving. This adds a sweet and tangy kick. If you like spice, try adding a pinch of cayenne or smoked paprika. This gives the beets a warm, smoky flavor. If you are feeling adventurous, add nuts for crunch. Walnuts or pecans work great! Roasted beets can stain your hands and clothes. Wear gloves when you cut them to avoid stains. After roasting, let them cool a bit before you slice or serve. This makes them easier to handle. If you have leftovers, store them in an airtight container in the fridge. They taste great in salads or on their own! Pro Tips Choose Fresh Beets: Always select firm, smooth, and vibrant-colored beets for the best flavor and texture. Keep the Skin On: Roasting beets with their skin helps retain moisture and enhances their natural sweetness. Enhance the Flavor: Experiment with different herbs like rosemary or dill for a unique twist on the classic thyme flavor. Make Ahead: Roasted beets can be prepared in advance and stored in the refrigerator for up to a week, making them a convenient option for meal prep. {{image_2}} You can change the taste of your roasted beets by using different herbs. For a fresh twist, try using rosemary or oregano. Both herbs add a nice aroma and depth of flavor. If you want a touch of sweetness, consider basil. Just remember to chop them finely and mix them in with the beets before roasting. To enhance your beets, infuse them with different flavors. Citrus is a great option. Adding orange or lime zest gives a bright, fresh taste. You can also sprinkle in some spices. Try cumin for warmth or smoked paprika for a hint of smokiness. These flavors can transform your dish into something special. Roasted beets make a fantastic addition to salads. They pair well with greens like arugula or spinach. For a hearty dish, serve them alongside grilled chicken or fish. You can also enjoy them cold as a snack. Just slice them up and add a little feta cheese. The options are endless, and each twist adds a new layer of flavor. To store roasted beets, let them cool first. Place them in an airtight container. This keeps them fresh and tasty. You can also use a resealable bag. Make sure to remove excess air before sealing. Store them in the fridge for best results. When you want to eat your roasted beets again, you can reheat them easily. Preheat your oven to 350°F (175°C). Spread the beets on a baking sheet. Heat them for about 10-15 minutes. You can also use a microwave. Just place them in a microwave-safe bowl and heat for 1-2 minutes. Stir halfway for even warmth. Roasted beets last in the fridge for about 3 to 5 days. If you want to keep them longer, consider freezing them. When frozen, they last for about 3 months. Just make sure to store them in a freezer-safe container. Yes, you can eat beets raw. They are crunchy and tasty. Raw beets are great in salads. You can slice or grate them. They add color and a sweet flavor to your dish. Just wash them well. Peeling is optional, as the skin is edible. You can tell beets are done when they are tender. Insert a fork or knife into a piece. If it goes in easily, they are ready. Roasting time is about 30 to 40 minutes. Stir halfway to help them cook evenly. You want a nice caramelized look on the outside. Beets are very good for you. They are low in calories and high in fiber. This helps with digestion. Beets also have vitamins and minerals. They contain folate, which is good for your blood. Antioxidants in beets may help fight inflammation. Plus, they can help lower blood pressure. Eating beets can improve your overall health. Roasting beets enhances their natural sweetness and flavor. You learned how to prep, roast, and check for doneness. Fresh ingredients really make a difference. I shared tips for seasoning, flavoring, and serving ideas. Storage and reheating are easy. Experimenting with herbs and spices can add fun twists. Enjoy your delicious, healthy roasted beets. With these methods, you can impress anyone at your next meal.

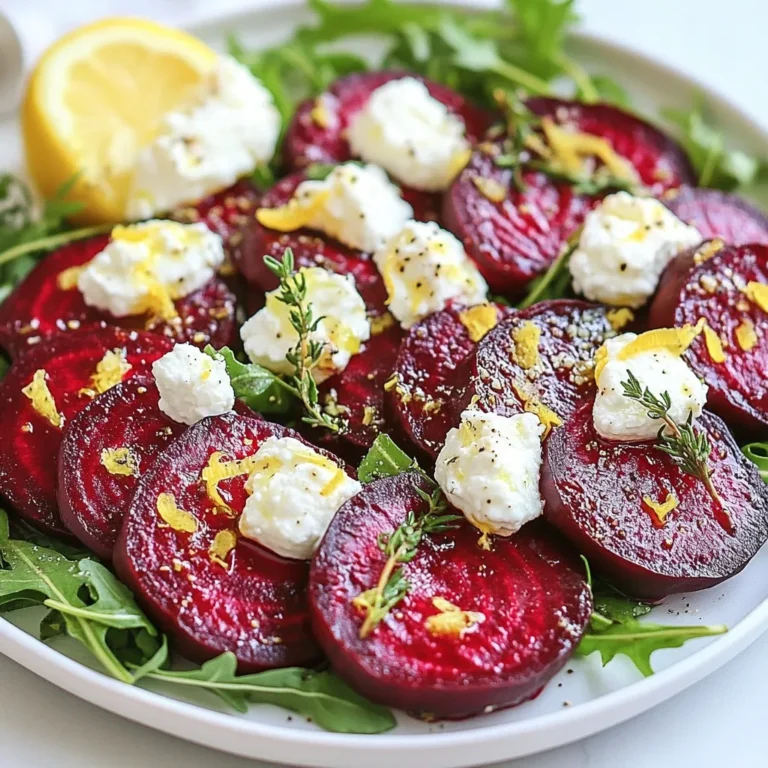
Simple Roasted Beets Flavorful and Easy Side Dish

- 4 boneless, skinless chicken thighs - 1 cup teriyaki sauce (store-bought or homemade) - 2 cups broccoli florets - 1 large red bell pepper, sliced - 1 medium carrot, sliced thinly - 1 medium red onion, cut into wedges - 2 tablespoons sesame oil - 3 cloves garlic, minced - 1 teaspoon grated ginger - Salt and pepper to taste These ingredients create a tasty dish that is easy to make. The chicken thighs bring flavor and moisture. The teriyaki sauce adds a sweet, salty kick that everyone loves. Fresh veggies like broccoli and bell pepper bring crunch and color. You can add other ingredients for more depth. Try adding: - Pineapple chunks for sweetness - Snap peas for extra crunch - Mushrooms for an earthy taste These additions can change the taste and make it your own. To finish your dish, I suggest adding: - 1 tablespoon sesame seeds - 2 green onions, chopped These garnishes add a pop of color and texture. They also make the dish look fancy. You’ll impress your family and friends with this easy meal! {{ingredient_image_1}} Start by preheating your oven to 400°F (200°C). This ensures even cooking. In a large bowl, mix the chicken thighs with teriyaki sauce, garlic, and ginger. Let them soak in these flavors for at least 15 minutes. If you have more time, let them marinate in the fridge for up to 2 hours. This step makes the chicken juicy and tasty. While the chicken marinates, prepare the vegetables. In another bowl, toss the broccoli, red bell pepper, carrot, and red onion with sesame oil, salt, and pepper. Make sure they are well coated. This adds flavor and helps them roast nicely. Line a large baking sheet with parchment paper. Place the marinated chicken thighs in the center. Arrange the vegetables around the chicken in a single layer. This helps everything cook evenly and look great. Put the sheet pan in the oven. Bake for 25-30 minutes. The chicken should reach an internal temperature of 165°F (74°C). The veggies should be tender. Keep an eye on them to avoid overcooking. In the last 5 minutes of baking, brush more teriyaki sauce over the chicken. This gives it a shiny look and extra flavor. Once it's done, take the pan out of the oven. Let it cool for a few minutes. Then, garnish with sesame seeds and chopped green onions. This adds a nice crunch and fresh taste. Enjoy your delicious sheet pan teriyaki chicken and vegetables! To boost the teriyaki taste, marinate the chicken longer. A full two hours makes a big difference. You can also add a splash of rice vinegar for brightness. Mixing in a bit of honey or brown sugar can give added sweetness. If you like heat, try adding a touch of sriracha to the sauce. Oven temperatures may vary, so keep an eye on your dish. If you use chicken breasts instead of thighs, they may cook faster. Check the chicken's internal temperature. It should reach 165°F (74°C) to be safe. If the chicken looks done but the veggies are still crunchy, give them more time. Cut your vegetables into similar sizes for even cooking. Broccoli and bell peppers usually cook well with chicken. Carrots take longer, so slice them thin. If you like your veggies softer, add them to the pan ten minutes after the chicken. This way, they won’t overcook. Pro Tips Marinate for Maximum Flavor: Letting the chicken marinate for at least 2 hours will enhance the flavors significantly. If you're short on time, even 15 minutes will help, but longer is better! Cut Vegetables Evenly: To ensure even cooking, slice your vegetables into uniform sizes. This way, they will all cook through at the same rate, making for perfectly tender veggies. Use Parchment Paper: Lining your baking sheet with parchment paper not only makes clean-up easier but also prevents the chicken and veggies from sticking, helping them roast beautifully. Check Chicken Temperature: Always use a meat thermometer to check the internal temperature of the chicken. It should read 165°F (74°C) to ensure it's fully cooked and safe to eat. {{image_2}} You can swap chicken thighs for chicken breasts. Breasts cook faster, so check them early. If you want a plant-based option, use firm tofu. Press it to remove moisture and cut it into cubes. Marinate just like chicken for great flavor. Feel free to mix up the veggies! Snap peas and zucchini work well. You can also add mushrooms for extra taste. Use whatever you have on hand. Just make sure to cut them into similar sizes for even cooking. Making your own teriyaki sauce is fun and easy! Here’s a simple recipe: - Ingredients - 1/2 cup soy sauce - 1/4 cup honey or brown sugar - 1/4 cup rice vinegar - 1 tablespoon minced garlic - 1 teaspoon grated ginger - 1 tablespoon cornstarch mixed with 2 tablespoons water 1. Combine all ingredients in a pot. 2. Heat over medium until the sauce thickens. 3. Stir often to avoid burning. This sauce adds a personal touch to your dish! To store your leftovers, let the dish cool down. Place the chicken and veggies in an airtight container. This keeps them fresh for up to three days in the fridge. Make sure to separate the chicken from the veggies if possible. This helps each keep its texture. To reheat, you can use the oven or microwave. If using the oven, set it to 350°F (175°C). Place the chicken and veggies on a baking sheet. Heat for about 10-15 minutes, or until warm. In the microwave, use a microwave-safe plate. Heat for 1-2 minutes, checking to avoid overheating. If you want to freeze your teriyaki chicken and veggies, do it right after cooking. Let the dish cool completely. Then, place it in a freezer-safe container. It can last up to three months in the freezer. When ready to eat, thaw it in the fridge overnight before reheating. Yes, you can use frozen chicken or vegetables. However, you need to adjust the cooking time. Frozen chicken may take longer to cook. Make sure the chicken reaches an internal temperature of 165°F (74°C). Frozen vegetables may not need as much time to bake. Check for tenderness. The best way to check chicken is with a meat thermometer. Insert it into the thickest part of the thigh. It should read 165°F (74°C). If you don’t have a thermometer, cut into the chicken. It should be white and no longer pink inside. You can use soy sauce mixed with honey or brown sugar. Mix equal parts to get a sweet flavor. You can also try hoisin sauce or a mix of soy sauce and rice vinegar. These options provide a similar taste profile. Yes, you can make this dish gluten-free. Use gluten-free teriyaki sauce or soy sauce. Always check the labels to ensure no gluten-containing ingredients are included. The vegetables and chicken are naturally gluten-free. You can prepare the chicken and veggies ahead of time. Marinate the chicken for up to two hours in the fridge. You can also chop the vegetables a day before. Store them in an airtight container in the fridge. This saves time when you are ready to cook. Sheet pan teriyaki chicken is simple and tasty. We covered the main ingredients, easy steps, and helpful tips. You learned how to enhance flavors and try new ingredients. Don’t forget to store leftovers properly for later enjoyment. This dish is flexible, so feel free to modify. With practice, you’ll create a meal everyone loves. Enjoy cooking and have fun experimenting with new flavors!

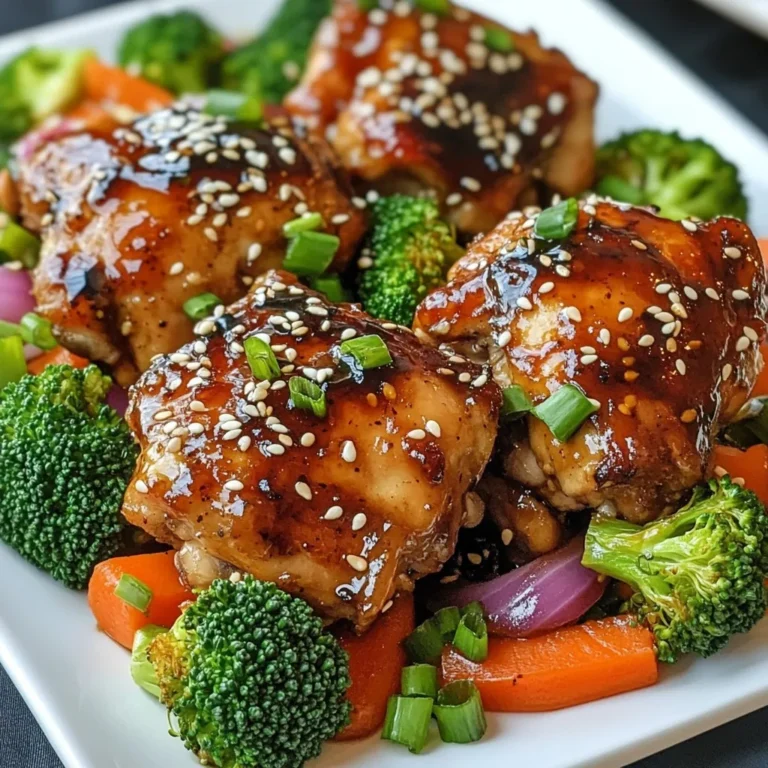
Sheet Pan Teriyaki Chicken and Vegetables Delight

PREV 1 … 72 73 74 … 86 NEXT
spicy fork kitchen

explore

DessertsDinnerAppetizersDrinks

Our Policies

  • Cookie Policy
  • Copyright Policy
  • Disclaimer
  • GDPR Policy
  • Terms Of Use
Back to Top
  • About
  • Contact Us
  • Privacy Policy
© 2026 spicy fork kitchen