FREE DINNER EBOOK! Get your copy!
  • Cookie Policy
  • GDPR Policy
  • Disclaimer
  • Terms Of Use
  • Visit my other site: Fun Cookie Recipes
spicy fork kitchen
  • Home
  • Dinner
  • Desserts
  • Drinks
  • Appetizers
  • Contact
  • About
  • Privacy Policy
  • Home
  • Dinner
  • Desserts
  • Drinks
  • Appetizers
  • Contact
  • About
  • Privacy Policy
  • Cookie Policy
  • GDPR Policy
  • Disclaimer
  • Terms Of Use
Visit my other site: Fun Cookie Recipes

HOME / CATEGORIES /

Latest

To make a classic homemade pumpkin pie, you need simple and fresh ingredients. Each one plays a key role in creating that warm, comforting flavor we all love. Here’s what you will need: - 1 ¾ cups pumpkin puree (canned or fresh) - 1 cup heavy cream - 3 large eggs - ¾ cup brown sugar - ½ cup granulated sugar - 1 teaspoon vanilla extract - 2 teaspoons ground cinnamon - 1 teaspoon ground ginger - ½ teaspoon ground nutmeg - ¼ teaspoon ground cloves - ½ teaspoon salt - 1 pre-made pie crust (9-inch) When you gather these ingredients, you set yourself up for success. The pumpkin puree gives the pie its rich flavor and vibrant color. Heavy cream adds a smooth texture. Eggs help bind everything together, making the filling firm and delicious. The sugars sweeten the pie, while the vanilla and spices bring in warmth and depth. Using a pre-made pie crust saves time and provides a flaky base. If you prefer, you can make your crust from scratch, which adds a personal touch. Each ingredient is essential for that classic taste, ensuring every bite is as delightful as the last. {{ingredient_image_1}} 1. Preheating the oven Start by preheating your oven to 425°F (220°C). This high heat helps set the crust. 2. Mixing pumpkin filling In a large bowl, whisk together 1 ¾ cups of pumpkin puree, 1 cup of heavy cream, and 3 large eggs. Make sure it's smooth and well mixed. Next, add ¾ cup of brown sugar, ½ cup of granulated sugar, and 1 teaspoon of vanilla extract. Mix these until everything is blended nicely. In a separate small bowl, combine 2 teaspoons of ground cinnamon, 1 teaspoon of ground ginger, ½ teaspoon of ground nutmeg, ¼ teaspoon of ground cloves, and ½ teaspoon of salt. Stir this spice mixture into your pumpkin filling. Make sure there are no lumps. 1. Initial high-temperature baking Place your pre-made 9-inch pie crust in a pie dish. Pour the smooth pumpkin filling into the crust. Make sure it is even. Bake it in the preheated oven for 15 minutes. 2. Reducing temperature and final baking After the first 15 minutes, lower the oven temperature to 350°F (175°C). Continue to bake for another 35-40 minutes. The pie is done when the filling is set. You can check by inserting a knife into the center; it should come out clean. 1. Cooling time Once baked, remove the pie from the oven. Place it on a wire rack and let it cool for at least 1 hour. This cooling helps the filling set up nicely. 2. Presentation tips For serving, add a dollop of whipped cream on top. A sprinkle of cinnamon adds a nice touch. You can also garnish with a few pumpkin seeds or a slice of fresh pumpkin for decoration. How to avoid a soggy crust To keep your crust crisp, bake it before adding the filling. This method is called blind baking. Simply pre-bake the crust for about 10 minutes at 425°F. Use pie weights or dried beans to keep it flat. This step makes a big difference! Ensuring a perfectly set filling To check if your filling is ready, insert a knife in the center. It should come out clean. If it wobbles too much, bake it a bit longer. Remember, the pie will firm up as it cools. Best time to make pumpkin pie Fall is the best time to bake pumpkin pie. That’s when pumpkins are fresh and in season. The flavors are richer, making your pie taste even better. However, you can enjoy this pie anytime! Choosing the right pumpkin puree When picking pumpkin puree, look for 100% pumpkin. Canned or fresh both work. If using fresh, choose sugar pumpkins for the best flavor. They are sweeter and smoother than larger pumpkins. Homemade whipped cream recipe For a quick whipped cream, beat 1 cup of heavy cream with 2 tablespoons of sugar. Whip until soft peaks form. This cream pairs perfectly with pumpkin pie. Dairy-free options If you prefer a dairy-free option, try coconut cream. Chill a can of coconut milk overnight. Scoop out the cream and whip it. It adds a lovely tropical twist to your pie! Pro Tips Use Fresh Pumpkin: If possible, use fresh pumpkin instead of canned for a more vibrant flavor. Roast the pumpkin, scoop out the flesh, and purée it for the best results. Check for Doneness: To ensure your pie is perfectly set, insert a knife in the center. If it comes out clean, your pie is ready; if not, bake a little longer. Cool Properly: Allow the pie to cool completely on a wire rack. This helps set the filling and makes slicing easier. Experiment with Spices: Feel free to adjust the spices to your taste! Adding a pinch of cardamom or allspice can give your pie a unique twist. {{image_2}} You can add a twist to your pumpkin pie with flavors. Try adding chocolate chips for a rich, sweet touch. This will give your pie a fun texture and a hint of chocolate. You can also make a maple or honey sweetened version. This will give your pie a lovely, warm flavor. Use pure maple syrup or honey to sweeten the filling. Each option makes the pie more unique and tasty. Not everyone can eat regular pie crust. For those who need gluten-free options, look for gluten-free pie crusts at stores. You can also make your own with almond flour or coconut flour. If you want something different, try a graham cracker crust. Just crush the graham crackers and mix them with melted butter. You can also use nuts to create a nut-based crust. This adds flavor and crunch to your pie. Serving your pie can be a delight. Pair it with a scoop of vanilla ice cream or drizzle warm caramel sauce on top. This adds creaminess and sweetness to each bite. For a festive touch, serve slices with whipped cream and a sprinkle of cinnamon. You can also add a few pumpkin seeds or a slice of fresh pumpkin on the side. These little details make your pie look and taste amazing! - Best practices for refrigeration After cooling, cover your pumpkin pie with plastic wrap. This keeps it fresh and moist. Store it in the fridge for the best taste. Try to eat the pie within four days. - How to freeze pumpkin pie If you want to save your pie longer, freeze it. Wrap it well in plastic wrap and then in foil. This helps avoid freezer burn. Your pie can last up to three months in the freezer. Thaw it overnight in the fridge before serving. - How long does pumpkin pie last in the fridge? Pumpkin pie lasts about four days in the fridge. Make sure to keep it covered to maintain freshness. - Signs of spoilage Check for a bad smell or mold. If the pie looks watery or has a strange texture, it’s best to throw it out. Trust your senses; if it seems off, don’t eat it. Yes, you can use fresh pumpkin! To prepare fresh pumpkin, follow these steps: - Choose a sugar pumpkin, which is sweet and smooth. - Cut it in half and scoop out the seeds. - Roast the halves in the oven at 350°F for about 45 minutes, or until soft. - Let it cool, then scoop out the flesh and puree it in a blender or food processor. Fresh pumpkin gives a lovely flavor. It might take more time, but the taste is worth it! You can serve pumpkin pie both ways! Some love it warm, right from the oven. Others prefer it chilled after a few hours in the fridge. It’s all about your taste! Warm pie has a cozy feel, while cold pie is refreshing. Try both and see what you like best! To check if your pumpkin pie is done, look for these signs: - The edges should be set, and the center will look slightly wobbly. - Insert a knife into the center; it should come out clean. - If the filling jiggles too much, it needs more time in the oven. These tips will help you bake a perfect pie every time! Making pumpkin pie is simple and fun. You learned about key ingredients, step-by-step baking, and helpful tips. The variations let you be creative, while storage info helps keep your pie fresh. Remember, you can use fresh pumpkin, and serving it warm or cold depends on your taste. Enjoy making this classic dessert, and don’t be afraid to experiment. Each pie you bake is a chance to share joy with friends and family. Happy baking!

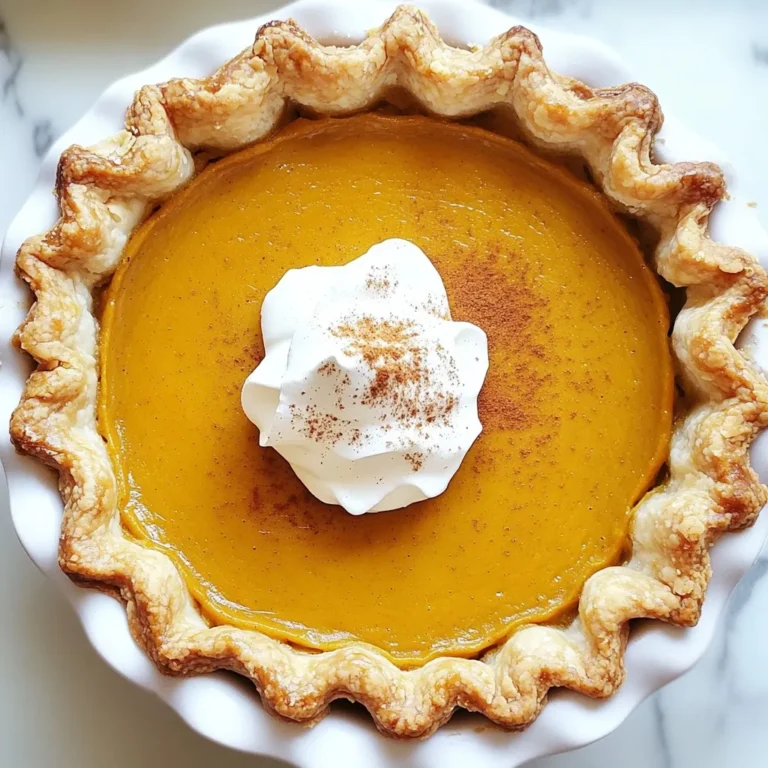
Classic Homemade Pumpkin Pie Irresistible and Simple

- 1 lb boneless, skinless chicken breast - 1 red bell pepper - 1 yellow bell pepper - 1 cup broccoli florets - 1 cup sugar snap peas The star of this dish is the chicken. I like to slice it into thin strips. This helps it cook quickly and soak up flavors. Fresh vegetables add color and crunch. Bell peppers bring sweetness, while broccoli and sugar snap peas add a crisp texture. - 1/4 cup sweet chili sauce - 1 tablespoon soy sauce - 1 teaspoon sesame oil The sweet chili sauce gives this stir fry its name. It adds a sweet and spicy taste. Soy sauce brings umami, while sesame oil adds a nutty flavor. Together, they create a sauce that coats the chicken and veggies perfectly. - 2 tablespoons cornstarch - 2 tablespoons vegetable oil - 3 cloves garlic - 1 tablespoon fresh ginger Cornstarch helps to make the chicken crispy. It coats the chicken well before cooking. Vegetable oil is great for frying. I always use garlic and ginger for extra flavor. They add depth and warmth to the dish. {{ingredient_image_1}} - Start by taking 1 pound of boneless, skinless chicken breast. Slice it into thin strips. - Place the chicken in a large bowl and sprinkle it with 2 tablespoons of cornstarch. - Toss the chicken well to coat each piece evenly. This step adds a tasty crust when cooked. - Heat 1 tablespoon of vegetable oil in a large skillet over medium-high heat. - Add the chicken to the hot skillet. Cook it for about 5 to 7 minutes. - Make sure the chicken turns a nice golden brown and is cooked through. - Once done, remove the chicken from the pan and set it aside. - In the same skillet, add another tablespoon of vegetable oil. - Toss in 3 cloves of minced garlic and 1 tablespoon of minced ginger. Sauté for about 30 seconds. - This step makes your kitchen smell amazing! - Next, add 1 sliced red bell pepper, 1 sliced yellow bell pepper, 1 cup of broccoli florets, and 1 cup of sugar snap peas. - Stir-fry the veggies for 4 to 5 minutes. You want them tender but still crisp. - Return the cooked chicken to the skillet. - Pour in 1/4 cup of sweet chili sauce, 1 tablespoon of soy sauce, and 1 teaspoon of sesame oil. - Toss everything together until all the ingredients are well coated. - Cook for an additional 2 to 3 minutes to heat everything through. - Finally, season with salt and pepper to taste before removing from heat. To cook the chicken just right, aim for a golden brown color. This usually takes about 5 to 7 minutes on medium-high heat. Make sure to stir it often for even cooking. For vegetables, keep them crunchy. Stir-fry them for only 4 to 5 minutes. This helps them stay bright and tasty. Remember, you want that tender-crisp texture. Serve your sweet chili chicken stir fry over fluffy jasmine rice. The rice soaks up the sauce, making each bite delightful. You can garnish the dish with chopped green onions and sesame seeds. This adds a nice touch of color and flavor. A sprinkle of fresh herbs can also elevate the look. Use a large skillet or wok for the best stir-fry results. A non-stick surface helps prevent sticking and makes cleaning easier. For prep, a sharp knife and a cutting board are essential. They help you chop ingredients quickly and safely. A sturdy spatula is also a must for tossing everything together. Pro Tips Coat Chicken Evenly: Make sure to coat the chicken strips evenly with cornstarch to achieve that crispy texture when they are cooked. High Heat for Stir Fry: Use high heat while cooking to quickly sear the ingredients, preserving their color and crunch for a perfect stir-fry. Fresh Ingredients Matter: Opt for fresh vegetables and herbs for the best flavor and nutritional value in your stir fry. Customize Your Sauce: Feel free to adjust the sweetness or spiciness of the sweet chili sauce to suit your taste preferences. {{image_2}} You can switch the chicken for beef or tofu in this dish. If you choose beef, use flank steak or sirloin. Slice it thin to keep it tender. Tofu is a great veggie option. Press it to remove extra water and cut it into cubes. When using beef, cook it for about 3-5 minutes. It cooks faster than chicken. For tofu, stir-fry it for about 4-6 minutes until it’s golden. Adjust cooking times to make sure all proteins are safe to eat. Feel free to swap in any veggies you have on hand. Carrots, zucchini, or snap peas work well. Think about seasonal vegetables, too. Fresh asparagus, baby corn, or bok choy are tasty choices in spring. Make sure to cut your veggies into similar sizes for even cooking. This helps them stay crisp and colorful in your stir fry. Want it spicier? Add sliced jalapeños or a splash of hot sauce. You can also sprinkle in some red pepper flakes. If you prefer a milder dish, cut back on the sweet chili sauce. You could also mix in a little extra soy sauce to balance the heat. Always taste as you go to find your perfect spice level! To keep your Sweet Chili Chicken Stir Fry fresh, place it in an airtight container. This helps lock in flavors and moisture. I recommend refrigerating it within two hours of cooking. Properly stored, it lasts about three to four days in the fridge. Reheat your stir fry gently to maintain taste and texture. The stovetop is best for this. Heat a non-stick skillet over medium heat, then add the stir fry. Stir occasionally until it’s hot. Avoid using the microwave, as it can make the veggies mushy. If you must use the microwave, heat in short bursts and stir in between. Yes, you can freeze Sweet Chili Chicken Stir Fry! Use a freezer-safe container or bag. Make sure to let it cool completely before freezing. This will help prevent ice crystals. It’s best if used within three months. To thaw, place it in the fridge overnight. Reheat on the stovetop for the best results. You can easily make Sweet Chili Chicken Stir Fry gluten-free. - Substitutes for soy sauce: Use tamari instead. Tamari is a gluten-free soy sauce alternative. You can also try coconut aminos. This option is soy-free and has a mild flavor. - Other gluten-friendly sauce options: Look for gluten-free sweet chili sauce. Many brands offer this. Always check labels to be sure. Yes, you can prepare this stir fry ahead of time. - Best practices for meal prepping: Cook the chicken and vegetables. Let them cool. Store them in airtight containers. This keeps them fresh for later. - Storing cooked stir-fry before serving: Place the stir fry in the fridge. It lasts about three to four days. Reheat it on the stove or in the microwave. Pairing this dish with the right sides enhances the meal. - Suggestions for complementary side dishes: Serve it over jasmine rice. You can also add a side salad. Steamed vegetables work well too. - Drink pairings for a complete meal: Enjoy it with iced tea or a light beer. Sparkling water with lime is refreshing too. This blog post covered how to make a delicious Sweet Chili Chicken Stir Fry. We explored key ingredients like chicken and fresh veggies, along with helpful sauces to enhance flavors. You now know the step-by-step instructions for cooking and tips for perfecting your stir fry. Consider trying different proteins and veggies for variety. Remember, proper storage and reheating methods can keep your meal fresh. Enjoy making this dish, and don’t hesitate to experiment with flavors and ingredients!

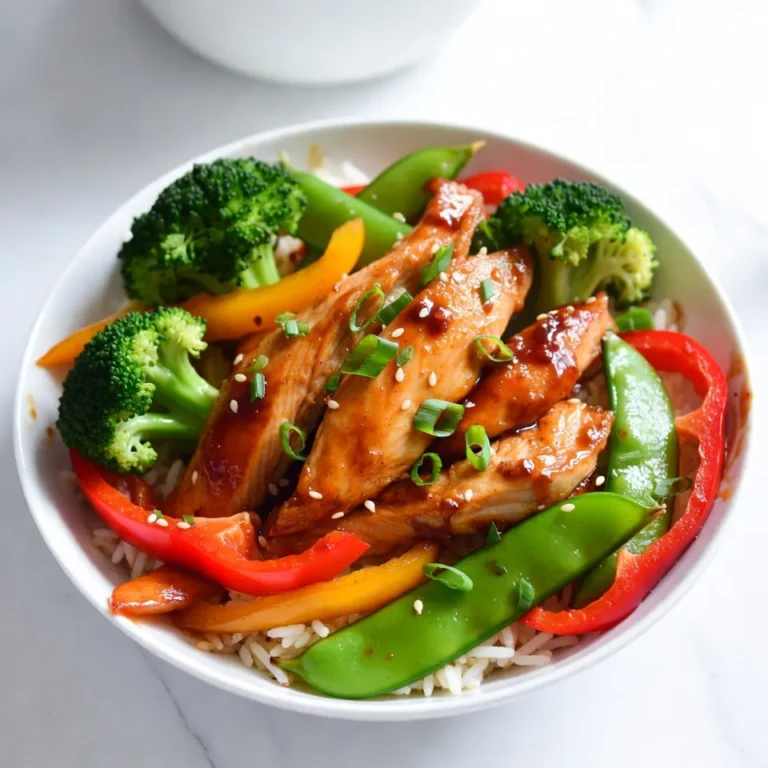
Sweet Chili Chicken Stir Fry Flavorful Dinner Delight

For your meatloaf, you will need: - 1 lb ground beef - 1/2 lb ground turkey These two meats blend well together. The beef adds flavor, while the turkey keeps it light. Next, gather these wet ingredients: - 1 small onion, finely chopped - 2 cloves garlic, minced - 1 cup breadcrumbs - 1/4 cup milk - 1 egg - 2 tablespoons Worcestershire sauce - 1 tablespoon ketchup The onion and garlic give a great taste. The egg helps bind the mixture, while the milk keeps it moist. Finally, you need seasonings and toppings: - 1 teaspoon dried parsley - 1 teaspoon dried oregano - Salt and pepper to taste - 1/2 cup ketchup (for topping) These seasonings add depth. The ketchup on top creates a nice glaze. This combination makes the meatloaf flavorful and fun! {{ingredient_image_1}} Start by grabbing a large mixing bowl. Add 1 pound of ground beef and 1/2 pound of ground turkey. Next, toss in 1 small onion, finely chopped, and 2 cloves of minced garlic. Add in 1 cup of breadcrumbs, 1/4 cup of milk, and 1 egg. Pour in 2 tablespoons of Worcestershire sauce and 1 tablespoon of ketchup. Now, sprinkle in 1 teaspoon each of dried parsley and dried oregano. Finally, add salt and pepper to taste. Mix everything with your hands. Be careful not to overmix; this keeps the meatloaf tender. Once mixed, shape the meat mixture into a loaf. Aim for a size of about 8 inches long and 4 inches wide. This shape helps it cook evenly in the air fryer. Make sure it’s not too thick, so it cooks well. Place the formed meatloaf on a plate. You can cover it with plastic wrap if you want to chill it for a bit before cooking. Now, preheat your air fryer to 320°F (160°C). Once ready, carefully place the meatloaf in the air fryer basket. Cook it for 25 to 30 minutes. Use a meat thermometer to check the internal temperature. It should reach 160°F (70°C). After 20 minutes, take the meatloaf out briefly. Spread 1/2 cup of ketchup on top for a tasty glaze. Return it to the air fryer to finish cooking. Once done, let the meatloaf rest for 5 minutes before slicing. This resting time helps keep it juicy. Enjoy your meal! When making meatloaf, mixing is key but don’t go overboard. Overmixing makes the meatloaf tough. Just blend the ingredients until mixed. Use your hands for the best results. This way, your meatloaf stays tender. A gentle touch is all you need. Cooking at the right temperature is a must. Set your air fryer to 320°F (160°C). This heat cooks the meatloaf evenly. Use a meat thermometer to check for doneness. Aim for an internal temperature of 160°F (70°C). This ensures safe and tasty meatloaf. Moisture adds flavor and texture to your meatloaf. Use milk and egg to help keep it juicy. Adding breadcrumbs also helps absorb moisture. Cover the meatloaf with ketchup during cooking. This adds a nice glaze and locks in moisture. Let the meatloaf rest before slicing. This keeps all the juices inside. Pro Tips Use Lean Meat: Opt for lean ground beef and turkey to reduce fat content while keeping the meatloaf moist and tender. Rest Before Slicing: Let the meatloaf rest for at least 5 minutes after cooking to ensure juices redistribute for a juicier slice. Add Veggies: Mix in grated carrots or bell peppers for added flavor and nutrition without compromising texture. Experiment with Spices: Customize your meatloaf by adding spices like smoked paprika or chili flakes for an extra kick of flavor. {{image_2}} To make a leaner meatloaf, you can swap the ground beef for lean ground turkey or chicken. This change cuts fat while still keeping great flavor. You can also mix in some cooked lentils or beans for added protein and fiber without extra fat. These options keep your meal light and healthy, making it perfect for any diet. Adding BBQ sauce is a fun way to boost flavor. You can mix it into the meat blend or use it as a topping. For a smoky taste, try adding smoked paprika or chipotle powder. You can also experiment with different sauces like teriyaki or sweet chili sauce. Each sauce adds its own unique twist to the meatloaf, making it exciting to eat. Adding veggies to your meatloaf makes it more nutritious. Consider mixing in finely chopped bell peppers, carrots, or spinach. You can sauté them first for extra flavor and softness. Mushrooms also work well, adding a nice earthy taste. These add-ins not only enhance the texture but also increase the vitamins in your meal. After enjoying your air fryer meatloaf, store leftovers in the fridge. Place slices in an airtight container. This keeps the meatloaf fresh for about four days. If you want to keep it longer, consider freezing it. To freeze the meatloaf, wrap it tightly in plastic wrap. Then, place it in a freezer bag. Make sure to label the bag with the date. This method lets the meatloaf stay good for up to three months. When you are ready to eat it, thaw it overnight in the fridge. To reheat your meatloaf, use the air fryer for the best results. Preheat the air fryer to 320°F (160°C). Place the meatloaf slices in the basket. Heat for about 10 minutes or until warm. You can also use a microwave, but the air fryer keeps the texture better. Enjoy your tasty meatloaf again! Yes, you can use just one type of meat. Ground beef works well alone. You can also try ground turkey for a lighter option. Just remember to adjust cooking times if you change the meat type. Using one meat may change the flavor and texture slightly. Ground beef gives a rich taste, while turkey is milder. Check the meatloaf's internal temperature. It should reach 160°F (70°C) for safety. Use a meat thermometer for accuracy. If you don’t have one, you can cut into the meatloaf. The inside should not be pink, and juices should run clear. Remember, letting it rest for 5 minutes helps it firm up for slicing. Absolutely! Mini meatloaves cook quickly and are fun to make. Simply shape the mixture into smaller loaves, about 4 inches long. They will cook faster, so check them after 15-20 minutes. Mini versions are great for meal prep or kids. Plus, they look cute on a plate! This blog post covered how to make a tasty meatloaf in an air fryer. We discussed each ingredient type and how they blend for flavor. Next, I gave clear steps for making, forming, and cooking your meatloaf. I shared tips to keep it moist and how to store leftovers. Lastly, I offered fun variations for everyone. Try these methods for your best meatloaf. Happy cooking!

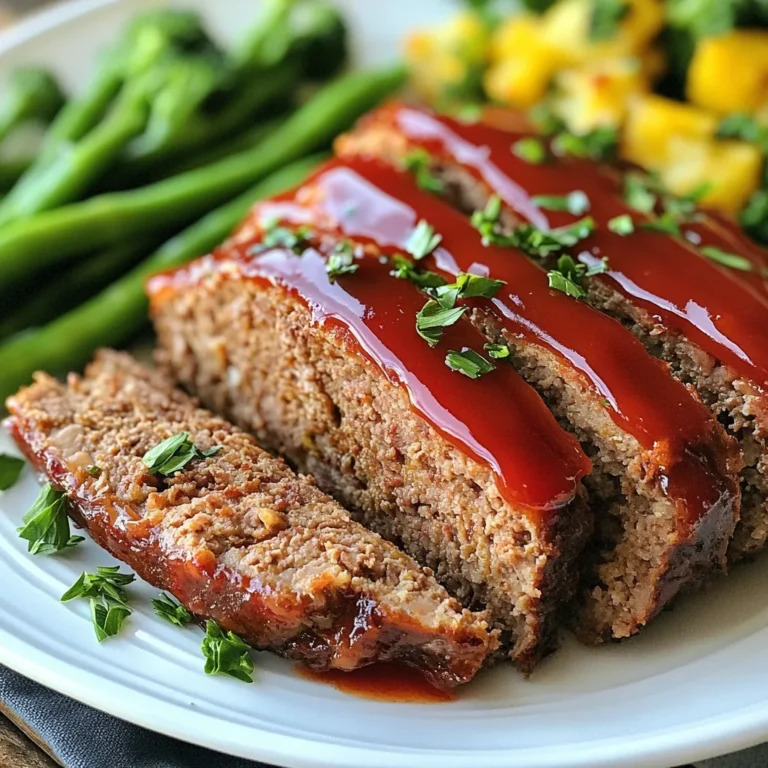
Air Fryer Meatloaf Quick and Flavorful Recipe

For this drink, you need 4 cups of fresh watermelon. Choose a ripe watermelon that feels heavy for its size. Look for a smooth skin with a creamy spot. This spot shows it ripened on the vine and is sweet. You will use 1/2 cup of freshly squeezed lime juice. This is about 4 to 5 limes. Fresh juice gives a bright taste that bottled juice cannot match. Roll the limes on the counter before cutting. This helps release more juice. Add 1/4 cup of honey or agave syrup. You can adjust this amount to suit your taste. Honey brings a floral note, while agave syrup is milder. Both sweeteners blend nicely with the watermelon and lime. You need 2 cups of chilled sparkling water. This adds fizz and makes the drink refreshing. Use plain sparkling water to keep the flavors pure. Ensure it is well-chilled for the best experience. Fresh mint leaves and lime slices are perfect for garnish. Mint adds a nice aroma, and lime slices make the drink look pretty. Place a mint leaf and a lime slice on each glass to impress your guests. {{ingredient_image_1}} First, take your fresh watermelon and cut it into cubes. I like to use about 4 cups. Place the cubes into a blender. Blend until the watermelon is smooth. Next, strain the juice through a fine mesh sieve into a large pitcher. This removes the pulp and gives you nice, smooth juice. You can save the pulp for another use or toss it away. Now, add the freshly squeezed lime juice to the pitcher. You will need about 1/2 cup, which comes from about 4 to 5 limes. Next, pour in 1/4 cup of honey or agave syrup. Stir the mixture well until the sweetener dissolves completely. This step is key to balancing the tartness of the lime with the sweetness of the watermelon. Carefully add 2 cups of chilled sparkling water to the pitcher. Pour it gently, so you keep that nice fizz. After adding the sparkling water, stir the mixture lightly. You want to mix the ingredients without losing that refreshing bubble. Now, it’s time to taste your drink. If you want it sweeter, add a little more honey or agave syrup. You can adjust it based on your taste buds. Remember, the sweetness should balance with the lime's tanginess. To serve, fill each glass with ice. Then pour the sparkling watermelon limeade over the ice. For a nice touch, garnish each glass with fresh mint leaves and a slice of lime on the rim. This adds a pop of color and freshness to your drink. Enjoy your refreshing summer drink! Pick a watermelon that feels heavy for its size. Look for a uniform shape and a creamy spot on one side. This spot shows where it rested on the ground. A ripe watermelon will also sound hollow when you tap it. These tips help you select a sweet and juicy fruit for your drink. Honey and agave syrup work well, but you can try other sweeteners too. Use maple syrup for a unique flavor. Stevia is a low-calorie choice if you're cutting sugar. Adjust the amount based on your taste. Always start with a little, then add more if needed. To keep the fizz, add sparkling water last. Stir gently so you don’t lose the bubbles. Serve the drink right away after mixing. If you need to prepare ahead, keep sparkling water separate until serving. This helps keep your drink lively and refreshing. Make your drink look great with simple garnishes. Use fresh mint leaves for a pop of color. Add lime slices on the rim of your glass for a fun touch. Serve in clear glasses to show off the pink hue. You can even add ice cubes with mint leaves frozen inside for a cool look. Pro Tips Choose Ripe Watermelon: For the best flavor, select a watermelon that feels heavy for its size and has a uniform shape. Look for a creamy yellow spot on one side, indicating it ripened on the ground. Chill Your Sparkling Water: Make sure your sparkling water is chilled before mixing it with the watermelon juice to keep the drink refreshing and fizzy. Adjust Sweetness to Taste: Everyone's palate is different, so taste the mixture after adding honey or agave syrup and adjust the sweetness to your liking before serving. Garnish Creatively: Enhance the presentation by using colorful garnishes like edible flowers or thinly sliced fruits along with mint leaves for a beautiful touch. {{image_2}} You can easily change the flavor by adding other fruits. Try mixing in strawberries or pineapples for a twist. Blend these fruits with the watermelon for more depth. You can also muddle fruit in the glass before pouring in the limeade. This method adds a fun texture and bursts of flavor. Herbs can enhance your drink. Try adding fresh basil or rosemary for a unique taste. You can muddle the herbs at the bottom of the glass to release their oils. Mint is a classic choice that pairs well with watermelon. Just a few leaves can add a refreshing note. Want to turn your limeade into a cocktail? Add a splash of vodka or rum for an adult twist. Mix in a shot before serving over ice. This change makes it perfect for summer parties. Remember to adjust the sweetness if you add alcohol; you want a balanced drink. To keep your Sparkling Watermelon Limeade fresh, store leftovers in a sealed container. Use a pitcher or a jar with a lid. This helps to keep flavors intact. Make sure to consume it within two days for best taste. Always refrigerate your Sparkling Watermelon Limeade. Place it in the fridge as soon as possible. Cold temperatures keep the drink refreshing. It can lose fizz if left out too long. If you notice any separation, just give it a gentle stir. You can freeze leftover watermelon juice for later use. Pour the juice into ice cube trays. Once frozen, store the cubes in a zip-top bag. This method is great for smoothies or future limeade. Just remember to use it within three months for the best flavor. Yes, you can use bottled lime juice. However, fresh lime juice tastes best. Fresh limes give a bright and zesty flavor. Bottled juice can be more tart. If you use bottled juice, taste and adjust the sweetness. To make it less sweet, use less honey or agave syrup. Start with half the amount, then taste it. You can also add more lime juice for tartness. This adds balance and makes it refreshing. Yes, you can easily scale this recipe. Simply multiply the ingredients. If you want to serve a crowd, it works great. Make sure to use a bigger pitcher. Keep the sparkling water separate until serving for the best fizz. Store leftovers in the fridge in a sealed container. It stays fresh for up to two days. However, it may lose some fizz. If you want to keep the bubbles, add sparkling water just before serving. Yes, you can use soda instead of sparkling water. Choose a lemon-lime soda for a nice twist. This will add sweetness and flavor. Just remember to adjust the amount of honey or agave syrup based on the soda's sweetness. This blog post covered how to make a refreshing Sparkling Watermelon Limeade. We talked about key ingredients, step-by-step instructions, and tips to make it better. You learned how to add other fruits and herbs for extra flavor. We also shared storing tips to keep your drink fresh. This recipe is easy, fun, and perfect for warm days. Enjoy making this drink and impress your friends!

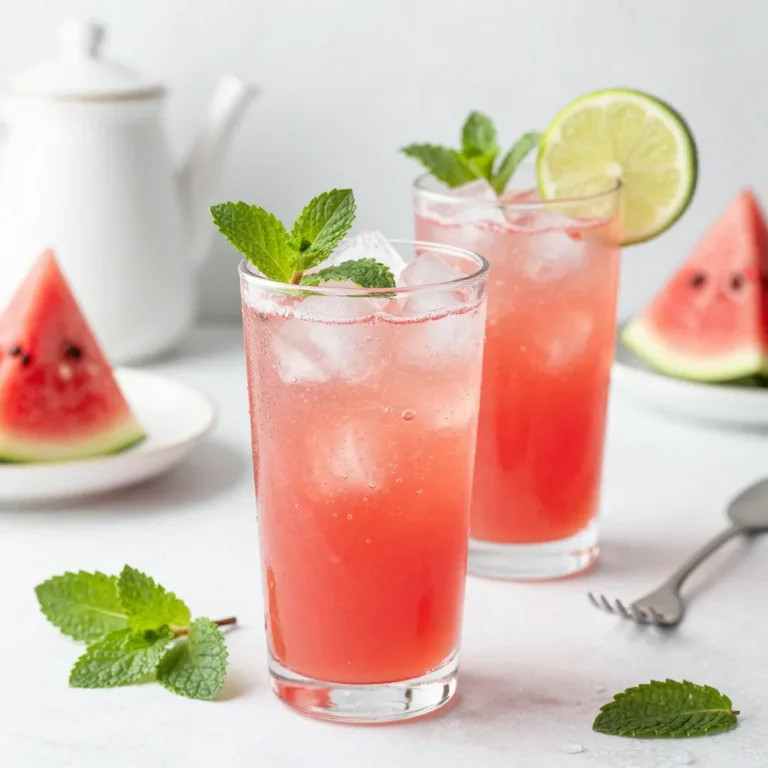
Sparkling Watermelon Limeade Refreshing Summer Drink

- 2 cups cooked chicken, shredded - 1 cup carrots, diced - 1 cup peas (fresh or frozen) - 1 cup potatoes, diced - 1 onion, chopped - 3 cloves garlic, minced I love using cooked chicken in this dish. It makes the pot pie hearty and filling. Diced carrots add a nice crunch. Peas add sweetness and color. Diced potatoes give a creamy texture. The chopped onion and minced garlic bring great flavor. - 1 cup chicken broth - 1 cup heavy cream The chicken broth makes the filling juicy. Heavy cream adds richness. Together, they create a smooth and thick sauce that coats the chicken and veggies well. - 1 tablespoon fresh thyme, chopped (or 1 teaspoon dried thyme) - 1 tablespoon olive oil - Salt and pepper to taste - 1 package of refrigerated pie crusts (2 crusts) - 1 egg, beaten (for egg wash) Fresh thyme gives a nice herb flavor. Olive oil helps sauté the veggies. Salt and pepper enhance every bite. Using refrigerated pie crusts saves time. An egg wash makes the crust golden and shiny. This mix of ingredients creates a cozy meal that warms the heart. Each bite brings comfort and joy. {{ingredient_image_1}} - Cook the Vegetables: Start by heating olive oil in a large skillet. Add chopped onion, minced garlic, diced carrots, and diced potatoes. Sauté these veggies for about 5 to 7 minutes. You want them to soften but not brown. - Add Chicken and Seasoning: Next, stir in 2 cups of shredded chicken and 1 cup of peas. Sprinkle in fresh thyme, salt, and pepper to taste. Cook this mix for another 2 to 3 minutes, letting the flavors combine. - Make the Creamy Filling: Pour in 1 cup of chicken broth and 1 cup of heavy cream. Stir well and bring this mixture to a simmer. Let it cook for 5 to 7 minutes until the sauce thickens. Once thick, take it off the heat and let it cool slightly. - Preheat the Oven: Set your oven to 425°F (220°C). This step is key for a golden crust. - Assemble the Pie: Roll out one pie crust and fit it into a 9-inch pie dish. Pour the chicken mixture into this crust, spreading it evenly. Roll out the second crust and place it over the filling. Seal the edges by crimping them together. Cut a few slits in the top crust to let steam escape. - Egg Wash: Brush the top crust with a beaten egg. This gives it a nice golden finish when baked. - Bake: Place the pot pie in your preheated oven. Bake for 30 to 35 minutes, or until the crust turns golden brown and the filling bubbles. - Cool and Serve: Let the pie cool for about 10 minutes before slicing. This helps the filling set and makes it easier to serve. Using homemade chicken broth gives your pot pie a rich taste. You can make it easily by simmering chicken bones with veggies. It adds depth to your dish. You can also try adding fresh herbs like rosemary or sage. These herbs can make your pie smell and taste amazing. Chill your pie crusts before you use them. A cold crust helps it turn out flaky. This small step makes a big difference. Be sure not to overfill your pie. If you add too much filling, it might leak while baking. Keep a little space at the top for best results. Cut some decorative slits in the top crust. This gives your pie a rustic look. It also allows steam to escape. You can serve your pot pie with fresh herbs on top. Adding a side salad brings color to your plate and makes it look more inviting. Pro Tips Use Rotisserie Chicken: For a quicker preparation, consider using store-bought rotisserie chicken. It adds flavor and saves cooking time! Customize Your Veggies: Feel free to add your favorite vegetables, such as corn or green beans, to the filling for extra flavor and nutrition. Thicken the Filling: If you prefer a thicker filling, you can add a cornstarch slurry (1 tablespoon cornstarch mixed with 1 tablespoon water) to the mixture before simmering. Let It Rest: Allow the pot pie to cool for about 10-15 minutes before slicing. This helps the filling set and makes serving easier. {{image_2}} You can make your chicken pot pie a bit lighter. Replace heavy cream with sour cream. This swap cuts fat while keeping it creamy. You can also choose whole grain pie crust. This option adds fiber and nutrients to your meal. If you want to change the protein, swap chicken for turkey. This choice works well, especially after a holiday. For a vegetarian option, use tofu instead. It soaks up flavors and adds protein. You can even add bacon or ham. These meats bring a smoky taste and extra richness. Get creative with your veggies! Add corn, mushrooms, or bell peppers. Each brings a new taste and texture. You can also mix in different cheese. Cheddar gives a creamy twist and a sharp flavor. Try these changes to make your pot pie truly unique! After enjoying your ultimate chicken pot pie, store any leftovers in the fridge. Make sure to use an airtight container. This keeps the pie fresh and tasty. You can safely eat it within 3-4 days. If you wait too long, it may spoil. If you want to save some for later, freeze the pie before baking. This gives you a quick meal for busy days. Wrap it well in plastic wrap and place it in a freezer bag. When ready to bake, thaw it in the fridge overnight. This ensures even cooking later. For the best texture, reheat your pot pie in the oven. Set it to 350°F (175°C) and bake until warm. This helps the crust stay flaky. If you're in a hurry, you can use the microwave. Just heat it for a few minutes, checking often to avoid overheating. To make a simple pie crust, you need: - 2 1/2 cups all-purpose flour - 1 teaspoon salt - 1 cup unsalted butter, cold and cubed - 6-8 tablespoons ice water Here’s how to do it: 1. In a bowl, mix flour and salt. 2. Add cold butter. Use your hands or a pastry cutter to mix until it looks like crumbs. 3. Slowly add ice water, one tablespoon at a time, until the dough holds together. 4. Divide the dough in half, shape into discs, and wrap in plastic wrap. Chill for at least one hour before rolling out. Yes, you can make the pot pie a day ahead. Here’s how: 1. Prepare the filling and let it cool. 2. Assemble the pie but do not bake it. 3. Cover it tightly with plastic wrap or foil. 4. Store it in the fridge. 5. When ready to bake, remove it from the fridge, brush with egg wash, and bake as directed. Several side dishes complement chicken pot pie well. Here are some ideas: - A light green salad with vinaigrette - Garlic bread or dinner rolls - Steamed broccoli or green beans - A simple coleslaw for crunch You know the pot pie is done when: - The crust is golden brown. - The filling is bubbling through the slits on top. - A knife inserted in the center comes out hot. These signs mean your pot pie is perfectly baked and ready to enjoy! This blog post covered how to create a delicious chicken pot pie. We looked at ingredients, from cooked chicken and veggies to seasonings and crust. I shared step-by-step instructions to prepare, assemble, and bake your pot pie. I also offered tips for flavor and presentation, along with variations and storage advice. In summary, you can enjoy a warm, hearty meal that fits your tastes. Happy cooking, and enjoy your pot pie!

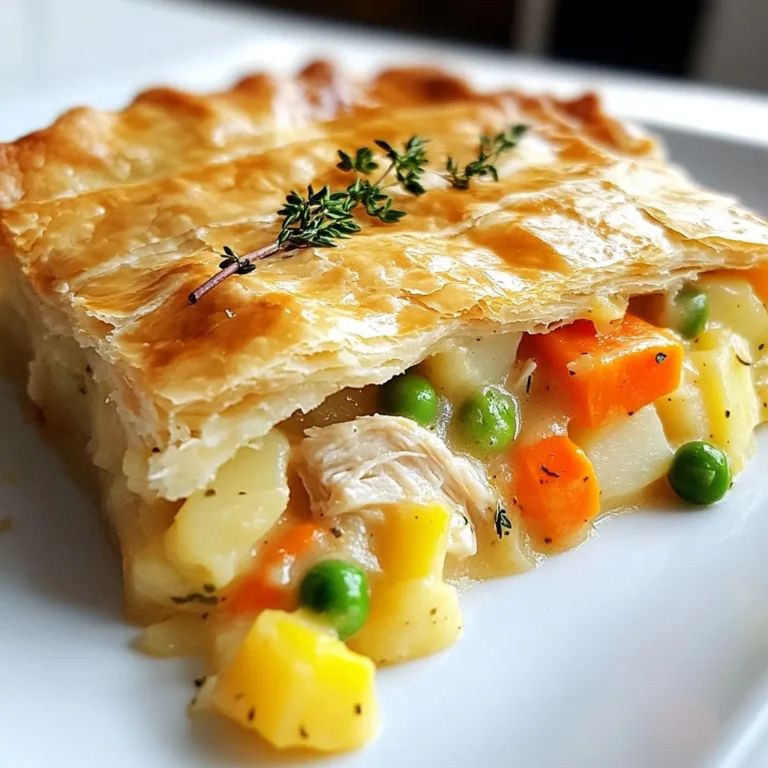
Ultimate Chicken Pot Pie Simple Comfort Food Delight

- 2 cups whole grain pasta (fusilli or penne) - 1 cup cooked chickpeas (canned, drained, and rinsed) - 1 cup cherry tomatoes, halved - 1 medium cucumber, diced - 1/2 cup red bell pepper, diced - 1/4 cup red onion, finely chopped - 1/4 cup fresh parsley, chopped These main ingredients make your pasta salad healthy and tasty. Whole grain pasta adds fiber. Chickpeas boost protein and make it filling. Fresh veggies add crunch and color. - 1/2 cup feta cheese, crumbled - 1/4 cup sunflower seeds Feta cheese gives the salad a creamy touch. Sunflower seeds add a nice crunch. You can mix and match based on your taste. - 3 tablespoons extra virgin olive oil - 2 tablespoons lemon juice - 1 teaspoon Dijon mustard - Salt and pepper to taste The dressing ties everything together. Olive oil adds richness. Lemon juice gives a fresh zing. Dijon mustard adds a bit of spice. Adjust salt and pepper to make it perfect for you. {{ingredient_image_1}} - First, bring a large pot of salted water to a boil. - Add 2 cups of whole grain pasta. Cook it according to the package instructions. - Aim for al dente texture, which usually takes around 8 to 10 minutes. - Once cooked, drain the pasta and rinse it under cold water to stop the cooking. - While the pasta cooks, chop your vegetables. - Use 1 cup of cherry tomatoes, halved, and 1 medium cucumber, diced. - Dice 1/2 cup of red bell pepper and finely chop 1/4 cup of red onion. - Place all the chopped veggies into a large mixing bowl. - Now, add the chilled pasta to the bowl with the veggies. - Include 1 cup of cooked chickpeas, and if you like, toss in 1/2 cup of crumbled feta cheese. - Add 1/4 cup of sunflower seeds and 1/4 cup of chopped parsley for extra flavor and texture. - For the best taste, let the salad chill in the fridge for at least 30 minutes. - Serve it in a large bowl or on individual plates. - You can garnish with extra sunflower seeds and parsley for a nice touch. To cook pasta perfectly, aim for al dente. This means the pasta should be firm yet tender. Here are my tips: - Use salted water. It adds flavor to the pasta. - Check the package for cooking times. Start checking a minute early. - After cooking, drain and rinse the pasta under cold water. This stops the cooking process and helps it cool. You can easily customize your pasta salad. Swap out proteins based on your taste. Here are some ideas: - Use cooked chicken for a hearty option. - Try diced tofu for a vegan choice. - Add more chickpeas for extra protein. You can also play with spices and herbs. Fresh herbs like basil or dill can brighten the salad. Try adding: - A pinch of garlic powder for a kick. - A sprinkle of smoked paprika for depth. To make your salad sing with flavor, consider these tips: - Add a splash of red wine vinegar for tang. - Use a mix of olive oil and avocado oil for richness. - Balance the dressing flavors. Taste it first. If it’s too sour, add a bit of honey or maple syrup. These tricks will elevate your salad and keep it fresh and exciting! Pro Tips Cook Pasta Al Dente: Make sure to cook the pasta just until al dente for the best texture. This will help it hold up well in the salad without becoming mushy. Chill Before Serving: Allow the salad to chill in the refrigerator for at least 30 minutes. This enhances the flavors and allows the ingredients to meld together beautifully. Customize Your Veggies: Feel free to swap in your favorite vegetables or whatever you have on hand. Bell peppers, zucchini, or even broccoli can make great additions! Use Fresh Herbs: Fresh herbs like basil or cilantro can elevate the flavor of your pasta salad. Add them just before serving for the best impact. {{image_2}} You can switch up the protein in your pasta salad. For a tasty option, add cooked chicken. Just shred or cube it to mix well. If you prefer a plant-based choice, use tofu. Press it to remove water, then cube and sauté. Both options boost protein and add flavor. If you want high-protein alternatives, try lentils or edamame. These legumes pack a punch and mix well. They keep the dish healthy and filling. For those who need gluten-free pasta, options like brown rice or quinoa pasta work great. They give you the same texture and taste without gluten. When it comes to fresh veggies, choose what's in season. Swap cherry tomatoes for zucchini or bell peppers for asparagus. Seasonal vegetables add variety and freshness. The dressing can change the whole salad vibe. Instead of olive oil and lemon, try balsamic vinegar for a sweet twist. You can also use yogurt for a creamy dressing. Creamy dressings often feel rich, while vinaigrettes are light and zesty. Experiment with both to find your favorite flavor. Just remember to taste as you mix! To keep your high protein pasta salad fresh, store it in the fridge. Use an airtight container. This helps maintain its taste and texture. Make sure to seal the lid tightly. This way, no air gets in to spoil your salad. It's best to eat the salad within three to five days. Can it be frozen? Yes, but the texture may change. If you want to freeze it, do so without the dressing. Pack it in a freezer-safe container. For thawing, place it in the fridge overnight. When ready to serve, add fresh dressing for the best flavor. How long does it stay fresh? The salad lasts about three to five days in the fridge. Signs of spoilage include a sour smell or mushy vegetables. If you see any mold, throw it away. Trust your senses; if it doesn't look or smell right, it's best to discard it. To make high protein pasta salad, follow these simple steps: 1. Cook the pasta: Boil salted water, add whole grain pasta, and cook until al dente. Drain and cool. 2. Chop vegetables: Dice cherry tomatoes, cucumber, red bell pepper, and red onion. 3. Mix the ingredients: In a bowl, combine cooled pasta, chickpeas, veggies, feta, sunflower seeds, and parsley. 4. Prepare the dressing: Whisk olive oil, lemon juice, Dijon mustard, salt, and pepper. 5. Toss everything: Pour dressing over salad and mix well. 6. Chill: Let it cool in the fridge for about 30 minutes. Common mistakes to avoid: - Don't overcook the pasta; it should be firm. - Rinse pasta in cold water to stop cooking. - Avoid skipping the chilling step; it enhances flavor. You can boost protein with various ingredients. Here are some ideas: - Grilled chicken or turkey - Tofu or tempeh for a vegan option - Edamame or lentils for plant-based protein - Quinoa adds texture and protein - Hard-boiled eggs for extra richness Quick nutrition facts: - Chickpeas provide around 15 grams of protein per cup. - Whole grain pasta has about 8 grams of protein per serving. Yes, you can make this salad ahead of time! Here’s how: - Preparation in advance: Make the salad a day ahead. Store it in the fridge. - Best practices for flavor improvement: Chilling allows flavors to blend. Add fresh herbs just before serving for a burst of freshness. This blog post covered how to make a tasty, high-protein pasta salad. We discussed key ingredients like whole grain pasta and chickpeas. You learned step-by-step instructions, tips for customization, and ways to store your salad. In conclusion, this salad is flexible and fun. Feel free to change the ingredients to suit your taste. Enjoy exploring different flavors and making it your own!

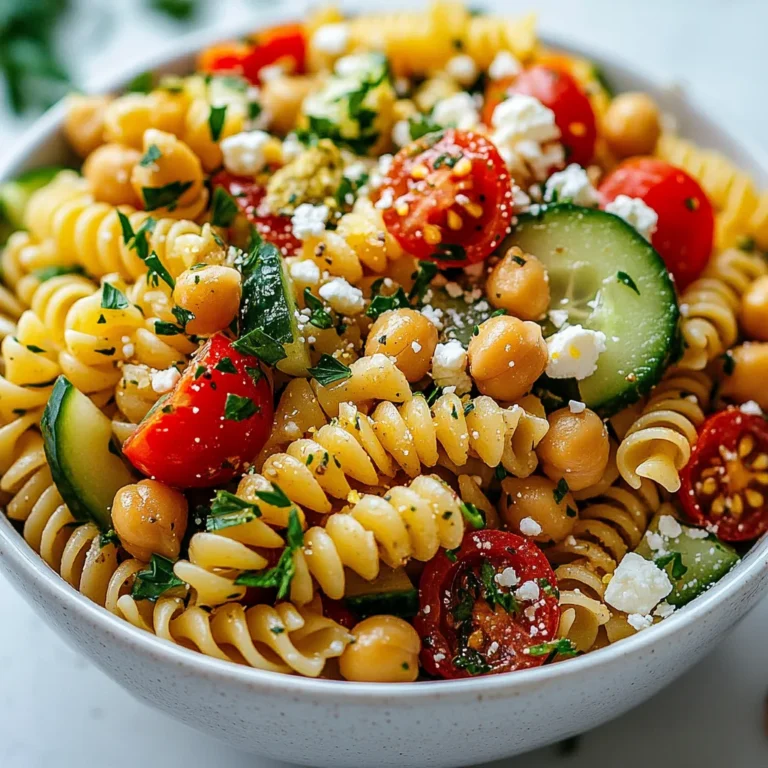
High Protein Pasta Salad Quick and Easy Recipe

- 1 cup mixed berries (strawberries, blueberries, raspberries) - 2 tablespoons maple syrup (or honey) - 1 tablespoon chia seeds - 1 teaspoon lemon juice - A pinch of salt - Medium-sized bowl - Fork - Airtight container or jar - Hand blender (optional) Gather your ingredients first. You need one cup of mixed berries. I love using strawberries, blueberries, and raspberries together. They create a sweet and tangy flavor. Next, grab two tablespoons of maple syrup or honey. This will sweeten your jam just right. You will also need one tablespoon of chia seeds. These tiny seeds help thicken the jam. A teaspoon of lemon juice adds brightness. Finally, add a pinch of salt to enhance the flavors. For equipment, you only need a few simple tools. A medium-sized bowl helps mix everything well. A fork is great for mashing the berries. An airtight container or jar is essential for storage. If you want a smoother jam, a hand blender can help, but it’s not a must. This quick and easy recipe lets you enjoy fresh, homemade berry chia jam in no time! {{ingredient_image_1}} First, take your mixed berries. I love using strawberries, blueberries, and raspberries for flavor. Place them in a medium bowl. Next, use a fork to mash the berries. You want to mash them until they reach your preferred consistency. If you like some chunks, leave larger pieces. This adds nice texture to the jam. Now, it's time to mix in the other ingredients. Add 2 tablespoons of maple syrup or honey to sweeten the jam. Then, add 1 tablespoon of chia seeds. These seeds are key as they will help thicken the jam. Next, squeeze in 1 teaspoon of lemon juice for brightness and a pinch of salt to balance the flavors. Stir everything well until it is fully combined. A good mix ensures even flavor throughout. Let the mixture sit for about 5 to 10 minutes. During this time, the chia seeds soak up moisture. This process helps the jam thicken nicely. If you prefer a smoother jam, you can use a hand blender to blend it briefly. Taste the jam after thickening. If it needs more sweetness, add a bit more maple syrup or honey. To make your jam just right, taste it after mixing. If it’s not sweet enough, add more maple syrup or honey. Start with a little and mix well. Keep tasting until it suits your taste buds. Each berry has its own sweetness, so this step is key. Serving this jam in small jars looks cute and fun. Add a sprig of mint on top for a fresh touch. You can pair this jam with many foods. Try it on toast for breakfast or mix it into yogurt for a snack. It also makes a great topping for pancakes. Each bite will feel like a treat! To get the perfect jam thickness, let it sit for 5-10 minutes. This gives chia seeds time to absorb moisture. If you want it smoother, use a hand blender for a few seconds. If your jam feels too thick, just add a splash of water or more fruit. Adjust until it feels just right! Pro Tips Choose Ripe Berries: Select fresh, ripe berries for the best flavor. Overripe berries may lead to a jam that’s too sweet or mushy. Experiment with Sweeteners: Feel free to substitute maple syrup with agave nectar or coconut sugar for a different flavor profile. Adjust Consistency: If the jam is too thick after sitting, stir in a bit of water or additional lemon juice to reach your desired consistency. Store Properly: To extend the shelf life, keep the jam in an airtight container and use clean utensils to scoop it out. {{image_2}} You can have fun with flavors in your berry chia jam. Start by using different types of berries. Mix strawberries, blueberries, and raspberries for a classic taste. If you want something new, try blackberries or cherries. Each berry brings its own sweet and tart notes. You can also add spices like cinnamon or vanilla. A dash of cinnamon adds warmth. A splash of vanilla gives the jam a lovely aroma. If you prefer a low-calorie option, you can swap the sweetener. Instead of maple syrup or honey, try agave syrup or stevia. Agave syrup is sweeter than sugar and has a mild taste. Stevia is a plant-based sweetener that has zero calories. Both options keep the jam tasty without extra calories. Chia seeds are great, but they are not the only option. You can explore other seeds like flaxseeds. Flaxseeds can provide a similar texture. They also offer extra fiber and nutrients. Use ground flaxseeds for the best results. They blend well into the jam while keeping it healthy. To keep your Minute Berry Chia Jam fresh, store it in a clean, airtight jar. Make sure the jar is sealed tightly to prevent air from getting in. Place the jar in the refrigerator right after you make the jam. This keeps it cool and tasty. Your jam will stay fresh for about one week in the fridge. Check for any changes in smell or color before using. If it looks or smells off, it’s best to toss it. If you want to save some jam for later, freezing is a great option. Use a freezer-safe container or a zip-top bag for this. Fill the container, leaving some space for expansion. The jam can last for up to three months in the freezer. When you’re ready to use it, thaw it in the fridge overnight. Yes, you can use frozen berries. They work well in this jam. Just thaw them first. This helps break down the berries easily. Frozen berries may have more water. You might need to adjust the amount of sweetener. Taste the jam and tweak as needed. Homemade chia jam lasts about one week in the fridge. Store it in a clean jar or airtight container. This keeps it fresh and tasty. Always check for any off smells or changes in color. If it looks or smells strange, throw it away. If your jam is too thick, add a bit of water. Start with a teaspoon and mix well. This helps loosen the jam's texture. You can also add more berries or a splash of lemon juice. Adjust until you reach your desired consistency. This post covered how to make tasty chia jam using berries and common ingredients. I shared steps for preparation, combining, and thickening for the perfect texture. You learned how to adjust sweetness and present your jam beautifully. We discussed variations, storage tips, and answers to common FAQs. Making chia jam is simple and fun. Enjoy experimenting with flavors and sharing your creations!

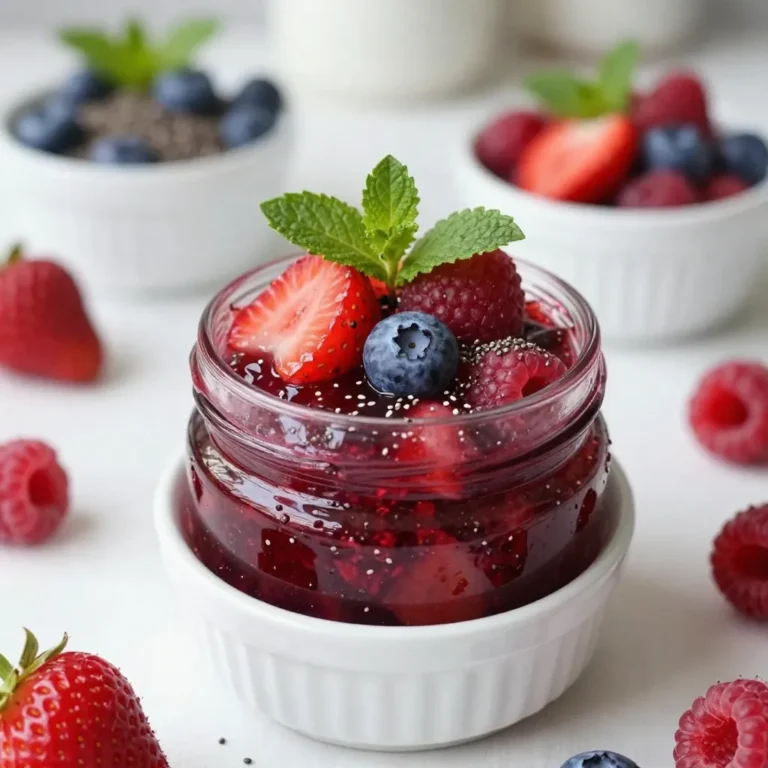
Minute Berry Chia Jam Simple and Quick Delight

To make a great pumpkin pot de crème, you need the following ingredients: - 1 cup canned pumpkin puree - 1 ½ cups heavy cream - ½ cup whole milk - ½ cup granulated sugar - 4 large egg yolks - 1 teaspoon vanilla extract - 1 teaspoon ground cinnamon - ¼ teaspoon ground nutmeg - ¼ teaspoon ground ginger - ¼ teaspoon salt These ingredients create a rich, smooth dessert. The pumpkin puree gives it a warm, earthy flavor. The heavy cream and milk provide a creamy texture. The sugars and spices bring sweetness and warmth. I love to add a few toppings to my pumpkin pot de crème. Here are some great options: - Whipped cream - Crushed gingersnap cookies - A sprinkle of cinnamon - Chopped nuts These toppings add texture and flavor. They also make your dish look more appealing. Choosing the best ingredients really matters. Here are some tips: - Pumpkin Puree: Use pure pumpkin puree, not pumpkin pie filling. It has no added sugar or spices. - Cream and Milk: Select fresh heavy cream and whole milk for a richer taste. - Spices: Use fresh spices for the best flavor. Ground spices lose their taste over time. - Eggs: Choose large, fresh eggs for the best results. When you use high-quality ingredients, your dessert will taste even better. This ensures a delightful experience with each bite. {{ingredient_image_1}} First, preheat your oven to 325°F (160°C). This step is key for even baking. Next, take four ramekins and place them in a baking dish. The baking dish will hold water during cooking. This water bath helps the pot de crème cook gently and keeps it creamy. In a medium saucepan, mix together one cup of canned pumpkin puree, one and a half cups of heavy cream, and half a cup of whole milk. Heat this mixture on medium heat until it is steaming. Do not let it boil. Stir often to prevent sticking. While this heats, grab a separate bowl. In this bowl, whisk together four large egg yolks, half a cup of granulated sugar, one teaspoon of vanilla extract, one teaspoon of ground cinnamon, a quarter teaspoon of ground nutmeg, a quarter teaspoon of ground ginger, and a quarter teaspoon of salt. Mix until smooth. When the pumpkin mixture is hot, slowly pour it into the egg yolk mix. Whisk constantly to blend. This step is called tempering. It prevents the eggs from scrambling. Now, strain the mixture through a fine sieve. This removes any lumps, making it smooth. Next, evenly pour the mixture into the ramekins. Fill the baking dish with hot water until it reaches halfway up the sides of the ramekins. This bath helps cook the pot de crème evenly. Carefully place the baking dish in the preheated oven. Bake for 30 to 35 minutes. The centers should be just set but still slightly wobbly. Once done, remove the ramekins from the water bath. Let them cool to room temperature. After they cool, refrigerate them for at least two hours. This chilling time helps the flavors deepen. Before serving, add a dollop of whipped cream on top. Sprinkle crushed gingersnap cookies for extra crunch and flavor. Enjoy this tasty treat! To get the best texture for your Pumpkin Pot de Crème, follow these tips: - Use room temperature eggs. Cold eggs can cause lumps. - Whisk gently. Mix the egg yolks and sugar slowly to keep air bubbles out. - Strain the mixture. This step removes lumps and ensures a smooth finish. - Monitor the baking time. Bake until the centers are just set but still wobbly. These steps will give you the creamy, velvety texture you want. Here are some mistakes to watch out for: - Overheating the cream mixture. If it boils, it can curdle your custard. - Not whisking enough. This can lead to uneven cooking and a grainy texture. - Skipping the water bath. This helps cook the custard evenly and prevents cracking. - Not cooling properly. Letting them cool before chilling gives the best results. Avoiding these mistakes will help you achieve a great dessert. To make your Pumpkin Pot de Crème shine, try these serving ideas: - Top with whipped cream. A dollop adds lightness and sweetness. - Add crushed gingersnap cookies. They give a nice crunch and spice. - Garnish with a sprinkle of cinnamon. This enhances the pumpkin flavor. - Serve in a chilled ramekin. Cold dishes taste better and feel fresher. These suggestions will elevate your dessert experience. Pro Tips Use Fresh Spices: Freshly ground spices like cinnamon, nutmeg, and ginger can enhance the flavor profile of your pot de crème significantly compared to pre-ground spices. Prevent Overcooking: Keep an eye on the baking time. The centers should be just set with a slight wobble; overcooking can lead to a grainy texture. Chill Properly: Allow the pot de crème to chill for at least 2 hours in the refrigerator for the best texture and flavor development. Creative Toppings: Experiment with different toppings like caramel sauce, chocolate shavings, or toasted pecans for a unique twist on the classic recipe. {{image_2}} You can easily change the sugar in this recipe. Try using maple syrup or honey for a unique flavor. Both add sweetness and a bit of their own taste. If you want a lower-calorie option, consider using stevia or monk fruit sweetener. For dairy options, coconut milk works well. It gives a creamy texture and a hint of coconut flavor. Almond milk is another choice, but it may make the pot de crème less rich. Want to mix things up? Add chocolate to your pumpkin pot de crème! Just melt dark chocolate and stir it into the mixture. It pairs well with pumpkin flavors. You can also add a splash of espresso for a coffee twist, or a bit of orange zest for citrus brightness. If you don't have some spices, you can swap them out. For instance, use allspice instead of nutmeg. This will give a warm flavor that still fits the dish. In fall, you can add a touch of cranberry sauce for a tart layer. It looks pretty and adds a fun twist. For winter, consider a peppermint extract. Just a few drops can make this dessert festive. You can also experiment with seasonal spices. Try adding cardamom for a unique taste or pecans for crunch. Each idea brings a new life to this classic dessert. To keep your Pumpkin Pot de Crème fresh, cover each ramekin tightly with plastic wrap. Store them in the fridge. This dessert stays good in the fridge for about four days. If you plan to enjoy it later, be sure to keep it chilled. I recommend enjoying Pumpkin Pot de Crème cold. However, if you prefer it warm, use a gentle method. Place the ramekin in a warm water bath for a few minutes. This method heats it slowly, keeping the texture smooth. Avoid using the microwave, as it may cook the custard unevenly. Pumpkin Pot de Crème lasts up to four days in the fridge. If you want to freeze it, do so before adding toppings. Wrap each ramekin tightly. It can stay frozen for up to two months. When ready to eat, move it to the fridge overnight to thaw. Reheat gently if desired, and then top with whipped cream and crushed gingersnaps. Enjoy! Yes, you can make Pumpkin Pot de Crème ahead of time. It’s best to prepare it one to two days in advance. After baking, let it cool to room temperature. Then, cover each ramekin and place it in the fridge. This dessert tastes even better after chilling. The flavors meld well, and the texture firms up nicely. If you don’t have pumpkin puree, you can use butternut squash puree or sweet potato puree. Both options provide a similar taste and texture. You can even make your own puree by roasting and blending the squash or sweet potatoes until smooth. Just ensure the consistency is thick and creamy. The pot de crème is done when the edges are set but the center is slightly wobbly. This usually takes about 30-35 minutes in the oven. You can also check by gently shaking the ramekins. If they jiggle slightly, they are ready. Overbaking can lead to a grainy texture, so keep an eye on them. Absolutely! You can customize the spices to suit your taste. Try adding cardamom for warmth or allspice for depth. You can even mix in some cocoa powder for a chocolate twist. The beauty of this recipe is its flexibility, so feel free to experiment with flavors you love. In this post, we explored how to make Pumpkin Pot de Crème. We covered the key ingredients, step-by-step instructions, and tips for perfect texture. Using quality ingredients makes a huge difference. We discussed fun variations and smart storage ways. Finally, we answered common questions about making and serving this tasty dish. Now, you’re ready to create your own delicious Pumpkin Pot de Crème. Enjoy every creamy bite!

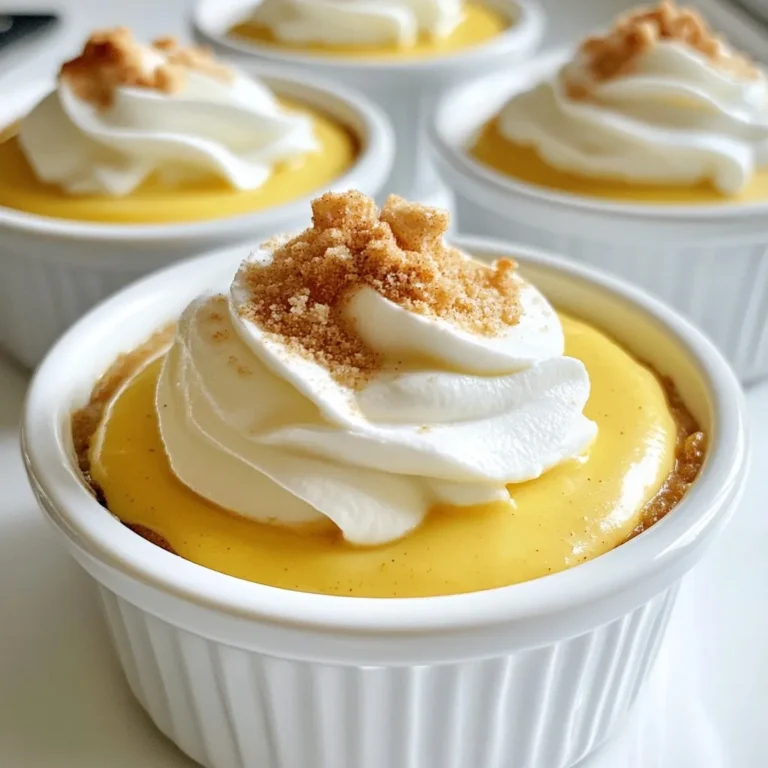
Delicious Pumpkin Pot de Crème Easy Dessert Recipe

- 1 cup blanched almonds, finely chopped - 1/2 cup honey - 1 teaspoon ground cinnamon - 1/4 teaspoon ground nutmeg - 1/2 cup unsalted butter, melted - 10 sheets of phyllo dough - 1/2 cup powdered sugar (for dusting) - 1/4 cup sesame seeds (optional) To make Moroccan Honey Almond Cigars, gather these ingredients first. The blanched almonds give a nice crunch. Honey adds sweetness and moisture. Ground cinnamon and nutmeg bring warmth and spice to the mix. Next, you'll need unsalted butter. It helps the phyllo dough crisp up nicely. Phyllo dough is key to the cigar shape. You will also need powdered sugar for a lovely finish. Finally, sesame seeds can add a nice touch if you like. These ingredients create a tasty dessert. They come together to make a delightful treat. Enjoy the process of measuring and preparing them. Each ingredient plays a role in the final flavor. {{ingredient_image_1}} 1. Preheat your oven to 350°F (175°C). This helps the cigars bake evenly. 2. Line a baking sheet with parchment paper. This makes cleanup easy and prevents sticking. 3. In a mixing bowl, combine the finely chopped almonds, honey, ground cinnamon, and nutmeg. Mix well and set aside. This blend gives the cigars a rich flavor. 1. Take one sheet of phyllo dough and brush it lightly with melted butter. This adds flavor and helps the layers stick. 2. Place a second sheet on top and brush it again with butter. This creates a strong base for your cigars. 3. Cut the layered phyllo dough into long strips, about 3 inches wide. Each strip will hold the filling. 4. Place about 2 tablespoons of the almond mixture at one end of each phyllo strip. 5. Fold the sides over the filling and roll it tightly to form a cigar shape. Ensure the filling is secure inside. 6. Place the finished cigars seam-side down on the prepared baking sheet. This keeps them from unrolling. 7. Brush the tops of the cigars with any remaining melted butter. If you like, sprinkle sesame seeds on top for crunch. 1. Bake in the preheated oven for 20-25 minutes. Watch for a golden brown color, which means they are ready. 2. Once baked, remove them from the oven and let them cool slightly. This keeps them crispy. 3. Dust with powdered sugar before serving. This adds a sweet finish to your beautiful cigars. - Handling phyllo dough: Phyllo dough is delicate. Keep it covered with a damp cloth while you work. This prevents it from drying out. When you layer the sheets, brush each one with melted butter. This adds flavor and helps them stick together. - Ensuring a golden, crispy texture: Bake your cigars until they are golden brown. This usually takes 20-25 minutes. If they are too light, they may not be crispy. You want a nice crunch when you bite into them. - Presentation ideas for serving: Arrange the cigars on a nice platter. Dust them with powdered sugar for a sweet touch. Add whole almonds for decoration. This makes the dish look fancy. - Pairing with beverages or dips: These cigars go well with sweet tea or mint tea. You can also serve them with a small bowl of honey for dipping. This adds extra sweetness and flavor. Pro Tips Use Fresh Ingredients: Always use fresh blanched almonds for the best flavor and texture in your cigars. Layering Technique: Ensure each phyllo sheet is brushed evenly with butter to achieve a crispy, golden finish. Cooling Time: Allow the cigars to cool slightly after baking for easier handling and to enhance the flavors. Adjust Sweetness: Feel free to adjust the amount of honey based on your personal preference for sweetness in the filling. {{image_2}} You can switch up the nuts in this recipe. Try walnuts or pistachios instead of almonds. Both add a rich flavor. For sweeteners, agave or maple syrup work well in place of honey. These swaps keep the dessert tasty while adding new twists. If you want a zesty vibe, add some citrus zest. A bit of orange or lemon zest brightens the flavors. You can also mix in chocolate chips for a sweet surprise. These cigars can be served warm or cold. Warm cigars have a nice, gooey filling. Cold ones are crisp and refreshing. For parties, cut the cigars into bite-sized pieces. This makes them easy to grab and enjoy. You can also serve them with a side of honey for drizzling. This adds extra sweetness and flavor. To keep your Moroccan Honey Almond Cigars fresh, store them in an airtight container. This helps prevent them from getting soggy. If you have leftovers, place them in the fridge. They will stay fresh for about three days. For longer storage, consider freezing them. Wrap each cigar in plastic wrap and place them in a freezer-safe bag. They can last up to three months in the freezer. Just make sure to label the bag with the date. When you want to enjoy your cigars again, reheating is easy. Preheat your oven to 350°F (175°C) for the best results. Place the cigars on a baking sheet. Bake for about 10 minutes. This helps them regain their crispness. Avoid using a microwave. It makes the cigars soft and chewy. For a quick warm-up, use a toaster oven if you have one. That way, you keep the crunch while warming them up. Enjoy your tasty treat! Moroccan Honey Almond Cigars are sweet pastries. They feature a crispy phyllo dough outer layer. Inside, they are filled with finely chopped almonds, honey, and spices. The cinnamon and nutmeg add warmth and depth. These treats are perfect for dessert or snacks. They are often dusted with powdered sugar for a lovely finish. Yes, you can prepare these cigars ahead of time. You can fill and roll them, then store them in the fridge. Just cover them tightly with plastic wrap. When you are ready to bake, take them out and brush with butter. Bake them fresh for the best taste and texture. Yes, you can make gluten-free Moroccan Honey Almond Cigars. Substitute phyllo dough with gluten-free dough or rice paper. This change keeps the flavors similar while making it gluten-free. Just ensure the other ingredients are also gluten-free. Enjoy these delightful treats without worry! In this post, we covered how to make Moroccan Honey Almond Cigars. You learned the key ingredients, step-by-step instructions, and useful tips for perfecting your dish. Working with phyllo dough might seem tricky, but with practice, you'll get it right. You can also try different nuts or flavors to make it your own. Remember to store your leftovers properly to keep them fresh. Enjoy making these tasty treats for yourself or to share. You will impress everyone with this delicious dessert!

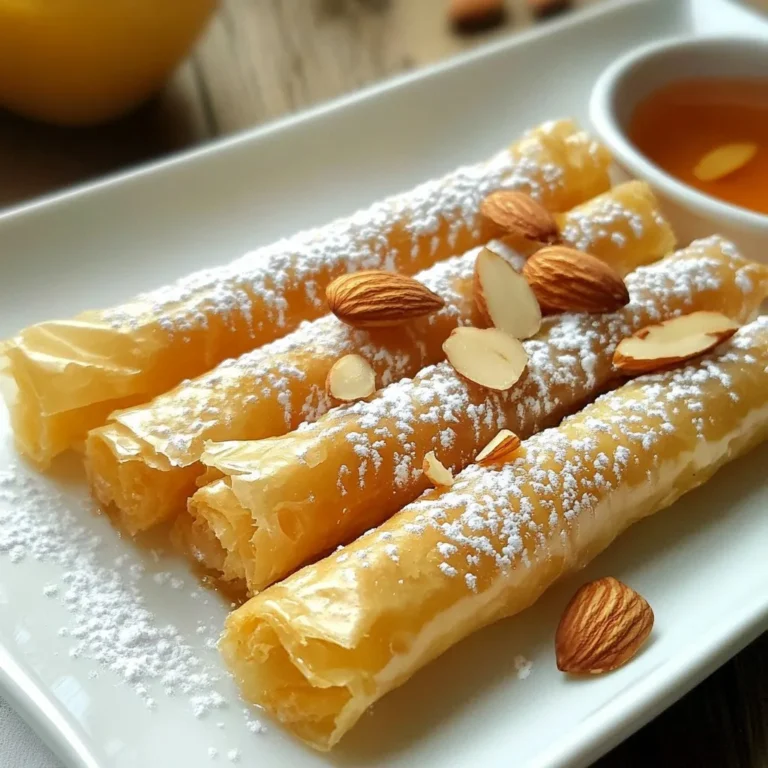
Moroccan Honey Almond Cigars Tasty Dessert Recipe

- 3 lbs beef chuck roast, trimmed and cut into chunks - 4 dried guajillo peppers, seeds removed - 2 dried ancho peppers, seeds removed - 4 cloves garlic, minced - 1 medium onion, chopped - 2 bay leaves - 2 teaspoons ground cumin - 1 teaspoon dried oregano - 1 teaspoon smoked paprika - 1/2 teaspoon black pepper - 1 teaspoon salt (adjust to taste) - 4 cups beef broth - 1/4 cup apple cider vinegar - Fresh cilantro, chopped (for garnish) - Lime wedges (for serving) - Corn tortillas (for serving) Start by soaking the dried guajillo and ancho peppers in hot water. Let them sit for 15-20 minutes until they soften. This step helps to bring out their rich flavors. After soaking, remove the seeds and place the peppers in a blender. Next, add the minced garlic, chopped onion, ground cumin, dried oregano, smoked paprika, black pepper, and salt into the blender. Pour in about 1 cup of beef broth and 1/4 cup of apple cider vinegar. Blend this mix until it becomes a smooth marinade. This blend is the heart of your birria. The key to great birria lies in its deep flavors. The dried guajillo and ancho peppers lend a rich, smoky taste. Garlic and onion add depth, while cumin and oregano bring warmth and earthiness. Smoked paprika enhances the dish with a subtle smokiness, making it truly special. The apple cider vinegar balances the richness of the beef. It adds a slight tang that brightens the overall flavor. With this mix of spices and seasonings, your Crockpot Beef Birria will be savory and flavorful. {{ingredient_image_1}} First, soak the dried guajillo and ancho peppers. Use hot water and let them sit for 15-20 minutes. This softens the peppers. After soaking, drain the water and put the peppers in a blender. Next, add four cloves of minced garlic and one chopped onion. Then, add two teaspoons of ground cumin, one teaspoon of dried oregano, one teaspoon of smoked paprika, half a teaspoon of black pepper, and one teaspoon of salt. Pour in a quarter cup of apple cider vinegar and one cup of beef broth. Blend everything until it is smooth. This mixture is your marinade, rich in flavor and spice. Now, take your three pounds of beef chuck roast. Cut it into chunks and place it in the crockpot. Pour the blended marinade over the beef. Make sure each piece is well-coated. Next, add the remaining beef broth and two bay leaves. Stir the mixture gently to combine all the ingredients. This step ensures that the beef absorbs the full flavor of the marinade. Cover the crockpot and set it to cook. For tender beef, cook on low for 8-10 hours. If you're in a hurry, you can set it to high for 4-6 hours. When the time is up, the beef will be tender and easy to shred. Take the beef out and use two forks to shred it. Return the shredded beef to the broth in the pot. This helps keep the meat moist and flavorful. When serving, warm some corn tortillas. Fill each tortilla with the birria beef and add chopped cilantro for garnish. Serve with lime wedges on the side. This dish is both savory and satisfying. To get tender beef in your birria, start with a good cut. I recommend using beef chuck roast. It has fat and marbling that makes it juicy. Cut it into chunks to help it cook better. Make sure you trim excess fat. This will keep the stew from being too greasy. Cook the beef low and slow. The crockpot is perfect for this. Set it on low for 8-10 hours. If you’re short on time, high for 4-6 hours works too, but low is best. The longer it cooks, the more tender it gets. Marinades make a big difference in flavor. For birria, the marinade is key. Start by soaking dried guajillo and ancho peppers. This softens them and brings out their taste. Blend them with garlic, onion, cumin, oregano, and smoked paprika. This mix gives depth to your dish. Don't skip the apple cider vinegar. It adds a nice tang. Pour the marinade over the beef in the crockpot. Make sure all the pieces are coated well. This step is crucial for flavor. When serving birria, warm corn tortillas are a must. You can heat them in a skillet or over a flame. Fill each tortilla with shredded beef. Garnish with fresh cilantro for a pop of color and taste. Serve with lime wedges on the side. A squeeze of lime brightens the dish. You can also add a small bowl of the broth for dipping. This adds a fun twist to your meal. Enjoy your birria tacos with family and friends! Pro Tips Toast the Peppers: Lightly toast the dried guajillo and ancho peppers in a dry skillet for a few seconds before soaking. This enhances their flavor and adds depth to your marinade. Marinate Overnight: For even more flavor, consider marinating the beef overnight in the blended marinade before cooking. This allows the spices to penetrate the meat. Use Beef Shank: For a more authentic birria, replace some of the beef chuck with beef shank. It adds a rich, beefy flavor and makes the broth even more delicious. Serve with Consommé: Don't forget to serve the birria with a small bowl of the flavorful broth (consommé) for dipping. It elevates the dish and adds a wonderful garnish with fresh lime and cilantro. {{image_2}} You can switch the beef chuck for other cuts. Brisket or short ribs work well too. They add great flavor and tenderness. If you choose a leaner cut like sirloin, cook it for less time. Sirloin can dry out if cooked too long. You can make a tasty birria without meat. Use jackfruit or mushrooms as your base. Both soak up flavors well. Use the same spices and broth to keep the taste rich. Lentils or chickpeas also add a hearty touch. Serve in corn tortillas with the same garnishes for a fun twist. Want more heat? Add extra dried guajillo or ancho peppers to the blend. You can also toss in jalapeños for a fresh kick. If you prefer milder flavors, reduce the number of peppers. Taste as you go, and adjust to your liking. Adding more garlic or onion can also balance the heat. To store leftover birria, let it cool first. Place the beef and broth in an airtight container. This will keep the meat moist and tasty. You can store it in the fridge for up to four days. If you want to keep it longer, freezing is a great option. To freeze birria, use freezer-safe containers. Make sure to leave some space at the top. Freezing can expand the liquid. You can freeze it for about three months. When you are ready to eat it, thaw it in the fridge overnight. To reheat birria, put it in a pot over medium heat. Stir often to heat evenly. You can also microwave it in a bowl. Cover the bowl to keep moisture in. Heat for about two minutes, stirring halfway. Check the temperature; it should be hot all the way through. Enjoy your birria just like the first time! Birria is a traditional Mexican dish made with tender beef. It often features a rich and spicy broth. You can use different cuts, but chuck roast works great. The flavors come from a mix of dried peppers, spices, and herbs. Many people serve it in tacos, with a side of broth for dipping. It's a dish full of history and flavor that warms the heart. Yes, you can use other types of peppers. For a milder taste, try using poblano peppers. If you want more heat, add chipotle peppers. The guajillo and ancho peppers add a unique flavor, but feel free to experiment. Just remember to adjust the amount based on how spicy you want your dish. To make crispy Birria tacos, start by warming your corn tortillas. Once warm, dip them briefly in the broth. Then, place them in a hot skillet with a bit of oil. Add the shredded beef and cook until golden brown. Flip them over to crisp both sides. This technique gives you a delicious crunchy texture with each bite. Birria is a rich and tasty dish with layers of flavor. We covered the key ingredients, like peppers and spices, that make this dish shine. I shared step-by-step instructions for a perfect crockpot meal. You learned best practices for juicy beef and tasty serving ideas. We explored fun twists like vegetarian options and how to store leftovers. This dish is versatile and rewarding, ensuring every bite leaves you wanting more. Enjoy the process and the delicious results of your efforts with birria tacos!

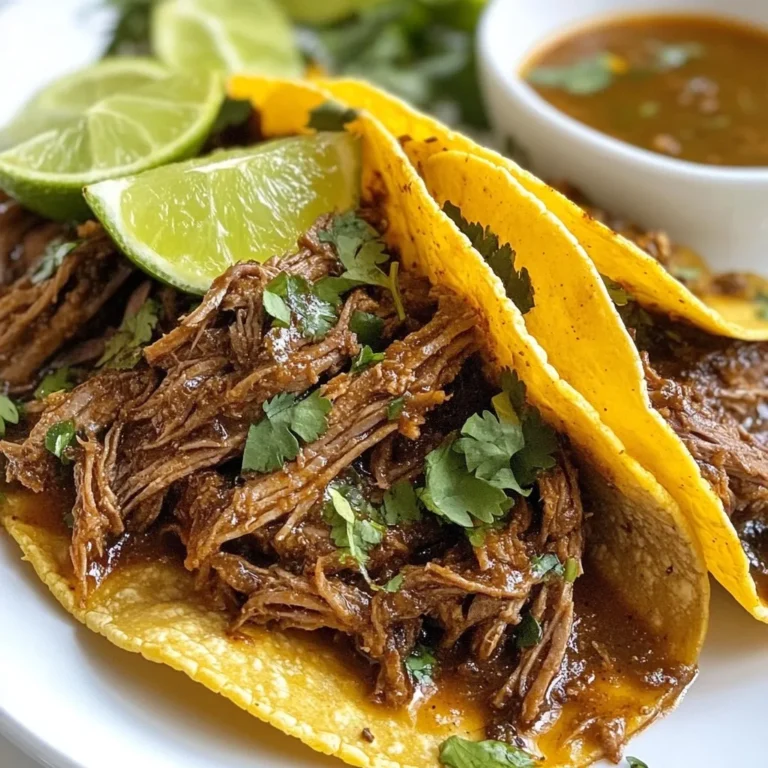
Crockpot Beef Birria Savory and Flavorful Dish

PREV 1 … 70 71 72 … 86 NEXT
spicy fork kitchen

explore

DessertsDinnerAppetizersDrinks

Our Policies

  • Cookie Policy
  • Copyright Policy
  • Disclaimer
  • GDPR Policy
  • Terms Of Use
Back to Top
  • About
  • Contact Us
  • Privacy Policy
© 2026 spicy fork kitchen