FREE DINNER EBOOK! Get your copy!
  • Cookie Policy
  • GDPR Policy
  • Disclaimer
  • Terms Of Use
  • Visit my other site: Fun Cookie Recipes
spicy fork kitchen
  • Home
  • Dinner
  • Desserts
  • Drinks
  • Appetizers
  • Contact
  • About
  • Privacy Policy
  • Home
  • Dinner
  • Desserts
  • Drinks
  • Appetizers
  • Contact
  • About
  • Privacy Policy
  • Cookie Policy
  • GDPR Policy
  • Disclaimer
  • Terms Of Use
Visit my other site: Fun Cookie Recipes

HOME / CATEGORIES /

Latest

- 2 tablespoons olive oil - 1 medium onion, diced - 3 cloves garlic, minced - 3 medium carrots, sliced - 2 celery stalks, chopped - 6 cups low-sodium chicken broth - 2 cups cooked chicken, shredded - 1 teaspoon dried thyme - 1 teaspoon dried rosemary - 1 bay leaf - 2 cups egg noodles - Salt and pepper to taste - 2 tablespoons fresh parsley, chopped (for garnish) To make a great chicken noodle soup, you need fresh ingredients. Start with olive oil, diced onions, and minced garlic. These create a tasty base. Carrots and celery add crunch and flavor. The heart of the soup is low-sodium chicken broth. It gives depth without being too salty. Use shredded cooked chicken for protein and richness. Dried thyme and rosemary bring warmth and aroma. A bay leaf adds a subtle layer of flavor. Egg noodles are essential. They soak up the broth and make the soup hearty. Don’t forget salt and pepper for seasoning. Finally, fresh parsley gives a bright finish. It adds color and a hint of freshness. Gather these ingredients to create your comforting bowl of chicken noodle soup. {{ingredient_image_1}} - Heat 2 tablespoons of olive oil in a large pot over medium heat. - Add 1 medium diced onion and sauté for about 3-4 minutes. The onion should become soft and clear. - Next, stir in 3 minced garlic cloves and cook for 1 more minute. This step adds great flavor. - Now, add 3 sliced carrots and 2 chopped celery stalks. Cook for about 5 minutes, or until they soften. - Pour in 6 cups of low-sodium chicken broth and bring the mixture to a gentle boil. - Stir in 2 cups of shredded cooked chicken. - Add 1 teaspoon of dried thyme, 1 teaspoon of dried rosemary, and 1 bay leaf. - Season the soup generously with salt and pepper. This makes the flavors pop. - Add 2 cups of egg noodles to the pot. - Let the soup simmer for about 8-10 minutes, or until the noodles are tender. - Once cooked, remove the bay leaf and check the seasoning. Adjust if needed. - Serve hot, garnished with 2 tablespoons of chopped fresh parsley for a fresh finish. - Cut your vegetables evenly. This helps them cook at the same rate. - Adjust your seasoning as needed. Taste your soup before serving. - Serve the soup hot with crusty bread. The bread soaks up the broth well. - Pair it with a light salad for a full meal. The salad adds freshness. These tips can elevate your chicken noodle soup experience. Enjoy each bowl! Pro Tips Enhance Flavor: Add a splash of white wine to the broth to deepen the flavor profile of your soup. Shred Chicken: For a more tender texture, use two forks to shred the chicken after cooking; it will blend seamlessly into the soup. Vegetable Variations: Feel free to add other vegetables like peas or corn for extra nutrition and color. Storage Tips: Store leftovers in an airtight container, but keep the noodles separate if possible, as they can become mushy when reheated. {{image_2}} If you want a vegan twist, swap chicken for chickpeas or tofu. Both options add protein and texture. For the broth, use vegetable broth instead of chicken broth. This keeps the soup hearty and full of flavor. For a gluten-free soup, pick gluten-free egg noodles. These noodles work well without losing taste. Make sure to check all other ingredients. Adjust them to fit gluten restrictions. This way, everyone can enjoy the soup. Spice things up! Add your favorite spices or a splash of hot sauce for heat. You can also mix in different vegetables, like spinach or bell peppers. Fresh herbs, such as basil or dill, boost the taste too. These small changes make the soup exciting and unique. To store your leftover chicken noodle soup, let it cool first. Transfer the soup to an airtight container. This keeps it fresh and prevents spills. You can store it in the fridge for up to 3 to 4 days. If you want it to last longer, freezing is a great option. To freeze chicken noodle soup, use a freezer-safe container. Leave some space at the top because the soup will expand when frozen. This helps avoid spills. You can freeze it for up to 3 months. When you're ready to eat, thaw the soup in the fridge overnight. To reheat, warm it on the stove over low heat. Stir often to make sure it heats evenly. You can use water with added flavor. Consider using vegetable broth or bouillon cubes. A mix of water and white wine works too. If you have herbs, add thyme and bay leaves for depth. Yes, leftover rotisserie chicken is a great option. Shred the chicken into bite-sized pieces. Add it to the soup when you pour in the broth. This saves time and adds great flavor. To thicken chicken noodle soup, you can add more noodles. Cook them longer to absorb more broth. Another method is to mix cornstarch with water. Stir that mixture in while the soup simmers. You can also blend some soup and add it back for a creamy texture. This blog post covered how to make a hearty chicken noodle soup from scratch. We discussed the key ingredients like olive oil, chicken broth, and egg noodles. I provided clear steps for preparation, cooking, and serving suggestions. You can also explore vegan and gluten-free options to customize your soup. Remember, storage tips keep your leftovers fresh for later enjoyment. With these insights, you can create a comforting meal any day. Enjoy your cooking adventure and savor every bowl you make!

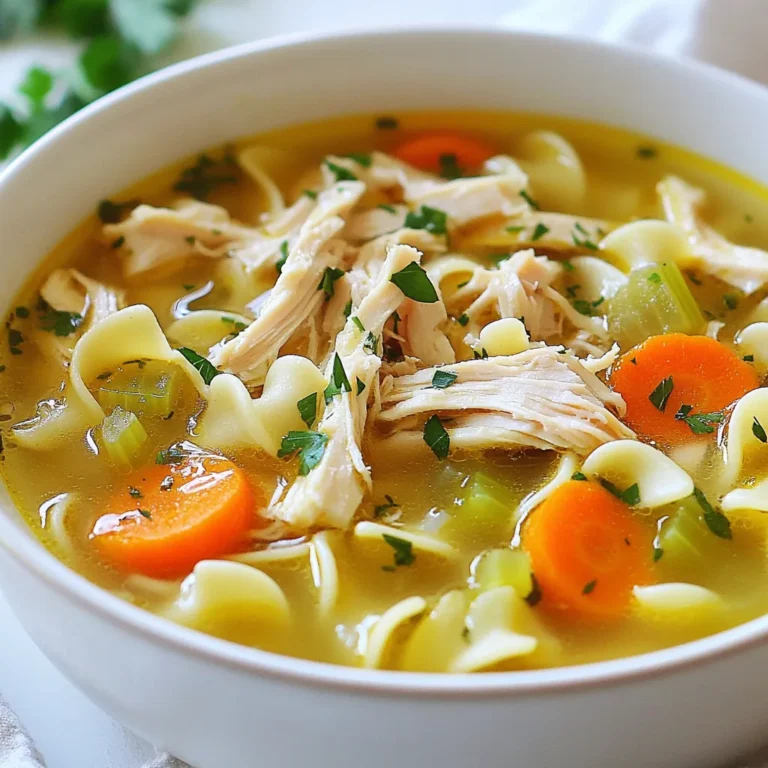
Savory Chicken Noodle Soup Simple and Comforting Dish

To make creamy mushroom spinach pasta, you need: - 8 oz fettuccine pasta - 2 tablespoons olive oil - 1 tablespoon butter - 8 oz mushrooms, sliced (cremini or button) - 3 cloves garlic, minced - 5 oz fresh spinach - 1 cup heavy cream - ½ cup grated Parmesan cheese - Salt and pepper to taste - 1 teaspoon Italian seasoning - Fresh parsley, chopped (for garnish) When picking mushrooms, look for ones that are firm and smooth. Avoid mushrooms with dark spots or slimy skins. Fresh spinach should be bright green with no yellow leaves. Choose spinach that feels crisp and not wilted. If you can, buy organic for better flavor. Always check the sell-by date if buying packaged spinach. You can swap fettuccine with gluten-free pasta for a gluten-free option. If you want a lighter dish, use half-and-half instead of heavy cream. For a vegan twist, try coconut cream and nutritional yeast instead of cheese. You can also use olive oil instead of butter for vegan needs. Always check labels for allergens! {{ingredient_image_1}} Start by boiling water in a big pot. Add a pinch of salt for flavor. Cook the fettuccine pasta for about 8-10 minutes. You want it to be al dente, which means firm but not hard. Drain the pasta and save 1 cup of the cooking water. Set the pasta aside for later. In a large skillet, heat 2 tablespoons of olive oil and 1 tablespoon of butter over medium heat. Once the butter melts, add 8 ounces of sliced mushrooms. You can use cremini or button mushrooms. Cook them for about 5 minutes until they turn golden and soft. Next, add 3 cloves of minced garlic and stir for 1 minute. You want to smell that garlic! Now, add 5 ounces of fresh spinach to the skillet. Cook it for about 2-3 minutes until it wilts down. Pour in 1 cup of heavy cream. Stir it well and bring the mixture to a gentle simmer. Then, add ½ cup of grated Parmesan cheese and 1 teaspoon of Italian seasoning. Mix until the cheese melts and the sauce thickens. Don’t forget to season with salt and pepper to taste! Finally, add the cooked fettuccine to the creamy mushroom-spinach sauce. Use tongs to toss it until the pasta is well coated. If the sauce seems too thick, add a bit of the reserved pasta water. Serve right away and sprinkle with fresh parsley and more Parmesan if you like. Enjoy your meal! To get the best creamy texture, use heavy cream. This cream makes the sauce rich and smooth. If you want a lighter sauce, try half-and-half. For a vegan option, use coconut cream or cashew cream. Always stir the sauce well after adding the cream. This helps it blend nicely with the other ingredients. If the sauce is too thick, add some reserved pasta water. This water helps loosen it without losing flavor. You can make this dish vegan easily. Instead of butter, use olive oil. For the cheese, try nutritional yeast for a cheesy taste. You can also use vegan Parmesan cheese. If you want a lighter dish, replace heavy cream with a mix of almond milk and cornstarch. This keeps it creamy and light. Fresh spinach can be swapped with kale for extra nutrients. To store leftover pasta, place it in an airtight container. Let it cool before sealing the lid. This helps keep the sauce creamy. You can keep it in the fridge for up to three days. To reheat, add a splash of water or cream in a pan. Heat over low heat and stir gently. This keeps the pasta from drying out. Avoid microwaving, as it can make the sauce lumpy. Pro Tips Use Fresh Ingredients: Fresh spinach and mushrooms provide the best flavor and texture for this dish. Avoid pre-packaged or frozen versions for optimal results. Perfect Pasta Texture: Cook the fettuccine until al dente to ensure it holds up well in the creamy sauce without becoming mushy. Adjust Sauce Consistency: If the sauce is too thick, add more reserved pasta water gradually until you reach your desired consistency. Cheese Melting Tip: Remove the skillet from heat before adding Parmesan to prevent it from clumping and ensure a smooth sauce. {{image_2}} You can easily add protein to your creamy mushroom spinach pasta. Chicken is a great choice. Simply cook diced chicken in the skillet before adding mushrooms. Shrimp also works well. Sauté shrimp until they turn pink. Both options will make the dish hearty and filling. You can even use tofu for a vegetarian twist. Just make sure to cook the protein first for best flavor. If you like heat, adding red pepper flakes is a smart move. Start with just a pinch for a mild kick. You can always add more if you want it spicier. Stir the flakes in when you add the garlic. This way, they can bloom and release their flavor. Spicy and creamy flavors blend beautifully, making every bite exciting. While fettuccine is classic, you can try other pasta types. Penne or rigatoni works well. Their shapes hold the sauce nicely. Spaghetti is another option for a twist. You could even use whole wheat or gluten-free pasta. Each type brings a unique taste and texture to the dish. The choice is yours! To keep your creamy mushroom spinach pasta fresh, store it in an airtight container. Let it cool down before sealing. This step helps prevent sogginess. Place the container in the fridge. It will last for about three to four days. When you’re ready to eat, check for any strange smells. If it smells off, it’s best to toss it. Reheating creamy mushroom spinach pasta is simple. You can use a microwave or a stovetop. If using a microwave, place the pasta in a bowl. Add a splash of water or cream to keep it moist. Heat for one minute, then stir. You may need to heat it longer, depending on your microwave. If reheating on the stovetop, use low heat. Add a bit of water or cream. Stir gently until it’s warm. You can freeze creamy mushroom spinach pasta for later. However, the cream may change texture when thawed. To freeze, place portions in airtight containers. Make sure to leave space for expansion. Label the containers with the date. It’s best to eat frozen pasta within two months. When you’re ready to eat, thaw it in the fridge overnight. Reheat using the methods above, adding a little cream for a better texture. Yes, you can use other types of pasta. I like to use fettuccine, but penne, spaghetti, or even gluten-free pasta work well. Just adjust the cooking time based on the pasta you choose. Each type brings its own fun texture. You can even try whole wheat pasta for a healthy twist. If you need a substitute for heavy cream, try using half-and-half or whole milk. You can also use a mix of milk and butter for a similar feel. For a lighter option, coconut cream adds a nice flavor. Just remember, it may change the taste a bit. To make this dish gluten-free, swap the fettuccine for gluten-free pasta. Many brands offer great options that taste just as good. Be sure to check the package for cooking times. You can also check labels on other ingredients to ensure they are gluten-free. Absolutely! You can add more veggies like bell peppers, zucchini, or broccoli. Sauté them along with the mushrooms for great flavor. Just make sure to adjust the cooking times. This dish is all about making it your own! This blog post covered how to make creamy mushroom spinach pasta. We discussed the best ingredients to use and how to pick fresh ones. I shared tips for cooking the pasta and making the sauce. You learned ways to store leftovers and even how to change up the dish. My final thought is that this recipe is simple, tasty, and flexible. You can make it your own and enjoy it every time!

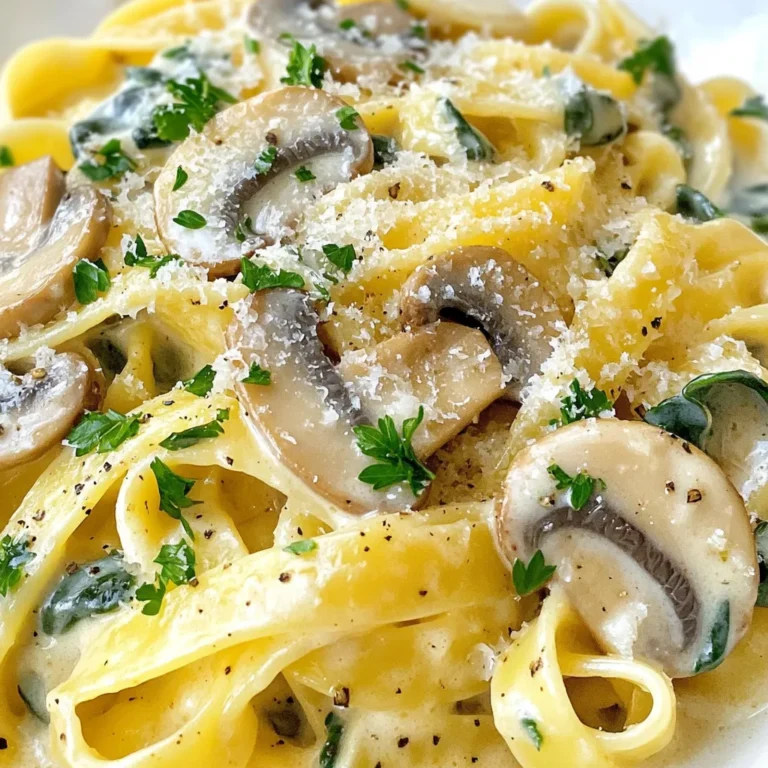
Creamy Mushroom Spinach Pasta Flavorful Dinner Idea

- 1 cup dried red kidney beans (or canned, drained) - 1 tablespoon vegetable oil - 1 medium onion, finely chopped - 1 bell pepper (any color), finely chopped - 2 stalks of celery, diced - 3 cloves garlic, minced - 1 teaspoon smoked paprika - 1 teaspoon dried thyme - 1 teaspoon cayenne pepper (adjust to taste) - 1 bay leaf - 4 cups vegetable broth (or chicken broth) - 1 cup long-grain white rice - 1 tablespoon apple cider vinegar - Salt and pepper to taste - Green onions, chopped (for garnish) In this dish, the dried red kidney beans give a hearty base. They soak up all the flavors. You can also use canned beans for quick cooking. The onion, bell pepper, and celery create a classic base called the "holy trinity" in Cajun cooking. Garlic adds depth, while smoked paprika brings a warm, smoky taste. - Chopped green onions - A drizzle of olive oil I love adding green onions for a fresh crunch. They brighten the dish and add color. A touch of olive oil makes it rich and smooth. - Use black beans if red kidney beans are not available. - Swap vegetable broth for chicken broth for more flavor. - If you don’t have smoked paprika, regular paprika works too. These substitutes keep the dish tasty. They let anyone adjust the recipe to their taste. Experiment and find what you love! {{ingredient_image_1}} Start with dried red kidney beans. Rinse them well. Soak them in water overnight. This helps them cook better. If you use canned beans, drain and rinse them. This saves time and effort. In a big pot, heat vegetable oil over medium heat. Add chopped onion, bell pepper, and celery. Cook these until they are soft, about 5 to 7 minutes. Then, add minced garlic, smoked paprika, dried thyme, and cayenne pepper. Stir for 1 to 2 minutes. This brings out the flavors. If you soaked the beans, drain and rinse them now. Add the beans to the pot along with the bay leaf. Pour in vegetable broth and bring it to a boil. Once boiling, lower the heat, cover, and let it simmer. Cook for 1.5 to 2 hours. Stir occasionally and add broth if it gets too thick. The beans should be tender when done. While it simmers, cook the rice per package instructions. Usually, bring 2 cups of water and 1 cup of rice to a boil. Then, lower the heat and cover for about 20 minutes. When the beans are ready, take out the bay leaf. Add apple cider vinegar, salt, and pepper to taste. Stir it all well. To serve, scoop rice into bowls, top with the red bean mix, and add chopped green onions for a fresh touch. Soaking dried red kidney beans is key. It helps them cook faster and improves texture. Rinse the beans, then soak them in water overnight. If you forget to soak them, use the quick soak method. Boil them for 2 minutes, then let them sit for an hour. For canned beans, just drain and rinse them well. Spice is a big part of this dish. I add cayenne pepper for heat. Start with one teaspoon. Taste your dish as it cooks. If you want more spice, add more cayenne a little at a time. You can also add hot sauce at the end for extra kick. To boost the flavor, I add smoked paprika and apple cider vinegar. Smoked paprika adds depth and warmth. The vinegar brightens the dish and balances the flavors. For extra richness, stir in a splash of broth while cooking. You can also add a bay leaf early in the cooking process for more flavor. Pro Tips Soaking Beans: Soaking dried beans overnight not only reduces cooking time but also helps to achieve a creamier texture. Adjusting Spice Levels: Taste your mixture as it cooks and adjust the cayenne pepper based on your heat preference. Using Canned Beans: If you're short on time, canned beans are a great alternative. Just make sure to rinse and drain them to reduce sodium content. Garnishing: Chopped green onions not only add color but also offer a fresh crunch that complements the dish beautifully. {{image_2}} You can easily make Louisiana red beans and rice vegetarian or vegan. Instead of using meat, focus on veggies. Use vegetable broth for cooking. You can add mushrooms for a meaty texture. Try diced zucchini or carrots for added sweetness. Toss in extra spices to enhance the flavor. Always check for vegan-friendly seasonings to keep it plant-based. If you want to add protein, smoked sausage is a great choice. Andouille sausage works well for its spice. You can also use diced ham for a savory note. If you pick sausage, slice it and brown it first in the pot. Then, add the onions and peppers. This adds depth to your dish. You can mix and match proteins based on your taste. Serving Louisiana red beans and rice can be fun! Try serving it in a bowl topped with avocado slices. You can also add a dollop of sour cream for creaminess. For a crunch, serve with cornbread on the side. You can also sprinkle some hot sauce for a spicy kick. Pair it with a fresh salad to balance the meal. Once you finish your Louisiana red beans and rice, let it cool. Place it in an airtight container. This helps keep it fresh. Store in the fridge for up to four days. If you want to keep it longer, freezing is a great option. To freeze your leftovers, scoop the beans and rice into freezer-safe bags. Be sure to remove as much air as you can. Label each bag with the date. You can freeze them for up to three months. When you're ready to eat, just thaw them overnight in the fridge. Reheat your red beans and rice on the stove or in the microwave. If using the stove, add a splash of water or broth to prevent sticking. Heat over low until warm. In the microwave, heat in short bursts. Stir after each burst to make sure it warms evenly. Enjoy the warmth of this comfort dish again! Red beans and rice has a rich history. This dish dates back to Creole culture in New Orleans. It became popular in the 1800s. People would cook it on Mondays. They used leftover meat from Sunday dinners. The slow cooking helped flavors blend well. Today, it remains a staple in Louisiana homes. Yes, you can use canned beans. Canned beans save time and effort. Drain and rinse them before adding them to the pot. This helps remove extra salt and preservatives. You can skip the soaking step when using canned beans. This makes the recipe quicker. Making this recipe gluten-free is easy. Use gluten-free vegetable broth or chicken broth. Ensure all spices are gluten-free. Rice is naturally gluten-free, so you're safe there. Just check labels for any hidden gluten. Enjoy a tasty, gluten-free meal! In this blog post, we explored the key ingredients and steps needed for a perfect Red Beans and Rice dish. We shared tips on cooking techniques and spice adjustments. We looked at various ways to enjoy this meal, including vegetarian options and protein add-ins. Lastly, we covered storage tips and answered common questions. Remember, cooking is all about experimentation. Don’t hesitate to try new flavors and ideas. Enjoy making this dish your own!

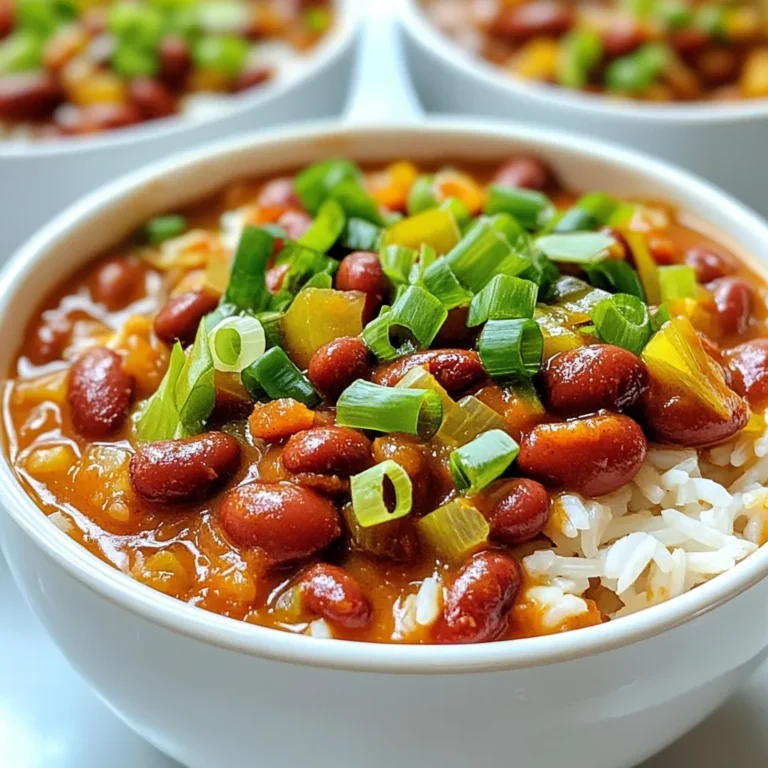
Louisiana Red Beans and Rice Flavorful Comfort Dish

To make tasty homemade peppermint patties, you need the following: - 2 cups powdered sugar - 2 tablespoons cornstarch - 1/4 cup sweetened condensed milk - 1 teaspoon peppermint extract - 1/4 teaspoon vanilla extract - 1 cup dark chocolate chips (or semi-sweet) - 1 tablespoon coconut oil (or butter) You can easily swap some ingredients for others: - Use coconut cream instead of sweetened condensed milk for a dairy-free option. - If you don’t have peppermint extract, try using mint extract for a different flavor. - You can use white chocolate chips instead of dark chocolate for a sweeter taste. - Instead of coconut oil, you can use unsalted butter, which works well too. Choosing the best ingredients makes a big difference: - Look for pure peppermint extract. This ensures a strong and fresh flavor. - When buying chocolate chips, choose high-quality brands for the best melting and taste. - Fresh powdered sugar is key. Check for clumps; it should be light and fluffy. - Always choose organic ingredients when possible. They often have better flavor and quality. {{ingredient_image_1}} First, grab a large mixing bowl. Sift together 2 cups of powdered sugar and 2 tablespoons of cornstarch. This step helps make the patties smooth. Next, add 1/4 cup of sweetened condensed milk, 1 teaspoon of peppermint extract, and 1/4 teaspoon of vanilla extract. Use a spatula to mix everything well. Keep mixing until a dough forms. If the dough feels sticky, add more powdered sugar. Do this slowly until the dough is easy to handle. Now it's time to shape the patties. Divide the dough into small pieces. Each piece should be about 1 inch wide and 1/4 inch thick. Roll each piece into a rounded disc. Make sure the discs are flat for easy coating later. Once shaped, place them on a baking sheet lined with parchment paper. Put the baking sheet in the freezer for about 30 minutes. This will help the patties set and hold their shape. While the patties freeze, let's melt the chocolate. Take 1 cup of dark chocolate chips and mix it with 1 tablespoon of coconut oil in a microwave-safe bowl. Heat it in the microwave in 30-second bursts. Stir in between each burst until the chocolate is fully melted and smooth. After the patties are firm, dip each one into the melted chocolate. Make sure they are fully coated. Let any extra chocolate drip off. Place the coated patties back on the parchment-lined sheet. If you want, sprinkle crushed peppermint candies on top before the chocolate sets. Finally, let the patties sit at room temperature or in the fridge until the chocolate hardens. To get the right texture for your peppermint patties, you want a smooth dough. Start by sifting the powdered sugar and cornstarch well. This step helps break up clumps and makes mixing easier. When you add the sweetened condensed milk and extracts, mix until a dough forms. If it feels sticky, add powdered sugar bit by bit. You want it to be soft but not too wet. Avoid overmixing the dough. If you mix too long, it can become tough. Also, don't skip freezing the shaped patties. This step helps the chocolate stick better. If the chocolate is too hot, it can melt the patties. Let the chocolate cool a bit before dipping. Lastly, make sure to coat each patty fully, so every bite is rich with flavor. To boost flavor, try adding a bit more peppermint extract. Just a drop can make a big difference. For a fun twist, sprinkle crushed peppermint candies on top before the chocolate hardens. This adds a crunchy texture and looks great. You can also use white chocolate instead of dark for a different taste. Don’t be afraid to experiment; your unique touch can make these treats even better! Pro Tips Chill the Dough: Ensuring the dough is well-chilled before shaping makes it easier to work with and helps the patties hold their shape during the chocolate coating process. Quality Chocolate Matters: Using high-quality chocolate will enhance the overall flavor of the patties. Look for chocolate with a cocoa content of at least 60% for a richer taste. Experiment with Flavors: Feel free to customize your peppermint patties by adding different extracts such as orange or almond for a unique twist on the classic flavor. Storage Tips: Store your peppermint patties in an airtight container in the refrigerator for up to two weeks. They can also be frozen for longer storage; just separate layers with parchment paper. {{image_2}} You can change the peppermint flavor to fit your taste. If you want a stronger taste, add more peppermint extract. Start with an extra 1/4 teaspoon. For a milder flavor, reduce it to 1/2 teaspoon. You can also mix in other extracts. Almond or orange extract can bring a fun twist. The type of chocolate you use can change the taste of your patties. Dark chocolate gives a rich, bold flavor. If you prefer something sweeter, use semi-sweet chocolate. You can even try milk chocolate for a creamier taste. For a fun twist, use white chocolate too. Just remember to adjust the sweetness of your filling if you choose milk or white chocolate. Get creative with flavors! You can add a hint of coconut or even coffee. To do this, mix in 1 tablespoon of coconut cream or coffee extract into the dough. You can also try adding crushed candies or zest from citrus fruits, like lemon or lime. These little changes can take your peppermint patties to a new level. Enjoy experimenting! To keep your homemade peppermint patties fresh, store them in an airtight container. This will help prevent them from drying out. I recommend placing a piece of parchment paper between layers. This step keeps the patties from sticking together. You can store them at room temperature or in the fridge. If you choose the fridge, allow them to come to room temp for the best taste. Homemade peppermint patties can last about one week at room temperature. If you store them in the fridge, they can stay fresh for up to two weeks. Just make sure they stay in an airtight container. If you see any signs of melting or changes in texture, it's best to discard them. Freezing is a great option if you want to save some for later. To freeze, place the patties in a single layer on a baking sheet. Freeze them for about 30 minutes until firm. Then, transfer them to a freezer-safe container. They can last up to three months in the freezer. When you're ready to enjoy them, let them thaw in the fridge or at room temperature. This method keeps your peppermint patties tasty and fresh! Yes, you can make them vegan! Replace sweetened condensed milk with a plant-based option, like coconut cream or almond milk. Use dairy-free chocolate chips to coat the patties. Be sure to check the labels for vegan-friendly choices. To lower the sweetness, reduce the powdered sugar. Start by using 1.5 cups instead of 2 cups. You can also add a pinch of salt to balance the flavors. Another option is to use dark chocolate with a higher cocoa content, which will add a nice depth and reduce the overall sweetness. Absolutely! Many ingredients in this recipe are already nut-free. Just ensure your chocolate chips and any flavorings do not contain nuts. You can also use coconut oil or butter for coating, both of which are nut-free. Always check labels to avoid hidden allergens. In this article, we explored how to make delicious homemade peppermint patties. We covered the key ingredients, step-by-step instructions, and helpful tips for perfecting your treats. You learned about variations you can try and how to store your patties for best results. Homemade peppermint patties are fun and tasty. With simple swaps and tricks, you can make them just right for you. Remember, practice makes perfect. Enjoy your sweet creations during any season!

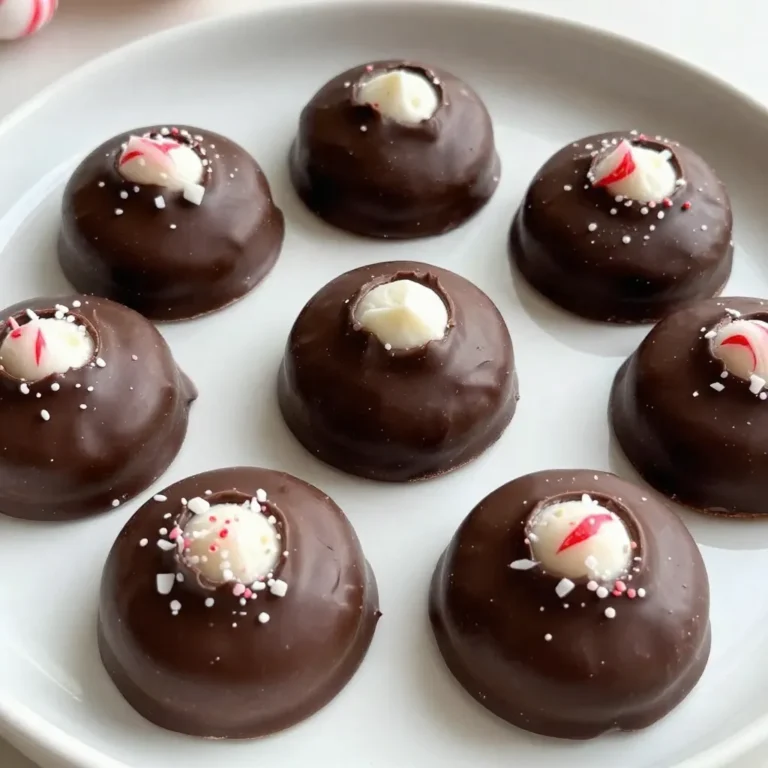
Homemade Peppermint Patties Tasty and Easy Treat

To create a tasty Mediterranean Chicken Bake, gather these ingredients: - 4 boneless, skinless chicken breasts - 1 cup cherry tomatoes, halved - 1 bell pepper (red or yellow), diced - 1 medium red onion, sliced - 1 cup Kalamata olives, pitted and halved - 2 cloves garlic, minced - 1 tablespoon dried oregano - 1 teaspoon paprika - 1/4 cup olive oil - Salt and pepper to taste - Fresh parsley, chopped (for garnish) - 1 lemon, zested and juiced You can add more flavor with these optional ingredients: - Feta cheese for a tangy twist - Artichoke hearts for a briny kick - Spinach for added greens - A pinch of red pepper flakes for heat If you need swaps, try these substitutions: - Chicken thighs instead of breasts for more moisture - Grape tomatoes if cherry tomatoes are not available - Green bell pepper for a milder taste - Black olives if you can't find Kalamata olives - Fresh herbs like thyme or basil instead of oregano {{ingredient_image_1}} First, set your oven to 400°F (200°C). This temperature gives the chicken a nice cook. Next, grab a 9x13 inch baking dish and lightly grease it. You can use olive oil or cooking spray. This step helps prevent sticking and makes cleanup easy. In a large bowl, add your cherry tomatoes, diced bell pepper, sliced onion, and Kalamata olives. It’s a colorful mix! In a small bowl, whisk together the olive oil, minced garlic, dried oregano, paprika, lemon zest, and lemon juice. This blend adds great flavor. Don’t forget to season with salt and pepper to your taste. Pour half of this mixture over the chicken in the baking dish, making sure to coat each piece well. Spoon the vegetable mix around and on top of the chicken. Drizzle the rest of the olive oil mixture over everything to enhance the flavor. Cover your baking dish with aluminum foil. This helps the chicken cook evenly. Bake for 25 minutes. After that, remove the foil and bake for another 15-20 minutes. Check that the chicken reaches 165°F (75°C). The vegetables should also be tender. Once done, let the dish rest for a few minutes. Finally, sprinkle fresh parsley on top for a lovely finish. Your Mediterranean Chicken Bake is ready to enjoy! To cook chicken perfectly, start with room temperature meat. Cold chicken cooks unevenly. Always season well. Use salt and pepper to enhance the flavor. When cooking, use a meat thermometer. Aim for an internal temperature of 165°F. This ensures the chicken is safe to eat and juicy. Let it rest for a few minutes after baking. This helps the juices redistribute, keeping it moist. Cut your vegetables into even pieces. This helps them cook at the same rate. Use a mix of colors for a vibrant dish. Toss them in olive oil and seasoning. This adds flavor and helps with browning. Bake them in a hot oven, about 400°F. The high heat caramelizes the sugars, giving a sweet flavor. Stir halfway through for even cooking. Look for tender veggies with a slight char. To boost flavor, add fresh herbs like basil or thyme. Lemon zest brightens the dish and adds freshness. You can also try different olives for unique tastes. Consider adding a sprinkle of feta cheese for creaminess. For a spicy kick, mix in red pepper flakes. Experiment with these ideas to find your favorite combination! Pro Tips Marinate for Flavor: For an extra boost of flavor, marinate the chicken breasts in the olive oil mixture for at least 30 minutes or up to overnight in the refrigerator. Vegetable Variations: Feel free to mix and match your vegetables! Zucchini, eggplant, or even artichokes would make great additions to this dish. Serve with Sides: Pair the Mediterranean Chicken Bake with a side of crusty bread or a fresh green salad to round out the meal. Leftovers Storage: Store any leftovers in an airtight container in the refrigerator for up to 3 days. This dish also reheats well in the oven or microwave. {{image_2}} You can add feta cheese to your Mediterranean Chicken Bake for a salty touch. Just sprinkle crumbled feta on top before baking. It melts nicely and adds creaminess. Feta pairs well with the olives and tomatoes, boosting flavor. This twist makes the dish even more delicious. If you want a low-carb option, swap bell peppers for zucchini. Slice zucchini into rounds and add them to the mix. They cook well and soak up all the tasty juices. This change keeps the dish light and healthy, while still being full of flavor. To spice things up, add red pepper flakes or diced jalapeños. This will bring some heat to your Mediterranean Chicken Bake. Mix them into the olive oil blend or sprinkle on top before baking. You can control the spice level to fit your taste. This variation will keep your meal exciting and new. To keep your Mediterranean Chicken Bake fresh, let it cool first. Place leftovers in an airtight container. This helps keep moisture in and flavors strong. Store it in the fridge for up to three days. If you need to store it longer, freezing is a great option. When you’re ready to enjoy leftovers, preheat your oven to 350°F (175°C). Place the chicken bake in an oven-safe dish. Cover it with foil to keep it from drying out. Heat for about 20 minutes or until it’s hot throughout. This method keeps the chicken juicy and the veggies tender. You can also reheat it in the microwave, but the oven gives better taste. To freeze, wrap the dish tightly in plastic wrap or foil. You can also use a freezer-safe container. It stays good for up to three months. When you're ready to eat it, thaw it overnight in the fridge. Then, reheat using the oven method for best results. Enjoy the flavors even after a few months! Mediterranean Chicken Bake stays good in the fridge for about three to four days. Make sure to store it in an airtight container. This keeps it fresh and safe to eat. It's a tasty meal to enjoy later. Just reheat it before serving. Yes, you can use bone-in chicken pieces. Just remember that cooking time will change. Bone-in chicken takes longer to cook than boneless. You should bake it for about 40 to 50 minutes. Always check that it reaches 165°F (75°C) inside. You can serve Mediterranean Chicken Bake with many sides. Some great options include: - Couscous - Quinoa - Rice - A simple green salad These pair well with the flavors in the dish and make a complete meal. Enjoy your cooking! You learned how to make a tasty Mediterranean Chicken Bake. We covered key ingredients, step-by-step instructions, and tips for perfecting your dish. Don't forget the fun variations, like adding feta or trying low-carb options. Proper storage ensures your leftovers stay fresh and delicious. With these insights, you can impress your family and friends at dinner. Enjoy cooking and experimenting with this lovely meal in your kitchen!

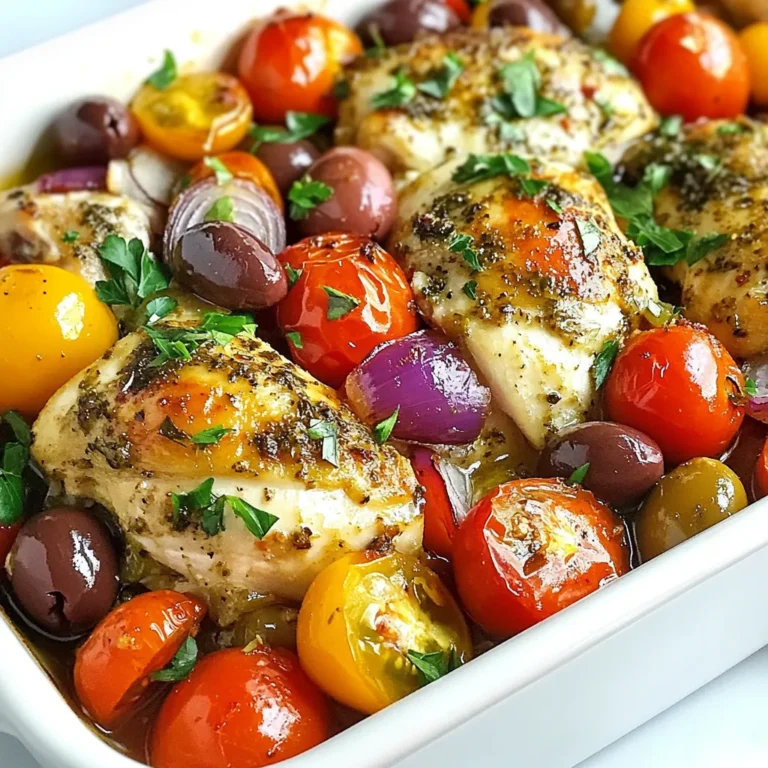
Mediterranean Chicken Bake Flavorful and Simple Dish

- 1 pound Italian sausage, casings removed - 1 cup long-grain rice - 2 cups chicken broth - 1 cup diced bell peppers (red, green, or yellow) - 1 cup onion, chopped - 1 teaspoon garlic powder - 1 teaspoon Italian seasoning - 2 cups shredded cheese (cheddar or a blend) - 2 tablespoons olive oil - Salt and pepper to taste The main ingredients in this dish bring together rich flavors and textures. The Italian sausage really adds heartiness to the meal. I love using long-grain rice because it cooks evenly and absorbs all the tasty broth. The bell peppers and onion provide a sweet crunch, while garlic powder and Italian seasoning create a warm flavor. You can’t forget the cheese! It melts into creamy goodness, making every bite delightful. Olive oil helps cook the veggies perfectly and adds a nice richness. Don't forget to season with salt and pepper to enhance all these flavors. - Variations in cheese types - Additional vegetables You can switch up the cheese for something different, like mozzarella or pepper jack. These options change the taste and texture of the dish. If you want more veggies, consider adding spinach or zucchini. These ingredients not only boost nutrition but also add more color. Feel free to get creative! {{ingredient_image_1}} 1. Heating ingredients in skillet Start by heating two tablespoons of olive oil in a large skillet over medium heat. This helps to get a nice base for your dish. 2. Cooking sausage until browned Add one pound of Italian sausage, breaking it apart with a spoon. Cook it for about 7 to 10 minutes. You want it browned and no longer pink. This step adds great flavor to your dish. 1. Toasting rice with sausage Once the sausage is browned, stir in one cup of long-grain rice. Mix it well with the sausage and let it cook for 2 to 3 minutes. This toasting step brings out the rice's nutty flavor. 2. Adding chicken broth and seasoning Next, pour in two cups of chicken broth. Season with salt and pepper to taste. Add one teaspoon of garlic powder and one teaspoon of Italian seasoning for extra flavor. Bring this mixture to a boil. 1. Simmering the dish After it boils, reduce the heat to low and cover the skillet. Let it simmer for 15 to 20 minutes. This allows the rice to absorb all the tasty liquid and become tender. 2. Mixing in cheese When the rice is cooked, remove the skillet from the heat. Stir in two cups of shredded cheese until it melts and becomes creamy. This makes your dish rich and delicious. Enjoy your Cheesy Sausage Rice Skillet! It’s an easy and tasty meal everyone will love. Achieving the right rice texture To get fluffy rice, rinse it before cooking. This removes excess starch. Use long-grain rice for a light and airy texture. Stir the rice gently while it toasts in the skillet. This helps it absorb flavors without getting mushy. Tips for sausage selection Use high-quality Italian sausage. Fresh sausage gives the best flavor. If you want a kick, try spicy sausage. For a milder dish, use sweet sausage. Always remove the casings for easy cooking and better blending with the rice. Creative plating ideas Serve the dish straight from the skillet for a cozy look. You can also scoop it into bowls. Top with extra cheese and fresh parsley for color. A sprinkle of red pepper flakes adds a pop of color and heat. Pairing with side dishes This dish pairs well with a fresh salad. A simple green salad with lemon dressing complements the flavors. Garlic bread or crusty rolls make a great side too. Consider a light vegetable side to balance the richness of the cheese. Pro Tips Use Fresh Ingredients: Always opt for fresh bell peppers and onions to enhance the flavor and texture of your dish. Cheese Choice Matters: Experiment with different cheese blends; mozzarella adds a stretchy quality while gouda gives a smoky flavor. Toast the Rice: Toasting the rice for a few minutes before adding the broth brings out a nutty flavor that elevates the dish. Garnish for Color: Fresh parsley not only adds a pop of color but also provides a fresh taste that balances the richness of the cheese and sausage. {{image_2}} You can easily swap the sausage type in this recipe. Try using chicken sausage or turkey sausage for a healthier choice. Each type brings its own unique flavor. For rice alternatives, use brown rice or quinoa. These options add more fiber and nutrients. Just remember, cooking times may change slightly with different grains. Spicy variations are fun to try! Add diced jalapeños or a dash of hot sauce for heat. You can also use spicy sausage to amp up the flavor. If you want a vegetarian option, try using black beans or lentils. Replace the sausage with mushrooms to keep that hearty feel. This way, you still enjoy a rich dish without meat. To keep your Cheesy Sausage Rice Skillet fresh, store it in an airtight container. You can also use plastic wrap or foil. Make sure it cools down before sealing. This helps avoid extra moisture inside. You can keep it in the fridge for up to 3 days. If you want to store it longer, freeze it for up to 2 months. When it’s time to enjoy your leftovers, you can use the microwave or stovetop. For the microwave, place a portion in a bowl. Add a splash of water to help it steam. Heat it in 30-second bursts until hot. For stovetop, warm it in a skillet over medium heat. Stir often to keep it from sticking. Add a little broth or water if it feels dry. This keeps the texture just right and creamy. Can I use instant rice instead? Yes, you can use instant rice. Just reduce the cooking time and follow package directions for water. Instant rice cooks much faster than long-grain rice. How do I make it more cheesy? To make it more cheesy, add more shredded cheese at the end. You can also mix different cheese types for extra flavor. Cream cheese or a cheese sauce can give it a creamy touch too. Can this be made in a slow cooker? Yes, you can make this dish in a slow cooker. Brown the sausage and veggies first. Then combine everything in the slow cooker with broth and cook on low for 4 hours. Can I add more vegetables? Yes, you can add more vegetables. Try adding spinach, zucchini, or corn. Just make sure to chop them small so they cook well in the skillet. Is this dish gluten-free? This dish is not gluten-free due to the rice. However, you can use gluten-free rice or quinoa as a substitute. Always check labels to ensure your products are gluten-free. Options for low-fat versions? For a low-fat version, use turkey sausage or chicken sausage. You can also reduce the cheese or use a low-fat cheese option. Substitute some broth for water to keep moisture without added fat. This blog covers a delicious dish using simple ingredients like sausage, rice, and cheese. You learned the steps to prepare, combine, and cook each element for the best flavor. I shared tips for perfecting texture and creative serving ideas too. Don’t shy away from experimenting with variations! Substitute ingredients or try new flavors. Whether you’re storing leftovers or reheating, keeping the taste and texture intact is key. Enjoy making this dish often, as it’s easy and satisfying.

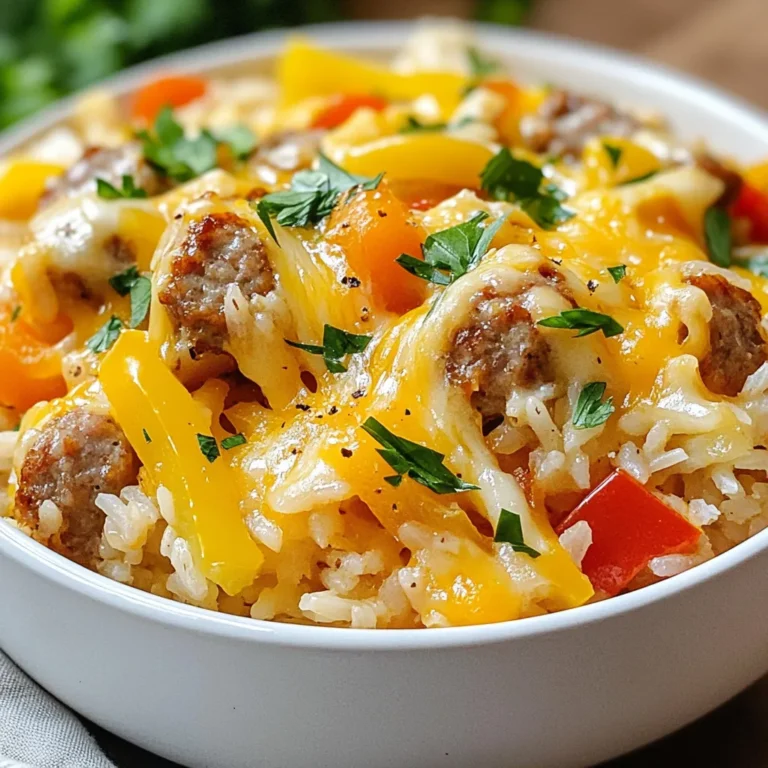
Cheesy Sausage Rice Skillet Delightful and Simple Dish

To make Greek lemon rice soup, you need simple, fresh ingredients. Here's what you will gather: - 1 cup long-grain rice (like basmati or jasmine) - 8 cups vegetable broth - 4 large eggs - 1/2 cup fresh lemon juice (about 3-4 lemons) - Zest from 1 lemon - 1 cup diced carrots - 1 cup diced celery - 1 medium chopped onion - 2 tablespoons olive oil - Salt and freshly cracked pepper, to taste - Fresh dill or parsley for garnish These ingredients come together to create a soup that is both warming and bright. Garnishes add a lovely touch to your soup. Here are some great options: - Extra lemon slices - More fresh dill or parsley - A sprinkle of paprika for color These garnishes make your soup look appealing and add extra flavor. You can easily adjust this recipe for different diets. Here are some ideas: - Rice: Swap long-grain rice for quinoa for a gluten-free option. - Broth: Use chicken broth if you prefer a meatier flavor. - Eggs: For a vegan version, try using silken tofu blended with lemon juice. - Vegetables: Add or swap in veggies like spinach or peas for more nutrients. These swaps help you enjoy this dish no matter your dietary needs. {{ingredient_image_1}} First, gather your vegetables. You need onions, carrots, and celery. Dice one cup of carrots and one cup of celery. Chop one medium onion. In a large pot, heat two tablespoons of olive oil over medium heat. Add the chopped onion, carrots, and celery. Sauté these for about five to seven minutes. You want them to soften and become fragrant. Next, rinse one cup of long-grain rice under cold water. This step helps remove excess starch. Once the water runs clear, add the rinsed rice to the pot. Stir for about one minute to coat the rice in olive oil. Then, pour in eight cups of vegetable broth. Bring this to a boil. After boiling, reduce the heat to low, cover, and let it simmer for about 15 to 20 minutes. The rice should be tender by then. While the rice cooks, prepare the egg mixture. In a mixing bowl, whisk together four large eggs, half a cup of fresh lemon juice, and the zest from one lemon. This adds great flavor. Once the rice is ready, take the pot off the heat. Slowly ladle a cup of the warm broth into the egg-lemon mixture. Whisk continuously to temper the eggs. This step is key to avoiding scrambled eggs in your soup. Gradually stir this mixture back into the pot, keeping the heat low. Stir until the soup thickens a bit, and then season with salt and freshly cracked pepper to taste. To get the right texture in Greek lemon rice soup, focus on the rice. Use long-grain rice, like basmati or jasmine, for a light feel. Rinse the rice well to remove excess starch. This helps keep it fluffy. When cooking, don’t rush. Let the rice simmer in the broth until it’s tender. Stir gently while adding the egg mixture to avoid lumps. A smooth, creamy soup is your goal. Fresh herbs can elevate your soup's taste. Dill and parsley add bright notes. Add them at the end for the best flavor. You can also mix them in before serving. Feel free to experiment with other herbs like mint for a twist. Just remember, fresh is key. Dried herbs do not pack the same punch. If you have soup left, store it in an airtight container. Keep it in the fridge for up to three days. To reheat, warm it gently on the stove. Add a splash of broth if it thickens too much. Avoid freezing, as the eggs can change texture. This way, you keep the soup tasty for your next meal. Pro Tips Rinse the Rice: Always rinse your rice under cold water before cooking to remove excess starch, which helps achieve a fluffier texture. Tempering the Eggs: When adding the egg mixture to the soup, be sure to temper the eggs by gradually mixing in warm broth to prevent them from scrambling. Adjusting Consistency: If you prefer a thicker soup, allow it to simmer a bit longer after adding the egg mixture until it reaches your desired consistency. Herb Variations: Experiment with different herbs like mint or basil for a unique flavor twist that complements the lemon in the soup. {{image_2}} You can easily add protein to Greek lemon rice soup. Chicken is a great choice. Use cooked, shredded chicken for quick prep. Add it when you mix the egg and lemon. Tofu is perfect for a vegetarian option. Use firm tofu, cut into small cubes. Sauté it with the veggies for added flavor. This gives the soup a hearty touch. You can make this soup vegetarian or vegan with a few swaps. Instead of chicken broth, use vegetable broth. For a vegan version, skip the eggs. Use silken tofu mixed with lemon juice for creaminess. Blend the tofu until smooth. This keeps the soup rich and flavorful without eggs. You still get that signature lemon taste. While long-grain rice is classic, you can try other grains too. Quinoa is a great gluten-free option. It cooks quickly and adds protein. Or use farro for a nutty flavor and chewy texture. Adjust cooking times as needed. Each grain brings its own twist to this comforting soup. Experiment and find your favorite! Greek lemon rice soup, also known as Avgolemono, holds a special place in Greece. This dish is more than just soup; it brings comfort and warmth. Many families serve it during cold months or when someone is sick. The tangy lemon and creamy texture soothe the soul. It is a staple at festive meals, too. You will find it on tables during holidays and gatherings. In Greece, people often serve this soup as a starter. A bowl of Avgolemono warms you up before the main course. It is common to garnish it with fresh dill or parsley. This not only adds flavor but also brightens the dish's look. Enjoying the soup with crusty bread enhances the experience. It invites family and friends to share a meal and connect. The roots of Greek lemon rice soup trace back many centuries. Ancient Greeks enjoyed similar egg-lemon mixtures in their meals. The recipe evolved over time, blending with regional flavors. Each family adds its twist, creating unique versions. This soup reflects Greece's rich culinary history and love for fresh ingredients. Its enduring popularity shows how food can connect generations and cultures. The best rice for Greek lemon rice soup is long-grain rice. I recommend basmati or jasmine rice. Both types stay fluffy and absorb flavors well. When cooked, they add a nice texture to the soup. Yes, you can make this soup in advance. It stores well in the fridge for up to three days. Just reheat it gently on the stove. If you plan to store it, skip adding the egg mixture until you reheat. This keeps the soup creamy and fresh. You can easily adjust the lemon flavor. Start with half the lemon juice, then taste the soup. If you like it more tangy, add more juice. You can also add extra lemon zest for a stronger flavor. Just remember, it’s easier to add than to take away. Yes! You can thicken the soup using cornstarch or flour. Mix one tablespoon of cornstarch with cold water, then stir it into the soup. Let it cook for a few minutes until thickened. You can also use mashed potatoes or puréed beans for a creamy texture. Greek Lemon Rice Soup is a bright dish full of flavor and history. We covered the essential ingredients, tips for perfecting your soup, and how to make variations for different diets. This recipe is simple and rewarding, perfect for any home cook. Try your hand at this delicious recipe, and enjoy the warmth it brings. You can share it with friends and family for a taste of Greece right in your kitchen. Embrace the cooking process and make it your own!

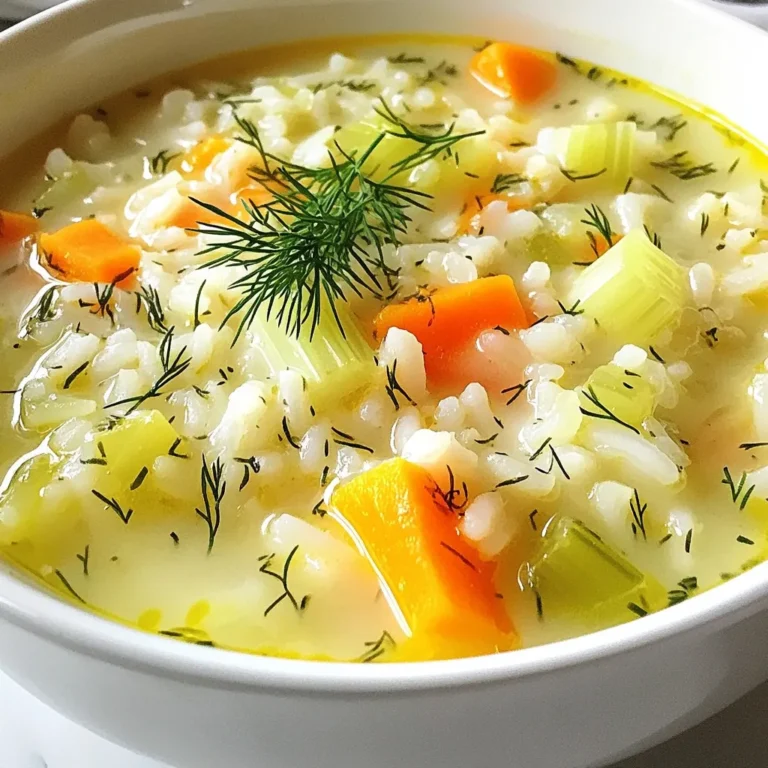
Greek Lemon Rice Soup Flavorful Comfort in a Bowl

To make churro cheesecake bars, you need the following key ingredients: - 1 cup all-purpose flour - 1/2 teaspoon baking powder - 1/4 teaspoon salt - 1/2 cup unsalted butter, softened - 1 cup granulated sugar, divided - 1 large egg - 1 teaspoon vanilla extract - 8 oz cream cheese, softened - 1/2 cup sour cream - 1 tablespoon cinnamon These ingredients create a soft crust and a creamy filling. The mix of cream cheese and sour cream gives the bars a rich taste. You can customize your churro cheesecake bars. Some optional ingredients include: - Chopped nuts (like pecans or walnuts) for crunch - Chocolate chips for a sweet twist - A dash of nutmeg for added warmth Feel free to get creative! Customizing lets you make this treat your own. Having the right tools makes baking easier. Here’s what you’ll need: - 8x8 inch baking pan - Parchment paper - Medium mixing bowl - Large mixing bowl - Electric mixer or whisk - Rubber spatula for mixing Using these tools helps you make perfect bars each time. {{ingredient_image_1}} Start by preheating your oven to 350°F (175°C). This is key for baking. Next, take an 8x8 inch baking pan. Line it with parchment paper. Leave some paper hanging over the sides. This helps you lift out the bars later. In a medium bowl, whisk together 1 cup of all-purpose flour, 1/2 teaspoon baking powder, and 1/4 teaspoon salt. This mixture gives the bars structure. In a large bowl, beat 1/2 cup of softened unsalted butter and 3/4 cup of granulated sugar until it’s light and fluffy. This takes about 3-4 minutes. Then, mix in 1 large egg and 1 teaspoon of vanilla extract. Add the dry ingredients to this wet mix slowly. Mix just until combined. Press about two-thirds of the dough into the bottom of the prepared pan. In another bowl, beat 8 oz of softened cream cheese with the remaining 1/4 cup of sugar. Mix until smooth. Then, add 1/2 cup of sour cream and mix well. This filling is creamy and rich. Spread this cheesecake mixture evenly over the dough in the pan. Now, crumble the rest of the dough over the cream cheese layer. Make sure it’s evenly spread out. In a small bowl, mix 1 tablespoon of cinnamon with 2 tablespoons of sugar. Sprinkle this mix over the crumbled dough. This adds a sweet and spicy touch. Bake the bars for 35-40 minutes. You want the top to be golden brown. The cheesecake should be set in the middle. After baking, let the bars cool in the pan for about 30 minutes. Then, use the parchment paper to lift the bars out. Chill them in the fridge for at least 2 hours. Once chilled, cut them into squares and enjoy! When making Churro Cheesecake Bars, a few common mistakes can happen. First, do not skip softening the butter and cream cheese. They need to mix well. If they are cold, the batter will not be smooth. Second, be careful not to overmix the dough. This can make the bars tough. Lastly, do not forget to let the bars cool before cutting. This helps them set up perfectly. To get the best texture and flavor, focus on your ingredients. Use fresh cream cheese and sour cream for a creamy filling. When mixing the butter and sugar, make sure it’s light and fluffy. This adds air, making the bars lighter. Also, do not rush the baking time. Keep an eye on the bars, and look for a golden top. A slight jiggle in the center is okay but not too much. Presentation is key for these bars. After cooling, dust them with powdered sugar. This adds a sweet touch. For extra flair, drizzle caramel sauce on top. You can also serve them on a nice platter. Add a few cinnamon sticks or fresh fruit to make it pop. These simple touches make your dessert look as good as it tastes. Pro Tips Use Room Temperature Ingredients: Ensure your butter, cream cheese, and sour cream are at room temperature for easy mixing and a smoother batter. Don't Overmix: When combining the dry and wet ingredients, mix until just combined to keep the bars tender and avoid a dense texture. Cooling Time is Key: Allow the bars to cool completely before cutting to ensure clean edges and a better presentation. Customize Your Toppings: Feel free to add chocolate chips or nuts to the cream cheese layer for added texture and flavor. {{image_2}} You can make churro cheesecake bars even more delightful by adding different flavors. Try mixing in chocolate chips for a rich twist. You can also swirl in fruit purees, like strawberry or raspberry, for a fresh taste. If you love peanut butter, blend some into the cream cheese layer for a creamy, nutty flavor. Feel free to get creative! If you want gluten-free churro cheesecake bars, swap the all-purpose flour for a gluten-free blend. Many blends work well in baking. Just make sure to check that your other ingredients, like baking powder, are gluten-free too. This way, everyone can enjoy these tasty treats without worry. For vegan churro cheesecake bars, use plant-based butter and a flaxseed egg instead of a regular egg. Replace cream cheese with a vegan cream cheese option. You can also use coconut yogurt in place of sour cream. These swaps keep the flavors while making it suitable for a vegan diet. Enjoy every bite without the animal products! Store your churro cheesecake bars in an airtight container. They stay fresh for up to five days. Keep them in the fridge to maintain their great taste and texture. If you want to keep them longer, consider freezing. You can freeze these bars for up to three months. First, cut the bars into squares. Then, wrap each piece tightly in plastic wrap. Place the wrapped bars in a freezer-safe bag. Label the bag with the date for easy reference. To reheat, take a bar out of the fridge or freezer. If frozen, let it thaw in the fridge overnight. You can warm it in the microwave for about 10-15 seconds. This will help bring back the creamy texture without drying it out. Enjoy your delicious treat! You can tell the cheesecake bars are done when the top is golden brown. The center should not jiggle when you gently shake the pan. Bake them for 35 to 40 minutes. A toothpick inserted in the center should come out clean. Yes, you can make these bars ahead of time. They store well in the fridge for up to three days. Just be sure to let them cool completely before cutting. This helps keep their shape. You can also freeze them for up to two months. Just wrap them tightly in plastic wrap and foil. Churro Cheesecake Bars shine on their own, but you can enhance them. Serve them with a scoop of vanilla ice cream. A drizzle of caramel or chocolate sauce adds extra sweetness. Fresh fruit like strawberries or raspberries also pairs nicely. For a fun twist, sprinkle some extra cinnamon sugar on top! Churro cheesecake bars combine warm, sweet flavors with creamy cheesecake. You learned about the key ingredients and exciting variations to make these bars your own. We covered simple steps to prepare and bake, plus tips to avoid common errors. Remember to store leftovers well and heat them up for later. Enjoy this tasty treat with friends or family, and get creative with your toppings. Happy baking!

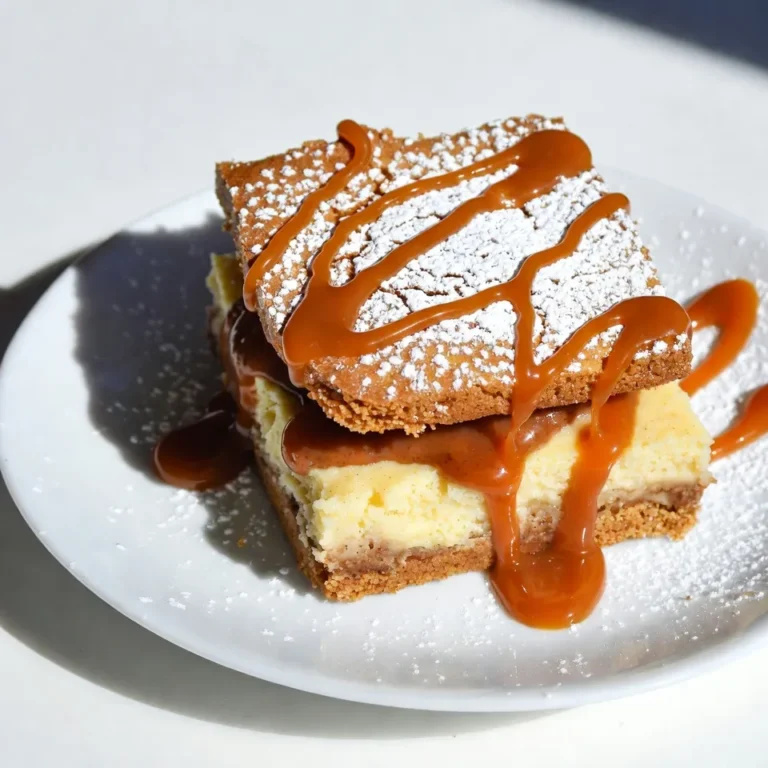
Churro Cheesecake Bars Deliciously Sweet Treat

- 2 tablespoons olive oil - 1 small onion, diced - 3 garlic cloves, minced - 1 can (14 oz) crushed tomatoes - 4 cups vegetable broth - 1 teaspoon dried oregano - 1 teaspoon dried basil - 250g (about 9 oz) cheese tortellini (fresh or frozen) - 1 cup heavy cream - 1 cup fresh basil leaves, chopped - Salt and pepper to taste - Grated Parmesan cheese, for serving Using fresh ingredients is key. Fresh basil brings bright flavor. Choose high-quality olive oil for rich taste. Look for a good brand of crushed tomatoes. These can enhance your sauce's depth. If you go for frozen tortellini, check the package date. Fresh tortellini is better but frozen works in a pinch. For a dairy-free option, use coconut cream instead of heavy cream. You can swap cheese tortellini for spinach or mushroom tortellini for a twist. If you need a gluten-free dish, use gluten-free tortellini. You can also add vegetables like spinach or bell peppers to boost nutrition. {{ingredient_image_1}} 1. Start by heating 2 tablespoons of olive oil in a large pot over medium heat. 2. Add 1 small diced onion to the pot. Cook it for about 3-4 minutes until it turns clear. 3. Next, mix in 3 minced garlic cloves. Cook for 1-2 minutes until you smell that lovely garlic scent. 4. Pour in 1 can of crushed tomatoes and 4 cups of vegetable broth. 5. Add 1 teaspoon each of dried oregano and dried basil. Season with salt and pepper. Bring this mix to a simmer. 6. Once it simmers, add 250 grams of cheese tortellini. Stir well so they are covered in sauce. 7. Cook for 5-7 minutes until the tortellini is soft. Cooking time may change if you use fresh or frozen. 8. Lower the heat and stir in 1 cup of heavy cream and 1 cup of chopped fresh basil. Mix until everything is warm. 9. Taste the dish and add more salt and pepper if needed. 10. Serve the dish hot with grated Parmesan cheese on top and extra basil if you like. - Always sauté the onion until it is clear. This brings out the flavor. - Stir the tortellini gently to avoid breaking them. - Adjust the cream and basil to your taste. Fresh basil adds a nice touch. - If the sauce is too thick, add a splash more broth or cream. - Taste before serving to ensure a good balance of flavors. - When the onion is cooked, it should look clear and shiny. - You’ll know the garlic is fragrant when it fills the kitchen with a warm aroma. - The sauce will bubble gently when it simmers. - The tortellini will float to the top when they are ready. - The cream should blend in easily, making the sauce rich and creamy. When making tortellini, avoid overcooking the pasta. Fresh tortellini cooks fast, about 5-7 minutes. If you use frozen, check the package for cooking times. Don't skip the salt when boiling the tortellini. It adds flavor to the dish. Also, don't rush the sauté of the onion and garlic. Cook them until soft and fragrant. This builds a strong flavor base. Lastly, remember to stir gently when adding the cream. This keeps the sauce smooth. To boost the flavor, try adding fresh herbs. Basil is a great choice. You can also add parsley or thyme for depth. If you like spice, red pepper flakes can add heat. Another tip is to use high-quality olive oil. A good oil adds richness. You can also swap dried herbs for fresh when available. This makes the dish more vibrant. For the best results, use a large pot. This allows the tortellini to move freely. Keep the heat medium when cooking. If it's too high, the sauce can splatter. When you stir in the cream, do it off the heat. This keeps the cream from curdling. Always taste your dish before serving. Adjust the salt or pepper as needed. Enjoy the bright, creamy flavors of your creation! Pro Tips Fresh vs. Frozen Tortellini: Using fresh tortellini will give you a more tender texture, while frozen is convenient and still delicious. Adjust the cooking time accordingly. Customize Your Herbs: Feel free to experiment with other fresh herbs like parsley or thyme to enhance the flavor of your dish. Adjusting Creaminess: For a lighter version, you can substitute half-and-half for heavy cream or use a non-dairy alternative. Serving Suggestions: Pair this dish with a side salad or garlic bread to make it a complete meal. {{image_2}} You can easily make this dish vegetarian. Just skip the cheese tortellini and use plant-based options. Look for tortellini made with vegetables or whole grains. For gluten-free, choose gluten-free tortellini. There are many great brands that offer this option. Also, make sure your vegetable broth is gluten-free. This way, you keep all the flavors without any gluten. Adding vegetables boosts the nutrition of this creamy dish. Spinach, kale, or zucchini work well. You can toss in fresh spinach during the last few minutes of cooking. It wilts quickly and adds a nice color. If you want more crunch, add diced bell peppers or carrots. For a heartier meal, try adding cooked beans or lentils. These choices make your meal more filling. While the creamy tomato sauce is fantastic, you can switch it up. Try a pesto sauce for a fresh twist. You can also mix in some sun-dried tomatoes for a richer flavor. For cheese lovers, mozzarella or ricotta are great options. They melt beautifully into the dish. You might also sprinkle some feta cheese on top before serving for a tangy kick. Each of these changes adds a new layer of taste. To keep your One-Pot Creamy Tomato Basil Tortellini fresh, store it in an airtight container. Let it cool to room temperature before sealing. This helps prevent condensation, which can make the dish soggy. When stored properly, it stays good for up to three days in the fridge. When you’re ready to enjoy leftovers, reheat gently. I recommend using a medium saucepan over low heat. Add a splash of vegetable broth or cream to keep it creamy. Stir often until heated through. Avoid using the microwave, as it can make the tortellini tough. You can freeze this dish for later meals. Portion it into freezer-safe containers. Leave some space at the top, as it will expand when frozen. It can last for up to three months in the freezer. To reheat, let it thaw in the fridge overnight. Then, follow the reheating instructions to enjoy it fresh again. One-Pot Creamy Tomato Basil Tortellini lasts about 3 to 5 days in the fridge. For best taste, store it in an airtight container. Make sure it cools before sealing. This keeps the creaminess intact and prevents spoilage. Always check for any odd smells or changes in color before eating. Yes, you can use frozen tortellini in this recipe. Just add them directly to the pot without thawing. Keep in mind that cooking time may increase by a few minutes. Make sure to stir well to ensure even cooking. Frozen tortellini adds convenience and still tastes great! To complete your meal, serve One-Pot Creamy Tomato Basil Tortellini with a simple side salad. A green salad with mixed greens, cherry tomatoes, and a light vinaigrette works well. You can also add garlic bread for extra flavor. For a heartier option, serve it with grilled chicken or roasted vegetables. This blog post has covered everything you need to make One-Pot Creamy Tomato Basil Tortellini. We discussed top-notch ingredients and how to choose fresh options. You learned step-by-step cooking instructions and useful tips to avoid common errors. We explored variations for different diets and how to store leftovers properly. Now, you can create a delicious, creamy dish at home. Enjoy experimenting with flavors and variations. Your next meal will be tasty and satisfying!

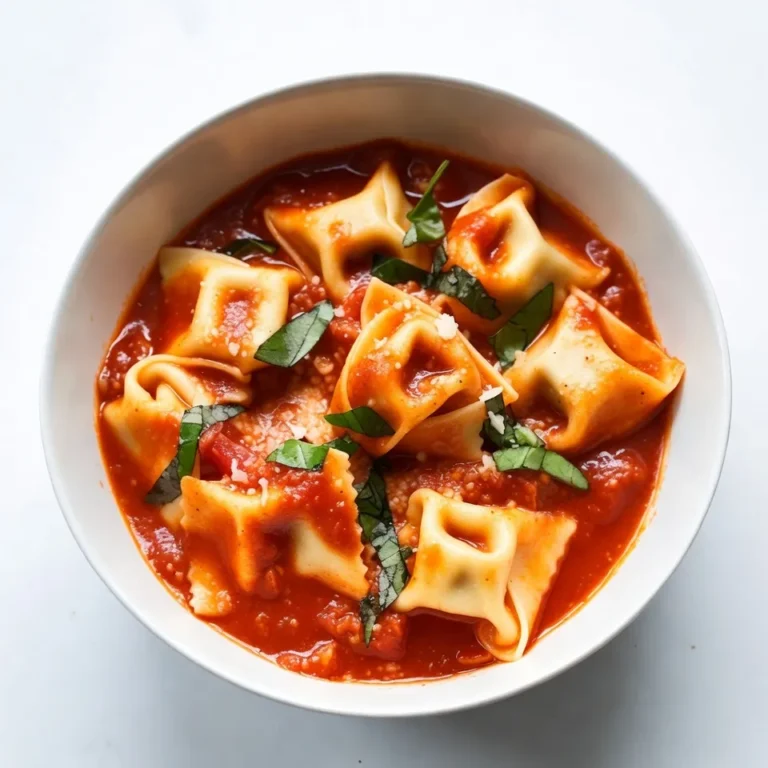
One-Pot Creamy Tomato Basil Tortellini Delight

- 1 cup unsalted butter, softened - 1 cup brown sugar, packed - 1/3 cup pure maple syrup - 1 teaspoon vanilla extract - 2 cups all-purpose flour - 1 teaspoon baking soda - 1/2 teaspoon salt - 1 teaspoon ground cinnamon - 1/2 teaspoon ground ginger - 1/4 teaspoon ground cardamom - 1/4 teaspoon ground cloves - 1/4 teaspoon black pepper - 1/2 cup chopped walnuts (optional) - 1/2 cup dark chocolate chips (optional) Choosing high-quality butter is key. Unsalted butter gives you control over the salt levels. Look for butter with a high fat content for a rich flavor. Selecting pure maple syrup is essential for authentic taste. Avoid imitation syrups; they lack the depth of flavor you want in these cookies. Real maple syrup offers a warm, sweet note that blends perfectly with spices. Fresh spices work best. Ground spices lose their flavor over time. If you can, buy whole spices and grind them yourself. This small step adds great aroma and taste to the cookies. Using high-quality ingredients makes a big difference. When you invest in the right items, you elevate the whole cookie experience. These little details lead to a cookie that not only tastes great but also brings joy to every bite. {{ingredient_image_1}} - Preheat your oven to 350°F (175°C). - In a large bowl, cream together 1 cup of softened unsalted butter and 1 cup of packed brown sugar. Mix until the blend is light and fluffy. This step is key to getting a nice texture in your cookies. - In another bowl, whisk together 2 cups of all-purpose flour, 1 teaspoon of baking soda, 1/2 teaspoon of salt, and all your spices: 1 teaspoon of ground cinnamon, 1/2 teaspoon of ground ginger, 1/4 teaspoon of ground cardamom, 1/4 teaspoon of ground cloves, and 1/4 teaspoon of black pepper. - Gradually add this dry mix to the wet mix. Stir until just combined. Do not overmix! Overmixing can make the cookies tough. You want a soft dough that holds together well. - Use a tablespoon to scoop out dough portions. Place them on the prepared baking sheet, leaving about 2 inches of space between each scoop. - Bake for 10-12 minutes. The edges should turn golden, and the centers should remain soft. Keep an eye on them to avoid overbaking. - Once baked, let the cookies cool on the baking sheet for 5 minutes. Then, transfer them to a wire rack to cool completely. Enjoy the warm aroma as they cool! To get the right cookie texture, focus on the mixing. Cream the butter and sugar until fluffy. This adds air and lightness. For chewy cookies, underbake slightly. For crispy ones, bake a minute longer. Keep an eye on the edges; they should be golden. For a lovely presentation, dust your cooled cookies with powdered sugar. Arrange them on a festive platter. Add a few cinnamon sticks for a cozy touch. Pair the cookies with chai tea or a glass of cold milk. The flavors blend well and make for a comforting treat. Boost the flavor by adding a pinch of nutmeg or a splash of almond extract. You can also fold in chopped dried fruits for a twist. For toppings, consider drizzling melted chocolate on top. Chopped walnuts add crunch, while dark chocolate chips give a rich flavor. Pro Tips Chill the Dough: For a more pronounced flavor and better texture, chill the cookie dough for at least 30 minutes before baking. This helps the spices meld together and prevents the cookies from spreading too much during baking. Experiment with Spices: Feel free to adjust the spices according to your taste. Adding a pinch of nutmeg or a bit more ginger can give your cookies a unique flavor profile that you may enjoy! Store Properly: To keep your cookies fresh, store them in an airtight container at room temperature for up to a week. You can also freeze the unbaked dough for up to three months and bake them fresh whenever you want! Use Quality Ingredients: Opt for high-quality maple syrup and fresh spices for the best flavor. The quality of your ingredients can significantly impact the overall taste of your cookies. {{image_2}} You can easily make gluten-free Maple Chai Cookies. Just swap the all-purpose flour for a gluten-free blend. This will keep your cookies soft and tasty. For dairy-free options, use coconut oil instead of butter. You can also choose a dairy-free butter substitute. Both options work well and still taste great! Want to change the spice level? You can add more cinnamon or ginger for a kick. For a sweeter touch, mix in a bit of nutmeg. If you love chocolate, try adding white chocolate chips instead of dark chocolate. You can also toss in dried fruits like cranberries or raisins for a chewy bite. You can adapt these cookies for holidays! Add some peppermint extract for a festive twist during winter. For fall, mix in pumpkin spice to bring in those cozy flavors. Using fresh apples or pears in the dough works well in the autumn. These seasonal ingredients make each batch special and fun! To keep your Maple Chai Cookies fresh, store them in an airtight container. This helps maintain their soft texture. You can layer parchment paper between cookies to prevent sticking. I recommend using a glass or plastic container. Avoid metal containers, as they can alter the taste over time. You can freeze cookie dough for later use. First, scoop the dough into balls and place them on a baking sheet. Freeze them for about an hour until firm. Then, transfer the dough balls to a freezer-safe bag or container. When ready to bake, thaw the dough in the fridge overnight. Bake as usual, adding a minute or two to the baking time. These cookies last about a week at room temperature. Store them properly for the best taste. Look for signs of spoilage, like an off smell or hard texture. If they feel dry or crumbly, it's time to toss them. Enjoy your cookies at their best! How do I make cookies softer? To make cookies softer, use more butter and reduce baking time. You can also add an extra egg yolk. This adds moisture and keeps cookies chewy. Baking at a lower temperature can help too. Try 325°F (160°C) for a softer texture. Experiment with these tips to find your favorite softness. Can I use vegetable oil instead of butter? Yes, you can use vegetable oil instead of butter. However, the flavor will change. Cookies may lose some richness and become softer. Use about 3/4 cup of oil for each cup of butter. This swap works well, but the taste and texture will differ from the original recipe. What should I do if my cookies spread too much? If cookies spread too much, chill the dough for at least 30 minutes before baking. This helps firm up the fat. Also, check your oven temperature with a thermometer. If it's too hot, cookies will spread. Use parchment paper to help control spread as well. Can I add nuts or chocolate chips after mixing? Yes, you can add nuts or chocolate chips after mixing. Just fold them in gently. This way, they mix evenly without breaking. Adding them later lets you control the amount. Feel free to get creative with different mix-ins for variety! What can I use instead of maple syrup? If you need a substitute for maple syrup, try honey or agave nectar. Both add sweetness and moisture. For a richer flavor, use brown sugar mixed with water. Mix 1 cup of brown sugar with 1/4 cup of water to mimic maple syrup. Adjust to taste as needed. Are there alternatives to all-purpose flour? Yes, there are alternatives to all-purpose flour. You can use almond flour or oat flour for a gluten-free option. Coconut flour works too, but use less because it absorbs more moisture. Experiment with these flours, but be aware that the texture may change. You now have a clear guide to baking delicious cookies. We covered essential ingredients, important tips for quality, and step-by-step instructions. You learned ways to perfect texture and classic serving suggestions. Variations allow you to adapt recipes for different diets and seasons. Lastly, proper storage ensures your treats stay fresh and tasty. Follow these steps to create tasty cookies that impress friends and family. Happy baking!

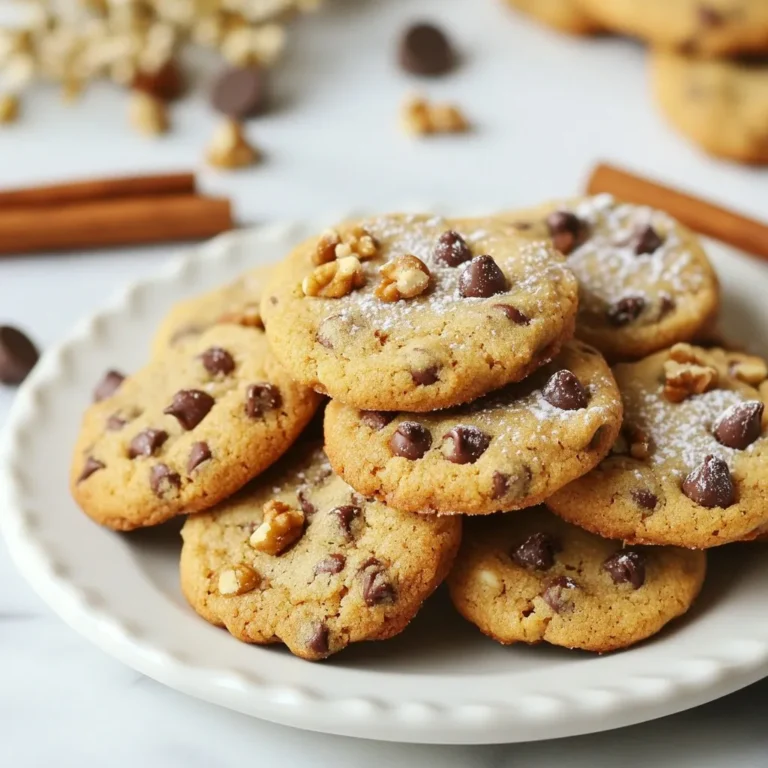
Maple Chai Cookies Irresistible Flavor Awaits

PREV 1 … 69 70 71 … 86 NEXT
spicy fork kitchen

explore

DessertsDinnerAppetizersDrinks

Our Policies

  • Cookie Policy
  • Copyright Policy
  • Disclaimer
  • GDPR Policy
  • Terms Of Use
Back to Top
  • About
  • Contact Us
  • Privacy Policy
© 2026 spicy fork kitchen