FREE DINNER EBOOK! Get your copy!
  • Cookie Policy
  • GDPR Policy
  • Disclaimer
  • Terms Of Use
  • Visit my other site: Fun Cookie Recipes
spicy fork kitchen
  • Home
  • Dinner
  • Desserts
  • Drinks
  • Appetizers
  • Contact
  • About
  • Privacy Policy
  • Home
  • Dinner
  • Desserts
  • Drinks
  • Appetizers
  • Contact
  • About
  • Privacy Policy
  • Cookie Policy
  • GDPR Policy
  • Disclaimer
  • Terms Of Use
Visit my other site: Fun Cookie Recipes

HOME / CATEGORIES /

Latest

- 4 cups of lime sherbet - 2 liters of lemon-lime soda (like Sprite or 7Up) - 1 cup of cranberry juice - 1/2 cup of pineapple juice - 1 teaspoon of fresh lime juice - Fresh mint leaves for garnish - Lime slices for garnish - Red and green gummy candies (optional) Creating Grinch Punch is simple and fun! You need just a few ingredients. Start with lime sherbet for a creamy base. The lime flavor gives it a bright and festive touch. Next, grab lemon-lime soda for bubbles. This adds a fizzy kick that everyone loves. You will also need cranberry juice. It adds a nice tartness and deep red color. Pineapple juice brings sweetness and a tropical feel. A dash of fresh lime juice brightens the flavor even more. For garnish, fresh mint leaves add a pop of green. Lime slices look pretty and add zest. If you want to add a fun twist, use red and green gummy candies. They make the punch extra cheerful and colorful. Gather these ingredients and prepare for a delightful holiday drink that will wow your guests! {{ingredient_image_1}} - Scoop lime sherbet into a punch bowl. This gives a bright green base that looks festive and fun. - Mix juices in a separate pitcher. Combine cranberry juice, pineapple juice, and fresh lime juice. Stir until blended. - Combine juice mixture with sherbet. Pour the juice over the sherbet slowly. This lets the sherbet float and not melt fully. - Add lemon-lime soda carefully. Pour this in gently to keep the fizz. Stir lightly to mix but keep bubbles. - Optional: Decorate with gummy candies. Place red and green gummy candies on top for extra fun. They brighten up the punch! - Garnish before serving. Add fresh mint leaves and lime slices on each cup for a special touch. This punch takes just 10 minutes to make and serves 8-10 people. Enjoy this festive drink at your holiday gatherings! To create the best Grinch Punch, follow these simple tips. - Mixing Ingredients: Always add the lime sherbet first. This helps create a fun and frothy base. Pour the mixed juices over the sherbet slowly. This keeps the colorful layers visible. - Maintaining Carbonation: Add the lemon-lime soda at the end. Pour it gently to keep the bubbles. Stir lightly, just enough to blend the flavors without losing fizz. - Punch Bowl Presentation: Use a clear punch bowl to show off the green and red colors. Add festive cups or clear glasses for serving. For a fun touch, float red and green gummy candies on top. Garnish each serving with mint leaves and lime slices for extra cheer. These steps will ensure your Grinch Punch is not only tasty but also a feast for the eyes. Pro Tips Chill Your Ingredients: For an extra refreshing punch, make sure to chill the cranberry juice and pineapple juice before mixing. This keeps the punch cool without the need for too much ice, which can dilute the flavor. Use Fresh Ingredients: Whenever possible, opt for fresh lime juice instead of bottled. Fresh juice adds a vibrant flavor that elevates the punch and makes it taste more authentic. Make It a Mocktail: If you want to create a non-alcoholic version, simply omit any alcohol and enjoy the punch as is or add some fresh fruit slices for added flavor and aesthetics. Customize Your Garnish: Get creative with your garnishes! Aside from mint and lime, consider adding pomegranate seeds or slices of kiwi for a pop of color and texture. {{image_2}} You can have fun with Grinch Punch by changing a few key ingredients. Here are some great ideas. - Alternative sherbet flavors: While lime sherbet gives a lovely green hue, you can use other flavors. Try raspberry sherbet for a pink twist, or even lemon for a bright yellow drink. Each flavor brings a new taste and look. - Adding alcohol for adults: If you want a festive drink for adults, add some vodka or rum. Start with one cup and adjust to your taste. This extra kick makes the punch perfect for holiday parties. - Swapping out juices for different flavors: You can mix and match juices to create your own blend. Consider using orange juice for a sunny vibe or apple juice for a sweet twist. Each juice changes the taste, making it fun to experiment. These variations let you make Grinch Punch that matches your style and holiday cheer! To keep your Grinch Punch fresh, store it in the fridge. Pour any leftover punch into a large pitcher. Make sure to cover it tightly. This helps keep the flavors bright and yummy. Garnishes like mint leaves and lime slices should be stored separately. Place them in a small container with a lid. This keeps them fresh and crisp. If you mix them into the punch, they may wilt or lose their flavor. Grinch Punch stays good for about 2 days in the fridge. After that, the taste might change. The soda can lose its fizz. So, it's best to enjoy this punch fresh. If you have leftover garnishes, use them in your next drink or dessert! Can I make Grinch Punch ahead of time? Yes, you can prepare Grinch Punch ahead. Mix the juices and sherbet. Add the soda right before serving. This keeps the fizz fresh and fun! What could I substitute for lime sherbet? If you need a substitute, try lemon or rainbow sherbet. You can also use a non-dairy sorbet for a dairy-free option. Each choice adds a unique taste. Is it possible to make a non-carbonated version? Absolutely! Just skip the lemon-lime soda. Use more juice instead. You can use sparkling juice for a bit of fizz without soda. Can children enjoy this drink? Yes! Grinch Punch is great for kids. It’s tasty and colorful. They will love the fun gummy candies on top! This blog post covered how to make a fun Grinch Punch with easy steps. You learned about the key ingredients, which include lime sherbet and lemon-lime soda. I provided tips for mixing and presenting your drink, along with ways to customize it. Don’t forget to store any leftovers properly. This festive punch is sure to bring joy to your gathering, whether it’s for kids or adults. Remember, creativity is key when making it your own! Enjoy every sip of your holiday cheer.

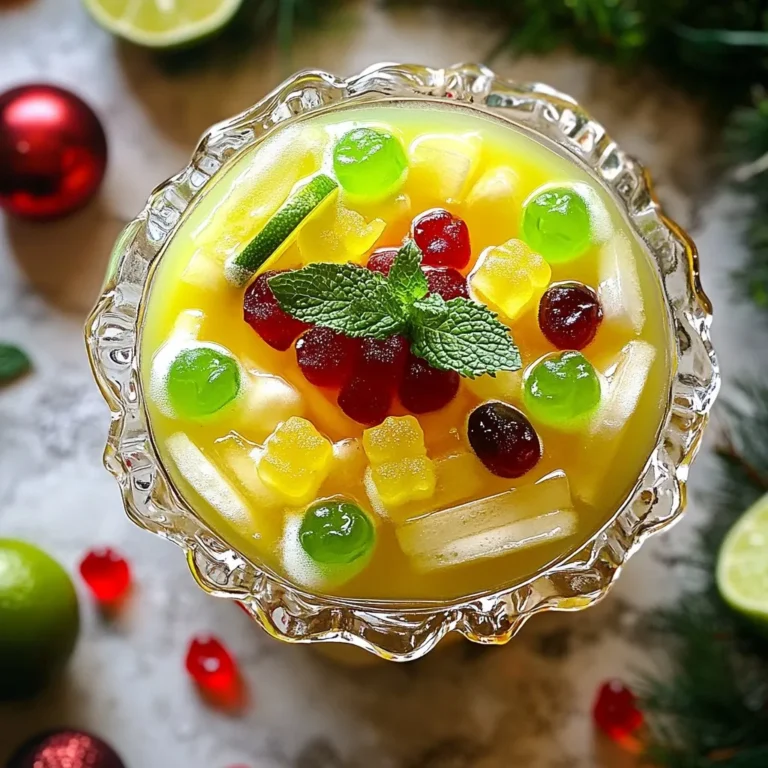
Grinch Punch Festive and Refreshing Holiday Drink

To make delicious garlic butter steak bites, gather these key items: - 1 pound sirloin steak, cut into bite-sized pieces - 4 tablespoons unsalted butter - 4 cloves garlic, minced - 1 teaspoon fresh thyme leaves (or ½ teaspoon dried thyme) - Salt and pepper to taste - 1 tablespoon olive oil - Fresh parsley, chopped (for garnish) These ingredients work together to create a rich and tasty dish. The sirloin steak provides a tender base, while butter and garlic bring in the flavor. To take your steak bites to the next level, consider adding: - A splash of Worcestershire sauce for a savory kick - Red pepper flakes for a bit of heat - Lemon juice for brightness - A sprinkle of parmesan cheese for creaminess These extras can add depth and a unique twist to your meal. Using fresh herbs can elevate your dish. Try these seasonal herbs: - Fresh rosemary adds a woodsy flavor - Fresh oregano brings a hint of sweetness - Fresh basil offers a fresh, peppery note Choose herbs based on what you enjoy or what’s in season. Fresh herbs make your garlic butter steak bites even more delightful! {{ingredient_image_1}} Start by cutting your sirloin steak into small, bite-sized pieces. This helps the steak cook evenly. Next, season the steak with salt and pepper. Make sure to coat all sides well. Let the steak sit for about 10 minutes. This allows the flavors to soak into the meat, making it juicy and tasty. Now it's time to cook the steak bites. Heat a large skillet on medium-high heat. Pour in the olive oil and wait for it to shimmer. This shows the oil is hot enough. Place the seasoned steak bites in the skillet in a single layer. Avoid crowding the pan, as it can make the meat steam instead of sear. Cook for 3-4 minutes on each side for medium-rare. If you want it more done, cook a bit longer. Once cooked, remove the steak from the skillet and set it aside. In the same skillet, lower the heat to medium. Add the butter and the minced garlic. Stir it often to stop the garlic from burning. After a minute, add the fresh thyme. This gives the butter a lovely flavor. When the garlic smells great, return the steak bites to the skillet. Toss them in the garlic butter until they are well coated and heated through. This takes about 2 minutes. Now your garlic butter steak bites are ready to enjoy! To make the best garlic butter steak bites, start with the right seasoning. Use a good amount of salt and pepper. This helps to bring out the steak's natural flavor. I usually recommend about one teaspoon of salt and half a teaspoon of pepper per pound of meat. Allow the steak to sit for 10 minutes after seasoning. This step lets the flavors soak in better. Cooking times matter for great steak bites. For medium-rare, cook the steak for 3-4 minutes on each side. If you like your steak medium, add one more minute per side. For well-done, aim for about 6-7 minutes per side. Always check with a meat thermometer if unsure. For medium-rare, the internal temp should be 130-135°F. For medium, it should be 140-145°F. A good sear is key to tasty steak bites. Heat your pan until it shimmers. This shows that it is hot enough. Use olive oil for the best result. Do not overcrowd the pan, as this lowers the temperature. Cook the steak in batches if needed. A proper sear gives that nice crust you want. This adds flavor and keeps the juices in the meat. Pro Tips Rest the Steak: Allow the seasoned steak bites to rest for at least 10 minutes before cooking. This helps the meat retain its juices, resulting in a more tender bite. Use High Heat: Ensure your skillet is hot enough before adding the steak. A hot pan will sear the meat, creating a delicious crust while keeping the inside juicy. Don’t Overcrowd the Pan: Cook the steak bites in batches if necessary. Overcrowding can lead to steaming instead of searing, preventing that desirable texture. Fresh Herbs Matter: Using fresh thyme enhances the flavor significantly. If using dried thyme, make sure to use less, as dried herbs are more potent. {{image_2}} You can use other cuts of steak for garlic butter steak bites. Each cut brings a unique flavor and texture. Here are some great options: - Ribeye: This cut is juicy and tender. It has rich marbling. - Filet Mignon: This is very tender and mild. It melts in your mouth. - Flank Steak: This cut is lean and flavorful. Slice it thin against the grain. - Skirt Steak: This has a strong beefy taste. It cooks quickly and is great for bites. You can boost the flavor of your steak bites by adding spices or sauces. Here are some ideas: - Smoked Paprika: This adds a smoky flavor and depth. - Cayenne Pepper: A pinch gives a nice kick. - Soy Sauce: This adds umami and extra saltiness. - Worcestershire Sauce: A dash enhances the beefy taste. Experimenting with these can make your dish exciting! If you want low-carb or gluten-free options, here are some tips: - Cauliflower Rice: Serve the steak bites over cauliflower rice instead of regular rice. - Zucchini Noodles: Use spiralized zucchini as a base for your steak bites. - Leafy Greens: Serve on a bed of spinach or arugula for a fresh touch. - Broccoli or Asparagus: Roast or steam these veggies as a tasty side. These alternatives keep your meal light and healthy while still being delicious! To store leftover garlic butter steak bites, let them cool first. Place them in an airtight container. Make sure to keep them in the fridge. They will stay fresh for up to three days. If you want to keep them longer, freezing is a good option. When you are ready to eat the leftovers, reheat them in a skillet. Heat a small amount of oil or butter on medium heat. Add the steak bites and cook until they are warm. This helps keep the steak juicy. You can also microwave them in short bursts. Just cover them to keep moisture in. If you have extra steak bites, you can freeze them. Place the bites in a single layer on a baking sheet. Freeze them for about an hour. Once frozen, transfer them to a freezer bag. Remove as much air as possible. They will last up to three months in the freezer. When ready to eat, thaw them in the fridge overnight before reheating. To cut steak for bites, choose a sirloin or tender cut. First, let the meat rest. This keeps juices in and makes it easier to cut. Next, slice the steak against the grain. Cutting against the grain helps make each bite tender and easy to chew. Aim for pieces about one inch in size. This size cooks well and stays juicy in the pan. Yes, you can use different herbs to change the flavor! Fresh rosemary or oregano adds a nice twist. You can also try using dried herbs if fresh ones are not available. Just remember, dried herbs are stronger, so use less. A half teaspoon of dried herbs can be enough. Feel free to get creative with your favorite herbs! You can keep leftover garlic butter steak bites in the fridge for up to three days. Store them in an airtight container to keep them fresh. When you’re ready to eat, just reheat them gently. This keeps the steak tender and tasty. If you want to save them longer, you can freeze them for up to three months. Garlic butter steak bites are simple and tasty. You learned about main and optional ingredients to enhance flavor. Step-by-step, I showed how to prepare and sear the steak, then make the garlic butter sauce. I shared tips on seasoning and cooking times for your perfect steak. We explored variations for different cuts and diets, along with storage and reheating advice. These bites are easy to create and fun to share. Enjoy making them your own!

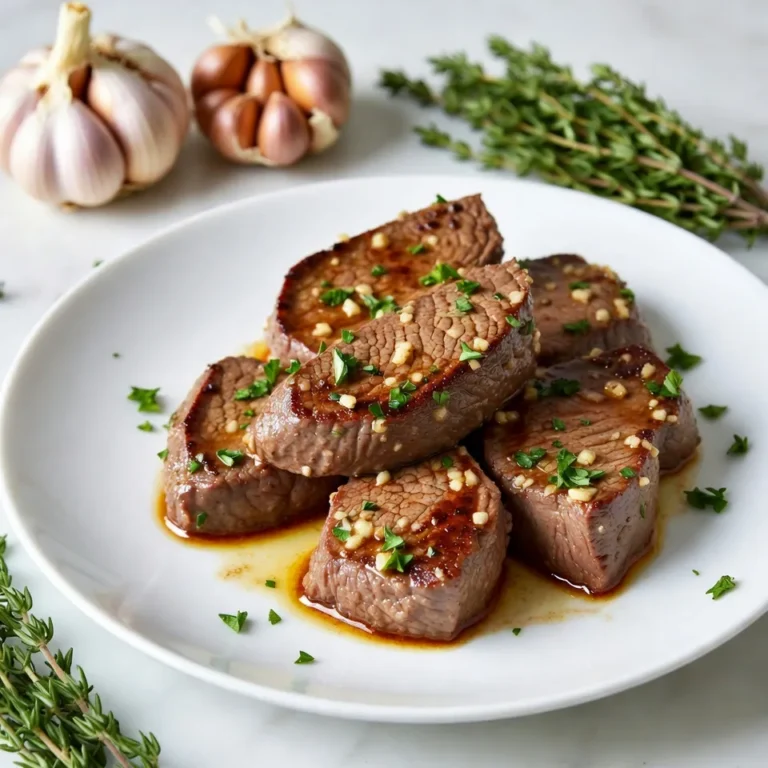
Garlic Butter Steak Bites Flavorful Dinner Delight

- 2 lbs chicken thighs, boneless and skinless, cut into chunks - 1 large onion, finely chopped - 4 cloves garlic, minced - 1 tablespoon ginger, grated - 1 can (14 oz) diced tomatoes - 1 cup coconut milk - 1 tablespoon tomato paste - 2 tablespoons butter - 1 tablespoon garam masala - 1 tablespoon ground cumin - 1 teaspoon turmeric powder - 1 teaspoon chili powder (adjust to taste) - Salt to taste The main ingredients make this dish rich and tasty. Chicken thighs are perfect for slow cooking. They stay juicy and tender. Onions and garlic give a strong base flavor. The spices create warmth and depth. Each spice adds a unique note to the dish. - Coconut milk - Fresh herbs for garnish - Variations in spices Coconut milk adds creaminess and sweetness. You can skip it if you prefer a less rich sauce. Fresh herbs, like cilantro, brighten the dish. They add a pop of color and taste. You can also play with the spices. Try adding more chili for heat or less cumin for a milder flavor. - Cooked basmati rice (for serving) - Recommended toppings: fresh cilantro, a squeeze of lime - Drink pairings: mango lassi, chai tea Serve butter chicken over fluffy basmati rice. The rice soaks up the sauce well. Top with fresh cilantro for a nice finish. A squeeze of lime adds tang. For drinks, a mango lassi cools the heat. Chai tea also pairs well, enhancing the meal's warmth. {{ingredient_image_1}} Start by prepping your ingredients. You will need 2 pounds of chicken thighs, boneless and skinless. Cut them into chunks. Chop one large onion finely. Mince four cloves of garlic. Grate one tablespoon of fresh ginger. Next, mix the sauce. In a bowl, combine one can of diced tomatoes, one cup of coconut milk, and one tablespoon of tomato paste. Add one tablespoon of garam masala, one tablespoon of ground cumin, one teaspoon of turmeric powder, and one teaspoon of chili powder. Don’t forget to add salt to taste. For cooking, you can choose two settings. If you use low heat, cook for 6 to 8 hours. If you prefer high heat, cook for about 4 hours. The chicken will be tender when done. To ensure the chicken remains tender, place the chicken on top of the onion mixture. Pour the sauce over the chicken. Dot the mixture with two tablespoons of butter for extra flavor. Once the cooking is done, shred the chicken directly in the slow cooker. Use two forks for this task. Stir the sauce well to combine everything. Finally, taste and adjust the seasoning. You can add more salt or spices to suit your taste. Serve the butter chicken warm over cooked basmati rice and garnish with chopped cilantro. Enjoy your meal! To get that rich, authentic taste in your slow cooker butter chicken, spice adjustments are key. Use garam masala and cumin to build a strong base. Add more chili powder if you like heat. Fresh herbs bring brightness. Use fresh cilantro for garnish. Dried herbs can work too but won’t taste as vibrant. If using dried herbs, use less. Dried herbs are more potent than fresh. Choosing the right slow cooker matters. A 6-quart slow cooker is perfect for this dish. It allows enough space for all ingredients. To avoid overcooking, set the timer. Cooking on low for 6-8 hours is best. If you’re in a hurry, use the high setting for about 4 hours. Always check the chicken's tenderness. It should shred easily. Garnish your butter chicken with chopped cilantro. This adds color and freshness. Serve it over fluffy basmati rice for texture and flavor. For a stylish presentation, use a large serving dish. Pour the butter chicken over the rice. Then, sprinkle more cilantro on top. Serve with naan on the side for a complete meal. Pro Tips Marinate for Maximum Flavor: For deeper flavor, marinate the chicken thighs in the spices and yogurt for a few hours or overnight before cooking. Adjust Spice Level: If you prefer a milder dish, reduce the amount of chili powder and garam masala. You can always add more later if desired. Use Fresh Ingredients: Fresh garlic and ginger provide a more vibrant flavor than dried or powdered versions, enhancing the overall taste of the dish. Garnish Wisely: Fresh cilantro adds a burst of freshness; consider also adding a squeeze of lime juice for an extra zing before serving. {{image_2}} You can use chicken breast instead of thighs. Chicken breast gives a leaner dish. However, thighs add more flavor and moisture. For a vegan option, swap chicken with chickpeas or tofu. Both options soak up flavors well. Use coconut milk for creaminess. You can adjust the heat level by changing the chili powder amount. If you like it spicy, add more chili. For a milder dish, reduce the chili powder. Adding vegetables can boost nutrition. Try spinach, peas, or bell peppers. Just chop them and toss them in with the chicken. They add color and taste. Butter chicken has its roots in India. It features rich spices and creamy sauce. Traditional recipes use tandoori chicken, which adds a smoky flavor. In Western kitchens, adaptations exist. Some recipes use cream instead of coconut milk. Others might add cheese for a richer taste. These changes can appeal to different palates. To store leftovers, let the butter chicken cool down first. Place it in an airtight container. This keeps it safe and fresh. Use glass or plastic containers with tight lids. Make sure to eat it within three to four days for the best taste. For long-term storage, you can freeze the butter chicken. Put it in freezer-safe bags or containers. Remove as much air as you can. Label the bags with the date. It can last up to three months in the freezer. When you want to eat it, thaw it overnight in the fridge. This helps keep the flavor and texture. When reheating, you can use a microwave or stovetop. For the microwave, heat it in short bursts. Stir between each burst for even warming. If you use the stovetop, add a splash of water to keep it moist. Heat gently on low. This method helps maintain the flavor and texture of the dish. Enjoy your butter chicken warm! Butter chicken, or murgh makhani, hails from India. This dish blends rich flavors and creamy sauce. It began in Delhi in the 1970s. Chefs mixed leftover chicken with tomatoes and spices. The result was a delightful meal that gained fame worldwide. Common ingredients in butter chicken include chicken, tomatoes, and spices. You’ll often find garlic, ginger, and cream in the mix. The flavors are warm, spicy, and slightly sweet, creating a tasty balance. Each bite is a burst of richness and comfort. Yes, you can use frozen chicken. It’s a great time-saver for busy cooks. Just make sure to add extra cooking time. If your chicken is frozen, cook on high for 5-6 hours instead of 4. On low, extend the time to 8-9 hours. Always check that the chicken reaches 165°F. This ensures it is safe to eat. Using frozen meat may change the texture slightly. However, the flavors will still be amazing. To spice things up, add more chili powder. Start with an extra half teaspoon and taste. You can also try adding fresh green chilies or cayenne pepper for heat. Mix them in with the other spices. Be mindful of the spice balance. Too much heat can overpower the dish. If it gets too spicy, add more coconut milk or cream to mellow it. Enjoy adjusting the spice level to fit your taste. In this blog post, we explored how to make butter chicken from start to finish. We covered the main and optional ingredients, step-by-step instructions, tips for authentic flavor, and various serving suggestions. You learned about ingredient substitutions and how to store leftovers properly. Butter chicken is versatile and rewarding. With the right spices and techniques, you can impress anyone. Enjoy your cooking journey, and remember to make it your own!

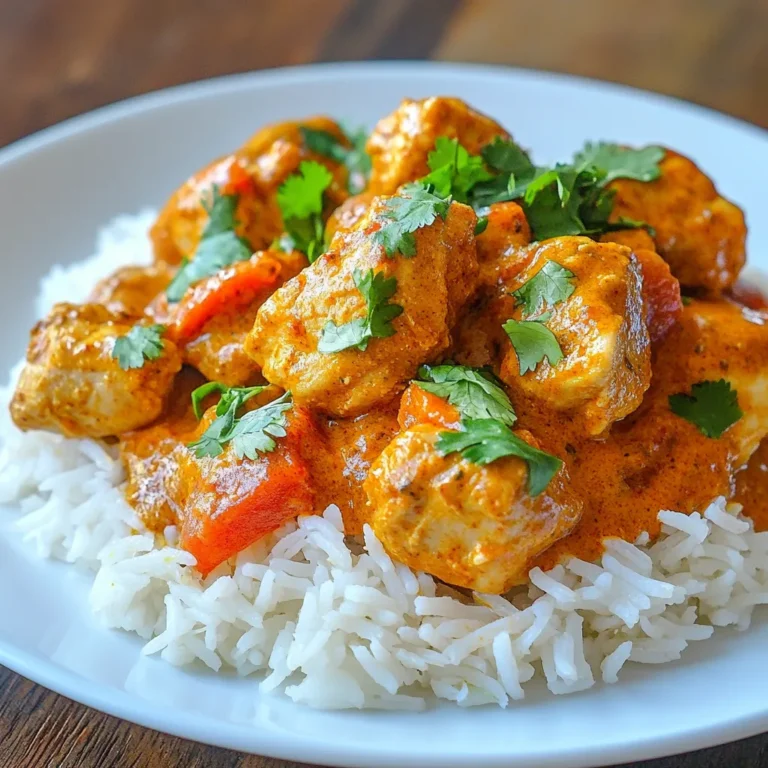
Slow Cooker Butter Chicken Flavorful and Simple Dish

- 1 tablespoon olive oil - 1 medium onion, diced - 2 cloves garlic, minced - 3-4 jalapeños, diced (seeds removed for less heat) - 4 cups vegetable broth - 1 cup cream cheese, softened - 1 cup shredded sharp cheddar cheese - 1 cup milk (or plant-based milk) - 1 teaspoon smoked paprika - 1/2 teaspoon cumin - Salt and pepper to taste I love using fresh ingredients to make this soup pop. Olive oil gives a rich base. Diced onion adds sweetness, while garlic brings in a punch. Add diced jalapeños for that spicy kick. You can remove the seeds if you want a milder flavor. Next, pour in four cups of vegetable broth. This is the heart of the soup. It adds depth and flavor. Cream cheese makes the soup creamy and rich. Sharp cheddar cheese brings a nice bite. Milk, or a plant-based option, helps to balance everything out. Spices like smoked paprika and cumin add warmth. Salt and pepper are key to bringing out all the flavors. - 4 slices of bread (your choice, like sourdough or whole grain) - 1 cup shredded mozzarella cheese for grilling - Fresh cilantro or chives for garnish (optional) For the dippers, I suggest using sourdough or whole grain bread. Both add great texture and taste. Place shredded mozzarella cheese between two slices of bread. This creates a gooey, melty treat perfect for dunking. You can garnish with fresh cilantro or chives for a nice touch. It adds color and flavor to your meal. First, heat one tablespoon of olive oil in a large pot over medium heat. Next, add one medium onion, diced, and two cloves of minced garlic. Sauté these for about five minutes. You want them to be soft and fragrant. When they smell great, you know they are done. Now, stir in three to four diced jalapeños. If you want less heat, make sure to remove the seeds. Cook the jalapeños for two to three minutes until they start to soften. Then, pour in four cups of vegetable broth. Bring it to a simmer and let it cook for ten minutes. This helps all the flavors come together. Next, lower the heat and add one cup of softened cream cheese. Stir until it melts and becomes smooth. After that, mix in one cup of shredded sharp cheddar cheese, one cup of milk, one teaspoon of smoked paprika, and half a teaspoon of cumin. Keep stirring until the cheese melts fully. Taste and add salt and pepper as needed. While your soup simmers, it’s time to make grilled cheese dippers. Preheat a skillet over medium heat. Butter one side of each slice of your choice of bread. Place one slice butter-side down in the skillet. Add one cup of shredded mozzarella cheese on top. Cover with another slice of bread, butter-side up. Grill until golden brown, about three to four minutes per side. The cheese should melt nicely. Ladle the hot jalapeño popper soup into bowls. Serve the grilled cheese dippers on the side for dunking. If you like, you can garnish with fresh cilantro or chives for a nice touch. Enjoy your warm, comforting meal! To enjoy a milder soup, remove the seeds from the jalapeños. This simple step cuts the heat. You can also swap jalapeños for poblano peppers. They add flavor without the spice. Use oat milk or almond milk for a plant-based option. For cream cheese, try cashew cream or a store-bought vegan cream cheese. Shredded vegan cheese works well too. Add spices like cayenne or garlic powder for a kick. A squeeze of lime juice brightens the soup. Top with crispy bacon bits for a savory touch. To make it lighter, use less cream cheese and more broth. {{image_2}} You can boost your soup with great add-ins. Try adding some black beans or corn for texture. Chopped spinach or kale can also add color and nutrients. For cheese lovers, you can swap sharp cheddar for pepper jack. This gives a spicy kick and adds depth to the flavor. Grilled cheese is a classic dipper, but you can mix it up! Use different bread types like rye or ciabatta. Each bread brings its own taste. Consider adding toppings like pesto or spicy mustard to your grilled cheese. These give a tasty twist that will surprise your taste buds. Pair your soup with crunchy sides. A simple green salad adds freshness. You can also serve tortilla chips for a fun crunch. If you want a light appetizer, try veggie sticks with ranch dip. These sides make your meal more exciting and balanced. Store leftover soup in an airtight container. Make sure it cools to room temp first. Place it in the fridge for up to four days. Reheat on the stove over low heat. Stir often to prevent sticking. You can use a microwave too. Heat in short bursts, stirring in between. You can freeze the soup and dippers separately. For the soup, let it cool completely. Pour it into freezer-safe containers. Leave some space at the top for expansion. For the dippers, wrap them tightly in plastic wrap. Place both items in the freezer for up to three months. To thaw, move the soup to the fridge overnight. Reheat on the stove or microwave. For dippers, bake in the oven until warm. Enjoy the soup within four days when refrigerated. When frozen, aim to use it within three months for best taste. Look for signs of spoilage, like strange smells or off colors. If it looks or smells bad, it’s best to toss it. Always trust your senses for safety. Yes, you can make this soup ahead of time. Cook the soup, let it cool, and store it in the fridge. When you’re ready to eat, just reheat it on the stove. This soup tastes even better the next day as the flavors deepen. If you don’t have cream cheese, you can use sour cream or Greek yogurt. Both will add creaminess. You can also try using cashew cream for a dairy-free option. These alternatives keep the soup rich and tasty. The spice level depends on the jalapeños. Remove the seeds for less heat. If you want more spice, add extra diced jalapeños or a dash of hot sauce. You can adjust the heat to fit your taste. Yes, you can use frozen jalapeños. They work well in this soup. Just thaw them first and chop them. Fresh jalapeños add a crunch, but frozen ones still bring great flavor. Absolutely! This soup is perfect for meal prep. You can store it in individual containers. It keeps well in the fridge for up to three days. Just make sure to pack your grilled cheese dippers separately to keep them fresh. You now have the perfect recipe for Jalapeño Popper Soup. We covered the key ingredients like creamy cheeses and spices. You learned step-by-step how to make the soup and its tasty grilled cheese dippers. Remember to adjust spice levels to fit your taste. Feel free to explore variations and storage tips to keep things fresh. This dish is great for meal prep, too. Enjoy each comforting bowl paired with your dippers for a delightful experience. Happy cooking!

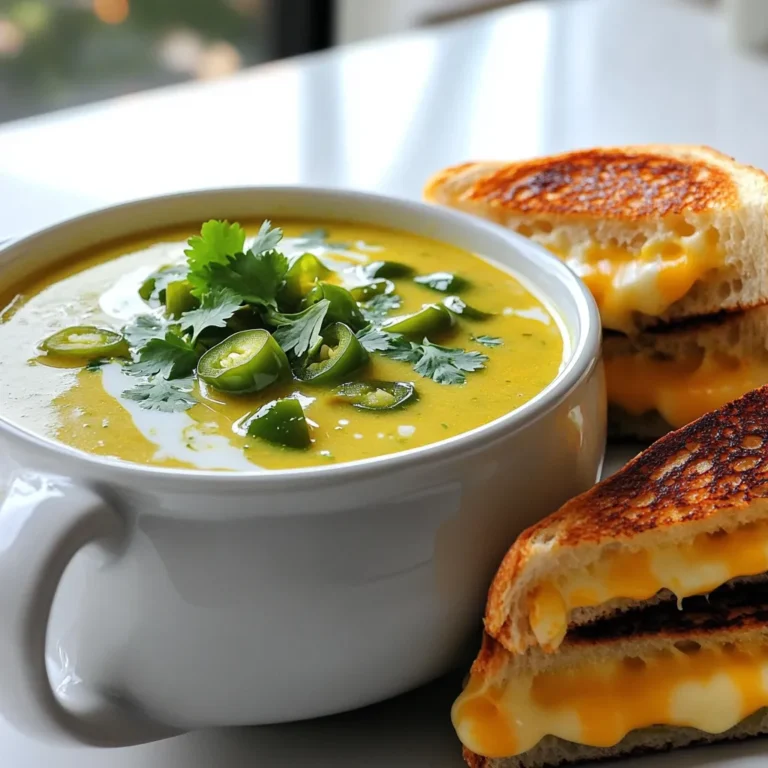
Savory Jalapeño Popper Soup with Grilled Cheese Dippers

- 1 pound Italian sausage - 1 medium onion - 2 cloves garlic - 2 carrots - 2 celery stalks - 6 cups chicken broth - 1 can diced tomatoes - 1 cup ditalini pasta - 1 cup heavy cream - 1 cup grated Parmesan cheese - 2 teaspoons Italian seasoning - Salt and pepper - Fresh parsley for garnish Gather your ingredients before you start. This makes cooking easier and more fun. I like to use Italian sausage because it adds great flavor. You can choose mild or spicy, based on your taste. Chopping the onion, garlic, carrots, and celery gives the soup a nice base. The chicken broth adds depth to the dish. It brings all the flavors together. Diced tomatoes add a touch of sweetness and acidity. And don't forget the ditalini pasta! It’s the perfect shape for this soup. Heavy cream makes the soup rich and smooth. Parmesan cheese gives it a salty kick. Italian seasoning adds warmth and depth. Always taste your soup as you go, and adjust salt and pepper to your liking. Finally, fresh parsley adds color and brightness. It makes your soup look lovely when served. Enjoy the process of gathering and preparing these ingredients! To start, heat a large pot over medium heat. Add 1 pound of Italian sausage. Cook the sausage for 5 to 7 minutes. Use a spoon to break it up. You want it fully brown. Once cooked, remove the sausage with a slotted spoon. Set it aside for later. In the same pot, add the chopped onion, minced garlic, diced carrots, and diced celery. Sauté these veggies for about 5 minutes. Stir them often until they become soft. This adds great flavor to your soup. Next, pour in 6 cups of chicken broth. Add one can of diced tomatoes, including the juice. Bring this mixture to a boil. Once boiling, add 1 cup of ditalini pasta. Cook it according to the package instructions, usually 8 to 10 minutes until it's al dente. When the pasta is ready, reduce the heat to low. Stir in 1 cup of heavy cream and the cooked sausage. Next, add 1 cup of grated Parmesan cheese and 2 teaspoons of Italian seasoning. Stir until the cheese melts and the soup is creamy. Season with salt and pepper to taste. Let the soup simmer for another 5 minutes, stirring occasionally. - Choosing the right sausage: Use Italian sausage for great flavor. You can pick mild or spicy based on your taste. Spicy sausage adds a kick, while mild keeps it gentle. Either way, it gives the soup a rich base. - Adjusting the creaminess level: Want a creamier soup? Add more heavy cream. Start with half a cup and taste. You can also mix in a bit of milk for a lighter touch. If you prefer less cream, cut back and add more broth. - Serving suggestions: Serve the soup hot in bowls. It looks great with some extra Parmesan sprinkled on top. You can also pair it with crusty bread for dipping. This makes it a filling meal. - Garnishing ideas: Fresh parsley adds color and flavor. Chop it finely and sprinkle it on the soup just before serving. You can also add a drizzle of olive oil for extra richness and shine. - Overcooking the pasta: Keep an eye on the ditalini pasta. Cook it only until al dente. If you overcook it, it becomes mushy. This will ruin the texture of your soup. - Not seasoning properly: Don't skip the salt and pepper. Taste the soup before serving. Adjust the seasonings until you are happy. This step is key for a tasty dish. {{image_2}} You can change the pasta type in this soup. Bowtie, elbow, or even whole grain pasta work well. They all add a unique twist to your dish. If you want a lighter option, ground turkey or chicken can replace the sausage. It still keeps the flavor but cuts down on fat. Adding greens like spinach or kale brightens the soup. They add a pop of color and nutrients. You can mix in fresh herbs like basil or thyme for more flavor. These herbs lift the dish and make each bite special. If you need gluten-free options, choose gluten-free pasta. Many brands offer great alternatives that cook up nicely. For dairy-free choices, try coconut milk instead of heavy cream. It gives a nice taste without the dairy. To store leftovers of your creamy Parmesan sausage ditalini soup, let it cool first. Use airtight containers to keep it fresh. This soup stays good in the fridge for about three to four days. Always check for any signs of spoilage before eating. If you want to freeze your soup, it is best to do this right after it cools. Pour the soup into freezer-safe containers, leaving some space at the top for expansion. Your creamy soup can last in the freezer for up to three months. When it's time to enjoy again, thaw it in the fridge overnight. To reheat, warm it on the stove over low heat. Stir often to keep it creamy. You might need to add a splash of broth or cream to regain the original texture. To thicken this soup, you have a few great options. You can add more ditalini pasta. Cooking it a bit longer will help absorb some liquid. Another way is to mix a bit of cornstarch with cold water and stir it in. Finally, you can let the soup simmer longer. This will reduce the liquid and create a thicker texture. Yes, you can make this soup in advance! Cook the soup as directed, but stop before adding the heavy cream and cheese. Let it cool and store it in the fridge. When you are ready to serve, heat it up and add the cream and cheese. This keeps the soup creamy and fresh. This soup pairs well with crusty bread or a fresh salad. A side of garlic bread is also a hit! You might enjoy a simple green salad with a light vinaigrette to balance the meal. These sides complement the rich flavors of the soup. To add heat, you can use spicy Italian sausage instead of mild. You might also add red pepper flakes or diced jalapeños. Another option is to toss in some hot sauce while cooking. Start with a little and taste as you go to find your perfect spice level. You can use low-fat milk, but the soup will be less creamy. The texture may not be as rich. If you want to keep some creaminess, try mixing low-fat milk with a bit of cream. This will give you a nice balance without losing too much flavor or richness. This blog post shared a simple and tasty recipe for Creamy Parmesan Sausage Ditalini Soup. We covered every step, from cooking the sausage to serving ideas. I also shared tips to avoid common mistakes and make the soup your own. Remember to store your leftovers properly to keep them fresh. Whether you want to enjoy a cozy meal or impress guests, this soup fits the bill. It's easy to adapt and always satisfying. Give it a try and enjoy the warmth it brings to your table.

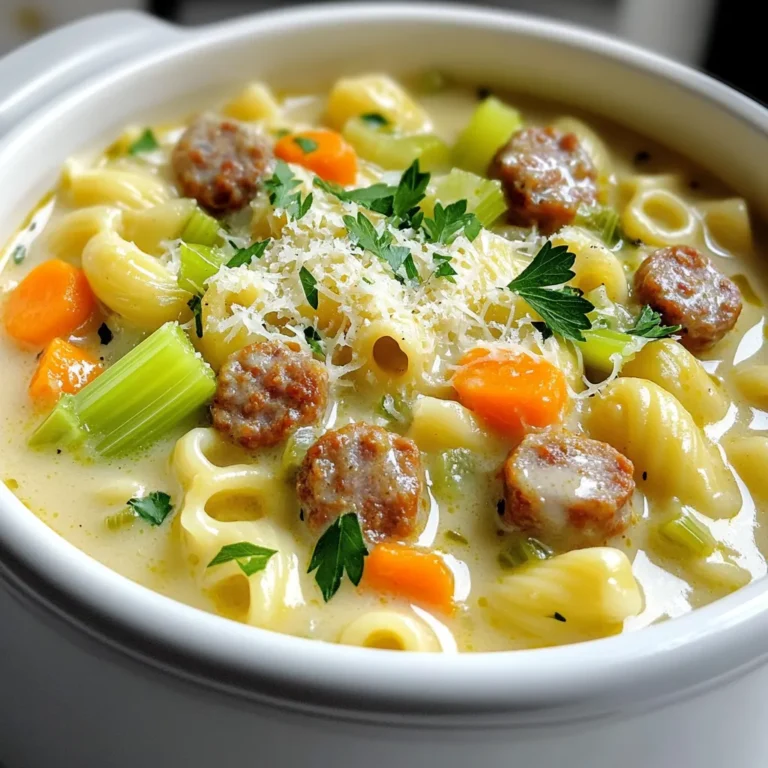
Creamy Parmesan Sausage Ditalini Soup Delightful Meal

- 3 ripe bananas, mashed - 1/2 cup unsalted butter, melted - 1 cup granulated sugar - 2 large eggs - 1 teaspoon vanilla extract - 1 teaspoon baking soda - Pinch of salt - 1 1/2 cups all-purpose flour - 1/2 cup chocolate chips (semi-sweet or dark) - 1/4 cup chopped walnuts or pecans (optional) - 1/2 teaspoon cinnamon (optional, for extra flavor) For this super moist banana bread, the key is using ripe bananas. The more brown spots, the better! They add natural sweetness and flavor. Melted unsalted butter gives the bread a rich taste. You will need granulated sugar to sweeten the mix. Next, you’ll add two large eggs. They help bind everything together. A teaspoon of vanilla extract adds a lovely aroma. For leavening, we use baking soda and a pinch of salt to balance the sweetness. All-purpose flour brings the batter together and gives it structure. Chocolate chips are a must! They melt and create gooey pockets of goodness. Optional walnuts or pecans add a nice crunch. If you want a warm spice, add cinnamon. This makes the bread even more special. Gather all these ingredients to start your delicious journey. Each one plays a vital part in making this banana bread super moist and flavorful. - First, preheat your oven to 350°F (175°C). This step is key for good baking. - Grease a 9x5 inch loaf pan with cooking spray or butter. This prevents sticking. - In a large bowl, mash the ripe bananas until they are smooth. - Next, add the melted butter to the bananas and mix well. - Now, stir in the granulated sugar, eggs, and vanilla extract. Mix until combined. - Sprinkle the baking soda and a pinch of salt over the mixture. Stir gently until mixed in. - Slowly fold in the all-purpose flour. It’s okay if the batter has some lumps. - Add in the chocolate chips and nuts if you’re using them. Mix until they are spread out. - Pour the batter into the greased loaf pan. Smooth the top with a spatula. - Place the loaf pan in the preheated oven. Bake for 60-70 minutes. - To check for doneness, insert a toothpick into the center. It should come out clean. - Once baked, let the bread cool in the pan for about 10 minutes. - Carefully transfer the bread to a wire rack to cool completely before slicing. Measuring ingredients well is key to great banana bread. Use a kitchen scale for accuracy. If you don’t have one, spoon flour into a measuring cup, then level it off with a knife. Avoid packing the flour down. For sugar, scoop it directly into the cup and level it off too. When mixing your batter, be gentle. Over-mixing can lead to tough bread. Stir just enough to combine the ingredients. A few lumps are fine. Your banana bread will still turn out moist. Adding cinnamon can boost the flavor of your banana bread. It pairs well with bananas. Just a half teaspoon can make a big difference. You can also try nutmeg or allspice for a warm kick. If you like it sweeter, adjust the sugar. You can use less than a cup or add a bit more. Taste the batter before baking. This way, you can find the right balance for your flavor. Serving banana bread can be fun. Try slicing it on a rustic wooden board. Add a dusting of powdered sugar on top. You can also drizzle melted chocolate for a fancy look. For a fresh touch, serve with fruit or whipped cream. It adds color and makes the dish pop. Your guests will love the presentation! {{image_2}} Alternative sweeteners You can swap granulated sugar for honey or maple syrup. These options add a unique flavor. Use 3/4 cup of honey or maple syrup for 1 cup of sugar. This change may make the bread slightly denser but still tasty. Adjust the flour by reducing it by 1/4 cup since these sweeteners add moisture. Nut-free options If you want to make this banana bread nut-free, just skip the walnuts or pecans. The bread remains moist and full of flavor without them. You can also add more chocolate chips or use seeds like sunflower seeds for a different crunch. Other types of chips You can try using peanut butter chips or white chocolate chips. Each variety brings a new twist to the classic banana flavor. Mix 1/2 cup of your chosen chips into the batter for added sweetness. Adding dried fruits or coconut Dried fruits like raisins or cranberries can add sweetness and texture. You can also mix in 1/2 cup of shredded coconut. Both options enhance the flavor and make the bread more interesting. Gluten-free alternatives To make this banana bread gluten-free, use a gluten-free flour blend. Most blends work well as a 1:1 substitute. The bread will still be moist and delicious. Just ensure your baking soda and other ingredients are gluten-free too. Vegan adaptations For a vegan version, replace the eggs with flaxseed meal. Mix 1 tablespoon of flaxseed meal with 2.5 tablespoons of water for each egg. Let it sit for a few minutes until it thickens. This keeps the bread moist and helps it rise. To store banana bread at room temperature, wrap it in plastic wrap. This keeps it moist. Place the wrapped bread in a cool, dry spot. It stays fresh for about three days. If you want to keep it longer, check the next section. For longer storage, put the banana bread in the fridge. Use an airtight container or wrap it tightly in foil. This method keeps it fresh for up to a week. The cold air helps slow down spoilage. However, the bread may lose some moisture in the fridge. Freezing is a great option for banana bread. Slice the bread before freezing. Wrap each slice in plastic wrap. Then, place all slices in a freezer bag. This way, you can take out just what you need. To thaw, leave the slices at room temperature for about an hour. Enjoy your moist banana bread anytime! For the best flavor, use very ripe bananas. Look for bananas that are mostly brown. The more brown spots, the sweeter the taste. These bananas break down easily and add moisture to your bread. If your bananas are yellow and firm, they won’t give you the same flavor. Yes, you can use frozen bananas! Just thaw them before using. To thaw, place them in the fridge overnight. You can also microwave them for a quick thaw. Make sure to drain any excess liquid. This helps keep your batter from getting too wet. If your banana bread is dry, there are ways to fix it. First, add more mashed bananas to your batter next time. You can also use yogurt or sour cream for moisture. If you have dry bread, try toasting it and spreading butter or jam on top. It adds flavor and makes it more enjoyable. You now know how to make delicious banana bread from scratch. We covered the ingredients, step-by-step instructions, tips, variations, and storage info. Whether you prefer chocolate chips or nuts, there are many ways to customize your loaf. Remember, with the right ingredients and techniques, you can enjoy tasty banana bread anytime. Now, gather your ingredients and start baking. Enjoy the process, and share the joy with friends and family!

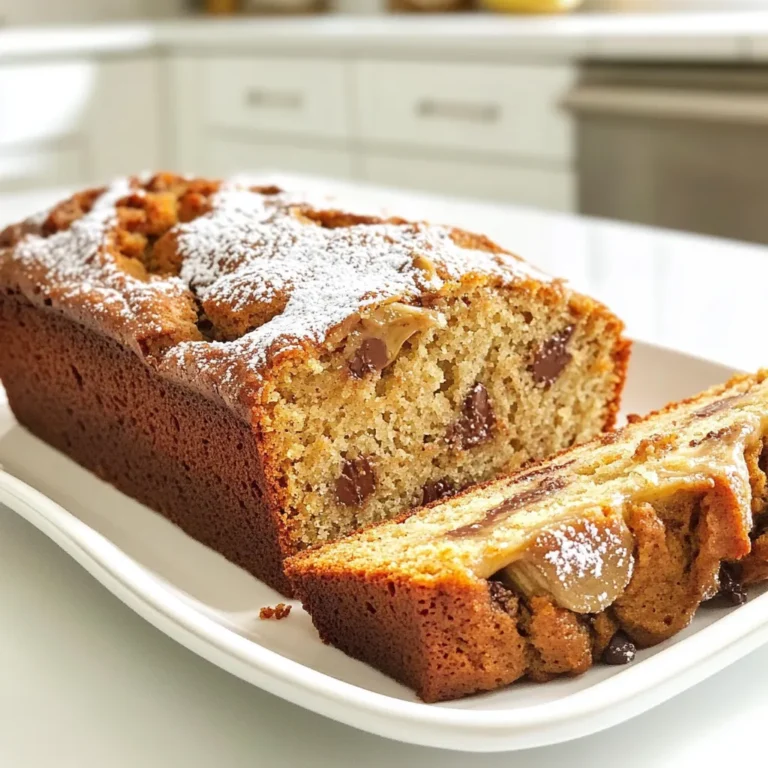
Super Moist Banana Bread with Chips Recipe Guide

- 1 cup long-grain rice - 2 cups vegetable broth - 3 tablespoons olive oil - 4 cloves garlic, minced - 1 small onion, finely chopped - 1 teaspoon dried thyme - 1 teaspoon dried rosemary - Salt and pepper to taste - Fresh parsley, chopped (for garnish) - Additional herbs (basil, cilantro) - Lemon zest for freshness Garlic herb rice offers around 200 calories per serving. It provides a good mix of carbs and fats. Each serving has about 4 grams of protein and 8 grams of fat. The dish is light yet filling. This simple recipe keeps the focus on fresh flavors. The garlic and herbs blend well with the rice. It’s a great way to boost your meals. You can add other herbs or lemon zest for a twist. Enjoy! - Rinsing and draining the rice: First, grab 1 cup of long-grain rice. Rinse it under cold water. Keep rinsing until the water runs clear. This step removes excess starch. After rinsing, drain the rice well. - Chopping garlic and onion: Next, take 4 cloves of garlic. Mince them finely. Then, chop 1 small onion into small pieces. Having these ready makes cooking easier and faster. - Sautéing onions and garlic: In a medium saucepan, heat 3 tablespoons of olive oil over medium heat. Add the chopped onion first. Sauté the onion until it turns translucent, which takes about 3-4 minutes. Then, stir in the minced garlic. Cook for another 1-2 minutes. Be careful not to burn the garlic; it can turn bitter. - Toasting rice and combining ingredients: Now, add the rinsed rice to the saucepan. Stir it well to coat the rice with oil. Toast the rice for about 2 minutes. This adds a nice flavor. After toasting, pour in 2 cups of vegetable broth. Add 1 teaspoon of dried thyme, 1 teaspoon of dried rosemary, and salt and pepper to taste. Give it a quick stir to mix everything. - Cooking and simmering details: Bring the mixture to a boil. Once boiling, reduce the heat to low. Cover the saucepan and let it simmer for 15-18 minutes. This is when the rice absorbs all the liquid and becomes tender. - Fluffing the rice: After the cooking time, remove the saucepan from heat. Let it sit covered for an extra 5 minutes. This step helps the rice to finish cooking. Then, use a fork to fluff the rice gently. - Adding fresh parsley: Finally, stir in some freshly chopped parsley for a burst of color and flavor. Adjust the seasoning if you need to. Now, your garlic herb rice is ready to serve! Enjoy it with your favorite dishes. - Overcooking garlic: Garlic cooks fast. If you cook it too long, it turns bitter. Watch it closely and remove it once it’s fragrant. - Not rinsing rice properly: Rinsing rice is key. It removes excess starch and prevents it from being sticky. Rinse until the water runs clear. - Letting the rice sit after cooking: After you finish cooking, let the rice sit covered for about five minutes. This helps the grains firm up and improves texture. - Adjusting seasoning to personal taste: Taste your rice after cooking. You can always add more salt or herbs to boost the flavor. - Best proteins to serve with: Garlic herb rice pairs well with chicken, fish, or tofu. These proteins add great taste and texture. - Complementary vegetable sides: Serve it with grilled veggies like zucchini or bell peppers. Their flavors mix well with the rice and make a lovely plate. {{image_2}} You can make garlic herb rice even better with some simple tweaks. If you're looking for a vegan option, use vegetable broth instead of water. It adds depth and flavor. For those who like a kick, sprinkle in some red pepper flakes. This adds spice and excitement to each bite. Want to switch it up? You can use brown rice or quinoa instead of long-grain rice. Both options are healthy and add a nutty flavor. If you enjoy wild rice, give it a try. Wild rice offers a chewy texture and unique taste that makes your dish stand out. You can also give garlic herb rice a global twist. For a Mediterranean flavor, add herbs like oregano and dill. This change brings vibrant tastes to your plate. If you want something Asian-inspired, stir in some soy sauce or sesame oil. This will give the rice a rich, savory taste that pairs well with many dishes. To store leftover garlic herb rice, let it cool first. Place the rice in an airtight container. This keeps out moisture and odors. Make sure to seal it tightly. You can store it in the fridge for about 3 to 5 days. For the best results, use glass or plastic containers. These are sturdy and easy to clean. They also help keep the rice fresh. Avoid using metal containers, as they can react with the food. Freezing garlic herb rice is a great way to save it for later. First, let the rice cool completely. Then, scoop it into freezer bags. Press out as much air as possible before sealing. This helps prevent freezer burn. To thaw the rice, leave it in the fridge overnight. You can also use the microwave. Just add a splash of water and cover it. Heat in short bursts until hot. Stir often to warm it evenly. Garlic herb rice lasts about 3 to 5 days in the fridge. If you freeze it, the shelf life extends to about 2 to 3 months. Always check for signs of spoilage. If it looks or smells off, it’s best to toss it. Yes, you can use different rice types. Here are some great options: - Brown rice for a nutty flavor and more fiber. - Jasmine rice for a fragrant touch. - Basmati rice for a unique aroma and texture. - Quinoa for a protein boost and a gluten-free option. Each rice type has its own cooking time. Always check the package for instructions. You can prepare garlic herb rice in advance. Here are some tips: - Cook the rice as directed and let it cool. - Store it in an airtight container in the fridge. - It stays fresh for about 3-4 days. - To reheat, add a splash of broth or water for moisture. You can also freeze it. Just thaw it overnight in the fridge before reheating. You can add proteins or beans to make the dish heartier. Consider these ideas: - Cooked chicken or shrimp for a protein boost. - Black beans or chickpeas for a plant-based option. - Sautéed vegetables like bell peppers or zucchini for more flavor. - Nuts or seeds for crunch and healthy fats. These additions make the dish more satisfying and nutritious. This blog post shows you how to make garlic herb rice. You learned the ingredients, step-by-step instructions, and some variations. We also covered storage tips to keep your rice fresh and tasty. Experimenting with flavors and add-ins makes it fun and unique. Remember to adjust the recipe to fit your taste. You now have everything you need to create this dish for your meals or gatherings. Enjoy your cooking journey and savor each bite!

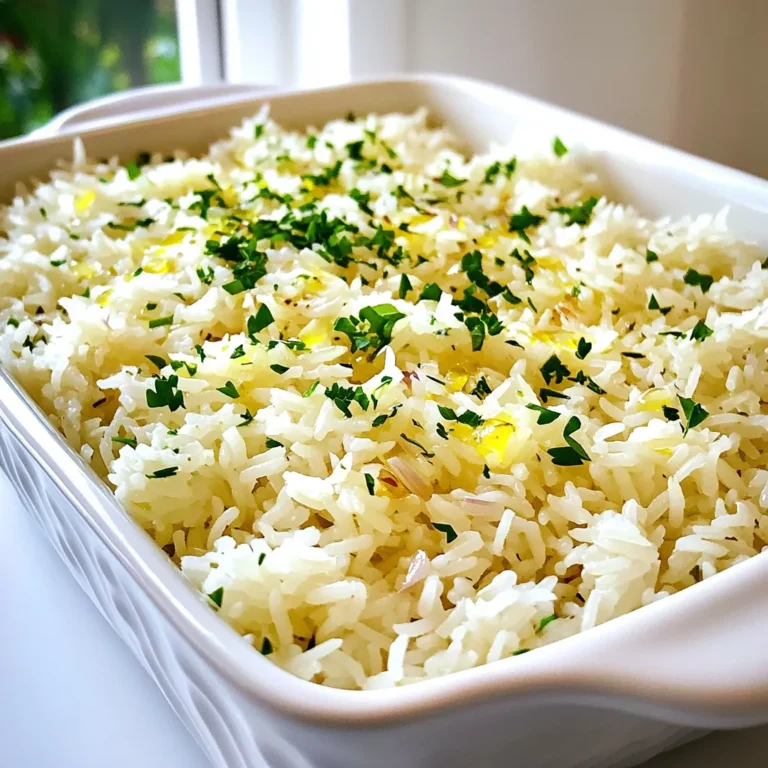
Garlic Herb Rice Tasty and Simple Side Dish

To make TikTok banana bread, you need these simple ingredients: - 4 ripe bananas, mashed - 1/3 cup melted butter - 1 teaspoon vanilla extract - 1 teaspoon baking soda - Pinch of salt - 3/4 cup sugar (or 1/2 cup for less sweetness) - 1 large egg, beaten - 1 cup all-purpose flour You can swap some ingredients if needed: - Use coconut oil instead of butter for a dairy-free option. - Try maple syrup instead of sugar for a healthier sweetener. - Replace the egg with a flaxseed meal mix if you want it vegan. Add some fun flavors to your banana bread: - 1/2 cup chocolate chips for a sweet touch. - 1/2 cup chopped walnuts or pecans for crunch. - A sprinkle of cinnamon for extra warmth. These ingredients make a tasty banana bread that you will love! Start by gathering your ingredients. You need ripe bananas, butter, and other basics. Preheat your oven to 350°F (175°C). Grease a 9x5 inch loaf pan with butter or non-stick spray. This step helps the bread come out easily. In a large bowl, mash the bananas until smooth. Mix in the melted butter until well blended. Stir in the beaten egg, vanilla extract, and sugar. This creates a sweet and rich base. Now, add the baking soda and a pinch of salt. Stir until mixed. Gradually add the flour. Be careful not to over-mix. The batter should still look lumpy. If you want, fold in the chocolate chips or nuts. Pour the batter into the loaf pan. Use a spatula to smooth the top. Place it in the oven and bake for 60 to 65 minutes. The smell will fill your kitchen! To check if your banana bread is done, insert a toothpick into the center. If it comes out clean, it’s ready. If not, bake for a few more minutes. Once done, let it cool in the pan for 10 minutes. Then, transfer it to a wire rack. Let it cool completely before slicing. Enjoy your tasty banana bread with a bit of butter or honey! To make great banana bread, avoid over-mixing the batter. When you mix too much, the bread can become tough. Mix just until the flour disappears. Use very ripe bananas. The riper they are, the sweeter your bread will be. If you forget to check your oven, it can get too hot. Always use an oven thermometer to keep track of the temperature. For extra flavor, add a pinch of cinnamon. This spice pairs well with bananas. You can also add nuts or chocolate chips for fun textures. If you want a more unique taste, try adding a tablespoon of peanut butter. It makes the bread rich and creamy. To get a soft and moist loaf, don't skip the butter. It adds richness and helps with moisture. Let the banana bread cool in the pan for a bit, then on a wire rack. This helps it firm up without getting soggy. If you want a crustier top, bake it a few minutes longer. Just keep an eye on it! {{image_2}} You can switch things up with your banana bread. Here are some fun ideas: - Peanut Butter: Add 1/2 cup of peanut butter for a nutty taste. - Cinnamon: Mix in 1 teaspoon of ground cinnamon for warmth. - Coconut: Add 1/2 cup of shredded coconut for tropical flair. - Pumpkin: Use 1/2 cup of pumpkin puree for a fall twist. These changes make your banana bread unique and tasty. If you want a healthier banana bread, here are some easy swaps: - Gluten-Free: Use gluten-free flour instead of all-purpose flour. - Dairy-Free: Swap melted butter with coconut oil or a dairy-free butter. - Lower Sugar: Reduce sugar to 1/2 cup or use honey or maple syrup. These options can fit different diets without losing flavor. How you serve banana bread can make it even better. Try these ideas: - Warm with Butter: Serve warm with a pat of butter on top. - With Honey: Drizzle honey over a slice for extra sweetness. - Ice Cream: Top a slice with vanilla ice cream for dessert. - Toast It: Toast your slice for a crunchy texture. These serving ideas can make your banana bread a hit at any meal. To keep your banana bread fresh, wrap it well. Use plastic wrap or aluminum foil. Store it at room temperature for up to three days. If you want it to last longer, put it in the fridge. This will keep it good for about a week. Make sure to let it cool down before wrapping. This helps to keep the crust nice and soft. Freezing banana bread is simple. Slice the bread into pieces. Wrap each slice in plastic wrap tightly. Then, place them in a freezer-safe bag. Remove as much air as you can. Label the bag with the date. You can freeze banana bread for up to three months. When you want to eat it, just take out a slice. Let it thaw at room temperature or pop it in the microwave for a quick warm-up. To reheat banana bread, use the oven for the best results. Preheat your oven to 350°F (175°C). Place the bread on a baking sheet. Heat for about 10 minutes or until warm. You can also use the microwave. Heat it on low for about 15-20 seconds. Be careful not to overheat, or it may dry out. Enjoy your warm banana bread with a pat of butter or your favorite spread! You can use several options. Common substitutes include unsweetened applesauce or mashed bananas. Use 1/4 cup of applesauce for each egg. You can also use yogurt or silken tofu. Each of these options keeps the bread moist and tasty. You have many choices! Try honey or maple syrup. Use about 1/2 cup for every 3/4 cup of sugar. You can also use coconut sugar or stevia. They add sweetness without the extra calories. Yes, you can! Frozen bananas work great. Just thaw them before mashing. They may be mushy, but that’s perfect for banana bread. You’ll get a moist and flavorful loaf every time. This blog post covered how to make banana bread. We talked about ingredients, including substitutions and add-ins. You learned step-by-step how to prepare, bake, and check for doneness. We shared tips to avoid mistakes and enhance flavors. Variations offered new ways to enjoy banana bread while considering dietary needs. Lastly, storing tips kept your bread fresh. With this guide, you can bake great banana bread every time. Enjoy your delicious creation and share it with others!

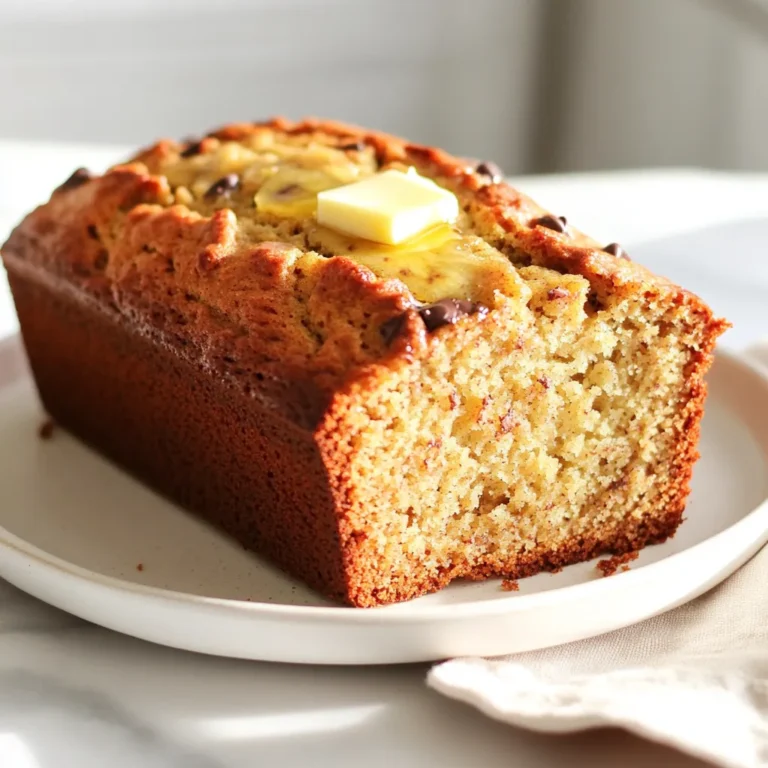
TikTok Banana Bread Simple and Delicious Recipe

- 2 cups cooked chicken, shredded - 1 cup carrots, diced - 1 cup peas (fresh or frozen) - 1 cup potatoes, diced - 1 cup onion, chopped - 2 cloves garlic, minced - 1/2 cup celery, diced - 1/3 cup all-purpose flour - 2 cups chicken broth - 1 cup milk - 1 package refrigerated pie crusts (2 crusts) - 1 egg, beaten (for egg wash) - 2 tablespoons olive oil - 1 teaspoon dried thyme - 1/2 teaspoon black pepper - 1/2 teaspoon salt When making chicken pot pie, the ingredients are key. First, you need cooked chicken. You can use any leftover chicken you have. Shredding it helps mix it well with the other flavors. Next, add diced carrots and peas for color and sweetness. Dice potatoes and onions to add texture and taste. Onions give a nice base flavor when sautéed. Garlic and celery add depth to your filling. Don't forget to use flour to thicken the sauce. The chicken broth and milk make it creamy. Finally, you need pie crusts. Store-bought ones save time but taste great. An egg wash on top gives a nice golden color when baked. Use olive oil, thyme, salt, and pepper to season your filling. These simple ingredients come together to create a warm and hearty meal. {{ingredient_image_1}} 1. Preheat your oven to 425°F (220°C). This step helps the pot pie bake evenly. 2. In a large skillet, heat 2 tablespoons of olive oil over medium heat. Add 1 cup of chopped onion, 1 cup of diced carrots, 1/2 cup of diced celery, and 2 cloves of minced garlic. Sauté these veggies for about 5-7 minutes. You want them to soften and start to smell great. 3. Next, add 1 cup of diced potatoes to the skillet. Cook for another 3-4 minutes. 4. Sprinkle 1/3 cup of all-purpose flour over the vegetable mix. Stir well to combine. This helps thicken the filling. Cook for 1-2 minutes to remove any raw flour taste. 5. Gradually whisk in 2 cups of chicken broth and 1 cup of milk. Stir until the mixture thickens, which takes about 5-7 minutes. 6. Now, mix in 2 cups of shredded cooked chicken, 1 cup of peas, 1 teaspoon of dried thyme, 1/2 teaspoon of salt, and 1/2 teaspoon of black pepper. Combine everything well and remove from heat. 7. Unroll one pie crust and fit it into a 9-inch pie dish. This will hold all the tasty filling. 8. Pour the chicken filling into the crust. Spread it evenly. 9. Cover the filling with the second pie crust. Trim any extra crust and crimp the edges to seal it well. Cut a few slits in the top crust for steam to escape. 10. Brush the top crust with 1 beaten egg for a nice golden finish. 11. Place the pot pie in the preheated oven and bake for 30-35 minutes. Look for a golden brown crust and bubbling filling. 12. Once done, take it out and let it sit for 10 minutes before slicing. This helps the filling set a bit. Enjoy your delicious chicken pot pie! To make a flaky crust, handle the dough gently. Do not overwork it; this can make it tough. Keep your pie dough cold. Chilling the crust before baking helps maintain that desired flakiness. I recommend chilling it for at least 30 minutes. This makes rolling easier and ensures a light texture. To elevate the taste of your chicken pot pie, consider adding herbs and spices. Dried thyme and black pepper are great choices. You can also experiment with rosemary or dill for a unique twist. Adding umami ingredients like mushrooms can boost the flavor. Sauté them with your vegetables to release their rich taste. You can make your chicken pot pie healthier in simple ways. Try using a whole wheat pie crust instead of a white one. This adds more fiber and nutrients. For the filling, consider substituting low-fat milk or broth. This keeps the dish creamy without as many calories. Enjoy a comforting meal without the guilt! Pro Tips Choose the Right Chicken: Use a rotisserie chicken for added flavor and convenience, or leftover roasted chicken for a homemade touch. Enhance the Flavor: Add a splash of white wine or a dash of Worcestershire sauce to the filling for extra depth. Make it Creamy: For a richer filling, substitute half of the milk with heavy cream or add a dollop of sour cream before baking. Perfect the Crust: Allow the pie to cool for a few minutes after baking; this helps the filling set and makes slicing easier. {{image_2}} You can make this dish without chicken. For a vegetarian option, use tofu or chickpeas. Tofu adds protein and absorbs flavors well. Chickpeas give a nice texture and nutty taste. Replace chicken broth with vegetable broth for a deeper flavor. Use non-dairy milk like almond or oat milk for creaminess. These swaps keep the dish rich and tasty. If you need a gluten-free option, look for gluten-free pie crusts. Many stores sell ready-made gluten-free crusts. You can also make your own using almond or rice flour. To thicken the filling, try cornstarch or arrowroot powder instead of flour. These alternatives work well and keep the filling thick and creamy. You can add local vegetables or spices to make the pot pie unique. For instance, in the South, try adding corn or okra for a twist. In the Midwest, mix in some mushrooms for an earthy flavor. You can also draw inspiration from global cuisines. A dash of curry powder can give an Indian flair, while fresh herbs like dill can add a fresh touch. To store your chicken pot pie leftovers, let it cool first. Cover it tightly with plastic wrap or aluminum foil. This helps keep it fresh. In the fridge, it lasts up to three days. Make sure to keep it at a safe temperature for best taste. You can freeze chicken pot pie both before and after baking. If you freeze it unbaked, cover it well. It can stay frozen for up to three months. When ready to bake, no need to thaw it; just add extra time to the oven. If baked, let it cool first before wrapping. To reheat a frozen pot pie, bake it at 375°F (190°C) for about 45 minutes. Cover with foil if the crust browns too fast. To refresh your meal, serve leftovers with a fresh salad. A simple green salad pairs nicely. You can also use leftover filling in a tasty casserole. Spread it on toast for a quick snack. Or stuff it in crepes for a fun twist! You can use many things instead of chicken. If you want a meat option, try turkey or cooked ham. For a vegetarian option, use tofu or chickpeas. Both options provide great taste and texture. If you are vegan, opt for jackfruit or tempeh. Choose vegetable broth to keep it plant-based. To keep your crust crispy, avoid overcooking the filling. Cook it just until thick. Use a pre-baked crust for extra crunch. Brush the crust with egg wash for a nice seal. Cut slits in the top to let steam escape. These tips help keep your crust perfect. Yes, you can make this pot pie ahead of time. Prepare the filling and let it cool. Store it in the fridge for up to two days. Assemble the pie and bake it when you are ready. You can also freeze it before baking. Just thaw it overnight before cooking. The filling should be thick but creamy. Stir it for about five to seven minutes. If it coats the back of a spoon, it’s ready. The filling will thicken more as it bakes. If it looks too runny, cook it a bit longer over medium heat. Absolutely! Homemade pie crust can add a special touch. For a flaky crust, keep the butter cold. Roll it out evenly and fit it into your pie dish. Remember to chill the crust before baking. This helps it hold its shape and adds great flavor. In this blog, we explored how to make a tasty pot pie. We covered key ingredients, simple steps for preparation, and tips for a flaky crust. You can customize it with different flavors to match your taste. Remember, this dish is great for leftovers or quick meals. No matter how you make it, pot pie is a comforting meal. Enjoy creating your perfect version at home!

Classic Chicken Pot Pie Comfort Food Delight

- 1 lb chicken breast - 1 tablespoon red curry paste - 1 can (14 oz) coconut milk - 1 cup bell peppers (mixed colors) - 1 cup snap peas - 1 tablespoon fish sauce - Fresh basil leaves - Lime wedges - 2 tablespoons vegetable oil - 2 cloves garlic - 1 tablespoon fresh ginger Gathering the right ingredients makes cooking easier and more fun. You need 1 pound of chicken breast. Slice it thin. This helps it cook fast. You also need 1 tablespoon of red curry paste. This gives the dish its bold flavor. One can of coconut milk adds creaminess. For a colorful touch, use 1 cup of sliced bell peppers. Mix different colors for a vibrant look. Add 1 cup of snap peas for crunch. Optional items can enhance your dish. A tablespoon of fish sauce adds depth. Fresh basil leaves brighten the flavors. Lime wedges give a fresh kick when served. You will also need some cooking essentials. Use 2 tablespoons of vegetable oil to cook. Garlic and ginger add amazing aroma. You will need 2 cloves of garlic and 1 tablespoon of grated ginger. With these ingredients, you’re ready to cook a delicious Minute Thai Red Curry Chicken! {{ingredient_image_1}} - Heat the oil: In a large skillet or wok, heat 1 tablespoon of vegetable oil over medium heat. This oil will help cook the chicken evenly. - Cook the chicken: Add 1 pound of thinly sliced chicken breast to the skillet. Stir occasionally for about 5 minutes. You want the chicken to turn golden and cook through. - Add aromatics: Stir in 2 minced garlic cloves and 1 tablespoon of grated fresh ginger. Cook this mixture for another minute until it smells great. - Incorporate curry paste: Next, add 1 tablespoon of red curry paste to the skillet. Mix it well with the chicken, garlic, and ginger until everything is coated. - Pour in coconut milk: Slowly pour in a 14-ounce can of coconut milk. Stir to combine and let it simmer for about 2 minutes. This will help the flavors blend nicely. - Toss in vegetables: Add 1 cup of sliced bell peppers and 1 cup of snap peas. Cook for an additional 3-4 minutes. You want the veggies to be tender but still crisp. - Season the dish: Stir in 2 tablespoons of soy sauce and 1 tablespoon of fish sauce if you like. Taste it and adjust if needed. - Garnish and serve: Remove from heat. Garnish with fresh basil leaves. Serve hot with lime wedges on the side for extra flavor. How to cook chicken perfectly To cook chicken well, always slice it thin. This helps it cook fast and evenly. Heat the oil in your skillet before adding the chicken. Cook the chicken for about five minutes. Look for a nice golden color. Stir it often to avoid burning. Adjusting spice levels If you like heat, add more red curry paste. Start with one tablespoon and taste. You can always add more, but you can’t take it out. For less spice, use less curry paste. You can also add a bit of sugar to balance the heat. Garnishing for the best visuals Garnishing makes your dish pop! Use fresh basil leaves on top for color and flavor. Lime wedges add a nice touch too. Place them on the side for a fresh squeeze. Serving suggestions with sides Serve your curry with fluffy rice. Jasmine rice pairs well with the flavors. You can also add a simple salad. This adds crunch and freshness to balance the dish. Homemade red curry paste variant You can make your own red curry paste. Blend dried red chilies, garlic, ginger, and spices. This way, you control the flavors. It’s fresh and fun to make! Using fresh vs. dried herbs Fresh herbs add brighter flavors. Use fresh basil if you can. Dried herbs work too, but use less. They are more potent. Always taste as you go to find what you like best. Pro Tips Use Fresh Ingredients: Fresh vegetables and herbs will enhance the flavors of your curry, making it more vibrant and aromatic. Adjust the Heat: If you prefer a spicier dish, feel free to add more red curry paste or some fresh chili peppers to the mix. Serve with Rice: Pair your Thai red curry with jasmine rice or coconut rice for a complete meal that soaks up the delicious sauce. Leftover Storage: Store any leftovers in an airtight container in the fridge for up to 3 days, and reheat gently on the stove to preserve the texture. {{image_2}} You can change the protein in this dish. Try shrimp instead of chicken. Cook the shrimp for about 3 minutes. It cooks faster than chicken. For a vegetarian or vegan dish, use tofu or chickpeas. Tofu adds protein and texture. Chickpeas bring a nice nutty flavor. Feel free to mix in other veggies. Carrots, zucchini, or broccoli all work well. Just cut them into small pieces. Adjust cooking times for harder veggies. Cook them a minute or two longer to soften. This way, they stay crisp but get tender. Want to kick up the flavor? Add more spices like cumin or coriander. These spices add warmth and depth. You can also try sauces like sriracha or hoisin. These give an extra layer of taste. Don’t be afraid to experiment and find your favorite mix! To reheat your Minute Thai Red Curry Chicken, you have a few options. The best method is using the stove. Place the curry in a pan over low to medium heat. Stir often until it's hot all the way through. You can also use the microwave. Place the curry in a microwave-safe bowl. Heat it in short bursts, stirring in between. This keeps the flavors rich and the chicken tender. To maintain flavor and texture, add a splash of coconut milk or water. This helps prevent the curry from drying out. You can freeze Minute Thai Red Curry Chicken for later. First, let it cool completely. Then, transfer it to airtight containers or freezer bags. Remove as much air as you can before sealing. For best quality, use it within three months. When you’re ready to eat, thaw the curry in the fridge overnight. Reheat it on the stove or in the microwave, as mentioned earlier. This curry pairs wonderfully with rice. Jasmine rice or basmati rice are great choices. The fluffy grains soak up the rich sauce well. You can also serve it with quinoa for a nutty flavor. For side dishes, try steamed broccoli or a fresh cucumber salad. These add a nice crunch and balance the dish. Enjoy your meal! It takes about 20 minutes to make Minute Thai Red Curry Chicken. You will spend 10 minutes prepping the ingredients and 10 minutes cooking. This quick time makes it easy to enjoy a tasty meal on busy nights. Yes, you can make this dish ahead of time. Just cook it fully and let it cool. Store it in airtight containers in the fridge. It will stay fresh for about 3 days. When you are ready to eat, reheat it in a pan or microwave. The flavors will still be great! If you need a substitute for coconut milk, you can use almond milk or soy milk. For a creamier option, try heavy cream or half-and-half. Keep in mind that these options may change the flavor slightly. Adjust the seasoning to match your taste. In this blog post, I detailed how to make a delicious Minute Thai Red Curry Chicken. We covered the key ingredients, cooking steps, and great tips for success. You learned about variations like using shrimp or veggies and how to store leftovers properly. Cooking can be fun and creative. Don’t hesitate to add your favorite flavors. With simple steps, you can create a tasty dish that impresses. Enjoy your cooking adventure!

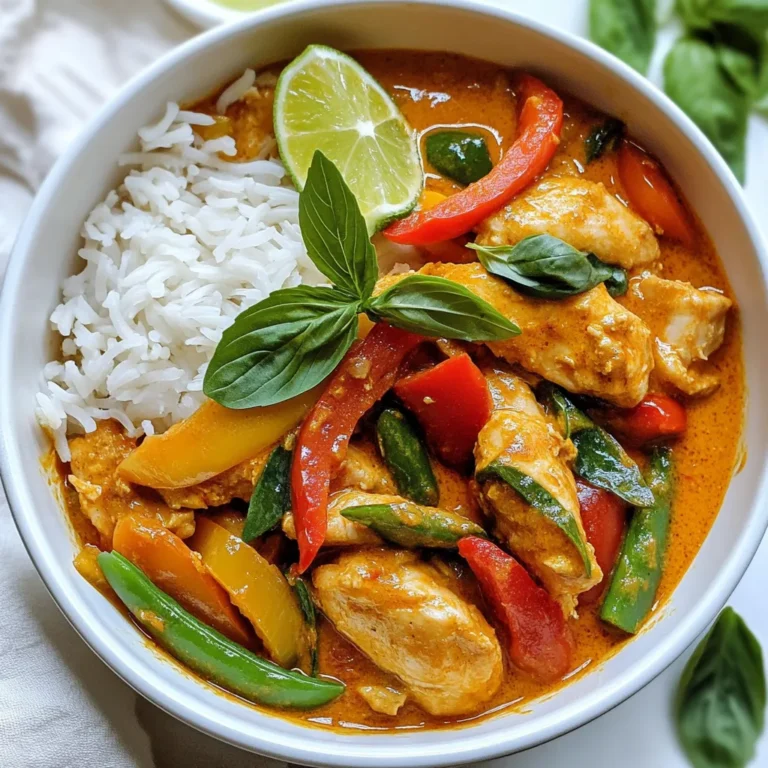
Minute Thai Red Curry Chicken Quick and Easy Recipe

PREV 1 … 6 7 8 … 86 NEXT
spicy fork kitchen

explore

DessertsDinnerAppetizersDrinks

Our Policies

  • Cookie Policy
  • Copyright Policy
  • Disclaimer
  • GDPR Policy
  • Terms Of Use
Back to Top
  • About
  • Contact Us
  • Privacy Policy
© 2025 spicy fork kitchen