FREE DINNER EBOOK! Get your copy!
  • Cookie Policy
  • GDPR Policy
  • Disclaimer
  • Terms Of Use
  • Visit my other site: Fun Cookie Recipes
spicy fork kitchen
  • Home
  • Dinner
  • Desserts
  • Drinks
  • Appetizers
  • Contact
  • About
  • Privacy Policy
  • Home
  • Dinner
  • Desserts
  • Drinks
  • Appetizers
  • Contact
  • About
  • Privacy Policy
  • Cookie Policy
  • GDPR Policy
  • Disclaimer
  • Terms Of Use
Visit my other site: Fun Cookie Recipes

HOME / CATEGORIES /

Latest

- 12 Hawaiian rolls - 1/2 cup unsalted butter, softened - 4 cloves garlic, minced - 1 teaspoon dried parsley - 1 teaspoon dried oregano - 1/2 teaspoon salt - 1 cup shredded mozzarella cheese - 1/4 cup grated Parmesan cheese - 2 tablespoons fresh cilantro, chopped (for garnish) The main ingredients for Cheesy Hawaiian Roll Garlic Bread create a great flavor mix. The soft, sweet rolls are perfect for soaking up that rich garlic butter. The combination of mozzarella and Parmesan gives it a cheesy, gooey texture that everyone loves. - Garlic alternatives: You can use garlic powder if you want a quicker option. - Cheese variations: Try adding cheddar for a sharp flavor or cream cheese for a rich taste. - Herb substitutions: Swap dried parsley and oregano with fresh herbs like basil or thyme for a fresher twist. These substitutions let you customize this dish. You can mix and match based on what you have at home. This makes the recipe fun and unique every time. {{ingredient_image_1}} Preheating the oven First, you need to preheat your oven to 350°F (175°C). This step is key for even cooking and cheesy goodness. Mixing the garlic butter blend In a medium bowl, mix 1/2 cup of softened unsalted butter with 4 minced cloves of garlic. Add 1 teaspoon of dried parsley, 1 teaspoon of dried oregano, and 1/2 teaspoon of salt. Stir until everything blends well. This garlic butter will add rich flavor to your rolls. Slicing and spreading the mixture Carefully slice 12 Hawaiian rolls in half. Keep them connected at the bottom. Spread the garlic butter mixture evenly over both cut sides. Make sure every bit gets covered for maximum flavor. Layering the cheese Now, sprinkle 1 cup of shredded mozzarella cheese on the bottom half of the rolls. For a tasty twist, add 1/4 cup of grated Parmesan cheese on top of the mozzarella. This double cheese layer creates a delicious, gooey filling. Wrapping the rolls for baking Once you’ve layered the cheese, place the top half of the rolls back on. Wrap the entire loaf tightly in aluminum foil. This keeps the moisture in while baking. Baking time and tips for perfecting Bake your wrapped garlic bread in the preheated oven for 15 minutes. After that, remove the foil and bake for another 10 minutes. Watch for the cheese to become bubbly and slightly golden. This is the perfect sign that your bread is ready. Allow it to cool for a few minutes, then garnish with fresh cilantro before serving. Enjoy that melty, cheesy goodness! To get the best cheese melt, use good quality cheese. Mozzarella is key for that gooey texture. You want it to stretch when you pull apart the rolls. Avoid low-fat cheese since it won’t melt as well. To keep your rolls from getting soggy, make sure the garlic butter mix is even. Don't soak the bread. Spread just enough to coat both sides. Wrapping the rolls in foil helps steam them but still allows for a crispy top when you bake without the foil. Add a pinch of red pepper flakes if you like heat. It warms up the flavor without overpowering it. You can also try adding some crushed black pepper for a bit of spice. For herbs, fresh basil or thyme can add a unique twist. You might also consider a sprinkle of garlic powder for an extra garlic kick. Don't be afraid to mix and match herbs to find your favorite blend! These rolls pair well with soups and salads. A creamy tomato soup is a great match. You can also serve them with a fresh garden salad for a light meal. For presentation, serve the cheesy garlic bread in a nice basket. Line it with parchment paper for a rustic look. Adding small napkins makes it easy for guests to enjoy. Pro Tips Use Fresh Garlic: For the best flavor, use fresh garlic cloves instead of pre-minced garlic. Fresh garlic has a sharper taste that enhances the garlic bread. Experiment with Cheeses: While mozzarella and Parmesan are classic choices, feel free to mix in other cheeses like cheddar or gouda for a unique flavor twist. Make it Ahead: You can prepare the garlic butter and slice the rolls in advance. Just assemble and bake them when you're ready to serve for fresh, warm bread. Customize Herbs: Don't hesitate to customize the herbs to your liking. Fresh herbs like basil or thyme can add a delightful touch to the garlic bread. {{image_2}} You can change the cheese for fun flavors. Instead of mozzarella, try cheddar for a sharper taste. Gouda adds a nice smokiness. For a creamy option, use fontina. For a vegetarian twist, swap the cheeses for dairy-free ones like cashew cheese or almond cheese. These options keep the dish tasty while meeting dietary needs. You can mix in veggies or meats for added flavor. Chopped spinach or diced bell peppers give a fresh crunch. For meat lovers, add crumbled bacon or diced ham. If you want a sweet twist, sprinkle some cinnamon or add small pieces of fruit like pineapple. These options make each bite unique and exciting. To keep your cheesy Hawaiian roll garlic bread fresh for 1-2 days, wrap it tightly. Use plastic wrap or aluminum foil. Store it in a cool, dry place, or in the fridge if you prefer. This helps maintain the texture and flavor. If you notice any leftover garlic butter, spread it on the bread before storing. That extra flavor stays strong! For longer shelf life, you can freeze the garlic bread. Wrap it tightly in plastic wrap, then in aluminum foil. This prevents freezer burn. It can last up to 3 months in the freezer. When you're ready to enjoy it again, simply thaw it overnight in the fridge. To reheat, preheat your oven to 350°F (175°C). Unwrap the bread and place it on a baking sheet. Bake for about 15-20 minutes until it’s hot and the cheese is melted. This method keeps the bread crispy. Enjoy the fresh, cheesy goodness just like the day you made it! If you cannot find Hawaiian rolls, you have options. You can use sweet dinner rolls for a similar taste. Another choice is brioche rolls, which offer a rich flavor. Slider buns also work well. Each option brings its own twist but keeps the essence of the dish. Yes, you can prep this garlic bread ahead of time. Make the garlic butter and spread it on the rolls. Then, wrap the rolls in foil and refrigerate. When ready to bake, just pop them in the oven. This makes it easy for parties or busy nights. For a gluten-free version, choose gluten-free rolls. Many brands offer tasty options. You can also use gluten-free baguettes. Just make sure to check the labels for hidden gluten. The flavors will still shine, giving you that cheesy, garlic delight. This blog covered how to make tasty garlic bread using Hawaiian rolls. We discussed the main ingredients, alternative options, and step-by-step instructions. Tips on texture, flavor, and storage help you perfect your dish. You can explore variations to suit your taste and dietary needs. Now you have the tools to make delicious garlic bread that fits any occasion! Enjoy your cooking and impress your friends with this easy recipe!

Cheesy Hawaiian Roll Garlic Bread Irresistible Treat

- 1 medium head of cauliflower, cut into bite-sized florets - 1/2 cup honey - 3 tablespoons soy sauce Cauliflower serves as the star here. It has a great texture and absorbs flavors well. Honey adds sweetness, while soy sauce brings saltiness. Together, they create a tasty combo. - 1/2 cup all-purpose flour - 1/2 cup breadcrumbs (Panko for extra crunch) - 1 teaspoon garlic powder - 1 teaspoon onion powder - 1/2 teaspoon smoked paprika - Salt and pepper to taste The flour helps the spices stick to the cauliflower. Breadcrumbs give a nice crunch. Garlic powder and onion powder boost the flavor. Smoked paprika adds a hint of smokiness. Don't forget to season with salt and pepper! - Sesame seeds - Green onions, chopped These garnishes add a pop of color and flavor. Sesame seeds give a nutty taste, and green onions add freshness. Together, they make your dish look and taste even better. {{ingredient_image_1}} First, preheat your oven to 425°F. This high heat helps the cauliflower get crispy. While the oven warms up, line a baking sheet with parchment paper. This will make clean-up super easy. Next, take your cauliflower florets and place them in a large bowl. Toss them with 1/2 cup of all-purpose flour. Add 1 teaspoon of garlic powder, 1 teaspoon of onion powder, and 1/2 teaspoon of smoked paprika. Sprinkle in some salt and pepper to taste. Mix it all well so every piece is covered. Now, coat the flour-covered cauliflower in 1/2 cup of breadcrumbs. I recommend using Panko breadcrumbs here for extra crunch. Make sure each floret is fully covered. Then, arrange the coated florets evenly on your baking sheet. Place the baking sheet in your preheated oven. Bake the cauliflower for 25 to 30 minutes. Flip them halfway through. This step helps them brown evenly. While the cauliflower bakes, let’s make the honey garlic sauce. In a small saucepan, whisk together 1/2 cup of honey, 3 tablespoons of soy sauce, 2 tablespoons of apple cider vinegar, and 2 minced garlic cloves. Heat it over medium heat until it simmers. Then, lower the heat and let it thicken for about 5 to 7 minutes. When the cauliflower is done baking, take it out of the oven. Drizzle the honey garlic sauce over the hot florets. Toss them gently to coat every piece. Your honey garlic cauliflower bites are now ready to serve! To make your honey garlic cauliflower bites super crispy, use Panko breadcrumbs. They add extra crunch and texture. Make sure each floret is evenly coated. This helps them bake beautifully and stay crisp. You can boost the flavor by adding spices like cayenne pepper or cumin. Fresh herbs like cilantro or parsley also work well. Adjust the sweetness with more or less honey. Balance the saltiness by tasting as you go. To reheat leftovers, use the oven. Preheat to 350°F and bake for about 10 minutes. This keeps them crispy. Serve with a side of dipping sauce or on a salad. Try adding a sprinkle of crushed red pepper for some heat. Pro Tips Choose the Right Cauliflower: Opt for a medium to large head of cauliflower that is firm and free from blemishes for the best texture. For Extra Crunch: Use Panko breadcrumbs instead of regular breadcrumbs to achieve a crunchier coating on your cauliflower bites. Perfectly Thicken Your Sauce: Allow the honey garlic sauce to simmer and thicken on low heat; this enhances the flavor and ensures it coats the cauliflower beautifully. Garnishing Tips: For a fresh touch, add a squeeze of lime juice over the finished dish before serving for an extra burst of flavor. {{image_2}} For gluten-free options, swap all-purpose flour with almond flour or a gluten-free blend. For breading, use gluten-free panko or crushed rice cereal. This way, you can still enjoy the crunch. If you want a vegan dish, replace honey with maple syrup or agave nectar. These sweeteners work well and keep the flavor balanced. You can also use soy sauce or tamari for a gluten-free alternative. To spice things up, add sriracha or red pepper flakes to the honey garlic sauce. This will give your bites a nice kick. You can mix in some chili paste for extra heat too. If you prefer a different sweetness, try using coconut sugar or brown sugar. Both will add depth to the sauce. You can also experiment with fruit-based sweeteners like date syrup for a unique twist. For a quicker option, try air frying the cauliflower. Preheat your air fryer to 400°F (200°C) and cook for about 15-20 minutes. This method gives you a great crunch without using as much oil. You can also cook the cauliflower on the stovetop. Simply sauté the florets in a pan with a bit of oil. Cook until they are golden brown and tender. This method is quicker and still very tasty. You can store honey garlic cauliflower bites in the fridge for up to three days. Place them in an airtight container to keep them fresh. Make sure they cool down before sealing the container. This helps prevent moisture buildup. If you want to save some bites for later, freezing is a great idea. First, let the bites cool completely. Then, place them in a single layer on a baking sheet. Freeze for one hour. After that, transfer them to a freezer-safe bag or container. They can last up to three months in the freezer. Label the bag with the date, so you know when to use them. To reheat your cauliflower bites, the oven is the best choice. Preheat it to 350°F (175°C). Arrange the bites on a baking sheet. Heat them for about 10-15 minutes until they are warm and crispy again. You can also use an air fryer for a quick option. Just heat them for about 5-7 minutes at 350°F (175°C) to get that crunch back. Avoid using the microwave, as it can make them soggy. Yes, you can use frozen cauliflower. First, thaw the florets completely. Drain any excess water to avoid sogginess. Pat them dry with a towel. Then, follow the same coating and baking steps as fresh cauliflower. This method works well, but you may need to bake them a bit longer to ensure they get crispy. To add heat, mix in red pepper flakes or cayenne pepper. Start with a small amount and taste as you go. You can also add sriracha or chili garlic sauce to the honey garlic sauce for a spicy kick. Adjust the spice level to suit your taste. Honey garlic cauliflower bites pair well with several dips. Here are a few ideas: - Ranch dressing for a creamy touch - Sweet chili sauce for extra sweetness - Soy sauce mixed with a bit of sesame oil for a savory flavor - Spicy mayo for a zesty bite These dips will enhance the flavors of your bites and make them even more enjoyable. This blog post covered how to make honey garlic cauliflower bites. We explored the main ingredients, the coating and spice mix, and the garnish. I provided detailed step-by-step instructions for baking, making sauce, and tips for crispiness. You also learned about variations, storage options, and key FAQs. These bites are tasty and easy to customize. Experiment with flavors and share with friends. Enjoy your cooking adventure!

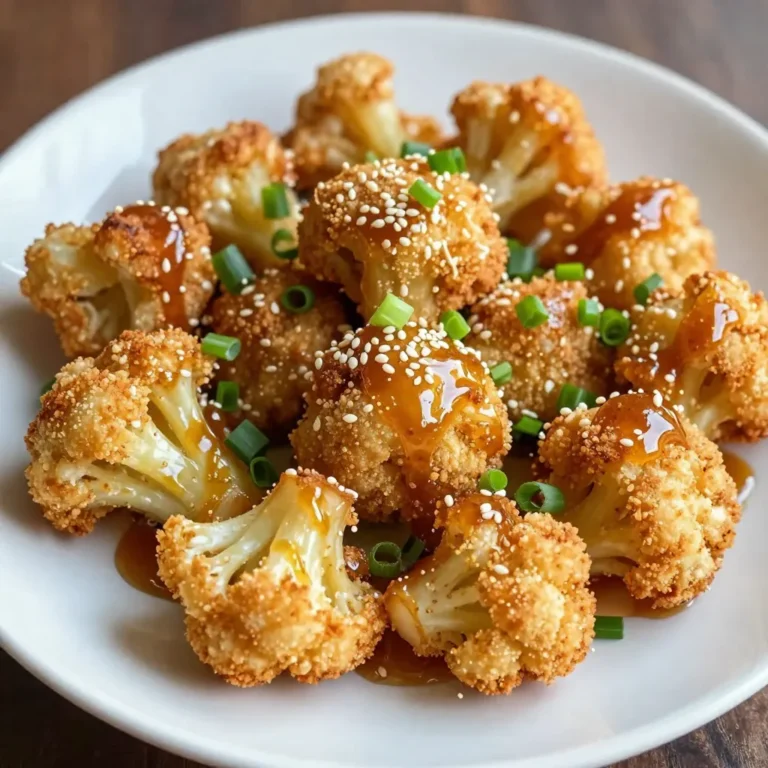
Honey Garlic Cauliflower Bites Irresistible Snack Option

- 2 ½ cups all-purpose flour - ¼ cup granulated sugar - 1 packet (2 ¼ tsp) active dry yeast - ¾ cup whole milk, warmed - 1 large egg - ¼ cup unsalted butter, melted I always choose high-quality all-purpose flour for my sticky buns. It gives the dough a nice texture. Granulated sugar helps the yeast thrive. The active dry yeast is key for a good rise. Warm milk activates the yeast and makes the dough soft. I use a large egg for richness, and unsalted butter adds great flavor. - ½ cup chopped pecans - 1 cup brown sugar, packed - 1 tablespoon cinnamon - ¼ teaspoon nutmeg - ¼ teaspoon salt Chopped pecans bring a lovely crunch. Brown sugar adds sweetness and a caramel flavor. Cinnamon and nutmeg infuse warmth into the filling. A pinch of salt balances the sweetness perfectly. - Mixing bowls - Rolling pin - Baking dish - Measuring cups and spoons I always use sturdy mixing bowls for the dough. A good rolling pin helps flatten the dough evenly. A baking dish, preferably 9x13 inches, is perfect for baking. Accurate measuring cups and spoons ensure I get the right amounts. These tools make the process smooth and fun! {{ingredient_image_1}} To start, combine warm milk and sugar in a large mixing bowl. Stir until the sugar dissolves. Next, sprinkle the yeast over the milk mixture. Let it sit for about 5-10 minutes until it becomes frothy. This step is crucial for activating the yeast, which helps the dough rise. Now, add the melted butter, egg, vanilla extract, and salt to the yeast mixture. Stir everything together until well mixed. Gradually add the flour, mixing until a dough forms. Knead the dough on a floured surface for about 5-7 minutes. You want it to feel smooth and elastic. Once kneaded, place the dough in a greased bowl. Cover it with a damp cloth. Let it rise in a warm area for about 1 hour, or until it has doubled in size. While waiting, prepare the filling mixture. In another bowl, mix together the chopped pecans, brown sugar, softened butter, cinnamon, nutmeg, and salt until it looks crumbly. After the dough has risen, punch it down and roll it out on a floured surface. Aim for a rectangle that is about 12x18 inches. Spread the prepared filling evenly over the rolled-out dough. Starting from the long end, tightly roll the dough into a log. Cut the log into 12 equal pieces. In a small saucepan, melt ½ cup of brown sugar with ½ cup of butter. Pour this mixture into a greased 9x13 inch baking dish. Sprinkle the remaining chopped pecans over this layer. Arrange the cut rolls on top of the pecan mixture, keeping them close together. Cover the dish with a cloth and let the rolls rise for another 30-45 minutes. Preheat your oven to 350°F (175°C). Once preheated, bake the rolls for 25-30 minutes, or until they are golden brown. After baking, remove them from the oven and let them cool in the dish for about 5-10 minutes. This step helps the caramel set before serving. - Ideal rising temperature: Your dough needs warmth to rise. Aim for around 80°F. This helps yeast work well. - Checking the dough consistency: The dough should feel soft and smooth. If it sticks to your hands, add a little flour. - Tips for filling variations: You can mix in chocolate chips or dried fruits. This adds fun flavors to your sticky buns. - Adding extra toppings: Try drizzling melted chocolate or adding a pinch of sea salt on top. These can boost taste and look. - Drizzling remaining caramel: After baking, pour any leftover caramel over the buns. This makes them extra gooey and sweet. - Serving suggestions: Serve warm for best taste. Pair with coffee or tea for a yummy treat. Pro Tips Use Warm Milk: Ensure the milk is warm, not hot, to activate the yeast effectively without killing it. Perfect Dough Consistency: The dough should be slightly tacky but not overly sticky; adjust flour as needed during kneading. Flavor Boost: Add a pinch of sea salt to the caramel mixture for a delightful contrast to the sweetness. Get Creative: Feel free to add chocolate chips or dried fruits to the filling for an extra flavor twist! {{image_2}} You can change the flavor of your caramel pecan sticky buns easily. Here are some fun ideas: - Chocolate chip caramel sticky buns: Add 1 cup of chocolate chips to your filling. The sweet chocolate pairs nicely with the caramel. - Pumpkin spice sticky buns: Mix 1 cup of pumpkin puree and 1 tablespoon of pumpkin spice into your dough. This gives a warm, fall flavor. - Apple cinnamon sticky buns: Add 1 cup of chopped apples to the filling. It adds a nice, fruity touch that brightens every bite. If you have special dietary needs, you can still enjoy these sticky buns. Here are two options: - Gluten-free option: Use a gluten-free flour blend. Make sure it has a good binding agent, like xanthan gum. - Vegan substitution ideas: Replace the egg with a flax egg (1 tablespoon flaxseed meal + 3 tablespoons water). Use plant-based milk and butter. Sticky buns can fit any meal. Here’s how to serve them: - Breakfast vs dessert: Serve these sticky buns for breakfast with coffee or as a sweet dessert after dinner. - Pairing with beverages: Try them with a hot cup of coffee or a cold glass of milk. Both drinks enhance the flavors of the buns. To keep your caramel pecan sticky buns fresh, store them in an airtight container. This helps to prevent them from drying out. You can also wrap them in plastic wrap. If you plan to eat them within two days, leave them at room temperature. For longer storage, place them in the fridge. You can reheat your sticky buns in two ways: in the microwave or the oven. In the microwave, heat one bun for about 15-20 seconds. This warms it quickly but may make it a bit soft. For a crispier texture, use the oven. Preheat the oven to 350°F. Heat the buns for about 10-15 minutes. This will help keep that delicious, gooey texture. To freeze unbaked rolls, prepare the rolls but don’t bake them. Place them in a greased dish, cover with plastic wrap, and freeze. When you want to bake them, remove from the freezer and let them thaw overnight in the fridge. Then, let them rise for about 30-45 minutes before baking. This keeps your sticky buns fresh and tasty! How long do caramel pecan sticky buns last? Caramel pecan sticky buns last about 2 to 3 days at room temperature. Keep them in an airtight container. The buns can also last a week in the fridge. For the best taste, eat them warm. Can I make the dough ahead of time? Yes, you can make the dough ahead of time. Prepare the dough, let it rise, then cover it. Place it in the fridge for up to 24 hours. When you're ready, let it come to room temp before shaping and baking. What can I use instead of pecans? You can use walnuts or almonds instead of pecans. Both add a nice crunch and flavor. If you want a nut-free option, try using raisins or chocolate chips for sweetness. What if my dough doesn’t rise? If your dough doesn’t rise, check the yeast. It might be old or inactive. Make sure to use warm milk (about 110°F) to activate the yeast. If it still doesn't rise, give it more time in a warm spot. How to fix sticky dough? To fix sticky dough, add a little more flour, one tablespoon at a time. Knead the dough until it feels smooth and elastic. Avoid adding too much flour; you want the dough to be soft but not sticky. Can I double the recipe? Yes, you can double the recipe. Use a larger bowl to mix the dough. You may need to bake the sticky buns in two separate batches. Keep an eye on the baking time, as it may vary. What are the best toppings for sticky buns? The best toppings for sticky buns include chopped nuts, drizzled caramel, or a light glaze. You can also try adding some fresh fruit, like sliced bananas or berries, for more flavor. In this post, we covered the key ingredients for making caramel pecan sticky buns, including flour, sugar, and butter, along with filling options like nuts and spices. I provided step-by-step instructions from preparing the dough to baking. You learned tips for perfecting your rolls and various flavor options. Always store leftovers properly and reheat them strategically. With practice, you'll create delicious sticky buns to delight everyone. Enjoy your baking journey and make these treats your own!

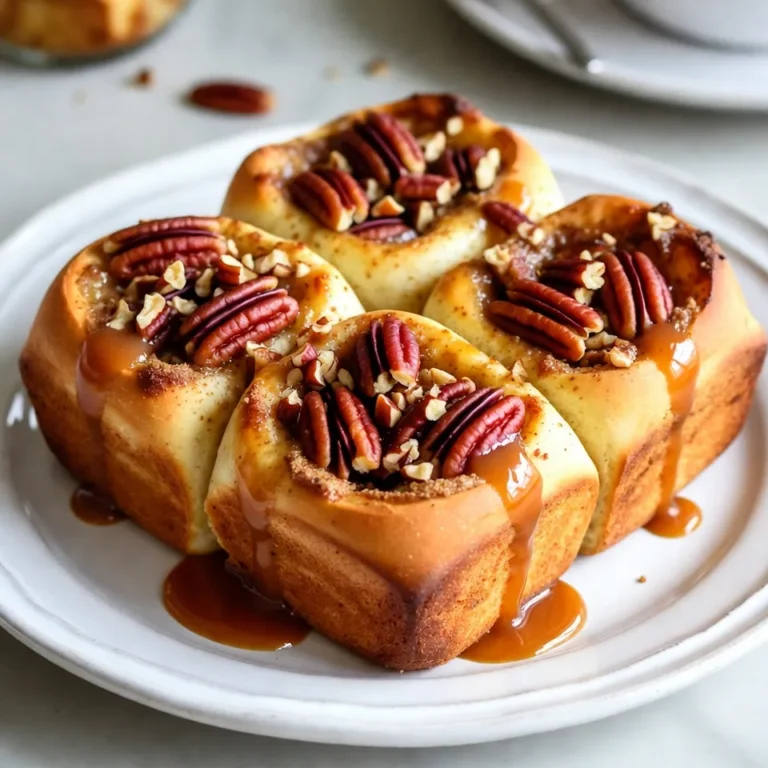
Caramel Pecan Sticky Buns Delightful and Easy Recipe

To make a Hocus Pocus Latte, gather these items: - 1 cup brewed espresso or strong coffee - 1 cup milk (or dairy-free alternative) - 2 tablespoons pumpkin puree - 1 tablespoon maple syrup (or honey) - 1/2 teaspoon pumpkin pie spice - Whipped cream for topping - Extra pumpkin pie spice for garnish You can swap some ingredients if needed: - Use any strong coffee if you don’t have espresso. - Try almond milk or oat milk for a dairy-free option. - Honey can replace maple syrup for sweetness. - Use cinnamon if you lack pumpkin pie spice. For the best flavors, select fresh ingredients: - Choose high-quality coffee beans or espresso for a rich taste. - Use pure pumpkin puree without additives for the best flavor. - Select organic maple syrup for a natural sweetness. - Buy fresh spices from a trusted store for full aroma. {{ingredient_image_1}} 1. Start by brewing your espresso or strong coffee. Pour it into a large mug. 2. In a small saucepan, combine the milk and pumpkin puree. Heat this over medium heat. 3. Whisk the milk and pumpkin until it is smooth and warm. This step takes a few minutes. 4. Add the maple syrup and pumpkin pie spice to the pan. Stir well for about one minute. 5. Use an electric frother or whisk to froth the warm milk mixture until creamy. 6. Slowly pour the frothy milk over the coffee. This creates a lovely layered look. 7. Top it off with whipped cream. Sprinkle some extra pumpkin pie spice on top. 8. If you want, add a colorful straw or a cinnamon stick for a fun touch. - When heating the milk, keep an eye on it. You don’t want it to boil. - Use a good quality coffee for the best flavor. Fresh coffee beans work wonders. - Froth the milk until it has small bubbles. This makes for a smooth texture. - Be gentle when pouring the milk. This helps maintain the layers in your latte. - If your milk curdles, it may be too hot. Try lowering the heat next time. - If your latte is too sweet, reduce the maple syrup. Taste as you go. - If the milk doesn’t froth well, check your frother. Clean it before use for best results. - If you end up with a thick layer of foam, whip the milk less. Aim for a creamy blend instead. To get the best froth, start with warm milk. Use a small saucepan to heat the milk and pumpkin puree. Whisk it until smooth and hot. This helps create a creamy texture. For a nice froth, use an electric frother. If you don't have one, a whisk works too. Just whip it fast to add air. You can boost the flavor of your latte. Try adding vanilla extract or a dash of nutmeg. These flavors mix well with pumpkin spice. If you like it sweeter, add more maple syrup or honey. For a chocolate twist, mix in cocoa powder. Each addition makes your drink unique and fun. When serving, choose a large mug for a cozy vibe. Pour the frothy milk slowly to create layers. Top with whipped cream for extra creaminess. Sprinkle a little pumpkin pie spice on top for a pop of flavor. For added charm, use a colorful straw or a cinnamon stick. This makes your drink look as good as it tastes! Pro Tips Use Fresh Pumpkin Puree: For the best flavor, use homemade pumpkin puree instead of canned. Simply roast fresh pumpkin and blend until smooth. Milk Temperature Matters: Heat your milk slowly to avoid scalding. Ideal frothing temperature is around 150°F (65°C) for creamy texture. Experiment with Sweetness: Adjust the amount of maple syrup or honey to taste. You can also try swapping for flavored syrups like vanilla or caramel. Garnish Creatively: Beyond pumpkin pie spice, consider using crushed graham crackers or a drizzle of caramel sauce for an extra festive touch. {{image_2}} You can easily make a dairy-free Hocus Pocus Latte. Use almond, oat, or coconut milk. These options give the drink a nice flavor. They also keep it creamy. The pumpkin puree adds richness, so you won’t miss the dairy. Want to change up the taste? Add a teaspoon of cocoa powder for a chocolate twist. You can also sprinkle in some nutmeg for a warm touch. Each flavor will bring a new vibe to your latte. Experimenting is fun and tasty! Make your latte extra special with seasonal touches. During Halloween, add spooky sprinkles or candy corn. For Thanksgiving, use a cinnamon stick as a stirrer. These little details make your drink festive and fun. Don’t be afraid to get creative with your garnishes! To store leftover ingredients for your Hocus Pocus Latte, keep them in airtight containers. Store unused pumpkin puree in the fridge. Use it within a week for the best taste. If you have leftover milk, seal it tightly and refrigerate. It should last about a week too. Maple syrup can stay in your pantry. Just make sure it’s sealed well. If you have leftover latte, you can reheat it. Pour the latte into a small pot. Heat it gently on low. Stir it often to keep it smooth. Don’t boil it, or the milk may curdle. You can also use a microwave. Heat it in short bursts of 30 seconds. Stir in between to warm it evenly. Your prepared Hocus Pocus Latte is best enjoyed fresh. If stored well, it lasts about two days in the fridge. After that, the flavors may fade. For the best taste, drink it within 24 hours. If you notice any changes in smell or texture, it’s best to toss it. Always trust your senses! A Hocus Pocus Latte is a fun, festive drink. It blends espresso, pumpkin puree, and warm spices. This drink gives you a cozy feeling, perfect for fall days. The whipped cream on top adds a sweet touch. You can find this drink at coffee shops during the season. It's a great way to celebrate autumn flavors. Yes, you can easily make a sugar-free Hocus Pocus Latte. Instead of maple syrup, use a sugar-free sweetener. You can try stevia or erythritol. Check the labels to find the right amount. This way, you enjoy the taste without the added sugar. You still get the creamy pumpkin flavor and warm spices. You can find the Hocus Pocus Latte at some coffee shops. Many places offer it during the fall. You can also make it at home with simple ingredients. Look for brewed espresso, pumpkin puree, and spices at your local store. This way, you can enjoy it any time you want! In this blog post, we explored the key ingredients for a great Hocus Pocus Latte. You learned about substitutes and how to choose quality items. I shared step-by-step instructions and tips for each part of the process. We also discussed how to enhance flavors and make variations, like dairy-free options. Lastly, I covered storage tips and answered your key FAQs. Use these insights to create your own perfect latte. Enjoy every sip you make and serve!

Hocus Pocus Latte Delightful Seasonal Beverage Recipe

- 2 cups butter beans, soaked overnight and drained - 1 medium onion, finely chopped - 3 cloves garlic, minced - 1 can (14 oz) diced tomatoes (with juice) - 1 tablespoon tomato paste - 1 teaspoon smoked paprika - 1 teaspoon ground cumin - 1 teaspoon dried oregano - ½ teaspoon cayenne pepper (optional, for heat) - 4 cups vegetable broth - 2 tablespoons olive oil - Salt and pepper to taste - Fresh parsley, chopped (for garnish) Gather these ingredients to create a cozy dish. Butter beans are the star here. They are creamy and filling. Soaking them overnight makes them soft. This helps them cook faster and taste better. Chop the onion finely. This adds a sweet flavor as it cooks. Minced garlic will give your dish a nice aroma. Diced tomatoes add moisture and tanginess. Tomato paste enhances the sauce's richness. Spices are key to bringing flavor. Smoked paprika adds a warm depth. Ground cumin gives an earthy taste. Dried oregano brings a hint of freshness. Cayenne pepper is optional for those who love heat. Vegetable broth adds warmth to your dish. Olive oil is perfect for sautéing. Finally, salt and pepper balance all the flavors. Fresh parsley is great for a pop of color. With these ingredients, you can create a dish that warms the heart. {{ingredient_image_1}} - Sautéing the Onion and Garlic: Start with a large pot. Heat the olive oil over medium heat. Add the finely chopped onion. Sauté until it becomes soft and clear, about five minutes. Next, stir in the minced garlic. Cook for one more minute until it smells great. - Combining Ingredients: Now, add in the diced tomatoes, including their juice. Mix in the tomato paste, smoked paprika, cumin, oregano, cayenne pepper, salt, and pepper. Stir everything well to blend the flavors. - Boiling and Simmering: Pour in the vegetable broth. Bring the mixture to a boil. Once it boils, add the soaked butter beans. Lower the heat and cover the pot. Let it simmer for 45 minutes to one hour, or until the beans are soft. Stir now and then. If it looks dry, add more broth or water. - Time Management for Cooking Butter Beans: The total cooking time is about one hour and ten minutes. You spend about ten minutes prepping and the rest cooking. This timing helps the beans absorb all the flavors. - Tips for Simmering: Keep the heat low when simmering. This gentle cooking helps the beans become tender. Stir occasionally to stop them from sticking to the pot. - Adjusting Seasoning: After the beans are soft, taste the dish. You might want to add more salt or pepper. Adjust to your liking. - Garnishing with Parsley: Serve the butter beans hot. Sprinkle fresh chopped parsley on top. This adds color and a fresh taste. Enjoy your meal! - Avoiding Overcooking the Beans: Soak your butter beans overnight. This helps them cook evenly. Cook them gently. Check them after 45 minutes. They should be soft but firm. If they are mushy, you have overcooked them. - Ensuring Proper Flavor Balance: Use fresh ingredients for the best taste. The onion and garlic add depth. The spices like smoked paprika and cumin give warmth. Taste as you go. Adjust salt and pepper as needed to enhance flavors. - Ideal Pairings with Butter Beans: Marry Me Butter Beans go well with crusty bread. The bread helps soak up the sauce. A side salad adds freshness and crunch. Try a simple green salad with lemon dressing. - Recommended Side Dishes: Serve with rice for a filling meal. Roasted vegetables also complement the beans. Grilled corn on the cob adds a sweet touch. These sides balance the rich flavors of the dish. - Adding Protein for a Hearty Meal: For extra protein, add cooked sausage or chicken. You can also stir in canned chickpeas. These options make the dish more filling without losing flavor. - Spicy Alterations with Additional Peppers: Want some heat? Add chopped jalapeños or crushed red pepper. You can also use a splash of hot sauce. This makes the dish spicy and exciting. Adjust to your taste preference. These tips will help you create a delicious and satisfying meal every time! Pro Tips Soaking Beans: For best results, soak the butter beans overnight to help them cook evenly and reduce cooking time. Flavor Boost: Add a bay leaf or a sprig of thyme while simmering for an extra layer of flavor. Adjusting Consistency: If you prefer a creamier texture, mash a portion of the beans with a fork before serving. Storage Tips: Store leftovers in an airtight container in the fridge for up to 3 days, or freeze for longer preservation. {{image_2}} Best Practices for Refrigeration After enjoying Marry Me Butter Beans, store any leftovers in an airtight container. Make sure to let the beans cool down first. Place them in the fridge within two hours of cooking. They will stay good for three to five days. Always check for any strange smells or colors before eating. How to Freeze Butter Beans For longer storage, you can freeze the butter beans. First, let them cool completely. Then, scoop them into freezer-safe bags or containers. Press out as much air as possible to avoid freezer burn. Label the bags with the date. These beans can last for up to three months in the freezer. When ready to eat, thaw them overnight in the fridge. Tips for Microwaving To reheat in the microwave, place a serving in a bowl. Cover it with a damp paper towel to keep moisture in. Heat on high for about two to three minutes. Stir halfway through for even heating. If they seem dry, add a splash of vegetable broth. Stovetop Reheating Strategies For stovetop reheating, pour the butter beans into a pot. Add a little water or broth to keep them moist. Heat on low, stirring often, until they are hot. This method helps keep the texture nice and creamy. Enjoy your comforting dish just like the first time! Breakdown per Serving One serving of Marry Me Butter Beans has about 300 calories. This makes it a filling choice for lunch or dinner. Each serving provides a good mix of protein, fiber, and healthy fats. Health Benefits of Butter Beans Butter beans are rich in nutrients. They are high in fiber, which helps digestion. They also provide protein, aiding muscle growth. Plus, they contain important vitamins like B vitamins. These vitamins help with energy and metabolism. Eating butter beans supports heart health due to their low fat content. Vegetarian and Vegan Friendliness This dish is perfect for vegetarians and vegans. It contains no meat or animal products. You can enjoy it without worry. It fits well into a plant-based diet. Gluten-Free Options Marry Me Butter Beans is naturally gluten-free. None of the ingredients contain gluten. You can serve it to those with gluten sensitivities. This makes it a great option for everyone at your table. What are butter beans? Butter beans are large, creamy beans. They have a rich, buttery taste. These beans are often used in soups and stews. They are high in fiber and protein, making them great for a healthy diet. Can I use canned butter beans instead? Yes, you can use canned butter beans. They save time and are ready to eat. Just rinse and drain them before using. Reduce the cooking time since they are already cooked. How long do butter beans take to cook? Dried butter beans take about 45 minutes to 1 hour to cook. Soaking them overnight helps speed up the cooking. If you use canned beans, they only need to be heated through. What can I substitute for vegetable broth? You can use chicken broth or water instead of vegetable broth. Both will work well. For more flavor, add herbs or spices to your liquid. Can I make this recipe in a slow cooker? Yes, you can make this recipe in a slow cooker. Combine all the ingredients and cook on low for 6 to 8 hours. This method allows the flavors to blend nicely. How do I adjust the spice level? To adjust the spice level, add more or less cayenne pepper. You can also add fresh peppers for more heat. For a milder dish, skip the cayenne altogether. This post covered key aspects of cooking with butter beans. We explored the ingredients and provided simple steps for preparation. You learned tips for cooking and serving, along with storage advice. The nutritional value highlights the health benefits of butter beans. Remember, cooking is fun and allows for creativity. Don’t hesitate to experiment with flavors and ingredients. Enjoy the process and your delicious meals!

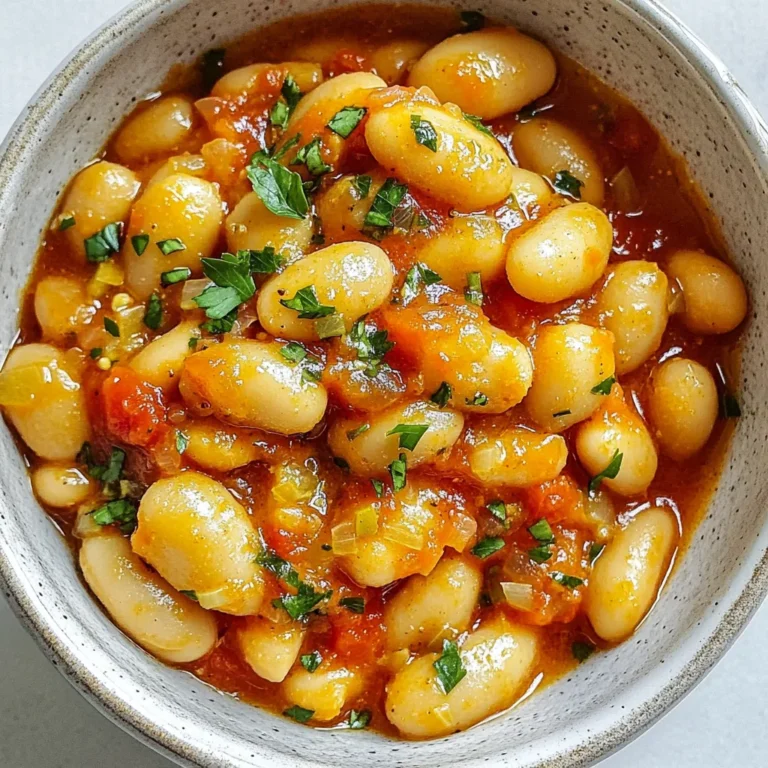
Marry Me Butter Beans Comforting and Hearty Dish

- 1.5 pounds baby potatoes, halved - 4 cloves garlic, minced - 1 cup heavy cream - 1/2 cup grated Parmesan cheese - 2 tablespoons unsalted butter - 1 teaspoon dried thyme - Salt and pepper to taste - Fresh parsley, chopped (for garnish) The key to a great creamy garlic sauce lies in a few essential ingredients. - Heavy cream gives that rich and smooth texture. It makes the dish creamy. - Garlic adds a robust flavor that elevates the potatoes. Freshly minced garlic works best. - Parmesan cheese brings a salty, nutty taste. It melts well and thickens the sauce. - Butter enhances the sauce's richness. It also helps the garlic sauté perfectly. These items combine to create a sauce that clings to every potato. You can customize this dish with some optional add-ins. - Fresh herbs like rosemary or chives add extra flavor. - Cream cheese can replace some heavy cream for a different texture. - Vegetable broth can substitute for cream. This makes a lighter version. - Bacon bits add a savory crunch for those who like a meaty twist. - Different cheeses like cheddar or feta can change the taste profile. Feel free to experiment and make this dish your own! {{ingredient_image_1}} First, wash the baby potatoes under cold water. This removes dirt and grit. Next, cut each potato in half. Place the halved potatoes in a large pot. Fill the pot with water, covering the potatoes completely. Add a generous pinch of salt to the water. Bring the pot to a boil over medium-high heat. Cook the potatoes for about 15 to 20 minutes. They should be tender when you pierce them with a fork. Once cooked, drain the potatoes and set them aside. While the potatoes cook, you can make the creamy garlic sauce. Start by melting unsalted butter in a skillet over medium heat. Once the butter is melted, add the minced garlic. Sauté the garlic for 1 to 2 minutes. You want it fragrant but not brown. Pour in the heavy cream and stir well. Add dried thyme, salt, and pepper to taste. Bring the mixture to a gentle simmer. Gradually add the grated Parmesan cheese. Stir continuously until the cheese melts and the sauce thickens, about 3 to 5 minutes. Now, combine the cooked potatoes with the creamy garlic sauce. Add the drained potatoes to the skillet. Toss gently to coat the potatoes evenly with the sauce. Cook for an additional 2 to 3 minutes to heat everything through. This step lets the flavors meld together beautifully. Finally, remove the skillet from heat and garnish with freshly chopped parsley for a touch of color. Serve warm and enjoy this rich and flavorful dish! To make the best creamy garlic baby potatoes, start with fresh baby potatoes. Choose firm ones for the best texture. Wash them well to remove dirt. Halving them helps them cook evenly. Use a large pot for boiling. This ensures all potatoes get equal heat. Don’t skip the salt in the water. It adds flavor right from the start. When you sauté garlic, keep an eye on it. Cook just until it’s fragrant, about one minute. Overcooking can lead to bitterness. When adding cream, stir gently. This helps it blend with the garlic flavor. Gradually add cheese to avoid clumps. This makes your sauce smooth and creamy. Toss the potatoes carefully to coat them without breaking. One common mistake is overcooking the potatoes. They should be fork-tender but not mushy. If you add the cream too early, it can curdle. Let the garlic cool slightly before adding cream. Also, be cautious with salt. You can always add more, but you can't take it out. Another mistake is not tasting as you go. Adjust the seasoning to your liking. If it feels bland, add more pepper or thyme. Lastly, don’t rush the simmering process. Letting the sauce thicken makes a big difference in taste. To boost flavor, consider adding more herbs. Fresh thyme or rosemary can add depth. You can also sprinkle in some red pepper flakes for heat. If you like a tangy taste, add a splash of lemon juice. Try adding cooked bacon bits for a savory twist. For a creamy finish, a dollop of sour cream works well. You can also experiment with cheese types. Cheddar or goat cheese can change the flavor profile. Use these suggestions to make the dish your own! Pro Tips Choose the Right Potatoes: For this recipe, baby or new potatoes work best due to their creamy texture and natural sweetness. Avoid using starchy potatoes like Russets for this dish. Don't Skip the Salt: Adding salt to the boiling water not only flavors the potatoes but also helps them cook evenly. Be generous with the salt for the best results. Adjust the Creaminess: If you prefer a lighter sauce, consider substituting half of the heavy cream with chicken or vegetable broth. This will still yield a rich flavor but with fewer calories. Enhance the Flavor: For an extra depth of flavor, consider adding a splash of white wine to the garlic and butter before adding the cream. Let it reduce slightly for a delicious twist. {{image_2}} You can change the flavor of your creamy garlic baby potatoes with herbs. Try using fresh rosemary or basil for a new twist. Thyme adds warmth, but fresh dill brings a bright taste. You can also add a squeeze of lemon juice for freshness. If you love spice, a pinch of red pepper flakes can give it a nice kick. You can bake your baby potatoes for a crispy texture. Preheat your oven to 400°F. Halve the potatoes and toss them with olive oil, salt, and pepper. Bake for 25-30 minutes until tender. Then, follow the creamy sauce steps in a skillet. Drizzle the sauce over the baked potatoes for a rich dish. Creamy garlic baby potatoes pair well with meats like grilled chicken or steak. They also go great with roasted vegetables for a full meal. For a lighter option, serve them with a fresh salad. A sprinkle of extra Parmesan or fresh herbs on top adds a nice touch. Enjoying these potatoes with friends makes every meal special. To keep your creamy garlic baby potatoes fresh, place them in an airtight container. Make sure they cool down before sealing. Store them in the fridge. They will last up to three days. If you want to enjoy them later, consider freezing them. When reheating, use a skillet for the best results. Add a splash of cream or broth to keep them moist. Heat on low, stirring gently. This helps revive the creamy texture. You can also use the microwave. Just cover the bowl to keep the moisture in. Heat in short bursts, stirring between each. Freezing creamy garlic baby potatoes is possible, but texture may change. To freeze, let them cool completely. Place them in a freezer-safe bag. Remove as much air as possible. They can last up to three months in the freezer. To use, thaw in the fridge overnight. Reheat as mentioned above for the best flavor. Yes, you can! While baby potatoes are perfect, you can use Yukon Gold or red potatoes. These types have a creamy texture and great flavor. Just make sure to cut them into similar sizes for even cooking. To lighten this dish, replace heavy cream with half-and-half or milk. You can also use Greek yogurt for creaminess. Reducing the butter and cheese will help cut calories without losing flavor. These potatoes pair well with grilled chicken, steak, or fish. They also go great with a fresh salad or steamed veggies. For a complete meal, try them with roasted vegetables or a simple green salad. This blog post covered how to make creamy garlic baby potatoes. We looked at key ingredients and essential steps for success. You learned tips to avoid common mistakes and ways to boost flavor. Variations allow you to customize the dish, while storage info helps you enjoy leftovers. Incorporating these ideas will help you create a tasty dish that impresses. With a little practice, you can make this recipe your own. Enjoy every creamy bite!

Creamy Garlic Baby Potatoes Rich and Flavorful Dish

To make Crescent Roll Cinnamon Twists, you need: - 2 cans of refrigerated crescent roll dough - 1/2 cup unsalted butter, melted - 1 cup granulated sugar - 2 tablespoons ground cinnamon - 1 teaspoon vanilla extract - 1/2 cup powdered sugar (for drizzling) - 2 tablespoons milk (for drizzling) These ingredients create a sweet and buttery treat. The crescent roll dough gives it a nice flaky texture. The cinnamon adds warmth and flavor. I suggest using high-quality unsalted butter. It makes the twists rich and tasty. For the best flavor, choose pure vanilla extract over imitation. The granulated sugar should be fine for easy mixing. Look for fresh ground cinnamon for a stronger taste. You can make some swaps if needed. Use dairy-free butter for a vegan option. Try coconut sugar instead of granulated sugar for a lower glycemic option. For gluten-free twists, look for gluten-free crescent dough. Make sure to check the labels to ensure they meet your dietary needs. {{ingredient_image_1}} First, heat your oven to 375°F (190°C). Line your baking sheet with parchment paper. This helps the twists not to stick. Open one can of crescent roll dough. Unroll it onto your countertop. Press the seams together to make a big rectangle. In a small bowl, mix the granulated sugar and ground cinnamon. This mixture gives the twists their sweet flavor. Next, brush half of the melted butter over the dough. Sprinkle half of the cinnamon-sugar mix on top. Gently press the mix into the dough to stick it well. Now, grab a pizza cutter or a sharp knife. Cut the rectangle into 1-inch strips. The more strips you have, the more twists you can make. Twist each strip several times to create a spiral. Then, place the twisted strips on the baking sheet. Repeat these steps with the second can of crescent dough, using the remaining butter and cinnamon-sugar mix. Now it’s time to bake! Place your baking sheet in the preheated oven. Bake the twists for 12-15 minutes. You want them to turn golden brown. Keep an eye on them so they don’t burn. When they look perfect, take them out of the oven. Let them cool for a few minutes before adding the drizzle. While your twists are baking, let’s make the drizzle. In a bowl, whisk together the powdered sugar, milk, and vanilla extract. Keep whisking until the mixture is smooth. If it’s too thick, add a little more milk. If it’s too runny, add more powdered sugar. Once the twists cool, drizzle this sweet mix over them. This adds a nice finish and extra flavor. Enjoy your tasty cinnamon twists! To make the best cinnamon twists, start with fresh crescent roll dough. It should be cold but not frozen. When you roll out the dough, press the seams well. This helps create a nice, solid rectangle. Use a good amount of melted butter. It keeps the twists moist and adds flavor. Don’t skip the cinnamon-sugar mix. It gives the twists their sweet taste. Twist each strip tightly for a fun shape. This makes them look fancy and helps them bake evenly. One common mistake is not preheating your oven. This can lead to uneven baking. Make sure to watch the time closely. Baking too long can burn the edges. Avoid using too much flour when rolling out the dough. This can dry out the twists. Another mistake is not letting them cool before adding the drizzle. If you drizzle too soon, it will melt and run off. For this recipe, you’ll need some basic tools. A pizza cutter or sharp knife works well for slicing. A large baking sheet is a must for baking. Parchment paper helps prevent sticking. A small bowl for mixing the cinnamon-sugar is helpful too. Finally, a whisk makes mixing the drizzle easy. These tools will help you create perfect cinnamon twists every time. Pro Tips Chill the Dough: For easier handling, refrigerate the crescent roll dough for about 15 minutes before unrolling it. This will make it less sticky and easier to work with. Even Butter Distribution: To ensure even flavor, brush the melted butter carefully and try to cover all edges and corners of the dough before adding the cinnamon-sugar mixture. Variations Galore: Feel free to experiment with different fillings such as nutella, fruit preserves, or chopped nuts for a unique twist on the classic cinnamon flavor. Storage Tips: Store any leftovers in an airtight container at room temperature for up to 2 days. Reheat in the oven for a few minutes before serving for that fresh-baked taste. {{image_2}} You can change the flavor of your cinnamon twists easily. Try adding nutmeg for a warm spice kick. You could also use brown sugar instead of white sugar for a deeper taste. Want a chocolate twist? Add cocoa powder to the cinnamon-sugar mix. You can even mix in some chopped nuts for crunch. If you like fruit, use apple pie spice or add finely chopped apples. Each choice gives your twists a fun new twist! These cinnamon twists are great for any time of day. Serve them for breakfast with coffee or tea. They make a fun snack for kids after school. You can also serve them at parties or family gatherings. Just place them on a platter for all to share. For a special treat, try serving them warm with ice cream or whipped cream on the side. Everyone will love them! Dipping sauces can take your cinnamon twists to the next level. A simple icing made from powdered sugar and milk works well. You can also use chocolate sauce for a sweet, rich taste. For something fruity, try a raspberry or strawberry sauce. If you want a tart flavor, cream cheese dip adds a nice balance. Mix and match to find your favorite combo! Store your leftover cinnamon twists in an airtight container. Keep them at room temperature for up to two days. If you want them to last longer, place them in the fridge. They stay fresh for about a week in the fridge. Make sure to let them cool completely before storing them. This helps prevent sogginess. To reheat your cinnamon twists, use an oven or microwave. If using an oven, preheat it to 350°F (175°C). Place the twists on a baking sheet for about 5-7 minutes. This keeps them crispy. If you choose the microwave, heat them for about 10-15 seconds. Check to see if they are warm enough. Be careful not to overheat them, or they may get tough. You can freeze your cinnamon twists for later. Wrap each twist in plastic wrap and place them in a freezer bag. They keep well for up to three months. When you want to enjoy them, thaw them in the fridge overnight. After that, use the reheating instructions to warm them up. They will taste almost as good as fresh! To make cinnamon twists from scratch, start with basic dough. You can mix flour, sugar, salt, and yeast. This takes time for the dough to rise, but it gives a fresh taste. After the dough rises, roll it out flat. Spread melted butter, sugar, and cinnamon on top. Cut strips, twist them, and bake as usual. This method adds a personal touch. Yes, you can use other dough types. Puff pastry or biscuit dough works well. Each type will change the texture and flavor. For puff pastry, expect a flaky twist. For biscuit dough, the twists will be softer and fluffier. Experimenting can lead to new and fun flavors. If your twists are too dense, check the dough. It may need more rising time. If they are dry, brush with more butter before baking. You can also soak them in a warm glaze after baking. This will add moisture and flavor. Leftover cinnamon twists last about two days at room temperature. Store them in an airtight container to keep them fresh. For longer storage, you can freeze them. Just wrap each twist tightly in plastic wrap and place them in a freezer bag. They can last for up to three months in the freezer. You learned about the key ingredients for cinnamon twists, plus some great product picks. We covered how to prepare and bake them, along with making a tasty drizzle. I shared tips to make your twists perfect and avoid common mistakes. You now know how to try different flavors and store your leftovers. Follow these steps, and you will enjoy amazing cinnamon twists. Don't hesitate to get creative, and make this recipe your own. Enjoy baking!

Crescent Roll Cinnamon Twists Easy and Tasty Treat

- 1 lb chicken breast, sliced into thin strips - 1 bell pepper (red, yellow, or green), sliced - 1 onion, sliced - 1 teaspoon chili powder - 1 teaspoon cumin - 1 teaspoon paprika - 1 tablespoon olive oil - Salt and pepper, to taste - 2 cups cooked rice (white or brown) - 1 cup black beans, drained and rinsed - 1 avocado, diced - 1 cup corn (canned or frozen, thawed) - Fresh cilantro, chopped (for garnish) - Lime wedges (for serving) When making Chicken Fajita Rice Bowls, you need fresh and tasty ingredients. First, let's talk about the main ingredients. You want to use good quality chicken breast. Slice it into thin strips. This helps it cook evenly. Next, choose a bell pepper. You can use red, yellow, or green. Each adds a different flavor and color. Don't forget the onion! Slice it thin. Onions add sweetness and depth to your dish. Now, for seasonings and oils. You'll need chili powder, cumin, and paprika. Each spice gives your chicken flavor and warmth. Use olive oil to cook everything. It adds richness. Finally, season with salt and pepper to taste. Rice is the next part of your dish. You can use white or brown rice. Cook it before adding it to your bowls. For toppings, include black beans for protein. Diced avocado adds creaminess. Corn brings sweetness. Fresh cilantro gives a bright touch. Lastly, serve with lime wedges. A squeeze of lime lifts all the flavors. Enjoy your cooking! {{ingredient_image_1}} - In a medium bowl, combine the chicken strips with chili powder, cumin, paprika, olive oil, salt, and pepper. - Mix well and let it marinate for at least 15-20 minutes. This enhances the flavor greatly. - Heat a large skillet over medium-high heat. - Add the marinated chicken to the skillet. Cook for about 5-7 minutes, until the chicken is fully cooked and golden brown. - Remove the chicken from the skillet and set it aside. - In the same skillet, add the sliced bell pepper and onion. - Sauté for about 3-4 minutes until the veggies are tender but still crisp. - Season with a little salt and pepper for added flavor. - Add the cooked chicken back into the skillet with the sautéed veggies. - Stir in the black beans and corn. Cook for an additional 2 minutes until everything is heated through. - In serving bowls, place a generous scoop of cooked rice as the base. - Top with the chicken and veggie mixture. Add diced avocado on top for creaminess. - Finish with fresh cilantro and a squeeze of lime juice for a bright taste. - Serve with lime wedges on the side for extra flavor. - Ensure chicken is marinated for full flavor. - Marinate for at least 15-20 minutes. This time allows spices to soak in. - Adjust cook time based on chicken thickness. Thicker strips need more time to cook. - Layering ingredients for visual appeal makes your bowl eye-catching. - Start with rice, then add chicken and veggies on top. - Use colorful veggies for variety. Red, yellow, and green peppers look great together. - Add additional spices for a kick. Try cayenne or red pepper flakes. - Serve with salsa or yogurt to boost flavor. A fresh salsa adds a nice touch. Pro Tips Marinate for Maximum Flavor: Allow the chicken to marinate for at least 30 minutes, or even overnight, to deepen the flavors. Choose Your Veggies Wisely: Feel free to add other vegetables like zucchini or mushrooms for extra flavor and nutrition. Perfectly Cooked Rice: Use day-old rice or allow freshly cooked rice to cool for a while to prevent it from becoming mushy. Presentation Matters: Layer your ingredients in the bowl for a beautiful presentation, and don't forget to garnish with cilantro and lime! {{image_2}} You can easily swap chicken for tofu. Tofu absorbs flavors well, making it a great choice. Just marinate it like you would the chicken. You can add more veggies for extra crunch and color. Try zucchini, mushrooms, or even sweet potatoes. If you want to change the base, try quinoa or cauliflower rice. Quinoa adds protein and has a nutty taste. Cauliflower rice is low in carbs and very light. You can also use brown rice for more fiber or jasmine rice for a fragrant twist. Feel free to mix and match spices for new flavors. Try adding taco seasoning, or even some smoked paprika for a deeper taste. You can also use different beans, like pinto or kidney beans. They will give your dish a unique twist. Store your Chicken Fajita Rice Bowls in airtight containers. This keeps them fresh. I recommend using glass or BPA-free plastic containers. Make sure they cool before sealing. Leftovers can last up to three days in the fridge. You can reheat your bowls in a microwave or a skillet. If using the microwave, cover the bowl to keep moisture in. Heat for one to two minutes. Stir halfway to ensure even warming. For the skillet, add a splash of water and heat on low. This helps avoid soggy rice. To freeze an assembled bowl, wrap it tightly in plastic wrap. Then, place it in a freezer-safe bag. Remove as much air as possible. Your bowls can stay fresh for up to three months. When you're ready to eat, thaw the bowl overnight in the fridge. Reheat as described above. Enjoy your meal! Yes, you can use frozen chicken. Just be sure to thaw it before cooking. Thawing helps the chicken cook evenly. You can leave it in the fridge overnight or use the microwave for a quick thaw. Once thawed, season and marinate as usual. Your chicken will turn out just as tasty! To add heat, try using more chili powder or add cayenne pepper. You can also incorporate diced jalapeños or hot sauce into the chicken mix. For a unique twist, grill the peppers with a sprinkle of chipotle powder. Adjust the spice level to suit your taste. Absolutely! You can prepare the chicken and veggies a day ahead. Cook and store them in the fridge. When you're ready to eat, just heat everything in a skillet. This makes a quick meal on busy days. You can also cook the rice in advance for added convenience. There are many delicious toppings to choose from! You can add shredded cheese like cheddar or queso fresco. Sour cream, pico de gallo, or guacamole also work well. Consider adding fresh jalapeños, olives, or even a sprinkle of crushed tortilla chips for crunch. Mix and match to create your perfect bowl! This post covered how to make tasty fajita rice bowls. We went through the key ingredients, like chicken, bell peppers, and black beans. You learned step-by-step instructions to marinate and cook the chicken, sauté the veggies, and assemble the bowls. I shared tips for flavor and presentation, plus variations to meet different tastes. Finally, we discussed storage and reheating methods for leftovers. Enjoy creating your fajita rice bowls, and feel free to experiment with your favorite ingredients!

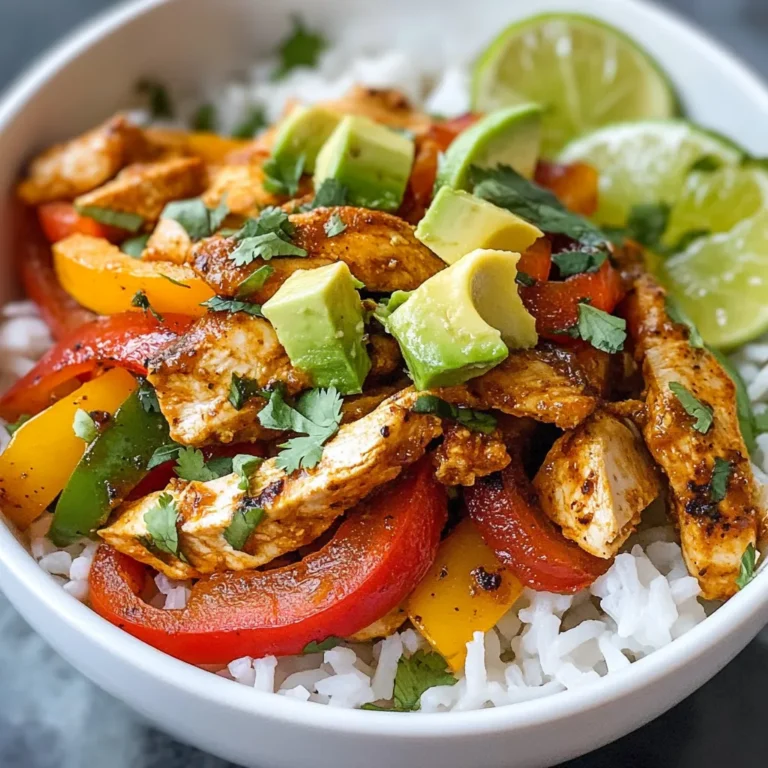
Chicken Fajita Rice Bowls Flavorful and Easy Recipe

To make Buffalo Chicken Zucchini Boats, gather these key items: - 4 medium zucchinis - 2 cups cooked shredded chicken - 1/2 cup buffalo sauce (adjust for heat preference) - 1/2 cup cream cheese, softened - 1/2 cup shredded cheddar cheese - 1/4 cup green onions, chopped - Salt and pepper to taste - Olive oil for drizzling These ingredients create a bold and flavorful dish that everyone will enjoy. The zucchini acts as a great base, while the buffalo sauce brings the heat. The cream cheese makes everything creamy and rich. You can swap some ingredients if needed. Here are some ideas: - Use ground turkey or beef instead of chicken for a different taste. - Swap cream cheese for Greek yogurt for a lighter option. - Try mozzarella cheese in place of cheddar for a milder flavor. - Use different hot sauces if you want to change up the spice level. - Chives or parsley can replace green onions for a fresh twist. These substitutions can help you cater to your taste or dietary needs while keeping the dish delicious. Each serving of Buffalo Chicken Zucchini Boats typically contains: - Calories: 350 - Protein: 30g - Carbohydrates: 10g - Fat: 20g - Fiber: 3g This dish is not only tasty but also packed with protein, making it a filling meal. The zucchini adds fiber and keeps the dish light. Enjoy this healthy option that satisfies your cravings! {{ingredient_image_1}} First, gather your zucchinis. You need four medium zucchinis for this dish. Slice each zucchini in half lengthwise. Use a spoon to scoop out the centers. Make sure to leave about 1/4-inch of zucchini along the edges. This keeps the boats stable. Place the zucchini halves on a baking sheet lined with parchment paper. Drizzle them lightly with olive oil. This adds flavor and helps with cooking. In a medium bowl, combine two cups of cooked shredded chicken with 1/2 cup of buffalo sauce. Adjust the sauce based on how spicy you want the filling. Next, add 1/2 cup of softened cream cheese. This makes the filling creamy and rich. Then, mix in 1/4 cup of chopped green onions and half of the shredded cheddar cheese. Stir everything until it’s well mixed. Season with salt and pepper to taste. This step is key for flavor. Now it's time to fill the zucchini boats. Spoon the buffalo chicken mixture into each boat, filling them generously. Make sure to pack the filling well. Sprinkle the remaining cheddar cheese on top of each filled zucchini boat. Preheat your oven to 375°F (190°C). Bake the zucchini boats for about 25 to 30 minutes. They should be tender, and the cheese should be melted and bubbly. Once done, let them cool slightly before serving. Enjoy your bold and flavorful dish! To get the best texture, choose firm zucchinis. They should not be too soft. Cut them in half lengthwise. Scoop out the center, but leave some flesh for strength. This helps them hold the filling well. Bake them long enough to make them tender, but not mushy. Check them around 25 minutes. If they are tender and the cheese is golden, they are ready. Buffalo sauce can be spicy. Start with half a cup, but taste as you go. If you like it hot, add more sauce. If you want it milder, mix in some cream cheese. This will calm the heat. Adjusting the sauce lets you make it just right for your taste. To make your dish look great, use a nice platter. Place the zucchini boats side by side. Top them with extra green onions for color. Drizzle more buffalo sauce over the top for flair. This makes it pop and look inviting. You can also add a side of ranch or blue cheese for dipping. Pro Tips Choose Fresh Zucchini: Opt for firm zucchinis that are bright in color for the best flavor and texture. Customize the Heat: Adjust the amount of buffalo sauce based on your heat tolerance; you can also mix in some ranch dressing to mellow it down. Cheese Variations: Try using different types of cheese like mozzarella or pepper jack for a unique twist on flavor. Make Ahead: You can prepare the filling in advance and assemble the zucchini boats right before baking for a quick weeknight meal. {{image_2}} You can make a vegetarian version of these zucchini boats. Swap the chicken for cooked quinoa or lentils. Mix them with buffalo sauce and cream cheese. You can also add black beans for a hearty texture. This makes a filling dish packed with protein. You still get the great flavors of buffalo sauce without meat. Feel free to get creative with toppings. Consider adding diced tomatoes or avocado for freshness. You could sprinkle some crumbled feta or blue cheese on top. These toppings add more flavor and texture. Don't forget a drizzle of ranch dressing for a creamy finish. Each bite will be a tasty surprise. You can adjust this recipe for different diets. For a dairy-free option, use vegan cream cheese and cheese. If you're watching carbs, skip the cheese or use less. You can even make it gluten-free by checking the sauce label. This way, everyone can enjoy buffalo chicken zucchini boats! To keep your Buffalo Chicken Zucchini Boats fresh, store them in an airtight container. Let them cool to room temperature before sealing the container. Place the container in the fridge. They will stay good for about three days. When you are ready to enjoy the leftovers, preheat your oven to 350°F (175°C). Place the zucchini boats on a baking sheet. Cover them with foil to keep them moist. Heat in the oven for about 15-20 minutes. You can also use a microwave for quick reheating. Just heat them for 1-2 minutes, but the oven gives better results. If you want to save these tasty boats for later, freezing is a great option. Before freezing, make sure they are cool. Wrap each zucchini boat tightly in plastic wrap. Then, place them in a freezer bag or container. They can last for up to three months in the freezer. When you're ready to eat, thaw them overnight in the fridge before reheating. Yes, you can use fresh chicken. Start by cooking the chicken fully. You can grill, bake, or boil it. Once cooked, shred the chicken with two forks. This method works great for flavor and texture. To prevent watery zucchini boats, choose smaller zucchinis. Larger ones tend to have more water. When preparing, scoop out the centers gently, leaving enough flesh. You can also sprinkle salt inside the boats and let them sit for a few minutes. This draws out excess moisture. Pat them dry before filling. Many side dishes pair nicely with buffalo chicken zucchini boats. Here are some great options: - Coleslaw – The crunch adds a nice texture. - Corn on the cob – Sweet corn complements the spicy flavors. - Sweet potato fries – They offer a tasty contrast to the dish. - Garden salad – Fresh greens balance the richness of the boats. This blog post shared how to make tasty buffalo chicken zucchini boats. You learned about essential ingredients, helpful substitutes, and the nutritional facts. I explained the steps for preparing and baking the filling. Tips and tricks helped you achieve the right texture and flavor balance. I also shared variations for different diets and how to store leftovers. Remember, cooking can be fun and creative. Enjoy making these zucchini boats your own!

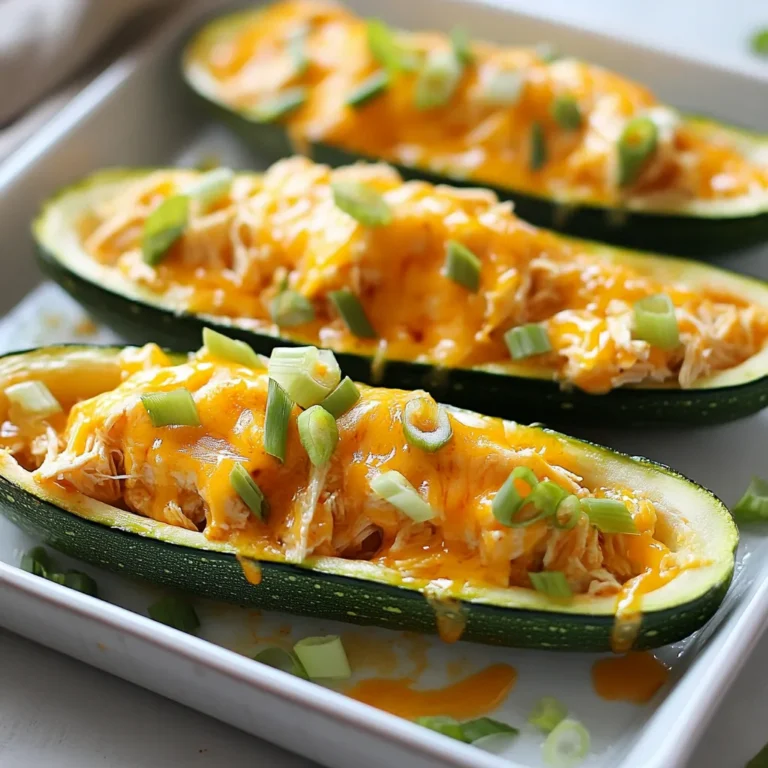
Buffalo Chicken Zucchini Boats Bold and Flavorful Dish

- 1 pre-made pizza crust (store-bought or homemade) - 1 cup cooked chicken breast, shredded - 1 cup cucumber, finely diced - 1/2 cup plain Greek yogurt - 2 tablespoons fresh dill, chopped - 2 tablespoons lemon juice - 1 clove garlic, minced - 1 cup shredded mozzarella cheese - 1/4 cup red onion, thinly sliced - Salt and pepper to taste - Olive oil for brushing Using fresh ingredients makes a big difference. For the chicken, you can use leftover roast chicken or poach some fresh. I suggest using high-quality Greek yogurt for the tzatziki. Homemade tzatziki beats store-bought for taste and freshness. Fresh dill adds a bright flavor, while store-bought may lack that zing. Don’t have cucumber? Use zucchini instead for a similar crunch. If you want a different cheese, try feta or goat cheese for a tangy twist. For a lighter pizza, swap the crust for a cauliflower base. If you want it spicy, add some red pepper flakes or jalapeños on top. {{ingredient_image_1}} Start by preheating your oven to 475°F (245°C). This high heat helps the pizza cook quickly and become crispy. While the oven warms up, you can prepare the tzatziki sauce. It only takes a few minutes to mix the ingredients. You will need a bowl for this. 1. Make Tzatziki Sauce: In a bowl, add 1 cup of Greek yogurt, 1 cup of diced cucumber, 2 tablespoons of chopped dill, 2 tablespoons of lemon juice, and 1 minced garlic clove. Season with salt and pepper, then stir until blended. Set this aside. 2. Prepare the Pizza Crust: Roll out the pre-made pizza crust on a floured surface. Make it as thick or thin as you like. Place it on a parchment-lined baking sheet or a pizza stone. 3. Add Chicken: Take 1 cup of shredded chicken and spread it evenly over the crust. This will be the main protein on your pizza. 4. Spread Tzatziki: Using a spoon, spread the tzatziki sauce over the chicken. Be gentle to keep some chicken visible. 5. Add Cheese and Onions: Sprinkle 1 cup of shredded mozzarella cheese over the tzatziki. Then, add 1/4 cup of thinly sliced red onion on top for extra flavor. 6. Brush with Olive Oil: Lightly brush the edges of the crust with olive oil. This gives a nice golden color when baked. 7. Bake the Pizza: Place your pizza in the oven. Bake it for 12 to 15 minutes. Look for a golden crust and bubbling cheese. 8. Serve: After baking, let the pizza cool for a couple of minutes. Slice it and enjoy! You can add extra dill on top if you like. - Prep Time: 15 minutes - Total Time: 30 minutes - Oven Temperature: 475°F (245°C) - Baking Time: 12-15 minutes Following these steps makes it easy to enjoy a tasty Tzatziki Chicken Pizza. To make a great crust, start with a good base. I recommend using a pre-made pizza crust. Roll it out on a floured surface to your desired thickness. A thicker crust can hold more toppings. Don’t forget to preheat your oven to 475°F (245°C). This helps the crust bake evenly and get golden. Brush the edges with olive oil before baking. It gives a nice crispy texture. Adding seasonings can elevate your pizza. Use fresh dill in the tzatziki sauce for a bright taste. Lemon juice adds a refreshing zing. When assembling, sprinkle salt and pepper on the chicken. You can also add a pinch of oregano or garlic powder. These small touches go a long way in making flavors pop. One common mistake is overcrowding the pizza. Too many toppings can make it soggy. Spread the chicken and tzatziki evenly. Another mistake is not preheating the oven. This step is key to a good crust. Lastly, don’t skip brushing the edges with olive oil. It helps achieve that perfect golden finish. Pro Tips Use Fresh Ingredients: Fresh cucumbers, dill, and quality chicken will elevate the flavor of your tzatziki and pizza. Experiment with Cheese: Feel free to mix different cheeses like feta or goat cheese for a unique twist on the classic mozzarella. Customize Your Toppings: Add extra toppings like olives, bell peppers, or spinach for additional flavor and nutrition. Let It Rest: Allow the pizza to rest for a few minutes after baking to help the toppings set and make slicing easier. {{image_2}} You can easily make a vegetarian version of Tzatziki Chicken Pizza. Simply swap the chicken for grilled vegetables. Zucchini, bell peppers, and mushrooms work well. These veggies add flavor and texture. Use the same tzatziki sauce to keep the taste fresh and zesty. This option is great for those who love meatless meals. If you want to change the protein, consider shrimp or beef. For shrimp, use cooked and peeled shrimp. Spread them evenly before adding the tzatziki. For beef, try thin slices of cooked steak. Both options provide a different taste and texture. These proteins can make the pizza even more exciting. You can also experiment with different sauces and toppings. Instead of tzatziki, try a spicy harissa or a creamy ranch. Each sauce changes the pizza's flavor profile. You can also add toppings like olives, artichokes, or fresh spinach. These additions can enhance the dish and make it unique. To keep your tzatziki chicken pizza fresh, store it in an airtight container. Let it cool first, then cover it tightly. If you use plastic wrap, press it against the pizza to remove air. This helps to prevent sogginess and keep flavors intact. You can also separate the pizza into slices for easy reheating later. When you're ready to enjoy leftovers, preheat your oven to 350°F (175°C). Place the pizza on a baking sheet. Heat for about 10-15 minutes. This helps to keep the crust crispy. If you prefer, you can also use a microwave. Just heat it for 1-2 minutes. However, this might make the crust soft. Tzatziki chicken pizza lasts up to 3 days in the refrigerator. Make sure to check for any signs of spoilage before eating. If you notice any odd smells or discoloration, it’s best to throw it away. Enjoy your tasty pizza while it’s fresh! Yes, you can use other types of cheese. Feta cheese adds a nice tang. Goat cheese also works well for a creamy texture. If you prefer a milder taste, try using cheddar. Just remember, mozzarella melts well and gives that classic pizza look. Making tzatziki sauce ahead is easy. Combine the yogurt, cucumber, dill, lemon juice, and garlic in a bowl. Mix them well and store it in the fridge. It stays fresh for about 2-3 days. Just give it a stir before using. This can save time on pizza night! A pre-made pizza crust is quick and convenient. You can use thin or thick crust, depending on your taste. Homemade crust offers a personal touch. Cauliflower crust is a great gluten-free option. Choose what you like best to create your perfect Tzatziki Chicken Pizza! In this post, we explored the key ingredients for pizza, tips for great crusts, and cooking steps. We discussed variations, like using chicken or shrimp, to keep things exciting. Storing leftovers properly ensures your meal stays fresh. Finally, we answered common questions about substitutions and prep. Remember, making pizza is fun and easy. With the right ingredients and steps, you create something delicious every time. Enjoy experimenting with flavors, and don’t be afraid to get creative!

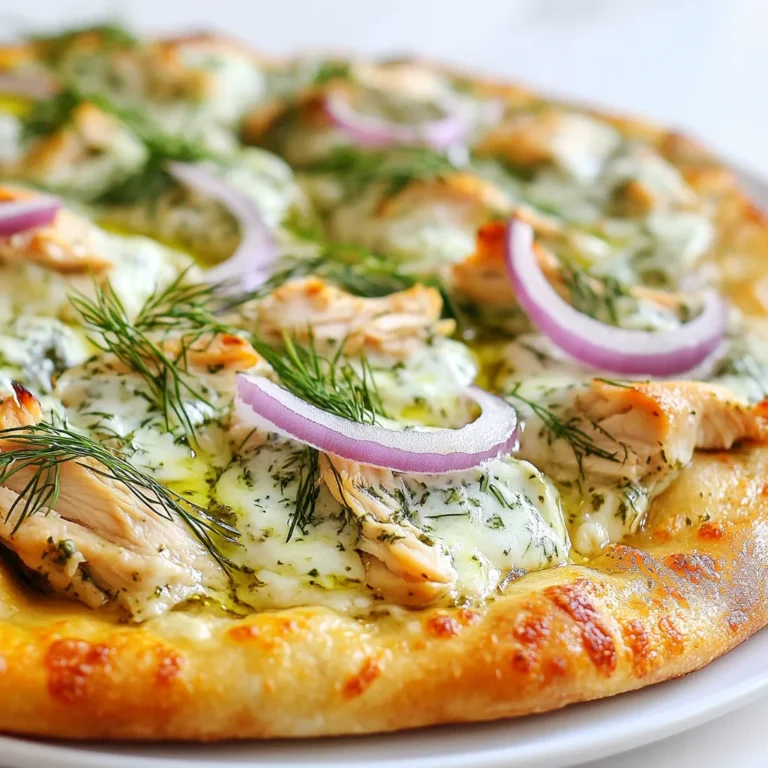
Tzatziki Chicken Pizza Flavorful and Easy Recipe

PREV 1 … 66 67 68 … 86 NEXT
spicy fork kitchen

explore

DessertsDinnerAppetizersDrinks

Our Policies

  • Cookie Policy
  • Copyright Policy
  • Disclaimer
  • GDPR Policy
  • Terms Of Use
Back to Top
  • About
  • Contact Us
  • Privacy Policy
© 2026 spicy fork kitchen