FREE DINNER EBOOK! Get your copy!
  • Cookie Policy
  • GDPR Policy
  • Disclaimer
  • Terms Of Use
  • Visit my other site: Fun Cookie Recipes
spicy fork kitchen
  • Home
  • Dinner
  • Desserts
  • Drinks
  • Appetizers
  • Contact
  • About
  • Privacy Policy
  • Home
  • Dinner
  • Desserts
  • Drinks
  • Appetizers
  • Contact
  • About
  • Privacy Policy
  • Cookie Policy
  • GDPR Policy
  • Disclaimer
  • Terms Of Use
Visit my other site: Fun Cookie Recipes

HOME / CATEGORIES /

Latest

For these S'mores Brownie Bars, you will need simple ingredients. Each one plays an important role in flavor and texture. Here’s what you need: - 1/2 cup unsalted butter, melted - 1 cup granulated sugar - 2 large eggs - 1 teaspoon vanilla extract - 1/3 cup unsweetened cocoa powder - 1 cup all-purpose flour - 1/4 teaspoon salt - 1 cup mini marshmallows - 1/2 cup chocolate chips - 1/2 cup crushed graham crackers (plus extra for topping) - 1/2 cup milk chocolate bar, broken into pieces The melted butter adds richness and moisture. Granulated sugar provides sweetness and helps the bars rise. Eggs bind everything together, creating a soft, chewy texture. Vanilla extract adds warmth and depth to the flavor. Cocoa powder gives that deep chocolate taste, while flour helps form the structure. Salt enhances all the flavors. Mini marshmallows create those gooey pockets of sweetness. Chocolate chips add extra chocolatey goodness. Crushed graham crackers give a nice crunch and bring that classic S'mores taste. Lastly, the milk chocolate bar on top makes everything extra special. These ingredients work together to create a treat that is both sweet and satisfying. Enjoy the process of mixing and baking these tasty bars! {{ingredient_image_1}} First, set your oven to 350°F (175°C). This step is key for even baking. Next, grab a 9x9 inch baking pan. You can grease it or use parchment paper. Both options work well to stop sticking. In a large bowl, melt your butter. Then, add the granulated sugar. Mix these together until smooth. Next, crack in two eggs. Add one at a time, mixing well after each. Finally, stir in one teaspoon of vanilla extract. This will add great flavor. In another bowl, whisk together the cocoa powder, flour, and salt. Use 1/3 cup cocoa powder, 1 cup flour, and 1/4 teaspoon salt. Gradually mix this dry mix into your wet ingredients. Stir until just combined but don’t over-mix. Now it’s time to add some fun! Fold in one cup of mini marshmallows, half a cup of chocolate chips, and half a cup of crushed graham crackers. Make sure they are evenly spread throughout the batter. This adds texture and flavor. Pour the batter into your prepared pan. Spread it evenly. Gently press pieces of a milk chocolate bar into the top. This makes it extra gooey. Bake in the oven for 25 to 30 minutes. Stick a toothpick in the center. It should come out with a few moist crumbs. Let the brownie bars cool in the pan for about 15 minutes. For a toasted look, sprinkle more crushed graham crackers and mini marshmallows on top. You can broil them for just a minute or two. Watch closely to avoid burning. This step adds a lovely finish! To get the ideal texture for S'mores Brownie Bars, focus on mixing. After you add the dry ingredients, mix just until combined. Overmixing makes brownies tough. You want a smooth batter with small lumps. This keeps the bars soft and chewy. To keep your S'mores Brownie Bars fresh, store them in an airtight container. Place parchment paper between layers to prevent sticking. If you seal them well, they last up to four days at room temperature. For longer storage, put them in the fridge, where they can last about a week. Serve these bars warm for the best taste. You can heat them in the microwave for a few seconds. Top with whipped cream or ice cream for a treat. Add extra crushed graham crackers on top for a nice crunch. They also pair well with a cold glass of milk. Enjoy! Pro Tips Use Room Temperature Ingredients: Make sure your eggs are at room temperature before adding them to the batter. This helps to create a smoother and more consistent mixture. Don't Overmix the Batter: When combining the wet and dry ingredients, mix until just combined. Overmixing can lead to dense brownies. Customize Your Toppings: Feel free to add your favorite mix-ins such as nuts, or swap out the chocolate chips for white chocolate or peanut butter chips for a unique flavor twist. Watch the Browning: If you decide to broil the top for a toasted marshmallow effect, keep a close eye on it. It can go from perfectly toasted to burnt in seconds! {{image_2}} You can change the type of chocolate in your S'mores Brownie Bars. Use dark chocolate for a richer taste. It brings out the cocoa flavor more than milk chocolate. You can also try white chocolate for a sweeter twist. Mix chocolate types for a fun surprise in every bite. Each choice changes the flavor and makes it unique. Want to add extra crunch? Try adding nuts like walnuts or pecans. They give a nice texture and pair well with chocolate. If you prefer fruity flavors, add chopped strawberries or raspberries. This adds a fresh taste. You can even use dried fruits like cherries or apricots for a chewy bite. Just remember to adjust the other ingredients if you add a lot. For a gluten-free version, swap the all-purpose flour with a gluten-free blend. Many brands offer one-to-one substitutes that work well. Just ensure the mix has xantham gum for better texture. This way, everyone can enjoy these tasty bars. They will still taste great, with a chewy and rich texture. To keep your S'mores Brownie Bars fresh, store them in an airtight container. This prevents moisture loss and keeps them soft. If you use a pan, cover it tightly with plastic wrap or aluminum foil. I often line my pan with parchment paper, making it easy to lift and cut the bars. When stored well, these brownie bars can last up to 5 days at room temperature. If you want to keep them longer, consider freezing them. They can stay fresh for about 3 months in the freezer. Just make sure to wrap them tightly to avoid freezer burn. If you want a warm treat, you can reheat the brownie bars. Place them in the microwave for about 10 to 15 seconds. This warms them up while keeping the gooey chocolate inside. Enjoy them fresh out of the microwave for a melty experience! Yes, you can use dark chocolate. Dark chocolate gives a richer taste. It pairs well with the sweet marshmallows and graham crackers. Just remember, dark chocolate is less sweet. You may want to adjust the sugar in your recipe. The brownie bars are done when a toothpick comes out with a few moist crumbs. If it's clean, they may be overbaked. Keep an eye on them, as ovens vary. Bake them for 25 to 30 minutes for best results. Absolutely! These bars freeze well. Let them cool completely first. Cut them into squares and wrap each piece tightly. Store them in an airtight container. They can last up to three months in the freezer. You can use applesauce or mashed bananas. Use 1/4 cup of either for each egg. This keeps the bars moist and adds some flavor. You can also use flaxseed meal mixed with water for a vegan option. You now have a clear guide to make delicious S'mores Brownie Bars. We covered the right ingredients and steps to achieve great taste and texture. Remember to keep an eye on baking time and feel free to try different mix-ins. Don't hesitate to explore variations, like adding nuts or using dark chocolate. Store them well to keep them fresh. Enjoy this treat with family and friends, and share your tasty results. Happy baking!

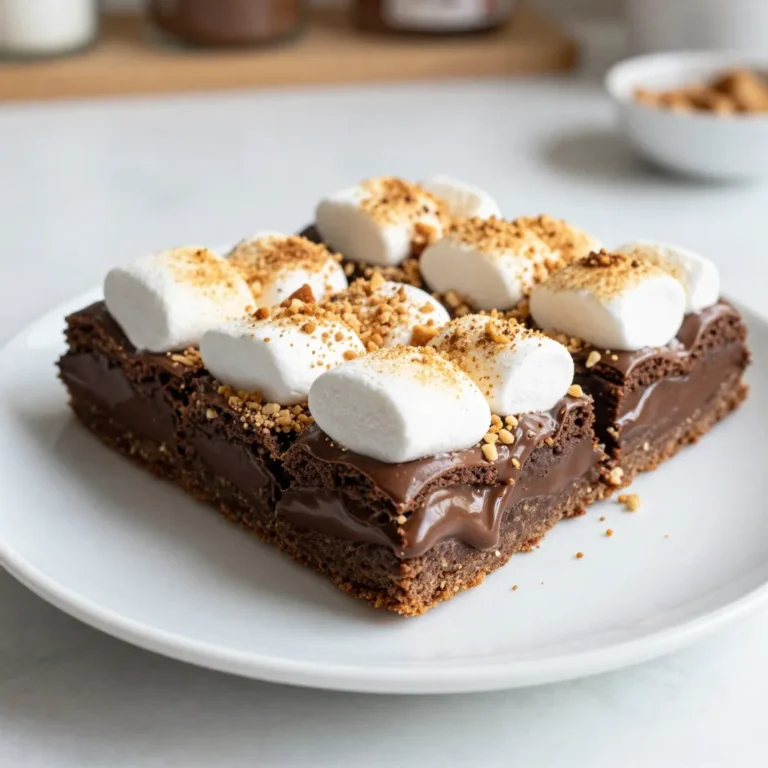
S’mores Brownie Bars Irresistible Chocolate Treat

- 1 ½ cups all-purpose flour - 1 teaspoon baking powder - ½ teaspoon baking soda - ½ teaspoon salt - 1 teaspoon ground cinnamon - ¼ teaspoon ground nutmeg - ½ teaspoon ground ginger In this recipe, all-purpose flour serves as the base. Baking powder and baking soda help the muffins rise. A pinch of salt boosts the flavors while spices like cinnamon, nutmeg, and ginger add warmth and depth. These dry ingredients blend well, creating a perfect balance for flavor and texture. - ½ cup granulated sugar - ½ cup brown sugar, packed - ¾ cup vegetable oil - 2 large eggs - 1 cup pumpkin puree - 1 teaspoon vanilla extract For the wet mix, we use both granulated and brown sugars to add sweetness. Vegetable oil keeps the muffins moist. Eggs help bind the ingredients, while pumpkin puree adds flavor and makes the muffins fluffy. Don't forget the vanilla extract; it adds a delightful aroma! - 4 ounces cream cheese, softened - 2 tablespoons powdered sugar The cream cheese filling brings a rich, creamy surprise. Mixing softened cream cheese with powdered sugar creates a smooth and sweet filling. This contrast of flavors makes each bite special. You can add a pinch of vanilla for extra flavor. {{ingredient_image_1}} First, preheat your oven to 350°F (175°C). This step is key for even baking. While the oven heats, line a 12-cup muffin tin with paper liners. You can also spray the tin with non-stick spray. This helps your muffins come out easily. In a medium bowl, whisk together 1 ½ cups of all-purpose flour, 1 teaspoon of baking powder, ½ teaspoon of baking soda, and ½ teaspoon of salt. Next, add in 1 teaspoon of ground cinnamon, ¼ teaspoon of ground nutmeg, and ½ teaspoon of ground ginger. Mix well and set aside. This blend gives the muffins their warm flavor. In a large mixing bowl, combine ½ cup of granulated sugar, ½ cup of brown sugar, and ¾ cup of vegetable oil. Stir until everything mixes well. Then, add 2 large eggs, 1 cup of pumpkin puree, and 1 teaspoon of vanilla extract. Mix until smooth and well blended. This step brings moisture and sweetness to the muffins. Now, gradually add the dry ingredients into the wet mixture. Fold gently until just combined. Be careful not to overmix; small lumps are okay. In a small bowl, mix 4 ounces of softened cream cheese with 2 tablespoons of powdered sugar until smooth. This cream cheese mixture adds a delightful surprise in each bite. Fill each muffin cup about halfway with the pumpkin batter. Then, drop a small spoonful of the cream cheese mixture into the center of each cup. After that, cover the cream cheese with more pumpkin batter until each cup is about ¾ full. If you like, sprinkle chopped pecans or walnuts on top for added crunch. Place the muffin tin in the oven and bake for 18-22 minutes. Check for doneness by inserting a toothpick into the center. Make sure to avoid the cream cheese center. If it comes out clean, the muffins are ready. After baking, let them cool in the tin for about 5 minutes. Then, transfer them to a wire rack to cool completely. Enjoy the warm, sweet aroma as they cool! To get the best texture in your pumpkin cream cheese muffins, mix gently. Overmixing can lead to tough muffins. When you combine the wet and dry ingredients, stop mixing once you no longer see dry flour. It’s okay to have some lumps. Using room temperature ingredients helps too. When your eggs and cream cheese are warm, they blend better. This creates a smoother batter and a fluffier muffin. You can boost the flavor by adding nuts or chocolate chips. Chopped pecans or walnuts add a nice crunch. If you love chocolate, try adding mini chocolate chips. They melt and create a gooey surprise. Incorporating seasonal spices can also elevate your muffins. Try adding a pinch of cloves or allspice to enhance the fall flavor. A hint of vanilla gives a warm touch too. For even baking, make sure to preheat your oven. An oven thermometer can help ensure the right temperature. Fill each muffin cup equally for uniform baking. To check for doneness, insert a toothpick into the center of a muffin. If it comes out clean, your muffins are ready. Avoid the cream cheese center to get an accurate read. Pro Tips Use Fresh Pumpkin Puree: For the best flavor, consider using homemade pumpkin puree instead of canned. Simply roast a small pumpkin, scoop out the flesh, and blend until smooth. Room Temperature Ingredients: Ensure your cream cheese is at room temperature before mixing for a smoother filling. This will help it blend easily with the powdered sugar. Don’t Overmix: Mix the batter just until combined. Overmixing can lead to dense muffins, so it's okay if there are a few small lumps. Storage Tips: Store leftover muffins in an airtight container at room temperature for up to 3 days or refrigerate for up to a week. You can also freeze them for longer storage. {{image_2}} For those needing gluten-free options, you can swap the all-purpose flour with a gluten-free blend. Many brands work well in baking, just check the package for a one-to-one ratio. This keeps the muffins tasty and fluffy! If you want a vegan version, replace the eggs with flax eggs. Just mix 1 tablespoon of ground flaxseed with 2.5 tablespoons of water. Let it sit for a few minutes until it thickens. You can also use plant-based cream cheese to keep it creamy and delicious. You can have fun with different cream cheese flavors. Try adding a hint of lemon or maple cream cheese for a twist. Each adds a unique taste that makes the muffins special. Seasonal add-ins can enhance your muffins too. Consider mixing in chopped cranberries or diced apples. These not only add flavor but also a pop of color. They can make your muffins even more festive! Drizzles and glazes can elevate your muffins. A simple glaze of powdered sugar and milk can be drizzled on top for extra sweetness. For a crunch, consider using different nuts or seeds. Chopped pecans or walnuts are great. You can also try sunflower seeds or pumpkin seeds for a nut-free option. Each adds texture and flavor, making your muffins even more delightful. You can store pumpkin cream cheese muffins at room temperature or in the fridge. If you choose room temperature, place them in a container with a lid. They stay fresh for about three days. If you want to keep them longer, the fridge is best. Store them in an airtight container to avoid drying out. To freeze muffins, cool them completely first. Wrap each muffin in plastic wrap tightly. Then, place them in a freezer-safe bag. This keeps them fresh for up to three months. When you’re ready to eat them, take a muffin out and let it thaw in the fridge overnight. You can also thaw it at room temperature for a few hours. To enjoy leftover muffins, reheat them in the oven or microwave. For the oven, set it to 350°F (175°C) and warm for about 10 minutes. This keeps them soft. In the microwave, heat for 10-15 seconds for a quick fix. Be careful not to overheat, as it can make them dry. Enjoy your warm muffins just like fresh! To keep your muffins moist, use these tips: - Use fresh pumpkin puree for the best flavor. - Add an extra egg for more richness. - Mix in a bit of yogurt or sour cream. - Avoid overbaking; check for doneness early. These small changes help keep your muffins soft and tasty. The right balance of ingredients adds to the overall moistness, making each bite delightful. Yes, you can substitute pumpkin puree. Some great options are: - Butternut squash puree - Sweet potato puree - Applesauce for a sweet twist Each alternative changes the taste slightly. Butternut squash gives a similar flavor, while applesauce adds sweetness. Experiment with these options and find what you love best! If your muffins sink, check these common causes: - Overmixing the batter can lead to sinking. - Too much leavening agent can create bubbles. - Opening the oven door too early can lower temperature. To fix this, mix gently and avoid adding too much baking powder or soda. Also, give your muffins time to rise before checking on them. Pumpkin Cream Cheese Muffins stay fresh for about: - 2-3 days at room temperature - Up to a week in the fridge - 2-3 months in the freezer Store them in airtight containers to keep them fresh. If you freeze them, wrap each muffin well. Thaw them in the fridge overnight for the best taste. In this blog post, we explored making delicious Pumpkin Cream Cheese Muffins. We covered key ingredients like flour, sugars, and cream cheese. You learned step-by-step instructions, tips for the best texture, and ways to customize flavors. Remember, small tweaks can lead to big changes in your baking. Baking is fun and rewarding. Experimenting will help you create a great muffin. Enjoy the process and share these muffins with friends!

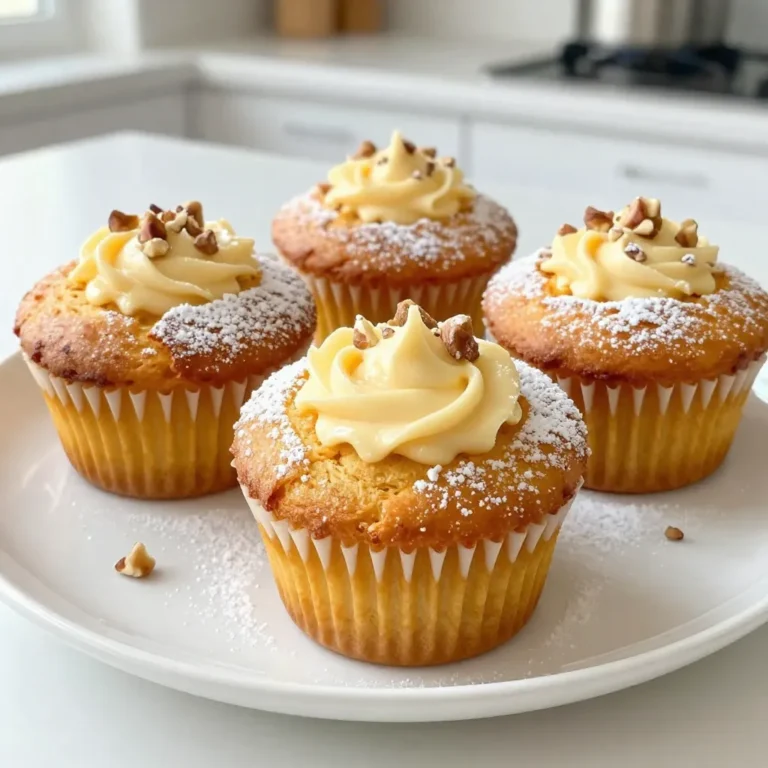
Pumpkin Cream Cheese Muffins Delightful and Easy Recipe

To make Cheesy Taco Rice Skillet, gather these ingredients: - 1 cup long-grain white rice - 2 cups vegetable broth - 1 pound ground beef or turkey - 1 tablespoon olive oil - 1 small onion, diced - 2 cloves garlic, minced - 1 packet taco seasoning - 1 cup corn (fresh or frozen) - 1 cup diced tomatoes (canned or fresh) - 1 cup shredded cheddar cheese - Fresh cilantro, chopped You can swap some ingredients for different flavors or diets: - Use black beans instead of ground beef or turkey for a vegetarian option. - Chicken broth can replace vegetable broth for a richer taste. - If you don’t have taco seasoning, mix chili powder, cumin, and paprika instead. - For a lighter dish, use ground turkey or chicken. Add fun toppings to make it your own: - Slices of avocado for creaminess. - A dollop of sour cream for tangy flavor. - Jalapeños for a spicy kick. - Extra cilantro for fresh taste. These ingredients and options help create a tasty meal that everyone will love! {{ingredient_image_1}} First, take a medium saucepan. Pour in 2 cups of vegetable broth. Bring it to a boil over high heat. Once boiling, add 1 cup of long-grain white rice. Lower the heat and cover the pot. Let it simmer for about 15 minutes. The rice will absorb all the liquid. After 15 minutes, check if it's tender. If so, remove it from heat and set it aside. Now, grab a large skillet and heat 1 tablespoon of olive oil over medium heat. Add 1 small diced onion to the skillet. Cook the onion for about 3-4 minutes until it is soft. Next, add 2 cloves of minced garlic. Let it cook for another minute. Then, add 1 pound of ground beef or turkey. Break it up with a spatula as it cooks. Cook until it is browned, which takes about 5-7 minutes. Drain any extra fat from the skillet. Sprinkle a packet of taco seasoning over the meat. Add 1 cup of corn and 1 cup of diced tomatoes. Stir everything together and let it simmer for 5 minutes. Now, it’s time to mix everything. Fold in the cooked rice into the skillet mixture. Stir until all the ingredients are well combined and heated through. Then, sprinkle 1 cup of shredded cheddar cheese on top. Cover the skillet with a lid and let it cook on low heat for 2-3 minutes. This will melt the cheese perfectly. Once melted, remove from heat. You can garnish it with chopped cilantro and add any optional toppings like avocado, sour cream, or jalapeños before serving. Enjoy your meal! To make the best Cheesy Taco Rice Skillet, follow these tips: - Use long-grain white rice for great texture. - Always cook the rice in vegetable broth for added flavor. - Let the onion cook until soft before adding garlic. This brings out the sweet taste. - Cook the meat well to avoid a greasy dish. Drain excess fat if needed. - Stir often to mix the flavors and prevent sticking. Avoid these common mistakes for a perfect dish: - Do not skip the seasoning. It adds depth to the meal. - Overcooking the rice can make it mushy. Check it often. - Forgetting to drain the meat can lead to a watery skillet. - Adding cheese too early can cause it to burn. Wait until the end to melt it. Boost the flavor of your dish with these ideas: - Add fresh lime juice before serving for a zesty twist. - Mix in some diced bell peppers for crunch and color. - Top with fresh herbs like cilantro or green onions for freshness. - Use spicy taco seasoning for a kick. - Serve with avocado or jalapeños for a creamy or spicy finish. Pro Tips Use Brown Rice for Extra Nutrients: Substituting long-grain white rice with brown rice will add fiber and nutrients, but remember to adjust the cooking time and liquid accordingly. Make it Spicy: If you love heat, add some diced jalapeños directly into the skillet or sprinkle crushed red pepper flakes over the top before serving. Meal Prep Friendly: This dish is great for meal prepping! Make a double batch and store leftovers in individual containers for easy lunches throughout the week. Customize Your Toppings: Feel free to get creative with toppings! Consider adding sliced olives, diced green onions, or a squeeze of lime for added flavor. {{image_2}} You can make this dish vegetarian by swapping the meat for black beans. Use one can of black beans, rinsed and drained. For a vegan option, skip the cheese or use a plant-based cheese. You can also add more veggies like bell peppers or zucchini for extra flavor and nutrition. To spice up your Cheesy Taco Rice Skillet, add diced jalapeños while cooking the onions. You can also use spicy taco seasoning. If you love heat, try adding a few dashes of hot sauce before serving. This will give your dish a nice kick without losing its creamy goodness. Feel free to get creative! You can mix in extra ingredients like diced bell peppers or black olives. For added crunch, think about topping with crushed tortilla chips. If you want more protein, chickpeas or lentils work great. Experiment and find your favorite combos! To store leftovers, let the Cheesy Taco Rice Skillet cool first. Use an airtight container. Place it in the fridge. It stays fresh for about three days. If you want to keep it longer, freezing is a great option. When you are ready to eat, take it out of the fridge. Heat it in a skillet over medium heat. Stir often to warm it evenly. For quick reheating, use the microwave. Just cover it loosely and heat in 30-second bursts until hot. To freeze, portion the dish into smaller containers. Make sure they are freezer-safe. Label each container with the date. The dish can last up to three months in the freezer. When ready to eat, thaw it overnight in the fridge before reheating. Yes, you can make Cheesy Taco Rice Skillet in advance. Cook the dish, then let it cool. Store it in an airtight container in the fridge. It will last for about three days. When you are ready to eat, just reheat it on the stove or in the microwave. You can serve many sides with this dish. Here are a few ideas: - Chips and salsa: This adds a nice crunch. - Guacamole: It gives a fresh taste. - Side salad: A simple green salad pairs well. - Refried beans: They add more protein and fiber. To change the spice level, you can do a few things: - Use mild taco seasoning for less heat. - Add diced jalapeños for extra spice. - Serve with a spicy salsa on the side. - Use hot sauce to spice it up as you like. These options let you make the dish just right for your taste. You learned about all the ingredients needed for a tasty Cheesy Taco Rice Skillet. We covered substitutions, optional toppings, and ways to prepare each part. I shared tips to avoid common mistakes and enhance flavor. You can also explore variations for different diets and spice levels. Remember, cooking is fun and flexible. Don’t stress about being perfect; enjoy the process and customize as you wish. Go ahead and make that skillet dish your own!

Cheesy Taco Rice Skillet Easy One-Pan Dinner Recipe

To make creamy coconut curry chickpeas, you need these key items: - 1 can (15 oz) chickpeas, drained and rinsed - 1 cup coconut milk - 1 tablespoon coconut oil - 1 onion, diced - 2 garlic cloves, minced - 1 inch ginger, grated - 1 bell pepper (red or yellow), chopped - 1 cup spinach, fresh or frozen These ingredients create a rich, creamy flavor. The chickpeas bring protein, while the coconut milk adds smoothness. Aromatics like onion, garlic, and ginger build a base of taste. The bell pepper adds sweetness, and spinach gives color and nutrients. For the perfect blend of flavors, you need: - 2 tablespoons curry powder - 1 teaspoon ground cumin - 1 teaspoon turmeric - Salt and pepper to taste These spices bring warmth and depth to the dish. Curry powder is the star, with its mix of spices. Cumin adds an earthy note, and turmeric brightens the color. Salt and pepper balance the flavors perfectly. To finish your dish, consider these options: - Fresh cilantro, for garnish - Cooked rice or quinoa, for serving Garnishing with cilantro adds a fresh touch. Serving it over rice or quinoa makes a filling meal. You can also pair it with naan for a fun twist. {{ingredient_image_1}} 1. Start by heating coconut oil in a large skillet over medium heat. 2. Add the diced onion and sauté for about 5 minutes. You want it to look clear. 3. Next, stir in the minced garlic and grated ginger. Cook for 1 more minute. 4. Now, add the chopped bell pepper. Cook this for 3-4 minutes until it softens a bit. 1. Sprinkle in the curry powder, ground cumin, and turmeric. Mix well to coat the veggies. 2. Sauté the spices for 1-2 minutes. This step brings out their rich flavors. 3. Pour in the coconut milk and add the drained chickpeas. Stir until everything is mixed. 1. Bring the mix to a gentle simmer. Let it cook for about 10 minutes. This allows all the flavors to blend. 2. If using frozen spinach, add it now. Stir until it thaws out. If using fresh spinach, add it a few minutes before serving. You want it to wilt nicely. 3. Season the curry with salt and pepper to your taste. Adjust anything as needed. 4. Serve this warm over cooked rice or quinoa. Don’t forget to garnish with fresh cilantro! - Sautéing for maximum flavor: Start by heating coconut oil in your skillet. Add diced onion first. Sauté until it turns soft and clear. This step builds a strong base for your dish. Next, add minced garlic and grated ginger. Cook for just one minute. This brings out their rich aromas. Finally, mix in chopped bell pepper. Cook for a few minutes until it softens. This method layers flavors beautifully. - Adjusting spice levels to taste: You can change the spice level to fit your taste. If you like it spicy, add more curry powder. Start with a little and taste as you go. For a milder dish, reduce the amount of spices. You can also add a pinch of sugar to balance the heat. Remember, cooking is about what you enjoy! - Alternative vegetables: Feel free to swap vegetables based on what you have. Zucchini or carrots work great. You can also use peas or green beans. These will add different textures and flavors. - Dairy-free options beyond coconut: If you want another creaminess, try using almond milk or cashew cream. They provide a nice flavor without dairy. You can also blend soaked cashews with water for a thick, creamy alternative. - Best side dishes for pairing: This curry goes well with cooked rice or quinoa. They soak up the delicious sauce. You can also serve it with naan bread for a fun twist. - Presentation ideas for serving: For a beautiful presentation, use a wide bowl. Spoon the curry over rice or quinoa. Top with fresh cilantro for a pop of color. You can also sprinkle some crushed red pepper for heat. This makes the dish look as good as it tastes! Pro Tips Use Fresh Spices: Fresh spices enhance the flavor of your curry. Always check the expiration date of your spices for the best taste. Adjust Creaminess: For a creamier texture, add more coconut milk or a splash of vegetable broth to the curry. Customize Veggies: Feel free to add other vegetables like zucchini or cauliflower for added nutrition and flavor. Serve with a Side: Pair the curry with naan or a fresh salad for a complete meal experience. {{image_2}} You can easily switch the protein in this dish. Adding tofu makes a great vegan option. Just cube firm tofu and sauté it with the onions. It absorbs the flavors well. If you want meat, chicken works nicely too. Cut it into bite-sized pieces and cook it until golden. You can also swap chickpeas for lentils. Use red or green lentils for a different texture and flavor. They cook faster and add a nice twist. To brighten the taste, try adding lime or lemon juice. A squeeze just before serving will lift the flavors. You can also use different curry pastes. Red, green, or yellow curry pastes each bring unique flavors. Experiment with what you have on hand. This way, you can find your favorite mix. Seasonal vegetables can change the feel of the dish. In summer, add zucchini or corn for a fresh touch. In winter, root vegetables like carrots or sweet potatoes work well. They add heartiness and warmth. This recipe is flexible enough to fit any season. Just adapt the veggies to what is fresh and available. Creamy coconut curry chickpeas last about 4 to 5 days in the fridge. Store them in an airtight container. This keeps the flavors fresh and prevents spills. When you reheat, heat only what you need. This way, the leftovers stay tasty longer. You can freeze creamy coconut curry chickpeas for up to three months. To freeze, let the dish cool completely. Then, place it in a freezer-safe container. Make sure to leave some space at the top, as the curry may expand. To thaw, move it to the fridge overnight. For reheating, use the stove or microwave until it’s hot throughout. If you want to prepare in advance, cook the curry and store it in portions. Use small containers for easy meals. You can also chop your vegetables ahead of time. This cuts down on cooking time when you're ready to eat. Enjoying this dish throughout the week becomes simple and fun! Can I make this recipe vegan? Yes, this recipe is already vegan! It uses coconut milk and chickpeas, which are plant-based. You can enjoy this dish without any animal products. What can I use instead of coconut milk? If you need a substitute, try almond milk or cashew cream. These options will change the flavor a bit but still work well in the recipe. Is this recipe gluten-free? Yes, this recipe is gluten-free. Chickpeas and coconut milk do not contain gluten. Always check labels if you have a gluten allergy. Nutritional breakdown of chickpeas Chickpeas are packed with protein, fiber, and vitamins. A one-cup serving has about 15 grams of protein and 12 grams of fiber. They support heart health and digestion. Can I use dried chickpeas instead of canned? Yes, you can use dried chickpeas! Just soak them overnight and cook them until tender before adding to the dish. It takes more time, but they will taste great. What spice brands are recommended for curry powder? I like to use brands like McCormick or Simply Organic. They offer quality spices that have great flavor. Always check the freshness of your spices for the best taste. This blog post covers a delicious coconut curry chickpea recipe. We explored key ingredients, like chickpeas and coconut milk, along with essential spices and herbs. I shared step-by-step instructions for making the dish, including tips for flavor and variations. Overall, this recipe is simple and adaptable. You can customize it to fit your taste and preferences. Enjoy cooking and sharing this healthy, tasty meal with family and friends!

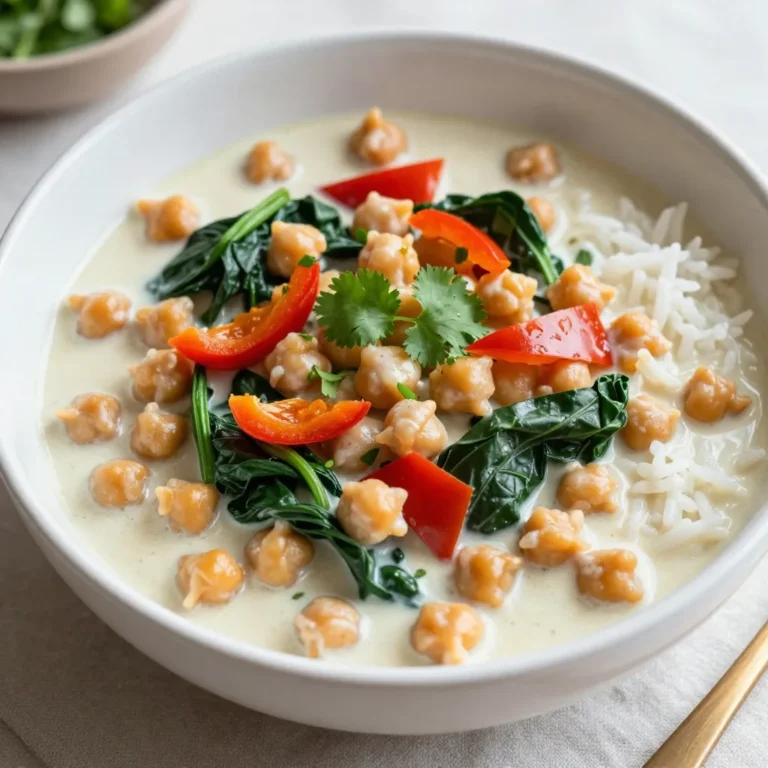
Creamy Coconut Curry Chickpeas Flavorful and Easy Dish

- 1 cup crushed Butterfinger candy bars - 1 ½ cups graham cracker crumbs - ½ cup unsalted butter, melted - 1 (8 oz) package cream cheese - 1 cup powdered sugar - 1 (12 oz) container whipped topping - 1 (3.4 oz) package instant vanilla pudding mix - 2 cups milk - Additional crushed Butterfinger for garnish To make Butterfinger Lush Dessert, gather these tasty ingredients ahead of time. Start with the Butterfinger candy bars. You need about three bars to get one cup of crushed candy. This candy adds a great crunch and flavor. Next, get graham cracker crumbs. These create a nice base for the dessert. You will use one and a half cups, so make sure to crush them well. Melt half a cup of unsalted butter to mix with the crumbs. This will hold the crust together. For the creamy layers, you will need an eight-ounce package of cream cheese. Make sure it is soft for easy mixing. A cup of powdered sugar sweetens the cream cheese. You’ll also need a container of whipped topping, about twelve ounces, to make it light and fluffy. Next, grab a package of instant vanilla pudding mix and two cups of milk. This will form a rich layer in the dessert. Finally, don’t forget to save some crushed Butterfinger for the top. This will make your dessert look and taste even better! With these ingredients, you are ready to create a delicious dessert that will impress everyone! {{ingredient_image_1}} To start, gather your ingredients. In a medium bowl, mix the graham cracker crumbs and melted butter. Stir until the crumbs soak up the butter. This will keep your crust nice and firm. Press this mixture into a greased 9x13 inch baking dish. Make sure it is even and compact. This crust will hold all the layers together. Now, grab a large bowl. Beat the softened cream cheese with an electric mixer. Mix until it is smooth and creamy. Slowly add the powdered sugar while mixing. This helps the sugar blend in well. Next, fold in one cup of whipped topping. This adds a light, fluffy texture. Spread this cream cheese layer evenly over the crust. In another bowl, whisk together the instant vanilla pudding mix and milk. Keep whisking until it thickens, which takes about two minutes. You want a nice, thick pudding. Once thick, gently spread the pudding over the cream cheese layer. This adds a sweet and creamy touch to your dessert. Next, take the remaining whipped topping. Carefully spread it over the pudding layer. Make sure to cover the pudding completely. This adds a smooth finish and a fluffy texture on top. Now, it’s time for the fun part! Sprinkle the crushed Butterfinger candy bars evenly over the whipped topping. This adds a sweet crunch that everyone loves. It also makes your dessert look pretty and inviting. Cover the dish with plastic wrap. Place it in the fridge for at least four hours, or overnight if you can wait. This chilling time helps the layers set and the flavors blend together. When you are ready to serve, cut into squares and enjoy your delicious Butterfinger Lush Dessert! When making Butterfinger Lush Dessert, avoid a few key mistakes. First, do not skip chilling. This dessert needs time to set. If you cut it too soon, it will fall apart. Second, make sure your cream cheese is softened. Cold cream cheese will not mix well. Lastly, do not rush the layering. Spread each layer evenly for the best look and taste. To make each layer shine, follow these tips: - For the crust, press it firmly into the pan. This will help it hold together. - When mixing the cream cheese, beat it until smooth. This step adds fluffiness. - Whisk the pudding mix with milk thoroughly. Let it thicken before spreading. - Smooth the whipped topping gently. Use a spatula to get a nice finish. Garnish your Butterfinger Lush Dessert for extra flair. Here are some ideas: - Drizzle chocolate syrup on top for a rich touch. - Use extra whipped topping. A dollop adds creaminess. - Sprinkle additional crushed Butterfinger on each piece. This gives a nice crunch. - Add a mint leaf for a pop of color. It also adds a fresh taste. With these tips, your dessert will impress everyone! Enjoy making this sweet treat! Pro Tips Chill for Best Results: Allow the dessert to chill overnight for the best flavor and texture. Use Fresh Ingredients: Always use fresh cream cheese and whipped topping for a creamier texture. Even Layering: Spread each layer evenly to ensure balanced flavor in every bite. Garnish Just Before Serving: Add crushed Butterfinger topping right before serving to maintain its crunchiness. {{image_2}} You can swap Butterfinger for other candy bars. Try Snickers for a nutty touch. Milky Way adds caramel flavor. For a fruity twist, use Reese's for a peanut butter vibe. Each option changes the taste but keeps the fun. To make this dessert gluten-free, use gluten-free graham crackers. For a dairy-free version, pick dairy-free cream cheese and whipped topping. Substitute regular milk with almond or coconut milk. These changes keep the dessert tasty for everyone. Seasonal flavors can enhance your Butterfinger Lush Dessert. In fall, add pumpkin spice to the pudding. For winter, mix in peppermint extract with the cream cheese. In summer, try fresh berries on top for a fruity burst. These options keep your dessert fresh and exciting. To keep your Butterfinger Lush Dessert fresh, store it in an airtight container. Make sure it is well-covered to avoid drying out. If you have leftovers, place them in the fridge as soon as you can. This dessert is best enjoyed cold, so keep it chilled. You can freeze Butterfinger Lush Dessert if needed. First, cut it into squares for easy serving later. Wrap each piece tightly in plastic wrap. Then, place them in a freezer-safe container. This will help keep the dessert from getting freezer burn. It can stay frozen for up to three months. In the fridge, Butterfinger Lush Dessert lasts about 3 to 5 days. The layers stay tasty and fresh during this time. Just remember to cover it well to keep flavors in. After five days, the dessert may start to lose its texture and taste. Enjoy it while it’s at its best! Butterfinger Lush Dessert needs to chill for at least 4 hours. Chilling lets the flavors blend well. If you can wait overnight, that’s even better! The longer it chills, the more delicious it tastes. Yes, you can substitute some ingredients. For example, you can use gluten-free graham crackers if needed. You can also swap out the Butterfinger bars for another candy bar you like. Just keep in mind that it may change the flavor a bit. Using instant pudding mix is key for this dessert. It helps the pudding thicken quickly without cooking. If you use regular pudding, you will need to cook it, which adds time and steps. Instant pudding makes this no-bake treat easy and fast! In this post, we explored the layers of the Butterfinger Lush Dessert. We detailed tasty ingredients, step-by-step instructions, and helpful tips. Each layer builds flavor and makes your dessert special. Remember, avoiding common mistakes is key for great results. Feel free to try variations that suit your taste. Enjoy your delicious creation and share it with others. Happy baking!

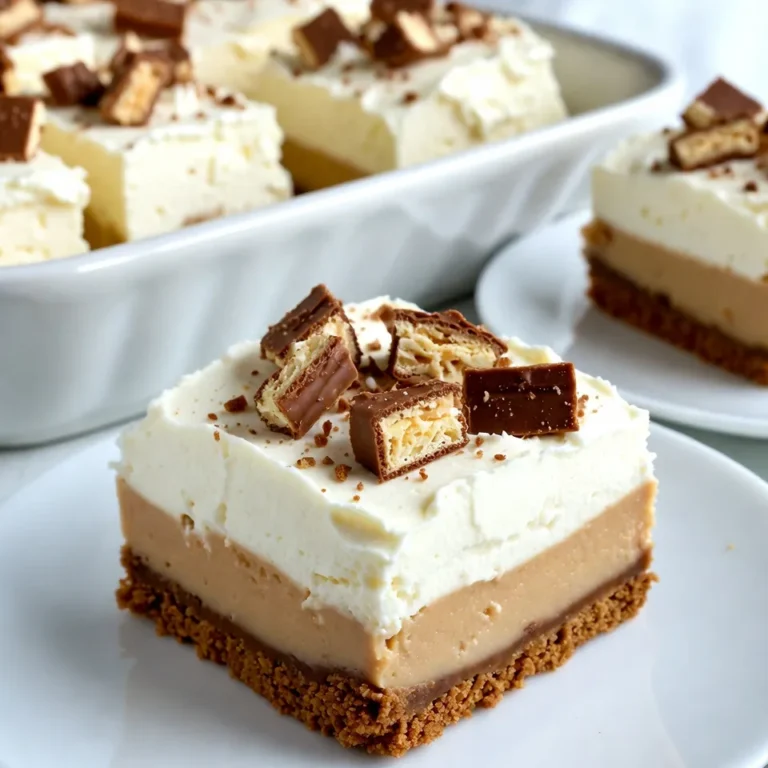
Butterfinger Lush Dessert Delightful No-Bake Treat

To make Keto Everything Bagel Bites, you will need: - 2 cups almond flour - 1 tablespoon baking powder - 1 teaspoon garlic powder - 1 teaspoon onion powder - 1 teaspoon ground sea salt - 2 large eggs - 1 cup shredded mozzarella cheese - 2 tablespoons cream cheese, softened - 2 tablespoons everything bagel seasoning You can swap almond flour for coconut flour, but use less. Coconut flour is very absorbent. For a dairy-free option, use a dairy-free cheese. If you need a nut-free choice, try sunflower seed flour. Low-carb ingredients are key for keto diets. They help keep your carb count low while still giving great flavor. Almond flour is a great substitute for wheat flour. It adds healthy fats and protein. Shredded mozzarella adds a nice stretch and taste. Using these ingredients keeps your snack tasty and in line with keto goals. When you choose low-carb options, you enjoy more snacks without guilt. {{ingredient_image_1}} First, you need to preheat your oven to 375°F (190°C). This step is key for even baking. While the oven heats up, take a baking sheet and line it with parchment paper. This keeps the bagel bites from sticking and makes clean-up easier. In a large mixing bowl, combine the dry ingredients. Use 2 cups of almond flour, 1 tablespoon of baking powder, 1 teaspoon of garlic powder, 1 teaspoon of onion powder, and 1 teaspoon of ground sea salt. Stir these well to blend them. This mix gives the bagel bites their wonderful flavor. In a separate bowl, whisk together 2 large eggs until they are well beaten. Then, add 1 cup of shredded mozzarella cheese and 2 tablespoons of softened cream cheese to the eggs. Mix until everything is smooth. This mixture will make your bagel bites creamy and tasty. Now, it’s time to combine the wet and dry mixtures. Gradually add the dry mix into the wet mix and stir it together. The dough will be a bit sticky. If it’s hard to handle, wet your hands slightly. This will help you shape the dough into bites. Using your hands, form small balls from the dough. Each ball should be about 1-inch in diameter. Place them on the lined baking sheet, leaving some space between each. This space allows them to puff up while baking. Before baking, sprinkle 2 tablespoons of everything bagel seasoning on top of each bite. Bake them in your preheated oven for 12-15 minutes. Keep an eye on them until they turn golden brown and puff up. Once done, remove them from the oven and let them cool for a few minutes before serving. To get that perfect texture, focus on the dough. Use almond flour and mix it well with the dry ingredients. This helps create a soft base. When you add the wet mixture, mix until just combined. Overmixing can lead to tough bites. Shape the dough into small balls, about 1-inch wide. This size helps them cook evenly and puff nicely. One common mistake is not measuring ingredients accurately. Use a kitchen scale if you can. Another mistake is skipping the oven preheat. Baking at the right temperature is key. Also, don’t rush the cooling time. Let the bites cool a bit before serving. This helps them firm up and makes them easier to eat. Serve your bagel bites warm for the best taste. Arrange them on a nice platter. You can add fresh herbs for a pop of color. Pair them with cream cheese or a keto-friendly dip for extra flavor. For a fun twist, let guests customize their bites with toppings. This can be a great way to enjoy your delicious creation! Pro Tips Use Fresh Seasoning: Ensure your everything bagel seasoning is fresh for the best flavor. Old spices can lose their potency and affect the overall taste. Experiment with Cheese: Try different cheeses like cheddar or pepper jack in place of mozzarella for varied flavors and textures in your bagel bites. Check for Doneness: Ovens can vary, so keep an eye on your bagel bites as they bake. Remove them when they are golden brown and puffed for the best texture. Cool Before Serving: Allow the bagel bites to cool for a few minutes after baking. This helps them set and makes them easier to handle when serving. {{image_2}} You don’t have to stick to just mozzarella cheese. Feel free to mix it up! Cheddar adds a sharp taste. Cream cheese can give a rich texture. A mix of cheeses can add depth. Try gouda for a smoky flavor. You can also go for pepper jack for a kick. Each cheese brings its own twist to the bagel bites. While everything bagel seasoning is great, you can explore various spices. Try Italian herbs for a fresh taste. Paprika can add some warmth and color. For a savory twist, use taco seasoning. If you love heat, add red pepper flakes. These changes keep your bites exciting and flavorful. Want to take your bagel bites to the next level? Consider adding some extras. Chopped olives can bring a salty punch. Diced sun-dried tomatoes add a sweet, tangy note. You can even fold in cooked bacon bits for a smoky flavor. Fresh herbs like chives or dill can add brightness. These add-ins give your bagel bites a new life with every batch. Store your leftover Keto Everything Bagel Bites in an airtight container. Keep them in the fridge. They stay fresh for about 3 to 4 days. If you want to keep them longer, freezing is a great option. To freeze, let the bites cool completely. Place them in a single layer on a baking sheet. Put the baking sheet in the freezer for about 1 hour. Once frozen, transfer the bites to a freezer bag. They will last for up to 2 months. Label the bag with the date for easy tracking. When you want to enjoy them again, take out the bites from the fridge or freezer. If frozen, let them thaw in the fridge overnight. To reheat, place them on a baking sheet. Bake at 350°F (175°C) for about 10 minutes. This keeps them crispy and warm. You can also use a microwave, but they may not stay as crispy. Yes, you can make these bagel bites ahead. You can prepare the dough and shape the bites. Store them in the fridge for up to 24 hours. When you are ready to bake, simply pop them in the oven. This saves time and makes snacking easy. Absolutely! These bagel bites are gluten-free. They use almond flour instead of wheat flour. Almond flour is low in carbs and fits perfectly in a keto diet. You can enjoy these bites without worrying about gluten. To make these bagel bites dairy-free, substitute mozzarella and cream cheese. Use vegan cheese that melts well. You can also try nut-based cream cheese. These swaps keep the flavor and texture enjoyable. Leftover bagel bites are great for snacks or quick meals. You can eat them cold or warm them up. Try dipping them in keto-friendly sauces. They also make a great addition to salads or charcuterie boards. We explored the key ingredients for making low-carb bagel bites and their substitutes. I shared step-by-step instructions to guide you through the process. Tips and tricks help you avoid common mistakes and achieve perfect texture. We also looked at fun variations to enhance flavor. Lastly, I covered storage and reheating for leftovers. Now, you're ready to enjoy tasty, guilt-free bagel bites anytime!

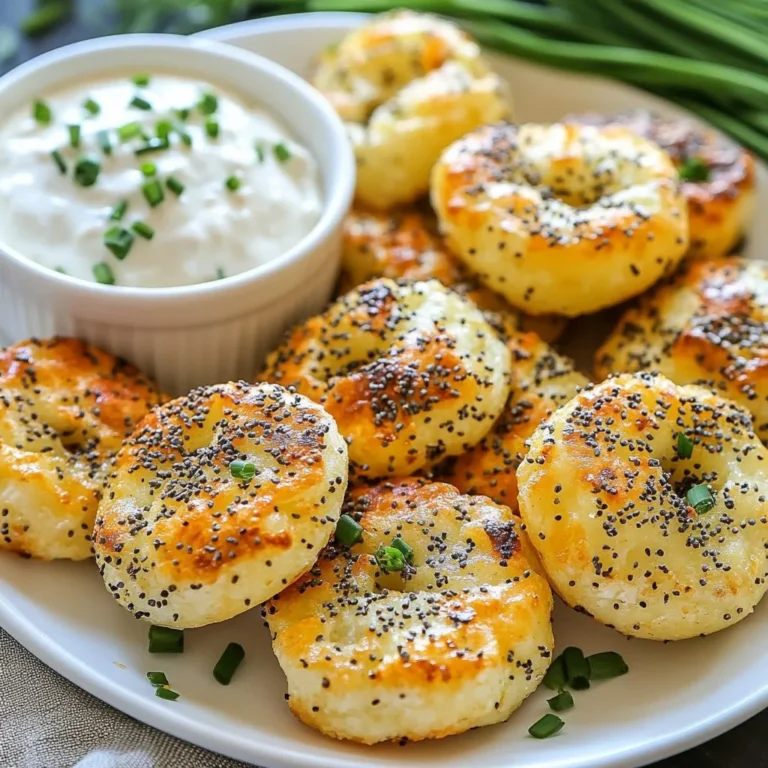
Keto Everything Bagel Bites Simple and Flavorful Snack

- 4 chicken breasts - 2 lemons (zested and juiced) - 3 cloves garlic, minced - 3 tablespoons olive oil - 1 teaspoon dried oregano - 1 teaspoon dried thyme - ½ teaspoon red pepper flakes (optional) - Salt and pepper to taste - Fresh parsley for garnish - Additional lemon wedges for serving The main ingredients in this recipe are simple but key. Chicken breasts serve as the star. The lemons give it a bright taste. Garlic adds depth, while olive oil keeps it moist. The flavor comes alive with oregano and thyme. Red pepper flakes can add a kick, but they are not a must. Salt and pepper round it all out. You can use fresh or dried herbs, but fresh adds more flavor. The lemon zest brings a joyful aroma to the dish. Zesting the lemons is easy. Just use a grater or zester to get the bright yellow peel. Juicing the lemons gives the chicken a tangy flavor. For garnish, fresh parsley adds a splash of color. Lemon wedges are great for serving. They let everyone add more lemon juice if they want. This dish looks and tastes fresh and bright on any plate. Enjoy your cooking! {{ingredient_image_1}} To start, gather your ingredients. You will need lemon zest, lemon juice, minced garlic, dried oregano, dried thyme, olive oil, salt, and pepper. In a mixing bowl, combine: - Zest of 2 lemons - Juice of 2 lemons - 3 minced garlic cloves - 1 teaspoon dried oregano - 1 teaspoon dried thyme - ½ teaspoon red pepper flakes (optional) - 3 tablespoons olive oil - Salt and pepper to taste Whisk everything together until it blends well. This marinade gives your chicken a bright, zesty flavor. Next, take your chicken breasts and place them in a large resealable bag or a shallow dish. Pour the marinade over the chicken. Make sure each piece is well-coated. Seal the bag or cover the dish. This step lets the chicken soak up all the flavors. Refrigerate for at least 30 minutes. For a stronger taste, marinate for up to 2 hours. After marinating, it's time to cook. Preheat your grill or stovetop skillet over medium-high heat. Remove the chicken from the marinade, letting any excess drip off. Discard the leftover marinade to avoid any food safety issues. Grill or sear the chicken breasts for about 6 to 7 minutes on each side. Cook until the internal temperature reaches 165°F (75°C). Look for those beautiful grill marks. This means your chicken is ready. Once cooked, remove the chicken from the heat and let it rest for 5 minutes. Resting keeps the chicken juicy and tender. Slice it up and enjoy! You can garnish with fresh parsley and serve with extra lemon wedges for a bright touch. To make a tasty lemon chicken, start with the marinade. Combine lemon zest, lemon juice, minced garlic, oregano, thyme, olive oil, salt, and pepper in a bowl. Whisk it well. This mix gives the chicken its bright flavor. Key Steps for Maximizing Flavor Infusion: - Use fresh lemons for zest and juice. - Let the marinade sit for a few minutes before using. Recommended Marinating Time: - Marinate for at least 30 minutes. For a deeper flavor, go for 2 hours. Grilling is the best way to cook this lemon chicken. It gives the chicken a smoky taste and nice grill marks. Suggested Cooking Methods: - Grill on medium-high heat for great results. - You can also use a stovetop skillet. How to Achieve Perfect Grill Marks: - Place the chicken on the grill and don’t move it for 6-7 minutes. - Flip and repeat on the other side. After cooking, it’s important to let the chicken rest. This step keeps it juicy and tasty. Importance of Resting Time: - Resting for 5 minutes allows the juices to settle inside. How to Prevent Dryness: - Cover the chicken loosely with foil while resting. This helps maintain warmth without losing moisture. Pro Tips Marinate Longer for Flavor: For the best flavor, marinate the chicken for at least 2 hours, or even overnight if possible. Check Internal Temperature: Always use a meat thermometer to ensure the chicken is cooked to 165°F (75°C) for safety and optimal juiciness. Rest Before Slicing: Let the chicken rest for 5 minutes after cooking. This helps the juices redistribute, keeping the meat moist. Customize the Heat: Adjust the amount of red pepper flakes according to your spice preference. Omit for a milder flavor. {{image_2}} You can change the taste of your lemon chicken by adding herbs or spices. Try fresh basil or rosemary for a new twist. You can also add a pinch of cumin or paprika for warmth. This can make the dish exciting and fresh. For a fruity twist, use other citrus fruits. Orange juice and zest can add sweetness. Lime juice offers a sharper taste. Experiment with what you like best. If you want a different cooking style, try oven-baking. Preheat your oven to 375°F (190°C). Place the marinated chicken in a baking dish. Bake for about 25 to 30 minutes until it reaches 165°F (75°C). This method keeps the chicken juicy. Alternatively, you can make a lemon chicken stir-fry. Cut the chicken into strips and cook in a hot skillet. Add bell peppers, broccoli, or snap peas. Stir-fry for about 5 to 7 minutes. This gives a fast and tasty meal. Pair your lemon chicken with side dishes for a complete meal. Rice or quinoa makes a great base. Steamed veggies, like green beans or asparagus, add color and nutrition. For garnish, chop fresh parsley and sprinkle it on top. You can also add lemon wedges on the side. This makes the dish look bright and inviting. You can store leftover lemon chicken in an airtight container. Place the chicken in the fridge within two hours of cooking. This keeps it fresh and safe to eat. Make sure to enjoy the chicken within three to four days. After that, the taste may change, and it may not be safe. To freeze cooked lemon chicken, let it cool first. Then, wrap each piece in plastic wrap. Place them in a freezer bag or container. This method prevents freezer burn. You can freeze the chicken for up to three months. When you're ready to eat, thaw the chicken in the fridge overnight. Reheat it in the oven or microwave until hot. Make sure it reaches an internal temperature of 165°F (75°C) to be safe. If you prepare marinated chicken, store it in the fridge. It can sit in the marinade for up to two hours. This allows the flavors to soak in. If you leave it longer, the meat may become too soft. Always be sure to cook it right after marinating for the best taste. The best way to check if chicken is done is by using a meat thermometer. Insert it into the thickest part of the chicken. If it reads 165°F (75°C), the chicken is safe to eat. You can also look for clear juices running from the meat. If the juices are pink, it needs more time. Always let it rest for five minutes before slicing. This helps keep the chicken juicy. Yes, you can use chicken thighs if you prefer. Thighs have more fat and flavor, making them very tasty. Just adjust the cooking time. Thighs may take a bit longer to cook than breasts. Aim for the same internal temperature of 165°F (75°C). They will be just as delicious in this lemon marinade. This recipe is naturally gluten-free. All the ingredients used are safe for those avoiding gluten. Just make sure to check labels on any packaged items, like spices or oils. If you follow this tip, you’ll enjoy a tasty, gluten-free meal. Feel free to serve it with gluten-free sides for a complete dish. This blog post shared how to make tasty lemon chicken. We explored key ingredients like chicken, lemon, and herbs. I provided step-by-step instructions for marinating and cooking. I also highlighted tips to ensure your chicken stays juicy and flavorful. By trying different cooking methods and serving ideas, you can enjoy lemon chicken in many ways. Keep these tips handy for your next meal! Trust me, it will impress everyone at the table. Enjoy your cooking!

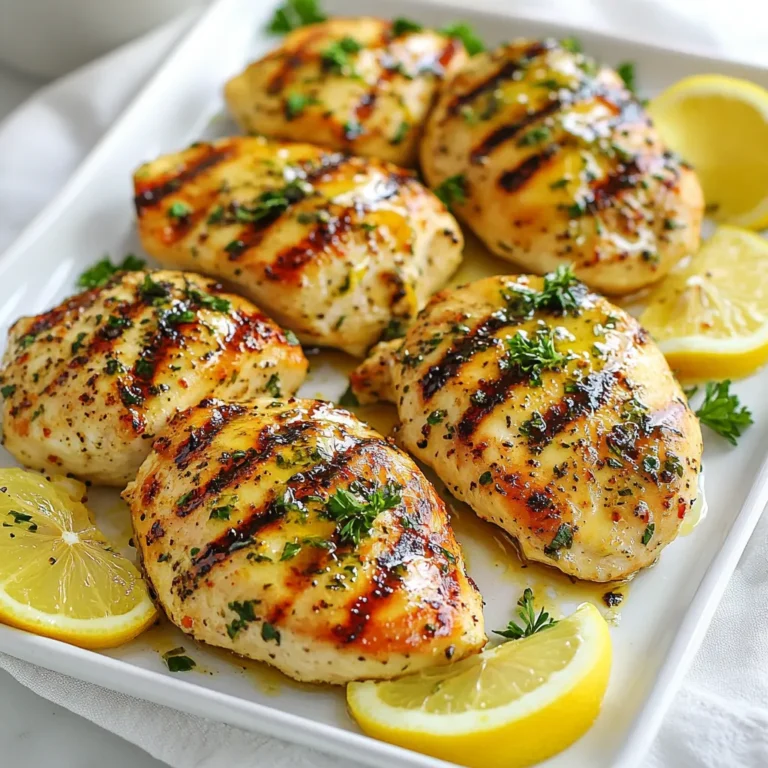
Simple Lemon Chicken Flavorful Grilled Delight

- 1 pound ground turkey - 2 large Yukon Gold potatoes, diced - 1 medium onion, chopped - 2 garlic cloves, minced - 1 bell pepper, diced - 1 cup corn (fresh or frozen) - 1 teaspoon paprika - 1 teaspoon cumin - 1 teaspoon dried oregano - Salt and pepper to taste - 2 tablespoons olive oil - Fresh parsley or cilantro for garnish Gathering the right ingredients is key to a great meal. I love using ground turkey because it is lean and tasty. Yukon Gold potatoes add a creamy texture. Chopped onion and bell pepper bring a sweet, savory base. Minced garlic adds a punch of flavor. Corn gives a nice crunch, whether fresh or frozen. The spices—paprika, cumin, oregano, salt, and pepper—transform the dish into something special. I always use olive oil to sauté the veggies; it enhances their taste and keeps everything moist. Finally, I like to top it with fresh parsley or cilantro for a burst of color and freshness. With these ingredients on hand, you are ready to cook a family meal that everyone will love. {{ingredient_image_1}} 1. Heating the olive oil Start by heating 2 tablespoons of olive oil in a large skillet over medium heat. You want the oil to shimmer but not smoke. This step helps to create a base for flavor. 2. Sautéing onion and bell pepper Next, add 1 medium chopped onion and 1 diced bell pepper. Sauté these for about 3 to 5 minutes. The goal is to soften them and get them fragrant. Stir them often to avoid burning. 3. Adding garlic After the onion and bell pepper are soft, stir in 2 minced garlic cloves. Cook for about 1 minute. Keep an eye on it; garlic can burn quickly and turn bitter. 1. Adding ground turkey to the skillet Now, it's time to add 1 pound of ground turkey. Break it up with your spatula as it cooks. This helps it brown evenly. 2. Browning the turkey Cook the turkey for about 6 to 8 minutes. You want it to be browned and cooked through. Stir it often to avoid clumps. This step adds a nice depth of flavor. 1. Adding diced potatoes and seasonings Toss in 2 large diced Yukon Gold potatoes. Season with 1 teaspoon of paprika, 1 teaspoon of cumin, 1 teaspoon of dried oregano, and salt and pepper to taste. Mix everything well to ensure the spices coat the potatoes. 2. Covering and cooking until tender Cover the skillet with a lid. Let it cook for about 10 minutes. Stir occasionally to check on the potatoes. You want them to be tender but not mushy. 1. Adding corn and mixing well After the potatoes are tender, add 1 cup of corn. This can be fresh or frozen. Mix it all together and cook for an additional 5 minutes until everything is heated through. 2. Garnishing with herbs Taste the dish and adjust the seasoning if needed. Once happy, remove it from the heat. Garnish with fresh parsley or cilantro for a pop of color. 3. Presentation tips Serve the skillet right from the pan for a rustic look. For a fancier touch, plate individual servings and add a dollop of sour cream on the side. Enjoy your meal! Choosing the right type of potatoes For this dish, I recommend using Yukon Gold potatoes. They have a creamy texture and hold their shape well when cooked. You could also use red potatoes if you prefer a firmer bite. Avoid starchy potatoes like Russets, as they can turn mushy. Cooking techniques for tender potatoes Cut your potatoes into small, even pieces. This ensures they cook evenly. You can parboil them for 5 minutes before adding them to the skillet. This extra step helps to make sure they are tender and cooked through. Adjusting spices to taste Feel free to play with the spices in this dish. If you like heat, add some cayenne pepper or chili powder. For a more aromatic flavor, try adding a pinch of cinnamon. Taste as you go to find your perfect mix! Adding optional veggies or proteins You can easily customize this skillet meal. Add veggies like zucchini, spinach, or mushrooms for more color and nutrition. If you're looking for extra protein, try adding black beans or chickpeas. They blend nicely with the other ingredients. Ideas for side dishes This skillet dish pairs well with a fresh green salad or crusty bread. You can also serve it with rice or quinoa for a heartier meal. Garnishing for visual appeal Garnish your dish with fresh parsley or cilantro for a pop of color. A squeeze of lemon juice right before serving adds brightness. You can also top it with a dollop of sour cream or Greek yogurt for creaminess. Pro Tips Use Fresh Herbs: Fresh parsley or cilantro not only adds color but also enhances the flavor of the dish. Add it just before serving for the best taste! Perfectly Cooked Potatoes: To ensure the potatoes cook evenly, cut them into uniform sizes. This will help them become tender at the same time. Adjust the Spice: Feel free to tweak the seasoning according to your preference. Adding a pinch of crushed red pepper flakes can give it an extra kick! Meal Prep Friendly: This dish can be made ahead of time and stored in the fridge for up to 3 days. Just reheat before serving for a quick meal! {{image_2}} You can swap ground turkey for other proteins. For a lighter meal, use ground chicken. It has a similar taste and texture. If you want something beefier, ground beef works well too. Just remember, beef may add more fat. Looking for a vegetarian option? Use beans or lentils. They add protein and fiber. Black beans or chickpeas are great choices. Just drain and rinse before adding them to the skillet. This change makes the dish hearty and filling. Mix up the veggies to keep things fresh. Instead of Yukon Gold potatoes, try diced zucchini or carrots. Both cook well and add unique flavors. Zucchini gives a nice crunch, while carrots add sweetness. You can also experiment with the seasonings. Swap paprika for chili powder for some heat. Or add Italian herbs like basil and thyme. This lets you create new flavor profiles that suit your taste. You can make this dish in different ways. For a one-pan oven-baked version, preheat your oven to 400°F. After browning the turkey and veggies, transfer everything to a baking dish. Cover it with foil and bake for about 25 minutes. If you prefer a slow cooker, brown the turkey and veggies first. Then add everything to the slow cooker with a bit of broth. Cook on low for 6-8 hours. This method will deepen the flavors and make the potatoes super tender. To keep your Ground Turkey and Potatoes Skillet fresh, you should store it properly. First, let the dish cool down to room temperature. This helps avoid condensation, which can make it soggy. Transfer the leftovers into airtight containers. Glass or plastic containers work well. Label them with the date so you know when to eat them. To safely reheat your skillet dish, place it in the microwave or on the stove. If using the microwave, cover the dish. Heat it in short bursts, stirring in between. This helps it warm evenly. On the stovetop, add a splash of water or broth to keep it moist. Stir often to avoid burning. To keep the potatoes from becoming mushy, reheat them gently. You can also freeze the Ground Turkey and Potatoes Skillet. First, let it cool completely. Then, scoop portions into freezer-safe bags or containers. Remove as much air as possible to prevent freezer burn. Label each bag with the date. When you're ready to eat, thaw it in the fridge overnight. Reheat it gently on the stove or microwave until hot. Can I make this dish ahead of time? Yes, you can make this dish ahead of time. Cook it fully and let it cool. Store it in an airtight container in the fridge. It will last for up to three days. When ready to eat, just reheat it in a skillet or microwave. How do I make it more nutritious? To add nutrition, include more veggies. Spinach, kale, or broccoli work great. You can also use brown rice or quinoa instead of potatoes to boost fiber and protein. What other vegetables can I add? You can add any vegetables you like! Zucchini, carrots, or green beans are excellent choices. Just chop them and toss them in with the other veggies. Can I use sweet potatoes instead of Yukon Gold potatoes? Yes, sweet potatoes are a great substitute! They add a nice sweetness and extra vitamins. Just dice them the same way and cook until tender. Is there a substitute for ground turkey? Absolutely! You can use ground chicken, beef, or even plant-based meat. Each will give a different flavor, so pick what you enjoy most. How to know when the turkey is fully cooked? The turkey is cooked when it is no longer pink inside. Use a meat thermometer to check. It should reach 165°F (75°C) for safety. What is the best way to ensure the potatoes are tender? To ensure tender potatoes, cut them into small, even pieces. Cook them covered in the skillet. Stir occasionally to help them cook evenly. If needed, add a splash of water to help steam them. This blog post covered a tasty ground turkey and potato skillet dish. You learned about the key ingredients, step-by-step cooking, and tips to enhance flavors. Consider customizing with different proteins or veggies to suit your taste. Storage tips can help you save leftovers for later. With this knowledge, you can create a hearty meal that's both easy and adaptable. Enjoy cooking and feel free to experiment with your ingredients!

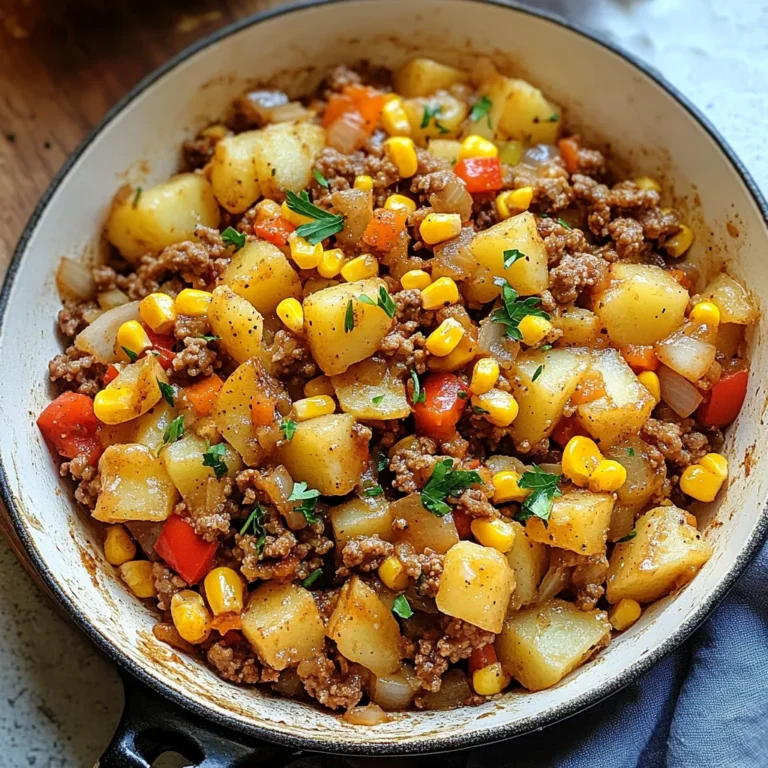
Ground Turkey and Potatoes Skillet Easy Family Meal

- 4 boneless, skinless chicken breasts - 2 cups mushrooms, finely chopped (such as cremini or button) - 1/2 cup cream cheese, softened - 1/4 cup grated Parmesan cheese - 2 cloves garlic, minced - 1 teaspoon dried thyme - 1 teaspoon dried parsley - Salt and pepper to taste - 4 tablespoons butter - 1 tablespoon olive oil - Fresh parsley, chopped Mushroom Stuffed Chicken in Garlic Butter is a treat for your taste buds. I love how the juicy chicken hugs rich mushroom filling. Each bite bursts with flavor! The creamy mixture pairs perfectly with tender chicken. You’ll find joy in cooking this meal. Let’s break down the ingredients. First, you need chicken breasts. I prefer boneless and skinless ones for easy stuffing. Mushrooms are next. They add depth and umami to the dish. You can use cremini or button mushrooms based on your taste. Cream cheese makes the filling creamy and smooth. It blends well with grated Parmesan cheese, adding a salty kick. Garlic enhances the flavor with its strong aroma. Thyme and parsley add freshness. Don’t forget the salt and pepper to bring all the tastes together. You’ll also need butter and olive oil for cooking. They add richness and help to sauté the mushrooms. Fresh parsley makes a lovely garnish, adding color and a hint of freshness. With these ingredients, you’ll create a dish that impresses your friends and family. It's simple yet packed with flavors. Let’s get ready to cook! {{ingredient_image_1}} - Preheat your oven to 375°F (190°C). - In a skillet over medium heat, melt 2 tablespoons of butter with 1 tablespoon of olive oil. - Add 2 cups of finely chopped mushrooms. Sauté them until golden brown, about 5-7 minutes. - Stir in 2 cloves of minced garlic, 1 teaspoon of dried thyme, and 1 teaspoon of dried parsley. Sauté for 2 more minutes. - Season the mix with salt and pepper to taste. - Remove the skillet from heat and let the filling cool slightly. - Mix in 1/2 cup of softened cream cheese and 1/4 cup of grated Parmesan cheese. Blend well. - Take 4 boneless, skinless chicken breasts and create a pocket in each. Slice through the side but do not cut all the way through. - Stuff each chicken breast with the mushroom and cheese mixture. Press it in gently to secure. - In a large oven-safe skillet, melt the remaining 2 tablespoons of butter over medium-high heat. - Season the outside of each stuffed chicken breast with salt and pepper. Place them in the skillet. - Sear the chicken for about 4-5 minutes on each side until golden brown. - Transfer the skillet to the preheated oven and bake for 20-25 minutes. The chicken should reach an internal temperature of 165°F (75°C). - After baking, remove the chicken from the oven and let it rest for 5 minutes before slicing. - Ensuring chicken is cooked through Always check the chicken's internal temperature. It should reach 165°F (75°C). Use a meat thermometer for accuracy. If you don’t have one, cut into the thickest part of the chicken. The meat should be white, not pink. - Achieving the perfect sear To get that nice, golden crust, dry the chicken breasts with paper towels. Season them well with salt and pepper. Heat the pan before adding the chicken. This helps to create a great sear without sticking. - Alternatives for cream cheese If you want a lighter option, use Greek yogurt. It adds creaminess and tang. You can also try ricotta cheese for a different texture and flavor. - Satisfactory mushroom types While cremini and button mushrooms work well, you can also use shiitake or portobello. These mushrooms add a rich, earthy taste to the dish. - Adding spices or herbs Consider adding a pinch of smoked paprika or cayenne for heat. Fresh herbs like basil or chives can also brighten the flavors. Experimenting with flavors can make your dish unique. - Variations in cheese options Mozzarella brings a nice stretch when melted. Goat cheese adds tanginess and depth. You can mix different cheeses for more complexity in flavor. Pro Tips Choose Fresh Mushrooms: Using fresh mushrooms will enhance the flavor and texture of the stuffing. Opt for cremini or button mushrooms for the best results. Let the Mixture Cool: Allowing the mushroom and cheese mixture to cool slightly before stuffing will prevent the chicken from cooking unevenly and keep the filling intact. Use a Meat Thermometer: To ensure your chicken is perfectly cooked, use a meat thermometer to check that the internal temperature reaches 165°F (75°C). Rest Before Slicing: Let the stuffed chicken rest for about 5 minutes before slicing. This allows the juices to redistribute, keeping the chicken moist and flavorful. {{image_2}} You can switch up the cheese in this dish. Try using mozzarella for a melty texture. Goat cheese adds a tangy flavor that pairs well with mushrooms. Both options bring a unique twist to the classic recipe. You can mix and match cheeses, too. Blend cream cheese with mozzarella for creaminess and stretch. The cheese you choose can change the taste and texture of your stuffed chicken. Don’t stop at mushrooms! You can add spinach for a pop of color and nutrients. Cooked spinach blends well with the cream cheese and mushrooms. You can also add bell peppers or zucchini for extra veggies. These options keep the dish fresh and exciting. Try different combinations to find your favorite mix. Adding nuts like walnuts or pine nuts can give a nice crunch, too. You can cook your stuffed chicken in different ways. Grilling adds a smoky flavor and nice char. Just be careful not to overcook it. Baking is great for even cooking and keeps the chicken juicy. If you prefer a slow cooker, you can adapt the recipe. Sear the chicken first, then place it in the slow cooker. Add a little broth to keep it moist. Cook on low for a few hours for tender results. Each method brings out different flavors and textures, so try them all! Storing leftovers is easy. After your meal, let the chicken cool down. Place the mushroom stuffed chicken in an airtight container. You can keep it in the fridge for up to three days. If you want to enjoy it later, do not wait too long. This dish tastes best fresh! To freeze mushroom stuffed chicken, wrap each piece in plastic wrap. Then, place them in a freezer-safe bag. Make sure to remove as much air as you can. You can freeze it for about three months. When you’re ready to eat, thaw it in the fridge overnight before reheating. The best way to reheat is in the oven. Preheat your oven to 350°F (175°C). Place the chicken on a baking sheet and cover it with foil. Heat for about 20 minutes, or until hot. You can also use a microwave. Just heat it for 2-3 minutes, but the oven keeps it crispy. Enjoy your delicious meal again! It takes about 50 minutes to cook Mushroom Stuffed Chicken in Garlic Butter. This includes 15 minutes for prep and 35 minutes for cooking. You will first prepare the filling, then stuff the chicken. After that, you sear it and bake it until done. The chicken should reach an internal temperature of 165°F. Yes, you can make this recipe ahead. You can prepare the mushroom filling a day before. Just keep it in the fridge. You can also stuff the chicken breasts ahead of time. Store them in the fridge until you are ready to cook. This saves time for your meal. Mushroom Stuffed Chicken goes well with many sides. Here are some great options: - Steamed vegetables, like broccoli or green beans - A light salad with mixed greens and vinaigrette - Garlic mashed potatoes for a hearty touch - Rice pilaf for a simple, comforting option These sides will enhance your meal and balance the flavors. Enjoy your cooking! This blog post shared a tasty recipe for mushroom stuffed chicken. You learned about essential ingredients, seasonings, and optional garnishes to enhance flavor. Step-by-step, you saw how to prepare, stuff, and cook the chicken. We also covered tips for perfecting the dish, including variations and storage methods. Enjoy experimenting with different cheeses and fillings to make this recipe your own. With a few tweaks, you can turn this dish into a family favorite. Happy cooking!

Mushroom Stuffed Chicken in Garlic Butter Delight

To make tasty Cajun shrimp tacos, you need a few key items. Here’s what to gather: - 1 lb shrimp, peeled and deveined - 2 tablespoons Cajun seasoning - 1 tablespoon olive oil - 1 tablespoon lime juice - 8 small corn tortillas - 1 cup red cabbage, thinly sliced - 1 ripe avocado, sliced - ½ cup cherry tomatoes, halved - ¼ cup fresh cilantro, chopped - 1/4 cup sour cream - Lime wedges for serving - Salt and pepper to taste These ingredients form the base of your meal. The shrimp bring a juicy taste, while Cajun seasoning adds bold flavor. Toppings make your tacos fun and fresh. I suggest using: - Sliced red cabbage for crunch - Creamy avocado for richness - Halved cherry tomatoes for sweetness - Fresh cilantro for a burst of flavor - Cool sour cream to balance the heat These toppings add color and texture. Plus, they heighten the flavor of each bite. If you want to switch things up, consider these optional items: - Sliced jalapeños for some heat - Diced onions for extra crunch - Shredded cheese for a creamy touch - Hot sauce for extra spice Feel free to mix and match! These extras let you customize your tacos to fit your taste. {{ingredient_image_1}} Start by getting your shrimp ready. Use one pound of shrimp that is peeled and deveined. In a bowl, mix the shrimp with two tablespoons of Cajun seasoning. Add one tablespoon of olive oil and one tablespoon of lime juice. Make sure to sprinkle in a little salt and pepper. Toss everything well so the shrimp gets coated evenly. This mix gives the shrimp a great flavor. Heat a large skillet over medium-high heat. Once the skillet is hot, add the seasoned shrimp. Cook each side for about two to three minutes. You want the shrimp to turn pink and opaque. This shows they are done. Remove the shrimp from heat when cooked. The aroma will be mouthwatering! Now it’s time to put your tacos together. First, warm eight small corn tortillas in a dry skillet or microwave. This step makes them soft and easy to fold. Place a good amount of shrimp on each tortilla. Next, add sliced red cabbage, ripe avocado, and halved cherry tomatoes on top. For extra creaminess, drizzle sour cream over the shrimp. Finally, sprinkle fresh cilantro on top for a burst of flavor. Serve with lime wedges to squeeze over the tacos. Enjoy your delicious Cajun shrimp tacos! To get great flavor, use fresh shrimp. Fresh shrimp tastes better than frozen. Coat the shrimp with Cajun seasoning, olive oil, and lime juice. This mix brings out the spices. Let it sit for a few minutes. This time allows the shrimp to soak up the flavors. Cook the shrimp on medium-high heat. This keeps them juicy inside and crispy outside. Corn tortillas work best for Cajun shrimp tacos. They have a nice texture and flavor. If you want a twist, try flour tortillas. They are soft and easy to fold. You can also use lettuce wraps for a low-carb option. Just make sure to warm them up first. Warming helps them hold the filling better. For a great meal, pair your tacos with a side of rice. Cilantro lime rice complements the taco's flavors. You could also serve black beans for added protein. A fresh salad with lime vinaigrette works well too. You can add mango or avocado for a sweet touch. These sides make your meal colorful and tasty. Pro Tips Fresh Shrimp is Key: Always choose fresh or properly thawed shrimp for the best flavor and texture. Frozen shrimp can be used, but ensure they are fully thawed before cooking. Customize Your Heat: Adjust the amount of Cajun seasoning based on your heat preference. If you’re sensitive to spice, start with half the amount and add more as needed. Perfectly Warm Tortillas: To achieve the best texture, warm your tortillas in a dry skillet over medium heat for about 30 seconds on each side. This makes them more pliable and enhances their flavor. Fresh Toppings Matter: Use ripe avocados and fresh cilantro to elevate the flavor of your tacos. Fresh ingredients make a noticeable difference in taste and presentation. {{image_2}} You can crank up the heat in your Cajun shrimp tacos. Start with the same base recipe. Use more Cajun seasoning to boost the spice. Add diced jalapeños or a splash of hot sauce. This will give your tacos an extra kick. The heat balances well with the cool toppings like avocado and sour cream. You don’t need shrimp for tasty tacos. Replace shrimp with grilled veggies or black beans. Zucchini, bell peppers, and corn work great. Toss them in Cajun seasoning for flavor. This way, everyone can enjoy tacos. Serve the same toppings like cabbage and avocado to keep it fresh. If you want a taco twist, try a Cajun shrimp bowl. Use the same shrimp and toppings. Instead of tortillas, serve them over rice or quinoa. Add beans and extra veggies for a hearty meal. This way, you can enjoy all the flavors in a different style. To keep your Cajun shrimp tacos fresh, store each part separately. Place leftover shrimp in an airtight container. Add a little lime juice to keep them tasty. Store red cabbage, avocado, and tomatoes in their own containers. This keeps them from getting soggy. Use the tacos within two days for the best flavor. For a quick reheat, warm the shrimp in a skillet over medium heat. This takes about 2-3 minutes. Watch closely so they don’t overcook. You can also microwave the shrimp for about 30 seconds. Warm the tortillas in a skillet or microwave for a few seconds. This helps them stay soft and tasty. If you want to meal prep, you can freeze the shrimp. Place cooked shrimp in a freezer-safe bag. Squeeze out the air and seal it tight. They will keep well for up to three months. When you’re ready to eat, thaw the shrimp overnight in the fridge. Then reheat as needed. Avoid freezing the tortillas and toppings, as they do not freeze well. I recommend using fresh, large shrimp for Cajun shrimp tacos. Look for shrimp that are peeled and deveined. They cook quickly and stay juicy. Frozen shrimp work too, but be sure to thaw them properly. The size of the shrimp matters. Larger shrimp give more bite and flavor in your taco. You can prep some parts in advance. The shrimp should be cooked right before serving. However, you can season the shrimp and chill them in the fridge. The toppings, like cabbage and avocado, can also be prepped ahead. Just keep them in separate containers. This way, you can assemble your tacos quickly when you are ready to eat. Making Cajun seasoning is easy! You need these spices: - 1 tablespoon paprika - 1 tablespoon onion powder - 1 tablespoon garlic powder - 1 teaspoon cayenne pepper - 1 teaspoon dried thyme - 1 teaspoon dried oregano - 1 teaspoon black pepper - 1 teaspoon salt Mix all the spices in a bowl. This mix adds bold flavor to your shrimp. You can adjust the heat by adding more cayenne if you like it spicy. Store any extra seasoning in a jar for later use. Cajun shrimp tacos mix bold flavors with ready-to-follow steps. We explored main ingredients, tasty toppings, and even options like vegetarian tacos. Cooking shrimp perfectly takes practice, but I shared tips to help you succeed. Remember, the right tortilla and sides boost your meal. Storing leftovers properly keeps your tacos fresh for later. Enjoy these recipes, and don’t hesitate to get creative with your own variations!

Cajun Shrimp Tacos Flavorful and Easy Recipe Guide

PREV 1 … 64 65 66 … 86 NEXT
spicy fork kitchen

explore

DessertsDinnerAppetizersDrinks

Our Policies

  • Cookie Policy
  • Copyright Policy
  • Disclaimer
  • GDPR Policy
  • Terms Of Use
Back to Top
  • About
  • Contact Us
  • Privacy Policy
© 2026 spicy fork kitchen