FREE DINNER EBOOK! Get your copy!
  • Cookie Policy
  • GDPR Policy
  • Disclaimer
  • Terms Of Use
  • Visit my other site: Fun Cookie Recipes
spicy fork kitchen
  • Home
  • Dinner
  • Desserts
  • Drinks
  • Appetizers
  • Contact
  • About
  • Privacy Policy
  • Home
  • Dinner
  • Desserts
  • Drinks
  • Appetizers
  • Contact
  • About
  • Privacy Policy
  • Cookie Policy
  • GDPR Policy
  • Disclaimer
  • Terms Of Use
Visit my other site: Fun Cookie Recipes

HOME / CATEGORIES /

Latest

To make hearty stuffed shells, you need the following ingredients: - 12 large pasta shells - 1 lb ground beef - 1 cup ricotta cheese - 1 cup shredded mozzarella cheese, divided - 1/2 cup grated Parmesan cheese - 1 large egg - 2 cloves garlic, minced - 1 teaspoon dried Italian herbs (oregano, basil, thyme) - 3 cups marinara sauce - Salt and pepper to taste - Fresh basil leaves for garnish For pasta, I recommend Barilla or Ronzoni. They cook well and hold their shape. For cheese, look for Galbani or BelGioioso for ricotta and mozzarella. Both brands offer great quality and taste. For Parmesan, Grana Padano works well too. If you have dietary needs, you can make swaps. For a gluten-free option, use gluten-free pasta shells. You can replace ground beef with turkey or chicken for a leaner dish. If you’re lactose intolerant, try dairy-free ricotta and cheese. These options keep your meal tasty and satisfying. {{ingredient_image_1}} Start by boiling the large pasta shells. Use salted water and follow the package instructions. Cook them until they are al dente. This means they should be firm but not hard. Once cooked, drain the shells and let them cool. This step helps prevent them from sticking together. Next, heat a skillet over medium heat. Add the ground beef and break it apart as it cooks. Brown the meat until it is fully cooked. Drain any excess fat. Now, add minced garlic and cook for one more minute. This adds a nice flavor to the meat. In a mixing bowl, combine the cooked ground beef with ricotta cheese, half of the mozzarella, Parmesan, egg, dried herbs, salt, and pepper. Mix everything well until it is smooth. Take a tablespoon of this mixture and carefully stuff each pasta shell. Place the stuffed shells seam side up in a baking dish. Spread one cup of marinara sauce on the bottom of a 9x13-inch baking dish. Arrange the stuffed shells over the sauce in a single layer. Pour the remaining marinara sauce over the shells, then sprinkle the rest of the mozzarella on top. Cover the baking dish with aluminum foil. Bake in the oven, preheated to 375°F (190°C), for 25 minutes. After 25 minutes, remove the foil. Bake for another 10 to 15 minutes until the cheese is bubbly and golden. Once done, let the dish cool for a few minutes before serving. Garnish with fresh basil leaves for an extra touch. To keep your pasta shells from sticking, follow these steps: - Cook them in boiling water with salt. - Stir them gently while they cook. - Drain and rinse the shells with cold water. - Toss them in a little olive oil. This will help each shell stay separate and easy to stuff. For a creamy filling, use these tips: - Mix ricotta cheese with an egg. - Add some grated Parmesan for richness. - Use fresh minced garlic for flavor. - Make sure to blend everything well. This results in a smooth and tasty filling that melts in your mouth. Adding spices can take your stuffed shells to the next level. - Use dried Italian herbs like oregano and basil. - Add a pinch of red pepper flakes for heat. - Try a dash of nutmeg for warmth. These flavors blend well with the meat and cheese, making each bite more exciting. Pro Tips Perfect Pasta: When boiling the shells, make sure to cook them al dente, as they will continue to cook in the oven. Flavor Boost: Add extra herbs or spices to the meat mixture for added flavor; a pinch of red pepper flakes can add a nice kick. Cheesy Goodness: For a more decadent dish, substitute some of the ricotta with mascarpone cheese for a creamier texture. Make Ahead: You can prepare the stuffed shells a day in advance and keep them in the fridge; just add a few extra minutes to the baking time. {{image_2}} You can easily make stuffed shells without meat. Try using spinach, mushrooms, or zucchini. Mix these veggies with ricotta cheese for a tasty filling. You can also add fresh herbs like basil or parsley. This gives the dish a fresh taste. Switching up the meat can change the flavor. Ground sausage works well for a spicy kick. Turkey is a leaner option if you want a healthier choice. You can even mix different meats for a unique taste. Just cook the meat fully before mixing it with the cheese. While marinara sauce is classic, you can try new sauces. Alfredo sauce adds creaminess and richness. Pesto gives a fresh, bright flavor. You can even blend sauces for a custom taste. Just pour your chosen sauce over the shells before baking. After you enjoy your stuffed shells, let them cool down first. Place the leftovers in an airtight container. This helps keep them fresh. Store them in the fridge. They will stay good for about 3 to 5 days. If you have more, consider freezing them for later. To freeze stuffed shells, first, cool them completely. Then, wrap them tightly in plastic wrap. You can also use aluminum foil. Place the wrapped shells in a freezer-safe container or bag. They can last for up to 3 months in the freezer. Label the container with the date, so you remember when you made them. To reheat stuffed shells, preheat your oven to 350°F (175°C). Place the shells in a baking dish. Add a bit of marinara sauce on top to keep them moist. Cover the dish with foil to prevent drying out. Bake for about 20 to 25 minutes, or until they are hot throughout. You can also use a microwave for quick reheating. Just make sure to cover them and heat in short bursts for best results. Yes, you can make stuffed shells ahead of time. Prepare the shells and filling, then stuff them. Place the shells in a baking dish, cover with sauce, and refrigerate. You can bake them the next day. Just add a few extra minutes to the baking time if they are cold. Stuffed shells pair well with many sides. Here are some great options: - Garlic bread - A fresh garden salad - Roasted vegetables - Steamed broccoli These sides add flavor and balance to your meal. Stuffed shells are done when the cheese is bubbly and golden. Remove the foil after the first 25 minutes. Check the shells after an additional 10 to 15 minutes. If the cheese is melted and slightly browned, they are ready to serve. Yes, you can substitute ricotta cheese. Here are some alternatives: - Cottage cheese for a lower-fat option - Cream cheese for a richer taste - Blended tofu for a dairy-free choice Each option will change the flavor and texture slightly, but they work well in the dish. We’ve explored how to make delicious stuffed pasta shells step-by-step. You learned about ingredients, including brands and alternatives for different diets. The cooking process helps ensure a perfect filling and assembly. I shared handy tips to prevent sticking and enhance flavor. Finally, we discussed storage and ways to enjoy your leftovers. Now, you have all the tools to create tasty stuffed shells your way. Get in the kitchen and make a dish that delights everyone!

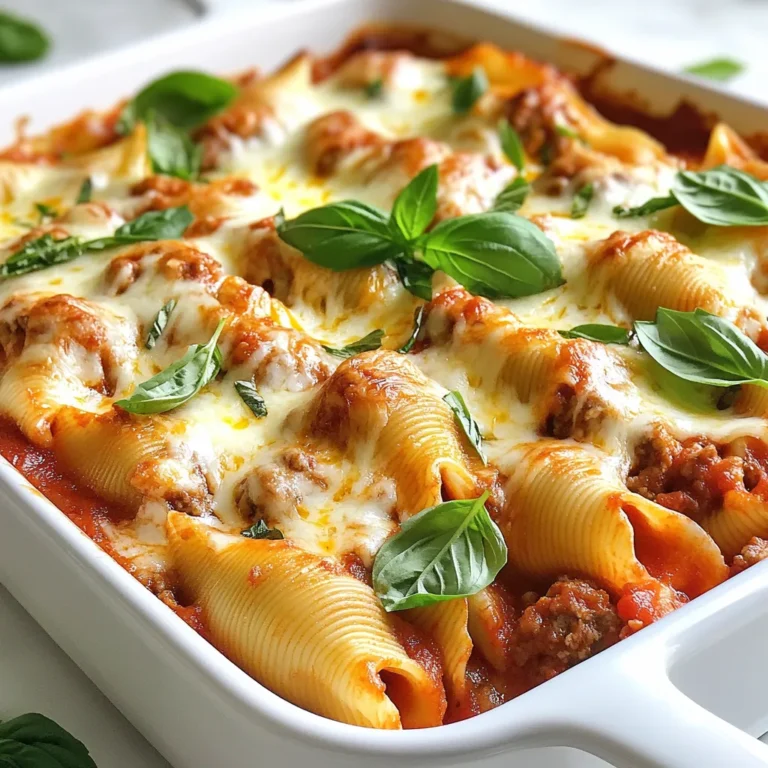
Stuffed Shells with Meat Hearty and Flavorful Recipe

When you make Chocolate Covered Strawberry Brownies, you need these key ingredients: - 1 cup unsalted butter, melted - 2 cups granulated sugar - 4 large eggs - 1 teaspoon vanilla extract - 1 cup all-purpose flour - 1 cup cocoa powder - 1/2 teaspoon baking powder - 1/4 teaspoon salt - 1 cup fresh strawberries, hulled and sliced - 8 oz dark chocolate, chopped (for coating) - 1 tablespoon coconut oil (for chocolate) Each element plays a role in making your brownies moist and tasty. The unsalted butter gives richness, while the sugar adds sweetness. The eggs help bind everything together. Vanilla extract adds a warm flavor that complements chocolate. Cocoa powder is key for that rich chocolate taste. All-purpose flour provides the structure, and baking powder helps the brownies rise. A pinch of salt balances the sweetness. Fresh strawberries add a fruity twist. They bring a burst of flavor and freshness. For the chocolate coating, dark chocolate and coconut oil melt together to create a smooth finish. This gives your brownies a lovely, shiny look and a delicious taste. {{ingredient_image_1}} - Preheat your oven to 350°F (175°C). - Grease and line a 9x13 inch baking pan with parchment paper. - In a large bowl, whisk the melted butter and sugar until smooth. - Add four eggs, one at a time, and whisk well. - Mix in one teaspoon of vanilla extract. - Sift together one cup of flour, one cup of cocoa powder, baking powder, and salt. - Fold the dry mix into the wet mix until just combined. - Gently add one cup of sliced strawberries into the batter. - Pour the brownie batter into your prepared pan. - Use a spatula to smooth the top. - Bake for 25-30 minutes. - Check doneness by inserting a toothpick in the center. - If it comes out with a few moist crumbs, it's done. - Let the brownies cool for about 15 minutes in the pan. - While they cool, prepare the chocolate coating. - In a heatproof bowl, combine eight ounces of chopped dark chocolate and one tablespoon of coconut oil. - Melt the chocolate in the microwave, stirring every 30 seconds until smooth. - Once cooled, cut the brownies into squares. - Dip each brownie halfway in the melted chocolate. - Allow excess chocolate to drip off. - Place the dipped brownies on a parchment-lined tray. - Top each one with a fresh strawberry slice for decoration. - Let the chocolate set for about 30 minutes at room temperature or in the fridge. To make perfect brownies, avoid overmixing the batter. Mix until just combined. Overmixing can make the brownies tough. Next, ensure even distribution of strawberries. Gently fold the sliced strawberries into the batter. This step keeps each bite delicious and fruity. For the best melting technique, use a microwave. Place the chopped dark chocolate and coconut oil in a heatproof bowl. Melt them in 30-second bursts, stirring each time. This method prevents burning and keeps the chocolate smooth. To achieve a smooth finish, dip each brownie halfway. Let excess chocolate drip off before placing it on parchment paper. For visual appeal, arrange brownies on a decorative platter. Drizzle any remaining chocolate over the top. This adds a nice touch. Garnish with whole strawberries around the base. This makes your dessert look elegant and inviting. Pro Tips Use Quality Chocolate: For the best flavor and texture, opt for high-quality dark chocolate when coating your brownies. This will enhance the overall taste of your dessert. Don't Overmix: When combining the dry and wet ingredients, mix just until incorporated to ensure your brownies remain fudgy and dense rather than cakey. Chill for Better Dipping: Refrigerate the brownies for a bit after cutting them into squares. This will firm them up and make them easier to dip into the melted chocolate. Decorate with Style: Enhance the presentation by adding a sprinkle of sea salt on top of the chocolate coating or a dusting of cocoa powder for an elegant finish. {{image_2}} You can change the flavor of your brownies easily. Try different types of chocolate to mix things up. Use milk chocolate for a sweeter taste, or white chocolate for a creamy twist. Adding nuts can also boost flavor and texture. Walnuts or almonds work well with chocolate. You might even mix in other fruits like raspberries or cherries for a fun twist. If you need gluten-free options, use gluten-free flour. This allows everyone to enjoy these treats. For a vegan alternative, replace the eggs with flaxseed meal mixed with water. Use dairy-free chocolate and coconut oil to keep it vegan. These changes make it easy to cater to various diets without losing taste. You can create themed brownies for special occasions. For holidays, add sprinkles or colored chocolate to match the theme. In the fall, use pumpkin spice or pecans. In spring, consider using seasonal fruits like blueberries or peaches. These ideas keep your brownies fresh and fun for every season! To keep your chocolate covered strawberry brownies fresh, store them at room temperature. Place them in an airtight container. This helps keep the brownies soft and flavorful. They can last up to three days on the counter. If you want them to last longer, refrigerate them. Make sure to wrap the brownies tightly in plastic wrap or place them in a sealed container. This keeps moisture out and prevents them from drying out. In the fridge, they can stay fresh for about a week. Freezing chocolate covered strawberry brownies is easy and a great way to save some for later. First, cut the brownies into squares. Then, place them on a baking sheet lined with parchment paper. Make sure they are not touching. Freeze them for about an hour until they are firm. Once frozen, transfer the brownies to a freezer-safe bag or container. Label it with the date. They can stay frozen for up to three months. When you're ready to enjoy them, thaw the brownies in the fridge overnight. For the best texture, let them sit at room temperature for about 30 minutes before serving. This way, they will taste just as great as when you first made them! How long do chocolate covered strawberry brownies last? These brownies can last up to five days. Store them in an airtight container at room temperature. If you want to keep them longer, refrigerate them. This keeps them fresh and tasty. Can I use frozen strawberries instead of fresh? Yes, you can use frozen strawberries. Thaw them first and drain excess water. They may change the texture, but they still taste great. Fresh strawberries add a nice crunch, but frozen ones work in a pinch. What can I substitute for coconut oil? You can use any neutral oil in place of coconut oil. Canola oil or vegetable oil are good options. Melted butter is another great choice if you want a richer flavor. Each substitute will change the taste a bit, but they will all work well. In this post, we covered the key ingredients for making delicious chocolate-covered strawberry brownies. You learned step-by-step instructions from mixing to baking and coating. We shared tips to perfect your brownies and explored fun variations. Storing your brownies properly helps them stay fresh and tasty. Remember, baking is all about experimenting. Enjoy making these treats and impressing everyone with your sweet skills. Happy baking!

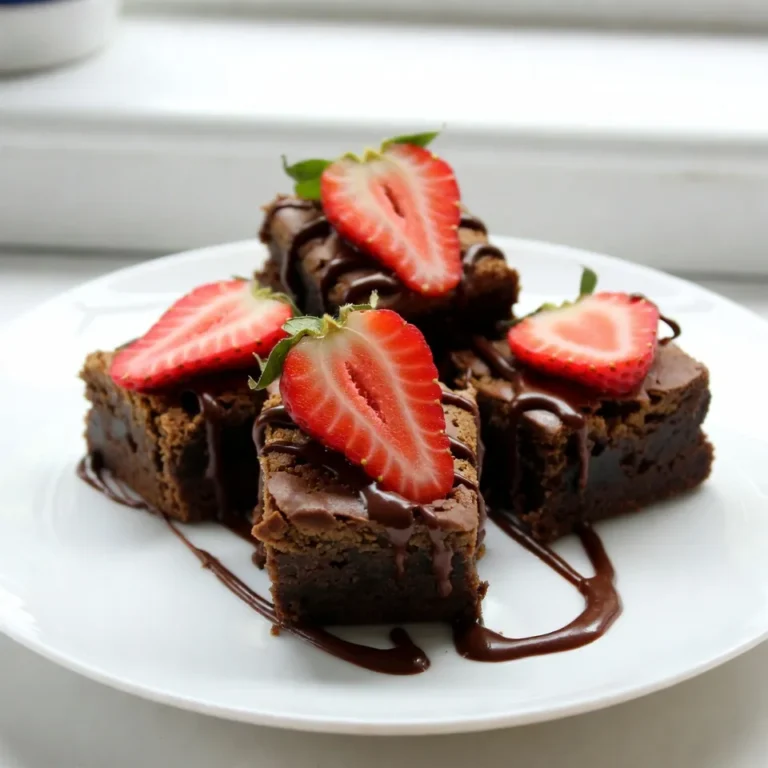
Chocolate Covered Strawberry Brownies Delightful Treat

- 4 boneless, skinless chicken breasts - 1 cup sun-dried tomatoes in oil, drained and chopped - 1 cup heavy cream - 1 cup chicken broth - 1 cup fresh spinach - 3 cloves garlic, minced - 1 tablespoon olive oil - 1 teaspoon Italian seasoning - Salt and pepper to taste - 1/2 cup grated Parmesan cheese - Fresh basil leaves, for garnish In this creamy sun-dried tomato chicken, the main ingredients create a rich and satisfying dish. The chicken breasts bring protein to the table. Sun-dried tomatoes add a burst of flavor. Heavy cream makes the sauce smooth and creamy. Chicken broth gives it depth. For the extra ingredients, fresh spinach adds color and nutrients. Garlic gives a lovely aroma and taste. Olive oil helps cook the chicken perfectly. Italian seasoning brings warmth and spice. Salt and pepper balance all the flavors. Parmesan cheese adds a salty finish. Fresh basil leaves on top make it look beautiful and fresh. Gather these ingredients, and you are ready to create a delightful meal that will impress anyone. {{ingredient_image_1}} Start by seasoning the chicken breasts. Use salt, pepper, and Italian seasoning. Make sure to coat both sides well. Next, heat a tablespoon of olive oil in a large skillet over medium heat. Once hot, add the seasoned chicken breasts. Cook them for about 6-7 minutes on each side. They should turn golden brown and be fully cooked. Remove the chicken from the skillet and set it aside on a plate. In the same skillet, add minced garlic. Sauté it for about 30 seconds. You want it fragrant but not burnt. Then, add the chopped sun-dried tomatoes. Cook them for about a minute to mix the flavors. Now pour in the chicken broth, scraping any browned bits from the bottom. This adds great flavor. Bring the mixture to a simmer. Lower the heat and stir in the heavy cream and grated Parmesan cheese. Mix until the cheese melts and the sauce becomes creamy. Add fresh spinach to the sauce. Cook it for about 2-3 minutes until it wilts. Finally, return the chicken to the skillet. Nestle it into the sauce and let it simmer for another 5 minutes. This helps the chicken absorb all those tasty flavors. Taste the sauce and adjust the seasoning if needed. Enjoy your creamy sun-dried tomato chicken! To ensure your chicken is cooked through, use a meat thermometer. The chicken should reach 165°F (75°C). This way, you avoid undercooked chicken. Another tip is to let chicken rest after cooking. It helps keep the juices in. For sautéing garlic without burning, cook on medium heat. Add garlic and stir quickly. If it starts to brown too fast, take it off the heat. Burnt garlic can ruin your dish. Serve creamy sun-dried tomato chicken over pasta or rice. This helps soak up the tasty sauce. You can also add a side salad for freshness. For presentation, drizzle extra sauce over the chicken. Place it on a colorful plate. Garnish with fresh basil leaves to add a pop of color. This makes the dish look more appealing and invites everyone to dig in! Pro Tips Use Fresh Ingredients: Whenever possible, opt for fresh spinach and high-quality sun-dried tomatoes. Fresh ingredients enhance the flavor of your dish significantly. Adjust Creaminess: For a lighter sauce, you can substitute half of the heavy cream with Greek yogurt or a lower-fat alternative, while still maintaining a creamy texture. Perfect Cooking Time: Ensure chicken is cooked to an internal temperature of 165°F (75°C) for safety. Use a meat thermometer for accurate readings. Flavor Boost: Add a splash of white wine to the sauce after sautéing the garlic and before adding the chicken broth for an added depth of flavor. {{image_2}} You can swap out heavy cream for different options. Try using coconut cream for a dairy-free choice. Greek yogurt can also work, but add it at the end to avoid curdling. For the chicken, you can use chicken thighs instead of breasts. Thighs stay juicy and add more flavor. If you prefer a plant-based option, use tofu. Just press it to remove excess water and cube it before cooking. Herbs and spices can change this dish's taste. Fresh or dried basil adds a nice touch. You might also like a hint of red pepper flakes for heat. Adding vegetables makes the dish even better. Sauté mushrooms or bell peppers with the garlic. Spinach is great, but you can also use kale or zucchini for extra color and nutrition. To store leftovers safely, let the chicken cool first. Place it in an airtight container. Make sure it is sealed tight. This keeps the dish fresh and tasty. The recommended shelf life in the fridge is about 3-4 days. Always check for any signs of spoilage before eating. If you want to freeze the dish, let it cool completely. Portion it into freezer-safe containers. Label each container with a date. This helps you track how long it has been frozen. The dish can last up to 2-3 months in the freezer. To thaw, move the container to the fridge overnight. This keeps the chicken safe while it defrosts. To reheat, use the stovetop or microwave. If using the stovetop, heat it gently to avoid drying out the chicken. Always stir well to mix the sauce before serving. Can I use fresh tomatoes instead of sun-dried? Yes, you can use fresh tomatoes. Fresh tomatoes add a different taste. They will not be as sweet or chewy as sun-dried tomatoes. Use about two cups of chopped fresh tomatoes. Cook them longer to soften before adding the cream. What can I substitute for chicken broth? You can use vegetable broth or water. Both options work well and keep the dish tasty. If you want more flavor, add a bit of salt and herbs to water. Is this recipe gluten-free? Yes, this recipe is naturally gluten-free. It contains no wheat or gluten ingredients. Always check labels if you use packaged items. Can it be made dairy-free or low-fat? Yes, you can make it dairy-free. Use coconut cream or almond milk as a substitute. For a low-fat version, use low-fat cream or Greek yogurt. Adjust the cheese amount if needed. This blog post explored a tasty creamy sun-dried tomato chicken recipe. You learned about key ingredients like chicken, sun-dried tomatoes, and heavy cream. I shared simple steps to make the dish, along with tips for perfect cooking. We discussed fun variations and how to store leftovers. In closing, this recipe is easy to adapt and serve. Enjoy making it your own!

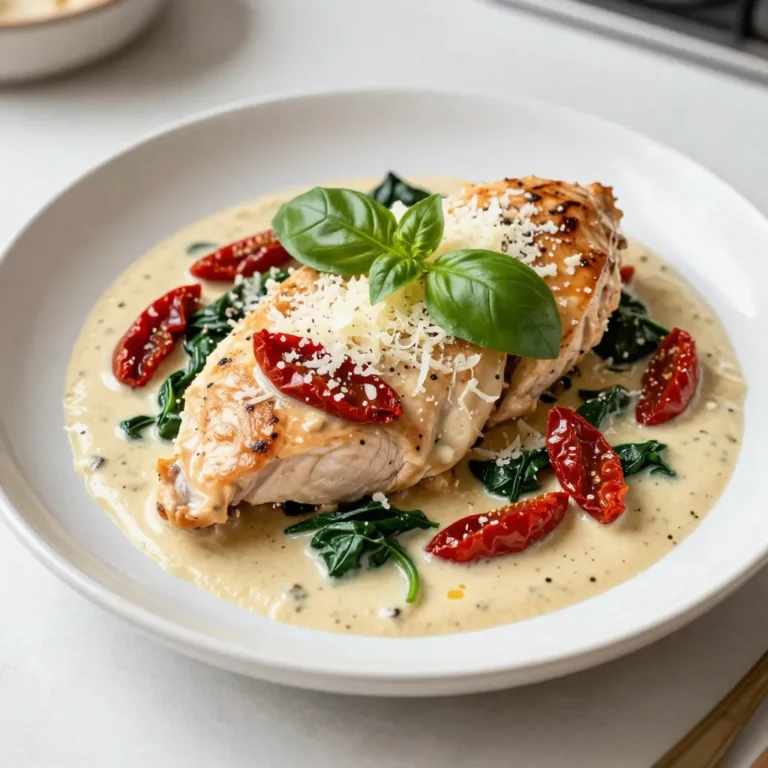
Creamy Sun-Dried Tomato Chicken Flavorful Dish Easy

- 1 lb thinly sliced beef - 1 cup bell peppers - 1 cup onion - 2 cloves garlic The main ingredients in this casserole create a rich and tasty base. I prefer using thinly sliced beef like sirloin or flank steak. It cooks quickly and keeps the dish tender. Bell peppers add color and sweetness. You can use any color you like, from green to red. Onions bring a nice depth of flavor, while garlic adds a warm aroma. Together, they create a hearty mix that fits perfectly in this dish. - 1 cup cream cheese - 1 cup shredded mozzarella cheese - 1 cup shredded provolone cheese The cheese blends in to give the casserole a creamy texture. I like to use cream cheese as it adds richness. Mozzarella melts beautifully and gives that gooey goodness we all love. Provolone adds a sharp flavor that balances the creaminess. This combination creates the ultimate cheesy layer on top that makes every bite delightful. - 1 tablespoon olive oil - 1 teaspoon Worcestershire sauce (optional) - Salt and pepper to taste Using olive oil helps cook the beef and vegetables without sticking. Worcestershire sauce adds a savory kick, but it’s up to you if you want to use it. Salt and pepper are key to enhancing all the flavors. Just remember to taste as you go. It helps ensure your casserole is seasoned just right. {{ingredient_image_1}} - Preheat the oven to 350°F (175°C). - In a large skillet, cook the beef until browned. This takes about 5-7 minutes. Use medium-high heat. - Next, sauté the onions and bell peppers in the same skillet. Cook them for about 4-5 minutes until they are tender. - Add the minced garlic for flavor. This will make your kitchen smell great! - In a large bowl, mix the cooked beef, sautéed veggies, and softened cream cheese. Stir until it’s creamy and well blended. - Spread this mixture into a greased 9x13 inch baking dish. - Top it off with shredded mozzarella and provolone cheese. - Now, place the dish in your preheated oven. Bake for 25-30 minutes. - Keep an eye on it until the cheese is melted and bubbly with a slight golden color. - After baking, let the casserole cool for about 5 minutes. - Garnish with freshly chopped parsley before serving. This adds a nice touch! To make a great casserole, you want the beef cooked just right. Use thin slices of beef like sirloin or flank steak. Cook it over medium-high heat for about 5-7 minutes. You want it nicely browned but not overcooked. If you let it rest, it stays juicy. For the veggies, choose colorful bell peppers and onions. Sauté them in olive oil for 4-5 minutes. This softens them and brings out their natural sweetness. Add garlic last to keep its strong flavor bright. Pair your casserole with a fresh salad or sliced cucumbers. The cool crunch of veggies balances the rich cheese. For an appealing dish, serve in individual bowls. A sprig of fresh parsley on top adds color and a touch of class. You can lower carbs by swapping cream cheese for a lower-carb option. Try using ricotta cheese or Greek yogurt for creaminess. Use more veggies like zucchini or mushrooms to bulk it up without adding carbs. To boost flavor without extra carbs, use spices like paprika or Italian seasoning. A sprinkle of red pepper flakes adds heat. You can also add Worcestershire sauce for a touch of umami. Pro Tips Choose the Right Cut: Opt for tender cuts like sirloin or flank steak to ensure your casserole is both flavorful and easy to chew. Perfectly Creamy: Make sure your cream cheese is at room temperature before mixing to achieve a smooth and creamy consistency throughout the casserole. Add Extra Flavor: Enhance the taste by incorporating additional spices or herbs such as Italian seasoning or smoked paprika for a unique twist. Customize Your Veggies: Feel free to add or substitute other vegetables such as mushrooms, zucchini, or spinach based on your preferences for added nutrition and flavor. {{image_2}} You can swap the beef for other meats. Try chicken, turkey, or pork. These options bring different tastes and textures. If you want a vegetarian dish, use mushrooms or tempeh. They soak up flavors well and add nice texture. To change the flavor profile, add spices. Paprika, cumin, or Italian herbs work great. They can kick up the taste. You can also top your casserole with jalapeños for heat. Black olives add a nice briny touch too. Just sprinkle them on before baking. If you want a slow cooker version, layer the beef and veggies in the pot. Cook on low for 6-8 hours. This method makes it very tender. For quicker cooking, try an Instant Pot. Use the sauté function for your beef and veggies. Then, cook on high pressure for about 10 minutes. This saves time while keeping the flavor. To store leftovers, place the casserole in an airtight container. You can also cover it tightly with plastic wrap. This will help keep it fresh. You can keep it in the fridge for about 3 to 4 days. Make sure it cools down before sealing. You can freeze the casserole before or after baking. If you freeze it before baking, assemble it in your dish. Wrap it tightly in plastic wrap and then aluminum foil. For freezing after baking, let it cool first. Then, store it in an airtight container. To thaw, move it to the fridge for a night. For reheating, bake it at 350°F (175°C) until hot. To reheat, the oven works best. It keeps the texture just right. Preheat the oven to 350°F (175°C). Place the casserole in a baking dish and cover it with foil. Bake for 20-25 minutes. If using a microwave, heat in short bursts. Stir in between to avoid hot spots. Be careful not to overcook. Enjoy your meal! To make this dish dairy-free, you can swap cream cheese for a dairy-free cream cheese. Use a plant-based cheese blend in place of mozzarella and provolone. Nutritional yeast can add a cheesy flavor without dairy. You can also try coconut cream for a creamy texture. This casserole is low in carbs, making it great for low-carb diets. It has protein from the beef, which helps build muscle. The bell peppers and onions provide vitamins like C and A. The dish is also rich in healthy fats from the cheese and olive oil. Yes, you can prepare this casserole ahead of time. Cook the beef and veggies, then mix with the cream cheese. Store it in the fridge for up to 24 hours. Just bake it when you're ready to eat. To serve leftovers, reheat in the oven for a crispy top. You can also microwave individual portions for a quick meal. Pair with a fresh salad or veggies for a balanced meal. If your casserole is frozen, bake it at 350°F (175°C) for about 50-60 minutes. Cover it with foil to prevent burning. Check that the center is hot before serving. Enjoy your meal! The Low Carb Philly Cheesesteak Casserole combines tasty ingredients like beef, peppers, and cheese. You can easily prepare it with simple steps that make cooking fun. Remember to mix and bake it well for a delicious meal. Try out variations for different flavors and use tips to enjoy each bite. Storing and reheating leftovers is easy, so you’ll always have a tasty dish ready. Enjoy making this meal, and share any new twists you add!

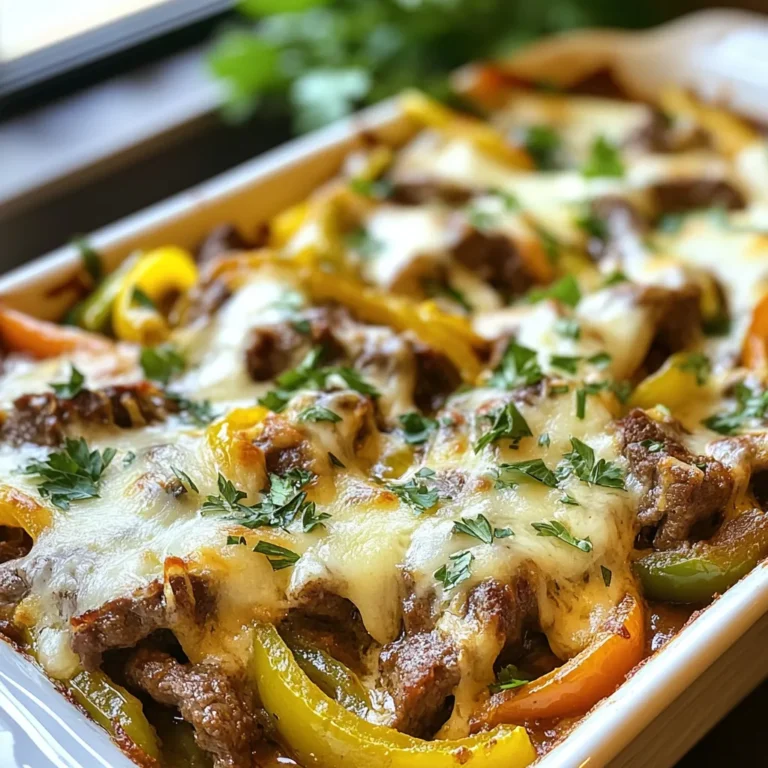
Low Carb Philly Cheesesteak Casserole Simple Dish

Here’s what you need to make these tasty enchiladas: - 2 cups cooked chicken, shredded - 1 cup black beans, rinsed and drained - 1 cup corn, frozen or canned - 1 cup diced tomatoes (canned or fresh) - 1 tsp ground cumin - 1 tsp chili powder - 1/2 tsp garlic powder - 8 small whole wheat tortillas - 1 cup low-fat shredded cheese (cheddar or Mexican blend) - 1 cup enchilada sauce (store-bought or homemade) - Fresh cilantro, chopped for garnish - Salt and pepper to taste Each ingredient in these enchiladas brings unique benefits: - Cooked chicken: A great source of lean protein. It helps build muscles and keeps you full. - Black beans: High in fiber and protein. They support digestion and heart health. - Corn: Adds natural sweetness and provides vitamins. It boosts energy and adds color. - Diced tomatoes: Rich in vitamins C and K. They add freshness and flavor while being low in calories. - Whole wheat tortillas: Offers more fiber than regular tortillas. They help maintain energy levels. - Low-fat cheese: Gives a creamy texture with less fat. It still provides calcium and protein. If you want to mix it up, try these swaps: - Chicken: Use shredded turkey or tofu for a vegetarian option. - Black beans: Swap with kidney beans or pinto beans for a different flavor. - Corn: Use diced bell peppers for crunch and color. - Diced tomatoes: Substitute with salsa for extra zest. - Whole wheat tortillas: Try corn tortillas for a gluten-free option. - Low-fat cheese: Use nutritional yeast for a vegan cheese alternative. These substitutions can make the dish fit your taste and dietary needs. {{ingredient_image_1}} First, gather all your ingredients. You need: - 2 cups cooked chicken, shredded - 1 cup black beans, rinsed and drained - 1 cup corn, frozen or canned - 1 cup diced tomatoes (canned or fresh) - 1 tsp ground cumin - 1 tsp chili powder - 1/2 tsp garlic powder - 8 small whole wheat tortillas - 1 cup low-fat shredded cheese (cheddar or Mexican blend) - 1 cup enchilada sauce (store-bought or homemade) - Fresh cilantro, chopped for garnish - Salt and pepper to taste In a large bowl, mix the shredded chicken, black beans, corn, and diced tomatoes. Add the spices: cumin, chili powder, and garlic powder. Don’t forget to add a pinch of salt and pepper. This mix packs in flavor and nutrition. Now, let’s assemble the enchiladas. Start by preheating your oven to 350°F (175°C). Pour about 1/4 cup of enchilada sauce in a 9x13 inch baking dish. This will keep the enchiladas from sticking. Take a tortilla and place about 1/3 cup of the chicken mixture in the center. Roll it up tightly and place it seam-side down in the dish. Repeat this step for all tortillas. After placing all the enchiladas in the dish, pour the remaining enchilada sauce on top. Make sure every tortilla is covered. Next, sprinkle the shredded cheese evenly over the top. Cover the baking dish with aluminum foil. Bake in the oven for 20 minutes. After that, remove the foil and bake for another 10-15 minutes. You want the cheese to melt and bubble. Once done, take the dish out and let it cool for a few minutes. Top with fresh cilantro for a pop of color. Serve hot, and consider pairing with guacamole or a fresh green salad for a tasty meal. Enjoy! To make these enchiladas even healthier, I suggest a few simple swaps. First, use low-sodium options for your black beans and enchilada sauce. This reduces salt but keeps flavor. You can also add more vegetables. Try bell peppers, spinach, or zucchini in the filling. These add nutrition without extra calories. If you want fewer carbs, use lettuce wraps instead of tortillas. This keeps the meal light and fresh. Lastly, consider using a smaller amount of cheese or a dairy-free option. This keeps the dish tasty while making it healthier. To bring out great flavors, I recommend a few cooking techniques. First, always sauté your spices. This step unlocks their natural oils and boosts the taste. You can do this in a pan before adding them to your filling. Next, try roasting your vegetables. Roasting brings out sweetness and depth. You can roast corn and tomatoes before mixing them in. For a smoky flavor, add a touch of smoked paprika to your spices. Just a little can make a big difference. Lastly, let your enchiladas sit for a few minutes after baking. This helps the flavors meld and makes each bite even better. Pair these enchiladas with fresh sides for a complete meal. A crisp green salad with a light vinaigrette works well. It adds crunch and balance to the dish. You can also serve guacamole on the side. The creaminess complements the enchiladas nicely. For a refreshing drink, try agua fresca or iced tea. Both are light and enhance the meal. Consider garnishing your plate with lime wedges and extra cilantro for a bright finish. These simple touches elevate your dining experience and make it feel special. Pro Tips Use Fresh Ingredients: Fresh vegetables and herbs can enhance the flavor of your enchiladas, making them even more delicious. Customize the Spice Level: Adjust the amount of chili powder and cumin to suit your spice preference for a tailored flavor profile. Make Ahead: Prepare the filling and assemble the enchiladas a day in advance to save time on busy weeknights. Garnish Creatively: In addition to cilantro, consider adding diced avocado or a squeeze of lime juice for extra freshness and flavor. {{image_2}} To make a vegetarian version, swap the chicken for more beans or veggies. You can use 2 cups of black beans or pinto beans. Add in chopped bell peppers, zucchini, or spinach for extra flavor. This keeps the dish tasty and healthy. Use the same spices for a great kick. If you love heat, add more spice! Use jalapeños or diced green chilies. You can mix these in with the chicken filling. Increase the chili powder to 2 teaspoons for a stronger flavor. For even more heat, top with hot sauce before serving. This will excite your taste buds! For a gluten-free meal, look for corn tortillas or gluten-free wraps. Many stores sell these options. Check the labels to ensure they are truly gluten-free. For the enchilada sauce, you can make your own using tomato sauce and spices. This way, you know it’s safe for your diet. Enjoy these variations to fit your needs! Let’s talk about storing your skinny chicken enchiladas. Once you have leftovers, let them cool to room temperature. This helps keep them fresh. Place the enchiladas in an airtight container. Make sure to layer them with some wax paper to avoid sticking. They will last in the fridge for about three to four days. When you are ready to eat again, reheating is easy. Preheat your oven to 350°F (175°C). Place the enchiladas in an oven-safe dish. Cover them with foil to keep them moist. Heat for about 15 to 20 minutes, or until hot. You can also use a microwave. Heat them for two to three minutes, checking often to avoid overcooking. If you want to save some for later, freezing is a great option. Wrap each enchilada in plastic wrap, then in foil. This helps prevent freezer burn. You can freeze them for up to three months. When you are ready to eat, thaw them overnight in the fridge. Then, reheat them using the oven methods I mentioned before. You can use cooked turkey as a great substitute. Shredded tofu also works well for a plant-based option. If you love beans, try using extra black beans or pinto beans. This keeps the dish hearty and tasty. Making your own enchilada sauce is easy! Start with these basic steps: - Combine 1 can of tomato sauce with 1 cup of water. - Add 1 tablespoon of chili powder, 1 teaspoon of ground cumin, and a pinch of salt. - Simmer for about 15 minutes. This gives you a fresh and flavorful sauce that is healthier than store-bought. Yes, you can prepare these enchiladas ahead. Assemble them and cover with foil. Store in the fridge for up to 24 hours. When ready to bake, just add a few extra minutes to the cooking time. This makes dinner planning easy and stress-free! In this post, we explored the tasty world of skinny chicken enchiladas. We covered key ingredients and their benefits, how to prepare and cook them, and tips for healthier versions. We also looked at fun variations like vegetarian and gluten-free options. Proper storage and reheating methods can keep leftovers fresh. Remember, these enchiladas are not just good for you; they’re also easy to make. Enjoy experimenting with your own twists to make them your favorite meal!

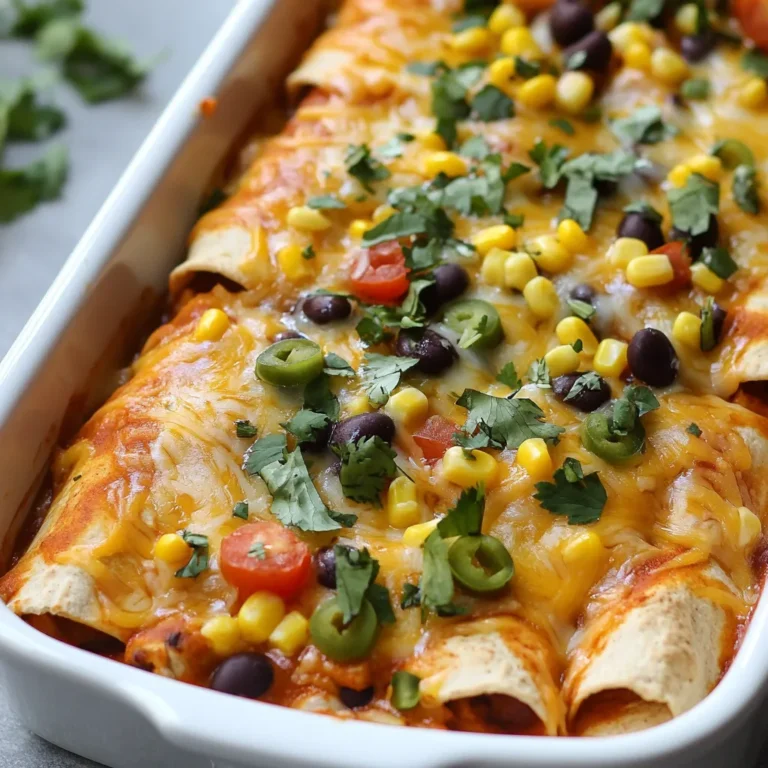
Skinny Chicken Enchiladas Healthy and Quick Dish

To make vegan eggnog, gather these key items: - 1 can (400ml) full-fat coconut milk - 1 cup almond milk (or any plant-based milk) - 1/4 cup maple syrup - 1 teaspoon vanilla extract - 1 teaspoon ground nutmeg - 1 teaspoon ground cinnamon - 1/4 teaspoon ground cloves - A pinch of sea salt - 1/4 cup soaked cashews (for extra creaminess) These ingredients create a rich and creamy base. The coconut milk gives a nice texture. Almond milk adds a lightness that balances it all. Maple syrup sweetens the mix, while spices add warmth. You can add personal touches to your eggnog. Consider these optional ingredients: - Extra maple syrup for more sweetness - More spices like ginger or cardamom - Coconut whipped cream for added fluffiness - A splash of rum or bourbon for an adult version These additions let you tailor the drink to your taste. Try different spices to create unique flavors. Vegan eggnog is often lighter than traditional versions. Here’s a quick comparison: - Traditional eggnog often contains eggs and cream. - Vegan eggnog uses plant-based milk and cashews. This switch reduces cholesterol and calories. It can also offer more fiber from the nuts and milk. Overall, vegan eggnog is a healthier option while still being festive and tasty. {{ingredient_image_1}} To start, soak 1/4 cup of cashews in water. You can do this for at least 2 hours or overnight. Soaking helps them soften and become creamy. Once done, drain and rinse the cashews. This step is key for a smooth texture in your eggnog. Next, take a blender and add the following: - 1 can (400ml) full-fat coconut milk - 1 cup almond milk (or any plant-based milk) - 1/4 cup maple syrup - 1 teaspoon vanilla extract - 1 teaspoon ground nutmeg - 1 teaspoon ground cinnamon - 1/4 teaspoon ground cloves - A pinch of sea salt - The soaked cashews Blend everything on high speed for about 1-2 minutes. You want the mix to be creamy and smooth. If you like it thicker, add more cashews or use less almond milk. This creates a rich base for your eggnog. After blending, taste your eggnog. If you want it sweeter, add more maple syrup. For a spicier kick, sprinkle in extra cinnamon or nutmeg. Adjusting these flavors helps you craft the perfect drink for your taste. Once you're happy with the flavor, pour the eggnog into a pitcher. Chill it in the fridge for at least 1 hour. This step allows all the flavors to blend and deepen. To make your vegan eggnog super creamy, use full-fat coconut milk. It gives a rich base. Soaking cashews for at least 2 hours is key. This step makes them soft and easy to blend. Blend all ingredients on high speed. Aim for 1-2 minutes. If it's not thick enough, add more soaked cashews or cut back on almond milk. This will help you reach that desired texture. You can store leftover vegan eggnog in the fridge. Use a sealed container for best results. It stays fresh for about 3-5 days. Give it a good shake before serving. If you notice separation, that’s normal. Just blend it again to restore its creaminess. When serving, chill your eggnog well. This enhances the flavors. Pour it into glasses, leaving some space at the top. For a festive touch, add a cinnamon stick and freshly grated nutmeg on each glass. This not only looks nice but adds extra flavor too. Enjoy your creamy delight! Pro Tips Soak Cashews Longer: The longer you soak the cashews, the creamier your eggnog will be. Aim for at least 4-6 hours if possible. Adjust Sweetness: Start with less maple syrup and add more to taste. This allows you to control the sweetness level to your liking. Chill Before Serving: Letting the eggnog chill for at least an hour enhances the flavors. It’s worth the wait! Experiment with Spices: Feel free to add more spices like ginger or cardamom for a unique twist on traditional eggnog flavor. {{image_2}} You can easily change the spices in your vegan eggnog. For a pumpkin spice twist, add 1 teaspoon of pumpkin pie spice. This mix gives a warm, fall flavor. If you prefer gingerbread, include 1 teaspoon of ground ginger and a bit of molasses. These spices make your drink cozy and festive. Want to make your vegan eggnog even more special? Try adding chocolate or coffee! For chocolate, blend in 2 tablespoons of cocoa powder. This gives a rich, chocolatey taste. If you love coffee, add 1/2 cup of cold brew coffee. It adds a nice kick to your drink. You can also mix in a splash of almond extract for a nutty flavor. For those who want a little fun, you can make an adult version of vegan eggnog. Add 1/2 cup of your favorite rum or bourbon. This makes the drink warm and festive. Just mix it in after blending. Make sure to serve it responsibly and enjoy with friends. To keep your vegan eggnog fresh, store it in the fridge. Use an airtight container to prevent any odors from other foods. It will stay good for up to five days. Make sure to give it a good shake before you pour it out. The flavors may settle, but shaking will mix everything back together. You can freeze vegan eggnog if you need to save it for later. Pour it into ice cube trays or freezer-safe containers. Leave some space at the top, as liquids expand when frozen. When you want to use it, thaw in the fridge overnight. Blend it again if it looks separated after thawing. Homemade vegan eggnog tastes best when fresh, but it can last up to five days in the fridge. For the best flavor, consume it within the first few days. Always check for any off smells or changes in texture before drinking. If it smells sour or looks funny, it's best to toss it out. Yes, you can use any plant-based milk. Almond milk works well, but oat or soy milk can also be nice. Each milk gives a different taste. You can mix and match to find your favorite flavor. Just keep in mind, the creaminess might change based on the milk you choose. You can store homemade vegan eggnog for up to one week. Keep it in a sealed container in the fridge. The flavors will deepen over time. If it separates, just shake or stir it before serving. This drink stays fresh if stored properly. Yes, vegan eggnog is great for kids. It has no eggs or dairy, making it safe for them. The flavors are sweet and fun. Kids will enjoy drinking this creamy treat during the holidays. Plus, it's a good way to include them in festive traditions. Yes, you can make vegan eggnog without cashews. If you want creaminess, try using soaked almonds or coconut cream instead. You can also omit them for a lighter drink. Just know that it might be less rich in texture. Adjust the recipe to fit your taste and needs. This blog post covered how to make vegan eggnog. We discussed essential and optional ingredients to create your style. I shared step-by-step instructions for a creamy base and tips for great texture. You learned about tasty variations to try and how to store leftovers properly. In the end, vegan eggnog offers a fun, plant-based twist on a classic drink. Enjoy sipping this holiday treat with family and friends!

Vegan Eggnog Creamy Delight for the Holidays

- 1.5 lbs boneless, skinless chicken thighs, chopped into bite-sized pieces - 1/4 cup low-sodium soy sauce - 2 tablespoons rice vinegar - 1 tablespoon hoisin sauce - 2 tablespoons sesame oil - 3 cloves garlic, minced - 1 inch ginger, grated - 1/4 teaspoon red pepper flakes (adjust to taste) - 1/2 cup roasted unsalted peanuts - 1 bell pepper (red or green), chopped - 1/2 cup green onions, sliced - 1 cup broccoli florets - Salt and pepper to taste - Cooked jasmine rice, for serving When I choose ingredients, I look for bright colors and firm textures. For chicken, I prefer thighs. They stay juicy and tender during cooking. Check the sell-by date for freshness. For veggies, pick bell peppers that are smooth and shiny. Fresh broccoli should be bright green and crisp. This ensures your dish tastes great and looks vibrant. If you can't find chicken thighs, chicken breast works too. Just remember, it may dry out faster. For the soy sauce, coconut aminos can be a good swap for a lighter flavor. If you want to skip peanuts, try cashews or sunflower seeds for crunch. These changes can still keep your meal tasty and fun! {{ingredient_image_1}} To start, grab a large bowl. Mix together the following ingredients: - 1/4 cup low-sodium soy sauce - 2 tablespoons rice vinegar - 1 tablespoon hoisin sauce - 2 tablespoons sesame oil - 3 cloves garlic, minced - 1 inch ginger, grated - 1/4 teaspoon red pepper flakes Stir these well. This mix creates a tasty marinade that adds flavor to the chicken. Next, take your 1.5 lbs of boneless, skinless chicken thighs. Chop them into bite-sized pieces. Add them to the marinade. Make sure every piece is covered. Cover the bowl and let it sit for at least 30 minutes. If you have time, let it sit overnight in the fridge. This makes the chicken even more flavorful. Now it’s time for the crockpot. Transfer the marinated chicken to your crockpot. Pour in all the marinade too. Add these ingredients: - 1 chopped bell pepper - 1 cup broccoli florets - 1/2 cup of sliced green onions (reserve half for later) Gently mix everything together. Cover the crockpot and set it to cook. You can cook it on low for 6-7 hours or on high for 3-4 hours. When it's ready, the chicken will be tender and juicy. About 30 minutes before serving, add in the 1/2 cup of roasted peanuts. Taste it and add salt and pepper as needed. Serve your Kung Pao Chicken over steamed jasmine rice, garnishing with the reserved green onions. Enjoy! To make your Crockpot Kung Pao Chicken taste great, start with the marinade. Mix the soy sauce, rice vinegar, hoisin sauce, sesame oil, garlic, ginger, and red pepper flakes in a bowl. This blend brings out rich flavors. Let the chicken soak in the marinade. The longer it sits, the better it tastes. If you can, marinate it overnight. This step adds depth to every bite. Overcooking can turn your chicken dry and tough. Use a meat thermometer to check the chicken. It should reach 165°F for safe eating. If you cook on low, aim for 6-7 hours. If you use high, set the timer for 3-4 hours. Stir in the peanuts about 30 minutes before serving. This keeps them crunchy and flavorful. Serving your Kung Pao Chicken over fluffy jasmine rice is a must. The rice soaks up the sauce, making every bite delightful. You can also add a sprinkle of green onions on top for a fresh touch. If you want a little crunch, serve with extra roasted peanuts on the side. You can pair this dish with a light salad or steamed veggies for a balanced meal. Pro Tips Marinate for Maximum Flavor: Allow the chicken to marinate for at least 30 minutes, but for the best flavor, marinate it overnight in the fridge. Adjust Heat Level: Modify the amount of red pepper flakes according to your spice preference; start with a small amount and increase as desired. Vegetable Variations: Feel free to add or substitute other vegetables like snap peas, carrots, or mushrooms for a different texture and flavor. Peanut Allergy Caution: If you have a peanut allergy, substitute the peanuts with sunflower seeds or omit them entirely for a nut-free version. {{image_2}} You can easily make a vegetarian version of Kung Pao Chicken. Use tofu instead of chicken. Firm tofu works best. First, press the tofu to remove extra water. Cut it into cubes. Then, marinate it just like the chicken. This will give it great flavor. You can also use tempeh for a nutty taste. Both options will soak up the sauce well. If you like heat, you can make it spicier. Start with the red pepper flakes. Use more than 1/4 teaspoon if you dare! You can also add fresh chopped chili peppers. Thai bird's eye chili peppers are great for this. Another option is to add Sriracha sauce at the end for an extra kick. Just stir it in before serving. Feel free to change the veggies in your Kung Pao dish. Snow peas and carrots add crunch and color. You can also use zucchini or snap peas for a fresh taste. Just remember to cut them into small pieces. This helps them cook evenly. Mixing and matching vegetables keeps the dish exciting and fun! After enjoying your meal, let the leftovers cool down. Place the Kung Pao Chicken in an airtight container. Make sure to seal it tightly to keep it fresh. Store it in the fridge. It will stay good for about 3 to 4 days. If you have extra rice, store it in a separate container. When you’re ready to eat the leftovers, you can reheat them easily. Use the microwave for a quick option. Place the chicken on a microwave-safe plate. Cover it with a damp paper towel to keep moisture in. Heat it for 1 to 2 minutes, stirring halfway. If you prefer the stove, use a pan on low heat. Stir often to warm it evenly. If you want to keep Kung Pao Chicken for a long time, freezing is a great option. First, let it cool completely. Then, put it in a freezer-safe bag or container. Make sure to remove as much air as possible. Label it with the date. You can freeze it for up to 3 months. When you want to eat it, thaw it in the fridge overnight before reheating. To make Crockpot Kung Pao Chicken gluten-free, swap regular soy sauce for gluten-free soy sauce. Many brands offer a great taste that fits your diet. Also, check your hoisin sauce. Some brands use wheat, so look for a gluten-free version. This small change allows everyone to enjoy this tasty dish. Yes, you can use chicken breast instead of thighs. Chicken breast is leaner and cooks well in the crockpot. Just make sure to cut it into bite-sized pieces. The cooking time stays the same, so your meal will still be quick and easy. Crockpot Kung Pao Chicken pairs well with jasmine rice. The rice soaks up the sauce and adds flavor. You can also add a side of steamed veggies for extra color and nutrition. If you want a crunch, try serving it with some crispy wontons or spring rolls. In this blog post, we covered the key ingredients and how to select fresh ones. I shared step-by-step instructions, from making the marinade to loading the crockpot. We also discussed cooking tips to boost flavor and prevent overcooking. Variations included vegetarian options and spice adjustments. Finally, I provided storage tips to help you save leftovers. Remember, using fresh ingredients and understanding cooking techniques can make your dish shine. Enjoy your cooking adventure and feel free to experiment!

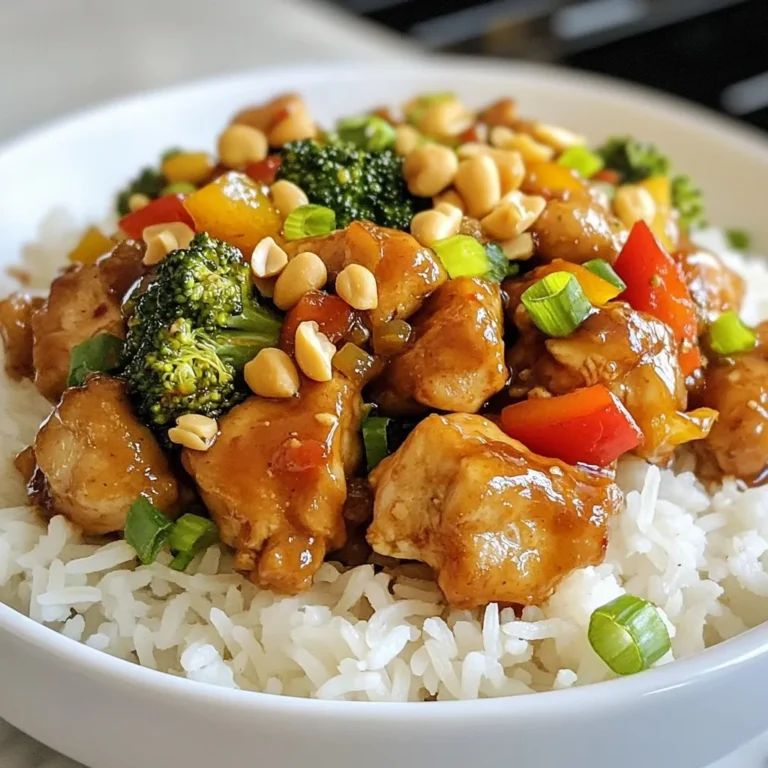
Crockpot Kung Pao Chicken Flavorful and Easy Meal

- 1 lb boneless, skinless chicken breast - 6 cups chicken broth - 1 cup orzo pasta (or rice) - 1 medium onion, diced - 3 medium carrots, sliced - 2 celery stalks, sliced - 2 cloves garlic, minced - 2 large lemons, zested and juiced - 1 teaspoon dried oregano - Salt and pepper to taste - Fresh dill or parsley for garnish The main ingredients in Greek Lemon Chicken Soup are simple yet vital. The chicken breast adds protein and richness. The chicken broth acts as a flavorful base. Orzo or rice gives the soup heartiness and texture. Next, we have the vegetables and aromatics. Onions, garlic, carrots, and celery create a sweet and savory base. These veggies release their flavors when sautéed. This step builds depth in the soup. The seasonings enhance the dish. Fresh lemon juice and zest bring brightness. Oregano adds a touch of earthiness. Finally, salt and pepper balance the flavors. Fresh dill or parsley makes a lovely garnish. It also adds a pop of color. Using these ingredients, you create a warm, nourishing soup. Each element plays a role in making this dish truly special. {{ingredient_image_1}} - Heat 2 tablespoons of olive oil in a large pot over medium heat. - Add 1 medium diced onion and 2 cloves of minced garlic. Sauté for 3-4 minutes until the onion turns soft and clear. - Next, add 3 sliced carrots and 2 sliced celery stalks. Cook for another 5 minutes. This mix adds a nice flavor base to your soup. - Pour in 6 cups of chicken broth and bring it to a boil. The broth gives the soup depth and warmth. - Once boiling, add 1 lb of boneless, skinless chicken breasts. Reduce the heat. Let it simmer for 15-20 minutes until the chicken cooks through. - After the chicken is done, take it out of the pot. Allow it to cool for a moment, then shred it into bite-sized pieces. - Return the shredded chicken to the pot. Add 1 cup of orzo pasta. Cook according to package instructions, about 8-10 minutes until tender. - Stir in the juice and zest of 2 large lemons, along with 1 teaspoon of dried oregano. Season with salt and pepper to taste. - Remove the pot from heat. Let it sit for a few minutes to let the flavors blend. Enjoy your soup hot, garnished with fresh dill or parsley for a bright finish. Choosing the right chicken and broth is key. I recommend using boneless, skinless chicken breast for a tender bite. A good quality chicken broth gives depth to the soup. Homemade broth is best, but store-bought works fine. Just pick one low in sodium. When you shred the chicken, let it cool first. Use two forks to pull it apart easily. Shredding while hot can burn your hands. You can also use a stand mixer for quick shredding. Timing is important for the orzo. Add it when the chicken is done cooking. Orzo takes about 8-10 minutes to cook. Stir it often to prevent sticking. If you want to switch things up, you can use rice instead of orzo. Just remember that rice may need a bit more time to cook. Quinoa is another great option if you want a nutty flavor. Fresh herbs can really brighten up the soup. I love adding dill or parsley right before serving. They add a fresh taste. For extra flavor, consider adding some crushed red pepper flakes. This adds a nice kick without overpowering the dish. A squeeze of extra lemon juice can also enhance the soup's brightness. Pro Tips Use Bone-in Chicken: For a richer flavor, consider using bone-in chicken thighs or drumsticks instead of breasts. The bones add depth to the broth. Fresh Herbs Matter: Whenever possible, use fresh dill or parsley for garnishing. Fresh herbs brighten the dish and enhance the overall flavor. Adjusting Acidity: If you prefer a more tangy soup, feel free to add more lemon juice at the end. Taste as you go to achieve your desired flavor. Make it Ahead: This soup can be made ahead of time and stored in the refrigerator. Just reheat gently and add fresh herbs before serving for the best results. {{image_2}} You can easily adjust this Greek Lemon Chicken Soup for different diets. If you want a gluten-free option, swap the orzo for rice. Rice cooks well and keeps the soup rich. For low-carb diets, you can skip the pasta altogether. Instead, add more veggies like zucchini or spinach. These changes help keep the soup light and still full of flavor. To boost the soup's nutrition, add more vegetables. Consider throwing in some peas, green beans, or even bell peppers. These add color and crunch. If you enjoy a kick, try adding spicy peppers. Just chop some jalapeños or red chili flakes for a nice heat. These tweaks make the soup exciting and packed with good stuff. You can also give the soup a cultural twist by using traditional Mediterranean ingredients. Try adding olives or capers for a salty punch. You might even use feta cheese as a topping for creamy goodness. Each region in Greece has its own spin on this dish. In some areas, they might use other herbs like mint or thyme. Exploring these variations can make your soup unique and delightful. To store leftovers, place the soup in an airtight container. Let it cool first. You can keep it in the fridge for up to 3 days. This helps keep the flavors fresh. If you want to save the soup for later, freezing is a great option. Pour cooled soup into freezer-safe bags or containers. Make sure to leave some space at the top, as soup expands when frozen. You can freeze it for up to 3 months. To thaw, move the soup from the freezer to the fridge for a few hours or overnight. For quick thawing, you can microwave it in a safe bowl. Reheat on the stove over low heat. Stir often until it's hot. You can get creative with leftover soup. Try adding fresh veggies or leftover grains. This adds texture and nutrition. For serving reheated soup, a sprinkle of fresh dill or parsley makes it pop. You can also pair it with crusty bread or a simple salad for a complete meal. Greek Lemon Chicken Soup pairs well with several delicious sides. Here are some common choices: - Crusty bread: A warm, crusty loaf is perfect for dipping. - Greek salad: Fresh veggies and feta add a nice crunch. - Pita chips: These add a fun crunch and are great for scooping. - Feta cheese: Crumble some on top for added flavor. These sides make your meal even more enjoyable and fulfilling. Yes, you can easily make this soup in a slow cooker. Here’s how: 1. Prepare the base: Sauté the onions, garlic, carrots, and celery in a pan. 2. Transfer to slow cooker: Add the cooked veggies to your slow cooker. 3. Add broth and chicken: Pour in the chicken broth and add the chicken breasts. 4. Set the time: Cook on low for 6-7 hours or high for 3-4 hours. 5. Finish the soup: Shred the chicken and stir in the orzo or rice. Add lemon juice and zest before serving. This method lets the flavors meld beautifully while you go about your day. Yes, you can make a vegetarian version of Greek Lemon Chicken Soup. Here are some easy substitutions: - Use vegetable broth: Swap chicken broth for vegetable broth. - Replace chicken: Use chickpeas or tofu for protein. - Add more veggies: Try adding spinach, zucchini, or bell peppers for extra flavor. With these changes, you can enjoy a tasty, meat-free soup that still brings the same bright flavors. This blog post shared a simple method for making Greek Lemon Chicken Soup. We explored key ingredients, step-by-step cooking, and helpful tips. You can modify the recipe to fit your taste and dietary needs. Remember, this soup is a warm, nourishing dish perfect for many occasions. Enjoy making it your own, and don’t hesitate to experiment with flavors. You’ll find that each bowl offers comfort and a taste of tradition.

Greek Lemon Chicken Soup Flavorful and Nourishing Dish

- 2 cups cooked chicken breast, shredded - 1 ripe avocado, mashed - 1 cup shredded cheddar cheese - 1/2 cup mayonnaise - 1 tablespoon lime juice - 1/4 teaspoon garlic powder - Salt and pepper to taste - 4 slices of whole grain or sourdough bread - 2 tablespoons olive oil - Fresh cilantro or parsley, for garnish For the chicken, you can use rotisserie or leftover chicken. This saves time and gives a nice flavor. If you want to cut calories, use Greek yogurt in place of mayonnaise. You can swap lime juice with lemon juice if needed. For cheese, feel free to try pepper jack for a spicy kick. This dish is rich in protein from the chicken and cheese. The avocado adds healthy fats and fiber. Each serving has about: - Calories: 550 - Protein: 36g - Carbohydrates: 40g - Fat: 30g - Fiber: 8g This meal is not only tasty but also balanced. It gives you energy and keeps you full. Enjoy creating your own Chicken Avocado Melt! {{ingredient_image_1}} 1. Start by shredding 2 cups of cooked chicken breast. I find rotisserie chicken works well. 2. In a medium bowl, mash 1 ripe avocado until smooth. 3. Combine the shredded chicken and mashed avocado in the bowl. Mix them well. 4. Add 1 cup of shredded cheddar cheese, 1/2 cup of mayonnaise, and 1 tablespoon of lime juice. 5. Sprinkle in 1/4 teaspoon of garlic powder, plus salt and pepper to your taste. 6. Stir the mixture until all ingredients are blended. 1. Heat a non-stick skillet over medium heat. Add 1 tablespoon of olive oil. 2. Place 2 slices of whole grain or sourdough bread in the skillet. 3. Spread half of the chicken-avocado mixture on each slice of bread. 4. Top the slices with the remaining two pieces of bread. Gently press down. 5. Cook for about 3-4 minutes on each side. Look for golden brown bread and melted cheese. 6. If needed, add the remaining olive oil to the skillet while cooking. 7. Once done, remove the melts from heat. Let them sit for a minute before slicing. 8. Garnish with fresh cilantro or parsley before you serve. - Use a non-stick skillet for even cooking. It helps prevent sticking. - Keep an eye on the heat; too high may burn the bread. - Press down gently on the bread for better browning. - Let the melts cool slightly to help the cheese set. - Adjust the lime juice to taste for a zestier flavor. To boost the flavor of your Chicken Avocado Melt, think about adding fresh herbs. Cilantro or parsley can add a bright touch. You can also mix in red pepper flakes for some heat. A dash of hot sauce can make it zesty too. Using fresh lime juice gives a nice tang. It wakes up the creamy avocado and rich cheese. You can make this meal healthier with a few easy swaps. Use Greek yogurt instead of mayonnaise for a lighter spread. You can also replace cheddar cheese with a lower-fat option. Whole grain bread adds more fiber than white bread. If you're low on calories, try cutting the portion size. This way, you can enjoy the melt but still stay on track. To make this melt, you need some handy tools. A non-stick skillet works best to get that crispy bread. Use a spatula to flip the sandwiches safely. A mixing bowl helps you combine all your ingredients well. A knife makes slicing easy when the melt is done. Don’t forget a cutting board too! These tools ensure a smooth cooking process. Pro Tips Choose the Right Bread: Opt for a hearty whole grain or sourdough bread that can hold up to the filling without getting soggy. Perfectly Mash the Avocado: Ensure your avocado is ripe and mash it until smooth for a creamier texture in the chicken mixture. Control the Heat: Cook on medium heat to allow the cheese to melt thoroughly without burning the bread. Add Some Spice: Consider adding diced jalapeños or a pinch of cayenne pepper to the mixture for a spicy kick. {{image_2}} You can switch up the protein in your Chicken Avocado Melt. Try using turkey for a leaner option. You can also use shredded pork for a richer flavor. If you like seafood, add cooked shrimp or crab meat. Each protein adds a unique taste and texture. For a vegetarian version, skip the chicken. Use black beans or chickpeas instead. Mash them with avocado for a creamy base. You can also add roasted vegetables like bell peppers or zucchini. These options make your melt filling and tasty without meat. Add spices for more flavor. A pinch of cayenne pepper gives a nice kick. Try smoked paprika for a smoky taste. Fresh herbs like basil or dill can brighten the dish. You can also mix in some hot sauce or salsa for extra zing. To keep your Chicken Avocado Melt fresh, store it in an airtight container. This helps prevent moisture loss. Place the sandwich in the fridge right after it cools down. It should stay good for about 2 to 3 days. If you notice any strange smell or color changes, it's best to toss it. You can freeze the chicken-avocado mixture, but not the bread. To freeze, place the mixture in a freezer-safe bag. Make sure to push out as much air as possible. This helps prevent freezer burn. The mixture can last up to 2 months in the freezer. When you're ready to eat, thaw it in the fridge overnight. When it's time to eat your leftovers, use a skillet for the best taste. Heat the skillet on medium-low. Add a little olive oil to keep it from sticking. Place the sandwich in the skillet and cover it with a lid. Heat for about 5 minutes on each side. This warms it through and makes the bread crispy again. Enjoy your tasty lunch! You can serve this tasty dish with a side salad. A simple green salad works well. You can also pair it with sweet potato fries for a crunchy bite. For a fresh taste, add sliced tomatoes or cucumbers. A light dip, like salsa, makes a great addition too. Yes, you can prep this meal ahead of time. Mix the chicken and avocado filling. Store it in the fridge until you are ready to cook. I suggest using it within 24 hours for the best taste. You can also slice the bread ahead of time. This makes cooking quick and easy. To make this recipe dairy-free, skip the cheddar cheese. You can use a dairy-free cheese alternative instead. Another option is to add more avocado for creaminess. You can also use hummus for a tasty twist. Always check the labels to ensure your substitutes are dairy-free. In this article, we explored the key ingredients and step-by-step instructions for making a Chicken Avocado Melt. We discussed measurements, nutritional information, and cooking tips to ensure perfect results every time. You now have ideas for variations and helpful storage info to keep leftovers fresh. Remember, small tweaks can enhance flavor and nutrition. With these tips, you can impress anyone with your culinary skills. Enjoy your cooking, and have fun experimenting with different flavors!

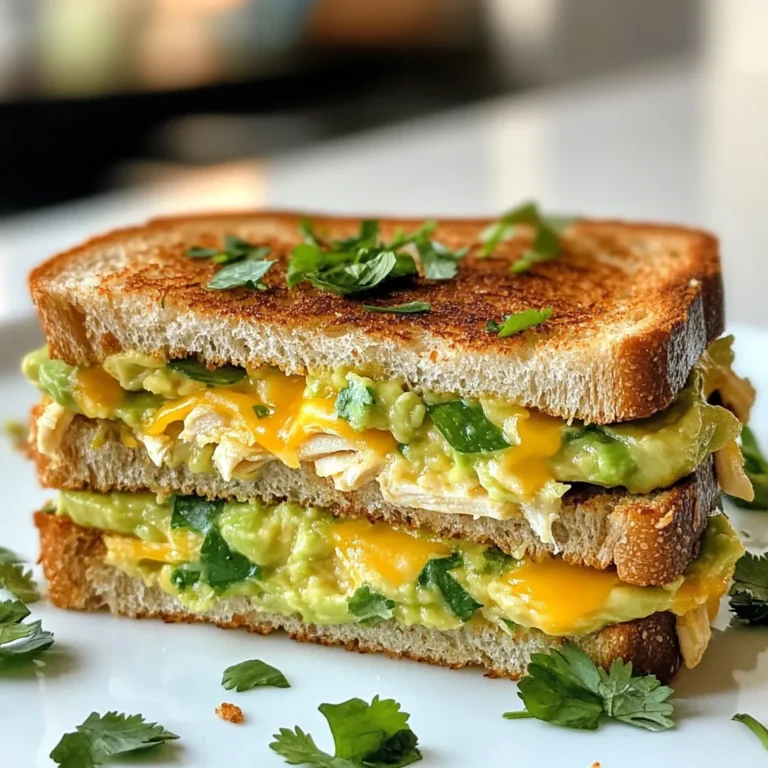
Chicken Avocado Melt Tasty Lunch You’ll Love

To make cinnamon apple fritters, gather these ingredients: - 2 large apples, peeled, cored, and diced - 1 cup all-purpose flour - 1/2 cup granulated sugar - 1 teaspoon baking powder - 1 teaspoon ground cinnamon - 1/4 teaspoon salt - 1/2 cup milk - 1 large egg - 1 teaspoon vanilla extract - Vegetable oil (for frying) - Powdered sugar (for dusting) Using fresh apples is key. Look for crisp and juicy varieties. I recommend Granny Smith or Honeycrisp apples for their tartness. They hold up well during frying. Use high-quality all-purpose flour for the best texture. Also, choose a good vanilla extract. Pure vanilla makes a noticeable difference in flavor. You can swap the apples for pears if you want a different taste. For a gluten-free option, use a gluten-free all-purpose flour blend. If you need a dairy-free version, almond or oat milk works well in place of regular milk. For added sweetness, consider using brown sugar instead of granulated sugar. {{ingredient_image_1}} Start by peeling, coring, and dicing two large apples. I love using sweet apples like Fuji or Honeycrisp. In a medium bowl, mix the diced apples with 2 tablespoons of granulated sugar. Let them sit for about 10 minutes. This helps the apples release their natural juices. The juices will add flavor to your fritters. In another bowl, whisk together 1 cup of all-purpose flour, 1/2 cup of sugar, 1 teaspoon of baking powder, 1 teaspoon of ground cinnamon, and 1/4 teaspoon of salt. This mix gives your fritters a nice rise and flavor. In a separate bowl, combine 1/2 cup of milk, 1 large egg, and 1 teaspoon of vanilla extract. Whisk until smooth. Pour the wet ingredients into the dry mix. Stir gently until just combined. Now, fold in the diced apples and their juices. Heat about 2 inches of vegetable oil in a deep skillet or fryer over medium heat. The oil should reach 350°F (175°C). Use a spoon or small ice cream scoop to drop spoonfuls of the batter into the hot oil. Be careful not to overcrowd the pan. Fry the fritters until golden brown, about 3-4 minutes on each side. Once done, remove the fritters and let them drain on a paper towel-lined plate. Once the fritters cool slightly, dust them with powdered sugar. They look beautiful and taste great! You can also serve them warm with a scoop of vanilla ice cream or a drizzle of caramel sauce. These treats are perfect for any time of day! To fry your fritters just right, heat the oil to 350°F (175°C). Use a thermometer for accuracy. If the oil is too cool, your fritters will soak up oil and become greasy. If it's too hot, they will burn. Drop a small spoonful of batter into the oil to check. It should sizzle and float. Fry in small batches to avoid crowding. This helps them cook evenly and stay crisp. One common mistake is not letting your apples sit long enough. This step allows the apples to release their juices. If you skip this, your fritters may turn out too wet. Another mistake is adding too much batter to the oil. This can lower the oil temperature. Lastly, don’t skip the dusting of powdered sugar. It adds sweetness and looks great! To make your fritters even more special, try adding a pinch of nutmeg along with the cinnamon. You can also mix in some chopped nuts for a crunchy texture. Want a fun twist? Add a splash of lemon juice to the apples for a bright flavor. For a richer taste, drizzle caramel sauce over the fritters before serving. These small changes can elevate your Cinnamon Apple Fritters to a whole new level! Pro Tips Use Firm Apples: Choose crisp varieties like Granny Smith or Honeycrisp for the best texture and flavor in your fritters. Check Oil Temperature: Make sure the oil is at 350°F (175°C) before frying; too low and they'll absorb oil, too high and they may burn. Don't Overmix: When combining wet and dry ingredients, mix until just combined to ensure light and fluffy fritters. Keep Warm: If frying in batches, keep finished fritters warm in a low oven while you cook the rest for optimal serving temperature. {{image_2}} You can change the fruit in this recipe for fun. Try using pears for a sweeter taste. They add a nice flavor when mixed with cinnamon. You can also use diced peaches or berries. Each fruit gives a unique twist to the fritters. Just remember to adjust the sugar based on the fruit's sweetness. If you need a gluten-free option, use gluten-free flour. Many brands work well for frying. You can also use almond flour for a nutty flavor. Just make sure to mix it with a starch, like cornstarch or tapioca flour. This mix helps keep the texture light and fluffy. You can add spices to change the flavor. Try adding nutmeg or ginger for warmth. A dash of allspice can also be nice. For a fun twist, add a bit of orange zest for brightness. Vanilla extract adds sweetness, but you can also try almond extract for a different taste. Be creative and find what you love! To keep your cinnamon apple fritters fresh, store them in an airtight container. Place a paper towel at the bottom to absorb extra moisture. This helps keep them crisp. Place the container in a cool, dry spot. They stay good for up to two days on the counter. If you want them to last longer, refrigeration is an option. When you're ready to enjoy your fritters again, reheating is key. Preheat your oven to 350°F (175°C). Place the fritters on a baking sheet. Heat them for about 10 minutes. This makes them warm and crispy. Avoid using the microwave, as it can make them soggy. If you want to save some fritters for later, freezing works great. Let them cool completely first. Then, wrap each fritter in plastic wrap. Place the wrapped fritters in a freezer bag. They can stay fresh in the freezer for up to three months. When you're ready to eat them, thaw in the fridge overnight, then reheat as mentioned above. You can tell fritters are done when they turn golden brown. This usually takes about 3 to 4 minutes on each side. Use a slotted spoon to check their color. If they look nice and brown, they are ready to come out. Remember, frying too long can make them dry. Yes, you can make the batter ahead of time. Mix all the dry ingredients and store them in a bowl. Keep the wet ingredients in another bowl. When you are ready to fry, just combine them. This can save you time and make cooking easier. The best apples for fritters are firm and sweet. I like using Granny Smith or Honeycrisp. These apples hold their shape when cooked. They also add a nice sweet and tart flavor. You can experiment with other apples too. Just choose ones that you enjoy eating! Our journey through making apple fritters covered all key points. We learned about essential ingredients, quality, and smart substitutes. You now have a clear step-by-step guide to fritter-making. We discussed tips for perfect frying and common mistakes to avoid. Variations offered creative twists to the classic recipe. You also learned how to store and reheat them properly. In the end, making apple fritters is fun and rewarding. Enjoy sharing your tasty fritters with friends and family.

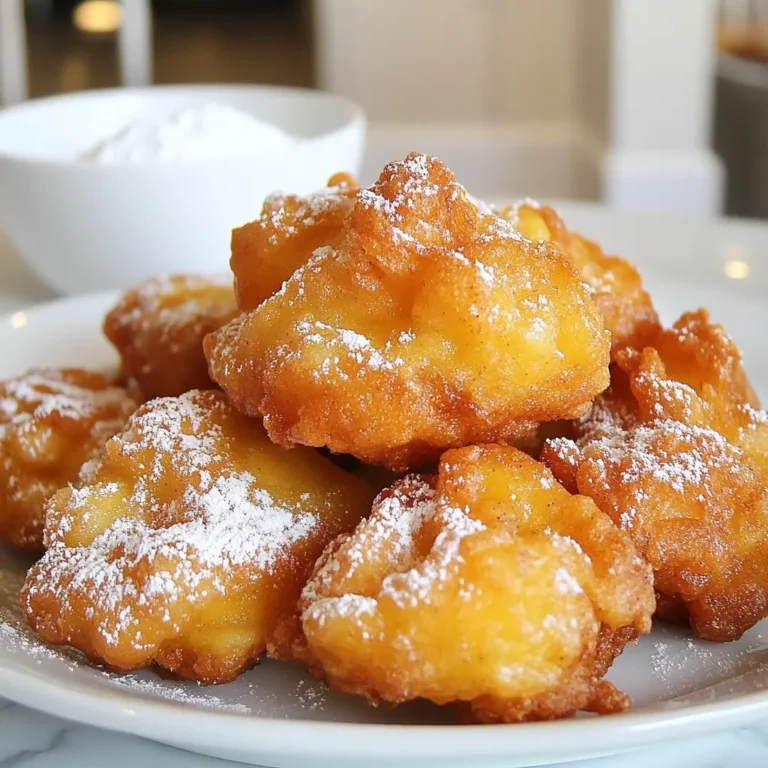
Cinnamon Apple Fritters Perfectly Fried Treat Recipe

PREV 1 … 63 64 65 … 86 NEXT
spicy fork kitchen

explore

DessertsDinnerAppetizersDrinks

Our Policies

  • Cookie Policy
  • Copyright Policy
  • Disclaimer
  • GDPR Policy
  • Terms Of Use
Back to Top
  • About
  • Contact Us
  • Privacy Policy
© 2026 spicy fork kitchen