FREE DINNER EBOOK! Get your copy!
  • Cookie Policy
  • GDPR Policy
  • Disclaimer
  • Terms Of Use
  • Visit my other site: Fun Cookie Recipes
spicy fork kitchen
  • Home
  • Dinner
  • Desserts
  • Drinks
  • Appetizers
  • Contact
  • About
  • Privacy Policy
  • Home
  • Dinner
  • Desserts
  • Drinks
  • Appetizers
  • Contact
  • About
  • Privacy Policy
  • Cookie Policy
  • GDPR Policy
  • Disclaimer
  • Terms Of Use
Visit my other site: Fun Cookie Recipes

HOME / CATEGORIES /

Latest

- 9 oz cheese tortellini (fresh or frozen) - 1 cup basil pesto (store-bought or homemade) - 1 cup heavy cream - 1 cup shredded mozzarella cheese - 1/2 cup grated Parmesan cheese - 1 cup cherry tomatoes, halved - 1 cup baby spinach - 2 cloves garlic, minced - Salt and pepper to taste - Fresh basil leaves for garnish The creamy pesto tortellini bake needs simple, tasty ingredients. Cheese tortellini forms the base, giving a rich flavor. You can choose fresh or frozen. Pesto adds a wonderful herb taste. You can use store-bought or make your own. Heavy cream makes this dish extra rich and creamy. Mozzarella cheese brings gooey, melty goodness. Parmesan cheese adds a sharp note that pairs well. Cherry tomatoes provide a burst of sweetness and color. Baby spinach adds a pop of green and a healthy touch. Garlic gives a warm, savory flavor. Don't forget salt and pepper to taste. Fresh basil leaves work great as a garnish. They add color and aroma to your dish. This meal serves four people. Each serving has about 500 calories. It contains around 30 grams of carbs, 20 grams of protein, and 35 grams of fat. This dish offers a good mix of nutrients. It is perfect for a family meal or a cozy dinner. {{ingredient_image_1}} First, bring a large pot of water to a boil. Add the cheese tortellini to the boiling water. Cook the tortellini according to the package instructions. This usually takes around 3 to 5 minutes for fresh tortellini and a bit longer for frozen. Once cooked, drain the tortellini and set it aside. In a mixing bowl, combine 1 cup of basil pesto, 1 cup of heavy cream, and 2 cloves of minced garlic. Add half of the shredded mozzarella cheese to the bowl. Stir everything together until well blended. This creamy pesto sauce brings rich flavor to the dish. Grab a large baking dish. Combine the drained tortellini with the creamy pesto sauce. Add in 1 cup of halved cherry tomatoes and 1 cup of baby spinach. Toss all the ingredients gently to make sure everything is mixed well. Season with salt and pepper to taste. Finally, sprinkle the remaining mozzarella cheese and 1/2 cup of grated Parmesan cheese over the top. Cover the baking dish with aluminum foil. Place it in the oven, which you preheated to 375°F (190°C). Bake for 20 minutes. After that, remove the foil and bake for another 10 to 15 minutes. This step allows the cheese to become bubbly and golden brown. Once done, take it out of the oven and let it cool for a few minutes before serving. Enjoy your creamy pesto tortellini bake! To ensure your cheese is bubbly and golden, I recommend a few key steps. Start by baking covered for the first 20 minutes. This keeps the moisture inside. After that, remove the foil. Let the cheese get that beautiful brown color. Keep an eye on it! It usually takes another 10 to 15 minutes. Pay attention to the edges for that perfect crisp. Want to boost the flavor? Try adding a pinch of red pepper flakes. It gives a nice kick. You can also mix in some sun-dried tomatoes or olives for added depth. Fresh herbs like thyme or oregano work well too. Experiment a bit! Each of these can change the dish in a fun way. Pair your creamy pesto tortellini bake with a light salad. A mix of greens with a simple lemon vinaigrette works great. You might also serve it with garlic bread for a comforting touch. For garnish, fresh basil leaves add a pop of color and flavor. This makes your dish not just tasty but beautiful too! Pro Tips Use Fresh Ingredients: For the best flavor, opt for fresh basil and high-quality cheese. Fresh ingredients can elevate the taste of your dish significantly. Customize Your Pesto: Feel free to customize your pesto by adding nuts like walnuts or pine nuts for extra crunch, or even a squeeze of lemon for brightness. Make-Ahead Option: You can prepare the tortellini mixture ahead of time and store it in the refrigerator. Just bake it when you're ready to serve! Perfectly Bubbly Cheese: To achieve a beautifully bubbly and golden cheese topping, broil the dish for a couple of minutes at the end of baking, keeping a close eye to prevent burning. {{image_2}} You can easily make this dish vegetarian. Use vegetable-based tortellini instead of cheese tortellini. You can also add more veggies. Try bell peppers, zucchini, or mushrooms. These add flavor and texture. Adding extra baby spinach boosts the nutrition too! Want some protein? Adding chicken, shrimp, or sausage works great. For chicken, use cooked and shredded pieces. For shrimp, simply add raw shrimp to the bake. They will cook perfectly in the oven! If you prefer sausage, cook it first and slice it before adding. Each option enhances the dish's heartiness. If you're avoiding dairy, don't worry! You can use non-dairy cheese and creams. Look for almond or cashew cream as a substitute for heavy cream. For cheese, use vegan mozzarella or Parmesan. This keeps the creamy texture while being dairy-free. Enjoy this dish without the dairy! To keep your creamy pesto tortellini bake fresh, store leftovers in an airtight container. Make sure it cools down to room temperature before sealing. This helps prevent moisture buildup. You can refrigerate it for up to three days. If you want to keep it longer, freezing is a great option. Just place it in a freezer-safe container. It can stay good for up to three months in the freezer. When you want to enjoy it again, remember to label the container with the date. For the best results when reheating, use the oven. Preheat your oven to 350°F (175°C). Place the tortellini bake in a baking dish. Cover it with aluminum foil to prevent it from drying out. Heat for about 20 minutes, or until it is warm throughout. If you prefer a crispy top, remove the foil for the last 5 minutes. You can also use the microwave, but it may not heat evenly. If using the microwave, place a damp paper towel over the dish. Heat in 1-minute intervals until warm. Enjoy your meal just like it was fresh! Yes, you can use other pasta types. Penne, rigatoni, or farfalle work well. Just cook them according to the package instructions. The cooking time may change based on the pasta shape. Keep in mind that the sauce will cling differently to each shape, which can change the texture a bit. You can prep this dish in advance. Cook the tortellini and mix it with the sauce. Place it in a baking dish, cover it well, and store it in the fridge. When ready to bake, preheat your oven and bake it straight from the fridge. Just add about 10 minutes to the baking time. This helps the flavors meld nicely. Absolutely! This recipe is great for meal prep. You can portion it into individual servings. Store them in airtight containers in the fridge. It stays fresh for about three days. You can also freeze the portions for up to a month. Just remember to reheat them well before serving. This dish combines simple ingredients like cheese tortellini, pesto, and cream to create a tasty meal. You learned how to mix and bake these ingredients for a creamy, flavorful dish. Whether you choose to add protein or keep it vegetarian, the recipe is flexible. Store leftovers properly to enjoy later. Getting creative with your ingredients can make the dish even better. So, don't hesitate to try different spices or veggies. Enjoy your cooking and the delicious results!

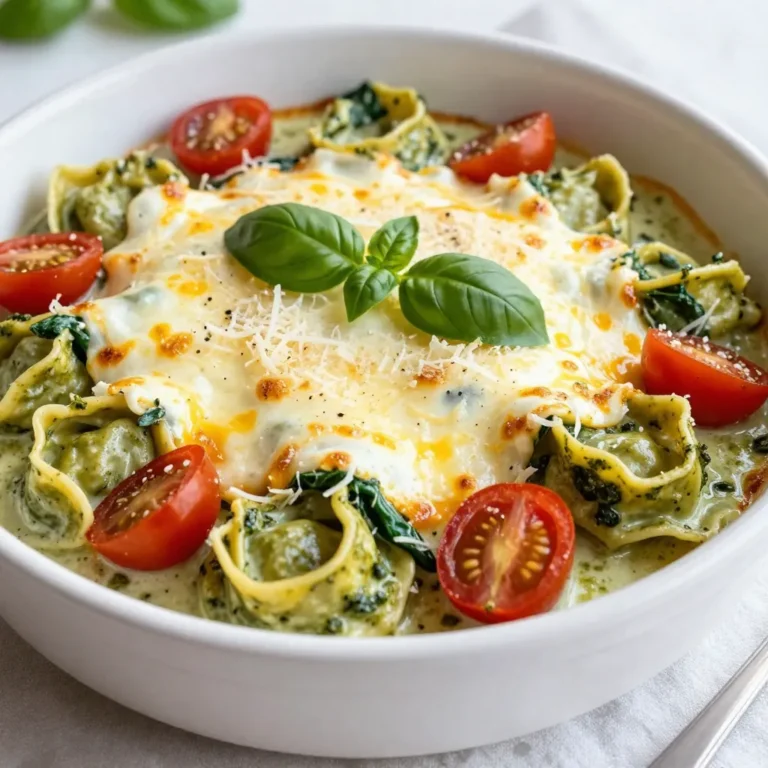
Creamy Pesto Tortellini Bake Bold and Flavorful Meal

To make these gluten-free gingerbread cookies, gather the following ingredients: - 2 cups gluten-free all-purpose flour - 1 teaspoon baking soda - 2 teaspoons ground ginger - 1 teaspoon ground cinnamon - 1/2 teaspoon ground nutmeg - 1/4 teaspoon ground cloves - 1/4 teaspoon salt - 1/2 cup unsalted butter, softened - 1/2 cup brown sugar, packed - 1/4 cup molasses - 1 large egg - 1 teaspoon vanilla extract - Optional: Decorative sugar or icing for topping This flour blend is key for a soft cookie. It replaces regular flour well in this recipe. Look for brands that mix rice flour, potato starch, and tapioca flour for the best results. The spices give these cookies their warm flavor. Ground ginger, cinnamon, nutmeg, and cloves blend well together. Adjust spice amounts to suit your taste. For a kick, add a bit more ginger. The wet mix includes butter, brown sugar, molasses, egg, and vanilla. Butter adds richness, while brown sugar gives a deep flavor. Molasses adds moisture and that classic gingerbread taste. Once the cookies cool, you can add decorative sugar or icing. A simple icing can be made with powdered sugar and water. This makes your cookies festive and fun! These ingredients come together to create a delicious treat. Enjoy making these cookies as part of your holiday traditions! {{ingredient_image_1}} - Preheating Oven: Start by preheating your oven to 350°F (175°C). This step helps the cookies bake evenly. - Lining with Parchment Paper: Next, line two baking sheets with parchment paper. This prevents the cookies from sticking and makes cleanup easier. - Combining Flour and Spices: In a mixing bowl, whisk together 2 cups of gluten-free all-purpose flour, 1 teaspoon of baking soda, 2 teaspoons of ground ginger, 1 teaspoon of ground cinnamon, 1/2 teaspoon of ground nutmeg, 1/4 teaspoon of ground cloves, and 1/4 teaspoon of salt. Mix until everything is well combined. This mix creates that warm, spiced flavor we love. - Mixing Butter and Sugar: In another bowl, cream together 1/2 cup of softened unsalted butter and 1/2 cup of packed brown sugar. Use a hand mixer or stand mixer for about 2-3 minutes. The mix should look light and fluffy. - Adding Molasses, Egg, and Vanilla: Now, add 1/4 cup of molasses, 1 large egg, and 1 teaspoon of vanilla extract to the butter mix. Blend until all the ingredients are fully combined. This adds richness to your dough. - Combining Wet and Dry Mixtures: Gradually add the dry mixture to the wet mix. Stir until a soft dough forms. Don't overmix; just combine until you see no dry flour. - Portioning Dough: Use a tablespoon to scoop portions of dough onto the prepared baking sheets. Space them about two inches apart. This allows room for spreading while baking. - Baking Time and Tips: Bake in your preheated oven for 8-10 minutes. The edges should be set, and the cookies should look slightly puffed. Keep an eye on them, as every oven is a bit different. - Cooling on Baking Sheets: Once baked, remove the cookies from the oven. Let them cool on the baking sheets for 5 minutes. This helps them firm up before moving. - Transferring to Wire Rack: After 5 minutes, transfer the cookies to a wire rack to cool completely. This keeps them from getting soggy and helps them stay crisp. Ensuring Soft Cookies To make soft cookies, watch your baking time. Remove them when the edges are set but the centers are still soft. The cookies continue to bake on the hot sheet. This keeps them chewy and delicious. Adjusting Baking Time Baking time can vary based on your oven. Start checking at 8 minutes. If you want crispier cookies, leave them in a minute longer. Just be careful not to overbake. Experimenting with Spices Feel free to add more spices for a bolder taste. Try a bit more cinnamon or ginger. You can also add cardamom for a unique twist. Just adjust it to your liking. Adding Chocolate or Nuts You can mix in chocolate chips or chopped nuts. Chocolate adds richness, while nuts give a nice crunch. Both options elevate the flavor and texture of your cookies. Simple Icing Recipe For icing, mix powdered sugar with a bit of water. Start with one cup of sugar and add water slowly. Aim for a thick consistency. Drizzle it on cooled cookies for a sweet finish. Festive Presentation Suggestions To make your cookies festive, arrange them in a holiday jar. You can also stack them with decorative tissue paper. Add a ribbon for a beautiful gift or treat display. Pro Tips Chill the Dough: Refrigerate the dough for at least 30 minutes before baking to help the cookies maintain their shape and enhance the flavors. Use Fresh Spices: For the best flavor, use fresh spices rather than old ones. Ground spices lose potency over time, so check your pantry! Check for Doneness: Keep an eye on the cookies as they bake. They should be slightly puffed and set at the edges but may look soft in the center. Store Properly: Store cooled cookies in an airtight container at room temperature to keep them soft and fresh for longer. {{image_2}} You can use almond flour or coconut flour for these cookies. Both flours add flavor and nutrition. Almond flour gives a nutty taste and a moist texture. Coconut flour may need more liquid, as it absorbs moisture. Adjust the wet ingredients if you swap flours. This change helps you find your perfect cookie base. If you want a vegan version, use plant-based ingredients. Replace the egg with a flaxseed egg or applesauce. Use vegan butter instead of regular butter. This keeps the cookies rich and tasty. You can also try maple syrup or agave for sweetness. These swaps make the cookies suitable for everyone. Adding seasonal flavors can make your cookies shine. Peppermint extract gives them a fresh touch. Just a few drops will do! You can also add orange zest for a bright, citrus flavor. This adds a festive twist to your gingerbread. Try these ideas to create your unique holiday treat. To keep your gluten-free gingerbread cookies fresh, follow these tips. After baking, allow the cookies to cool completely. Place them in an airtight container to seal in moisture. You can stack them, but separate layers with parchment paper. This helps avoid sticking. Store the container in a cool, dry place. They stay fresh for about one week. For longer storage, freezing is a great option. Freezing gluten-free gingerbread cookies is simple. First, let the cookies cool completely. Then, place them in a single layer on a baking sheet. Freeze them for about an hour. Once frozen, transfer the cookies to a freezer-safe bag. Remove as much air as possible before sealing. Label the bag with the date. These cookies can last up to three months in the freezer. To enjoy frozen cookies, you need to reheat them. Start by removing cookies from the freezer. Let them sit at room temperature for about 10 minutes. If you want them soft, warm them in the oven. Preheat the oven to 300°F (150°C). Place cookies on a baking sheet and heat for 5-7 minutes. This way, they taste fresh and delicious again. Gluten-free flour is made without wheat. Instead, it uses other grains or nuts. Common choices include rice flour, almond flour, and chickpea flour. These flours do not contain gluten, which is a protein found in wheat. This makes them safe for those with gluten intolerance or celiac disease. Gluten-free flour can have different textures and flavors than regular flour. Some may be gritty, while others are light and fluffy. Always check the blend to ensure it works in your recipe. Yes, you can! Some great options are coconut sugar, maple syrup, or agave nectar. Coconut sugar has a similar taste to brown sugar. It adds a nice caramel flavor to your cookies. Maple syrup adds moisture but may change the dough’s consistency. If you choose maple syrup, reduce the liquid in the recipe a bit. Agave nectar is sweeter, so use less. Always adjust the amounts to keep the right taste and texture. Check your cookies at the 8-minute mark. They should be slightly puffed and set at the edges. If the center looks soft but not wet, they are ready. They will continue to firm up as they cool. Let them cool on the baking sheet for five minutes first. This helps them stay soft and chewy. If you like crunchier cookies, bake for a minute longer. Yes, with a few changes! Replace the egg with flaxseed meal or applesauce. For flaxseed meal, mix one tablespoon with three tablespoons of water. Let it sit for a few minutes to thicken. For applesauce, use a quarter cup as a substitute. You can also swap the butter with coconut oil or vegan butter. These changes let you enjoy delicious gingerbread cookies while keeping them vegan. You can create delicious gluten-free gingerbread cookies by following the steps we explored. We covered key ingredients, from gluten-free flour to optional toppings. Each step, from mixing to baking, builds your perfect cookie. You also learned tips to enhance flavor and texture. Explore variations for more fun, like vegan options or seasonal twists. Remember the best storage methods to keep your cookies fresh. Enjoy the process and share your tasty results! Your efforts will make baking a joyous occasion.

Gluten-Free Gingerbread Cookies Perfect for the Holidays

To make this tasty dish, you will need: - 8 oz (225g) penne pasta - 1 tablespoon olive oil - 1 pound (450g) Italian sausage, casings removed - 1 small onion, diced - 2 cloves garlic, minced - 1 bell pepper (red or yellow), diced - 1 can (15 oz) diced tomatoes (with juices) - 2 cups vegetable broth - 1 teaspoon Italian seasoning - 1/2 teaspoon red pepper flakes (optional) - Salt and pepper to taste - 1 1/2 cups shredded mozzarella cheese - 1/2 cup grated Parmesan cheese - Fresh basil, for garnish You can add more flavors with these options: - Extra garlic for a stronger taste - Spinach or kale for greens - Black olives for a briny touch - A splash of cream for richness If you need to switch some items, here are some ideas: - Use whole wheat penne for a healthier option. - Swap Italian sausage for turkey or chicken sausage. - Replace vegetable broth with chicken broth for more flavor. - Use fresh herbs like oregano or thyme if you have them. - If you lack Parmesan, use any hard cheese you have on hand. Each ingredient choice can change the dish's taste and health. Explore and enjoy! {{ingredient_image_1}} Start by heating one tablespoon of olive oil in a big pot over medium heat. Add one pound of Italian sausage without the casings. Cook it for about 4-5 minutes. Break it apart with a spatula until it is brown. Next, add one small diced onion and one diced bell pepper. Sauté these for 3-4 minutes until the onion looks clear. Then, stir in two minced garlic cloves. Cook for one more minute until you smell the garlic. Now, pour in one can of diced tomatoes with their juices and two cups of vegetable broth. Season this with one teaspoon of Italian seasoning, half a teaspoon of red pepper flakes (if you want some heat), and salt and pepper to taste. Bring this mixture to a simmer. Once it is simmering, add eight ounces of penne pasta. Stir well to mix everything together. Reduce the heat to medium-low, cover the pot, and cook for 12-15 minutes. Stir occasionally until the pasta is al dente and most of the liquid has soaked in. After that, take the pot off the heat. Fold in one and a half cups of shredded mozzarella cheese and half a cup of grated Parmesan cheese. Mix until it is all melted and blended. Taste it and adjust the seasoning if needed. Let it sit for a few minutes to thicken before serving. To save time, prepare your ingredients before starting. Dice the onion, bell pepper, and garlic ahead of time. This way, you can add them quickly when needed. Use pre-grated cheese to cut down on prep time. You can even cook the sausage in advance and store it in the fridge. This lets you skip a step when you are ready to cook. Another tip is to use a large pot. It gives you more room to stir. This helps the pasta cook evenly. If you have more space, you can mix everything easily. Stirring is very important in this recipe. It helps the pasta cook evenly. If you don’t stir, some pasta may stick to the bottom. This can cause it to burn. Stir every few minutes while it cooks to keep things moving. The consistency of the sauce is also key. You want it creamy but not too watery. If it seems too thick, add a little more broth. If it’s too runny, let it sit for a few minutes. The pasta will absorb some of the liquid. This will help get the right texture. Always check before serving to make sure it looks good! Cooking pasta in one pot is simple. Use a large pot to fit all the ingredients. Start by browning the sausage first. This adds a great flavor base. After browning, add your veggies. Sauté them until soft. This step builds depth in taste. When you add the pasta, make sure to stir well. This prevents sticking. Pour in enough liquid to cover the pasta. Stir often while it cooks. This helps the pasta absorb flavors. Cook until the pasta is al dente, not mushy. For better flavor, use fresh ingredients. Fresh basil adds a nice touch at the end. You can also add a squeeze of lemon juice for brightness. If you like heat, toss in red pepper flakes. They add warmth without being too spicy. To improve texture, mix in the cheese at the end. This creates a creamy mouthfeel. Don't forget to taste and adjust the seasoning. A pinch more salt or pepper can make a big difference. One common mistake is not using enough liquid. Insufficient broth makes the pasta dry. Always check that the pasta is well-covered. Another mistake is overcooking the pasta. Keep an eye on the time. Avoid skipping the resting time after cooking. This lets the dish thicken nicely. Lastly, don't forget to garnish. A sprinkle of cheese or fresh herbs makes your dish pop. Pro Tips Use Fresh Herbs: Adding fresh basil at the end enhances flavor and freshness, making the dish more vibrant. Perfect Pasta Texture: To ensure the pasta is perfectly al dente, taste it a minute or two before the suggested cooking time is up. Cheese Variations: Experiment with different cheeses like cheddar or gouda for a unique twist on the classic flavor profile. Leftover Transformation: If you have leftovers, try baking them with extra cheese on top for a delicious pasta bake! {{image_2}} You can swap the sausage with chicken or turkey. Ground chicken or turkey works well. They both cook quickly and soak up flavors nicely. For a vegetarian option, use plant-based sausage or lentils. This keeps the dish hearty and satisfying without meat. Adding veggies boosts the nutrition of this dish. You can mix in spinach, zucchini, or mushrooms. Just chop them up and add them when you add the onion and bell pepper. This helps them cook evenly, making the meal colorful and healthy. Changing the cheese can change the taste of the pasta. Try using cheddar for a sharp kick, or gouda for a smoky flavor. You can also mix in some feta for a tangy touch. Each cheese adds its own twist to the creamy goodness. To keep your One Pot Cheesy Sausage Pasta fresh, let it cool first. Then, place leftovers in an airtight container. Store it in the fridge for up to three days. Make sure to seal the container tight to avoid drying out. When you’re ready to enjoy your leftovers, reheat them on the stove. Add a splash of vegetable broth or water to keep it moist. Stir often over low heat until warmed through. This helps the pasta stay creamy and tasty. For longer storage, you can freeze the pasta. Use a freezer-safe container and portion it out. Make sure to leave some space at the top for expansion. It can last in the freezer for up to three months. When you're ready to eat, thaw it overnight in the fridge before reheating. Yes, you can use any pasta you like. Penne works great, but fusilli or rotini are good too. Just keep an eye on the cooking time. Different shapes may need slight adjustments. Follow the package instructions to cook it al dente. To add heat, use more red pepper flakes. You can also add sliced jalapeños or hot sausage. If you prefer, try a dash of hot sauce. Adjust the spice level to your taste. Always taste as you go to find the right balance. This pasta dish pairs well with a simple green salad. Garlic bread makes a great side too. You can also serve it with roasted vegetables for extra nutrition. Fresh basil on top adds a nice touch. Enjoy your meal! This blog post covered everything you need to know about making One Pot Cheesy Sausage Pasta. We discussed the ingredients, step-by-step cooking tips, and best practices. I shared ways to make it tastier and common mistakes to avoid. You learned about fun variations, storage tips, and answers to common questions. Now you can cook with ease and confidence. Enjoy this tasty dish and share it with others!

One Pot Cheesy Sausage Pasta Quick and Tasty Meal

- 300g pasta of choice (fettucine or penne works well) - 1 cup sun-dried tomatoes, packed in oil, drained and roughly chopped - 1/2 cup roasted red peppers, chopped - 1/4 cup almonds or pine nuts, toasted - 2 cloves garlic, minced - 1/2 cup fresh basil leaves In this dish, the pasta is the star. You can use fettucine or penne. Both shapes hold the sauce well. Sun-dried tomatoes add a rich, sweet flavor. Roasted red peppers bring a smoky touch. Nuts like almonds or pine nuts add crunch and depth. Garlic gives a fragrant kick. Fresh basil brightens the dish with its herbal notes. - 1/2 cup heavy cream or coconut cream for a dairy-free option - 1/4 cup Parmesan cheese, grated (or nutritional yeast for a vegan option) For creaminess, I love using heavy cream. It makes the sauce rich and smooth. If you want a dairy-free choice, coconut cream works well too. Parmesan cheese adds a salty, nutty flavor. If you follow a vegan diet, try nutritional yeast instead. It gives a cheesy taste without dairy. - 2 tablespoons olive oil - Salt and pepper to taste - Fresh basil leaves and extra cheese for garnish Olive oil is key for blending the pesto. It adds smoothness and flavor. Don't forget to season with salt and pepper. They enhance every ingredient's taste. For a beautiful finish, garnish with fresh basil leaves and extra cheese. This makes your dish look and taste amazing. {{ingredient_image_1}} First, fill a large pot with water. Add a generous pinch of salt. Bring the water to a boil. Once boiling, add 300g of your chosen pasta. Cook the pasta until it is al dente, which means it should still have a slight bite. This usually takes about 8-10 minutes, but check the package for exact timing. After cooking, drain the pasta and set it aside. Remember to save about 1 cup of the pasta water for later. Next, we’ll make the pesto. Grab a food processor and add these ingredients: - 1 cup sun-dried tomatoes, roughly chopped - 1/2 cup roasted red peppers, chopped - 1/4 cup toasted almonds or pine nuts - 2 cloves garlic, minced - 1/2 cup fresh basil leaves - 2 tablespoons olive oil Blend these ingredients until you reach a smooth paste. If the mixture gets stuck, stop and scrape down the sides. Then blend again until it is nice and smooth. Now, take a large skillet and set it over medium heat. Add your blended pesto to the skillet. Pour in 1/2 cup of heavy cream or coconut cream if you prefer a dairy-free option. Stir well to mix everything. Let it simmer for about 2-3 minutes, which helps to warm it and make it creamy. Add the drained pasta to the skillet with the creamy sauce. Toss gently to coat the pasta evenly. If the sauce seems too thick, slowly add some reserved pasta water. Keep mixing until you reach the sauce consistency you like. When you’re ready to serve, plate the pasta in bowls. For a pop of color and flavor, garnish with fresh basil leaves and a sprinkle of extra cheese. Enjoy your creamy red pesto pasta! To make your creamy red pesto pasta perfect, adjust creaminess with reserved pasta water. This water has starch, which helps bind and thicken the sauce. If the sauce feels too thick, add a little pasta water until it feels just right. You can also try other binding ingredients. For example, using ricotta or cream cheese can add a different texture and flavor to your dish. To boost flavor, use spices like red pepper flakes or black pepper. Fresh herbs like parsley or oregano also add depth. Fresh ingredients give a brighter taste compared to dried ones. If you must use dried herbs, remember to use less. Dried herbs are stronger than fresh. So, keep that in mind when mixing flavors. For blending your pesto, I recommend a good food processor. A 7-cup model works well and makes blending easy. Make sure your pots and pans can hold enough water for boiling pasta. A large pot is best for cooking. Non-stick pans are great for making the creamy sauce. They help prevent sticking and make cleaning easier. Pro Tips Choose Your Pasta Wisely: Opt for pasta shapes that hold sauce well, like penne or fettuccine, to enhance the dish's overall flavor and texture. Customize Your Nuts: Feel free to experiment with different nuts, such as walnuts or cashews, to give the sauce a unique twist and flavor profile. Adjust Creaminess: If you prefer a lighter sauce, you can reduce the amount of cream or substitute with a plant-based milk for a healthier option. Fresh Basil Boost: For an extra burst of flavor, add fresh basil leaves just before serving instead of cooking them in the sauce. {{image_2}} You can add protein for extra flavor and nutrition. Chicken, shrimp, or tofu all work well. For chicken, cook diced breast in olive oil until golden, about 6-7 minutes. Shrimp cooks fast; sauté for 3-4 minutes until pink. If you choose tofu, cube and fry until crispy, roughly 5-6 minutes. If you want a vegan dish, swap heavy cream for coconut cream and Parmesan for nutritional yeast. Both keep the rich taste. For gluten-free options, use gluten-free pasta like rice or chickpea pasta. They cook well and taste great. Change up the nuts you use for added flavor. Try walnuts or cashews for a twist. You can also add veggies like spinach or mushrooms for extra nutrients. Fresh herbs like parsley or oregano can brighten the dish, making it even tastier. To keep your creamy red pesto pasta fresh, store leftovers in a container. Use airtight containers to seal in flavor. Let the pasta cool before covering. This helps prevent condensation, which can make it soggy. You can keep it in the fridge for up to three days. Reheating creamy pasta can be tricky. You want to keep it creamy and not dry. The stovetop works best. Add a splash of water or cream while heating. Stir often to ensure even heating. If you prefer the oven, cover the dish with foil. Bake at a low temperature until warmed through. You can freeze creamy red pesto pasta, but it may change texture. To freeze, let it cool completely first. Transfer it to a freezer-safe container. Make sure to leave space for expansion. It can last for up to three months in the freezer. To defrost, place it in the fridge overnight. Reheat it gently on the stovetop or in the oven, adding liquid as needed. Yes, you can make creamy red pesto pasta ahead of time. For meal prep, cook the pasta and sauce separately. Store them in airtight containers. When ready to serve, simply reheat the sauce and mix it with the pasta. This keeps the pasta fresh and the sauce creamy. You can even freeze the sauce for later use. Just thaw it in the fridge before reheating. If you want a lighter option, you can use half-and-half. For a non-dairy choice, coconut cream works great. You can also try cashew cream for a rich flavor. Each option will change the taste a little, but it will still be tasty! To keep your pasta from sticking, use plenty of water when boiling. Add a good amount of salt to the water too. Stir the pasta during the first few minutes of cooking. After draining, toss it with a little olive oil. This keeps it loose and easy to mix with the sauce. Yes, you can make it gluten-free! Just choose gluten-free pasta. There are many types available, like rice or chickpea pasta. They cook similarly to regular pasta, so follow the package instructions for the best results. This creamy red pesto pasta recipe is simple and flavorful. I covered key ingredients like pasta types, sun-dried tomatoes, and nuts. You learned how to prepare the pesto and create a creamy sauce. I also shared tips for perfecting texture and enhancing flavor. Your cooking can shine with this dish. Feel free to explore variations for proteins or dietary needs. Try to store any leftovers properly, and don’t forget to ask questions if you have any! Enjoy your meal and make it your own!

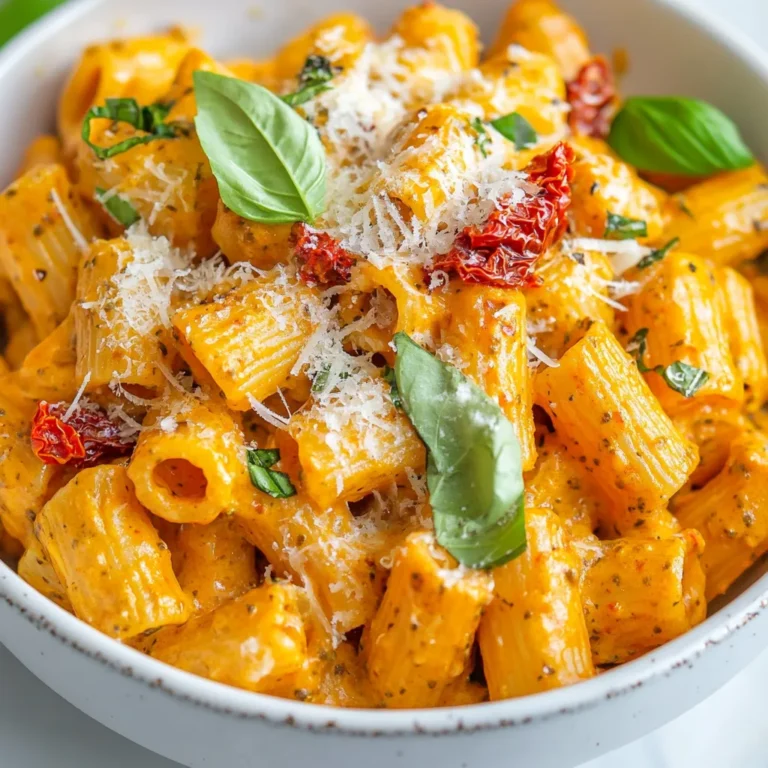
Creamy Red Pesto Pasta Simple and Flavorful Dish

To make Parmesan crusted zucchini fries, gather these key ingredients: - 2 medium zucchinis, cut into fry shapes - 1 cup breadcrumbs (panko or regular) - 1/2 cup grated Parmesan cheese - 1 teaspoon garlic powder - 1 teaspoon onion powder - 1 teaspoon smoked paprika - 1/2 teaspoon salt - 1/4 teaspoon black pepper - 2 large eggs - 1 tablespoon olive oil - Fresh parsley, chopped (for garnish) These ingredients work well together. The zucchini offers a fresh crunch, while the cheese brings a rich flavor. Accurate measurements are key for great results. Here’s how to break it down: - Zucchinis: Two medium ones give you enough fries for four servings. - Breadcrumbs: Use one cup. Panko is crunchier, but regular works too. - Parmesan cheese: Half a cup adds a salty kick. Grated cheese melts nicely. - Spices: One teaspoon each of garlic and onion powder gives a savory taste. Smoked paprika enhances the flavor with a hint of smokiness. - Salt and pepper: Use half a teaspoon of salt and a quarter teaspoon of black pepper for seasoning. - Eggs: Two large eggs help the coating stick well. - Olive oil: One tablespoon drizzled on top helps with crispiness. Following these measurements ensures your fries turn out perfect. For those who want to experiment, consider these optional ingredients: - Parmesan cheese: Extra for more cheesy goodness. - Herbs: Try adding dried oregano or thyme for more depth. - Spices: A pinch of cayenne pepper adds heat. - Zucchini alternatives: Sweet potatoes or eggplant are great substitutes. These additions can elevate your fries and suit your taste. Feel free to mix and match! {{ingredient_image_1}} First, set your oven to 425°F (220°C). This high heat helps the fries get crispy. While the oven heats, take a baking sheet and line it with parchment paper. This prevents sticking and makes clean-up easy. In a shallow bowl, combine the dry ingredients. Use 1 cup of breadcrumbs, either panko or regular works well. Add 1/2 cup of grated Parmesan cheese for that rich flavor. Next, mix in 1 teaspoon of garlic powder, 1 teaspoon of onion powder, and 1 teaspoon of smoked paprika. Finally, add 1/2 teaspoon of salt and 1/4 teaspoon of black pepper. Stir until everything is mixed well. Take 2 medium zucchinis, cut into fry shapes. In another bowl, beat 2 large eggs until they are mixed well. Grab each zucchini fry and dip it into the eggs. Let the extra egg drip off. Then, roll the fry in the breadcrumb mixture. Press lightly to make sure the coating sticks. Place each coated fry on the lined baking sheet in a single layer. Drizzle 1 tablespoon of olive oil over the fries for extra crispiness. Bake them for 20-25 minutes, flipping halfway through. Keep an eye on them; they should turn golden brown and crispy. Once done, take them out and sprinkle fresh parsley on top before serving. Enjoy your warm fries with your favorite dipping sauce! To make zucchini fries crispier, follow these steps. First, cut your zucchinis into even fry shapes. This helps them cook at the same time. Next, ensure you use panko breadcrumbs. They give a great crunch. Drizzling olive oil on your fries before baking helps too. You can also flip them halfway through baking for even browning. If you have an air fryer, use it for a healthier option. Set it to 400°F and cook for about 10-15 minutes. Check them often to avoid burning. You can also fry the zucchini fries in hot oil. Heat oil in a pan to 350°F and cook until golden brown. This method adds a lot of flavor but is less healthy. Avoid these common mistakes to get the best fries. First, don’t skip the egg wash. It helps the coating stick well. Second, don’t overcrowd the baking sheet. This can cause steaming, making them soggy. Lastly, pay attention when baking. If they look golden, they are ready. Enjoy your crispy bites! Pro Tips Choose the Right Zucchini: Opt for medium-sized zucchinis that are firm and free from blemishes for the best texture and flavor. Use Fresh Breadcrumbs: For extra crunch, use freshly made breadcrumbs instead of store-bought ones. This enhances the overall taste. Don’t Skip the Oil: Drizzling olive oil not only adds flavor but also helps achieve a golden, crispy finish on the fries. Experiment with Seasonings: Feel free to customize the spice mix by adding your favorite herbs or spices to enhance the flavor profile. {{image_2}} If you want a kick, add heat to your fries. Use 1 teaspoon of cayenne pepper or red pepper flakes in the breadcrumb mix. This small change makes a big difference. The spice blends well with the cheese. You can easily make these fries gluten-free. Swap the regular breadcrumbs for gluten-free breadcrumbs. Panko is a great choice here. This keeps the same crunch, which we all love. Check labels to ensure the ingredients fit your diet. Zucchini is fantastic, but other veggies work well too. Try eggplant, carrots, or sweet potatoes. Cut them into fry shapes like the zucchini. Follow the same steps for coating and baking. Each veggie brings its unique flavor and texture. Enjoy the fun of trying new variations! To keep your Parmesan crusted zucchini fries fresh, place them in an airtight container. You can store them in the fridge for up to three days. Make sure they cool completely before sealing the container. This helps prevent moisture build-up, which can make the fries soggy. When reheating, aim to crisp them up again. Preheat your oven to 375°F (190°C). Spread the fries on a baking sheet in a single layer. Bake for about 10 to 15 minutes. Check them often to avoid burning. This method gives you that delightful crunch again. You can freeze these fries for later enjoyment! After baking, let them cool completely. Arrange them in a single layer on a baking sheet and freeze for 1-2 hours. Once frozen, transfer them to a freezer bag. They will stay good for up to three months. When you're ready, bake them straight from the freezer at 425°F (220°C) for about 20-25 minutes. Yes, you can. If you want to skip breadcrumbs, try almond flour or crushed nuts. These options add crunch and flavor. You can also use ground oats for a different texture. Just remember, the fries may not be as crispy. Experiment to find your favorite substitute. Check the color and texture. Zucchini fries should look golden brown and crisp. You can also test one with a fork. It should feel tender inside but firm outside. Baking takes about 20-25 minutes, so keep an eye on them. Flip halfway through for even cooking. Zucchini fries taste great with many sauces. Marinara sauce adds a classic touch. Ranch dressing is creamy and cool. For a spicy kick, try buffalo sauce. You can also mix Greek yogurt with herbs for a fresh dip. Feel free to get creative with your favorite flavors! This blog post guides you through making delicious Parmesan crusted zucchini fries. We covered essential ingredients and measurements, easy step-by-step cooking tips, and helpful tricks for the perfect fries. I shared fun variations, storage information, and answers to common questions. Remember, with a few tweaks, you can make these fries your own. Now go ahead, try this recipe, and enjoy a tasty snack that everyone will love. Happy cooking!

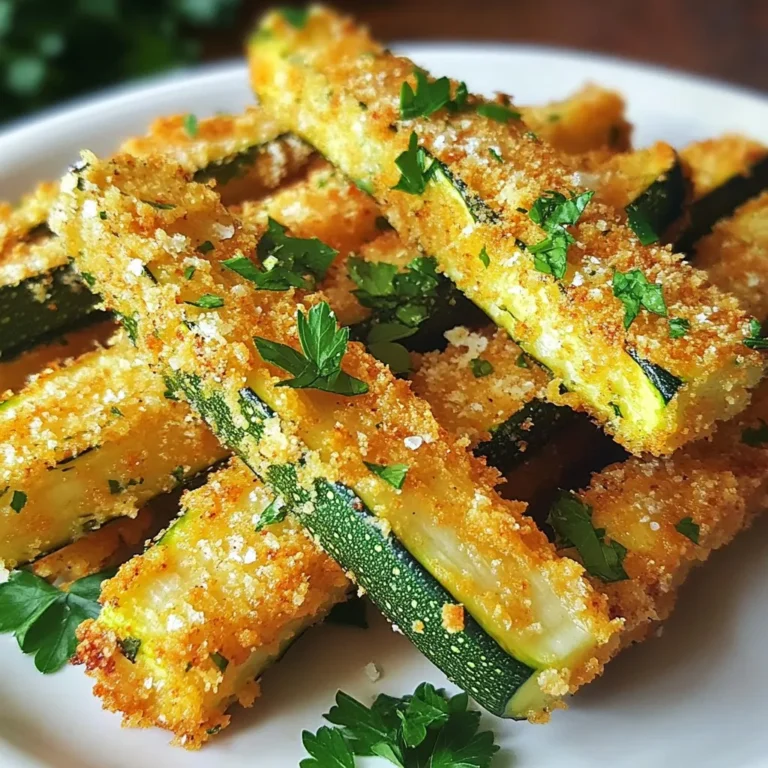
Parmesan Crusted Zucchini Fries Crisp and Tasty Bites

- 3 large leeks, cleaned and sliced (white and light green parts only) - 4 medium Yukon gold potatoes, peeled and diced - 1 medium onion, chopped - 3 tablespoons unsalted butter - 4 cups vegetable broth - 1 cup heavy cream - Salt and pepper, to taste - Fresh chives, finely chopped (for garnish) Using the right amounts makes a big difference. Here is what you need: - Leeks: Use 3 large ones. You can swap them with green onions if needed. - Potatoes: Yukon gold gives a rich flavor. You can use russet potatoes if you prefer. - Onion: One medium onion adds sweetness. Shallots can be a nice substitute. - Butter: Unsalted butter is best. Olive oil works if you want a lighter taste. - Vegetable broth: Four cups are key for a deep flavor. Chicken broth is a good swap if you like. - Heavy cream: One cup makes it creamy. Coconut milk is a dairy-free option. Fresh ingredients make this soup shine. Here’s why: - Flavor: Fresh leeks and potatoes taste better. They add depth to the soup. - Nutrition: Fresh vegetables pack more vitamins. They are good for your health. - Texture: Fresh ingredients give a lovely, smooth texture. This is key for a creamy soup. Using fresh ingredients can elevate your cooking. This is true for any recipe, but it shines in this soup. {{ingredient_image_1}} Start by melting the butter in a large pot over medium heat. Add the chopped onions and sliced leeks. Sauté them for about 5 to 7 minutes. You want them to soften but not brown. This step builds a flavorful base for your soup. The sweet aroma will fill your kitchen! Next, add the diced Yukon gold potatoes to the pot. Stir everything together well. Let it cook for another 2 to 3 minutes. This step helps bring out the flavor of the potatoes. Now, pour in the vegetable broth. Bring the mix to a gentle boil. Once boiling, reduce the heat to low. Cover the pot and let it simmer for about 20 minutes. The potatoes should become tender and easy to pierce with a fork. Once the potatoes are cooked, remove the pot from heat. Use an immersion blender to purée the soup until it’s smooth. If you don’t have one, you can blend in batches with a countertop blender. Be careful with hot soup! Return the smooth soup to low heat and stir in the heavy cream. Cook for another 5 minutes until it is heated through. Season with salt and pepper to your taste. Now you have a rich, creamy potato leek soup! When making potato leek soup, keep it simple. Use fresh leeks and potatoes for the best flavor. Julia Child loved to sauté the leeks until they were soft. This brings out their natural sweetness. She also suggested using Yukon gold potatoes. They add a nice creaminess to the soup. Always remember to taste as you go. Adjust the salt and pepper to your liking. One common mistake is overcooking the leeks. You want them soft, not browned. If they brown, the soup may taste bitter. Another mistake is not blending enough. You want a smooth texture, so blend thoroughly. Finally, don’t skip the cream. It adds richness. Without it, the soup can taste flat. The key to a creamy soup is blending. Use an immersion blender for ease. If you don’t have one, a regular blender works too. Just be careful when blending hot liquids. Always blend in small batches. After blending, return the soup to low heat. This keeps it warm and ready to serve. If the soup is too thick, add more broth or cream. This helps reach your desired consistency. Pro Tips Use Fresh Leeks: Ensure the leeks are fresh for the best flavor. Look for vibrant green tops and firm white bases. Blend for Texture: For a creamier texture, blend the soup longer. You can also reserve some potato chunks for added texture. Adjust Creaminess: Feel free to adjust the amount of cream based on your preference. For a lighter version, substitute half-and-half or evaporated milk. Add Herbs: Enhance the flavor by adding fresh herbs like thyme or parsley during the cooking process. {{image_2}} You can add herbs and spices to boost the soup's flavor. Try adding thyme or bay leaves while cooking. These herbs give a warm, earthy taste. You can also add garlic for extra depth. A pinch of nutmeg brings a lovely warmth, too. Just remember to remove any whole herbs before blending. To make this soup vegan, swap the butter for olive oil. Use coconut milk instead of heavy cream. It adds a touch of sweetness and a creamy texture. You can also add cashew cream for a rich flavor. Make sure the vegetable broth is plant-based to keep it vegan-friendly. Toppings can change the whole dish. Instead of chives, try crispy bacon bits or toasted croutons. You can also sprinkle some fresh parsley for a bright finish. A drizzle of olive oil adds richness, too. For a spicy kick, add a dash of hot sauce. Each topping gives the soup a new twist, making it fun to enjoy! After you enjoy your soup, let it cool. Pour any leftovers into a clean container. Make sure it has a tight lid. Store it in the fridge for up to three days. Always label the container with the date. This way, you will know when to use it. To reheat, you have a few options. You can use a pot on the stove. Heat it over low heat, stirring often. This helps keep the soup creamy. If you prefer a microwave, pour the soup into a bowl. Heat it in short bursts, stirring in between. Check the soup's temperature before serving. Freezing your potato leek soup is simple. Use freezer-safe containers or bags. Leave some space at the top, as the soup will expand. It can stay in the freezer for up to three months. When ready to eat, thaw it in the fridge overnight. Reheat on the stove or in the microwave. Enjoy the creamy flavor delight whenever you want! To make the soup thicker, you can use less broth. Start with three cups instead of four. You can also add more potatoes. Diced potatoes will cook down and thicken the soup. Another option is to blend some of the soup back into the pot. This adds body without changing the flavor. If you need a substitute for vegetable broth, use chicken broth. It gives a rich flavor. You can also use water with added seasonings. Try adding bay leaves, garlic, or herbs for extra taste. Keep in mind that these options may change the soup's final flavor. Yes, you can prepare the soup in advance. Make the soup and cool it down first. Store it in an airtight container in the fridge for up to three days. When ready to eat, just reheat on low heat. You may want to add a splash of cream when reheating for extra richness. In this post, we covered the key ingredients for a tasty soup, along with their measurements and importance. You learned step-by-step instructions, from sautéing to blending for a creamy finish. We shared tips from Julia Child and common mistakes to avoid, ensuring you achieve the perfect consistency. You also explored delicious variations and storage tips for leftovers. In conclusion, fresh ingredients and careful cooking make the best soup. Enjoy experimenting with your flavors!

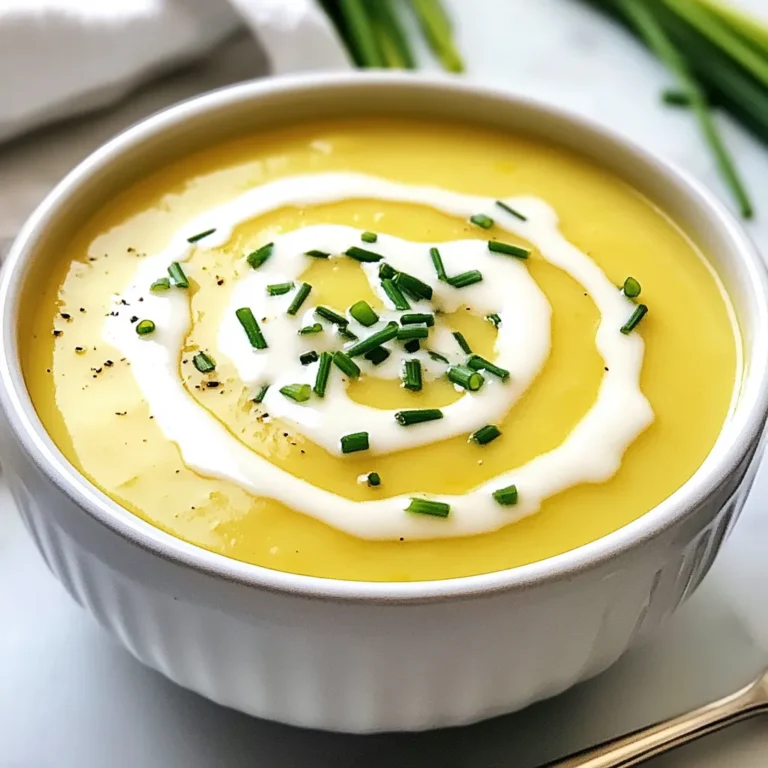
Julia Child Potato Leek Soup Creamy Flavor Delight

To make Gingerbread Crinkle Cookies, gather these ingredients: - 2 cups all-purpose flour - 1/4 cup unsweetened cocoa powder - 1 teaspoon baking soda - 1/2 teaspoon salt - 2 teaspoons ground ginger - 1 teaspoon ground cinnamon - 1/2 teaspoon ground nutmeg - 1/2 cup unsalted butter, softened - 1 cup packed brown sugar - 1/4 cup molasses - 1 large egg - 1 teaspoon vanilla extract - 1 cup powdered sugar (for rolling) These ingredients come together to create warm, spiced flavors with a rich cocoa twist. You might want to change some ingredients. Here are some easy swaps: - Flour: Use gluten-free flour for a gluten-free option. - Butter: Coconut oil works well if you're dairy-free. - Molasses: Honey or maple syrup can replace molasses, but the taste will change slightly. - Egg: A flax egg (1 tablespoon ground flaxseed mixed with 2.5 tablespoons water) is a great vegan choice. These substitutions let you keep the spirit of the recipe while fitting your needs. Make sure you have these tools ready: - Mixing bowls (one large and one medium) - Electric mixer for creaming butter and sugar - Whisk for dry ingredients - Measuring cups and spoons for accuracy - Baking sheet lined with parchment paper - Plastic wrap to cover the dough These tools help make your baking process smooth and enjoyable, ensuring lovely cookies every time! {{ingredient_image_1}} Start by preheating your oven to 350°F (175°C). This step is key for perfect cookies. Line a baking sheet with parchment paper to prevent sticking and make cleanup easy. In a large bowl, whisk together the dry ingredients: 2 cups of all-purpose flour, 1/4 cup of cocoa powder, 1 teaspoon of baking soda, and 1/2 teaspoon of salt. Also, add 2 teaspoons of ground ginger, 1 teaspoon of ground cinnamon, and 1/2 teaspoon of ground nutmeg. This mix gives the cookies their warm, spicy flavor. In another bowl, cream together 1/2 cup of softened unsalted butter and 1 cup of packed brown sugar until it looks light and fluffy. Use an electric mixer for this; it makes things easier. Next, add 1/4 cup of molasses, 1 large egg, and 1 teaspoon of vanilla extract. Mix until everything is well combined. Now, slowly add the dry mix to the wet mix. Do this on low speed to avoid a flour cloud. Keep mixing until you have a smooth dough. Make sure there are no bits of flour left. Cover the bowl with plastic wrap and chill it in the fridge for at least 30 minutes. This makes the dough easier to handle. After the dough has chilled, take it out of the fridge. Scoop tablespoons of dough and roll them into small balls with your hands. You should get about 24 balls from the dough. Next, roll each ball in 1 cup of powdered sugar until they are fully coated. This step gives them their signature crinkle look when baked. Place the sugar-coated balls on the prepared baking sheet. Make sure to space them about 2 inches apart. They need room to spread while baking. Bake the cookies in the preheated oven for 10-12 minutes. The edges should set, but the centers should still be soft. Remember, they will continue to cook a bit after you take them out. Once baked, let the cookies cool on the baking sheet for about 5 minutes. Then, transfer them to a wire rack to cool completely. This cooling step helps them firm up and enhances their texture. For a festive touch, stack the cookies in a tin or arrange them on a platter with extra powdered sugar on top. You can even add a sprig of rosemary or a cinnamon stick for decoration. Enjoy the process and the delicious results! To get the best texture for your gingerbread crinkle cookies, start by chilling the dough. Chilling helps the cookies hold their shape while baking. Aim for a dough that is smooth and not too sticky. If your dough feels too soft, add a little more flour. Rolling the dough balls in powdered sugar gives them that lovely crinkle look as they bake. One common mistake is not measuring ingredients correctly. Use a kitchen scale for accuracy. Too much flour can make the cookies dry. Another mistake is skipping the chilling step. If you don’t chill the dough, the cookies may spread too much. Keep an eye on the baking time. Overbaking makes cookies hard and less tasty. To boost the flavor of your cookies, try adding a pinch of black pepper or a dash of cloves. These spices add warmth and depth. You can also mix in chocolate chips for extra sweetness. If you love nuts, consider adding chopped pecans or walnuts. They add a nice crunch and pair well with the ginger flavor. Pro Tips Chill the Dough: Refrigerating the dough for at least 30 minutes helps the cookies maintain their shape and enhances the flavors. Use Fresh Spices: For the best flavor, use fresh ground spices. They’ll make a noticeable difference in the taste of your cookies. Experiment with Toppings: Try rolling the cookies in crushed candy canes or sprinkles for a festive twist. Store Properly: Keep the cookies in an airtight container at room temperature for up to a week, or freeze them for longer storage. {{image_2}} You can make gluten-free gingerbread crinkle cookies easily. Instead of all-purpose flour, use a gluten-free flour blend. Make sure the blend has xanthan gum, which helps bind the dough. Follow the same steps in the recipe. The cookies will still be soft and tasty. To make vegan gingerbread crinkle cookies, swap out a few ingredients. Replace the egg with 1/4 cup of unsweetened applesauce. Use vegan butter in place of the unsalted butter. Also, check that your molasses is vegan. The cookies will turn out just as delicious and crinkly! Get creative with flavor add-ins! Try adding chocolate chips or dried fruit, like cranberries or raisins. You can also mix in chopped nuts for crunch. For a spicy kick, add a dash of cayenne pepper or a pinch of ground cloves. These choices will give your cookies a fun twist! To keep your gingerbread crinkle cookies fresh, store them in an airtight container. This helps retain moisture and flavor. You can layer the cookies with parchment paper to prevent sticking. If you prefer, you can also wrap each cookie in plastic wrap. This extra layer keeps them moist longer. Remember to keep the cookies in a cool, dry place away from heat and sunlight. Freezing these cookies is easy. First, let the cookies cool completely. Then, place them in a single layer on a baking sheet. Freeze them for about one hour until firm. Once frozen, transfer the cookies to a freezer-safe bag or container. Be sure to remove as much air as possible. Label the container with the date. These cookies can stay fresh for up to three months in the freezer. Gingerbread crinkle cookies have a good shelf life. At room temperature, they can last for about one week. If you refrigerate them, they can last up to two weeks. However, the best taste comes from eating them fresh. To enjoy their best flavor, eat them within the first few days. For maximum freshness, check for any signs of staleness before serving. Yes, you can use different flours. All-purpose flour works best for this recipe. If you want a gluten-free option, try using a gluten-free flour blend. Just ensure the blend is made for baking. This will help with texture and taste. Keep in mind that results may vary. If you lack molasses, you can use honey or maple syrup. These alternatives will keep the cookies sweet and moist. You may need to adjust the sugar slightly. Remember, molasses adds a unique flavor, so the taste will change a bit. Check your cookies after 10 minutes. The edges should look set. The centers may still seem soft, and that’s okay! They will firm up as they cool. If you see cracks on the surface, that’s a good sign too. Enjoy the aroma as they bake! This blog post covered how to make gingerbread crinkle cookies. We discussed the key ingredients and how to prepare them. I shared useful tips to get the right texture and flavor. You learned about gluten-free and vegan options, too. Remember, practice leads to better cookies. Keep these tips in mind for future baking. Enjoy creating your cookies and sharing them with friends and family!

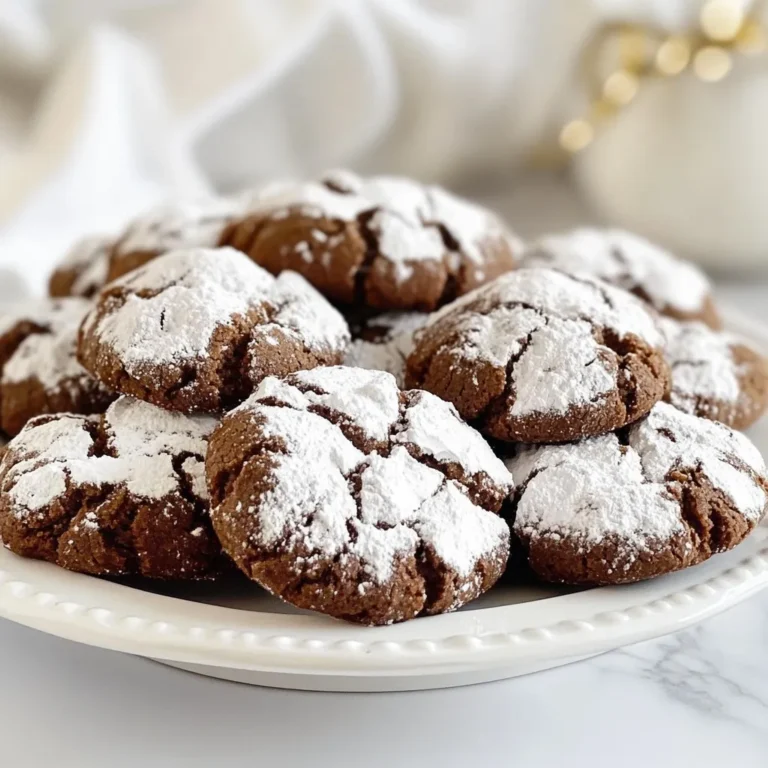
Gingerbread Crinkle Cookies Simple and Tasty Treat

To make Garlic Parmesan Chicken & Potatoes, you will need simple yet tasty items. Here’s a list of what you need: - 4 boneless, skinless chicken breasts - 1 pound baby potatoes, halved - 4 tablespoons unsalted butter, melted - 4 cloves garlic, minced - 1 cup grated Parmesan cheese - 1 teaspoon dried Italian herbs (oregano, basil, thyme) - Salt and pepper to taste - 2 tablespoons fresh parsley, chopped (for garnish) These ingredients come together to create a dish that is both hearty and full of flavor. The chicken becomes juicy and cheesy, while the potatoes turn golden and buttery. Each bite offers a delightful mix of garlic and Parmesan that you will love. Don’t skip any of these items; they all work together for the best taste. Enjoy gathering these ingredients before you start cooking! {{ingredient_image_1}} - Preheat the oven: Start by setting your oven to 400°F (200°C). This will help cook everything evenly and give a nice crisp. - Mix garlic butter and herbs: In a large bowl, combine 4 tablespoons of melted butter, 4 minced garlic cloves, 1 teaspoon of dried Italian herbs, salt, and pepper. This mix is the key to flavor. - Toss potatoes in garlic mixture: Add 1 pound of halved baby potatoes to the bowl. Toss them well until each piece gets coated in that tasty garlic butter mix. - Prepare baking sheet: Spread the coated potatoes in a single layer on a baking sheet. This helps them roast nicely without steaming. - Coat chicken with Parmesan: In the same bowl, place 4 boneless, skinless chicken breasts. Sprinkle ½ cup of grated Parmesan cheese over the chicken. Make sure every piece is covered. - Arrange chicken and potatoes on baking sheet: Now, place the chicken breasts next to the potatoes on your baking sheet. Sprinkle the rest of the cheese on top of both the chicken and potatoes. - Bake chicken and potatoes: Place the baking sheet in your preheated oven. Bake for 25-30 minutes. - Check for doneness: Use a meat thermometer to check the chicken's internal temperature. It should reach 165°F (75°C). The potatoes should be tender and golden. Enjoy the delicious aroma filling your kitchen! - Ensuring chicken is tender: To keep your chicken juicy, don’t overcook it. Baking at 400°F helps. Use a meat thermometer to check for 165°F. This way, you avoid dry meat. - Perfect potato texture: For soft, buttery potatoes, cut them in half. This helps them cook evenly. Toss them well in the garlic butter mix to coat every piece. Bake until golden and tender for the best results. - Adding herbs or spices: Feel free to experiment! Adding fresh rosemary or thyme can boost flavor. You might also try crushed red pepper for a bit of heat. Mix in what you love. - Alternative cheese options: If you want a twist, try using mozzarella or gouda. These cheeses melt well and add a nice stretch. You can also mix cheeses for a richer taste. - Garnishing ideas: Fresh parsley adds a pop of color. Sprinkle it over the dish right before serving. You can also use lemon zest for a bright touch. - Serving suggestions: Serve this dish on a big plate. Lay the chicken beside the potatoes. You can add a side salad for a fresh crunch. This makes your meal look tasty and inviting. Pro Tips Use Fresh Garlic: Fresh garlic provides a more robust flavor compared to pre-minced garlic, enhancing the overall taste of the dish. Even Cooking: Ensure chicken breasts are of uniform thickness for even cooking. If needed, gently pound them to achieve this. Parmesan Variations: Experiment with different types of grated cheese, such as Pecorino Romano, for a unique flavor twist. Check Potato Doneness: Test potato tenderness with a fork; they should be easily pierced yet hold their shape. {{image_2}} You can switch up the chicken cut for this dish. Thighs or drumsticks add more flavor. They also stay juicy during cooking. If you want to change the potatoes, try sweet potatoes. They bring a nice sweetness and color. You can also add other veggies like carrots or green beans for extra nutrition. If you need gluten-free options, this recipe works great. The main ingredients are naturally gluten-free. For those on a low-carb diet, you can skip the potatoes. Try using cauliflower instead. It roasts well and soaks up the garlic flavor. This keeps your meal tasty without the carbs. Want a quicker meal? Use an air fryer. Cook the chicken and potatoes at 375°F for about 25 minutes. This gives you a crispy texture without the oven time. You can also use a slow cooker. Just add all the ingredients, cover, and cook on low for 4-6 hours. This method makes the chicken super tender and full of flavor. To store leftover Garlic Parmesan Chicken and potatoes, wait for them to cool. Place them in an airtight container. This keeps them fresh and tasty. Use glass or plastic containers with tight lids. Make sure to store them in the fridge. They can last for 3 to 4 days. When reheating, you can use a microwave or an oven. The microwave is quick, but it may lose some crispiness. To keep the texture, heat it in the oven. Preheat the oven to 350°F (175°C). Place the chicken and potatoes on a baking sheet. Heat for about 15 to 20 minutes, or until hot. This will help keep the flavors intact. You can freeze Garlic Parmesan Chicken and potatoes for later use. First, let the dish cool completely. Then, wrap it tightly in plastic wrap. Place it in a freezer-safe container or bag. This will prevent freezer burn. When ready to eat, thaw it in the fridge overnight. Reheat in the oven or microwave as mentioned before. Enjoy a quick and easy meal! Can I use frozen chicken? Yes, you can use frozen chicken. Just make sure to thaw it fully before cooking. This helps the chicken cook evenly. If you put frozen chicken directly in the oven, it may not cook through properly. How can I make this dish ahead of time? You can prepare the chicken and potatoes ahead of time. Mix the garlic butter and coat the chicken and potatoes. Then, cover and refrigerate. When ready, bake it straight from the fridge, adding a few extra minutes to the cooking time. What to serve with Garlic Parmesan Chicken & Potatoes? This dish pairs well with a fresh salad or steamed veggies. You can also serve it with crusty bread to soak up all the tasty garlic butter. What to do if chicken is not cooked through? If the chicken is not cooked through, return it to the oven. Check the internal temperature. It should reach 165°F (75°C). Cook it for another 5 to 10 minutes, checking often. How to prevent potatoes from burning? To prevent potatoes from burning, spread them out on the baking sheet. Avoid stacking them too closely. You can also cover them loosely with foil for part of the baking time. Caloric content per serving Each serving has about 500 calories. This includes both the chicken and potatoes. Nutritional breakdown (protein, carbs, fats) - Protein: 35g - Carbohydrates: 40g - Fats: 25g This dish is balanced and provides a good mix of nutrients to keep you satisfied. This recipe for Garlic Parmesan Chicken and Potatoes is simple and delicious. We covered ingredients, step-by-step instructions, and useful tips. You learned how to customize the dish with variations and storage tips. Cooking can be fun and easy, even for beginners. Try this tasty meal for your family. Enjoy experimenting with flavors and methods. You'll impress everyone with your cooking skills. Happy cooking!

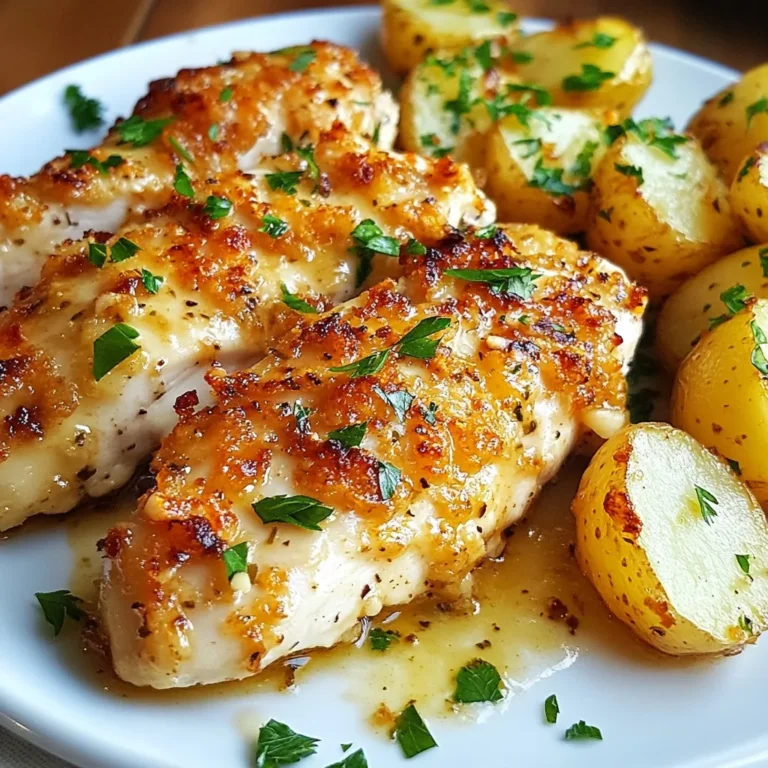
Garlic Parmesan Chicken & Potatoes Simple Dinner Delight

- 8 oz rice noodles - 1 can (13.5 oz) coconut milk - 2 tablespoons red curry paste - 1 tablespoon soy sauce - 1 tablespoon lime juice - 1 tablespoon brown sugar - 1 cup bell peppers (sliced, mix of red and yellow) - 1 cup snap peas - 1 cup bean sprouts - 2 tablespoons vegetable oil - 3 green onions (sliced) - Fresh cilantro (for garnish) - Crushed peanuts (for garnish) - Salt to taste Gather these ingredients before you start cooking. The rice noodles give a nice base. Coconut milk adds creaminess. Red curry paste brings the heat, while soy sauce and lime juice balance the flavors. Brown sugar adds a hint of sweetness. I like to use a mix of bell peppers for color and crunch. Snap peas and bean sprouts add freshness and texture. Green onions, cilantro, and crushed peanuts make great garnishes. They help the dish look pretty and taste even better. Make sure to have salt on hand. You might want to adjust the seasoning at the end. Having everything ready will make your cooking smooth and fun! {{ingredient_image_1}} To start, bring a pot of water to a boil. Add 8 oz of rice noodles to the pot. Cook them until they are al dente, which usually takes about 4 to 6 minutes. Stir them often to prevent sticking. Once cooked, drain the noodles in a colander and set them aside. This step is key for a perfect texture. Next, take a large pan and heat 2 tablespoons of vegetable oil over medium heat. When the oil is hot, add 2 tablespoons of red curry paste. Sauté this for 1 to 2 minutes until it smells amazing. Then, pour in a can of coconut milk. Add 1 tablespoon of soy sauce, 1 tablespoon of lime juice, and 1 tablespoon of brown sugar. Stir everything well and let it simmer gently. This mix creates a rich, flavorful base. Now, it’s time to add some color! Toss in 1 cup of sliced bell peppers and 1 cup of snap peas. Cook these for about 3 to 4 minutes. You want them to be tender but still crisp. After that, add the drained rice noodles and 1 cup of bean sprouts to the pan. Mix everything together so the noodles soak up the sauce. Cook for another 2 to 3 minutes until everything is hot. Taste and add salt if needed. Enjoy the bright flavors in this dish! To make your spicy coconut noodles just right, tweak the curry paste. Start with two tablespoons. If you want more heat, add a bit more. The red curry paste gives depth and warmth. Balance the flavors with brown sugar. This sweet touch helps calm the spice. You can adjust the sugar based on your taste. Just remember, a little goes a long way! Keep your veggies crisp! When you add bell peppers and snap peas, avoid overcooking. Just three to four minutes on medium heat is enough. This way, they stay bright and crunchy. For even noodle distribution, toss the noodles well in the sauce and veggies. Use tongs to mix everything gently. This ensures each bite has flavor and texture. Garnishing makes your dish pop. Use fresh cilantro and crushed peanuts on top. They add color and crunch. For serving, a bowl works best. It keeps the noodles cozy and warm. You can also add a lime wedge for that zesty finish. Pro Tips Use Fresh Ingredients: Fresh vegetables like bell peppers and snap peas will enhance the flavor and crunch of your dish. Adjust the Spice Level: Feel free to add more red curry paste or even chili flakes if you prefer your noodles spicier! Garnish Generously: The toppings of cilantro and crushed peanuts not only add flavor but also texture—don't skip them! Meal Prep Friendly: This dish can be made in advance; just reheat gently to avoid overcooking the vegetables. {{image_2}} You can make Spicy Coconut Noodles even better by adding protein. Tofu is a great choice. It soaks up the flavors well. Shrimp also works nicely. Both options add texture and taste. To cook tofu, cut it into cubes. Sauté it for about 5-6 minutes before adding the coconut milk. For shrimp, add them after the bell peppers. Cook until they turn pink, around 3-4 minutes. Adjust your cooking times to ensure the protein is cooked through. If you want to keep it vegetarian or vegan, you can easily substitute some ingredients. Use plant-based soy sauce for a vegan-friendly option. Make sure to pick a red curry paste that is vegan. Some brands may add fish sauce. You can also add more veggies. Try carrots, zucchini, or broccoli. These add color and nutrients. They will keep your dish both tasty and colorful. Different regions have their own takes on coconut noodles. You can explore various curry pastes. Green curry paste gives a fresh kick. Yellow curry paste offers a mild flavor. You can also change the vegetables. In Thailand, you might see bok choy or Thai basil. In India, try adding spinach or peas. These changes give you new flavors and experiences. Enjoy experimenting with what you have at home! To store leftovers of your spicy coconut noodles, place them in an airtight container. Make sure to cool them to room temperature first. This helps keep the noodles fresh and safe to eat later. The dish stays good in the fridge for about 3 to 4 days. When you are ready to eat, just reheat it on the stove or in the microwave. If you want to freeze your spicy coconut noodles, start by cooling them down completely. Then, transfer them to a freezer-safe container. You can also use freezer bags to save space. Try to remove as much air as possible to prevent freezer burn. The noodles can last up to 2 months in the freezer. When you are ready to enjoy them again, take them out and let them thaw in the fridge overnight. Reheat them gently in a pan or microwave. If the noodles seem dry, add a splash of coconut milk or water. This keeps the texture nice and creamy. You can try several noodle types instead of rice noodles. Here are some options: - Soba noodles: These are made from buckwheat. They add a nutty taste. - Udon noodles: Thick and chewy, these work well in the dish. - Zucchini noodles: For a low-carb option, use spiralized zucchini. - Egg noodles: These add richness but are not gluten-free. Each of these noodles brings a unique flavor and texture. Adjust cooking times based on the type you choose. Yes, you can make this dish gluten-free! Here are some tips: - Use gluten-free soy sauce: Regular soy sauce contains gluten. - Opt for rice noodles: As they are already gluten-free. - Check curry paste: Some brands may have gluten, so read labels. These swaps keep the flavors intact while ensuring gluten-free enjoyment. The spice level can vary based on your taste. Here’s a simple scale: - 1-2: Mild, use less red curry paste. - 5: Medium spice, use the recipe as is. - 8-10: Very spicy, add more red curry paste or extra chili. Adjust the red curry paste to find your perfect heat level. Enjoy the journey! You learned how to make a delicious curry with rice noodles. The recipe uses simple ingredients like coconut milk and fresh vegetables. You can adjust flavors, add proteins, and make it vegan or vegetarian. Proper storage keeps leftovers fresh longer. With these tips, you can cook a dish that impresses everyone. Enjoy your cooking journey, and don’t hesitate to experiment with flavors! Your kitchen adventures can lead to new favorites.

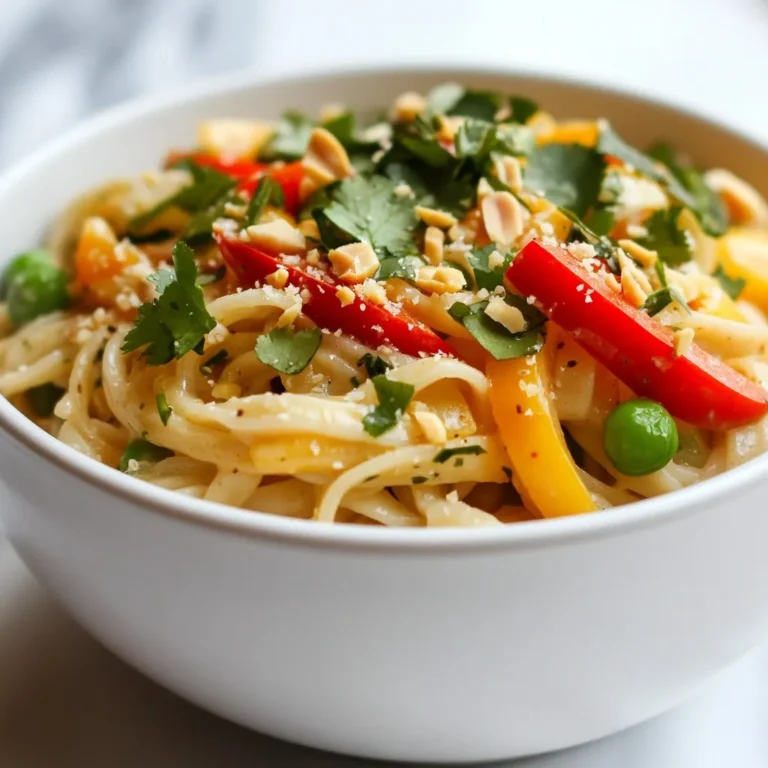
Spicy Coconut Noodles Flavorful and Simple Recipe

- 2 boneless, skinless chicken breasts, sliced - 8 oz fettuccine pasta - 1 tablespoon Cajun seasoning These main ingredients are the heart of your dish. The chicken gives protein and richness. Fettuccine pasta provides a lovely base. Cajun seasoning adds spice and character. - 2 tablespoons olive oil - 1 medium onion, diced - 2 cloves garlic, minced - 1 bell pepper (red or green), sliced The sauce needs these vegetables for flavor and texture. Olive oil helps cook the chicken and veggies. Onion and garlic add a sweet aroma. Bell pepper gives a crunch and color. - 1 cup heavy cream - 1 cup chicken broth - 1 cup cherry tomatoes, halved - 1 cup spinach leaves These creamy components create the sauce's richness. Heavy cream makes it smooth and luscious. Chicken broth adds depth and flavor. Cherry tomatoes bring a burst of sweetness. Spinach gives a fresh touch and vibrant color. {{ingredient_image_1}} How to boil fettuccine Boil a large pot of salted water. When it boils, add the fettuccine. Cook it according to the package directions until it is al dente. Stir occasionally to stop it from sticking. Once done, drain the pasta and set it aside. Tips for perfect pasta - Use enough water; it helps the pasta cook evenly. - Salt the water well for flavor. - Don’t rinse the pasta; it will wash away the starch that helps the sauce stick. Marinating chicken with Cajun seasoning Slice the chicken breasts into thin strips. Place them in a bowl and sprinkle the Cajun seasoning over the chicken. Toss the chicken well to coat it evenly. Let it sit for a few minutes to absorb the flavors. Cooking chicken in olive oil Heat olive oil in a large skillet over medium-high heat. Once hot, add the seasoned chicken strips. Cook them for about 5 to 7 minutes. Turn the chicken occasionally until it is cooked through and no longer pink. Remove it from the skillet and set it aside. Sautéing onion and bell pepper In the same skillet, add diced onion and sliced bell pepper. Sauté them for about 3 to 4 minutes until they are soft. Then, add minced garlic and cook for another minute while stirring often. Bringing the sauce to the right consistency Pour in chicken broth and heavy cream. Stir everything to mix well. Bring this mixture to a simmer and let it thicken for about 3 to 5 minutes. The sauce should become creamy and smooth, perfect for coating the pasta. To make the best Cajun seasoning, mix these spices: - 1 tablespoon paprika - 1 teaspoon cayenne pepper - 1 teaspoon garlic powder - 1 teaspoon onion powder - 1 teaspoon dried oregano - 1 teaspoon dried thyme - Salt and pepper to taste You can adjust the spice levels. Use less cayenne for a milder taste. If you love heat, add more cayenne or some hot sauce. If you need gluten-free pasta, use rice pasta. It cooks well and tastes great. For a dairy-free option, substitute heavy cream with coconut milk. It adds a nice flavor! You can also swap veggies to fit your taste. Try zucchini, mushrooms, or broccoli. These add color and nutrition. Garnish your dish with fresh parsley. It adds a pop of color. You can also sprinkle grated Parmesan cheese on top for extra flavor. Serve the pasta in large bowls or on plates. Pair it with a side salad or garlic bread for a full meal. Enjoy the creamy goodness! Pro Tips Perfectly Cooked Pasta: To achieve al dente pasta, always test it a minute or two before the package instructions suggest. It should be firm to the bite but not hard. Seasoning the Chicken: For a deeper flavor, let the seasoned chicken sit for at least 15 minutes before cooking. This allows the spices to penetrate the meat better. Thickening the Sauce: If you prefer a thicker sauce, let it simmer longer or add a cornstarch slurry (1 tablespoon cornstarch mixed with 2 tablespoons water) to the sauce while it's simmering. Fresh Spinach Substitute: If fresh spinach is unavailable, you can use frozen spinach. Just make sure to thaw and drain it well to avoid excess water in your dish. {{image_2}} You can easily switch the chicken for shrimp. Just sauté the shrimp in olive oil. Cook them until they turn pink, about 3-4 minutes. This adds a sweet and savory flavor to your dish. For a vegetarian option, try using diced tofu or chickpeas. These protein options absorb the Cajun flavor well. They blend nicely with the creamy sauce too. While fettuccine is great, you can use other pasta types. Penne, spaghetti, or even rigatoni work well. Choose what you love best! If you want a low-carb option, zucchini noodles are fantastic. They add a fresh taste and cut down on carbs. Just sauté them for a few minutes before adding to the sauce. Feel free to add different spices or sauces. A splash of hot sauce can spice things up! You can also add smoked paprika for a deeper flavor. Incorporating seasonal veggies makes this dish even better. Try adding asparagus in spring or butternut squash in fall. This keeps the dish fresh and exciting all year round. To store your creamy Cajun chicken pasta, first let it cool. Then, place it in an airtight container. Make sure to use a container that is not too big, as excess air can spoil your pasta. - Refrigeration tips: Store the pasta in the fridge for up to 3 days. Keep it sealed to avoid drying out. - Freezing cooked pasta: You can freeze the pasta for up to 2 months. Use freezer-safe containers or bags. Label them with the date, so you remember when you made it. When you want to enjoy your leftovers, reheating is key. You want to keep that creamy texture. - Best methods to retain creaminess: The microwave works well, but add a splash of cream or broth. This helps keep it moist. You can also heat it in a skillet over low heat, stirring often. - Duration for reheating: In the microwave, heat for about 2-3 minutes. If using a skillet, it may take around 5-7 minutes. Knowing how long your pasta lasts is important to avoid waste. - How long does it last in the fridge?: In the fridge, the pasta can stay fresh for up to 3 days. - Signs pasta has gone bad: If you see mold or it smells sour, it’s time to toss it. Also, if the cream seems separated or grainy, do not eat it. Cajun seasoning is a blend of spices. It usually includes: - Paprika - Cayenne pepper - Garlic powder - Onion powder - Oregano - Thyme - Black pepper - Salt These spices give Cajun dishes a warm, spicy flavor. You can adjust the heat by adding more or less cayenne. Making your own blend at home is fun and easy! Yes, you can make this creamy pasta dish ahead of time. Here are some tips: - Cook the pasta and chicken, then cool them down. - Store them in separate containers in the fridge. - Mix the sauce and veggies, and store them too. - When you’re ready to eat, combine everything and warm it up. This way, you save time and still enjoy a fresh meal! Absolutely! This recipe works great for meal prep. Here are some best practices: - Use airtight containers to keep the pasta fresh. - Portion out servings to make it easy to grab. - You can freeze the dish if you want to keep it longer. - Just remember to reheat gently to keep the creaminess. Meal prepping helps you enjoy delicious food all week long! This blog post gave you a clear path to making a delicious creamy Cajun chicken pasta. You learned about essential ingredients like chicken, pasta, and spices. I shared step-by-step instructions for cooking and a few tips to help you get it just right. There are many ways to adjust the dish for your taste. Try new ingredients and methods to make it your own. Enjoy your cooking adventure and impress your friends and family with a tasty meal!

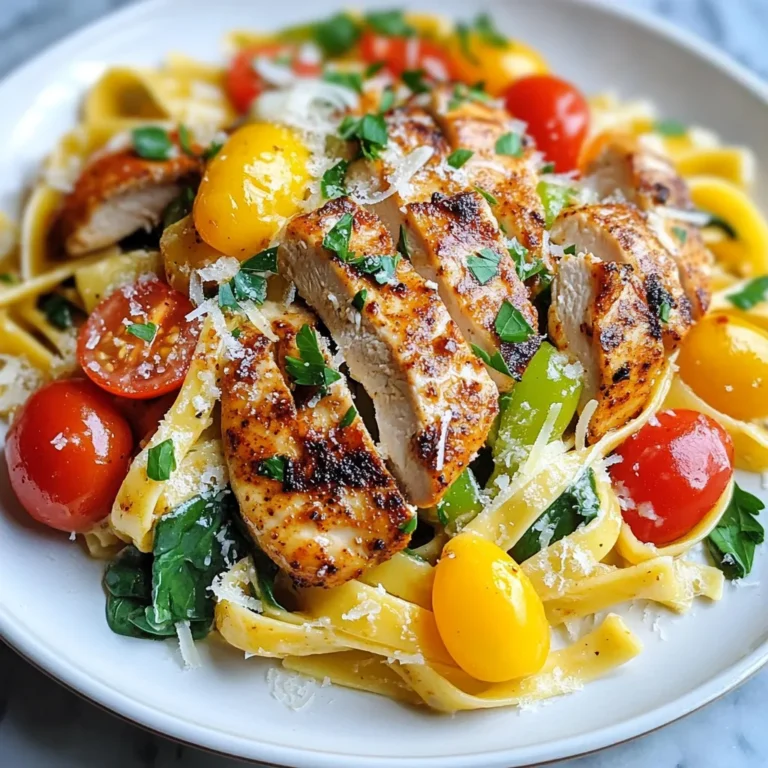
Creamy Cajun Chicken Pasta Delight in 30 Minutes

PREV 1 … 62 63 64 … 86 NEXT
spicy fork kitchen

explore

DessertsDinnerAppetizersDrinks

Our Policies

  • Cookie Policy
  • Copyright Policy
  • Disclaimer
  • GDPR Policy
  • Terms Of Use
Back to Top
  • About
  • Contact Us
  • Privacy Policy
© 2026 spicy fork kitchen