FREE DINNER EBOOK! Get your copy!
  • Cookie Policy
  • GDPR Policy
  • Disclaimer
  • Terms Of Use
  • Visit my other site: Fun Cookie Recipes
spicy fork kitchen
  • Home
  • Dinner
  • Desserts
  • Drinks
  • Appetizers
  • Contact
  • About
  • Privacy Policy
  • Home
  • Dinner
  • Desserts
  • Drinks
  • Appetizers
  • Contact
  • About
  • Privacy Policy
  • Cookie Policy
  • GDPR Policy
  • Disclaimer
  • Terms Of Use
Visit my other site: Fun Cookie Recipes

HOME / CATEGORIES /

Latest

To make this tasty Everything Bagel Cheese Ball, you need these ingredients: - 16 oz cream cheese, softened - 1 cup sharp cheddar cheese, shredded - 1/2 cup chives, finely chopped - 1/2 cup green onions, finely chopped - 1/4 cup sour cream - 1 tablespoon Worcestershire sauce - 1 tablespoon garlic powder - 1 tablespoon onion powder - 2 tablespoons Everything Bagel seasoning - Optional: assorted crackers and vegetable sticks for serving You can serve your cheese ball with: - Crackers: Choose your favorites, like wheat or rice crackers. - Veggie sticks: Carrots, celery, and bell peppers add crunch and color. - Pita chips: These bring a nice texture and flavor. Per serving (assuming 10 servings): - Calories: 200 - Protein: 6g - Total Fat: 18g - Saturated Fat: 10g - Carbohydrates: 4g - Dietary Fiber: 0g - Sugars: 1g - Sodium: 300mg This information helps you keep track of what you eat. Enjoy your cheese ball and share with friends! {{ingredient_image_1}} Start by taking a large bowl. Add 16 oz of softened cream cheese. Next, mix in 1 cup of shredded sharp cheddar cheese. Then, add 1/4 cup of sour cream and 1 tablespoon of Worcestershire sauce. Use a hand mixer or spatula to blend until smooth. This step is key for a creamy texture. After that, fold in 1/2 cup of finely chopped chives and 1/2 cup of finely chopped green onions. Also, mix in 1 tablespoon each of garlic powder and onion powder. Finally, add 2 tablespoons of Everything Bagel seasoning. Make sure everything is well combined for full flavor. Now it's time to shape the mixture. Take a handful of the cheese mix and form it into a ball. Use your hands to get the right shape. Once you have the ball, roll it in the leftover Everything Bagel seasoning. Make sure it gets fully coated. This gives the cheese ball its signature look and taste. After coating, wrap the cheese ball in plastic wrap. This helps keep it fresh. Place it in the refrigerator for at least 2 hours. Chilling lets the flavors meld together nicely. When you’re ready to serve, take it out and let it sit for about 15 minutes. This makes it easier to slice. Then, place it on a platter with your favorite crackers and vegetable sticks. Enjoy your tasty treat! To get the best texture for your cheese ball, start with softened cream cheese. If it’s cold, it will be hard to mix. Use a hand mixer or spatula to blend until smooth. This step is key for a creamy finish. When you fold in the chives and onions, do it gently. This keeps the mixture light and fluffy. You can add more flavor by trying different cheeses. Creamy goat cheese or tangy feta can work well. If you want a kick, add some diced jalapeños or a dash of hot sauce. For a fresh twist, mix in some herbs like dill or parsley. You can also swap sour cream for Greek yogurt to make it healthier. Serve your cheese ball with a variety of crackers. Think about using whole grain or flavored options. Fresh vegetable sticks like carrots and celery add crunch and color. Try pairing it with sliced apples for a sweet touch. This cheese ball also goes well with wine or a light beer. Pro Tips Use Fresh Herbs: Fresh chives and green onions will enhance the flavor of your cheese ball compared to dried herbs. Chill Before Serving: Allowing the cheese ball to chill for at least two hours helps the flavors to meld together beautifully. Variety of Dippers: Serve with a mix of crackers, pretzels, and vegetable sticks to provide a range of textures and flavors. Customize the Seasoning: Feel free to adjust the amount of Everything Bagel seasoning to suit your taste preferences. {{image_2}} You can mix up the cheese for fun flavors. Try using cream cheese and feta for a tangy twist. Go for goat cheese if you want a creamier texture. You can also use mozzarella for a milder, stretchy cheese. Each choice adds a unique taste to your cheese ball. Feel free to play with spices and herbs. Add dill or parsley for fresh notes. If you like heat, include some red pepper flakes. For a smoky flavor, use smoked paprika. These small changes can make your cheese ball stand out at any party. Serving can be just as fun as making the cheese ball. Pair it with a variety of crackers and breadsticks. Fresh vegetable sticks, like carrots and celery, add crunch. You could also serve it with apple slices for a sweet touch. Consider a cheese board with fruits and nuts to impress guests. To keep your Everything Bagel Cheese Ball fresh, wrap it in plastic wrap. Place it in an airtight container. Store it in the fridge. This helps lock in flavor and moisture. If you use it within a few days, it will taste great! You can freeze the cheese ball if you want to keep it longer. Wrap it tightly in plastic wrap first. Then, place it in a freezer-safe bag. Try to push out all the air before sealing. It can last up to three months in the freezer. To thaw, place it in the fridge overnight. The cheese ball lasts about a week in the fridge. If you notice any change in smell or texture, it’s best to toss it. You don’t need to reheat the cheese ball. Serve it cold or let it sit at room temp for about 15 minutes before serving. Enjoy it with crackers or veggies! Everything Bagel seasoning is a mix of spices and seeds. It usually includes sesame seeds, poppy seeds, garlic flakes, onion flakes, and salt. This blend gives your dishes a savory, crunchy taste. It works great on bagels but can also spice up other foods. You can sprinkle it on salads, roasted veggies, or even popcorn for added flavor. This seasoning adds a fun twist to the cheese ball, making it extra tasty. Yes, you can make this cheese ball ahead of time. In fact, it tastes better after some time in the fridge. You should chill it for at least two hours. This allows the flavors to blend and grow deeper. You can even make it a day before your event. Just wrap it tightly in plastic wrap and keep it in the fridge. When it’s time to serve, let it sit out for about 15 minutes. This helps it soften a bit and makes it easier to spread. Serving an Everything Bagel Cheese Ball is easy and fun. You can place it on a nice platter. Add assorted crackers and vegetable sticks around it. Carrots, celery, and bell peppers work great for dipping. You can also serve it with pita chips for a crunchy option. It makes a perfect snack for parties, game days, or family gatherings. Your guests will love the mix of flavors and textures. Enjoy sharing this tasty treat! In this post, I shared how to make a delicious cheese ball with everything bagel seasoning. We covered the key ingredients, step-by-step instructions, and useful tips. You learned about variations to fit your taste and how to store your creation for later. Making this cheese ball is easy and fun. I hope you try it out at your next gathering. Enjoy the creamy flavor and great texture you create!

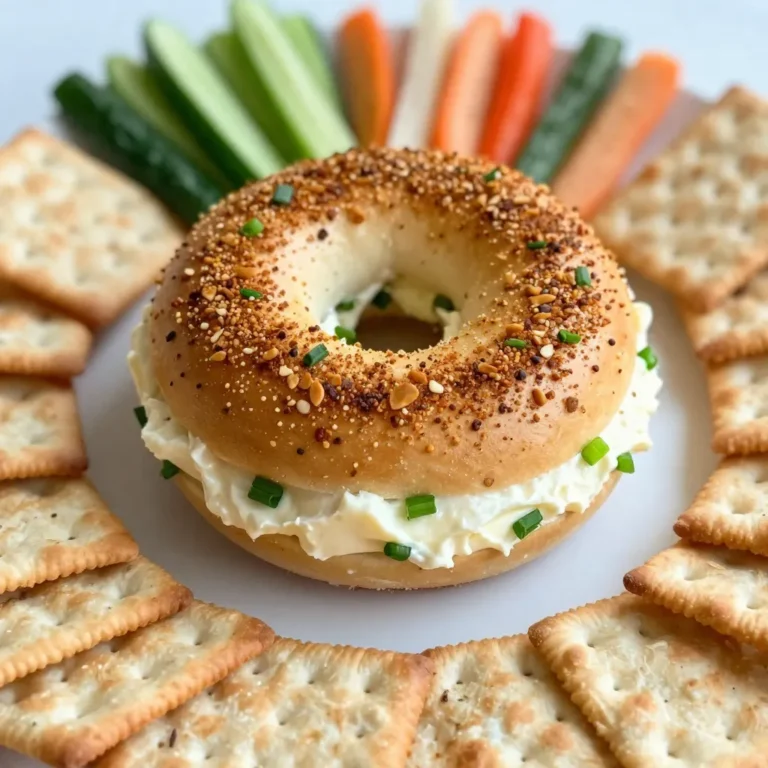
Everything Bagel Cheese Ball Easy and Flavorful Recipe

When making Mexican Street Corn Pasta Salad, gather these simple ingredients: - 8 oz. elbow macaroni or any pasta of your choice - 1 cup sweet corn (fresh or frozen) - 1 red bell pepper, diced - 1/2 red onion, finely chopped - 1 jalapeño, deseeded and minced - 1/2 cup crumbled queso fresco or feta cheese - 1/4 cup fresh cilantro, chopped - 2 tablespoons mayonnaise - 1 tablespoon sour cream - 1 tablespoon lime juice - 1 teaspoon chili powder - Salt and pepper to taste You can use any pasta shape you like. I prefer elbow macaroni for its nice bite. You can also try shells, penne, or fusilli. Each shape holds the dressing well and adds fun to the salad. Fresh corn gives a sweet crunch. You can grill it for added flavor. Just sauté it lightly until it gets a nice char. Frozen corn is quick and easy. Just heat it until warm. Either option works well for this dish. Feel free to mix it up! Add diced avocado for creaminess. Chopped tomatoes add juiciness. Black beans bring protein and fiber. If you love more heat, throw in extra jalapeños. Get creative and make this salad your own! {{ingredient_image_1}} Start by boiling water in a large pot. Add a pinch of salt to the water. Once it boils, add 8 ounces of elbow macaroni or your pasta of choice. Cook according to the package instructions until the pasta is al dente. This usually takes about 8 to 10 minutes. When ready, drain the pasta and rinse it under cold water. This helps cool it down and stops the cooking process. Set the pasta aside in a large bowl. If you use fresh corn, take a skillet and heat it over medium heat. Add 1 cup of sweet corn. Sauté the corn for about 5 to 7 minutes. You want it to be lightly charred for the best flavor. If you choose frozen corn, you only need to heat it until warm. Both options work well, but the fresh corn adds a nice touch. In your large bowl with the pasta, add the charred corn, 1 diced red bell pepper, 1 minced jalapeño, and 1/2 finely chopped red onion. Use a spatula to mix these ingredients together gently. In a separate bowl, whisk together 2 tablespoons of mayonnaise, 1 tablespoon of sour cream, 1 tablespoon of lime juice, and 1 teaspoon of chili powder. Add salt and pepper to taste. Pour this creamy dressing over your pasta mixture. Don’t forget to add 1/2 cup of crumbled queso fresco and 1/4 cup of chopped fresh cilantro. Toss everything well until it is evenly coated. Taste your salad and adjust the seasoning if needed. Chill it in the refrigerator for at least 30 minutes. This lets the flavors blend beautifully. Chilling your salad is key for great flavor. After mixing, cover the bowl with plastic wrap. Place it in the fridge for at least 30 minutes. This helps the flavors blend well. If you have time, chill it longer. The longer it sits, the better it tastes! To boost the taste, add a little more lime juice. It brings out the corn's sweetness. A dash of extra chili powder can give it a nice kick. If you love spice, chop up more jalapeño. You can also mix in some garlic powder for depth. Always taste as you go! Serve this pasta salad as a side dish or a main meal. It pairs well with grilled chicken or tacos. For a fun twist, serve it in a bowl made from corn tortillas. You can also garnish with extra cilantro and cheese before serving. This makes it look even more inviting! Pro Tips Use Fresh Ingredients: Whenever possible, opt for fresh sweet corn and vegetables to enhance the flavor and texture of your pasta salad. Customize the Heat: Adjust the amount of jalapeño according to your spice preference. For a milder dish, you can also omit the seeds and membranes. Make Ahead: Prepare the salad a few hours in advance to allow the flavors to meld together, making for a more delicious dish when served. Garnish for Presentation: Add extra cilantro or a sprinkle of chili powder on top before serving to give your dish a vibrant and inviting look. {{image_2}} You can easily make this salad meat-free. Just focus on the fresh veggies. Add diced cucumbers or ripe avocados for extra creaminess. You can also mix in black beans for protein. They add a nice texture and flavor. This way, you keep the dish light and fresh while enhancing its nutrition. If you love heat, spice it up! Add more jalapeños to boost the flavor. You can also sprinkle in some cayenne pepper for a quick kick. For a fun twist, try adding diced chipotle peppers in adobo sauce. They give a smoky flavor that pairs well with the corn. Adjust the spice to your taste for a unique salad. While queso fresco is a classic choice, you have options. Try crumbled feta for a tangy taste. If you want creaminess, use goat cheese. For a milder flavor, shredded cheddar works great. Each cheese adds its own flair, making your pasta salad exciting every time you make it. To keep your Mexican street corn pasta salad fresh, place it in an airtight container. This helps keep flavors intact and prevents drying out. Be sure to seal the lid tightly. Store it in the fridge for up to three days. If you notice excess moisture, you can drain it before serving. I recommend eating this salad cold. If you prefer warm pasta, heat it gently in a skillet. Add a splash of water or lime juice to help it stay moist. Avoid using the microwave, as it can make the pasta mushy. Always taste and adjust the seasoning after reheating. Freezing pasta salad is tricky. The texture of pasta and veggies can change. If you want to freeze it, do so without the dressing. Store the pasta and vegetables in a freezer-safe bag. When ready to eat, thaw it in the fridge overnight. Mix in fresh dressing before serving for the best flavor. Yes, you can use any pasta shape you like. I enjoy elbow macaroni, but shells or rotini work great too. Just make sure the pasta is small enough to mix well with the other ingredients. Cooking times may vary, so check the package for the right time to cook. If you can’t find queso fresco, feta cheese is a tasty option. It has a similar crumbly texture and salty taste. You can also use goat cheese for a creamier feel. Just remember that each cheese will change the flavor a bit. This salad stays fresh for about 3 to 5 days in the fridge. Store it in an airtight container to keep it crisp. If you notice any changes in smell or color, it’s best to toss it out. Enjoy it cold, as the flavors get better over time! To recap, we explored pasta salad ingredients, focusing on pasta, corn, and add-ins. I detailed step-by-step instructions for cooking and mixing. I also shared tips for chilling, flavor enhancement, and serving. We discussed variations like vegetarian options and different cheeses. Finally, I provided storage tips for leftovers and answered common questions. In summary, making pasta salad is fun and easy. Try experimenting with your favorite flavors!

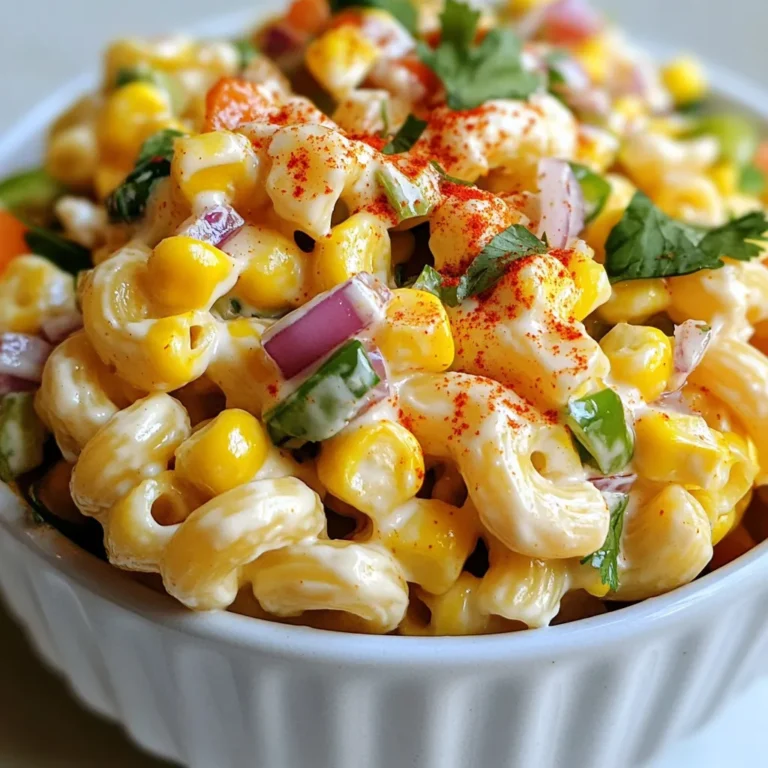
Sensational Mexican Street Corn Pasta Salad Recipe

- 2 cups pre-cooked white cornmeal (masarepa) - 2 1/2 cups warm water - 1 teaspoon salt - 1 cup shredded queso blanco or mozzarella cheese - 2 tablespoons butter, melted The key to great arepas con queso starts with the right ingredients. First, you'll need pre-cooked white cornmeal, known as masarepa. This cornmeal gives the arepas their signature texture. Next, warm water helps the dough come together smoothly. Salt adds flavor, while shredded cheese brings that melty goodness inside. Finally, a bit of melted butter helps give the outside a lovely golden finish. - Fresh cilantro, chopped for garnish - Sliced avocado - Salsa for dipping Garnishes make your arepas shine. Fresh cilantro adds a burst of flavor. Sliced avocado provides creaminess. A side of salsa can add a nice kick. You can mix and match these garnishes to create a dish that looks as good as it tastes! {{ingredient_image_1}} To start, you need to mix the cornmeal and salt. In a large bowl, combine 2 cups of pre-cooked white cornmeal with 1 teaspoon of salt. Gradually add 2 1/2 cups of warm water. Stir until the dough is smooth and holds together well. Next, let the dough rest for about 5 minutes. This step helps the dough hydrate, making it easier to shape. A well-hydrated dough will give you better arepas. Now it's time to shape your arepas. Divide the dough into 8 equal portions. Roll each portion into a ball, then flatten each ball into a disc about 1/2-inch thick. For the filling, take half of the discs and place a spoonful of shredded cheese in the center. You can use queso blanco or mozzarella cheese for a great taste. Cover with the other half of the discs. Press the edges firmly to seal them well. This step keeps the cheese inside while cooking. You can cook the arepas in two ways. First, heat a non-stick skillet or griddle over medium heat. Add some melted butter to the pan. Cook the arepas for about 5-7 minutes on each side. They should turn golden brown and be fully cooked. If you prefer a crispier texture, bake the arepas in the oven. Preheat it to 375°F (190°C) and cook for 10-15 minutes. After cooking, let them cool slightly. Then slice them open to reveal the melty cheese inside. Enjoy your homemade arepas con queso! To make the best arepas, focus on the dough. You want the dough to be smooth and not sticky. Mix the cornmeal and salt well. Gradually add warm water while stirring. This helps you get the right consistency. After mixing, let the dough rest for five minutes. This step helps the cornmeal soak up the water. For cooking, use medium heat on your skillet or griddle. This ensures the outside gets golden brown while the inside stays soft. If you want a crispier texture, consider baking them at 375°F (190°C) for about 10 to 15 minutes. This method gives a great crunch. When serving arepas con queso, think about what goes well with them. Fresh cilantro adds a nice touch. You can also offer sliced avocado on the side. A bowl of salsa for dipping is a great choice too. For presentation, serve the warm arepas on a wooden board. This looks nice and rustic. Garnish with chopped cilantro for a pop of color. This makes your dish more inviting and fun to eat. Pro Tips Tip Title: Use Fresh Ingredients: For the best flavor, use fresh queso blanco or mozzarella cheese. Fresh cheese melts better and provides a creamier texture to your arepas. Tip Title: Rest the Dough: Allowing the dough to rest for 5 minutes is crucial. This hydration time ensures the arepas are soft and pliable, making them easier to shape and cook. Tip Title: Perfect Cooking Temperature: Cooking arepas at medium heat allows them to brown evenly without burning. Adjust the heat as needed, especially if they start to brown too quickly. Tip Title: Customize Fillings: Feel free to experiment with different fillings like seasoned ground beef, black beans, or sautéed vegetables for a unique twist on traditional arepas. {{image_2}} You can change up the cheese in your arepas. Try using queso de mano for a fresh twist. Cheddar works great too, giving a sharp flavor. Adding spices or herbs can enhance your filling. A dash of cumin or some fresh parsley adds depth. Experiment to find what you love. You can fill arepas with meats or veggies for a hearty meal. Shredded chicken or black beans make tasty options. If you crave something sweet, try adding jam or chocolate. A spoon of dulce de leche can make a delightful treat. These variations make arepas fun and versatile! To keep your cooked arepas fresh, place them in an airtight container. You can store them in the refrigerator for up to three days. Before storing, let them cool to room temperature. This helps prevent moisture build-up. When you are ready to eat, simply reheat them in a skillet. They will taste great! You can freeze uncooked arepas for up to three months. To do this, place them in a single layer on a baking sheet. Once frozen, transfer them to a freezer bag. For cooked arepas, allow them to cool first. Then, store them in an airtight container or freezer bag. To reheat cooked arepas, you can use a skillet or an oven. If using a skillet, heat over low heat until warmed through. If using an oven, preheat to 375°F (190°C) and bake for about 10 minutes. This keeps them crispy on the outside and warm inside. Enjoy your delicious arepas at any time! Arepas con Queso are a tasty dish from Venezuela. They are made from cornmeal dough. The dough is shaped into round patties and filled with cheese. These golden treats are crispy on the outside and soft on the inside. The melting cheese makes every bite special. Arepas are often served for breakfast or as a snack. You can top them with avocado or salsa for extra flavor. Yes, you can make the dough ahead of time. Mix the cornmeal and salt with water as usual. After mixing, let the dough rest. Then, wrap it tightly in plastic wrap. Store the dough in the fridge for up to two days. When you’re ready to cook, shape and fill the arepas. If you want to store it longer, freeze the dough. Just make sure to thaw it before using. You can use many types of cheese for Arepas. Queso blanco is a popular choice. It melts well and adds great taste. Mozzarella is another good option for its stretchiness. If you like stronger flavors, try queso de mano or even cheddar. Feel free to mix cheeses for a unique flavor. Adding herbs or spices can also give your arepas a personal touch. Arepas con Queso are a tasty treat made from simple ingredients like cornmeal, cheese, and butter. You learned how to make the dough, shape the arepas, and cook them in different ways. I shared tips for perfecting the texture and the best ways to serve them. You can even personalize your arepas with various cheeses or fillings. Remember, good storage will keep them fresh longer. Enjoy making this flavorful dish that brings a taste of Venezuela to your kitchen!

Arepas con Queso Flavorful and Simple Recipe Guide

Here’s what you need for this tasty crockpot white chicken chili. Each ingredient adds its own flavor. - 1.5 lbs boneless skinless chicken breasts - 1 medium onion, chopped - 3 cloves garlic, minced - 2 cans (15 oz each) white beans (cannellini or great northern), drained and rinsed - 1 can (15 oz) corn, drained - 2 cups low-sodium chicken broth - 1 can (4 oz) diced green chilies - 1 teaspoon ground cumin - 1 teaspoon chili powder - 1 teaspoon smoked paprika - Salt and pepper, to taste - 1 cup heavy cream or coconut cream - 1/2 cup fresh cilantro, chopped, for garnish - 1 lime, cut into wedges for serving Gathering these ingredients is easy. You can find them at any grocery store. Make sure to choose fresh chicken and herbs. This dish cooks up creamy and full of flavor. The beans and corn add texture and nutrition. You can also swap heavy cream for coconut cream if you want a dairy-free dish. {{ingredient_image_1}} To start, layer the chicken in the crockpot. Use 1.5 lbs of boneless, skinless chicken breasts. Place them at the bottom of the pot. Next, add the chopped onion, minced garlic, drained white beans, drained corn, and diced green chilies. This mix creates a great base. Now, pour in 2 cups of low-sodium chicken broth. Make sure it covers the ingredients well. Sprinkle in 1 teaspoon each of ground cumin, chili powder, and smoked paprika. Season with salt and pepper to your taste. This step adds depth to your chili's flavor. You can cook this chili on low or high. If you choose low, set the crockpot for 6-7 hours. This long cooking time makes the chicken tender. If you are short on time, cook it on high for 3-4 hours. Either way, the chicken will cook through and be ready to shred. Once the cooking time is up, take the chicken out of the pot. Use two forks to shred it into bite-sized pieces. After shredding, return the chicken to the pot. Stir in 1 cup of heavy cream or coconut cream for a dairy-free option. Let it cook for another 30 minutes on low to heat through. Before serving, taste the chili. Adjust the seasoning if needed. You can add more salt, pepper, or spices to fit your taste. Ladle the chili into bowls, garnish with fresh chopped cilantro, and serve with lime wedges for extra flavor. Enjoy! To shred chicken easily, use two forks. Hold one fork in each hand. Grab a piece of chicken with one fork. Then pull it apart with the other fork. This method works well for tender chicken. If you want to try something different, use a stand mixer. Place the cooked chicken in the bowl and mix on low speed. The chicken will shred quickly and evenly. Adjusting seasoning is key to great chili. Start with salt and pepper. Taste your chili before serving. If it lacks flavor, add more spices. You can boost the heat with cayenne pepper or extra chili powder. If you like fresh flavors, add lime juice just before serving. This gives a bright taste to your chili. Garnishes make your chili look great and add flavor. Fresh cilantro is a must for topping. You can also add sliced jalapeños for heat. Serve with lime wedges on the side. This adds a fresh burst of flavor. Pair your chili with tortilla chips or cornbread for a nice crunch. These sides make the meal feel special. Pro Tips Use Chicken Thighs for More Flavor: Chicken thighs are more flavorful and tend to stay juicier than chicken breasts. Consider substituting them for a richer taste. Adjust Spice Levels to Your Preference: Feel free to increase or decrease the amount of chili powder and cumin to suit your heat tolerance. For a kick, add some cayenne pepper! Let It Simmer for Best Flavor: Allowing the chili to simmer for an extra 30 minutes after adding the cream helps meld the flavors together beautifully. Garnish with Fresh Ingredients: Adding fresh lime juice and cilantro just before serving enhances the chili's flavor and adds a vibrant, fresh touch. {{image_2}} You can make this dish dairy-free. Just swap heavy cream for coconut cream. This change keeps the soup creamy, rich, and adds a light coconut flavor. To do this, add one cup of coconut cream at the end of cooking, like you would with heavy cream. To keep this dish gluten-free, check all your ingredients. Most canned goods are gluten-free, but always read labels. Use gluten-free broth and ensure your seasonings do not contain gluten. This way, everyone can enjoy the meal. If you want a quick option, use rotisserie chicken. Just shred the chicken and add it near the end of cooking. This saves time and adds great flavor. You can also substitute turkey or tofu for chicken. Turkey breast works well and is a lean option. Tofu gives a nice plant-based twist. Just be sure to cube the tofu and add it early in cooking so it absorbs flavors. To store your white chicken chili, let it cool first. Place it in an airtight container. You can keep it in the fridge for up to three days. Make sure to label the container with the date. This helps you track how long it stays fresh. For longer storage, freezing is a great option. Portion the chili into freezer-safe bags or containers. Leave some space at the top, as liquids expand when frozen. You can freeze it for up to three months. When you’re ready to eat, just thaw it in the fridge overnight. When reheating, use the stove for best results. Heat it gently over medium-low heat until it’s warm. Stir it often so it heats evenly. If it seems thick, add a splash of broth or water. You can also reheat it in the microwave. Just use a microwave-safe bowl, cover it loosely, and heat in short bursts. Always check the temperature to ensure it’s safe to eat. Yes, you can use frozen chicken in the crockpot. Just place it at the bottom. The cooking time will be longer. For frozen chicken, cook on high for 4-5 hours or low for 8-9 hours. Check that the chicken reaches 165°F for safety. This method keeps the meat tender and juicy. To add heat to your chili, try a few methods. First, use more chili powder or cumin. You can also add fresh jalapeños or hot sauce. Another option is to stir in diced green chilies. Adjust the spice level to suit your taste. Start with small amounts and taste as you go. White chicken chili pairs well with many sides. Consider serving it with: - Cornbread - Tortilla chips - Fresh avocado slices - A side salad You can also add toppings like shredded cheese, sour cream, or more cilantro. Each option enhances the meal and adds flavor. Enjoy your chili however you like! This blog post covered ingredients, steps, tips, and variations for white chicken chili. You learned the best ways to prepare, cook, garnish, and store your dish. Remember, feel free to adjust spices and ingredients based on your taste. Whether you go for a dairy-free twist or use different proteins, the key is to enjoy the process. With these insights, you'll make a flavorful chili that warms the soul. Happy cooking and enjoy your delicious creation!

Crockpot White Chicken Chili Hearty and Simple Meal

- 4 boneless, skinless chicken breasts - 2 cups button mushrooms, sliced - 1 onion, diced - 4 cloves garlic, minced The main ingredients are key to a tasty casserole. The chicken serves as the protein base. I prefer using boneless, skinless chicken breasts for their tenderness. The mushrooms add a rich, earthy flavor. I always choose button mushrooms for their mild taste. Onions and garlic provide a fragrant aroma, making the dish comforting and warm. - 1 cup chicken broth - 1 cup heavy cream - 1 teaspoon dried thyme - 1 teaspoon dried oregano - 1 cup shredded cheddar cheese - 1 cup cooked rice (white or brown) - 2 tablespoons olive oil - Salt and pepper to taste Seasonings and additions elevate the dish. Chicken broth and heavy cream create a creamy base. I like adding thyme and oregano for a fresh herb taste. The cheese melts beautifully, making the casserole gooey and rich. Cooked rice adds substance and helps soak up the sauce. Olive oil is essential for sautéing the veggies. - Fresh parsley, chopped (for garnish) Garnishing with fresh parsley adds color and brightness. It also gives a fresh flavor that contrasts well with the creamy casserole. I suggest using a generous sprinkle right before serving. This simple addition makes your dish look fancy and inviting. {{ingredient_image_1}} - Preheat your oven to 375°F (190°C). - Gather your chicken breasts and slice the mushrooms. - Dice the onion and mince the garlic. - In a large skillet, heat two tablespoons of olive oil over medium heat. - Add the diced onion and sauté for about 3-4 minutes. - When the onion is soft, add the minced garlic and sliced mushrooms. - Cook for 5-7 minutes until the mushrooms are tender. - Season the chicken breasts with salt, pepper, dried thyme, and oregano on both sides. - Push the cooked mushrooms to one side of the skillet. - Add the seasoned chicken breasts to the other side. - Sear the chicken for 3-4 minutes on each side until golden brown. - Pour in one cup of chicken broth and one cup of heavy cream. - Stir the mixture and let it simmer gently. - Add in one cup of cooked rice and half of the shredded cheddar cheese. - Stir well to combine all the flavors. - Transfer the mixture to a greased casserole dish, spreading it evenly. - Top with the remaining shredded cheese. - Cover the dish with aluminum foil and bake for 20 minutes. - After 20 minutes, remove the foil and bake for another 10-15 minutes. - The cheese should be bubbly and golden brown when done. To get great results, sear the chicken well. Start with a hot skillet. Use olive oil and let it heat up. Add the seasoned chicken breasts and don’t move them for 3-4 minutes. This helps form a nice crust. Flip them and sear the other side. This locks in the juices. When you sauté vegetables, aim for maximum flavor. Start with onions. Cook them until they turn soft and clear. Then add garlic and mushrooms. Keep stirring so they cook evenly. This caramelizes the onions and brings out sweet flavors. To boost the taste, add herbs and spices. Thyme and oregano give a warm flavor. You can also try adding a pinch of paprika or rosemary for a kick. Fresh herbs can also brighten the dish. Using different types of cheese can change the taste. Cheddar is a classic choice, but try gouda or mozzarella for a twist. Mixing cheeses adds depth to the dish. For a beautiful presentation, serve the casserole in individual bowls. Sprinkle fresh parsley on top for color. This adds a nice touch and makes it look fancy. Pair this casserole with a green salad. A simple side of mixed greens works well. You can also serve it with crusty bread for a heartier meal. Enjoy your delicious garlic mushroom chicken casserole! Pro Tips Use Fresh Ingredients: Fresh mushrooms and herbs will enhance the flavor of your casserole, making it more vibrant and aromatic. Customize the Cheese: Feel free to mix different types of cheese, like mozzarella or gouda, for a unique twist on the classic flavor. Make it Ahead: This casserole can be prepared in advance and stored in the refrigerator, making it a perfect dish for meal prep or potlucks. Adjust the Creaminess: For a lighter version, use half-and-half instead of heavy cream, or replace some of the cream with additional chicken broth. {{image_2}} You can change the chicken for other proteins. Try turkey, shrimp, or tofu. This makes the dish new and fun. If you need it vegan, use mushrooms and a plant-based cream. For gluten-free, swap rice with quinoa or gluten-free pasta. You can add more veggies to your casserole. Spinach, bell peppers, or zucchini all work well. They add color and nutrition. Adjust spices too. More garlic gives it a kick, while fresh herbs can add brightness. Experiment with what you love! If you want to use a slow cooker, brown the chicken first. Then add all other ingredients. Cook on low for 6-8 hours. For an Instant Pot, sauté the onions and garlic. Then, add the rest of the ingredients. Cook for 10 minutes on high pressure. Both methods make a tasty casserole! To keep your garlic mushroom chicken casserole fresh, follow these tips: - Refrigerate promptly: Store leftovers in the fridge within two hours of cooking. - Use airtight containers: Glass or plastic containers with tight lids work best. - Label your containers: Write the date so you know when to eat them. When it's time to enjoy your leftovers, reheating is key: - Oven method: Preheat the oven to 350°F (175°C). Cover the casserole with foil and bake for 20 minutes. - Microwave method: Use a microwave-safe dish. Heat in short bursts, stirring in between, until warm. - Maintain texture: Add a splash of broth or cream when reheating to keep it moist. Want to save some for later? Freezing is a great option: - Cool before freezing: Let the casserole cool completely before wrapping it. - Wrap securely: Use plastic wrap, then aluminum foil to prevent freezer burn. - Thawing: For best results, thaw in the fridge overnight before reheating. - Reheat from frozen: If you’re in a hurry, bake it directly from the freezer. Just add extra time to the cooking. It takes about 50 minutes to cook this casserole. This includes 15 minutes of prep and 35 minutes of baking. You will need to bake it for 20 minutes covered and about 10-15 minutes uncovered. This ensures the cheese gets nice and golden. Yes, you can use frozen chicken. Just make sure to thaw it first. Cooking frozen chicken directly may lead to uneven cooking. Thawing helps the chicken cook through evenly and stay juicy. You can use many different cheeses. Some good options are mozzarella, gouda, or even pepper jack. Each cheese will bring a unique flavor. Feel free to mix or match based on your tastes. Absolutely! This casserole is great for meal prep. You can make it ahead and store it in the fridge. Just heat it up when you’re ready to eat. It holds up well, so you can enjoy it throughout the week. Yes, you can make this recipe ahead of time. You can assemble it and store it in the fridge before baking. Just cover it tightly with foil. When ready, bake it without thawing. Adjust the cooking time if needed. This article covered how to make a tasty garlic mushroom chicken casserole. We explored the key ingredients, from chicken to creamy broth. I shared step-by-step instructions for prepping and baking. You learned tips for flavor, serving ideas, and variations to fit different diets. In the end, this dish is adaptable and delicious. You can easily store leftovers and enjoy them later. Now, get cooking and impress your family with this comforting meal!

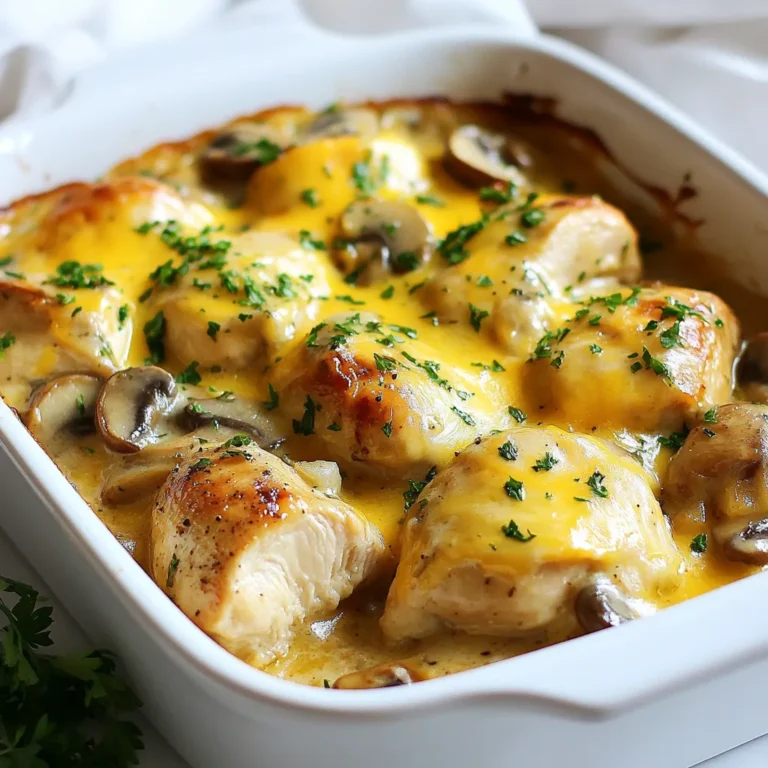
Garlic Mushroom Chicken Casserole Savory and Satisfying

- 2 tablespoons olive oil - 1 onion, chopped - 2 carrots, diced - 2 celery stalks, diced - 3 cloves garlic, minced - 1 teaspoon ground cumin - 1 teaspoon smoked paprika - 1/2 teaspoon turmeric - 1 pound boneless, skinless chicken thighs, cut into bite-sized pieces - 1 cup dried green or brown lentils, rinsed - 6 cups chicken broth - 1 can (14 ounces) diced tomatoes (with juices) - 2 cups fresh spinach or kale, chopped - Salt and pepper to taste - Fresh lemon juice (optional, for garnish) - Fresh parsley or cilantro, chopped (for garnish) To make this soup, gather these ingredients. Each one adds flavor and nutrition. Olive oil starts the cooking. Onion, carrots, and celery add sweetness and crunch. Garlic brings a strong, aromatic taste. Spices like cumin and paprika give warmth and depth. Turmeric adds a nice color and health benefits. Chicken thighs are tender and juicy. Lentils are hearty and fill you up. Chicken broth adds a rich base, while diced tomatoes add acidity. Spinach or kale brings freshness and nutrients. Finally, season with salt, pepper, and lemon juice for a bright finish. {{ingredient_image_1}} - Heat 2 tablespoons of olive oil in a large pot over medium heat. - Add 1 chopped onion, 2 diced carrots, and 2 diced celery stalks. Sauté them for 5-7 minutes until soft. - Stir in 3 minced garlic cloves, 1 teaspoon ground cumin, 1 teaspoon smoked paprika, and 1/2 teaspoon turmeric. Cook for 1 more minute until you smell the spices. - Add 1 pound of boneless, skinless chicken thighs cut into bite-sized pieces. Brown the chicken on all sides for about 5 minutes. - Now, stir in 1 cup of rinsed green or brown lentils, 6 cups of chicken broth, and 1 can of diced tomatoes with their juices. - Bring this mixture to a boil, then reduce the heat to low. Cover the pot and simmer for 25-30 minutes until the lentils are tender. - After the lentils are cooked, add 2 cups of chopped fresh spinach or kale. Cook for 5 more minutes until the greens are wilted. - Season the soup with salt and pepper to taste. Serve hot, drizzled with fresh lemon juice and topped with chopped parsley or cilantro for extra flavor. To make your chicken lentil soup stand out, use spices and herbs wisely. I love to add ground cumin, smoked paprika, and turmeric. They bring warmth and depth to the dish. Fresh herbs like parsley or cilantro add a bright touch. Always season your soup well with salt and pepper. Taste as you cook. This way, you can adjust flavors to your liking. Cooking lentils can be tricky. Make sure to rinse them well before adding to the pot. This helps remove any dust or debris. Keep an eye on them while they cook. Overcooked lentils can become mushy, ruining the soup's texture. Cook your veggies just until tender. This keeps them flavorful and colorful in the soup. Pair your soup with crusty bread or a simple salad. This adds crunch and freshness. If you have leftovers, store them in an airtight container in the fridge. The soup will taste even better the next day! You can also freeze it for later. Just make sure to leave some space in the container for expansion. Pro Tips Use Fresh Herbs: Adding fresh parsley or cilantro at the end enhances the flavor profile and freshness of the soup. Customize Your Veggies: Feel free to add other vegetables like bell peppers or zucchini for extra nutrition and variety. Make It Ahead: This soup tastes even better the next day. Make a big batch and store it for easy meals throughout the week. Spice It Up: If you like a little heat, consider adding a pinch of red pepper flakes or a dash of hot sauce for some extra kick. {{image_2}} You can switch up the lentils in this soup. Try red, yellow, or black lentils. Each type brings a unique texture and taste. Green lentils hold their shape well, while red lentils cook down and become creamy. If you want to substitute chicken, there are many options. You can use turkey for a lighter flavor. If you prefer plant-based protein, try chickpeas or tofu. Both add great texture and soak up the soup's flavors. To make this soup vegetarian or vegan, remove the chicken and use vegetable broth. Add more lentils or beans to keep it filling. You can also include more veggies like mushrooms or zucchini for texture. For gluten-free options, this recipe is already gluten-free. Just ensure your broth is gluten-free as well. You can serve it with gluten-free bread or crackers on the side. You can find many international twists on chicken lentil soup. In India, add coconut milk and curry powder for a creamy soup. For a Middle Eastern flair, use spices like coriander and cinnamon. If you enjoy spice, add chili powder or diced jalapeños. These will give the soup a nice kick. For a creamy version, stir in some cream or yogurt before serving. This adds richness and a smooth finish. To keep your chicken lentil soup fresh, follow these tips: - Refrigerate: Cool the soup to room temperature. Store it in an airtight container. It lasts in the fridge for about 3 to 4 days. - Label: Write the date on the container. This helps you track how long it’s been stored. - Divide: If you have a large batch, divide it into smaller portions. This makes it easy to grab one when needed. If you want to save it for longer, you can freeze it: - Freezing: Pour the soup into freezer-safe bags or containers. Leave some space at the top for expansion. - Freeze in Portions: This allows you to thaw only what you need. The soup can last in the freezer for up to 3 months. When it’s time to enjoy your soup again, here’s how to reheat it safely: - Stovetop Method: Pour the soup into a pot. Heat it over medium heat, stirring often. This helps it heat evenly. - Microwave Method: Use a microwave-safe bowl. Heat it in short intervals, stirring in between. This prevents hot spots. To maintain the flavor and texture: - Add Liquid: If the soup seems thick, add a splash of broth or water while reheating. - Taste and Adjust: Before serving, taste the soup. You may need to add a bit of salt or pepper. By following these storage and reheating tips, you can enjoy your chicken lentil soup at its best! Chicken lentil soup lasts about 3 to 4 days in the fridge. Be sure to store it in an airtight container. This keeps the soup fresh and tasty. If you want to enjoy it later, consider freezing it. Yes, you can use a slow cooker for chicken lentil soup. Just add all the ingredients to the slow cooker. Cook on low for 6-8 hours or on high for 3-4 hours. This method makes the flavors blend well, giving you a rich taste. You can use tofu or chickpeas as a substitute for chicken. Both options add protein and work well with lentils. For a meat-free option, try shredded jackfruit. This keeps the soup hearty and delicious. Yes, you can use canned lentils instead of dried ones. Just rinse and drain them first. Add them to the soup in the last 10 minutes of cooking. This way, they heat through without getting mushy. Yes, this soup is freezer-friendly! You can freeze it for up to 3 months. Just let it cool completely before packing it into freezer-safe containers. When you're ready to eat, thaw it in the fridge overnight and reheat it on the stove. In this blog post, I shared a simple recipe for chicken lentil soup. You learned about the key ingredients and their health benefits. I provided easy preparation and cooking steps to make this meal tasty and nutritious. You also found tips to enhance flavor and avoid common mistakes. Remember, you can customize this soup with different ingredients. It’s versatile and keeps well for future meals. Enjoy this heartwarming dish, knowing it’s good for you. Dive in and explore the benefits it brings to your table.

Chicken Lentil Soup Flavorful and Nourishing Recipe

- 2 cups fresh pineapple, diced - 1 cup coconut milk (full-fat for creaminess) - 1/2 cup sweetened shredded coconut - 1/4 cup honey or agave syrup (adjust based on sweetness of pineapple) - Juice of 1 lime - Pinch of salt Using fresh pineapple is key. It gives a bright, sweet flavor that shines. The juice enhances the taste. When choosing coconut milk, go for full-fat for a creamier bite. Light coconut milk may lose richness. Adjust sweetness to your liking. If your pineapple is very sweet, use less honey or agave. If it’s tart, add more sweetener. Always taste your mix before pouring it into molds. This step ensures your pops are just right. Remember, the right balance makes these popsicles a refreshing treat. {{ingredient_image_1}} - Blending the base mixture Start by placing the diced pineapple in a blender. Add the coconut milk, honey or agave syrup, lime juice, and a pinch of salt. Blend until the mixture is smooth and creamy. This blend creates a rich flavor. - Adjusting sweetness to taste After blending, taste the mixture. If it’s not sweet enough, add a bit more honey or agave syrup. Blend again briefly to mix in the sweetness. Remember, ripe pineapples can be sweet, so adjust carefully. - Incorporating shredded coconut Once your base is ready, add the sweetened shredded coconut. Stir gently with a spoon. You want to keep the coconut pieces whole for texture. This adds a nice chew to your popsicles. - Pouring into molds Carefully pour the mixture into your popsicle molds. Fill them about three-quarters full. This gives space for the popsicles to expand as they freeze. - Inserting popsicle sticks Once filled, place the popsicle sticks in the center of each mold. Make sure they stand up straight. This allows for easy holding when frozen. - Freezing duration for optimal texture Place the molds in the freezer. Let them freeze for at least 4 to 6 hours. This ensures they are solid and ready to enjoy on a hot day. - Running warm water technique To remove the popsicles, run warm water over the outside of the molds for a few seconds. This helps loosen the popsicles without melting them. - Best methods to avoid breakage Gently pull the popsicles out of the molds. If they resist, run the warm water a bit longer. Be careful to avoid breaking the popsicles during this step. Enjoy your refreshing treat! Creaminess is key for pineapple coconut popsicles. Use full-fat coconut milk for the best results. This milk gives the popsicles a rich, smooth texture. When blending, keep these tips in mind: - Blend Well: Make sure to blend the ingredients until smooth. This helps mix everything perfectly. - Check for Clumps: If you see any bits or clumps, blend again. You want a creamy finish. To make your popsicles even tastier, try adding other fruits. For example, mango or banana can add a fun twist. You can also try herbs and spices. A little mint or ginger can give a nice kick. Here are some ideas: - Mix Fruits: Blend in some ripe mango or strawberries for added flavor. - Herbs and Spices: Add a pinch of cinnamon or fresh mint for a unique taste. How you serve these popsicles can make them even more fun. Here are some creative ideas: - Presentation: Place the popsicles on a wooden board. Add fresh pineapple slices and a sprinkle of shredded coconut for color. - Drink Pairing: Serve with a refreshing coconut water or a tropical juice. This will enhance the summer vibe. Pro Tips Use Ripe Pineapple: Ensure your pineapple is perfectly ripe for the sweetest flavor. Look for a golden color and a fragrant smell. Customize the Sweetness: Adjust the amount of honey or agave syrup based on the natural sweetness of your pineapple to achieve your desired flavor. Experiment with Flavors: Feel free to add other fruits like mango or strawberries to the mixture for a fun twist on the classic recipe. Storage Tips: Store leftover popsicles in an airtight container in the freezer to prevent freezer burn and maintain their delicious taste. {{image_2}} You can use maple syrup or stevia instead of honey. Maple syrup adds a warm flavor. Stevia is much sweeter, so use less. Each sweetener changes the taste a bit. Experiment to find your favorite. For those avoiding dairy, use coconut alternatives. Almond milk or oat milk work well too. They add a different texture. You can blend them with pineapple for a creamy treat. To make these popsicles even better, try adding mango or passion fruit. These fruits bring a new level of sweetness. You can layer flavors by blending different fruits. This creates a fun twist to your popsicles. Enjoy mixing and matching! - Freeze popsicles in airtight containers or freezer bags. - Keep them at the back of the freezer for the best chill. - To avoid freezer burn, ensure no air is in your storage. - Don’t leave popsicles in the freezer for too long. - You can store popsicles for up to 3 months. - If they develop ice crystals, it's a sign of spoilage. - Watch for off smells or a change in taste as well. - To thaw, run warm water over the outside of the mold. - This helps loosen the popsicle without sogginess. - Avoid leaving them out at room temperature too long. - Enjoy them as soon as they are easy to remove. It takes about 4 to 6 hours for these popsicles to freeze completely. I recommend leaving them in the freezer overnight for best results. This way, they become solid and perfect for a hot day. Yes, you can use canned pineapple. Canned pineapple offers convenience and is often sweeter. However, fresh pineapple has a better texture and flavor. Be sure to check the label for added sugars in canned versions. If your popsicles are stuck, run warm water over the outside of the molds. This helps loosen the popsicles. Be gentle when pulling them out to avoid breaking. If they still won’t budge, let them sit at room temperature for a few minutes. You can make these popsicles without added sweetener. Use very ripe pineapple for natural sweetness. Adding a squeeze of lime can also enhance the flavor without sugar. Taste the mixture to ensure it still has a good balance. You can make delicious pineapple coconut popsicles using simple, fresh ingredients. We discussed how to blend the base, adjust sweetness, and achieve a great texture. I shared tips for creative flavor pairings and how to store popsicles for the best results. Remember, you can customize these treats to fit your taste. Enjoy experimenting with fruits and sweeteners to find your perfect blend. These popsicles are easy, fun, and a tasty way to cool off!

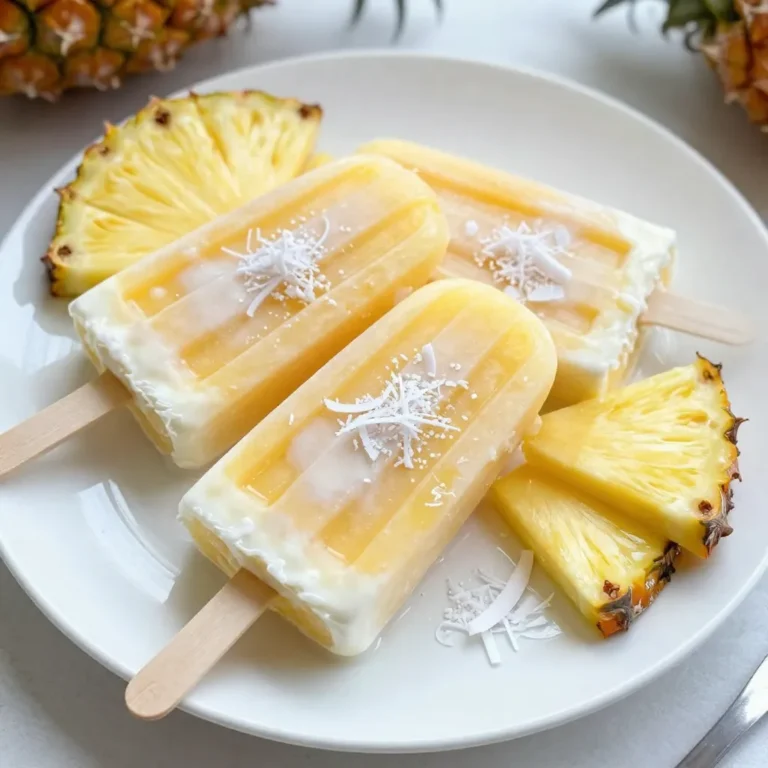
Pineapple Coconut Popsicles Refreshing Summer Treat

- 1 cup rolled oats - 1 cup unsweetened almond milk (or milk of choice) - 1 ripe peach, diced (plus extra for topping) - 1 tablespoon chia seeds - 1 tablespoon maple syrup (or honey) - 1/2 teaspoon cinnamon - 1/4 teaspoon vanilla extract - A pinch of salt The main ingredients for peach pie overnight oats create a creamy and sweet dish. Rolled oats serve as the base. They soak up the almond milk and become soft. I like unsweetened almond milk, but any milk works fine. The diced peach brings a fresh, fruity taste. It also adds nice texture. Chia seeds are great for thickening and add healthy omega-3s. Maple syrup or honey sweetens the oats naturally. Cinnamon and vanilla extract give a warm flavor. Lastly, a pinch of salt enhances all these tastes. - Granola - Chopped nuts - Shredded coconut Toppings can take your overnight oats to the next level. Granola adds a crunchy bite. Chopped nuts, like almonds or walnuts, provide protein and texture. Shredded coconut gives a tropical flair. Feel free to mix and match your favorite toppings! They make each bite special and fun. {{ingredient_image_1}} - Mix the base ingredients In a medium bowl or jar, combine 1 cup of rolled oats, 1 cup of unsweetened almond milk, 1 tablespoon of chia seeds, 1 tablespoon of maple syrup, 1/2 teaspoon of cinnamon, 1/4 teaspoon of vanilla extract, and a pinch of salt. Stir well until all ingredients blend. - Incorporate the diced peach Take 1 ripe peach and dice it into small pieces. Gently fold the diced peach into the mixture. Make sure you mix it well so every bite has peachy goodness. - Refrigerate the mixture Cover the bowl or jar with a lid or plastic wrap. Place it in the refrigerator overnight. This allows the oats to soak up the milk and flavors. You can also let it chill for at least 4 hours if you're short on time. - Check the consistency and adjust with almond milk In the morning, take the oats out of the fridge. Give it a good stir. If the oats seem too thick, add a splash of almond milk to loosen them up. - Serve and add toppings Spoon the overnight oats into bowls. Top with extra slices of peach and your choice of granola, chopped nuts, or shredded coconut. This adds great texture and flavor to your meal. Enjoy your delicious and easy peach pie overnight oats! To make your peach pie overnight oats just right, you can change the sweetness. If you want it sweeter, add more maple syrup or honey. For a less sweet flavor, use less. This lets you enjoy it just how you like. You can also change how thick your oats are by adding more or less milk. If you like it thicker, use less milk. If you want it runny, add a splash more. This helps you find the perfect texture. Store your overnight oats in a sealed jar or container. This keeps them fresh and tasty. You can make a few jars at once for quick breakfasts. Just make sure to leave some room at the top. You can keep them in the fridge for up to five days. This makes meal prep easy and saves time during busy mornings. Pro Tips Use Fresh Peaches: For the best flavor, opt for ripe, in-season peaches. They add a natural sweetness and vibrant flavor to your overnight oats. Chia Seed Benefits: Chia seeds not only help to thicken the oats but also provide a good source of omega-3 fatty acids and fiber, making your breakfast more nutritious. Make Ahead: Prepare several jars of overnight oats at once for a quick and easy breakfast option throughout the week. Just switch up the fruit and toppings for variety! Customize the Sweetness: Adjust the amount of maple syrup or honey based on your sweetness preference. You can also omit it for a sugar-free version. {{image_2}} You can change the taste of your Peach Pie Overnight Oats in fun ways. - Adding spices: A dash of nutmeg or ginger can give your oats a warm kick. Nutmeg adds a sweet note, while ginger brings a fresh zing. Just a pinch goes a long way! - Using different fruits: While peaches are great, you can swap in other fruits. Try fresh strawberries, blueberries, or even ripe bananas. Each fruit brings its own unique flavor and texture. If you need to make your oats fit your diet, here are some easy swaps. - Dairy-free alternatives: You can use any plant-based milk. Almond milk works well, but oat or coconut milk can be tasty too. Choose what you like best! - Gluten-free options: Make sure to use certified gluten-free oats. This way, you can enjoy your oats without worry. Always check labels for safety! Experimenting with these ideas helps you create a bowl of oats just for you. To keep your peach pie overnight oats fresh, use an airtight container. Glass jars work great, as they seal well and let you see the oats. You can also use plastic containers if you prefer. Just make sure the lid fits tightly. Store them in the fridge for up to 4 days. If you want to freeze them, use freezer-safe containers. Leave some space at the top, as the oats will expand when frozen. They can last up to 3 months in the freezer. Thaw them in the fridge overnight before eating. If you like warm oats, you can reheat them. Pour the oats into a bowl and microwave for about 30 to 60 seconds. Stir and check the temperature. If they are too thick, add a splash of almond milk to loosen them up. For serving, this recipe makes two portions. You can divide the oats into two bowls. Top each bowl with extra peach slices and your choice of granola, nuts, or coconut. Enjoy your tasty and healthy breakfast! Yes, you can use quick oats. They will soak up liquid faster. This means your oats might be softer. But the flavor will still be great! Just watch the soaking time. Aim for about 2-3 hours instead of overnight. Overnight oats last for about 3-5 days in the fridge. Store them in a sealed jar or container. This keeps them fresh and tasty. Just remember to add your toppings before serving. This helps keep them crunchy. Absolutely! To make it vegan, use almond milk or any plant-based milk. Swap honey for maple syrup. All other ingredients are already vegan-friendly. This way, everyone can enjoy this delicious breakfast. Many fruits go well with peach pie overnight oats. Try strawberries, blueberries, or raspberries. Apples or bananas also add great flavor. Mix and match to find your favorite combo. This keeps breakfast fun and tasty! Peach pie overnight oats are simple and tasty. We learned the best ingredients, how to prepare them, and tips for storage. You can adjust sweetness and try different fruits too. Use this recipe to boost your mornings. Enjoy a delicious start each day with your own peach pie overnight oats!

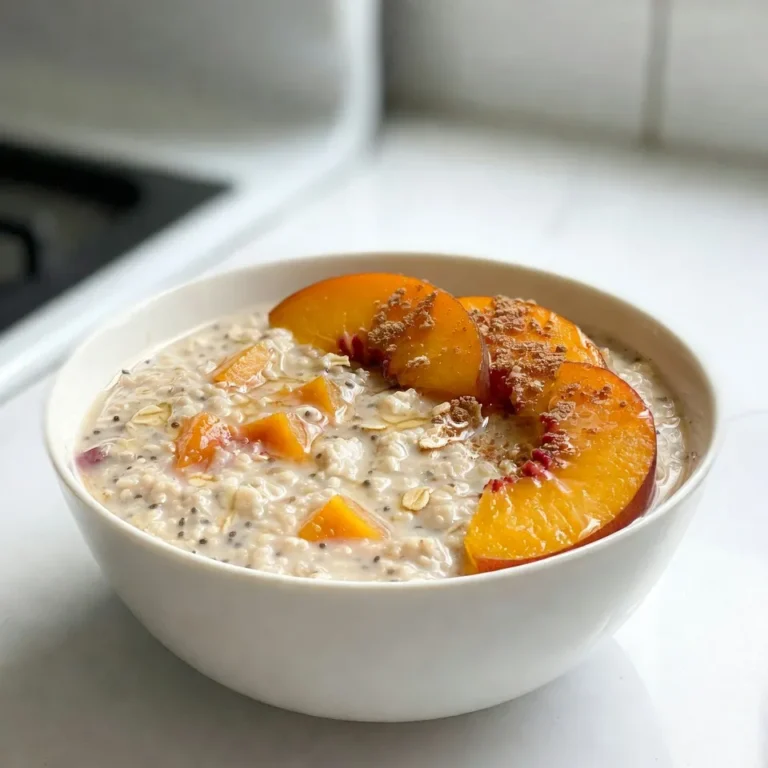
Peach Pie Overnight Oats Easy and Tasty Recipe

For BBQ Chicken Coleslaw Wraps, gather the following: - 2 cups shredded cooked chicken - 1 cup BBQ sauce (your favorite kind) - 2 cups coleslaw mix (cabbage and carrots) - ½ cup cilantro, chopped - 1 tablespoon apple cider vinegar - 1 teaspoon sugar - Salt and pepper to taste - 4 large flour tortillas - 1 avocado, sliced - ½ cup pickled jalapeños (optional) You can easily swap out some ingredients. Here are a few ideas: - Shredded Chicken: Use rotisserie chicken or grilled turkey. - BBQ Sauce: Try a homemade sauce or use teriyaki sauce for a twist. - Coleslaw Mix: Use shredded broccoli or kale for a different crunch. - Cilantro: If you dislike cilantro, try parsley or green onions. - Flour Tortillas: Corn tortillas or lettuce wraps work well for a lighter option. Choosing the right BBQ sauce can make a big difference. Here are some brands I trust: - Sweet Baby Ray’s: This sauce is sweet and tangy, perfect for chicken. - Stubbs: Great for a smoky flavor with a touch of heat. - Kraft: A classic choice that balances sweetness and spice well. These options will enhance the flavor of your wraps and make your cooking experience enjoyable. {{ingredient_image_1}} To start, take 2 cups of shredded cooked chicken. I prefer using rotisserie chicken for quick prep. In a large bowl, add the chicken. Pour in 1 cup of your favorite BBQ sauce. Mix the chicken and sauce well. You want every piece coated. Set this bowl aside while you prepare the coleslaw. Grab another bowl for the coleslaw. Add 2 cups of coleslaw mix, which includes cabbage and carrots. Next, toss in ½ cup of chopped cilantro. This adds a fresh taste. Now, pour in 1 tablespoon of apple cider vinegar. Add 1 teaspoon of sugar, and season with salt and pepper to taste. Toss everything together until it's well mixed. The slaw should look colorful and inviting. Now it’s time to assemble the wraps. Lay a large flour tortilla flat on a clean surface. Take a generous amount of the BBQ chicken mixture and place it in the center. Make sure it’s not too much or the wrap will spill. Next, add a scoop of the coleslaw mixture on top of the chicken. For extra creaminess, add a few slices of avocado. If you like heat, toss in some pickled jalapeños. Gently fold the sides of the tortilla inward. Then, roll the tortilla from the bottom up tightly. This keeps all the yummy stuff inside. Repeat this process with the remaining tortillas. If you want, you can grill each wrap for 2-3 minutes on each side. This adds a nice crunch. Finally, slice each wrap in half and serve with extra BBQ sauce on the side for dipping. Enjoy! To make the best BBQ Chicken Coleslaw Wraps, choose fresh ingredients. Use cooked chicken that is juicy and tender. Mix the chicken with your favorite BBQ sauce until every piece is coated. This makes sure each bite has great flavor. When making coleslaw, chop the cilantro finely. This way, you get its bright flavor in every bite. Use fresh cabbage and carrots for crunch. Toss the slaw well with vinegar, sugar, salt, and pepper. This adds a nice balance of flavors. Don’t overfill your tortilla. A little goes a long way. Keep the filling centered and fold the sides in neatly. This helps the wrap stay together. If you want a crispy texture, grill the wraps for a few minutes on each side. One common mistake is using dry chicken. Always use juicy, shredded chicken for the best taste. Another mistake is not mixing the coleslaw well. If the dressing doesn’t coat the slaw, it may taste bland. Avoid overloading the tortilla. Too much filling can make it hard to wrap. If you struggle, try smaller amounts. Lastly, don’t forget to season the chicken and slaw. A pinch of salt and pepper can make a big difference. To boost the flavor, add spices to the BBQ sauce. A pinch of smoked paprika or chili powder works well. For a fresh twist, try squeezing lime juice over the slaw. This gives it a zesty kick. For presentation, slice the wraps into halves or quarters. Arrange them on a plate with some extra BBQ sauce for dipping. Garnish with cilantro leaves or avocado slices. This makes your dish look colorful and inviting. Pro Tips Choose the Right BBQ Sauce: Select a BBQ sauce that complements your taste preference, whether it’s sweet, tangy, or spicy, to enhance the overall flavor of the wraps. Prep Ahead: You can prepare the BBQ chicken and coleslaw a day in advance. This saves time and allows the flavors to meld beautifully. Customize Your Fillings: Feel free to add other ingredients such as diced bell peppers or corn to the coleslaw for extra crunch and flavor. Keep It Warm: If serving a crowd, wrap the finished wraps in aluminum foil and place them in a warm oven to keep them warm until ready to serve. {{image_2}} You can make BBQ Chicken Coleslaw Wraps healthier. For a low-carb option, use large lettuce leaves instead of tortillas. Romaine or iceberg works well. If you need a gluten-free wrap, look for gluten-free tortillas. They are soft and easy to use. You can switch up the protein in this recipe. If you like pulled pork, use it instead of chicken. Just mix it with the BBQ sauce. For a plant-based option, try tofu. Press and cube the tofu, then sauté it before adding BBQ sauce. Both options taste great and make the wraps unique. You can adjust the coleslaw to fit your diet. If you want a creamy slaw, add a bit of mayo or Greek yogurt. For a spicy kick, mix in some chopped jalapeños or sriracha. You can also use different veggies, like bell peppers or radishes. This lets you create a slaw that fits your taste. To keep your BBQ chicken coleslaw wraps fresh, store them in an airtight container. This helps keep moisture out. If you have extra BBQ chicken or coleslaw, store those in separate containers. They will last longer this way. Always let your wraps cool down before sealing them tight. This prevents sogginess. When reheating, I recommend using a skillet. Heat the skillet over medium heat. Place the wrap in the skillet and cover it. Heat for about 3-4 minutes on each side. This warms the wrap evenly and keeps it crispy. You can also use a microwave for quick reheating. Just cover the wrap with a damp paper towel. Heat for 30 seconds to 1 minute. Check if it's warm enough before eating. If you want to freeze your wraps, wrap each one in plastic wrap. Then place them in a freezer-safe bag. This keeps them fresh for up to three months. When you are ready to eat, thaw in the fridge overnight. Reheat as mentioned above for the best taste. Avoid freezing the coleslaw separately since it can lose its crunch. Yes, you can make these wraps ahead of time. Prepare the chicken and coleslaw mix first. Store them separately in the fridge for up to two days. When ready to eat, just assemble the wraps. This keeps the tortillas fresh and prevents them from getting soggy. I like using large flour tortillas for these wraps. They are soft and flexible, which makes rolling easy. You can also try whole wheat or spinach tortillas for added flavor and color. If you're gluten-free, use corn tortillas or gluten-free wraps. To make BBQ Chicken Coleslaw Wraps vegan, swap the chicken for shredded jackfruit or tofu. Use vegan BBQ sauce to keep the flavors intact. For the coleslaw, stick with the same ingredients, ensuring the vinegar and sugar are vegan-friendly. This gives you a tasty and plant-based meal. This article covered all you need to know about BBQ Chicken Coleslaw Wraps. You learned about key ingredients, helpful tips, and ways to customize the dish. I shared methods for preparing the chicken and coleslaw, plus storage tips for leftovers. In the end, feel free to experiment with your wrap. Mix flavors, try new proteins, or adapt ingredients to suit your taste. Enjoy creating your unique BBQ wraps!

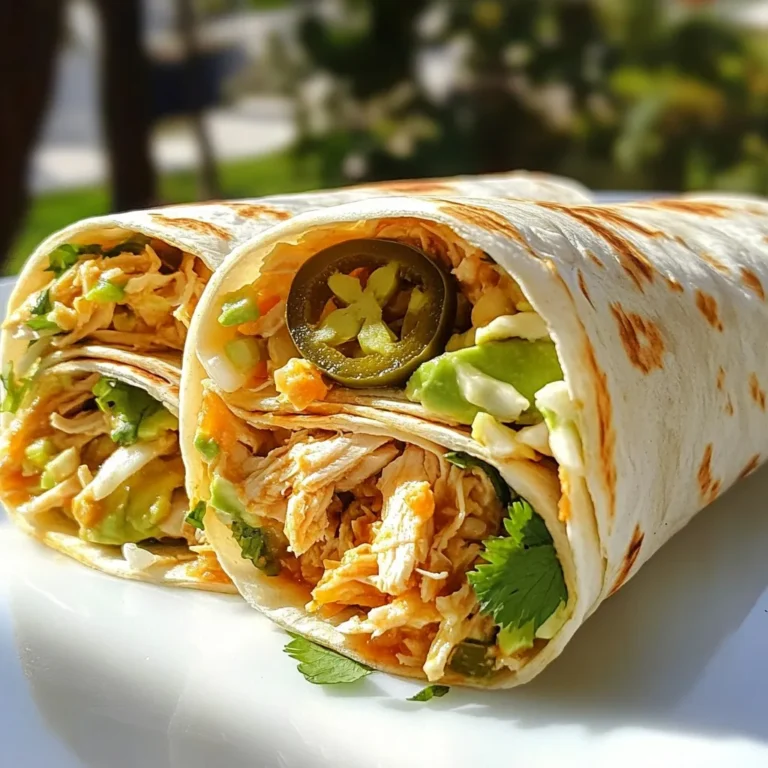
BBQ Chicken Coleslaw Wraps Flavorful and Easy Recipe

- 1 cup ricotta cheese - 1 cup all-purpose flour - 1 cup fresh blueberries - 2 tablespoons sugar - 2 teaspoons baking powder - ½ teaspoon baking soda - Zest of 1 lemon - 1 cup buttermilk (or regular milk with 1 tablespoon lemon juice added) - 2 large eggs - Butter or oil for cooking The main ingredients bring a lovely balance of flavors. Ricotta cheese adds creaminess and moisture. All-purpose flour gives the pancakes structure. Fresh blueberries pop with sweetness and juice, making each bite delightful. In the additional ingredients, sugar adds just the right amount of sweetness. Baking powder and baking soda help the pancakes rise. Lemon zest brightens the flavor, giving it a fresh twist. For cooking essentials, buttermilk or lemon-infused milk keeps the pancakes tender. Eggs add richness and help bind the batter. Butter or oil is key to cooking, ensuring a golden finish. These ingredients work together to make Lemon Blueberry Ricotta Pancakes fluffy and tasty. They create a breakfast treat that feels special but is easy to make. Enjoy the process of mixing and cooking! {{ingredient_image_1}} To start, grab a large mixing bowl. In this bowl, combine 1 cup of ricotta cheese, 1 cup of buttermilk, and 2 large eggs. Whisk these ingredients until they blend smoothly. This mix will give your pancakes a fluffy texture. Next, take another bowl and mix 1 cup of all-purpose flour, 2 tablespoons of sugar, 2 teaspoons of baking powder, ½ teaspoon of baking soda, and ¼ teaspoon of salt. This dry mix adds the right rise and sweetness to your pancakes. Now, it's time to bring the wet and dry mixes together. Gently fold the dry ingredients into the wet mixture. Make sure not to overmix. A few lumps are okay; they keep the pancakes light and airy. Once combined, add the zest of 1 lemon and 1 cup of fresh blueberries. Carefully fold these in so they spread evenly throughout the batter. The lemon and blueberries will add amazing flavor to each bite. Heat a non-stick skillet over medium heat. Add a small amount of butter or oil to the skillet. This will help prevent sticking. Pour ¼ cup of batter into the skillet for each pancake. Cook them until bubbles form on the surface and the edges look set, about 3-4 minutes. This is when the magic happens! When ready, flip the pancakes and cook for another 2-3 minutes until they turn golden brown. Keep repeating this with the rest of the batter. If needed, add more butter or oil to the skillet. Serve these warm with maple syrup, extra blueberries, and a sprinkle of powdered sugar if desired. Enjoy your delicious Lemon Blueberry Ricotta Pancakes! To make fluffy pancakes, avoid overmixing. Mix just until the dry ingredients blend with the wet. This keeps the pancakes light. A lumpy batter is good! Lumps mean air pockets, which help the pancakes rise. You can add spices like cinnamon or nutmeg for extra flavor. A splash of vanilla extract also works well. Adjust the sugar to your taste. If you love sweet, add a bit more sugar. Use a non-stick skillet or griddle for best results. This helps prevent sticking and burning. Keep the heat on medium. Too high heat can cook the outside too fast, leaving the inside raw. Pro Tips Use Fresh Blueberries: Opt for fresh blueberries instead of frozen for the best flavor and texture. They’ll burst beautifully when cooked! Adjust the Thickness: If the batter seems too thick, add a splash more buttermilk to reach your desired consistency for easier pouring. Keep Pancakes Warm: While cooking the pancakes, keep them warm in a low oven (about 200°F) to ensure they’re all served hot at the same time. Experiment with Citrus: For a twist, try adding orange or lime zest along with or instead of the lemon zest for a unique flavor profile. {{image_2}} You can change the fruits in this recipe. Use strawberries, raspberries, or bananas for new tastes. Each fruit adds its own special flavor. You can also play with citrus. Try lime or orange zest instead of lemon. This will give your pancakes a fresh twist. If you want gluten-free pancakes, swap all-purpose flour for almond flour or oat flour. These flours work well and keep the texture nice. For a vegan option, use plant-based ricotta and almond or soy milk. Replace eggs with flaxseed meal or applesauce. Your pancakes will still be fluffy and delicious. Get creative with toppings! You can add yogurt for creaminess, whipped cream for sweetness, or chopped nuts for crunch. For a fun twist, turn your pancakes into dessert. Try adding chocolate chips or a drizzle of chocolate sauce. You can also layer them with fruit or ice cream for a treat that is sure to impress. After enjoying your pancakes, let them cool down. Place them in a single layer on a plate. Cover them with plastic wrap or foil. If you have a lot of pancakes, stack them with parchment paper between each layer. This keeps them from sticking together. Store them in the fridge for up to three days. To freeze pancakes, first, make sure they are cool. Then, place them in a freezer-safe bag or container. Be sure to remove as much air as possible. Label the bag with the date. You can freeze pancakes for up to two months. When you want to eat them, take out the desired amount. Reheat them in a toaster or microwave. For the toaster, use a medium setting. For the microwave, heat for 30 seconds to 1 minute. You want them warm but not too hot. This keeps the flavor fresh. In the fridge, pancakes last about three days. In the freezer, they stay good for about two months. Always check for signs of spoilage before eating. If you see mold or smell something off, throw them away. Fresh pancakes should smell sweet and lemony. Enjoy the taste while they are still good! Yes, you can prepare these pancakes ahead of time. Here are some tips: - Make the batter: You can mix the wet and dry ingredients and store the batter in the fridge for up to 24 hours. Just stir gently before cooking. - Cook and store: Cook the pancakes and let them cool. Stack them with parchment paper between each pancake. - Refrigerate or freeze: Store in an airtight container in the fridge for up to three days or freeze for up to a month. If you don’t have ricotta, try these options: - Cottage cheese: Blend it for a smoother texture. - Cream cheese: Soften it and mix it well. - Mascarpone: This adds a rich, creamy flavor. Each option will give a different taste, so choose based on your preference. To make fluffy pancakes, baking powder and baking soda are key. Here’s how they work: - Baking powder: This helps the pancakes rise when it reacts with moisture and heat. Use two teaspoons for the best results. - Baking soda: This needs an acid, like buttermilk or lemon juice, to activate. It boosts rise and adds a nice flavor. Using both will give you those light, airy pancakes you want! Lemon blueberry ricotta pancakes combine fresh flavors and simple ingredients for a tasty treat. You learned about key ingredients, step-by-step instructions, and how to achieve the best texture. Remember to try different fruits or dietary options to make the recipe your own. Store any leftovers properly so you can enjoy them later. With this guide, you can create pancakes that are not just good but great. Enjoy the process, and happy cooking!

Lemon Blueberry Ricotta Pancakes Fluffy and Tasty Treat

PREV 1 … 61 62 63 … 86 NEXT
spicy fork kitchen

explore

DessertsDinnerAppetizersDrinks

Our Policies

  • Cookie Policy
  • Copyright Policy
  • Disclaimer
  • GDPR Policy
  • Terms Of Use
Back to Top
  • About
  • Contact Us
  • Privacy Policy
© 2026 spicy fork kitchen