FREE DINNER EBOOK! Get your copy!
  • Cookie Policy
  • GDPR Policy
  • Disclaimer
  • Terms Of Use
  • Visit my other site: Fun Cookie Recipes
spicy fork kitchen
  • Home
  • Dinner
  • Desserts
  • Drinks
  • Appetizers
  • Contact
  • About
  • Privacy Policy
  • Home
  • Dinner
  • Desserts
  • Drinks
  • Appetizers
  • Contact
  • About
  • Privacy Policy
  • Cookie Policy
  • GDPR Policy
  • Disclaimer
  • Terms Of Use
Visit my other site: Fun Cookie Recipes

HOME / CATEGORIES /

Latest

For the best butter chicken, gather these key items: - 500g chicken thighs, boneless and skinless, cut into cubes - 1 cup plain yogurt - 2 tablespoons lemon juice - 1 tablespoon ginger-garlic paste - 2 teaspoons garam masala - 1 teaspoon ground cumin - 1 teaspoon turmeric powder - 1 teaspoon red chili powder (adjust to taste) - Salt to taste - 3 tablespoons butter - 1 medium onion, finely chopped - 2 large tomatoes, pureed - 1 tablespoon sugar - 1 cup heavy cream These ingredients bring rich flavor and smooth texture to your dish. The chicken thighs work best here. They stay juicy and tender during cooking. You likely have these staples at home: - Salt - Sugar - Ground cumin - Turmeric powder - Red chili powder These spices add depth and warmth to your butter chicken. They balance the creaminess of the sauce. To make your dish look great, consider these garnishes: - Fresh coriander leaves - Extra cream drizzles Garnishes not only add color but also enhance the flavor. The fresh coriander brings a bright touch to the rich sauce. {{ingredient_image_1}} To start, grab a mixing bowl. Add 1 cup of plain yogurt. Then, squeeze in 2 tablespoons of lemon juice. Next, add 1 tablespoon of ginger-garlic paste. This mix gives the chicken great flavor. Now, sprinkle in 2 teaspoons of garam masala, 1 teaspoon of ground cumin, 1 teaspoon of turmeric powder, and 1 teaspoon of red chili powder. Adjust the chili to your taste. Finally, add salt as needed. Mix it all well. Cut 500g of boneless chicken thighs into cubes. Place the chicken in the marinade. Make sure each piece is coated well. Cover the bowl and put it in the fridge. Let it sit for at least 1 hour, or overnight for the best taste. Heat a large skillet over medium heat. Add 3 tablespoons of butter and let it melt. Once melted, toss in 1 finely chopped medium onion. Sauté the onions until they turn golden brown. This step adds a sweet flavor to the dish. Now, take the marinated chicken from the fridge. Add the chicken to the skillet, along with any extra marinade. Cook it for about 5 to 7 minutes. You want the chicken to brown nicely. Next, stir in 2 pureed large tomatoes and 1 tablespoon of sugar. This combo brings a rich taste. Let it cook for about 10 minutes. Watch for the sauce to thicken and some oil to separate. Now, add the reserved marinade back into the pan. Mix everything well and cook for another 5 minutes. This step deepens the flavors. Then, pour in 1 cup of heavy cream. Stir to blend it in. Let the sauce simmer for another 5 to 10 minutes on low heat. This makes the sauce creamy and smooth. Taste your dish and adjust salt and spice levels if needed. Garnish with fresh coriander leaves before serving. Enjoy your delicious butter chicken! If you want a lighter dish, use coconut milk instead of heavy cream. It adds a nice sweetness. You can also try cashew cream for a rich texture. Blend soaked cashews with water until smooth for this. Both options make the dish creamy without dairy. Marinating the chicken is key for great taste. I recommend letting it sit for at least one hour. For deeper flavors, marinate the chicken overnight. The yogurt softens the meat and adds a tangy note. Make sure every piece is well coated in the marinade. Spice level can change a lot in butter chicken. Start with one teaspoon of red chili powder if you prefer mild. You can add more if you like heat. Always taste the sauce before serving. This way, you can adjust the flavors to your liking. Pro Tips Marinate Longer: For deeper flavor, marinate the chicken overnight. This allows the spices to infuse into the meat, resulting in a richer taste. Control the Heat: Adjust the amount of red chili powder based on your heat preference. Start with less if you're unsure, as you can always add more later. Use Ghee for Richness: If available, substitute butter with ghee for an authentic Indian flavor. Ghee adds a nuttiness that complements the spices beautifully. Perfect Creaminess: To achieve a velvety sauce, add the cream slowly while stirring continuously. This prevents the cream from curdling and ensures a smooth texture. {{image_2}} If you want a vegetarian option, use paneer or tofu. Marinate the paneer or tofu like you would the chicken. Cook it the same way in the pan. You can also use chickpeas for a protein-packed dish. The flavors will still shine through in the sauce. Different regions in India add their own twist to butter chicken. For example, in Delhi, people often make it richer by using more cream. In Punjab, you might find it with a smoky flavor from cooking over open flames. These regional styles offer a fun way to explore different tastes. To make a lighter version, swap heavy cream for coconut milk. It gives a nice flavor without all the calories. You can also use skinless chicken breasts instead of thighs. Reducing the butter can also help make it healthier. Enjoy the same great taste while being mindful of your health. To store leftover butter chicken, let it cool to room temperature. Then, place it in an airtight container. This keeps the dish fresh. You can store it in the fridge for up to three days. Make sure to label your container with the date. This way, you know when to eat it. When you're ready to eat, take out your butter chicken. You can reheat it in the microwave or on the stove. If using a microwave, heat it for 1-2 minutes. Stir it halfway through to warm it evenly. On the stove, heat it on low. Stir often to prevent burning. Add a splash of water or cream if it seems too thick. You can freeze butter chicken for longer storage. First, let it cool completely. Then, transfer it to a freezer-safe container. It can last up to three months in the freezer. When you're ready to eat, thaw it overnight in the fridge. Reheat as mentioned above. Enjoy the rich flavors even after freezing! Butter chicken is a rich and creamy dish from India. It features tender chicken in a spiced tomato sauce. The sauce is buttery and smooth, with a hint of sweetness. It’s known for its warm spices like garam masala and cumin. This dish is a favorite in many homes and restaurants. Yes, you can use chicken breasts. They will work well in this recipe. Breasts cook faster and are leaner than thighs. However, thighs have more flavor and stay juicy. If you prefer breasts, be careful not to overcook them. To make butter chicken less spicy, you can reduce or skip the red chili powder. You can also add more cream or yogurt to cool it down. Adding sugar can help balance the heat too. Taste as you go to find the right level for you. Butter chicken pairs well with warm naan or fluffy basmati rice. You can also serve it with a fresh salad or raita. Raita is a yogurt side that cools the palate. This makes a great meal even better! Butter chicken is a tasty dish with rich flavors. You learned about key ingredients, easy steps, and helpful tips. We also explored fun variations and storage ideas. Always remember to adjust spices to your liking. Feel free to try vegetarian options for a twist. Whether it’s your first time or you’re an old pro, butter chicken is sure to please. Enjoy your cooking journey!

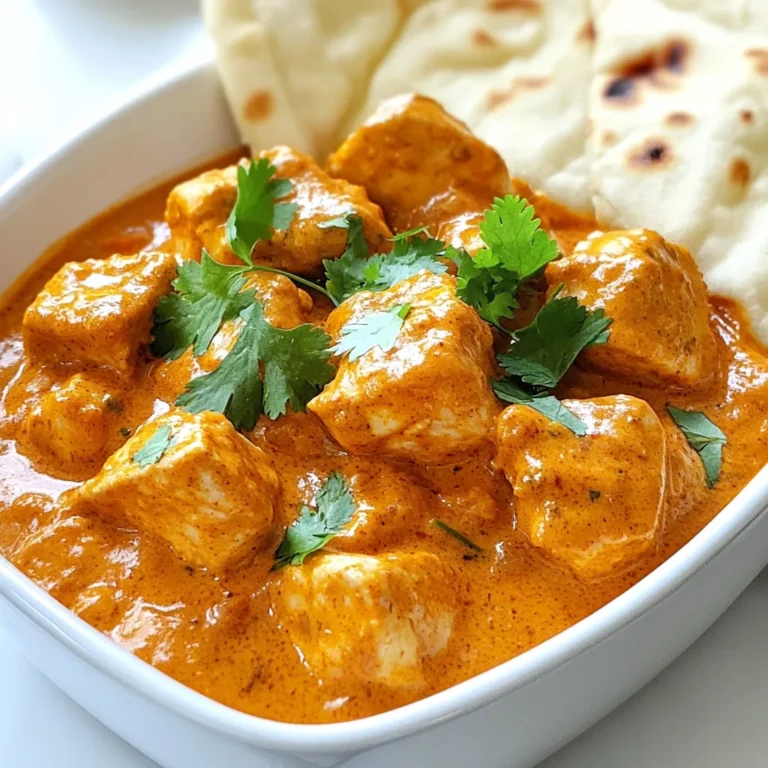
Indian Butter Chicken Tasty and Simple Recipe Guide

- 1 wheel of Brie cheese (approximately 8 oz) - 1/4 cup fig jam - 1/4 cup pecans, roughly chopped - 1 package of puff pastry (thawed if frozen) - 1 tablespoon honey - 1 tablespoon olive oil - Fresh thyme leaves, for garnish - Salt and pepper to taste - Crackers and sliced baguette - Extra toppings and accompaniments For this baked Brie, I love using a creamy wheel of Brie cheese. It melts beautifully and adds richness. Fig jam gives a sweet touch, which pairs well with the cheese. I also add chopped pecans for a nice crunch and nutty flavor. You will need puff pastry to wrap the Brie. This pastry gets crispy and golden when baked. The honey and olive oil help enhance the flavors and make the dish shine. Fresh thyme leaves make a lovely garnish that adds a pop of color. When serving, I suggest offering crackers and sliced baguette. These are perfect for scooping up the warm, gooey cheese. You can add extra toppings like honey or even more chopped nuts for added flavor. Enjoy this delightful dish at your next gathering! {{ingredient_image_1}} 1. First, preheat your oven to 375°F (190°C). This ensures even cooking. 2. Next, lightly flour your workspace. Roll out the puff pastry to about 1/8 inch thick. 3. Gently place the Brie cheese in the center of the pastry. 1. Spread the fig jam evenly over the top of the Brie. This adds a sweet and fruity taste. 2. In a small bowl, mix the roughly chopped pecans with honey, olive oil, and a pinch of salt and pepper. Spoon this mixture on top of the fig jam. 3. Now, fold the edges of the puff pastry over the Brie. Make sure to completely encase it. Trim any excess pastry, then press the seams to seal it tight. 1. Place the wrapped Brie on a parchment-lined baking sheet. 2. Brush the top with olive oil or an egg wash. This helps it get a golden-brown finish. 3. Bake for 25-30 minutes. Look for a golden and crispy crust as a sign it’s done. 4. After baking, let it cool for a few minutes. Garnish with fresh thyme leaves before serving. This step-by-step guide ensures that your Baked Brie with Fig Jam & Pecans turns out delicious every time. Enjoy your creation! To ensure your baked Brie shines, focus on the pastry. A crispy pastry makes the dish stand out. Make sure your puff pastry is rolled to about 1/8 inch thick. This thickness helps it bake evenly and get that perfect crunch. You can mix up your flavors by using different jams or nuts. Raspberry or apricot jam adds a fun twist. Try walnuts or almonds instead of pecans for new tastes. Adding herbs like rosemary or spices like cinnamon can elevate your dish. These extra flavors make each bite exciting and unique. For an elegant look, arrange the dish on a wooden board. Surround the baked Brie with crackers and sliced baguette. This adds color and texture. Drizzle some honey on top for a sweet touch. Pair it with a nice white wine or sparkling cider for a delightful experience. Pro Tips Choose the Right Brie: Opt for a high-quality Brie cheese for the best flavor and texture. Look for one that is creamy and has a slight aroma. Customize the Jam: Feel free to experiment with different types of jam, such as apricot or raspberry, to create a unique flavor profile that suits your taste. Make Ahead: You can prepare the wrapped Brie a few hours in advance. Just keep it in the refrigerator until you're ready to bake it for a quick and easy appetizer. Serve Warm: For the best experience, serve the baked Brie warm. The gooey cheese paired with the sweet jam and crunchy pecans is irresistible! {{image_2}} If you want to mix it up, try different cheeses. Gouda offers a rich, creamy taste. Cheddar adds a sharp twist that pairs well with sweet toppings. Other soft cheeses, like camembert, can also work well. Each cheese brings its own unique flavor to the dish. You can play with flavors by adding various fruits or jams. Try apricot or raspberry jam for a different taste. Fresh fruits like pears or apples can also enhance the dish. For a nutty crunch, consider toppings like walnuts or almonds. Each of these options adds a unique touch and keeps things exciting. If you're looking for gluten-free options, use gluten-free puff pastry. This keeps the dish delicious for everyone. For vegan alternatives, try using a plant-based cheese. You can find vegan puff pastry too. These swaps let you enjoy baked brie while meeting dietary needs. To store leftover baked Brie, let it cool first. Wrap it tightly in plastic wrap or foil. Place it in the fridge. This keeps it fresh and tasty. Baked Brie can last about 3 days in the refrigerator. Beyond that, it may lose flavor and texture. When reheating baked Brie, do it gently. Preheat your oven to 350°F (175°C). Place the wrapped Brie on a baking sheet. Heat it for about 10 to 15 minutes. This warms it up without making the pastry soggy. You want that crisp shell to stay intact. You can freeze baked Brie, but it changes a bit. The texture may not be as good after thawing. To freeze it, wrap it tightly in plastic wrap, then in foil. Label the package with the date. It can last for up to 2 months in the freezer. To defrost, move it to the fridge for several hours or overnight. After thawing, reheat it gently in the oven. This way, you keep some of that delicious flavor and texture. How do I know when baked Brie is done? You can tell baked Brie is done when the pastry turns golden brown. The cheese inside should be soft and gooey. To check, gently press the top. If it feels soft, it's ready to enjoy! Can I prepare this dish ahead of time? Yes, you can prepare it ahead of time! Wrap the Brie in puff pastry and chill it in the fridge. Bake it just before serving. This keeps the pastry fresh and flaky. What drinks pair well with baked Brie? Baked Brie pairs well with white wine, especially Chardonnay. For a non-alcoholic option, try sparkling cider. Both drinks enhance the flavors of the cheese and fig jam. Can I serve baked Brie at room temperature? Yes, you can serve baked Brie at room temperature. However, it tastes best warm. If it cools down, just pop it back in the oven for a few minutes to warm it up. What can I use if I don't have fig jam? If you don't have fig jam, try using apricot or raspberry jam instead. These jams add sweetness and flavor that complements the Brie well. Can I skip the nuts for a nut-free version? Yes, you can skip the nuts if needed. The baked Brie will still taste delicious without them. You might want to add extra jam or herbs to enhance the flavor. Baked Brie with fig jam and pecans is simple yet stunning. You learned about main ingredients, like puff pastry and honey. I guided you through the steps for a perfect bake. Tips for serving and variations can make it your own. Enjoying this dish brings friends and family together. With the right recipes and ideas, you can wow your guests every time. Explore different flavors and storage tips to keep the fun going. I hope you feel inspired to bake your own delicious Brie soon!

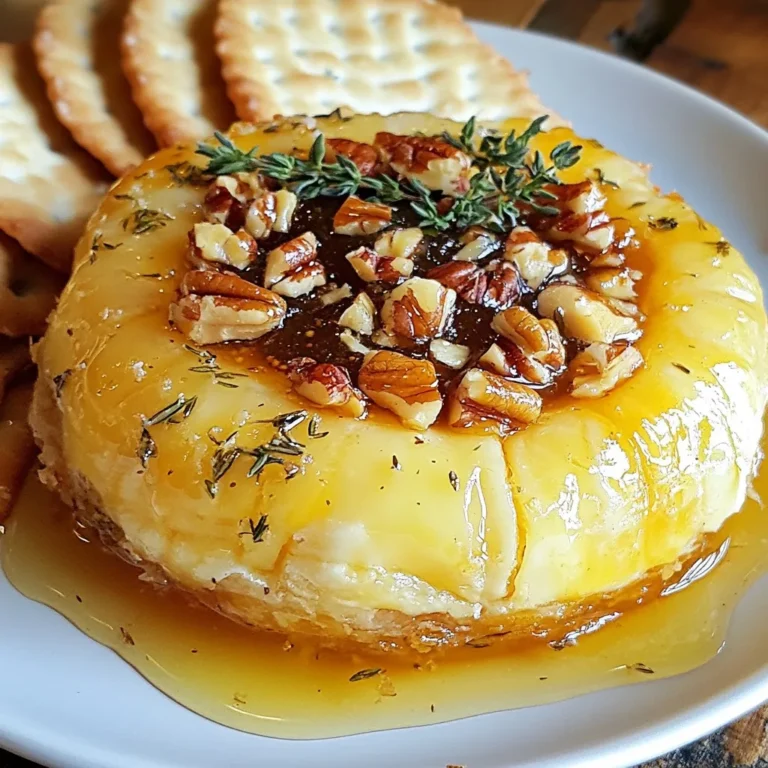
Baked Brie with Fig Jam & Pecans Savory Delight

- Ground chicken - Olive oil - Garlic and ginger - Sriracha sauce - Honey - Soy sauce - Rice vinegar - Bell peppers - Green onions - Lettuce for wraps The main ingredients in Sriracha honey chicken lettuce wraps create a tasty mix. Ground chicken brings protein, while olive oil adds flavor. Garlic and ginger give a nice aroma. The Sriracha sauce adds heat, and honey balances it with sweetness. Soy sauce gives depth, and rice vinegar adds a tangy kick. Bell peppers add crunch, and green onions bring freshness. Finally, lettuce wraps hold all these flavors nicely. - Sesame seeds for garnish - Additional spices or toppings You can use sesame seeds to add a little crunch and look nice. Other spices or toppings can boost flavor too. Feel free to experiment with what you have at home! - Gluten-free options - Vegetarian alternatives If you need gluten-free, use tamari instead of soy sauce. For a vegetarian option, try crumbled tofu or tempeh as a substitute for ground chicken. Both options work well and keep the recipe delicious. {{ingredient_image_1}} Heat one tablespoon of olive oil in a large skillet over medium heat. Add three minced garlic cloves and one inch of grated ginger. Sauté these for about one minute until they smell great. Next, add one pound of ground chicken to the skillet. Use a spatula to break the chicken apart. Cook it until it turns brown and is fully cooked, which takes about five to seven minutes. In a small bowl, mix three tablespoons of Sriracha sauce, two tablespoons of honey, two tablespoons of soy sauce, and one tablespoon of rice vinegar. Whisk these ingredients together until well combined. Pour this sauce over the cooked chicken in the skillet. Stir well to make sure the chicken gets coated. Let it simmer for two to three minutes to allow the flavors to blend. Now, add one cup of finely chopped bell peppers to the skillet. Cook for an additional two to three minutes until the peppers soften a little. Season the mix with salt and pepper to your liking. Remove the skillet from heat and stir in a quarter cup of sliced green onions. To serve, place a good amount of the chicken mixture into each lettuce leaf and fold it like a wrap. Enjoy your tasty dish! To make your Sriracha honey chicken taste amazing, balance the sweetness and spice. The honey adds a nice touch of sweetness, while the Sriracha brings the heat. You can adjust these to suit your taste. If you want it sweeter, add more honey. If you prefer it spicier, add more Sriracha. Cooking time is key for the best texture. You want to brown the ground chicken well. This usually takes about 5 to 7 minutes. Make sure to break the chicken apart as it cooks. This will help it cook evenly and get a nice texture. When serving, arrange the lettuce wraps on a platter. This makes a great display for your guests. You can also sprinkle sesame seeds on top for a nice look. This adds a bit of crunch and makes the wraps more inviting. If you have any chicken mixture left, store it in an airtight container. It will stay fresh in the fridge for up to three days. Just make sure it cools before sealing. For reheating, use a skillet over medium heat. This helps keep the texture nice. Stir it often to heat it evenly. You can also add a splash of water if it seems dry. Enjoy your wraps again with fresh lettuce! Pro Tips Use Fresh Ingredients: Fresh garlic and ginger can enhance the flavor profile of your dish, making it more aromatic and appealing. Adjust Spice Level: If you prefer a milder taste, reduce the amount of Sriracha. You can always add more later for extra heat! Make Ahead: Prepare the chicken mixture in advance and store it in the refrigerator. This will save you time during busy weeknights. Garnish Creatively: Besides sesame seeds, consider adding chopped cilantro or crushed peanuts for added texture and flavor. {{image_2}} You can switch out ground chicken for turkey or even tofu. Both options work well. Turkey gives a leaner taste, while tofu adds a nice plant-based twist. For sauces, try different flavors like teriyaki or sweet chili. These changes keep your dish fresh and exciting. These wraps pair well with sides like rice or noodles. You can serve jasmine rice for a fragrant touch. Noodles add a nice texture to your meal. If you want to meal prep, make a big batch of the chicken mixture. Store it in the fridge for quick lunches or dinners. Just add fresh lettuce leaves when ready to eat. You can change the heat by adding more Sriracha or using less. If you like it mild, start with a small amount. You can also add different vegetables. Try mushrooms, carrots, or cucumbers for crunch. Mixing in these veggies will enhance flavor and nutrition. Each serving of Sriracha Honey Chicken Lettuce Wraps has key nutritional values. One serving is about one large lettuce wrap filled with chicken mixture. Here’s what you get: - Calories: 300 - Protein: 25g - Carbohydrates: 15g - Fat: 15g - Fiber: 2g - Sugar: 6g This information helps you track your intake while enjoying a tasty meal. The caloric content of Sriracha Honey Chicken Lettuce Wraps comes from several ingredients. The ground chicken provides most of the protein and calories. Honey adds sweetness and some calories. Olive oil contributes healthy fats. Overall, this dish balances flavor and nutrition without too many calories. The main ingredients in Sriracha Honey Chicken Lettuce Wraps offer many health benefits: - Ground chicken: A lean protein that helps build and repair muscles. - Bell peppers: Packed with vitamins A and C, plus fiber. - Garlic and ginger: Known for their anti-inflammatory and immune-boosting properties. - Lettuce: Low in calories and high in water, helping you stay hydrated. These ingredients make the dish not only delicious but also nutritious. Enjoy your wraps knowing they support a healthy lifestyle. You can swap ground chicken for tofu or tempeh. Use 1 pound of firm tofu. Crumble it before cooking to mimic the chicken texture. You can also use lentils for a hearty option. Cook them until tender, then mix with the sauce. Both options absorb flavors well. Yes, you can make the filling ahead of time. Store it in an airtight container in the fridge for up to three days. When ready to eat, reheat it in a skillet over low heat. Stir until warm. This keeps the flavors fresh and tasty. Many sides pair well with these wraps. You can serve rice or quinoa for a filling meal. A simple salad or steamed veggies adds color and nutrition. For extra crunch, try crispy wontons or rice crackers. These make great complements to the wraps. This blog post covered Sriracha Honey Chicken Lettuce Wraps, highlighting key ingredients and cooking steps. We explored how to balance spice and sweetness while offering tips to enhance flavor and presentation. You learned about gluten-free and vegetarian substitutions, plus how to store leftovers for later. Remember, flexibility in ingredients lets you customize this dish to your taste. Enjoy creating these wraps, and share them with your friends and family!

Sriracha Honey Chicken Lettuce Wraps Tasty and Easy

To make Chocolate Chip Banana Bread Muffins, you need some simple ingredients. Here is what you will need: - 3 ripe bananas, mashed - 1/2 cup granulated sugar - 1/4 cup brown sugar, packed - 1/3 cup melted coconut oil - 2 large eggs - 1 teaspoon vanilla extract - 1 teaspoon baking soda - 1/2 teaspoon salt - 1 teaspoon ground cinnamon - 1 1/2 cups all-purpose flour - 1 cup semi-sweet chocolate chips - 1/2 cup walnuts or pecans, chopped (optional) These ingredients blend together to create a moist and flavorful muffin. The ripe bananas add natural sweetness and moisture. Coconut oil makes the muffins rich and soft. The chocolate chips bring a delicious, sweet touch. If you like nuts, adding walnuts or pecans gives a nice crunch. This combination is simple yet so satisfying. Make sure your bananas are ripe for the best flavor. The sugars enhance the sweetness, while cinnamon adds warmth. This list keeps it easy and fun for you. Enjoy gathering these items and getting ready to bake! {{ingredient_image_1}} 1. Preheat oven and prepare muffin tin: Start by setting your oven to 350°F (175°C). Line a muffin tin with paper liners or lightly grease it with non-stick spray. 2. Mix wet ingredients: In a large bowl, mash the 3 ripe bananas. Add 1/2 cup granulated sugar, 1/4 cup brown sugar, and 1/3 cup melted coconut oil. Stir until the mixture is smooth and well combined. 3. Combine dry ingredients and mix: In another bowl, whisk together 1 teaspoon baking soda, 1/2 teaspoon salt, 1 teaspoon ground cinnamon, and 1 1/2 cups all-purpose flour. Slowly add this dry mix to the wet ingredients. Stir gently to combine, but don't overmix. 4. Fold in chocolate chips and nuts: Add 1 cup semi-sweet chocolate chips and 1/2 cup chopped walnuts or pecans if you want. Carefully fold them into the batter until they are evenly spread. 1. Fill muffin tins and bake: Spoon the batter into the prepared muffin tins, filling each cup about 2/3 full. Place the tin in the preheated oven. 2. Test for doneness: Bake for 18-20 minutes. To check if they are ready, insert a toothpick into the center of a muffin. If it comes out clean or with a few crumbs, they are done. Enjoy the process! These muffins will fill your kitchen with a wonderful smell! - Avoid overmixing the batter: Overmixing can make your muffins tough. Mix just until the dry and wet ingredients blend. This keeps the muffins light and fluffy. - Tips for perfect texture: Use ripe bananas. They add moisture and sweetness. Measure flour correctly. Too much flour makes muffins dry. Use the spoon and level method. - Presentation tips with powdered sugar and chocolate: Dust warm muffins with powdered sugar. Or drizzle melted chocolate over the top for a sweet touch. Both make the muffins look great and taste even better. - Best ways to enjoy warm muffins: Serve muffins warm from the oven. They taste best fresh. You can pair them with butter or your favorite spread. Enjoy with a cup of coffee or tea for a cozy treat. Pro Tips Use Overripe Bananas: The riper the bananas, the sweeter and more flavorful your muffins will be. Look for bananas with brown spots for the best results. Don’t Overmix the Batter: To keep your muffins light and fluffy, mix the wet and dry ingredients until just combined. A few lumps are perfectly fine! Customize Your Mix-ins: Feel free to experiment with different nuts, dried fruits, or even spices like nutmeg to personalize your muffins to your taste. Storing Muffins: Store leftover muffins in an airtight container at room temperature for up to 3 days, or freeze them for longer storage. Just reheat before serving! {{image_2}} You can change a few ingredients to suit your taste. If you need an alternative for coconut oil, use unsalted butter. It gives a rich flavor. You can also try using applesauce instead of oil. It makes the muffins moist and adds sweetness. For sugar, you can use honey or maple syrup. Just remember to adjust the liquid in your recipe. If you like nuts, swap walnuts for pecans. You can also use almonds or hazelnuts for a different crunch. To make your muffins even better, think about adding spices or extracts. A pinch of nutmeg or a dash of almond extract can really boost the flavor. You could also try adding pumpkin spice for a cozy taste. Incorporating fruits is another great idea. Chopped strawberries or blueberries can add a burst of freshness. You can even mix in shredded coconut for a tropical vibe. These small tweaks can make your muffins unique and tasty! To keep your muffins fresh for a few days, place them in an airtight container. You can use a plastic or glass container with a tight lid. Make sure the muffins are completely cool before you store them. If you leave them out, they may get dry. You can also wrap them in plastic wrap for extra protection. Store them at room temperature for up to three days. If you want to keep them longer, the fridge is not the best choice. It can make your muffins dry too fast. For long-term storage, freezing is a great option. To freeze, let the muffins cool completely first. Wrap each muffin tightly in plastic wrap or aluminum foil. Then, place the wrapped muffins in a freezer-safe bag. Make sure to remove as much air as possible to prevent freezer burn. You can freeze them for up to three months. When you're ready to enjoy them, take out a muffin and let it thaw at room temperature. If you want, you can reheat it in the oven at 350°F (175°C) for about 10 minutes. This will bring back the warm, fresh taste. How to ripen bananas quickly for baking? To ripen bananas fast, place them in a paper bag. Add an apple or a tomato. They release ethylene gas, which speeds up ripening. Check every day. Bananas will turn brown and soft in a few days. Can I make these muffins gluten-free? Yes, you can. Use a gluten-free flour blend. Make sure it has a good binding agent. Almond flour or oat flour are good options. Adjust the baking time if needed. How do I prevent muffins from sticking to the liners? To stop muffins from sticking, use high-quality liners. Lightly spray them with non-stick spray. This extra step helps remove muffins easily after baking. Why are my muffins dense? Dense muffins can happen for a few reasons. Overmixing the batter is a common cause. Make sure to mix just until combined. Using too much flour can also lead to density. Measure flour correctly. How to fix muffins that have sunk in the middle? If muffins sink in the middle, it could be due to underbaking. Always test with a toothpick. If the toothpick comes out wet, bake a bit longer. Also, check the oven temperature. An oven that is too hot can cause sinking too. You now have all the tools to bake delicious muffins using ripe bananas. We covered the key ingredients, preparation steps, and baking tips. Remember to mix your wet and dry ingredients carefully to avoid dense muffins. Explore variations and storage options for the best results. With practice, you’ll master this recipe and enjoy warm muffins anytime. Happy baking!

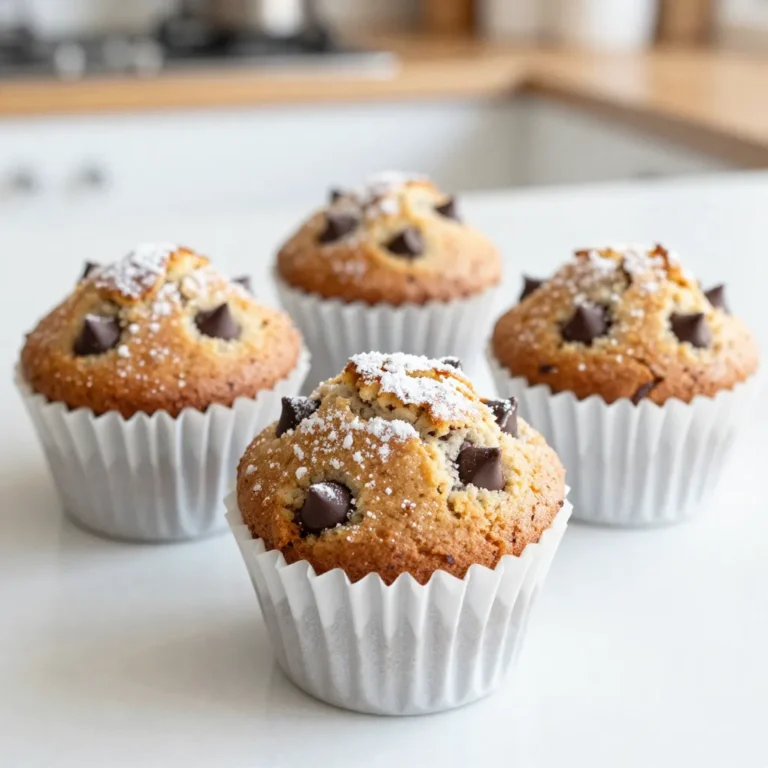
Chocolate Chip Banana Bread Muffins Delicious and Easy

- 1 cup rolled oats - ½ cup natural peanut butter - ¼ cup honey or maple syrup - ¼ cup dark chocolate chips - 2 tablespoons chia seeds - 1 teaspoon vanilla extract - A pinch of salt For these energy balls, you need just a few simple items. Rolled oats give a nice base. Natural peanut butter adds creaminess and flavor. Honey or maple syrup serves as the sweetener. Dark chocolate chips bring a rich touch. Chia seeds add a bit of crunch and health benefits. Vanilla extract boosts the taste, while a pinch of salt balances everything out. - Calories per serving: About 120 calories - Macronutrients breakdown: 4g protein, 7g fat, 12g carbs Each energy ball packs a good punch of nutrition. With roughly 120 calories per ball, they offer a mix of protein, healthy fats, and carbs to keep you going. This balance makes them a great snack for any time of day. - About 1-2 energy balls per serving For the best experience, I suggest enjoying 1 to 2 energy balls at a time. This serving size gives you enough energy without overdoing it. These treats are perfect for a quick snack or a post-workout boost. {{ingredient_image_1}} 1. Mixing Ingredients Start by taking a mixing bowl. Add 1 cup of rolled oats, ½ cup of natural peanut butter, and ¼ cup of honey or maple syrup. Then, pour in 1 teaspoon of vanilla extract. Stir all these together until they blend well. 2. Add the Extras Next, throw in ¼ cup of dark chocolate chips, 2 tablespoons of chia seeds, and a pinch of salt. Mix everything until you see the chocolate and seeds spread out evenly. 3. Rolling the Energy Balls Grab a tablespoon and scoop out some of the mixture. Roll it in your hands to make a ball. If your hands get sticky, wet them lightly with water. This helps the mixture roll easier. 4. Chilling for Firmness Place the energy balls on a tray lined with parchment paper. Once done rolling, put the tray in the fridge. Let them chill for at least 30 minutes. This helps them firm up nicely. - Suggested Images I recommend taking photos of each key step. Capture the mixing, rolling, and finished energy balls. This visual guide will help you see what each stage should look like. - Tips for Easy Rolling If you find the mixture too sticky, remember to use damp hands. Keep your hands slightly wet as you roll to make the process smoother. - Sticky Mixtures If your mixture is too sticky, add a bit more rolled oats. This will help absorb the extra moisture and make rolling easier. - Adjusting Texture If you want a firmer texture, let the rolled balls chill a bit longer. You can also add more chia seeds to help thicken the mix. To make the best energy balls, start with high-quality ingredients. Use natural peanut butter without added sugar or oils. This choice keeps the flavor rich and the texture smooth. When it comes to sweetness, balance is key. If you find the mix too sweet, cut back on honey or maple syrup. Adding a pinch of salt can help enhance the flavors. For the best storage, keep your energy balls in an airtight container. They stay fresh in the fridge for up to one week. If you notice any odd smells or changes in texture, toss them out. This ensures you enjoy only the best snacks. These energy balls pair well with milk or your favorite plant-based drink. They make a great snack anytime, whether before or after a workout. Enjoy them as a quick breakfast or an afternoon treat. Pro Tips Use Old-Fashioned Oats: They provide a better texture and hold the energy balls together more effectively than instant oats. Experiment with Nut Butters: Try almond butter or cashew butter for a different flavor profile while still keeping it nutritious. Chill for Best Results: Refrigerating the energy balls not only helps them firm up but also enhances the flavors as they meld together. Make a Batch for Meal Prep: These energy balls are perfect for on-the-go snacks. Make a double batch and store them in the freezer for longer freshness. {{image_2}} You can make your energy balls even better with some simple changes. Adding spices like cinnamon or nutmeg gives a warm and cozy flavor. Just a pinch can elevate the taste. Try different nut butters too! Almond butter or cashew butter can change the whole vibe. Each nut butter adds a unique twist. If you need gluten-free options, use certified gluten-free oats. These oats keep the recipe safe for your diet. For vegan alternatives, swap honey with maple syrup. This will keep the sweetness while staying plant-based. You can enjoy your treat without worries. There are many fun add-ins to try! You can toss in seeds like pumpkin or sunflower seeds for extra crunch. Nuts add protein and flavor, so mix in some chopped almonds or walnuts. Dried fruits like raisins or cranberries can make your energy balls chewy and sweet. If you want a twist on chocolate, use white chocolate chips or carob chips instead. These options keep your snacks exciting and tasty. Store your Chocolate Peanut Butter Energy Balls in an airtight container. They stay fresh for up to one week in the fridge. Make sure to keep them sealed tight. This helps keep them tasty and prevents drying out. To freeze your energy balls, follow these steps: 1. Place the rolled energy balls on a tray. 2. Put the tray in the freezer for about 1-2 hours. 3. Once frozen, transfer the balls to a freezer-safe bag or container. 4. Label it with the date for easy tracking. When you want to eat them, thaw the balls in the fridge overnight. This way, they will keep their nice texture and flavor. For long-term storage, you can keep energy balls in the freezer. They last up to three months this way. Check for any off smells or changes in color. These are signs they have gone bad. Always trust your senses! Yes, you can! If you want to switch things up, try almond butter or cashew butter. Both will give a nice flavor. Just make sure you choose a nut butter that is smooth and has no added sugar. This will keep your energy balls tasty and healthy! These energy balls last up to one week in the fridge. Just store them in an airtight container to keep them fresh. If you want to keep them longer, you can freeze them. They will stay good for about three months in the freezer. Just let them thaw in the fridge before you eat them. Yes, making these energy balls ahead of time is a great idea! You can mix and roll them up to a week in advance. Just keep them in the fridge or freezer. This way, you have a quick snack ready when you need it. Meal prepping makes it easy to eat healthy! You now have all the ingredients and steps to make energy balls. This simple snack is healthy and easy to prepare. Remember to balance the flavors and choose quality ingredients. Store them properly to enjoy longer. Feel free to experiment with variations or add-ins to keep things exciting. These energy balls fit into any routine, whether you're at home or on the go. Now, it's your turn to roll up your sleeves and create a tasty snack! Enjoy every bite of your energy-giving treat.

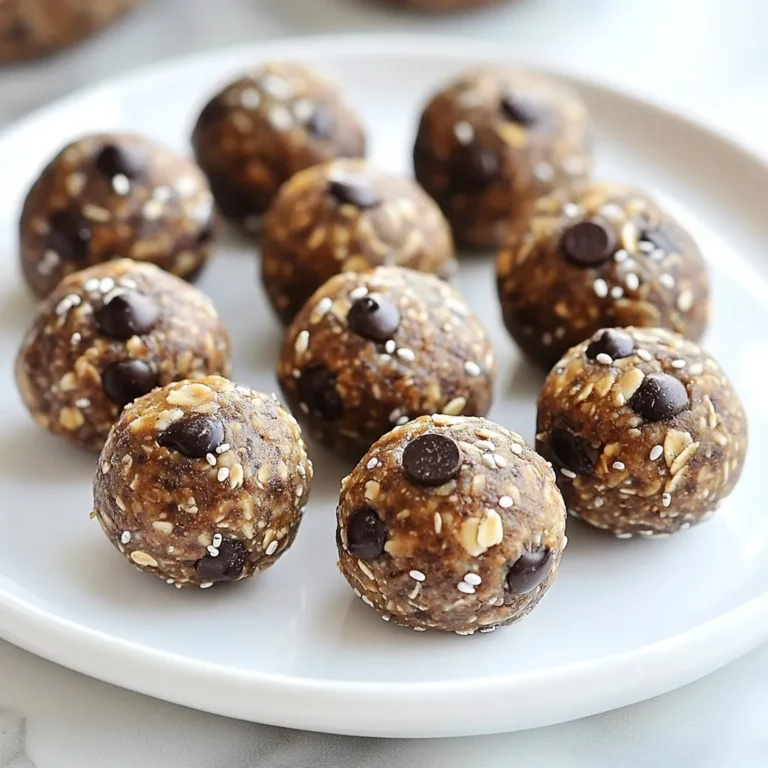
Chocolate Peanut Butter Energy Balls Simple Snack Recipe

- 4 cups fresh peaches, sliced (or 2 cans of peach slices in syrup) - 1 cup granulated sugar (adjust to taste if using canned peaches) - 1 teaspoon ground cinnamon - 1 box yellow cake mix (about 15.25 oz) - 1/2 cup unsalted butter, melted - 1 cup water (or peach juice if using canned peaches) - 1/2 teaspoon vanilla extract (optional) - Whipped cream or vanilla ice cream for serving When making Peach Cobbler Dump Cake, the choice of peaches is key. Fresh peaches bring a bright, juicy flavor. They add a lovely texture to the dish. If fresh peaches are not an option, canned peaches work well too. They are sweet and convenient. Just be sure to drain some syrup for balance. Next, consider the sugar. If you use fresh peaches, you might want less sugar. Fresh peaches are naturally sweet. Canned peaches are often sweeter, so adjust the sugar level based on your taste. You can also add a few optional ingredients. A dash of vanilla extract enhances the flavor. It adds a warm note to the cake. Serving it with whipped cream or vanilla ice cream takes it to the next level. This adds a creamy texture that pairs perfectly with the warm cake. This simple yet delicious combination creates a dish that warms the heart. Each bite is a sweet, juicy experience that you’ll want to share with friends and family. {{ingredient_image_1}} First, set your oven to 350°F (175°C). Preheating helps the cake bake evenly. It’s key for a great result. While the oven warms up, you can prepare the peach mixture. Grab a large bowl, and add your sliced peaches. If you’re using fresh peaches, make sure they are ripe. Add 1 cup of granulated sugar. If you use canned peaches, adjust the sugar to your taste. Then sprinkle in 1 teaspoon of ground cinnamon. Mix it all gently. Pour this peach mix into a greased 9x13 inch baking dish. This sets the base for your dump cake. Now, take a box of yellow cake mix. Sprinkle it evenly over the peach mixture. Do not mix it in; just cover the fruit. Next, melt 1/2 cup of unsalted butter. Drizzle the melted butter evenly over the cake mix. This adds richness and helps create a nice crust. Finally, pour 1 cup of water or peach juice over everything. Again, do not stir. The liquid will work its magic while baking. Now, it’s time to bake! Place the dish in your preheated oven and let it bake for about 45 to 50 minutes. Look for a golden brown top and bubbly edges. After baking, let it cool for about 10 minutes. Enjoy your peach cobbler dump cake warm with ice cream or whipped cream! To get that perfect texture, focus on the cake mix layer. Sprinkle the dry mix evenly over the peaches. Do not stir it in. This keeps the cake light and fluffy. The mix absorbs the peach juices as it bakes. You want a nice, crisp top with a soft, gooey center. If you want a crunchier top, add a bit of extra butter on the mix. When using fresh peaches, you can control the sweetness. Start with one cup of sugar. Taste the peach mixture before baking. If it needs more sweetness, add a little more sugar. If you use canned peaches, drain some syrup but keep some for sweetness. Less syrup means less sugar needed. Adjust based on your taste for the best results. A soggy bottom can ruin your dump cake. To avoid this, use a good amount of cake mix. Make sure it covers the fruit fully. The melted butter should also be evenly drizzled. Pour the water or peach juice slowly. This helps the liquid mix well while baking. Also, bake it until the top is golden brown. This indicates that the bottom has cooked properly too. Pro Tips Use Ripe Peaches: The flavor of your dump cake will greatly improve if you use ripe, fresh peaches. They should be slightly soft to the touch and fragrant for the best taste. Adjust Sugar to Preference: When using canned peaches, taste the syrup first. You may want to reduce the amount of added sugar if the peaches are already sweet. Experiment with Flavors: Feel free to add other spices like nutmeg or ginger, or even a splash of almond extract for a unique twist on the traditional peach flavor. Serve it Warm: For the best experience, serve your dump cake warm right out of the oven with a scoop of vanilla ice cream or a dollop of whipped cream for a delightful contrast. {{image_2}} You can switch up the peaches for other fruits. Try using berries, apples, or cherries. Each fruit brings its own flavor. Blueberries add a nice burst of sweetness. Apples give a lovely crunch. Cherries bring a tart touch that pairs well with cake. The type of cake mix can change the taste too. A spice cake mix adds warmth. Chocolate cake mix offers a rich contrast. Lemon cake mix gives a bright, zesty punch. Feel free to experiment with your favorites to find the perfect match. You can make this recipe gluten-free easily. Use a gluten-free cake mix instead of regular. For a vegan version, swap the butter with coconut oil or vegan butter. Use a plant-based milk in place of water. This way, everyone can enjoy this treat! To keep your Peach Cobbler Dump Cake fresh, store it in the fridge. Place it in an airtight container. This will help it stay good for about 3 to 5 days. If you want to serve it later, it's best to wait until it cools down first. This way, you avoid extra steam that can make it soggy. You can freeze Peach Cobbler Dump Cake too! First, let it cool completely. Then, cut it into pieces and wrap them tightly in plastic wrap. Next, place the wrapped pieces in a freezer-safe bag or container. It should last for up to 3 months in the freezer. When you want to enjoy it, just thaw it in the fridge overnight. For the best taste, reheat your Peach Cobbler Dump Cake in the oven. Preheat your oven to 350°F (175°C). Place the cake in an oven-safe dish and cover it with foil. Heat it for about 15 to 20 minutes, or until it’s warm all the way through. You can also use the microwave but be careful not to overheat. Enjoy it warm with a scoop of ice cream or whipped cream! Yes, you can use frozen peaches. Thaw them first and drain any excess liquid. This keeps the cake from getting too soggy. Frozen peaches work well and still taste great. Look for a golden brown top that is bubbly. The edges may slightly pull away from the pan. Baking usually takes about 45 to 50 minutes. If you insert a toothpick and it comes out clean, your dump cake is ready. Peach cobbler dump cake is delicious with whipped cream or vanilla ice cream. You can also add a slice of fresh peach on top. This adds a nice touch and enhances the flavor. Serve it warm for the best experience. This blog post covered how to make a delicious Peach Cobbler Dump Cake. We discussed fresh versus canned peaches, sugar adjustments, and optional ingredients. I provided simple steps for preheating the oven and preparing the cake. You learned tips for texture, sweetness, and preventing soggy bottoms. We explored variations and storage methods, including freezing and reheating. By following these steps, you can create a tasty dessert. Enjoy experimenting and making this recipe your own. Have fun baking!

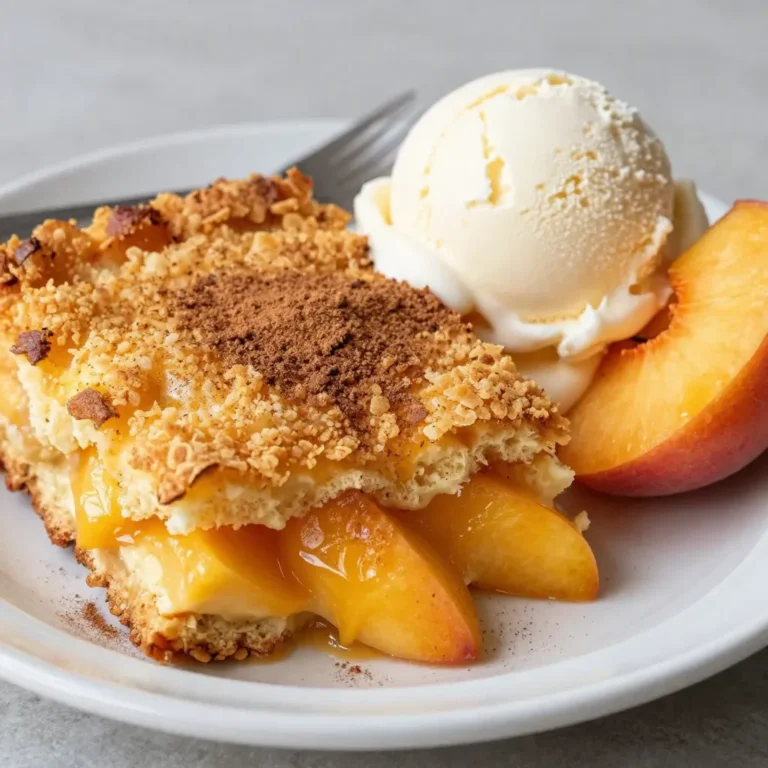
Peach Cobbler Dump Cake Easy and Delicious Recipe

To create a rich and creamy RumChata hot cocoa, you need these ingredients: - 2 cups whole milk - 2 tablespoons unsweetened cocoa powder - 2 tablespoons sugar (or to taste) - 1/2 teaspoon vanilla extract - 1/4 teaspoon ground cinnamon - 1/4 teaspoon nutmeg - Whipped cream (for topping) - Chocolate shavings or cocoa powder (for garnish) - Cinnamon sticks (for stirring) - 1/2 cup RumChata I recommend starting with the basic measurements. You can adjust to fit your taste. Use: - 2 cups whole milk for creaminess - 2 tablespoons cocoa powder for rich flavor - 2 tablespoons sugar to sweeten it up - 1/2 teaspoon vanilla for depth - 1/4 teaspoon cinnamon for warmth - 1/4 teaspoon nutmeg for a hint of spice - 1/2 cup RumChata for a creamy kick Garnishing your hot cocoa adds a special touch. Here are some fun ideas: - Top with whipped cream for fluffiness - Sprinkle chocolate shavings for extra chocolate flavor - Dust with cocoa powder for a classy finish - Add a cinnamon stick for stirring and flavor - Drizzle caramel or chocolate sauce for sweetness Feel free to mix and match these garnishes. They can make your drink look pretty and taste even better! {{ingredient_image_1}} Making RumChata Hot Cocoa is easy and fun. You only need a few steps for a warm drink. This recipe takes about 10 minutes. It serves two people, perfect for sharing. 1. Combine the Ingredients: In a small saucepan, pour in 2 cups of whole milk. Add 2 tablespoons of unsweetened cocoa powder and 2 tablespoons of sugar. 2. Heat the Mixture: Place the saucepan over medium heat. Whisk the mix constantly. Keep whisking until it is smooth and warm. Do not let it boil. 3. Add Spices: Sprinkle in 1/4 teaspoon of ground cinnamon and 1/4 teaspoon of nutmeg. Whisk again to mix the spices evenly. 4. Finish with Vanilla: Remove the saucepan from heat. Stir in 1/2 teaspoon of vanilla extract for that extra flavor. 5. Pour the Cocoa: Take two mugs and pour the hot cocoa into each. 6. Top It Off: Add whipped cream on top. You can also add chocolate shavings or a sprinkle of cocoa powder for decoration. 7. Garnish: Place a cinnamon stick in each mug. This adds more flavor and gives a nice touch. Serve the RumChata Hot Cocoa warm. It’s great for chilly nights or cozy gatherings. You can make it more festive by adding a splash of RumChata directly into the cocoa. Enjoy it while wrapped in a blanket or by the fire! To get the best texture in your RumChata hot cocoa, use whole milk. Whole milk gives a rich and creamy base. Heat the milk slowly to avoid boiling. Stir continuously to mix in the cocoa powder and sugar. This will create a smooth drink without lumps. Adding spices like cinnamon and nutmeg brings warmth and depth, making each sip comforting. One common mistake is boiling the milk. Boiling can change the flavor and texture. Always heat it until it steams but never let it boil. Another mistake is not whisking enough. Proper whisking helps blend all the ingredients well. Lastly, don’t skip the vanilla extract. It adds a fragrant note that elevates your drink. You can enhance the flavors in your hot cocoa easily. Try adding a pinch of sea salt. This will balance the sweetness and bring out the chocolate flavor. If you like a bit of spice, consider adding cayenne pepper. Just a tiny amount will add a surprising kick. You can also experiment with different toppings. Chocolate shavings, marshmallows, or a sprinkle of crushed peppermint work well. Each choice adds a new twist to the classic drink. Pro Tips Use Fresh Spices: For the best flavor, use freshly ground cinnamon and nutmeg instead of pre-ground spices. Sweetness Balance: Adjust the sugar to your taste; you can also use alternatives like honey or maple syrup for a unique twist. Milk Variations: Experiment with different types of milk, like almond or oat milk, for a dairy-free version. Garnish Enhancements: Try adding a pinch of sea salt or a few drops of peppermint extract for an extra layer of flavor. {{image_2}} You can switch out whole milk for other milk types. Almond, oat, or soy milk works well. Each one adds its own taste. Oat milk gives a creamy texture. Almond milk adds a nutty flavor. Choose what you like best. You can make your hot cocoa special with fun flavors. Add peppermint extract for a minty kick. Just use a drop or two. For a mocha twist, mix in coffee or espresso. This adds depth to the cocoa. You can also try adding white chocolate chips. They melt and create a sweet layer. If you want a non-alcohol option, simply skip the RumChata. The hot cocoa still tastes great! Use whipped cream and your favorite toppings. You can add marshmallows for extra fun. This way, everyone can enjoy the treat! You can store leftover hot cocoa in the fridge. Use an airtight container. Make sure to cool it down first. It stays fresh for about three days. When you're ready to enjoy it, just follow the reheating instructions below. To reheat your hot cocoa, pour it into a saucepan. Warm it over low heat. Stir it often to keep it smooth. You can also use a microwave. Heat it in a microwave-safe mug for about one minute. Stir it halfway through. If it’s too thick, add a splash of milk. You can freeze hot cocoa too! Use ice cube trays to freeze it. Once frozen, transfer the cubes to a freezer bag. They last for about three months. To use, thaw the cubes in the fridge or reheat in a pan. You can blend them into fresh milk for a quick treat. Yes, you can make RumChata Hot Cocoa ahead of time. Simply prepare the hot cocoa as per the recipe, then allow it to cool. Store it in a sealed container in the fridge. When you want to enjoy it, just reheat it gently on the stove or in the microwave. This method saves time and lets you enjoy a cozy drink anytime. Garnishes add fun and flavor to your hot cocoa. Here are some great options: - Whipped cream: A classic topping that adds creaminess. - Chocolate shavings: These give a rich chocolate flavor. - Cocoa powder: A simple dusting enhances the cocoa taste. - Cinnamon sticks: They add a warm spice and can be used for stirring. - Marshmallows: They melt into the cocoa and add sweetness. You can easily adjust the sweetness of your RumChata Hot Cocoa. Here’s how: - Start with the suggested sugar amount, then taste it. - If it’s not sweet enough, add more sugar a little at a time. - If you prefer less sweetness, reduce the sugar in the recipe. - You can also use flavored syrups or sweeteners for a different taste. You learned about making delicious hot cocoa with the right ingredients and steps. We covered tips for texture and flavor, and explored fun variations. Remember to store any leftovers properly so you can enjoy them later. Hot cocoa can bring joy, and small changes can make it better. Experiment with flavors and garnishes to find your perfect cup. Enjoy your warm drink and share it with friends!

RumChata Hot Cocoa Delightful and Cozy Recipe

For a vibrant Mango Habanero Salsa, you need: - 2 ripe mangos, diced - 1-2 habanero peppers, finely minced - 1/2 small red onion, finely chopped - 1/4 cup fresh cilantro, chopped - 1/2 red bell pepper, diced - Juice of 1 lime - 1/2 teaspoon salt - 1/4 teaspoon black pepper These fresh ingredients give the salsa its bold and exciting flavors. The ripe mangos add sweetness and a bright color. Habanero peppers provide the heat, and red onion adds a nice crunch. Cilantro brings freshness, while lime juice gives a zesty kick. The red bell pepper adds more sweetness and color. - 1/2 teaspoon honey for sweetness If you want to balance the heat, consider adding honey. It enhances the flavor and makes the salsa even more delicious. Adjust this based on your taste. You can make this salsa your own by mixing and matching these ingredients. Get creative and enjoy exploring different flavors! {{ingredient_image_1}} First, peel the ripe mangos. Cut them around the pit. Dice the mango into small pieces and add them to a medium bowl. Next, take the habanero peppers. Use gloves to avoid the heat on your skin. Carefully mince the peppers into tiny bits and mix them with the mango. Now, let’s add more flavor. Finely chop the red onion. Toss it into the bowl with the mango and habanero. Dice the red bell pepper and add it, too. Don’t forget the fresh cilantro; chop it and mix it in. Squeeze the lime juice over everything. Add salt and black pepper to taste. If you want it sweeter, drizzle in some honey. Use a spatula to gently fold all the ingredients together. Taste your salsa and adjust the flavors. Add more lime juice, salt, or habanero if you like. Once it’s just right, cover the bowl. Chill the salsa in the fridge for at least 30 minutes. This helps all the flavors blend together nicely. To adjust the heat, you can change the amount of habanero used. Start with one pepper if you want less spice. If you love heat, use two. Always remember to wear gloves when handling habaneros. They can irritate your skin. Balancing spice with sweetness can enhance your salsa. Adding a bit of honey helps tone down the heat. Mix in honey gradually and taste as you go. You want a nice blend of spicy and sweet. You can add other herbs or spices for more flavor. Try adding a pinch of cumin or smoked paprika. These can give your salsa a unique twist. Fresh herbs like mint can also add freshness. Pairing with other ingredients can elevate your dish. Chopped avocado or diced pineapple work well. They add creaminess and sweetness, balancing the heat. Using the right tools makes prep easy. A sharp knife helps you cut mangos and peppers smoothly. A sturdy cutting board is also a must. Look for one that won’t slip while you chop. Mixing bowls are essential for combining your ingredients. Use one medium bowl for mixing and another for prep. This keeps your workspace organized and your salsa ready to enjoy. Pro Tips Choose Ripe Mangos: Look for mangos that are slightly soft to the touch and have a sweet aroma to ensure maximum flavor. Adjust Spice Level: Always taste the habanero before adding it to gauge its heat; you can always add more but can't take it out! Let it Chill: Allowing the salsa to sit for at least 30 minutes in the refrigerator enhances the flavors as they meld together. Use Fresh Ingredients: Fresh cilantro and lime juice elevate the salsa’s taste, so opt for fresh over dried or bottled versions. {{image_2}} You can switch up the fruit in your salsa. Pineapple adds a sweet twist, while peach brings a juicy taste. Both fruits pair well with the heat of habanero. You can also play with spices. If you want more heat, add jalapeño. For a savory kick, minced garlic works great too. Each change gives your salsa a new vibe. Mango Habanero Salsa shines with many dishes. It pairs well with grilled chicken or fish. You can also serve it with tacos or nachos for a fun meal. Want to create a salsa bar? Offer various salsas, chips, and fresh veggies. Guests will love mixing and matching flavors! This salsa is naturally vegan and gluten-free. If you want to keep it light, skip the honey. The mangos provide enough sweetness. You can serve this salsa at any gathering, knowing everyone can enjoy it. Just make sure to label it when you have guests with dietary needs! To keep your Mango Habanero Salsa fresh, store it in an airtight container. This helps to lock in flavor and prevent spills. Always place it in the refrigerator right after making it. The salsa will stay good for about 3 to 5 days. Check for any signs of spoilage before use. If it smells off or has a strange color, it’s best to toss it. If you want to keep your salsa longer, consider freezing it. Start by pouring the salsa into a freezer-safe bag or container. Leave some space at the top for expansion as it freezes. You can freeze it for up to 3 months. When you’re ready to use it, thaw the salsa in the fridge overnight. For a quicker option, place the bag in a bowl of cold water. Once thawed, stir it well before serving. You may want to add a splash of lime juice to refresh the flavors. Enjoy your delicious salsa with your favorite dishes! You can serve Mango Habanero Salsa with many dishes. Here are some great ideas: - Tacos: Add it to chicken, fish, or veggie tacos for a fresh kick. - Grilled meats: It pairs well with grilled chicken, pork, or shrimp. - Chips: Use it as a dip for tortilla chips or pita chips. - Burgers: Top your burgers with this salsa for an exciting flavor twist. - Salads: Mix it into green salads for a bright, zesty touch. The spiciness of this salsa depends on the habanero peppers. Habaneros can be quite hot, ranging from 100,000 to 350,000 Scoville heat units. For a milder salsa, use just one pepper or remove the seeds. If you love heat, add more habaneros. Remember, the heat can build over time, so taste as you go. Yes, you can make Mango Habanero Salsa ahead of time. I recommend preparing it at least 30 minutes before serving. This allows the flavors to meld together nicely. You can store it in the fridge for up to three days. Just be sure to cover it tightly to keep it fresh. Mango Habanero Salsa is easy and fun to make. You can use fresh ingredients like ripe mangos, habanero peppers, and lime juice. By following the steps and tips, you create a tasty salsa that fits your spice level. Consider trying different fruit and serving ideas. This salsa can add a vibrant touch to many meals. Remember to store it well for later use. Enjoy the fresh flavors, and don’t hesitate to experiment!

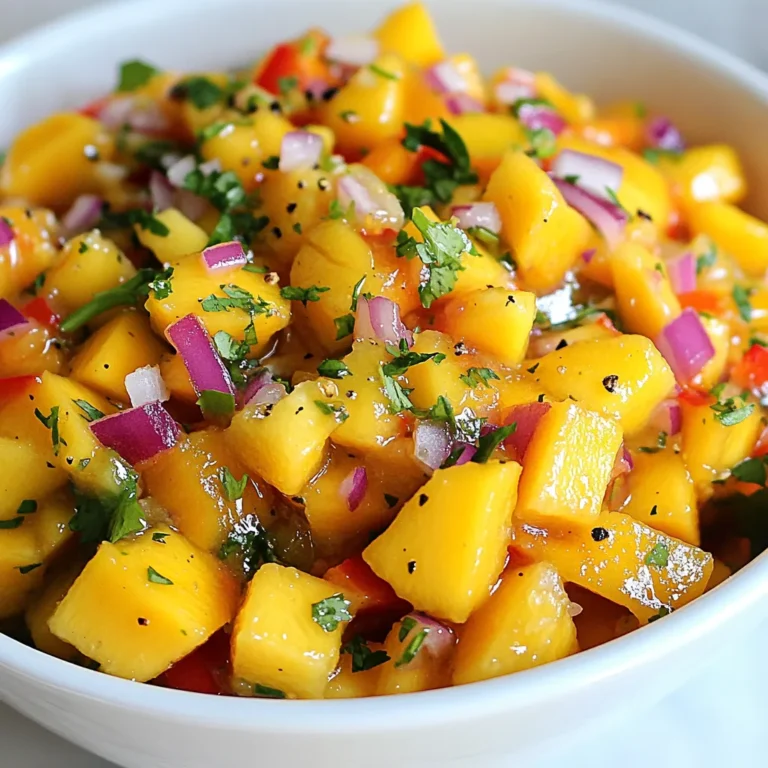
Mango Habanero Salsa Bold and Flavorful Recipe

To make the best chicken katsu, you'll need: - 2 boneless, skinless chicken breasts - Salt and pepper, to taste - 1 cup all-purpose flour - 2 large eggs, beaten - 2 cups panko breadcrumbs - Vegetable oil, for frying These items create a crispy and juicy katsu. The chicken is the star here, so choose fresh pieces. The panko gives it that delightful crunch. For the flavorful curry sauce, gather: - 1 medium onion, finely chopped - 2 cloves garlic, minced - 1 tablespoon ginger, minced - 2 medium carrots, sliced - 2 medium potatoes, diced - 2 cups chicken broth - 2 tablespoons curry powder - 1 tablespoon soy sauce - 1 tablespoon ketchup - 1 tablespoon cornstarch (mixed with 2 tbsp water for thickening) The curry sauce is rich and hearty. The vegetables add sweetness, while the ginger and garlic kick it up a notch. You can enhance your dish with these garnishes: - Cooked rice, for serving - Chopped green onions - Sesame seeds These garnishes add color and texture. They also bring fresh flavors that balance the meal. Enjoy your cooking! {{ingredient_image_1}} Start by seasoning the chicken breasts. Use salt and pepper on both sides. This step adds flavor. Let the seasoned chicken rest for a few minutes. This helps the seasoning stick better. Next, set up a breading station. Use three shallow dishes: one for flour, one for beaten eggs, and one for panko breadcrumbs. First, dredge each chicken breast in flour. Shake off any excess flour. Then, dip the chicken in the beaten eggs. Finally, coat the chicken in panko. Press down to help the breadcrumbs stick well. Heat about half an inch of vegetable oil in a large skillet. Use medium-high heat for frying. Once hot, carefully add the chicken. Fry each piece for about 4 to 5 minutes on one side. Flip and fry for another 4 to 5 minutes until golden brown. The chicken should be cooked through. Remove it and let it drain on paper towels. In a separate pot, heat a tablespoon of vegetable oil over medium heat. Add the finely chopped onions. Sauté them until they turn translucent, about 5 minutes. Then, add the minced garlic and ginger. Stir for about one minute until fragrant. Now, toss in the sliced carrots and diced potatoes. Cook them for 5 to 7 minutes until they start to soften. Pour in the chicken broth, curry powder, soy sauce, and ketchup. Bring this mixture to a boil. After boiling, lower the heat and let it simmer for 15 to 20 minutes. This will make the vegetables tender. To thicken the sauce, stir in the cornstarch mixed with water. Cook for another 2 to 3 minutes. Taste the sauce and adjust the seasoning with salt and pepper if needed. Slice the fried chicken katsu into strips. Serve it over cooked rice. Generously ladle the warm curry sauce over the chicken. For a lovely finish, garnish with chopped green onions and sesame seeds. Enjoy your delicious meal! To get crispy chicken katsu, start with dry chicken. Pat the chicken breasts with paper towels. Season both sides with salt and pepper to enhance flavor. Create a breading station with three shallow dishes: flour, beaten eggs, and panko breadcrumbs. Dredge the chicken in flour first. Then, dip it in the eggs, and coat it with panko. Press down firmly to ensure the breadcrumbs stick. Fry in hot oil, about 350°F. Cook for 4-5 minutes on each side. You want a golden-brown finish. Drain on paper towels to keep it crispy. For a rich curry sauce, sauté onions until they are soft and slightly sweet. After about 5 minutes, add minced garlic and ginger. This adds depth to your sauce. Add sliced carrots and diced potatoes next. Cook them until they soften a bit. Using chicken broth gives your sauce a great base. Mix in curry powder, soy sauce, and ketchup for that classic taste. Simmer for 15-20 minutes to let the flavors blend well. To thicken it, stir in a cornstarch mixture. This step gives your sauce that nice, creamy texture. One common mistake is using cold oil. Always heat the oil before adding the chicken. If the oil is not hot enough, the katsu becomes soggy. Another mistake is overcrowding the pan. Fry one or two pieces at a time. This ensures even cooking. For the curry, don’t skip simmering time. This step is key for flavor. Lastly, taste your sauce before serving. Adjust salt and pepper to your liking. By avoiding these mistakes, you’ll create a delicious meal every time. Pro Tips Perfectly Crispy Katsu: For an extra crunchy coating, double-bread your chicken by dipping it in the egg and panko a second time before frying. Seasoning the Flour: Add a pinch of garlic powder and paprika to your flour for an additional layer of flavor in the chicken katsu. Vegetable Variations: Feel free to add other vegetables like bell peppers or peas for more color and nutrition in your curry sauce. Make-Ahead Sauce: The curry sauce can be made ahead of time and stored in the fridge for up to 3 days, making this meal quick to prepare when you're ready to serve. {{image_2}} You can make a tasty vegetarian katsu curry. Instead of chicken, use tofu or eggplant. Both options give a nice texture. - Tofu: Press to remove water. Cut into thick slices. Coat and fry as you would chicken. - Eggplant: Slice into thick pieces. Salt to draw out moisture, then coat and fry. These choices stay crispy and soak up the curry flavor well. If you like heat, try a spicy chicken katsu curry. Add chili powder or fresh chili to the curry sauce. You can also use spicy panko breadcrumbs. This gives your dish a nice kick. - Chili Powder: Start with one teaspoon and adjust to taste. - Fresh Chili: Chop finely and add during the sauce-making step. The heat balances well with the savory flavors. Japan has many styles of katsu curry. Each region adds its twist. - Hokkaido Style: This version often includes seafood, like scallops or shrimp. - Kansai Style: Known for a sweeter sauce, sometimes using fruits. - Okinawa Style: Often includes local vegetables and spices, giving a unique taste. These regional touches make each katsu curry special. Explore these styles to find your favorite. To store your leftover katsu curry, let it cool first. Use an airtight container to keep it fresh. Place the chicken katsu and curry sauce together or separate them if you prefer. Store it in the fridge for up to three days. When you’re ready to eat, reheat your katsu curry on the stove. Use medium heat and stir often. This helps it heat evenly. If you prefer the microwave, place it in a microwave-safe bowl. Cover it with a lid or a microwave-safe wrap. Heat it in short bursts, stirring between each, until it’s hot. You can freeze katsu curry for later use. Let it cool completely before freezing. Place the curry sauce and chicken katsu in separate containers. Make sure to label them with the date. They will stay good for about three months in the freezer. To thaw, move them to the fridge overnight. Reheat as mentioned before. Chicken Katsu Curry comes from Japan. It blends two popular dishes: katsu and curry. Katsu is a breaded and fried meat cutlet, while curry is a thick, spiced sauce. This dish became popular after World War II, as Western-style food mixed with Japanese flavors. Today, you can find Chicken Katsu Curry in homes and restaurants across Japan and beyond. Yes, you can use different types of rice. Brown rice offers a nutty flavor and more fiber. Jasmine rice adds a fragrant touch. You might also try sushi rice for a sticky texture. Each type of rice changes the dish's character, so feel free to experiment to find your favorite! To make Chicken Katsu Curry gluten-free, you can substitute a few ingredients. Use gluten-free flour instead of all-purpose flour. Choose gluten-free panko breadcrumbs, which are widely available. For the curry sauce, ensure the soy sauce is gluten-free. Follow the rest of the recipe as usual, and you’ll enjoy a tasty curry without the gluten! You learned how to make delicious Chicken Katsu Curry step by step. We covered the key ingredients, cooking methods, and helpful tips to get it just right. I shared variations to suit different tastes and preferences. Remember, great cooking takes practice. Don’t hesitate to experiment with flavors. Enjoy your cooking journey, and share your results with others. This dish brings joy to the table, so have fun serving it!

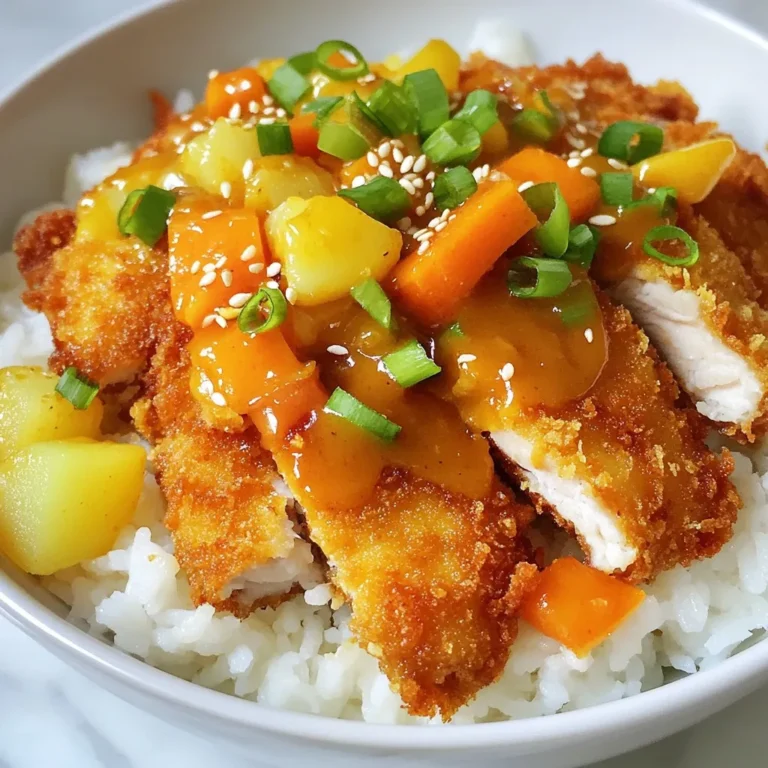
Savory Japanese Chicken Katsu Curry Recipe Guide

- 1 lb (450g) boneless, skinless chicken breasts, diced - 1 tablespoon olive oil - 1 medium onion, finely chopped - 3 cloves garlic, minced - 2 carrots, diced - 2 celery stalks, diced - 1 cup frozen peas - 6 cups low-sodium chicken broth - 1 teaspoon dried thyme - 1 teaspoon dried oregano - Salt and pepper to taste - 1 cup heavy cream - 1/4 cup fresh parsley, chopped - Optional: Crusty bread for serving When making Million Dollar Chicken Soup, quality matters. Choose fresh chicken breasts for the best flavor. Opt for organic, if possible. Fresh herbs like parsley can elevate your soup. Use low-sodium broth for a healthier twist. This helps you control the salt. You can make this soup even better. Consider adding a splash of lemon juice for brightness. Spinach or kale can boost nutrition. Try adding corn for sweetness. For a spicy kick, add red pepper flakes. Each add-in can change the flavor and make it fun! {{ingredient_image_1}} To start, gather all your ingredients. You will need: - 1 lb boneless, skinless chicken breasts, diced - 1 tablespoon olive oil - 1 medium onion, finely chopped - 3 cloves garlic, minced - 2 carrots, diced - 2 celery stalks, diced - 1 cup frozen peas - 6 cups low-sodium chicken broth - 1 teaspoon dried thyme - 1 teaspoon dried oregano - Salt and pepper to taste - 1 cup heavy cream - 1/4 cup fresh parsley, chopped - Optional: Crusty bread for serving Now, heat the olive oil in a large pot over medium heat. Add the diced chicken. Cook it until it turns brown, about 5 to 7 minutes. Once the chicken is browned, remove it from the pot and set it aside. In the same pot, add the chopped onion, minced garlic, diced carrots, and diced celery. Sauté these veggies for about 5 to 7 minutes. You want them to be tender and fragrant. Next, return the browned chicken to the pot. Pour in the low-sodium chicken broth. Stir in the dried thyme and oregano. Season with salt and pepper to taste. Bring this mixture to a boil. Once boiling, lower the heat. Let the soup simmer for about 20 minutes. This allows the flavors to blend. After simmering, add the frozen peas and heavy cream to the pot. Keep simmering for an additional 5 minutes. This step makes the soup rich and creamy. After simmering, taste the soup. Adjust the seasoning if needed. Stir in the fresh parsley just before serving. Serve the soup hot. You can pair it with crusty bread for dipping. Enjoy this comforting and rich dish! To get tender chicken, start with good quality meat. Use boneless, skinless chicken breasts. Cut them into small pieces for even cooking. Sear the chicken in olive oil until browned. This locks in moisture and flavor. Remove it from the pot before adding other ingredients. This step helps avoid overcooking. Add depth to your soup with fresh herbs. Use thyme and oregano for a classic taste. Don’t rush the sautéing process. Cook onions, carrots, and celery until soft. This builds a flavorful base. For extra richness, add heavy cream at the end. It gives the soup a luxurious texture. Adjust salt and pepper based on your taste. Always taste as you go. To thicken the soup, use a few tricks. The heavy cream adds richness and body. If you want a thicker texture, mash some of the vegetables. This will help create a creamy consistency. Another method is to add a cornstarch slurry. Mix equal parts cornstarch and water, then stir it into the soup. Allow it to simmer for a few minutes. This will help achieve the desired thickness while keeping the flavor intact. Pro Tips Use Fresh Herbs: Fresh parsley adds a brighter flavor than dried. Add it just before serving for maximum freshness. Perfect Chicken Texture: To avoid overcooking, remove the chicken when it’s just browned and return it later to keep it tender. Adjusting Creaminess: For a lighter soup, substitute half of the heavy cream with low-fat milk or a plant-based alternative. Add Extra Vegetables: Feel free to toss in other vegetables like green beans or corn for added texture and nutrition. {{image_2}} To make this soup gluten-free, choose low-sodium chicken broth that is certified gluten-free. Most brands offer this type. Use cornstarch or arrowroot powder to thicken. Just mix it with water before adding to the soup. This will keep your soup thick and creamy without any gluten. For a vegetarian version, swap the chicken for hearty vegetables. Try mushrooms, chickpeas, or lentils. Use vegetable broth instead of chicken broth. Add more carrots, celery, and peas for flavor. You can also toss in some spinach or kale at the end for added nutrients. Serve your soup with crusty bread for dipping. You can also offer a sprinkle of cheese on top. Try adding a dollop of sour cream or Greek yogurt for creaminess. For extra flavor, add fresh herbs like basil or cilantro. Each of these ideas will make your soup special and fun to eat. To store your soup, let it cool first. Use airtight containers for storage. Place the soup in the fridge. It will stay fresh for about three days. Always label the container with the date. This way, you won't forget when you made it. For longer storage, freeze the soup. Use freezer-safe containers or bags. Pour the cooled soup into these containers. Leave some space at the top, as it will expand when frozen. You can freeze it for up to three months. Thaw it in the fridge before reheating. When ready to eat, reheat the soup on the stove. Use medium heat for even warming. Stir it often to prevent sticking. If it seems too thick, add a bit of water or broth. You can also microwave it in a bowl. Cover it loosely to allow steam to escape. Enjoy your warm, tasty soup! Million Dollar Chicken Soup stands out for its rich flavors and creamy texture. The mix of fresh veggies, tender chicken, and herbs creates a warm hug in a bowl. The heavy cream adds a luxurious touch that makes this soup feel like a treat. Each sip brings comfort and joy, making it perfect for any day. Yes, you can use leftover chicken! It’s a great way to save time and reduce waste. Just shred or chop the chicken into bite-sized pieces. Add it to the pot after you sauté the veggies. This method adds great flavor and helps the chicken stay tender. To spice up Million Dollar Chicken Soup, add red pepper flakes or diced jalapeños. Start with a small amount and taste as you go. You can also stir in a splash of hot sauce for extra heat. Adjust it to your liking for a warm, zesty kick! This article covered all you need for Million Dollar Chicken Soup. We discussed key ingredients, cooking steps, tips, and variations. You can use leftover chicken for a faster meal. Remember, adding spices or herbs can make your soup even better. Storing and reheating leftovers is easy and keeps the soup tasty. Explore all the ways to enjoy this dish. Try different flavors and make it your own. Enjoy cooking and savoring each bowl!

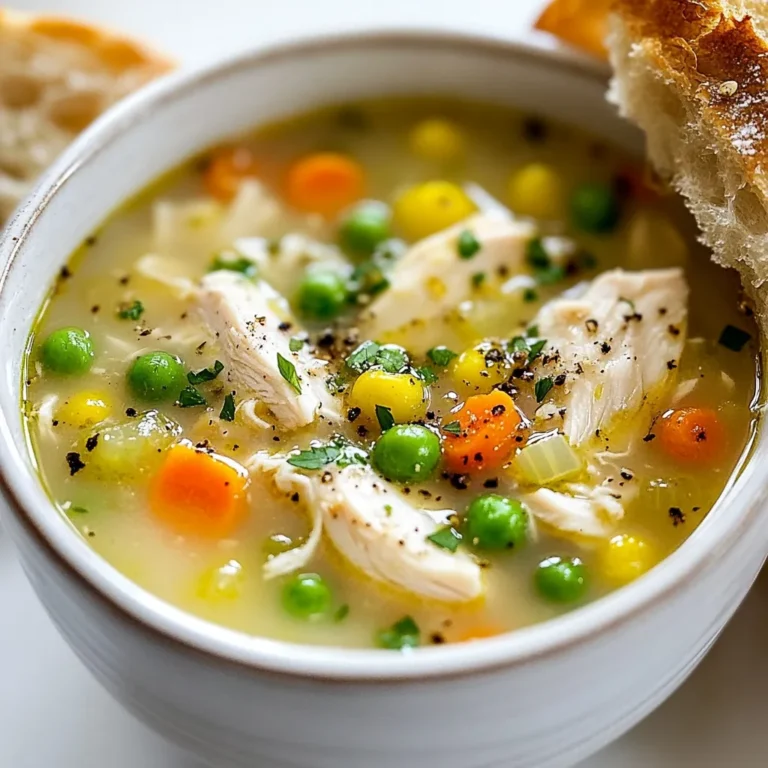
Million Dollar Chicken Soup Flavorful and Rich Dish

PREV 1 … 5 6 7 … 86 NEXT
spicy fork kitchen

explore

DessertsDinnerAppetizersDrinks

Our Policies

  • Cookie Policy
  • Copyright Policy
  • Disclaimer
  • GDPR Policy
  • Terms Of Use
Back to Top
  • About
  • Contact Us
  • Privacy Policy
© 2025 spicy fork kitchen