FREE DINNER EBOOK! Get your copy!
  • Cookie Policy
  • GDPR Policy
  • Disclaimer
  • Terms Of Use
  • Visit my other site: Fun Cookie Recipes
spicy fork kitchen
  • Home
  • Dinner
  • Desserts
  • Drinks
  • Appetizers
  • Contact
  • About
  • Privacy Policy
  • Home
  • Dinner
  • Desserts
  • Drinks
  • Appetizers
  • Contact
  • About
  • Privacy Policy
  • Cookie Policy
  • GDPR Policy
  • Disclaimer
  • Terms Of Use
Visit my other site: Fun Cookie Recipes

HOME / CATEGORIES /

Latest

- 4 boneless, skinless chicken breasts - 1 cup ricotta cheese - 1/4 cup grated Parmesan cheese - 1/4 cup fresh basil, chopped - 1/4 cup fresh parsley, chopped - 1 clove garlic, minced - 1 teaspoon lemon zest - Salt and pepper to taste - 1/2 teaspoon paprika (for seasoning) - 1 cup spinach leaves - 2 tablespoons olive oil - Toothpicks or kitchen twine for securing The main ingredients for Herbed Ricotta Stuffed Chicken Rolls are simple yet full of flavor. You start with chicken breasts that are boneless and skinless. These are easy to work with and cook evenly. For the filling, you need ricotta cheese, which gives a creamy texture, and Parmesan cheese, adding a rich taste. Fresh herbs are key. I love using basil and parsley for their bright flavors. They bring a fresh taste that works well with the creamy filling. Garlic and lemon zest add depth to the mix. Salt, pepper, and paprika round out the seasoning, making each bite tasty. Spinach leaves add a nice touch. They complement the cheese filling and add a bit of color. You will also need olive oil for cooking and either toothpicks or kitchen twine to hold the rolls together. Each part of this dish comes together to create a meal that is flavorful and satisfying. {{ingredient_image_1}} First, I mix the cheeses and herbs. In a bowl, combine 1 cup of ricotta cheese with 1/4 cup of grated Parmesan cheese. Then, add 1/4 cup of chopped fresh basil and 1/4 cup of chopped fresh parsley. Next, include 1 minced garlic clove and the zest of 1 lemon. Season the mix with salt and pepper to taste. Stir well until creamy and smooth. This filling gives the chicken rolls a burst of flavor. Now, let’s prepare the chicken. Take 4 boneless, skinless chicken breasts. Carefully slice each one horizontally to create a pocket. Make sure not to cut all the way through. Once you have your pockets, spread a generous tablespoon of the herbed ricotta mixture into each one. On top of the filling, add a few spinach leaves for extra color and nutrition. Then, roll up each chicken breast tightly. Secure the rolls using toothpicks or kitchen twine. Let’s cook these delicious rolls. Start by seasoning the outside of each chicken roll with salt, pepper, and a dash of paprika. In a large oven-safe skillet, heat 2 tablespoons of olive oil over medium heat. Place the stuffed chicken rolls in the skillet and sear them on all sides until golden brown, about 3 to 4 minutes per side. After searing, transfer the skillet to a preheated oven at 375°F (190°C). Bake for 20 to 25 minutes or until the chicken reaches 165°F (75°C) internally. Once cooked, take the skillet out and let the rolls rest for 5 minutes. Finally, remove the toothpicks or twine, slice the rolls, and serve warm. Enjoy your flavorful meal! To make great herbed ricotta stuffed chicken rolls, start by securing the chicken well. Use toothpicks or kitchen twine to hold the rolls tight. This keeps all the tasty filling inside. Make sure to not cut the chicken all the way through when you create pockets. A deep pocket helps keep your filling secure without spilling out. Avoiding overstuffing is key. Fill each chicken breast pocket with just enough ricotta mixture. Too much filling can make rolling difficult and lead to spills during cooking. Remember, you want each bite to be balanced. To get juicy chicken, monitor the internal temperature closely. The perfect temperature is 165°F (75°C). Use a meat thermometer for accuracy. Checking ensures the chicken cooks through without drying out. After cooking, let the chicken rest for about five minutes. This step allows the juices to redistribute. Resting makes each bite tender and moist. For a vibrant dish, arrange the sliced chicken rolls on a beautiful platter. Drizzle some olive oil on top. This adds shine and flavor. You can also sprinkle extra herbs for a fresh touch. Serve the rolls with a side of roasted vegetables or a crisp salad. This not only makes your meal colorful but also adds nutrition. Garnishing your dish creates a feast for the eyes, making it more enjoyable for everyone! Pro Tips Use Fresh Herbs: Fresh herbs enhance the flavor of the ricotta filling. If possible, opt for fresh basil and parsley instead of dried herbs for a vibrant taste. Don’t Overstuff: While it’s tempting to add more filling, overstuffing can make it difficult to roll the chicken tightly and may lead to leakage during cooking. Rest the Chicken: Allowing the chicken to rest for a few minutes after baking helps the juices redistribute, resulting in a more tender and juicy roll. Serve with a Sauce: Consider pairing the chicken rolls with a light lemon butter sauce or a marinara for extra flavor and a beautiful presentation. {{image_2}} You can mix things up with different cheeses. Try using mozzarella or feta for a fun twist. If you want a creamier texture, go for mascarpone. You can also swap the greens. Kale or arugula work well in place of spinach. Feel free to play with seasonings. If you like spice, add a pinch of cayenne. For a smoky flavor, try smoked paprika instead of regular paprika. These small changes can make a big difference. To take your chicken rolls to the next level, think about adding sun-dried tomatoes. They bring a sweet and tangy taste. Chopped olives add a nice briny kick, too. You can also incorporate different herbs. Rosemary or thyme can bring new flavors to the dish. Experimenting with different herbs will keep it fresh and exciting. Just remember to balance the flavors so one does not overpower the others. If you need a gluten-free option, this dish is already safe. All the ingredients are naturally gluten-free. For a dairy-free version, use a nut-based cheese in place of ricotta and Parmesan. If you're following a low-carb diet, skip the breading and focus on the chicken and filling. This recipe can easily fit into your meal plan with these small tweaks. Enjoy customizing it to suit your needs! To keep your Herbed Ricotta Stuffed Chicken Rolls fresh, store them in the fridge. Use an airtight container or wrap them tightly in plastic wrap. This helps prevent moisture loss and keeps them flavorful. You can safely store cooked rolls for up to three days. After that, they may lose taste and texture. Freezing the rolls is easy and a great way to save them for later. First, let the cooked rolls cool completely. Then, wrap each roll in plastic wrap and place them in a freezer-safe bag. This method keeps them safe from freezer burn. You can freeze them for up to three months. When you're ready to eat, thaw the rolls in the fridge overnight. Reheat them in the oven at 350°F (175°C) for about 15-20 minutes until warm. To avoid food spoilage, always cool your chicken rolls before storing. Bacteria thrive in warm conditions. Make sure they cool for no more than two hours before placing them in the fridge or freezer. This helps keep your meal safe and tasty. Cook the Herbed Ricotta Stuffed Chicken Rolls for about 20 to 25 minutes in the oven. First, sear them for 3 to 4 minutes on each side in a skillet. This gives them a nice golden color. After searing, place the skillet in an oven preheated to 375°F (190°C). Use a meat thermometer to check if they reach 165°F (75°C). This ensures the chicken is safe to eat. Yes, you can use other cuts of chicken. Thighs can work well since they stay juicy. You might also try chicken tenders, but adjust cooking times. If using bone-in pieces, cook longer. Just remember that the stuffing method stays the same. Each cut offers a unique taste and texture. You can prep the Herbed Ricotta Stuffed Chicken Rolls a day in advance. Prepare the filling and stuff the chicken. Cover them tightly and store in the fridge. When ready to cook, take them out about 30 minutes before cooking. This helps them cook evenly. You can also freeze the rolls. Just thaw overnight in the fridge before cooking. This way, you save time on busy days. In this blog post, we explored making Herbed Ricotta Stuffed Chicken Rolls. You learned about key ingredients like chicken, cheeses, and fresh herbs. I provided step-by-step instructions for preparing and cooking the rolls. Tips for perfect results and variations for flavor were shared too. Keep experimenting with ingredients to suit your taste. Cooking is all about making recipes your own. Enjoy the process and savor every bite!

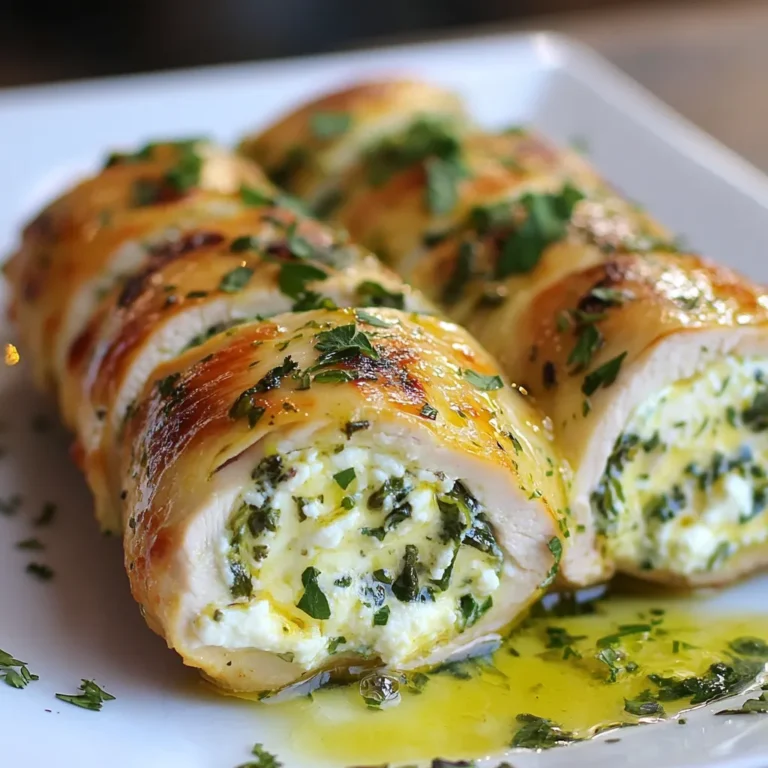
Herbed Ricotta Stuffed Chicken Rolls Flavorful Meal

- 4 chicken thighs, skin-on and bone-in - 1 cup long-grain rice - 2 cups chicken broth - 1 medium onion, diced - 3 cloves garlic, minced - 1 red bell pepper, diced - 1 teaspoon smoked paprika - 1 teaspoon dried oregano - 1/2 teaspoon turmeric - Salt and pepper to taste - 2 tablespoons olive oil - Fresh parsley, for garnish Gather these ingredients before you start cooking. The chicken thighs are key for flavor and moisture. The rice soaks up all the tasty broth. Using fresh vegetables adds color and crunch. The spices bring warmth and depth to the dish. Olive oil helps with cooking the chicken and veggies. Lastly, fresh parsley adds a pop of color when serving. {{ingredient_image_1}} - Preheat your oven to 375°F (190°C). - Gather all your ingredients and prepare them. - Season the chicken thighs with salt, pepper, smoked paprika, oregano, and turmeric. - Heat olive oil in a large oven-safe skillet over medium heat. - Place the chicken thighs skin-side down in the skillet. - Sear the chicken for 5-7 minutes until browned, then flip it. - Sear the other side for another 5 minutes. - Remove the chicken from the pan and set it aside. - In the same skillet, add the diced onion. - Sauté the onion for 3-4 minutes until it softens. - Next, add the minced garlic and sauté for 1 more minute. - Stir in the rice, toasting it for a couple of minutes. - Make sure the rice is well coated with the onion and garlic. - Pour in the chicken broth and bring it to a light boil. - Add the diced red bell pepper and frozen peas, stirring well. - Place the seared chicken thighs on top of the rice mixture, skin-side up. - Cover the skillet with a lid or aluminum foil. - Transfer the skillet to the preheated oven. - Bake for 35-40 minutes until the rice is tender. - Check the chicken's internal temperature; it should be at least 165°F (75°C). - Once done, remove the skillet from the oven. - Let it rest for about 5 minutes before serving. To ensure perfectly tender chicken, start with skin-on, bone-in thighs. This cut keeps the meat juicy. Sear the chicken in hot oil for a nice crust. Use a meat thermometer to check the internal temperature. It should reach at least 165°F (75°C). For the rice, the ideal ratio is two parts broth to one part rice. This helps the rice absorb moisture and flavor. If you want extra flavor, use homemade chicken broth if you have it. Garnishing with fresh herbs can elevate your dish. Chopped parsley adds color and freshness. Sprinkle it right before serving for a pop of green. For a rustic appeal, serve directly from the skillet. This creates a warm and inviting look. You can place a large spoon in the skillet for easy serving. If the rice is undercooked, add a bit more broth or water. Cover the skillet and return it to the oven for a few more minutes. This will help the rice finish cooking. To fix overly dry chicken, you can add a splash of broth. Cover the pan and let it sit for a few minutes. This allows the chicken to soak up moisture again. Pro Tips Rest the Chicken: After baking, let the chicken rest for 5 minutes to allow the juices to redistribute, resulting in a more flavorful and juicy bite. Customize Your Veggies: Feel free to add or substitute other vegetables like carrots or zucchini for added nutrition and color. Use Fresh Herbs: For an extra burst of flavor, consider adding fresh herbs like thyme or rosemary along with the parsley garnish. Check Rice for Doneness: Before removing from the oven, ensure the rice has absorbed all the liquid and is tender; if not, cover and bake for an additional 5-10 minutes. {{image_2}} You can easily swap ingredients in this dish. If you prefer chicken breast, use it instead of thighs. Chicken breast cooks faster, so reduce the baking time. You can also try other proteins like turkey or tofu for a tasty twist. Another option is to use brown rice instead of long-grain rice. Brown rice adds a nutty flavor and extra fiber. Keep in mind, brown rice needs more cooking time and liquid. Adjust the broth to one and a half cups for brown rice. Adding more veggies makes this dish colorful and healthy. Try mixing in chopped carrots or green beans. You can also toss in some spinach or zucchini for extra nutrition. Spicing it up with extra herbs and spices can change the flavor. Add fresh thyme or basil for a bright taste. A pinch of red pepper flakes can give it a nice kick, too. Changing the broth or sauces can bring new flavors. Use vegetable broth for a lighter taste. You might also try coconut milk for a creamy, tropical touch. Adjusting the seasoning allows you to create unique twists. Add lemon juice or zest for a fresh zing. Experiment with different spices like cumin or coriander for a fun change. To store leftovers properly, let the dish cool first. Place it in an airtight container. This keeps the food fresh and tasty. You can store it in the fridge for up to three days. Make sure to label the container with the date. This way, you know when to use it. For freezing, let the dish cool completely before packing. Use freezer-safe containers or bags. Remove as much air as possible to avoid freezer burn. You can freeze it for up to three months. To keep the flavor, reheat slowly. Thaw it overnight in the fridge for best results. You can reheat leftovers in a few ways. The oven works great. Preheat it to 350°F (175°C) and cover the dish with foil. This helps keep the moisture in. You can also use the microwave. Heat in short bursts, stirring in between. This ensures even heating without drying out the chicken. Enjoy your meal again! Can I use other rice types for this recipe? Yes, you can use other rice types. However, cooking times may change. For example, brown rice takes longer to cook. It needs more liquid and time. Make sure to adjust the broth and baking time to fit your rice. How can I tell if the chicken is fully cooked? The best way is to use a meat thermometer. Check the thickest part of the chicken. It should read at least 165°F (75°C). If you don’t have a thermometer, cut into the chicken. The meat should be white, not pink. Is it suitable for meal prep? Absolutely! One Pan Chicken and Rice Bake is great for meal prep. You can make it in advance and save it for later. Just store it in airtight containers. It stays fresh for up to four days in the fridge. How to safely reheat the dish? To reheat, you can use the oven or microwave. If using the oven, set it to 350°F (175°C). Cover the dish with foil to keep it moist. Heat for about 20 minutes or until warm. In the microwave, heat in short bursts, stirring in between. What sides pair well with One Pan Chicken and Rice Bake? This dish pairs well with a simple salad or steamed veggies. You can also serve it with crusty bread to soak up the juices. A light vinaigrette salad adds a nice crunch and freshness. Can I serve it as a one-pot meal? Yes, you can! One Pan Chicken and Rice Bake is perfect as a one-pot meal. Everything cooks together, making it easy to serve. You can enjoy it right from the skillet, which adds a rustic touch to your dining table. This blog post covered a tasty one-pan chicken and rice bake. We explored the main ingredients, step-by-step cooking methods, and cooking tips. You now know how to avoid common issues and try fun variations. Perfectly tender chicken and flavorful rice are just a recipe away. Feel free to customize ingredients and enjoy this dish in new ways. Remember, following storage tips keeps leftovers fresh for later. You can make this meal a regular favorite in your kitchen!

One Pan Chicken and Rice Bake Simple Family Meal

- 4 boneless, skinless chicken thighs - 1/4 cup honey - 1/4 cup low sodium soy sauce - 4 cloves garlic, minced - 2 tablespoons fresh ginger, minced - 1 tablespoon rice vinegar - 1 tablespoon sesame oil These main ingredients make the dish shine. The chicken thighs keep it juicy and tender. Honey brings sweetness, while soy sauce adds depth. Garlic and ginger give it a nice kick. Rice vinegar brightens the flavors, and sesame oil adds a nutty touch. - 1 teaspoon crushed red pepper flakes - 2 green onions, sliced (for garnish) - Sesame seeds (for garnish) These optional ingredients can elevate your dish. Crushed red pepper flakes add heat if you like spice. Green onions and sesame seeds make a lovely garnish. They add color and a bit of crunch. - Recommended pairing with jasmine rice - Alternative side dishes like steamed broccoli or stir-fried veggies I love serving this dish over jasmine rice. The rice soaks up the tasty sauce. You can also serve it with steamed broccoli or stir-fried veggies for a balanced meal. Try different sides to see what you enjoy most! {{ingredient_image_1}} To start, gather all your marinade ingredients. You need honey, soy sauce, minced garlic, minced ginger, rice vinegar, sesame oil, and crushed red pepper flakes if you want heat. In a mixing bowl, add: - 1/4 cup honey - 1/4 cup soy sauce (low sodium) - 4 cloves garlic, minced - 2 tablespoons fresh ginger, minced - 1 tablespoon rice vinegar - 1 tablespoon sesame oil - 1 teaspoon crushed red pepper flakes (optional) Whisk these together until they blend smoothly. The mixture should smell amazing and have a nice balance of sweet and savory. Next, it's time to marinate the chicken. Place the 4 boneless, skinless chicken thighs in a ziplock bag or a shallow dish. Pour the marinade over the chicken, making sure it’s well coated. Seal the bag or cover the dish. Refrigerate the chicken for at least 30 minutes. For the best flavor, marinate it for up to 4 hours. This time allows the chicken to soak up all the delicious flavors. Now, let's cook the chicken. Start by preheating your grill or grill pan over medium-high heat. While it heats, take the chicken out of the marinade. Let the excess marinade drip off, but keep it for later. Place the chicken on the grill. Cook it for about 6-7 minutes on each side. You want it to reach an internal temperature of 165°F (75°C). It should have a nice char on the outside. While the chicken cooks, pour the reserved marinade into a small saucepan. Bring it to a boil and let it simmer for 5-7 minutes until it thickens slightly. Once the chicken is done, remove it from the grill and let it rest for 5 minutes. After resting, slice the chicken and serve it over cooked jasmine rice. Drizzle the thickened marinade on top and garnish with sliced green onions and sesame seeds. Enjoy! To ensure your chicken is juicy and safe to eat, check the internal temperature. The ideal temperature is 165°F (75°C). Use a meat thermometer for accuracy. Insert it into the thickest part of the thigh. This step prevents undercooked or dry chicken. Always let chicken rest for a few minutes after cooking. This helps the juices redistribute. If you want to mix things up, try different marinades. You can use orange juice or maple syrup instead of honey. For a tangy twist, swap rice vinegar with apple cider vinegar. You can also use garlic powder instead of fresh garlic. Adding herbs like thyme or rosemary can boost flavor, too. Experimenting with different ingredients keeps your meals exciting. To enhance your honey garlic chicken, add more garlic or ginger. You can also adjust the sweetness by adding more honey or using less soy sauce. For a spicy kick, increase the crushed red pepper flakes. If you prefer a milder dish, skip the flakes altogether. Drizzle extra marinade over the chicken after cooking for added flavor. Don't forget to garnish with sliced green onions and sesame seeds for a fresh touch. Pro Tips Marinate Longer for Depth of Flavor: For the best taste, marinate the chicken for at least 2 hours, or even overnight, to allow the flavors to penetrate deeply. Use a Meat Thermometer: To ensure the chicken is cooked perfectly, use a meat thermometer to check that the internal temperature reaches 165°F (75°C). Grill with Care: Avoid flipping the chicken too often; let it develop a good char before turning, which enhances flavor and texture. Thickening the Sauce: If you want a richer sauce, consider adding a cornstarch slurry (cornstarch mixed with water) to the marinade while it simmers to thicken it further. {{image_2}} You can bake or pan-fry Honey Garlic Chicken for a tasty twist. To bake, preheat your oven to 400°F (200°C). Place marinated chicken thighs on a baking sheet. Bake for 25-30 minutes until they reach 165°F (75°C). Basting them with the marinade halfway adds flavor. For pan-frying, heat some oil in a skillet over medium heat. Add the chicken thighs and cook for 6-7 minutes on each side. This method gives you a nice sear and keeps the chicken juicy. Adding veggies can make this dish even better! You can toss in seasonal vegetables like bell peppers, broccoli, or snap peas. Chop them into bite-sized pieces. Sauté them in the pan before adding the chicken. This way, you get a colorful and nutritious meal. You can also roast the vegetables with the chicken. Just add them to the baking sheet during the last 15 minutes of baking. They will soak up the delicious honey garlic flavor! If you need a gluten-free option, swap soy sauce for tamari or coconut aminos. Both taste great and keep the dish flavorful. This small change allows you to enjoy Honey Garlic Chicken without worry. Use the same amount as soy sauce in the recipe. Now, everyone can enjoy this tasty meal! Store leftover honey garlic chicken in an airtight container. It stays fresh for up to four days in the fridge. Make sure the chicken cools to room temperature before sealing. This helps keep it safe and tasty. When you're ready to eat, just heat it up in the microwave or on the stove. To freeze honey garlic chicken, first let it cool completely. Place the chicken in a freezer-safe bag or container. Remove as much air as possible to prevent freezer burn. It can stay frozen for up to three months. To reheat, thaw it overnight in the fridge. Heat it in a pan over medium heat until warmed through. You can also microwave it, but be careful not to overcook it. Here’s how long each ingredient lasts in storage: - Boneless, skinless chicken thighs: 1-2 days in the fridge; 6-9 months in the freezer - Honey: Indefinitely when stored properly - Soy sauce: 6 months in the pantry; up to 2 years in the fridge - Garlic: 1-2 weeks in the fridge; can be frozen for several months - Ginger: 1-3 weeks in the fridge; can be frozen for up to 6 months - Rice vinegar: Indefinitely when stored in a cool, dark place - Sesame oil: 6 months in the pantry; up to 1 year in the fridge - Crushed red pepper flakes: 1-2 years in the pantry - Green onions: 1 week in the fridge; can be frozen for a few months - Sesame seeds: 1 year in the pantry; up to 2 years in the fridge Keep these tips in mind to enjoy your honey garlic chicken at its best! You can use maple syrup or agave syrup. Both will keep the sweet taste. If you want a less sweet flavor, try brown sugar mixed with water. This mix gives a nice caramel note, too. Yes, you can use chicken breasts. However, remember that chicken breasts cook faster. They may dry out if overcooked. Cook them for about 5-6 minutes per side. Use a meat thermometer to check for 165°F (75°C) for safety. Absolutely! I love making Honey Garlic Chicken ahead of time. You can marinate the chicken and store it in the fridge. It stays fresh for up to 4 hours. You can also cook a larger batch. Just store leftovers in an airtight container. This dish tastes great even after a few days! You can create a tasty Honey Garlic Chicken dish with simple steps. We covered main ingredients like chicken, honey, and soy sauce. You learned how to marinate, cook, and serve for the best flavor. Don't forget tips for cooking right and storing leftovers. Explore variations for baking or adding veggies to cater to your taste. Enjoying your cooking journey makes it more fun. Keep experimenting with flavors and methods. Happy cooking!

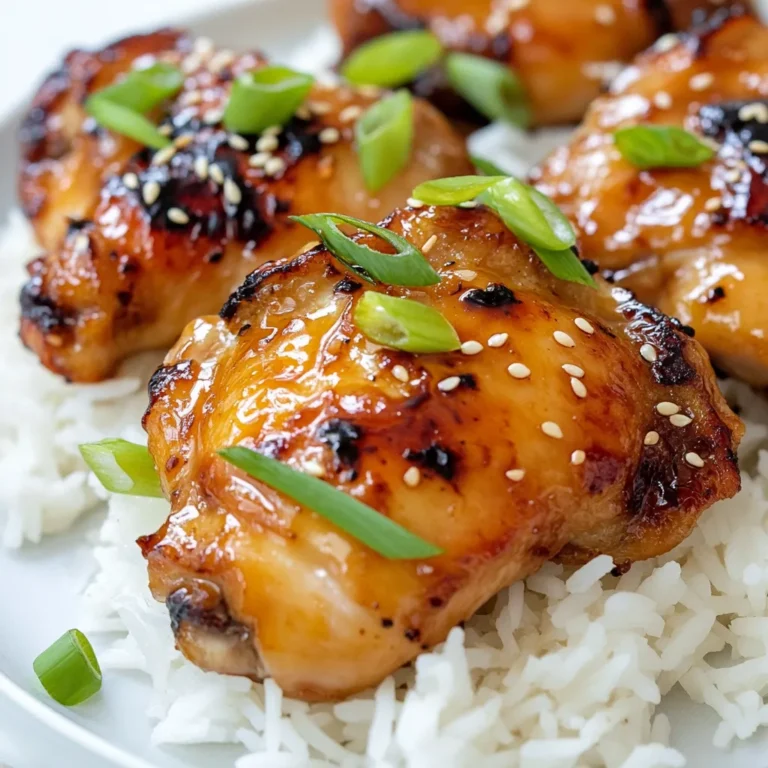
Honey Garlic Chicken Flavorful and Easy Recipe

- Rolled Oats: Use 1 cup of rolled oats. They give the right texture. - Milk Options: Choose 1 cup of almond milk or your favorite milk. - Sweeteners and Flavorings: Add 2 tablespoons of maple syrup, 1 teaspoon of vanilla extract, and 1/2 teaspoon of cinnamon for flavor. - Coffee Component: Use 1 shot of espresso or 1/2 cup of cooled strong brewed coffee. - Optional Toppings: Whipped cream, extra caramel sauce, and chocolate shavings make great toppings. This mix of ingredients creates a creamy and sweet breakfast. The coffee and caramel blend perfectly. You can adjust the sweetness with more or less maple syrup. Each bite gives you a taste of morning coffee and dessert. {{ingredient_image_1}} First, get a medium bowl. Add 1 cup of rolled oats and 1 tablespoon of chia seeds. Pour in 1 cup of almond milk. You can use any milk you like. Next, add 2 tablespoons of maple syrup for sweetness. If you want, adjust the amount to your taste. Then, include 1 teaspoon of vanilla extract and 1/2 teaspoon of cinnamon. Mix everything well until it combines. Now, grab two mason jars or containers with lids. Divide the oat mixture evenly between them. Next, take a shot of espresso or 1/2 cup of strong brewed coffee. Make sure it is cooled down. Pour it gently over the oats in each jar. Do not mix it; let it sit on top for a nice layer. Finally, drizzle 2 tablespoons of caramel sauce over each jar. Cover each jar with a lid. Place them in your fridge to chill overnight. If you are in a hurry, let them chill for at least 4 hours. In the morning, stir the oats to mix the flavors. If you like it more creamy, add some extra almond milk. Enjoy your delicious caramel macchiato overnight oats! You can change the sweetness of your oats easily. Start with two tablespoons of maple syrup. Taste the mixture. If you want it sweeter, add more syrup. You can also use honey or agave if you prefer. Keep adjusting until it’s just right for you. If you want a dairy-free option, almond milk works great. You can also use oat milk, soy milk, or coconut milk. Each milk gives a unique flavor. Choose what you like best. Just keep the same amount, one cup, to keep your oats creamy. For creamy oats, use rolled oats, not quick oats. Rolled oats soak well overnight. Add chia seeds for extra creaminess and nutrients. If you want a thinner texture, stir in more almond milk in the morning. This makes it easier to enjoy with a spoon. Pro Tips Use Fresh Coffee: For the best flavor, use freshly brewed coffee or espresso. The aroma and taste will elevate your overnight oats! Adjust Sweetness: Feel free to adjust the amount of maple syrup based on your personal preference for sweetness. You can also try different sweeteners! Experiment with Milk: While almond milk works great, try other milk alternatives like oat milk or coconut milk for a unique flavor profile. Layering Techniques: For a stunning presentation, pour the coffee slowly over the oats to create distinct layers before adding caramel sauce. {{image_2}} To make chocolate caramel macchiato oats, add cocoa powder. Use two tablespoons of unsweetened cocoa. Mix the cocoa with the other ingredients, just like before. The chocolate adds a rich taste to your oats. You can top these with chocolate shavings, too. This way, you get a sweet treat in the morning. For spiced caramel macchiato oats, add a pinch of nutmeg and ginger. These spices bring warmth and a cozy flavor. Just mix them in with the oats and other ingredients. This version is great for chilly mornings. It gives your breakfast a nice fall vibe. To make a vegan version, replace dairy milk with almond or oat milk. Use maple syrup for sweetness, just like in the regular recipe. Make sure the caramel sauce is vegan, too. You can find many brands that offer vegan caramel. This way, everyone can enjoy this tasty breakfast. Store your Caramel Macchiato Overnight Oats in airtight containers. Choose mason jars or any sealed bowl. This keeps the oats fresh and tasty. Always let the oats cool completely before sealing. This step helps avoid soggy oats. These oats last up to five days in the fridge. Enjoy them for breakfast or as a snack. If you notice any off smell or change in color, it is best to discard them. Always check the oats before eating. You can eat the oats cold or warm them up. If you prefer warm oats, heat them in the microwave for about 30 seconds. Stir well to evenly heat them. Add more milk if the mixture seems thick. Top with whipped cream, extra caramel sauce, or chocolate shavings for a special treat. Yes, you can use instant oats. They will soak up the liquid fast. The texture may be softer than rolled oats. If you like a creamier feel, instant oats work well. Just remember, they may not hold their shape as much. To reduce sweetness, cut back on maple syrup. Start with one tablespoon instead of two. You can also skip the caramel sauce on top. Tasting as you go helps you find the right balance. Absolutely! These oats are great for meal prep. Make a batch on Sunday for a quick breakfast all week. Just store them in the fridge in jars. They stay fresh for up to five days. You can add many flavors to these oats. Try a scoop of cocoa powder for chocolate. Add peanut butter for a nutty twist. Fresh fruits like bananas or berries also work great. Get creative and enjoy different tastes! This blog post covered how to make delicious overnight oats. We discussed key ingredients, like rolled oats, milk options, and sweeteners. I provided a simple guide for mixing and layering your oats, plus tips for perfect texture. You can customize flavors with options like chocolate or spices and explore vegan choices. Lastly, I shared storage tips to keep your oats fresh. These oats not only make breakfast easy but also let you enjoy tasty variations every time. Get creative and make these oats your own!

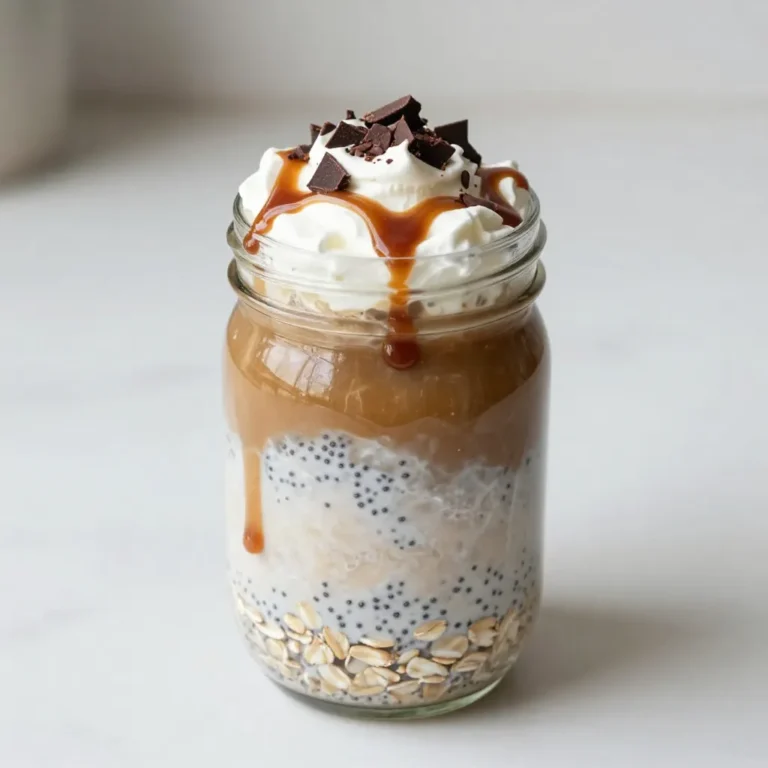
Caramel Macchiato Overnight Oats Ready in Minutes

To make a tasty avocado tomato pasta salad, gather these key items: - 8 oz penne pasta - 2 ripe avocados, diced - 2 cups cherry tomatoes, halved - 1/2 cup red onion, finely diced - 1/4 cup fresh basil, chopped - 3 tablespoons olive oil - 2 tablespoons balsamic vinegar - 1 teaspoon garlic powder - Salt and pepper to taste These ingredients create a colorful and fresh dish. The penne pasta gives a hearty base, while the avocados add creaminess. Cherry tomatoes bring sweetness and bright color. Fresh basil adds a wonderful aroma, making each bite delightful. You can add a few optional items for extra taste: - 1/4 cup feta cheese, crumbled Feta cheese adds a salty kick to the salad. It pairs well with the creamy avocado and juicy tomatoes. If you love cheese, don’t skip this ingredient! To enjoy the best flavors, use fresh ingredients. Look for ripe avocados that feel slightly soft when you press them. Fresh basil should smell strong and fragrant. Cherry tomatoes should be bright and firm. This will ensure your salad tastes amazing and looks vibrant. When ingredients are fresh, they make the salad pop! {{ingredient_image_1}} Start by boiling a large pot of salted water. Add 8 oz of penne pasta. Cook it until it's al dente, which means it should be firm but not hard. This usually takes about 8 to 10 minutes, but check the package for exact times. Once done, drain the pasta in a colander. Rinse it under cold water to cool it off. This step helps stop the cooking process and keeps the pasta from sticking. In a big mixing bowl, add the cooled pasta. Next, toss in 2 ripe avocados, diced into small pieces. Then, add 2 cups of halved cherry tomatoes and 1/2 cup of finely diced red onion. The colors will start to pop! For some fresh flavor, mix in 1/4 cup of chopped basil. If you like feta, sprinkle in 1/4 cup of crumbled cheese. This adds a nice creamy touch. Now, let's make the dressing. In a small bowl, whisk together 3 tablespoons of olive oil and 2 tablespoons of balsamic vinegar. Add 1 teaspoon of garlic powder, salt, and pepper to taste. Whisk until it’s well mixed. Pour this dressing over your pasta salad. Gently toss everything together so that all the ingredients are coated. Taste your salad and adjust the seasoning if needed. Let it sit for about 15 to 20 minutes. This time helps the flavors blend perfectly. To dice avocados, start by cutting them in half. Remove the pit carefully. Use a spoon to scoop out the flesh. Place the avocado half on a cutting board, flesh side up. Make vertical and horizontal cuts in the flesh without cutting through the skin. Use a spoon again to scoop out the diced pieces. This keeps the pieces neat and makes your salad look great. To make your salad pop with flavor, use simple seasonings. Garlic powder adds a nice touch. Salt and pepper enhance all the other tastes. Olive oil and balsamic vinegar bring richness and tang to the dish. You can also add fresh herbs like basil or parsley for a bright twist. These flavors blend well with the creamy avocado and juicy tomatoes. Keep your prep simple by using a few quick tricks. Cook the penne pasta ahead of time and keep it in the fridge. This way, you save time when you prepare the salad. Use pre-diced onions or cherry tomatoes if available. You can also buy crumbled feta cheese to skip the crumbling step. These small changes make cooking faster and easier, so you can enjoy your meal sooner. Pro Tips Fresh Ingredients: Always use ripe avocados and fresh basil for the best flavor in your salad. Chilling Time: Let the salad sit for 15-20 minutes before serving to allow the flavors to meld together beautifully. Pasta Cooking: Be sure not to overcook the penne pasta; al dente ensures the pasta holds up well in the salad. Customizable Options: Feel free to add other veggies or proteins like grilled chicken or chickpeas to make the salad more hearty. {{image_2}} You can boost your salad's protein with chicken or chickpeas. For chicken, grill or roast some pieces. Chop them into bite-sized bits. Toss them in with the pasta for a hearty meal. If you prefer chickpeas, use canned ones for a quick option. Rinse and drain them, then mix them in. Both choices add great flavor and texture. If you want a vegan version, simply leave out the feta cheese. You can replace it with a sprinkle of nutritional yeast. This adds a cheesy flavor without dairy. You can also add some avocado for creaminess. Your salad will still taste fresh and delicious without any animal products. You can change the salad based on the season. In spring, add peas or asparagus for a crunch. In summer, include diced cucumbers or bell peppers for freshness. You can even swap cherry tomatoes for heirloom ones to mix flavors. Seasonal ingredients keep your salad exciting and full of life. To keep your avocado tomato pasta salad fresh, place it in an airtight container. Make sure to press out as much air as possible before sealing. This helps prevent browning of the avocados and keeps the salad tasty. If you have extra dressing, store it separately to keep the salad from getting soggy. You can store the pasta salad in the fridge for up to three days. After that, the avocados may turn brown, and the salad can lose its bright flavor. If you notice any off smells or changes in texture, it’s best to toss it out. Always check before eating! You can enjoy this salad cold, as it is meant to be a refreshing dish. If you prefer it warm, gently reheat it in a pan over low heat. Add a splash of olive oil to help maintain the creamy texture. Avoid using the microwave, as it can make the salad mushy. Yes, you can use different types of pasta. Penne works well, but you can try rotini or fusilli. These shapes hold the dressing well and add fun to the dish. Just remember to cook the pasta until it is al dente. This keeps the pasta firm and tasty. You can keep this salad in the fridge for about three days. After that, the avocados may brown and the tomatoes may become mushy. To keep it fresh, store it in an airtight container. If you add the dressing later, it can last even longer. If you need a substitute for balsamic vinegar, try red wine vinegar. It has a nice tang that works well with this salad. You can also mix lemon juice with olive oil for a fresh twist. Both options add flavor without changing the salad too much. This article covered the key ingredients for your pasta salad, plus how to mix and serve it. I shared tips for perfecting flavors, like dicing avocados and choosing seasonings. You can try variations for added protein or seasonal freshness. Lastly, I discussed how to store leftovers and answered common questions. Now, it's time to make your pasta salad your own. Use these tips and enjoy a tasty dish!

Avocado Tomato Pasta Salad Fresh and Flavorful Meal

To make Chocolate Covered Strawberry Fudge, you need a few key ingredients. Here’s the list: - 2 cups dark chocolate chips - 1 can (14 oz) sweetened condensed milk - 1 teaspoon vanilla extract - 2 cups freeze-dried strawberries, crushed - 1 cup fresh strawberries, hulled and halved - Sea salt for garnish Each ingredient plays a special role. The dark chocolate chips give a rich taste. Sweetened condensed milk adds creaminess and sweetness. The vanilla extract boosts the flavor, making it even better. Freeze-dried strawberries give a crunchy texture and bright flavor. Fresh strawberries add a juicy burst. Lastly, sea salt enhances all the sweet flavors. When you gather these ingredients, make sure they are fresh and high-quality. This choice will make your fudge even more delicious! {{ingredient_image_1}} First, grab an 8x8 inch baking dish. Line it with parchment paper. Leave some paper hanging over the edges. This helps when you take the fudge out later. It makes removal easy and neat. Next, take a medium saucepan. Pour in 2 cups of dark chocolate chips. Add 1 can of sweetened condensed milk to the pan. Heat this over low heat. Stir it constantly until the chocolate melts. You want it smooth and creamy. Once melted, remove the pan from the heat. Add 1 teaspoon of vanilla extract. Mix it well to combine. Now fold in 2 cups of crushed freeze-dried strawberries. Make sure they are evenly spread in the chocolate. Now, pour half of the chocolate-strawberry mix into the dish. Spread it evenly across the bottom. Take your halved fresh strawberries and arrange them on top. Then, pour the rest of the chocolate mixture over the fresh strawberries. Smooth it out so it covers everything. Finally, sprinkle a pinch of sea salt on top. This adds a nice contrast to the sweet fudge. Place the dish in the fridge for at least 2 hours. Once it sets, lift the fudge out using the parchment paper. Cut it into squares and enjoy! Melting chocolate can be tricky. Here are some easy tips to help you. - Use a heavy saucepan. Thin pans can burn the chocolate. - Heat on low. This helps chocolate melt evenly. - Stir constantly. This keeps the heat even and smooths the chocolate. - Use a double boiler if you can. It adds gentle heat. - Avoid water. Even a drop can make chocolate seize up. A great fudge needs the right texture. Follow these steps for success. - Use sweetened condensed milk. This gives fudge a creamy base. - Mix until smooth. Stir well after adding the chocolate. - Fold in freeze-dried strawberries gently. This keeps them whole and adds crunch. - Let it cool before cutting. This helps it set better. - Refrigerate long enough. Chill for at least two hours for best results. You want your fudge to look as good as it tastes. Here are some tips. - Cut into even squares. This makes it look neat and tidy. - Place fudge on a decorative plate. A nice plate adds charm. - Garnish with fresh strawberries. They add color and freshness. - Use a sprinkle of sea salt on top. It gives a nice contrast. - Serve with toothpicks. This makes it easy for guests to grab. Pro Tips Use High-Quality Chocolate: Opt for premium dark chocolate chips for a richer flavor and smoother texture in your fudge. Chill for Perfect Setting: Allow the fudge to chill in the refrigerator for at least 2 hours to ensure it sets properly and is easy to cut. Experiment with Toppings: Feel free to add other toppings like crushed nuts or drizzles of white chocolate to customize your fudge. Store Properly: Keep the fudge in an airtight container in the refrigerator to maintain its freshness for up to a week. {{image_2}} You can make your fudge even more exciting by adding different mix-ins. Try adding nuts like almonds or walnuts for a crunchy bite. You can also use mini marshmallows for a fun texture. For a touch of spice, consider adding a sprinkle of cinnamon or a dash of chili powder. This twist will bring warmth to the sweet fudge. If you love coconut, try adding shredded coconut for a tropical flair. If you want a vegan version of this fudge, swap the sweetened condensed milk for coconut cream or a plant-based condensed milk. Use dairy-free chocolate chips instead of dark chocolate chips. This way, you can enjoy the same rich flavor without any animal products. Make sure to check the labels to confirm they are dairy-free. Want to change the flavor profile? You can use white chocolate instead of dark chocolate. It will give a sweeter taste and a creamy texture. You can also try milk chocolate for a more balanced flavor. For a fruity twist, add orange or lemon zest to the mixture for a fresh kick. Each of these swaps can create a unique fudge experience. To keep your fudge fresh, store it in an airtight container. You can layer the fudge squares between parchment paper. This will prevent them from sticking together. If you store it properly, the fudge lasts up to two weeks at room temperature. For best taste and texture, eat it within the first week. If you keep it in the fridge, it stays fresh for about three weeks. You can freeze fudge for longer storage. Wrap each square in plastic wrap before placing them in a freezer bag. It lasts for up to three months in the freezer. When you want to enjoy it, let it thaw in the fridge overnight. This keeps the texture smooth and tasty. Yes, you can use milk chocolate. It will make the fudge sweeter and creamier. The taste will change a bit, but it's still delicious. If you love milk chocolate, go for it! Just melt it the same way as dark chocolate. You can use coconut milk and sugar for a similar taste. Mix one cup of coconut milk with a bit of sugar until it thickens. Another option is to use evaporated milk mixed with sugar. This will give you a creamy base without using condensed milk. To check if the fudge is set, feel it after two hours in the fridge. It should feel firm to the touch. You can also gently press the top with your finger. If it holds its shape, it is ready. If not, give it more time in the fridge. This blog post covered how to make delicious strawberry fudge. We explored the key ingredients you'll need, like dark chocolate and fresh strawberries. I provided step-by-step instructions for smooth preparation and melting. You also learned tips for perfect texture and creative variations, such as vegan options. Lastly, we discussed storage methods for keeping your fudge fresh. In your kitchen, this fudge can be a fun, tasty treat. Enjoy making it your way!

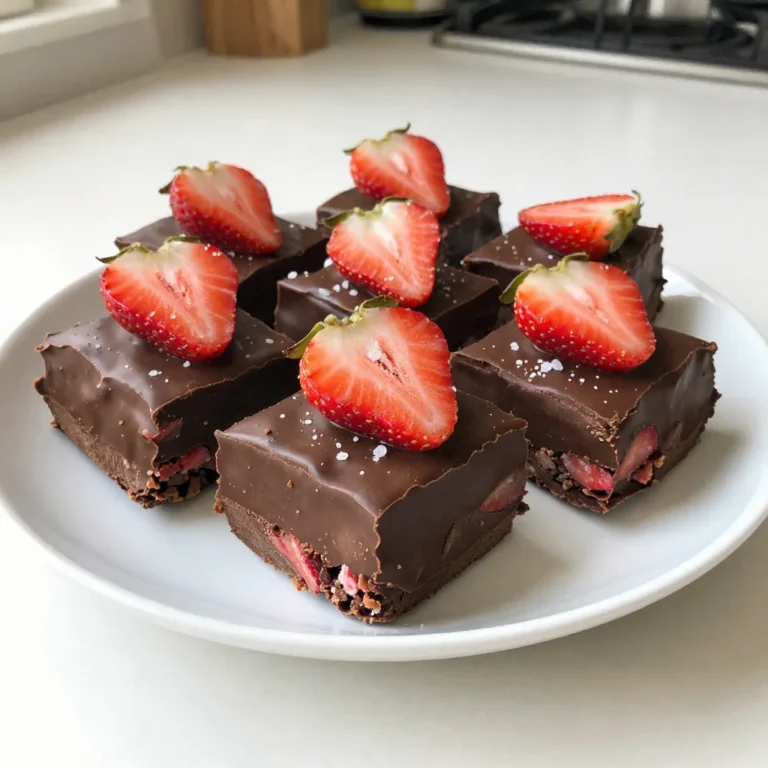
Chocolate Covered Strawberry Fudge Irresistible Delight

- 1 lb large shrimp, peeled and deveined - 1 ripe mango, diced - 1/2 red bell pepper, diced - 1/4 red onion, finely chopped - 1 jalapeño, deseeded and minced - 2 tablespoons lime juice - 1 tablespoon honey - 2 tablespoons fresh cilantro, chopped - Salt and pepper to taste - 12 small tortilla cups (store-bought or homemade) To make Mango Salsa Shrimp Cups, gather your ingredients first. Using fresh shrimp makes a big difference. Look for large shrimp, as they have a nice bite. Choose a ripe mango for sweetness. The red bell pepper adds a crunchy texture and vibrant color. The red onion gives a mild bite, while the jalapeño adds a bit of heat. You’ll need lime juice to brighten the flavors and honey for a touch of sweetness. Fresh cilantro adds a lovely herbaceous note. Keep salt and pepper handy for seasoning. Lastly, grab twelve small tortilla cups. You can buy these or make them at home. These ingredients create a fresh, flavorful dish that will impress your guests. Each bite bursts with taste, and the colors pop on the plate. Enjoy creating this delightful appetizer! {{ingredient_image_1}} - First, in a medium bowl, combine diced mango, red bell pepper, red onion, and jalapeño. This mix brings a sweet and spicy kick to your salsa. - Next, in a small bowl, whisk together lime juice, honey, and chopped cilantro. This dressing adds a zesty and fresh flavor. - Pour the dressing over the mango mix and toss gently. Season with salt and pepper to taste. Set this aside to let the flavors meld. - Heat a drizzle of olive oil in a skillet over medium heat. This oil will help cook the shrimp evenly. - Add the shrimp to the skillet and season with salt and pepper. Cook for about 2-3 minutes on each side until the shrimp are pink and opaque. - Once cooked, remove the shrimp from heat and let them cool slightly. This step keeps the shrimp tender and juicy. - Take your small tortilla cups and fill each with a few pieces of shrimp. The cups are perfect for holding the shrimp and salsa. - Top each cup generously with the mango salsa. This adds color and flavor to each bite. - Serve immediately for the best taste. Enjoy the fresh bursts of flavor in each cup! Choosing the right mango for sweetness When picking a mango, look for one that feels slightly soft. It should have a sweet smell at the stem. A ripe mango adds great flavor to your salsa. If it’s too firm, it will taste sour and not as good. Balancing flavors with lime and honey Lime juice adds a zesty kick to your salsa. Honey helps to cool the heat from jalapeños. Mix them well to enjoy a balanced taste. A touch of salt will enhance all the flavors. Avoiding overcooking shrimp Shrimp cooks quickly. Aim for about 2-3 minutes per side. You want them pink and opaque. Overcooked shrimp turns tough and rubbery. Keep a close eye while cooking. Alternative cooking methods (grilling, sautéing) You can grill shrimp for a smoky flavor. Simply skewer them for easy handling. Sautéing works well too. Use a bit of olive oil and the same cooking time as before. Pairing with drinks or side dishes These shrimp cups pair well with light drinks. Try a crisp white wine or a refreshing mocktail. For sides, consider a simple green salad or chips and guacamole. Presentation ideas for parties For a fun touch, serve shrimp cups on a colorful platter. Add lime wedges and cilantro leaves for decoration. This makes the dish look vibrant and festive. Your guests will be impressed! Pro Tips Fresh Ingredients: Use the ripest mango you can find for the best flavor and sweetness in your salsa. Perfectly Cooked Shrimp: Avoid overcooking the shrimp; they should be just pink and opaque for the best texture. Spice it Up: Adjust the jalapeño to your heat preference, or add more for a spicier kick to your salsa. Make Ahead: Prepare the mango salsa in advance and let it sit in the fridge for a couple of hours to enhance the flavors. {{image_2}} You can easily swap ingredients in this recipe to suit your taste. If you don't have mango, try pineapple or peach. Both fruits add a sweet and tangy flavor. For the shrimp, consider using scallops or crab. Each option brings a unique taste and texture to your cups. This recipe can fit different diets. To make it gluten-free, use gluten-free tortilla cups. You can also find rice or lettuce cups as great alternatives. If you're looking for a vegan option, simply replace shrimp with marinated tofu or chickpeas. Both choices will still provide a satisfying bite. Want to kick the flavor up a notch? Add spices like cumin or paprika to your salsa. Fresh herbs, like basil or mint, can also bring a new twist. If you're a fan of creamy textures, try adding diced avocado. Black beans are another tasty addition for extra protein and fiber. These enhancements will make your shrimp cups even more delicious! To keep your shrimp cups fresh, follow these steps: - Place the shrimp cups in an airtight container. - Use a container with a lid to prevent moisture loss. - Store them in the fridge for best results. This method helps maintain flavor and texture. Avoid stacking the cups to keep them intact. You can freeze your salsa or shrimp separately. Here’s how: - For shrimp, let them cool completely, then place in a freezer bag. - Squeeze out air before sealing the bag. This keeps them fresh longer. - For salsa, use a freezer-safe container. Leave space at the top for expansion. To thaw, move the shrimp or salsa to the fridge overnight. Reheat shrimp in a skillet for best results. Your mango salsa shrimp cups can stay fresh for up to three days in the fridge. After that, they may spoil. Watch for these signs of spoilage: - Unpleasant odor from the shrimp. - Change in color or texture of the salsa. - Any mold growth in the cups. If you notice these signs, it’s best to discard them. Enjoy your delicious shrimp cups while they’re fresh! It takes about 15 minutes to prep and 15 minutes to cook. Overall, you need 30 minutes to make these tasty shrimp cups. You can eat them right after making them. Yes, you can make the mango salsa ahead of time. Let it sit for at least 30 minutes. This wait helps the flavors mix well. If you make it a day before, the salsa gets even better. Yes, these shrimp cups work great for meal prep. You can cook the shrimp and make the salsa in advance. Just store them separately in the fridge. When you're ready, assemble the cups for quick snacks or parties. You can serve these cups with chips, guacamole, or a fresh salad. For drinks, try a light beer, a fruity cocktail, or iced tea. These pairs enhance the vibrant flavors of the shrimp cups. This blog shared a delicious recipe for mango salsa shrimp cups. We covered each ingredient, from shrimp to mango, and detailed the step-by-step process. I offered tips on making the best salsa and cooking shrimp perfectly. Variations and serving suggestions add fun to this dish. Whether you serve it at parties or enjoy it alone, this recipe is a win. Get creative with your ingredients and enjoy every bite!

Mango Salsa Shrimp Cups Flavorful and Fresh Appetizer

- 200g feta cheese, crumbled - 4 large eggs - 1 cup cherry tomatoes, halved - 2 tablespoons olive oil To make baked feta eggs, you need key ingredients. First, get feta cheese. This cheese adds a creamy and salty flavor. Next, use fresh eggs. They create a rich texture. Then, add cherry tomatoes. Their sweetness enhances the dish. Lastly, drizzle in olive oil. It helps everything bake nicely. - 1 teaspoon dried oregano - 1/2 teaspoon red pepper flakes (optional) - Salt and pepper to taste Seasonings bring out the best flavors. Dried oregano gives the dish a nice herbal taste. Red pepper flakes add heat, but they are optional. Always season with salt and pepper to your liking. These simple additions make a big difference. - Crusty bread - Fresh parsley, chopped (for garnish) Once baked, serve this dish with crusty bread. The bread soaks up the savory sauce. For a fresh touch, add chopped parsley on top. It makes the dish look vibrant and appetizing. Enjoy this tasty breakfast treat with loved ones! {{ingredient_image_1}} - Preheat the oven: Set your oven to 400°F (200°C) to get it ready. - Prepare cherry tomatoes and feta: Cut the cherry tomatoes in half. Crumble the feta cheese into small bits. - Combine ingredients in a baking dish: In a baking dish, mix the halved tomatoes and crumbled feta. Drizzle olive oil over the mix. Add dried oregano, red pepper flakes, salt, and pepper. Stir gently. - Create wells for the eggs: After mixing, use a spoon to make four small wells in the mixture. - Bake until golden and set: Place the dish in the oven. Bake for 15-20 minutes. The feta should turn golden, and the tomatoes should blister. - Adding garnishes and serving: Take the dish out and carefully crack an egg into each well. Return it to the oven and bake for another 10-15 minutes. Once done, cool it slightly. Top with fresh parsley and serve with crusty bread. Enjoy the flavors! For eggs, you can choose soft or hard yolks. Soft yolks are runny and creamy. Hard yolks are firm and crumbly. If you like soft yolks, bake for about 10-12 minutes. For hard yolks, aim for 12-15 minutes. Keep an eye on the eggs to get your perfect doneness. Fresh herbs can really boost the taste. Try adding basil, thyme, or dill. These herbs bring a bright flavor that pairs well with feta. You can also add spices to change the taste. A pinch of cumin or smoked paprika can add depth. Experiment with flavors to find your favorite mix. Choose a good baking dish for even cooking. A glass or ceramic dish works well. These dishes help the eggs cook evenly and look great for serving. Using parchment paper can make cleanup easier. It helps prevent sticking and keeps your dish looking nice. Pro Tips Fresh Ingredients: Using fresh cherry tomatoes and high-quality feta will enhance the flavor of this dish significantly. Perfectly Cooked Eggs: Keep an eye on the eggs while baking; they should be set but still slightly runny for the best texture. Customize Your Spices: Feel free to adjust the amount of red pepper flakes based on your spice tolerance or swap in your favorite herbs. Serving Suggestions: Pair this with a light salad or roasted vegetables for a complete meal that's both satisfying and healthy. {{image_2}} You can boost your Baked Feta Eggs with a Mediterranean twist. Add some olives and roasted red peppers. Choose Kalamata olives for a salty taste. Slice up roasted red peppers for sweetness. These add color and flavor. Just mix them in with the feta and tomatoes before baking. You'll enjoy a rich and vibrant dish. Change the ingredients with the seasons. In spring, add fresh spinach or asparagus. For spinach, use a handful and wilt it in the oven. If using asparagus, cut it into small pieces and mix it in. Both greens bring bright colors and nutrients. This keeps your breakfast exciting and fresh. If you want a dairy-free meal, tofu works great. Use firm tofu instead of feta. Crumble it up to mimic feta's texture. Marinate it in olive oil and spices for extra flavor. This option keeps the dish creamy and delicious without dairy. You won't miss the feta! To keep your baked feta eggs fresh, use an airtight container. This helps keep moisture out. You can store leftovers in the fridge for up to three days. If you plan to eat them later, cover them well. The best way to reheat baked feta eggs is in the oven. Preheat the oven to 350°F (175°C). Place your dish in the oven for about 10-15 minutes. This warms them well without making them rubbery. You can also use a microwave for a quick fix. Heat for 30 seconds, check, and repeat as needed. You can freeze baked feta eggs, but it’s best to do so before baking. Prepare and assemble the dish, then cover it well. Freeze for up to two months. When you are ready, defrost it overnight in the fridge. Bake it as normal, adding a few extra minutes to the cooking time. Enjoy your tasty treat! Yes, you can try other cheeses! Goat cheese adds a tangy taste. Cream cheese gives a creamy texture. Mozzarella melts well and is mild. Use what you like best! Baked feta eggs taste great with crusty bread. You can also pair them with a fresh salad. Sliced avocado adds creaminess. Serve with roasted veggies for a hearty meal. Check the eggs after 10-15 minutes in the oven. The whites should be set and firm. The yolks can be soft or hard, based on your choice. For soft yolks, bake less. For firmer yolks, leave them longer. This blog post covered delicious baked feta eggs. We explored the key ingredients like feta cheese, eggs, and cherry tomatoes. I shared easy steps for prepping and baking, plus tips for perfect eggs. You can try variations to suit your taste and learn how to store leftovers properly. Baked feta eggs are fun and easy to make. They’re perfect for breakfast, brunch, or any meal. Enjoy experimenting with flavors, and you’ll impress everyone at your table. Happy cooking!

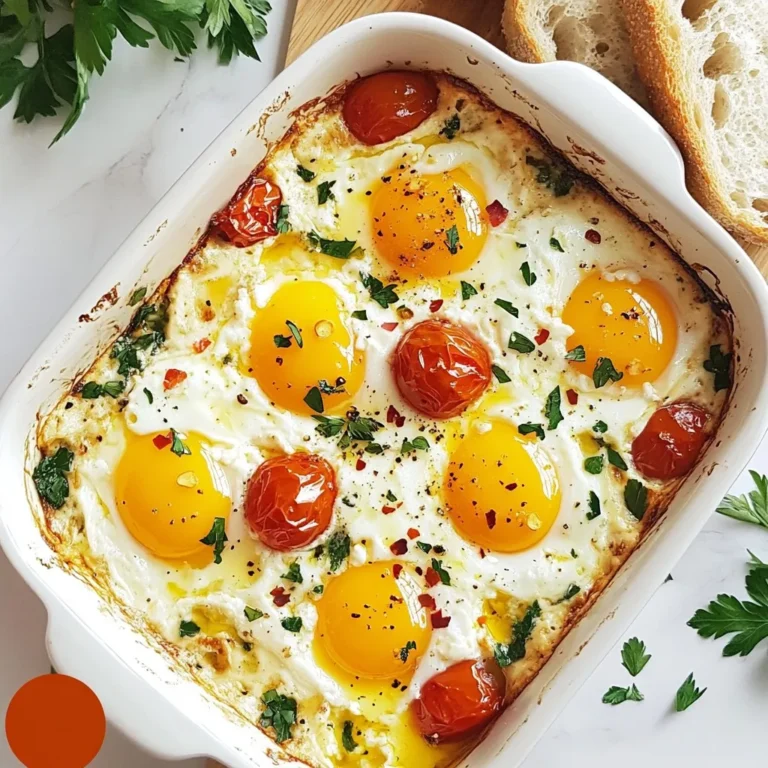
Baked Feta Eggs Delightful and Easy Breakfast Treat

- 4 boneless, skinless chicken breasts - 1 cup grated Parmesan cheese - 1 cup panko breadcrumbs - 1/4 cup olive oil - 2 cloves garlic, minced - 1 teaspoon dried Italian herbs (oregano, basil, thyme) - 1 teaspoon paprika - Salt and pepper to taste - 2 cups broccoli florets - 1 red bell pepper, chopped - 1 lemon (zest and juice) In this recipe, the main ingredients create a tasty and crunchy dish. The chicken breasts are the star, providing a juicy base. Grated Parmesan cheese adds rich flavor. Panko breadcrumbs give a delightful crunch. Olive oil helps the coating stick and adds moisture. The seasonings enhance the flavor. Garlic adds a robust taste, while Italian herbs bring aroma. Paprika gives a hint of warmth, and salt and pepper balance the flavors. For the veggies, broccoli florets add a pop of green and nutrition. Chopped red bell pepper adds sweetness and color. Fresh lemon juice and zest brighten the dish. This combination makes every bite enjoyable and delicious. {{ingredient_image_1}} 1. Preheat your oven to 400°F (200°C). This heat helps the chicken get crispy. 2. Line a large baking sheet with parchment paper. It makes cleanup easy. 3. In a mixing bowl, combine: - 1 cup grated Parmesan cheese - 1 cup panko breadcrumbs - 2 cloves garlic, minced - 1 teaspoon dried Italian herbs - 1 teaspoon paprika - Salt and pepper to taste Mix until everything is well combined. 1. In a separate bowl, whisk together: - 1/4 cup olive oil - Zest of 1 lemon - Juice of 1 lemon This mixture adds great flavor to the chicken. 2. Dip each chicken breast in the olive oil mix. Let the excess oil drip off. 3. Coat the chicken in the Parmesan mixture. Press gently so it sticks well. 1. In the same bowl used for the breadcrumbs, toss: - 2 cups broccoli florets - 1 chopped red bell pepper Add a bit of olive oil, salt, and pepper. 2. Arrange the coated chicken on one side of the baking sheet. Spread the veggies on the other side. 3. Bake for 25-30 minutes. Check if the chicken is golden and cooked through. The internal temperature should reach 165°F (74°C). The veggies should be tender. - Achieving the perfect golden crust To get that nice golden crust, make sure to press the coating on the chicken. This helps the panko breadcrumbs and Parmesan stick well. A quick tip is to set your oven to the right temperature. I love 400°F (200°C) for a crispy finish. - Ensuring chicken remains tender To keep the chicken tender, don’t overcook it. Use a meat thermometer to check that it hits 165°F (74°C). Brining the chicken in a little saltwater for an hour before cooking works wonders too. It helps lock in moisture. - Garnishing suggestions A sprinkle of fresh parsley adds a lovely touch. You can also use lemon wedges. They not only look good but also add brightness to the dish. - Serving options for the dish Serve the chicken and veggies on a large platter. This makes it easy for everyone to help themselves. You can even add a side of rice or a fresh salad for a complete meal. - Overcooking the chicken Keep an eye on your chicken. If you let it cook too long, it can dry out. I recommend checking it a few minutes before the timer goes off. - Uneven vegetable cooking Cut your veggies evenly. Broccoli and bell peppers need to be about the same size. This way, they cook at the same rate. Toss them in oil and seasoning before spreading them out on the pan. Pro Tips Use Fresh Ingredients: Always opt for fresh chicken and vibrant vegetables to ensure maximum flavor and nutrition in your dish. Customize Your Coating: Feel free to add your favorite spices or herbs to the breadcrumb mixture for a personalized touch that enhances the flavor. Check for Doneness: Use a meat thermometer to ensure the chicken reaches an internal temperature of 165°F (74°C) for safe consumption. Let It Rest: Allow the chicken to rest for a few minutes after baking; this helps retain its juices, making it more tender and flavorful. {{image_2}} You can switch the cheese in this dish. Try using mozzarella or cheddar instead of Parmesan. Each cheese adds a unique flavor. You can also use regular breadcrumbs if panko is not available. They will still give a nice crunch but may not be as light and airy. If you want to change the veggies, use asparagus, green beans, or carrots. These also roast well in the oven. Seasonal veggies like zucchini or squash can add great taste too. They are fresh and vibrant during summer. To spice things up, add some cayenne pepper or garlic powder to the breadcrumb mix. This will give the chicken a nice kick. You can also use fresh herbs like rosemary or thyme for more flavor. These herbs work well with chicken and add a lovely aroma. To keep your Parmesan crusted chicken fresh, store leftovers in an airtight container. This helps maintain flavor and texture. You can safely refrigerate the dish for up to three days. If you want to enjoy it later, make sure to cool it down before sealing it. For longer storage, freezing is a great option. Wrap the chicken tightly in plastic wrap, then place it in a freezer bag. This prevents freezer burn. The dish can freeze well for up to three months. When you're ready to eat, thaw it overnight in the fridge. Reheat it in the oven at 350°F (175°C) for about 20 minutes, or until it's hot throughout. If you plan to use this dish for meal prep, portion the chicken and veggies into single servings. This makes it easy to grab a meal on busy days. You may store the chicken and veggies separately to keep the veggies crisp. You can mix and match with different sides throughout the week! Bake the Parmesan crusted chicken for 25 to 30 minutes at 400°F (200°C). Check for a golden crust and an internal temperature of 165°F (74°C). This ensures the chicken is safe to eat and juicy inside. Yes, you can use chicken thighs instead of breasts. Thighs have more fat, making them juicier. Adjust the baking time to about 30 to 35 minutes, as they may take a bit longer to cook. You can use regular breadcrumbs or crushed crackers. Both will still give a nice crunch. If you want a gluten-free option, try crushed cornflakes or ground nuts. To make this dish gluten-free, use gluten-free breadcrumbs instead of panko. Check your Parmesan cheese to ensure it’s gluten-free as well. This keeps the flavor while meeting dietary needs. Great side dishes include roasted vegetables, mashed potatoes, or a fresh salad. These sides balance the flavors and add color to your plate. Try a lemon vinaigrette for extra zing. This blog post covered a delicious Parmesan crusted chicken recipe. You learned about the key ingredients, including chicken, cheese, and veggies. I gave step-by-step instructions to follow for a tasty meal. You now have tips to create the perfect dish and avoid common errors. Try variations and storage tips to keep your meals fresh. Enjoy making this easy, flavorful recipe again and again. Happy cooking!

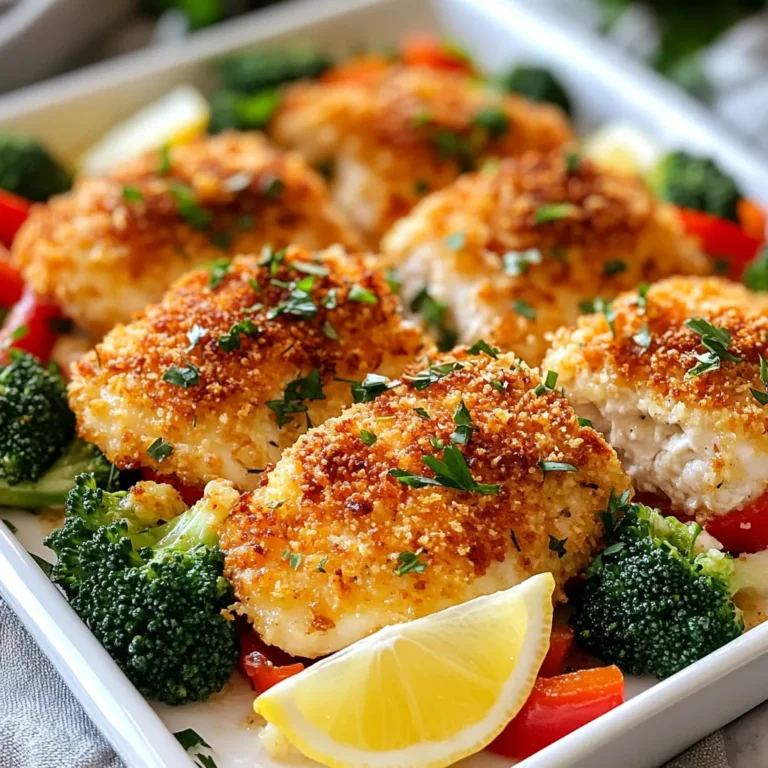
Parmesan Crusted Chicken Sheet Pan Delight

- 4 bone-in, skin-on chicken thighs - 4 cloves garlic, minced - 2 tablespoons fresh thyme, chopped (or 1 tablespoon dried) - 2 tablespoons fresh rosemary, chopped (or 1 tablespoon dried) - 1 tablespoon olive oil - 1 lemon, zested and juiced - Salt and pepper to taste - 1 teaspoon paprika - Fresh parsley for garnish To make Garlic Herb Roasted Chicken Thighs, you need simple, fresh items. The chicken thighs give great flavor and stay juicy. The garlic brings a strong kick, while thyme and rosemary add a fresh touch. Olive oil helps the herbs stick and makes the skin crispy. Lemon juice brightens the dish, and paprika adds a warm color. - Vegetables for roasting - Additional herbs You can add your favorite vegetables for roasting. Think of carrots, potatoes, or bell peppers. They soak up the chicken's flavor. You can also mix in other herbs like oregano or basil if you want different tastes. This way, you can customize it for your family's likes. {{ingredient_image_1}} 1. Preheating the oven Start by preheating your oven to 400°F (200°C). This step is key to getting crispy skin on your chicken thighs. 2. Combining ingredients for the herb mixture In a small bowl, mix together the minced garlic, fresh thyme, fresh rosemary, olive oil, lemon zest, lemon juice, salt, pepper, and paprika. This herb mixture adds flavor and depth to the chicken. 1. Properly coating the chicken thighs Pat the chicken thighs dry with paper towels. Place them in a large mixing bowl. Pour the herb mixture over the chicken thighs. Use your hands to coat them well. Massage the marinade into the chicken for 2-3 minutes. This helps the flavors seep in. 2. Roasting techniques Arrange the chicken thighs skin-side up on a baking sheet lined with parchment paper or in a cast-iron skillet. This allows the fat to render out and the skin to crisp up. Roast in the oven for 35-40 minutes. The chicken should reach an internal temperature of 165°F (74°C) and the skin should look golden brown. 1. Checking for doneness Use a meat thermometer to check the internal temperature. It should read 165°F (74°C) at the thickest part of the thigh. This ensures the chicken is fully cooked. 2. Resting and garnishing the chicken Once cooked, remove the chicken from the oven. Let it rest for 5 minutes before serving. This helps the juices redistribute. Finally, garnish with fresh parsley for a pop of color and serve with roasted vegetables or a simple salad. To make your garlic herb roasted chicken thighs tasty, marinate them well. Use a mix of minced garlic, fresh thyme, fresh rosemary, and olive oil. Let the chicken sit in this mix for at least 30 minutes. If you have time, marinate for a few hours or overnight. This helps the flavors soak in. For seasoning, I suggest starting with salt and pepper. A good rule is to use about one teaspoon of salt per pound of chicken. You can adjust based on your taste. Add paprika for a nice kick and color. To get that crispy skin, pat the chicken dry before cooking. Moisture makes it hard to crisp. Place the chicken skin-side up on a baking sheet or cast-iron skillet. If you want extra crispiness, broil it for the last few minutes. Baking in the oven is great for even cooking. Skillet methods can also work, but watch the time closely. Both methods can yield great results. Pair your chicken thighs with roasted vegetables like carrots, potatoes, or green beans. A simple salad with fresh greens works well too. For a nice presentation, arrange the chicken on a platter. Drizzle some of the pan juices on top. Garnish with fresh parsley for color. This not only looks good but adds a fresh taste. Pro Tips Pat the Chicken Dry: Ensuring the chicken skin is dry will help achieve a crispy texture when roasted. Use Fresh Herbs: Fresh herbs bring a vibrant flavor to the dish. If possible, opt for fresh thyme and rosemary instead of dried. Let it Rest: Allowing the chicken to rest for a few minutes after roasting helps the juices redistribute, keeping the meat moist. Check for Doneness: Always use a meat thermometer to ensure chicken has reached an internal temperature of 165°F (74°C) for safety. {{image_2}} You can mix up the herbs in this dish easily. If you do not have thyme or rosemary, try using oregano or sage instead. Both add a nice flavor to the chicken. Fresh herbs bring more taste than dried ones. But if dried is all you have, it's still a great option. Use one-third of the amount when using dried herbs. This ensures the flavor does not overpower your dish. You may want to try different cooking methods for your chicken thighs. Air frying is a quicker way to get crispy skin. Preheat your air fryer to 380°F (193°C) and cook for about 25-30 minutes. The chicken will remain juicy and flavorful. Grilling is another great option. It adds a nice smoky flavor. Cook on medium heat for about 6-7 minutes per side, depending on thickness. Adding a twist can make this dish even better. Try squeezing fresh lemon juice over the chicken before serving. It brightens the flavors and adds freshness. If you love heat, add a pinch of cayenne pepper to the herb mixture. You can also try different marinades. Soy sauce or honey mustard can change the taste entirely. Experiment and find your favorite! To store leftover garlic herb roasted chicken thighs, first let them cool. Place them in an airtight container. You can keep them in the fridge for up to four days. If you want to keep them longer, freeze the chicken. In the freezer, they will last for about three months. Just remember to label the container with the date. When reheating chicken thighs, you have a few options. You can use the oven, microwave, or stovetop. For the oven, preheat it to 350°F (175°C). Place the chicken on a baking sheet and cover it with foil. Bake for about 20 minutes. This will help keep the skin crispy. If you use a microwave, place the chicken on a plate and cover it with a damp paper towel. Heat it in short bursts of one minute until warm. This method may not keep the skin crispy. To reheat on the stovetop, add a little oil to a skillet. Heat it over medium heat and add the chicken. Cook for about 5-7 minutes, turning occasionally. This method helps maintain the flavor and texture. Enjoy your meal as if it were fresh! The best temperature to cook chicken thighs is 400°F (200°C). This high heat helps the skin get crispy while keeping the meat juicy. I find this temperature works well for roasting. It takes about 35-40 minutes to cook the thighs fully. A good rule is to always preheat your oven, so it’s hot when you put the chicken in. Yes, you can use boneless chicken thighs. They cook faster than bone-in thighs. If you choose boneless, reduce the cooking time to about 25-30 minutes. The chicken should still reach an internal temperature of 165°F (74°C) to be safe. Remember, without the bone, the meat may dry out more quickly. To tell when chicken thighs are done, check the internal temperature. It should be at least 165°F (74°C). You can use a meat thermometer for this. Insert it into the thickest part of the thigh. Another way is to cut into the chicken and check if the juices run clear. If they are pink, cook it a bit longer. In this post, we explored how to make perfectly roasted chicken thighs. We covered essential ingredients, step-by-step cooking instructions, and tips for enhancing flavor. You learned about variations and storage methods to keep your dish fresh. Remember, using bone-in, skin-on thighs makes for juicy meat and crispy skin. Try different herbs or cooking methods to find your favorite twist. With practice, roasting chicken thighs can become an easy, delicious meal for any occasion. Enjoy your cooking journey and savor each bite!

Garlic Herb Roasted Chicken Thighs Easy Weeknight Meal

PREV 1 … 55 56 57 … 86 NEXT
spicy fork kitchen

explore

DessertsDinnerAppetizersDrinks

Our Policies

  • Cookie Policy
  • Copyright Policy
  • Disclaimer
  • GDPR Policy
  • Terms Of Use
Back to Top
  • About
  • Contact Us
  • Privacy Policy
© 2026 spicy fork kitchen