FREE DINNER EBOOK! Get your copy!
  • Cookie Policy
  • GDPR Policy
  • Disclaimer
  • Terms Of Use
  • Visit my other site: Fun Cookie Recipes
spicy fork kitchen
  • Home
  • Dinner
  • Desserts
  • Drinks
  • Appetizers
  • Contact
  • About
  • Privacy Policy
  • Home
  • Dinner
  • Desserts
  • Drinks
  • Appetizers
  • Contact
  • About
  • Privacy Policy
  • Cookie Policy
  • GDPR Policy
  • Disclaimer
  • Terms Of Use
Visit my other site: Fun Cookie Recipes

HOME / CATEGORIES /

Latest

- 2 cups all-purpose flour - 1/4 cup granulated sugar - 1 tablespoon baking powder - 1/2 teaspoon salt - 1/2 cup unsalted butter, cold and cubed - 1/2 cup heavy cream - 1 large egg - 1 teaspoon vanilla extract - 1 cup fresh raspberries - 1/2 cup white chocolate chips - Extra cream for brushing on top - Additional sugar for sprinkling Each ingredient in these scones plays an important part. The all-purpose flour gives structure. The granulated sugar adds sweetness and a nice crust. Baking powder helps the scones rise, making them light. Salt enhances the flavor of all the other ingredients. Cold, cubed butter brings richness and helps create a tender texture. Heavy cream adds moisture and richness. The egg binds everything together. Vanilla extract gives a warm, sweet flavor. Fresh raspberries provide tartness, and white chocolate chips add creamy sweetness. You can replace all-purpose flour with whole wheat flour for a healthier option. Instead of heavy cream, use milk or a plant-based milk for a lighter scone. If you want less sugar, you can cut the granulated sugar in half. You can also switch fresh raspberries with blueberries or strawberries. For a different twist, try dark chocolate chips instead of white chocolate. {{ingredient_image_1}} First, I set the oven to 400°F (200°C). This temperature helps the scones rise nicely. I line a baking sheet with parchment paper. This will keep the scones from sticking. Next, I take a large bowl and add 2 cups of all-purpose flour. I add 1/4 cup of granulated sugar, 1 tablespoon of baking powder, and 1/2 teaspoon of salt. I whisk these ingredients together until they blend well. Now, I cube 1/2 cup of cold, unsalted butter. I add the butter to the flour mix. Using my fingers or a pastry cutter, I work the butter in until it looks like coarse crumbs. This step gives the scones a flaky texture. In another bowl, I whisk together 1/2 cup of heavy cream, 1 large egg, and 1 teaspoon of vanilla extract. I mix them well until everything combines. I pour the cream mixture into the bowl with the dry ingredients. I gently stir until the dough starts to come together. I make sure not to overmix, as this can lead to tough scones. Next, I turn the dough out onto a floured surface. I pat it down into a circle about 1 inch thick. Then, I cut the dough into 8 wedges, like slicing a pizza. I carefully transfer these to the lined baking sheet. I brush the tops of the scones with extra cream. Then, I sprinkle a little sugar on top for added sweetness. I bake the scones for 15-20 minutes. They should look golden brown and feel cooked through. After baking, I let them cool slightly before serving. Enjoy them warm or at room temperature! To make the best Raspberry White Chocolate Scones, keep a few tips in mind: - Use cold butter. This helps create flaky layers. - Don’t overmix the dough. Mix just until it comes together. - Fold in raspberries and chocolate gently. You want them to stay whole. - Pat the dough down to about an inch thick. This helps them rise. - Brush the tops with cream before baking. It gives a nice golden finish. Many home cooks face similar issues when making scones. Here are ways to avoid them: - Make sure your baking powder is fresh. Old baking powder can make scones dense. - Avoid overworking the dough. This can lead to tough scones. - Cut the dough into even wedges. This ensures even baking. - Do not open the oven door too soon. This can cause the scones to collapse. I love serving these scones warm from the oven. Here are some fun ideas: - Pair them with clotted cream or butter for a rich treat. - Serve with a cup of tea or coffee for a cozy afternoon. - Add a drizzle of chocolate on top for extra sweetness. - Enjoy them with fresh fruit or a light fruit salad on the side. Pro Tips Use Cold Butter: Make sure your butter is very cold. This helps create a flaky texture in the scones as the butter melts during baking. Don't Overmix: When combining the wet and dry ingredients, mix just until incorporated. Overmixing can lead to tough scones. Fresh Raspberries: Use fresh raspberries for the best flavor. If using frozen, do not thaw them before adding to the dough to prevent excess moisture. Brush with Cream: Brushing the tops of the scones with cream before baking gives them a beautiful golden color and a slight shine. {{image_2}} You can mix and match fruits in your scones. Try blueberries, strawberries, or blackberries. Each fruit adds its own taste and color. For example, blueberries bring a sweet burst. Strawberries add a touch of tartness. You can also mix fruits for a fun flavor blend. Just keep the fruit amount the same. Use one cup total, and your scones will stay moist. If white chocolate isn’t your favorite, try dark or milk chocolate instead. Dark chocolate adds a rich, deep flavor. Milk chocolate gives a sweeter touch. You can also use chocolate chunks for a chunky texture. Choose your favorite chocolate to make these scones truly yours. Just remember to keep the amount the same as the recipe calls for. To make gluten-free scones, swap all-purpose flour for a gluten-free blend. Many blends work well for baking. Look for one that includes xanthan gum for good texture. You might also need to adjust the liquid a little. Start with the same amount and add more if the dough feels too dry. Your scones will still be delicious and fluffy. Enjoy your gluten-free treat! To keep your leftover scones fresh, place them in an airtight container. This method helps prevent them from drying out. You can store them at room temperature for up to two days. If you live in a humid area, it’s best to refrigerate them. Just remember to let them cool completely before sealing them away. If you want to enjoy these scones later, freezing is a great option. First, let the scones cool completely. Then, wrap each scone tightly in plastic wrap. Place the wrapped scones in a freezer bag or container. They can last in the freezer for up to three months. When you’re ready to eat them, just thaw them overnight in the fridge. To bring back the fresh taste of your scones, preheat your oven to 350°F (175°C). Place the scones on a baking sheet and warm them for about 5 to 10 minutes. This will help them regain their soft texture. If you prefer, you can also microwave them for about 15 to 20 seconds. Just be careful not to overheat, as they can become tough. Enjoy your cozy treat! Yes, you can use frozen raspberries. They work well in these scones. Just remember to thaw and drain them first. This helps avoid extra moisture in the dough. Frozen raspberries may break apart more, so be gentle when mixing them in. To keep your scones moist, store them in an airtight container. You can also wrap them in plastic wrap. If you plan to eat them later, consider freezing them. This helps keep their soft texture intact. Reheat them in the oven for a warm treat. Check the scones after 15 minutes. They should be golden brown on top. You can also insert a toothpick into the center. If it comes out clean, the scones are ready. Don’t overbake them, or they might get dry. In this guide, we explored how to make Raspberry White Chocolate Scones. We detailed the essential ingredients and their roles, as well as smart substitutions. I shared step-by-step instructions and handy tips for perfect scones. You learned about different fruit and chocolate options and how to store leftovers. Now, you have everything to create tasty scones. Enjoy baking and sharing this treat with others!

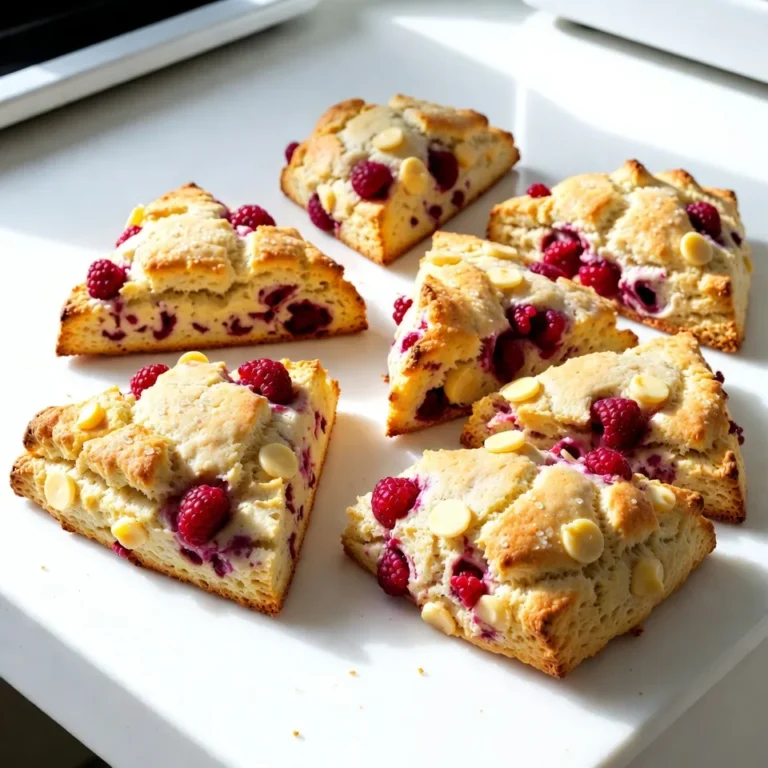
Raspberry White Chocolate Scones Cozy and Delicious Treat

- 1 cup green or brown lentils, rinsed - 1 can (15 oz) butter beans, drained and rinsed - 4 cups vegetable broth - 1 onion, finely chopped - 2 cloves garlic, minced - 2 cups fresh spinach, chopped - 1 carrot, diced - 1 celery stalk, diced - 1 tablespoon olive oil - 1 teaspoon ground cumin - 1 teaspoon smoked paprika - Salt and pepper to taste - Juice of 1 lemon - Fresh parsley for garnish Each serving of this soup is about 1.5 cups. It has: - Calories: 250 - Protein: 12g - Carbohydrates: 40g - Fiber: 12g - Fat: 5g - Lentils: They are rich in protein and fiber. Lentils help keep you full. They also support heart health. - Butter Beans: These beans provide a creamy texture. They are high in protein, iron, and magnesium. - Spinach: Spinach is low in calories but high in vitamins A and C. It also contains antioxidants that help fight disease. - Carrots: Carrots are great for your eyes. They have beta-carotene, which your body turns into vitamin A. - Olive Oil: This oil has healthy fats. It can help lower bad cholesterol and support heart health. - Lemon Juice: Lemon adds a bright flavor. It is high in vitamin C, which boosts your immune system. These ingredients come together to make a tasty and healthy meal. Enjoy the comfort of this soup while knowing you are eating well! {{ingredient_image_1}} Start by gathering all your ingredients. This makes cooking easier and faster. You will need lentils, butter beans, vegetable broth, onion, garlic, spinach, carrot, celery, olive oil, spices, salt, pepper, and lemon juice. 1. Heat the oil: In a large pot, heat 1 tablespoon of olive oil over medium heat. 2. Sauté the veggies: Add the finely chopped onion, minced garlic, diced carrot, and diced celery. Sauté for 5-7 minutes. Wait until the vegetables soften and smell great. 3. Add spices: Stir in 1 teaspoon of ground cumin and 1 teaspoon of smoked paprika. Cook for 1-2 minutes. This helps the spices release their flavor. 4. Combine lentils and broth: Pour in 1 cup of rinsed lentils and 4 cups of vegetable broth. Bring it to a boil. 5. Simmer the soup: Reduce the heat to a simmer and cover the pot. Let it cook for 20-25 minutes. The lentils should be soft when done. 6. Add beans and spinach: Stir in 1 can of drained butter beans and 2 cups of chopped spinach. Let it simmer for another 5-10 minutes. This wilts the spinach and warms the beans. 7. Season the soup: Add salt, pepper, and juice from 1 lemon. Taste and adjust the seasoning if needed. 8. Serve hot: Ladle the soup into bowls and garnish with fresh parsley. Enjoy your delicious meal! - Always sauté your vegetables on medium heat. This ensures they cook evenly and stay tender. - If your lentils seem too firm, give them a few extra minutes. They should be soft but not mushy. - When adding the spinach, keep the pot covered. This helps it cook quickly while keeping its bright color. These easy steps make cooking this soup simple and fun! When cooking lentils, start by rinsing them. This helps remove dust or debris. Use green or brown lentils for this soup. They hold their shape well. - Soak lentils for 1-2 hours for quicker cooking. - Use a large pot for even cooking. - Don’t skip the simmering step; it makes them tender. To boost flavor, add spices early in the cooking process. Ground cumin and smoked paprika add depth. You can also use fresh herbs for a fresh taste. - Stir in a bay leaf while cooking. - Squeeze in lemon juice just before serving. - Use vegetable broth instead of water for more taste. A few common mistakes can spoil your soup. Don’t overcook the lentils; they should remain firm. Add spinach only in the last minutes of cooking. - Avoid adding salt too early; it can toughen lentils. - Ensure the pot is covered to keep moisture in. - Don’t skip garnishing with parsley; it adds color and flavor. Pro Tips Tip Title: Use Fresh Ingredients: Fresh spinach and high-quality vegetable broth can greatly enhance the flavor of your soup. Tip Title: Adjust Consistency: If you prefer a thicker soup, blend a portion of the soup and return it to the pot. Tip Title: Spice It Up: Feel free to add more spices or herbs like thyme or bay leaves for an extra flavor kick. Tip Title: Leftover Storage: This soup stores well in the fridge for up to 3 days; just make sure to reheat gently. {{image_2}} You can switch lentils and beans based on what you have. If you want, use red lentils. They cook faster and add a nice color. For beans, try chickpeas or black beans. Both work well and add a different taste. Just remember, these swaps may change the cooking time, so keep an eye on them. Feel free to add more veggies to your soup. Zucchini, bell peppers, or green beans are great options. You can also add protein. Cooked chicken or turkey gives a hearty twist. For a plant-based option, toss in some tofu or tempeh. This makes the soup even more filling and tasty. You can change the flavors with different spices. Add curry powder for a warm taste. A dash of chili flakes brings a nice kick. If you like fresh herbs, try basil or thyme. They add brightness to the soup. Don't forget to adjust salt and pepper to match your taste. This lets you personalize the soup just how you like it! To keep your soup fresh, let it cool first. Pour the soup into a clean, airtight container. Make sure it is sealed tightly. Store it in the fridge. This method keeps the soup safe and tasty for later. You can freeze this soup too! Allow it to cool completely. Then, place it in freezer-safe bags or containers. Be sure to leave some space for expansion. When you want to eat it, thaw the soup in the fridge overnight. Heat it in a pot on low until hot. You can also use the microwave for quick reheating. In the fridge, your soup lasts about 3-4 days. If you freeze it, it can last up to 3 months. Just remember that the longer it sits, the more its flavor changes. Always check for any off smells or colors before eating leftovers. Enjoy your soup fresh for the best taste! Yes, you can make this soup in a slow cooker. Start by sautéing the onion, garlic, carrot, and celery in a pan. Once they are soft, add them to the slow cooker. Then, add the rinsed lentils, vegetable broth, spices, and butter beans. Cook on low for 6-8 hours or on high for 3-4 hours. Add the spinach and lemon juice near the end, just before serving. This soup pairs well with crusty bread or a fresh salad. Try serving it with a slice of whole-grain bread for a hearty meal. A side of mixed greens with a light vinaigrette adds crunch and freshness. You can also serve it with a dollop of yogurt for creaminess. Yes, this soup freezes well. Let it cool completely before packing it into airtight containers. Leave some space at the top, as the soup will expand when frozen. It can stay in the freezer for up to three months. To reheat, thaw it overnight in the fridge and warm it on the stove or in the microwave. This blog post covered a range of topics about Spinach Lentil Butter Bean Soup. I shared ingredients, cooking steps, and essential tips. Each section helps you create a delicious and healthy meal. Remember to avoid common mistakes, use flavor enhancements, and store your soup properly for later. With these insights, you can enjoy a nutrient-rich dish that fits your needs. Feel confident trying new variations and sharing the soup with family and friends. Your cooking journey can be fun and rewarding!

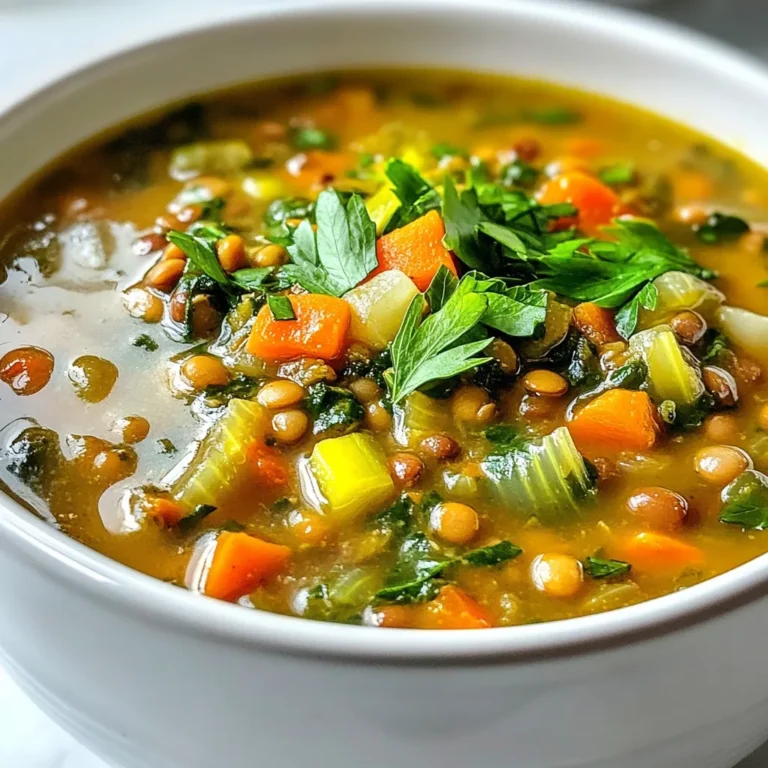
Spinach Lentil Butter Bean Soup Easy and Healthy Meal

- 1 and 1/2 cups gingerbread cookie crumbs - 1/4 cup unsalted butter, melted - 16 oz cream cheese, softened - 1 cup granulated sugar - 1 teaspoon vanilla extract - 3 large eggs - 1 teaspoon ground ginger - 1 teaspoon ground cinnamon - 1/4 teaspoon ground nutmeg - 1/4 teaspoon ground cloves - 1 cup sour cream - 1 tablespoon all-purpose flour To create a great gingerbread cheesecake, you need a few key ingredients. First, gingerbread cookie crumbs form the base. You can make these by crushing gingerbread cookies. Then, you'll need unsalted butter to bind the crumbs. The filling consists of cream cheese, which gives that smooth texture we love. Granulated sugar adds sweetness. For flavor, use vanilla extract along with ground ginger, cinnamon, nutmeg, and cloves. These spices make the cheesecake taste festive and warm. Don’t forget the eggs! They help the cheesecake set. We also add sour cream for creaminess and a bit of tang. Lastly, a tablespoon of all-purpose flour helps stabilize the filling. This combination of ingredients ensures your gingerbread cheesecake will be rich and delicious. Each bite will remind you of the holiday spirit. {{ingredient_image_1}} 1. Preheating the oven: Start by preheating your oven to 325°F (163°C). This step is key for even baking. 2. Mixing cookie crumbs and butter: In a medium bowl, combine 1 and 1/2 cups of gingerbread cookie crumbs with 1/4 cup of melted unsalted butter. Stir until the mix looks like wet sand. 3. Baking the crust: Firmly press this mixture into the bottom of a 9-inch springform pan. Bake the crust for 10 minutes. After baking, let it cool while you make the filling. 1. Beating the cream cheese and sugar: In a large mixing bowl, beat 16 oz of softened cream cheese with an electric mixer. Mix until it’s smooth and creamy. 2. Mixing in flavorings: Gradually add 1 cup of granulated sugar while mixing. Next, add 1 teaspoon of vanilla extract, 1 teaspoon of ground ginger, 1 teaspoon of ground cinnamon, 1/4 teaspoon of ground nutmeg, and 1/4 teaspoon of ground cloves. Make sure everything blends well. 3. Incorporating eggs: Add 3 large eggs, one at a time. Mix on low speed after each egg until just blended. Avoid overmixing to keep it smooth. 4. Final touches: Gently fold in 1 cup of sour cream and 1 tablespoon of all-purpose flour. Use a spatula, and ensure no streaks remain. 1. Pouring filling over crust: Carefully pour the cheesecake filling over the cooled crust in your springform pan. 2. Baking time guidelines: Bake in your preheated oven for 50-60 minutes. The edges should be set, while the center has a slight jiggle. 3. Cooling tips in the oven: Turn off the oven and crack the door open. Let the cheesecake cool in the oven for about 1 hour. This helps avoid cracks. After that, refrigerate it for at least 4 hours, or overnight for the best flavor. To get the best texture, do not overmix the batter. Mix each egg in just until blended. This keeps the cheesecake light and creamy. Bake it at 325°F (163°C) for the best results. The edges should set, but the center should jiggle slightly when done. This means it will firm up nicely as it cools. For toppings, consider using whipped cream. You can also add a sprinkle of ground ginger or cinnamon. This will enhance the flavor and look of your cheesecake. Serve it on a festive plate to impress your guests. A nice touch is to add a few gingerbread cookie crumbs on top for decoration. Many bakers overbake their cheesecakes. Keep an eye on the time to avoid this. Remember to chill the cheesecake properly. It needs at least 4 hours in the fridge to set well. If you rush this step, the cheesecake may be too soft and difficult to slice. Pro Tips Chill for Best Texture: Allowing the cheesecake to chill overnight in the refrigerator enhances its texture and flavor, making it creamier and more delicious. Prevent Cracks: To avoid cracks on the cheesecake surface, bake it in a water bath. Place the springform pan in a larger pan filled with hot water before baking. Use Room Temperature Ingredients: Ensure all ingredients, especially cream cheese and eggs, are at room temperature to achieve a smoother batter and even baking. Don't Overbake: The cheesecake is done when the edges are set, and the center still jiggles slightly. Overbaking can lead to a dry texture. {{image_2}} You can make a vegan version of this cheesecake. For cream cheese, use a cashew-based spread or coconut cream. Both give a rich and creamy texture. Instead of eggs, use flaxseed meal. Mix one tablespoon of flaxseed with three tablespoons of water. Let it sit until it thickens. This will help set your cheesecake. If you want a gluten-free cheesecake, change the crust. Use almond flour or gluten-free cookie crumbs. Mix these with melted coconut oil instead of butter. Press this mixture into your springform pan. This change keeps the flavor while making it safe for gluten-free diets. You can make this cheesecake even more delightful with extra layers. Try adding a chocolate layer. Melt dark chocolate and spread it over the cooled crust before adding the filling. You can also add a fruit layer. Use a berry compote or sliced fruits like pears or apples on top. These flavors mix well with gingerbread and add a fun twist. After enjoying your gingerbread cheesecake, store any leftovers properly. - Refrigeration guidelines: Place the cheesecake in an airtight container. It will stay fresh for up to five days in the fridge. You can also cover it tightly with plastic wrap if you prefer. - Freezing instructions: If you want to keep it longer, freeze the cheesecake. Wrap individual slices in plastic wrap, then place them in a freezer-safe bag. It can last up to three months in the freezer. Just remember to label the bag with the date! How long does your gingerbread cheesecake last? - How long it lasts in the fridge: In the fridge, it stays good for about five days. Ensure it stays covered to keep it fresh. - Signs of spoilage: Look for changes in texture or smell. If the cheesecake feels slimy or has a sour odor, it’s time to toss it. Always trust your senses! Yes, you can use store-bought gingerbread cookies. They save time and effort. Look for brands like Nabisco or Pepperidge Farm. These cookies work well for the crust. Just crush them into crumbs and mix with melted butter. Gingerbread cheesecake pairs well with whipped cream. You can also add caramel or chocolate sauce. Fresh fruit like berries adds a nice touch. For drinks, serve with hot cocoa or spiced apple cider. These options complement the warm flavors of the cheesecake. Check the edges of the cheesecake for firmness. The center should jiggle slightly. It will firm up as it cools. A toothpick inserted in the center should come out clean or with a few moist crumbs. Keep an eye on it to avoid overbaking. This blog post covered how to make a delicious Gingerbread Cheesecake. We explored the simple ingredients, from gingerbread crumbs to cream cheese. You learned step-by-step instructions for preparing the crust and baking the filling. I shared tips to avoid common mistakes and suggested fun variations. This dessert is perfect for any occasion. Remember, with the right care and simple tweaks, you can create the perfect cheesecake. Enjoy your baking!

Gingerbread Cheesecake Delightful Holiday Dessert Recipe

Ground chicken is the star of this dish. I use one pound for a hearty meal. It cooks up nicely and absorbs flavors well. Choose lean ground chicken for a lighter option. This keeps the dish healthy without losing taste. To add texture and flavor, I use one cup of breadcrumbs. Italian seasoned breadcrumbs work best. They bring in herbs and spices that enhance the dish. I also mix in half a cup of grated Parmesan cheese. This cheese adds a salty, rich flavor. Together, they create a crispy crust on the patties. Seasoning is key to a tasty Ground Chicken Parmesan. I add one teaspoon each of garlic powder and onion powder. These give a nice depth of flavor. I also mix in one teaspoon of dried oregano. It adds an earthy taste that pairs well with chicken. Don’t forget salt and pepper to taste. For a fresh touch, I sprinkle in a quarter cup of chopped basil. This herb brightens the dish and adds color. {{ingredient_image_1}} Start by grabbing a large mixing bowl. Add 1 pound of ground chicken. Then, sprinkle in 1 teaspoon of garlic powder and 1 teaspoon of onion powder. Next, toss in 1 teaspoon of dried oregano, along with salt and pepper to taste. Mix everything well until the flavors blend. This step is key to a tasty patty. Once your mixture is ready, take small amounts and form patties. Aim for about 1/2 inch thick. This thickness helps them cook evenly. Next, prepare a shallow dish. In that dish, mix 1 cup of breadcrumbs with 1/2 cup of grated Parmesan cheese. Now, coat each patty in this breadcrumb mix. Press gently so it sticks well. Heat some olive oil in a large skillet over medium heat. Once the oil is hot, add the coated patties in batches. Cook for about 4-5 minutes on each side. Look for a golden brown color. This means they are getting crispy and delicious! Once done, remove them and let them drain on a paper towel. This keeps them from being greasy. To make your Ground Chicken Parmesan shine, use fresh ingredients. Fresh basil adds a bright taste. Use Italian seasoned breadcrumbs for an extra flavor boost. Add a pinch of red pepper flakes for heat. You can also mix in some chopped sun-dried tomatoes for a sweet touch. A splash of lemon juice brightens the dish too. Cook the patties over medium heat. This helps them brown nicely without burning. Always check the internal temperature. It should reach 165°F (74°C). If you want crispier patties, let them rest after frying. This helps firm them up before baking. Make sure not to overcrowd the pan. Fry in batches for even cooking. Serve your Ground Chicken Parmesan hot from the oven. Garnish with fresh basil for color and flavor. Pair it with a side of pasta or a crisp green salad. You can also serve it in a sub roll for an easy sandwich. Drizzle extra marinara sauce on top for added richness. Enjoy this simple yet delicious meal with family and friends! Pro Tips Use Fresh Ingredients: Fresh basil and high-quality cheeses will elevate the flavor of your Ground Chicken Parmesan Delight, making it more aromatic and delicious. Don’t Skip the Browning: Ensure the patties are golden brown before baking; this adds depth of flavor and a lovely texture to the dish. Experiment with Cheese: Try mixing different cheeses like provolone or cheddar with mozzarella for a unique twist on the classic flavor. Let it Rest: Allow the dish to rest for a few minutes after baking; this helps the layers set and enhances the overall presentation. {{image_2}} You can swap ground chicken for other meats. Try ground turkey for a leaner option. Ground beef also works well, giving a richer taste. For a lighter meal, use ground pork. Each protein brings its own flavor to the dish. Marinara sauce is a classic choice, but you can mix it up. Try pesto for a fresh twist. Alfredo sauce gives a creamy texture that many love. You can also use a spicy arrabbiata sauce for some heat. Experiment with these sauces to find your favorite. To make this dish gluten-free, choose gluten-free breadcrumbs. You can also use crushed cornflakes or almond flour. They work well and add nice crunch. Be sure to check the sauce too. Some brands may contain gluten, so read the label. Store your Ground Chicken Parmesan in an airtight container. It stays fresh in the fridge for up to three days. Make sure the dish cools to room temperature before sealing. This helps prevent moisture buildup, which can make it soggy. If you plan to eat it within a few days, refrigerating is perfect. To freeze, let the dish cool completely first. Then, place it in a freezer-safe container. You can also use a freezer bag. Squeeze out as much air as possible before sealing. Ground Chicken Parmesan can last up to three months in the freezer. When you’re ready to eat, just thaw it in the fridge overnight before reheating. To reheat, use the oven for the best results. Preheat your oven to 350°F (175°C). Place the dish in an oven-safe dish. Cover it with foil to keep it moist. Heat for about 15-20 minutes or until hot. If you want a crispy top, remove the foil for the last few minutes. You can also use a microwave, but it may not keep the same texture. Heat in short bursts, stirring in between, until hot. Yes, you can use chicken breast. Simply chop it finely or grind it. This keeps the flavor. Ground chicken is moist and tender. Chicken breast needs some added fat to stay juicy. Consider mixing in some olive oil or cheese. You have many tasty options! Here are some ideas: - Pasta: Serve with spaghetti or penne. - Salad: A fresh green salad adds crunch. - Garlic Bread: This pairs well for a cozy meal. - Vegetables: Roasted or steamed veggies add color and nutrients. Making Ground Chicken Parmesan lower in fat is easy. Here are some tips: - Use lean ground chicken: Look for 93% lean or higher. - Swap cheese: Use low-fat cheese or less of it. - Bake instead of fry: Skip the oil by baking the patties. - Add veggies: Mix in chopped spinach or zucchini for bulk and nutrition. In this post, we explored making delicious Ground Chicken Parmesan. We covered the key ingredients like ground chicken, breadcrumbs, and seasonings. I shared step-by-step instructions for mixing, forming, and cooking patties. Tips for flavor and cooking perfection were included. We also looked at variations, storage, and answers to common questions. Now you have a great recipe to try. Enjoy making this dish your own!

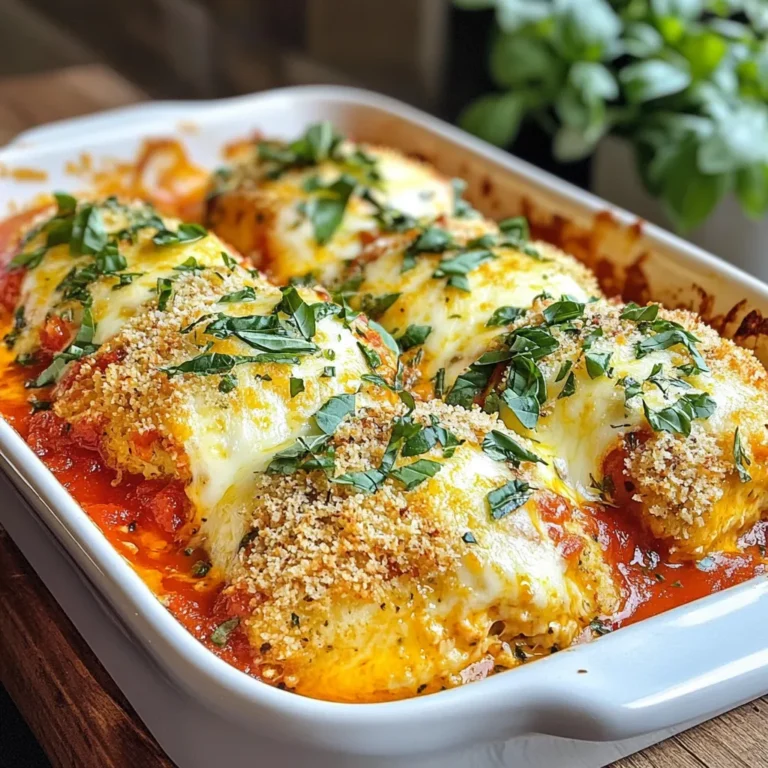
Ground Chicken Parmesan Flavorful and Simple Dish

- 1 cup cottage cheese - 6 large eggs - 1/2 cup bell peppers, diced - 1/2 cup spinach, chopped Cottage cheese is the star in these muffins. It gives a creamy texture. Eggs bind the mix and add protein. Bell peppers bring a sweet crunch, and spinach adds nutrients. These ingredients make a healthy, tasty breakfast. - 1/2 teaspoon garlic powder - 1/2 teaspoon onion powder - Salt and pepper to taste - 1/2 cup cheddar cheese, shredded (optional) Seasoning is key. Garlic powder and onion powder boost flavor. Salt and pepper balance everything out. If you like cheese, add cheddar for extra creaminess. This makes the muffins even more delicious. - Cooking spray or olive oil Greasing the muffin tin is important. Use cooking spray or a bit of olive oil. This helps the muffins pop out easily after baking. A well-greased tin is your best friend for perfect muffins. {{ingredient_image_1}} First, preheat your oven to 350°F (175°C). This step warms the oven for even baking. Next, grease your muffin tin using cooking spray or a little olive oil. This helps the muffins release easily once baked. Make sure every cup is well-coated to avoid sticking. In a large mixing bowl, whisk together 6 large eggs and 1 cup of cottage cheese. Mix them until they blend well. Then, add in your veggies: 1/2 cup of diced bell peppers, 1/4 cup of chopped green onions, and 1/2 cup of chopped spinach. Stir these together gently. Next, sprinkle in 1/2 teaspoon each of garlic powder and onion powder. Add salt and pepper to taste. Mix everything well so the flavors spread evenly. If you like cheese, fold in 1/2 cup of shredded cheddar cheese for extra creaminess. Now, pour the egg mixture into the prepared muffin tin. Fill each cup about 3/4 full. This allows room for the muffins to rise. Bake in the preheated oven for 20-25 minutes. To check if they are done, insert a toothpick in the center of a muffin. It should come out clean. When they are baked, let the muffins cool for about 5 minutes. This makes them easier to remove from the tin. Carefully take them out and place them on a plate. Enjoy your delicious and fluffy cottage cheese egg muffins! To get that light and fluffy texture, whisk your eggs and cottage cheese well. This step adds air into the mix, making your muffins rise nicely. Use a large bowl and a whisk to combine them until smooth. When baking, keep an eye on the time and temperature. Bake your muffins at 350°F for about 20-25 minutes. If your oven runs hot, check them a bit sooner. A toothpick should come out clean when they are done. For a beautiful presentation, arrange your muffins on a colorful platter. Garnish with fresh herbs like parsley or extra green onions. This makes them look even more tempting. These muffins pair well with sides like fresh fruit or yogurt. You can also serve them with dips like salsa or avocado. This adds flavor and variety to your meal. Feel free to add other vegetables to your muffins. Zucchini, tomatoes, or even mushrooms work great. Just chop them small so they mix well. You can also swap the cheddar cheese for other types. Feta or mozzarella adds different flavors. Experiment and find your favorite mix! Pro Tips Use Fresh Ingredients: Opt for fresh vegetables and herbs to enhance the flavor and nutritional value of your muffins. Experiment with Add-ins: Feel free to add cooked bacon, sausage, or other veggies to customize the muffins to your taste. Store for Easy Meals: These muffins can be frozen for up to 3 months. Just reheat in the microwave for a quick breakfast! Perfect Portion Control: Use a measuring cup to ensure each muffin cup is filled evenly for consistent baking. {{image_2}} You can easily change this recipe to fit your needs. For a gluten-free option, make sure to check that all ingredients are gluten-free. Most of the ingredients, like eggs and cottage cheese, are naturally gluten-free. You can also use gluten-free flour if you want to make it thicker. If you prefer dairy-free, there are great alternatives. You can swap cottage cheese with almond or cashew cheese. Use a dairy-free cheese that melts well, or simply leave it out. This keeps the muffins tasty without the dairy. To make these muffins extra tasty, try adding herbs and spices. Fresh herbs like basil or parsley add a bright flavor. You can also use dried herbs like oregano or thyme. Spices like paprika or chili powder give a nice kick. Adding meats like ham or turkey boosts protein and flavor. Simply chop them into small pieces and mix them in. You can also use cooked bacon or sausage for a savory twist. You can change the size of the muffins based on your needs. For mini muffins, fill each cup only halfway. Bake them for about 15-20 minutes. They will be perfect for snacks or a light breakfast. If you want larger muffins, fill the cups more, but don’t fill them to the top. Larger muffins will take a bit longer to cook, around 25-30 minutes. Just check them with a toothpick to see if they are done. To keep your Fluffy Cottage Cheese Egg Muffins fresh, store them in airtight containers. This helps prevent moisture loss and keeps them tasty. I recommend using glass or plastic containers with tight-fitting lids. Place the muffins in the fridge if you plan to eat them within a week. They will stay fresh and safe to eat for up to five days. When you're ready to enjoy your muffins again, there are easy ways to reheat them. For quick reheating, use the microwave. Place one muffin on a microwave-safe plate and heat for about 30 seconds. Check if it's warm enough; if not, heat in 10-second bursts. For a crispier texture, use the oven. Preheat it to 350°F (175°C). Place the muffins on a baking sheet and heat for 10-15 minutes. This method keeps the outside a bit crunchy. You can freeze these muffins for later. To freeze them, let the muffins cool completely first. Then, wrap each muffin in plastic wrap. Place the wrapped muffins in a freezer-safe bag or container. They will stay fresh for up to three months. When you're ready to eat, take them out and let them thaw in the fridge overnight. You can also thaw them in the microwave. Just be careful not to overheat them! To make your muffins fluffier, focus on two key adjustments. First, whisk the eggs and cottage cheese well until they are smooth and light. This step adds air to the mixture. Second, do not overmix after adding the vegetables. Gentle folding keeps the texture airy. You can also bake at a slightly higher temperature for the first few minutes to create a nice rise. Yes, you can use only egg whites. However, this change will alter the texture and taste. Egg whites provide less richness compared to whole eggs. Your muffins may turn out less moist and a bit rubbery. If you prefer a lighter taste, you can replace some of the eggs with whites. A mix of whole eggs and whites works well too. These muffins last about 5 days in the fridge. Store them in an airtight container to keep them fresh. If you want to keep them longer, freeze the muffins. They can last up to 3 months in the freezer. Just remember to thaw them in the fridge overnight before reheating. Yes, you can use frozen vegetables. They are a great time-saver. Just make sure to thaw and drain them before adding. This prevents extra moisture in your muffins. Frozen spinach, bell peppers, or onions work perfectly. They will still taste great and save you prep time! This blog post covered making delicious breakfast muffins with cottage cheese, eggs, and veggies. We explored tips for achieving a fluffy texture and various ways to customize your muffins. You learned about storage and reheating, ensuring your muffins stay fresh and tasty. These muffins are simple, fun, and full of flavor. Whether you need a quick breakfast or a snack, they fit the bill. Try adding your favorite ingredients to make them even better. Enjoy your cooking and the tasty results!

Fluffy Cottage Cheese Egg Muffins Healthy Breakfast Treat

- 1 cup cranberry juice (preferably unsweetened) - 1 cup sparkling water - 1 tablespoon fresh rosemary leaves, chopped - 1 tablespoon honey or agave syrup (adjust to taste) - Juice of 1 lime - Ice cubes The main ingredients make this drink special. First, the cranberry juice gives a tangy flavor. I prefer unsweetened juice; it lets the other flavors shine. Next, sparkling water adds fizz and makes it fresh. Fresh rosemary leaves bring an earthy taste. They also smell great! Honey or agave syrup sweetens the drink. You can adjust the amount based on your taste. Lime juice adds zing, balancing the sweetness. Finally, ice cubes keep your drink cool. - Fresh rosemary sprigs - Lime slices Garnishes elevate your mocktail. A sprig of fresh rosemary adds a pop of color. It also boosts the herbal flavor. Lime slices look nice and add extra zest. These simple garnishes make your drink look fancy. - Sweetener alternatives - Flavor enhancers You can customize your mocktail with optional ingredients. If you like it sweeter, try maple syrup or stevia. If you want more flavor, add a splash of orange juice or a few slices of ginger. These small changes can make your drink unique. {{ingredient_image_1}} - Combining ingredients in a mixing glass: Start by taking a mixing glass. Add 1 cup of cranberry juice. Then, add 1 tablespoon of chopped fresh rosemary leaves. Next, include 1 tablespoon of honey or agave syrup. Finally, squeeze in the juice of 1 lime. Stir well to mix everything. - Infusing flavors with rosemary: Let your mixture sit for about 5 minutes. This step allows the rosemary to infuse its lovely flavor into the drink. - Straining and serving the drink: After the infusion, get a strainer. Place it over a serving glass filled with ice cubes. Pour the cranberry-rosemary mixture over the ice, filling the glass about two-thirds full. - Ice preparation: Use fresh ice cubes for the best chill. Fill your serving glass generously. - Filling the glass: After straining, top off the glass with 1 cup of sparkling water. Pour gently to maintain the bubbles. - Garnishing tips: Finish your mocktail with a sprig of fresh rosemary. You can also add a slice of lime on the rim for a pop of color. - Stirring techniques: Use a gentle stir to mix the sparkling water into the drink. This keeps the bubbles intact for a refreshing sip. - Adjusting sweetness level: If you like it sweeter, add more honey or agave syrup. Just stir it in well. - Ensuring proper flavor balance: Taste your drink before serving. Adjust the lime juice for tartness and the honey for sweetness to suit your palate. To make your cranberry rosemary mocktail pop, try adding more herbs. You can use mint or basil for a fresh twist. These herbs pair well with the tartness of cranberry. For a spicy kick, a pinch of ginger can bring warmth. You can also add slices of fruit like oranges or strawberries. They not only taste good but also make the drink look beautiful. Choosing the right glass can elevate your drink. Use tall glasses or stemless wine glasses for a classy look. You can also try mason jars for a rustic vibe. For garnishing, place a sprig of fresh rosemary on top. Adding a lime slice on the rim creates an eye-catching touch. You can even freeze some cranberries and use them as ice cubes. They add color and keep the drink cold. If you like your drinks sweeter, add more honey or agave syrup. Start with a teaspoon and taste as you go. You can make it less sweet by using less honey. To infuse more flavors, let the rosemary soak longer before serving. You can also add a splash of other juices like orange or pomegranate. This adds depth and makes the drink unique. Pro Tips Choose Quality Juice: Use high-quality, unsweetened cranberry juice for the best flavor. This will enhance the overall taste of your mocktail. Infusion Time: Let the rosemary infuse for longer if you prefer a stronger herbal flavor. Just be cautious not to overdo it, as it can become too overpowering. Adjust Sweetness: Taste the mixture before serving and adjust the sweetness as needed. Different brands of cranberry juice vary in tartness. Garnish Creatively: Get creative with your garnishes! Consider adding a few fresh cranberries or lime wedges for extra color and flavor. {{image_2}} You can make your cranberry rosemary mocktail even more special. Adding pomegranate juice gives it a richer color and flavor. Just mix in half a cup of pomegranate juice with your cranberry juice. This mix adds a sweet and tart twist that brightens your drink. Incorporating citrus flavors can also enhance your drink. Squeeze in some orange or grapefruit juice. This addition will bring a zesty kick. You can use the juice of one orange along with lime juice. Citrus flavors make the drink refreshing and vibrant. If you want to try different herbs, basil or mint work well. They give a fresh taste that pairs nicely with cranberry. Just swap out the rosemary for an equal amount of chopped basil or mint. This change can surprise your taste buds! Combining herbs can add complexity to your drink. Mix rosemary with a bit of mint for a unique flavor. This blend creates a refreshing twist that is sure to impress. Experimenting with different herb combinations keeps your mocktail exciting. Switching up your sparkling water can change the whole drink. Using flavored sparkling water, like lemon or berry, adds a fun twist. This option makes your mocktail even more fruity and bubbly. You might also want to experiment with tonic water. Tonic water adds a slight bitterness that can balance the sweetness. This change can create a more sophisticated drink. Try it and see how the flavors mix! To store any leftover mocktail, place it in a sealed jar. Keep it in the fridge. This drink stays fresh for 1 to 2 days. If you notice any change in color or smell, it’s best to throw it away. You can make the cranberry-rosemary mix ahead of time. Combine the juice, honey, rosemary, and lime juice in a jar. Let it sit in the fridge overnight for more flavor. When you are ready to serve, add ice and sparkling water. This keeps your drink fresh and fizzy. You can freeze the cranberry juice mix for later use. Pour it into an ice cube tray and freeze it. Use these cubes in your drink for a chill and extra flavor. You can also freeze rosemary sprigs in water. This adds a lovely touch to your mocktail when serving. A Cranberry Rosemary Mocktail is a fun, non-alcoholic drink. It blends sweet cranberry juice with fresh rosemary. You get a tasty, refreshing drink with a unique twist. This mocktail has bright flavors from lime and honey, making it perfect for any occasion. Yes, you can prepare this mocktail ahead of time. Mix the cranberry juice, rosemary, honey, and lime juice. Store this mix in the fridge for up to two days. Just add sparkling water and ice right before serving. This keeps it fizzy and fresh! Absolutely! This drink is great for kids. It has no alcohol and uses natural ingredients. The cranberry juice provides vitamins, and the lime adds a zesty taste. Just watch the sweetness. You can adjust the honey to suit their taste. Cranberries are high in vitamins C and K. They help support your immune system. Rosemary has antioxidants, which can help with digestion and memory. Together, they make a tasty, healthy drink. Enjoying this mocktail is a fun way to boost your health! You can change this drink to fit your taste! Try adding pomegranate juice for a fruity twist. Use mint or basil if you want a different herb flavor. You can also adjust the sweetness by adding more or less honey. Have fun making it your own! This blog post shared how to craft a tasty Cranberry Rosemary Mocktail. You learned about all the key ingredients, from cranberry juice to honey. I provided easy steps for mixing and serving the drink. You discovered tips for enhancing flavor and ways to present it well. Remember, feel free to change it up! Use different fruits, herbs, or sweeteners. Enjoy this refreshing drink any time, or share it with friends. Have fun mixing and make it yours!

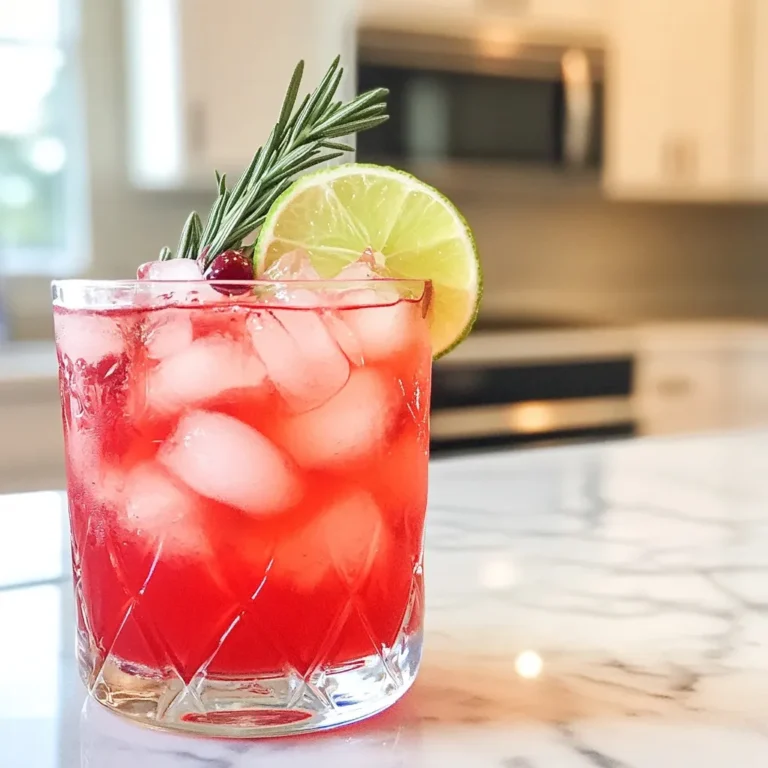
Cranberry Rosemary Mocktail Refreshing and Simple Drink

- 2 cups all-purpose flour - 2 tablespoons baking powder - 1/2 teaspoon salt - 1/4 cup granulated sugar - 2 large eggs - 1 1/2 cups milk - 1/4 cup unsalted butter, melted - 1 teaspoon vanilla extract - 1 teaspoon cinnamon (optional) - 2 cups fresh or frozen blueberries When I make blueberry pancake casserole, I always start with the dry ingredients. I mix together flour, baking powder, salt, and sugar in a big bowl. This mix gives the casserole its fluffy base. Next, I focus on the wet ingredients. I beat the eggs and then add milk, melted butter, and vanilla. These ingredients bring moisture and flavor to the dish. If I want a little warmth, I sprinkle in some cinnamon. The star of this dish is the blueberries. I use either fresh or frozen blueberries. They add natural sweetness and a pop of color. When I fold them into the batter, I save a few to sprinkle on top later. This makes for a beautiful finish. With these simple ingredients, you can create a tasty breakfast that everyone will love. {{ingredient_image_1}} 1. Preheat your oven to 350°F (175°C). This helps cook the casserole evenly. 2. Grease a 9x13-inch baking dish with non-stick spray or butter. This keeps the casserole from sticking. 1. In a large bowl, combine 2 cups of all-purpose flour, 2 tablespoons of baking powder, 1/2 teaspoon of salt, and 1/4 cup of granulated sugar. Mix well. 2. In another bowl, beat 2 large eggs. Add 1 1/2 cups of milk, 1/4 cup of melted butter, and 1 teaspoon of vanilla extract. Mix until smooth. 3. Pour the wet mixture into the dry ingredients. Stir gently until just combined. The batter should look slightly lumpy. 1. Gently fold in 2 cups of blueberries. Save a handful to sprinkle on top. 2. Pour the batter into the greased baking dish. Spread it out evenly. 3. Sprinkle the reserved blueberries on top. If you like, add a dash of cinnamon for extra flavor. 4. Bake for 30-35 minutes. Check doneness with a toothpick; it should come out clean. 5. Let the casserole cool for 5-10 minutes before slicing. Enjoy warm with maple syrup! To get the best texture for your casserole, avoid overmixing the batter. Mix until just combined, and leave some lumps. This helps keep the pancakes fluffy. Each oven is different, so adjust the baking time as needed. Check for doneness by using a toothpick. It should come out clean when done. You can add a layer of cinnamon to boost flavor. Just sprinkle it on top before baking. This gives a warm, cozy taste. For toppings, consider fresh fruit, whipped cream, or nuts. These add nice textures and flavors that make each bite special. Serve the casserole warm straight from the oven. It is best enjoyed fresh. Drizzle maple syrup on top to add sweetness. This makes every bite even more delicious. Each slice is like a warm hug on a plate! Pro Tips Use Fresh Blueberries: Fresh blueberries provide the best flavor and texture. If using frozen, make sure to thaw them first and pat them dry to avoid excess moisture in the batter. Don’t Overmix: To achieve a light and fluffy pancake casserole, mix the wet and dry ingredients until just combined. A few lumps are perfectly fine! Make It Ahead: You can prepare the batter the night before and refrigerate it. Just give it a gentle stir before pouring it into the baking dish. Add a Crunchy Topping: For extra texture, sprinkle some granola or chopped nuts on top before baking. This will create a delightful crunchy layer. {{image_2}} You can easily change the flavor of your casserole. Swap blueberries for raspberries or strawberries. Both fruits add a fresh taste. You can also mix different berries together. A combination of blueberries, strawberries, and raspberries creates a colorful and tasty dish. This variation is fun and keeps breakfast exciting. If you need gluten-free options, replace all-purpose flour with a gluten-free blend. Many blends work well in pancake recipes. For vegan substitutions, use plant-based milk and replace eggs with flax eggs. To make a flax egg, mix one tablespoon of ground flaxseed with three tablespoons of water. Let it sit for five minutes. This simple swap works great in this casserole. Adding nuts can give your casserole a nice crunch. Walnuts or pecans are good choices. Just chop them and mix them in with the blueberries. You can also infuse spices like nutmeg for a warm taste. A little cinnamon on top adds more flavor. These enhancements make your casserole even more enjoyable. Store leftover blueberry pancake casserole in the fridge. Use an airtight container for best results. This helps keep it fresh and tasty. It is best to eat leftovers within three days. If you have more, consider freezing some. You can reheat your casserole in the oven or microwave. For the oven, preheat to 350°F (175°C). Place the casserole in the oven for about 10-15 minutes. Cover it with foil to keep it moist. If using the microwave, heat it in short bursts. Heat for about 30 seconds at a time. Check to see if it is warm enough. This method helps keep the texture soft. You can freeze the casserole both before or after baking. If you freeze it before baking, wrap it well. Use plastic wrap and foil to prevent freezer burn. If you freeze it after baking, let it cool first. Then, slice it into pieces for easy thawing. To thaw, move it to the fridge overnight. You can also warm it in the oven or microwave directly from the freezer. Just add extra time to heat through. Yes, you can use frozen blueberries. They are just as tasty. Frozen berries save time and are easy to find. When you use them, they may make the batter a bit wetter. To prevent this, add them frozen or toss them in flour before mixing. This helps them hold their shape while baking. Yes, you can get this casserole ready before serving. Mix the dry and wet ingredients and store them separately in the fridge. You can also mix everything and pour it into the baking dish. Just cover it tightly and keep it cold. Bake it when you’re ready. It saves time on busy mornings. There are many tasty sides to pair with this casserole. Here are some ideas: - Crispy bacon or sausage for protein - Fresh fruit like bananas or strawberries - A dollop of yogurt for creaminess - A warm cup of coffee or tea - A glass of fresh orange juice for a kick This blueberry pancake casserole mixes simple ingredients for a tasty treat. You can use fresh or frozen blueberries and swap flavors with other fruits. Remember, it's key to mix wet and dry ingredients well but avoid overmixing. Store carefully and reheating tips keep it delicious. Explore variations to fit your taste and dietary needs. This dish is versatile and perfect for any breakfast or brunch. Enjoy baking and delight in the sweet results!

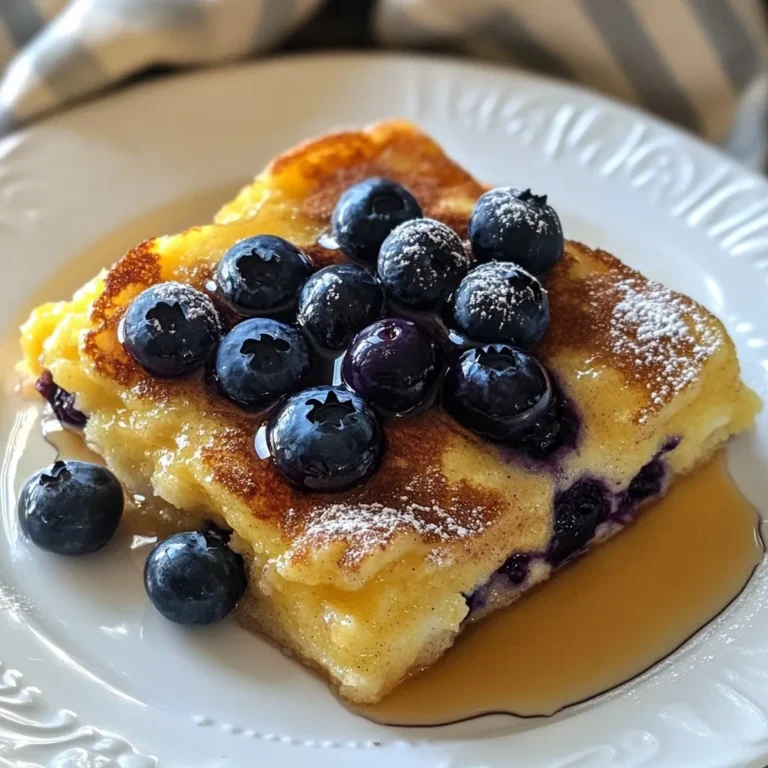
Blueberry Pancake Casserole Tasty Breakfast Delight

You need 1 pint of fresh strawberries. Wash them well and dry them gently. Look for bright red berries with no soft spots. The best strawberries have a sweet scent and a firm texture. Be sure to pick the ones you enjoy the most. For the chocolate, grab 8 ounces of semi-sweet chocolate chips. This chocolate melts well and gives a rich taste. You will also need 2 tablespoons of coconut oil or vegetable oil. The oil makes the chocolate smooth and easy to dip. Toppings can make your pops even more fun. You can use 1/2 cup of crushed nuts like almonds, pistachios, or hazelnuts. These add crunch and flavor. You may also want 1/2 cup of colorful sprinkles. Sprinkles make the pops look bright and festive. With these ingredients ready, you are set to create your tasty chocolate covered strawberry pops! {{ingredient_image_1}} Start by washing and drying 1 pint of fresh strawberries. Make sure they are clean and dry. Take a lollipop stick or skewer and insert it into the top of each berry. Push it in gently, but not too deep. You want the stick to hold the berry without coming out the bottom. This step makes it easy to dip and eat the pops later. Next, take 8 ounces of semi-sweet chocolate chips and put them in a microwave-safe bowl. Add 2 tablespoons of coconut oil. This oil helps the chocolate melt smoothly. Heat the bowl in the microwave for 30 seconds. Then, stir the mixture well. Repeat this until the chocolate is fully melted and smooth. Be careful not to overheat it. Now comes the fun part! Hold a strawberry by the stick and dip it into the melted chocolate. Make sure to coat it well. Let any extra chocolate drip back into the bowl. After dipping, roll the strawberry in crushed nuts or colorful sprinkles. You can use 1/2 cup of either option. Cover the strawberry all over for a fun look and extra crunch. Once you finish coating the strawberries, it’s time to set them. Place the pops upright in a foam block, a glass, or on parchment paper. This keeps them from rolling. Now, refrigerate the pops for about 30 minutes. This chill time helps the chocolate harden. After that, they are ready to enjoy! To get that smooth chocolate coat, start with good chocolate chips. I like using semi-sweet chocolate. The key is to add coconut oil. It helps the chocolate melt smooth. Heat the chocolate in short bursts. Stir after each round. This keeps the chocolate from burning. Once melted, dip the strawberry quickly. Let the extra chocolate drip off. This gives a nice, even coat. Toppings make these pops fun! Choose your toppings right after dipping. Roll the chocolate-covered berry in crushed nuts or sprinkles. Cover all sides for a great look. If you wait too long, the chocolate hardens. Then, toppings won’t stick well. Use a mix of nuts for crunch. Colorful sprinkles add a fun touch and make them pop! You can switch up the chocolate for different tastes. Dark chocolate gives a rich flavor. White chocolate adds sweetness. Try mixing chocolates for a fun look and taste. Each type of chocolate melts a bit differently. Keep that in mind when melting. Adjust the amount of coconut oil if needed. This way, you can enjoy a variety of flavors in your chocolate-covered strawberry pops! Pro Tips Choose the Right Chocolate: Opt for high-quality chocolate chips for a smoother melt and a richer flavor in your pops. Don’t Overheat the Chocolate: Melt the chocolate in short intervals and stir frequently to prevent burning and ensure a silky texture. Experiment with Toppings: Try different toppings like crushed cookies, shredded coconut, or even edible glitter for a fun twist. Keep Them Cool: Store the finished strawberry pops in the refrigerator to maintain their firmness and freshness until serving. {{image_2}} You can add fun flavors to your chocolate-covered strawberry pops. For a mint twist, mix in mint extract with the melted chocolate. Use just a few drops. For an orange flavor, add orange zest to the chocolate. This gives a bright, fresh taste. You can even try mixing chocolate with flavored oils. The toppings can change the game! Instead of nuts, try shredded coconut. It adds a tropical feel. You can also use crushed cookies. Oreos or graham crackers work great! Just roll your chocolate-dipped strawberries in these for a crunchy texture. Experiment with different toppings to find your favorite. Want to impress at a party? Get creative! Use colored chocolate to drizzle over the pops. This adds a fun pattern. You can also use edible glitter for a festive look. For holidays, match your toppings to the theme. Red and green sprinkles for Christmas or pastel colors for Easter will wow your guests. Let your imagination run wild! To keep your chocolate covered strawberry pops fresh, store them in an airtight container. Place a layer of parchment paper at the bottom. This keeps the chocolate from sticking. You can stack the pops, but add more parchment between layers. Keep them in the fridge if you plan to eat them soon. You can freeze chocolate covered strawberry pops too. First, let them set in the fridge until the chocolate hardens. Then, wrap each pop in plastic wrap. Put them in a freezer-safe bag or container. This helps keep out air and moisture. When you're ready to eat them, just take out a pop and let it thaw in the fridge for about 30 minutes. These tasty treats can last up to 5 days in the fridge. If you freeze them, they can last for about 2 months. Just remember, the longer they sit, the more the flavor changes. Enjoy them while they are fresh for the best taste! Yes, you can make these pops ahead of time. They stay fresh in the fridge for about three days. Just chill them after making. Keep them in an airtight container to avoid moisture loss. This helps keep the chocolate crisp. I recommend using semi-sweet chocolate for a balanced taste. Dark chocolate also works well if you like a richer flavor. Milk chocolate adds sweetness, which kids often enjoy. You can even use white chocolate for a fun twist. Each type gives a unique taste to the pops. You can find pre-made chocolate covered strawberry pops at many grocery stores. Some bakeries also sell them. Look in the frozen section or the candy aisle. If you prefer, you can order them online from specialty dessert shops. They make great gifts too! You can make delicious chocolate-covered strawberry pops with fresh strawberries and simple ingredients. We explored steps to prepare, coat, and chill these tasty treats. Remember to choose the right chocolate and experiment with fun toppings. With variations like mint flavor or coconut coating, you can personalize your pops for any occasion. Finally, proper storage keeps them fresh longer. Enjoy creating your own chocolate-covered strawberry pops!

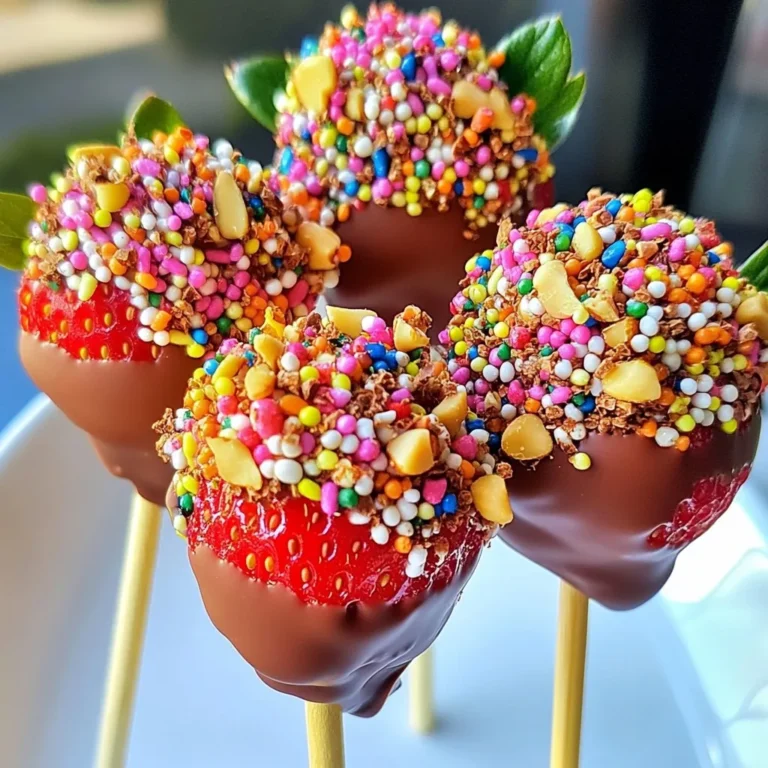
Chocolate Covered Strawberry Pops Delightful Treats

- 1.5 lbs boneless, skinless chicken breasts - 1 medium onion, diced - 3 cloves garlic, minced - 1 red bell pepper, diced - 1 can (14 oz) diced tomatoes with green chilies - 1 can (15 oz) black beans, drained and rinsed - 4 cups chicken broth - 1 cup corn (frozen or canned) - 2 teaspoons ground cumin - 1 teaspoon chili powder - 1 teaspoon smoked paprika - Salt and pepper to taste - 2 tablespoons olive oil - Fresh cilantro, for garnish - Tortilla strips, for serving - Avocado, sliced, for serving - Lime wedges, for serving This soup gets its heart from the chicken and beans. I love using boneless chicken breasts. They cook quickly and stay tender. The diced tomatoes add a nice tang, while the black beans bring protein and fiber. Next, the spices really make this dish pop. Ground cumin gives warmth. Chili powder adds a bit of heat. Smoked paprika brings a rich, smoky flavor. Together, they create a lovely base. Don’t forget the garnishes! Fresh cilantro adds brightness. Tortilla strips give great crunch. Sliced avocado adds creaminess. Lastly, lime wedges give a zesty finish. These toppings make each bowl special. This mix of ingredients makes the soup both tasty and filling. You can easily adjust the flavors to your liking. Enjoy experimenting with this tasty dish! {{ingredient_image_1}} 1. Sautéing the vegetables: Start by pressing the Sauté button on your Instant Pot. Add 2 tablespoons of olive oil. Wait until the oil is hot. Then, add 1 medium onion and 1 diced red bell pepper. Cook for about 3-4 minutes. You want them soft and fragrant. Next, stir in 3 minced garlic cloves and cook for 1 more minute. This step builds a strong base for your soup. 2. Adding chicken and spices: Place 1.5 lbs of boneless, skinless chicken breasts into the pot. Sprinkle 2 teaspoons of ground cumin, 1 teaspoon of chili powder, and 1 teaspoon of smoked paprika over the chicken. Add salt and pepper to taste. Use a spatula to mix everything well. This helps coat the chicken with spices and veggies. 3. Combining all ingredients: Now, add 1 can of diced tomatoes with green chilies, 1 can of drained black beans, 1 cup of corn, and 4 cups of chicken broth. Give everything a good stir to mix. Make sure the chicken is submerged in the broth. This ensures even cooking and rich flavor throughout the soup. To get the best flavor in your soup, use fresh ingredients. Fresh veggies and spices boost taste. For the chicken, boneless breasts work well. They cook fast and stay tender. Avoid common mistakes like overcooking the chicken. If you do, it can dry out. Also, do not skip the sauté step. This builds great flavor. Stirring the spices with the veggies helps blend the tastes. For a beautiful presentation, use colorful bowls. Ladle the soup generously into each bowl. Add crispy tortilla strips on top for crunch. Fresh cilantro adds a nice pop of green. Pair the soup with a side salad or fresh corn bread. These sides complement the soup's flavors well. Lime wedges are a must for that zingy finish. They brighten up each bite! Pro Tips Use Fresh Ingredients: Fresh vegetables and herbs elevate the flavor of your soup. If possible, use freshly chopped cilantro and ripe tomatoes for the best taste. Adjust the Spice Level: If you prefer a milder soup, reduce the amount of chili powder and choose mild diced tomatoes. You can always add hot sauce later for extra heat! Cook in Batches: If you're making a large batch, consider dividing the ingredients into two separate cooking sessions to ensure even cooking and flavor distribution. Garnish Creatively: Experiment with different toppings like shredded cheese, jalapeños, or sour cream for added flavor and a personalized touch to your soup. {{image_2}} Alternative proteins You can change the chicken for other meats. Use turkey for a lighter soup. Pork also works well; just cook it longer. If you want a meatless option, try beans or lentils. Both add protein and flavor. Substituting vegetables Feel free to switch up the veggies. Zucchini or carrots add nice texture. You can also toss in some spinach for added greens. Each choice gives a fresh taste to your soup. Adding extra spices Want more kick? Add more chili powder or cumin. A pinch of cayenne can spice things up. Consider adding oregano for a new layer of flavor. A dash of hot sauce can also make it exciting. Incorporating toppings Don't skip the toppings! Fresh cilantro adds brightness. Sliced avocado brings creaminess. You can also use cheese for richness. Tortilla strips give a crunchy finish. Lime juice adds a zesty twist. These little extras make each bowl special. To store your leftover soup, let it cool first. Pour the soup into an airtight container. Make sure to leave some space at the top. This allows the soup to expand when it freezes. You can keep it in the fridge for up to three days. When you're ready to eat, simply heat it on the stove or in the microwave. If you want to freeze the soup, follow these steps. First, cool it completely. Then, use freezer-safe bags or containers. Fill them with soup, leaving some space at the top. Seal tightly to avoid air pockets. You can freeze the soup for up to three months. To reheat, thaw overnight in the fridge. Heat it on the stove or in the microwave until hot. Yes, you can use frozen chicken. Just add a few extra minutes to the cooking time. The Instant Pot will cook it safely and evenly. This is a great way to save time if you forget to thaw the chicken. To add heat, try these options: - Add more chili powder. - Include diced jalapeños or serrano peppers. - Use hot salsa instead of diced tomatoes. You can adjust the spice level to suit your taste. Start small and add more until it’s just right for you. Absolutely! To make a vegetarian version: - Substitute chicken with cubed tofu or extra beans. - Use vegetable broth instead of chicken broth. - Keep all the veggies and spices for a flavorful dish. This way, everyone can enjoy a tasty bowl of soup! This blog post showed you how to make a hearty soup using the Instant Pot. We discussed key ingredients, step-by-step instructions, and helpful tips to avoid common mistakes. I also shared ideas for ingredient swaps and flavor enhancements. Proper storage practices were covered to keep leftovers fresh. With all this info, you can create a delicious soup that matches your taste. Try it yourself, and enjoy every savory bite!

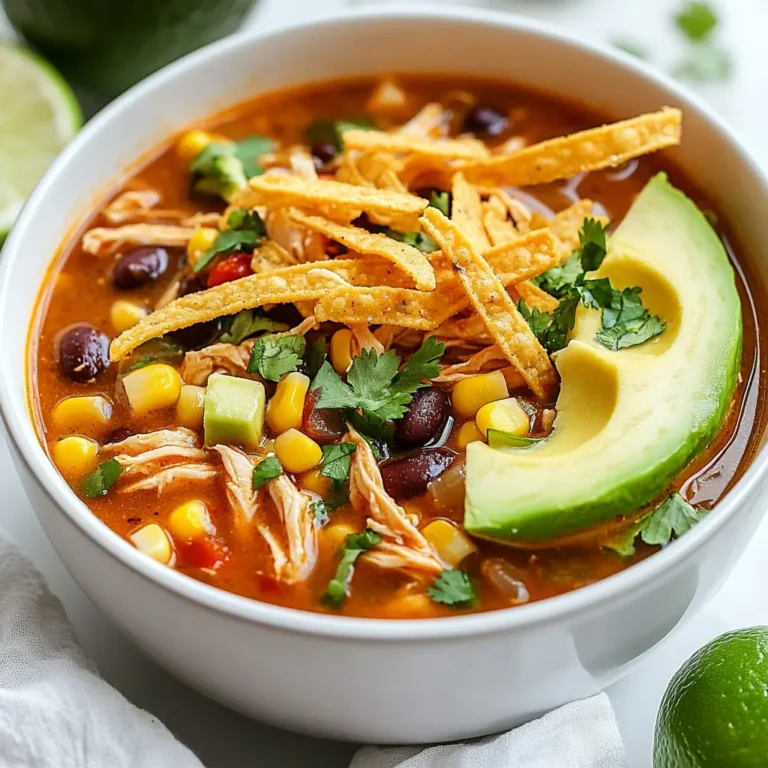
Instant Pot Chicken Tortilla Soup Flavorful and Quick

To make Easy Potsticker Soup, gather these key ingredients: - 1 packet of frozen potstickers (about 12-16 pieces) - 4 cups chicken or vegetable broth - 1 tablespoon soy sauce - 1 teaspoon sesame oil - 1 inch ginger, grated - 2 cloves garlic, minced - 1 cup bok choy, chopped - 1 cup baby spinach - 1 carrot, thinly sliced - 3 green onions, chopped - Salt and pepper to taste These ingredients work together to create rich and tasty soup. You can add a few optional items to enhance your soup: - Chili oil for drizzling - Sesame seeds for garnish These extras bring a touch of flavor and fun to the dish. If you don’t have some ingredients, here are some easy swaps: - Use tofu instead of potstickers for a vegetarian option. - Swap bok choy with kale or Swiss chard for a different green. - Any broth works; try beef broth for a bolder taste. These substitutions make the recipe flexible to your needs. {{ingredient_image_1}} Start by heating a drizzle of sesame oil in a large pot over medium heat. Add the minced garlic and grated ginger. Sauté them for about one minute. You will know they are ready when they smell amazing. This step creates a flavorful base for your soup. Next, pour in four cups of chicken or vegetable broth. Bring it to a gentle simmer. Stir in one tablespoon of soy sauce. Then add the thinly sliced carrots. Let everything cook for five minutes. This allows the carrots to soften and blend into the broth. Now, carefully add the frozen potstickers to the pot. Let them simmer for eight to ten minutes. This will heat them through and make them tender. After that, include one cup of chopped bok choy and one cup of baby spinach. Cook for another two to three minutes. The greens should be tender and bright. Taste your soup and season it with salt and pepper as needed. Ladle the soup into bowls. Top with chopped green onions for freshness. If you like spice, drizzle some chili oil on top. You can also sprinkle sesame seeds for a nice finish. Enjoy this colorful and tasty dish! To boost the flavor of your potsticker soup, consider adding extra ingredients. Here are some ideas: - Mushrooms: Sliced shiitake or button mushrooms add a nice umami taste. - Peppers: Diced bell peppers can add sweetness and color. - Cabbage: Shredded napa cabbage gives a nice crunch. - Fresh herbs: Cilantro or basil can brighten the soup. - Chili oil: A drizzle of chili oil adds heat and depth. Each ingredient adds a unique twist. Feel free to mix and match based on your taste. Cooking potstickers well is key to a great soup. Here are my top tips: - Sauté first: Sauté potstickers in a bit of oil before adding broth. This adds a crispy texture. - Simmer gently: Keep the heat low to avoid breaking the potstickers. A gentle simmer is best. - Don’t overcrowd: Cook in batches if needed. This ensures even cooking. Using these techniques makes for perfectly cooked potstickers in your soup. To make a full meal from your potsticker soup, consider these sides: - Rice: A bowl of steamed jasmine or brown rice complements the soup well. - Salad: A light Asian-style salad with sesame dressing adds freshness. - Spring rolls: These crispy treats are a tasty addition to the meal. These pairings round out your dining experience, making it satisfying and delicious. Enjoy! Pro Tips Use Fresh Ingredients: For the best flavor, opt for fresh garlic and ginger instead of pre-minced options. Fresh ingredients will enhance the aroma and taste of your soup. Customize Your Greens: Feel free to swap bok choy and spinach with other greens like kale or Swiss chard for a different flavor profile and added nutrition. Make It Spicy: If you enjoy heat, add some sliced fresh chili peppers or a splash of hot sauce along with the chili oil for an extra kick. Perfect Potsticker Cooking: Ensure not to overcrowd the pot with potstickers; this allows them to heat evenly and maintain their texture without becoming mushy. {{image_2}} You can easily make this soup vegetarian or vegan. Just swap the broth. Use vegetable broth instead of chicken broth. Check the potstickers too. Many brands offer vegetarian options. Look for ones filled with mushrooms, tofu, or veggies. This change keeps all the great flavors while making it plant-based. If you want meat, try different options. Ground pork is a classic choice and brings rich flavor. Chicken, turkey, or even beef potstickers work well too. You can also add cooked shrimp for a seafood twist. Just make sure to adjust the cooking time if you use raw meat. You want everything to cook evenly in the broth. For a gluten-free version, look for gluten-free potstickers. Many brands now offer this option. Use gluten-free soy sauce or tamari, which tastes great. Check the labels on your broth too. Some contain gluten, so read carefully. With these tweaks, you can enjoy a comforting bowl without gluten. After you enjoy your Easy Potsticker Soup, let it cool down. Pour the soup into an airtight container. This helps keep it fresh. Store the container in the fridge for up to three days. If you want to keep it longer, consider freezing it. To reheat your soup, pour it into a pot. Heat it on low to medium heat. Stir occasionally to avoid burning. If you find the soup too thick, add a splash of broth or water. You can also use the microwave. Heat it in a safe bowl. Stir halfway through to warm it evenly. If you want to freeze your soup, do it right after it cools. Use freezer-safe containers. Leave some space at the top. This allows for expansion when the soup freezes. It will stay good for up to three months. When you're ready to eat, thaw it in the fridge overnight. Then reheat as usual. To make potstickers from scratch, you need a few key items. First, prepare the dough. Mix flour and water, then knead until smooth. Let it rest for 30 minutes. Next, make the filling. Use ground meat, chopped vegetables, and seasonings like soy sauce and ginger. Roll out the dough into thin circles. Place a spoonful of filling in the center of each circle. Fold the dough over and pinch the edges to seal. You can pan-fry, steam, or boil them until cooked. This way, you can enjoy fresh potstickers in your soup! Yes, you can use fresh vegetables! Fresh bok choy, spinach, and carrots add great flavor and texture. Just chop them to the same size as the frozen ones. Cook them slightly longer to ensure they’re tender. Fresh veggies give your potsticker soup a bright and crisp taste. The best sides to serve with potsticker soup are light and fresh. Here are some ideas: - Steamed edamame: Simple to prepare and packed with protein. - Cucumber salad: A refreshing crunch that balances the soup's warmth. - Fried rice: Perfect for a filling meal alongside the soup. - Spring rolls: Add an extra layer of flavor and texture. These sides enhance your meal and create a delightful dining experience! In this blog post, we explored how to make potsticker soup. I shared essential ingredients, optional garnishes, and substitutions to suit your taste. The step-by-step instructions cover preparing aromatics, simmering broth, and cooking potstickers. We also looked at tips for enhancing flavor, cooking techniques, and pairing suggestions. You can try variations like vegetarian options or gluten-free adjustments. Finally, I provided storage and reheating tips for leftovers. Enjoy your cooking adventure!

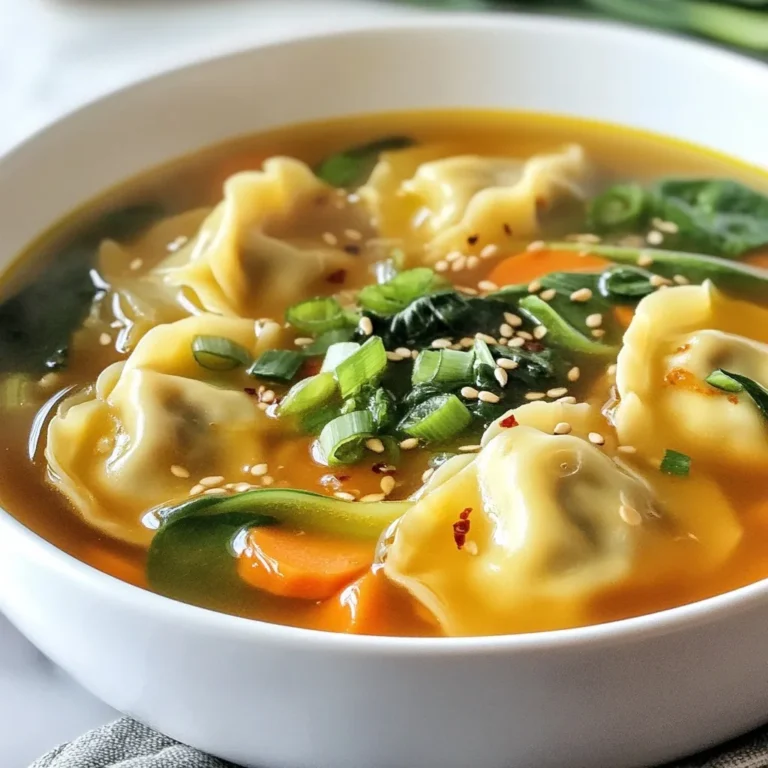
Easy Potsticker Soup Flavorful and Simple Recipe

PREV 1 … 54 55 56 … 86 NEXT
spicy fork kitchen

explore

DessertsDinnerAppetizersDrinks

Our Policies

  • Cookie Policy
  • Copyright Policy
  • Disclaimer
  • GDPR Policy
  • Terms Of Use
Back to Top
  • About
  • Contact Us
  • Privacy Policy
© 2026 spicy fork kitchen