FREE DINNER EBOOK! Get your copy!
  • Cookie Policy
  • GDPR Policy
  • Disclaimer
  • Terms Of Use
  • Visit my other site: Fun Cookie Recipes
spicy fork kitchen
  • Home
  • Dinner
  • Desserts
  • Drinks
  • Appetizers
  • Contact
  • About
  • Privacy Policy
  • Home
  • Dinner
  • Desserts
  • Drinks
  • Appetizers
  • Contact
  • About
  • Privacy Policy
  • Cookie Policy
  • GDPR Policy
  • Disclaimer
  • Terms Of Use
Visit my other site: Fun Cookie Recipes

HOME / CATEGORIES /

Latest

To make Zesty Black Bean Corn Salsa, you need the following: - 1 can (15 oz) black beans, drained and rinsed - 1 cup sweet corn (frozen, fresh, or canned) - 1 cup cherry tomatoes, quartered - 1 small red onion, finely diced - 1 bell pepper (red or yellow), diced - 1 jalapeño, seeded and minced - 1/4 cup fresh cilantro, chopped - 2 tablespoons lime juice - 1 teaspoon cumin - Salt and pepper to taste Each ingredient brings its own flavor to the dish. Black beans add protein and fiber. Sweet corn gives a nice crunch and sweetness. Cherry tomatoes add juiciness. The red onion and bell pepper offer color and texture. Jalapeño gives a spicy kick, while cilantro adds freshness. Lime juice brightens the flavors, and cumin adds warmth. Each serving of this salsa is healthy and tasty. Here’s a quick look at what you get in one serving: - Calories: 120 - Protein: 6g - Carbohydrates: 20g - Dietary Fiber: 5g - Sugars: 3g - Fat: 1g This salsa is low in fat and high in fiber. It’s great for snacking or as a side dish. You can enjoy it guilt-free! You can swap some ingredients if you want a different taste or if you lack something. Here are some easy swaps: - Black beans: Use pinto beans or kidney beans. - Sweet corn: Try using roasted corn for a smoky flavor. - Cherry tomatoes: Diced regular tomatoes work well too. - Red onion: Use green onions for a milder taste. - Bell pepper: Any color of bell pepper works. - Jalapeño: Leave it out if you prefer no heat, or use a milder pepper. - Cilantro: You can use parsley if you dislike cilantro. - Lime juice: You can use lemon juice as a substitute. - Cumin: Try chili powder for a different spice profile. These swaps let you customize the salsa to fit your likes. Have fun experimenting! If you want the full recipe, check out the details above. Making Zesty Black Bean Corn Salsa is simple. You start with fresh ingredients that burst with flavor. This salsa takes just 15 minutes to prepare. Let’s break it down step by step so you can get the most out of each bite. 1. Gather all your ingredients. You need black beans, corn, tomatoes, red onion, bell pepper, jalapeño, cilantro, lime juice, cumin, salt, and pepper. 2. In a large bowl, combine the black beans and corn. Make sure to drain and rinse the beans first. This removes extra salt and keeps the salsa fresh. 3. Add the cherry tomatoes, diced red onion, diced bell pepper, and minced jalapeño to the bowl. Mix gently so you don’t mash the beans. 4. Fold in the chopped cilantro. This herb gives your salsa a bright flavor and a lovely green color. 5. In a small bowl, whisk the lime juice, cumin, salt, and pepper. This dressing adds zing and depth to the salsa. 6. Pour the dressing over the salsa mixture. Gently toss everything together until well mixed. 7. Taste your salsa. Adjust the seasoning as needed. You can add more lime juice for tang or extra salt for flavor. 8. Let it sit for at least 15 minutes. This helps the flavors blend and makes each bite more delicious. - For a thicker salsa, try adding more black beans or corn. - If you like it spicy, leave some seeds in the jalapeño or add a dash of hot sauce. - Fresh lime juice is key. It brightens flavors and keeps the salsa fresh. - Serve the salsa chilled for the best taste. Enjoy it with chips or on tacos! For the full recipe, be sure to check the recipe section! Using fresh ingredients makes a big difference in flavor. Choose ripe cherry tomatoes for sweetness. Look for corn that is bright and crisp. Fresh cilantro adds a wonderful aroma. Always rinse black beans well to remove excess salt. If you can, use fresh lime juice instead of bottled. This small change brightens the salsa. Making salsa ahead of time is easy and smart. Combine all your ingredients in a bowl. Cover it tightly with plastic wrap. Let it chill in the fridge for a few hours. This allows the flavors to blend well. You can prep it the night before a party. Just remember to taste it again before serving. You might need to add more salt or lime juice. Zesty black bean corn salsa goes well with many dishes. Serve it with grilled chicken or fish for a fresh touch. It also pairs nicely with tacos and burritos. For a light meal, try it with quinoa or rice. You can even use it as a topping for baked potatoes. If you like heat, add more jalapeño or serve with spicy chips. Check out the Full Recipe for more ideas! {{image_2}} If you like heat, add more jalapeño or try a serrano pepper. You can also mix in a dash of hot sauce for extra spice. For a smoky flavor, consider adding smoked paprika. This gives the salsa a nice kick without losing its fresh taste. This salsa is naturally vegetarian and vegan. You can keep it that way by adding more veggies. Try diced zucchini or chopped avocado for creaminess. Both add flavor and texture while keeping the dish plant-based. Zesty Black Bean Corn Salsa works well for many events. Serve it at BBQs, picnics, or game days. Pair it with tortilla chips or use it as a topping for tacos. You can also spoon it over grilled chicken or fish for a tasty meal. For a light lunch, serve it on a bed of greens. Check the full recipe for more ways to enjoy this fresh and colorful dish. To keep your salsa fresh, place it in an airtight container. Make sure the lid seals tightly. This helps keep out air and moisture. Store it in the fridge. It stays fresh and tasty when properly stored. Zesty Black Bean Corn Salsa lasts about 3 to 5 days in the fridge. Check for any signs of spoilage before eating. If you want to save it longer, consider freezing it. Use a freezer-safe container or a heavy-duty freezer bag. It can last up to 3 months in the freezer. However, the texture may change when thawed. When you are ready to eat the salsa again, take it out of the fridge. If it’s frozen, let it thaw in the fridge overnight. Stir well to mix the flavors. You might need to add a splash of lime juice to freshen it up. Serve it chilled, just like the first time. Enjoy with chips or as a topping on tacos. For the full recipe, check out the earlier sections. You can serve Zesty Black Bean Corn Salsa with many dishes. It pairs great with tortilla chips. The crunch of the chips balances the salsa's freshness. You can also use it as a topping for tacos or grilled chicken. It adds a burst of flavor to burritos and salads. For a fun twist, try it on a quesadilla. The options are endless! Absolutely! You can swap some ingredients if needed. If you don't have black beans, try pinto beans. For corn, frozen, fresh, or canned all work well. If cherry tomatoes aren't available, diced regular tomatoes are fine. You can skip jalapeños for less heat. Green onions can replace red onion if you prefer a milder taste. Feel free to get creative! Homemade salsa can last about 3 to 5 days in the fridge. Make sure to store it in an airtight container. Keep it cold to maintain flavor and freshness. If you notice any changes in smell or color, it’s best to toss it out. Enjoy your salsa while it’s fresh for the best taste! This blog post covered everything you need for Zesty Black Bean Corn Salsa. We looked at ingredients, step-by-step cooking, and tips for the best flavors. You now know how to store your salsa and answer common questions. Try different variations to keep it fun. With these tools, you can make a tasty salsa that fits any meal. Enjoy your cooking and impress your friends with your skills!

Zesty Black Bean Corn Salsa Fresh and Flavorful Dish

For a tasty chicken korma, you need key items. Start with: - 2 lbs boneless, skinless chicken thighs, cut into chunks - 1 can (13.5 oz) coconut milk - 1 cup plain yogurt Chicken thighs bring great flavor and tenderness. Coconut milk and yogurt add creaminess, making the dish rich. Spices are essential for korma's unique taste. Use: - 1 tablespoon ground cumin - 1 tablespoon ground coriander - 1 tablespoon garam masala - 1 teaspoon turmeric - 1 teaspoon paprika - 1 teaspoon red chili powder (adjust for spice level) These spices create a warm, aromatic blend. They make every bite a delight. Don’t forget the basics. You will also need: - 1 large onion, finely chopped - 4 cloves garlic, minced - 1 tablespoon ginger, grated - 2 tablespoons vegetable oil - Salt to taste Onions, garlic, and ginger add depth. Vegetable oil helps sauté these flavors, while salt enhances everything. {{ingredient_image_1}} Start by heating vegetable oil in a large skillet over medium heat. Next, add the finely chopped onion. Sauté the onion until it turns golden brown, which takes about 5 to 7 minutes. The smell will be wonderful! After that, add the minced garlic and grated ginger. Stir this mixture for 1 to 2 minutes until it becomes fragrant. Once done, transfer the onion mixture directly to the slow cooker. This step builds a strong flavor base for your korma. Now, it’s time to add the chicken. Place 2 pounds of cut chicken thighs into the slow cooker. Alongside, pour in the coconut milk and plain yogurt. These ingredients add creaminess and depth. Next, mix in all the spices: ground cumin, ground coriander, garam masala, turmeric, paprika, and red chili powder. Don't forget to add salt to taste. Stir everything well to ensure the chicken gets evenly coated with the sauce. You can set the slow cooker to low heat for 6 to 7 hours. If you're short on time, high heat works too, cooking it in 3 to 4 hours. Just check that the chicken is tender and cooked through. When it's done, give the korma a gentle stir. This helps break up any large chicken pieces and mixes the sauce nicely. Adjust the seasoning if needed. Enjoy your savory chicken korma! To make your chicken korma even tastier, consider marinating the chicken. A simple marinade can add depth. Mix yogurt, garlic, ginger, and a pinch of salt. Let the chicken soak for at least one hour, or overnight if you can. This step makes the chicken tender and flavorful. Sometimes, the sauce might be too thick or thin. If it’s too thin, try adding a bit more yogurt or let it cook longer. For a thicker sauce, you can blend some of the sauce and mix it back in. Keep stirring gently to ensure a smooth texture. Chicken korma pairs well with basmati rice, but you can also serve it with naan or roti. Adding a side of cucumber salad can balance the spices. For extra flavor, sprinkle fresh cilantro on top before serving. A slice of lime adds a nice touch, too. Pro Tips Marinate for Extra Flavor: For a deeper taste, marinate the chicken in yogurt and spices for a few hours or overnight before cooking. Add Vegetables: Include vegetables like spinach or bell peppers in the last hour of cooking for added nutrition and flavor. Garnish Creatively: Enhance the presentation with toasted coconut flakes or slivered almonds on top of the korma before serving. Adjust Spice Levels: Modify the amount of red chili powder to suit your spice preference; start with less and add more if needed. {{image_2}} You can easily swap chicken for vegetables or tofu. Use sturdy veggies like cauliflower, carrots, or bell peppers. Tofu is another great choice. It absorbs flavors well and adds protein. For tofu, use firm or extra-firm varieties. Cut them into cubes and add them just like you would the chicken. Cook the korma on low for about 4-5 hours until the veggies become tender and flavorful. The spice level of your chicken korma is all in the chili powder. If you like it mild, cut the red chili powder in half or leave it out. If you crave more heat, add extra chili powder or some chopped fresh chilies. You can also add a pinch of cayenne pepper for a spicy kick. Always taste as you go to find your perfect balance. You can explore regional twists to make your korma unique. Try adding nuts like cashews or almonds for a nutty flavor. You can also mix in dried fruits like raisins or apricots for sweetness. Another option is to add fresh herbs like mint or curry leaves for a pop of freshness. Each of these additions creates a different gourmet experience, so feel free to get creative! To keep your chicken korma fresh, store it in an airtight container. This helps prevent air from getting in. Let the korma cool before sealing it. It’s best to refrigerate leftovers right away. Chicken korma stays good in the fridge for about three to four days. When you want to enjoy your chicken korma again, you can use the microwave or the stovetop. For the microwave, place your korma in a bowl. Heat it in short bursts of 30 seconds. Stir in between to ensure even warming. The stovetop method is simple too. Pour the korma into a pan and heat it over low heat. Stir often until it is hot. If you want to save korma for later, freezing is a great option. First, let it cool completely. Then, divide it into portions and use freezer bags. Squeeze out excess air before sealing. Label the bags with the date. To thaw, place the frozen korma in the fridge overnight. You can then reheat it on the stovetop or in the microwave. This way, you can enjoy a tasty meal anytime! Chicken korma is a rich, creamy dish from South Asia. It has roots in Mughlai cuisine, known for its use of spices and yogurt. The dish usually features chicken cooked slowly in a blend of spices, coconut milk, and yogurt. This process makes the chicken tender and flavorful, creating a comforting meal. Yes, you can prepare chicken korma in advance. The flavors deepen if you let it sit. Cook the dish and cool it before storing it in the fridge. You can keep it for up to three days. Just reheat it gently before serving. This makes meal prep easy and saves time on busy nights. To adjust the spice level, you can change the amount of red chili powder. Use less for a milder dish or more for extra heat. You can also add fresh green chilies for a kick. Another tip is to include more coconut milk or yogurt to tone down spiciness. Taste as you go, and find the perfect balance for your family. This blog post explored making Slow Cooker Chicken Korma. We covered key ingredients, like chicken thighs and spices. We detailed step-by-step instructions, giving tips for perfect results. Enhancing flavor and suggesting sides were also discussed. You can even try variations, like using tofu for a vegetarian dish. In conclusion, this recipe is simple and flexible. You can adjust it to fit your taste. Enjoy delicious korma today!

Savory Slow Cooker Chicken Korma Easy and Flavorful

To make Easy Pad Thai with shrimp, you need some key ingredients: - 8 ounces rice noodles - 1 tablespoon vegetable oil - 1 pound shrimp, peeled and deveined - 2 cloves garlic, minced - 2 eggs, lightly beaten - 1 cup bean sprouts - 3 green onions, sliced - 1/4 cup roasted peanuts, chopped - 3 tablespoons tamarind paste - 3 tablespoons fish sauce - 2 tablespoons sugar - 1 lime, cut into wedges - Fresh cilantro, for garnish - Red pepper flakes, optional These ingredients give Pad Thai its famous taste. The rice noodles are soft and chewy. The shrimp adds a sweet and salty flavor. Garlic gives it a nice kick, while the eggs make it rich and filling. The bean sprouts and green onions add crunch and freshness. You can change up your Pad Thai to match your taste: - Additional proteins like chicken or tofu - Substitutions for shrimp, such as scallops or veggies - Garnishes like sesame seeds or lime zest Customizing your dish makes it more personal. You can mix and match to suit your family’s likes. Each serving of Easy Pad Thai with shrimp has around 400 calories. Here’s a quick look at the macronutrients: - Protein: 25 grams - Carbohydrates: 55 grams - Fat: 15 grams This dish is not only tasty, but it also has health benefits. Shrimp is high in protein and low in fat. The vegetables provide vitamins and minerals. Eating Pad Thai can be a balanced part of your meal plan. For the full recipe, check out the details above. To start, soak the rice noodles in hot water. This takes about 20 minutes. Make sure they soften but do not over-soak. Drain the noodles well when ready. For perfect texture, aim for a bit of firmness. They will cook more when you add them to the pan later. Next, heat the vegetable oil in a skillet over medium-high heat. When it's hot, add the shrimp and minced garlic. Cook for about 2-3 minutes. You'll know the shrimp is done when it turns pink and opaque. Remove the shrimp from the skillet and set them aside. In the same skillet, pour in the beaten eggs. Scramble them until fully cooked. Then, mix the eggs back with the shrimp. Now, it’s time to bring everything together. Add the soaked noodles to the skillet. In a small bowl, mix the tamarind paste, fish sauce, and sugar. Pour this sauce over the noodles. Toss everything together well until combined. For the final touch, add bean sprouts and sliced green onions. Toss for another 2 minutes until warmed. Serve your Pad Thai on plates, topping with chopped peanuts and fresh cilantro. Don't forget the lime wedges for that zesty finish! For a full recipe, you can check the earlier section. - Overcooking shrimp: This can make shrimp tough. Cook them just until they turn pink and opaque. - Incorrect noodle preparation: Soak rice noodles until they are soft, but not mushy. Drain them well before use. - Best skillet or wok to use: A large skillet or a wok works best. These allow for even cooking and easy tossing. - Recommended utensils for easy cooking: Use a wooden spoon or spatula. These tools help mix the ingredients without sticking. - Pairing side dishes: Serve with a light salad or spring rolls. These complement the flavors of Pad Thai. - Best beverages to complement the meal: A cold Thai iced tea or a light beer pairs well. They balance the meal's bold flavors. {{image_2}} For a vegetarian or vegan Pad Thai, swap the shrimp with tofu or tempeh. Both add protein and absorb flavors well. You can also skip the eggs or replace them with scrambled tofu. For the sauce, use soy sauce or a vegan fish sauce. Check labels to ensure they fit your diet. Want to spice things up? Add chili paste or red pepper flakes for heat. You can also toss in more veggies like bell peppers, carrots, or snap peas. These add color and crunch. Fresh herbs like basil or mint can boost the flavor too. In Thailand, Pad Thai often has a sweeter sauce and more peanuts. Some places add lime juice for tanginess. In Western versions, chefs may use chicken or beef. They might even include cheese! These twists make the dish unique but still delicious. For the full recipe, check out the Easy Shrimp Pad Thai section. After you enjoy your Easy Pad Thai with Shrimp, store any extras in the fridge. Use an airtight container to keep it fresh. This dish stays good for about 3 to 4 days. If you want to enjoy it later, proper storage is key. You can freeze Pad Thai, but it’s best to separate the components. Freeze the noodles and shrimp in one bag. Keep the sauce and veggies in another. This way, they stay fresh longer. When you want to eat them, thaw everything in the fridge overnight. To bring back the great taste, reheat the Pad Thai in a skillet. Add a splash of water or broth to help it steam, keeping it moist. If you have more veggies, throw them in while heating. You can also use leftover Pad Thai as a filling for spring rolls or a topping for a salad. Enjoy new meals without waste! To make Pad Thai taste authentic, focus on key ingredients. Use rice noodles, tamarind paste, and fish sauce. These add real depth to the dish. Cooking techniques matter too. Stir-fry quickly over high heat. This keeps the noodles tender and the shrimp juicy. Yes, you can use other noodles if needed. Options include egg noodles or even zucchini noodles. However, keep in mind their texture and flavor. Rice noodles provide a chewy base that holds sauce well, while egg noodles are richer and softer. Pad Thai can be gluten-free. Use rice noodles and gluten-free fish sauce. Check the labels on sauces for hidden gluten. If you worry about cross-contamination, clean all cooking surfaces and utensils thoroughly before making your dish. Pair Pad Thai with fresh spring rolls for a light side. You can also serve it with a simple cucumber salad. For dessert, try mango sticky rice. This sweet treat balances the savory Pad Thai perfectly. You learned about making Easy Pad Thai with Shrimp. We covered key ingredients, cooking steps, and tips to avoid mistakes. You can customize it with different proteins or veggies. Remember the storage tips to enjoy leftovers later. Pad Thai is versatile and can suit many diets. Whether you stick to the traditional recipe or try variations, the goal is delicious food. Dive into this tasty dish and impress your friends and family!

Easy Pad Thai with Shrimp Flavorful and Simple Meal

To make delicious Chocolate Peanut Butter Protein Balls, gather the following simple ingredients: - 1 cup rolled oats - 1/2 cup natural peanut butter - 1/4 cup honey or maple syrup - 1/4 cup chocolate protein powder - 1/4 cup mini dark chocolate chips - 1/4 teaspoon salt - 1 teaspoon vanilla extract - 2 tablespoons chia seeds (optional) Each ingredient plays a key role. The rolled oats give a nice chewy base. Peanut butter adds creaminess and flavor. Honey or maple syrup sweetens the mix and helps bind everything. Chocolate protein powder boosts the protein content while adding rich chocolate taste. The mini dark chocolate chips add little bursts of sweetness. Salt enhances all the flavors, while vanilla brings warmth. Chia seeds boost nutrition if you choose to add them. You can find these ingredients at most grocery stores. They are easy to work with and blend well together. If you want to explore, try swapping some ingredients. The Full Recipe shows how to combine them into tasty protein balls. Enjoy the process of making these snacks! - Step 1: Combine dry ingredients In a large mixing bowl, add 1 cup of rolled oats, 1/4 cup chocolate protein powder, 1/4 teaspoon salt, and 2 tablespoons chia seeds if you want. Stir them well. - Step 2: Mix wet ingredients In another bowl, mix 1/2 cup natural peanut butter, 1/4 cup honey or maple syrup, and 1 teaspoon vanilla extract. Make it smooth and creamy. - Step 3: Combine wet and dry mixtures Pour the wet mix into the bowl with the dry ingredients. Stir them together until everything is mixed well. The mix should be sticky but hold its shape. - Step 4: Fold in chocolate chips Gently add 1/4 cup mini dark chocolate chips into the mix. Fold them in so they are evenly spread. - Step 5: Roll into balls Use your hands to roll the mix into 1-inch balls. Place them on a lined baking sheet or plate. - Step 6: Refrigerate to firm up Chill the protein balls in the fridge for at least 30 minutes. This helps them become firm and ready to eat. Check out the Full Recipe for more details. Enjoy these tasty snacks anytime! - Adjust sweetness: You can use honey or maple syrup. Honey gives a thicker texture, while maple syrup adds a unique flavor. Try both to see which you like best! - Consistency matters: The right stickiness is key. If your mix is too dry, add a touch more peanut butter. If it's too wet, sprinkle in more oats. Aim for a mix that holds together well but isn't too sticky. - Rolling techniques: To get even-sized balls, use a measuring spoon. Scoop out the mixture and roll it in your hands. This way, all your protein balls will be the same size, making for a nice presentation. - Best ways to serve and store: These protein balls are great on their own. Serve them in a small bowl or mason jar for a fun look. Store them in the fridge, where they stay fresh for about a week. You can also freeze them for later. - Great pairings for snacks or meals: Pair your protein balls with fruit, yogurt, or a smoothie. They make a great snack before or after workouts. You can also enjoy them as a quick breakfast on busy mornings. {{image_2}} You can easily change some ingredients in your protein balls. If you want a different nut flavor, try almond or cashew butter instead of peanut butter. Each nut brings its own taste and texture. For protein powder, you can use any flavor you like. Vanilla or unflavored protein powder works well too. This swap can change the taste but keep the protein boost. Adding superfoods can make your protein balls even better. Consider mixing in hemp seeds or flaxseed. Both add extra nutrients and healthy fats. They also add a nice crunch. To change up the flavor, you can add some cocoa powder. This will make your protein balls even more chocolatey. If you like a fresh taste, peppermint extract is a fun option. Just a few drops can give a nice twist. Toppings are a great way to make your protein balls special. Roll them in coconut flakes for a tropical vibe. You can also sprinkle chopped nuts on top for added crunch. These simple changes can make your snacks exciting! For the full recipe, check out the earlier section. To keep your chocolate peanut butter protein balls fresh, store them in the fridge. Place them in an airtight container. This method helps them stay moist and delicious. You can also use a glass jar with a tight lid. If you make a big batch, layer them with parchment paper. This prevents them from sticking together. They can last up to a week when stored properly. To save protein balls for later, freezing works well. Place the rolled balls on a baking sheet. Make sure they are not touching each other. Freeze them for about two hours. Once frozen, transfer them to a freezer-safe bag. Remove as much air as possible before sealing. They can stay good for up to three months. When you want to eat one, just take it out. Let it thaw in the fridge for a few hours. You can also enjoy them straight from the freezer for a cool treat! How to make Chocolate Peanut Butter Protein Balls vegan? To make these protein balls vegan, use maple syrup instead of honey. Choose a plant-based protein powder. For the peanut butter, ensure it’s free from added sugars or oils. This keeps the protein balls both tasty and vegan-friendly. Can I substitute protein powder with other ingredients? Yes, you can swap protein powder. Try using ground oats or nut flour. These will change the texture and protein content. You may need to adjust the liquid in the recipe to keep the mixture sticky. What are the nutritional benefits of these protein balls? These protein balls offer several benefits. They are high in protein, which helps build muscle. The oats and peanut butter provide fiber, keeping you full. Dark chocolate adds antioxidants. Overall, they are a balanced snack for energy and nutrition. How long do homemade protein balls last in the fridge? Homemade protein balls last about one week in the fridge. Store them in an airtight container. If you want them to last longer, try freezing them. They can stay fresh for up to three months in the freezer. Where to buy pre-made chocolate peanut butter protein balls You can find pre-made protein balls at health food stores or online. Many grocery stores now carry them in the snack aisle. Check local shops for fresh options. Recommended brands and product reviews Some popular brands include RXBAR and Quest. RXBAR offers clean ingredients with no added sugar. Quest combines taste and protein in their snacks. Always read reviews to find what best fits your needs. These protein balls are easy to make with simple ingredients. You learned how to mix dry and wet items, then form and chill them. You can add your own twist with flavors or swaps. Remember to store them right for freshness. Enjoy these treats as a quick snack or meal boost. Making your own gives you control over what goes in. Try it out and customize your bites to fit your tastes. They are fun, tasty, and good for you. Happy snacking!

Chocolate Peanut Butter Protein Balls Easy Snack Idea

- 2 cans black beans - 1 medium onion - 3 garlic cloves To make Spicy Black Bean Soup, you need some key ingredients. Black beans are the star here. They provide protein and make the soup hearty. You’ll also need a medium onion, which adds sweetness and depth. Garlic brings a strong aroma and flavor that blends well with the beans. - Fresh cilantro - Lime wedges Garnishes can elevate your soup. Fresh cilantro gives a burst of freshness. Lime wedges add a zesty kick. These simple touches make the dish pop and can enhance the overall taste. - Olive oil - Vegetable broth Don’t forget the pantry staples! Olive oil is perfect for sautéing. It adds richness to the soup. Vegetable broth serves as the base, bringing all the flavors together. Using good-quality broth makes a big difference in taste. For the full recipe, you can check out the detailed steps that follow! To start, heat olive oil in a large pot over medium heat. Once hot, add the diced onion. Sauté the onion for about 3-4 minutes. You want it to turn soft and translucent. Next, stir in the minced garlic. Cook for 1 minute until you smell its great aroma. Then, add the diced red bell pepper and the chopped jalapeño. Sauté for another 2-3 minutes. This step brings lots of flavor to the soup. Now it’s time to add spices. Add ground cumin, smoked paprika, and chili powder to the pot. Stir well to combine and cook for 1 minute. This helps to release the spices’ lovely scents. Then, pour in the vegetable broth and the can of diced tomatoes with green chilies. Stir everything together so that the flavors mix well. Bring the soup to a gentle boil before lowering the heat to a simmer. Next, add the rinsed black beans to the pot. Season the soup with salt and pepper to taste. Allow the soup to simmer for 20-25 minutes. Stir occasionally to ensure it cooks evenly. If you want a creamier texture, you can partially mash some of the beans with a potato masher. Alternatively, blend a portion of the soup and return it to the pot. Lastly, taste the soup and adjust the seasoning if needed. Serve hot, garnished with fresh cilantro and a lime wedge on the side. You can find the full recipe above. To get the perfect spice level in your soup, start with the jalapeño. You can adjust how much you use based on your taste. If you like it milder, remove the seeds and ribs. This part holds most of the heat. For extra kick, add more jalapeño or even a dash of hot sauce. You can also think about other spices. Cayenne pepper adds heat without changing the soup's texture. If you prefer smokiness, try chipotle powder. Each spice changes the flavor, so feel free to experiment! Toppings can take your spicy black bean soup to the next level. Fresh cilantro brightens the dish. Squeeze some lime juice for a zesty kick. Avocado adds creaminess and balance. You can also sprinkle cheese for richness or tortilla chips for crunch. When blending your soup, I suggest blending only part of it. This keeps some beans whole and adds texture. Use a regular blender or an immersion blender. Blend until it’s as smooth as you like. Canned black beans make this soup quick and easy. They save you time from soaking and cooking dried beans. Just rinse them well before adding to the pot. If you want to make it ahead, this soup is great for meal prep. It lasts in the fridge for about a week. You can also freeze it. Just let it cool completely before placing it in a freezer-safe container. When you’re ready to eat, thaw and reheat on the stove. For the full recipe, check out the details above. Enjoy cooking! {{image_2}} To make this soup vegetarian or vegan, add tofu or tempeh. Both options boost protein. Tofu works well when you cube it and sauté it first. Tempeh adds a nutty flavor and a bit of texture. You can toss either into the soup near the end of cooking. This keeps them tender and adds great taste. You can switch beans for variety. Try kidney beans or pinto beans if you want. Each bean adds its own flavor and texture. Also, substitute low-sodium broth for a lighter soup. This helps control salt levels while keeping the taste rich. Adding unique spices can change your soup's flavor. Try smoked chipotle for a smoky kick. A dash of cayenne can also boost heat. Experiment with toppings too! Fresh avocado, crumbled queso, or crunchy tortilla chips give extra texture and taste. You can even add a dollop of sour cream for creaminess. The options are endless! For the full recipe, check out the instructions above. To keep your spicy black bean soup fresh, store it in an airtight container. Make sure to cool the soup to room temperature first. This step helps avoid condensation inside the container. Once cooled, seal it well and place it in the fridge. It can last for about 3 to 5 days. Label the container with the date you made it. This way, you’ll know when to enjoy it before it spoils. If you want to save some for later, freezing is a great option. First, let the soup cool completely. Next, pour it into freezer-safe bags or containers. Leave some space at the top for expansion. You can freeze the soup for up to three months. When you're ready to eat, just thaw it in the fridge overnight for the best results. To reheat spicy black bean soup, pour the desired amount into a pot. Heat it over medium heat. Stir occasionally to avoid sticking. If the soup seems too thick, add a splash of vegetable broth or water. For a quick option, you can microwave it. Just transfer it to a microwave-safe bowl and cover it. Heat in 1-minute intervals, stirring in between, until hot. Enjoy your warm, comforting soup! Spicy Black Bean Soup lasts about 4 to 5 days in the fridge. To store it, let the soup cool first. Then, place it in an airtight container. This helps keep it fresh and tasty. Always check for any signs of spoilage before eating leftovers. Yes, you can use other beans! Pinto beans or kidney beans work well. They have a similar texture and taste. You can also try chickpeas for a different flavor. Just remember to adjust cooking times if needed. This soup pairs well with many sides. You can serve it with rice or cornbread. A fresh salad also adds a nice touch. For a fun twist, try tortilla chips for crunch. You can even top it with avocado for creaminess. Spicy Black Bean Soup Ingredients: - 2 cans (15 oz each) black beans, rinsed and drained - 1 medium onion, diced - 3 garlic cloves, minced - 1 red bell pepper, diced - 1 jalapeño, finely chopped (adjust for spice level) - 4 cups vegetable broth - 1 can (14 oz) diced tomatoes with green chilies - 1 teaspoon ground cumin - 1 teaspoon smoked paprika - 1 teaspoon chili powder - Salt and pepper to taste - 2 tablespoons olive oil - Fresh cilantro, for garnish - Lime wedges, for serving You now have everything you need to make Spicy Black Bean Soup. We covered the key ingredients and the cooking steps to create a tasty dish. You learned useful tips for spice levels and ways to enhance flavor. We also explored variations, storage, and reheating methods. Try this soup and make it your own. Enjoy experimenting with different spices or garnishes. You'll find it both fun and rewarding. Happy cooking!

Spicy Black Bean Soup Simple and Tasty Recipe

- 1 pound large shrimp, peeled and deveined - 1 pound Andouille sausage, sliced - 2 cups baby potatoes, halved - 1 bell pepper, diced (any color) - 1 medium onion, diced - 4 cloves garlic, minced - 2 tablespoons Cajun seasoning - 2 tablespoons olive oil - Salt and pepper to taste - Fresh parsley, chopped (for garnish) Gathering the right ingredients is the first step to your Cajun shrimp and sausage foil packs. Start with fresh, large shrimp. They should be peeled and deveined for easy eating. Next, grab a pound of Andouille sausage. This spicy sausage adds great flavor. Don’t forget baby potatoes. Halve them to ensure they cook evenly. Now, let’s add some color and taste. Choose a bell pepper in your favorite color. Dice it up along with a medium onion. Garlic is a must for that rich flavor; you’ll need four cloves minced. Finally, reach for Cajun seasoning. This spice mix brings the heat and depth. You will need olive oil to help everything blend. Add salt and pepper to taste. Fresh parsley makes a great garnish. It adds a pop of color and fresh taste to your dish. For the full recipe, check out the detailed instructions above. - Preheat your oven to 400°F (200°C). If you want to grill, preheat it to medium-high. - In a large bowl, combine the shrimp, sausage, baby potatoes, bell pepper, onion, and garlic. - Tear off four sheets of aluminum foil, each about 12x18 inches. - Divide the shrimp and sausage mixture evenly among the foil sheets, placing it in the center of each. - Drizzle the olive oil over the mixture, then sprinkle with Cajun seasoning, salt, and pepper. Toss everything well to coat evenly. - Fold up the sides of the foil over the mixture to create a sealed packet. Make sure there are no openings. - Place the foil packs on a baking sheet or directly on the grill. Cook for 20-25 minutes. The shrimp should turn pink and cooked through, and the potatoes should be tender. - If you choose to grill, keep the same cooking time. After cooking, unwrap the foil packs carefully. Steam will escape, so watch out! Garnish with fresh parsley before serving. You’ll find the full recipe gives you a flavor-packed meal that’s easy to enjoy. You can adjust the Cajun seasoning to fit your taste. Start with a little and add more if you like it spicy. This dish should taste bold yet balanced. The shrimp should cook until they turn pink. Check that the potatoes are tender too. You want both to be perfect and ready to enjoy. I love to garnish with fresh parsley for a pop of color. Lemon wedges add a bright flavor that pairs well with the dish. Serve the foil packs right on the table for a rustic feel. This makes for a fun and casual dining experience. If you have a larger group, consider doubling the recipe. This way, everyone gets enough to eat. Use larger foil sheets to hold all the tasty ingredients. You can easily make more servings without any fuss. Enjoy cooking for your friends and family! For the complete details, check the Full Recipe. {{image_2}} You can switch the shrimp and sausage for other proteins. Chicken works well, as does fish. For a lighter meal, try using cod or tilapia. You can also explore different vegetables. Zucchini, corn, or asparagus add great flavor and color. Feel free to mix and match based on what you have. Want more heat? Add extra Cajun seasoning or a splash of hot sauce. You can also try different herbs or spices. Paprika, thyme, or even a bit of lemon zest can enhance the dish. Don’t be afraid to get creative with your spice blends. Each change can bring a new twist to this meal. You can add cheese for a creamy touch. Try cheddar or pepper jack for a fun kick. You can also drizzle your favorite sauce before sealing the foil. This adds a nice layer of flavor. For a fun outdoor experience, cook these foil packs over a campfire. It’s a perfect way to enjoy nature while eating a tasty meal. For the full recipe, check out the details above. After you enjoy your Cajun shrimp and sausage foil packs, store any leftovers promptly. Place the foil packs in a shallow dish to cool. Once cooled, transfer them to airtight containers. Use glass or plastic containers with tight-fitting lids. This helps keep the shrimp and sausage fresh. Store them in the fridge for up to three days. When you're ready to eat your leftovers, reheating them safely is key. You can use the oven or a microwave. For the oven, preheat it to 350°F (175°C). Place the foil pack on a baking sheet and heat for about 10-15 minutes. If using a microwave, remove the foil. Place the food on a microwave-safe plate. Heat in short bursts, checking every minute until warm. To keep the flavor and texture, avoid overheating. Freezing is a great way to save your foil packs for later. To freeze, let the cooked packs cool completely. Wrap them tightly in plastic wrap, then place them in freezer bags. This prevents freezer burn. You can store them for up to three months. When you're ready to eat, thaw them in the fridge overnight. Reheat as mentioned before to enjoy a tasty meal again. Cajun Shrimp & Sausage Foil Packs cook quickly. In the oven, they need about 20-25 minutes at 400°F (200°C). On the grill, they take the same time. The key is to check the shrimp. They should turn pink and curl up. Potatoes should be tender. If needed, cook a few more minutes. Yes, you can make the foil packs ahead of time. Just prepare the packs and store them in the fridge. It’s best to use them within 24 hours for fresh taste. If you want to keep them longer, freeze them. When ready to cook, thaw in the fridge overnight. These foil packs go great with many sides. Here are a few ideas: - Rice or quinoa for a filling meal - A fresh green salad for crunch - French bread to soak up the juices - Coleslaw for a cool contrast You can mix and match these sides to fit your taste! For the full recipe, check out the details above. This blog post covered a tasty recipe for Cajun Shrimp and Sausage Foil Packs. We discussed the key ingredients, preparation steps, and cooking methods. I shared tips for perfecting the dish and suggestions for serving. You can even customize the recipe with different proteins or spices. Remember to follow storage and reheating tips to enjoy leftovers later. This dish is fun, simple, and great for gatherings. Try it out, and enjoy a flavorful meal that friends and family will love.

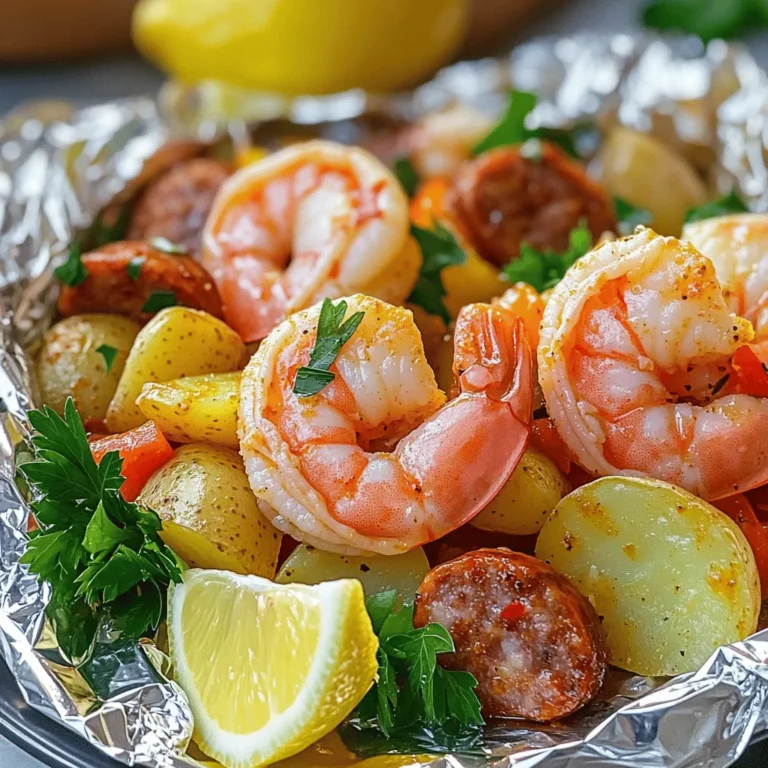
Cajun Shrimp & Sausage Foil Packs Flavorful Dinner Idea

To make avocado deviled eggs, you need just a few key items. Here’s what you will need: - 6 large eggs - 1 ripe avocado, peeled and pitted - 2 tablespoons plain Greek yogurt - 1 tablespoon lime juice - 1 teaspoon Dijon mustard - 1/4 teaspoon garlic powder - Salt and pepper to taste These ingredients blend well to create that creamy and smooth filling you will love. You can make your avocado deviled eggs even more fun with garnishes. Here are some ideas: - 1 tablespoon fresh cilantro, chopped - Paprika Cilantro adds a fresh taste, while paprika gives a nice color. You can mix and match these for extra flair. Choosing the right avocado is key. Look for avocados that feel slightly soft when gently pressed. If it feels hard, it’s not ripe. If it feels too mushy, it may be overripe. A perfect avocado should have a dark green skin and no large dark spots. This ensures you get that creamy texture in your deviled eggs. To start, I take six large eggs and place them in a pot. I cover the eggs with cold water. Then, I set the pot on medium heat. As the water heats up, I watch for it to boil. Once it starts boiling, I cover the pot and remove it from the heat. I let the eggs sit for about 9 to 12 minutes. After that, I transfer them to an ice bath for five minutes. This cools the eggs and makes peeling easier. Once the eggs cool down, I peel them and slice them in half lengthwise. I carefully remove the yolks and put them in a mixing bowl. Next, I add a ripe avocado that I have peeled and pitted. I also add two tablespoons of plain Greek yogurt to make it creamy. Then, I mix in one tablespoon of lime juice for some zing. I add one teaspoon of Dijon mustard and a quarter teaspoon of garlic powder. Finally, I season with salt and pepper to taste. Using a fork, I mash everything together until it’s smooth and well blended. Now, it's time to fill the egg whites. I use a spoon or a piping bag to carefully add the avocado yolk mixture into each egg white half. For the finishing touch, I sprinkle paprika over the filled eggs. I also chop some fresh cilantro to place on top. This adds a nice pop of color and flavor. You can find the full recipe in the earlier section. I love serving these avocado deviled eggs right away, but they can also chill in the fridge until I’m ready to serve them. To hard boil eggs perfectly, start with cold water. Place the eggs in a pot and cover them with water. Heat on medium until it boils. Once boiling, cover the pot and turn off the heat. Let the eggs sit for 9 to 12 minutes. After that, transfer them to an ice bath for 5 minutes. This helps stop the cooking and makes peeling easier. To get a creamy texture, use a ripe avocado. When mashing, add Greek yogurt; it adds creaminess without extra fat. Lime juice brightens the flavor and keeps the avocado green. Mix everything until it’s smooth. If you want it super creamy, use a food processor instead of a fork. One common mistake is overcooking the eggs. This can lead to a green ring around the yolk. Make sure to follow the timing for boiling. Another mistake is not cooling the eggs quickly. Always use an ice bath after boiling. Lastly, avoid using unripe avocados; they won’t mash well and will taste bitter. For the best flavor and texture, use ripe avocados. For the full recipe, check the section above. {{image_2}} To add a kick to your avocado deviled eggs, try the spicy version. Simply mix in diced jalapeños or a dash of hot sauce to the filling. This adds heat and depth. You can adjust the spice level to your taste. I love how the creamy avocado balances the spice. It makes each bite exciting and full of flavor. For a Mediterranean twist, add crumbled feta cheese and chopped olives. This gives your eggs a salty and tangy flavor. Mix the feta and olives into the avocado filling. The briny taste complements the rich avocado well. You can also add a sprinkle of oregano for extra flavor. This version is perfect if you love bold, savory tastes. If you enjoy seafood, try adding smoked salmon to your eggs. Chop the salmon and mix it into the avocado filling. This adds a rich, smoky flavor that pairs nicely with the avocado. Top the filled eggs with a small piece of salmon for a nice touch. This variation feels fancy and works great for brunch or special occasions. You can find the full recipe in the earlier section. To keep your avocado deviled eggs fresh, store them in an airtight container. Place a piece of plastic wrap directly on the exposed filling. This helps reduce browning and keeps them creamy. You can also cover the eggs with a layer of lime juice to prevent oxidation. For the best taste, eat your avocado deviled eggs within two days. If you wait longer, the filling may change in flavor and texture. Keep them in the refrigerator, and avoid leaving them out for too long. Cold eggs taste better and keep their shape. When serving leftover avocado deviled eggs, take them out of the fridge about 15 minutes before. This lets them warm slightly and enhances the flavors. You can garnish them with fresh cilantro and a sprinkle of paprika again for a fresh look. Enjoy them as a snack or at your next gathering! For the full recipe, refer to the Full Recipe section. Yes, you can make avocado deviled eggs ahead of time. I suggest preparing the filling and storing it in the fridge. Keep the egg whites separate until you're ready to serve. This way, the eggs stay fresh and look nice. To stop avocados from browning, use lime juice. The acid in lime helps keep the green color. You can also keep the pit with the filling until serving. This can slow down the browning too. If you don't have Greek yogurt, use sour cream or plain yogurt. Both will give a creamy texture. You can also try avocado oil for a dairy-free option. Each choice will still taste great. Yes! Avocado deviled eggs are perfect for meal prep. They are easy to make and store. Just keep the filling and egg whites separate, and they can last a few days in the fridge. Pair avocado deviled eggs with fresh veggies, chips, or crackers. They also go well with drinks like lemonades or cocktails. This makes for a tasty and fun party spread. For the full recipe, check out the recipe section above! Avocado deviled eggs are tasty and easy to make. We discussed essential ingredients, tips for cooking, and tasty variations to try. I shared ways to store leftovers, so they stay fresh. Remember to choose ripe avocados for the best flavor. Feel free to experiment with different garnishes and spice levels. With these tips, you can impress anyone with your dishes. Make these eggs for your next party, and enjoy!

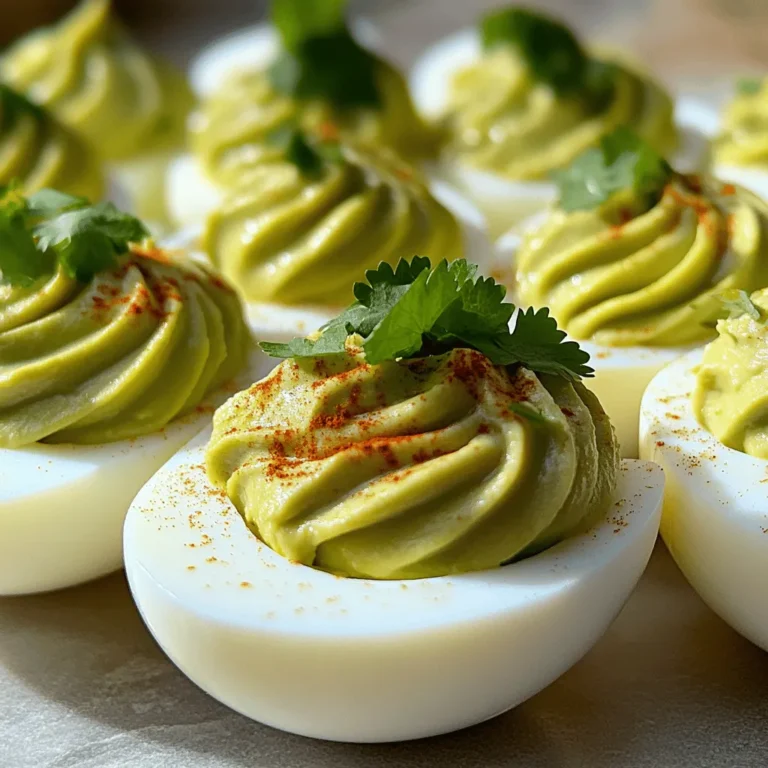
Avocado Deviled Eggs Irresistible and Creamy Delight

To make these tasty Lemon Blueberry Scones, gather these items: - 2 cups all-purpose flour - 1/3 cup granulated sugar - 1 tablespoon baking powder - 1/2 teaspoon salt - 1/2 cup unsalted butter, cold and cubed - 1 cup fresh blueberries - Zest of 1 lemon - 1 tablespoon lemon juice - 1/2 cup heavy cream - 1 large egg - Additional cream for brushing - Turbinado sugar for topping - All-purpose flour: This flour gives scones their nice structure. - Granulated sugar: It adds sweetness and helps with browning. - Baking powder: This helps the scones rise, making them fluffy. - Salt: A little salt enhances the overall flavor. - Unsalted butter: Use cold butter for a flaky texture. - Fresh blueberries: These add a burst of flavor and color. - Lemon zest: It brightens the scone with fresh lemon flavor. - Lemon juice: Adds acidity and balances sweetness. - Heavy cream: It keeps the dough moist and helps with richness. - Egg: This binds the ingredients and adds structure. - Turbinado sugar: It gives a nice crunch on top. - Gluten-free flour: Replace all-purpose flour with a gluten-free blend. - Dairy-free butter: Use coconut oil or a vegan butter substitute. - Non-dairy milk: Substitute heavy cream with almond or oat milk. - Egg replacement: Use a flax egg or applesauce for a vegan option. These options help you enjoy the scones while fitting your dietary needs. You can find the full recipe to guide you through creating these delightful treats! Start by preheating your oven to 400°F (200°C). Line a baking sheet with parchment paper. In a large bowl, mix the flour, sugar, baking powder, and salt. Use a whisk to combine them well. Next, add the cold, cubed butter into the bowl. With a pastry cutter or your fingers, work the butter into the mix. You want it to look like coarse crumbs. Now, gently fold in the blueberries and lemon zest. Be careful not to crush the berries as you do this. In another bowl, whisk together the heavy cream, egg, and lemon juice. Once blended, pour this mixture into the dry ingredients. Stir until just combined. The dough will feel a bit sticky. Turn the dough out onto a floured surface. Knead it gently a few times until it forms a ball. Pat the dough down into a circle, about 1 inch thick. Cut it into 8 wedges and place them on the prepared baking sheet. Before baking, brush the tops of the scones with extra cream. Sprinkle turbinado sugar on top for added texture. Now, bake the scones in your preheated oven. Keep an eye on them for about 15-20 minutes. They should turn golden brown around the edges. To check if they are done, insert a toothpick. It should come out clean if they are ready. Once baked, allow the scones to cool slightly on the baking sheet. After a few minutes, transfer them to a wire rack. For the best taste, serve them warm. I love adding a drizzle of honey or clotted cream on top. Add some extra blueberries on the side for color. A light dusting of powdered sugar can elevate your serving. Enjoy these delightful treats with a cup of tea or coffee! For the complete guide, check out the Full Recipe. To get a great scone texture, keep your butter cold. Cold butter creates flaky layers. Use a pastry cutter or your fingers to mix it into the flour. Do this until it looks like coarse crumbs. Avoid over-mixing the dough; it should be a bit sticky. This helps keep the scones light and airy. One common mistake is using warm butter. Warm butter makes scones dense and heavy. Another mistake is overworking the dough. This can lead to tough scones. Also, make sure to measure your flour correctly. Too much flour can dry out the dough. Follow the Full Recipe for best results. Serve your scones warm for the best taste. A drizzle of honey or clotted cream makes them extra special. Add a few fresh blueberries on the side for color. A light dusting of powdered sugar can add a nice touch too. Pair your scones with tea or coffee for a delightful treat. {{image_2}} You can switch out blueberries for many fruits. Try raspberries for a tart twist. Strawberries add sweetness and color. Blackberries offer a rich, deep flavor. Each fruit brings its own charm to the scone. Just remember to adjust the sugar if the fruit is sweeter or more tart. You can make these scones gluten-free easily. Use a gluten-free flour blend instead of all-purpose flour. Make sure it contains xanthan gum for the right texture. Also, check the baking powder to ensure it's gluten-free. These simple swaps keep the taste and texture delicious without gluten. Adding herbs or spices can elevate your scones. Try a hint of rosemary or thyme for a savory touch. A pinch of cinnamon or cardamom can add warmth and depth. Lemon zest pairs well with these flavors, giving you a fresh twist. Experiment with combinations to find your favorite mix. Store leftover Lemon Blueberry Scones in an airtight container. This keeps them fresh. Make sure to let them cool completely before storing. If you leave them warm, they may become soggy. For best taste, eat them within two days. You can also place parchment paper between layers to avoid sticking. Freezing scones is easy! First, cool them completely. Wrap each scone in plastic wrap. Then, place them in a freezer bag. Be sure to squeeze out as much air as possible. You can freeze them for up to three months. When you’re ready to eat, thaw them in the fridge overnight. To reheat your scones, preheat the oven to 350°F (175°C). Place the scones on a baking sheet. Warm them for about 10 minutes. This method helps keep them soft and tasty. If you want, you can also microwave them for 15-20 seconds. However, the oven gives a better texture. Enjoy your fresh-tasting scones! You can tell scones are done when they turn golden brown. Check the edges first; they should be firm. Insert a toothpick into the center. If it comes out clean, they are ready. Let them cool for a few minutes before serving. This helps the flavors settle and makes them easier to handle. Yes, you can use frozen blueberries in this recipe. They may release more juice, making the dough a bit wetter. Just fold them in gently. This will help prevent them from breaking apart too much. If you want, you can toss them in a bit of flour before adding them to the mix. This helps keep the color from bleeding. I love serving these scones warm. You can add a drizzle of honey or clotted cream. Fresh blueberries on the side add a nice touch. For extra flavor, try a sprinkle of powdered sugar on top. You can also pair them with tea or coffee for a delightful afternoon treat. - Additional FAQs - Can I make the dough ahead of time? Yes, you can make the dough and chill it. Just shape it and store it in the fridge. - Why do my scones taste dry? This can happen if you overmix the dough or use too much flour. Always measure carefully. - Can I use a different fruit? Yes, you can try raspberries or strawberries for a twist. Just adjust the amount as needed. For the full recipe, check the Lemon Blueberry Bliss Scones section. In this blog post, we covered all you need to know about making Lemon Blueberry Scones. We discussed key ingredients, their measurements, and substitutions. I walked you through the steps for preparing, baking, and serving your scones. I also shared tips to perfect your texture and avoid common mistakes. Lastly, we explored variations, storage tips, and answered your FAQs. Making scones can be easy and fun. Enjoy these tips to create your own perfect batch!

Lemon Blueberry Scones Delightful and Simple Recipe

Making a Maple Pecan Sweet Potato Casserole is easy and fun. The flavors blend so well together. Here is what you need: - 4 large sweet potatoes, peeled and cubed - 1/2 cup maple syrup - 1/4 cup milk (or almond milk for a dairy-free option) - 1/4 cup unsalted butter, melted (or coconut oil for a dairy-free option) - 1 teaspoon vanilla extract - 1/2 teaspoon cinnamon - 1/4 teaspoon nutmeg - Salt to taste - 1 cup pecans, chopped - 1/2 cup miniature marshmallows (optional) Sweet potatoes are the star here. They bring sweetness and creaminess. Maple syrup adds a rich, natural taste. You can use milk or almond milk to make it creamy. The butter or coconut oil gives a nice richness. Vanilla makes everything taste better. Now, let's talk spices. Cinnamon and nutmeg add warmth and depth. They balance the sweetness and enhance the overall flavor. Chopped pecans add crunch and nutty goodness. If you like marshmallows, you can add them on top. They get all gooey and sweet when baked. You can find the full recipe for this delightful dish to guide you step by step. Cooking should be fun, and this casserole is a sure way to impress your family and friends! Boiling Sweet Potatoes Start by peeling and cubing four large sweet potatoes. Place them in a large pot. Cover the sweet potatoes with salted water. Bring the water to a boil over medium heat. Cook them for about 15 to 20 minutes. You want the sweet potatoes to be tender. Test them by poking with a fork. Once tender, drain the potatoes and let them cool slightly. Mashing Until Smooth In a mixing bowl, add the drained sweet potatoes. Mash them well until they are smooth. This step is key for a creamy texture. You can use a potato masher or a fork. It helps to get rid of any lumps. The smoother the mash, the better your casserole will be. Mixing Sweet Potato Mixture Now, add your flavor boosters. Pour in half a cup of maple syrup and a quarter cup of milk. If you want a dairy-free option, use almond milk. Then, add melted butter or coconut oil, one teaspoon of vanilla extract, half a teaspoon of cinnamon, and a quarter teaspoon of nutmeg. Add salt to taste. Mix everything well until it is creamy and fully combined. Transferring to Baking Dish Take a greased 9x13-inch baking dish. Carefully transfer the sweet potato mixture into the dish. Use a spatula to smooth the top. This helps ensure even baking. Mixing Pecans and Marshmallows In a separate bowl, chop one cup of pecans. If you like, you can add half a cup of miniature marshmallows. This is optional, but it adds sweetness. Mix the pecans and marshmallows together. Sprinkling Mixture over Sweet Potatoes Evenly sprinkle the pecan mixture over the sweet potato layer. This topping creates a great crunch. It also adds a lovely flavor contrast to the sweet potatoes. Setting the Oven Preheat your oven to 375°F (190°C). Make sure it is fully heated before baking. Baking Time and Temperature Now, place your casserole in the oven. Bake for 25 to 30 minutes. You want the casserole to be hot and the topping lightly toasted. When it’s done, remove it from the oven and let it cool for a few minutes before serving. This dish is a flavor explosion that everyone will love! For the full recipe, check out the detailed instructions provided earlier. Mashing Techniques To get the best texture, mash your sweet potatoes well. Use a potato masher or a ricer. These tools help achieve a creamy consistency. Avoid using a blender, as it can make the potatoes gluey. Avoiding Stringy Sweet Potatoes Choose fresh sweet potatoes. Older potatoes can be stringy. Boil them until they are very soft. This step helps you avoid any unpleasant strings in your casserole. Accurate Measurements for Success Measuring ingredients correctly is key for a great casserole. Use dry measuring cups for solids and liquid measuring cups for liquids. Level off flour or sugar with a knife for accuracy. This ensures your flavors come together perfectly. Additional Spices and Herbs You can boost flavor with more spices. Besides cinnamon and nutmeg, try a pinch of ginger or allspice. These spices add warmth and depth to your dish. Using Fresh Ingredients Always use fresh ingredients when possible. Fresh sweet potatoes taste better than canned. Fresh spices have more flavor than old ones. This tip will make your casserole a hit. For the full recipe, check the earlier sections. {{image_2}} You can easily make this casserole dairy-free. For milk, use almond milk or coconut milk. Both will keep it creamy and delicious. Instead of butter, try coconut oil. It adds a nice flavor and keeps the dish rich. If you need a gluten-free dish, check your ingredients. Ensure the maple syrup and any toppings are gluten-free. Most nuts are naturally gluten-free, so using pecans is a great choice. You can switch up the topping to suit your taste. Instead of pecans, try walnuts or hazelnuts for a new flavor. You can also add extra crunch with sunflower seeds. For a twist, consider sweet toppings. Mini marshmallows give a fun touch. If you prefer savory, add crispy bacon bits or herbs like rosemary. Each option adds a unique flavor and texture to your Maple Pecan Sweet Potato Casserole. For the full recipe, check out the details above. To keep your Maple Pecan Sweet Potato Casserole fresh, refrigerate it. First, let the casserole cool to room temperature. Then, cover it tightly with plastic wrap or aluminum foil. You can also transfer it to an airtight container. Proper refrigeration can keep it fresh for about three to five days. When reheating, you want to maintain that great flavor. The best way is to use an oven. Preheat your oven to 350°F (175°C). Place the casserole in a baking dish and cover it with foil. Heat it for about 20-25 minutes. This method keeps it moist and tasty. You can also use a microwave, but the oven is best for flavor. Want to save some for later? You can freeze the casserole! First, let it cool completely. Then, cut it into portions. Wrap each piece in plastic wrap and place them in a freezer-safe bag. This way, you can enjoy it for up to three months. When you're ready to eat, just thaw it overnight in the fridge before reheating. For the complete recipe, refer to the [Full Recipe]. Yes, you can prepare this casserole in advance. Cook the sweet potatoes and mash them as directed. Mix in the other ingredients and place the mixture in your baking dish. Cover it and store it in the fridge for up to two days. When you are ready to bake, add the topping and bake it straight from the fridge. Just remember to check it for doneness, as it may take a bit longer to heat through. If you don't have maple syrup, you can use honey, agave nectar, or brown sugar. Each will give a sweet flavor, but the taste will vary. Honey is thicker and has a floral note. Agave is a bit sweeter and more neutral. Brown sugar gives a rich, caramel-like taste. Adjust the amount based on your sweetness preference. You can tell the casserole is done by checking its temperature and appearance. Look for a golden brown topping and bubbling edges. Insert a fork into the center; it should feel hot and creamy. If the topping is golden but the casserole isn't warmed all the way, cover it loosely with foil and bake a bit longer. Yes, you can easily make this recipe vegan. Substitute regular milk with almond milk or any plant-based milk. Replace unsalted butter with coconut oil or vegan butter. Use maple syrup as your sweetener, which is vegan-friendly. This way, you can enjoy the same great flavor without animal products. Maple Pecan Sweet Potato Casserole is nutritious and packed with vitamins. Sweet potatoes are high in fiber and vitamin A. The pecans add healthy fats and protein. On average, each serving has about 200 calories, 5g of protein, and 10g of fat. If you want to check specific nutritional values, consider using an online calculator with the Full Recipe. This helps you stay on track with your dietary needs. This blog post covered how to make a tasty Maple Pecan Sweet Potato Casserole. We looked at the key ingredients like sweet potatoes, maple syrup, and spices. Then, I shared the steps for preparation and baking. You also learned tips to improve texture and flavor. Finally, I discussed how to store leftovers or make variations. This dish is a great choice for gatherings or family meals. Enjoy it!

Maple Pecan Sweet Potato Casserole Flavor Explosion

- 2 medium sweet potatoes, peeled and diced - 1 pound Italian chicken sausage or plant-based sausage, casings removed - 1 onion, diced - 2 cloves garlic, minced - 4 cups vegetable broth - 2 cups kale, chopped - 1 can (15 oz) diced tomatoes with juices - 1 teaspoon smoked paprika - 1 teaspoon dried thyme - Salt and pepper to taste - 2 tablespoons olive oil - Optional: Fresh parsley for garnish Sweet potatoes are the star here. They add sweetness and warmth. You can choose Italian chicken sausage for a savory kick or a plant-based sausage if you prefer. Both work great! Onions and garlic build a strong base. They add depth and flavor to the soup. Kale brings in nutrients and a lovely green color. We use vegetable broth for a rich base. Diced tomatoes add a hint of acidity. Smoked paprika and dried thyme give it a nice aroma. Don’t forget salt and pepper! They balance all the flavors. For a fun touch, add fresh parsley or red pepper flakes on top. This soup is all about comfort and joy in every bite. {{ingredient_image_1}} 1. Peel and Dice Sweet Potatoes: Start by peeling your sweet potatoes. Use a sharp knife to chop them into small cubes. Aim for uniform pieces to ensure even cooking. About two medium sweet potatoes should be enough for this soup. 2. Remove Sausage Casings: If you use sausage links, remove the casings. Simply slice the casing down one side and squeeze the meat out. Plant-based sausage also works well in this recipe. 3. Chop Vegetables: Dice your onion and mince the garlic. The onion adds sweetness, while the garlic brings flavor. Set them aside until you are ready to cook. 1. Sauté Onions and Garlic: In a large pot, heat two tablespoons of olive oil over medium heat. Add the diced onion and cook for about 3-4 minutes. Stir often until the onion softens. Then, add the minced garlic and cook for another minute. 2. Cook Sausage Until Browned: Crumble the sausage into the pot. Cook it for about 6-8 minutes, stirring frequently. The sausage should be browned and fully cooked. 3. Add Sweet Potatoes and Seasonings: Stir in the sweet potatoes, one teaspoon of smoked paprika, and one teaspoon of dried thyme. Season with salt and pepper to taste. This mix will add depth to your soup. 4. Incorporate Broth and Tomatoes: Pour in four cups of vegetable broth and one can of diced tomatoes with their juices. Bring the mixture to a boil. Once boiling, reduce the heat and cover the pot. 5. Simmer the Soup: Let the soup simmer for 15-20 minutes. Check for tenderness by poking the sweet potatoes with a fork. They should be soft. 6. Add Kale and Adjust Seasoning: Finally, stir in two cups of chopped kale. Cook for an additional 5 minutes until the kale wilts. Taste the soup and adjust the seasoning if needed. This soup is a warm hug in a bowl. It’s packed with flavor and nutrients, perfect for any cozy night. - Best Techniques for Sautéing: Start with a hot pan to get a nice sear. Use olive oil to coat the bottom. Add onions first and let them soften before adding garlic. This order builds deep flavors. Stir often to avoid burning. - Tips for Cooking Sausage Perfectly: Crumble the sausage into small pieces. This helps it cook evenly. Stir it occasionally to brown all sides. Cook until no pink remains, about 6-8 minutes. This ensures it’s safe to eat and adds great flavor. - Gluten-Free Options: Use gluten-free sausage. Many brands offer tasty options. Always check the label for hidden gluten. Ensure your broth is gluten-free too. - Vegan Alternatives: Replace the sausage with plant-based options. There are many flavors to choose from. You can also use mushrooms for a meaty texture. Ensure your broth is vegetable-based to keep it vegan. - Ideal Pairings with the Soup: This soup goes well with crusty bread or a fresh salad. A light green salad adds crunch and freshness. You can also serve it with a side of cornbread for extra comfort. - Best Bowls and Garnishing Tips: Use deep bowls to hold the soup well. Garnish with fresh parsley for color. A sprinkle of red pepper flakes adds a nice kick. Serve hot, and enjoy the warmth! Pro Tips Perfectly Cooked Sausage: Ensure the sausage is well-browned for added flavor, and consider using a mix of chicken and pork sausage for a richer taste. Sweet Potato Texture: Cut the sweet potatoes into even pieces to ensure they cook evenly and achieve the right tenderness. Seasoning Balance: Taste the soup before serving and adjust the seasoning; a dash of lemon juice can enhance the flavors further. Kale Alternatives: If you prefer, you can substitute kale with spinach or Swiss chard for a different texture and flavor profile. {{image_2}} To make Sweet Potato Sausage Soup your own, try using different sausage flavors. You can use spicy Italian sausage for heat. If you like a milder taste, go for turkey or pork sausage. Plant-based sausages also work well. They add a nice texture without meat. You can also add more veggies to the soup. Carrots and celery can bring extra crunch. Peppers lend a sweet flavor, while spinach offers a fresh touch. Consider adding corn for sweetness or zucchini for a light flavor. Mix and match to find your favorite combo! Do you want more heat in your soup? You can add red pepper flakes while cooking. Start with a small amount and taste as you go. If you want less heat, skip the red pepper flakes. Instead, use sweet smoked paprika for depth without the spice. You can even add a splash of cream for a creamy texture. This can help balance the heat, making the soup rich and soothing. If you want to make a vegan or vegetarian version, swap out the broth and sausage. Use vegetable broth instead of meat broth. For sausage, try lentils or chickpeas for protein. You can also use mushrooms for a meaty texture. To keep the flavor strong, add more spices. A dash of soy sauce can give depth. If you want to make it creamy, blend some cooked sweet potatoes into the soup. This adds thickness and a nice flavor. To keep your sweet potato sausage soup fresh, follow these steps: - Best Practices for Refrigeration: Allow the soup to cool first. Then, transfer it to an airtight container. Store it in the fridge for up to three days. This keeps the flavors intact and prevents spoilage. - Proper Freezing Techniques: If you want to save some for later, pour the cooled soup into freezer-safe containers. Leave some space at the top for expansion. You can freeze it for up to three months. This way, you can enjoy it when you want a warm meal. When you’re ready to eat your leftover soup, use these methods: - Methods for Best Texture and Flavor: Reheat the soup on the stove over low heat. Stir often to avoid sticking. You can also use the microwave. Heat in short bursts, stirring in between, until warm. This helps keep the texture creamy and the flavors fresh. Knowing how long your soup lasts is key: - How Long It Lasts in the Refrigerator/Freezer: Your soup will stay fresh in the fridge for about three days. In the freezer, it can last up to three months. Just remember to label your containers with the date. Can I use different types of sausage? Yes, you can! Feel free to swap Italian chicken sausage for turkey, pork, or plant-based options. Each sausage brings its own flavor to the soup. How can I make this soup spicier? You can add red pepper flakes, diced jalapeños, or hot sauce to the pot. Start with a little, then taste and adjust for your heat level. Is it possible to make this soup in a slow cooker? Absolutely! Brown the sausage and onions first, then add all the ingredients to the slow cooker. Cook on low for 6-8 hours or high for 3-4 hours. Can I add beans to the soup? Yes! Beans like white beans or black beans work great. They add protein and texture. Just rinse and drain canned beans before adding. What can I serve with Sweet Potato Sausage Soup? This soup pairs well with crusty bread, a fresh salad, or cornbread. These sides balance the meal and add extra flavor. How do I know when the sweet potatoes are done cooking? Sweet potatoes are done when they are tender. You can poke them with a fork. If it goes in easily, they are ready! This blog post dives into making a delicious Sweet Potato Sausage Soup. We covered key ingredients, step-by-step cooking, and tips for enhancing flavor and meeting dietary needs. You can customize this soup with various spices and vegetables. Storing and reheating it properly will keep it tasty. Finally, we answered common questions to help you. Enjoying this easy soup will warm your days and impress your guests. Get creative, and have fun cooking!

Sweet Potato Sausage Soup Cozy and Comforting Meal

PREV 1 … 52 53 54 … 86 NEXT
spicy fork kitchen

explore

DessertsDinnerAppetizersDrinks

Our Policies

  • Cookie Policy
  • Copyright Policy
  • Disclaimer
  • GDPR Policy
  • Terms Of Use
Back to Top
  • About
  • Contact Us
  • Privacy Policy
© 2026 spicy fork kitchen