FREE DINNER EBOOK! Get your copy!
  • Cookie Policy
  • GDPR Policy
  • Disclaimer
  • Terms Of Use
  • Visit my other site: Fun Cookie Recipes
spicy fork kitchen
  • Home
  • Dinner
  • Desserts
  • Drinks
  • Appetizers
  • Contact
  • About
  • Privacy Policy
  • Home
  • Dinner
  • Desserts
  • Drinks
  • Appetizers
  • Contact
  • About
  • Privacy Policy
  • Cookie Policy
  • GDPR Policy
  • Disclaimer
  • Terms Of Use
Visit my other site: Fun Cookie Recipes

HOME / CATEGORIES /

Latest

To make Chocolate Peanut Butter Banana Bread, gather the following ingredients: - 3 ripe bananas, mashed - 1/3 cup melted coconut oil - 1/2 cup creamy peanut butter - 1/2 cup brown sugar - 2 large eggs - 1 teaspoon vanilla extract - 1 teaspoon baking soda - 1 pinch of salt - 1 1/2 cups all-purpose flour - 1/2 cup dark chocolate chips - 1/4 cup chopped walnuts (optional) Each ingredient plays an important role in making this bread rich and tasty. Ripe bananas add natural sweetness, while coconut oil gives it a moist texture. Creamy peanut butter brings a nutty flavor that pairs perfectly with chocolate. Brown sugar adds depth to the sweetness. The eggs help bind everything together, while vanilla extract enhances the overall flavor. Baking soda acts as a leavening agent, ensuring the bread rises nicely. A pinch of salt balances the sweetness and highlights all the flavors. All-purpose flour is the base of our bread, giving it structure. Dark chocolate chips provide bursts of chocolatey goodness, and walnuts add a nice crunch if you choose to include them. Gathering these ingredients sets you up for a delightful baking experience. Enjoy the process and the delicious smells that will fill your kitchen! - Preheat your oven to 350°F (175°C) and grease a 9x5-inch loaf pan. - In a large bowl, mash the bananas until smooth. Add the melted coconut oil and mix well. - Stir in the creamy peanut butter until it blends into the banana mixture. - Next, add the brown sugar, eggs, and vanilla extract. Mix until everything is smooth. - In a separate bowl, whisk together the baking soda, salt, and all-purpose flour. - Gradually add the dry mix to the wet ingredients. Stir gently until just combined. A few lumps are okay. - Fold in the dark chocolate chips and chopped walnuts if you like them. - Pour the batter into the greased loaf pan. Use a spatula to smooth the top. - Place the pan in the oven and bake for 50-60 minutes. Check for doneness by inserting a toothpick into the center. - If it comes out clean, your banana bread is ready! - Once baked, let it cool in the pan for about 10 minutes. Then, transfer it to a wire rack to cool completely. To make the best chocolate peanut butter banana bread, pay close attention to a few key factors. - How to avoid over-mixing: Mix the batter gently. When you add the dry ingredients, stir just until you see no more flour. This keeps the bread light and fluffy. A few lumps are fine! - Choosing the right bananas: Use ripe bananas that are spotted and soft. They have more flavor and sweetness. If your bananas are not ripe, place them in a paper bag for a day or two. - Tips for achieving moistness: Coconut oil and peanut butter add moisture. Make sure you measure them accurately. Also, do not bake too long. A toothpick should come out with a few crumbs for perfect moistness. Get creative when serving your chocolate peanut butter banana bread! - Serving with peanut butter and chocolate toppings: You can spread extra peanut butter on warm slices. Add a sprinkle of chocolate chips or chopped walnuts for extra texture and flavor. - Pairing with beverages: This bread goes great with coffee or tea. The rich flavors balance well with a warm drink. You can also enjoy it with a glass of milk for a classic treat. {{image_2}} You can change things up a bit in this recipe! Here are some easy swaps: - Alternative nut butters: You can use almond, cashew, or sunflower seed butter. Each nut butter brings its own taste. Swap them for a fun twist! - Using different types of chocolate: Instead of dark chocolate chips, try milk chocolate or white chocolate. Each type gives a new flavor to the bread. - Gluten-free options: To make this banana bread gluten-free, use almond flour or a gluten-free all-purpose flour blend. Just make sure to check the package for the right measurements. Want to make your banana bread even better? Here are some ideas: - Adding spices such as cinnamon: A sprinkle of cinnamon adds warmth and depth. It pairs well with the banana and chocolate flavors. - Incorporating fruits like blueberries: Blueberries add a burst of flavor and color. Just fold them in with the chocolate chips for a fruity twist. These variations let you make the recipe your own. Enjoy experimenting with your chocolate peanut butter banana bread! To keep your chocolate peanut butter banana bread fresh, follow these tips: - Let the bread cool completely before storing. - Wrap it tightly in plastic wrap or foil. - Place it in an airtight container. - Store at room temperature for up to three days. - For longer storage, keep it in the fridge. Freezing banana bread is simple and great for future treats: - Slice the bread before freezing. - Wrap each slice in plastic wrap, then foil. - Place the wrapped slices in a freezer bag. - Store in the freezer for up to three months. To enjoy later, thaw slices in the fridge overnight. Reheat in the toaster or microwave for a warm treat. Can I substitute ingredients? Yes, you can! Swap coconut oil for melted butter. Use almond butter instead of peanut butter. You can also replace brown sugar with honey or maple syrup. Just keep the same amount for a good mix. How long does this banana bread last? This banana bread lasts about 3 to 4 days at room temperature. For longer storage, keep it in the fridge for up to a week. Wrap it well to keep it fresh and tasty. What’s the best way to know when it’s done? A toothpick is your best friend! Insert it into the center of the bread. If it comes out clean, the bread is ready. If it has batter on it, bake for a few more minutes. What to do if the bread is too dry? If your bread is too dry, try adding a bit of milk or more mashed banana next time. You can also check your oven temperature. It might be too hot, causing the bread to dry out quickly. Fixing overbaking issues If you overbake the bread, slice it while warm. Serve it with butter or yogurt to add moisture. You can also make a banana bread pudding with the leftovers for a sweet treat! You learned how to make delicious banana bread. We covered ingredients, easy steps, and tips to succeed. I shared ways to change flavors and how to store it well. Making banana bread is fun and rewarding. You can enjoy it warm or freeze some for later. With these skills, you’ll impress family and friends. Enjoy baking your banana bread!

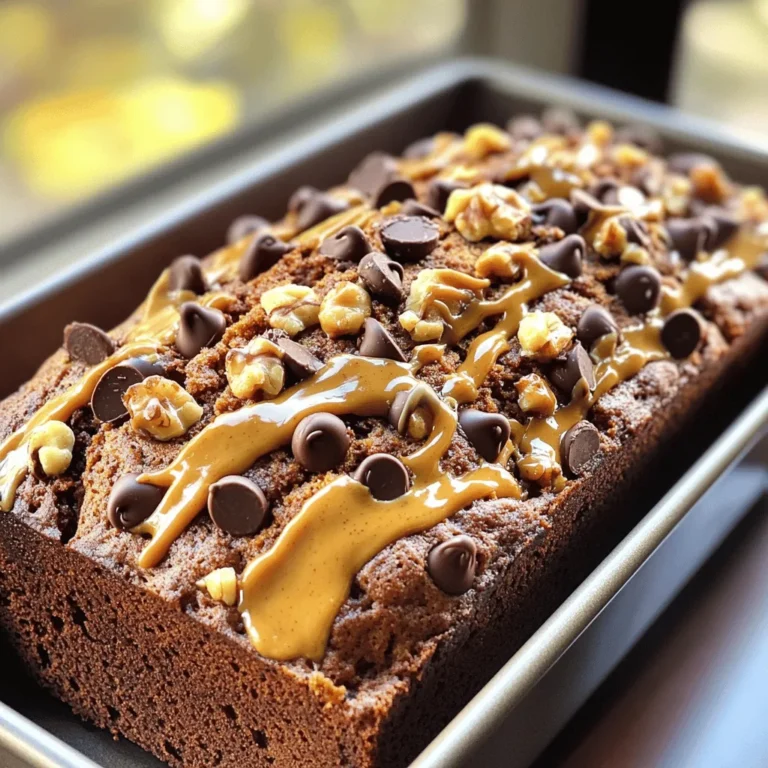
Chocolate Peanut Butter Banana Bread Delightful Recipe

- 1 lb large shrimp, peeled and deveined - 2 tablespoons unsalted butter - 3 tablespoons honey - 4 garlic cloves, minced - 1 tablespoon soy sauce - 1 teaspoon smoked paprika - 1/2 teaspoon red pepper flakes (optional for heat) - Salt and pepper to taste - 2 green onions, sliced (for garnish) - Fresh parsley, chopped (for garnish) Using fresh ingredients makes a big difference. The shrimp should be large and fresh. I love working with shrimp that has been peeled and deveined. It saves time and lets you focus on cooking. The butter adds richness, and honey brings sweetness. Garlic gives a great aroma and flavor. For seasonings, soy sauce adds umami. Smoked paprika gives a warm, smoky taste. If you like heat, use red pepper flakes. A pinch of salt and pepper is key for balance. Don't forget the garnishes! Green onions and fresh parsley brighten the dish. They make it look beautiful and add fresh flavor. - Prep the Shrimp: Start by rinsing the shrimp under cold water. Then, pat them dry with paper towels. This step is key to getting nice, juicy shrimp. Season them with salt and pepper to taste. This simple seasoning really brings out the shrimp's flavor. - Heat the Skillet: Get a large skillet and melt the butter over medium-high heat. Watch for it to start bubbling, which means it’s hot enough for the next step. - Add Garlic: Once the butter is bubbling, add the minced garlic. Sauté it for about one minute. The garlic will smell amazing, but be careful not to burn it. Burnt garlic can ruin the dish. - Cook the Shrimp: Now, add the shrimp to the skillet in a single layer. Sprinkle them with smoked paprika and optional red pepper flakes for a kick. Cook for about 2 to 3 minutes on one side until they turn pink. Then, flip them over and cook for another 2 to 3 minutes. - Make the Sauce: Drizzle the honey and soy sauce over the shrimp. Stir gently to coat all the shrimp evenly. Let it cook for a few more minutes until the sauce thickens. This makes the dish sweet and savory. - Garnish and Serve: Remove the skillet from the heat. Sprinkle sliced green onions and chopped parsley on top. This adds a fresh touch and makes the dish look pretty. You can serve it right from the skillet or transfer it to a platter for a nice presentation. Enjoy! To achieve perfectly cooked shrimp, focus on timing. Cook shrimp for just 2-3 minutes on each side. They turn pink when done. Overcooking makes them rubbery, so keep an eye on them. Not burning garlic is key for great flavor. Add minced garlic to the melted butter and stir right away. Sauté it for about a minute. If it burns, it gets bitter, and that changes the taste. To add heat, use more red pepper flakes. You can also try a dash of hot sauce. For sweetness, drizzle extra honey on top when serving. Each adds a nice twist to the dish. Fresh herbs enhance flavor. Try adding chopped cilantro or basil before serving. They brighten the dish and make it look appealing. For visual appeal, serve shrimp in the skillet you cooked them in. This keeps them warm and creates a nice rustic look. If you prefer, transfer them to a beautiful platter. For gatherings, serve shrimp with lemon or lime wedges. Guests can squeeze them over the dish for a fresh burst. You can also drizzle extra honey on top for a sweet touch. {{image_2}} You can switch up the sweetener in this recipe. Maple syrup works great in place of honey. It adds a rich flavor that pairs well with garlic. If you want to try a different seafood, use scallops or fish fillets. Just adjust the cooking time based on the seafood you choose. To make this dish low-carb, skip the honey or use a low-carb sweetener. This keeps the flavor while cutting carbs. For a gluten-free version, pick gluten-free soy sauce. You can also make it vegan! Use tofu or chickpeas instead of shrimp. Cook them until golden for a tasty option. Add zest from a lemon or lime to brighten the dish. This adds a fresh taste that lifts the entire meal. You can also try different spice blends. For a kick, add cumin or chili powder. These spices give a unique twist and make the dish your own. To store leftovers, place the shrimp in an airtight container. Make sure to cool the dish to room temperature first. Refrigerate the shrimp within two hours of cooking. This helps keep it fresh. Honey butter garlic shrimp will stay good for up to three days in the fridge. Always check for any off smells or changes in color before eating. Yes, you can freeze cooked shrimp. To freeze, let the shrimp cool completely. Then, place them in a freezer-safe bag. Remove as much air as possible to prevent freezer burn. Cooked shrimp can last up to three months in the freezer. When you're ready to eat, thaw them in the fridge overnight. For reheating thawed shrimp, use a skillet. Heat on medium-low until warmed through. Avoid high heat, as it can make shrimp rubbery. You can also add a splash of broth or water to keep them moist. Preparing shrimp ahead of time makes for quick meals. Cook the honey butter garlic shrimp, then let it cool. Divide the shrimp into meal prep containers. Pair them with rice or veggies for a balanced meal. For serving, add fresh herbs or extra sauce for flavor. You can even add lemon wedges for a zesty kick. This way, you have tasty meals ready to go all week. What is the best type of shrimp for this recipe? The best type of shrimp for this recipe is large shrimp. They cook evenly and have a nice texture. Look for shrimp that are firm and have a fresh smell. You can use fresh or frozen shrimp, but if using frozen, make sure to thaw them fully before cooking. Can I double the recipe for a larger crowd? Yes, you can easily double the recipe. Just make sure your skillet is large enough. You may need to cook the shrimp in batches if your skillet is small. This way, they cook evenly and don’t steam. How long does it take to cook shrimp in a skillet? Cooking shrimp in a skillet takes about 5 to 6 minutes. You cook them for 2 to 3 minutes on one side, then flip them over and cook for another 2 to 3 minutes. They are done when they turn pink and opaque. What should I serve with Honey Butter Garlic Shrimp Skillet? You can serve this dish with rice or pasta for a full meal. A fresh salad or steamed veggies also pair well. If you want something light, serve it with lemon wedges for a zesty kick. What can I substitute for honey if I'm allergic? If you are allergic to honey, you can use maple syrup or agave nectar instead. They add a similar sweetness and work well in the sauce. Just use the same amount as you would honey. How can I make it spicier? To make it spicier, add more red pepper flakes or some chopped fresh chili. You can also use hot sauce in place of some soy sauce for an extra kick. Just remember to start small and taste as you go. In this blog post, we've covered how to make a delicious Honey Butter Garlic Shrimp. You learned about the main ingredients, step-by-step cooking, and some helpful tips. We also discussed fun variations and important storage information. Remember, cooking shrimp can be easy and fun with the right methods. Don't hesitate to try different flavors and garnishes. This dish can impress anyone, making gatherings special. Enjoy experimenting and sharing your tasty creations!

Honey Butter Garlic Shrimp Skillet Easy Dinner Delight

- 2 cups all-purpose flour - 1 cup granulated sugar - 1/2 cup brown sugar, packed - 3 large eggs - 1/2 cup vegetable oil To make spiced carrot cake muffins, we start with the main ingredients. The all-purpose flour gives structure. The sugars add sweetness. Eggs help bind everything together. Oil keeps the muffins moist. - 1 teaspoon ground cinnamon - 1/2 teaspoon ground nutmeg - 1/4 teaspoon ground ginger - 1/4 teaspoon salt For flavor, we need spices. Cinnamon gives warmth. Nutmeg adds a nutty taste. Ginger brings a hint of zest. Salt balances all the flavors. These spices make your muffins special. - 2 cups grated carrots - 1/2 cup crushed pineapple, drained - 1/2 cup walnuts or pecans, chopped (optional) - 1/2 cup raisins (optional) Now, let's talk about add-ins. Grated carrots keep muffins moist and sweet. Pineapple adds a tropical twist. Nuts give a nice crunch. Raisins add chewiness. You can mix and match these add-ins to fit your taste! - Preheat your oven to 350°F (175°C). - Line or grease your muffin tin. This helps the muffins release easily. - In a medium bowl, whisk together: - 2 cups all-purpose flour - 1 teaspoon baking powder - 1/2 teaspoon baking soda - 1 teaspoon ground cinnamon - 1/2 teaspoon ground nutmeg - 1/4 teaspoon ground ginger - 1/4 teaspoon salt This mix gives your muffins a warm flavor. - In a large bowl, mix together: - 1 cup granulated sugar - 1/2 cup brown sugar, packed - 3 large eggs Beat until smooth. - Add in: - 1/2 cup vegetable oil - 1 teaspoon vanilla extract Stir until fully mixed. - Gradually combine the dry mix with the wet mix. - Fold in: - 2 cups grated carrots - 1/2 cup crushed pineapple, drained - Optional: 1/2 cup walnuts or pecans, chopped - Optional: 1/2 cup raisins Mix gently so you don't overwork the batter. - Spoon the batter into your prepared muffin tin. Fill each cup about 3/4 full. - Bake in your preheated oven for 18-22 minutes. The muffins are done when a toothpick comes out clean. - Allow the muffins to cool in the tin for about 5 minutes. - Transfer them to a wire rack to cool completely. This helps keep them from getting soggy. To get the best muffins, avoid overmixing the batter. Mixing too much can make them tough. Instead, stop as soon as you see no dry flour. Also, make sure your ingredients are at room temperature. This helps the batter mix smoothly and rise well. Use a toothpick to check for doneness. Insert it into the center of a muffin. If it comes out clean, your muffins are ready. Also, rotate the muffin tin halfway through baking. This ensures even cooking and helps all muffins rise nicely. Dust your muffins with powdered sugar for a pretty touch. It adds a nice sweetness too. Serve them warm with cream cheese frosting. This makes each bite rich and creamy, perfect for a tasty treat. {{image_2}} You can make these muffins gluten-free! Simply substitute the all-purpose flour with a gluten-free blend. This change keeps the muffins light and fluffy without losing flavor. Many gluten-free blends work well in baking. Make sure to check for one that includes xantham gum for better texture. Want a vegan twist? Replace the eggs with flaxseed meal or applesauce. To do this, mix 1 tablespoon of flaxseed meal with 2.5 tablespoons of water for each egg. Let it sit until it thickens. For the oil and milk, choose a plant-based oil like coconut or canola, and opt for almond or oat milk. These swaps keep the muffins moist and tasty. You can add even more flavor with fruits! Try incorporating shredded zucchini or diced apples for extra moisture and sweetness. Dried fruits, like apricots or cranberries, add a nice chew. You can also add crushed pecans or walnuts for a crunchy texture. Mix and match to create your perfect muffin! Keep your spiced carrot cake muffins in an airtight container. They stay fresh for 2-3 days. This way, you can enjoy their moist texture and rich flavors right away. If you want to keep the muffins longer, store them in the fridge. They stay fresh for up to a week. Just place them in a sealed container to avoid drying out. For long-term storage, freeze your muffins. Wrap each muffin individually in plastic wrap. They can last for up to 3 months in the freezer. When you want one, just thaw it at room temperature or warm it in the oven. Enjoy the delightful taste anytime! Yes, you can make these muffins and store them for later. I love making a batch on the weekend. Just let them cool fully. Then, place them in an airtight container. They stay fresh for up to three days at room temperature. If you want to keep them longer, you can freeze them. Wrap each muffin in plastic wrap. Then place them in a freezer bag for up to three months. A toothpick inserted into the center should come out clean when they are done. This is a simple test I always use. If the toothpick has wet batter on it, they need more time. Check your muffins at about 18 minutes. They may take up to 22 minutes, depending on your oven. You can make these muffins healthier in a few easy ways. First, try using natural sweeteners like honey or maple syrup. You can also reduce the amount of sugar in the recipe. Another option is to add more grated carrots or use whole wheat flour. These changes will keep the muffins tasty while adding more nutrients. You now have all the tools to make delicious muffins. We covered the key ingredients, from flour to spices, and even added optional mix-ins. I shared step-by-step instructions for perfect baking. Don’t forget to try the tips for better texture and taste. Consider variations like gluten-free or vegan options. Remember to store your muffins well to keep them fresh. Enjoy your baking, and share your tasty creations with others!

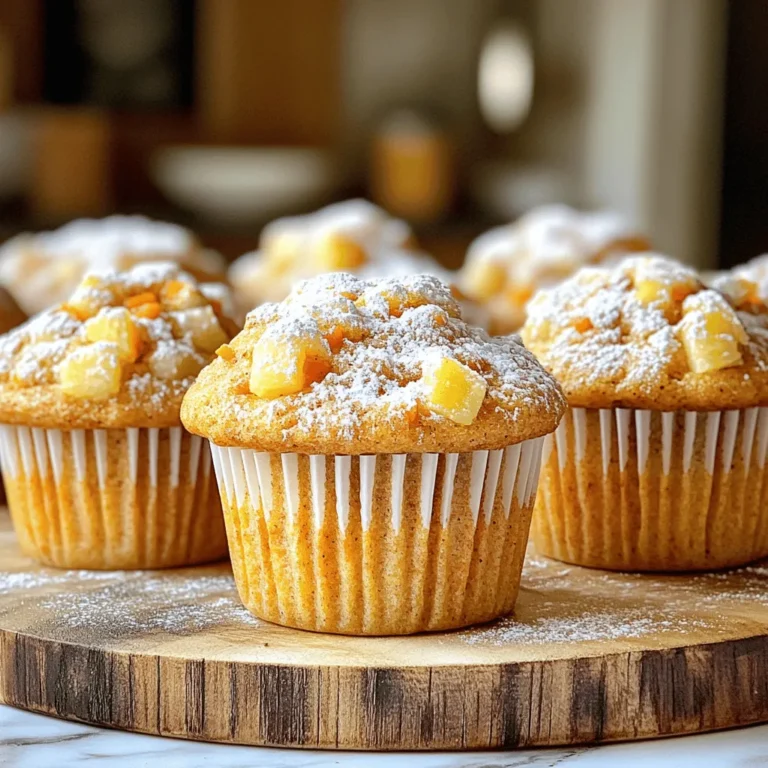
Spiced Carrot Cake Muffins Flavorful and Easy Treat

- 1 cup Biscoff cookie butter - 1 cup crushed Biscoff cookies (plus extra for rolling) - 1 cup white chocolate chips - 1 tablespoon coconut oil - A pinch of sea salt The main star of this recipe is the Biscoff cookie butter. It has a rich, sweet flavor that makes these truffles special. The crushed Biscoff cookies add a crunchy texture and deep taste. White chocolate chips provide a creamy coating that perfectly balances the flavors. Coconut oil helps the chocolate melt smoothly and adds a hint of tropical taste. A pinch of sea salt enhances all the sweet notes. - Chopped nuts (hazelnuts or almonds) - Additional toppings (e.g., extra crushed Biscoff cookies) If you want to add a bit more crunch, toss in some chopped nuts like hazelnuts or almonds. They bring a nice contrast to the soft truffles. Extra crushed Biscoff cookies work well as toppings too. They give a fun look and extra flavor. You can mix and match these add-ins to make your truffles unique and fun! {{ingredient_image_1}} Start by mixing the Biscoff cookie butter and crushed Biscoff cookies in a bowl. Use a spatula or spoon to combine them well. You want a firm dough that holds together easily. Once mixed, cover the bowl with plastic wrap and chill it in the fridge for about 30 minutes. This step is key. Chilling makes the mixture easier to shape into truffles later. After chilling, take the mixture out of the fridge. Use your hands to scoop small amounts of the mixture. Aim for about 1 inch in diameter for each ball. Roll the mixture in your palms until smooth. Place each ball on a baking sheet lined with parchment paper. This keeps them from sticking. Next, grab a microwave-safe bowl. Add the white chocolate chips and coconut oil to it. Microwave in 30-second bursts. Stir between each burst until smooth. This keeps the chocolate from burning. Once melted, dip each truffle into the chocolate. Let the excess chocolate drip off. You can roll the truffles in extra crushed Biscoff cookies or chopped nuts for a fun finish. After coating, place the truffles back on the parchment paper. Let them set at room temperature for about 15-20 minutes until hard. If you want to add a drizzle of white chocolate, melt some more and use a fork to create patterns on top. This adds a nice touch and makes the truffles look extra special. Chilling the dough is key for smooth truffles. When you chill the mixture for about 30 minutes, it firms up. This makes rolling easier and helps the truffles hold their shape. If you skip this step, your truffles may turn out too soft and hard to manage. The coating chocolate needs to be just right. When melting the white chocolate, mix in some coconut oil. This helps the chocolate stay smooth and shiny. If it gets too thick, it will not coat the truffles well. Aim for a nice, even coating that hugs each truffle. If your mixture feels dry or crumbly, add a bit more Biscoff cookie butter. Start with one tablespoon at a time until the texture improves. You want the mixture to hold together without falling apart. Sometimes, the chocolate hardens too quickly when coating the truffles. To fix this, melt the chocolate in smaller batches. Dip a few truffles, then reheat the chocolate briefly. This keeps it smooth and easy to work with. Arranging truffles can be fun and creative. Use a nice plate to show off your treats. You can stack them in groups or place them in small paper cups for a cute touch. For serving, consider pairing them with coffee or tea. The rich flavors of Biscoff and white chocolate go great with warm drinks. You can also add a simple garnish, like a sprinkle of crushed cookies, on top of each truffle for extra flair. Pro Tips Chill for Easier Rolling: Ensure the cookie mixture is chilled for at least 30 minutes to make rolling into truffles easier and less sticky. Quality Chocolate Matters: Use high-quality white chocolate for melting to achieve a smoother and creamier coating on the truffles. Customize Your Coating: Feel free to experiment with different toppings, such as crushed nuts, sprinkles, or even a drizzle of dark chocolate for added flavor. Store Properly: Keep the truffles in an airtight container in the refrigerator to maintain their shape and freshness for up to a week. {{image_2}} You can change the taste of your Biscoff cookie butter truffles easily. One fun idea is to use dark chocolate instead of white chocolate. Dark chocolate adds a rich taste that pairs well with the sweet cookie butter. If you want to get creative, try adding a few drops of flavor extracts like vanilla or almond. This small change can give your truffles a unique twist. For those with dietary needs, I have options. To make these truffles gluten-free, simply use gluten-free Biscoff cookies. This keeps the deliciousness while meeting gluten-free diets. If you need a vegan version, substitute white chocolate with vegan chocolate chips. You can also swap regular butter for a plant-based butter. These adjustments keep the truffles tasty and suitable for more diets. Toppings can make your truffles stand out. You might try rolling them in crushed nuts like hazelnuts or almonds for added crunch. Another idea is to mix in different cookie types. For example, you can use chocolate cookies or even graham crackers for a fun flavor blend. Feel free to experiment with various toppings to make each batch unique and exciting! To keep your Biscoff cookie butter truffles fresh, store them in the fridge. They taste best cold and stay firm. If you plan to eat them within a week, you can keep them at room temperature. Just make sure they are in a cool, dry place. - Refrigeration: Store in an airtight container. This keeps moisture away and helps the truffles last longer. - Room Temperature: Use a sealed container, away from heat. Check for any signs of melting chocolate. To maintain freshness, avoid stacking the truffles. This prevents them from sticking together. If you want to add a nice touch, place a piece of parchment paper between layers. Freezing your truffles is a great option if you want to save some for later. Make sure to pack them properly before freezing. - Proper Packing: Place the truffles in a single layer in an airtight container. You can also wrap each truffle in plastic wrap before putting them in the container. This protects them from freezer burn. - Thawing Tips: When you are ready to enjoy them, take the truffles out of the freezer. Let them sit in the fridge for several hours or overnight. This keeps their taste and texture nice. Avoid thawing them at room temperature to prevent melting. Shelf life at room temperature: Biscoff cookie butter truffles can last for about 2 days at room temperature. Keep them in a cool, dry place. Refrigerated shelf life: If you store them in the fridge, they can last up to 1 week. This helps the chocolate stay firm and fresh. Yes, you can use other types of cookie butter. Brands like Trader Joe's or Speculoos offer great flavors. You can also try flavors like gingerbread or chocolate cookie butter for a twist. To make these truffles nut-free, simply skip the nuts in the recipe. Use crushed Biscoff cookies for rolling instead. Check that any cookie butter you use is nut-free. Always read labels to avoid allergens. Biscoff Cookie Butter Truffles are easy and fun to make. We explored key ingredients, like Biscoff cookie butter and white chocolate, guiding you step-by-step from mixing to coating. I shared tips to achieve the best texture and troubleshoot common problems. Remember, you can customize these truffles with fun flavors and toppings. Store them properly for the best taste. Enjoy making these sweet treats! They’re sure to impress anyone who tries them.

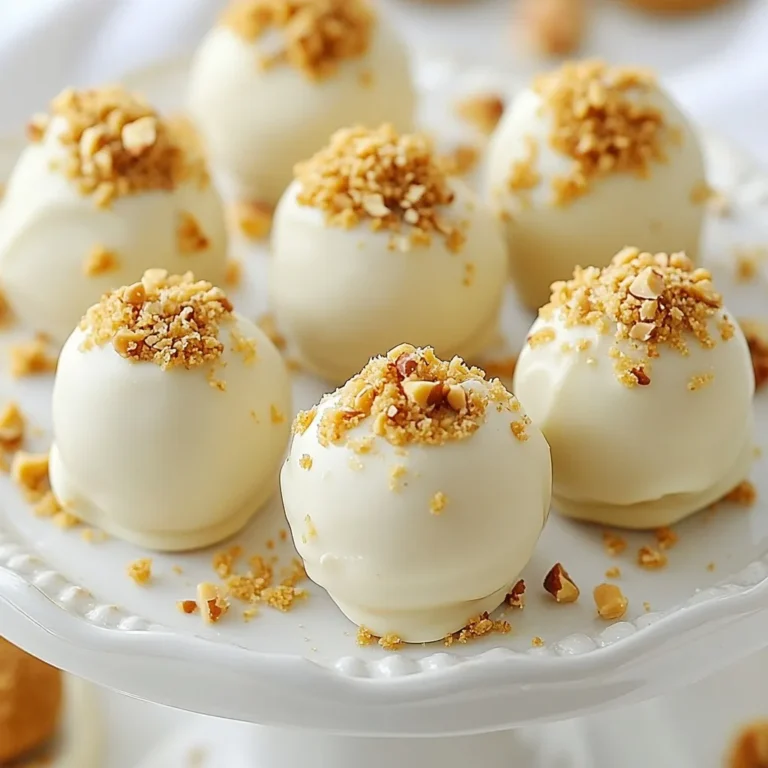
Biscoff Cookie Butter Truffles Irresistible Treats

To make Vegan Sun-Dried Tomato Pasta, gather these simple ingredients: - 12 oz whole grain pasta (spaghetti or penne) - 1 cup sun-dried tomatoes in oil, drained and chopped - 1 can chickpeas, rinsed and drained - 2 cups fresh spinach - 1/4 cup nutritional yeast - 1/2 cup vegetable broth - 3 cloves garlic, minced - 1 teaspoon red pepper flakes (optional) - Salt and black pepper to taste - Fresh basil leaves for garnish Each ingredient plays a key role in building flavors. The whole grain pasta gives a hearty base. The sun-dried tomatoes add a sweet and tangy depth. Chickpeas bring protein and texture, while fresh spinach adds color and nutrients. Nutritional yeast gives a cheesy flavor without dairy. Vegetable broth amplifies the taste of the sauce, and garlic adds a rich aroma. Red pepper flakes add heat if you like a kick. Finally, fresh basil brightens the dish, making it appealing. This recipe is perfect for a quick weeknight meal or a cozy dinner. You can easily adjust the ingredients based on what you have at home. Enjoy cooking! {{ingredient_image_1}} - Bring a large pot of salted water to a boil. - Add 12 oz of whole grain pasta. Cook according to the package instructions until al dente. - Drain the pasta and reserve 1 cup of the cooking water. This water helps to keep the dish creamy. - In a large skillet, heat 2 tablespoons of oil from the sun-dried tomatoes over medium heat. - Add 3 cloves of minced garlic and sauté for 1–2 minutes until it smells good. Watch it closely so it does not burn. - Stir in the chopped sun-dried tomatoes. If you like some heat, add 1 teaspoon of red pepper flakes. Cook for 2–3 minutes to let the flavors mix. - Add a can of rinsed and drained chickpeas to the skillet. Pour in 1/2 cup of vegetable broth and bring it to a simmer. Let it cook for 5 minutes. - Mix in 2 cups of fresh spinach and stir until it wilts, which should take about 2 minutes. - Add the drained pasta to the skillet. Toss everything together. If it seems too dry, add some reserved pasta water until it reaches your desired creaminess. - Finally, sprinkle in 1/4 cup of nutritional yeast. Mix well to coat everything. Season with salt and black pepper to taste. Cooking pasta well is key to this dish. Always add salt to boiling water. This simple step makes your pasta taste great. Use about one tablespoon of salt for every four quarts of water. Cook your pasta until it is al dente. This means it should be firm but not hard. Check the package for timing. Usually, it takes about 8 to 10 minutes. Remember, you can always taste a piece to see if it's ready! You can boost the flavor of your dish with more spices or herbs. Try adding dried oregano or thyme for a tasty twist. Fresh herbs like parsley or cilantro also add freshness. Don't forget about oil options! If you want a different taste, use olive oil or avocado oil. Each oil gives a unique flavor to your dish. This Vegan Sun-Dried Tomato Pasta is best served hot. However, it can be enjoyed cold as a pasta salad too! Pair it with a fresh green salad or garlic bread. A glass of white wine or sparkling water can make your meal even better. Enjoy this dish with friends or family for a lovely dining experience! Pro Tips Perfect Pasta Cooking: Always cook your pasta al dente for the best texture. This ensures it maintains a slight bite and won’t become mushy when mixed with the sauce. Oil from Sun-Dried Tomatoes: Use the oil from the jar of sun-dried tomatoes to sauté your garlic. This adds an extra layer of flavor to the dish. Chickpeas for Protein: Chickpeas add a hearty protein boost to this dish, making it filling and nutritious. Consider using roasted chickpeas for added crunch! Customize Your Greens: Feel free to substitute spinach with other greens like kale or arugula, depending on what you have on hand or your flavor preference. {{image_2}} You can make this dish gluten-free. Simply swap the whole grain pasta for gluten-free varieties. Look for options made from rice, quinoa, or chickpeas. These choices cook well and have a nice texture. Just follow the package instructions for the best results. If you want extra protein, try adding tofu or tempeh. Both are great plant-based choices. For tofu, use firm or extra-firm. Cut it into cubes and sauté it in the skillet before adding the other ingredients. For tempeh, slice it thin and cook it until golden. This addition will make your pasta even more filling. Adding seasonal vegetables can boost flavor and nutrition. Some great options are zucchini, bell peppers, or asparagus. Chop them into bite-sized pieces and add them to the skillet when you cook the garlic. This way, they can soften and blend with the other ingredients. You can really customize the dish to match what's fresh and in season. To store leftovers, let the pasta cool first. Place it in an airtight container. This keeps the pasta fresh. In the fridge, the pasta stays good for about 3 to 4 days. When you’re ready to eat, check for any signs of spoilage before reheating. For freezing, portion the pasta into suitable amounts. Use freezer-safe bags or containers. Remove as much air as possible to prevent freezer burn. The pasta will freeze well for up to 2 months. When you want to enjoy it again, just thaw it in the fridge overnight. To reheat, I like to use a skillet. Heat it over medium-low heat and add a splash of vegetable broth. This helps keep the pasta moist and tasty. Stir often until it's heated through. You can also use the microwave, but be careful not to dry it out. Cover it with a damp paper towel to keep moisture in. Enjoy your flavorful dish just like when you first made it! Yes, you can! You can swap whole grain pasta for any pasta you like. Try gluten-free pasta, zoodles, or even pasta made from lentils. Cooking times may vary slightly. Check the package for the best time to cook. Absolutely! To make it oil-free, skip the oil from the sun-dried tomatoes. Use water or vegetable broth instead to sauté the garlic. The dish will still taste great, and you won’t miss the oil. This dish stays good for about three to five days in the fridge. Store it in a sealed container. Make sure it cools down before you cover it. This helps keep the pasta fresh. Yes, you can! If you want it nut-free, just leave out the nutritional yeast. You can use sunflower seed flour for a cheesy taste. You could also add lemon juice for a bit of tang without nuts. This recipe brings together whole grain pasta, sun-dried tomatoes, and fresh spinach for a healthful meal. You learned how to cook the pasta, make a tasty sauce, and combine everything for a delightful dish. Remember, you can customize the recipe with different proteins or veggies. Proper storage helps keep leftovers fresh. I hope you enjoy making this dish as much as I do. It’s both easy and satisfying!

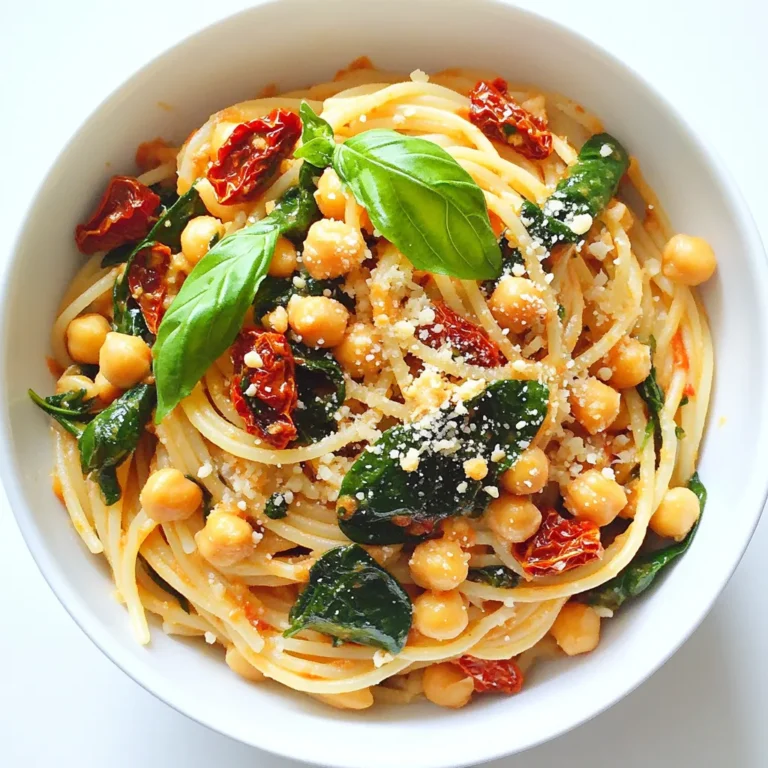
Vegan Sun-Dried Tomato Pasta Rich and Flavorful Dish

- 1 cup unsalted butter, melted - 2 cups granulated sugar - 1 teaspoon vanilla extract - 4 large eggs - 1 cup all-purpose flour - ½ cup unsweetened cocoa powder - ½ teaspoon baking powder - ¼ teaspoon salt - 1 cup fresh strawberries, hulled and sliced - 1 cup semi-sweet chocolate chips - 1 cup heavy cream When making chocolate covered strawberry brownies, the right ingredients matter. Each part plays a role in creating that perfect treat. - Choosing the best quality chocolate chips: Look for semi-sweet chocolate chips with a rich flavor. Brands with higher cocoa content provide more depth. This enhances the taste of your brownies. - Fresh strawberries vs. frozen strawberries: Fresh strawberries are best for this recipe. They provide a juicy burst of flavor. Frozen strawberries may turn mushy and water your brownies down. - Recommended baking supplies: Use a sturdy mixing bowl and a good whisk. A baking pan lined with parchment helps with easy removal. These tools make your baking process smoother and more enjoyable. Choosing the right ingredients will elevate your dessert. Each item adds to the flavor and texture of your chocolate covered strawberry brownies. Happy baking! - Preheat your oven to 350°F (175°C). Grease a 9x13-inch pan or line it with parchment paper. - In a large bowl, mix melted butter and sugar. Stir until smooth and well combined. - Add eggs and vanilla extract to the mix. Beat until the mixture is creamy and smooth. - Sift the flour, cocoa powder, baking powder, and salt into the bowl. Gently fold until just combined. - Pour the brownie batter into the prepared pan. Spread it evenly across the bottom. - Bake for 25-30 minutes. Check with a toothpick; it should come out with a few moist crumbs. - While brownies bake, prepare the chocolate ganache. Heat heavy cream in a small pot until it simmers. - Remove from heat and stir in chocolate chips. Mix until melted and smooth. Let it cool slightly. - Once brownies cool in the pan, pour ganache on top. Spread it evenly for a nice layer. - Place sliced strawberries on top of the ganache. Press them gently so they stick. - Refrigerate for at least 30 minutes. This helps the ganache set before you cut them. To make the best brownies, avoid common mistakes. Don't overmix the batter. Gently fold in the dry ingredients until just combined. If you mix too long, your brownies can turn out dry. Check for doneness by using a toothpick. Insert it into the center of the brownies. If it comes out with a few moist crumbs, they are ready. Remember, they will continue to cook a bit after you take them out. Cooling is key for the best texture. Let the brownies cool in the pan for about 15 minutes. Then transfer them to a wire rack. This helps them set and keeps them from getting soggy. When serving, presentation matters. Use a white platter to make the brownies pop. Garnish with whole strawberries or a light sprinkle of powdered sugar. This adds a nice touch. Pair the brownies with ice cream or whipped cream. The cold creaminess balances the rich chocolate. Vanilla ice cream works nicely, but feel free to explore other flavors too. Beverage pairings can elevate your dessert. A glass of milk goes great with brownies. For adults, try a rich coffee or a sweet dessert wine. These drinks complement the chocolate flavor well. {{image_2}} You can make these brownies even more fun. Try adding nuts like walnuts or pecans for a crunch. You can also sprinkle on coconut flakes or drizzle caramel for extra flavor. If you want a twist, swap the strawberries for other fruits. Raspberries or bananas work well too. They add a nice touch and keep it fresh. To change the taste, consider infusing flavors. A hint of almond extract or a dash of cinnamon can add warmth. You might also mix in a bit of espresso powder. This will give your brownies a rich depth without being too sweet. You can enjoy these brownies while sticking to your diet. For a gluten-free version, swap all-purpose flour with almond or coconut flour. Make sure to check the packaging to ensure they are gluten-free. If you want a vegan treat, replace eggs with flaxseed meal. Mix one tablespoon of flaxseed with three tablespoons of water. Let it sit until it thickens. Use almond milk instead of heavy cream for the ganache. For those watching sugar, use a sugar substitute in the batter. Many options work well, like stevia or erythritol. They keep the sweetness without the calories. Always check the ratios on the packaging for the best results. To keep your chocolate covered strawberry brownies fresh, store them properly. Use an airtight container to avoid drying out. Place parchment paper between layers if stacking them. This prevents sticking and keeps them nice. - The brownies last up to four days at room temperature. - For longer storage, place them in the fridge for up to a week. - You can also freeze them for up to three months. Wrap each brownie in plastic wrap and then in foil to keep them safe. When you're ready to enjoy a brownie, you may want to reheat it. For the best flavor, use the oven. Preheat to 350°F (175°C). Place the brownies on a baking sheet and warm for about 10 minutes. If you're in a hurry, the microwave works too. Heat on medium power for 15 to 20 seconds. This warms them gently without making them tough. Enjoy your treat warm with the chocolate still gooey! How do I know if my brownies are baked properly? You can check if your brownies are done by inserting a toothpick. If it comes out with a few moist crumbs, they are ready. If it comes out clean, they may be overbaked. Can I make the brownies ahead of time? Yes, you can make the brownies one day ahead. Just store them in an airtight container. This helps the flavors meld and improves the taste. What can I do if I don’t have heavy cream? If you lack heavy cream, use half-and-half or milk with butter. Mix two tablespoons of melted butter with a cup of milk to create a similar texture. What’s the best way to cut brownies? To cut brownies neatly, use a sharp knife. Dip the knife in hot water, wipe it dry, and make your cuts. This method prevents tearing and gives you clean edges. Can I substitute different types of chocolate? Yes, you can use dark chocolate or white chocolate. Just adjust the sugar slightly if you use dark chocolate, as it is less sweet. How should I serve these brownies for a party? For parties, slice brownies into small squares. Serve them on a white platter for a nice contrast. You can also add whole strawberries or a dusting of powdered sugar for decoration. In this blog post, we explored making rich, chocolatey brownies with fresh strawberries. We covered essential ingredients, tips for choosing the best quality, and step-by-step instructions for perfect results. I shared helpful tricks to avoid common mistakes and suggested tasty serving ideas. Whether you're looking for classic flavors or fun variations, these brownies can fit any occasion. With these tips, you can bake delicious brownies that impress everyone. Enjoy your baking journey and the joy these treats bring!

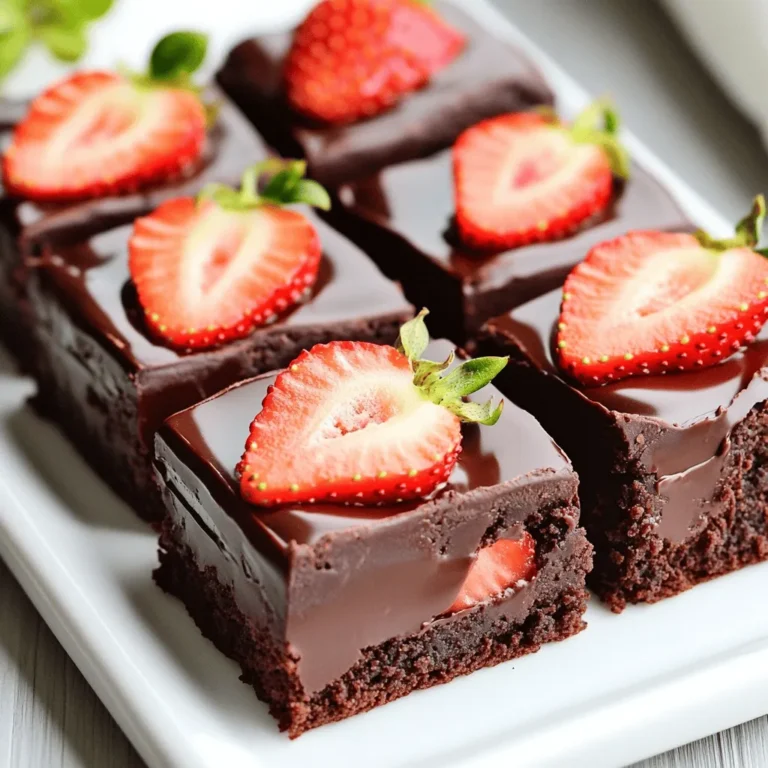
Chocolate Covered Strawberry Brownies Irresistible Treat

To make delicious blueberry lemon ricotta pancakes, you need the right ingredients. Here’s a list to get started: - 1 cup ricotta cheese - 2 large eggs - 1/4 cup milk (or plant-based milk) - Zest of 1 lemon - 1 tablespoon fresh lemon juice - 1 cup all-purpose flour - 2 tablespoons sugar - 1 tablespoon baking powder - 1/2 teaspoon salt - 1 cup fresh blueberries (plus extra for serving) - Butter or oil for cooking Each ingredient plays a key role. The ricotta makes the pancakes fluffy and rich. The eggs help bind everything together. Milk adds moisture, while lemon zest and juice give a bright flavor. The flour is the base, and sugar sweetens the mix. Baking powder is essential for fluffiness. Salt balances flavors, and blueberries add a burst of sweetness. Using fresh ingredients will make a big difference in taste. I always recommend using seasonal blueberries if you can. You can also substitute milk with a plant-based option for a dairy-free version. Enjoy gathering these ingredients! - Step 1: Combine wet ingredients In a large bowl, add 1 cup of ricotta cheese, 2 large eggs, 1/4 cup of milk, the zest of 1 lemon, and 1 tablespoon of fresh lemon juice. Whisk until smooth. This gives the pancakes a rich flavor. - Step 2: Mix dry ingredients In another bowl, mix 1 cup of all-purpose flour, 2 tablespoons of sugar, 1 tablespoon of baking powder, and 1/2 teaspoon of salt. This mix adds the right texture to your pancakes. - Step 3: Combine both mixtures Gradually add the dry ingredients to the wet mix. Stir gently until just combined. Don’t overmix. Overmixing can lead to tough pancakes. - Step 4: Fold in blueberries Gently fold in 1 cup of fresh blueberries. This step adds bursts of sweetness in every bite, making your pancakes extra delicious. - Step 5: Cook pancakes Heat a non-stick skillet over medium heat and lightly grease it with butter or oil. Pour about 1/4 cup of batter for each pancake. Cook for 2-3 minutes or until bubbles form on top. - Step 6: Serving suggestions Carefully flip the pancakes and cook for another 2-3 minutes until golden brown. Stack them high on a plate, add some extra blueberries, and drizzle with maple syrup or whipped cream if you like. Enjoy these tasty pancakes! How to avoid overmixing the batter To keep your pancakes fluffy, mix gently. Combine the wet and dry ingredients just until they blend. A few lumps are okay. Overmixing makes pancakes tough. Tips for achieving the fluffiest pancakes Use ricotta cheese in the batter. It adds moisture and makes pancakes light. Let the batter rest for 5 minutes before cooking. This helps the baking powder work better. Best cooking temperature for pancakes Cook pancakes on medium heat. If it's too hot, the outside will burn before the inside cooks. A good way to test is to sprinkle a drop of water on the skillet. If it dances and evaporates, you're ready! Ideas for toppings: maple syrup, blueberries, whipped cream Top your pancakes with maple syrup for sweetness. Fresh blueberries add a burst of flavor. Whipped cream makes it extra special. Mix and match to find your favorite! Presentation tips for an appealing dish Stack pancakes high on a plate. Add extra blueberries on top for color. Dust with powdered sugar for a nice touch. A drizzle of syrup makes it look tasty and inviting. {{image_2}} You can easily change the fruits or flavors in these pancakes. Try using raspberries, strawberries, or even peaches. Each fruit gives a new taste. If you want a twist, add a touch of vanilla or almond extract. If you're looking for dairy-free options, swap ricotta cheese with a plant-based ricotta. Many brands make coconut or almond-based versions. For milk, use your favorite plant milk like almond, soy, or oat. These swaps keep the pancakes tasty and creamy. Want to make this dish gluten-free? You can use gluten-free all-purpose flour. Many brands have blends that work well. Just check the package for baking ratios. If you're vegan, you can replace eggs with flaxseed meal. Mix 1 tablespoon of flaxseed meal with 2.5 tablespoons of water. Let it sit for a few minutes until it thickens. Use plant-based milk and a dairy-free ricotta, and you'll have a great vegan pancake! To keep your blueberry lemon ricotta pancakes fresh, store them properly. Place cooled pancakes in an airtight container. You can refrigerate them for up to three days. If you want to store them longer, freezing is a great option. To freeze pancakes, stack them with parchment paper between each one. This helps prevent sticking. Wrap the stack in plastic wrap or aluminum foil. Place the wrapped pancakes in a freezer-safe bag. They can last for up to two months in the freezer. When it’s time to enjoy your pancakes again, you can easily reheat them. The best method is using a skillet. Heat the skillet over medium-low heat. Place the pancakes in the skillet for a couple of minutes on each side. This keeps them soft and warm. You can also use a microwave. Place a pancake on a microwave-safe plate. Cover it with a damp paper towel to keep it moist. Heat for about 20-30 seconds. Check to see if it’s warm enough. If not, heat it a bit longer. Enjoy your pancakes just like they were freshly made! How do I make pancakes that don’t stick to the pan? To prevent pancakes from sticking, use a non-stick skillet. Heat it over medium heat and grease it with butter or oil. Make sure the skillet is hot before adding the batter. This way, pancakes will flip easily. Can I make the batter ahead of time? Yes, you can make the batter ahead of time. Store it in the fridge for up to 2 hours. Just give it a quick stir before using. This helps the flavors blend well. What are the variations for add-ins in the batter? You can add many things to your batter. Try chocolate chips, nuts, or other fruits like bananas. Each add-in gives a new taste and fun twist to your pancakes. Overview of calories, carbs, and protein per serving Each serving of these blueberry lemon ricotta pancakes has about 250 calories. It provides around 35 grams of carbs and 8 grams of protein. This makes it a tasty yet balanced breakfast option. Tips for balancing the dish with healthier sides Pair these pancakes with fresh fruit or a side of yogurt. This adds nutrients and keeps your meal balanced. You can also serve them with a scoop of nut butter for extra protein. For the full recipe, check this [link to Full Recipe](#). You can print it easily for your kitchen! This blog post covered a tasty pancake recipe using simple ingredients. You learned how to mix wet and dry items, fold in blueberries, and cook fluffy pancakes. With tips for cooking and serving, you'll impress anyone at breakfast. Don't forget about the variations for dietary needs! Whether you store or reheat them, these pancakes stay delicious. Now, you're ready to create a fun, tasty dish that can please any crowd. Enjoy making your pancakes and sharing them with family or friends!

Blueberry Lemon Ricotta Pancakes Easy and Tasty Recipe

To make Jalapeño Popper Mac and Cheese, you need a few key items: - 8 oz elbow macaroni - 4 oz cream cheese, softened - 1 cup shredded sharp cheddar cheese - 1 cup shredded mozzarella cheese - 2 jalapeños, finely chopped (seeds removed for less heat) - 1/2 cup breadcrumbs - 1/2 teaspoon garlic powder - 1/2 teaspoon onion powder - 1/4 teaspoon smoked paprika - Salt and pepper to taste - 2 tablespoons butter - 1 tablespoon olive oil - Fresh cilantro, chopped (for garnish) These ingredients create a creamy and cheesy dish. The jalapeños add a nice kick, making it fun to eat. If you want to boost the taste, consider these extras: - Chopped bacon for a smoky crunch - A dash of hot sauce for more heat - Different types of cheese like gouda or pepper jack - Chopped green onions for freshness These options can make your mac and cheese even better. Feel free to mix and match to suit your taste. Here’s what you’ll need to cook this dish: - Large pot for boiling pasta - Medium pot for making the cheese sauce - Whisk for mixing ingredients - Baking dish to hold the mac and cheese - Small bowl for mixing breadcrumbs Having the right tools makes cooking easier and more fun. Make sure to gather everything before you start. Start by boiling salted water in a large pot. Once it boils, add 8 oz of elbow macaroni. Cook it until it is al dente, which means it should be firm but not hard. This takes about 7 to 9 minutes. Drain the pasta and set it aside for later. In the same pot, melt 2 tablespoons of butter over medium heat. Add 4 oz of softened cream cheese and stir until it becomes smooth. Gradually whisk in 1 cup of milk. Then, add 1/2 teaspoon of garlic powder, 1/2 teaspoon of onion powder, and 1/4 teaspoon of smoked paprika. Season with salt and pepper to taste. Heat this mixture until it's hot but not boiling. Once your cheese sauce is ready, slowly stir in 1 cup of shredded sharp cheddar and 1 cup of shredded mozzarella cheese. Keep stirring until the cheese melts and the sauce is creamy. Now, fold in the finely chopped jalapeños, along with the cooked macaroni. Mix until all the pasta is well coated with the cheese sauce. Preheat your oven to 350°F (175°C). Pour the mac and cheese mixture into a greased baking dish. In a small bowl, mix 1/2 cup of breadcrumbs with 1 tablespoon of olive oil and a pinch of salt. Sprinkle this breadcrumb mix evenly over the mac and cheese. Bake for 20 to 25 minutes, or until the top is golden and crispy. Remove from the oven and let it sit for a few minutes. You can garnish with fresh chopped cilantro before serving. To get a creamy cheese sauce, use room temperature cream cheese. This helps it melt better. Melt the butter in a pot over medium heat. Add the cream cheese and stir until smooth. Gradually whisk in a cup of milk. Keep stirring until it heats up. Add garlic powder, onion powder, smoked paprika, salt, and pepper. Stir in the sharp cheddar and mozzarella cheese slowly. This gives the sauce its rich flavor and smooth texture. Want to control the heat? Start with jalapeños that have no seeds. For more heat, leave some seeds in. You can also add more jalapeños to the dish. If you like it milder, use fewer peppers. Another trick is to mix in a bit of sour cream. It adds creaminess and cools down the spice. If your cheese sauce is too thick, add a splash of milk and stir. This makes it creamy again. If it's too thin, you can add more cheese. Just melt in a little more cheddar or mozzarella. If the dish is too spicy, add more cream cheese or sour cream. This helps to balance the heat. Lastly, if your topping burns, cover it with foil and bake a bit longer. This keeps the inside warm while fixing the top. {{image_2}} You can add proteins to enhance your Jalapeño Popper Mac and Cheese. Chicken or bacon works great. Cook the chicken first, then chop it. For bacon, fry it until crispy, then crumble it. Mix them into the cheese sauce with the jalapeños. This makes the dish heartier and more filling. If you want a vegetarian version, skip the meat. You can add more veggies. Try spinach, bell peppers, or mushrooms. These add color and flavor. Sauté the veggies before adding them to the cheese sauce. This keeps all the taste but makes it meat-free. Changing the cheese can create new flavors. Besides sharp cheddar and mozzarella, try gouda or pepper jack. Gouda gives a rich taste, while pepper jack adds a spicy kick. Mix different cheeses for a unique blend. Just remember to keep the melted cheese creamy for the best results. To keep your Jalapeño Popper Mac and Cheese fresh, store it in an airtight container. Allow it to cool to room temperature first. Place it in the fridge for up to four days. Use glass or plastic containers that seal well. This way, your dish stays creamy and tasty for later. When you're ready to eat leftovers, reheat them gently. You can use the microwave or the oven. If using the microwave, place it in a bowl and cover it. Heat in short bursts of one minute, stirring in between. For the oven, preheat to 350°F (175°C) and bake for about 15-20 minutes. Add a splash of milk if it seems dry. If you want to store it longer, freezing is a great option. Portion it into freezer-safe containers. Leave some space at the top for expansion. It can last for up to three months in the freezer. To enjoy it later, thaw it in the fridge overnight before reheating. This keeps your dish delicious and ready for a quick meal! Yes, you can make Jalapeño Popper Mac and Cheese ahead of time. Prepare it up to the baking step. Store it in the fridge for a day. When ready, just bake it straight from the fridge. This saves time for busy days. Jalapeño Popper Mac and Cheese pairs well with many dishes. Here are some ideas: - Grilled chicken or steak - Fresh salad with a light dressing - Roasted vegetables for a healthy side - Garlic bread for extra carbs These options add variety to your meal. To boost the heat in your Jalapeño Popper Mac and Cheese, consider these tips: - Use more jalapeños, keeping the seeds for extra spice - Add a pinch of cayenne pepper - Mix in hot sauce to the cheese sauce These changes will give you that fiery kick you crave! You can find the full recipe for Jalapeño Popper Mac and Cheese above. It includes all the ingredients and step-by-step instructions. This makes it easy to follow and enjoy! Jalapeño Popper Mac and Cheese is a fun and tasty dish. We covered the key ingredients and optional ones for extra flavor. You learned step-by-step how to cook it perfectly. Tips and tricks helped you avoid common mistakes. Plus, we explored fun variations and how to store leftovers. Enjoy this dish hot or save it for later. You can customize it to fit your taste. Make it your own!

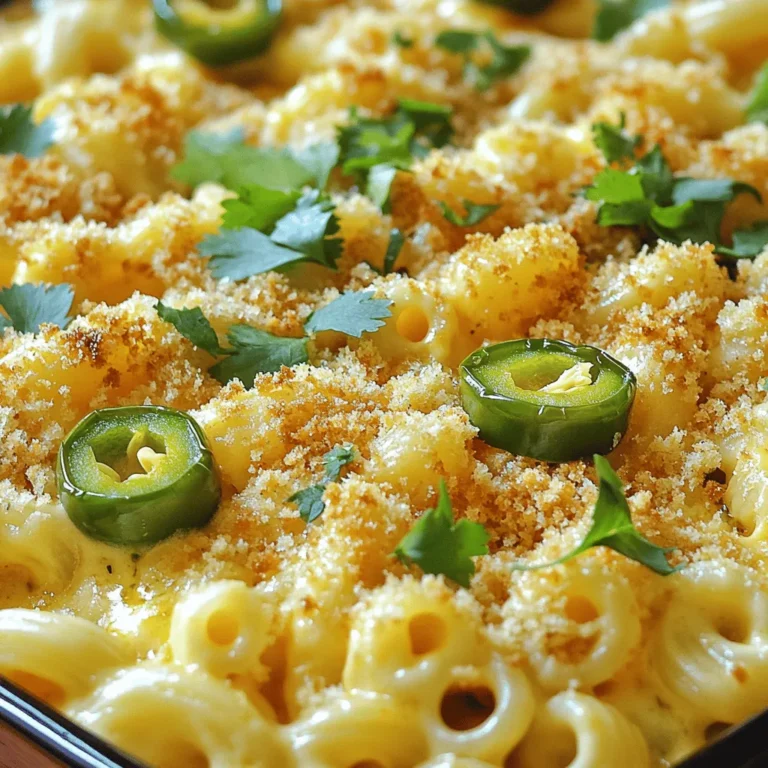
Jalapeño Popper Mac and Cheese Tasty Comfort Dish

- 1 lb ground beef or ground turkey - 1/2 cup breadcrumbs - 1/4 cup finely chopped onion - 1/4 cup grated carrot - 2 cloves garlic, minced To make a great meatloaf, start with some key ingredients. You can use either ground beef or ground turkey. Ground turkey gives a lighter taste, while beef adds richness. Both options work well, so choose what you like best. Next, you need breadcrumbs. They help bind the meatloaf and keep it moist. Finely chopped onion brings sweetness and flavor. Grated carrot adds a touch of natural sweetness and moisture. Lastly, minced garlic gives that punchy aroma that everyone loves. - 1/4 cup teriyaki sauce (plus extra for glazing) - 2 tablespoons soy sauce - 1 teaspoon ginger paste or freshly grated ginger - 1/2 teaspoon black pepper - 1/4 teaspoon salt These flavor enhancers take your meatloaf to the next level. Teriyaki sauce adds a sweet and savory touch. Soy sauce deepens the umami flavor. Ginger paste or freshly grated ginger adds warmth and zest. Black pepper and salt balance the flavors. - Sesame seeds - Chopped green onions Garnishing can make your dish look even better. Sprinkle sesame seeds on top for crunch. Chopped green onions add a pop of color and freshness. These small details make your Teriyaki Glazed Meatloaf feel gourmet. - Preheat the oven to 350°F (175°C). - In a large bowl, mix together the ground meat, breadcrumbs, chopped onion, grated carrot, minced garlic, and egg. - Pour in the teriyaki sauce, soy sauce, ginger paste, black pepper, and salt. Mix until combined, but don't overmix. - Transfer the meat mixture to a loaf pan, shaping it into a loaf. - Spread a thin layer of extra teriyaki sauce on top for glazing. - Bake in the preheated oven for 45-55 minutes at 350°F (175°C). - In the last 10 minutes, brush on another layer of teriyaki sauce for a shiny finish. - Avoid overmixing the meat: When you mix the meatloaf, do it gently. Overmixing can make your meatloaf tough and dry. Just blend until all ingredients are combined. - Proper resting time after baking: After you bake the meatloaf, let it rest for about 10 minutes. This helps the juices settle, keeping it moist when you slice it. - Customizing teriyaki glaze: You can make the glaze your own! Try adding honey or a splash of lime juice for extra sweetness and tang. A bit of garlic powder can also boost the flavor. - Adding favorite vegetables: Want to sneak in more nutrients? Chop up bell peppers or mushrooms and mix them in. They add flavor and moisture, making your meatloaf even better. - Accompanying sides and garnishes: Serve your meatloaf with steamed broccoli or fluffy rice. These sides balance the richness of the teriyaki glaze. Don't forget to sprinkle some sesame seeds and green onions on top for a nice touch! - Presentation tips for serving: Place slices of meatloaf on a bright platter. Drizzle extra teriyaki sauce around the edges. This makes your dish look appealing and adds flavor in every bite. {{image_2}} You can switch up the meat for your teriyaki glazed meatloaf. Ground turkey or chicken works great. These options keep the dish leaner. You can also choose plant-based proteins, like lentils or chickpeas. These swaps add new flavors and textures. Each choice offers a unique twist on the classic recipe. Try using whole grain breadcrumbs instead of white ones. Whole grains add fiber and nutrients. You can also sneak in veggies like spinach or zucchini. These additions boost the nutrition and taste. Grate or chop them finely to blend well. They make your meatloaf even more delicious and colorful! Get creative with spices and sauces for a twist. Add miso for a rich umami flavor. A touch of chili sauce can add heat. Mixing flavors from different cuisines can be fun. Think about adding garlic powder or sesame oil. These fusion ideas will make your teriyaki glazed meatloaf stand out! Store your leftover teriyaki glazed meatloaf in an airtight container. This keeps it fresh. Make sure it cools to room temperature first. You can refrigerate it for up to 3 days. You can freeze both uncooked and cooked meatloaf. For uncooked meatloaf, wrap it tightly in plastic wrap. Then, place it in a freezer bag. This helps prevent freezer burn. For cooked meatloaf, slice it first, then wrap each slice. Store it in a freezer bag or container. It can last up to 3 months in the freezer. To reheat, you can use the oven or microwave. For the oven, preheat to 350°F (175°C). Place the meatloaf in a baking dish. Add a splash of water or broth to keep it moist. Cover with foil to prevent drying. Bake for about 20 minutes. In the microwave, heat slices on a microwave-safe plate. Cover with a damp paper towel. This helps keep moisture in. Heat for 1 to 2 minutes, checking often. You can easily make this dish gluten-free. Use gluten-free breadcrumbs instead of regular ones. Many brands offer good options at stores. For the teriyaki sauce, choose a gluten-free version. You can find this in most grocery stores. Check the label to be sure. To check if your meatloaf is done, use a meat thermometer. The internal temperature should reach 160°F (70°C). You can also look for clear juices when you cut into it. The meat should not be pink in the middle. Both methods ensure a safe and tasty meal. Yes, you can prepare the meatloaf ahead of time. Mix the ingredients and shape the loaf. Then, cover it and store it in the fridge for up to 24 hours. You can also freeze it before baking. Just make sure to wrap it well. When ready to bake, thaw it overnight in the fridge. Cooking times may vary with frozen meatloaf, so check it closely. In this post, we explored how to make Teriyaki Glazed Meatloaf. We covered key ingredients, preparation, and baking steps. I shared tips to keep your meatloaf moist and flavorful. There are also variations to try and storage tips for leftovers. This dish is easy to customize and perfect for any meal. Enjoy creating your own tasty versions!

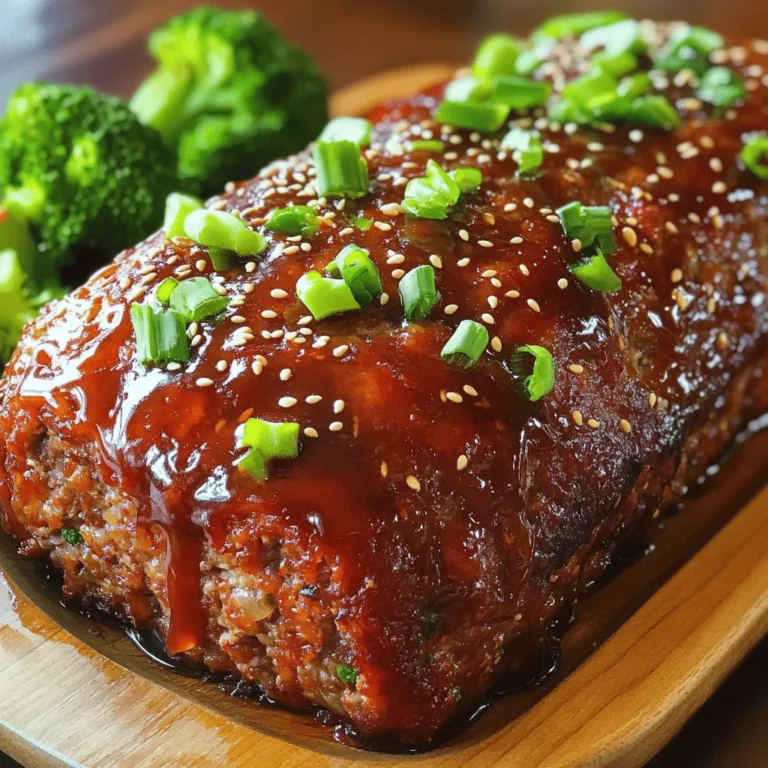
Teriyaki Glazed Meatloaf Flavorful Comfort Food Recipe

- 4 large red bell peppers - 1 medium onion, chopped - 3 cloves garlic, minced - 2 cups vegetable broth - 1 cup coconut milk (or heavy cream) - 1 tablespoon olive oil - 1 teaspoon smoked paprika - 1 teaspoon dried basil - Salt and pepper to taste - Fresh basil leaves for garnish The ingredients for this creamy roasted red pepper soup are simple yet flavorful. The key players are the red bell peppers. They provide a rich sweetness and a vibrant color. When you roast them, their natural sugars caramelize, enhancing the taste. The onion and garlic add depth. They form a perfect base. Don’t skip the smoked paprika; it gives a warm, smoky flavor. Coconut milk or heavy cream makes the soup silky and creamy. Make sure to have fresh basil on hand for the final touch. It adds a burst of freshness to each bowl. This soup is not just a dish; it’s a cozy experience. 1. Preheat your oven to 400°F (200°C). This step is key for roasting. 2. Cut the red bell peppers in half. Remove all the seeds carefully. 3. Place the peppers skin-side up on a baking sheet. Drizzle with olive oil and season with salt and pepper. 4. Roast the peppers for 25-30 minutes. Watch for the skins to blacken. 5. Once done, take them out and put them in a bowl. Cover with plastic wrap to steam for 10 minutes. This makes peeling easier. 1. In a large pot, heat a tablespoon of olive oil over medium heat. 2. Add the chopped onion first. Sauté until soft and translucent, about 5 minutes. 3. Next, add the minced garlic and cook for an additional minute. Enjoy the aroma! 4. Peel the roasted peppers. Add them to the pot with the sautéed onion and garlic. 5. Stir in the smoked paprika and dried basil. Mix well to combine all the flavors. 1. Pour in the vegetable broth. Bring the mixture to a simmer. Let it cook for about 10 minutes to meld the flavors. 2. Remove the pot from heat. Use an immersion blender to puree the soup until smooth. If you do not have one, transfer in batches to a blender. 3. Stir in the coconut milk. Adjust seasoning with salt and pepper to your liking. 4. If needed, gently reheat the soup. Serve warm and garnish with fresh basil leaves for a lovely touch. Use an immersion blender to make your soup smooth. This tool is easy to use and clean. If you want a creamier soup, adjust the coconut milk based on your taste. You can add more for a richer feel or less for a lighter version. To brighten the soup, add a splash of lemon juice. This small touch makes a big difference. You can also experiment with spices. A dash of cayenne adds heat, while thyme brings earthiness. Try small amounts and adjust to your liking. Garnish your soup with fresh basil for a pop of color. A drizzle of olive oil adds a nice touch too. Serve the soup with crusty bread or crunchy croutons for texture. These simple details make your meal look and taste amazing. {{image_2}} You can switch up the cream in this soup. Use heavy cream for a rich taste. It adds a nice smoothness. If you prefer a nut-based option, try cashew cream. It gives a unique flavor and great creaminess. Both choices make the soup feel luxurious and comforting. To make your soup heartier, consider adding protein. You can stir in cooked chicken for a meaty touch. Chickpeas are another great choice for plant-based protein. They add texture and flavor. You can also serve this soup with a protein-rich side, like a salad or sandwich, to make it a full meal. If you want a vegan version, it’s simple. Just use vegetable broth instead of chicken broth. It tastes just as good! You can also garnish the soup with avocado slices or vegan cheese. These toppings add creaminess and a fresh taste to the soup, making it even more delicious. After you enjoy your creamy roasted red pepper soup, store any leftovers in an airtight container. This keeps it fresh for you. It will stay good in the fridge for up to 4 days. If you want to keep it longer, freeze the soup. It lasts up to 3 months in the freezer. Label the container with the date so you know when to use it. When you are ready to eat the soup again, thaw it overnight in the fridge. This makes reheating easier. You can gently heat the soup on the stove or in the microwave. Stir occasionally to warm it evenly. Just be careful not to boil it, as it can change the texture. For easy reheating, use glass containers. They are safe for both the microwave and the oven. Remember to label and date any frozen portions. This way, you can keep track of what you have. It helps to avoid any waste and ensures you enjoy your soup at its best. You can easily swap coconut milk for heavy cream or any non-dairy milk. This change keeps the soup creamy while offering different flavors. If you use heavy cream, the soup may taste richer. Non-dairy options like almond or oat milk work well, too. Just remember, the taste may shift slightly, but it will still be delicious! Absolutely! This soup stores well in both the fridge and the freezer. If you make it ahead, let it cool before storing. In the fridge, it stays fresh for up to four days. For longer storage, freeze it for up to three months. Just remember to label your containers! This soup pairs nicely with grilled cheese sandwiches or a fresh salad. The crunchy texture of the sandwich contrasts well with the soup's creaminess. You can also serve it with crusty bread for dipping. Adding a side salad brings freshness to the meal. Yes, all ingredients in this soup are gluten-free! Just make sure to check the labels on your vegetable broth. Some brands add gluten, so it’s good to be cautious. Enjoy this soup without worry if you follow these tips! In this article, we explored how to make Creamy Roasted Red Pepper Soup. We covered the main ingredients, easy steps for preparation, and tips to enhance flavor. You learned how to store leftovers and even saw variations for different tastes. Making this soup is simple and rewarding. It’s tasty, healthy, and perfect for any meal. Enjoy making it your own, and don’t forget to share it with loved ones. This delightful recipe brings warmth and comfort to your kitchen. Try it out and savor every spoonful!

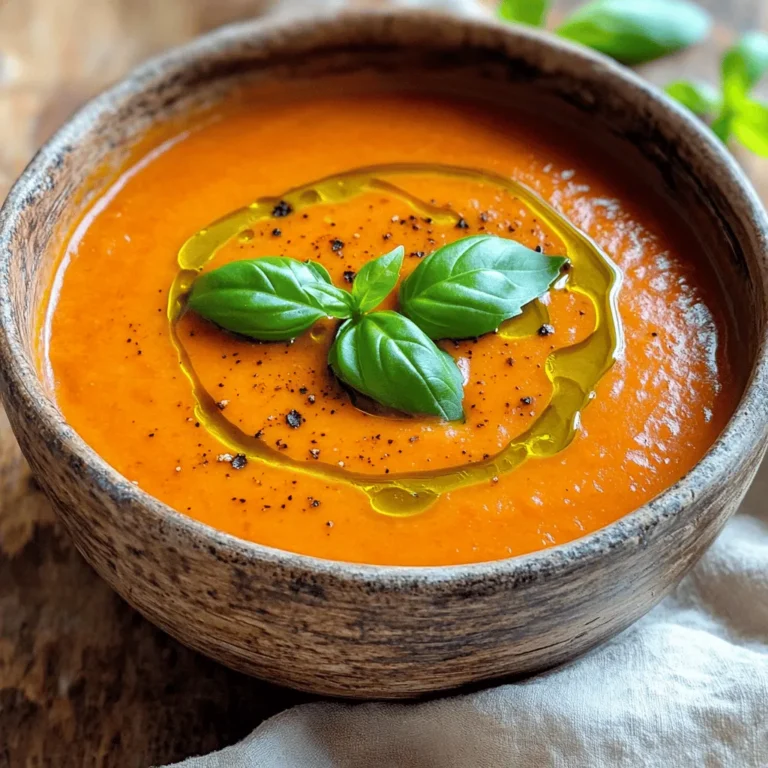
Creamy Roasted Red Pepper Soup Delightful Comfort Meal

PREV 1 … 49 50 51 … 86 NEXT
spicy fork kitchen

explore

DessertsDinnerAppetizersDrinks

Our Policies

  • Cookie Policy
  • Copyright Policy
  • Disclaimer
  • GDPR Policy
  • Terms Of Use
Back to Top
  • About
  • Contact Us
  • Privacy Policy
© 2026 spicy fork kitchen