FREE DINNER EBOOK! Get your copy!
  • Cookie Policy
  • GDPR Policy
  • Disclaimer
  • Terms Of Use
  • Visit my other site: Fun Cookie Recipes
spicy fork kitchen
  • Home
  • Dinner
  • Desserts
  • Drinks
  • Appetizers
  • Contact
  • About
  • Privacy Policy
  • Home
  • Dinner
  • Desserts
  • Drinks
  • Appetizers
  • Contact
  • About
  • Privacy Policy
  • Cookie Policy
  • GDPR Policy
  • Disclaimer
  • Terms Of Use
Visit my other site: Fun Cookie Recipes

HOME / CATEGORIES /

Latest

- 2 cups rolled oats - 2 cups almond milk (or any milk of choice) - 2 large apples, peeled, cored, and diced (I like Granny Smith or Honeycrisp) - 1/2 cup brown sugar (or maple syrup for a healthier choice) - 1/4 cup unsweetened applesauce - 1 teaspoon vanilla extract - 1 teaspoon cinnamon - 1/2 teaspoon nutmeg - 1/4 teaspoon salt - 1/2 cup raisins (optional for sweetness) - 1/2 cup chopped walnuts or pecans (optional for crunch) I love using rolled oats because they give a nice chewy texture. Almond milk works great, but feel free to use any milk you like. Apples add natural sweetness and flavor. I suggest using tart apples like Granny Smith or sweet ones like Honeycrisp. For sweeteners, brown sugar gives a classic touch, but maple syrup is a tasty alternative. Applesauce keeps it moist and also adds sweetness. Cinnamon and nutmeg are key to that warm flavor. Lastly, I often add raisins for extra sweetness and walnuts or pecans for crunch. These optional ingredients really enhance the dish's texture and taste. 1. Preheat your oven to 350°F (175°C). This helps the bake cook evenly. 2. Lightly grease a 9x9 inch baking dish. This will stop the oatmeal from sticking. 3. In a large mixing bowl, combine the ingredients. Mix together rolled oats, almond milk, diced apples, brown sugar, applesauce, vanilla extract, cinnamon, nutmeg, and salt. Stir until well mixed. 1. Pour the mixture into the greased baking dish. Spread it out evenly with a spatula. 2. Bake the oatmeal in the preheated oven for 30-35 minutes. It is done when the top is golden and firm. A toothpick should come out clean when inserted in the center. 1. After baking, let it cool for about 5-10 minutes. This makes it easier to slice. 2. Slice the baked oatmeal into squares. Serve warm with a drizzle of honey or maple syrup. You can also add yogurt or a sprinkle of cinnamon for extra flavor. - Choosing the best apples I recommend using tart apples like Granny Smith or Honeycrisp. These apples add a nice balance of sweet and sour. Their firm texture holds up well during baking. - Substitutions for milk and sweeteners If you want a nut-free option, use oat milk or regular cow's milk. For a healthier sweetener, try maple syrup instead of brown sugar. It adds a rich flavor with fewer calories. - How to know when it’s done Check that the top is golden brown. Insert a toothpick into the center. If it comes out clean, your bake is ready. It should feel firm to the touch. - Achieving the perfect texture Mix the ingredients well but avoid over-mixing. This keeps the oatmeal light and fluffy. A little bit of moisture is okay; it will set as it bakes. - Toppings and accompaniments Serve warm with a drizzle of honey or maple syrup. A dollop of yogurt adds creaminess. You can also sprinkle extra cinnamon on top for more flavor. - Meal ideas (breakfast or dessert) This dish is great for breakfast or as a dessert. Pair it with fresh fruit for breakfast. For dessert, serve it with ice cream or whipped cream. {{image_2}} You can easily change the taste of your Apple Cinnamon Oatmeal Bake. Adding spices like ginger or cardamom gives it a warm kick. These spices pair well with apples and cinnamon. You can also try different fruit combinations. Berries or bananas can add sweetness and color. Mix and match your favorite fruits for a unique dish. If you need gluten-free options, use certified gluten-free rolled oats. This swap keeps the dish safe for those with gluten allergies. For vegan modifications, substitute almond milk with any plant-based milk. You can also replace eggs with a flaxseed mixture. Simply mix one tablespoon of flaxseed with three tablespoons of water and let it sit until it thickens. You can make this bake in an Instant Pot for a quick meal. Just layer the ingredients and set it to steam for about 15 minutes. If you prefer a slow cooker, combine all ingredients and cook on low for 4-6 hours. This method gives a soft and creamy texture, perfect for chilly mornings. To keep your Apple Cinnamon Oatmeal Bake fresh, follow these tips: - Refrigeration: Let the bake cool completely. Then, store it in an airtight container. It lasts up to five days in the fridge. - Freezing: You can freeze leftovers. Cut the bake into squares and wrap each piece in plastic wrap. Place them in a freezer bag. This way, they stay fresh for up to three months. When you want to enjoy your oatmeal bake again, reheating is key: - Best ways to reheat: Preheat your oven to 350°F (175°C). Place the squares on a baking sheet. Heat for about 10 to 15 minutes for the best taste. You can also use a microwave. Heat each piece for about 30 seconds to 1 minute. - Portioning for easy servings: Cut the bake into squares before storing. This makes it easy to grab a piece and reheat. Plus, it helps with portion control! How can I make it more nutritious? You can add more fruits like berries or bananas. Nuts and seeds can boost protein. Try using less sugar or swapping it for honey or maple syrup. You can also use whole grain oats for better fiber. Can I use steel-cut oats instead of rolled oats? Yes, you can use steel-cut oats. However, they need longer cooking time. Cook them on the stovetop first for about 10-15 minutes before mixing them in. This helps them soften and bake well. How long does it take to bake? Baking takes about 30 to 35 minutes. The top should be golden and firm. A toothpick inserted in the center should come out clean when it's ready. What can I substitute for ingredients if I’m out? If you lack almond milk, any milk works fine. You can skip the brown sugar or use honey. Applesauce is replaceable with mashed banana. No raisins? Try dried cranberries or leave them out. Is this recipe suitable for meal prep? Yes, this dish is great for meal prep. You can bake it at the start of the week. Slice it into squares and store them in the fridge for quick breakfasts. What are the nutritional benefits of this dish? This dish is high in fiber and helps keep you full. Apples add vitamins and antioxidants. Oats are good for heart health and digestion. With nuts, you get healthy fats and protein, making it a balanced meal. We explored how to make a delicious baked oatmeal dish. You learned about key ingredients like oats, apples, and sweeteners. I shared steps for perfect preparation, baking, and serving. Tips on ingredient choices and baking methods help you create the best version. You now have ideas for variations and storage, ensuring long-lasting enjoyment. Remember, customization makes this recipe your own. Happy baking, and enjoy this nutritious dish for breakfast or dessert!

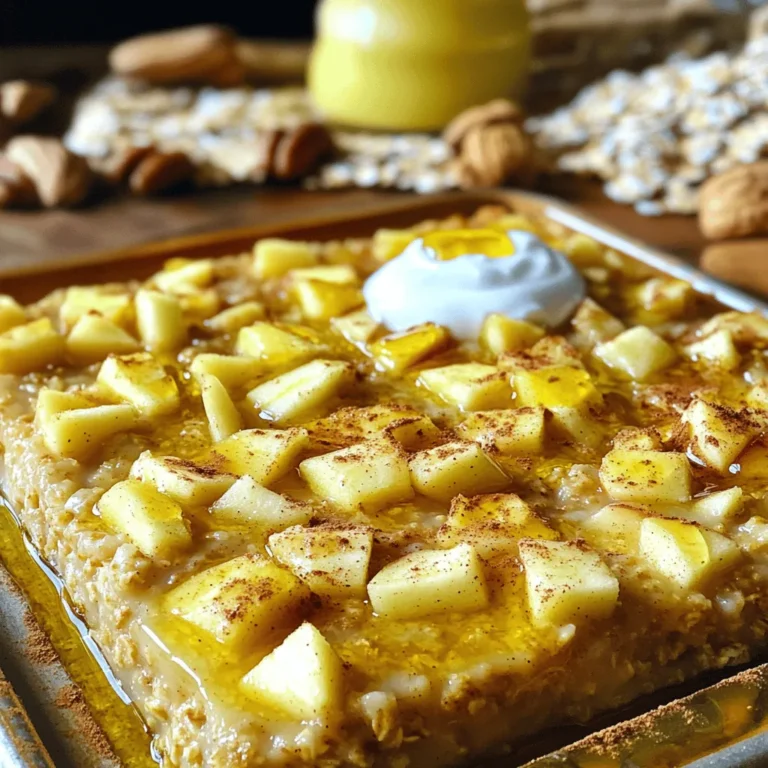
Apple Cinnamon Oatmeal Bake Delicious and Easy Treat

To make the best Key Lime Pie Bars, gather these key ingredients: - 1 cup graham cracker crumbs - 1/4 cup granulated sugar - 1/2 cup unsalted butter, melted - 2 large eggs - 1 can (14 oz) sweetened condensed milk - 1/2 cup freshly squeezed key lime juice (or regular lime juice) - Zest of 2 key limes - 1/4 teaspoon salt Using fresh key limes is important. They have a bright, tangy flavor that makes these bars special. Bottled lime juice lacks the same fresh taste. If you cannot find key limes, regular lime juice works too, but the flavor will change slightly. For extra flair, consider these toppings and garnishes: - Whipped cream (for topping) - Lime slices (for garnish) - Extra zest (for garnish) You can also switch up the ingredients if you like. Try using crushed cookies instead of graham crackers for a different crust. If you want a more creamy filling, add more sweetened condensed milk. These changes can make the recipe fit your taste. 1. Make the graham cracker crust. Start by preheating your oven to 350°F (175°C). In a medium bowl, mix together the graham cracker crumbs, granulated sugar, and melted butter. Stir until the mixture looks like wet sand. Next, press this crumb mixture firmly into the bottom of a greased 8x8 inch baking dish. Make sure it is even. Bake this crust for 8-10 minutes until it turns lightly golden. Once done, take it out and let it cool. 2. Mix the key lime filling. In a separate bowl, crack the two large eggs. Whisk them well. Then, add in the sweetened condensed milk, key lime juice, lime zest, and salt. Mix everything until smooth. You want it to be creamy and well combined. Pour this lime filling over the cooled crust. Use a spatula to spread it evenly. 1. Oven temperature and timing guidelines. Place the baking dish back in the preheated oven. Bake for 15-20 minutes. You’ll know it’s done when the filling is set and does not jiggle in the center. 2. Signs for determining doneness of the bars. After baking, remove the bars from the oven. Let them cool to room temperature. Then, refrigerate for at least 2 hours so they can chill and set completely. Look for a firm texture when cutting into squares. Serve them topped with whipped cream and a sprinkle of lime zest for a fresh touch. - Use an 8x8 inch baking dish. This size gives the right thickness. - Line the dish with parchment paper. This helps lift out the bars easily. - Do not overbake the filling. It should be set but still slightly jiggly in the center. - Cool the crust before adding the filling. This keeps the layers distinct. Avoid these common mistakes for the best results: - Measure ingredients accurately. Too much or too little can change the texture. - Mix the filling just until smooth. Over-mixing can add air and change the bake. - Let the bars chill properly. This makes cutting easier and improves flavor. Serve your Key Lime Pie Bars with flair: - Top each bar with whipped cream for a creamy touch. - Add a sprinkle of lime zest for color and brightness. - Garnish with lime slices or fresh mint for a pop of freshness. Pair these bars with refreshing drinks: - Try them with iced tea or a zesty lemonade. - A light sparkling water enhances the lime flavor. - For dessert lovers, serve with vanilla ice cream or sorbet. Get creative with your presentation: - Arrange bars on a colorful platter for a vibrant look. - Use small dessert cups to hold individual bars for easy serving. - Add edible flowers for a unique touch at gatherings. {{image_2}} You can switch up the flavors in your Key Lime Pie Bars easily. Try using lemon or orange juice for a fresh twist. These fruits add a bright note and keep that tangy taste. You can also layer in different fruits like berries. They look pretty and add fun flavors. Just place them on top after baking. This adds color and makes each bite special. If you need a gluten-free option, swap the graham crackers for gluten-free crumbs. Many brands offer tasty alternatives that work well. For a vegan version, you can replace the eggs with flax eggs or applesauce. Use coconut milk or almond milk in place of dairy. This way, everyone can enjoy these bars, no matter their diet. To keep your Key Lime Pie Bars fresh, store them in the fridge. Place the bars in an airtight container. This helps keep them from drying out. They will stay fresh for up to five days. If you want to keep them longer, freezing is a good option. Wrap the bars tightly in plastic wrap or foil. Then, place them in a freezer-safe bag. They can last up to three months in the freezer. Make sure to label the bags with the date. This way, you will know when to eat them. If you freeze the bars, let them thaw in the fridge overnight before serving. This keeps the texture nice and smooth. You can serve Key Lime Pie Bars chilled or at room temperature. If they are frozen, thaw them first. Avoid heating them in the microwave. This can change their creamy texture. Instead, let them sit out for about 30 minutes before serving. You want them to be just cool, not warm. If you want to warm them slightly, use a low oven setting. Preheat the oven to 200°F (93°C). Place the bars on a baking sheet for 5-10 minutes. This way, they warm up without losing their texture. Always serve them with a dollop of whipped cream and a sprinkle of lime zest for a fresh touch! If you can’t find key limes, use regular limes. Their juice works well too. You may also try bottled key lime juice. However, fresh juice gives the best flavor. To adjust the recipe, use the same amount of lime juice. You might want to add a bit more zest for a stronger flavor. This helps keep the tangy taste of the bars. Yes, you can make these bars ahead of time. I suggest making them a day or two before serving. They taste even better after chilling. To store, keep them in the fridge in an airtight container. You can also cover them with plastic wrap. This keeps them fresh and tasty. You can use this recipe for a pie. Just switch to a standard pie crust. A deep dish works best for this filling. Baking time will change. Bake the pie for about 25-30 minutes, or until the filling is set. Check for a firm center, just like with the bars. In this article, we covered how to make delicious key lime pie bars. You learned about essential and optional ingredients, including the benefits of fresh key limes. I shared step-by-step instructions for preparing the crust and filling, as well as baking tips for the best results. We explored variations and storage tips to keep your bars fresh. Remember, these bars are versatile and fun to serve. With the right ingredients and techniques, you’ll impress family and friends. Enjoy making this tasty treat!

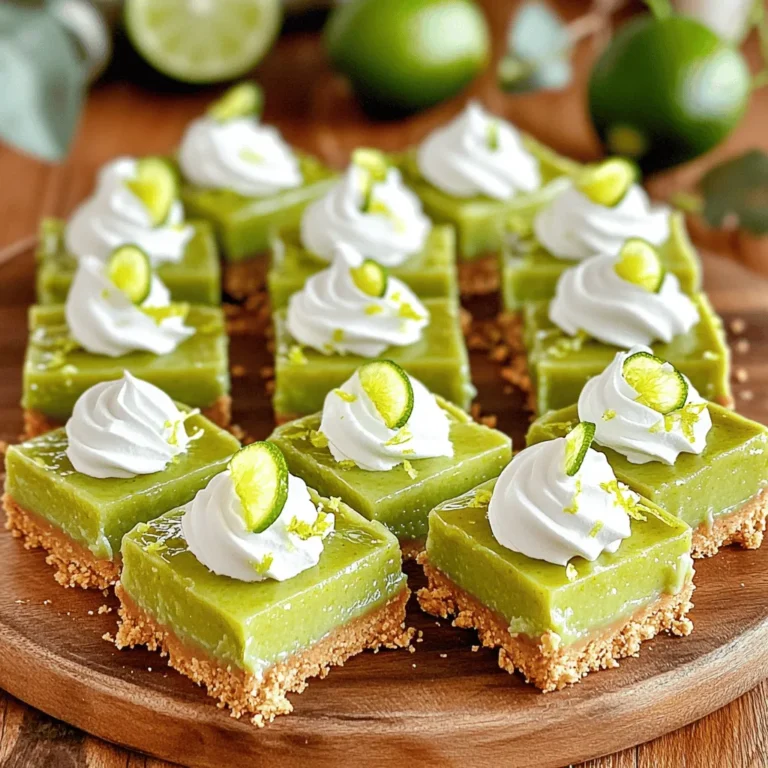
Key Lime Pie Bars Simple and Tangy Delight

- 8 oz dark chocolate, finely chopped - 4 oz white chocolate, finely chopped - 1 cup heavy cream - 1 cup fresh raspberries, pureed - 2 tablespoons raspberry extract - 1 tablespoon unsweetened cocoa powder - 1 tablespoon powdered sugar - Fresh raspberries for garnishing - Cocoa powder for dusting Choose high-quality chocolate for the best truffles. Look for chocolate with 70% cocoa solids for dark chocolate. This will give your truffles a rich taste. For white chocolate, select one with real cocoa butter. Check the label to avoid fillers. Fresh raspberries should be bright and firm. Smell them to ensure they are not overly ripe. When picking heavy cream, go for ones with no additives. This keeps the flavor clean and pure. Each truffle has about 100 calories. It contains 6g of fat, 10g of carbs, and 1g of protein. The sugar content is around 8g. Raspberries add fiber and vitamins. Enjoy these truffles in moderation for a sweet treat. {{ingredient_image_1}} To start, I heat 1 cup of heavy cream and 1 cup of fresh raspberry puree in a saucepan. I stir gently until the mix is warm but not boiling. Once heated, I add 8 oz of finely chopped dark chocolate. After about 2 minutes, I stir until the chocolate melts and the mixture is smooth. I set it aside to cool for 30 minutes at room temperature. This ganache will be rich and creamy. While the dark chocolate ganache cools, I take a separate bowl. I add 4 oz of finely chopped white chocolate and 2 tablespoons of raspberry extract to it. After the ganache cools, I take half of it and fold it gently into the white chocolate mix. This creates a nice marbled effect. The mix is now both raspberry and chocolate. Next, I place the combined mixtures in the fridge for 1 to 2 hours. This helps them firm up. Once set, I use a small scoop to form truffles. I alternate between the dark chocolate ganache and the raspberry-white chocolate mix. This adds fun shapes and designs. After forming, I roll each truffle in my hands to smooth them out. I place them on a plate lined with parchment paper. For the finishing touch, I roll half in unsweetened cocoa powder and dust the others with powdered sugar. To make them look special, I top each truffle with a fresh raspberry. To make a smooth ganache, heat the cream gently. Do not let it boil. Add the dark chocolate after removing it from heat. Let it sit for two minutes. This helps the chocolate melt evenly. Stir until everything blends well. If you notice any lumps, keep stirring. You can also use a whisk for a silkier texture. Store your truffles in an airtight container. This keeps them fresh and moist. Place a piece of parchment paper between layers. This prevents them from sticking together. You can keep them in the fridge for up to two weeks. If you want them to last longer, freeze them. Just thaw them in the fridge before serving. For a stunning display, use a nice platter. Arrange the truffles in groups. Alternate cocoa-dusted and powdered sugar ones. Add fresh raspberries around the truffles. This adds color and charm. You can also use small decorative cups for each truffle. This makes them easy to grab and enjoy! Pro Tips Use Quality Chocolate: The flavor of your truffles greatly depends on the quality of chocolate you use. Opt for high-quality dark and white chocolates for the best results. Chill Thoroughly: Ensure that your ganache is completely chilled before scooping. This prevents the truffles from melting in your hands while shaping. Experiment with Flavors: Feel free to add other flavor extracts or spices to your truffles. A hint of vanilla or a pinch of sea salt can elevate the taste. Make Ahead: These truffles can be made in advance and stored in the refrigerator. They also freeze well, making them perfect for parties or gifting. {{image_2}} You can add fun flavors to your truffles. Try vanilla extract for a sweet touch. Almond extract gives a nutty taste. You might even use mint extract for a cool twist. Just add a teaspoon to the cream and raspberry mix. This small change can create a whole new truffle experience. While cocoa powder and powdered sugar are classic, you can explore other coatings. Chopped nuts like almonds or hazelnuts add crunch. You can use shredded coconut for a tropical vibe. For a fancy look, dip the truffles in melted chocolate again. This adds a smooth outer shell. Play with colors to match your theme! Raspberries shine, but other fruits work well too. Strawberries give a sweet twist. Blueberries can add a burst of flavor. Try cherries for a tart touch. You can even mix fruits, like raspberries and strawberries, for a fruity surprise. Use fruit purees in your ganache for added fun. When making truffles, the chocolate matters a lot. I recommend using high-quality chocolate for the best taste. Look for brands like: - Ghirardelli: Their dark chocolate is rich and smooth. - Callebaut: This brand is perfect for fine baking. - Lindt: Their white chocolate melts well and tastes great. These brands offer a mix of flavor and texture you need for your truffles. Fresh raspberries are key for flavor. You can often find them at local farmer's markets. These berries are ripe and sweet. You can also check grocery stores like: - Whole Foods: They have organic options. - Trader Joe’s: Their produce is fresh and affordable. - Local farms: If you have a farm nearby, visit them for the best berries. Buying local ensures you get the freshest raspberries for your truffles. For hard-to-find items, online shopping is your best bet. Websites like Amazon have everything you need. You can find: - Specialty chocolate brands. - Raspberry extract to add more flavor. - Cocoa powder and powdered sugar for coating. Shopping online gives you access to a wide range of products. Plus, you can compare prices easily, ensuring you get the best deal. Yes, you can make these truffles ahead of time. They keep well in the fridge. Make them up to a week in advance. Just store them in an airtight container. This way, you can enjoy them fresh when you want. To store leftover truffles, place them in a sealed container. Keep them in the fridge for up to a week. If you want to keep them longer, freeze them. Just remember to thaw them in the fridge before serving. This keeps them from getting too soft. The best way to serve chocolate truffles is on a nice plate. You can arrange them by coating type, like cocoa or powdered sugar. Adding fresh raspberries around them makes a lovely touch. This adds color and a pop of flavor. You learned how to make delicious chocolate truffles today. We covered the key ingredients and how to select them wisely. I shared step-by-step instructions for making the perfect ganache and rolling the truffles. You also discovered tips for smooth ganache and best storage practices. Don't forget the fun variations to try and where to find the best ingredients. Remember, making truffles is easy and rewarding. Enjoy your chocolate-making journey!

Dark & White Chocolate Raspberry Truffles Delight

To make these tasty cookies, you will need: - 1 cup unsalted butter, softened - 1 cup brown sugar, packed - 1/2 cup granulated sugar - 2 large eggs - 1 teaspoon vanilla extract - 2 1/4 cups all-purpose flour - 1 teaspoon baking soda - 1/2 teaspoon salt - 1 cup semi-sweet chocolate chips - 1 cup milk chocolate chips - 1/2 cup white chocolate chips - 1/2 cup chopped walnuts (optional) You can add some fun flavors to your cookies. Try using: - 1/2 teaspoon espresso powder for a coffee kick - 1 teaspoon orange zest for a citrus twist - A sprinkle of sea salt on top for added depth These ingredients can make your cookies even more special. Measuring your ingredients correctly is key. Here are some tips: - Use a kitchen scale for precise measurements. - For flour, spoon it into the cup and level it off with a knife. - Always pack brown sugar firmly into the measuring cup. - For sticky ingredients like honey or syrup, spray the cup with cooking spray first. These small steps help ensure your cookies turn out just right. To make the dough, start by preheating your oven to 350°F (175°C). This step is key. It helps your cookies bake evenly. Now, grab a large bowl. Cream together 1 cup of softened unsalted butter, 1 cup of packed brown sugar, and 1/2 cup of granulated sugar. Mix until it looks light and fluffy. This usually takes about 2-3 minutes. Next, add 2 large eggs, one at a time. Mix well after each egg. Then, stir in 1 teaspoon of vanilla extract. In another bowl, whisk together 2 1/4 cups of all-purpose flour, 1 teaspoon of baking soda, and 1/2 teaspoon of salt. This is your dry mix. Slowly add the dry mix to the wet mix. Stir gently until just combined. Do not over-mix; this keeps your cookies soft. Now, it’s time for the fun part! Fold in 1 cup of semi-sweet chocolate chips, 1 cup of milk chocolate chips, and 1/2 cup of white chocolate chips. If you like, add 1/2 cup of chopped walnuts for extra crunch. Ensure that all the chocolate and nuts are evenly spread in the dough. Drop rounded tablespoons of dough onto a lined baking sheet. Space them about 2 inches apart. This gives them room to spread as they bake. Bake in your preheated oven for 10-12 minutes. Look for golden edges but soft centers. They will firm up as they cool, so don’t worry if they seem a bit soft. Keep an eye on them while they bake. Ovens can vary, and you want the best result. When they are done, remove the baking sheet from the oven. Let the cookies cool on the sheet for 5 minutes. This helps them set before you move them. After 5 minutes, carefully transfer the cookies to a wire rack. This step is crucial to keep them from getting soggy. Let them cool completely on the rack. Once cool, you can arrange them on a platter. For a special touch, drizzle some melted chocolate over the top. Enjoy your delicious triple chocolate chip cookies with a glass of cold milk! To keep your cookies fresh, store them in an airtight container. This will seal in moisture and keep them soft. You can also add a slice of bread to the container. The bread will help keep the cookies nice and chewy. If you want to save them for later, place the cookies in the freezer. They can last up to three months in a freezer bag. Just remember to let them thaw at room temperature before enjoying! Baking can be tricky, and some mistakes are easy to make. One common error is over-mixing the dough. This can make your cookies tough. Mix until just combined for the best texture. Another mistake is not measuring your ingredients correctly. Using too much flour can lead to dry cookies. Always use a scale or proper measuring cups. Lastly, don’t skip the cooling time. Letting cookies cool on a wire rack helps them firm up without becoming hard. The right dough consistency is key to great cookies. Your dough should be soft but not sticky. When you mix the wet and dry ingredients, stop once everything is combined. If the dough feels too wet, add a little more flour. If it’s too dry, a splash of milk can help. Once you fold in the chocolate chips, the dough will feel rich and thick. This means it’s ready to scoop and bake! {{image_2}} You can make these cookies gluten-free. Use a gluten-free flour blend instead of all-purpose flour. Look for blends that have xanthan gum. This keeps your cookies soft and chewy. You can also try almond flour or coconut flour. Adjust the amount of flour to get the right texture. To make vegan triple chocolate chip cookies, swap eggs for flaxseed meal. Mix one tablespoon of flaxseed with three tablespoons of water. Let it sit for five minutes before adding. Use coconut oil or vegan butter instead of regular butter. Choose dairy-free chocolate chips for a full vegan treat. Add fun flavors to your cookies! Try adding a teaspoon of espresso powder for a coffee kick. You can mix in a half-cup of peanut butter chips for a nutty taste. Dried fruit like cherries or cranberries can add a sweet twist. Chopped nuts, like pecans or hazelnuts, also give a nice crunch. Freezing cookies is easy and keeps them fresh. First, let your cookies cool completely. This step prevents ice crystals from forming. After they cool, you can freeze them in batches. Place them on a baking sheet in a single layer. Freeze for about an hour. Once solid, transfer them to a freezer-safe bag. Remove as much air as possible. Label the bag with the date. This method helps keep your cookies tasty. To store cookies, choose an airtight container. I like using glass or plastic containers with tight lids. Line the bottom with parchment paper to absorb moisture. If you stack cookies, separate layers with wax paper. This keeps them from sticking together. For longer freshness, you can also add a slice of bread. This trick helps keep cookies soft. You can store baked cookies at room temp for about a week. Keep them in an airtight container. If you freeze them, they last up to three months. Just remember to thaw them in the fridge overnight for the best taste. Enjoy your cookies fresh, chewy, and full of flavor! To make your cookies chewy, use more brown sugar than white sugar. Brown sugar has moisture, which helps keep cookies soft. Chill the cookie dough for at least an hour before baking. This step slows the spread and helps create a chewy texture. Bake them just until the edges turn golden. The centers should look underbaked. They will firm up as they cool. Chocolate chips are small, round pieces made for baking. They hold their shape when baked. Chocolate chunks are larger and have a rustic look. They melt and create gooey pockets in your cookies. Both add great flavor, but they give different textures. You can mix and match them for fun! Yes, you can swap sugars based on what you have. Brown sugar gives a rich flavor and chewy texture. White sugar makes cookies crispier. You can use coconut sugar or maple sugar as alternatives. Just keep the same total amount of sugar. Adjust the taste slightly, but the cookies will still be yummy! You now have all the tools to make delicious Triple Chocolate Chip Cookies. We explored the key ingredients, helpful measuring tips, and step-by-step instructions to make perfect cookies every time. We also shared ways to store and enhance these treats, along with variations for different diets. With these tips, you can avoid common mistakes and enjoy cookies at their best. Remember, the right ingredients and techniques lead to tasty results. Happy baking!

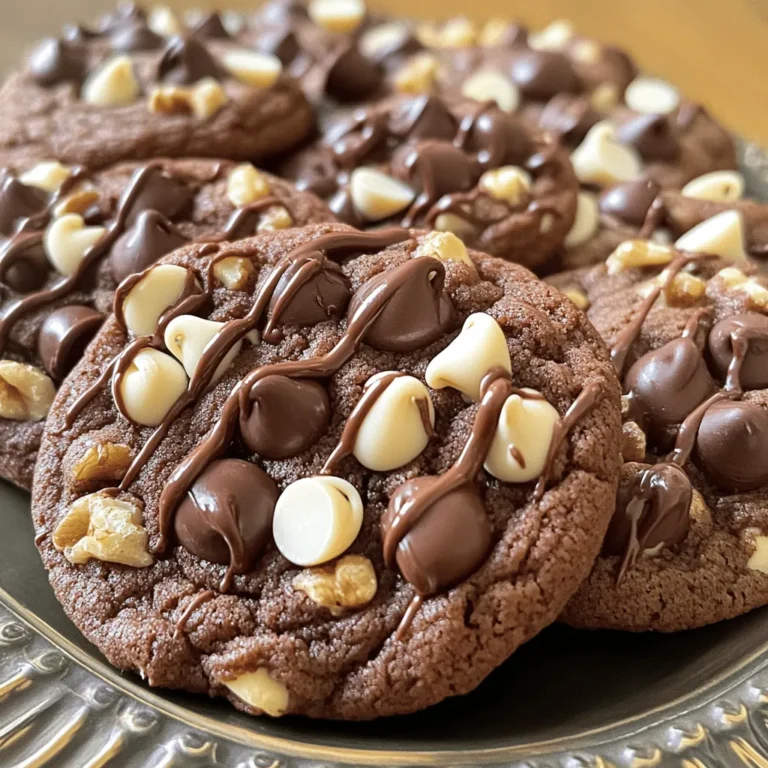
Triple Chocolate Chip Cookies Easy and Delicious Treat

- 2 medium zucchinis - 1 cup all-purpose flour - 2 large eggs - 1 cup breadcrumbs (preferably panko for extra crunch) - 1 cup grated Parmesan cheese - 1 teaspoon garlic powder - 1 teaspoon onion powder - 1 teaspoon Italian seasoning - Salt and pepper to taste - Cooking spray or olive oil for baking - For a gluten-free option, use almond flour or gluten-free breadcrumbs. - To make it dairy-free, try nutritional yeast or dairy-free cheese. - For low-carb, use crushed pork rinds instead of breadcrumbs. When I make crispy Parmesan zucchini fries, I love to play with the ingredients. Zucchini is so versatile! You can adjust the recipe to meet dietary needs. If you want a gluten-free treat, almond flour works great. It gives a nice texture. For those avoiding dairy, nutritional yeast adds cheesy flavor without the milk. Low-carb eaters can use crushed pork rinds. They add crunch and keep the fries light. I often switch things up based on what I have at home. This keeps the recipe fun and fresh. Plus, it makes cooking more accessible for everyone. 1. Preheat your oven to 425°F (220°C). This ensures the fries cook evenly. 2. Line a baking sheet with parchment paper. This helps with easy clean-up. 3. Cut the zucchinis into fry-shaped sticks. Aim for about 1/4 inch thick. 4. Place the zucchini sticks on a towel. Sprinkle salt over them. 5. Let them sit for about 15 minutes. This draws out moisture. 6. Pat the zucchini dry with paper towels. This helps them become crispy. 1. Set up your breading station with three shallow dishes. 2. In the first dish, add the flour. 3. In the second dish, beat the eggs until mixed well. 4. In the third dish, combine breadcrumbs, Parmesan cheese, garlic powder, onion powder, Italian seasoning, salt, and pepper. 5. Take a zucchini stick and dredge it in the flour. Make sure it is coated evenly. 6. Tap off any extra flour to avoid clumping. 7. Next, dip the floured zucchini into the beaten eggs. Let the excess egg drip off. 8. Finally, coat the zucchini sticks in the breadcrumb mix. Press lightly to make it stick. 1. Place the breaded zucchini fries on the prepared baking sheet. Arrange them in a single layer. 2. If you like, lightly spray the tops with cooking spray or drizzle olive oil. This adds extra crunch. 3. Bake in your preheated oven for 20-25 minutes. Flip them halfway through for even cooking. 4. Look for a golden brown color and crispy texture. 5. Once baked, remove them from the oven. Let them cool slightly before serving. For crispy zucchini fries, choosing the right breadcrumbs is key. I recommend using panko breadcrumbs. They are lighter and create more crunch than regular breadcrumbs. If you can’t find panko, regular breadcrumbs work too, but the crunch will be less. To ensure an even coating, start with a dry surface. Dust the zucchini sticks with flour first. This helps the egg stick better. After dipping in the egg, press the zucchini into the breadcrumb mix. Make sure to cover every part. This will help them crisp up nicely in the oven. Dipping sauces can really enhance your zucchini fries. Marinara sauce is a classic choice. It pairs well with the cheesy flavor. Ranch dressing is another favorite. You can even try a spicy aioli for a kick. These fries also go well as a side dish. Serve them alongside grilled chicken or burgers. They add a nice crunch to any meal. One common mistake is overcooking the zucchini. Keep an eye on them while baking. If they turn too dark, they may taste bitter. Another mistake is not drying the zucchini enough. Salting them before cooking helps draw out moisture. After 15 minutes, be sure to pat them dry. This step is vital for achieving that perfect crispiness. {{image_2}} You can make your crispy Parmesan zucchini fries even tastier. Try adding spices to the breadcrumb mix. For a kick, add a pinch of cayenne pepper or paprika. You can also mix in some dried herbs like thyme or oregano. These spices boost the flavor and add a nice touch. Incorporate different cheeses for a fun twist. Cheddar or mozzarella can replace some Parmesan. This change adds a new taste and melts beautifully. You can even try a blend of cheeses for a gourmet feel. Air frying gives you a quick and healthy option. Set your air fryer to 400°F (200°C). Place the breaded zucchini fries in a single layer. Cook for about 10-15 minutes, shaking halfway for even crispiness. You can also pan-fry the zucchini fries if you prefer. Heat some oil in a skillet over medium heat. Fry the zucchini sticks in batches, turning until golden brown. This method gives you a crunchy outside and soft inside. In summer, you can use summer squash instead of zucchini. This variety has a slightly sweeter taste and cooks well. Just slice it the same way and follow the recipe. You can also incorporate fresh herbs for extra flavor. Try adding chopped basil or parsley to the breadcrumb mix. The herbs bring freshness and a colorful touch to your fries. To keep your crispy Parmesan zucchini fries fresh, store them properly. Place any leftovers in an airtight container. Keep them in the fridge for up to three days. If you want to store them longer, freeze them. First, let them cool completely. Then, place them in a freezer-safe bag or container. They can last in the freezer for about two months. When it’s time to enjoy your leftovers, here are two great ways to reheat them: - Microwave: Place a few fries on a microwave-safe plate. Cover them with a paper towel to keep moisture in. Heat for about 30 seconds to one minute. Check if they are warm enough. If not, heat them for another 15 seconds. - Oven: Preheat your oven to 375°F (190°C). Spread the fries on a baking sheet in a single layer. Bake for about 10-15 minutes. This method keeps them crispy and tasty. Refrigerated, crispy zucchini fries last for three days. To keep them crunchy, avoid stacking them. Use parchment paper between layers if you need to. When freezing, remember they last for two months. Be sure to thaw them in the fridge before reheating for the best taste. To make crispy zucchini fries, follow these steps: 1. Preheat your oven to 425°F (220°C). 2. Cut two medium zucchinis into fry-shaped sticks, about 1/4 inch thick. 3. Sprinkle the cut zucchinis with salt. Let them sit for 15 minutes to remove moisture. 4. Pat the zucchini dry with paper towels. 5. Set up a breading station with flour in one dish, beaten eggs in another, and a mix of breadcrumbs, Parmesan, garlic powder, onion powder, Italian seasoning, salt, and pepper in a third. 6. Dredge each zucchini stick in flour, dip in eggs, and coat with the breadcrumb mix. 7. Place them on a baking sheet and bake for 20-25 minutes, flipping halfway through. This method gives you crispy fries that are golden brown and tasty. Yes, you can make zucchini fries in an air fryer! Here’s how: 1. Prepare the zucchini as above, following the same cutting and drying steps. 2. Preheat your air fryer to 400°F (200°C). 3. Arrange the coated zucchini fries in a single layer in the basket. 4. Spray lightly with cooking spray for extra crispiness. 5. Cook for 12-15 minutes, shaking the basket halfway through. Air-fried zucchini fries are just as crispy and delicious! Crispy Parmesan zucchini fries pair well with many dips. Here are some great options: - Marinara sauce - Ranch dressing - Garlic aioli - Spicy ketchup You can also serve them alongside burgers, grilled chicken, or a fresh salad for a complete meal. - Can I use other cheeses? Yes, try cheddar or mozzarella for a different flavor. - What if I don’t have panko breadcrumbs? Regular breadcrumbs work too, but panko gives extra crunch. - For gluten-free fries, use gluten-free flour and breadcrumbs. - If you need dairy-free options, substitute the Parmesan with nutritional yeast or a dairy-free cheese. - For a low-carb version, consider using almond flour and crushed pork rinds for the coating. This blog post covers how to make crispy Parmesan zucchini fries. We explored ingredient choices, preparation steps, and cooking methods. You learned about substitutions for dietary needs, tips for perfect crispiness, and common mistakes to avoid. Remember to store your leftovers properly for the best taste. Now you can enjoy a tasty snack or side dish anytime. Using this guide makes cooking simple and fun! Make these fries your own by trying variations and serving them with your favorite dips. Enjoy your cooking adventure!

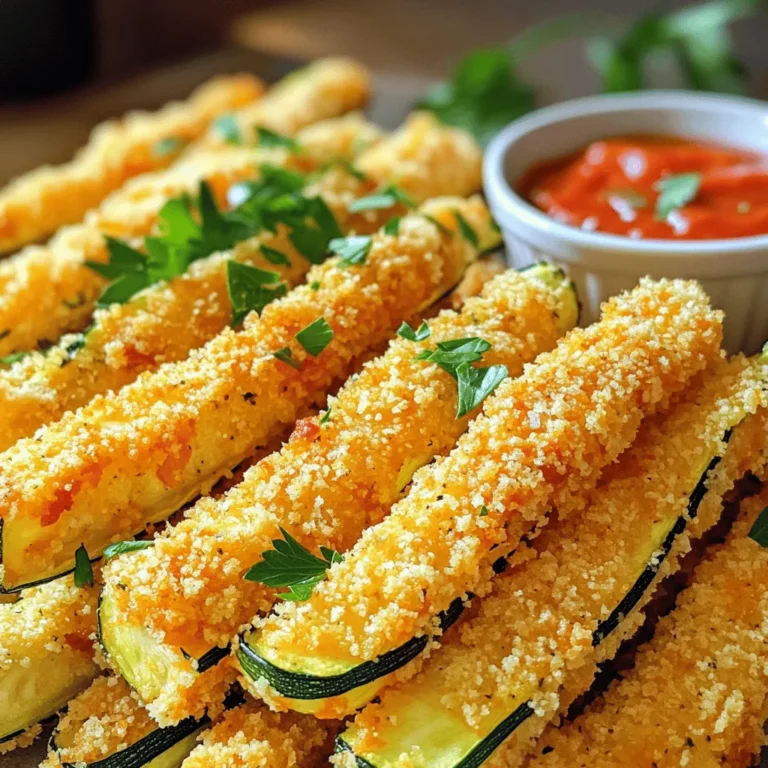
Crispy Parmesan Zucchini Fries Perfectly Baked Snack

- 1 sheet of puff pastry (thawed) - 8 oz cream cheese, softened - 1/3 cup powdered sugar - 1/2 teaspoon vanilla extract - 1 cup fresh blueberries (or frozen) - 1 tablespoon lemon juice - 1 egg (for egg wash) - 1 tablespoon milk (for egg wash) - Additional powdered sugar for dusting (optional) - Use high-quality cream cheese for rich taste. - Fresh blueberries give a burst of flavor. Frozen blueberries work too, but may be softer. - Baking sheet to hold your danishes. - Parchment paper to prevent sticking. - Mixing bowls for combining ingredients. - Pastry brush for applying egg wash. - Thaw the puff pastry in your fridge overnight. - On a floured surface, roll out the pastry into a rectangle. Aim for about 1/8 inch thick. - In a mixing bowl, combine 8 oz of softened cream cheese, 1/3 cup of powdered sugar, and 1/2 teaspoon of vanilla extract. - Blend the mixture until smooth and creamy. - For the blueberry filling, mix 1 cup of fresh blueberries with 1 tablespoon of lemon juice in a small bowl. - Place a square of the rolled pastry on a baking sheet. Spoon a generous tablespoon of cream cheese mixture onto the center of each square. - Top the cream cheese with a few spoonfuls of the blueberry mixture. - To shape the danish, fold the corners of the pastry towards the center. Pinch them slightly to seal, leaving the center exposed. - Preheat your oven to 400°F (200°C) and prepare a baking sheet with parchment paper. - In a small bowl, whisk together 1 egg and 1 tablespoon of milk for the egg wash. Brush the tops of the danishes with it for a golden finish. - Bake for 15-20 minutes or until the pastry puffs and turns golden brown. Check them often to avoid burning. - Rolling out puff pastry without sticking: Start with a clean, lightly floured surface. Keep your rolling pin floured too. This helps the pastry slide easily. Roll gently from the center outward for even thickness. - Achieving the perfect puffiness: Ensure your oven is fully preheated. Bake your danishes at 400°F for a good rise. The heat makes the layers of pastry puff up nicely. - Overfilling the pastry: Avoid adding too much filling. A tablespoon of cream cheese and a few blueberries work best. Too much filling can cause spills and prevent puffing. - Not brushing enough egg wash: Use a good coat of egg wash on top. This gives your danish a golden color. Don’t skip this step for that beautiful finish. - Best ways to serve warm: Serve your danishes right out of the oven for a warm treat. They taste best when fresh and warm. - Pairing options, like coffee or tea: Enjoy your danish with a cup of coffee or tea. The flavors blend perfectly, making each bite more delightful. {{image_2}} You can easily change the taste of your Blueberry Cream Cheese Danish. Try adding spices like cinnamon or nutmeg to the cream cheese mix. These spices give a warm flavor that pairs well with blueberries. You can also swap out the blueberries for other fruits. Strawberries or raspberries work great too. Each fruit brings its unique taste and color, making your danish fun and fresh. If you need gluten-free options, you can find gluten-free puff pastry at many stores. This type of pastry works just as well as regular puff pastry. For those who avoid dairy, dairy-free cream cheese is a great choice. Brands like Tofutti or Kite Hill make tasty options that fit right into this recipe. Make your Blueberry Cream Cheese Danish even more special. You can drizzle a simple glaze over the top for extra sweetness. To make a glaze, mix powdered sugar with a bit of milk until smooth. Serve your danish with a side of whipped cream for a delightful touch. It adds creaminess and a lovely presentation. To keep your Blueberry Cream Cheese Danish fresh, place it in the fridge. Use an airtight container to lock in moisture. If you don't have one, wrap it tightly in plastic wrap. This prevents the pastry from drying out. You can freeze the danish both before and after baking. To freeze before baking, assemble the danish but do not egg wash or bake. Place them on a baking sheet and freeze until firm, then transfer to a freezer bag. For after baking, let them cool completely. Wrap each danish in plastic wrap and place in a freezer bag. When ready to enjoy, reheat baked danish in the oven at 350°F (175°C) for about 10-15 minutes. This helps restore its crispness. In the fridge, the danish lasts about 3-4 days. Check for signs of spoilage before enjoying. If you see mold, or if it smells off, it’s best to toss it. Always trust your senses when it comes to food safety. To make Blueberry Cream Cheese Danish from scratch, follow these basic steps: - Preheat your oven to 400°F (200°C). - Roll out one sheet of thawed puff pastry into a thin rectangle. - Cut the pastry into six 4x4 inch squares. - Mix softened cream cheese, powdered sugar, and vanilla until smooth. - Prepare the blueberry filling by mixing fresh blueberries with lemon juice. - Place a square of pastry on a baking sheet and add cream cheese. - Top with blueberries and fold the corners of the pastry. - Brush with an egg wash before baking for a golden finish. - Bake for 15-20 minutes until golden brown. Yes, you can use frozen blueberries! They work well in this recipe. Just remember: - Thaw the blueberries first to avoid excess moisture. - Pat them dry with a paper towel if needed. - They may burst during baking, so expect some juicy goodness. If you need an alternative to cream cheese, consider these options: - Ricotta cheese offers a similar texture and mild flavor. - Greek yogurt can work for a lighter option. - Vegan cream cheese is great for a dairy-free choice. Typically, it takes about 15-20 minutes to bake Blueberry Cream Cheese Danish. Watch for: - A puffed and golden brown pastry as a sign of doneness. - Your oven may vary, so keep an eye on them. Yes, you can prepare the danish in advance! Here are some best practices: - Assemble the danish and keep them in the fridge for up to 24 hours. - You can also freeze unbaked danish. Just thaw before baking. - Bake them fresh for the best taste and texture. In this post, we explored making a Blueberry Cream Cheese Danish from scratch. We covered the key ingredients, tools, and step-by-step instructions. I also shared helpful tips and common mistakes to avoid. With tasty variations and storage tips, you can enjoy this treat any time. Remember, using fresh ingredients will improve your flavor. Now, go ahead and give this recipe a try! Enjoy delicious pastries at home that impress everyone.

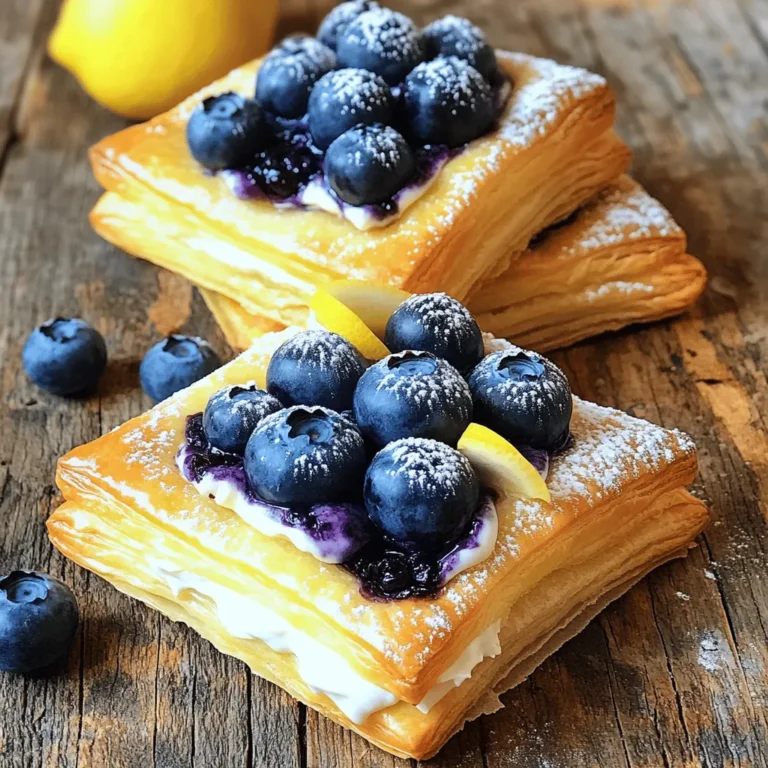
Blueberry Cream Cheese Danish Delightful and Easy Recipe

This Fiesta Rice and Beans Skillet is a colorful, tasty, and easy meal. It takes about 45 minutes to prepare and cook. You can serve four hungry people with this dish. The best part? You can cook it all in one skillet. This saves time on clean-up and gives you more time to enjoy your food. - 1 cup long-grain brown rice - 2 cups vegetable broth - 1 can (15 oz) black beans, rinsed and drained - 1 can (15 oz) corn, drained - 1 red bell pepper, diced - 1 small red onion, chopped - 2 cloves garlic, minced - 1 teaspoon cumin - 1 teaspoon chili powder - ½ teaspoon smoked paprika - Salt and pepper to taste - 2 tablespoons olive oil - ¼ cup fresh cilantro, chopped (for garnish) - Juice of 1 lime Each ingredient adds flavor and nutrition. Long-grain brown rice is hearty and fills you up. Vegetable broth gives the rice a rich taste. Black beans are full of protein and fiber. Corn adds sweetness and color. Fresh veggies like bell pepper, onion, and garlic brighten the dish. Spices like cumin, chili powder, and smoked paprika bring warmth. Olive oil adds richness, while lime juice and cilantro finish it off with freshness. Enjoy this blend of flavors and colors on your table! Sautéing the onion and garlic First, heat olive oil in a large skillet over medium heat. Add the chopped red onion. Sauté for about 3 to 4 minutes until the onion softens. Then, add the minced garlic. Cook for another 2 to 3 minutes. The garlic should become fragrant. Adding bell pepper Next, add the diced red bell pepper to the skillet. Stir it in with the onion and garlic. Cook for a few more minutes. You want the peppers to soften a bit, adding color and flavor. Toasting the rice and spices Now, it’s time to add the brown rice. Stir in the cumin, chili powder, smoked paprika, salt, and pepper. Cook this mixture for 1 to 2 minutes. This step helps toast the rice and spices, enhancing their flavors. Bringing the mixture to a boil Pour the vegetable broth into the skillet. Stir well to combine everything. Turn up the heat to bring the mixture to a boil. Simmering the rice Once it boils, reduce the heat to low. Cover the skillet and let it simmer. This will take about 30 minutes. Check the rice to see if it’s tender and the liquid is absorbed. Folding in beans and corn After the rice is cooked, gently fold in the black beans and corn. Stir everything together and cook for 5 more minutes. This heats everything through. Adding lime juice and cilantro Finally, remove the skillet from the heat. Stir in the lime juice and chopped cilantro. Taste and adjust seasoning if needed. Your Fiesta Rice and Beans Skillet is ready to enjoy! To make perfect rice, choose long-grain brown rice. It gives a fluffy texture. Rinse the rice before cooking. This helps remove excess starch. Use two cups of vegetable broth for flavor. If you prefer softer rice, add a bit more broth. To adjust spice levels, start with the suggested amounts. Taste as you go. Add more cumin or chili powder for heat. If it's too spicy, add a bit of sugar or more corn to balance the flavors. For a fun presentation, serve the skillet right in the pan. This looks rustic and inviting. You can also use colorful bowls. Top each serving with extra cilantro and lime wedges. Pair this meal with sliced avocado or fresh salsa. The creamy avocado adds richness. Salsa gives a nice kick and freshness. You can also serve tortilla chips on the side for crunch. Enjoy your vibrant meal! {{image_2}} You can easily change up this dish by swapping ingredients. For beans, try pinto or kidney beans. They add different flavors and textures. You can also use chickpeas for a unique twist. If you're looking to switch the grain, consider quinoa or white rice. Quinoa cooks faster and adds protein. White rice has a lighter texture, making it a great option as well. To make this dish vegetarian or vegan, use vegetable broth instead of chicken broth. It keeps all the flavors while being plant-based. For added protein, you can include tofu or tempeh. Both are great sources of protein and will soak up the dish's flavors. Just cube them and cook them in the skillet before adding the rice. To store leftovers, let the skillet cool down first. Then, place the rice and beans in an airtight container. This keeps it fresh and tasty. You can keep it in the fridge for up to four days. For best results when reheating, use a skillet or microwave. If using a skillet, add a splash of water or broth to keep it moist. Heat over medium-low until warmed through. In the microwave, cover the dish with a lid or a microwave-safe wrap. Heat in short bursts, stirring in between, until hot. For longer storage, you can freeze the Fiesta Rice and Beans Skillet. First, ensure the dish is completely cool. Then, transfer it to a freezer-safe container or bag. Remove as much air as possible to avoid freezer burn. You can freeze it for up to three months. When you’re ready to eat, thaw it in the fridge overnight. To reheat, you can use a skillet or the microwave. If using the skillet, add a little broth or water to help it heat evenly. Cook on low heat, stirring often. If using the microwave, heat in intervals, stirring as needed. Enjoy your tasty meal! How long does it take to cook brown rice? It usually takes about 30-40 minutes to cook brown rice. You want it to be soft but not mushy. In our Fiesta Rice and Beans Skillet, we cook it for about 30 minutes in vegetable broth. This method adds flavor and helps keep the rice fluffy. Can I make this dish ahead of time? Yes, you can make this dish ahead of time. Cook the skillet and let it cool. Store it in the fridge for up to three days. When you're ready to eat, just reheat it gently on the stove. You might want to add a splash of broth to keep it moist. What can I serve with Fiesta Rice and Beans Skillet? This dish is great on its own, but you can serve it with many sides. Try adding sliced avocado for creaminess. A side of fresh salsa adds a zesty kick. You can also serve it with corn tortillas for a fun twist. Enjoy mixing and matching! This blog post guides you through making a Fiesta Rice and Beans Skillet. We covered essential ingredients, step-by-step cooking instructions, and useful tips to enhance your dish. Remember, you can adjust spices and ingredients to suit your taste. Whether you want a quick meal or to impress guests, this recipe fits the bill. Enjoy your culinary adventure, and don’t forget to get creative with your variations and pairings! Cooking is fun, so have fun with it!

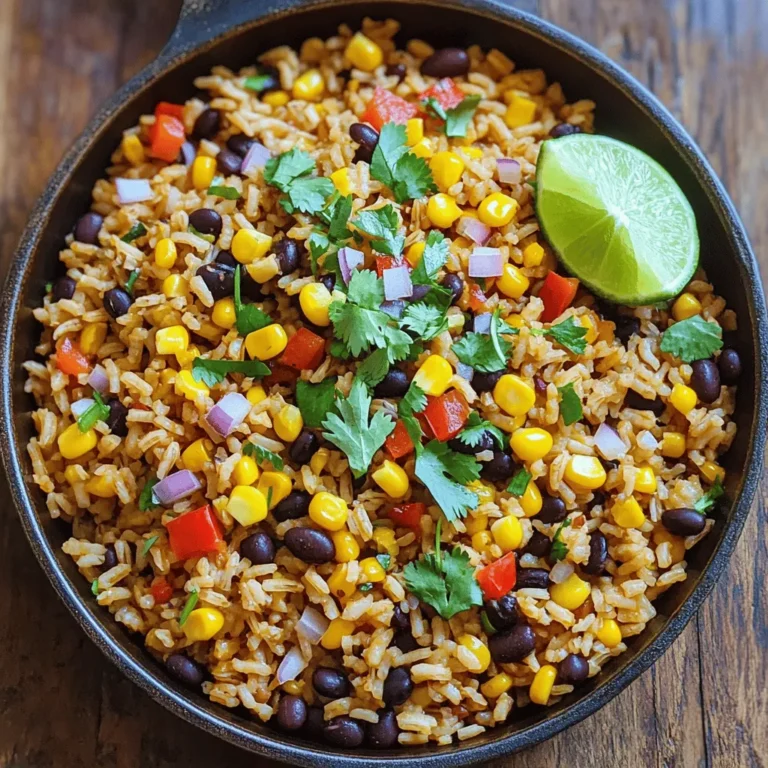
Fiesta Rice and Beans Skillet Tasty Weeknight Meal

- 8 oz fettuccine or penne pasta - 1 tablespoon olive oil - 1 zucchini, sliced - 1 bell pepper (red or yellow), sliced - 1 cup cherry tomatoes, halved - 1 cup broccoli florets - 1 carrot, julienned - 2 cloves garlic, minced - 1 teaspoon dried Italian herbs (or a mix of basil, oregano, and thyme) - 1/2 teaspoon red pepper flakes (optional for heat) - Salt and pepper to taste - 1/4 cup fresh basil, chopped - 1/4 cup grated Parmesan cheese (or nutritional yeast for a vegan option) Pasta primavera is all about fresh veggies and bright flavors. You can pick your favorite pasta. I often use fettuccine or penne for this dish. Both hold the sauce well and feel great when you bite into them. Next, we need olive oil. It adds richness and helps cook the veggies nicely. Fresh vegetables are the stars here. I love using zucchini, bell peppers, cherry tomatoes, broccoli, and carrots. They bring color and crunch! Garlic gives a lovely aroma and taste. Italian herbs add a classic flavor that ties everything together. If you want some heat, a pinch of red pepper flakes does the trick. Don't forget salt and pepper for seasoning! Fresh basil at the end brightens the dish. Finally, Parmesan cheese or nutritional yeast adds a savory touch. You can swap cheese for nutritional yeast to keep it vegan. Gather these ingredients to create your own pasta primavera masterpiece! {{ingredient_image_1}} 1. Start by boiling a pot of water. Make sure to add a pinch of salt. 2. Add 8 oz of fettuccine or penne pasta to the water. Cook it according to the package instructions. 3. Before draining, reserve 1/2 cup of the pasta water. This water helps create a nice sauce later. 4. Drain the pasta and set it aside while you prepare the veggies. 1. In a large skillet, heat 1 tablespoon of olive oil over medium heat. 2. Add 2 cloves of minced garlic to the oil. Sauté it for about 30 seconds until it smells great. 3. Next, add 1 cup of broccoli florets, 1 sliced zucchini, and 1 julienned carrot. Sauté these for 3-4 minutes. They should start to soften. 4. Now, stir in 1 sliced bell pepper and 1 cup of halved cherry tomatoes. Add 1 teaspoon of dried Italian herbs and 1/2 teaspoon of red pepper flakes if you want some heat. 5. Cook everything for another 5-6 minutes. Stir occasionally until all the veggies are tender. 1. Add the drained pasta to the skillet with the veggies. 2. Pour in some of the reserved pasta water. This helps to create a light sauce. 3. Toss everything together well until it’s mixed nicely. 4. Season with salt and pepper to taste. 5. Finally, stir in 1/4 cup of fresh chopped basil and 1/4 cup of grated Parmesan cheese. 6. Serve right away, garnished with extra basil and cheese if you like. Enjoy your colorful garden pasta primavera! To make Pasta Primavera shine, use fresh herbs. Fresh basil adds a bright note. You can also mix dried Italian herbs like oregano and thyme. For heat, sprinkle in red pepper flakes. This gives your dish a nice kick. Fresh ingredients matter. Use vibrant, seasonal veggies. They taste better and look great. Try to pick firm zucchini and ripe tomatoes. This makes your dish pop with color and flavor. Sautéing vegetables takes skill. Start with garlic in hot olive oil. It should smell nice but not burn. Add harder veggies first, like broccoli and carrots. They need more time to cook. Timing is key. Add softer veggies next, like bell peppers and tomatoes. Cook them until tender, about 5-6 minutes. This keeps all veggies at their best texture. Presentation makes a dish special. Serve your Pasta Primavera in a big bowl or on individual plates. Top with extra Parmesan and fresh basil for flair. A drizzle of olive oil adds shine. Make it fun! You can use colorful bowls to match the veggies. This will make your meal look even more inviting. Pro Tips Use Seasonal Vegetables: Choosing seasonal vegetables not only enhances the flavor but also adds a variety of colors to your pasta primavera. Don't Overcook the Pasta: Ensure your pasta is cooked al dente, as it will continue to cook slightly when tossed with the vegetables. Experiment with Herbs: Feel free to mix different fresh herbs like parsley, cilantro, or chives for a unique flavor twist. Add Protein: For a heartier dish, consider adding grilled chicken, shrimp, or chickpeas to the mix for extra protein. {{image_2}} Want a vegan twist on this dish? You can swap the cheese for nutritional yeast. This gives a cheesy flavor without using dairy. Nutritional yeast is rich in vitamins and adds depth to your meal. You can also try other plant-based cheeses. They melt well and taste great. If you need a gluten-free meal, choose gluten-free pasta. Many brands offer great options. You can find pasta made from rice, quinoa, or chickpeas. Just be sure to follow the cooking time on the package. This ensures your pasta has the right texture. Using fresh, seasonal vegetables makes your Pasta Primavera even better. Think about what’s in season. Spring veggies like asparagus or snap peas add bright flavors. In summer, try using zucchini or bell peppers. Adjust your herbs and spices based on what you find. Fresh basil in summer or sage in fall can change the dish's flavor profile. To keep your Pasta Primavera fresh, store leftovers in the refrigerator. First, let the pasta cool down. Then, place it in an airtight container. This helps prevent moisture loss and keeps flavors intact. You can store it for up to three days. If you want to keep it longer, consider freezing it. Use freezer-safe bags or containers for this. When you are ready to eat your leftovers, reheating pasta is simple. Use a skillet over low heat. Add a splash of water or olive oil to avoid drying out the dish. Stir often to heat evenly. If you use the microwave, cover the bowl to retain moisture. This helps keep the pasta tender. Be cautious with vegetables while reheating. You want them warm, not mushy. Add them last when reheating in a skillet. This way, they stay crisp and maintain their bright colors. Enjoy your delicious meal again! Pasta Primavera keeps well in the fridge for about 3 to 4 days. Store it in an airtight container to keep it fresh. If you notice any off smells or changes in color, it's best to toss it. Yes, you can prepare Pasta Primavera ahead of time. Cook the pasta and vegetables, then store them separately. Combine them just before serving for the best taste. You can also chop your veggies a day in advance. This saves time when you are ready to eat. The best vegetables are those that you enjoy. Here are some great options: - Zucchini - Bell peppers (red or yellow) - Cherry tomatoes - Broccoli - Carrots You can also try adding spinach, asparagus, or peas. Feel free to mix it up based on what's in season or what you have in your fridge. Pasta Primavera offers a simple, fresh dish packed with flavor. You can use different pasta, fresh veggies, and herbs to make it your own. Follow our step-by-step guide to ensure success. Remember, fresh ingredients make a big difference. You can customize storage and reheating methods to enjoy leftovers easily. I hope you feel excited to make this dish again and again. Enjoy bringing vibrant, seasonal flavors into your home!

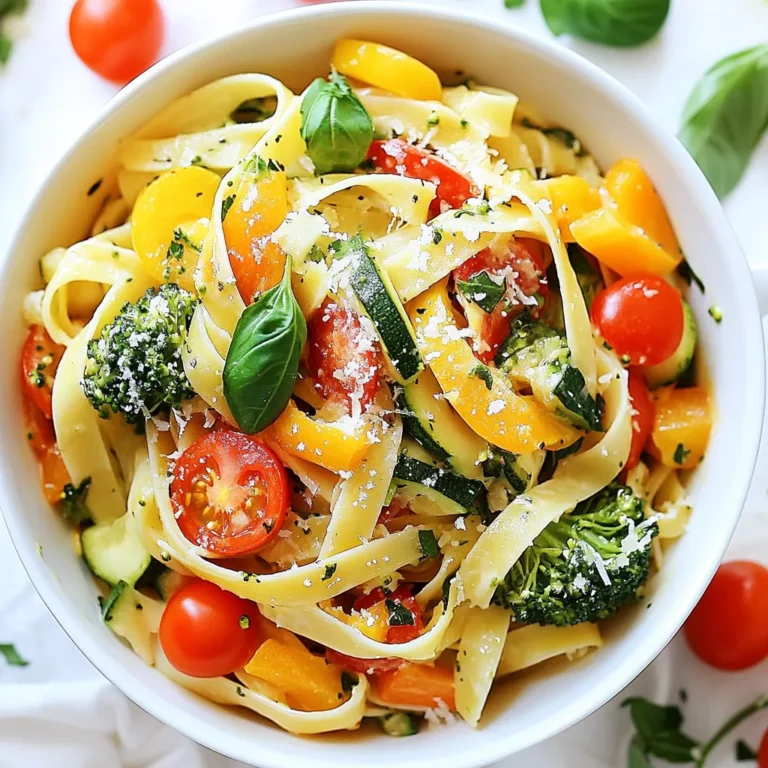
Pasta Primavera Flavorful Vegetable Delight Recipe

- 1 can (8 oz) refrigerated crescent roll dough - 1 cup brie cheese, cut into small cubes - 1/2 cup cranberry sauce (sweetened) - 1 tablespoon fresh rosemary, finely chopped (optional) - 1 egg, beaten (for egg wash) - Sea salt for sprinkling When choosing brie, go for a soft, creamy cheese. A good brie will melt well and add a rich flavor. Look for brie that has a smooth rind and a nice buttery texture. Fresh rosemary gives a fragrant touch, but it's optional. You can also find different types of cranberry sauce. Try to use sweetened sauce to balance the cheese's creaminess. If you want to swap out brie, try camembert or goat cheese. Both will give you a nice, creamy bite. For cranberry sauce, you can use homemade if you're feeling adventurous. It just takes fresh cranberries, sugar, and a bit of water. Store-bought is still great if you're short on time. It should be sweet and thick. 1. First, preheat your oven to 375°F (190°C). This ensures even cooking. Line a baking sheet with parchment paper. This keeps the bites from sticking. 2. Next, place the crescent roll dough on a clean surface. Unroll it and separate it into 8 triangles. Follow the perforations for easy separation. 1. Start by placing a small cube of brie cheese in the center of each triangle. The cheese will melt beautifully. 2. Add about a teaspoon of cranberry sauce on top of the brie. This gives a sweet burst of flavor. 3. If you like, sprinkle a pinch of finely chopped rosemary on the cranberry sauce. It adds a lovely aroma. 4. Now, roll each triangle starting from the wide end. Roll toward the point to wrap the brie and cranberry tightly. This helps them cook evenly. 1. Place the rolled bites on the baking sheet. Make sure the pointed end faces down to keep them closed. 2. Brush the tops with the beaten egg. This gives a golden finish when baked. 3. Sprinkle a tiny pinch of sea salt on each bite. This enhances the flavors nicely. 4. Bake in the preheated oven for 12 to 15 minutes. Watch them closely until they are golden brown and puffed up. To get crescent rolls to puff up well, start with cold dough. Cold dough helps create steam, which makes the rolls light and airy. Make sure your oven is preheated to 375°F (190°C) before baking. If the oven is not hot enough, the rolls might not rise properly. A common pitfall is overcrowding the baking sheet. Leave space between each bite. This allows hot air to circulate and helps them puff up. Also, avoid pressing down on the rolls after they are formed; this can flatten them and prevent rising. Finally, brush the tops with beaten egg for a golden color. Too much egg wash can make them soggy, so use just enough. To boost flavor, consider adding spices like cinnamon or nutmeg to the cranberry sauce. A sprinkle of crushed red pepper can add a nice kick. You can also swap out the cranberry sauce for a different jam, like fig or apricot. Each choice gives a unique twist. For a beautiful presentation, top each bite with a small sprig of fresh rosemary or thyme. This adds color and a lovely aroma. Serving them on a rustic wooden board can also elevate the look. These little touches can impress your guests and make the bites even more enjoyable. {{image_2}} You can change the flavor of your Cranberry Brie Crescent Bites easily. One great way is to use different jams or jellies. Instead of cranberry sauce, try using raspberry jam or fig preserves. These swaps create a new taste and keep things fun. You can also change the cheese for a new experience. Instead of brie, use goat cheese or sharp cheddar. Goat cheese adds a tangy flavor, while cheddar brings a bold taste. Each cheese choice helps create a unique bite. If you need gluten-free options, you can find gluten-free crescent roll dough at many stores. This way, everyone can enjoy these bites. Just make sure to follow the same steps in the recipe. For vegan alternatives, you can swap out the cheese. Look for plant-based cheese that melts well. There are many options available now. You can also replace the egg wash with a mixture of plant milk and a bit of oil for a nice glaze. These adjustments keep your bites tasty and friendly for all diets. To store your leftover Cranberry Brie Crescent Bites, let them cool first. Place them in an airtight container. You can use a plastic or glass container with a tight lid. This keeps them fresh and stops them from getting soggy. If you want to keep them longer, you can freeze them. Wrap each bite in plastic wrap before placing them in a freezer bag. This helps prevent freezer burn and keeps them tasty. To reheat, use the oven for the best taste and texture. Preheat your oven to 350°F (175°C). Place the bites on a baking sheet. Heat them for about 10 minutes, or until warm. This helps keep the crescent dough flaky. You can also use a microwave if you're in a hurry, but the texture may not be as good. If you use the microwave, heat in short bursts. Check every 15 seconds until warm. Enjoy your delicious bites! Cranberry Brie Crescent Bites stay fresh in the fridge for about three days. Store them in an airtight container to keep them moist. If you want to keep them longer, you can freeze them. They last up to three months in the freezer. Just make sure to wrap them well to prevent freezer burn. Yes, you can prepare these bites ahead of time. You can assemble them and keep them in the fridge for a day. If you want to freeze them, roll them up and place them on a baking sheet. Freeze them until solid, then transfer them to a bag or container. Bake from frozen, adding a few extra minutes to the cooking time. These bites pair well with many dishes. Consider serving them with a fresh salad or a fruit platter. For drinks, try a light white wine or sparkling water. You can also offer a selection of dips, like honey or a balsamic glaze, to enhance their flavors. You learned how to make tasty Cranberry Brie Crescent Bites. We explored key ingredients, like quality brie and cranberry sauce options. I shared step-by-step baking instructions to ensure perfect results. Remember, you can switch flavors and adjust for dietary needs. Store your leftovers correctly and reheat them to keep that fresh taste. Enjoy these bites at any meal. With the right tips, you can create a dish everyone loves. Happy baking!

Cranberry Brie Crescent Bites Flavorful Crowd Pleaser

- 2 ripe avocados, diced - 1 cup fresh corn kernels or 1 can of corn, drained - 1 red bell pepper, chopped - 1 small red onion, finely chopped - 1 cup cherry tomatoes, halved - 1 jalapeño, deseeded and minced (optional for heat) For this salad, fresh produce is key. The ripe avocados give a creamy texture. Use fresh corn kernels for sweetness, or canned corn for ease. The red bell pepper adds crunch and color. A small red onion brings sharpness, and cherry tomatoes add juicy bites. If you want heat, add jalapeño. - Juice of 2 limes - 3 tablespoons olive oil - 1 teaspoon cumin - Salt and pepper to taste The dressing is simple yet bright. Lime juice gives a zesty kick, while olive oil adds richness. Cumin offers a warm spice, balancing the flavors. Don't forget salt and pepper to enhance taste. - Fresh cilantro leaves Cilantro adds a fresh note to the salad. It brightens the dish and gives it a vibrant look. You can add extra leaves on top for more color and flavor. - Combine diced avocados and corn in a bowl. - Add chopped red bell pepper and cherry tomatoes. - If you like heat, add the minced jalapeño. Start by taking two ripe avocados and cutting them into small pieces. Then, grab a cup of fresh corn or a can of corn. Mix these in a large bowl. Next, chop one red bell pepper and halve a cup of cherry tomatoes. Toss these into the bowl too. If you want some spice, you can slice up a jalapeño and add it. This is optional but fun! - Whisk together lime juice, olive oil, cumin, salt, and pepper. Now, let’s make the zesty dressing. In a small bowl, squeeze the juice of two limes. Add three tablespoons of olive oil, one teaspoon of cumin, and a pinch of salt and pepper. Whisk this mixture well. You want to blend all the flavors together. This dressing adds a bright taste to the salad. - Toss the salad and adjust seasoning. - Garnish before serving. Pour the dressing over the salad. Gently toss everything together. Be careful not to mash the avocados. Taste the salad and see if it needs more salt or lime juice. If it seems flat, add a touch more seasoning. Finally, garnish your salad with fresh cilantro leaves. This adds color and a fresh flavor. Serve it up, and enjoy! How to choose ripe avocados To find a ripe avocado, look for a dark green color. Gently press the skin; it should yield slightly. If it feels too hard, it is not ready. If it feels too soft, it may be overripe. Tips for storing leftover avocados To save leftover avocado, keep the pit in the half you store. Brush the cut side with lime juice to slow browning. Wrap it tightly in plastic wrap. Store it in the fridge to keep it fresh for a day or two. Suggestions for additional spices or ingredients To boost flavor, try adding garlic powder or smoked paprika. Fresh herbs like parsley or basil can also add freshness. A splash of vinegar can give it a nice zing. How to adjust heat levels with jalapeño For mild heat, remove the seeds and veins from the jalapeño. If you want more spice, leave some seeds in. You can also add more jalapeño if you enjoy a kick. Creative serving methods Serve the salad in a colorful bowl to catch the eye. You can use a large platter for a family-style meal. For individual servings, use small mason jars for a fun twist. Using garnishes to elevate appearance Fresh cilantro leaves make a great garnish. Sprinkle them on top right before serving. Adding lime wedges on the side also creates a bright look. Consider using edible flowers for a fancy touch. {{image_2}} You can change up your Zesty Avocado Corn Salad with simple swaps. Try adding proteins like black beans or chickpeas for a hearty touch. These options boost protein and make the dish more filling. For veggies, consider adding corn, zucchini, or even diced cucumbers. Each option adds crunch and flavor. If you want a gluten-free version, this salad is already safe as is. Just ensure your lime juice and olive oil are pure. For a vegan-friendly touch, make sure your dressing has no animal products. To lower calories, use less olive oil or add more veggies. This keeps the taste while cutting extra calories. You can switch ingredients based on what’s in season. In summer, use fresh peaches or strawberries for a sweet twist. In fall, try adding roasted butternut squash for warmth. For special occasions, consider adding festive herbs like mint or basil. They can give your salad an extra pop and make it special! To store leftovers, place the salad in an airtight container. Make sure to cover it well. This helps keep the salad fresh. You can also squeeze a bit of lime juice over the top. This extra lime juice helps the avocados stay green. Avoid using plastic wrap as it may not seal tightly. To maintain freshness, store the salad in the fridge. It is best to eat it within one to two days. If you notice the avocados turning brown, that means the salad is losing its freshness. Can you freeze avocado corn salad? No, freezing is not a good idea for this salad. The avocados will turn mushy and brown. The texture will not be pleasant after thawing. If you have to freeze, consider freezing the corn and dressing separately. This way, the flavors stay fresh. When ready to eat, thaw the corn and dressing in the fridge overnight. Mix them with fresh avocado when ready to serve. How long does the salad last in the fridge? This salad stays good for about two days. After that, the avocados start to spoil. Watch for signs of spoilage, like a bad smell or brown color. If the salad smells off or looks mushy, it is time to throw it away. Always trust your senses when checking for freshness. You can serve this salad with many meals. Here are some great pairings: - Grilled chicken or shrimp - Tacos or burritos - Rice or quinoa bowls - A fresh green salad These options add protein and balance the meal. They also enhance the fresh flavors of the salad. Yes, you can prepare this salad in advance. Here are some tips: - Chop the vegetables and store them separately. - Mix the dressing and keep it in a jar. - Combine everything just before serving. This keeps the avocados fresh and prevents sogginess. You can enjoy the salad’s zesty taste without losing its crunch. Yes, this salad is gluten-free. All the ingredients are safe for those with gluten sensitivities. If you serve it with gluten-free dishes, it fits well into a gluten-free diet. To keep your avocados fresh, try these methods: - Squeeze extra lime juice on the cut surface. - Store the salad in an airtight container. - Use plastic wrap to cover the top tightly. These tips help keep the avocados vibrant. Enjoy your colorful salad longer! We've covered how to make a tasty Zesty Avocado Corn Salad using fresh produce, dressings, and garnishes. You can adjust flavor and presentation based on your preferences. Remember to store leftovers properly and check for spoilage signs. Try different ingredients for variety, and enjoy this salad with your favorite meals. Keep it fresh and vibrant, and your salad will impress every time. Enjoy making it!

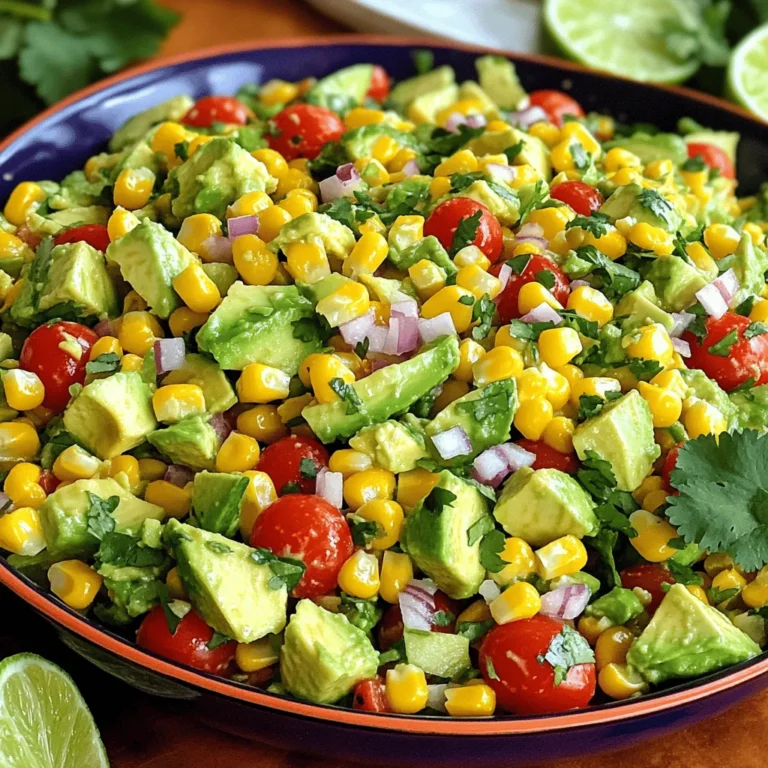
Zesty Avocado Corn Salad Fresh and Flavorful Dish

PREV 1 … 48 49 50 … 86 NEXT
spicy fork kitchen

explore

DessertsDinnerAppetizersDrinks

Our Policies

  • Cookie Policy
  • Copyright Policy
  • Disclaimer
  • GDPR Policy
  • Terms Of Use
Back to Top
  • About
  • Contact Us
  • Privacy Policy
© 2026 spicy fork kitchen