FREE DINNER EBOOK! Get your copy!
  • Cookie Policy
  • GDPR Policy
  • Disclaimer
  • Terms Of Use
  • Visit my other site: Fun Cookie Recipes
spicy fork kitchen
  • Home
  • Dinner
  • Desserts
  • Drinks
  • Appetizers
  • Contact
  • About
  • Privacy Policy
  • Home
  • Dinner
  • Desserts
  • Drinks
  • Appetizers
  • Contact
  • About
  • Privacy Policy
  • Cookie Policy
  • GDPR Policy
  • Disclaimer
  • Terms Of Use
Visit my other site: Fun Cookie Recipes

HOME / CATEGORIES /

Latest

- 2 large poblano peppers, roasted and chopped - 1 lb boneless, skinless chicken breasts, diced - 1 medium onion, chopped - 3 cloves garlic, minced - 1 can (14 oz) diced tomatoes - 4 cups chicken broth - 2 teaspoons ground cumin - 1 teaspoon smoked paprika - 1 teaspoon chili powder - Salt and pepper to taste - 1 tablespoon olive oil - 1 cup corn kernels (fresh or frozen) - 1 cup black beans, rinsed and drained - Fresh cilantro, chopped (for garnish) - Tortilla strips (for topping) - Lime wedges (for serving) When preparing this soup, accurate measurements are key. Use a scale for the chicken. Fresh produce should be weighed for best results. A standard measuring cup works well for broth and canned goods. For spices, use teaspoons to ensure the right flavor balance. You can swap poblano peppers with Anaheim peppers for a milder taste. For chicken, use cooked rotisserie chicken to save time. If you're out of black beans, kidney beans work well too. You can also replace corn with frozen peas for a different texture. If you're vegan, use plant-based broth and omit the chicken. {{ingredient_image_1}} Start by roasting the poblano peppers. Preheat your oven to 450°F (230°C). Place the peppers on a baking sheet and roast them for about 20 minutes. You want the skin to get charred and blistered. Once done, take them out of the oven. Put the peppers in a bowl and cover it with plastic wrap. This helps them steam for about 10 minutes. After cooling, peel off the skin, remove the stems and seeds, then chop the peppers into small pieces. Next, heat a large pot over medium heat and add one tablespoon of olive oil. Once the oil is hot, add one chopped onion. Sauté it for about 3-4 minutes until it softens. Then, stir in three minced garlic cloves and cook for one more minute. This will make your kitchen smell amazing! Now, add one pound of diced chicken breasts to the pot. Sprinkle in two teaspoons of ground cumin, one teaspoon of smoked paprika, and one teaspoon of chili powder. Add salt and pepper to taste. Cook for about 5-7 minutes until the chicken turns brown and is fully cooked. After that, stir in the roasted poblano peppers, one can of diced tomatoes (with juices), four cups of chicken broth, one cup of corn, and one cup of black beans. Bring it all to a boil, then reduce the heat and let it simmer for about 20 minutes. This allows all the flavors to blend together. Taste your soup and add more salt, pepper, or chili powder if needed. Once you are happy with the taste, it's time to serve. Ladle the soup into bowls, garnish with fresh chopped cilantro, and top with crispy tortilla strips. Serve with lime wedges on the side to add a zesty kick. Enjoy your delicious Poblano Chicken Tortilla Soup! Roasting poblano peppers brings out their sweetness. Start by preheating your oven to 450°F (230°C). Place the peppers on a baking sheet. Roast them for about 20 minutes. Watch for the skin to char and blister. This process adds depth to the soup. After roasting, cover the peppers with plastic wrap. This lets them steam for about 10 minutes. Once they cool, peeling them becomes easy. Remove the skin, seeds, and stem. Chop the peppers and add them to your soup. To boost flavor, use fresh spices. Ground cumin and smoked paprika are key. They add warmth and depth. You can also toss in a splash of lime juice. This adds brightness and balances the heat. Don’t forget to taste your soup as it cooks. Adjust the salt and pepper to your liking. Adding fresh cilantro at the end gives a nice finish. You can also use tortilla strips for crunch. These small touches elevate your soup. If time is short, use pre-cooked chicken. It saves cooking time and still tastes great. You can also use canned beans and frozen corn. They cut down prep time without losing flavor. Consider chopping your veggies ahead of time. Store them in the fridge for easy access. Lastly, make a big batch and freeze some. This way, you’ll have a quick meal ready when you need it. Pro Tips Roasting Poblano Peppers: Make sure to roast the peppers until the skins are charred for a deeper flavor. This adds a smoky richness to the soup. Seasoning the Chicken: Don't skip on seasoning the chicken well. A proper seasoning will enhance the overall flavor of the soup. Adjusting Spice Levels: Taste the soup before serving. You can easily adjust the spice level by adding more chili powder or a dash of hot sauce if you prefer more heat. Serving Suggestion: For a more filling meal, serve the soup with a side of warm tortillas or over a bed of rice. {{image_2}} You can easily make this soup vegetarian or vegan. Start by swapping the chicken for a mix of beans. Use chickpeas or lentils to add protein. For broth, choose vegetable broth instead of chicken broth. You can also add more veggies, like zucchini or bell peppers. These changes keep the soup hearty and filling. If you want more heat, add extra chili powder or diced jalapeños. You can also use spicier peppers, like serrano or habanero. For a mild version, skip the chili powder. You can add a dollop of sour cream or yogurt to cool it down. Always taste as you go to find your perfect heat level. Feel free to get creative with your ingredients. Instead of black beans, try pinto or kidney beans. You can also swap corn for diced potatoes for a different texture. If you love fresh herbs, add parsley or green onions instead of cilantro. This flexibility lets you create a soup that matches your taste. After you enjoy your Poblano Chicken Tortilla Soup, let it cool first. Use an airtight container to keep it fresh. Store the soup in the fridge for up to four days. If you want it to last longer, consider freezing it. When you're ready to eat again, reheating is a breeze. Pour the soup into a pot over medium heat. Stir it often to warm it evenly. If you need a quick option, use the microwave. Heat it in a microwave-safe bowl. Stir every minute to avoid hot spots. For long-term storage, freeze the soup in portions. Use freezer bags or containers. Leave some space at the top, as the soup will expand. Label the bags with the date. You can freeze it for up to three months. To serve, thaw it overnight in the fridge before reheating. Yes, you can use other peppers. Bell peppers add sweetness. Jalapeños bring heat. Each type gives a unique taste. This soup lasts about four days in the fridge. Store it in an airtight container. Always cool it before putting it away. You can serve it with tortilla strips for crunch. Lime wedges add a nice zing. A side salad or cornbread pairs well too. Yes, this soup is gluten-free. Just make sure the broth and toppings are gluten-free. Enjoy it worry-free! This blog post covered delicious ingredients and easy steps for making Poblano Chicken Tortilla Soup. We reviewed how to prepare, cook, and serve this dish. You learned about ingredient swaps and how to store leftovers. In closing, this soup is flexible and can suit many tastes. Use these tips to make your meal fun and tasty. Enjoy creating your version of this flavorful soup!

Poblano Chicken Tortilla Soup Flavorful and Easy Recipe

- 2 pounds Yukon Gold potatoes, peeled and cubed - 4 tablespoons unsalted butter, plus extra for serving - 1/2 cup heavy cream (or milk for a lighter option) - 4 cloves garlic, minced - 1 teaspoon dried thyme - 1 teaspoon fresh rosemary, chopped - Salt and pepper to taste - Chives, finely chopped for garnish - You can use Russet or red potatoes instead of Yukon Gold. - For a dairy-free option, try almond milk or coconut cream. - Fresh herbs add brightness; use 3 times more than dried herbs. I love Yukon Gold potatoes for their creamy texture. They mash up beautifully and absorb flavors well. The unsalted butter adds richness, while heavy cream makes them smooth. If you're watching calories, milk works great too. Fresh garlic gives these potatoes a bold taste. I recommend using four cloves for a strong flavor. Thyme and rosemary add an earthy touch. If you want a lighter flavor, feel free to cut back on the herbs. Chives not only look pretty but also add a mild onion flavor. You can sprinkle them on top before serving for that fresh finish. This simple ingredient list makes the dish easy yet very tasty! {{ingredient_image_1}} Start by filling a large pot with water. Add a generous amount of salt. This step is key! Salting the water helps flavor your potatoes. Bring the water to a boil. Once boiling, add the cubed Yukon Gold potatoes. Cook them until they are tender, which takes about 15 to 20 minutes. You can check doneness by poking a potato with a fork. If it slides off easily, they are ready. While your potatoes cook, let’s make the garlic butter. In a small saucepan, melt 4 tablespoons of unsalted butter over medium heat. Once it’s melted, add the minced garlic. This will add a lovely fragrance to your dish. Sauté the garlic for about 1 to 2 minutes. Be careful not to burn it! If garlic turns brown, it can taste bitter. Keep stirring gently until it’s just fragrant. Once your potatoes are cooked, drain them well and return them to the pot. Now, pour the melted garlic butter over the potatoes. Add in 1/2 cup of heavy cream (or milk if you prefer). Toss in the dried thyme, chopped rosemary, salt, and pepper. For mashing, use a potato masher or a hand mixer. Mash the potatoes until smooth and creamy. If they seem too thick, adjust the cream to get your desired consistency. Taste your mixture and adjust the seasoning as needed. Finally, serve hot, topped with a pat of butter and a sprinkle of fresh chives. Enjoy your buttery herb garlic mashed potatoes! For creamy mashed potatoes, choose Yukon Gold potatoes. They have a rich flavor and smooth texture. Use a potato masher or a hand mixer to get the right consistency. When you mash, do it gently. Over-mashing can make them gummy. To avoid lumps, ensure your potatoes are fully cooked. Boil them until they are fork-tender. Drain well to remove excess water. Adding warm cream and butter helps create a silky finish. You can boost the flavor with fresh herbs. Try adding parsley, dill, or basil. Each herb brings a unique taste. For a kick, add a dash of cayenne pepper or smoked paprika. Balancing flavors is key. Taste as you mix. Adjust salt and pepper as needed. A squeeze of lemon juice can add brightness and depth. Mashed potatoes pair well with many dishes. Serve them alongside roasted meats or grilled vegetables. They make a great base for stews and gravies. For gatherings, get creative. Serve in individual bowls with a dollop of butter on top. You can also make a mashed potato bar with toppings like cheese, bacon bits, or green onions. Let guests customize their plates for extra fun! Pro Tips Use Yukon Gold Potatoes: They have a creamy texture and buttery flavor that make them perfect for mashed potatoes. Don't Over-Mash: For the best texture, mash just until creamy. Over-mashing can lead to gummy potatoes. Warm Your Cream: Heating the cream or milk before adding it to the potatoes helps to keep them hot and enhances the flavor. Season Gradually: Taste as you go! Adjust salt and pepper gradually to ensure balanced seasoning. {{image_2}} You can switch up herbs to change the flavor. An Italian herb blend adds a nice twist. Use oregano, basil, and thyme for a fresh taste. For a classic approach, stick with garlic and parsley. This combo is simple yet full of flavor. It brings a bright note to your mashed potatoes. If you want a lighter mash, try Greek yogurt. It gives a nice tang and cuts calories. You can also use cream cheese for extra richness. This addition makes the potatoes super creamy and indulgent. Adjust the amount to fit your taste. Want to make cheesy garlic mashed potatoes? Add shredded cheese like cheddar or Parmesan. It melts into the mash, making it creamy and savory. Another fun option is roasted garlic. Roasting softens the garlic and gives a sweet, deep flavor. Just add it to the mix when you mash the potatoes. To store leftovers, let the mashed potatoes cool. Place them in an airtight container. You can use glass or plastic containers with tight lids. This keeps the potatoes fresh and prevents odors from other foods. To reheat without losing texture, use the stovetop. Add a splash of milk or cream. Stir gently over low heat until warmed through. You can also use the microwave, but cover the dish to retain moisture. For long-term storage, you can freeze the mashed potatoes. Scoop them into freezer-safe bags. Flatten the bags for easy stacking. They can last up to three months in the freezer. Leftovers can last about three to five days in the fridge. Look for signs of spoilage, like an off smell or discoloration. If the mashed potatoes seem dry or hard, it's best to toss them. Always trust your senses when checking food freshness. Yes, you can make these mashed potatoes ahead of time. To do this, follow these best practices: - Prepare the mashed potatoes as directed. - Allow them to cool completely. - Transfer the potatoes to an airtight container. - Store them in the fridge for up to two days. - When ready to serve, reheat gently on the stove or in the microwave. - Add a splash of cream or milk to restore creaminess. This way, you save time and still serve a tasty dish. Yukon Gold potatoes are best for mashed potatoes. They are creamy and buttery. Here’s a quick comparison of potato varieties: - Yukon Gold: Creamy, buttery flavor; great for mashing. - Russet: Fluffy and dry; absorbs liquid well but can be less creamy. - Red Potatoes: Waxy texture; good for a chunkier mash. - Fingerling Potatoes: Unique shape; adds visual interest but less traditional. For the best results, stick with Yukon Gold or Russet. You can easily make these mashed potatoes vegan. Here are some suggestions for dairy alternatives: - Butter: Use vegan butter or olive oil. - Cream: Substitute with unsweetened almond milk or coconut cream. For complements to vegan versions, add fresh herbs like parsley or green onions. You can also mix in nutritional yeast for a cheesy flavor. Enjoy your creamy vegan mash! This post covered making perfect mashed potatoes from scratch. We explored ingredients like Yukon Gold potatoes and garlic, plus tips for creamy texture. Substitutions and variations offered new ways to customize your dish. We also discussed proper storage and reheating to keep leftovers tasty. In the end, enjoy the journey of creating this beloved side dish. With practice, you'll master it and impress everyone at your table. Happy cooking!

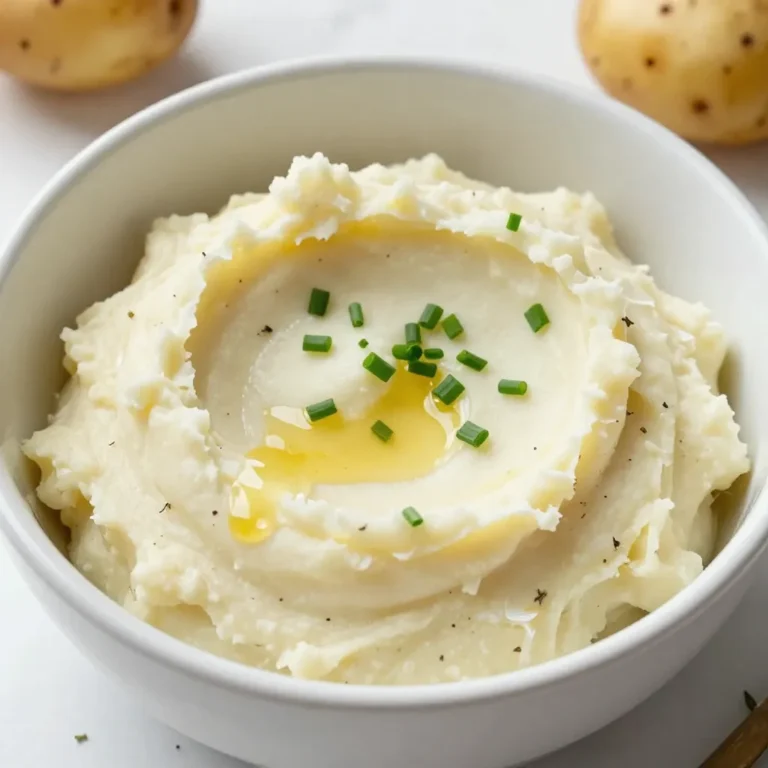
Buttery Herb Garlic Mashed Potatoes Delightful Recipe

- Ripe avocados (2) - Garlic cloves (2) - Lemon juice (1 tablespoon) - Fresh basil leaves (1/4 cup) - Olive oil (2 tablespoons) - Salt and pepper - Pasta of choice (8 oz spaghetti) - Parmesan cheese (optional, 1/4 cup) - Cherry tomatoes (for garnish) - Extra basil leaves (for garnish) Creamy avocado pasta is simple and tasty. You need just a few fresh ingredients. Start with two ripe avocados. Their rich texture creates the creamy sauce. Next, use two garlic cloves to add flavor. Fresh garlic gives the dish a nice kick. For brightness, add one tablespoon of lemon juice. This helps balance the creaminess. Fresh basil leaves are a must. Use about a quarter cup for a fresh taste. Olive oil adds richness to the sauce. Use two tablespoons for a smooth blend. Always remember to season with salt and pepper to taste. For the pasta, spaghetti works well, but you can choose any type. Eight ounces is enough for four servings. If you love cheese, add grated Parmesan. About a quarter cup will enhance the flavor. Finally, gather cherry tomatoes for garnish. They add color and a fresh bite. Extra basil leaves also make a nice touch on top. With these ingredients ready, you can make a delightful meal that everyone will love. 1. First, fill a large pot with water and bring it to a boil. 2. Add a generous pinch of salt to the boiling water. This adds flavor to the pasta. 3. Next, add 8 ounces of spaghetti to the pot. Cook according to the package instructions until it is al dente. 4. Once the pasta is ready, carefully drain it in a colander. 5. Remember to save about a cup of the pasta water before draining. This water helps make the sauce creamy. 1. While the pasta cooks, take two ripe avocados and cut them in half. Remove the pits. 2. In a food processor, add the avocado flesh, two minced garlic cloves, and one tablespoon of lemon juice. 3. Toss in 1/4 cup of fresh basil leaves and two tablespoons of olive oil. 4. Blend the mixture until it is smooth and creamy. If it feels too thick, you can add a bit of reserved pasta water to your liking. 5. Season the sauce with salt and pepper. 1. Return the drained spaghetti to the pot over low heat. 2. Pour the creamy avocado sauce over the pasta. Toss gently to coat every strand. 3. If you like, sprinkle in 1/4 cup of grated Parmesan cheese and mix it well. 4. Serve your pasta right away. Garnish with halved cherry tomatoes and extra basil leaves for a fresh look. If your avocado sauce is too thick, use pasta water to fix it. After cooking your spaghetti, set aside a cup of the pasta water. When you mix the sauce with the pasta, add a little pasta water at a time. This helps the sauce coat the pasta better. Aim for a smooth and creamy texture that clings to every strand. Want to make your dish even better? Consider adding spices. A pinch of red pepper flakes gives heat. Fresh herbs like cilantro or parsley can add a fresh taste. You can also mix in some lemon zest for brightness. Experiment with these ingredients to find your favorite flavor boost. Different pasta types cook at different speeds. For example, penne or fusilli may need extra time compared to spaghetti. Always check the package instructions. For best results, cook pasta until al dente, so it holds its shape. Adjust your cooking times based on your choice of pasta to ensure it pairs well with the creamy sauce. {{image_2}} You can easily make this dish gluten-free. Simply swap regular pasta for gluten-free pasta. Choices like brown rice pasta or chickpea pasta work great. Cook them just like regular pasta and follow the same steps. Want to make this vegan? Omit the Parmesan cheese and try a plant-based substitute. Nutritional yeast gives a cheesy flavor without dairy. You can also add a splash of almond milk for extra creaminess. This keeps the dish rich and satisfying. To make your creamy avocado pasta even more special, add proteins or veggies. Grilled chicken or shrimp enhances the dish. If you prefer plants, try adding spinach or peas. Cherry tomatoes add a pop of color and taste too. Mix and match to find your favorite combo! Store your creamy avocado pasta in an airtight container. Make sure to cover it well. You can keep it in the fridge for up to three days. The avocado may darken slightly, but it will still taste great. If you see brown spots, just mix it well before serving. To reheat the pasta, use a pan over low heat. Add a splash of water or olive oil to help it stay creamy. Stir gently to warm it through without cooking it again. You can also use a microwave, but cover it to keep moisture in. Heat in short bursts, stirring often for even warmth. You can freeze creamy avocado pasta, but it may change in texture. To freeze, place the pasta in a freezer-safe container. Leave some space at the top for expansion. It stays good for about one month. When you're ready to eat, let it thaw in the fridge overnight. Reheat as mentioned before for the best results. Yes, you can prepare this dish ahead of time. Cook the pasta and make the sauce separately. Store the pasta in an airtight container in the fridge. Keep the avocado sauce in another container. When ready to eat, mix them together. This keeps the pasta fresh and the sauce creamy. To ripen avocados fast, place them in a brown paper bag. Add an apple or banana to speed up the process. The gases from these fruits help avocados ripen quicker. Check them after a day. If they're soft, they're ready to use! Absolutely! You can try parsley, cilantro, or mint. Each herb adds a unique flavor. Parsley gives a fresh taste, while cilantro adds a bit of zest. Mint brings a cool twist. Feel free to mix them for a fun flavor blend! This blog post covers a delicious avocado pasta recipe. We explored key ingredients, from ripe avocados to pasta. I shared simple steps to cook the pasta and make a creamy sauce. Tips showed ways to enhance flavor and ensure perfect texture. We also discussed variations for gluten-free and vegan diets. In closing, I encourage you to try this recipe. It’s easy, healthy, and full of flavor. Enjoy your cooking adventure!

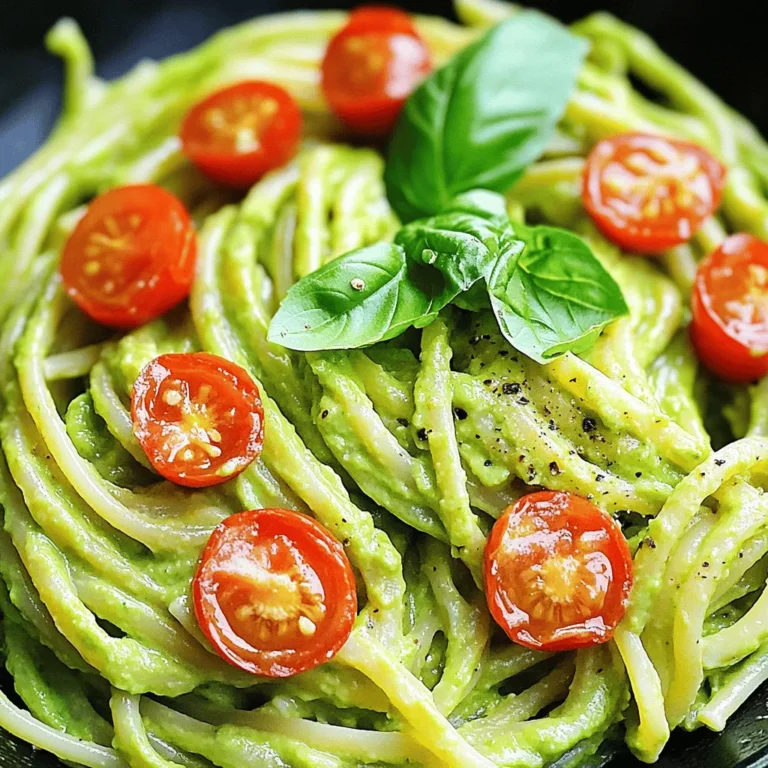
Creamy Avocado Pasta Delightful and Easy Recipe

To make the Cinnamon Roll French Toast Casserole, gather the following items: - 4 cans of refrigerated cinnamon rolls - 6 large eggs - 1 cup milk - 1 teaspoon vanilla extract - 1 teaspoon ground cinnamon - 1/4 teaspoon nutmeg - 1/4 cup maple syrup - Optional: powdered sugar for dusting These ingredients work together to create a warm, sweet dish. The cinnamon rolls provide a soft base. Eggs and milk bind everything, giving it a custard-like texture. Vanilla extract adds depth, while cinnamon and nutmeg bring warmth. Maple syrup sweetens the dish and enhances the flavor. You can also dust with powdered sugar for extra sweetness. This dish is perfect for breakfast or brunch. It feeds a crowd and makes mornings feel special. - Preheat your oven to 350°F (175°C). Grease a 9x13 inch baking dish. - Open the cans of cinnamon rolls. Cut each roll into quarters and place them in the dish. - In a large bowl, whisk together 6 eggs, 1 cup of milk, and 1 teaspoon of vanilla extract. - Add 1 teaspoon of ground cinnamon, 1/4 teaspoon of nutmeg, and 1/4 cup of maple syrup to the bowl. Mix until everything is combined. - Pour this egg mixture over the cinnamon roll pieces. Make sure every piece gets soaked. Let it sit for 10-15 minutes so the rolls can absorb the liquid. - Bake the casserole in the preheated oven for 25-30 minutes. Look for a golden brown top and set filling. - While it bakes, prepare the icing from the cinnamon rolls following the package directions. - Once baked, take it out and let it cool for a few minutes. Drizzle the icing over the top. Enjoy warm with extra maple syrup on the side. To make your casserole perfect, ensure even soaking. Cut the cinnamon rolls into quarters. Spread them out in the baking dish. This way, every piece gets soaked well. When you pour the egg mixture, do it slowly. Make sure each piece is covered. Let it sit for 10-15 minutes. This helps the rolls soak up the flavors. Avoiding overbaking is key. Keep an eye on the casserole while it bakes. Check for a golden brown top. It should be set in the middle. If you bake too long, it can dry out. Aim for 25-30 minutes in the oven. For the best flavor, serve with maple syrup. Drizzle it on top right before eating. Powdered sugar adds a nice touch too. Just dust a little on top after baking. This dish is perfect for breakfast or brunch. It’s great for family gatherings or special occasions. You can also serve it as a fun dessert. Warm pieces with a scoop of ice cream work wonders. Enjoy the blend of cinnamon and sweet syrup! {{image_2}} You can easily change the taste of your Cinnamon Roll French Toast Casserole. Adding fruits like berries or bananas brings freshness. You can also mix in nuts like walnuts or pecans for crunch. If you want a fun twist, try using alternative spice blends. Instead of just cinnamon, add pumpkin spice for a warm flavor. You could even use cardamom for a unique taste. To make this dish vegan, replace the eggs with flax eggs. Use almond milk instead of regular milk. You can find dairy-free cinnamon rolls in stores. If you need a gluten-free option, choose gluten-free cinnamon rolls. This way, everyone can enjoy this tasty casserole. To keep your Cinnamon Roll French Toast Casserole fresh, store it in the fridge. Place any leftovers in an airtight container. This way, it stays moist and tasty. It can last in the fridge for up to three days. If you want to keep it longer, freezing is a great option. For freezing, cut the casserole into single servings. Wrap each piece in plastic wrap, then place them in a freezer bag. Label the bag with the date so you know how long it’s been there. It can stay in the freezer for up to two months. When you’re ready to enjoy your casserole again, reheating is easy. The best method is to use the oven. Preheat it to 350°F (175°C). Place the casserole or individual pieces in an oven-safe dish. Cover with foil to keep it from drying out. Heat for about 15-20 minutes or until warmed through. You can also use the microwave for quick reheating. Just place a piece on a microwave-safe plate. Heat for 30 seconds to one minute. Check to see if it’s warm enough. The oven method keeps the texture nice, while the microwave is quick and handy. Enjoy your delicious leftovers! Can I make this casserole the night before? Yes, you can! Prepare the casserole the night before. Just cover it and keep it in the fridge. In the morning, bake it straight from the fridge. This saves time and makes breakfast easy. What can I substitute for cinnamon rolls? If you don’t have cinnamon rolls, try brioche or challah bread. These breads work well because they soak up the egg mixture nicely. You can also use store-bought or homemade sweet rolls. How do I know when it’s fully cooked? Check if the top is golden brown and firm. You can insert a knife in the center. If it comes out clean, it’s done. The casserole should not be wobbly. What drinks pair well with Cinnamon Roll French Toast Casserole? Coffee or chai tea makes a great match. You can also serve it with fresh orange juice. These drinks balance the sweetness of the casserole well. Can I serve this as a dessert? Absolutely! This casserole works as a sweet dessert too. Just add a scoop of vanilla ice cream on top. It will be a hit at any gathering. This Cinnamon Roll French Toast Casserole is simple and fun to make. We covered ingredients, preparation steps, and baking tips. You can add your own twist with fruits or nuts or adjust for dietary needs. Store leftovers for easy reheating later. I hope you feel inspired to try this tasty dish for breakfast or brunch. It’s a real crowd-pleaser that you can customize for any occasion. Enjoy every bite!

Cinnamon Roll French Toast Casserole Delightful Dish

- 2 salmon fillets (about 6 oz each) - 1/4 cup teriyaki sauce - 1 tablespoon honey - Salt and pepper to taste - 1 cup jasmine rice - 2 cups water - 1 cup broccoli florets - 1/2 cup shredded carrots - 1 tablespoon olive oil - 1/4 cup sliced green onions - 1 tablespoon sesame seeds The ingredients for teriyaki salmon rice bowls are simple yet delightful. You start with salmon fillets, which give a rich, buttery taste. The teriyaki sauce adds a sweet and savory kick. Honey enhances that sweetness, bringing balance to the dish. Don't forget to season with salt and pepper, which highlights all the flavors. For the rice, jasmine is a perfect choice. Its fragrant aroma pairs well with the salmon. You’ll need just two cups of water to cook it. Next, we have bright, fresh vegetables. Broccoli florets add crunch. Shredded carrots introduce color and sweetness. A touch of olive oil brings everything together when you sauté the veggies. To add the finishing touch, we use green onions and sesame seeds. They provide a pop of freshness and texture that makes this dish truly special. With these ingredients, you’ll create a bowl that is not just tasty but also pleasing to the eye. Start by rinsing the jasmine rice. Place it in a fine mesh strainer. Rinse under cold water until the water runs clear. This step removes excess starch. It helps keep the rice from getting sticky. Next, add the rinsed rice to a medium saucepan. Pour in 2 cups of water. Bring this to a boil over high heat. Once boiling, lower the heat to low. Cover the pan with a lid and let it simmer for 15 minutes. After 15 minutes, turn off the heat. Let it sit covered for 5 minutes. Finally, fluff the rice with a fork before serving. While the rice cooks, prepare the salmon. In a small bowl, mix 1/4 cup of teriyaki sauce with 1 tablespoon of honey. Whisk this until it blends well. Place the salmon fillets in a shallow dish. Pour the marinade over the salmon. Let it sit for about 15 minutes to soak in the flavors. Heat a large skillet over medium heat. Add 1 tablespoon of olive oil. Once hot, toss in the broccoli florets and shredded carrots. Sauté for about 3-4 minutes. You want them to be tender but still bright in color. Season with salt and pepper to taste. Once done, remove the veggies from the skillet and set them aside. In the same skillet, remove any excess oil. You want just a light coating left. Place the marinated salmon fillets in the skillet skin-side down. Cook for about 4-5 minutes on each side. You want the salmon to be fully cooked and have a nice glaze. If you like, add any leftover marinade during the last minute of cooking for more flavor. To assemble your bowls, start with a scoop of jasmine rice. Next, add the sautéed broccoli and carrots. Place one salmon fillet on top. Drizzle any extra teriyaki sauce over everything for added taste. For the final touch, sprinkle sliced green onions and sesame seeds on top. This adds crunch and flavor. Serve your teriyaki salmon rice bowls warm for the best taste. Enjoy! To cook salmon just right, aim for an internal temperature of 145°F. Use a meat thermometer for accuracy. This ensures your fish is safe to eat and remains juicy. To keep salmon moist, marinate it for at least 15 minutes. The teriyaki sauce and honey add flavor and moisture. Also, cook salmon skin-side down first. This helps lock in the juices. For seasoned rice, add a pinch of salt to the water while cooking. You can also add a splash of teriyaki sauce for extra flavor. If you want variety, try brown rice or quinoa. They offer different textures and nutrients. Jasmine rice is great, but other grains work well too. To make your meal even better, consider adding toppings. Sliced avocado, radishes, or edamame add color and taste. You can also pair your rice bowl with extra sauces. Try spicy mayo or a drizzle of sesame oil. Each adds unique flavors to your dish. {{image_2}} You can swap salmon for other proteins. Tofu, chicken, or shrimp work well. If you choose tofu, press it first to remove moisture. For chicken, use boneless, skinless thighs. Shrimp should be peeled and deveined. Each protein needs a different marination time. Tofu takes about 30 minutes. Chicken should marinate for 1 hour. Shrimp needs just 15 minutes. Adjust these times for the best flavor. Feel free to change the veggies in your rice bowl. You can use bell peppers, snap peas, or zucchini. These vegetables add great color and taste. Seasonal veggies are always a great choice. In spring, use asparagus or peas. In fall, add squash or kale. This keeps your meal fresh and exciting. Experiment with different sauces or spices to change the flavor. You might try sriracha for heat or hoisin for sweetness. Adding ginger or garlic can give a nice kick too. Want more sweetness? Add a splash of orange juice or maple syrup. The key is to find a balance that you enjoy. Explore different flavors to make your rice bowl unique. To keep your teriyaki salmon rice bowls fresh, store them in an airtight container. Place the salmon, rice, and vegetables separately if possible. This helps maintain texture. You can refrigerate leftovers for up to three days. After that, the taste may fade. When reheating, I recommend using the microwave or a skillet. If using the microwave, heat in short bursts to avoid overcooking. For the skillet, warm on low heat and cover to keep moisture. This way, the salmon stays juicy. Yes, you can freeze teriyaki salmon rice bowls! To freeze, let everything cool completely. Then, place portions in freezer-safe containers. Make sure to label them with the date. They can last up to three months in the freezer. When ready to eat, thaw in the fridge overnight before reheating. To make teriyaki salmon rice bowls, start by cooking jasmine rice. Rinse the rice until the water is clear. Boil it with water, then simmer until soft. While the rice cooks, marinate the salmon in teriyaki sauce and honey for 15 minutes. Cook broccoli and carrots in olive oil until tender. Next, cook the salmon in the same pan until it glazes. Finally, assemble the bowls with rice, veggies, and salmon. Yes, you can use brown rice. Brown rice is chewier and has a nuttier taste. It takes longer to cook, about 40-45 minutes. Jasmine rice is softer and has a light floral aroma. The choice depends on your texture and flavor preference. Both options provide a healthy base. You can serve teriyaki salmon rice bowls with various sides. A simple green salad pairs well. Pickled vegetables add a nice crunch. Edamame or miso soup can enhance the meal too. You can also try steamed bok choy or sautéed snap peas for more greens. Yes, teriyaki salmon rice is healthy. Salmon is rich in omega-3 fatty acids, good for heart health. The dish includes broccoli and carrots, adding fiber and vitamins. Using brown rice instead of white can boost the fiber content even more. Just watch the amount of teriyaki sauce, as it can add sugar and sodium. To check if the salmon is cooked, use a food thermometer. The safe internal temperature is 145°F. The fish should flake easily with a fork and appear opaque. If it's still translucent in the center, it needs more time to cook. Always cook it until it's firm yet moist. In this blog post, we explored how to make delicious teriyaki salmon rice bowls. We covered essential ingredients, step-by-step cooking instructions, and helpful tips. You learned about marinating salmon, cooking perfect rice, and enhancing flavors with vegetables and garnishes. In conclusion, this dish is both tasty and easy to prepare. It’s a great way to enjoy healthy food at home. Try different proteins and vegetables to make it your own. Enjoy the flavors and make this meal a family favorite!

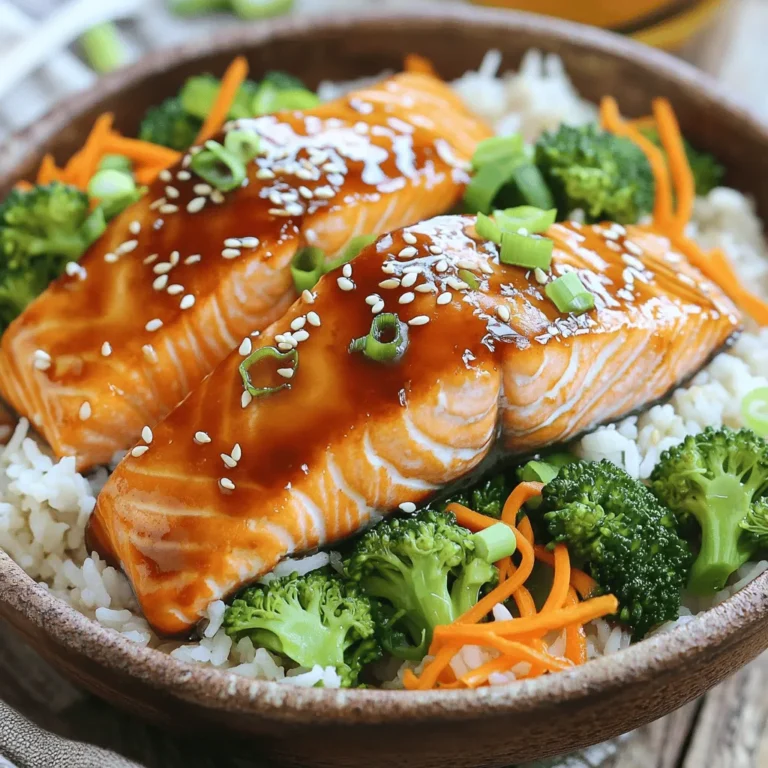
Teriyaki Salmon Rice Bowls Flavorful and Simple Meal

- Baby spinach: Use 4 cups of fresh baby spinach. Wash and dry it well. This helps keep the salad crisp. - Strawberries: Take 2 cups of strawberries. Hull them and slice them thin. This adds sweetness and color. - Red onion: Use 1/2 cup of red onion. Slice it very thin. This gives a nice crunch and flavor. - Olive oil: You will need 1/4 cup of olive oil. This is the base for your dressing. - Apple cider vinegar: Add 2 tablespoons of apple cider vinegar. It adds a tangy flavor. - Honey: Use 2 tablespoons of honey for sweetness. Adjust to your taste, if needed. - Salt and pepper: Add salt and pepper to taste. This enhances all the flavors. - Feta cheese: Use 1/4 cup of crumbled feta cheese. It adds a creamy and salty touch. - Pecans: Take 1/4 cup of pecans. Chop them roughly for a crunchy texture. - Poppy seeds: Use 2 tablespoons of poppy seeds. They add a nutty flavor and pretty look. To make the dressing, start by mixing the olive oil, apple cider vinegar, and honey. Use a small bowl for this. Whisk these together until they blend well. This whisking method helps create a smooth dressing. After whisking, taste it. You might want more salt or pepper. Adjust it to your liking. Next, grab a large salad bowl. Add the fresh baby spinach first. This is the base of your salad. Then, gently fold in the sliced strawberries and thinly sliced red onion. Layering like this keeps the salad pretty. When it’s time to toss, do it gently. This way, you won’t wilt the spinach. For a nice presentation, serve the salad right away. Top it with crumbled feta cheese and chopped pecans. Sprinkle the poppy seeds on top for a final touch. Use big serving spoons to help guests take portions easily. Enjoy seeing everyone love your fresh salad! To pick fresh spinach, look for bright green leaves. Avoid any yellow or wilting leaves. For strawberries, choose firm, red berries with no white spots. The best strawberries smell sweet. Store spinach in a breathable bag in the fridge. Keep it dry to avoid spoilage. For strawberries, place them in a container lined with paper towels. This helps absorb excess moisture. Add nuts, like walnuts or almonds, for a crunch. You can also toss in some sliced apples for sweetness. If you want a zesty kick, try adding sliced jalapeños. Fresh herbs like mint or basil can give your salad a fresh twist. A pinch of chili flakes can also make it exciting. Prep your spinach and strawberries in advance. Wash and dry them well, then store in the fridge. Keep the dressing separate until you serve the salad. This keeps everything crisp. When making salads for the week, layer your ingredients in jars. Start with dressing at the bottom, followed by sturdier items like onions and nuts. Finish with spinach and strawberries on top. {{image_2}} You can easily switch fruits in this salad. Try using blueberries, peaches, or apples. Each fruit adds a different taste and texture. For leafy greens, consider using arugula or kale. These greens offer a bold flavor and crunch. Mixing greens can make your salad more exciting. If you want a vegan version, swap out the feta cheese for avocado. Avocado adds creaminess and healthy fats. You can replace honey with maple syrup or agave nectar. Both options keep the sweetness without animal products. For a gluten-free salad, use nuts or seeds as toppings. Pumpkin seeds or sunflower seeds work great here. You can give this salad a global flair. For an Asian twist, add mandarin oranges and sesame seeds. A drizzle of soy sauce can enhance the flavor. For a Mediterranean vibe, try olives and sun-dried tomatoes. Use herbs like basil or mint to freshen the taste. These small changes can make your salad unique and tasty. To keep your salad fresh, store it in the fridge. Use an airtight container for best results. This will help keep the greens crisp and the strawberries juicy. The salad tastes best within 30 minutes of making it. If you must store it longer, use it within a day for the best flavor. Freezing spinach and strawberries can change their texture. Spinach may become mushy, while strawberries can lose their firmness. If you must freeze, wash and dry them first. For spinach, chop it before freezing. For strawberries, slice them and lay them flat in a single layer on a tray before freezing. Thaw them in the fridge overnight when you are ready to use them. To extend the life of your ingredients, buy fresh produce. Store spinach and strawberries separately. Keep spinach dry by washing it just before use. For strawberries, remove any damaged ones right away. Check your ingredients often. If spinach turns slimy or strawberries become mushy, discard them. This will ensure your salad stays fresh and tasty. To make this salad, follow these steps: 1. Prepare the dressing: In a small bowl, whisk together 1/4 cup of olive oil, 2 tablespoons of apple cider vinegar, and 2 tablespoons of honey. Add salt and pepper to taste. 2. Start the salad: In a large bowl, add 4 cups of fresh baby spinach. 3. Add fruits and veggies: Gently fold in 2 cups of hulled and sliced strawberries and 1/2 cup of thinly sliced red onion. 4. Dress the salad: Drizzle the dressing over the salad and toss gently to combine. 5. Top it off: Add 1/4 cup of crumbled feta cheese, 1/4 cup of roughly chopped pecans, and 2 tablespoons of poppy seeds. 6. Serve: Enjoy immediately or chill for 30 minutes to let flavors blend. Yes, you can prepare the salad in advance. However, it's best to wait to add the dressing until just before serving. This keeps the spinach fresh and crisp. You can mix all the solid ingredients and store them in the fridge. The dressing can stay in a separate container for up to a week. Just combine them right before you want to eat. If you want to replace honey, you can use maple syrup or agave nectar. Both add sweetness but have different flavors. Maple syrup has a mild, rich taste, while agave nectar is sweeter and more neutral. You can also use a sugar substitute like stevia if you're looking for a low-calorie option. This salad is naturally gluten-free! All ingredients like baby spinach, strawberries, and the dressing are safe for gluten-free diets. Just make sure to check the labels on any packaged items, like feta cheese, to ensure they are gluten-free. If you want to add grains or other toppings, choose gluten-free options like quinoa or gluten-free croutons. This blog post covered how to make a delicious Strawberry Spinach Poppy Seed Salad. We explored fresh produce, dressing ingredients, and toppings. I shared step-by-step instructions for making the dressing and assembling the salad. We also discussed tips for freshness and flavor enhancements, along with meal prep suggestions. Remember, feel free to swap ingredients to match the seasons or your diet. These small changes keep the salad exciting and tasty. With these tools, you can create a fresh, healthy dish that shines at every meal.

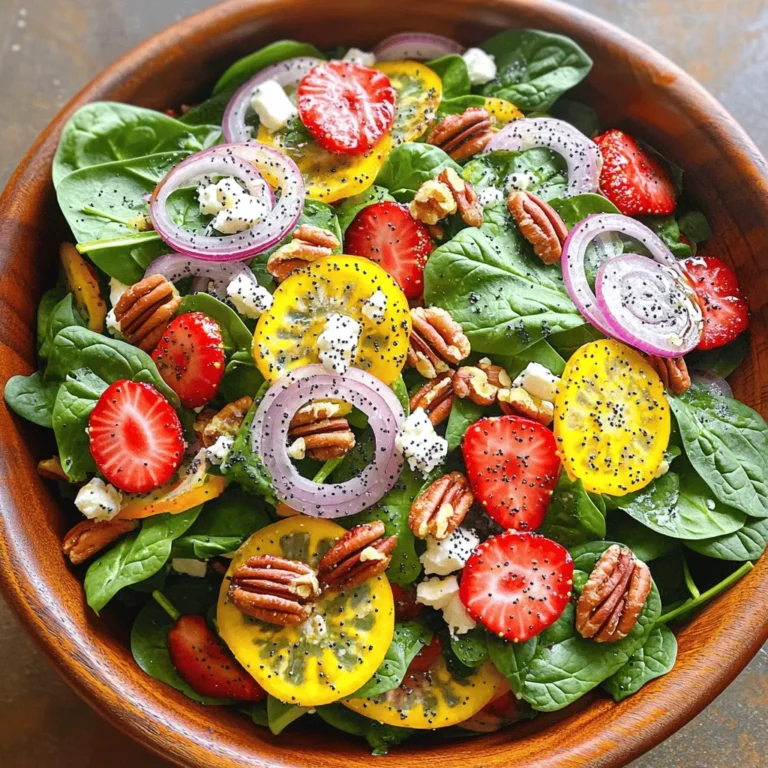
Strawberry Spinach Poppy Seed Salad Fresh and Tasty

- 8 oz fettuccine pasta (or pasta of your choice) - 2 tablespoons olive oil - 2 cups cremini mushrooms, sliced - 3 cloves garlic, minced - 1 cup raw cashews (soaked in water for at least 4 hours) - 1 cup unsweetened almond milk (or any plant-based milk) - 3 tablespoons nutritional yeast - 1 tablespoon lemon juice - Salt and pepper to taste - Fresh parsley, chopped (for garnish) To make this Vegan Alfredo Mushroom Pasta, you'll need the right ingredients. Fettuccine is the classic choice, but you can use any pasta you like. Cremini mushrooms add a rich flavor, while garlic gives it a nice kick. Soaking cashews makes them creamy for the sauce. Nutritional yeast adds a cheesy taste without dairy. Almond milk keeps it plant-based. Don't forget salt and pepper to make it pop! - Fettuccine pasta: Use gluten-free pasta or zucchini noodles for a lighter option. - Cremini mushrooms: Swap with button mushrooms or shiitake for different flavors. - Almond milk: Try soy milk, oat milk, or coconut milk if you prefer. - Nutritional yeast: Use vegan cheese or omit it if you need to. - Lemon juice: Vinegar can replace lemon juice for acidity. Substitutions can help fit your taste and dietary needs. Feel free to get creative with what you have on hand! This dish serves four people and packs in some great nutrients. Each serving has about: - Calories: 350 - Protein: 10g - Carbohydrates: 50g - Fiber: 4g - Fat: 15g This meal is not just tasty; it’s also a good source of healthy fats and plant protein. It’s perfect for those who want comfort food without the guilt. Enjoy! First, grab a large pot and fill it with water. Add a good pinch of salt. Bring the water to a boil. Once boiling, add 8 oz of fettuccine pasta. Cook it according to the package instructions until it's al dente. This usually takes about 8-10 minutes. After cooking, save 1 cup of the pasta water. Then, drain the pasta and set it aside. Next, take a large skillet and heat 2 tablespoons of olive oil over medium heat. Once hot, add 2 cups of sliced cremini mushrooms. Sauté them for about 5-7 minutes. You want them golden brown and tender. Then, add 3 cloves of minced garlic to the skillet. Cook for another 1-2 minutes until you can smell the garlic. Now, let's make the creamy sauce. In a blender, combine 1 cup of soaked raw cashews, 1 cup of unsweetened almond milk, 3 tablespoons of nutritional yeast, and 1 tablespoon of lemon juice. Add a pinch of salt and pepper too. Blend the ingredients until they are smooth and creamy. If the sauce is too thick, add some of the reserved pasta water to make it just right. Add the cooked fettuccine to the skillet with the sautéed mushrooms. Pour the Alfredo sauce over the pasta. Gently toss everything to mix it well. If needed, add more reserved pasta water for a smoother sauce. Taste and adjust the salt and pepper if necessary. Remove from heat and serve it in wide bowls. Top with fresh chopped parsley for color and flavor. Enjoy your creamy, vegan dish! To make the creamiest sauce, use soaked cashews. Soak them for at least four hours. This softens the nuts and helps blend them smoothly. Blend the soaked cashews with almond milk until creamy. If the sauce is too thick, add some reserved pasta water. The water helps reach the perfect consistency. Always taste your sauce. Adjust salt and pepper to your liking for the best flavor. I love using cremini mushrooms for this dish. They have a rich, earthy flavor. You can also try portobello mushrooms for a meatier texture. Shiitake mushrooms add a unique taste, too. Mix different types for added depth. Each kind brings its own flavor, making the dish more exciting. If you want gluten-free pasta, use brown rice or chickpea pasta. They are tasty and hold the sauce well. Zucchini noodles are a great low-carb choice, too. They add nutrients and keep the dish light. For a high-protein option, look for lentil pasta. It boosts protein while still tasting great. Choose the pasta that fits your diet best! {{image_2}} You can make this dish even better by adding more veggies. Try adding spinach, kale, or broccoli. These greens provide vitamins and minerals. You can toss them in while sautéing the mushrooms. They will cook down nicely and blend with the sauce. Carrots or bell peppers also work well. Just chop them small so they cook fast. Herbs and spices can make your pasta more exciting. Fresh basil or oregano adds a nice touch. You can sprinkle them in while cooking. Try adding a pinch of red pepper flakes for some heat. This will give the dish a spicy kick. You can also add a touch of smoked paprika for a deeper flavor. These small changes can take your dish to the next level. Want to add protein? Tofu or tempeh is a great choice. You can cube and sauté them before adding the mushrooms. This will give your pasta a hearty feel. Chickpeas are another option. They can be tossed in with the pasta for extra protein. These options will keep you full and satisfied. Plus, they add more texture to the dish. To keep your Vegan Alfredo Mushroom Pasta fresh, store it in an airtight container. Make sure it cools to room temperature first. This helps to prevent moisture buildup. You can keep it in the fridge for up to three days. If you want to enjoy it later, store the pasta and sauce separately to maintain texture. When you're ready to eat the leftovers, reheat them gently. You can use the stove or the microwave. For the stove, add a splash of plant-based milk to the pasta. This helps the sauce stay creamy. Stir over low heat until warm. If using a microwave, heat in short intervals. Stir in between to avoid hot spots. If you want to freeze Vegan Alfredo Mushroom Pasta, place it in a freezer-safe container. It can last up to three months in the freezer. When you’re ready to eat it, thaw it in the fridge overnight. Reheat it on the stove, adding a bit of almond milk to restore its creaminess. Enjoy your delicious pasta again! Vegan Alfredo is creamy and rich. It uses simple plant-based ingredients. The main base is soaked cashews, which add creaminess. You also need almond milk for fluidity and nutritional yeast for a cheesy flavor. Garlic and lemon juice enhance the taste, while mushrooms add texture. Yes, you can easily make this dish gluten-free. Just swap regular pasta for gluten-free pasta. Look for options made from rice, quinoa, or lentils. These alternatives will still give you a delicious meal without gluten. To make Vegan Alfredo without nuts, use silken tofu instead of cashews. Blend silken tofu with almond milk, nutritional yeast, garlic, and lemon juice. This will create a creamy texture, just like the nut-based version. You can also use cooked cauliflower for a nut-free sauce. Many sides go well with this pasta dish. Here are a few ideas: - A fresh green salad with lemon vinaigrette - Roasted or steamed vegetables like broccoli or asparagus - Garlic bread or crusty baguette - A light soup, such as tomato or vegetable soup Yes, you can prep this dish ahead of time. Cook the pasta and store it in the fridge. You can also make the sauce and keep it in a separate container. When you are ready to eat, just warm everything together. Add a little pasta water to adjust the sauce’s creaminess. In this post, I covered how to make Vegan Alfredo Mushroom Pasta. We explored ingredients, cooking steps, and storage tips. You learned about substitutes and variations for different diets. The right mushrooms and sauces can make your dish shine. This recipe is not only tasty but also flexible. Feel free to add veggies or proteins to suit your taste. Most importantly, enjoy cooking and sharing this meal with others. Your kitchen can create something wonderful!

Vegan Alfredo Mushroom Pasta Creamy and Flavorful Dish

The key to bold and flavorful Sriracha Lime Chicken Wings lies in the perfect mix of ingredients. Here’s what you need: - 2 lbs chicken wings - 1/4 cup Sriracha sauce - 1/4 cup honey - 2 tablespoons olive oil - Juice of 2 limes - Zest of 1 lime - 3 cloves garlic, minced - 1 teaspoon ground cumin - 1/2 teaspoon salt - 1/4 teaspoon black pepper - Fresh cilantro, chopped (for garnish) - Lime wedges (for serving) Each ingredient adds its own flair. The chicken wings serve as the canvas, absorbing all the flavors. Sriracha sauce brings heat, while honey adds sweetness. Olive oil ensures moisture and helps with crispiness. Lime juice and zest brighten the dish, and garlic adds depth. Ground cumin gives a warm note, while salt and pepper enhance the overall taste. For garnishing, cilantro adds freshness, and lime wedges offer a tangy kick when served. First, gather all your marinade ingredients in a large bowl. You need: - 1/4 cup Sriracha sauce - 1/4 cup honey - 2 tablespoons olive oil - Juice of 2 limes - Zest of 1 lime - 3 cloves garlic, minced - 1 teaspoon ground cumin - 1/2 teaspoon salt - 1/4 teaspoon black pepper Mix these ingredients together well. You want a smooth mixture, so stir until everything blends nicely. The zesty lime and spicy Sriracha will give your wings a bold kick! Next, it's time to coat the chicken wings. Add the 2 lbs of chicken wings to the marinade. Make sure each wing gets a good coating. This step is key for flavor. Cover the bowl with plastic wrap. Let the wings marinate in the fridge for at least 1 hour. For more flavor, you can marinate them overnight. Now, preheat your oven to 425°F (220°C). This temperature helps the wings cook evenly and get crispy. Line a baking sheet with parchment paper or foil for easy cleanup. Place a wire rack on top of the baking sheet. This setup allows hot air to circulate around the wings, making them crispy. Arrange the marinated wings on the wire rack in a single layer. Leave space between each wing. This will help them crisp up nicely. Bake in the oven for 35-40 minutes. Remember to turn the wings halfway through cooking. This ensures they brown evenly. Once golden brown and crispy, remove them from the oven. Let them rest for a few minutes before serving. To get crispy wings, spacing is key. When you place your wings on the rack, leave space between them. This allows hot air to circulate. If the wings touch, they won’t crisp up well. You can also try other cooking methods. Frying gives wings a nice crunch. Grilling adds smoky flavor and great texture. Both methods work well with the Sriracha lime taste. To kick up the flavor, think about adding spices. Paprika gives a nice smoky taste. Cayenne pepper can add more heat. You can mix these into the marinade for added depth. If you want to adjust the heat level, play with the Sriracha amount. Add more for a fiery blast. Use less if you prefer a milder taste. Balance is important, so find what you enjoy best. {{image_2}} You can change the flavor of your wings with different sauces. - Sweet chili sauce: This sauce adds a sweet and spicy kick. Just swap it for Sriracha in the marinade. It gives a nice glaze when baked. - Buffalo sauce substitutes: If you like heat, try buffalo sauce. Use it in place of Sriracha for a classic kick. You can mix it with butter for added richness. There are other ways to cook these wings if you want to try something new. - Air fryer method: Preheat your air fryer to about 400°F (200°C). Cook the wings for 25-30 minutes. Shake the basket halfway through for even cooking. They will come out crispy and delicious! - Slow cooker adaptation: For a hands-off approach, use a slow cooker. Marinate your wings as usual. Then, place them in the slow cooker on low for 4-6 hours. This method makes them tender and juicy, though they won’t be crispy. You can also make these wings fit your diet. - Gluten-free options: Make sure to use gluten-free Sriracha and honey. Most brands are gluten-free, but check the labels to be safe. - Low-sugar substitutions: To cut sugar, use less honey or try a sugar substitute. You can also add more lime juice for balance. This keeps the flavor bright without the extra sweetness. To keep your leftover wings fresh, place them in an airtight container. You can also wrap them tightly in plastic wrap or aluminum foil. This helps prevent them from drying out. Store the wings in the fridge. They will stay good for up to three days. After that, they may lose their taste and texture. For the best taste, reheating wings in the oven works well. Preheat your oven to 350°F (175°C). Place the wings on a baking sheet lined with foil. Heat them for about 10-15 minutes. This method keeps them crispy. You can also use a microwave, but it may make them a bit soggy. If you choose the microwave, heat them for 1-2 minutes. Remember to check that they are hot all the way through. Enjoy your tasty wings again! For the best flavor, marinate chicken wings for at least one hour. If you can, let them sit overnight. This longer time allows the flavors to soak into the meat well. It makes the wings taste amazing! Yes, you can freeze Sriracha Lime Chicken Wings. First, let them cool completely. Then, place them in an airtight container or freezer bag. Make sure to remove as much air as possible to avoid freezer burn. These wings can last up to three months in the freezer. These wings taste great with many sides. Here are some ideas: - Fresh vegetable sticks like carrots and celery - Creamy ranch or blue cheese dip - Crispy French fries or sweet potato fries - A light salad with lime dressing - Corn on the cob for a sweet touch Feel free to mix and match! These sides will balance the spice and flavor of your wings. You now have a great recipe for Sriracha Lime Chicken Wings. We covered the ingredients needed, from chicken wings to garnishes. I provided clear steps for marinating and baking, ensuring you achieve crispy wings. I shared tips for flavor and variations, plus how to store and reheat your leftovers. Enjoy your wings with family and friends. Experiment with different sauces and cooking methods. Keep these tips in mind for tasty results every time. You’ll impress everyone at your next gathering!

Sriracha Lime Chicken Wings Bold and Flavorful Recipe

- 2 cups all-purpose flour - 1/3 cup granulated sugar - 1 tablespoon baking powder - 1/2 teaspoon salt For the dry ingredients, start with all-purpose flour. This gives the scones their base. Next, add granulated sugar for sweetness. Baking powder helps the scones rise, making them fluffy. Salt enhances all the flavors and balances the sweetness. - 1/2 cup unsalted butter, cold and cubed - 1/2 cup buttermilk - 1 large egg - 1 teaspoon vanilla extract Now, let’s look at the wet ingredients. Cold, cubed butter is key for flakiness. When the butter stays cold, it creates layers in the scones. Buttermilk adds moisture and tang. The egg binds everything together, while vanilla adds a lovely aroma. - 3/4 cup dried cranberries - Zest of 1 orange - Optional: 1/2 cup orange glaze For flavor, dried cranberries bring tartness and chewiness. The zest of one orange adds brightness and a fresh scent. You can also drizzle an orange glaze over the scones for extra sweetness. This is optional but adds a nice touch. Each ingredient plays a big role in making these scones delightful. Mixing these together creates a beautiful balance of flavors and textures. Enjoy experimenting with these ingredients to create your own version! - Preheat your oven to 400°F (200°C) and prepare the baking sheet. - In a large bowl, mix the flour, sugar, baking powder, and salt until well combined. - Work in the cold, cubed butter until the mixture looks like coarse crumbs. - Add the dried cranberries and orange zest, mixing them in well. - In another bowl, whisk the buttermilk, egg, and vanilla extract together. - Pour the wet ingredients into the dry mix. Stir gently to combine without overmixing. - Turn the dough onto a floured surface and pat it into a disc, about 1 inch thick. - Cut the disc into 8 wedges and place them on the baking sheet, spacing them apart. - Bake for 15-18 minutes, or until the scones turn golden brown. For the best scones, keep your ingredients cold. Cold butter helps create a flaky texture. When you add it to the flour, it should stay in small bits. This gives the scones that light and airy feel. Another key tip is to avoid overmixing the dough. Mix just until you combine the wet and dry parts. If you mix too much, your scones can turn out tough. You want a soft, tender bite. Serve your scones warm on a rustic wooden board. This adds charm and makes them look great. You can garnish with fresh cranberries and orange slices. This not only looks nice but also adds color to your table. Pair these scones with drinks like tea or coffee. The bright flavors of cranberry and orange work well with both. You might also try them with a glass of fresh orange juice for a morning treat. One common mistake is overworking the dough. Remember, more mixing is not better. This can make your scones dense instead of light. Another mistake is not setting the oven right. Make sure your oven is at 400°F (200°C) before baking. If it is too hot or too cold, your scones may not bake properly. Keep an eye on the time, too. Bake them for 15-18 minutes or until they are lightly golden. {{image_2}} You can change the flavor of your cranberry orange scones in fun ways. Try using fresh cranberries instead of dried ones. Fresh cranberries give a tart punch. You might also add nuts or chocolate chips for a tasty twist. Walnuts or pecans add crunch and richness. Chocolate chips bring a sweet touch that pairs well with orange. If you need gluten-free scones, swap regular flour for a gluten-free blend. Look for a blend that works well for baking. You can also make vegan scones. Use plant-based butter and a flax egg instead of a chicken egg. A flax egg is easy to make. Just mix one tablespoon of ground flaxseed with three tablespoons of water. Let it sit for a few minutes until it thickens. You can adapt this recipe to fit the seasons. In spring, try using berries like strawberries or blueberries. In the fall, add apples or pears for a cozy flavor. For winter holidays, spice it up with cinnamon or nutmeg. A dash of these spices can make your scones even more special. These twists keep your scones fresh and exciting all year long. To keep your cranberry orange scones fresh, store them at room temperature. Use an airtight container to prevent them from drying out. Place a paper towel inside to absorb moisture. This helps maintain their flaky texture for about two days. If you want to save them for later, freezing is a great option. Wrap each scone tightly in plastic wrap. Then, place them in a freezer-safe bag. They can last up to three months in the freezer. When you’re ready to enjoy them, just thaw them overnight in the fridge or on the counter for a few hours. To reheat scones and keep them fresh, the oven is your best bet. Preheat the oven to 350°F (175°C). Place the scones on a baking sheet and heat for about 10 minutes. This will help restore their crispiness. If you’re short on time, you can use the microwave. Heat each scone for about 15-20 seconds. However, this may make them a bit soft rather than crisp. Cranberry orange scones last about two days at room temperature. You can keep them in the fridge for up to a week. Just remember to store them in an airtight container. Watch for signs of spoilage, such as a dry texture or mold. If they smell off or taste stale, it’s best to toss them. Always prioritize freshness for the best flavor experience. Yes, you can prepare the dough ahead. After mixing, shape the dough into a disc. Wrap it tightly in plastic wrap and store it in the fridge for up to 24 hours. When ready to bake, cut the dough into wedges and bake as usual. This saves time and lets the flavors blend. If you lack buttermilk, you can make a quick substitute. Mix 1/2 cup of milk with 1/2 tablespoon of lemon juice or vinegar. Let it sit for about 5 minutes. This gives you a similar tangy flavor needed for the scones. The orange glaze is not required, but it adds a sweet touch. It enhances the scones’ flavor and gives them a beautiful finish. If you prefer less sweetness, serve the scones plain. Both options taste great! You can find cranberry orange scones in many bakeries and cafes. Look for local spots known for fresh baked goods. Grocery stores often carry them, too, especially during the holiday season. Check the bakery section for fresh options. To test if your scones are done, look for a golden-brown top. They should feel firm to the touch. You can also insert a toothpick into the center; it should come out clean. If it’s wet, bake for a few more minutes. You now know how to make delicious cranberry orange scones. We covered all the steps, from mixing dry and wet ingredients to perfect baking. Remember to use cold ingredients and avoid overmixing for the best texture. Add your favorite fruits or nuts for a personal twist. Store your scones properly to enjoy them later. Baking can be fun and rewarding. Try these tips and enjoy your tasty treats!

Cranberry Orange Scones Flaky and Flavorful Delight

- 6 large eggs - 1/2 cup cottage cheese - 1/2 cup spinach, chopped - 1/4 cup bell pepper, diced - 1/4 cup onion, finely chopped - 1/2 cup cooked chicken, shredded - 1/4 teaspoon garlic powder - 1/4 teaspoon black pepper - 1/4 teaspoon salt - 1/2 cup shredded cheese (cheddar or feta) These ingredients combine to create a delicious and healthy breakfast. Eggs provide a solid base, full of protein. Cottage cheese adds creaminess and even more protein. Spinach and bell peppers boost the vitamins and minerals. Cooked chicken makes these muffins filling. You can mix and match the ingredients based on your taste. Protein-packed egg muffins offer many health benefits. They are high in protein, which helps build and repair muscles. The eggs and cottage cheese provide essential amino acids. Spinach and bell peppers add vitamins A and C. These muffins are low in carbs, making them a great choice for many diets. Healthy fats from cheese keep you full longer. - Muffin tin - Mixing bowls - Whisk and measuring cups Having the right tools makes cooking easier. A muffin tin shapes the muffins perfectly. Mixing bowls help combine all the ingredients well. A whisk ensures a smooth mixture. Use measuring cups for accuracy to get the best results. - Preheat the oven to 350°F (175°C). - Grease the muffin tin or use liners. Start by heating your oven. This step is key in getting the muffins to rise well. Greasing the tin or using liners helps with easy removal. - Whisk eggs and cottage cheese. - Add veggies and meat, mix thoroughly. In a large mixing bowl, whisk the eggs and cottage cheese together. This combo adds creaminess and protein. Next, add the chopped spinach, diced bell pepper, chopped onion, and shredded chicken. Mix it all well. You want every bite to have a bit of everything. - Pour mixture into muffin cups. - Bake for 20-25 minutes until set. Pour the egg mixture into the muffin cups. Fill each cup about three-quarters full. Bake them in the preheated oven for 20 to 25 minutes. The muffins should puff up, and a toothpick should come out clean when inserted. Enjoy the lovely aroma while they bake! - Avoid overmixing the egg mixture. This keeps the muffins fluffy and light. - Bake until the tops are lightly golden. This shows they are cooked just right. - Make a batch for the week. This saves time on busy mornings. - Store in the fridge or freezer. They stay fresh and ready to eat. - Serve with avocado or salsa. This adds flavor and healthy fats. - Pair with a side salad. This makes a complete, balanced meal. {{image_2}} You can make your egg muffins even better by changing some ingredients. First, swap cottage cheese for Greek yogurt. This change keeps the muffins creamy and adds a tangy flavor. You can also use different vegetables. Try adding zucchini or mushrooms for a new taste. Both veggies bring great texture and nutrients. To boost the flavor, add fresh herbs like dill or parsley. These herbs brighten the taste and add a pop of color. You can also experiment with different cheese varieties. Cheddar adds sharpness, while feta brings a salty zing. Mixing cheeses can create a unique flavor that you’ll love. If you want a vegetarian option, just omit the chicken. You can replace it with more veggies or beans for protein. Also, if you have allergies, make sure to pick gluten-free options. This way, everyone can enjoy these muffins without worry. To keep your protein packed egg muffins fresh, store them in an airtight container. They will last for up to one week in the fridge. This makes it easy to grab a healthy breakfast on busy mornings. For longer storage, freeze the muffins. Place them on a baking sheet first. Once they are frozen, transfer them to a freezer bag. They can be stored for up to three months. This way, you can always have a protein boost ready whenever you need it. When you’re ready to enjoy your muffins, reheat them in the microwave or oven. For the best taste, serve them warm. This enhances their flavor and gives you that fresh baked experience again. You can boost protein in these muffins easily. - Add more eggs or cottage cheese. - Include toppings like diced turkey or bacon. These changes will add flavor and make them even more filling. Yes, you can make these muffins ahead of time. They store well and are great for meal prep. Simply keep them in an airtight container in the fridge. They last about one week. You can also freeze them for later use. Yes, these muffins are quite healthy. They are high in protein and nutrient-dense. With ingredients like eggs, spinach, and chicken, they offer many vitamins. You get healthy fats and low carbs, making them a balanced meal. These protein-packed egg muffins are easy to make and great for any meal. You need simple ingredients like eggs, cheese, and veggies. They offer high protein, low carbs, and essential vitamins. Use a muffin tin to bake them in only 20-25 minutes. You can tweak the recipe with different veggies or cheeses to fit your taste. Meal prep for the week, store them well, and enjoy them at any time. With these tips, I hope you create your own tasty muffins and fuel your day!

Protein Packed Egg Muffins Nutritious Breakfast Delight

PREV 1 … 45 46 47 … 86 NEXT
spicy fork kitchen

explore

DessertsDinnerAppetizersDrinks

Our Policies

  • Cookie Policy
  • Copyright Policy
  • Disclaimer
  • GDPR Policy
  • Terms Of Use
Back to Top
  • About
  • Contact Us
  • Privacy Policy
© 2026 spicy fork kitchen