FREE DINNER EBOOK! Get your copy!
  • Cookie Policy
  • GDPR Policy
  • Disclaimer
  • Terms Of Use
  • Visit my other site: Fun Cookie Recipes
spicy fork kitchen
  • Home
  • Dinner
  • Desserts
  • Drinks
  • Appetizers
  • Contact
  • About
  • Privacy Policy
  • Home
  • Dinner
  • Desserts
  • Drinks
  • Appetizers
  • Contact
  • About
  • Privacy Policy
  • Cookie Policy
  • GDPR Policy
  • Disclaimer
  • Terms Of Use
Visit my other site: Fun Cookie Recipes

HOME / CATEGORIES /

Latest

To make crispy tofu nuggets, you need: - 1 block (14 oz) firm tofu, pressed and drained - ½ cup cornstarch - 1 teaspoon garlic powder - 1 teaspoon onion powder - 1 teaspoon smoked paprika - ½ teaspoon salt - ½ teaspoon black pepper - 1 tablespoon soy sauce (or tamari for gluten-free) - 1 tablespoon olive oil - Fresh parsley for garnish (optional) These ingredients work together to create a tasty and crunchy snack. Firm tofu holds up well and absorbs flavors nicely. The cornstarch gives a crispy texture, while the spices add great taste. You can enhance your tofu nuggets with a tasty dipping sauce. Here are some options: - Sweet chili sauce - Sriracha - Tahini These sauces pair well with the nuggets. They add flavor and a creamy texture, making your snack even better. When picking tofu, always choose firm or extra-firm types. Soft tofu will not hold its shape. Look for tofu that is fresh and well-packaged. This ensures you get the best flavor and texture. Pressing the tofu is key. It removes excess moisture, leading to crispier nuggets. {{ingredient_image_1}} Start by pressing and draining one block of firm tofu. This step removes excess water, helping the tofu get crispy. Cut the tofu into bite-sized cubes or nugget shapes. Aim for even pieces to cook well. Preheat your air fryer to 400°F (200°C) while you prepare the tofu. In a large bowl, mix together cornstarch, garlic powder, onion powder, smoked paprika, salt, and black pepper. This mix adds flavor and crunch. In a separate bowl, combine soy sauce and olive oil. Toss the tofu nuggets in this mixture until they are well coated. Next, sprinkle the cornstarch mix over the nuggets. Toss gently until every piece is covered. Place the coated tofu nuggets in the air fryer basket. Make sure they are in a single layer to ensure crispiness. Avoid overcrowding the basket. Air fry the nuggets for 15-20 minutes, shaking the basket halfway through. This helps them cook evenly. When they turn golden brown and crispy, they are ready. Transfer them to a serving plate, and add fresh parsley as a garnish if you like. Serve with your favorite dipping sauce, such as sweet chili, sriracha, or tahini. To get the best crunch, start with firm tofu. Press it well to remove water. Cut the tofu into small cubes or nuggets. Coat them in the soy sauce mixture first. Then, add the cornstarch mix. Make sure every piece is covered. This layering helps create a crispy crust. Avoid overcrowding the air fryer basket. Leave space between nuggets for better air flow. Shake the basket halfway through cooking for even crispiness. Most air fryers work well at 400°F (200°C). Cooking times can change based on the model. For most, 15-20 minutes is ideal. If your air fryer runs hot, check earlier. If it runs cooler, you might need extra time. Keep an eye on the nuggets. They should turn golden brown and crispy. Always shake or turn them halfway through for even cooking. Serve the tofu nuggets hot for the best taste. You can pair them with sweet chili sauce or sriracha for a kick. Tahini also makes a great dip if you want something creamy. Add fresh parsley on top for color. Serve alongside a crisp salad for a complete meal. These nuggets make a tasty snack or a fun appetizer for any gathering. Pro Tips Press Tofu Well: Ensure you press the tofu thoroughly to remove excess moisture. This helps achieve maximum crispiness in the air fryer. Even Coating: Coat the tofu evenly with the cornstarch mixture to get a consistent crispy texture on every nugget. Don’t Overcrowd: Place the tofu nuggets in a single layer in the air fryer basket, allowing for proper airflow and even cooking. Customize Seasoning: Feel free to adjust the spices and seasonings according to your taste preferences for a unique flavor profile. {{image_2}} You can easily change the flavor of your tofu nuggets. Here are some ideas: - Curry Powder: Add a teaspoon of curry powder for a warm, spicy taste. - Cayenne Pepper: If you like heat, try adding a pinch of cayenne. - Italian Herbs: Mix in dried oregano or basil for a fresh twist. - Lemon Zest: A little lemon zest can brighten the flavors. Feel free to mix and match these spices to find your favorite blend. The right sauce can make your nuggets even better. Here are some tasty options: - Sweet Chili Sauce: This sauce adds a sweet and spicy kick. - Sriracha: Use sriracha for a bold, hot flavor. - Tahini: A creamy tahini sauce gives a nutty taste. - Barbecue Sauce: For a smoky flavor, dip in your favorite BBQ sauce. Try these sauces to see what you enjoy most. Want to make your nuggets vegan and gluten-free? It’s simple. Here’s what you can do: - Soy Sauce: Use tamari instead of regular soy sauce to keep it gluten-free. - Cornstarch: This ingredient is both vegan and gluten-free. - Olive Oil: This oil is also vegan and helps with crispiness. Make these swaps, and you’ll have a delicious snack that fits your diet. Store leftover tofu nuggets in an airtight container. Place them in the fridge. They stay fresh for about 3 days. Make sure they cool down first to keep them crispy. To reheat, use your air fryer. Set it to 350°F (175°C) for about 5-7 minutes. This keeps them crunchy. You could also use the oven. Place them on a baking sheet and heat for 10-12 minutes. You can freeze tofu nuggets if you want to save them. First, let them cool down completely. Then, place them in a single layer on a baking sheet. Freeze for 1-2 hours until solid. After that, transfer them to a freezer bag. They last up to 3 months. When ready to eat, cook them straight from frozen in the air fryer for 15-20 minutes. No, you cannot use soft tofu. Soft tofu is too moist. It won’t hold its shape or crisp up well. Firm tofu is best for this recipe. It gives a nice texture and holds the coating better. Always press firm tofu to remove excess water. This helps make the nuggets crispy. To make this recipe soy-free, substitute soy sauce with coconut aminos or a blend of vinegar and salt. Coconut aminos gives a similar taste but is soy-free. You can also use tamari if you want a gluten-free option. Just ensure your other ingredients are also soy-free. The best dipping sauce for tofu nuggets depends on your taste. Sweet chili sauce adds a nice sweetness. Sriracha gives a spicy kick. Tahini offers a creamy option that pairs well. You can even mix them for more flavor. Try different sauces to find your favorite! You learned how to make crispy tofu nuggets from scratch. The main ingredients give a solid base, and optional sauces add flavor. I shared steps to prepare, coat, and air-fry these bites. Tips included how to get them super crispy and serving ideas. You can try variations with spices and sauces to fit your taste. Don't forget to store leftovers properly for later enjoyment. With these simple steps, you can enjoy tasty, homemade tofu nuggets any time!

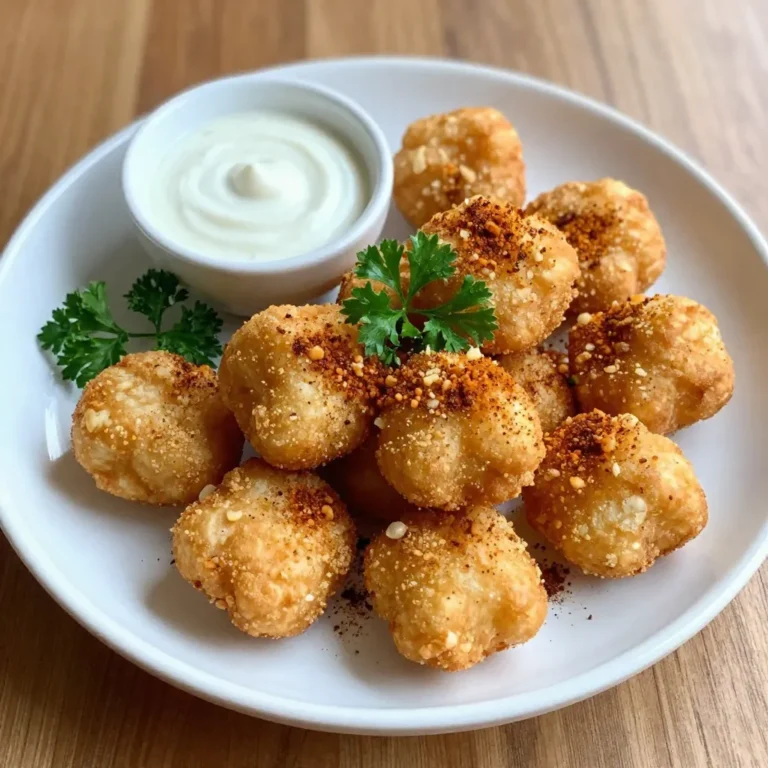
Crispy Air Fryer Tofu Nuggets Simple and Tasty Snack

- 1 lb boneless, skinless chicken thighs - 2 tablespoons olive oil - 1 tablespoon smoked paprika - 1 teaspoon chipotle powder - 1 teaspoon garlic powder - 1 teaspoon onion powder - 1 teaspoon ground cumin - Salt and pepper to taste - 1 lime, juiced - 8 small corn tortillas - 1 cup shredded red cabbage - 1/2 cup diced tomatoes - 1 avocado, sliced - Fresh cilantro for garnish In this recipe, chicken thighs shine. They are juicy and full of flavor. The marinade brings heat and smoke. You need olive oil, smoked paprika, chipotle powder, garlic powder, onion powder, ground cumin, lime juice, salt, and pepper. These all mix to create a tasty blend. Next, corn tortillas are key. They hold everything together. I love using small tortillas for easy handling. They pair perfectly with the smoky chicken. For toppings, I use shredded red cabbage for crunch. Diced tomatoes add freshness. Sliced avocado brings creaminess. Fresh cilantro brightens the dish. Each ingredient plays a part in making these tacos great. {{ingredient_image_1}} To start, make the marinade. In a bowl, mix together: - 2 tablespoons olive oil - 1 tablespoon smoked paprika - 1 teaspoon chipotle powder - 1 teaspoon garlic powder - 1 teaspoon onion powder - 1 teaspoon ground cumin - Salt and pepper to taste - Juice from 1 lime Once mixed, add the 1 lb of chicken thighs. Coat them well with the marinade. Cover the bowl and let it sit. For the best flavor, marinate for at least 30 minutes. If you have more time, marinate for up to 2 hours in the fridge. Now it’s time to cook the chicken. Preheat your grill or a skillet over medium-high heat. After it heats up, add the marinated chicken thighs. Cook them for 6-7 minutes on each side. You want them nice and charred. The chicken should reach an internal temperature of 165°F (75°C). Once done, take it off the heat and let it rest for a few minutes. This helps keep it juicy. Slice the chicken into thin strips. While the chicken rests, warm your corn tortillas. You can do this on the grill or in a dry skillet. Heat them for about 30 seconds on each side until they feel soft. Now, it's time to build your tacos. Start with a good amount of sliced chicken on each tortilla. Next, add toppings. Use: - 1 cup shredded red cabbage - 1/2 cup diced tomatoes - 1 avocado, sliced Finally, don’t forget to garnish with fresh cilantro. This adds a nice touch of flavor and color! Enjoy your smoky chipotle chicken tacos! For the best taste, marinate the chicken for at least 30 minutes. If you have time, let it sit for up to 2 hours. This longer marination makes the chicken extra tasty. If you like spice, add more chipotle powder. For less heat, cut back on the chipotle. You can also mix in some sweet paprika to balance the heat. Serve the tacos on a wooden board or a bright platter. This makes them look fun and inviting. Add lime wedges on the side for extra zest. For a pop of color, sprinkle some smoked paprika and add more cilantro on top. This will make your dish look even better and more appealing. Pro Tips Marinate for Maximum Flavor: Allow the chicken to marinate for at least 2 hours, or overnight if possible, to enhance the flavors and tenderness. Use a Meat Thermometer: To ensure the chicken is perfectly cooked, use a meat thermometer to check that the internal temperature reaches 165°F (75°C). Warm Tortillas Properly: Warm the corn tortillas on a hot skillet for a few seconds on each side to make them pliable and enhance their flavor. Fresh Ingredients Matter: Use fresh cilantro, ripe avocados, and crisp cabbage for the best texture and taste in your tacos. {{image_2}} You can easily swap chicken for other proteins. If you prefer beef, use flank steak. Marinate it the same way and grill until tender. For pork lovers, pork tenderloin works well, too. Just adjust cooking time based on thickness. If you want a vegetarian option, try grilled mushrooms or jackfruit. Both soak up the marinade flavors nicely. You can also use tofu, but press it first to remove excess water. This helps it absorb more taste. Toppings can change the whole taco experience. You can add fresh ingredients like diced onions and jalapeños. They add a nice crunch and heat. Crumbled queso fresco or feta cheese gives a creamy touch. For sauces, consider a tangy crema or a zesty salsa verde. These add moisture and flavor. You can also drizzle a bit of hot sauce for extra kick. Don’t forget lime wedges to squeeze over your tacos! After making your smoky chipotle chicken tacos, you may have some leftovers. To store them, place the tacos in an airtight container. Keep them in the fridge for up to three days. For best taste, try to eat them sooner. When reheating, take out the chicken and tortillas. Warm the chicken in a skillet over medium heat. Add a splash of water to keep it moist. Heat the tortillas in a separate pan for about 30 seconds on each side. This keeps them soft and tasty. If you want to save tacos for later, freezing is a great option. First, assemble the tacos without toppings. Wrap each taco in foil or plastic wrap. Place them in a freezer-safe bag. They can last up to three months in the freezer. To thaw, take the tacos out and move them to the fridge overnight. If you're in a hurry, you can microwave them. Heat on low power for a few minutes until warm. Enjoy your smoky chipotle chicken tacos anytime! To make smoky chipotle chicken tacos from scratch, follow these steps: 1. Mix olive oil, smoked paprika, chipotle powder, garlic powder, onion powder, cumin, lime juice, salt, and pepper in a bowl. This is your marinade. 2. Add chicken thighs to the marinade. Coat them well and let them sit for 30 minutes in the fridge. 3. Heat a grill or skillet over medium-high heat. Cook the marinated chicken for 6-7 minutes on each side until it reaches 165°F. 4. Let the chicken rest for a few minutes. Slice it into thin strips. 5. Warm corn tortillas in a skillet for about 30 seconds each side. 6. Assemble the tacos by placing chicken on each tortilla. Top with red cabbage, diced tomatoes, and avocado. 7. Add fresh cilantro on top for flavor. Yes, you can use different types of chicken. Chicken breasts work well, but they may cook faster. Thinly slice them for even cooking. If you want to switch proteins, turkey or pork can also be tasty. Some great sides for tacos include: - Spanish rice - Refried beans - Grilled corn on the cob - A fresh guacamole - A light salad with lime dressing These sides add more flavor and texture to your meal. Enjoy! This post covered how to make smoky chipotle chicken tacos. We talked about ingredients, marinade tips, and cooking methods. You learned how to assemble and present your tacos for the best flavor. I shared ideas for variations and storage, too. Remember, the key to great tacos lies in marinating the chicken well and choosing fresh toppings. Enjoy creating and sharing this dish with friends and family. Happy cooking!

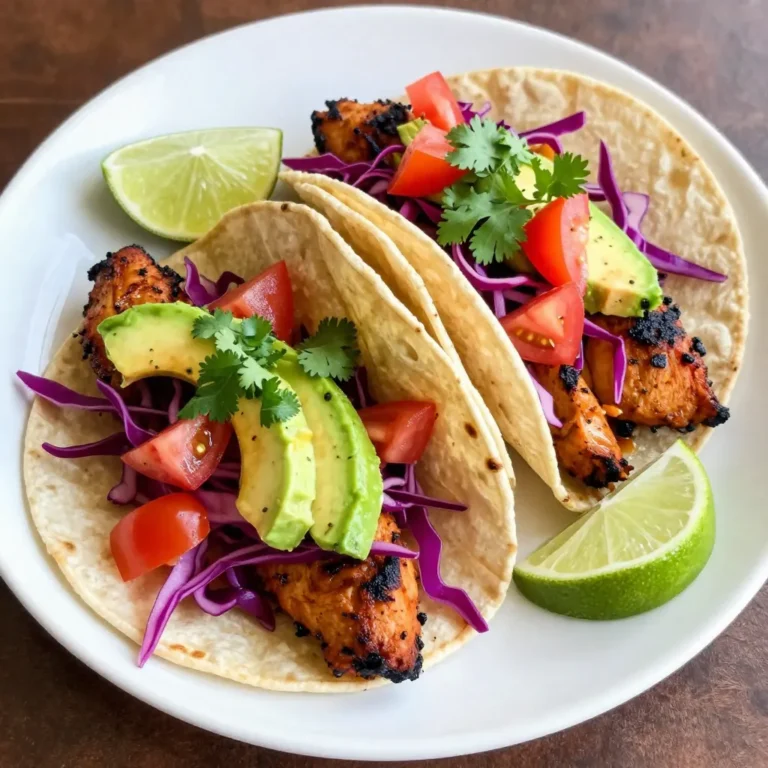
Smoky Chipotle Chicken Tacos Flavorful and Easy Meal

- 4 large flour tortillas - 1 cup shredded mozzarella cheese - 1 cup pepperoni slices - 1/2 cup pizza sauce (plus additional for dipping) - 1/4 cup sliced black olives - 1/4 cup sliced bell peppers - 1 teaspoon dried oregano - 1 teaspoon garlic powder - Cooking spray or olive oil To make pepperoni pizza quesadillas, you need a few basic items. Start with large flour tortillas. They hold the filling well. Next, get shredded mozzarella cheese. This cheese melts beautifully, giving that gooey texture we love. Pepperoni slices are a must. They add flavor and a bit of spice. Don't forget the pizza sauce. You can use it inside the quesadilla and for dipping. For added flavor and crunch, consider using optional ingredients. Black olives bring a savory touch. Bell peppers add color and sweetness. Dried oregano gives a nice Italian flair. Garlic powder boosts the taste, too. Finally, use cooking spray or olive oil to cook the quesadilla. This helps it get golden and crispy. All these ingredients will make your quesadillas tasty and fun! To start, heat a large skillet over medium heat. Lightly spray it with cooking spray or drizzle some olive oil. This helps the quesadilla cook well without sticking. Place one tortilla in the skillet. Sprinkle half of the shredded mozzarella cheese evenly on top. Next, layer half of the pepperoni slices over the cheese. If you like, add black olives and bell peppers for more flavor. These toppings give your quesadilla a tasty twist. Now, spoon half of the pizza sauce over the toppings. This adds moisture and flavor. Sprinkle some dried oregano and garlic powder on top, then add the rest of the mozzarella cheese. Finally, place a second tortilla on top to complete the quesadilla. Cook the quesadilla for about 3-4 minutes or until the bottom side turns golden brown. You can lift the edge with a spatula to check the color. Once it’s golden, carefully flip the quesadilla over. Cook the other side for another 3-4 minutes. This side should also be golden and the cheese should be melted. After cooking, remove the quesadilla from the skillet. Let it rest for a minute to cool down a bit. Then, cut it into wedges for easy serving. Serve your quesadilla with extra pizza sauce for dipping. This adds a fun touch and enhances the flavor! Enjoy your tasty creation! To get that gooey, melted cheese, cook on medium heat. Too high a temperature can burn the tortillas before the cheese melts. I like to use a mix of mozzarella and provolone for a creamy texture. This blend melts well and adds great flavor. Spice up your quesadillas with dried oregano and garlic powder. These herbs bring out that pizza taste. You can also add crushed red pepper for some heat. Want to make it your own? Customize with toppings like mushrooms or spinach. Serve your quesadillas cut into wedges for easy sharing. Place them on a colorful plate to make it pop. For garnish, sprinkle fresh parsley or basil on top. A small bowl of pizza sauce for dipping always adds a nice touch. {{image_2}} You can make a tasty vegetarian version of pepperoni pizza quesadillas. Use ingredients like mushrooms, spinach, or artichokes. These plant-based toppings add flavor and nutrients without meat. For cheese, try using a blend of mozzarella and cheddar. Vegan cheese works well too. It melts nicely and keeps the quesadilla creamy. If you want more protein, chicken or sausage can be great choices. Grilled chicken adds a nice flavor and pairs well with pizza sauce. For sausage, use crumbled Italian sausage. Cook it before adding it to the quesadilla. Layer it with cheese and pepperoni for a hearty meal. For those who love heat, adding jalapeños can spice things up. Sliced jalapeños give a nice kick. You can also drizzle hot sauce on top for extra flavor. Want more spice? Add crushed red pepper flakes or diced habaneros. Be careful, though, as they can be very hot. Store your leftover quesadillas in the fridge. Use an airtight container to keep them fresh. They stay good for about 3 to 4 days. If you want to keep them longer, consider freezing. To freeze quesadillas, let them cool first. Wrap each one in plastic wrap. Then, place them in a freezer bag. They can last for up to 2 months. When you’re ready to eat, take them out and thaw in the fridge overnight. Reheat quesadillas in a skillet for the best result. Heat on medium until warm, about 3-4 minutes on each side. This method keeps them crispy. Avoid using a microwave, as it can make them soggy. If you use a microwave, place a paper towel on top to absorb moisture. To get a crispy quesadilla, use a hot skillet. You can also use less cheese for a crisper bite. Lightly oil the pan with olive oil or cooking spray. Cook each side for 3-4 minutes. Keep an eye on the color. You want it golden brown. If you want even more crunch, try pressing the quesadilla down with a spatula. This helps the outside crisp up nicely. Yes, you can use corn tortillas! Corn tortillas have a distinct flavor. They are also gluten-free, which is great for some diets. However, they can break easier. To help, warm them up first to make them more pliable. You might also need to adjust the cooking time. Corn tortillas cook faster, so check them often. I love serving these quesadillas with sides that complement their flavor. A fresh salad adds a nice crunch. You can also serve them with marinara sauce for dipping. Garlic bread is another tasty choice. For a fun twist, try some pickled jalapeños or a side of guacamole. These options bring out the best in your quesadillas! This article covers how to make tasty pepperoni pizza quesadillas from scratch. You learned about main and optional ingredients, along with step-by-step cooking methods. Tips to achieve the best cheese melt and presentation ideas help elevate your dish. You can explore variations to fit your taste, plus storage and reheating tips for leftovers. Enjoy crafting this easy and delicious meal anytime!

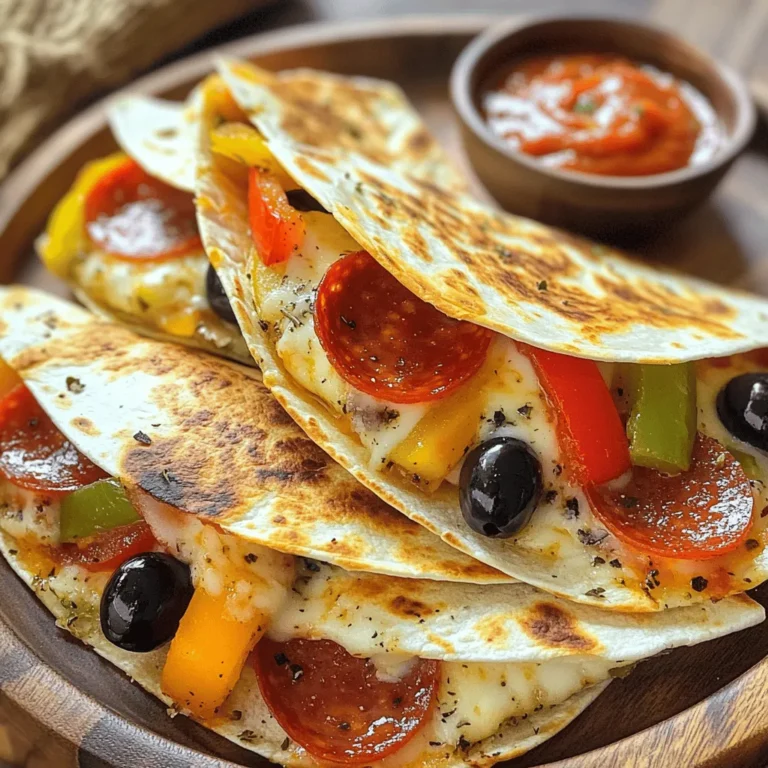
Pepperoni Pizza Quesadillas Easy and Delicious Recipe

- 1 cup plain Greek yogurt - 1 cup granulated sugar - 3 large eggs - 1/3 cup vegetable oil - Zest of 1 lemon - 1 tablespoon lemon juice - 1 teaspoon vanilla extract - 2 cups all-purpose flour - 1 tablespoon baking powder - 1/2 teaspoon baking soda - 1/4 teaspoon salt - 1 cup fresh blueberries (or frozen, if needed) - Powdered sugar for dusting (optional) This lemon blueberry yogurt loaf uses simple ingredients that create big flavors. The Greek yogurt gives it a moist texture. The fresh blueberries burst with sweetness, and the lemon adds brightness. - Alternatives for Greek yogurt: You can use regular yogurt or sour cream. Both will work well. - Egg replacements for a vegan option: Try using flax eggs. Mix 1 tablespoon of flaxseed meal with 2.5 tablespoons of water. Let it sit for a few minutes to thicken. - Different oils and sweeteners: You can swap vegetable oil for coconut oil or melted butter. For sweeteners, honey or maple syrup can replace granulated sugar. Adjust the amount based on your taste. Feel free to mix and match these options. This way, you can make this loaf fit your diet and taste! 1. Preheat the Oven: Set your oven to 350°F (175°C). Grease a 9x5-inch loaf pan or line it with parchment paper. This helps the loaf release easily after baking. 2. Mix Wet Ingredients: In a large bowl, whisk together 1 cup of plain Greek yogurt, 1 cup of granulated sugar, and 3 large eggs. Mix until everything blends well and is smooth. The yogurt adds moisture and tang. 3. Add Flavors: Stir in 1/3 cup of vegetable oil, the zest of 1 lemon, 1 tablespoon of lemon juice, and 1 teaspoon of vanilla extract. Ensure all flavors combine well for a fresh taste. 1. Mix Dry Ingredients: In another bowl, whisk together 2 cups of all-purpose flour, 1 tablespoon of baking powder, 1/2 teaspoon of baking soda, and 1/4 teaspoon of salt. This creates a balanced dry mix for the loaf. 2. Combine Mixtures: Gradually add the dry ingredients to the wet mixture. Stir gently until just combined. It’s key not to overmix, as this keeps the loaf light and fluffy. 1. Fold in Blueberries: Gently fold in 1 cup of fresh blueberries. If using frozen, ensure they are slightly thawed and coated with flour to help them stay afloat in the batter. 2. Pour into Pan: Pour the batter into your prepared loaf pan. Smooth the top with a spatula for even baking. 3. Bake: Place the pan in your preheated oven. Bake for 50-60 minutes. Check if a toothpick inserted in the center comes out clean. This indicates the loaf is done. To get the best texture in your lemon blueberry yogurt loaf, avoid overmixing. When you mix the wet and dry ingredients, do it gently. Stop as soon as you see no dry flour. Overmixing can make your loaf dense and tough. Even baking is also key. Make sure your oven is preheated to 350°F (175°C) before you put your loaf in. This helps the loaf rise evenly. Place the loaf in the center of the oven. This spot gets the best heat circulation. When using blueberries, fresh is great, but frozen works too. If you choose frozen blueberries, let them thaw first. Dust them lightly with flour before adding them to the batter. This keeps them from sinking. Fold the blueberries in gently to avoid breaking them. Use a spatula and a gentle motion. This keeps your batter light and fluffy while spreading the berries evenly throughout. {{image_2}} You can make this lemon blueberry yogurt loaf even more fun! Here are a couple of easy ideas: - Adding nuts or seeds: Chopped walnuts or sliced almonds add nice crunch. Add about 1/2 cup to the batter before baking. - Citrus variations for additional zest: Try using orange or lime zest. This gives a fresh twist to the loaf. Just swap out some lemon zest for the new flavor. Want to make your loaf a bit healthier? You can easily tweak the recipe: - Reducing sugar or using natural sweeteners: Try cutting the sugar by half. You can also use honey or maple syrup for a natural touch. Just remember to adjust the liquid slightly if you switch. - Incorporating whole grain flour: Swap out half of the all-purpose flour with whole wheat flour. This adds fiber and nutrients without changing much of the taste. To keep your lemon blueberry yogurt loaf fresh, follow these steps: - Cool Completely: Let the loaf cool fully on a wire rack. This prevents sogginess. - Wrap it Up: Wrap the loaf tightly in plastic wrap. This keeps moisture in. - Use a Container: Place the wrapped loaf in an airtight container. This protects it from odors. Storing your loaf this way can keep it fresh for up to five days. Place it in a cool, dry spot, away from direct sunlight. If you want to enjoy your loaf later, freezing is a great option. Here’s how: - Slice Before Freezing: Cut the loaf into slices for easy thawing later. - Wrap Each Slice: Wrap each slice in plastic wrap. This helps to prevent freezer burn. - Use a Freezer Bag: Place the wrapped slices into a freezer-safe bag. Squeeze out the air before sealing. To defrost, take out the slices and leave them at room temperature for about 30 minutes. For a warm treat, heat in the microwave for about 10-15 seconds. Enjoy your loaf without losing its taste! Can I make this recipe gluten-free? Yes, you can make this loaf gluten-free. Use a gluten-free flour blend. Look for one that includes xanthan gum. This helps to mimic the structure of regular flour. How can I adjust the recipe for a mini loaf? To make a mini loaf, reduce the baking time. Use a 5x3-inch loaf pan. Bake for about 30-40 minutes. Check with a toothpick to see if it’s done. Why is my loaf too dense? A dense loaf may come from overmixing the batter. Mix just until combined. Also, check your baking powder for freshness. Old baking powder can lose its strength. How do I know when it’s done baking? Your loaf is done when a toothpick comes out clean from the center. The top should be golden brown. If it's still wet, bake a few more minutes and check again. Pairing ideas for enjoying the loaf This loaf pairs well with fresh fruit or yogurt. You can also serve it with a dollop of whipped cream. A sprinkle of nuts adds a nice crunch. Best drinks to serve alongside the yogurt loaf Enjoy this loaf with a cup of herbal tea or fresh lemonade. Coffee also complements the flavors well. Choose what you love for the best experience. You now know how to make a delicious yogurt loaf. We covered the key ingredients, helpful substitutions, and detailed steps. I shared tips for the best texture and fun variations to try. Remember to store your loaf properly for freshness and freeze extras if needed. Use the FAQs for any questions that pop up during baking. Enjoy experimenting with flavors and sharing this tasty treat with others. Happy baking!

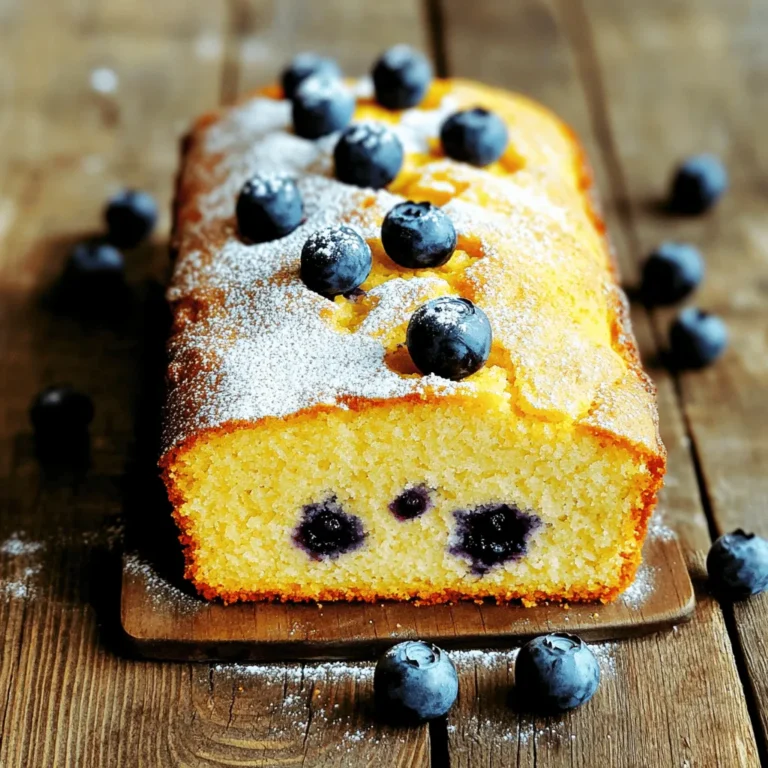
Lemon Blueberry Yogurt Loaf Delightful and Easy Recipe

To make tasty teriyaki pineapple meatballs, gather these key items: - 1 pound ground chicken or turkey - 1/2 cup breadcrumbs - 1/4 cup grated Parmesan cheese - 1/4 cup finely chopped green onion - 1 large egg - 2 cloves garlic, minced - 1 tablespoon fresh ginger, minced - 1 teaspoon soy sauce - 1 teaspoon sesame oil - 1/2 cup teriyaki sauce - 1 cup fresh pineapple chunks These ingredients blend to create a juicy meatball with sweet pineapple flavor. Adding garnishes makes your dish look great and adds flavor. Consider these options: - Sesame seeds - Fresh cilantro These touches bring color and a fresh taste to your plate. You can swap some items based on your taste or what you have. Here are a few ideas: - Use ground beef or pork instead of chicken or turkey. - Substitute breadcrumbs with crushed crackers or oats for a different texture. - If you don’t have fresh ginger, use ground ginger in a pinch. - For a gluten-free option, choose gluten-free breadcrumbs and soy sauce. These substitutions help you customize the recipe while keeping it delicious. First, you need to preheat your oven to 400°F (200°C). While that warms up, line a baking sheet with parchment paper. This helps the meatballs not stick. It makes cleanup easy too. In a large bowl, combine these ingredients: - 1 pound ground chicken or turkey - 1/2 cup breadcrumbs - 1/4 cup grated Parmesan cheese - 1/4 cup finely chopped green onion - 1 large egg - 2 cloves garlic, minced - 1 tablespoon fresh ginger, minced - 1 teaspoon soy sauce - 1 teaspoon sesame oil Mix these well until everything blends together. You want a nice, even texture. Now, shape the mixture into small meatballs, about 1 inch wide. Place them on your lined baking sheet. Bake them for 15-20 minutes. They should turn golden brown and be cooked through. While the meatballs bake, grab a small saucepan. Warm 1/2 cup teriyaki sauce over medium heat. Then, add 1 cup fresh pineapple chunks. Let it simmer for about 5 minutes. This lets the pineapple soften and soak up the sauce. When the meatballs finish baking, carefully move them to the saucepan with your teriyaki sauce. Gently toss them until they are coated well. Serve the meatballs warm on a platter. For a nice touch, sprinkle sesame seeds on top. Adding fresh cilantro is optional but gives a nice pop of color. To make juicy meatballs, start with fresh meat. Ground chicken or turkey works great. Use breadcrumbs to keep them moist. The egg helps bind the mixture. Mix gently to avoid tough meatballs. Overmixing can lead to a dry texture. Adding green onions gives a nice flavor and moisture. Always let the meatballs rest for a few minutes before cooking them. This helps them hold their shape. Set your oven to 400°F (200°C). This temperature helps meatballs cook evenly. Line your baking sheet with parchment paper. This keeps meatballs from sticking and makes cleanup easy. Make sure to space the meatballs well. They need room to brown. Bake them for 15-20 minutes. Check for a golden color and ensure they are cooked through. Use a food thermometer to check the center. It should read 165°F (74°C) for safety. Serve your Teriyaki Pineapple Meatballs warm. A platter looks nice for gatherings. Garnish with sesame seeds and fresh cilantro. You can also pair them with steamed rice or noodles. They fit well in a wrap or on a salad. Drizzle extra teriyaki sauce for added flavor. For a fun twist, serve with toothpicks for easy eating. Enjoy the balance of sweet and savory in every bite! {{image_2}} You can switch the ground chicken or turkey for other meats. Try ground beef for a richer taste. Ground pork adds a nice flavor too. If you want to keep it light, consider ground chicken breast. Each option brings a unique flavor and texture to your meatballs. For a vegetarian version, use plant-based ground meat. There are many options available now, like soy or pea protein. If you go vegan, swap the egg for a flaxseed egg or applesauce. These choices help bind the meatballs without using animal products. You can still enjoy the great flavors of teriyaki and pineapple in a meat-free way. While store-bought teriyaki sauce is easy, making your own is simple. Combine soy sauce, brown sugar, garlic, and ginger in a saucepan. Simmer it until it thickens slightly. You can also add orange juice for a citrus kick. Feel free to experiment with other sauces, like sweet chili or hoisin, to find your favorite flavor. The sauce can change the whole dish, so have fun with it! You can store leftover meatballs in a sealed container. Let them cool to room temperature first. Place them in the fridge for up to three days. If you want to keep them longer, freezing is a great option. To freeze meatballs, let them cool completely. Arrange them in a single layer on a baking sheet. Freeze for about two hours until solid. Then, transfer the meatballs to a freezer-safe bag or container. They can stay in the freezer for up to three months. To reheat, you can use an oven or a microwave. For the oven, preheat it to 350°F (175°C). Place the meatballs on a baking sheet and heat for about 10-15 minutes. In the microwave, heat them in short bursts of 30 seconds, checking often. Make sure they are hot all the way through before serving. Yes, you can make Teriyaki Pineapple Meatballs ahead. Prepare the meatballs and bake them. Once they cool, store them in the fridge. You can also freeze them for longer storage. When you’re ready to eat, just heat them up. This saves time on busy days. These meatballs pair well with many sides. Serve them with rice, noodles, or a fresh salad. You can also add steamed veggies for a colorful plate. Don’t forget to drizzle extra teriyaki sauce on top for more flavor. Your meal will look great and taste even better! Check the meatballs after baking for 15-20 minutes. They should be golden brown. Use a meat thermometer to check the inside. The meatballs need to reach 165°F (74°C) for chicken or turkey. This ensures they are safe to eat and packed with flavor. Yes, you can use canned pineapple. Drain it well to avoid excess juice. Canned pineapple still gives that sweet flavor we love. Fresh pineapple is great too, but canned works well in a pinch. Enjoy the taste in your Teriyaki Pineapple Meatballs! You learned how to make delicious Teriyaki Pineapple Meatballs, from selecting ingredients to cooking them perfectly. The recipe includes tips for juiciness and fun serving ideas. You can even adapt the dish for different diets or make it ahead of time. With these methods, you can enjoy a tasty meal that fits your needs. Now, it's time for you to cook and savor this sweet and savory treat!

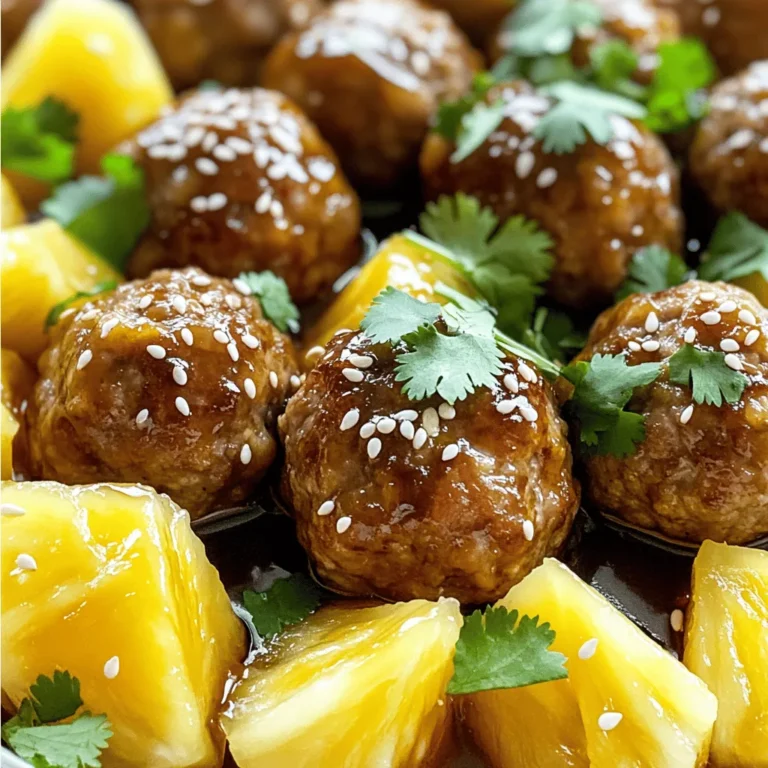
Teriyaki Pineapple Meatballs Flavorful and Easy Recipe

You can use fresh or frozen blackberries for this recipe. Fresh blackberries taste bright and sweet. They add a burst of flavor to your cobbler. If you have frozen ones, thaw them first. This helps keep the texture nice. Either choice works well, so pick what you have on hand. Here’s what you need to make blackberry cobbler: - 2 cups fresh blackberries (or frozen, thawed) - 1 tablespoon lemon juice - 1/2 cup granulated sugar, divided - 1 cup all-purpose flour - 1 teaspoon baking powder - 1/4 teaspoon salt - 1/2 cup milk - 1/4 cup unsalted butter, melted - 1 teaspoon vanilla extract - 1/2 teaspoon cinnamon These ingredients work together to create a sweet and buttery base. The blackberries provide a tart flavor that balances the sweetness. You can add some fun extras to your cobbler: - A pinch of nutmeg for warmth - Chopped nuts for crunch, like pecans or walnuts - A scoop of vanilla ice cream on top for creaminess These optional additions can make your dessert even more special. Consider trying them for a new twist! Start by preheating your oven to 350°F (175°C). Grab a 10-inch cast-iron skillet. Lightly grease it with butter or non-stick spray. This helps the cobbler not stick. It also gives a nice golden crust. In a medium bowl, toss together 2 cups of fresh blackberries and 1 tablespoon of lemon juice. Add 1/4 cup of granulated sugar to the mix. Gently coat the berries. Let them sit for about 10 minutes. This allows the juices to come out and makes the berries sweet and tasty. In a different bowl, mix 1 cup of all-purpose flour, 1 teaspoon of baking powder, 1/4 teaspoon of salt, and 1/2 teaspoon of cinnamon. Whisk these ingredients until they are well combined. In another bowl, whisk 1/2 cup of milk, 1/4 cup of melted unsalted butter, and 1 teaspoon of vanilla extract. Pour the wet mix into the dry mix. Stir until just combined. Do not overmix; the batter should be a bit lumpy. Pour the batter into your preheated skillet. Spread it evenly across the bottom. Now, spoon the blackberry mixture over the batter. Make sure to distribute the berries evenly. Bake in the oven for 30-35 minutes. Your cobbler is ready when the top is golden brown. A toothpick should come out clean from the center. Once done, let it cool slightly before serving. Enjoy it warm with a scoop of vanilla ice cream if you like! When choosing blackberries, look for shiny, plump fruits. They should be dark purple or black in color. Avoid berries that are soft, mushy, or dry. Fresh blackberries should have a sweet aroma. If you can, buy local blackberries for the best taste. Always check for mold or signs of spoilage. This will ensure your cobbler tastes great! One mistake is overmixing the batter. This can make the cobbler tough. Mix just until the dry and wet ingredients blend. Another issue is not greasing the skillet well. This can cause the cobbler to stick. Also, avoid opening the oven door too soon. Doing so can let heat escape and affect baking. Lastly, remember to check your oven's temperature. An oven thermometer can help. For a light and fluffy texture, use cold milk and melted butter. This helps the batter rise nicely. Don't skip the cinnamon; it adds flavor and warmth. If you want a crispy topping, bake until golden brown. Let the cobbler cool for a few minutes before serving. This helps set the texture. Serve with vanilla ice cream for a delicious touch! {{image_2}} You can easily make this recipe gluten-free. Use a gluten-free flour blend instead of all-purpose flour. This blend works well and will not change the taste much. If you want a dairy-free option, replace milk with almond milk or coconut milk. You can also swap the butter for coconut oil to keep it dairy-free. Want to switch things up? Add other fruits like blueberries, peaches, or raspberries. Mixing berries can create a new flavor burst. You can also add nuts, like chopped pecans or walnuts. These add a nice crunch and extra taste. For a spicy kick, try adding a pinch of nutmeg or ginger. Serve your warm blackberry cobbler with a scoop of vanilla ice cream. The cold ice cream melts into the warm cobbler, making it extra tasty. You can also top it with whipped cream for a light touch. Drizzle some extra blackberry juice over the top for a beautiful finish. Enjoy it fresh out of the oven for the best taste! To store leftover blackberry cobbler, let it cool first. Cover the skillet with plastic wrap or aluminum foil. You can also transfer it to an airtight container. Store it in the fridge for up to four days. This keeps the cobbler fresh and tasty. When you are ready to enjoy your leftover cobbler, preheat your oven to 350°F (175°C). Place the cobbler in an oven-safe dish if it is not already in one. Heat for about 15 to 20 minutes or until it is warm throughout. If you want a softer top, cover it with foil while reheating. You can freeze blackberry cobbler for later. Allow it to cool completely first. Wrap it tightly in plastic wrap, then in aluminum foil to prevent freezer burn. Store it in the freezer for up to three months. When you are ready to eat it, thaw it in the fridge overnight. Reheat it in the oven for the best texture. Yes, you can use frozen blackberries. Thaw them first. This will help keep the cobbler juicy. The flavor remains great, and the texture will still be nice. Just remember to drain any excess liquid. The cobbler is done when the top is golden brown. A toothpick should come out clean from the center. You can also check if the edges pull away from the skillet a bit. Keep an eye on it after 30 minutes. Yes, you can use an oven-safe skillet. A metal or glass skillet works well too. Just make sure it can handle the oven heat. The baking time should remain the same. Serving options are fun! Vanilla ice cream is a classic choice. Whipped cream adds a nice touch too. You can drizzle extra blackberry juice over the top for a burst of flavor. Enjoy it warm for the best taste! In this blog post, I covered how to make a delicious blackberry cobbler. We explored fresh versus frozen blackberries and the key ingredients you'll need. I provided step-by-step instructions, along with tips to avoid common mistakes. Variations and ways to store your cobbler were also discussed. Perfecting your cobbler is easy with these insights. Enjoy baking this tasty treat, and share it with friends and family!

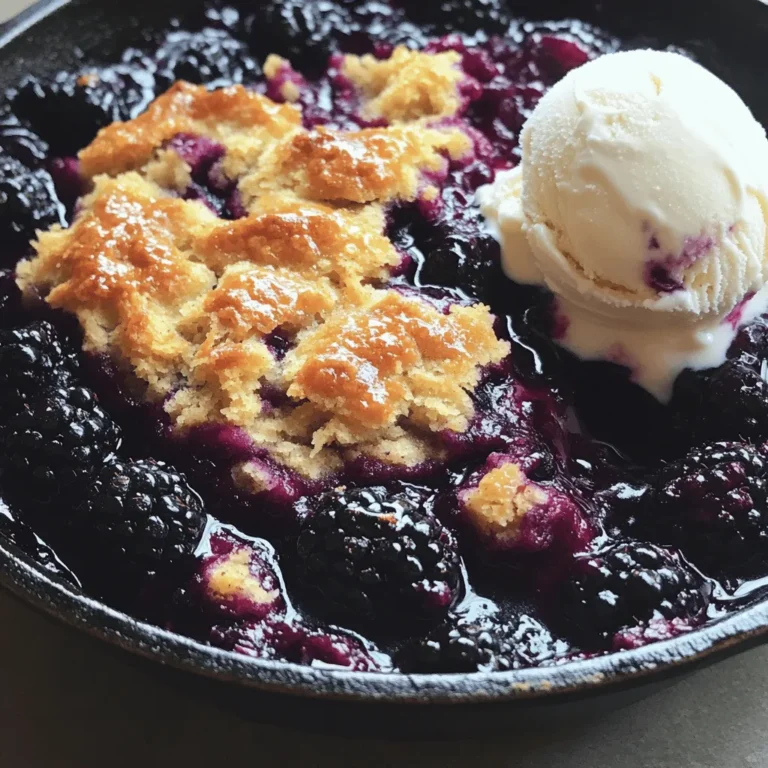
Blackberry Cobbler Skillet Scrumptious Dessert Recipe

- 2 packs of instant ramen noodles - 3 tablespoons sesame oil - 4 cloves garlic, minced - 1 inch fresh ginger, grated - 3 tablespoons soy sauce - 1 tablespoon rice vinegar - 1 tablespoon brown sugar - 1/2 cup green onions, thinly sliced - 1/2 cup snap peas, trimmed - 1/2 cup bell peppers, julienned - Sesame seeds for garnish - Optional: Sriracha for heat These ingredients come together to create a flavorful dish. The instant ramen noodles are quick and easy, making this meal perfect for busy days. The sesame oil adds a rich, nutty taste, while the garlic and ginger bring a warm, aromatic touch. The soy sauce, rice vinegar, and brown sugar blend well, creating a savory sauce that coats the noodles perfectly. Fresh vegetables like snap peas and bell peppers add a nice crunch and vibrant colors. Top it all off with green onions and sesame seeds for a beautiful finish. If you like a bit of spice, add Sriracha to kick up the heat. This dish not only tastes great, but it also looks stunning when served. It's simple to make and packed with flavor. Get ready to impress your taste buds! Start by bringing a pot of water to a boil. Once the water bubbles, add the instant ramen noodles. Cook them according to the package instructions. This usually takes about 3-4 minutes. You want the noodles to be al dente, so keep an eye on them. After they are cooked, drain the noodles and set them aside. For the sauce, gather these ingredients: - 3 tablespoons soy sauce - 1 tablespoon rice vinegar - 1 tablespoon brown sugar In a small bowl, whisk these ingredients together. Mix until the brown sugar is fully dissolved. This sauce adds a nice balance of salty and sweet. Next, heat 3 tablespoons of sesame oil in a large skillet or wok over medium heat. Once the oil is hot, add 4 cloves of minced garlic and 1 inch of grated ginger. Sauté these for about 1 minute. You want them fragrant, not browned. This step builds great flavor in your dish. Add 1/2 cup of trimmed snap peas and 1/2 cup of julienned bell peppers to the skillet. Stir-fry these veggies for about 2-3 minutes. You want them tender but still crisp. This adds color and crunch to your noodles. Now it’s time to combine everything. Add the drained ramen noodles to the skillet with the vegetables. Pour the prepared sauce over the noodles. Toss everything together gently. Make sure the noodles and veggies are evenly coated with the sauce. Cook for another 2-3 minutes until everything is heated through. To finish, stir in 1/2 cup of thinly sliced green onions. Toss once more to mix. If you like heat, add a drizzle of Sriracha to taste. This adds a spicy kick that brings the dish to life. Serve the noodles in bowls and sprinkle with sesame seeds for garnish. Enjoy your delicious sesame garlic ramen noodles! To get perfect ramen noodles, cook them al dente. This means they should be firm but not hard. Follow the package time closely. Drain the noodles right away to prevent them from cooking more. When sautéing garlic and ginger, heat the sesame oil over medium heat. Add the garlic and ginger, and stir quickly. Cook them for about a minute. You want them fragrant, not brown. Burnt garlic can make your dish taste bitter. Garnishing your noodles with sesame seeds adds a nice touch. Sprinkle them on top just before serving. The seeds give a great crunch and flavor. For extra flavor, drizzle sesame oil over the finished dish. This adds richness and a glossy look to your noodles. It makes a big difference in taste and presentation. Want more heat? Adjust the spice level by adding Sriracha. Start with a little, then add more to taste. It’s easy to make the dish just right for you. You can also swap vegetables based on your taste. Try using broccoli, carrots, or even mushrooms. This makes the dish unique and suits your preferences. {{image_2}} To make this dish vegetarian, you can add tofu or mushrooms. Tofu adds protein and absorbs flavors well. Press and cube firm tofu, then sauté it until crispy. You can also use shiitake or button mushrooms. Slice them and cook until tender. Both options enrich the dish and keep it satisfying. For extra protein, consider adding chicken, shrimp, or beef. If using chicken, slice it thin and cook it in the skillet first. Shrimp cooks quickly; add it after the garlic and ginger. For beef, use thin strips and stir-fry until browned. Each protein adds a unique flavor and makes the dish heartier. If you need a gluten-free option, use gluten-free ramen noodles. These noodles come in various types, such as rice or buckwheat. Always check the package for cooking instructions. They work well with the same sauce and ingredients, ensuring everyone can enjoy this tasty meal. To store your leftover sesame garlic ramen noodles, use an airtight container. This helps keep the noodles fresh for longer. Make sure to let the noodles cool before sealing. It’s best to eat them within three days for the best taste. For keeping the noodles, avoid having the sauce sit on top. Instead, store the noodles and sauce separately if possible. This keeps the noodles from getting too soggy. You can reheat your noodles in two ways: microwave or stovetop. If you use the microwave, place the noodles in a safe bowl. Add a splash of water to keep them moist. Heat in short bursts of 30 seconds, stirring in between. For stovetop reheating, use a pan over low heat. Add a bit of sesame oil to prevent sticking. Stir gently until the noodles are warm. This method keeps the texture nice and chewy. Remember, reheating is not just about warming up food. It’s about keeping that delicious flavor and texture too! You cook instant ramen noodles for about 3-4 minutes. Bring a pot of water to a boil. Add the noodles and stir. Check for doneness, then drain and set them aside. Yes, you can make this dish vegetarian. Simply skip the meat and add more veggies. You can use tofu for protein. It adds texture and flavor. Yes, you can prep this dish in advance. Cook the noodles and veggies, then store them separately. Keep them in airtight containers in the fridge. Reheat them when you are ready to eat. If you don't have sesame oil, try using olive oil or avocado oil. Both provide a nice flavor. You can also use peanut oil for a different twist. To add spice, you can use Sriracha. Drizzle it on top before serving. You can also add red pepper flakes or fresh chili peppers during cooking for extra heat. Yes, fresh ramen works well too. You typically cook fresh ramen for 2-3 minutes. Be sure to check the package for exact cooking times. Fresh noodles have a nice texture and flavor. This blog post shared a simple recipe for Sesame Garlic Ramen Noodles. You learned the key ingredients and easy steps to prepare a tasty dish. I highlighted useful tips for cooking and personalizing the recipe. You can adjust flavors and even add different proteins or vegetables. In conclusion, this dish is quick, fun, and perfect for any meal. Enjoy trying it out with your favorite twists!

Savory Sesame Garlic Ramen Noodles Quick and Easy Recipe

- 2 cups all-purpose flour - 1/2 cup granulated sugar - 1 tablespoon baking powder - 1/2 teaspoon salt - 1/2 cup unsalted butter, cold and cubed - 1 cup fresh or dried cranberries - Zest of 1 large orange - 1/2 cup heavy cream - 1 egg, beaten (for egg wash) When making cranberry orange scones, these ingredients work together to create a lovely flavor. Each item plays a key role in the final product. Can you use different flour? Yes! You can swap all-purpose flour for whole wheat flour or almond flour. Both can give a unique taste and texture. What if you don't have heavy cream? You can use whole milk or a mix of milk and melted butter. These alternatives will still keep the scones rich. Need different sweeteners? You can replace granulated sugar with brown sugar or honey. Each option will change the flavor a bit but will still taste great! {{ingredient_image_1}} 1. First, preheat your oven to 400°F (200°C). This step gets your oven ready for baking. 2. Next, grab a large bowl. In the bowl, whisk together: - 2 cups all-purpose flour - 1/2 cup granulated sugar - 1 tablespoon baking powder - 1/2 teaspoon salt Whisk until everything is mixed well. 3. Now, add the cold, cubed butter (1/2 cup) to the flour mixture. Use a pastry cutter or your fingers to mix. You want it to look like coarse crumbs. 4. Then, fold in the cranberries (1 cup) and the zest of 1 large orange. Mix gently until they are evenly spread in the dough. 5. Gradually add the heavy cream (1/2 cup) to the mixture. Stir just until the dough comes together. Avoid overmixing to keep it light. 6. Turn the dough out onto a floured surface and knead it gently a few times until smooth. 7. Pat the dough into a circle about 1 inch thick. Cut the dough into wedges or use a circle cutter for round scones. 8. Place the scones on a lined baking sheet. Brush the tops with a beaten egg for a nice golden color. 9. Bake in your preheated oven for 15-20 minutes. Look for a light golden top to know they’re done. 10. Once baked, remove the scones from the oven. Let them cool on a wire rack before you enjoy them. To get the best scone, start with cold butter. It keeps the scones flaky. When mixing, do not overwork the dough. Mix until just combined. This helps keep your scones light and airy. Kneading is simple. After mixing, turn the dough onto a floured surface. Gently knead it a few times, just until smooth. Avoid heavy pressure. You want to keep the air inside. For added flavor, try adding cinnamon or nutmeg. These spices pair well with cranberries and orange. You can also add a splash of vanilla for depth. When serving, think about pairing your scones with clotted cream or jam. A dollop of orange marmalade adds a nice touch. These pairings make each bite even more delicious. To present your scones, arrange them on a platter. Dust with powdered sugar for a sweet look. Garnish with fresh cranberries and orange slices. This makes your dish pop with color and charm. Serve your scones warm for the best taste. They are great with tea or coffee. You can also offer jam or clotted cream on the side. These add richness and flavor to your scone experience. Pro Tips Keep Butter Cold: Use cold, cubed butter to ensure your scones are flaky. The cold butter will create steam during baking, leading to a light texture. Don’t Overmix: Mix the dough just until it comes together. Overmixing can lead to tough scones, so handle the dough gently. Freshness Matters: If using dried cranberries, consider soaking them in warm water for 10 minutes to rehydrate and enhance their flavor. Egg Wash for Shine: Brushing the tops of the scones with a beaten egg before baking gives them a beautiful golden color and a shiny finish. {{image_2}} You can easily change the flavor of your cranberry orange scones. Here are some fun ideas: - Adding nuts or chocolate: Try mixing in chopped walnuts or pecans. These add a nice crunch. You could also add semi-sweet or dark chocolate chips for a sweet twist. The chocolate pairs well with the tart cranberries. - Using different citrus fruits: Instead of orange zest, try lemon or lime. These fruits give a bright flavor. Feel free to mix them, too! A blend of lemon and orange can make your scones pop with freshness. If you have dietary needs, these scone variations can work for you: - Gluten-free version using alternate flours: Use a gluten-free flour blend. Look for one that has xanthan gum for better texture. This will help the scones rise and stay light. - Vegan alternatives for butter and cream: You can swap the butter with coconut oil or vegan butter. Use almond milk or oat milk instead of heavy cream. These changes keep the scones rich and tasty while being dairy-free. These variations make the scones fun and accessible for everyone! To keep your cranberry orange scones fresh, place them in an airtight container. This way, they stay soft and tasty. You can also wrap them in plastic wrap before putting them in the container. If you want to keep them longer, freezing is a great option. To freeze scones, first, let them cool completely. Then, wrap each scone in plastic wrap. After that, place them in a freezer bag. This helps prevent freezer burn. When you want to eat them, just take out what you need. Reheating scones correctly is key to keeping their texture. You can use an oven or a microwave. The oven works best for keeping the scones crisp. To reheat in the oven, preheat it to 350°F (175°C). Place the scones on a baking sheet. Heat them for about 10 minutes. This warms them through and makes them slightly crispy again. If you use a microwave, put a scone on a plate. Heat it for about 15-20 seconds. Be careful not to overheat, or they might become tough. Enjoy these warm scones with your favorite drink! Can I use frozen cranberries? Yes, you can use frozen cranberries. Just make sure to rinse and drain them first. They may make the dough a bit wetter, so adjust the flour if needed. Frozen cranberries add a nice tart flavor too. How do I know when the scones are done baking? You can tell the scones are done when they turn golden brown on top. A toothpick inserted into the center should come out clean. Baking time is usually 15 to 20 minutes, so keep an eye on them in the last few minutes. What can I serve with cranberry orange scones? Cranberry orange scones taste great with butter or cream cheese. You can also serve them with homemade jam or clotted cream. Fresh orange slices or a drizzle of honey can add a nice touch. Enjoy them with tea or coffee for a cozy treat! Today, we explored making delicious cranberry orange scones. We covered all the key ingredients and gave you helpful tips for great texture and flavor. You learned about substitutes and variations for dietary needs. Storing and reheating scones is easy too. With the right care, you can enjoy these treats longer. Baking is fun, and now, you’re ready to impress with your scones. Let's get baking!

Cranberry Orange Scones Delightful and Simple Recipe

To make a delicious chocolate peanut butter mug cake, gather these simple items: - 4 tablespoons all-purpose flour - 4 tablespoons granulated sugar - 2 tablespoons unsweetened cocoa powder - 1/8 teaspoon baking powder - 1/8 teaspoon salt - 3 tablespoons milk (dairy or non-dairy) - 1 tablespoon vegetable oil - 1 tablespoon peanut butter - 1/4 teaspoon vanilla extract - Optional: a few chocolate chips for extra richness You can swap some ingredients if you need to. Here are a few ideas: - Use almond flour instead of all-purpose flour for a gluten-free option. - Swap granulated sugar with brown sugar for a richer flavor. - Use maple syrup or honey instead of sugar for a natural sweetener. - Replace vegetable oil with melted coconut oil for a different taste. - Use soy milk or almond milk if you want a dairy-free cake. Make your mug cake even better with these fun add-ins: - Mix in a tablespoon of Nutella for an extra chocolatey taste. - Add chopped nuts to give it some crunch. - Try a spoonful of jam or jelly for a fruity twist. - Fold in mini marshmallows for a gooey surprise. Feel free to get creative and make this mug cake your own! To make your chocolate peanut butter mug cake, gather your ingredients first. This recipe takes just a few minutes. You will need a microwave-safe mug. Make sure it is big enough to hold the cake as it rises. 1. In your mug, mix these dry ingredients: - 4 tablespoons all-purpose flour - 4 tablespoons granulated sugar - 2 tablespoons unsweetened cocoa powder - 1/8 teaspoon baking powder - 1/8 teaspoon salt Stir these well until they blend together. 2. Now, add the wet ingredients: - 3 tablespoons milk (dairy or non-dairy) - 1 tablespoon vegetable oil - 1 tablespoon peanut butter - 1/4 teaspoon vanilla extract Mix well until you have a smooth batter. Make sure there are no lumps. 3. If you want extra chocolate, fold in a few chocolate chips gently. 4. Put your mug in the microwave. Cook on high for about 1 minute and 30 seconds. Check at 1 minute to see if it is rising. 5. The cake is done when it puffs up. A toothpick should come out clean from the center. 6. Let the mug cake cool for a couple of minutes. This helps the flavors come together. - Use a larger mug to prevent overflow. - Every microwave is different. Adjust the cooking time if needed. - If the cake is not done, add 10-second intervals until it cooks through. - Letting it cool helps with texture. Enjoy your cake warm! To keep your mug cake from overflowing, choose a large mug. A 12-ounce mug works best. Fill it only halfway with batter. Keep an eye on the cake while it cooks. Start checking it at 1 minute. If it rises too high, stop the microwave for a moment. This way, you can avoid a messy spill. Mix carefully to get a smooth batter. First, combine the dry ingredients well before adding wet ones. This helps the cocoa and flour mix evenly. When you add the milk, oil, and peanut butter, whisk until there are no lumps. If your batter is too thick, add a bit more milk. This ensures a soft texture. To boost flavor, add a pinch of cinnamon or espresso powder. These spices work well with chocolate. You can also change up the nut butter. Try almond or cashew butter for a twist. For extra richness, fold in chocolate chips. They melt and add a creamy layer to your cake. Enjoy experimenting with these ideas to make your mug cake even better! {{image_2}} You can make this mug cake healthier with simple swaps. Use whole wheat flour instead of all-purpose flour. This adds fiber and nutrients. You can also use a sugar substitute like stevia or monk fruit. These options can reduce calories but keep the sweetness. If you want a lower-fat option, try using applesauce instead of oil. It keeps the cake moist without all the fat. Want to mix things up? You can add different flavors to your mug cake. Swap out peanut butter for Nutella for a rich twist. You can also drizzle in some caramel sauce for a sweet surprise. If you like coffee, adding a bit of instant coffee powder works great too. Each option gives your mug cake a new taste and keeps it exciting. If you follow a gluten-free diet, you can still enjoy this treat. Just replace all-purpose flour with a gluten-free blend. Many brands offer blends that work well in baking. If you need a nut-free option, skip the peanut butter and use sun butter instead. This keeps the same creamy texture and taste without nuts. If you have leftover mug cake, let it cool first. Once cool, cover it with plastic wrap or put it in an airtight container. It stays fresh for about 1 to 2 days at room temperature. If you want it to last longer, refrigerate it. Just remember, the cake may lose some moisture in the fridge. To reheat your mug cake, you can use the microwave. Place it in the microwave for about 10 to 15 seconds. Check it often to avoid overheating. The goal is to warm it up, not cook it again. This keeps the texture soft and tasty. If it seems a bit dry, add a small splash of milk before reheating. You can freeze your mug cake if you want to save it for later. Let it cool completely. Wrap it tightly in plastic wrap, then place it in a freezer bag. It can stay in the freezer for up to 2 months. When you're ready to eat it, thaw it in the fridge overnight. Reheat it in the microwave, just like before, for a quick treat. To make this mug cake dairy-free, swap the milk with a non-dairy option. Almond milk, soy milk, or oat milk work great. Just use the same amount as the recipe calls for. This change keeps the cake moist and tasty without any dairy. Yes, you can use other nut butters! Almond butter or cashew butter are excellent choices. They will add a unique taste to your cake. Just keep the same amount as the peanut butter in the recipe for best results. To avoid a dry cake, do not overcook it in the microwave. Start checking at one minute. If the cake looks puffed up and a toothpick comes out clean, it's done. Also, add a little extra milk if you want a softer texture. This article covered how to make a delicious mug cake with simple steps. We explored key ingredients, substitutions, and optional add-ins to fit your taste. Detailed cooking tips helped you avoid messes and enhance flavor. We discussed healthy swaps and dietary adjustments. Don't forget about storage options to keep your treat fresh! Enjoy experimenting with variations and adding your personal touch. Your mug cake journey is just beginning, so let your creativity shine!

Chocolate Peanut Butter Mug Cake Fast and Easy Recipe

- 4 boneless, skinless chicken thighs - 2 medium zucchinis, sliced into half-moons - 1 red bell pepper, diced - 1 yellow bell pepper, diced - 1 red onion, sliced - 1 cup cherry tomatoes, halved - 3 tablespoons olive oil - Juice and zest of 1 large lemon - 3 cloves garlic, minced - 2 teaspoons dried oregano - 1 teaspoon dried thyme - 1 teaspoon dried rosemary - Salt and pepper to taste - Fresh basil or parsley When I prepare this dish, I choose fresh, high-quality ingredients. They make a big difference in flavor. For the chicken, I prefer thighs. They stay juicy and tender during cooking. The veggies add color and nutrients. I like using zucchini, bell peppers, onions, and cherry tomatoes. The marinade is where the magic happens. I use olive oil for richness. The lemon juice and zest brighten the flavors. Garlic adds a nice kick, while herbs like oregano, thyme, and rosemary bring depth. Salt and pepper enhance everything. For a fresh touch, I like to add basil or parsley as a garnish. It makes the dish look beautiful and adds a pop of flavor. First, preheat your oven to 425°F (220°C). This high heat helps the chicken and veggies cook quickly. Next, line a large sheet pan with parchment paper. This makes cleanup easy and keeps food from sticking. In a large bowl, combine these ingredients: - 3 tablespoons olive oil - Juice and zest of 1 large lemon - 3 cloves garlic, minced - 2 teaspoons dried oregano - 1 teaspoon dried thyme - 1 teaspoon dried rosemary - Salt and pepper to taste Whisk the ingredients together until well mixed. The lemon juice adds a bright flavor that pairs well with the herbs. Add 4 boneless, skinless chicken thighs to the bowl. Make sure each piece is fully coated in the marinade. Let the chicken sit for at least 20 minutes. For more flavor, you can marinate it for several hours in the fridge. While the chicken marinates, prepare the veggies. In another bowl, toss the following: - 2 medium zucchinis, sliced into half-moons - 1 red bell pepper, diced - 1 yellow bell pepper, diced - 1 red onion, sliced - 1 cup cherry tomatoes, halved Drizzle olive oil over the veggies, along with salt and pepper. Toss until everything is evenly coated. Spread the marinated chicken thighs on one side of the sheet pan. Make sure they have space between them for even cooking. On the other side, spread out the seasoned vegetables in a single layer. This layout helps everything cook well. Place the sheet pan in the preheated oven. Roast for 25-30 minutes. The chicken is done when it reaches an internal temperature of 165°F. The veggies should be tender and slightly caramelized. Once finished, remove the pan from the oven and let it rest for about 5 minutes. Optionally, you can squeeze more lemon over the dish for extra brightness. For great taste, marinate the chicken for at least 20 minutes. You can also let it rest in the fridge for several hours. The longer you marinate, the better the flavor. I love using a mix of lemon juice, zest, and herbs. It really brings out the fresh taste. Pick veggies that roast well together. I suggest using zucchini, bell peppers, and cherry tomatoes. These colors and textures create a lovely dish. You can also add carrots or asparagus for more variety. Just make sure to cut them into even sizes. To check if the chicken is cooked, use a meat thermometer. The chicken should reach an internal temperature of 165°F. If you don’t have one, cut into the thickest part. The meat should be white, not pink. Let the chicken rest for a few minutes after cooking. This helps keep it juicy and tender. {{image_2}} You can switch up the protein in this dish. Chicken thighs work great, but chicken breasts are leaner. If you prefer a plant-based option, use tofu. Tofu absorbs flavors well. You can also try fish, like salmon or tilapia. Fish cooks faster, so keep an eye on it while roasting. The veggies in this dish are flexible. In spring, add asparagus or snap peas. In summer, try corn or eggplant. Fall brings great choices like butternut squash or Brussels sprouts. Winter calls for hearty greens, like kale or spinach. Using seasonal veggies makes your meal fresh and tasty. You can add more flavor with spices or sauces. For a kick, try red pepper flakes or smoked paprika. You can also mix in a tablespoon of Dijon mustard for a tangy twist. If you love herbs, add fresh thyme or rosemary. Experiment with different flavors to find your favorite mix. To keep your sheet pan lemon herb chicken and veggies fresh, store leftovers in an airtight container. Make sure to refrigerate them within two hours of cooking. This will help prevent bacteria growth. Leftovers can last for up to three days in the fridge. When you’re ready to eat, check for any spoilage before reheating. To reheat the dish without drying it out, use the oven or microwave. If using the oven, set it to 350°F (175°C). Place the chicken and veggies on a baking sheet. Add a splash of water or broth to keep moisture. Cover with foil and heat for about 15 minutes. For the microwave, place the chicken and veggies in a bowl. Cover with a damp paper towel and heat in 30-second intervals until warm. If you want to freeze your dish, let it cool completely first. Place portions in freezer-safe bags or containers. Remove as much air as possible to avoid freezer burn. This dish can last up to three months in the freezer. To thaw, move it to the fridge overnight or use the microwave for a quicker option. Always ensure it’s heated to 165°F (74°C) before eating. For the best flavor, marinate the chicken for at least 20 minutes. If you have more time, let it sit for several hours in the fridge. This helps the chicken soak up the lemon, garlic, and herbs. More time means more flavor! Yes, you can use frozen chicken thighs. If cooking from frozen, add extra time to your cooking. Make sure the chicken reaches an internal temperature of 165°F. You can also marinate the chicken while it’s still frozen. Just allow more time for the marinade to soak in. Roast your vegetables at 425°F (220°C). This temperature helps the veggies get tender and slightly brown. Spread them out in a single layer on the sheet pan. This allows them to cook evenly and get that nice caramelization. Absolutely! You can marinate the chicken and chop the veggies the night before. Store them in the fridge until you’re ready to cook. This makes meal time quick and easy. Just pop everything on the sheet pan and roast when you’re ready! This blog post detailed how to make a delicious sheet pan chicken dish. We covered the key ingredients like chicken thighs and fresh veggies, plus an easy marinade. The step-by-step instructions make it simple to follow. I shared tips to ensure your chicken cooks perfectly and how to customize with different proteins or veggies. Remember, you can store leftovers well and easily reheat them. Enjoy your cooking and experiment with flavors. You’ll create a meal everyone will love.

Sheet Pan Lemon Herb Chicken & Veggies Delight

PREV 1 … 42 43 44 … 86 NEXT
spicy fork kitchen

explore

DessertsDinnerAppetizersDrinks

Our Policies

  • Cookie Policy
  • Copyright Policy
  • Disclaimer
  • GDPR Policy
  • Terms Of Use
Back to Top
  • About
  • Contact Us
  • Privacy Policy
© 2026 spicy fork kitchen