FREE DINNER EBOOK! Get your copy!
  • Cookie Policy
  • GDPR Policy
  • Disclaimer
  • Terms Of Use
  • Visit my other site: Fun Cookie Recipes
spicy fork kitchen
  • Home
  • Dinner
  • Desserts
  • Drinks
  • Appetizers
  • Contact
  • About
  • Privacy Policy
  • Home
  • Dinner
  • Desserts
  • Drinks
  • Appetizers
  • Contact
  • About
  • Privacy Policy
  • Cookie Policy
  • GDPR Policy
  • Disclaimer
  • Terms Of Use
Visit my other site: Fun Cookie Recipes

HOME / CATEGORIES /

Latest

- Salmon fillets: You need 2 salmon fillets, about 6 oz each. This size cooks well and provides enough for two servings. Look for fresh, high-quality fish for the best flavor. - Jasmine rice: One cup of jasmine rice works great for this dish. It’s fragrant and slightly sticky. If you don’t have jasmine rice, you can use basmati or even brown rice for a healthier option. - Broccoli, carrots, bell pepper: These veggies add color and crunch. Use 1 cup of broccoli florets, 1 julienned carrot, and 1 thinly sliced bell pepper. You can mix and match your favorite vegetables like snap peas or zucchini. - Teriyaki sauce: You can choose store-bought teriyaki sauce for convenience or make your own at home. Homemade sauce gives you control over the flavors, and it’s simple to whip up. - Oils: Use 1 tablespoon of sesame oil for a nutty taste and 1 tablespoon of olive oil for sautéing the vegetables. Both oils enhance the dish’s flavor and texture. - Garnishes: Finish your bowls with 3 chopped green onions and 1 teaspoon of sesame seeds. These add a fun crunch and fresh taste to every bite. To cook the rice, start by combining 1 cup of jasmine rice with 2 cups of water in a medium saucepan. Bring the mixture to a boil. Once it boils, cover the pan and lower the heat. Let it cook for 15 to 18 minutes. This time allows the rice to absorb all the water. After cooking, take it off the heat and let it sit for 5 minutes while still covered. This step makes the rice fluffy and perfect. While the rice cooks, you can prepare the vegetables. Heat 1 tablespoon of olive oil in a large skillet over medium heat. Add 1 cup of broccoli florets, 1 julienned carrot, and 1 thinly sliced bell pepper. Sauté these for about 5 to 7 minutes. You want them tender but still crisp. Season with salt and pepper to enhance their natural flavors. After cooking, remove the vegetables from the skillet and set them aside. Now it's time to cook the salmon. In the same skillet, add 1 tablespoon of sesame oil and turn the heat to medium-high. Season 2 salmon fillets with salt and pepper. Place the salmon skin-side down in the skillet. Cook it for 4 to 5 minutes without moving it. This helps get a nice crisp skin. After that, flip the salmon. Brush it with ½ cup of teriyaki sauce. Cook for another 3 to 4 minutes until it flakes easily. This gives the salmon a rich flavor from the teriyaki sauce. Now, you're ready to assemble your bowls! To cook salmon just right, focus on timing and heat. Start with skin-side down in a hot skillet. Cook for about 4-5 minutes. This keeps the salmon moist and tender. Flip it gently, then brush with teriyaki sauce. Cook for another 3-4 minutes. The salmon should flake easily when done. Use a thermometer; it should read 145°F for safe eating. To boost flavor, try adding fresh herbs or spices. Ginger adds a nice zing. A sprinkle of garlic powder can also enhance the dish. Fresh cilantro or basil gives a fresh taste. You can mix in lime juice for a zesty twist. These little additions make each bite more exciting. Meal prep makes cooking easier during busy days. Cook extra rice and store it in the fridge. You can also chop your veggies ahead of time. Keep them in airtight containers to stay fresh. For salmon, season and marinate it for a few hours. This boosts flavor and cuts down on cooking time when you're ready to eat. {{image_2}} If you want to switch things up, try using chicken, tofu, or shrimp. Chicken thighs work well for this dish. Just cook them until they are golden brown. Tofu is a great plant-based choice. Press it to remove extra moisture, then pan-fry until crispy. Shrimp cooks quickly and adds a nice flavor. Just sauté them for a few minutes until pink. Not a fan of jasmine rice? No problem! Brown rice is a healthy swap. It has a nutty flavor and more fiber. Quinoa is another great option. It cooks fast and is packed with protein. For a low-carb choice, use cauliflower rice. Just sauté it lightly to keep it tender. Mixing up your veggies can really change the flavor. Use seasonal vegetables like snap peas, spinach, or zucchini. They add color and taste. You can also try mushrooms for an earthy flavor. Get creative! The goal is to use what you love and what’s fresh. To keep your teriyaki salmon and veggies fresh, store them in airtight containers. Place the salmon and vegetables in separate containers. This keeps the salmon from getting soggy. Refrigerate within two hours of cooking. Cooked salmon can last for 3 to 4 days in the fridge. Always check for any off smells before eating. When reheating the salmon, use low heat to avoid drying it out. You can use a microwave or a skillet. If using a microwave, cover the salmon with a damp paper towel. This helps keep moisture. Heat it in short bursts, checking often. In a skillet, add a splash of water and cover. This creates steam to keep it juicy. For quick meals, portion out your rice, salmon, and veggies into containers. This makes it easy to grab and go. Store the rice separately from the other items. It can dry out if stored together. Label your containers with the date. Aim to eat your prepped meals within 3 to 4 days for best taste. For teriyaki sauce, I love using Kikkoman or Soy Vay. These brands offer great taste. If you want to make your own, mix soy sauce, sugar, and mirin. Reduce it on the stove until thick. This way, you control the flavor and sweetness. Yes, you can! Use gluten-free soy sauce or tamari instead of regular soy sauce. Make sure your teriyaki sauce is gluten-free as well. Check the labels, as some sauces include wheat. You can also swap jasmine rice for quinoa or brown rice, which are naturally gluten-free. Cooked salmon lasts about 3 to 4 days in the fridge. Store it in an airtight container. To keep it fresh, ensure it cools down before sealing. If the salmon smells off or looks discolored, it's best to toss it for safety. Teriyaki salmon rice bowls are a tasty and easy meal. You learned how to choose the right salmon, rice, and veggies. I shared tips for cooking perfect rice and salmon, plus ways to enhance flavors. You can mix proteins and grains to suit your taste. Don't forget about meal prep and storage tips to make quick meals. Enjoy making this dish your own!

Teriyaki Salmon Rice Bowls Flavorful and Simple Meal

- 4 chicken thighs (bone-in, skin-on) - 1/4 cup honey - 2 tablespoons hot sauce (like Sriracha or your favorite brand) - 1 tablespoon olive oil - 1 teaspoon garlic powder - 1 teaspoon smoked paprika - 1/2 teaspoon salt - 1/2 teaspoon black pepper - Fresh herbs for garnish (such as parsley or cilantro) - Chicken thighs: Use bone-in, skin-on for flavor and moisture. - Honey: This adds sweetness and helps with caramelization. - Hot sauce: Adjust the amount for spice. Sriracha is great! - Olive oil: It adds richness and helps the spices stick. - Garlic powder: This gives a nice depth of flavor. - Smoked paprika: It adds a smoky taste that pairs well with honey. - Salt and black pepper: These enhance the overall flavor. - Fresh herbs: Use for garnish to add color and freshness. Quality matters in your ingredients. Fresh chicken thighs will taste best. Look for organic or free-range chicken if possible. For honey, local honey can add a unique flavor. If you need a substitute, maple syrup works well too. When it comes to hot sauce, you can also try chili paste for different heat levels. If you want it milder, use less hot sauce or choose a sweet chili sauce. Olive oil can be swapped for any neutral oil, like canola or avocado oil. For garlic powder, fresh garlic can be used as well. Just chop one clove for each teaspoon. Smoked paprika gives a distinct flavor, but regular paprika or cayenne can work in a pinch. Salt and pepper are usually easy to find, but sea salt can enhance the taste even more. Fresh herbs are optional but highly recommended. They add a burst of color and freshness to your dish. {{ingredient_image_1}} First, set your oven to 425°F (220°C). This high heat helps the chicken cook well. While it heats, grab 4 chicken thighs. Make sure they have bones and skin. Place them in a large baking dish or on a lined baking sheet. The skin helps keep the meat juicy. In a medium bowl, whisk together the following ingredients: - 1/4 cup honey - 2 tablespoons hot sauce (like Sriracha) - 1 tablespoon olive oil - 1 teaspoon garlic powder - 1 teaspoon smoked paprika - 1/2 teaspoon salt - 1/2 teaspoon black pepper Mix until everything blends well. This mixture gives the chicken its sweet and spicy flavor. Brush the hot honey mixture over the chicken thighs. Make sure they are well coated. Save a bit of the mixture for later. Bake the chicken in the oven for 25 minutes. After this time, take it out and baste the chicken with the reserved mixture. Return it to the oven for another 10-15 minutes. The chicken is done when it reaches 165°F (74°C). For crispy skin, broil the chicken on high for 2-3 minutes. Watch closely to prevent burning. After cooking, let the chicken rest for 5-7 minutes. This helps keep it juicy. To check if your chicken is done, use a meat thermometer. Insert it into the thickest part of the thigh. If it reads 165°F (74°C), it is safe to eat. Letting the chicken rest allows the juices to settle. Garnish with fresh herbs like parsley or cilantro for a nice touch. To get super crispy skin on your chicken, start with bone-in, skin-on thighs. Pat them dry with paper towels first. This step helps remove extra moisture. Moisture leads to soggy skin. Next, use high heat while baking. Preheat your oven to 425°F (220°C) for best results. Right before finishing, switch to broil for 2-3 minutes. Keep a close eye on the chicken. You want it crispy, not burnt! Basting adds flavor and moisture to your chicken. After 25 minutes of baking, take the chicken out and baste with the hot honey mixture you saved. Use a brush to coat the chicken well. This step helps lock in flavors. Repeat this every 10 minutes during baking. It keeps the chicken juicy and adds a glossy finish. Trust me, this small effort makes a big difference! Using the right tools makes cooking easier. Here’s what I recommend: - A large baking dish or lined baking sheet - A whisk for mixing the hot honey sauce - A brush for basting - A meat thermometer to check doneness These tools help you cook the chicken perfectly and save time. Happy cooking! Pro Tips Marinate for More Flavor: For an enhanced flavor experience, consider marinating the chicken thighs in the hot honey mixture for at least 30 minutes or up to overnight in the refrigerator. Use Fresh Ingredients: Fresh garlic and herbs can elevate the dish significantly. Substitute garlic powder with minced garlic and fresh herbs instead of dried for a vibrant flavor. Monitor the Broiling Stage: When broiling, keep a close watch on the chicken. Broiling can quickly turn from perfectly crispy to burnt, so stay nearby and adjust the time as needed. Perfect Searing: For even more flavor, sear the chicken thighs in a hot skillet for a few minutes on each side before baking. This will add a delicious crust and depth of flavor. {{image_2}} You can change the heat in the hot honey baked chicken. If you like it mild, use less hot sauce. Start with one tablespoon and taste. For more heat, add more hot sauce. You can also try different sauces. A spicy barbecue sauce can add a nice twist. While this recipe uses chicken thighs, you can use other cuts. Chicken breasts work too, but they may dry out faster. If you prefer drumsticks, they will also taste great. Just watch the cooking time. Always check that the chicken reaches 165°F for safety. You can make this dish even better with veggies. Cut carrots, potatoes, and bell peppers into small pieces. Toss them in the hot honey mix and place them around the chicken. They will soak up the flavor and cook nicely. You can also serve this chicken with rice or a fresh salad for a complete meal. Store leftover hot honey baked chicken in an airtight container. Make sure it is cool first. This helps keep it fresh. Place it in the fridge if you plan to eat it soon. Use it within 3 to 4 days for the best taste. If you want to keep it longer, consider freezing it. To reheat, preheat your oven to 350°F (175°C). Place the chicken on a baking tray. Cover it with foil to keep moisture. Heat for about 20 minutes or until warm. You can also use a microwave, but the skin won't be crispy. If you want crispy skin, broil it for a few minutes after heating. To freeze hot honey baked chicken, wrap each piece in plastic wrap. Then, place it in a freezer-safe bag or container. This helps prevent freezer burn. Label the bag with the date. Frozen chicken can last up to 3 months. When ready to eat, thaw it in the fridge overnight before reheating. To check if your hot honey baked chicken is done, use a meat thermometer. The internal temperature should reach 165°F (74°C). You can also check the juices. They should run clear, not pink. The skin should be golden brown and crispy. If it looks good, it is likely ready to eat! Yes, you can use boneless chicken in this recipe. Boneless chicken cooks faster, so keep an eye on the time. Reduce the baking time to about 20-25 minutes. Check the same internal temperature of 165°F (74°C) to be sure. You have many tasty options to serve with hot honey baked chicken. Here are some ideas: - Rice or quinoa for a filling side - Roasted vegetables for a healthy crunch - Mashed potatoes for comfort food - A fresh salad for a light touch These sides will balance the sweet and spicy flavors of the chicken. Making hot honey at home is easy and fun! Here’s how: 1. Combine 1/4 cup of honey with 2 tablespoons of hot sauce in a bowl. 2. Mix well until combined. 3. Adjust the heat to your taste! You can also add chili flakes for more spice or heat. Enjoy your homemade hot honey on chicken, pizza, or even drizzled on cheese! Hot honey baked chicken is a great dish, and it’s easy to make. We covered the ingredients, measurements, and quality tips to find the best options. I shared step-by-step instructions to help you prepare and bake the chicken perfectly. You learned tips for crispy skin and basting techniques. Variations allow you to adjust spice levels and add your favorite sides. Store any leftovers properly for later meals. Follow these tips, and you’ll create a delicious dish that impresses everyone. Enjoy your cooking adventure!

Hot Honey Baked Chicken Flavorful and Easy Recipe

To make Creamy Cowboy Soup, you need a mix of hearty ingredients. Each one adds flavor and texture to the dish. Here’s the full list of what you'll need: - 1 pound ground beef - 1 medium onion, diced - 2 cloves garlic, minced - 2 medium carrots, diced - 1 medium red bell pepper, diced - 1 can (15 oz) black beans, drained and rinsed - 1 can (15 oz) corn, drained - 1 can (14.5 oz) diced tomatoes with green chilies - 4 cups beef broth - 1 cup heavy cream - 2 teaspoons chili powder - 1 teaspoon cumin - 1 teaspoon smoked paprika - Salt and pepper to taste - 2 tablespoons olive oil - Fresh cilantro or parsley for garnish Each ingredient plays a key role. The ground beef gives the soup its rich base. Onions and garlic add depth and aroma. Carrots and bell peppers bring a sweet crunch. Black beans and corn add heartiness. Diced tomatoes offer a tangy kick. Beef broth gives the soup its savory profile. Heavy cream makes it creamy and smooth. Spices like chili powder, cumin, and smoked paprika add warmth and a hint of smoke. Don’t forget to add salt and pepper to enhance all the flavors. Use fresh cilantro or parsley as a garnish for a pop of color and freshness. With these ingredients, you will create a soup that is both hearty and full of flavor. {{ingredient_image_1}} 1. Sautéing onions and garlic: Start by heating 2 tablespoons of olive oil in a large pot over medium heat. Add the diced onion and sauté for about 4-5 minutes. You want the onion to be soft and slightly translucent. Then, add 2 cloves of minced garlic and cook for another minute until you can smell the garlic. 2. Cooking the ground beef: Next, add 1 pound of ground beef to the pot. Use a spoon to break it up as it cooks. Cook it for about 6-7 minutes, until it turns brown. If there is too much fat, drain it out. 3. Adding vegetables and ingredients: Now, stir in 2 diced carrots and 1 diced red bell pepper. Cook these for about 5 minutes until they start to soften. After that, add 1 can of black beans (drained and rinsed), 1 can of corn (drained), 1 can of diced tomatoes with green chilies, and 4 cups of beef broth. Mix in 2 teaspoons of chili powder, 1 teaspoon of cumin, 1 teaspoon of smoked paprika, along with salt and pepper to taste. 1. Bringing the soup to a boil: Increase the heat to high and bring the soup to a boil. This step helps blend all the flavors together. 2. Simmering the ingredients: Once the soup boils, reduce the heat to low. Allow it to simmer for 15-20 minutes. This helps the flavors meld nicely. 3. Finishing touches with heavy cream: Stir in 1 cup of heavy cream and cook for another 5 minutes. This adds a rich, creamy texture to the soup. Taste it, and adjust the seasoning with salt and pepper if needed. To boost the taste of your Creamy Cowboy Soup, adjust your spices. Start by adding more chili powder for heat. If you like smoky flavors, increase the smoked paprika. Don't forget salt and pepper; they can make a big difference. Recommended spices include: - Chili powder - Cumin - Smoked paprika These spices work well together, giving the soup a rich and bold flavor. Mix them in as you cook for the best results. For the best texture, cook the beef until it’s nicely browned. This adds depth to the soup. When you add the carrots and bell peppers, cook them until soft but still crunchy. This keeps the vegetables from becoming mushy. Cooking times for perfect vegetables: - Sauté onions and garlic for 5 minutes. - Cook carrots and red bell pepper for 5 minutes. These times help keep your veggies flavorful and vibrant. Presentation matters! For a lovely finish, garnish your soup with fresh cilantro or parsley. This adds a pop of color and freshness. Pairing ideas for meals: - Serve with crusty bread for dipping. - Pair with a light salad for balance. These options make your meal more satisfying and enjoyable. Pro Tips Use Lean Ground Beef: Opt for lean ground beef (90% lean or higher) to reduce excess fat and calories in your soup. Add Extra Veggies: Feel free to toss in additional vegetables like zucchini or spinach for added nutrition and flavor. Adjust Thickness: If you prefer a thicker soup, let it simmer longer or add a cornstarch slurry to achieve your desired consistency. Garnish Variations: Experiment with different garnishes like avocado slices or shredded cheese for extra creaminess and flavor. {{image_2}} You can switch up the proteins in this soup. Ground beef works great, but you can try chicken or turkey. These meats cook fast, making them easy to use. For a veggie option, use lentils or chickpeas. They add protein and fiber without the meat. Feel free to add or swap out vegetables too. You can try zucchini, spinach, or even sweet potatoes. These choices give the soup more color and taste. Each swap makes the soup your own. If you like heat, add jalapeños or hot sauce. This gives the soup a spicy kick. Start with a little, then add more to taste. You can also mix in spices like cayenne or crushed red pepper for extra warmth. To lighten the soup, swap heavy cream with half-and-half or coconut milk. Both options keep it creamy but cut some calories. You can even use low-fat yogurt for a tangy twist. These changes make the soup fit any diet while keeping it delicious. To keep Creamy Cowboy Soup fresh, store it in the fridge. Use an airtight container. The soup stays good for about 3 to 4 days. When you want to reheat, pour the soup into a pot. Heat it on medium until warm. Stir often to avoid sticking. You can also use a microwave. Just cover the bowl and heat in short bursts, stirring in between. For long-term storage, you can freeze the soup. Let it cool completely before freezing. Use freezer-safe containers or bags. The soup can last up to 3 months in the freezer. When you want to eat it, take it out and thaw in the fridge overnight. You can also use the microwave for quick thawing. Just be sure to heat it all the way through before serving. To add heat, use more chili powder. You can also add diced jalapeños. If you like it hot, try a splash of hot sauce. Adjust these spices to your taste. Yes, you can make this soup ahead of time. Just cool it down and store it in the fridge. It will last for about three days. Reheat it on the stove or in the microwave when you're ready to serve. Creamy Cowboy Soup pairs well with cornbread or crusty bread. You can also serve it with a fresh salad. For a fun twist, try tortilla chips on the side. They add crunch and flavor! This blog post covered the key ingredients and steps to make Creamy Cowboy Soup. You learned how to sauté vegetables, cook ground beef, and blend flavors perfectly. Remember the tips for seasoning and cooking techniques to boost taste. Consider variations for different proteins or spiciness based on your preference. Store your soup properly to enjoy later. These practices will help you create a dish that warms both the belly and heart. Cooking can be simple and fun; enjoy every step!

Creamy Cowboy Soup Hearty and Flavorful Delight

- 1 lb boneless, skinless chicken thighs - 1/2 cup sweet chili sauce - 2 tablespoons soy sauce - 1 tablespoon sesame oil - 1 red bell pepper - 1 green bell pepper - 1 zucchini - 1 tablespoon fresh ginger - 2 garlic cloves - Salt and pepper In this recipe, I use boneless, skinless chicken thighs. They stay juicy and tender when grilled. The sweet chili sauce brings a nice balance of heat and sweetness. Soy sauce adds depth, while sesame oil gives a nutty flavor. I include colorful bell peppers and zucchini for crunch and freshness. They not only look great but also add flavor. Fresh ginger and minced garlic give a nice zing to the marinade. Don’t forget to season with salt and pepper to enhance all the flavors. These ingredients come together to create a tasty dish that is perfect for any gathering or family meal. The bright colors and bold flavors will impress anyone at your table. To start, we need to mix the marinade. In a bowl, combine: - 1/2 cup sweet chili sauce - 2 tablespoons soy sauce - 1 tablespoon sesame oil - 1 tablespoon fresh ginger, grated - 2 garlic cloves, minced - Salt and pepper to taste Next, add 1 pound of boneless, skinless chicken thighs cut into 1-inch pieces. Toss the chicken in the marinade until it is well-coated. Cover the bowl and place it in the fridge for at least 30 minutes. For more flavor, let it marinate for up to 2 hours. If you use wooden skewers, soak them in water for 20 to 30 minutes. This step helps prevent burning on the grill. After soaking, it's time to assemble the kabobs. Take the marinated chicken pieces and thread them onto the skewers. Alternate the chicken with pieces of red and green bell peppers and thick slices of zucchini. Leave a little space between each piece. This will help them cook evenly and look nice on the grill. Now it’s time to preheat the grill. Set it to medium-high heat. Make sure the grill grates are clean and oiled. This will stop the kabobs from sticking. Place the assembled kabobs on the grill. Cook them for about 10 to 12 minutes. Turn them occasionally to get nice grill marks. To check doneness, the chicken should reach an internal temperature of 165°F (75°C). This ensures it is safe to eat and perfectly juicy. For the best flavor, marinate the chicken for at least 30 minutes. If you can, let it sit for up to 2 hours. This time allows the chicken to soak up the sweet chili sauce, soy sauce, and spices. The longer you marinate, the more flavor the chicken gets. Make sure your grill is clean and well-oiled before cooking. This step helps the kabobs not stick. Set the grill to medium-high heat to get a nice char. Cook the kabobs for about 10-12 minutes, turning them often. Check the chicken's internal temperature; it should reach 165°F (75°C). This check ensures the chicken is safe to eat and not dry. After grilling, let the kabobs rest for a few minutes. This resting time keeps them juicy. Serve them on a large platter with fresh cilantro and lime wedges. Drizzle some extra sweet chili sauce over the top for added flavor. It makes the dish even more delicious and visually appealing. {{image_2}} You can switch the chicken thighs for chicken breast. Chicken breast has less fat and cooks quicker. If you want a seafood twist, try shrimp. Shrimp grills fast and absorbs flavor well. Just ensure you don’t overcook it. Feel free to mix in other veggies. Onions add a nice crunch and sweetness. Mushrooms bring a rich, earthy taste. You can also use cherry tomatoes or asparagus for fun colors and flavors. Just keep the pieces similar in size for even cooking. If you want to change the flavor, use different sauces. Teriyaki sauce can add a sweet, savory twist. A spicy marinade can kick things up a notch! You can also try yogurt-based sauces for a creamy touch. Get creative and find what you love! Store leftover kabobs in an airtight container. They stay fresh for up to three days. Use parchment paper between layers to prevent sticking. This helps keep flavors intact. Always cool kabobs down before sealing them in the fridge. To freeze kabobs, first let them cool completely. Place them in a freezer-safe bag. Remove as much air as possible to avoid freezer burn. They can last up to three months in the freezer. When ready to use, move them to the fridge to thaw overnight. Reheat kabobs safely in the oven or microwave. For the oven, place them on a baking sheet at 350°F (175°C) for about 10 minutes. This keeps them juicy. In the microwave, heat in short bursts, checking often. Avoid overcooking to keep the chicken tender. I recommend marinating the chicken for at least 30 minutes. This lets the chicken soak up all the tasty flavors. For an even better taste, try marinating it for up to 2 hours. This extra time helps the sweet chili sauce and other ingredients really mix into the meat. Yes, you can use a grill pan! A grill pan works well on your stove. It gives you nice grill marks and a great flavor. Just preheat the pan over medium-high heat before adding the kabobs. Cook them for about 10-12 minutes, turning often. You can serve these kabobs with many tasty sides. Here are some ideas: - Steamed rice or jasmine rice - Fresh garden salad - Grilled vegetables - Quinoa or couscous - Flatbreads or pita These sides will complement the sweet and spicy flavors of the kabobs. Enjoy! You now have a tasty recipe for sweet chili grilled chicken kabobs. We covered the key ingredients, from marinating chicken to grilling it perfectly. Remember, using fresh veggies and spices boosts flavor. Don’t shy away from experimenting with different proteins or sauces. Store any leftovers well, so you can enjoy them later. This dish is fun to make and a hit at any meal. Enjoy the grilling process and get creative with your kabobs.

Sweet Chili Grilled Chicken Kabobs Flavorful Delight

- 1 cup medjool dates, pitted - 1 cup unsweetened shredded coconut - 1/2 cup almond butter - 1/2 cup chopped almonds - 1/4 cup cocoa powder - 1 tablespoon maple syrup - 1/2 teaspoon vanilla extract - Pinch of sea salt - Extra shredded coconut for rolling Each serving has about 150 calories. You get around 4 grams of protein. There are 9 grams of fats and 17 grams of carbs per serving. This snack is a tasty energy boost! You can enjoy these ingredients in many ways. Medjool dates add natural sweetness. Almond butter gives a creamy base. Chopped almonds add crunch. The cocoa powder brings rich flavor. You can adjust the sweetness with maple syrup. Adding a pinch of sea salt enhances all the flavors. I love rolling the balls in extra coconut for a fun touch. This makes them look great and adds texture. These ingredients work together to make a yummy, healthy snack you can feel good about eating. To start making your Almond Joy Energy Balls, grab your food processor. First, add 1 cup of pitted medjool dates and 1/2 cup of almond butter. Blend these two until they turn into a smooth, paste-like mix. This step is key for a great texture. Next, add in 1 cup of unsweetened shredded coconut, 1/2 cup of roughly chopped almonds, and 1/4 cup of cocoa powder. If you like it sweeter, toss in 1 tablespoon of maple syrup and 1/2 teaspoon of vanilla extract. Don’t forget a pinch of sea salt. Blend until everything forms a sticky mixture. You might need to stop and scrape down the sides of the bowl. Once blended, use your hands to form small balls, about 1 inch wide. For a fun twist, you can roll some of the balls in extra shredded coconut. This adds a lovely texture and makes them look great! Now, it’s time to chill these energy balls. Place them on a parchment-lined baking sheet. Refrigerate them for at least 30 minutes. This helps them firm up nicely. After they’ve chilled, transfer the energy balls to an airtight container. You can keep them in the fridge for up to 1 week. If you want them to last longer, freeze them for up to 3 months. When serving, arrange the energy balls on a nice platter. You might garnish them with a sprinkle of shredded coconut or a few whole almonds. This makes them look even more appealing. For a great pairing, enjoy these energy balls with a glass of almond milk or your favorite tea. They also make a perfect snack alongside fresh fruit or yogurt. You can enhance your Almond Joy Energy Balls with some fun options. - Adding protein powder or superfoods: Boost the protein by mixing in your favorite protein powder. This is great for an extra energy kick. You can also add superfoods like chia seeds or flaxseeds for added nutrition. - Substituting nut butters: If you want a new flavor, try different nut butters. Cashew or peanut butter works well. Each option brings its unique taste to the energy balls. Making these energy balls can be simple, but a few mistakes can happen. - Overblending vs. underblending ingredients: Blend just enough. If you overblend, the texture can become too smooth. If you underblend, the balls won't stick together well. Aim for a sticky mixture. - Not enough chilling time: Chilling is key. If you skip chilling, the balls may fall apart. Make sure to refrigerate them for at least 30 minutes. This helps them firm up nicely. Knowing how to serve these energy balls is important. - How to determine portion sizes for snacks: Each ball is about one inch wide. You can serve one or two balls per person as a snack. This keeps it light yet satisfying. - Adjusting the recipe for larger gatherings: If you're hosting, simply double or triple the recipe. This ensures everyone gets a tasty treat. Just make sure you have enough space to chill them! {{image_2}} You can add dried fruits like cranberries or raisins for a sweet kick. These fruits bring a chewy texture and extra flavor. If you want more warmth, try adding spices like cinnamon or nutmeg. These spices make the energy balls taste cozy and inviting. If you are vegan, this recipe already fits your needs. It uses plant-based ingredients. You can also make it gluten-free by checking your almond butter and cocoa powder labels. For nut allergies, substitute almond butter with sunflower seed butter. This keeps the creamy texture without nuts. Need more or fewer energy balls? It’s easy to scale this recipe. To double it, just multiply all the ingredients by two. For half, divide each ingredient in half. This way, you can always have the right amount for any occasion. Store your Almond Joy energy balls in an airtight container. This keeps them fresh and tasty. You can layer parchment paper between the balls to avoid sticking. In the fridge, they last about one week. After that, the taste and texture may change. To freeze your energy balls, place them on a baking sheet. Make sure they are not touching each other. Freeze them for about two hours. Once firm, transfer the balls to an airtight container or freezer bag. They can stay in the freezer for up to three months. For best texture, thaw the balls in the fridge overnight before eating them. This keeps them from getting too soft or mushy. Check your energy balls before eating. If they smell off or have a strange texture, throw them away. Look for any mold or discoloration. If you see these, do not eat them. Keeping an eye on these signs will help you enjoy your snack safely. Yes, you can use other nuts. Cashews or walnuts work well too. Each nut adds a unique flavor. Cashews give a creamier taste, while walnuts add a bit of earthiness. Feel free to mix and match to find your favorite. Each Almond Joy Energy Ball has about 100 calories. This number can change based on the ingredients you use. If you add maple syrup or extra nuts, the calories will rise. You can enjoy these balls as a tasty snack without too many calories. These energy balls last up to one week in the fridge. Keep them in an airtight container. For longer storage, freeze them for up to three months. Just remember to thaw them in the fridge before eating. Yes, these energy balls are great for kids. They are packed with healthy fats, fiber, and protein. The natural sweetness from dates makes them a fun treat. Plus, kids love the chocolatey flavor. They make a perfect after-school snack. Absolutely! You can mash the dates by hand with a fork. Then, mix in the almond butter and other ingredients in a bowl. It will take more time, but it still works well. Just make sure to mix everything until it’s sticky and combined. You’ve learned how to make delicious Almond Joy Energy Balls with simple ingredients. We covered the main components and optional tweaks to match your taste. Remember, you can customize the recipe for diet needs or flavor preferences. Proper storage keeps them fresh, and some freezing tips help for longer use. With all this knowledge, you can create tasty snacks that fit your lifestyle. Enjoy your energy balls and feel good about your healthy choices.

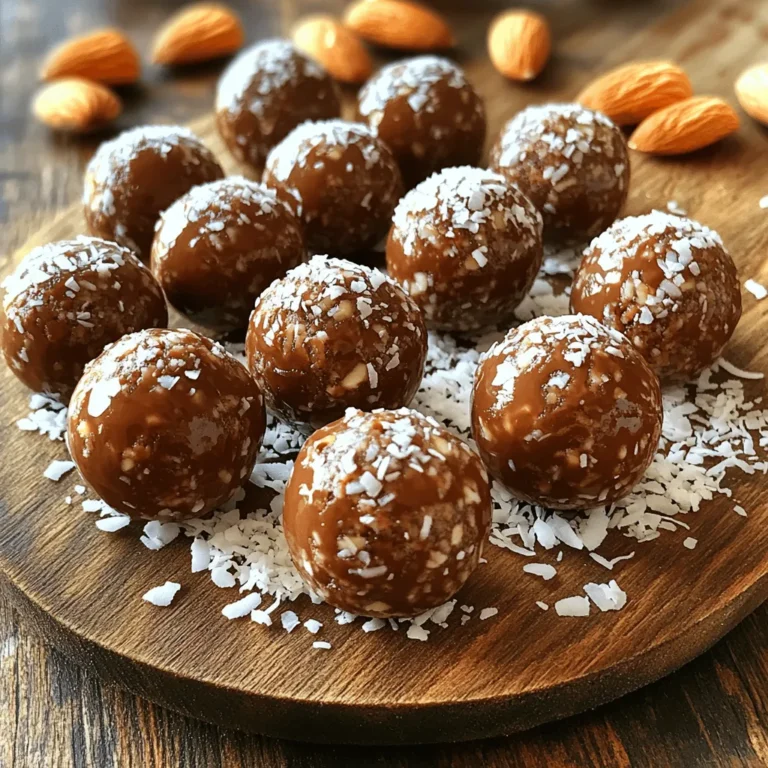
Almond Joy Energy Balls Easy and Tasty Snack Recipe

- 1 large red bell pepper - 1 can (15 oz) chickpeas, drained and rinsed - 2 tablespoons tahini - 2 tablespoons olive oil - 2 cloves garlic, minced - 2 tablespoons lemon juice - 1 teaspoon ground cumin - Salt and pepper to taste - Pinch of smoked paprika (optional, for garnish) - Fresh parsley, chopped (for garnish) - Red Bell Pepper: High in vitamin C and antioxidants. It boosts your immune system. - Chickpeas: They provide protein and fiber. They help keep you full longer. - Tahini: Made from sesame seeds, it adds healthy fats and calcium. - Olive Oil: A good source of monounsaturated fats. It can improve heart health. - Garlic: Packed with vitamins, garlic boosts your health and adds flavor. - Lemon Juice: High in vitamin C. It brightens the flavors in the hummus. - Ground Cumin: Adds warm, earthy notes. It aids digestion and may reduce inflammation. - Smoked Paprika: Optional, but it adds a deep, smoky flavor and a pop of color. - Fresh Parsley: A garnish that adds freshness and vitamins. - Red Bell Pepper: Look for ones that are firm and shiny. Avoid soft or wrinkled peppers. - Chickpeas: Choose canned ones with no added salt if you want to control sodium. - Garlic: Pick heads that are firm and dry, with no soft spots. - Lemon: Choose lemons that feel heavy for their size. They will have more juice. - Herbs: Fresh parsley should be bright green and crisp, not wilted or yellowed. These tips will help you pick the best ingredients to make your hummus shine! Start by preheating your oven to 425°F (220°C). This heat brings out the best in the red pepper. Next, cut the red bell pepper in half and remove the seeds. Place the halves cut side down on a baking sheet lined with parchment paper. Roast the bell pepper in the oven for 20 to 25 minutes. Look for the skin to blacken and blister. When it's done, remove it from the oven. To make peeling easier, place the hot pepper in a sealed plastic bag for 10 minutes. The steam helps loosen the skin. After cooling, peel off the skin and chop the pepper into small pieces. Now, gather your food processor. In it, combine the roasted red pepper, a can of drained and rinsed chickpeas, tahini, olive oil, minced garlic, lemon juice, cumin, and a pinch of salt and pepper. Blend everything until it’s smooth and creamy. If the mixture seems too thick, don't worry! Just add one tablespoon of water at a time until it reaches your desired consistency. Remember to taste the hummus and adjust the seasoning as needed. You may want to add more salt, lemon juice, or cumin for extra flavor. Transfer the hummus to a serving bowl. Drizzle a bit of olive oil on top for richness. Then, sprinkle some smoked paprika and chopped fresh parsley for color and flair. To present your hummus, arrange a variety of dippers around the bowl. Think pita bread, fresh vegetables, or tortilla chips. This colorful display makes for an inviting appetizer that everyone will enjoy! Making hummus is simple, but some common mistakes can ruin it. First, don’t skip roasting the red pepper. This step brings out the sweet, smoky flavor. If you skip it, your hummus will taste flat. Next, be careful with the garlic. If you add too much, it can overwhelm the other tastes. Start with two cloves, then adjust if you want more flavor. Also, don’t forget to rinse the chickpeas. This helps remove the canning liquid, which can affect the taste. You can enhance your hummus with fun add-ins. Try adding a bit of smoked paprika for a nice kick. A dash of cayenne can also add heat. For a fresh touch, mix in some chopped herbs like basil or cilantro. You might even want to blend in some sun-dried tomatoes for added depth. Feel free to get creative! Just keep tasting as you go to ensure the flavors balance well. This hummus recipe is naturally vegan and gluten-free, so most diets can enjoy it. If you want a nut-free version, skip the tahini or replace it with sunflower seed butter. For a low-sodium option, rinse the chickpeas well and cut back on salt. If you want a creamier texture, use aquafaba, the liquid from the chickpea can, in place of water. This will also help keep your hummus thick and rich. Always remember to tweak the recipe to fit your needs! {{image_2}} To make your hummus spicy, add jalapeños or chili flakes. Start with one small jalapeño, seeds removed. Blend it with the other ingredients. Adjust the spice level to your taste. For heat, consider adding cayenne pepper too. This version will really wake up your taste buds! You can easily change the flavor of your hummus. Try adding lemon zest for a bright zing. Fresh herbs like basil or cilantro can add depth. For a smoky taste, use smoked paprika in larger amounts. You can also mix in roasted garlic for a sweet flavor. The options are endless! Switching up the base bean can change your hummus game. Use black beans for a rich flavor. White beans can create a creamier texture. Lentils also work well and add protein. Each legume brings its own unique twist. Experiment and find your favorite! To keep your roasted red pepper hummus fresh, store it in an airtight container. Make sure the lid seals tightly. This prevents air from getting in and drying it out. I like to place a layer of plastic wrap directly on the hummus before sealing the lid. This extra step helps lock in moisture. When stored properly in the fridge, hummus lasts about five to seven days. If you want it to last longer, try freezing it. Portion out the hummus into smaller containers. It freezes well for up to three months. Just remember to label the containers with the date. This way, you’ll know when it’s time to enjoy it. After storing, hummus may thicken. To refresh it, stir in a little water or olive oil. This helps regain its creamy texture. If the flavor seems a bit dull, add a splash of lemon juice or a pinch of salt. Taste as you go to find the right balance. Enjoy your hummus with fresh dippers for a tasty snack! To make Roasted Red Pepper Hummus from scratch, follow these steps: 1. Preheat your oven to 425°F (220°C). 2. Cut a large red bell pepper in half and remove the seeds. 3. Place the halves cut side down on a baking sheet lined with parchment paper. 4. Roast the pepper for 20-25 minutes. The skin should get blackened. 5. After roasting, put the pepper in a sealed bag for 10 minutes. This helps steam it. 6. Once cool, peel off the skin and chop the pepper into smaller pieces. 7. In a food processor, add the roasted red pepper, one can of drained chickpeas, two tablespoons of tahini, two tablespoons of olive oil, two minced garlic cloves, two tablespoons of lemon juice, one teaspoon of ground cumin, and salt and pepper to taste. 8. Blend until smooth. If too thick, add water one tablespoon at a time. 9. Taste and adjust seasoning to your liking. 10. Serve in a bowl, drizzled with olive oil and garnished with smoked paprika and fresh parsley. You can find store-bought Roasted Red Pepper Hummus at many grocery stores. Look in the refrigerated section, near other dips. Brands like Sabra and Tribe often offer this flavor. You might also find it at health food stores or specialty markets. Check the ingredient list to ensure freshness and quality. Roasted Red Pepper Hummus pairs well with many dishes. Here are some great options: - Pita bread, warm and cut into triangles - Fresh vegetables like carrots, cucumbers, and bell peppers - Tortilla chips for a crunchy snack - Grilled meats or fish for added flavor - Spread on sandwiches or wraps for a tasty twist These options make great appetizers or side dishes. Enjoy experimenting with your favorites! Making roasted red pepper hummus is fun and easy. We covered the ingredients, their health benefits, and how to choose fresh produce. You learned step-by-step methods for prepping, roasting, and blending to get the perfect texture. We discussed common mistakes, flavor tips, and ways to adapt it for different diets. Plus, we explored creative variations and how to store your hummus right. Overall, you now have everything needed to make delicious hummus and enjoy it with your favorite dishes. Your hummus journey starts now, so get cooking!

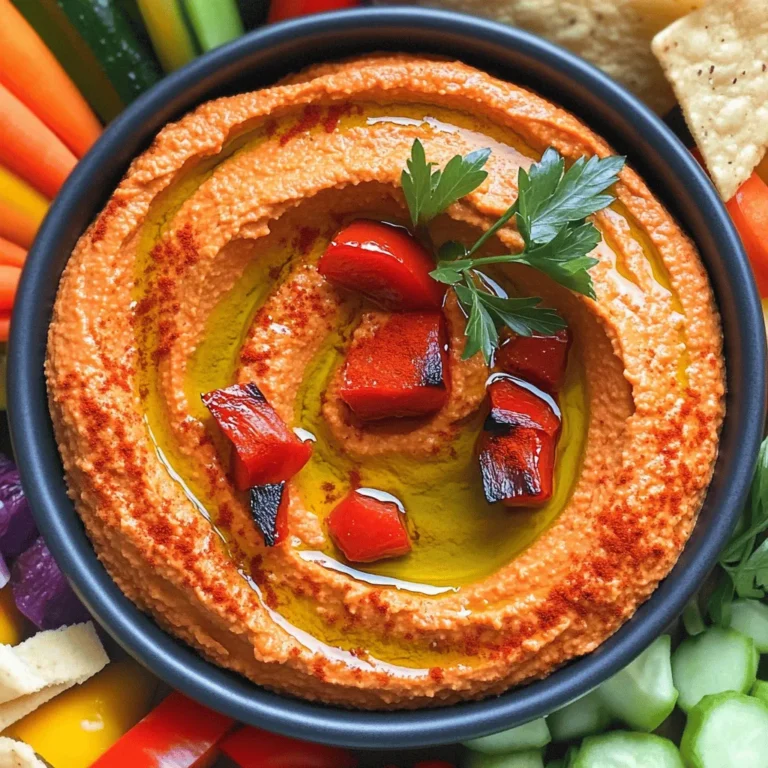
Roasted Red Pepper Hummus Flavorful and Simple Recipe

- 1 pound ground chicken or turkey - 1/2 cup breadcrumbs (preferably panko) - 1/4 cup fresh cilantro, chopped - 2 green onions, finely chopped - 2 cloves garlic, minced - 1 tablespoon fish sauce - 1 teaspoon ginger, grated - Salt and pepper to taste - 1 can (400 ml) coconut milk - 2 tablespoons red curry paste - 1 tablespoon lime juice - 1 tablespoon brown sugar - 1 cup vegetable broth - 1 bell pepper, sliced (any color) - 1 cup snap peas - Fresh basil and additional cilantro for garnish The meatballs need the right mix of ingredients. Ground chicken or turkey gives them a light texture. Breadcrumbs add a crisp bite. I love using panko for extra texture. Fresh cilantro and green onions bring that bright flavor. Garlic and ginger give a warm, aromatic base. Fish sauce adds umami and depth. Salt and pepper make everything pop. For the sauce, coconut milk is key. It creates a creamy base that balances the spices. Red curry paste gives heat and flavor. Lime juice adds a fresh zing. Brown sugar balances the spice with sweetness. Vegetable broth brings everything together, while bell peppers and snap peas add color and crunch. I enjoy garnishing with fresh basil and cilantro for a vibrant finish. In a large mixing bowl, combine the following ingredients: - 1 pound ground chicken (or turkey) - 1/2 cup breadcrumbs (preferably panko) - 1/4 cup fresh cilantro, chopped - 2 green onions, finely chopped - 2 cloves garlic, minced - 1 tablespoon fish sauce - 1 teaspoon ginger, grated - Salt and pepper to taste Mix until everything is just combined. Be careful not to overmix. This keeps the meatballs tender. Next, shape the mixture into small meatballs. Aim for about 1 to 1.5 inches in diameter. Place them on a baking sheet lined with parchment paper. In a large skillet, heat a tablespoon of olive oil over medium heat. Once hot, add the meatballs to the skillet. Cook for about 5-7 minutes, turning occasionally. Look for a nice brown color on all sides. Once browned, remove the meatballs and set them aside. In the same skillet, add the red curry paste. Cook for 1-2 minutes until it smells fragrant. This step adds depth to the sauce. Now, stir in one can of coconut milk and 1 cup of vegetable broth. Mix well to combine all the flavors. Add the sliced bell pepper and snap peas to the skillet. Bring the sauce to a gentle simmer. Cook for about 5-7 minutes until the vegetables are tender but still crisp. Return the cooked meatballs to the skillet. Add 1 tablespoon of lime juice and 1 tablespoon of brown sugar, stirring everything to coat. Let it simmer for an additional 8-10 minutes. This ensures the meatballs heat through and soak up the flavors. To serve, scoop the meatballs and curry sauce over steamed jasmine rice in shallow bowls. Garnish with fresh basil and extra cilantro. You can also add lime wedges for a zesty touch. This colorful presentation makes the dish pop and highlights the vibrant flavors of Thailand. To get the true taste of Thai food, use fresh herbs. Fresh cilantro makes a big difference. It adds bright flavor to your meatballs and curry. Basil is another great herb to include. It gives an aromatic kick that is unmistakably Thai. Fish sauce is key for depth. It adds umami to your dish. A little goes a long way. This salty, savory sauce enhances the flavor of the meatballs. Without it, your dish might taste flat. Mixing the ingredients properly is vital. Over-mixing can make meatballs tough. Combine your ground meat, breadcrumbs, and herbs gently. Just mix until everything is combined. Cooking tips help keep meatballs juicy. Start with medium heat to brown them. Don’t overcrowd the pan; this helps them cook evenly. If they brown too fast, reduce the heat. Avoid overcooking the meatballs. They should be tender and juicy. Cook them just until browned. Then, let them simmer in the curry sauce. This keeps them moist and flavorful. Not seasoning adequately is another mistake. Season your meat mixture with salt and pepper. Taste the mixture as you go. This ensures the meatballs are flavorful and not bland. {{image_2}} You can switch up the meat in these meatballs. Ground beef or pork works great. They add a rich taste. If you prefer a meatless option, try lentils or tofu. Both options soak up flavors well. Use firm tofu and crumble it for a nice texture. Lentils give a hearty bite and are packed with protein. You can adjust the spice in your curry. Use more or less red curry paste to fit your taste. For a milder dish, start with a little. You can also add different vegetables. Carrots, zucchini, or broccoli add color and nutrition. Feel free to mix and match based on what you have. Garnishes can make your dish pop. Try topping your meatballs with toasted coconut or crispy shallots. These add crunch and flavor. You can also use nuts or seeds. Chopped peanuts or sesame seeds can enhance texture. Fresh herbs like cilantro or basil add a burst of color. They also brighten the dish. To keep your Thai coconut curry meatballs fresh, store them in the fridge. Place them in an airtight container. If you have leftover sauce, store it separately to maintain the meatballs' texture. Use glass or BPA-free plastic containers for the best results. They help keep the flavors intact. You can freeze your curry meatballs for later use. First, let them cool completely. Then, arrange the meatballs on a baking sheet, not touching each other. Freeze for one hour before transferring them to a freezer-safe bag. Remove as much air as possible. When ready to eat, thaw them in the fridge overnight. Reheat them gently in a skillet over low heat. You can also add extra sauce to keep them moist. In the fridge, your meatballs will last about three to four days. Always check for signs of spoilage. If you see mold or a strange smell, it's best to toss them. If stored properly in the freezer, they can last up to three months. Keep an eye on your meatballs to enjoy their best taste and texture! Yes, you can use ground turkey, beef, or pork. Ground turkey works well if you want a lean option. Ground beef adds more flavor and richness. Ground pork gives a nice balance of fat and taste. To keep the meatballs tender, avoid overmixing. Just combine the meat and other ingredients until blended. To make this dish gluten-free, choose gluten-free breadcrumbs. Many stores offer options made from rice or almond flour. You can also use crushed gluten-free crackers as a substitute. Always check the labels on your ingredients. Some sauces may contain gluten. Serve these meatballs with steamed jasmine rice. The rice absorbs the tasty curry sauce. You can also add stir-fried veggies for extra color and nutrition. Another option is to serve them in lettuce wraps. This adds a nice crunch and freshness to each bite. The dish has some heat from red curry paste. If you're sensitive to spice, reduce the amount of curry paste. You can also add more coconut milk to tone it down. For a milder flavor, use sweet bell peppers and less ginger. Taste as you cook to find the right balance for you. Yes, you can prepare the meatballs in advance. Shape them and keep them in the fridge for up to a day. For longer storage, freeze the uncooked meatballs in a single layer. Place them in a bag or container once frozen. They can last for up to three months. When ready to cook, just thaw and proceed with the recipe as usual. This recipe for Thai Coconut Curry Meatballs highlights flavorful ingredients and simple steps. I shared tips to ensure moist meatballs and authentic Thai tastes. You can customize your dish with various proteins and spices. Don't forget to store leftovers correctly for later enjoyment. This meal is easy, delicious, and perfect for sharing. Try it out and make it your own! Enjoy your cooking journey and impress your family and friends with this tasty dish.

Thai Coconut Curry Meatballs Savory and Flavorful Dish

To make garlic butter shrimp scampi, you need simple, fresh items. Here’s what you’ll need: - 1 pound large shrimp, peeled and deveined - 4 tablespoons unsalted butter - 3 cloves garlic, minced - 1 teaspoon red pepper flakes (adjust to taste) - 1 tablespoon lemon juice (freshly squeezed) - Zest of 1 lemon - Salt and pepper to taste - 8 ounces linguine or spaghetti - 2 tablespoons fresh parsley, chopped (for garnish) - 1/4 cup grated Parmesan cheese (optional) These ingredients bring a bright and bold flavor to your dish. The shrimp offers a sweet, tender bite, while the garlic adds depth. The butter creates a rich, silky sauce that coats the pasta perfectly. You can customize your scampi with a few optional ingredients. Here are some ideas: - Extra lemon zest for more brightness - A splash of white wine for added flavor - Cherry tomatoes for a pop of color - Fresh basil or oregano for an herbal note These extras can elevate your dish further. They add layers of taste and make your meal stand out. If you prefer a vegetarian dish, swap shrimp for mushrooms or zucchini. They provide a nice texture and soak up the garlic butter flavor well. For a gluten-free dish, use gluten-free pasta. You won’t miss the traditional pasta, and it keeps the meal light and delicious. To start, fill a large pot with water. Add a good amount of salt. Bring the water to a boil. Once boiling, add 8 ounces of linguine or spaghetti. Cook the pasta as directed on the package until it is al dente. This usually takes about 8-10 minutes. Before draining, reserve 1 cup of that tasty pasta water. Drain the pasta and set it aside. Next, get a large skillet and heat it over medium heat. Add 2 tablespoons of unsalted butter. Once it melts, place the shrimp in a single layer. Season them with salt and pepper. Cook for 2-3 minutes on one side until they turn pink. Flip them over and cook for 1-2 more minutes until they are fully cooked. Remove the shrimp from the skillet and set them aside. In the same skillet, add the remaining 2 tablespoons of butter. Let it melt, then add 3 cloves of minced garlic and 1 teaspoon of red pepper flakes. Cook this mixture for about 1 minute. You want it fragrant but watch carefully so the garlic does not burn. Now, add 1 tablespoon of lemon juice and the zest of 1 lemon to the skillet. Next, toss in the cooked pasta and that reserved pasta water you saved. Mix everything well until the pasta is fully coated in the sauce. Finally, return the cooked shrimp to the skillet. Toss it all together until heated through. Adjust the seasoning with more salt and pepper if you like. Serve your Garlic Butter Shrimp Scampi right away. Garnish with 2 tablespoons of chopped fresh parsley and, if you wish, sprinkle on some grated Parmesan cheese. Enjoy your meal! When you pick shrimp, look for large, fresh ones. Fresh shrimp should smell like the ocean. Avoid any with a strong fishy odor. Check for bright colors; they should be pink or gray. If you buy frozen shrimp, choose ones that are peeled and deveined. This saves time and effort. Always thaw them in the fridge overnight for best results. Garlic gives this dish its heart. Use fresh garlic for the best taste. Mince it finely, but don’t overdo it. Too much garlic can overpower the dish. Sauté the minced garlic for just one minute. You want it to be fragrant, not burnt. If you love heat, add red pepper flakes to the garlic as it cooks. This adds a nice kick. Shrimp cooks quickly, so watch the time closely. Cook them for about 2-3 minutes on one side until pink. Flip them and cook for 1-2 more minutes. When they curl into a C shape, they’re done. If they turn into an O shape, you’ve overcooked them. Remove them from the skillet to keep them tender and juicy. {{image_2}} If you like heat, try spicy garlic butter shrimp. Simply add more red pepper flakes. You can also add diced jalapeños for extra spice. This twist gives your dish a nice kick. Pair it with a cool drink to balance the heat. For a luxurious touch, swap shrimp for lobster. Use the same garlic butter sauce. Cook the lobster meat until it’s tender. This dish feels special and tastes amazing. Serve it with a side of crusty bread to soak up the sauce. You can add vegetables to garlic butter shrimp scampi for extra flavor and color. Consider adding spinach, cherry tomatoes, or zucchini. Sauté them along with the shrimp. This makes your dish healthier and more vibrant. It’s a great way to sneak in some veggies! After you enjoy your Garlic Butter Shrimp Scampi, store leftovers right away. Place them in an airtight container. This helps keep the dish fresh. Make sure to cool it down to room temperature first. Keep the container in the fridge. You can enjoy your leftovers for up to two days. Reheat your Garlic Butter Shrimp Scampi easily. You can use the stove or the microwave. If you choose the stove, heat a pan over low heat. Add a splash of water or butter to keep it moist. Stir often until hot. If you use the microwave, place the dish in a microwave-safe bowl. Cover it with a lid or plastic wrap. Heat in short bursts for about one minute. Check and stir in between to avoid overcooking. Freezing Garlic Butter Shrimp Scampi is a great way to save it for later. First, let it cool completely. Then, place it in a freezer-safe container. You can also use a freezer bag. Squeeze out as much air as possible before sealing. It can stay in the freezer for up to three months. When you’re ready to eat, thaw it in the fridge overnight. Then, reheat it as mentioned above. Enjoy the flavors even after freezing! Yes, you can use frozen shrimp. Just thaw the shrimp before cooking. Place them in cold water for about 15-20 minutes. Once thawed, peel and devein them if needed. Using frozen shrimp works well and saves time. You can serve Garlic Butter Shrimp Scampi with several sides. Here are some great options: - Garlic bread - A fresh green salad - Steamed vegetables - Rice or quinoa These sides add flavor and balance to your meal. You can prep some parts in advance. Cook the pasta and make the sauce. Store them separately in the fridge. When ready to serve, heat the sauce and add the shrimp. Then mix in the pasta. This keeps everything fresh and tasty. This blog post shared how to make delicious Garlic Butter Shrimp Scampi step-by-step. We covered key ingredients, cooking techniques, and helpful tips. You can switch out shrimp for vegetarian or gluten-free options, too. Enjoy variations like spicy or lobster versions to suit your taste. Proper storage helps you enjoy leftovers later. Now, go ahead and try this easy recipe at home. You’ll impress your friends and family with your cooking skills!

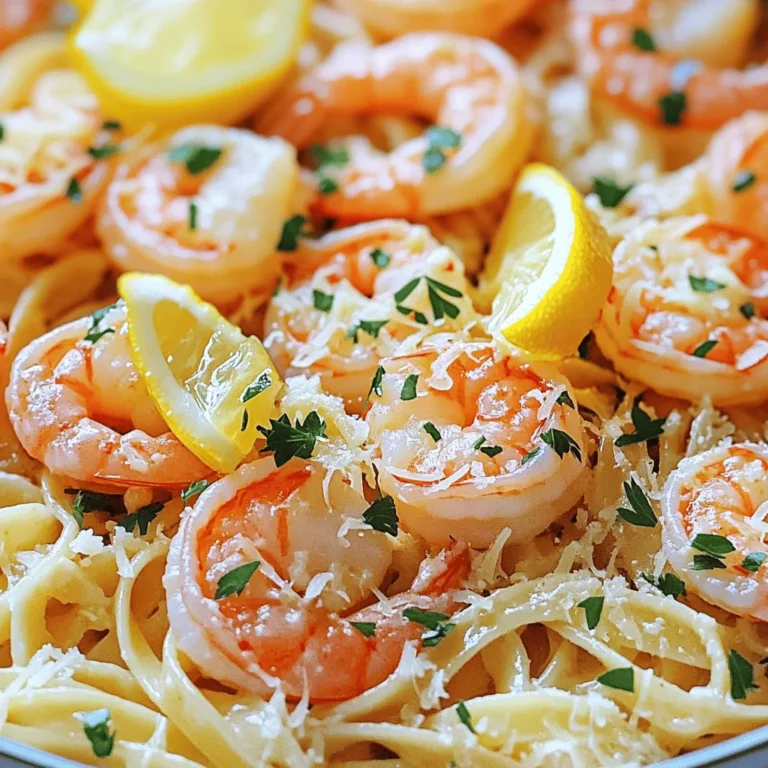
Garlic Butter Shrimp Scampi Tasty and Simple Recipe

- 1 cup pumpkin puree - 1/2 cup cream cheese, softened - 3/4 cup brown sugar - 1/4 cup granulated sugar Pumpkin puree gives these muffins a rich flavor. Cream cheese adds a creamy center, making each bite extra special. The sugars sweeten the muffins, balancing the pumpkin’s earthiness. - 1 1/2 cups all-purpose flour - 1 teaspoon baking powder - 1 teaspoon baking soda - 1 teaspoon pumpkin spice (or 1/2 teaspoon cinnamon and 1/2 teaspoon nutmeg) - 1/2 teaspoon salt All-purpose flour is the base for these muffins. Baking powder and baking soda help them rise. Pumpkin spice or cinnamon and nutmeg bring warmth and a cozy feel to each muffin. A pinch of salt enhances the flavors. - 1/2 cup chopped nuts (walnuts or pecans) - 1/4 cup powdered sugar (for frosting) Chopped nuts add a nice crunch and depth. Powdered sugar can top the muffins, giving them a sweet finish. You can choose to use them or skip them based on your taste. {{ingredient_image_1}} - Preheat your oven to 350°F (175°C). - Prepare your muffin tin by adding paper liners or greasing it lightly. - In a bowl, combine softened cream cheese and powdered sugar. - Use a hand mixer to whip them until smooth and creamy. - In another bowl, mix the pumpkin puree, brown sugar, granulated sugar, vegetable oil, eggs, and vanilla extract. - Whisk these wet ingredients until they blend well. - In a separate bowl, sift together all-purpose flour, baking powder, baking soda, pumpkin spice, and salt. - Gradually add the dry mixture to the wet mix and stir just until combined. Be careful not to overmix! - Fill each muffin cup with about 2 tablespoons of pumpkin batter. - Spoon about 1 teaspoon of the cream cheese filling into the center of each muffin. - Top with more pumpkin batter to cover the cream cheese. - Bake your muffins for 20-25 minutes. Check for doneness by inserting a toothpick in the center; it should come out clean. To make great muffins, avoid overmixing the batter. When you mix too much, you risk tough muffins. Mix just until the ingredients blend together. You want some lumps to keep them soft. Even baking is key for muffins. Place your muffins in the center of the oven. This allows hot air to flow evenly around them. If you have a fan oven, lower the temperature by 25°F. This helps avoid burning the tops. For a lovely finish, dust your muffins with powdered sugar. It adds a sweet touch and makes them look inviting. Serve them warm on a nice platter to impress your guests. Pair your muffins with warm tea or coffee. The flavors complement each other well. This makes for a cozy snack or breakfast option. Using cold cream cheese is a big mistake. It won’t blend well with the sugar. Make sure your cream cheese is soft before mixing. Not measuring ingredients properly can ruin your muffins. Use a kitchen scale for accuracy. This helps ensure your muffins turn out perfect every time. Pro Tips Use Room Temperature Ingredients: Ensure that your cream cheese and eggs are at room temperature for a smoother batter and better incorporation of ingredients. Don’t Overmix: When combining the wet and dry ingredients, mix just until combined to maintain a tender muffin texture. Overmixing can lead to dense muffins. Check for Doneness: Use a toothpick to check the center of the muffins; they are done when it comes out clean or with a few moist crumbs. Avoid overbaking! Experiment with Spices: Feel free to adjust the pumpkin spice or add other spices like ginger or allspice for a unique flavor profile in your muffins. {{image_2}} You can easily change up your pumpkin cream cheese muffins. Here are two tasty ideas: - Chocolate chips: Add about 1 cup of chocolate chips to the batter. This gives a sweet twist. - Dried fruits: Mix in 1/2 cup of dried cranberries or raisins. These add a nice chew and extra flavor. If you need to modify the recipe for dietary needs, here are some options: - Gluten-free alternatives: Replace all-purpose flour with a 1:1 gluten-free blend. This keeps the texture nice. - Vegan substitutions: Use flax eggs instead of regular eggs. Mix 1 tablespoon of flaxseed meal with 3 tablespoons of water for one egg. You can also swap cream cheese for a vegan cream cheese. Your muffins can look and taste different too. Here are some fun ideas: - Muffins in mini size: Make mini muffins by using a smaller muffin tin. Just reduce the baking time to about 15-20 minutes. - Muffins topped with streusel: Mix 1/4 cup of flour, 1/4 cup of brown sugar, and 2 tablespoons of butter for a streusel topping. Sprinkle it on top before baking for a crunchy finish. To keep your pumpkin cream cheese muffins fresh, store them at room temperature. Place them in an airtight container to prevent drying out. They stay tasty for up to two days this way. If you want to store them longer, consider refrigeration. In the fridge, they can last up to a week. Just remember to wrap them well to avoid fridge odors. Freezing muffins is a great way to keep them fresh. To freeze, let them cool completely first. Then, wrap each muffin in plastic wrap. Place them in a freezer-safe bag or container. They can stay good for up to three months in the freezer. When you want to enjoy one, just take it out and let it thaw at room temperature. You can also heat it in the microwave for a warm treat. Just 20-30 seconds should do the trick! When stored properly, your muffins can last quite a while. At room temperature, they last about two days. In the fridge, they can last up to a week. If frozen, they can stay fresh for three months. Always check for signs of spoilage before eating. Look for mold, a sour smell, or an off taste. If any of these are present, it’s best to toss the muffin. To check if your muffins are done, use the toothpick test. Insert a toothpick into the center of a muffin. If it comes out clean, your muffins are ready. If it has wet batter on it, bake for a few more minutes. Yes, you can use fresh pumpkin. Fresh pumpkin gives a great flavor. Be sure to cook and puree it well. Canned puree is often more convenient. Choose based on your time and taste preferences. To keep your muffins moist, use oil instead of butter. Adding an extra egg can help, too. Mix just until ingredients blend. Overmixing can lead to dry muffins. You can also add yogurt for extra moisture. You can prepare the batter a day ahead. Store it in the fridge to keep it fresh. When ready to bake, stir gently to mix. This helps keep the texture light and fluffy. In this post, we covered the key ingredients for pumpkin cream cheese muffins, from pumpkin puree to spices. You learned step-by-step instructions on prepping, mixing, and baking. We shared tips for perfect muffins and explored variations to suit different tastes and diets. Finally, we discussed storage info to keep your muffins fresh. I hope you feel ready to bake these delicious treats yourself. Enjoy every bite!

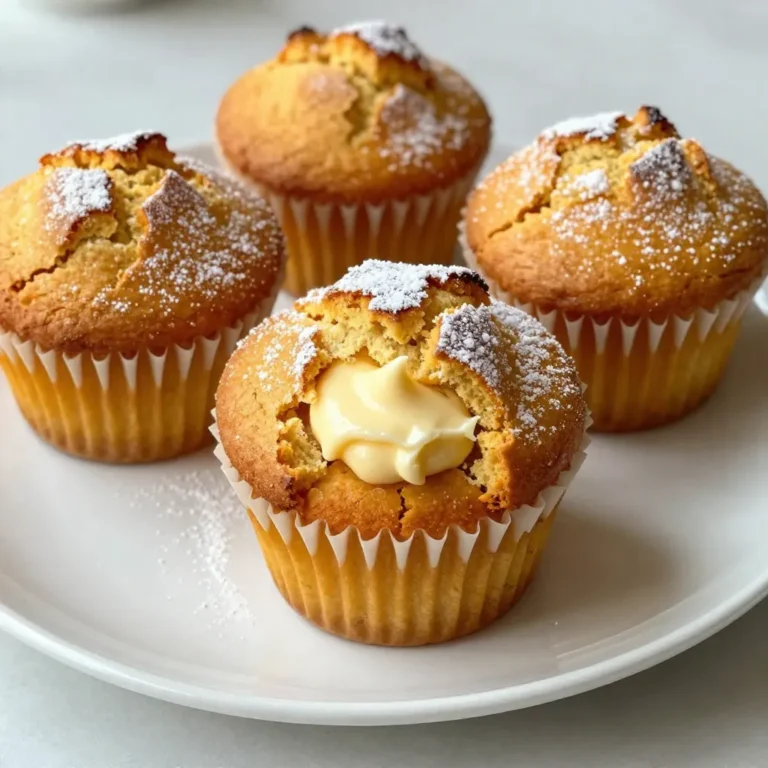
Pumpkin Cream Cheese Muffins Simple and Flavorful Treat

For a tasty Italian Chicken Saltimbocca, you need these main ingredients: - 4 boneless, skinless chicken breasts - 8 slices of prosciutto - 8 fresh sage leaves - 1 cup all-purpose flour These ingredients create the heart of the dish. The chicken gives you a nice base. The prosciutto adds a salty flavor. Fresh sage brings an earthy note that shines through. Next, you need a few seasonings and staples: - 1/2 teaspoon salt - 1/4 teaspoon black pepper - 2 tablespoons olive oil - 2 tablespoons unsalted butter - 1 cup chicken broth - Zest of 1 lemon - Juice of 1 lemon These items enhance the taste. Salt and pepper season the chicken. Olive oil and butter help with browning. The chicken broth gives depth, while lemon zest and juice add brightness to the sauce. To make your meal complete, consider these side dishes: - Garlic mashed potatoes - Roasted vegetables - Fresh green salad - Pasta aglio e olio These sides balance the rich flavors of the chicken. Garlic mashed potatoes are creamy and comforting. Roasted vegetables add color and crunch. A fresh green salad provides a crisp contrast, and pasta aglio e olio offers a light, flavorful option. Enjoy! {{ingredient_image_1}} To start, you need to prepare the chicken breasts. Place each chicken breast between two sheets of plastic wrap. Use a meat mallet to pound them to about 1/2 inch thickness. This step helps tenderize the chicken and ensures even cooking. Next, lay 2 slices of prosciutto over each chicken breast. Then, add 2 fresh sage leaves on top. Use toothpicks to secure the prosciutto and sage onto the chicken. This keeps everything in place while cooking. Now, it's time to cook the chicken. In a shallow dish, mix together 1 cup of all-purpose flour, 1/2 teaspoon of salt, and 1/4 teaspoon of black pepper. Dredge each chicken piece in the flour mixture. Shake off any excess flour. In a large skillet, heat 2 tablespoons of olive oil and 2 tablespoons of unsalted butter over medium-high heat. Once the butter is melted and bubbling, add the chicken. Cook for 4-5 minutes on each side until golden brown and cooked through. If your skillet is small, cook in batches. Remove the chicken from the skillet and set it aside on a plate. Next, let’s make the lemon sauce. In the same skillet, add 1 cup of chicken broth. Scrape the bottom to deglaze the pan. Stir in the zest and juice of 1 lemon. Allow the sauce to simmer for about 2-3 minutes, reducing slightly. Finally, return the chicken to the skillet and spoon the sauce over the top. Let it cook for another minute to heat everything through. Before serving, remove the toothpicks. Enjoy your flavorful Chicken Saltimbocca! To get the best chicken, start with a meat mallet. Place each chicken breast between two sheets of plastic wrap. This keeps your kitchen clean and helps to avoid splatter. Pound the chicken to about 1/2 inch thick. This step makes it tender and ensures even cooking. The thinner the chicken, the faster it cooks. Just be gentle; you want to flatten, not tear. Securing prosciutto and sage is key for flavor. After laying two slices of prosciutto on each chicken breast, add two sage leaves on top. Use toothpicks to hold everything in place. Make sure to insert the toothpicks at an angle. This helps keep the prosciutto from slipping off during cooking. If you’re worried, you can tie the chicken with kitchen twine for extra security. Cooking chicken saltimbocca is simple, but mistakes can happen. One common error is overcrowding the skillet. If you place too many pieces at once, the chicken won’t brown properly. Cook in batches if needed. Another mistake is skipping the deglazing step. Scraping the skillet after cooking adds great flavor to your sauce. Lastly, always check your chicken for doneness. It should reach an internal temperature of 165°F. Pro Tips Even Cooking: Pounding the chicken to an even thickness ensures that it cooks uniformly and remains juicy. Securing Ingredients: Use toothpicks to keep the prosciutto and sage in place, preventing them from falling off during cooking. Deglazing the Pan: Scraping the bottom of the skillet after cooking the chicken helps to incorporate the flavorful bits into the sauce. Garnishing: Fresh sage and lemon wedges not only enhance presentation but also add a burst of freshness to the dish. {{image_2}} You can make saltimbocca with other meats. Pork is a great choice. It gives a nice flavor. Veal also works well for a tender bite. Turkey can be a lighter option. Each meat brings its own taste. Just follow the same steps as with chicken. Want a meatless version? Try using eggplant or zucchini. Slice them thin and grill or roast them. You can also use tofu for a hearty feel. Just marinate it in lemon juice and herbs first. Make sure to add sage and a salty layer like cheese. This gives you the same tasty vibe. Herbs can change the dish a lot. Instead of sage, use basil for a fresh twist. Thyme or rosemary also add depth. Mix in some parsley for a burst of color. Each herb brings its own flavor, so feel free to experiment. Adjust the amount to suit your taste. To keep your Chicken Saltimbocca fresh, allow it to cool first. Place the chicken in an airtight container. You can layer it with parchment paper if needed. Store it in the fridge for up to three days. This helps keep the flavors intact and the chicken moist. Remember, the sooner you store it, the better it will taste later. When ready to enjoy leftovers, reheat them gently. I suggest using a skillet on low heat. Add a splash of chicken broth or water to keep it moist. Covering the skillet helps trap steam. Heat for about 5-7 minutes, flipping the chicken halfway. You can also use a microwave, but be cautious. Heat in short bursts to avoid drying it out. Freezing Chicken Saltimbocca is easy if done right. First, cool the chicken completely. Wrap each piece tightly in plastic wrap, then place it in a freezer bag. Make sure to remove as much air as possible. This helps prevent freezer burn. It can last up to three months in the freezer. When you're ready to eat, thaw it in the fridge overnight before reheating. Chicken Saltimbocca comes from Italy. This dish has roots in Roman cuisine. The word "saltimbocca" means "jump in the mouth." It reflects how tasty this dish is. Traditionally, it used veal, but chicken is a popular choice today. The key flavors are prosciutto and sage. They give this dish a rich, savory taste. Yes, you can prepare Chicken Saltimbocca ahead of time. You can pound the chicken and layer the prosciutto and sage earlier in the day. Store the chicken in the fridge until you are ready to cook. This makes dinner easy and quick. Just remember to cook the chicken fresh for the best taste. If you don't have prosciutto, you can use pancetta or bacon. These meats will add a similar salty flavor. For a lighter option, try using turkey bacon. It gives a nice taste but has less fat. You can also skip the meat for a vegetarian version. Use extra sage and some cheese for flavor. Italian Chicken Saltimbocca is a delightful dish that mixes chicken, prosciutto, and sage. We explored key ingredients, tasty pairings, and step-by-step cooking. I shared tips for pounding chicken and securing ingredients to avoid mistakes. You can even try different meats or vegetarian options. Storing leftovers and reheating properly keeps your meal fresh. In summary, with these insights, you can create a perfect Chicken Saltimbocca. Enjoy cooking this tasty dish!

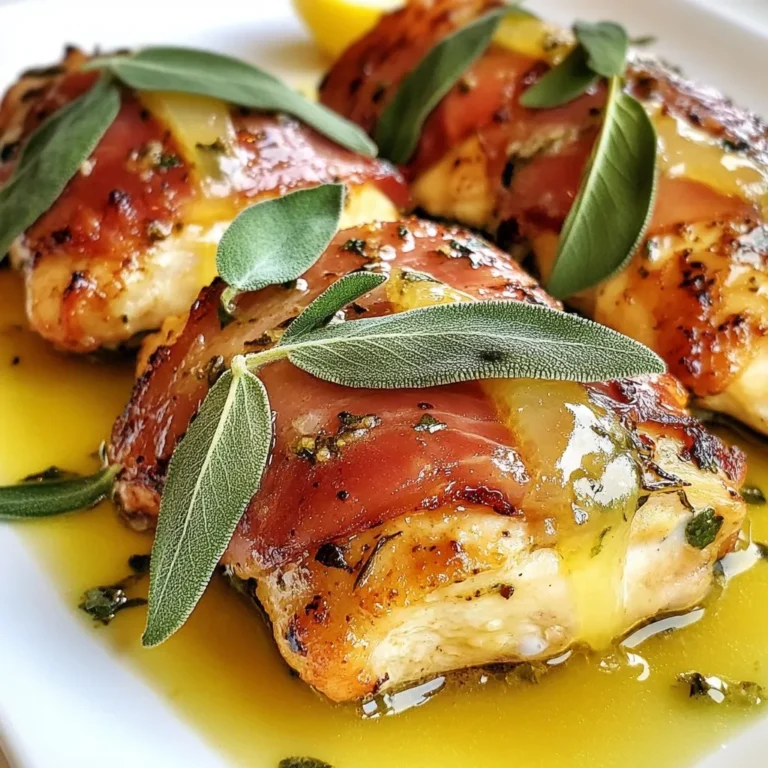
Italian Chicken Saltimbocca Flavorful Dinner Recipe

PREV 1 … 41 42 43 … 86 NEXT
spicy fork kitchen

explore

DessertsDinnerAppetizersDrinks

Our Policies

  • Cookie Policy
  • Copyright Policy
  • Disclaimer
  • GDPR Policy
  • Terms Of Use
Back to Top
  • About
  • Contact Us
  • Privacy Policy
© 2026 spicy fork kitchen