FREE DINNER EBOOK! Get your copy!
  • Cookie Policy
  • GDPR Policy
  • Disclaimer
  • Terms Of Use
  • Visit my other site: Fun Cookie Recipes
spicy fork kitchen
  • Home
  • Dinner
  • Desserts
  • Drinks
  • Appetizers
  • Contact
  • About
  • Privacy Policy
  • Home
  • Dinner
  • Desserts
  • Drinks
  • Appetizers
  • Contact
  • About
  • Privacy Policy
  • Cookie Policy
  • GDPR Policy
  • Disclaimer
  • Terms Of Use
Visit my other site: Fun Cookie Recipes

HOME / CATEGORIES /

Latest

To make a delightful Southwestern Quinoa Salad, gather these fresh ingredients: - 1 cup quinoa, rinsed - 2 cups vegetable broth - 1 cup black beans, drained and rinsed - 1 cup corn, fresh or frozen - 1 red bell pepper, diced - 1 avocado, diced - 1/2 cup cherry tomatoes, halved - 1/4 cup red onion, finely chopped - 1/4 cup fresh cilantro, chopped - 1 lime, juiced - 2 tablespoons olive oil - 1 teaspoon cumin - Salt and pepper to taste Quinoa is a superfood packed with protein. It has all nine essential amino acids. This makes it a complete protein source, great for vegans and vegetarians. Quinoa is also high in fiber, which helps digestion. It can lower cholesterol and keep you full longer. Plus, it has iron and magnesium, which are good for your body. Fresh ingredients make a big difference in flavor and nutrition. Fresh vegetables add crunch and vibrant colors to your salad. They also provide vitamins and minerals that are important for health. Using fresh herbs, like cilantro, boosts flavor without extra calories. Always choose the best quality ingredients for the best results. You’ll taste the difference in every bite! First, rinse one cup of quinoa in a fine mesh strainer. This step helps remove bitter flavors. Next, in a medium saucepan, combine the rinsed quinoa with two cups of vegetable broth. Bring the mixture to a boil over medium heat. Once it boils, lower the heat to a simmer. Cover the pot and let it cook for about 15 to 20 minutes. You want the liquid to be absorbed and the quinoa to be fluffy. After it's done, remove it from the heat and let it cool. While the quinoa cools, grab a large bowl. Add one cup of black beans, which should be drained and rinsed. Then, toss in one cup of corn; fresh or frozen works well. Next, add a diced red bell pepper for crunch and color. Don’t forget one diced avocado for creaminess. Also, include half a cup of cherry tomatoes, halved for bite-sized pieces. Add in a quarter cup of finely chopped red onion and a quarter cup of fresh cilantro. Gently mix all these ingredients together. In a small bowl, whisk together the juice of one lime, two tablespoons of olive oil, and one teaspoon of cumin. Don’t skip the salt and pepper; add them to taste. This dressing brings all the flavors together. After whisking, pour it over the salad mixture. Finally, add the cooled quinoa to the bowl. Toss everything gently to combine. Be careful not to mash the avocado. Let the salad sit for at least ten minutes so the flavors can meld. Enjoy your fresh and nutritious meal! To make fluffy quinoa, rinse it well before cooking. This step removes any bitter taste. Use a medium saucepan and combine one cup of rinsed quinoa with two cups of vegetable broth. Bring the mixture to a boil over medium heat. Once boiling, reduce the heat to low, cover, and simmer for about 15 to 20 minutes. When the liquid is absorbed, remove it from heat. Let it cool for a few minutes, then fluff it with a fork to separate the grains. To boost the flavor of your salad, use fresh herbs. Fresh cilantro adds a bright taste. You can also try adding lime juice for a zesty kick. Cumin gives the dish a warm flavor. For a little heat, add diced jalapeños. Adjust the salt and pepper to your liking. Mixing different ingredients like black beans, corn, and bell peppers creates a vibrant flavor profile. This salad shines as a main dish or a side. Serve it chilled or at room temperature. Add slices of grilled chicken or shrimp for extra protein. You can also pair it with tortilla chips for a crunchy contrast. For a fun twist, serve it in avocado halves or lettuce wraps. Enjoy the colorful presentation and the fresh taste! {{image_2}} You can boost your Southwestern Quinoa Salad with protein. Adding grilled chicken or shrimp makes it heartier. If you prefer plant-based protein, try chickpeas or diced tofu. These options add texture and flavor. They also make the meal more filling and nutritious. Feel free to swap ingredients based on what you have. Instead of black beans, use pinto beans or kidney beans. If you can’t find red bell pepper, yellow or orange peppers work well too. You can even change up the herbs. Try parsley or green onions instead of cilantro for a fresh twist. The dressing can change the whole salad experience. You can use a simple vinaigrette made of olive oil and vinegar. For a creamy option, add yogurt or avocado to your dressing. Spicy lovers might enjoy a kick with hot sauce or chipotle in adobo. Each dressing brings a new flavor, so don’t hesitate to experiment! Store any leftover Southwestern quinoa salad in an airtight container. This keeps it fresh. You can keep it in the fridge for up to three days. If you add avocado, eat it sooner. The avocado can brown quickly. For meal prep, divide the salad into individual containers. This makes it easy to grab and go. You can also store the dressing separately. This way, it stays fresh and the salad won’t get soggy. Combine them just before eating. You can eat the salad cold or warm. If you like it warm, heat it in the microwave. Use a microwave-safe dish and cover it. Heat for about 30 seconds, then stir. Check the temperature. If it’s not warm enough, heat it for another 30 seconds. Make sure not to overheat; it can change the texture. Yes, quinoa is gluten-free. It is a seed, not a grain. Many people with gluten issues enjoy quinoa. You can use quinoa in many dishes instead of wheat. It adds protein and flavor to meals. Yes, you can make this salad ahead of time. It keeps well in the fridge. The flavors blend nicely when it sits. Just add the avocado and dressing right before serving. This keeps them fresh and tasty. Some great toppings are sliced jalapeños, feta cheese, or crushed tortilla chips. You can also add extra cilantro or lime wedges. These toppings add crunch and flavor. Mix and match to find your favorite combo! This blog post covers all you need to make a delicious Southwestern Quinoa Salad. We explored the key ingredients, how to cook and mix them, and tips for fluffy quinoa. I shared tasty variations and smart storage tips. In closing, fresh ingredients make a big difference. Experiment with flavors and toppings to find your perfect mix. Enjoy your time creating this healthy dish!

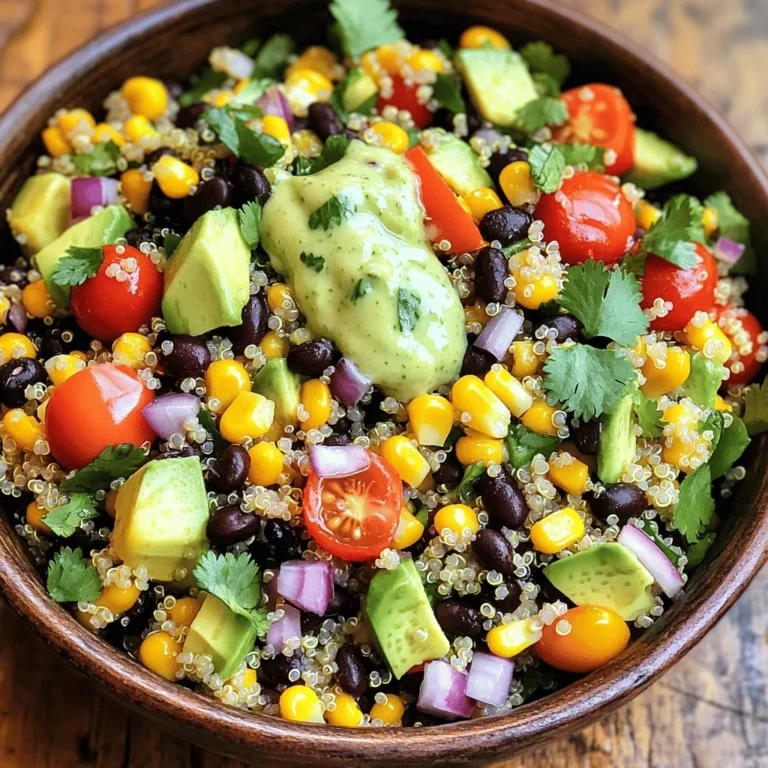
Southwestern Quinoa Salad Fresh and Nutritious Meal

- 3 cups cooked rotini pasta - 2 cups cooked chicken, shredded - 2 cups Alfredo sauce The base of this dish is rotini pasta. I love using it because the shape holds sauce well. You can use store-bought or homemade Alfredo sauce. Store-bought saves time, but homemade adds a special touch. Use shredded chicken for easy mixing and great taste. - 1 cup mozzarella cheese, shredded - 1/2 cup Parmesan cheese, grated - 2 cloves garlic, minced - 1 teaspoon Italian seasoning - Salt and pepper to taste Cheese adds creaminess and flavor. Mozzarella melts beautifully on top. Parmesan gives a nice salty kick. Garlic and Italian seasoning boost the flavor. Don’t forget to add salt and pepper for balance. - 1 cup cherry tomatoes, halved - Fresh parsley for garnishing Cherry tomatoes offer a fresh burst of flavor. They also add a pop of color. Fresh parsley makes your dish look beautiful and bright. It’s a nice touch that impresses guests. - Preheat the oven to 375°F (190°C). - In a large mixing bowl, combine the cooked rotini pasta, shredded chicken, Alfredo sauce, minced garlic, and Italian seasoning. Add a pinch of salt and pepper for flavor. Stir well until everything mixes nicely. This step is key for a creamy base that binds the dish. The pasta and chicken soak up the rich flavors of the sauce, making every bite delicious. Don’t rush this part; make sure everything is coated evenly. - Fold in the halved cherry tomatoes and half of the mozzarella cheese. - Transfer the mixture into a greased 9x13 inch baking dish. Adding cherry tomatoes brightens the dish with color and flavor. The sweet burst from the tomatoes pairs perfectly with the creamy sauce. Mixing half of the mozzarella in now helps it melt into the dish. - Cover the baking dish with aluminum foil and bake for 20 minutes. - Remove the foil and bake for an additional 10 minutes. Covering the dish keeps moisture in, ensuring the pasta cooks well. After 20 minutes, the dish will be hot and fragrant. Uncovering it allows the cheese to bubble and turn golden brown. That’s the moment you want to see! Cooking pasta al dente means it should be firm but tender. To do this: - Boil water in a large pot. - Add salt to the water before adding pasta. - Check the pasta package for cooking time. - Taste the pasta a minute before the time ends. It should have a slight bite. For a golden cheese topping, follow these steps: - Use a mix of mozzarella and Parmesan cheese. - Remove the foil during the last 10 minutes of baking. - Make sure the cheese is bubbly and golden before taking it out. Store-bought Alfredo sauce is quick and easy. However, it may contain preservatives. Homemade sauce gives you full control over taste and ingredients. Simple homemade Alfredo sauce recipe: - 1 cup heavy cream - 1/2 cup grated Parmesan cheese - 1 clove garlic, minced - Salt and pepper to taste Combine cream and garlic in a pan. Heat until warm, then stir in the cheese until it melts. For the best Chicken Alfredo Bake, you need the right tools: - Use a 9x13 inch baking dish for even cooking. - A large bowl is great for mixing your ingredients. - A spatula helps to fold everything together gently. These tools make the cooking process smooth and easy! {{image_2}} You can switch up the protein in your Chicken Alfredo Bake. Try using shrimp, sausage, or even turkey. Each option brings new flavors. For a vegetarian twist, use mushrooms or spinach. These ingredients give you a hearty meal without meat. You can mix and match to find your favorite combo! Adding vegetables boosts nutrition and flavor. Good choices include broccoli, bell peppers, or zucchini. These veggies mix well with pasta and sauce. To enhance their taste, roast them first. Roasting brings out their natural sweetness. Simply toss them in olive oil and bake briefly before mixing into your dish. If you need gluten-free options, use gluten-free pasta. Many brands offer great choices that taste good. For dairy-free needs, look for dairy-free cheese. It melts well and tastes creamy. These swaps keep the dish delicious while meeting dietary needs. Enjoy your creamy Chicken Alfredo Bake without worry! To keep your Chicken Alfredo Bake fresh, place it in an airtight container. Cover it tightly to prevent air from getting in. You can store it in the fridge for up to three days. If you want to eat it later, freezing is a great option. When reheating, the oven is best. Preheat it to 350°F (175°C). Place the bake in a safe dish and cover it with foil. This keeps moisture in and prevents drying out. Bake for about 20 minutes or until warm. If you use a microwave, heat in short bursts. Stir in between to help heat evenly. You can freeze Chicken Alfredo Bake before or after baking. If freezing before, mix all the ingredients and place them in a freezer-safe dish. Cover it well. To freeze after baking, let it cool first. Then, wrap it tightly or use a freezer bag. To thaw, put it in the fridge overnight. Reheat it in the oven for the best taste and texture. To reheat Chicken Alfredo Bake, I suggest using the oven. Preheat your oven to 350°F (175°C). Place the bake in an oven-safe dish. Cover it with foil to keep the moisture in. Heat for about 15 to 20 minutes. This method keeps the cheese creamy and the pasta soft. If you use a microwave, heat in short bursts. Check often to avoid drying it out. Yes, you can make Chicken Alfredo Bake ahead of time. Prepare the dish as normal but do not bake it. Cover it tightly and store it in the fridge. You can keep it for up to two days. When you're ready, just bake it as directed. You may need to add a few extra minutes to the cooking time. Chicken Alfredo Bake is great for meal prep. It makes six servings, perfect for lunches or dinners. I recommend portioning it into individual containers. This way, you can easily grab a meal when you're in a hurry. Just reheat it when you’re ready to eat. It saves time and effort during your busy week! Chicken Alfredo Bake is a tasty dish that combines simple ingredients for big flavor. You mix cooked pasta, chicken, and Alfredo sauce, then bake it with cheeses and spices. Don’t forget to add your favorite veggies or proteins for a twist. Make it easy with helpful tips and storage advice. You can even prepare it ahead! This dish is great for sharing or meal prep. Enjoy your delicious creation today, and make it your own!

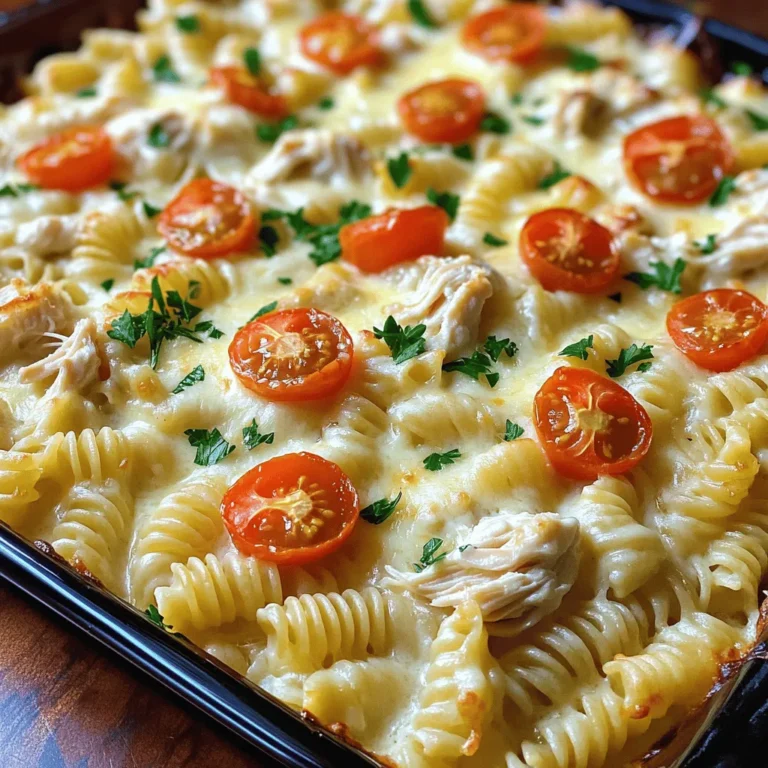
Easy Chicken Alfredo Bake Simple and Tasty Recipe

For a great teriyaki shrimp stir-fry, you need fresh and vibrant ingredients. Here’s what you’ll need: - 1 lb large shrimp, peeled and deveined - 2 tablespoons vegetable oil - 1 cup bell peppers (red, yellow, green), sliced - 1 cup broccoli florets - 1 cup sugar snap peas - 3 green onions, chopped - 3 cloves garlic, minced - 1 inch ginger, grated These ingredients give the dish color and crunch. The shrimp are tender and juicy. The veggies add great texture and flavor. The sauce is what makes this dish shine. You’ll need: - 1/4 cup low-sodium soy sauce - 2 tablespoons honey - 2 tablespoons rice vinegar - 1 teaspoon sesame oil - 1 teaspoon cornstarch mixed with 2 tablespoons water (for thickening) Mixing these items creates a sweet and savory sauce. It coats the shrimp and veggies perfectly. Adding garnishes can make your dish pop! Consider these options: - Sesame seeds, for garnish Sprinkling sesame seeds on top adds a nice touch. They give a bit of crunch and a nutty flavor. You can also add extra green onions if you like. To make the teriyaki sauce, grab a small bowl. Combine 1/4 cup low-sodium soy sauce, 2 tablespoons honey, 2 tablespoons rice vinegar, and 1 teaspoon sesame oil. Mix in 1 teaspoon cornstarch with 2 tablespoons water. Stir everything until smooth. Set the sauce aside for later. Heat 2 tablespoons vegetable oil in a large skillet or wok on medium-high heat. Add 3 cloves minced garlic and 1 inch grated ginger. Sauté for about 30 seconds until it smells good. Next, toss in 1 pound of large shrimp. Cook the shrimp for 2-3 minutes. They should turn pink and opaque. Once done, remove the shrimp and set them aside. In the same skillet, add 1 cup of sliced bell peppers and 1 cup of broccoli florets. Also, add 1 cup of sugar snap peas. Stir-fry these vegetables for about 4-5 minutes. You want them tender but still crisp. Return the cooked shrimp to the skillet. Pour the teriyaki sauce over the shrimp and vegetables. Stir well to coat everything evenly. Cook for another 2 minutes. This helps the sauce thicken and heat through. Finally, mix in 3 chopped green onions. Your dish is ready to serve! To cook shrimp perfectly, start with large shrimp. They cook fast and stay juicy. Heat your skillet to medium-high. Add vegetable oil and let it warm up. When the oil is hot, add minced garlic and grated ginger. Cook for about 30 seconds until you smell the aroma. Then, add your shrimp. Cook them for just 2-3 minutes. When they turn pink and opaque, they are done. Overcooking makes them rubbery. Always take them out of the pan as soon as they are ready. For a colorful stir-fry, use bell peppers, broccoli, and sugar snap peas. Bell peppers add crunch and sweetness. Broccoli gives a nice texture and nutrients. Sugar snap peas add a fresh snap with every bite. You can also try carrots or snow peas for variety. Cut all veggies into similar sizes. This helps them cook evenly. To boost the taste, use a mix of flavorful ingredients. The teriyaki sauce is key, made from soy sauce, honey, rice vinegar, and sesame oil. This blend gives a perfect sweet and salty balance. You can add a pinch of red pepper flakes for heat. Fresh green onions on top add a nice crunch and brightness. Don't forget sesame seeds for a nutty finish. Each ingredient builds layers of flavor, making your dish truly special. {{image_2}} You can switch the shrimp for other proteins. Chicken, beef, or tofu work well. This gives you more options to try. Just cut the meat into small pieces. Cook it until it’s fully done before adding the sauce. If you want a low-carb meal, skip the rice and add more veggies. Zucchini noodles or cauliflower rice are great swaps. They add taste and keep the meal light. You can change the vegetables based on what you like. Try carrots, snap peas, or mushrooms. Each adds a different taste and texture. Mix and match to find your favorite combo. Fresh or frozen veggies can both work well! To keep your teriyaki shrimp stir-fry fresh, let it cool first. Place leftovers in an airtight container. Store them in the fridge for up to three days. Make sure to separate shrimp from veggies if possible. This helps keep everything fresh and tasty. When you’re ready to eat, reheat your stir-fry in a skillet. Use medium heat for a few minutes. Stir often to warm it evenly. You can also use a microwave. Heat in short bursts, stirring in between. This ensures the shrimp stays juicy and the veggies crisp. You can freeze your teriyaki shrimp stir-fry too. Use a freezer-safe container or bag. Remove as much air as you can. It will last for about one month. When ready to eat, thaw overnight in the fridge. Reheat on the stove for the best texture. Yes, you can make Teriyaki Shrimp Stir-Fry ahead of time. To do this, prepare the shrimp and vegetables as usual. Cook the dish, then let it cool. Store it in the fridge for up to three days. When ready to eat, reheat it in a pan over medium heat. This helps keep the shrimp tender and the veggies crisp. Teriyaki Shrimp Stir-Fry pairs well with rice or noodles. You can use white rice, brown rice, or even cauliflower rice for a low-carb option. For a fresh touch, add a side salad with sesame dressing. You can also enjoy it with spring rolls for a fun meal. Not all teriyaki sauces are gluten-free. Traditional teriyaki sauce contains soy sauce, which often has wheat. Look for brands that offer gluten-free soy sauce. You can also make a simple homemade version using tamari instead of soy sauce. This way, you ensure it fits your dietary needs. Teriyaki Shrimp Stir-Fry is not spicy. The main flavors come from the sweet teriyaki sauce, garlic, and ginger. If you like heat, add red pepper flakes or fresh chili peppers. This gives the dish a nice kick while still keeping the sweet flavor in balance. This blog covered how to make Teriyaki Shrimp Stir-Fry. You learned about the main ingredients, including sauce options and garnishes. I shared step-by-step instructions, tips for perfect shrimp, and variations to mix things up. You also found storage info and answers to common questions. Now you can try this dish with confidence. Enjoy customizing it to match your taste. Happy cooking!

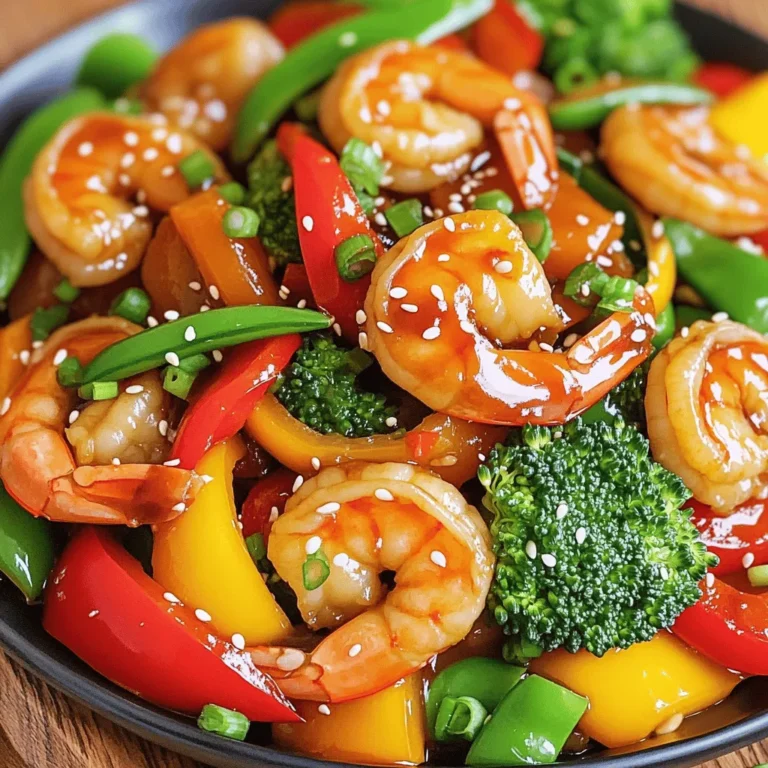
Teriyaki Shrimp Stir-Fry Flavorful and Quick Meal

Here are the ingredients you will need to make Keto Garlic Butter Meatballs: - 1 pound ground beef (80/20) - 1/4 cup almond flour - 1/4 cup grated Parmesan cheese - 1 large egg - 3 cloves garlic, minced - 1 teaspoon dried oregano - 1 teaspoon onion powder - 1/2 teaspoon salt - 1/4 teaspoon black pepper - 1/4 cup fresh parsley, chopped (for garnish) - 1/2 cup unsalted butter - 1 tablespoon olive oil - 1 teaspoon lemon juice Each ingredient plays a vital role. The ground beef gives meatballs their juicy texture. Almond flour keeps them keto-friendly while adding a nice crumb. Parmesan cheese adds a rich flavor that pairs well with garlic. The egg helps bind everything together. Garlic is the star here. It brings a strong, savory note. Dried oregano and onion powder add depth. Salt and black pepper enhance the flavors without overpowering them. Fresh parsley is perfect for a pop of color and freshness. Unsalted butter creates a rich sauce that coats the meatballs. Olive oil helps achieve a nice brown crust when cooking. Finally, lemon juice brightens the entire dish. With this list, you’ll create a dish that’s not just tasty but also fits your keto lifestyle. {{ingredient_image_1}} To start, grab a large mixing bowl. Add in 1 pound of ground beef. I suggest using 80/20 beef for the best flavor and juiciness. Next, sprinkle in 1/4 cup of almond flour and 1/4 cup of grated Parmesan cheese. These ingredients help bind the meatballs and add taste. Crack in 1 large egg to hold everything together. Then, add 3 cloves of minced garlic for that rich flavor. For a bit of depth, mix in 1 teaspoon of dried oregano and 1 teaspoon of onion powder. Don’t forget to season with 1/2 teaspoon of salt and 1/4 teaspoon of black pepper. Now, use your hands or a spoon to mix everything until well combined. Now it’s time to shape the meatballs. Take a small amount of the mixture and roll it into a ball about 1 inch wide. Make sure to place them on a lined baking sheet as you go. Preheat your oven to 400°F (200°C) while you work. Once all the meatballs are ready, it’s time to brown them. Heat 1 tablespoon of olive oil in a large skillet over medium heat. Add the meatballs in batches, not crowding the pan. Cook them for about 5-7 minutes, turning to brown all sides. This step gives the meatballs a nice crust. After browning, return them to the baking sheet. In the same skillet, lower the heat and add 1/2 cup of unsalted butter. Let it melt and bubble gently. It’s important to stir in 1 teaspoon of lemon juice at this point. This brightens the sauce and complements the meatballs well. Now, take the browned meatballs and transfer them to the skillet. Cook for another 5 minutes, ensuring they are well-coated in that rich garlic butter sauce. This final step adds a burst of flavor that makes the dish truly special. Remove from heat and get ready to serve them with fresh chopped parsley for a lovely touch. When picking ground beef, choose 80/20. This mix has enough fat to keep meatballs juicy. The fat adds flavor and moisture. Avoid leaner options; they can dry out. Always check the color, too. It should be bright red. Fresh ground beef gives the best taste. To keep meatballs moist, use almond flour and a large egg. These binders hold in moisture. Don't overmix the ground beef; gentle mixing is key. Let the meatballs rest for a few minutes before cooking. This helps them hold together. Cooking them in butter adds more flavor and keeps them tender. For a great look, serve meatballs on a rustic wooden board. Drizzle with garlic butter sauce. This adds shine and flavor. Sprinkle extra parsley on top for color. Pair with zucchini noodles or a fresh salad. This makes your meal complete and eye-catching. Pro Tips Use High-Fat Ground Beef: Opt for an 80/20 blend for juiciness and flavor in your meatballs. Chill the Mixture: After mixing the ingredients, chill the meatball mixture for about 15 minutes to help them hold their shape while cooking. Don’t Overcrowd the Pan: When browning the meatballs, cook them in batches to ensure even cooking and a nice brown crust. Enhance the Butter Sauce: Add a pinch of red pepper flakes or a splash of Worcestershire sauce to the garlic butter for an extra kick of flavor. {{image_2}} You can switch ground beef for turkey or chicken. These meats are leaner. They still taste great. Use ground turkey or chicken in the same amount. You may need to adjust spices. Turkey and chicken have milder flavors. Adding more garlic or herbs can help. If you want a dairy-free dish, try using nutritional yeast. This ingredient gives a cheesy taste without dairy. Replace Parmesan cheese with 1/4 cup of nutritional yeast. It works well in the meatball mix. Plus, it adds extra nutrients. You can change the flavor by adding spices or herbs. Try adding red pepper flakes for heat. Fresh basil or thyme can give a fresh taste. Mix in smoked paprika for a unique twist. Experimenting with flavors keeps the recipe fun. Each option creates a different, tasty dish. To store leftover meatballs, let them cool first. Place them in an airtight container. You can keep them in the fridge for up to four days. Keeping them sealed helps keep them fresh. I like to label my containers with the date. This way, I always know how long they’ve been in there. Reheating meatballs is easy. You can use the microwave or the oven. If you use the microwave, place them on a plate and cover them. Heat for one to two minutes, checking often. If you prefer the oven, preheat it to 350°F (175°C). Place the meatballs on a baking sheet and heat for about 10-15 minutes. This will keep them juicy and warm. Freezing meatballs is a great idea for quick meals later. To freeze, first let them cool completely. Place them in a freezer-safe bag or container. Separate the layers with parchment paper to prevent sticking. They can last up to three months in the freezer. When you're ready to eat, just thaw in the fridge overnight before reheating. Enjoy your tasty meal anytime! The carb count for these meatballs is low. Each serving has about 2 grams of carbs. This comes mainly from the almond flour and Parmesan cheese. These ingredients fit well into a keto diet. Enjoy these meatballs without worry! Yes, you can use a different flour if needed. Some good options are coconut flour or ground flaxseed. Just remember, these flours may change the texture. Almond flour works best for keto because it has fewer carbs. You can keep the meatballs in the fridge for about 3 to 4 days. Store them in a sealed container to keep them fresh. Reheat them gently in a skillet or microwave before serving. Enjoy them anytime you want a tasty meal! You now have a solid recipe for Keto Garlic Butter Meatballs. With simple yet tasty ingredients, you can create a dish that's sure to impress. You learned how to prepare, bake, and serve. The tips will help you avoid dry meatballs and make them look great on the plate. Remember, you can try different proteins and flavor twists to keep things exciting. Whether you store leftovers or freeze extras, these meatballs will be a hit. Enjoy your new favorite meal that fits your keto lifestyle!

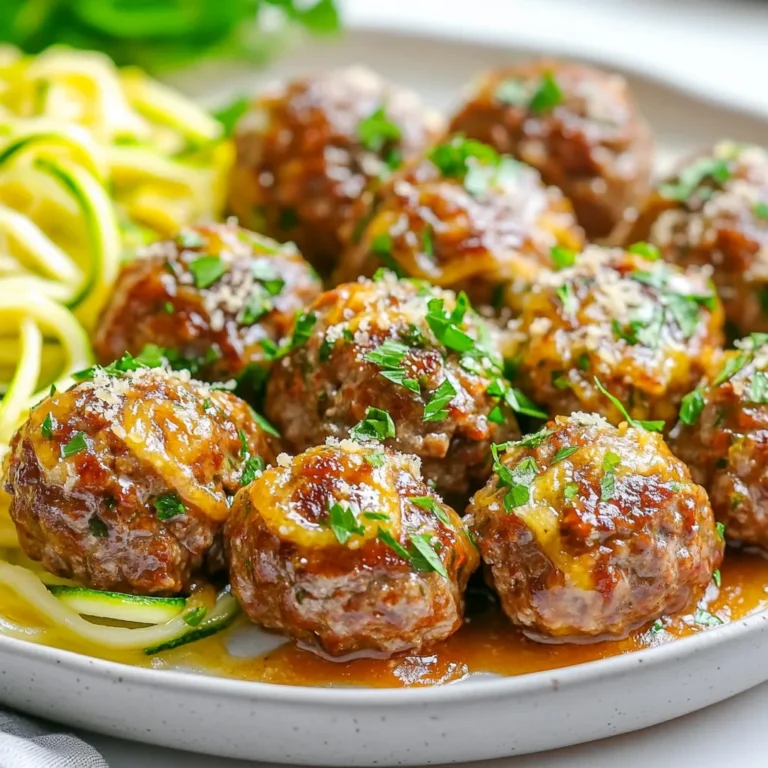
Keto Garlic Butter Meatballs Flavorful and Easy Recipe

To start, grab a large pot. Fill it with water and bring it to a boil. Add the udon noodles once the water is bubbling. Cook them for about 5 to 7 minutes, or follow the package directions. When they are done, drain the noodles. Set them aside for later. Next, take a bowl and slice the beef sirloin thinly. Add soy sauce, oyster sauce, and half of the black pepper to the beef. Mix it well. Let it sit for at least 10 minutes. This helps the beef soak up all the flavors. Now, heat vegetable oil in a large skillet or wok over medium-high heat. Toss in the sliced onions and bell peppers. Stir-fry them for about 2 to 3 minutes. They should get slightly soft. Then, add the minced garlic and ginger. Cook for one more minute until you smell their aroma. Push the cooked vegetables to one side of the skillet. Add the marinated beef to the center. Stir-fry it for about 3 to 4 minutes. Cook until the beef turns brown and is no longer pink. It’s time to add the udon noodles back into the skillet. Drizzle the sesame oil over the noodles. Sprinkle the rest of the black pepper on top. Toss everything together until well mixed. Make sure the noodles are hot and coated with the sauce. Finally, scoop the beef black pepper udon into bowls. For a nice finish, garnish your dish with chopped spring onions and sesame seeds. Enjoy your savory meal! Choose beef sirloin for its tenderness. This cut cooks fast and has great flavor. Look for thin slices to ensure even cooking. If you can, buy fresh beef. It tastes better than frozen. Ask your butcher for the best options. A good cut makes this dish shine. Start by boiling water in a large pot. Follow the package instructions for cooking time, usually 5-7 minutes. Stir the noodles gently to keep them from sticking. Once they’re cooked, drain them right away. Rinse under cold water to stop the cooking process. This keeps them chewy and perfect for your dish. To control the spice, adjust the black pepper. If you like it mild, use less. For a kick, add more. You can also mix in chili flakes or fresh chili. Taste as you go to find your perfect balance. Remember, cooking is about your taste, so make it your own! Pro Tips Use Fresh Ingredients: Always opt for fresh beef and vegetables to enhance the overall flavor of your dish. Control the Spice Level: Adjust the amount of black pepper based on your preference for heat; start with a little and increase to taste. Don't Overcook the Beef: Stir-fry the beef just until browned to ensure it remains tender and juicy. Garnish for Flavor: Fresh spring onions and sesame seeds not only add visual appeal but also enhance the dish's flavor profile. {{image_2}} You can switch out beef for chicken or shrimp. Chicken thighs work well because they stay juicy. Shrimp cooks quickly and adds a nice flavor. Just make sure to adjust cooking times. For chicken, cook it until no pink shows. For shrimp, cook until they turn pink and curl. If you prefer a meat-free meal, try using tofu. Firm tofu holds up well in stir-fries. Press the tofu to remove extra water before cooking. You can also use tempeh for a nutty flavor. Both can absorb the sauces nicely. Add in some mushrooms for a hearty bite. Feel free to mix and match your veggies. Broccoli, carrots, and snap peas add great color and crunch. Zucchini and bok choy are also tasty choices. Use what you have on hand. Just remember to cut veggies into similar sizes for even cooking. This helps them cook at the same time. After you make the Beef Black Pepper Udon, let it cool down. Place the leftovers in an airtight container. Store it in the fridge. It stays fresh for up to three days. When you're ready to eat, check for any off smells or changes in color. You can freeze Beef Black Pepper Udon too. Pack it in a freezer-safe container. Make sure to leave some space for expansion. It can last up to three months in the freezer. When you want to eat it, thaw it in the fridge overnight. This way, it stays safe and tasty. To reheat, you can use a microwave or a skillet. If using a microwave, cover the dish with a lid. Heat it for about two minutes, stirring halfway. If using a skillet, add a splash of water or broth. Heat over medium until warmed through. Always check the temperature before serving. Enjoy your meal! ```markdown H2 - FAQs H3 - Can I substitute udon noodles with other types of noodles? Yes, you can use other noodles. Try soba or rice noodles. They work well and cook fast. Each type adds a unique taste. Just follow the cooking time on the package. H3 - How do I make this dish spicier? To add heat, use more black pepper. You can also add chili flakes or fresh chilis. Try a splash of sriracha for a nice kick. Adjust the heat to your liking. H3 - What can I serve with Beef Black Pepper Udon? Serve this dish with a side salad or steamed vegetables. Pickled vegetables complement it nicely. You can also offer fried tofu as a protein option. Enjoy with a warm cup of miso soup for a complete meal. ``` This blog post covered how to make Beef Black Pepper Udon from scratch. We explored the key ingredients, like udon noodles, beef, and fresh veggies. I shared steps for cooking both the beef and noodles, along with useful tips for selecting beef and adjusting spice levels. We also looked at fun variations and how to store leftovers properly. Remember, you can customize this dish to fit your taste. Enjoy experimenting with different flavors and ingredients. Cooking should be fun, so dive in and make it your own!

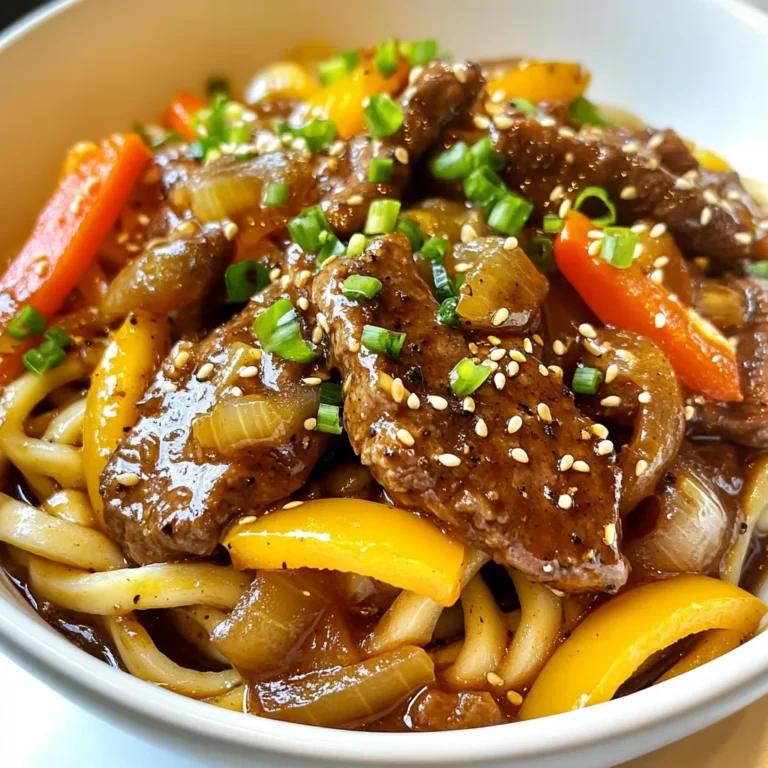
Beef Black Pepper Udon Savory and Quick Meal Idea

- Ripe avocados - Whole-grain bread - Cherry tomatoes - Balsamic vinegar - Honey - Olive oil - Fresh basil leaves - Crushed red pepper flakes - Salt and pepper to taste - Other seasoning suggestions For the best avocado toast, start with ripe avocados. They should give slightly when you press them. Use whole-grain bread for a healthy base. It adds fiber and flavor. Cherry tomatoes bring a sweet and juicy bite. Balsamic vinegar adds a tangy kick. You can add honey to sweeten the balsamic glaze. Olive oil adds richness to the mix. Fresh basil leaves brighten the dish with flavor. Crushed red pepper flakes add a nice kick if you like heat. Don't forget salt and pepper! They enhance the flavors. You can also try smoked paprika or garlic powder for a twist. Each ingredient works together to make your toast special. Enjoy mixing and matching these options! To make the balsamic glaze, I start by combining balsamic vinegar and honey in a small saucepan. I heat this mixture over medium heat. I bring it to a gentle simmer and cook it for about 5 to 7 minutes. You know it’s ready when it thickens slightly. After that, I remove it from the heat and let it cool. While the glaze cools, I toast the whole-grain bread. You can use a toaster or a grill for this. I like my bread golden brown and crispy, so I keep an eye on it. Toasting adds a nice crunch. Next, I prepare the avocados. I cut them in half, remove the pit, and scoop the flesh into a bowl. Using a fork, I mash the avocados until smooth. I season them with salt and pepper for flavor. This gives a creamy texture that pairs well with the toast. In a skillet, I heat some olive oil over medium heat. I add the halved cherry tomatoes and sauté them for about 3 to 4 minutes. I want them to soften a bit but still hold their shape. A pinch of salt and pepper enhances their flavor. Now comes the fun part: assembling the toast! I spread a generous amount of the mashed avocado on each slice of toasted bread. Then, I top it with the sautéed cherry tomatoes. This layering makes it visually appealing. Finally, I drizzle the cherry balsamic glaze over the avocado and tomato layers. For a lovely finish, I add fresh basil leaves on top. If I want a little heat, I sprinkle crushed red pepper flakes. This toast is now ready to enjoy! When you pick an avocado, check for ripeness. A ripe avocado feels slightly soft when you press it gently. Look for a smooth, dark green skin. Avoid avocados with large dark spots. If you find them, they are likely overripe. If you need to store avocados, keep them at room temperature until ripe. Once ripe, store them in the fridge to slow down the ripening process. To save time, do a few things ahead. You can toast bread while preparing the glaze. Another great tip is to mash avocados in advance. Just sprinkle them with lemon juice to keep them fresh. Cherry tomatoes can also be sautéed ahead of time. Store them in a sealed container in the fridge. Avocado toast pairs well with many sides. A light salad with greens and lemon dressing complements it nicely. You can also serve it with hard-boiled eggs for extra protein. For drinks, try a refreshing iced tea or a smooth coffee. Both drinks enhance the meal's flavors and keep it simple. {{image_2}} You can make your avocado toast more fun by adding different toppings. Try fresh radishes for a crunch. Sliced cucumbers also add a cool touch. If you want protein, eggs are great. A poached or sunny-side-up egg works well. Smoked salmon is another tasty option. It gives a rich flavor that pairs well with avocado. Switching up the glaze can change the whole taste. Instead of balsamic, try a lemon or honey glaze. These will brighten your toast. You can also change your seasoning. Instead of just salt and pepper, try garlic powder or chili flakes. Adding herbs like dill or cilantro can give new life to your dish. The type of bread you choose can really change the toast. Whole-grain bread is a classic, but you can explore more. Gluten-free bread options are now easy to find. Sourdough bread adds a nice tang. Ciabatta or a crusty baguette also works well. Each bread brings its own flavor and texture to your avocado bliss. To keep guacamole fresh, put it in an airtight container. Press plastic wrap directly onto the surface. This helps stop air from reaching it. You can also add a bit of lime juice. It slows down browning. To prevent browning, always store your avocado with some air removed. If you have leftover mashed avocado, use it within one day. For leftover toast, wrap it in foil or parchment paper. This keeps it from getting too soggy. Store it in the fridge if you plan to eat it later. To reheat, pop it in the toaster or use an oven. Heat it at 350°F for about 5 minutes. This way, it stays crispy and delicious. Avocados last about 3 to 5 days when ripe. If you store them in the fridge, they last longer. Cherry tomatoes can stay fresh for about a week. Keep them in a cool place. For other toppings, check their freshness. Most herbs last about a week in the fridge. Use fresh ingredients to make your toast taste great! To make the perfect avocado toast, focus on texture and flavor. Use ripe avocados; they should be soft but not brown. Mash them until creamy, adding salt and pepper for taste. Toast the bread until golden and crisp. Layer the mashed avocado generously on the bread. - Tips: - Add lemon juice to keep the avocado fresh. - Top with sautéed cherry tomatoes for sweetness. - Drizzle with balsamic glaze for a tangy kick. Yes, you can prepare some parts of avocado toast in advance. You can toast the bread ahead of time. Store it in an airtight container to keep it crispy. - Options for meal prepping: - Mash avocados just before serving to avoid browning. - Sauté tomatoes in advance and store them in the fridge. - Prepare the balsamic glaze and keep it ready to drizzle. If you need a substitute for balsamic vinegar, try using apple cider vinegar or red wine vinegar. Both add acidity and flavor. - Alternative ingredients and flavor tips: - Mix honey with apple cider vinegar for sweetness. - Try a squeeze of fresh lemon juice for brightness. - Use soy sauce for a savory twist. Making avocado toast vegan is easy! Replace honey with maple syrup or agave syrup. - Vegan alternatives to honey and toppings: - Use nutritional yeast for a cheesy flavor. - Top with sliced radishes or cucumbers for crunch. - Add sprouts or nuts for extra protein. To make great avocado toast, you need simple ingredients and easy steps. Start with ripe avocados, whole-grain bread, and cherry tomatoes. You can add other flavors with optional items, like honey and fresh basil. Don't forget to create a tasty balsamic glaze for that finishing touch. Avocado toast is easy to prep and fun to customize. With these tips and variations, I hope you feel inspired to make yours unique. Enjoy this nutritious meal, and keep experimenting with new ideas to make your toast delicious!

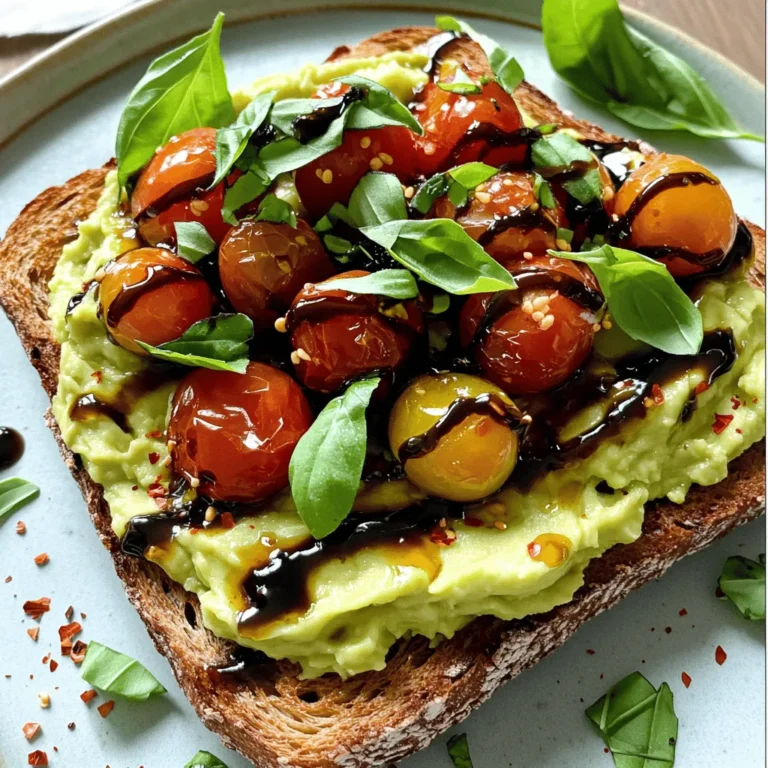
Minute Avocado Toast Ideas Quick and Easy Recipes

To make chocolate covered pretzel rods, you need a few key items. Gather these: - 12 pretzel rods - 1 cup semi-sweet chocolate chips - 2 tablespoons coconut oil These three ingredients form the base of your treat. The pretzel rods give a nice crunch. The chocolate offers a rich flavor, and coconut oil helps the chocolate melt smoothly. You can personalize your pretzel rods with fun toppings. Here are some ideas: - 1/2 cup crushed nuts (almonds, walnuts, or pecans) - 1/2 cup colorful sprinkles - Sea salt for garnish (optional) Crushed nuts add a savory touch, while sprinkles make it festive. A sprinkle of sea salt brings out the chocolate’s sweetness. Choosing a good chocolate chip matters for great taste. Some brands I recommend are: - Ghirardelli - Nestle Toll House - Guittard These brands melt well and taste fantastic. Always check for quality to get the best flavor for your pretzel rods. First, gather your tools. You need a baking sheet and parchment paper. Line the baking sheet with parchment paper to stop the pretzels from sticking. This step saves you time and mess later. Next, grab a microwave-safe bowl. Add 1 cup of semi-sweet chocolate chips and 2 tablespoons of coconut oil. The coconut oil helps the chocolate melt smoothly. Microwave the bowl in 30-second bursts. Stir the mixture after each time. This keeps the chocolate from burning. When it melts, let it cool for a minute. Now comes the fun part! Take a pretzel rod and dip it into the melted chocolate. Cover about two-thirds of it. Let any extra chocolate drip back into the bowl. After that, roll the chocolate-covered part in crushed nuts or colorful sprinkles. Be sure to coat it well. Place the decorated pretzel rods on the parchment-lined baking sheet. If you like sweet and salty, sprinkle some sea salt on top while the chocolate is still wet. Repeat this for all pretzel rods. Once all the pretzel rods are dipped, it’s time to set them. Place the baking sheet in the fridge for about 30 minutes. This will harden the chocolate completely. After they set, you can serve these treats right away or package them nicely for later. Enjoy your tasty creations! To get smooth chocolate, use semi-sweet chocolate chips. Mix in two tablespoons of coconut oil. The oil helps the chocolate melt better and stay shiny. Microwave in 30-second bursts. Stir after each burst to help it melt evenly. When it is smooth, let it cool for a minute. This will make it easier to dip the pretzels. You can make these rods your own! Use different toppings like crushed nuts or colorful sprinkles. Try almonds, walnuts, or pecans for a nutty crunch. If you want a fun look, use themed sprinkles. You can even drizzle white chocolate on top for a fancy touch. Experiment with flavors by using milk chocolate or dark chocolate instead. If your chocolate is too thick, add a bit more coconut oil. This will help it flow better. If the chocolate won't stick to the pretzel, it may be too cool. You can warm it up a bit in the microwave. If the toppings fall off, press them into the chocolate while it's still wet. This helps them stick better. Always keep an eye on the chocolate as it melts. Overheating will make it clumpy, which is not what you want! {{image_2}} You can change the flavor of your chocolate-covered pretzel rods easily. Instead of semi-sweet chocolate, try milk chocolate for a sweeter taste. White chocolate brings a creamy touch that kids love. Dark chocolate can add a rich flavor that many adults enjoy. Each type of chocolate gives a new twist to this treat. The fun doesn't stop at chocolate! You can use many toppings to dress your pretzel rods. Crushed nuts like almonds, walnuts, or pecans add a crunchy texture. Colorful sprinkles make them festive and fun. You can even use crushed candies like M&Ms or Oreos for extra sweetness. The sky’s the limit when it comes to garnishes! Make your pretzel rods special for any event! For holidays, use red and green sprinkles for Christmas or pastel colors for Easter. For Halloween, dip them in orange chocolate and add spooky sprinkles. At birthday parties, let kids pick their own toppings. You can even customize them for a wedding or baby shower with elegant colors and sprinkles! To keep your chocolate-covered pretzel rods fresh, store them in an airtight container. Place parchment paper between layers to prevent sticking. This method helps maintain their crunch and flavor. Keep the container in a cool, dry spot away from direct sunlight. For the best taste, avoid humidity. Moisture can ruin the chocolate's texture. If your kitchen is warm, consider refrigerating the rods. Just remember to allow them to reach room temperature before serving. This will help the chocolate stay smooth. Chocolate-covered pretzel rods last about two weeks at room temperature. If you want to keep them longer, freeze them. Wrap them well in plastic wrap and then in foil. This helps prevent freezer burn. They can last for up to three months in the freezer. When ready to eat, just thaw them in the fridge for a few hours. Yes, you can make chocolate-covered pretzel rods ahead of time. They stay fresh for a week in an airtight container. Just keep them at room temperature. If you want to store them longer, try freezing them. Just remember to let them thaw before serving. Yes, chocolate-covered pretzel rods can be gluten-free. Make sure to buy pretzels labeled gluten-free. Many brands offer great options. Always check the package to be safe. You can use vegetable oil or butter instead of coconut oil. Both work well for melting chocolate. They help give the chocolate a nice, smooth texture. This ensures a good dip for your pretzel rods. You can find ready-made chocolate-covered pretzel rods at many grocery stores. Look in the snack aisle or the candy section. Specialty candy shops and online retailers also sell them. You now have all the steps to make chocolate-covered pretzel rods. First, gather your ingredients and know what brands to use. Then, follow the step-by-step guide to melt, dip, and decorate. Remember the tips for perfect chocolate and customizing your treat. Explore different flavors and garnishes to make them unique. Store your rods properly to keep them fresh. With this guide, you'll impress yourself and others. Enjoy making and sharing these tasty snacks!

Chocolate Covered Pretzel Rods Deliciously Easy Treat

For this classic dish, you will need: - 2 cups cooked chicken, shredded - 1 cup carrots, diced - 1 cup peas (fresh or frozen) - 1 cup potatoes, diced - 1/2 cup onion, chopped - 3 cloves garlic, minced - 1/3 cup all-purpose flour - 1 cup chicken broth - 1/2 cup milk - 1 teaspoon thyme - 1 teaspoon rosemary - Salt and pepper to taste - 1 teaspoon olive oil - 1 package refrigerated pie crust (or homemade) - 1 egg, beaten (for egg wash) These ingredients make a rich filling. The chicken gives protein, while the veggies add color and taste. The herbs bring out the flavors. You can mix things up with a few optional ingredients: - Add corn for sweetness. - Use celery for extra crunch. - Swap out chicken for turkey if you have leftovers. - Use vegetable broth for a vegetarian option. These swaps keep the dish fresh and exciting. To make your pot pie, gather these tools: - Large skillet - 9-inch pie dish - Rolling pin (if making crust) - Mixing spoon - Knife and cutting board These tools help you create a delicious and comforting meal. Having the right equipment makes cooking easier and more fun. Start by gathering all your ingredients. You will need: - 2 cups cooked chicken, shredded - 1 cup carrots, diced - 1 cup peas (fresh or frozen) - 1 cup potatoes, diced - 1/2 cup onion, chopped - 3 cloves garlic, minced - 1/3 cup all-purpose flour - 1 cup chicken broth - 1/2 cup milk - 1 teaspoon thyme - 1 teaspoon rosemary - Salt and pepper to taste - 1 teaspoon olive oil - 1 package refrigerated pie crust (or homemade) - 1 egg, beaten (for egg wash) Heat a large skillet over medium heat. Add the olive oil. Once hot, add the chopped onion and minced garlic. Sauté for about 3-4 minutes until soft. Next, add the diced carrots and potatoes. Cook for another 5 minutes until they start to soften. Now, stir in the shredded chicken and peas. Add thyme, rosemary, salt, and pepper to taste. Mix everything well. Sprinkle the flour over the mixture, stirring to coat. Pour in the chicken broth and milk. Keep stirring until the mixture thickens, which should take about 5-7 minutes. Remove from heat. Roll out one pie crust and place it in a 9-inch pie dish. Pour the chicken filling into the crust, spreading it evenly. Roll out the second pie crust and lay it on top of the filling. Trim any extra crust and pinch the edges to seal. Cut a few slits in the top crust. This allows steam to escape while baking. Preheat your oven to 425°F (220°C). Brush the top crust with the beaten egg for a nice golden color. Place the pot pie in the oven and bake for 25-30 minutes. Look for a golden brown crust and bubbling filling. Once done, let it cool for about 10 minutes. Now, it’s ready to slice and serve. Enjoy! To get that perfect golden crust, start with an egg wash. This gives the pie a nice shine. Simply beat one egg and brush it over the top crust. Make sure to cover all areas. This helps with browning. Also, use a good quality pie crust. If you can, make your own for the best taste. Roll it out thinly but not too thin. A thicker crust can burn before the filling cooks through. Thickening the filling is key for a good chicken pot pie. Use flour to help bind the sauce. After you cook the chicken and veggies, sprinkle 1/3 cup of flour over the mix. Stir it well to coat everything. Then, add 1 cup of chicken broth and 1/2 cup of milk. Keep stirring until the mix gets thick, about 5-7 minutes. If your filling is still too runny, add a bit more flour mixed with water. This will help it thicken up nicely. For busy cooks, I have some great time-saving tips. First, use rotisserie chicken. Shredding it saves a lot of time. You can also chop your veggies ahead of time. Store them in the fridge until you are ready to cook. Additionally, consider using store-bought pie crusts. They are quick and easy. You get a great taste without all the work. Lastly, prep your filling the night before. Just heat it up when you're ready to bake the pie. {{image_2}} You can make a great vegetarian version of chicken pot pie. Start by replacing the chicken with a mix of hearty veggies. I love using mushrooms, chickpeas, and lentils. These add texture and protein. Use vegetable broth instead of chicken broth. You can also add extra herbs like basil or oregano for more flavor. Seasonal vegetables can boost your pot pie's taste. In spring, try asparagus and peas. In summer, use zucchini and corn. Fall is perfect for adding squash or sweet potatoes. Winter calls for root veggies like carrots and parsnips. Mix and match your favorites to keep it fresh and fun. If you need a gluten-free pot pie, swap the flour for cornstarch or gluten-free flour. Make sure to check your pie crust for gluten-free options. Many brands offer great alternatives. You can even make a crust using almond flour or chickpea flour. This way, everyone can enjoy your hearty meal! Once you finish your meal, let the chicken pot pie cool. Cover it tightly with plastic wrap or foil. You can also use an airtight container. Store it in the fridge for up to three days. Make sure to keep it away from strong-smelling foods to avoid flavor changes. To freeze your chicken pot pie, first cool it completely. Wrap it tightly in plastic wrap, then in aluminum foil. This helps prevent freezer burn. You can freeze it for up to three months. When you are ready to eat, thaw it in the fridge overnight before baking. To reheat the pot pie, preheat your oven to 350°F (175°C). Remove the cover and place the pie on a baking sheet. Heat for about 20-30 minutes or until it’s hot all the way through. If the crust browns too fast, cover it with foil. This keeps it from burning while the filling heats up. Enjoy your comforting meal! You can use turkey instead of chicken. It gives a similar taste. If you prefer a vegetarian option, use mushrooms or tofu. Both options add great flavor and texture. For a heartier twist, try chickpeas or lentils. They make a filling and nutritious choice. Yes, you can use a homemade pie crust. Making your own crust can boost flavor. Just ensure it is rolled out evenly and fits your pie dish. Use our recipe for a flaky crust, or try a simple butter and flour mix. Homemade crusts can enhance the taste of your pot pie. Classic Chicken Pot Pie lasts about 3 to 4 days in the fridge. Store it in an airtight container. This keeps it fresh and safe to eat. When reheating, check that it is heated all the way through. You want every bite to be warm and delicious. Yes, you can prepare the filling ahead of time. Store it in the fridge for up to two days. You can also assemble the pie and freeze it. Just bake it straight from the freezer, adding extra time. Making it ahead helps save time on busy days. Classic chicken pot pie combines simple ingredients and easy steps. You learned about the main and optional ingredients, essential tools, and how to cook the filling. We explored tips for a perfect crust, thickening methods, and time-saving hacks. You also found tasty variations for different diets and storage advice. By following these steps and tips, you can create a satisfying meal. Enjoy making this dish and make it your own by trying new ingredients. Happy cooking!

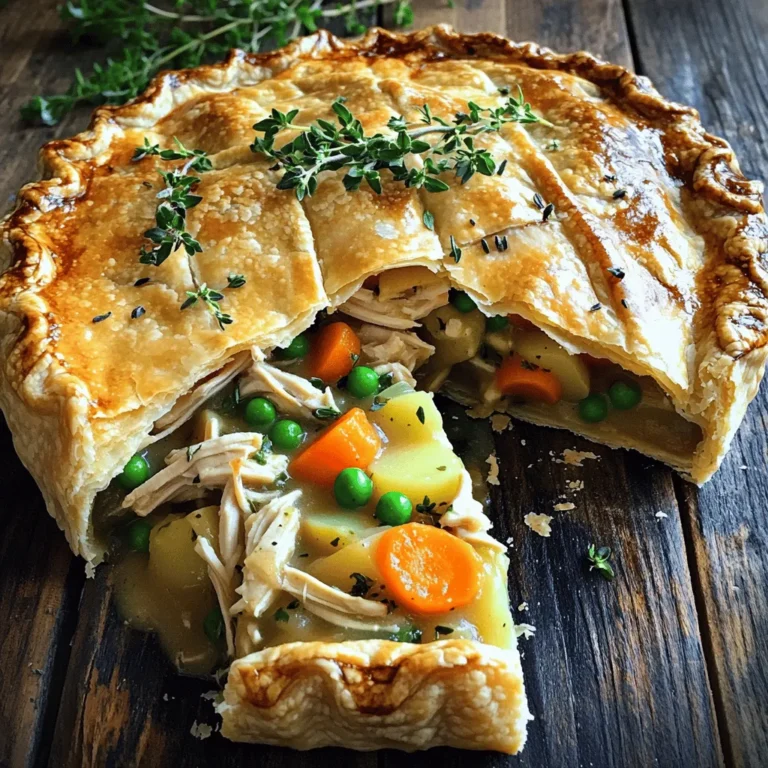
Classic Chicken Pot Pie Comforting and Hearty Meal

- 1 cup warm water (110°F) - 2 teaspoons sugar - 2 ¼ teaspoons active dry yeast - 3 cups all-purpose flour - 1 teaspoon salt - 2 tablespoons olive oil - 4 tablespoons unsalted butter, melted - 3 cloves garlic, minced - 1 ½ cups shredded mozzarella cheese - ½ cup grated Parmesan cheese - Fresh parsley, chopped (for garnish) To make cheesy garlic breadsticks, you need simple but key ingredients. Start with warm water. It activates the yeast. You’ll also need sugar, which helps the yeast grow. Next, grab active dry yeast. This is crucial for making the dough rise. For the base, use all-purpose flour and a bit of salt. Olive oil adds flavor and softness. For that cheesy goodness, you’ll want shredded mozzarella and grated Parmesan. These two cheeses melt beautifully and create a great texture. Finally, don’t forget garlic for that rich taste. A sprinkle of fresh parsley adds a nice touch when serving. These ingredients come together to create a mouthwatering snack. You can enjoy them on movie nights or as a side dish for dinner. First, take a small bowl. In it, combine 1 cup of warm water, 2 teaspoons of sugar, and 2 ¼ teaspoons of active dry yeast. Stir gently. Let this sit for about 5-10 minutes. You want to see some bubbles forming on the top. This is called blooming. It shows the yeast is alive and ready to make your breadsticks rise. Now, grab a large mixing bowl. In it, mix 3 cups of all-purpose flour and 1 teaspoon of salt. Make a well in the center of the dry mix. Pour in the yeast mixture and 2 tablespoons of olive oil. Use a spoon to mix everything until a dough starts to form. Next, flour your surface well. Knead the dough for about 5-7 minutes. You want it to be smooth and elastic. This helps develop the gluten, which gives your breadsticks that perfect texture. Once you’ve kneaded the dough, place it in a lightly greased bowl. Cover it with a damp cloth. Put it in a warm spot for about 1 hour. The dough should double in size. This rising is key for fluffy breadsticks. After the dough has risen, punch it down to release air. Roll it out on a floured surface into a rectangle about ½ inch thick. This is where the fun begins! Use a sharp knife or pizza cutter to cut the dough into strips or triangles. These will be your delicious breadsticks! To make the best garlic butter, you need just a few simple ingredients. Use: - 4 tablespoons unsalted butter, melted - 3 cloves garlic, minced Mix these well. This blend is key to that rich, buttery flavor. You can enhance it by adding herbs. Try parsley or oregano for a fresh touch. A pinch of salt can also boost the taste. These small tweaks make a big difference. For cheesy breadsticks, the right cheese matters. I recommend using: - 1 ½ cups shredded mozzarella cheese - ½ cup grated Parmesan cheese Mozzarella gives a nice stretch, while Parmesan adds a sharp bite. Be careful not to overbake. Watch for that golden color. If the cheese burns, it will taste bitter. Baking at the right temp, around 375°F, will help keep it melty and delicious. Cutting the dough evenly helps your breadsticks bake well. Here are some tips: - Roll the dough to about ½ inch thick for even baking. - Use a sharp knife or pizza cutter for clean cuts. You can shape them into strips or triangles. Strip shapes are classic, but triangles can be fun for dipping. Whatever shape you choose, aim for uniform sizes. This ensures they all cook evenly. {{image_2}} You can easily add herbs to your cheesy breadsticks. Fresh herbs boost flavor and aroma. I recommend using basil, oregano, or thyme. To incorporate them, mix chopped herbs into the melted garlic butter before brushing it on the dough. You can also sprinkle some on top, right after adding the cheese. This extra step adds color and flavor to your breadsticks. If you like heat, spicy garlic breadsticks are for you. Add crushed red pepper flakes to the garlic butter for a kick. You can also mix in some finely chopped jalapeños for extra spice. For a smoky flavor, try smoked paprika. This will make your breadsticks exciting and tasty. For a plant-based option, use vegan cheese. Brands like Daiya or Follow Your Heart offer great choices. To make the dough vegan, swap out the butter for a plant-based alternative. You can also use almond milk instead of regular milk for brushing. These swaps keep the flavors rich while staying dairy-free. To keep your leftover breadsticks fresh, place them in an airtight container. You can also wrap them in plastic wrap. Store them in the fridge for up to three days. If you want to keep them longer, consider freezing. When you're ready to enjoy your breadsticks again, preheat your oven to 350°F (175°C). Place the breadsticks on a baking sheet. Heat them for about 10 minutes, or until warm. This method keeps them crispy and delicious. To freeze breadsticks, let them cool completely first. Wrap each stick in plastic wrap, then place them in a freezer bag. They can last for up to three months in the freezer. When you want to eat them, thaw overnight in the fridge before reheating. Yes, you can use many types of cheese. Mozzarella gives a great melt and stretch. Parmesan adds a nice sharp flavor. You can also try cheddar for a stronger taste. If you want a twist, consider gouda or fontina. Just remember to balance the flavors. Mixing cheeses can create a unique taste that everyone will love. Look for the dough to double in size. It should feel soft and puffy. You can gently press the dough with your finger. If it springs back slowly, it is ready. Timing is key, so let it rise for about one hour. Keep it in a warm spot, away from drafts, for the best results. These breadsticks pair well with many dips. Marinara sauce is a classic choice. You can also try garlic butter for extra flavor. For a fresh touch, serve with a side of pesto. If you want something simple, a mix of olive oil and balsamic vinegar works great. They also complement salads and soups perfectly. This guide covered how to make cheesy garlic breadsticks. We went over ingredients and easy steps. You learned how to prepare the dough and perfect the garlic butter. We shared tips for different flavors, shapes, and storage methods too. Enjoy making these breadsticks fresh for yourself or friends. You now have the tools to create a tasty treat every time. Don't be afraid to try the variations that suit your taste. Happy baking!

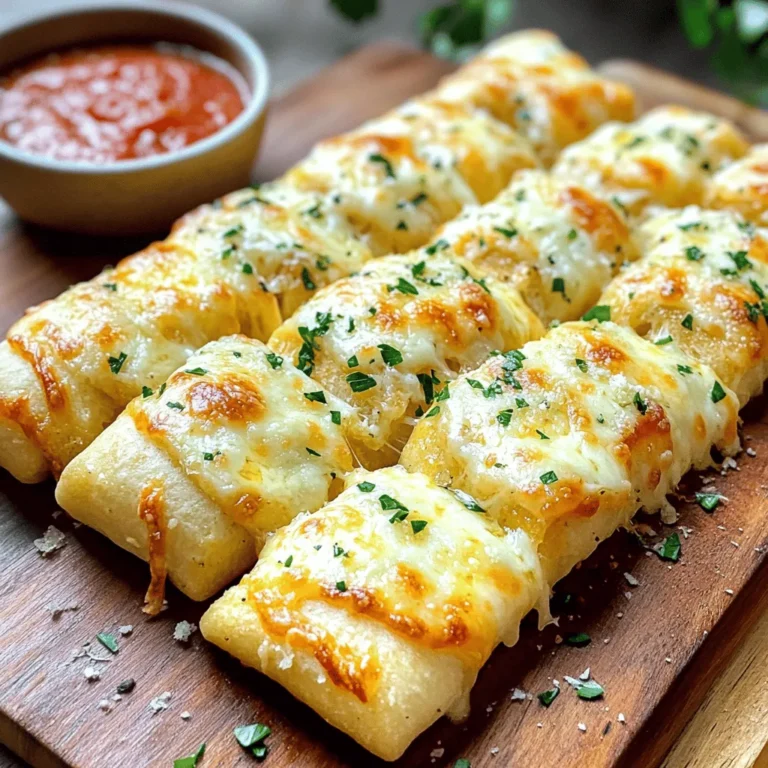
Cheesy Garlic Breadsticks Perfect for Any Occasion

- 1 cup ricotta cheese - 1 cup all-purpose flour - 2 large eggs - 1/2 cup milk - 1/4 cup sugar - Zest of 1 lemon - 2 tablespoons freshly squeezed lemon juice - 1 teaspoon baking powder - 1/2 teaspoon baking soda - Pinch of salt - Butter or oil for greasing the pan - Maple syrup and fresh berries for serving When making lemon ricotta pancakes, fresh ingredients matter. Fresh ricotta cheese gives a creamy texture. Use fresh lemons for zest and juice. This makes the pancakes bright and flavorful. Fresh milk and eggs enhance the taste. They also help create fluffy pancakes. Using stale or old ingredients can lead to flat, bland results. Always choose the best quality for a delightful dish. You can swap some ingredients if needed. For ricotta, try cottage cheese for a lighter option. Use almond milk instead of regular milk for a dairy-free choice. If you need a gluten-free pancake, use a gluten-free flour blend. You can also replace sugar with honey or maple syrup for natural sweetness. These substitutes can still create delicious pancakes while meeting your dietary needs. To make lemon ricotta pancakes, gather your ingredients first. You will need ricotta cheese, flour, eggs, milk, sugar, lemon zest, lemon juice, baking powder, baking soda, salt, and butter or oil. This recipe takes about 30 minutes and yields four servings. 1. Mix the Wet Ingredients: In a large bowl, whisk together the ricotta cheese, eggs, milk, sugar, lemon zest, and lemon juice. Mix until smooth. 2. Combine the Dry Ingredients: In another bowl, mix the flour, baking powder, baking soda, and salt. 3. Combine Wet and Dry: Gradually add the dry mix to the wet mix. Stir gently until just combined. A few lumps are okay; do not overmix. 4. Heat the Skillet: Preheat a non-stick skillet or griddle over medium heat. Lightly grease it with butter or oil. 5. Cook the Pancakes: Pour about 1/4 cup of batter onto the skillet for each pancake. Cook until bubbles form, about 2-3 minutes. 6. Flip the Pancakes: Carefully flip the pancakes using a spatula. Cook for another 2-3 minutes until golden brown. 7. Keep Warm: Remove pancakes from the skillet. Keep them warm while you cook the rest of the batter. Flipping pancakes can be tricky, but practice makes perfect. Wait until you see bubbles on the surface before flipping. This shows they are ready. Use a wide spatula to get under the pancake easily. If a pancake breaks, don’t worry! Just press it back together gently. Enjoy the process and have fun cooking! To make your pancakes fluffy, use fresh ingredients. Ricotta cheese is key here. It adds moisture and air. Make sure to mix the wet and dry ingredients separately first. Combine them gently to keep air in the batter. Overmixing can make your pancakes flat. A few lumps are okay. Serve these pancakes warm with maple syrup drizzled on top. Fresh berries like strawberries or blueberries add color and flavor. You can also sprinkle powdered sugar for a sweet touch. For a twist, try adding a dollop of yogurt or whipped cream. One common mistake is using cold ingredients. Bring your eggs and milk to room temperature first. This helps the batter mix well. Another mistake is cooking on too high heat. Medium heat cooks the pancakes evenly. Lastly, don’t forget to grease your pan. This prevents sticking and makes flipping easier. {{image_2}} You can easily boost the flavor of lemon ricotta pancakes by adding fruits. Fresh blueberries, raspberries, or strawberries work great. Just fold about one cup of your chosen fruit into the batter. If you like bananas, mash one ripe banana into the batter. This adds sweetness and moisture. For a fun twist, try diced peaches or apples for a seasonal touch. Fruits not only taste good, they also add bright colors to your pancakes. To give your pancakes a unique twist, experiment with flavor enhancers. Add a teaspoon of vanilla extract for warmth. A pinch of cinnamon or nutmeg can bring a cozy vibe. You could also try adding some almond extract for a nutty flavor. For a zesty kick, toss in some grated orange zest alongside the lemon. Each of these flavors can bring out the best in your lemon ricotta pancakes. If you need a gluten-free version, substitute the all-purpose flour with a gluten-free flour blend. Look for blends that include xanthan gum for better texture. You can also use almond flour or coconut flour, but you will need to adjust the liquid. Make sure your baking powder is gluten-free as well. These small changes let everyone enjoy your delicious pancakes without worry. Store leftover pancakes in an airtight container. Place them in the fridge. They stay fresh for up to three days. If you want, you can also separate layers with parchment paper. This keeps them from sticking together. To reheat, you have a few options. The microwave is quick. Place a pancake on a plate and heat for about 20-30 seconds. You can also use a skillet. Heat on medium-low for a few minutes on each side. This keeps them warm and fluffy. To freeze pancakes, first let them cool completely. Then, stack them with parchment paper in between. Wrap the stack tightly in plastic wrap. Place the wrapped pancakes in a freezer bag. They can stay in the freezer for about two months. When you’re ready to eat, reheat directly from the freezer. Yes, you can make the batter ahead of time. Store it in the fridge for up to 24 hours. Just cover the bowl with plastic wrap. When you are ready to cook, give it a gentle stir. If the batter is too thick, add a splash of milk to thin it out. You can serve these pancakes with many tasty options. Here are some ideas: - Maple syrup for sweetness - Fresh berries like strawberries, blueberries, or raspberries - A sprinkle of powdered sugar for a touch of elegance - Greek yogurt for added creaminess - Whipped cream for a rich treat Pancakes are done when they are golden brown on both sides. Look for bubbles forming on the surface. This usually takes about 2-3 minutes per side. You can also gently press the pancake. If it springs back, it is ready. If it still feels soft, cook for another minute. This blog post covers all you need for perfect pancakes. We explored fresh ingredients, step-by-step instructions, and useful tips. You learned how to make fluffy pancakes and avoid common mistakes. We also discussed fun variations, storing leftovers, and important FAQs. Remember, cooking is fun and a great way to enjoy time with others. Keep experimenting with flavors and enjoy your pancakes!

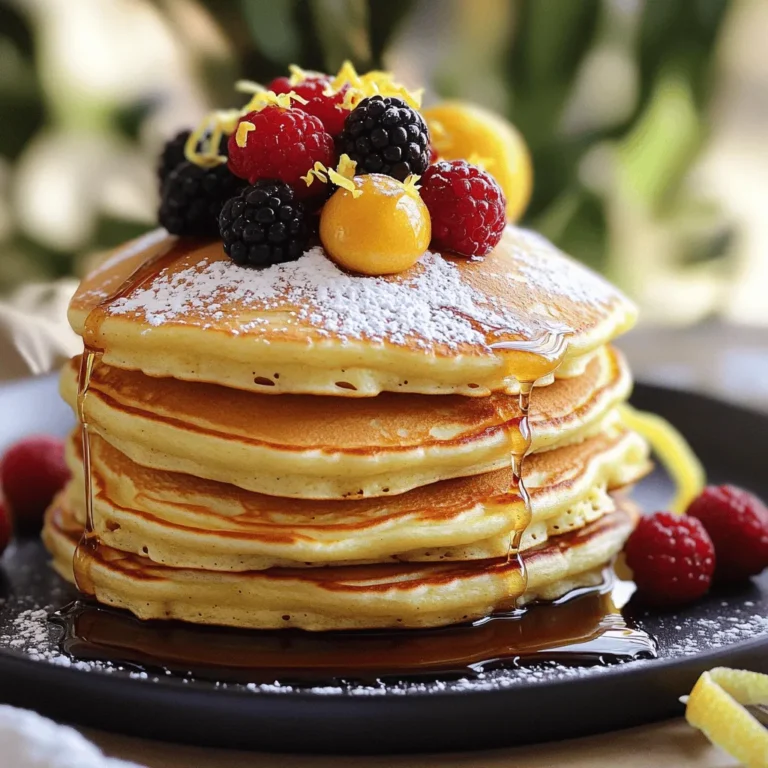
Lemon Ricotta Pancakes Fluffy and Flavorful Delight

PREV 1 … 40 41 42 … 86 NEXT
spicy fork kitchen

explore

DessertsDinnerAppetizersDrinks

Our Policies

  • Cookie Policy
  • Copyright Policy
  • Disclaimer
  • GDPR Policy
  • Terms Of Use
Back to Top
  • About
  • Contact Us
  • Privacy Policy
© 2026 spicy fork kitchen