FREE DINNER EBOOK! Get your copy!
  • Cookie Policy
  • GDPR Policy
  • Disclaimer
  • Terms Of Use
  • Visit my other site: Fun Cookie Recipes
spicy fork kitchen
  • Home
  • Dinner
  • Desserts
  • Drinks
  • Appetizers
  • Contact
  • About
  • Privacy Policy
  • Home
  • Dinner
  • Desserts
  • Drinks
  • Appetizers
  • Contact
  • About
  • Privacy Policy
  • Cookie Policy
  • GDPR Policy
  • Disclaimer
  • Terms Of Use
Visit my other site: Fun Cookie Recipes

HOME / CATEGORIES /

Latest

For this dish, you need 1 pound of gnocchi. You can use fresh or packaged gnocchi. Fresh gnocchi has a soft texture, while packaged gnocchi is quick and easy. Both options work well in this recipe. Gnocchi absorbs flavors well, making it perfect for this meal. You will need a few veggies to add color and taste. Gather these: - 2 cups cherry tomatoes, halved - 1 zucchini, sliced into half-moons - 1 bell pepper (any color), sliced - 1 red onion, cut into wedges These vegetables roast beautifully and add a fresh taste to the dish. Pesto is vital for flavor. You can use 1 cup of basil pesto. You have two choices: store-bought or homemade. Store-bought is quick, while homemade can be more flavorful. If you want to explore, try different pestos, like sun-dried tomato or spinach. To enhance your dish, consider these garnishes: - Fresh basil leaves for a pop of color - Grated Parmesan cheese for a rich finish These add extra flavor and make your meal look nice. Start by preheating your oven to 425°F (220°C). This helps cook everything evenly. Next, grab a large sheet pan. Add 1 pound of gnocchi, 2 cups of halved cherry tomatoes, 1 sliced zucchini, 1 sliced bell pepper, and 1 cut red onion. These fresh veggies add color and taste to your dish. Drizzle 3 tablespoons of olive oil over the gnocchi and veggies. Season with salt and pepper to your liking. Toss everything well. Make sure the gnocchi and veggies are fully coated with oil and seasoning. Spread the mixture evenly on the sheet pan. It’s important to keep everything in a single layer. This ensures all the gnocchi and veggies roast nicely. Now, place the pan in the oven. Roast for 20-25 minutes. Stir halfway through to get an even cook. You want the gnocchi to turn golden and the veggies to become tender. Once done, carefully remove the sheet pan from the oven. Drizzle 1 cup of basil pesto over the hot gnocchi and veggies. Toss gently to mix everything well. The warm gnocchi will soak up the pesto flavor, making it tasty. Serve your dish right away for the best taste. You can garnish with fresh basil leaves for a pop of color. If you like, sprinkle some grated Parmesan cheese on top. This adds a rich flavor that complements the dish. Enjoy your savory sheet pan gnocchi with pesto veggies! To get the best roasted veggies, use a large sheet pan. This helps them roast evenly. Cut your vegetables into similar sizes. This way, they cook at the same rate. I love to use cherry tomatoes, zucchini, bell peppers, and red onion. Toss them with olive oil, salt, and pepper to coat well. Make sure they are in a single layer on the pan. This gives them a nice caramelization. Stir them halfway through cooking. This helps them brown nicely on all sides. You can change the flavor by using different pestos. Try sun-dried tomato pesto for a rich taste. Or use a spicy arugula pesto if you like some heat. You can even make your own pesto at home. Just blend fresh basil, garlic, nuts, olive oil, and cheese. This adds a personal touch to your dish. Don't be afraid to experiment with flavor combinations! To ensure even cooking, spread the gnocchi and veggies out well. A crowded pan leads to steaming, not roasting. Make sure to stir everything halfway through. This helps the heat reach all parts of the pan. If you notice some parts cooking faster, move them around. Keeping an eye on them helps achieve that perfect golden color. Enjoy the great flavors and textures in every bite! {{image_2}} You can add protein to make this dish heartier. Consider using cooked chicken, shrimp, or sausage. Just chop them into bite-sized pieces. Mix them in with the gnocchi and veggies. This will add flavor and keep you full. For a plant-based option, try chickpeas or tofu. Both options work well and soak up the pesto flavor. Feel free to swap in seasonal veggies. Summer brings zucchini and bell peppers. In fall, use sweet potatoes or Brussels sprouts. Winter offers root veggies like carrots and parsnips. Each season brings something new. This keeps the dish fresh and exciting. Just aim for colorful and firm vegetables. They will roast well and taste great. While pesto shines in this recipe, you can try other sauces. Alfredo, marinara, or a simple garlic oil can add new flavors. If you like spicy food, add a drizzle of sriracha or chili oil. Mixing sauces can create fun flavor profiles. Experiment to find what you love best. Each sauce will change the dish, making it your own. After you enjoy your savory sheet pan gnocchi, store leftovers in an airtight container. This keeps it fresh and tasty. Refrigerate the dish within two hours of cooking. It will last for up to three days in the fridge. When you’re ready to eat, check for any signs of spoilage before reheating. You can freeze the gnocchi and veggies, but the texture may change. To freeze, place the cooled dish in a freezer-safe container. Use plastic wrap to cover it tightly. It will stay good for about one month. Label the container with the date to keep track. To reheat, I suggest using the oven for the best results. Preheat your oven to 350°F (175°C). Spread the gnocchi and veggies on a baking sheet. Bake for about 15-20 minutes, stirring halfway through. This will help them heat evenly. If you prefer the microwave, heat on high for 2-3 minutes, stirring halfway. Enjoy your meal again! Yes, you can use frozen gnocchi. Just add them straight to the pan. No need to thaw them first. They will cook well while roasting. The texture stays soft and fluffy. If you don’t have pesto, try using sun-dried tomato spread or hummus. You can also make a simple herb sauce with olive oil, garlic, and fresh herbs. This will give the dish a fresh flavor. To make this dish dairy-free, skip the Parmesan cheese. Use a vegan pesto instead of regular pesto. This way, you still enjoy the great taste without dairy. You can prep this dish ahead. Chop the veggies and gnocchi, then store them in the fridge. Just add the oil and seasoning right before roasting. This saves time on busy nights. This dish goes well with a light salad or garlic bread. You can also serve it with roasted asparagus or steamed broccoli. These sides add more color and flavor to your meal. This post covered key steps to make a tasty dish with gnocchi. We talked about the right ingredients, vegetables, and pesto options. You learned how to roast veggies and combine them well. I shared tips for perfect cooking and fun variations. In closing, remember that this dish is easy to customize. Enjoy creating your own flavors and sharing with others!

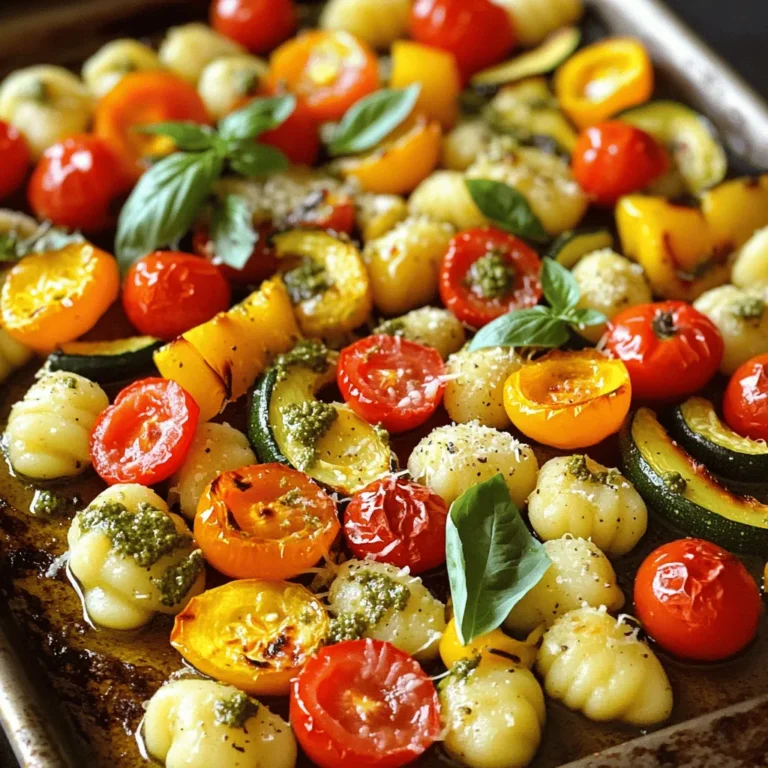
Savory Sheet Pan Gnocchi with Pesto Veggies Recipe

For these tasty meatballs, you need: - 1 lb ground chicken (or turkey) - 1/2 cup breadcrumbs - 1/4 cup grated Parmesan cheese - 1 large egg - 2 cloves garlic, minced - 1 tsp onion powder - 1/2 tsp salt - 1/4 tsp black pepper - 1/4 tsp red pepper flakes (optional) You can add these for extra flavor: - 1/4 cup honey - 1/4 cup soy sauce (or coconut aminos for a gluten-free option) - 1 tbsp rice vinegar - 2 tbsp green onions, finely chopped (for garnish) If you have dietary needs, here are some ideas: - Use ground turkey instead of chicken for leaner meat. - Swap breadcrumbs with gluten-free options like almond flour. - Use apple cider vinegar instead of rice vinegar for a different taste. - If you like spice, add more red pepper flakes or some sriracha. These ingredients make the meatballs sweet and savory. They bring a nice mix of flavors to your dish. Feel free to mix and match to fit your taste! To start, gather your ingredients. You need: - 1 lb ground chicken (or turkey) - 1/2 cup breadcrumbs - 1/4 cup grated Parmesan cheese - 1 large egg - 2 cloves garlic, minced - 1 tsp onion powder - 1/2 tsp salt - 1/4 tsp black pepper - 1/4 tsp red pepper flakes (optional) In a large bowl, mix the ground chicken, breadcrumbs, Parmesan cheese, egg, minced garlic, onion powder, salt, black pepper, and red pepper flakes. Use your hands to combine everything well. You want a smooth mixture. Next, preheat your air fryer to 375°F (190°C). While it heats up, shape the meat mixture into small meatballs. Aim for about 1 inch in size. Arrange them in a single layer in the air fryer basket. If you have a smaller air fryer, you may need to cook in batches. Cook the meatballs for 12-15 minutes. They should turn golden brown and be fully cooked. While the meatballs cook, let’s whip up that tasty honey garlic sauce. In a small saucepan, combine: - 1/4 cup honey - 1/4 cup soy sauce (or coconut aminos) - 1 tbsp rice vinegar Heat the mixture over medium heat. Stir it well and let it simmer for about 2-3 minutes. This helps blend the flavors. Once the meatballs finish cooking, carefully remove them from the air fryer. Place them in a large bowl and pour the honey garlic sauce over them. Toss gently to coat. Return the meatballs to the air fryer for an extra 3-4 minutes. This step makes the sauce sticky and caramelized. Garnish with finely chopped green onions before serving warm. Enjoy! To keep meatballs moist, use ground chicken or turkey. These meats have less fat than beef, making them lean. Add breadcrumbs to help hold moisture. The egg also acts as a binder. Mixing gently prevents tough meatballs. Overmixing can lead to a dry texture. If you can, let the mixture rest for a few minutes. This allows the breadcrumbs to soak up moisture. Preheat your air fryer to 375°F (190°C). This helps the meatballs cook evenly. Place the meatballs in a single layer in the basket. Avoid overcrowding, or they won’t cook well. Cook in batches if needed. Check them halfway through cooking for even browning. You can flip them if you want a nice crust. For added flavor, return the meatballs to the air fryer after coating them with sauce. This caramelizes the honey garlic sauce beautifully. Serve these meatballs warm, garnished with green onions. They make a great appetizer or main dish. Pair them with rice or noodles to soak up the sauce. You can also serve them on skewers for easy eating. For a twist, try them in a wrap with fresh veggies. They are versatile and can be enjoyed in many ways! {{image_2}} You can use various meats for these meatballs. Ground turkey or chicken works great. You can also try ground beef or pork. Each protein gives a unique taste. Ground lamb adds a nice twist too. The cooking time may change slightly, so keep an eye on them. Feel free to change the flavors to suit your taste. Add fresh herbs like parsley or basil for a fresh kick. You can also mix in some grated ginger for warmth. For a spicy version, increase the red pepper flakes or add sriracha to the sauce. Adding a splash of lime juice gives it a zesty touch. To make these meatballs gluten-free, use gluten-free breadcrumbs or oats. Coconut aminos is a great soy sauce substitute. For a keto-friendly option, skip the breadcrumbs and use almond flour instead. These changes keep the meatballs tasty without the carbs. Enjoy a guilt-free meal! You can store honey garlic meatballs easily. Place them in an airtight container. Keep the container in the fridge. They will stay fresh for up to three days. If you want them to last longer, consider freezing them. Reheat the meatballs in the air fryer for best results. Set it to 350°F (175°C). Cook for about 5-7 minutes. This keeps them crispy on the outside. You can also use a microwave if you’re in a hurry. Heat them for about 1-2 minutes. Add a little water to keep them moist. Freezing meatballs is simple. First, let them cool completely. Then, place them on a baking sheet. Freeze them for about one hour. After they are firm, transfer them to a freezer bag. They can stay frozen for up to three months. When you're ready to eat, thaw them in the fridge overnight before reheating. Yes, you can use ground beef instead of chicken or turkey. Ground beef gives a richer flavor. Just keep in mind it may take longer to cook. Also, adjust the cooking time if needed. Check the meatballs with a meat thermometer. They should reach an internal temperature of 165°F (74°C). If you don’t have a thermometer, cut one open. The meat should be no longer pink and juices should run clear. This ensures they are safe to eat and ready to enjoy. Yes, you can prepare the meatball mixture ahead of time. Mix the ingredients and store them in the fridge for up to 24 hours. This saves time on busy days. Just shape and cook them when you are ready. You can also freeze the mixture for longer storage. In this post, we explored the best ingredients for tasty meatballs, from main choices to dietary swaps. We detailed simple steps for air frying and making a delicious honey garlic sauce. You learned tips for keeping meatballs moist and serving them well. I shared variations with different proteins and flavors to try. Finally, we covered how to store and reheat your meatballs. Remember, you can mix and match ingredients to make this dish your own. Happy cooking!

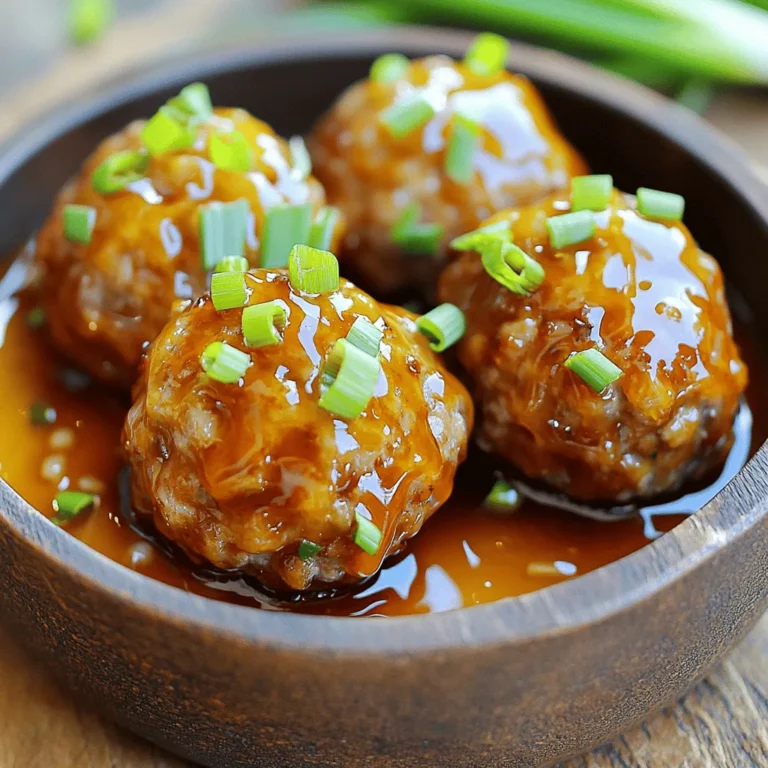
Honey Garlic Air Fryer Meatballs Quick and Easy Recipe

- 1 cup glutinous rice - 1 ½ cups coconut milk - ¼ cup sugar - ¼ teaspoon salt - 2 ripe mangoes, peeled and sliced I love using glutinous rice for this treat. This rice is sticky and chewy. It makes the perfect base for our cups. The coconut milk gives a rich, creamy flavor. When you mix it with sugar and salt, it becomes even better. The ripe mangoes add a sweet and fruity taste. Their bright color also makes the cups look great. - Toasted sesame seeds - Shredded coconut - Fresh mint leaves Garnishes add a fun touch. Toasted sesame seeds give a nice crunch. Shredded coconut adds more coconut flavor and texture. I like to top my cups with fresh mint leaves too. They look pretty and taste fresh. These little details make a big difference in how the cups feel and taste. To start, rinse the glutinous rice under cold water. Do this until the water runs clear. This step is important. It helps remove extra starch and makes the rice less sticky. After rinsing, soak the rice in water for at least four hours. If you can, soak it overnight. This soaking time helps the rice absorb water, making it cook better. Next, drain the soaked rice. Now it's time to steam it. You can use a bamboo steamer or a pot lined with cheesecloth. Steam the rice for about 30 to 40 minutes. You want it to be tender but not mushy. Check it around the 30-minute mark to make sure it’s cooked just right. While the rice is steaming, prepare the coconut mixture. In a small saucepan, combine 1 ½ cups of coconut milk, ¼ cup of sugar, and ¼ teaspoon of salt. Heat this over low heat. Stir it gently until the sugar dissolves. Once dissolved, remove it from heat. Make sure to save ½ cup of this coconut mixture for later. Now, let’s assemble our cups. Take a muffin tin or small cups. Spoon the sticky rice into each cup, pressing it down gently. This helps it hold its shape. Next, slice the ripe mangoes. Place a slice of mango on top of the rice in each cup. This adds color and flavor. For the final touch, drizzle the reserved coconut milk mixture over the mango and rice. This makes it extra creamy and rich. Let the cups chill in the refrigerator for about 15 to 20 minutes. Before serving, sprinkle some toasted sesame seeds or shredded coconut on top. Finish with fresh mint leaves for a pop of color. Enjoy your delightful mango coconut sticky rice cups! To make sure your rice is sticky enough, use glutinous rice. Rinse it under cold water until the water runs clear. This step is key. Soak the rice in water for at least four hours or overnight. The soaking helps the rice absorb water. After soaking, steam the rice for 30 to 40 minutes. This method keeps the rice tender and sticky, which is what we want! You can add other fruits or flavors to your sticky rice cups. While mango is a star, try adding bananas or berries for a twist. Some people like to infuse the coconut milk with vanilla or pandan. This adds a nice touch of flavor. You can also mix in a bit of lime zest to brighten the taste. Experiment and find your favorite combination! Creative serving suggestions can make your dish shine. Use a muffin tin or small cups for fun shapes. You can layer the rice and mango in a clear glass for a colorful look. Top each cup with toasted sesame seeds or shredded coconut for crunch. Fresh mint leaves add a pop of color and freshness. These small details make your treat look even more delightful! {{image_2}} You can switch up the mangoes for other fruits. Try ripe peaches for a sweet twist. Pineapple adds a fun tropical flair. Use berries for a pop of color and tartness. Each fruit brings its own flavor, making the cups exciting. This recipe is gluten-free since it uses glutinous rice. If you're vegan, skip the sugar or use coconut sugar. The coconut milk is already dairy-free, so no worries there. Make sure to check labels on any added ingredients, too. Want to change the flavor? Infuse the coconut milk with pandan leaves for a unique taste. Vanilla beans or extract can also add a lovely aroma. Just let the milk simmer with the flavoring for a few minutes. This small change can make a big difference in your dessert. To store your leftover mango coconut sticky rice cups, place them in an airtight container. This keeps them fresh and prevents them from drying out. You can store them in the fridge for up to three days. Just make sure to separate layers with parchment paper if they touch. This prevents sticking and helps maintain their shape. You can freeze sticky rice cups for later use. First, let them cool completely. Then, wrap each cup in plastic wrap. Place the wrapped cups in a freezer-safe bag or container. They can last in the freezer for about one month. When you're ready to enjoy, simply thaw them in the fridge overnight. To reheat your sticky rice cups, use the microwave for best results. Place a cup in a microwave-safe dish and cover it with a damp paper towel. Heat for about 30 seconds, then check the temperature. If needed, heat for another 15 seconds. This method keeps the rice soft and prevents it from becoming hard. Enjoy your treat! Glutinous rice is a special type of rice known for its sticky texture. This rice has a high starch content, which makes it ideal for sweet dishes like Mango Coconut Sticky Rice Cups. When cooked, it becomes soft and clumps together. This sticky quality is key in holding the rice in cups, making it easy to eat. Using regular rice is not a great idea for this recipe. Regular rice has different starch levels, which leads to a drier texture. It won't stick together like glutinous rice, making it hard to form cups. If you want the best results, stick with glutinous rice for that perfect, chewy bite. These cups stay fresh for about 2-3 days in the fridge. Store them in an airtight container to keep them moist. Over time, the rice may lose its stickiness, but the flavor will still be there. Just make sure to eat them within that time for the best taste. Yes, you can prepare these cups ahead of time. You can cook the rice and make the coconut mixture a day in advance. Just assemble the cups when you're ready to serve. Store the rice and coconut mixture separately in the fridge. This way, you can enjoy fresh mango cups without much hassle. In this post, we explored how to make delicious sticky rice cups with mango. You learned about the main ingredients, like glutinous rice and coconut milk, as well as easy steps to create this dish. I shared tips for perfecting the texture and offered variations for dietary needs. Remember, you can store leftovers and even freeze them for later. Creating this dessert can be fun and rewarding. With a few simple steps, you will impress anyone who tries your tasty creation.

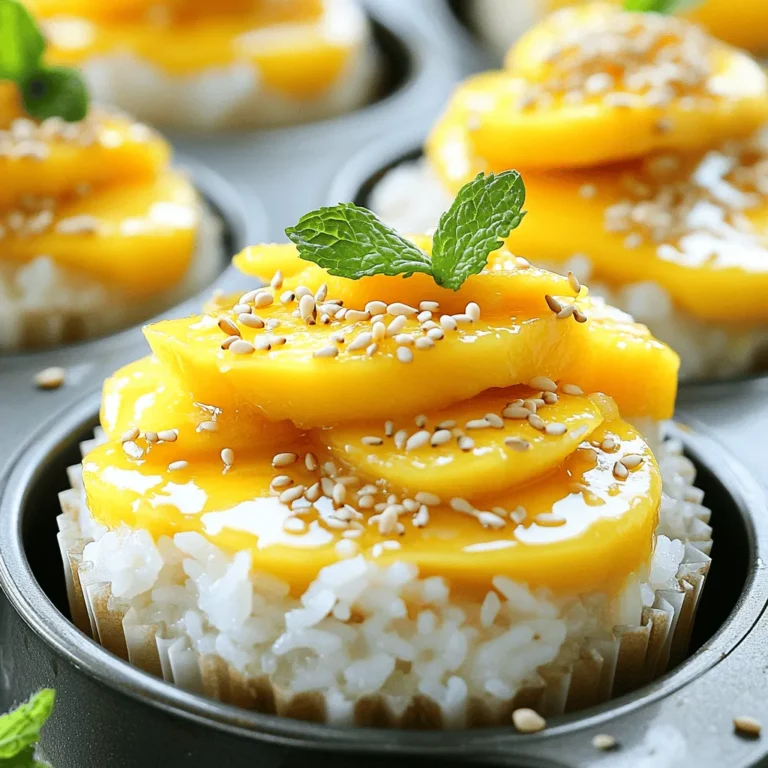
Mango Coconut Sticky Rice Cups Easy and Flavorful Treat

Here’s what you need for the whipped feta dip with roasted tomatoes: - 8 oz feta cheese, crumbled - 1/2 cup Greek yogurt - 2 tablespoons olive oil - 1 teaspoon lemon juice - 1 teaspoon dried oregano - 1/2 teaspoon garlic powder - 1 cup cherry tomatoes, halved - Salt and pepper to taste - Fresh basil leaves for garnish - Crusty bread or crackers for serving Each ingredient plays a key role in this dip. The feta cheese gives it a tangy flavor. Greek yogurt adds creaminess and a bit of tang. Olive oil adds richness, while lemon juice brightens the mix. Dried oregano provides a lovely herb taste. Garlic powder adds depth to the flavor. The cherry tomatoes add sweetness and a pop of color. Salt and pepper enhance all the flavors. Fresh basil leaves give a fresh touch at the end. Finally, crusty bread or crackers serve as the perfect vehicle for the dip. Enjoy the mix of textures and flavors! Preheating the Oven Start by preheating your oven to 400°F (200°C). This step is key for roasting tomatoes. Roasting the Tomatoes In a bowl, mix halved cherry tomatoes with 1 tablespoon of olive oil, salt, and pepper. Toss them well to coat. Spread the tomatoes on a baking sheet. Roast for 15 to 20 minutes. They should be soft and slightly caramelized when done. Making the Whipped Feta While the tomatoes roast, prepare the whipped feta. In a food processor, add crumbled feta, Greek yogurt, 1 tablespoon olive oil, lemon juice, dried oregano, garlic powder, and a pinch of salt and pepper. Blend until it becomes smooth and creamy. Scrape the sides as needed. Taste the mixture and adjust seasoning if you want. Combining Ingredients After the tomatoes cool a bit, gently fold them into the whipped feta. Reserve some tomatoes for garnish. This mix combines creamy and savory flavors. Final Touches Transfer the dip to a serving bowl. Top with the reserved roasted tomatoes and drizzle a bit of olive oil over it. Garnish with fresh basil leaves for added color and flavor. Now, your whipped feta dip is ready to serve! - Best Types of Feta: Use a good quality feta cheese. Look for the creamy kind packed in brine. This type gives the dip a rich flavor and smooth texture. Avoid crumbled feta. It often lacks the moisture needed for creaminess. - How to Store Leftovers: If you have extra dip, store it in an airtight container. It keeps well in the fridge for up to 3 days. To prevent drying out, cover the surface with a thin layer of olive oil. This keeps it fresh and tasty. - Adjusting Consistency: If your dip is too thick, add a splash of olive oil or more Greek yogurt. Blend until smooth. If it's too thin, add a little more feta to thicken it. Adjust to your liking for the perfect texture. - Ideal Pairing Options: This dip pairs great with crusty bread, crackers, or pita chips. You can also serve it with fresh veggies like cucumber or bell peppers for a healthy twist. Try adding marinated olives for an extra flavor kick. - Plating and Presentation Tips: Serve the dip in a rustic bowl for a cozy look. Drizzle extra olive oil on top. Add the reserved roasted tomatoes as a colorful garnish. Finish with fresh basil leaves for a bright touch. This makes your dish look as good as it tastes! {{image_2}} - Dairy-Free Alternatives: If you want a dairy-free dip, use a plant-based feta. You can also use cashew cream for a creamy texture. Coconut yogurt is a good swap for Greek yogurt. - Flavor Enhancements: To boost flavor, try adding a bit of smoked paprika. You can also mix in some sun-dried tomatoes or olives for a different taste. - Adding Spices: Spice up your dip by adding crushed red pepper flakes. You could also stir in a bit of cumin for warmth. Don't be afraid to experiment with spices you love! - Incorporating Other Vegetables: Try mixing in roasted red peppers or artichoke hearts. Fresh spinach or arugula can add a nice crunch and color. Get creative with what you have on hand! Refrigerator Storage Store your whipped feta dip in an airtight container. It stays fresh for about 3 to 5 days. Make sure to press plastic wrap directly onto the dip to keep it moist. This will help keep the flavors intact. Freezing Tips You can freeze the dip, but the texture may change. Use a freezer-safe container and leave some space at the top. This allows for expansion. When ready to eat, thaw it in the fridge overnight. Re-blend it if needed to restore creaminess. Duration of Freshness The dip is best when fresh. In the fridge, it lasts about 3 to 5 days. If frozen, aim to use it within 2 to 3 months for the best taste. Signs of Spoilage Watch for changes in smell, color, or texture. If it smells sour or looks discolored, it’s best to toss it. Always trust your senses. If in doubt, throw it out! Can I make this dip ahead of time? Yes, you can make this dip a day before. Just store it in the fridge. The flavors blend well overnight, making it taste even better. Before serving, give it a quick stir and taste for seasoning. What can I substitute for Greek yogurt? If you don't have Greek yogurt, try sour cream or plain yogurt. Both will add creaminess. You can also use a dairy-free yogurt if you prefer a vegan option. How can I enhance the flavor profile? Adding fresh herbs like chives or dill can boost the taste. You can also mix in a pinch of red pepper flakes for heat. A drizzle of balsamic glaze on top adds sweetness and brightness. Health Benefits of Ingredients - Feta cheese provides protein and calcium. - Greek yogurt adds probiotics, aiding digestion. - Olive oil offers healthy fats, supporting heart health. - Tomatoes are rich in vitamins and antioxidants. Caloric Breakdown per Serving One serving has about 120 calories. This includes calories from feta cheese, yogurt, and olive oil. The roasted tomatoes add minimal calories but bring great flavor and nutrients. In this post, we covered how to make a delicious whipped feta dip. We discussed the key ingredients like feta cheese, Greek yogurt, and cherry tomatoes. I shared step-by-step instructions for roasting and combining these flavors, plus tips to make it perfect. You can customize your dip easily and store leftovers well. This fun recipe suits any gathering and will impress your friends. Try it out, and enjoy the tasty results!

Whipped Feta Dip with Roasted Tomatoes Delightful Recipe

To make a delicious potato corn chowder, gather these ingredients: - 3 medium Yukon Gold potatoes, peeled and diced - 1 cup fresh or frozen corn kernels - 1 medium onion, diced - 2 cloves garlic, minced - 4 cups vegetable broth - 1 cup unsweetened coconut milk - 2 tablespoons olive oil - 1 teaspoon dried thyme - 1/2 teaspoon smoked paprika - Salt and pepper to taste - Fresh parsley or chives for garnish You can swap some ingredients for healthier options: - Use sweet potatoes instead of Yukon Gold potatoes for added vitamins. - Replace coconut milk with almond milk for fewer calories. - Use low-sodium vegetable broth to cut back on salt. - Add kale or spinach for extra vitamins and minerals. Each ingredient in this chowder brings great nutrition: - Yukon Gold potatoes are high in fiber and potassium. - Corn is rich in antioxidants and vitamins like B6. - Onions boost heart health and add flavor. - Garlic supports the immune system and adds depth. - Vegetable broth provides hydration with low calories. - Coconut milk delivers healthy fats and aids digestion. - Olive oil is full of good fats that are heart-healthy. - Thyme has antioxidants and can improve digestion. - Smoked paprika adds flavor without extra calories. These ingredients work together to create a tasty and nutritious meal. Enjoy! {{ingredient_image_1}} To make this chowder, we start by sautéing the onion. Heat the olive oil in a large pot over medium heat. Add the diced onion and cook for about 5 minutes. You want the onion to soften but not brown. Next, stir in the minced garlic and cook for one more minute. This makes the kitchen smell amazing! Now, it's time to add the diced potatoes. Pour in 4 cups of vegetable broth. Bring the mixture to a boil. After boiling, lower the heat and let it simmer for about 15 minutes. You want the potatoes to be tender. Next, add in the corn, dried thyme, smoked paprika, salt, and pepper. Stir well and let it simmer for another 5 minutes. This is where the flavors start to come together. For a creamy texture, blend part of the chowder. Use an immersion blender right in the pot. If you don’t have one, carefully pour half the soup into a blender. Blend until smooth and then return it to the pot. Finally, stir in 1 cup of coconut milk. Heat it gently until warm. Taste and adjust the seasoning as needed. To enhance the flavors in your chowder, always use fresh ingredients. Fresh corn tastes much better than canned. Also, sautéing the onion and garlic first builds a deep flavor base. Adding smoked paprika gives a nice, smoky kick. If you want more depth, consider using homemade vegetable broth. It’s simple to make and adds a rich taste. You can also experiment with herbs. Fresh parsley or chives as a garnish adds a pop of color and freshness. For this recipe, you will need a few key tools: - A large pot for cooking the chowder. - A wooden spoon for stirring. - An immersion blender or a regular blender. - A measuring cup for the coconut milk. - A cutting board and knife for chopping the veggies. Having the right equipment makes cooking easier and more enjoyable! To make your chowder creamier, use coconut milk or cashew cream. Both add richness without dairy. If you want a thicker chowder, blend more potatoes. You can also add a bit of cream cheese for extra smoothness. Another trick is to puree a portion of the soup. This keeps some texture while thickening the rest. Store your chowder in an airtight container. It keeps well in the fridge for up to three days. When you are ready to eat, reheat gently on the stove. Stir often to avoid burning. You can also freeze the chowder for up to two months. Just remember to leave space at the top of the container for expansion. Herbs and spices can make your chowder shine. Fresh parsley or chives add brightness at the end. Dried thyme brings depth, while smoked paprika adds a nice touch of warmth. You can also try adding a pinch of cayenne for heat. Just a little can make a big difference! Pro Tips Choose the Right Potatoes: Yukon Gold potatoes are perfect for chowder due to their creamy texture. If unavailable, you can use Russets, but they may break down more easily. Enhance Flavor with Fresh Herbs: For an aromatic boost, consider adding fresh thyme or rosemary when simmering the chowder. Fresh herbs can elevate the dish's overall flavor. Adjusting Thickness: If you prefer a thicker chowder, blend more of the soup mixture. For a lighter texture, blend less, allowing more chunky potato and corn pieces to shine through. Garnishing Tips: Fresh parsley or chives not only add a pop of color but also a fresh flavor. Consider adding a drizzle of extra coconut milk for a beautiful presentation. {{image_2}} This chowder is naturally gluten-free! You only need to use fresh ingredients. Always check that your vegetable broth is gluten-free. Some brands add gluten. You can also use corn starch to thicken it if needed. This gives a smooth texture without any gluten worries. Want to add protein? You can include beans or lentils. Chickpeas work well too. Just rinse and add them during the cooking stage. For meat lovers, diced chicken or turkey can be added. Cook the meat first, then mix it in. This boosts the chowder’s heartiness and keeps it filling. Adding more veggies is easy! Try carrots, bell peppers, or spinach. Cut them small so they cook fast. Add them when you put in the potatoes. You can also throw in some zucchini or kale for a nutrient boost. This makes your chowder colorful and tasty while adding extra vitamins. To keep your potato corn chowder fresh, store it in an airtight container. This helps maintain flavor and texture. Let it cool to room temperature before sealing. Place the container in the fridge. It will last for about 3 to 4 days. Always check for any off smells or changes in texture before eating. Freezing chowder is a great way to save leftovers. First, let the chowder cool completely. Then, pour it into freezer-safe bags or containers. Leave some space at the top for expansion. Label each bag or container with the date. You can freeze it for up to 3 months. When ready to use, thaw it overnight in the fridge. This keeps it safe and tasty. When reheating chowder, gentle heat is key. Pour the chowder into a pot over medium heat. Stir it often to prevent sticking. If it seems too thick, add a splash of vegetable broth or water. Heat until it warms through, which should take about 10 minutes. If using a microwave, heat in short intervals. Stir between each interval to ensure even heating. Enjoy your warm and creamy chowder! You can use almond milk or cashew milk. Both give a nice creamy feel. If you want a richer taste, try heavy cream or half-and-half. For a low-calorie option, use unsweetened soy milk. Just keep in mind that each option changes the flavor a bit. Potato corn chowder lasts about 3 to 4 days in the fridge. Make sure to store it in an airtight container. If you notice any odd smell or appearance, it’s best to toss it. Always check before reheating. Yes, you can make this chowder ahead of time. It tastes great after resting and lets flavors blend. Just follow the recipe, then cool it completely before storing. When ready to eat, reheat gently on the stove. Avoid boiling, as it can change the texture. This blog post covered key ingredients for a delicious chowder, with a complete list and healthier swaps. I shared step-by-step cooking tips for great flavor and the best tools to use. I highlighted ways to make the dish creamier and offered smart storage tips for leftovers. You can easily adapt the recipe for gluten-free diets or add protein and veggies. Lastly, I answered common questions to help you succeed. Cooking this chowder can be fun and satisfying. Enjoy every bite and share your experience!

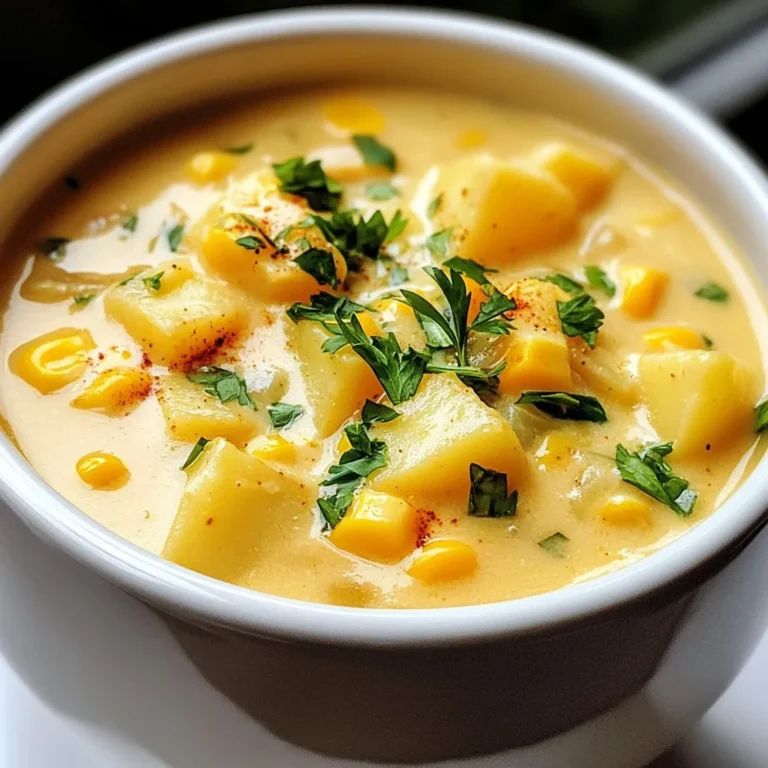
Healthy Potato Corn Chowder Simple and Flavorful Meal

- 1 cup unsalted butter, melted - 1 cup brown sugar, packed - 1/2 cup granulated sugar - 2 large eggs - 2 teaspoons vanilla extract - 2 cups all-purpose flour - 1 teaspoon baking powder - 1/2 teaspoon baking soda - 1/2 teaspoon salt - 1 tablespoon ground cinnamon - Topping: 1/4 cup granulated sugar, 1 teaspoon ground cinnamon To make chewy snickerdoodle blondies, gather your ingredients. Each one adds flavor and texture. First, start with unsalted butter. It gives the blondies a rich taste. I prefer melting it to blend well with the sugars. Next, use brown sugar. It adds moisture and a deep flavor. Combine it with granulated sugar for sweetness. You’ll also need two large eggs. They help bind the batter and create a soft, chewy texture. Vanilla extract is key. It enhances the overall flavor. The dry ingredients are just as important. All-purpose flour gives structure. Baking powder and baking soda help it rise. Don’t forget salt! It balances the sweetness and brings out flavors. Lastly, ground cinnamon is a must. It gives that classic snickerdoodle taste. For the topping, mix more cinnamon with granulated sugar. This adds a sweet, spiced crust. Keep these ingredients handy before you start. They are the heart of this delicious dessert. - Preheating the Oven Start by preheating your oven to 350°F (175°C). This step is very important. It ensures that your blondies bake evenly. - Preparing the Baking Pan Next, prepare a 9x13 inch baking pan. You can grease it with butter or line it with parchment paper. This makes it easy to remove the blondies later. - Combining Wet and Dry Ingredients In a large bowl, mix melted butter, brown sugar, and granulated sugar. Stir until the mix is smooth and creamy. This is the base of your blondies. - Adding Eggs and Vanilla Now, add the eggs one by one. Mix well after each egg. Then, pour in the vanilla extract. This adds great flavor to your batter. - Mixing in the Cinnamon and Sugar Topping In a small bowl, combine 1/4 cup granulated sugar and 1 teaspoon ground cinnamon. Set this aside; it will top your blondies later. - Pouring the Batter into the Pan Gradually add the dry mix to your wet mix. Stir until just combined. Be careful not to overmix. Pour the batter into your prepared pan and spread it evenly. - Setting the Timer Sprinkle your cinnamon-sugar mix over the batter. Bake your blondies for 20-25 minutes. They are done when the edges are golden and a toothpick comes out clean. - Cooling Instructions Let the blondies cool in the pan for 10 minutes. Then, transfer them to a wire rack to cool completely. This helps them set and makes them easier to cut. To get that chewy, soft texture in your blondies, avoid overmixing the batter. Mix just until the dry and wet ingredients blend. This keeps the blondies light and fluffy. For baking time, keep an eye on them. Bake for 20-25 minutes. The edges should turn golden brown. A toothpick should come out clean or with a few moist crumbs. Cinnamon is key here! Use high-quality ground cinnamon for the best taste. You can also try adding a dash more if you love that spice. For extra flavor, consider optional add-ins. Chopped nuts or chocolate chips work great. They add texture and richness to each bite. When it comes to cutting your blondies, wait until they cool down. This helps you get clean, even squares. Use a sharp knife for the best cuts. For serving, you can place them on a colorful plate. Add a dusting of powdered sugar or a scoop of ice cream for a fun touch! {{image_2}} You can easily change the flavor of your snickerdoodle blondies. One fun idea is adding nuts. Chopped walnuts or pecans give a nice crunch. Just mix in about a cup when you combine the wet and dry ingredients. Another great option is to make chocolate chip snickerdoodle blondies. Simply fold in a cup of chocolate chips into the batter. This addition brings a rich, sweet twist that pairs well with the cinnamon. If you need gluten-free blondies, swap the all-purpose flour for a gluten-free blend. Make sure it has a good binding agent, like xanthan gum, to keep your blondies chewy. For a vegan version, replace the eggs with flax eggs. Mix one tablespoon of ground flaxseed with three tablespoons of water, then let it sit for five minutes. You can also use coconut oil instead of butter for a rich flavor. Room Temperature Storage You can store your chewy snickerdoodle blondies at room temperature. Just keep them in an airtight container. This helps them stay soft and fresh. They can last about three days this way. If you want to keep them longer, it’s best to refrigerate them. Refrigeration Tips For longer storage, place the blondies in the fridge. Use a container with a tight lid. They will stay good for about a week. Just remember, cold blondies can be a bit firmer. Let them sit at room temperature for a few minutes before enjoying. How to Freeze Blondies To freeze your blondies, first, let them cool completely. Cut them into squares, then wrap each piece in plastic wrap. Place the wrapped pieces in a freezer bag. Make sure to remove as much air as possible. They can stay frozen for up to three months. Reheating Frozen Blondies When you’re ready to enjoy them, take out the blondies from the freezer. Unwrap them and let them thaw in the fridge overnight. For a warm treat, you can microwave them for about 10-15 seconds. Enjoy that gooey goodness! What makes these blondies chewy? The key to chewy blondies is the balance of sugars and butter. Brown sugar adds moisture, making the blondies soft. Butter gives them richness. Eggs also help create that nice chewy texture. Can I use margarine instead of butter? Yes, you can use margarine. However, it may change the flavor slightly. Butter gives a richer taste, while margarine can alter the texture. If you opt for margarine, choose a high-quality brand for the best results. Why are my blondies dry? Dry blondies can happen if you overbake them. Always check for doneness a few minutes early. Another cause is too much flour. Make sure to spoon flour into your measuring cup and level it off. What if my blondies end up too gooey? If your blondies are too gooey, they might need more baking time. Every oven is different, so check them early. You can also try using a toothpick to see if they are done. If it comes out with too much batter, they need more time. Best Pairings with Blondies These blondies pair well with vanilla ice cream or a cold glass of milk. A sprinkle of sea salt on top can enhance their flavor, too. You can also serve them with fresh fruit like berries for a lovely contrast. How to Serve for Parties or Gatherings Cut the blondies into small squares for easy serving. Place them on a decorative platter. Adding a drizzle of caramel or chocolate sauce can make them even more appealing. For a fun touch, offer toothpicks for guests to grab them easily. This post covered how to make delicious blondies from scratch. We started with the essential ingredients and then walked through simple steps to prepare and bake. I shared tips to achieve the perfect texture and flavor. You can also explore variations, store your blondies correctly, and troubleshoot common issues. Remember, blondies are fun to make and share. Enjoy these sweet treats at gatherings or cozy nights in. With practice, your blondies will impress everyone!

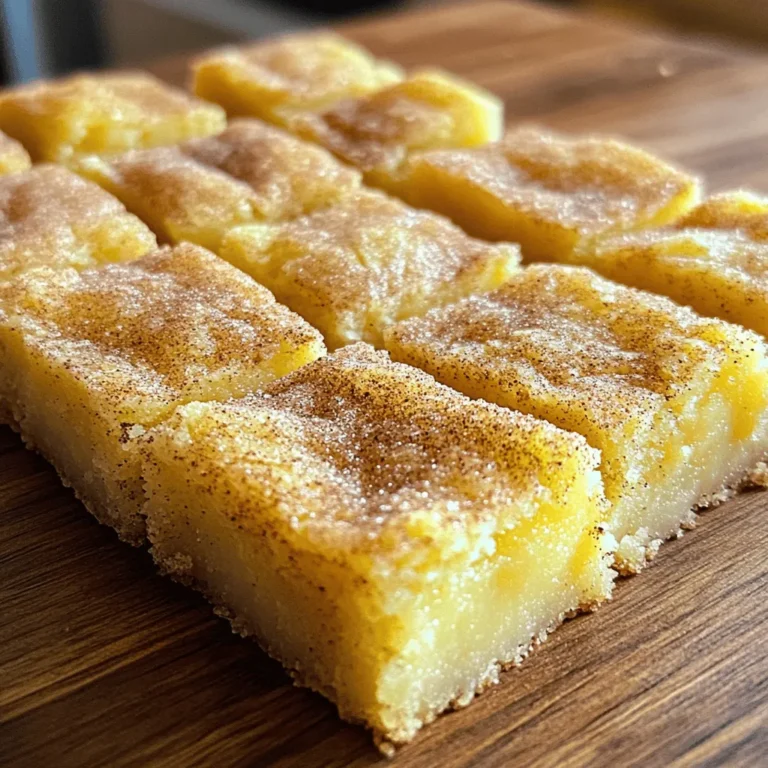
Chewy Snickerdoodle Blondies Decadent Dessert Recipe

- 1 ripe mango, diced - 2 avocados, diced - 1 small red onion, finely chopped - 1 jalapeño, deseeded and minced - 1/4 cup fresh cilantro, chopped - Juice of 2 limes - Salt and pepper to taste - 1 tablespoon olive oil (optional) Mango avocado salsa shines with fresh, simple ingredients. Each one adds bright flavors. Start with a ripe mango. It should feel soft but not mushy. The mango adds sweetness and juiciness. Next, grab two avocados. They should also be ripe. When cut, they should be creamy and smooth. Avocados bring a rich texture to the salsa. Then, pick a small red onion. Chop it finely. This onion adds a nice crunch and a slight bite. For heat, use a jalapeño. Remove the seeds for less spice. Mince it well to mix evenly. Fresh cilantro brightens the salsa. Chop a quarter cup and sprinkle it in. The lime juice adds tang. Squeeze juice from two fresh limes for the best taste. If you like, drizzle in olive oil. It adds richness but is not necessary. Finally, add salt and pepper. These simple seasonings boost all the flavors. With these ingredients, you create a fresh and flavorful delight. Each bite bursts with taste and texture. Enjoy mixing them together! 1. Start by grabbing a large bowl. 2. Dice the ripe mango and avocados. 3. Combine the diced mango and avocados in the bowl. 4. Next, finely chop the red onion and mince the jalapeño. 5. Add both to the bowl with the fruit. 6. Chop fresh cilantro and sprinkle it over the mix. 7. Squeeze the juice of two limes into the bowl. 8. If you want, add a tablespoon of olive oil for richness. 9. Gently stir it all together. Be careful not to mush the avocados! 10. Season with salt and pepper to your liking. 11. If you want more tang, add extra lime juice. 12. Cover the bowl or use an airtight container. 13. Refrigerate for about 30 minutes. This helps the flavors mix well. - Serve the salsa in a bright bowl. - Top it with a few whole cilantro leaves for color. - Pair it with tortilla chips for a crunchy snack. - You can also use it as a tasty topping for grilled meats or tacos. - The fresh and vibrant flavors will impress your guests! To make a great mango avocado salsa, you need ripe fruit. Look for a mango that is slightly soft when you squeeze it. The skin should have a nice yellow hue with some red blush. For avocados, check for firmness. They should yield to gentle pressure but not feel mushy. To dice a mango, stand it upright and slice off the cheeks. Cut a grid pattern in the flesh without cutting through the skin. Then, scoop it out with a spoon. For avocados, cut them in half and twist to separate. Remove the pit and scoop the flesh out with a spoon. Then, slice it into cubes. You can boost the flavor of your salsa with spices. A pinch of cumin adds a warm note. A little minced garlic gives it a nice kick. Both spices will make your salsa even more exciting. Don’t forget about herbs! While cilantro is great, you can also try fresh basil or mint. These herbs add a unique twist to your salsa. Experiment to find your favorite combination. {{image_2}} You can make this salsa your own by using different ingredients. If you want a milder taste, swap the red onion for green onion. Green onions add a nice crunch and a subtle flavor. You can also play with fruits. Pineapple or peach work great in this salsa. They add a sweet twist that pairs well with mango and avocado. Don’t be afraid to mix and match based on your taste! This salsa is already vegan, which makes it a great choice for plant-based diets. You don’t need to change much. Just skip the olive oil if you want it lighter. If you are gluten-free, you can enjoy this salsa without worry. All the ingredients are gluten-free, so you can serve it with corn chips or fresh veggies. Enjoy it with your favorite foods while staying healthy! Mango avocado salsa is best when fresh. You can keep it in the fridge for about 2 to 3 days. To store it, place the salsa in an airtight container. This keeps it safe from air and moisture. If you want to keep the avocados from browning, add extra lime juice. The acid helps maintain the bright color and flavor. You can freeze mango avocado salsa, but it might change a bit. The texture of the avocado may become mushy after thawing. If you still want to freeze it, use a freezer-safe container. Leave some space at the top because it will expand. When you’re ready to use it, thaw the salsa in the fridge overnight. Once thawed, give it a good stir. You might need to add a bit of lime juice to refresh the taste. If some avocado looks brown, just mix it in. It will still taste great! You can serve Mango Avocado Salsa with many tasty dishes. It pairs well with tortilla chips for a great snack. You can also use it as a topping for grilled meats like chicken or fish. It adds a fresh touch to tacos or burritos. Try it on top of a salad for extra flavor. The options are endless! This salsa has a mild heat level. The jalapeño adds some spice, but you can adjust it. If you like it hotter, leave some seeds in the jalapeño. For less heat, use half a jalapeño or skip it altogether. You can also replace it with a sweet pepper for no spice. Yes, you can make this salsa ahead of time! It tastes even better after chilling. I recommend making it about 30 minutes before serving. This lets the flavors blend nicely. Just cover it with plastic wrap or keep it in an airtight container. It will stay fresh in the fridge for up to two days. Mango avocado salsa is fresh, tasty, and easy to make. You learned about the main ingredients, including ripe mango, avocado, and jalapeño. We walked through simple steps to mix and serve this salsa, along with tips for choosing the best produce. Remember, you can change up the flavors or ingredients to fit your taste. Store it correctly for later enjoyment. With these ideas, you can impress your friends at your next gathering. Enjoy creating this delicious dish that everyone will love!

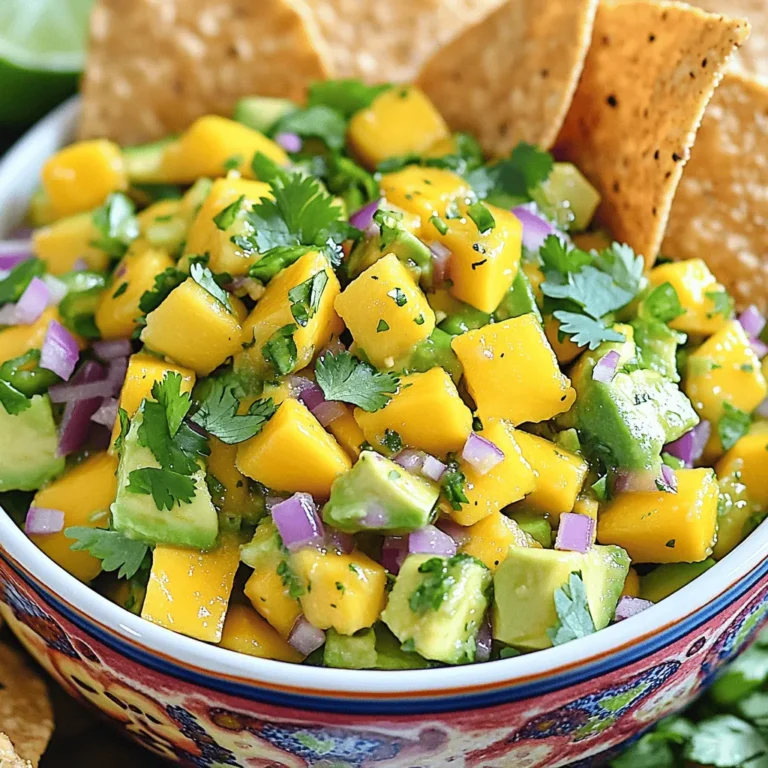
Mango Avocado Salsa Fresh and Flavorful Delight

- 2 cups cooked chicken, shredded - 1 cup cream cheese, softened - 1/2 cup sour cream - 1 cup shredded cheddar cheese These main ingredients form the heart of your casserole. Cooked chicken adds protein, while cream cheese and sour cream provide creaminess. Shredded cheddar cheese gives that delightful cheesy flavor we love. - 1 cup diced jalapeños (fresh or pickled) - 1/2 cup breadcrumbs - 2 tablespoons olive oil - 1 teaspoon garlic powder - 1 teaspoon onion powder - 1/2 teaspoon smoked paprika - Salt and pepper to taste The diced jalapeños kick up the heat. Breadcrumbs add a crunchy topping, while olive oil helps them brown nicely. Garlic and onion powder bring depth to the dish. Smoked paprika adds a warm, smoky flavor that enhances the casserole. - Chopped green onions - Additional cheese Garnishes can make your casserole pop. Chopped green onions add color and a fresh taste. Extra cheese on top can make it even more indulgent. Feel free to personalize it to your liking! 1. Preheat your oven to 350°F (175°C). This helps the casserole cook evenly. 2. Mix chicken and cream cheese. In a large bowl, combine the shredded chicken and softened cream cheese. Stir until the mix is creamy and smooth. 3. Adding jalapeños and spices. Toss in the diced jalapeños, shredded cheddar cheese, garlic powder, onion powder, and smoked paprika. Season with salt and pepper. Stir until everything is mixed well. 4. Incorporating breadcrumbs. In another bowl, combine the breadcrumbs and olive oil. Toss them together so every crumb gets coated. 5. Transferring to a casserole dish. Take your creamy chicken mix and pour it into a greased 9x13 inch casserole dish. Spread the mix evenly across the dish. 6. Baking time and temperature. Sprinkle the breadcrumb mix over the top. Bake in the preheated oven for 25-30 minutes. Look for bubbling and a golden brown top to know it’s ready. To make your casserole creamy, use softened cream cheese. Mix it well with shredded chicken and sour cream. This blend creates a smooth base. For added creaminess, consider using more sour cream. For a crunchy topping, breadcrumbs are key. Mix them with olive oil to coat evenly. This adds flavor and keeps them crisp after baking. Use fresh breadcrumbs for the best texture. They soak up more moisture and become golden brown. You can adjust the heat level of your casserole easily. For a mild dish, use fewer jalapeños or choose pickled ones, which are less spicy. If you want more heat, opt for fresh jalapeños, and add extra chopped ones. The best jalapeños are bright green and firm. Look for peppers that are smooth with no blemishes. You can also remove the seeds for less heat. This way, even those who don’t love spice can enjoy the dish. Pair your casserole with sides like rice or a fresh salad. These add balance and freshness to each bite. Cornbread or tortilla chips also work great for a crunchy side. When it comes to drinks, cold beer complements the spice well. A crisp white wine can also be a nice choice. If you prefer non-alcoholic drinks, try lemonade or iced tea for a refreshing taste. {{image_2}} You can switch up the cheese in this recipe. Cream cheese and cheddar work well together, but you might enjoy using pepper jack for a spicier kick. Mozzarella gives a nice stretch, too. Try different cheeses to find your favorite blend. If you want to swap the chicken, turkey or pork can work nicely. Both options still keep the dish hearty and filling. Just ensure the meat is cooked and shredded before mixing. This can add a fun twist to the casserole while keeping it simple. To make this dish lighter, consider low-fat cream cheese and sour cream. These swaps won't change the taste much but will cut some calories. You can also use Greek yogurt in place of sour cream. It adds protein and a nice tart flavor. For a veggie-packed version, try adding chopped spinach, zucchini, or bell peppers. These will not only add nutrients but also give a colorful touch. You can even go meatless and use beans for protein. This way, you cater to different diets while keeping the flavors vibrant. Adding fresh herbs can really elevate your casserole. Chopped cilantro or parsley brings a fresh taste. If you like more spice, try adding crushed red pepper flakes or chili powder. This can boost the heat to your liking. You can also mix in some corn or black olives for added flavor. These ingredients add a nice crunch and enhance the overall taste. Experiment with different mix-ins to personalize your casserole and make it truly your own. After enjoying your Jalapeño Popper Chicken Casserole, store leftovers properly. Place them in an airtight container. This keeps the flavors fresh. You can refrigerate it for up to three days. If you want to keep it longer, freezing is a great option. Just make sure to wrap it tightly in plastic wrap and then foil. This way, it can last for up to three months in the freezer. When you are ready to reheat, the best method is the oven. Preheat it to 350°F (175°C) and place your casserole in it. Cover it with foil to keep moisture in. Heat for about 20 minutes. You can also use the microwave for quick reheating. Just be sure to cover it to avoid drying it out. For both methods, check that it's hot all the way through. This keeps the texture and flavor just right. In the fridge, your casserole lasts about three days. If you notice any off smells, or if the cheese looks strange, it’s best to toss it. Signs of spoilage also include changes in texture or color. Always trust your senses to decide if it's still good to eat. Yes, you can make this casserole ahead of time. To prep, mix all the ingredients as usual. Then, cover the dish and store it in the fridge. You can keep it there for up to a day. When you're ready to bake, just preheat the oven. Bake it for about 30 minutes. Check if it's hot and bubbly before serving. If you need a cream cheese substitute, try using Greek yogurt. It gives a creamy texture but with a tangy taste. Another option is cottage cheese. Blend it until smooth for a similar feel. You can also use vegan cream cheese for a dairy-free version. Yes, this casserole can be gluten-free. Use gluten-free breadcrumbs instead of regular ones. You should also check labels on other ingredients. Most of them are naturally gluten-free. Just ensure your chicken and spices do not contain gluten. Enjoy this tasty dish without worry! This blog post covered a delicious casserole made with chicken, cream cheese, and spices. You learned how to prepare, bake, and even garnish your dish. We discussed tips for perfect texture and adjusting spice levels. I shared variations and storage tips to keep it fresh. Enjoy making this dish your own, and don’t be afraid to experiment. Each bite can be a new adventure. Now, gather your ingredients and get cooking!

Jalapeño Popper Chicken Casserole Flavorful Delight

- 1 large cucumber - 4 oz cream cheese, softened - 1/4 cup Greek yogurt - 2 tablespoons fresh chives, finely chopped - 2 tablespoons fresh dill, finely chopped - 1 tablespoon lemon juice - 1 tablespoon Everything Bagel seasoning - Salt and pepper to taste These ingredients create a fresh and tasty snack. The cucumber gives a nice crunch. The cream cheese and Greek yogurt make it creamy and smooth. Fresh herbs like chives and dill add great flavor. Lemon juice adds a zing, while Everything Bagel seasoning ties it all together. - Cherry tomatoes, cut in half for garnish - Alternative seasonings Cherry tomatoes add a pop of color and sweetness. You can also try different seasonings if you like. This keeps the recipe fun and flexible. Experiment with what you have in your pantry! Start with a large cucumber. First, wash it well under cold water. This step ensures you remove any dirt. Next, cut the cucumber into 1-inch thick rounds. Lay the slices flat on a serving platter. This arrangement looks nice and makes serving easy. In a medium bowl, combine 4 ounces of softened cream cheese and 1/4 cup of Greek yogurt. Mix them until smooth and creamy. This blend gives a great texture. Next, add 2 tablespoons each of finely chopped chives and dill. Then, squeeze in 1 tablespoon of fresh lemon juice. Finally, stir in 1 tablespoon of Everything Bagel seasoning. This adds that iconic flavor. Taste the mixture and adjust with salt and pepper if needed. Now, it’s time to put it all together! Use a small spoon or a piping bag to top each cucumber slice with the cream cheese mixture. Make sure to add a generous amount for the best flavor. For a fun touch, you can place half a cherry tomato on top of each cucumber bite. This step adds color and extra taste. After assembling, chill the bites in the fridge for about 30 minutes. This allows the flavors to blend beautifully. How to Achieve the Right Consistency To get the perfect mix, blend the softened cream cheese and Greek yogurt. Make sure they are smooth. If your mix seems too thick, add a bit more yogurt. This adds creaminess and helps the mixture spread easily on your cucumber. Adjusting Flavor Profiles with Seasoning Taste your mixture before you serve it. You can add a pinch of salt or pepper to enhance the flavors. If you want more zing, a splash of lemon juice can brighten it up. Just remember, adjust slowly; you can always add more, but you can’t take it away. Arranging for Visual Appeal Presentation matters! Arrange your cucumber bites in a neat circle on a platter. This makes a lovely display. You can sprinkle extra Everything Bagel seasoning on top. It adds a nice touch and looks great. Optional Additions to Enhance Flavor For a pop of color and taste, top each cucumber bite with half a cherry tomato. This not only adds flavor but also makes the bites more appealing. You can also add small sprigs of fresh herbs for an extra fresh look. Preparing Ingredients in Advance You can prep your ingredients ahead of time. Slice the cucumber and store it in the fridge. You can also mix the cream cheese blend a few hours before serving. Just keep it covered to stay fresh. Shortcuts for Quick Assembly If you're short on time, use a piping bag to top the cucumber rounds. This speeds up the process. You can also use store-bought cream cheese blends with Everything Bagel flavor for a fast option. {{image_2}} You can spice things up with spicy Everything Bagel cucumber bites. Just add some red pepper flakes to the cream cheese mix. This small change brings heat and a nice twist. For a vegan version, try using cashew cream instead of cream cheese. Blend soaked cashews with lemon juice and a bit of water until smooth. Then, mix in Greek yogurt and seasonings. This makes a rich, creamy topping that everyone can enjoy. These cucumber bites work great as a salad topper. Just chop the cucumber into smaller pieces. Then, add the cream cheese mix on top of your favorite greens. It adds flavor and fun to your salad. You can also include these bites on grazing boards. They look bright and colorful among cheeses, crackers, and nuts. This makes your board more appealing and tasty. In summer, you can add fresh vegetables like bell peppers or radishes. Cut them into small pieces and mix them into the cream cheese topping. This creates a refreshing and crunchy bite. For the holidays, make your cucumber bites festive. Try using red and green toppings, like diced peppers or pomegranate seeds. This not only tastes good but also looks beautiful on your table. To keep Everything Bagel Cucumber Bites fresh, store them in the fridge. Use an airtight container to prevent drying out. If you stack them, place parchment paper between layers. This helps keep them fresh and prevents sogginess. You can keep them in the fridge for up to two days. After that, the cucumber may become too soft, and the cream cheese mix can lose its flavor. If you want to prepare these bites for a party, you can make them a few hours ahead. Prepare the cucumber slices and cream cheese mix separately. Then, assemble them just before serving. Do not freeze these bites. The cucumber's texture changes when frozen, and that will ruin the dish. Check your cucumber bites for signs of spoilage. If they smell sour or look slimy, it’s time to toss them. Also, if the cucumber looks discolored or mushy, don’t eat them. Freshness is key for the best taste. Yes, you can make Everything Bagel Cucumber Bites ahead of time. I recommend chilling them for about 30 minutes before serving. You can store them in the fridge for up to 2 hours. This gives the flavors time to blend perfectly. If you want a dairy-free option, try cashew cream or silken tofu. Both will give you a nice creamy texture. You can also use vegan cream cheese if you prefer. To ensure your Everything Bagel Cucumber Bites are gluten-free, check all labels. Use gluten-free cream cheese and yogurt. Most Everything Bagel seasonings are safe, but confirm the ingredients. You can use store-bought Everything Bagel seasoning, or you can make your own. To make it, mix equal parts sesame seeds, poppy seeds, garlic powder, onion flakes, and salt. It's easy and adds a fresh touch! These cucumber bites are a tasty and fun snack. We explored ingredients, steps, and tips to make them great. You learned how to prepare cucumbers and mix cream cheese with yogurt. I shared variations and storage tips too, ensuring freshness and flavor. Consider the options for different diets and occasions. Enjoy serving these bites at your next gathering, knowing they will impress. Simple, tasty, and ready in no time—these are a must-try!

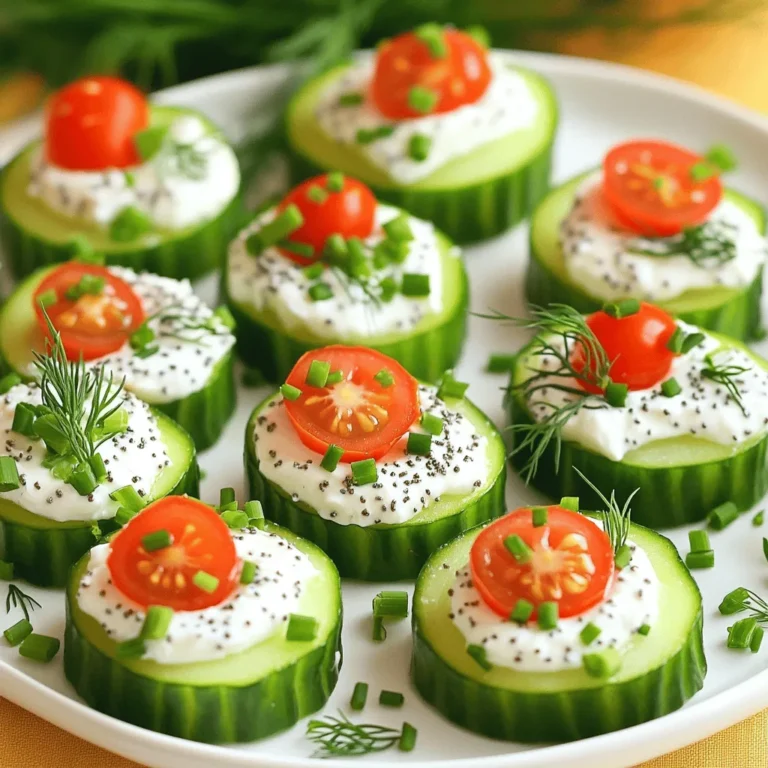
Everything Bagel Cucumber Bites Fresh and Easy Snack

For buttery herb dinner rolls, gather these key items: - 4 cups all-purpose flour - 2 tablespoons sugar - 1 tablespoon instant yeast - 1 teaspoon salt - 1 cup warm milk (110°F/43°C) - 1/2 cup unsalted butter, melted and slightly cooled - 2 large eggs, at room temperature - 1 tablespoon dried oregano - 1 tablespoon dried thyme - 1/2 teaspoon garlic powder - Extra melted butter for brushing Using high-quality ingredients makes a big difference. Fresh flour gives better texture. Real butter adds rich flavor. Use whole milk for creaminess. Fresh herbs can enhance taste. This attention to quality helps you create rolls that are soft and fluffy. Don’t worry if you lack some ingredients. For flour, whole wheat works well, though it may change texture. If you run out of sugar, honey or maple syrup can sweeten your dough. You can swap instant yeast for active dry yeast, just remember to proof it first. If you need a dairy-free option, almond milk can replace milk and vegan butter can stand in for regular butter. Start by pouring warm milk into a large bowl. Make sure the milk is around 110°F. Add sugar and instant yeast to the milk. Stir this mix gently, then let it sit for about 5 minutes. You want to see bubbles form. This shows the yeast is active. If it doesn’t foam, try again with fresh yeast. Once your yeast mixture is ready, add melted butter and eggs. Stir it well until mixed. In another bowl, combine flour, salt, oregano, thyme, and garlic powder. Mix these dry ingredients together. This blend adds flavor and helps the rolls rise. Now, combine the wet and dry mixes. Gradually add the dry mix to the wet mix. Use a wooden spoon or spatula to stir until a soft dough forms. Next, transfer the dough to a floured surface. Knead it for about 5 to 7 minutes. The dough should feel smooth and elastic. Place the dough in a greased bowl and cover it. Let it rise in a warm spot for about 1 hour. It should double in size. After the first rise, punch the dough down gently. Divide it into 12 equal pieces. Roll each piece into a ball. Place the balls in a greased 9x13 inch baking pan. Leave some space between each roll. Cover the pan again and let the rolls rise for another 30 minutes. They will puff up nicely. Preheat your oven to 375°F. After the second rise, brush the tops with melted butter. Bake the rolls for 20 to 25 minutes. They should turn golden brown when ready. Once baked, take them out and brush with more melted butter. Enjoy these soft and fluffy rolls warm! To make soft dinner rolls, use warm milk. It helps the yeast grow. Use instant yeast for quick results. Adding butter gives a rich taste and soft texture. Don't skip the eggs; they add moisture. Let the dough rise until it doubles in size. This step is key for fluffy rolls. Kneading helps develop gluten in the dough. Use a lightly floured surface. Push the dough down with your palms and fold it over. Keep kneading for about 5-7 minutes. You want the dough to feel smooth and elastic. If it’s too sticky, add a bit more flour. Don’t over-knead, as this can make the rolls tough. For the best rise, find a warm spot. An oven turned off but slightly warm works well. Cover the dough with a damp cloth to keep it moist. Let it rise until it doubles in size. This usually takes about an hour. If your kitchen is cool, it may take longer. Be patient; good things take time! {{image_2}} You can change the flavor of your rolls with different herbs. Some great options are rosemary, basil, or dill. Each herb brings its own taste. For example, rosemary adds a woodsy flavor. Basil gives a sweet, aromatic touch. Just remember to keep the amount similar to the original recipe. Adding cheese makes these rolls even more tasty. Try shredded cheddar for a sharp kick. Parmesan gives a nice nutty flavor. You can also mix in spices like red pepper flakes for heat. Just be careful not to add too much. A little goes a long way, and it can really change the taste. You can make these rolls sweet or savory. For sweet rolls, add honey or cinnamon. Mix in some dried fruits like raisins or cranberries for a treat. On the other hand, if you want savory, keep herbs and spices. You can even add some cheese to make them richer. Both versions are sure to impress. To keep your buttery herb dinner rolls fresh, store them in an airtight container. Place a paper towel at the bottom to absorb moisture. This method keeps the rolls soft for up to three days. If you want to keep them longer, consider freezing. When you're ready to enjoy your leftover rolls, reheat them for the best taste. Preheat your oven to 350°F (175°C). Wrap the rolls in foil to keep them from drying out. Heat for about 10-15 minutes. This makes them warm and soft, just like fresh. To freeze your rolls, let them cool completely. Place them in a single layer on a baking sheet. Freeze until firm, then transfer them to a freezer bag. This way, they won't stick together. They can stay frozen for up to three months. When you want to eat them, thaw in the fridge overnight and reheat as needed. Yes, you can use active dry yeast in place of instant yeast. Just make sure to activate it first. Mix it with warm milk and sugar, and let it sit for about 5-10 minutes. It will become frothy when ready. After that, simply add it to your dough as you would with instant yeast. You can prep these rolls in advance. After shaping the rolls, place them in the greased pan. Cover and refrigerate them instead of letting them rise. When you're ready to bake, let them sit at room temperature for about 30 minutes. Then, allow them to rise until they have doubled. Finally, bake as directed. If your rolls don’t rise, check the yeast. It may be old or inactive. You can also ensure the dough is in a warm place. If it's too cold, it won't rise well. Try moving it to a warmer location or using a warm oven (turned off) for rising. If all else fails, don't worry too much; they may still taste great! In this article, we explored the key aspects of making soft dinner rolls. We discussed the importance of quality ingredients, detailed each step in the baking process, and shared helpful tips for success. You can also try various flavors and learn effective storage methods. Baking rolls at home is simple and rewarding. With my tips, you’ll create delicious rolls that everyone will love. Enjoy your baking journey!

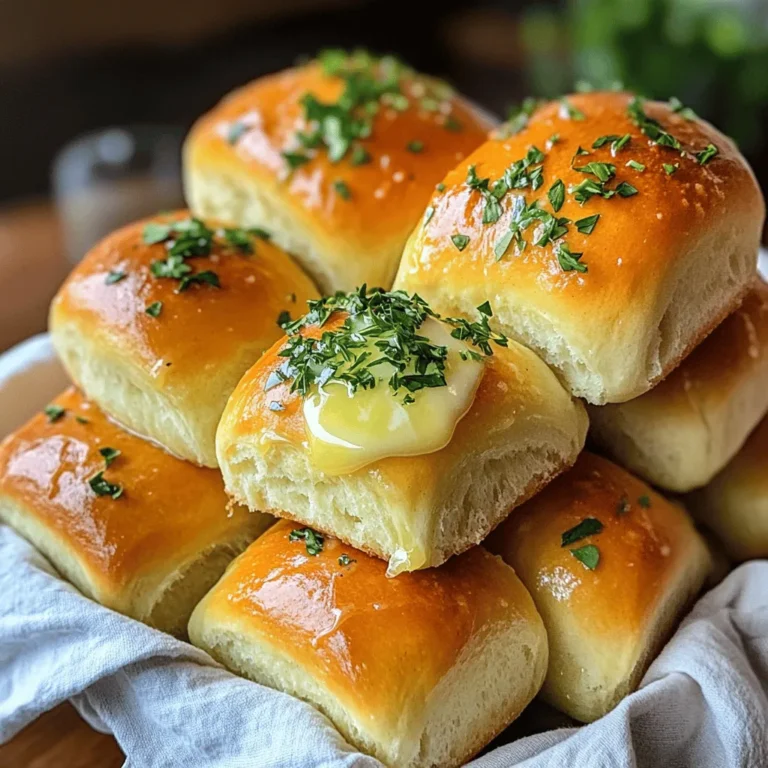
Buttery Herb Dinner Rolls Soft and Fluffy Delight

PREV 1 … 39 40 41 … 86 NEXT
spicy fork kitchen

explore

DessertsDinnerAppetizersDrinks

Our Policies

  • Cookie Policy
  • Copyright Policy
  • Disclaimer
  • GDPR Policy
  • Terms Of Use
Back to Top
  • About
  • Contact Us
  • Privacy Policy
© 2026 spicy fork kitchen