FREE DINNER EBOOK! Get your copy!
  • Cookie Policy
  • GDPR Policy
  • Disclaimer
  • Terms Of Use
  • Visit my other site: Fun Cookie Recipes
spicy fork kitchen
  • Home
  • Dinner
  • Desserts
  • Drinks
  • Appetizers
  • Contact
  • About
  • Privacy Policy
  • Home
  • Dinner
  • Desserts
  • Drinks
  • Appetizers
  • Contact
  • About
  • Privacy Policy
  • Cookie Policy
  • GDPR Policy
  • Disclaimer
  • Terms Of Use
Visit my other site: Fun Cookie Recipes

HOME / CATEGORIES /

Latest

- 1 cup liquid egg whites - 1/4 cup finely chopped spinach - 1/4 cup diced bell pepper (any color) - 1/4 cup shredded low-fat cheese (like mozzarella or cheddar) - 1/2 teaspoon garlic powder - 1/2 teaspoon onion powder - Salt and pepper to taste - Olive oil spray (for cooking) - Optional toppings: salsa, sliced avocado, hot sauce Each wrap packs a good punch of protein. A typical serving has about 80 calories. It also brings around 8 grams of protein and 2 grams of fat. The fiber from spinach and bell peppers adds to the health benefits. This makes it a great choice for a light meal or snack. Feel free to get creative with toppings! I love using fresh salsa for a zesty kick. Sliced avocado adds creaminess and healthy fats. If you like spice, drizzle hot sauce on top. You can mix and match to find your favorite flavors. To start, grab a mixing bowl. Add 1 cup of liquid egg whites. Then, sprinkle in 1/2 teaspoon of garlic powder and 1/2 teaspoon of onion powder. Season with salt and pepper. Whisk these together until smooth. Next, fold in 1/4 cup of finely chopped spinach and 1/4 cup of diced bell pepper. Finally, mix in 1/4 cup of shredded low-fat cheese. Make sure everything is well combined. This mixture gives your wraps a tasty boost. Now, heat a non-stick skillet over medium heat. Lightly spray it with olive oil. Pour half of the egg mixture into the skillet. Spread it out evenly to form a circle. Cook for 2-3 minutes. You will know it's ready when the edges lift and the bottom sets. Carefully flip the wrap and cook for another 1-2 minutes. Once cooked, remove it from the skillet. Keep it warm by wrapping it in a clean kitchen towel. Repeat this with the remaining mixture to make a second wrap. To serve, lay your wrap flat. Add your favorite toppings. I love using salsa, sliced avocado, or a dash of hot sauce. Roll it up tight and enjoy your warm, tasty wrap! Feel free to get creative with the fillings or toppings. To make your egg white wraps fluffy, whisk the egg whites well. This adds air and helps them rise. Mix in the spices gently, but don’t over-mix. When cooking, use medium heat. Too high heat can make them rubbery. Flip them carefully to keep the fluffiness. A non-stick skillet is best for cooking your egg wraps. It prevents sticking and makes flipping easier. I recommend using a skillet that is 10 inches wide. This size helps the wraps cook evenly. Also, preheat the skillet before pouring in the egg mixture. This ensures a nice sear. You can swap ingredients based on what you have. Instead of spinach, try kale or arugula. If you want a different color, use red or yellow bell peppers. For cheese, use feta or goat cheese for a tangy flavor. Garlic and onion powders can be replaced with fresh minced garlic and onion for more taste. {{image_2}} You can boost your wraps with many veggies. Try adding diced tomatoes, mushrooms, or zucchini. Each veggie adds its unique taste and texture. Spinach is great, but don’t stop there! For a fun twist, try shredded carrots or kale. These add color and nutrients. Mix and match your favorites for a new wrap each time! Spice up your egg white wraps with different seasonings. You can add smoked paprika for a smoky kick. Or try a bit of cumin for warmth. If you love heat, sprinkle in cayenne pepper or red pepper flakes. Fresh herbs like chives or parsley can brighten the flavor too. Experiment with what you have at home! If you want more protein, consider using Greek yogurt or cottage cheese in your wraps. They add creaminess and a protein boost. You can also use chickpea flour to make a gluten-free wrap. This option is rich in protein and fiber. Another choice is to use tofu for a plant-based version. Each alternative brings its unique taste and nutrition profile. To store leftover egg white wraps, let them cool down first. Place them in an airtight container. You can keep them in the fridge for up to three days. Make sure to layer them with parchment paper to avoid sticking. This will help keep them fresh and tasty. When you’re ready to eat, take the wraps out of the fridge. You can reheat them in a skillet over low heat. This takes about 1-2 minutes on each side. If you prefer, you can also use a microwave. Heat them for 30 seconds on medium power. Check if they are warm enough. If not, heat for an extra 15 seconds. You can freeze these wraps for later use. First, let them cool completely. Then, wrap each one in plastic wrap. Place the wrapped wraps in a freezer-safe bag. You can store them in the freezer for up to three months. When ready to eat, just thaw them in the fridge overnight. Reheat them as mentioned above, and enjoy! Egg white wraps last about 3-4 days in the fridge. Store them in an airtight container. This keeps them fresh and safe to eat. If you notice any change in color or smell, it is best to throw them out. Yes, you can make these wraps ahead of time. Cook the wraps and let them cool fully. Then, stack them with parchment paper in between. This helps prevent sticking. Store them in the fridge. When you need them, just heat them in a skillet or microwave. If you want a substitute for egg whites, try using silken tofu. Blend it until smooth for a similar texture. Another option is chickpea flour mixed with water. This mix can mimic the egg white's binding quality in wraps. We reviewed the ingredients needed for tasty egg wraps, from nutritional info to fun toppings. Next, we shared step-by-step instructions to guide you through mixing, cooking, and serving. I provided tips to help you create a fluffy texture and recommended specific skillets. We explored tasty variations and how to store your wraps for later use. My final thoughts: Egg wraps are simple, fun, and customizable. You can make them fit your taste. Enjoy these easy meals today!

Minute High-Protein Egg White Wraps Quick and Easy

To make these tasty bites, gather the following ingredients: - 1 cup rolled oats - 1/2 cup almond flour - 1/2 cup cream cheese, softened - 1/2 cup pumpkin puree - 1/4 cup maple syrup - 1 teaspoon vanilla extract - 1 teaspoon pumpkin pie spice - 1/4 teaspoon salt - 1/4 cup chocolate chips (dark or semi-sweet) - 1/4 cup crushed graham crackers (for coating) These ingredients ensure a creamy, sweet treat packed with fall flavors. You can play around with the flavors by adding these optional ingredients: - Chopped nuts for crunch - Dried fruits like cranberries or raisins - A dash of cinnamon for extra spice - Peanut butter for a nutty twist These options help you customize the bites to your taste. Each serving includes about 1 energy bite. Here’s what you get: - Calories: 120 - Protein: 3g - Carbohydrates: 15g - Fat: 6g - Fiber: 2g These bites are a great snack. They provide energy without too much sugar. First, gather all your ingredients. You will need: - 1 cup rolled oats - 1/2 cup almond flour - 1/2 cup cream cheese, softened - 1/2 cup pumpkin puree - 1/4 cup maple syrup - 1 teaspoon vanilla extract - 1 teaspoon pumpkin pie spice - 1/4 teaspoon salt - 1/4 cup chocolate chips - 1/4 cup crushed graham crackers Make sure to measure the ingredients carefully. This helps each bite taste just right. Set everything out on your counter. You want to work quickly and smoothly. In a large mixing bowl, add the rolled oats and almond flour. Stir these two together until they blend well. Then, add your cream cheese, pumpkin puree, maple syrup, vanilla extract, pumpkin pie spice, and salt. Now, it’s time to mix! You can use a spatula or your hands. The goal is to combine everything into a sticky mix that holds together. If it feels too dry, add a bit more pumpkin puree. After mixing, fold in the chocolate chips gently. This way, you keep the chips whole. Next, chill the mixture for 15-20 minutes in the fridge. This makes it easier to shape. After chilling, wet your hands lightly. Scoop out small portions, about one tablespoon each. Roll them into balls. Now for the fun part! Roll each ball in the crushed graham crackers to coat them evenly. This gives them a nice crunch. Place the bites on a baking sheet lined with parchment paper. Finally, refrigerate them for another 30 minutes to set. Enjoy this simple, tasty treat! To get the right texture for your energy bites, the mixture must be sticky. If it feels too dry, add a bit more pumpkin puree or cream cheese. If it’s too wet, mix in more almond flour or oats. Always aim for a balance that helps the bites hold together well. Store your energy bites in an airtight container. This keeps them fresh for about a week in the fridge. If you want them to last longer, consider freezing them. Just make sure to separate each bite with parchment paper before sealing them in a freezer bag. These energy bites make a great snack for any time. Try pairing them with a warm cup of tea or coffee. You can also serve them on a festive plate and sprinkle some extra pumpkin pie spice on top for a nice touch. For a fun twist, place them in a mason jar for easy grab-and-go snacks. {{image_2}} You can easily change the flavors in these bites. For a chocolate twist, add cocoa powder or use chocolate chips. Swap the pumpkin puree for mashed banana for a fruity taste. Want a festive flair? Try adding a few drops of peppermint extract for a holiday vibe. Each variation keeps the bites fun and exciting. You can make simple swaps to fit your needs. If you’re out of almond flour, use any nut flour or oat flour. Cream cheese can be replaced with Greek yogurt for a lighter option. If you want a sweeter touch, agave syrup works well in place of maple syrup. Be creative with what you have! Making these bites gluten-free is easy. Just use certified gluten-free oats and flour. For a vegan option, substitute cream cheese with a vegan cream cheese or cashew cream. Replace honey or maple syrup with date syrup for added sweetness. These modifications keep the bites delicious while fitting special diets. To keep your No-Bake Pumpkin Cheesecake Energy Bites fresh, store them in an airtight container. This helps prevent them from drying out. Place a piece of parchment paper between layers if you stack them. Refrigeration keeps them tasty for up to one week. The bites may lose some firmness if left out too long. Always check for any signs of spoilage before eating. Freezing is a great way to store these tasty bites for longer. Once you roll them into balls, place them on a baking sheet lined with parchment paper. Freeze them for about 1-2 hours until firm. Then, transfer them to a freezer-safe bag or container. This way, you can enjoy your energy bites for up to three months. Just remember to label the bag with the date. To defrost your frozen energy bites, take them out of the freezer and let them sit at room temperature. They usually thaw in about 15-30 minutes. If you're in a hurry, you can microwave them for 10-15 seconds. Avoid leaving them out too long, as they can become too soft. Enjoy them chilled or at room temp for the best taste! Yes, you can use other flours. If you want a gluten-free option, try coconut flour or oat flour. Just remember, each flour has a different texture. Almond flour gives a nice nutty flavor, while coconut flour absorbs more moisture. You might need to adjust the liquid in the recipe. These energy bites last about one week in the fridge. Store them in an airtight container to keep them fresh. If you want to keep them longer, you can freeze them. They’ll stay good for about three months in the freezer. Just thaw them in the fridge before you eat. Yes, adding protein powder is a great idea! It boosts the nutrition and makes them more filling. Start with one to two tablespoons. Mix it in with the other ingredients. You may need to add a little more liquid, like maple syrup or pumpkin puree, to keep the texture right. This blog post covered how to make tasty no-bake pumpkin cheesecake energy bites. You learned about the essential and optional ingredients, step-by-step instructions, and useful tips for success. We also explored flavor variations and proper storage. These bites are simple and fun to make. Enjoy them as a snack or treat. They fit many diets and are great for sharing. Try customizing them to match your taste. Now, you can enjoy this delicious and healthy treat whenever you want!

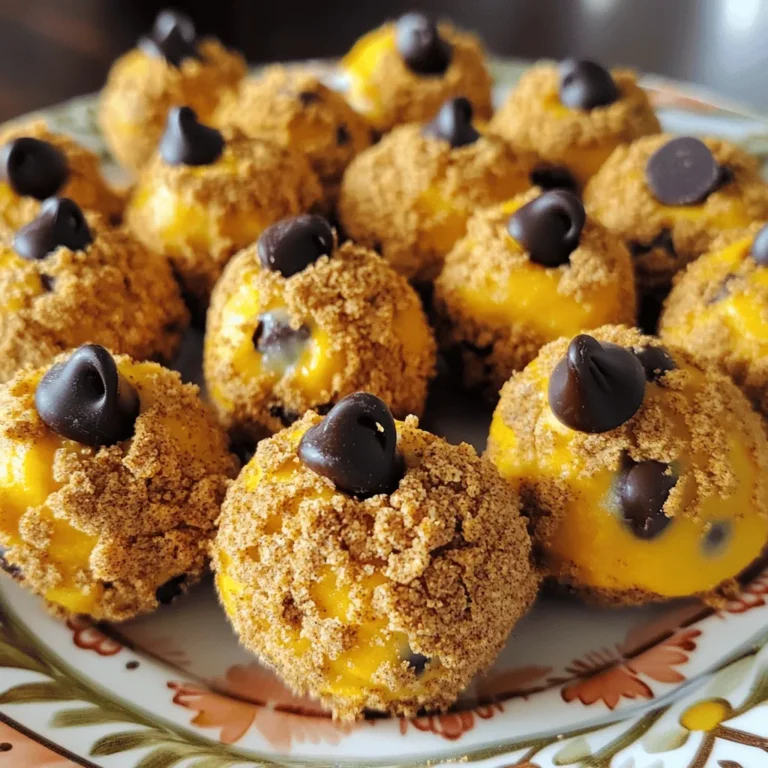
No-Bake Pumpkin Cheesecake Energy Bites Recipe

- 2 lbs beef chuck roast - 1 onion, diced - 4 cloves garlic, minced - 1 cup beef broth - 1 cup BBQ sauce (preferably smoky flavored) - 2 tablespoons brown sugar - 1 tablespoon Worcestershire sauce (non-alcoholic) - 1 teaspoon smoked paprika - 1/2 teaspoon black pepper - Salt to taste - 6 hamburger buns - Coleslaw (for topping, optional) For these Slow Cooker BBQ Beef Sandwiches, you need a few key ingredients. The beef chuck roast is the star of the show. It cooks low and slow to become tender and juicy. Diced onion and minced garlic add depth of flavor. You’ll also want seasonings and sauces to make it special. I recommend using smoky BBQ sauce for that rich taste. Brown sugar brings a hint of sweetness, while Worcestershire sauce gives a savory kick. Smoked paprika and black pepper enhance the overall flavor. Don’t forget the hamburger buns. They hold all that delicious beef inside. You can also add coleslaw on top for crunch and freshness. This simple mix of ingredients creates a meal that everyone will love. Start by seasoning the beef chuck roast. Use salt, black pepper, and smoked paprika. Make sure to cover all sides well. This step adds great flavor. Next, sear the beef on a hot skillet. Heat a splash of oil over medium-high heat. Sear each side for 4-5 minutes. Look for a nice brown color. This caramelization enhances the taste. Now, it’s time to cook! Layer the diced onion and minced garlic in the slow cooker. This base adds more flavor to the beef. Place the seared beef on top of the onion and garlic. In a bowl, mix beef broth, BBQ sauce, brown sugar, and Worcestershire sauce. Stir well before pouring it over the beef. Cover the slow cooker with a lid. Cook on low for 8 hours or high for 4 hours. The beef should be tender and shred easily. After cooking, remove the beef from the slow cooker. Use two forks to shred the beef. This is where the magic happens! Return the shredded beef to the sauce and mix well. Let it sit on warm for 15-20 minutes. This helps the beef soak up more flavor. Lightly toast the hamburger buns for a crispy touch. Serve the BBQ beef on the buns. Top with coleslaw for a crunchy finish. Enjoy this easy and tasty meal! For BBQ beef sandwiches, you want to use beef chuck roast. This cut is juicy and tender when cooked low and slow. Look for a roast with good marbling. Marbling means the fat is mixed in with the meat. This fat adds flavor and keeps the beef moist as it cooks. To make your BBQ beef even better, try adding spices. You can use cayenne pepper for heat or onion powder for depth. Balance the sweet and smoky flavors with brown sugar and smoked paprika. This mix creates a rich taste that will make your mouth water. When serving BBQ beef sandwiches, think about sides. Coleslaw adds crunch and freshness. You can also serve baked beans or potato chips for a classic touch. For a fun twist, try different types of bread. Pretzel buns or ciabatta rolls can elevate your meal. Serve the sandwiches with extra BBQ sauce on the side for dipping. {{image_2}} You can switch up your BBQ sauce for a new flavor. Try mustard-based sauces for a tangy twist. Or, use a vinegar-based sauce for a zesty kick. Add some hot sauce for heat or honey for sweetness. You can also mix in different seasonings. Adding cayenne pepper can give it a nice spice. Experiment with herbs like thyme or oregano for a fresh taste. Not a fan of beef? You can use pork or chicken instead. A pork shoulder works great for shredding. Chicken thighs are juicy and absorb flavors well too. For a vegetarian option, use jackfruit. It has a similar texture to pulled meat. You can also try mushrooms for a hearty bite. These options make BBQ sandwiches great for everyone. The bread you choose can change your sandwich game. Try using brioche buns for a sweet touch. Ciabatta rolls add a nice crunch. You can even use lettuce wraps for a low-carb option. Toppings can elevate your sandwich further. Add pickles for crunch or jalapeños for heat. Try creamy avocado or zesty coleslaw for added flavor and texture. To keep your BBQ beef fresh, store it in an airtight container. Make sure it cools down first. Place it in the fridge for up to three days. If packed well, the beef holds its flavor nicely. When reheating, use the stove or microwave. On the stove, warm it gently in a pan. Add a splash of broth to keep it moist. If using a microwave, cover it with a damp paper towel. This helps keep the beef juicy. For buns, toast them lightly in the oven. This way, they stay soft and tasty. You can freeze BBQ beef for later meals. Place it in a freezer bag and remove excess air. Label and date the bag for easy tracking. It stays good for up to three months. When ready to eat, thaw it in the fridge overnight. For quick thawing, use the microwave on defrost. This keeps the beef's flavor intact. You can add heat to your BBQ beef sandwiches easily. Here are some ideas: - Hot Sauce: Mix in a few dashes of your favorite hot sauce into the BBQ sauce. - Chili Powder: Sprinkle in some chili powder for a subtle kick. - Cayenne Pepper: A small pinch of cayenne can add a nice warmth. - Jalapeños: Slice fresh jalapeños and mix them in or use pickled ones for tang. - Spicy BBQ Sauce: Choose a BBQ sauce labeled "spicy" to amp up the flavor. These options let you tailor the heat level to your taste. Adjust the amount based on how spicy you want your sandwich. If your beef turns out tough, don't worry. Here are some tips to fix it: - Cook Longer: Sometimes, the beef needs more time. Cook on low for an extra hour or two. - Shred and Mix: After shredding, mix the beef back into the sauce. This can help it absorb moisture. - Add Liquid: Pour in a bit more beef broth or BBQ sauce. This helps to tenderize the meat. - Check the Cut: Ensure you used a chuck roast. Other cuts may not be as tender. These steps should help you achieve that melt-in-your-mouth texture you want. Yes, you can definitely make BBQ beef sandwiches ahead of time. Here’s how to do it: - Cook Ahead: Prepare the beef in the slow cooker as directed. Let it cool completely after cooking. - Store Properly: Place the shredded beef and sauce in an airtight container. It keeps well in the fridge for up to 3 days. - Freeze: For longer storage, freeze the beef in portions. It lasts up to 3 months in the freezer. - Reheat: When ready to serve, thaw in the fridge overnight. Reheat on the stove or in the microwave until hot. This makes meal prep easy and lets you enjoy these tasty sandwiches anytime! You can create great BBQ beef sandwiches by following these steps. Start with high-quality beef and seasonings. Cook the beef low and slow for the best flavor. Don't forget to experiment with sauces and toppings. Remember, leftovers are easy to store and reheat. You can even freeze them for later. Enjoy making these tasty sandwiches and impress your friends and family. Your skills in the kitchen will shine!

Slow Cooker BBQ Beef Sandwiches Delightful and Easy

To make crispy garlic Parmesan potato wedges, you will need: - 4 medium russet potatoes, washed and cut into wedges - 3 tablespoons olive oil - 4 cloves garlic, minced - 1 teaspoon onion powder - 1 teaspoon smoked paprika - 1 teaspoon dried oregano - ½ teaspoon salt - ½ teaspoon black pepper - ½ cup grated Parmesan cheese - Fresh parsley, chopped (for garnish) If you want to switch things up, here are some great alternatives: - You can use sweet potatoes instead of russet potatoes. They add a lovely sweetness. - Instead of olive oil, try avocado oil for a different flavor. - For garlic lovers, use garlic powder if you don’t have fresh garlic. - Swap Parmesan with Pecorino Romano for a sharper taste. Sometimes, you might not have everything. Here are some easy swaps: - If you lack onion powder, use fresh onion instead. Just chop it fine. - For smoked paprika, regular paprika works too, though it lacks the smoky taste. - If you want less salt, you can cut it down to a pinch. - Any fresh herb can replace parsley for garnish, like chives or basil. These simple swaps keep your potato wedges tasty and fun! Start by preheating your air fryer. Set it to 400°F (200°C) and let it warm up for about 5 minutes. This step is key to getting those crispy potato wedges. Next, grab your medium russet potatoes. Wash them well and cut them into wedges. In a large bowl, mix the cut potato wedges with 3 tablespoons of olive oil. Add 4 cloves of minced garlic, 1 teaspoon of onion powder, 1 teaspoon of smoked paprika, 1 teaspoon of dried oregano, ½ teaspoon of salt, and ½ teaspoon of black pepper. Toss everything together. Make sure each wedge is well-coated in the oil and spices. Now, it’s time to add the cheese. Toss ½ cup of grated Parmesan cheese over the garlic-coated potato wedges. Mix again to spread the cheese evenly. Place the potato wedges in a single layer in the air fryer basket. Cook them at 400°F (200°C) for 15-20 minutes. Remember to shake the basket halfway through cooking. This helps them crisp up nicely. Once they turn golden brown and crispy, they are ready to serve. Enjoy your delicious garlic Parmesan potato wedges! To make your potato wedges extra crispy, follow these steps: - Soak the potato wedges in cold water for 30 minutes. This helps remove excess starch. - Dry them well with a towel after soaking. Moisture can prevent crispiness. - Avoid overcrowding the air fryer basket. This allows hot air to circulate freely. - Flip the wedges halfway through cooking. This ensures even browning on all sides. To boost the garlic and Parmesan taste, consider these tips: - Use fresh garlic for a stronger flavor. Minced garlic adds a nice punch. - Mix in some garlic powder for an extra layer of taste. - Try adding a sprinkle of lemon zest. It brightens the flavor profile. - Experiment with different types of Parmesan. A sharp, aged cheese can add depth. Here are some mistakes to keep in mind: - Don’t skip the oil. It helps the wedges crisp up and stick to the seasonings. - Using too much salt can overpower the dish. Stick to the recommended amount. - Avoid cooking at a lower temperature. High heat is key for that perfect crunch. - Forgetting to shake the basket can lead to uneven cooking. Make that shake! {{image_2}} If you love heat, try adding cayenne pepper or red pepper flakes. You can use one teaspoon of either spice in the mix. This will give your wedges a nice kick. The garlic and Parmesan flavors will still shine through. Add fresh herbs to your mixture for a fragrant twist. Try rosemary or thyme for an earthy flavor. Chop a tablespoon of your chosen herb and mix it in with the other seasonings. This adds a fresh taste and makes your dish more aromatic. For a fun take, stuff your wedges with cheese. Before air frying, scoop a small part of the potato out. Fill it with your favorite cheese, like cheddar or mozzarella. Press the potato back together and air fry as usual. You'll get a cheesy surprise in every bite. To store leftover potato wedges, let them cool first. Place them in an airtight container. They will stay fresh in the fridge for up to three days. Make sure to separate layers with parchment paper to avoid sticking. To reheat your potato wedges, preheat your air fryer to 350°F (175°C). Place the wedges in a single layer. Heat them for about 5-7 minutes, or until they are hot and crispy again. This method keeps them crunchy and tasty. You can also use an oven if you prefer. Just spread them on a baking sheet and heat at 400°F (200°C) for 10 minutes. If you want to freeze the potato wedges, let them cool completely first. Then, spread them out on a baking sheet. Freeze them for about an hour until firm. After that, transfer them to a freezer bag. They can stay in the freezer for up to three months. When you’re ready to eat, cook them straight from frozen in the air fryer at 400°F (200°C) for about 15-20 minutes. This way, you can enjoy crispy wedges anytime! Yes, you can make these wedges in a regular oven. Preheat the oven to 425°F (220°C). Spread the potato wedges on a baking sheet lined with parchment paper. Bake for 30-35 minutes, flipping halfway through. This method will give you crispy wedges, though they may not be as quick as using an air fryer. Check the potato wedges after about 15 minutes. They should look golden brown and crispy. The best way to test is to poke one with a fork. If it feels soft inside and the outside is crispy, they are done. You can also taste one to make sure it has the right texture. These potato wedges pair well with many dishes. Try serving them with your favorite dipping sauce like ranch or ketchup. They also go great with grilled meats, burgers, or a fresh salad. For a complete meal, serve them alongside chicken tenders or steak. This article covered how to make delicious garlic Parmesan potato wedges. We talked about key ingredients, alternatives, and substitutions. I shared step-by-step directions and tips for crispiness. You now know variations and how to store leftovers. In closing, making these wedges is easy and fun. Experiment with flavors and enjoy! You can impress family and friends with your delicious creations. Happy cooking!

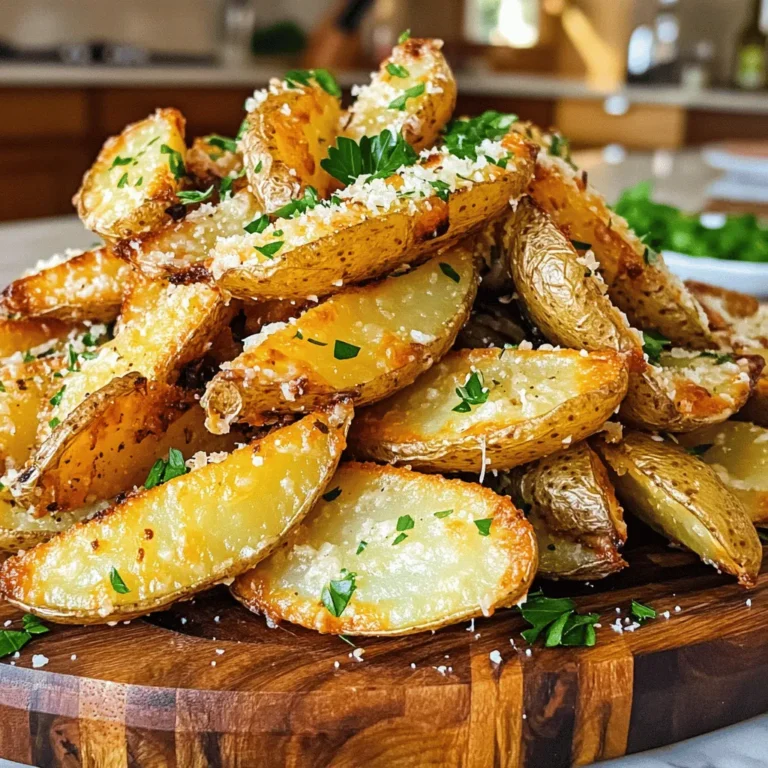
Air Fryer Crispy Garlic Parmesan Potato Wedges Delight

- 2 cups all-purpose flour - 1 teaspoon baking soda - 1/2 teaspoon baking powder - 1 teaspoon ground cinnamon - 1/2 teaspoon ground nutmeg - 1/4 teaspoon ground ginger - 1/2 teaspoon salt These dry ingredients form the base of our Pumpkin Streusel Bread. All-purpose flour gives the bread its structure. Baking soda and baking powder help it rise. The ground spices, like cinnamon, nutmeg, and ginger, add warmth and flavor. Finally, salt enhances all these tastes. - 1 cup granulated sugar - 1/2 cup brown sugar, packed - 1/2 cup vegetable oil - 2 large eggs - 1 cup canned pumpkin puree - 1 teaspoon vanilla extract The wet ingredients bring moisture and sweetness. Granulated sugar and brown sugar make the bread sweet. Vegetable oil keeps it soft and moist. Eggs bind everything together. Canned pumpkin puree gives it that rich, fall flavor. Vanilla extract adds a nice touch of warmth. - 1/2 cup all-purpose flour - 1/2 cup rolled oats - 1/3 cup brown sugar, packed - 1 teaspoon ground cinnamon - 1/4 cup cold unsalted butter, cubed The streusel topping adds a crunchy layer. All-purpose flour and oats make it hearty. Brown sugar sweetens it up, while cinnamon adds spice. Cold unsalted butter brings it all together, creating a crumbly texture. This topping is a must for a delicious finish to our bread. First, set your oven to 350°F (175°C). This helps the bread bake evenly. Next, take a 9x5 inch loaf pan. Grease it well to prevent sticking. You can use butter or cooking spray for this step. In a medium bowl, whisk together the dry ingredients. Combine 2 cups of flour, 1 teaspoon of baking soda, 1/2 teaspoon of baking powder, 1 teaspoon of ground cinnamon, 1/2 teaspoon of ground nutmeg, 1/4 teaspoon of ground ginger, and 1/2 teaspoon of salt. This mix gives the bread flavor. In a large bowl, mix the wet ingredients. Combine 1 cup of granulated sugar, 1/2 cup of brown sugar, and 1/2 cup of vegetable oil. Stir until smooth. Then, add 2 large eggs, one by one. Mix well after each egg. Finally, add 1 cup of canned pumpkin puree and 1 teaspoon of vanilla extract. Stir until everything blends well. Now, it’s time to mix the wet and dry ingredients. Gradually add the dry mix to the wet mix. Stir gently until just combined. Be careful not to overmix. Overmixing can make the bread dense and tough. For the streusel topping, mix the ingredients in a small bowl. Combine 1/2 cup of flour, 1/2 cup of rolled oats, 1/3 cup of brown sugar, and 1 teaspoon of ground cinnamon. Then, add 1/4 cup of cold unsalted butter, cubed. Use your fingers or a pastry cutter to mix until it looks crumbly. Pour half of the pumpkin batter into the greased loaf pan. Next, sprinkle half of the streusel topping over the batter. Pour the rest of the pumpkin batter on top, then add the remaining streusel topping. This layering adds flavor and texture. Place the loaf pan in the preheated oven. Bake for 60 to 70 minutes. To check if it’s ready, insert a toothpick into the center. If it comes out clean, the bread is done. Once baked, let it cool in the pan for 10 minutes. Then, transfer it to a wire rack to cool completely. To keep your Pumpkin Streusel Bread moist, measure your ingredients carefully. Too much flour or sugar can dry out the bread. I recommend using a kitchen scale for the best results. Fresh pumpkin puree is key. It adds natural moisture and flavor. You can use canned pumpkin, but make sure it is pure pumpkin, not pie filling. Get the streusel just right for a perfect crunch. Combine flour, oats, brown sugar, and cinnamon in a bowl. Add cold butter and mix until it crumbles. The right texture should look like coarse sand. If you want it sweeter, add a bit more brown sugar. This will balance the bread’s flavors nicely. When it’s time to slice, use a serrated knife for clean cuts. Present the bread on a rustic wooden board. You can dust it with powdered sugar for a festive look. Garnish with a sprinkle of cinnamon or a few pumpkin seeds. These touches make each slice more inviting and fun to eat! {{image_2}} You can easily add nuts to your pumpkin streusel bread. Chopped walnuts or pecans add a nice crunch. Just mix in 1/2 cup of your favorite nuts into the batter. You can also use chocolate chips for a sweet twist. Adding 1/2 cup of chocolate chips makes the bread even more decadent. If you need a gluten-free version, you can swap the all-purpose flour. Use almond flour or a gluten-free all-purpose blend instead. This will keep your bread delicious. You may need to adjust the baking time slightly. Start with the same time, but check for doneness a bit earlier. To make this bread vegan, you can substitute the eggs and oil. Use flax eggs by mixing 2 tablespoons of flaxseed meal with 6 tablespoons of water. Let it sit for a few minutes to thicken. For oil, try using applesauce instead. It keeps the bread moist. For sugar, use coconut sugar or maple syrup to keep it natural. Store your Pumpkin Streusel Bread at room temperature for the best taste. Use an airtight container to keep the bread fresh. If you live in a humid area, refrigeration may help. However, it can make the bread dry. Always check for moisture before sealing your container. To freeze the bread, let it cool completely first. Wrap it tightly in plastic wrap, then place it in a freezer bag. Remove as much air as possible to prevent freezer burn. For thawing, take the bread out and leave it at room temperature. It should thaw in about 2 hours. Enjoy your Pumpkin Streusel Bread within a week for peak freshness. Store it properly, and it will stay tasty. If frozen, it can last up to three months. Just remember, the sooner you enjoy it, the better the flavors will be! To make Pumpkin Streusel Bread, gather your ingredients first. You need flour, baking soda, baking powder, spices, sugar, oil, eggs, pumpkin puree, and vanilla. Mix the dry ingredients in one bowl. In another bowl, blend the sugars and oil. Add eggs, pumpkin, and vanilla. Combine both mixtures but do not overmix. Prepare the streusel topping by mixing flour, oats, sugar, and butter. Layer half the batter in a greased pan, sprinkle half of the streusel, add the rest of the batter, and top with streusel. Bake at 350°F for 60-70 minutes until a toothpick comes out clean. If you need an egg substitute, choose one of these options: - 1/4 cup unsweetened applesauce - 1/4 cup mashed banana - 1 tablespoon ground flaxseed mixed with 2.5 tablespoons water - 1/4 cup yogurt These substitutes work well in baking and help keep the bread moist. To check if your Pumpkin Streusel Bread is done, look for these signs: - A golden-brown top - A toothpick inserted in the center comes out clean - The bread springs back when lightly touched These hints confirm your bread is fully baked and ready to enjoy. Yes, you can make Pumpkin Streusel Bread ahead of time. Bake it and let it cool completely. Wrap it well in plastic wrap. Store it at room temperature for up to three days. You can also freeze it for up to three months. Just remember to thaw it in the fridge before serving. You learned how to make Pumpkin Streusel Bread from start to finish. We covered ingredients, step-by-step instructions, tips, and creative variations. I hope you feel ready to bake and impress others with this treat. Remember, using fresh ingredients and measuring accurately will lead to the best bread. Enjoy making it your own and share it with friends and family! Happy baking!

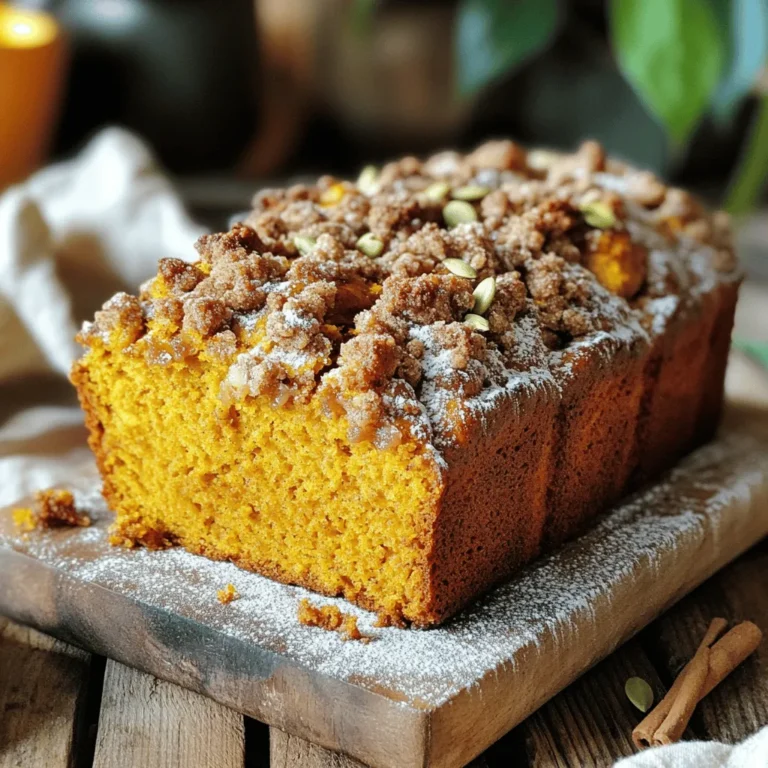
Pumpkin Streusel Bread Irresistible Fall Dessert

- 1 cup rolled oats - 2 tablespoons peanut butter - 2 tablespoons unsweetened cocoa powder - 2 tablespoons maple syrup (or honey) - 1 teaspoon vanilla extract - 2 cups almond milk (or any milk of choice) - 1 ripe banana, sliced - 1 tablespoon chia seeds - Chocolate shavings or chips for garnish - A pinch of sea salt - Rolled oats: 1 cup provides a hearty base. - Peanut butter: 2 tablespoons add creaminess and flavor. - Cocoa powder: 2 tablespoons bring rich chocolate taste. - Maple syrup: 2 tablespoons sweeten the mix. Use honey if preferred. - Vanilla extract: 1 teaspoon adds warmth and depth. - Almond milk: 2 cups make the oats creamy. You can use any milk. - Banana: 1 ripe banana, sliced, adds natural sweetness. - Chia seeds: 1 tablespoon boosts nutrition and thickens the mix. - Chocolate shavings or chips: Use for a fun garnish. - Sea salt: A pinch enhances all the flavors. - Oats: Great source of fiber. They keep you full and help digestion. - Peanut butter: Offers healthy fats and protein. It’s good for energy. - Cocoa powder: Packed with antioxidants. It can lift your mood. - Chia seeds: High in omega-3 fatty acids. They are good for your heart. - Banana: Full of potassium, which helps with muscle function. - Maple syrup: A natural sweetener, it has some minerals. This dish is not just tasty but also provides balanced nutrition. Enjoy making these peanut butter chocolate overnight oats! First, grab a mixing bowl. Add 1 cup of rolled oats. Next, sprinkle in 2 tablespoons of unsweetened cocoa powder. This gives our oats a rich chocolate flavor. Then, toss in 1 tablespoon of chia seeds. These tiny seeds add a nice texture and nutrition. Stir everything together until well mixed. Now, take another bowl. Pour in 2 cups of almond milk. You can use any milk you like. Add 2 tablespoons of peanut butter for creaminess. Next, add 2 tablespoons of maple syrup or honey for sweetness. Include 1 teaspoon of vanilla extract for a lovely aroma. Finally, add a pinch of sea salt. Whisk this mixture until it is smooth and well combined. Pour the smooth peanut butter mixture over the dry ingredients. Mix them together well. Make sure every oat is coated with the wet mixture. Now, slice 1 ripe banana and gently fold the pieces into the mix. This step adds natural sweetness and flavor. Divide the mixture into two jars or containers. Seal them tightly with lids. Place the jars in the fridge overnight. This soaking time helps the oats to soften and absorb the flavors. You can also leave them for at least 4-6 hours if you’re in a hurry. In the morning, stir the oats. If they are too thick, add a little more milk. Top with chocolate shavings or chips to make it special. Enjoy your tasty creation! To get the right texture, use the right oats. I recommend rolled oats. They soak up liquid well and give a nice chewy bite. The chia seeds also help thicken your mixture. If your oats are too thick in the morning, just add a splash of almond milk. This makes them creamy and smooth. Serve your overnight oats in clear jars. This shows off the lovely layers. You can also drizzle a bit of peanut butter on top. Add chocolate shavings or chips for that extra flair. Fresh banana slices on top also add color and taste. Keep your oats in the fridge. They last well for up to five days. Use airtight jars to keep them fresh. If you want to freeze them, portion them into containers. Just remember to thaw them in the fridge overnight before eating. {{image_2}} You can customize your peanut butter chocolate overnight oats with fun flavors. Try adding nuts like almonds or walnuts for extra crunch. You can also mix in fruits. Fresh berries or diced apples add sweetness. I love topping my oats with sliced strawberries or bananas. These fruits not only taste good but also boost nutrition. If you want to change the sweetness, consider using different sweeteners. Instead of maple syrup, try honey or agave syrup. You can also use stevia or coconut sugar for a lower-calorie option. Each sweetener brings its own flavor profile, so feel free to experiment until you find your favorite. Making the recipe fit your diet is easy. For a dairy-free option, use almond milk like I do, or try oat or coconut milk. If you need gluten-free oats, make sure to check the label. Many brands offer gluten-free rolled oats. This way, everyone can enjoy this tasty breakfast! You can keep peanut butter chocolate overnight oats in the fridge for up to five days. This makes them perfect for meal prep. After the first day, they still taste great! The oats absorb the flavors and become even better. Use airtight containers for the best storage. Glass jars work well. They let you see the layers and keep the oats fresh. If you don’t have glass jars, plastic containers are fine too. Just make sure they seal tightly. You can freeze these oats if you want to store them longer. Use freezer-safe containers or bags. Just remember, the texture can change after thawing. When you're ready to eat, move them to the fridge overnight to defrost. You can also eat them cold or warm them in the microwave. Overnight oats are packed with fiber, which helps digestion. They also contain protein from the oats and peanut butter. This mix can keep you full longer. The oats provide slow energy release, which helps keep your blood sugar steady. The chia seeds add omega-3 fatty acids, great for heart health. Plus, they are easy to customize with fruits and nuts. Yes, you can make these oats ahead of time. They are perfect for busy mornings. Just prepare them the night before and let them sit in the fridge. The oats will soak up the liquid. This makes them soft and creamy. You can store them for up to three days in the fridge. If you don’t have almond milk, try other milk types. Regular cow's milk works well. You can also use soy milk or oat milk. Each option gives a different flavor. Just pick what you like best. To make this recipe vegan, swap honey for maple syrup. Use plant-based milk instead of dairy milk. Check that your peanut butter is vegan too. Most are, but it’s good to check the label. This way, you can enjoy a tasty vegan treat! This blog covered everything you need to make perfect overnight oats. We discussed each ingredient, their measurements, and nutritional benefits. I shared simple steps for mixing, refrigerating, and achieving the best texture. You learned serving ideas and how to store them well. Explore flavor variations and dietary tweaks to suit your taste. Remember, overnight oats are easy and healthy. With a little prep, you enjoy a quick meal. Try these tips and tricks for a delicious start to your day!

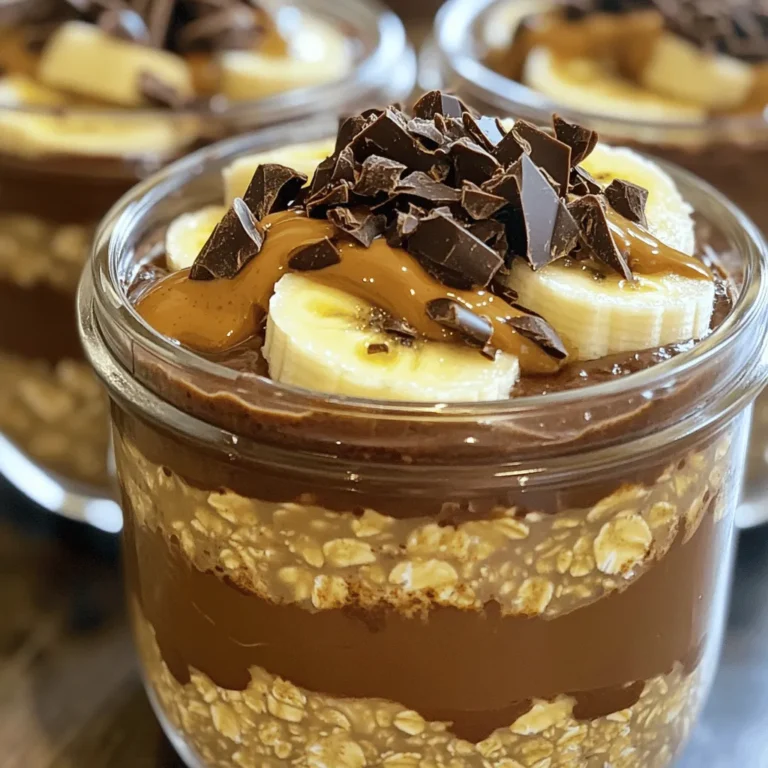
Peanut Butter Chocolate Overnight Oats Easy Recipe

- 2 tablespoons instant coffee - 2 tablespoons cocoa powder - 2 tablespoons granulated sugar - 2 tablespoons hot water - 1 cup milk (dairy or non-dairy) - Ice cubes (optional) - Cocoa powder or chocolate shavings for garnish To make Mocha Dalgona whipped coffee, you need just a few key items. First, the instant coffee gives you that rich coffee flavor. Cocoa powder adds a deep chocolate taste. Granulated sugar balances the bitterness of the coffee and cocoa. Hot water helps to dissolve the coffee and sugar quickly. Next, you will need milk. You can choose dairy or any non-dairy option you like, such as almond or oat milk. This choice makes your drink creamy. If you want a cold version, add ice cubes. For a special touch, sprinkle cocoa powder or chocolate shavings on top. These simple ingredients come together to create a bold and delicious drink that is sure to impress. With just a few minutes of prep, you can whip up this sweet, frothy delight at home. {{ingredient_image_1}} - Combine ingredients In a medium bowl, mix 2 tablespoons of instant coffee, cocoa powder, granulated sugar, and hot water. Use a spoon to stir until everything is well blended. - Whipping process Now, take a hand mixer or a whisk. Whip the mixture on high speed for about 2 to 5 minutes. You want it to become light and fluffy. Look for stiff peaks to form. This step is key for that perfect texture. - Assembling the drink Grab your favorite glass or mug. Pour in 1 cup of milk, either hot or cold. If you want a cold drink, add ice cubes! Spoon the whipped mocha mixture over the milk. Make sure it sits on top to create a beautiful layered look. - Garnishing techniques For a finishing touch, sprinkle cocoa powder or add chocolate shavings on top. This step adds flavor and makes your drink look fancy. Enjoy it as it is, or stir gently for a creamy mix. - Tools for the best results: Use a hand mixer or a whisk. A hand mixer saves time and energy. If you whisk by hand, it takes longer but can be fun. - Achieving the perfect texture: Whip until you see stiff peaks. This usually takes 2 to 5 minutes. The mixture should look light and fluffy. - Avoid common mistakes: Don’t rush the whipping. If the mixture is too thin, it won't hold its shape. Make sure to measure your ingredients carefully. - Sweetness adjustments: You can change the sugar amount. For less sweetness, use only one tablespoon. For more, add a bit more sugar. - Alternative milk options: Use almond, oat, or soy milk. Each milk gives a different taste. Try them to find your favorite. - Additional toppings: Garnish with cocoa powder or chocolate shavings. You can also add whipped cream for extra richness. Pro Tips Use Cold Water for Whipped Coffee: If you prefer a colder drink, use cold water instead of hot water to whip the coffee and cocoa mixture. This will help maintain the icy temperature of your beverage. Experiment with Milk Alternatives: Feel free to try different types of milk, such as almond, oat, or coconut milk, to find your favorite flavor profile that complements the mocha taste. Adjust Sweetness to Taste: The sweetness of the whipped coffee can be adjusted according to your personal preference. Start with the recommended sugar and add more if you like it sweeter. Chill Your Glass: For an extra refreshing experience, chill your glass or mug in the freezer for a few minutes before pouring in the milk and adding the whipped coffee mixture. {{image_2}} Mocha Dalgona whipped coffee is a fun twist on the classic Dalgona. The main difference is cocoa powder. This gives it a rich, chocolatey taste. You can also play with spices. Try adding a pinch of cinnamon or nutmeg for warmth. They blend well with the coffee and cocoa. If you want a sweeter drink, consider using maple syrup or honey. These alternative sweeteners can add a unique flavor. You can enjoy Mocha Dalgona whipped coffee in many ways. For a hot drink, heat the milk before adding the whipped coffee. This makes a cozy treat. If you prefer something cold, add ice cubes to your milk. The whipped coffee floats beautifully on top. You can get creative with your glassware too! Use clear glasses to show off the layers. Or try a fun mug for a personal touch. To keep your whipped coffee fresh, store it in an airtight container. This helps maintain its fluffy texture. Place it in the fridge for up to 3 days. The whipped coffee mixture may lose some volume over time, so it’s best to use it soon. For the milk portion, store it separately in a clean container. If you use dairy milk, it lasts about a week. Non-dairy options like almond or oat milk can last longer, usually about 7-10 days. Always check for freshness before using. When you’re ready to enjoy your drink again, heat the milk gently. Use a saucepan over low heat for best results. Stir often to prevent any scorching. You can also microwave the milk in short bursts. Heat it for about 30 seconds, then stir and check the warmth. To revive the whipped coffee, give it a good stir. If it seems too thick, add a splash of hot water. This will help bring back its light and fluffy texture. Enjoy your drink as if it was just made! Mocha Dalgona Whipped Coffee is a rich and creamy drink. It combines whipped coffee with cocoa for a chocolate twist. You start with instant coffee, cocoa powder, and sugar. When you whip these together, they become light and fluffy. Then, you spoon this mixture over milk. It creates a beautiful layered look. This drink is sweet, bold, and perfect for coffee lovers. Yes, you can easily make this drink vegan. Just swap the regular milk for a non-dairy option. Almond milk, oat milk, or soy milk work great. These milks will still give you a tasty drink. The other ingredients are already vegan-friendly. Keep this in mind for a delicious vegan treat. Whipped coffee can last about 1 to 2 days in the fridge. Store it in an airtight container to keep it fresh. However, the whipped texture may change over time. It might not be as fluffy after a day. If you want to enjoy it later, try to whip it fresh for the best taste. You can now make delicious mocha Dalgona whipped coffee with simple steps and key ingredients. We covered what you need and how to prepare it. I shared tips for perfect texture and flavor enhancements. Remember, you can customize this drink with spices or alternative sweeteners. Store leftovers properly, and enjoy them later. With the right tricks, you’ll create amazing drinks every time. Try this recipe, and let your coffee shine!

Mocha Dalgona Whipped Coffee Bold and Delicious Drink

- 1 ready-made flatbread or pizza dough - 4 oz goat cheese, softened - 1 cup fresh blackberries - 2 tablespoons fresh thyme leaves - 2 tablespoons honey - 1 tablespoon olive oil - Salt and pepper to taste This flatbread shines with its simple yet rich flavors. The base, either flatbread or pizza dough, provides a nice crunch. Goat cheese adds a creamy texture that melts beautifully in the oven. Fresh blackberries bring a burst of sweet-tart flavor. The thyme leaves add an earthy touch that complements both the cheese and the berries. Honey is the secret ingredient that ties it all together, adding a sweet drizzle that makes each bite special. A touch of olive oil helps blend the cheese and herbs smoothly. Don’t forget salt and pepper to enhance all the flavors. - ¼ cup arugula for garnish - Extra thyme for garnish If you want to elevate your flatbread, consider adding arugula. Its peppery taste balances the sweetness of the blackberries. Sprinkle a little extra thyme on top for a fresh finish. This adds color and flavor, making your dish look as good as it tastes. Each ingredient plays a role in making this flatbread a delightful treat. They work together to create a balanced dish that is sure to impress. 1. Preheat your oven to 425°F (220°C). This heat makes the flatbread crisp and perfect. 2. Prepare your flatbread or pizza dough. If you use pizza dough, roll it out to your desired thickness. 3. Line a baking sheet with parchment paper. This helps the flatbread not stick and makes for easy cleanup. 1. In a small bowl, combine goat cheese, olive oil, thyme, salt, and pepper. 2. Mix until smooth. This creates a rich and creamy spread for your flatbread. 1. Spread the goat cheese mixture evenly on the flatbread. Leave a small border around the edges. 2. Scatter the fresh blackberries over the cheese layer. Press them lightly into the cheese for better flavor. 3. Drizzle honey over the top. This adds a sweet touch that contrasts with the cheese. 1. Bake in the preheated oven for about 12-15 minutes. Keep an eye on it as it cooks. 2. Look for golden edges. The cheese should be softened and the flatbread crispy. 3. Remove from the oven and let it cool for a minute. This helps the flavors settle before slicing. To get crispy edges, bake your flatbread at 425°F (220°C). This high heat helps it crisp up quickly. Keep an eye on it during baking. You want a golden brown edge that is not burnt. For the ideal baking time, aim for 12-15 minutes. Check it around the 10-minute mark. The cheese should be soft, and the edges should look perfect. Serve your flatbread on a wooden board or a slate platter. This rustic look makes it pop. Add a few extra blackberries on top for color. Drizzle some honey over the flatbread for shine and extra sweetness. For garnish, use fresh thyme leaves. This adds a nice touch. If you like, toss some arugula on the side. It adds a lovely green contrast. {{image_2}} You can play with different cheeses on your flatbread. If goat cheese is not your favorite, try ricotta or feta. These cheeses add creaminess and flavor. Each choice makes the dish unique. Fruits can also change the flatbread's taste. If you want something different, use figs or sliced pears. Both fruits pair well with thyme and honey. They add a sweet twist to your meal. For gluten-free diets, use gluten-free flatbread or pizza crust. You can find these at most stores. They work just as well and taste great. If you follow a vegan diet, there are easy swaps for the cheese and honey. Use vegan cream cheese instead of goat cheese. Maple syrup can replace honey for sweetness. This keeps the dish tasty and kind to all diets. To keep your flatbread fresh, place it in an airtight container. This helps keep moisture in and prevents it from drying out. If you do not have a container, wrap the flatbread tightly in plastic wrap. You can also use aluminum foil. Store it in the fridge for up to three days. After this time, the flatbread may lose its taste and texture. When it’s time to enjoy leftovers, you want to keep that great texture. The best way is to use an oven. Preheat your oven to 350°F (175°C). Place the flatbread on a baking sheet. Heat it for about 10 minutes. This will warm it up and make the edges crispy again. You can also use a toaster oven for this. If you’re in a hurry, a microwave works too. Just heat it for about 30 seconds, but this might make it a bit softer. Can I make this flatbread ahead of time? Yes, you can prepare the flatbread ahead. You can make the goat cheese mixture and spread it on the flatbread. Just don’t add the blackberries or honey until you are ready to bake. Store the flatbread in the fridge for up to a day. When ready, add the blackberries and honey, then bake it for a fresh taste. What are the best sides to serve with blackberry thyme goat cheese flatbread? This flatbread pairs well with fresh salads. A simple arugula salad works great. You can also serve it with a light soup, like tomato or butternut squash. The flavors blend well and balance each other out. How can I substitute fresh thyme? If you don’t have fresh thyme, you can use dried thyme. Use one-third of the amount since dried herbs are stronger. You can also try other herbs like rosemary or basil for different flavors. Can I use frozen blackberries for this recipe? Yes, you can use frozen blackberries. Just make sure to thaw and drain them before using. This helps keep the flatbread from getting too soggy. This flatbread recipe is simple and tasty. I shared key ingredients, like goat cheese and fresh blackberries, and how to prepare, bake, and serve your dish. You can customize it with different toppings or use vegan and gluten-free options. Don’t forget to store leftovers properly and enjoy them later. This dish is great for any occasion. I hope you give it a try and impress your friends and family with your culinary skills. Enjoy creating your own unique flatbread!

Blackberry Thyme Goat Cheese Flatbread Delight

To make the Raspberry Lemonade Icebox Cake, gather these simple ingredients: - 1 cup fresh raspberries (plus extra for garnish) - 1 cup lemon curd - 1 cup heavy whipping cream - 1/3 cup powdered sugar - 1 teaspoon vanilla extract - 12-15 lemon-flavored graham crackers - Zest of 1 lemon Each ingredient plays a key role. The fresh raspberries add a sweet and tangy burst. Lemon curd brings a bright, zesty flavor. Heavy whipping cream gives the cake a rich and creamy texture. Powdered sugar sweetens the mixture without adding graininess. Vanilla extract enhances the overall taste. Lemon-flavored graham crackers provide a crunchy base. Finally, lemon zest adds a refreshing finish. With these ingredients, you can create a delightful dessert that cools you down on hot summer days! To make this Raspberry Lemonade Icebox Cake, start by whipping the heavy cream. In a medium bowl, combine 1 cup of heavy whipping cream, 1/3 cup of powdered sugar, and 1 teaspoon of vanilla extract. Use a mixer on high speed until stiff peaks form. This step is key for a light texture. Next, gently fold in the lemon curd and zest. You need 1 cup of lemon curd and the zest of 1 lemon. Be careful here; you want to keep that airy texture from the whipped cream. Now, it's time to layer the cake in your dish. Start by spreading a thin layer of the lemon curd mixture on the bottom of a rectangular or square dish. This helps the graham crackers stay in place. Then, arrange 12-15 lemon-flavored graham crackers over the mixture. You might need to break a few to fit perfectly. Spread half of the remaining lemon curd mixture over the graham crackers. Follow this with half of the fresh raspberries, which you should have washed and set aside. Repeat the layering process: add another layer of graham crackers, the rest of the lemon curd mixture, and finish with the remaining raspberries on top. Cover the dish with plastic wrap and place it in the fridge. You need to chill it for at least 4 hours, but letting it sit overnight is best. This time allows the flavors to meld together. The cake will set and become easier to slice. The longer it chills, the better the taste. The tartness of the lemon and the sweetness of the raspberries combine beautifully. When ready to serve, remove the dish from the fridge, garnish with extra raspberries, and sprinkle some lemon zest on top for a bright touch. Enjoy! To get stiff peaks when whipping cream, start with cold cream. Use a chilled bowl too. Whip the cream until it holds its shape. Avoid overwhipping, or it can turn grainy. When folding in the lemon curd, use a gentle motion. Start from the bottom of the bowl and lift the mixture. This keeps the cream light and airy. Be patient and fold until just combined. Using homemade lemon curd gives a fresh taste. It allows you to control the sweetness and tartness. Store-bought lemon curd can save time but may lack depth. For variety, try using different fruits. Strawberries or blueberries work well too. They add color and flavor, making your cake unique. Don't be afraid to mix it up! {{image_2}} You can switch the raspberries for strawberries or blueberries. Both fruits add a sweet twist. Strawberries give a rich, red color and a lovely taste. Blueberries bring a nice pop of flavor and look great. You can mix and match these fruits for a fun look. Just remember to adjust the amounts to keep the layers even. Try different flavored graham crackers for new tastes. Honey or cinnamon graham crackers can add depth. They pair well with the lemony filling. You can also play with citrus zests. Use lime or orange zest for a unique flavor. Each option changes the cake's vibe. It’s fun to get creative and find your favorite mix! To store leftovers, cover the cake with plastic wrap. This keeps it fresh and moist. Place it in the fridge right away. The cake stays fresh for about 3-4 days. The flavors will deepen as it sits, making each bite even better. You can freeze the cake for later use. Cut it into portions and wrap each piece tightly in plastic wrap. Then, place the wrapped pieces in a freezer bag. This helps prevent freezer burn. The cake can be stored in the freezer for up to 2 months. To thaw, move a piece to the fridge. Let it sit overnight. If you're in a hurry, you can leave it at room temperature for a few hours. Enjoy the cake cold or slightly chilled for a refreshing treat. Yes, you can make this cake ahead of time. I recommend making it the day before you want to serve it. This allows the flavors to mix well. The longer it chills, the better it tastes. If you don't have graham crackers, you can use vanilla wafers or shortbread cookies. Both options add a nice crunch. They also bring a sweet flavor that pairs well with the lemon and raspberries. You can store the cake in the fridge for up to three days. Make sure to cover it with plastic wrap. This helps keep the cake fresh and moist. Yes, you can use whipped topping as a substitute. However, the texture will be different. Heavy cream gives a richer flavor and a creamier texture. If you want a lighter cake, whipped topping works fine. You now know how to make a Raspberry Lemonade Icebox Cake. We covered the ingredients, preparation steps, and the right tips for success. Remember, thick peaks in your whipped cream create the best texture. Feel free to swap raspberries for other fruits or change up flavors with different graham crackers. Store any leftovers properly, and you can even freeze it for later. Enjoy your refreshing dessert, and get creative with it!

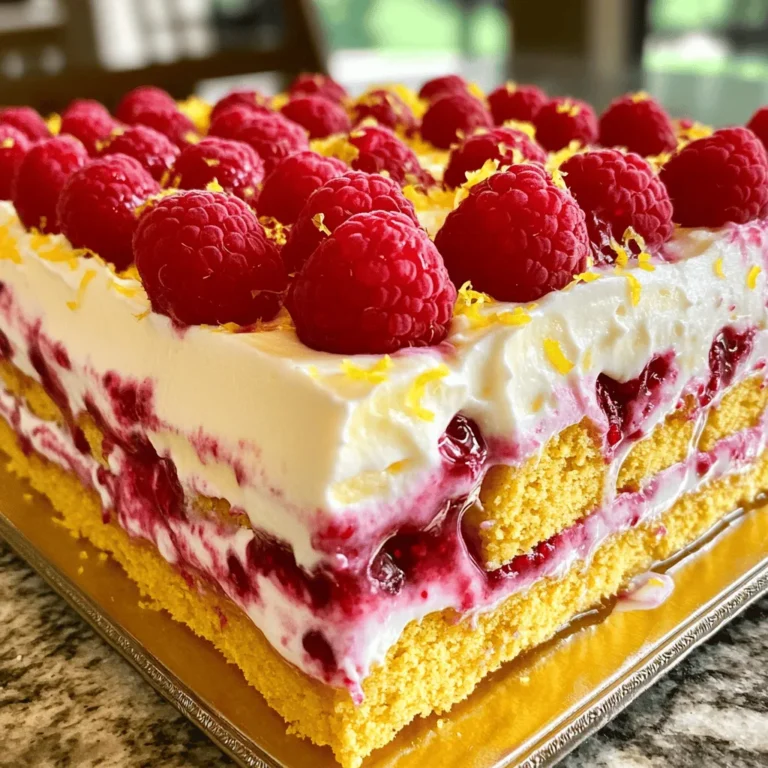
Raspberry Lemonade Icebox Cake Perfect for Summer

- 1 lb boneless, skinless chicken breasts - 1 can (15 oz) white beans, drained and rinsed - 1 cup chicken broth - 1 medium onion, chopped - 2 cloves garlic, minced - 1 teaspoon ground cumin - 1 teaspoon chili powder - 1 teaspoon oregano - 1 cup heavy cream - 1 cup corn (fresh, frozen, or canned) - Fresh cilantro, chopped (for garnish) - Lime wedges (for serving) I love these ingredients for creamy white chicken chili. Each one adds a great taste. The chicken breasts give the chili its heartiness. They soak up the flavors as they cook. The white beans add creaminess and protein. A can of chicken broth ties everything together. Onions and garlic are my favorite aromatics. They bring warmth and depth to the dish. I add cumin, chili powder, and oregano for spice. These seasonings give the chili a warm kick, perfect for chilly days. Heavy cream makes the chili rich and smooth. I use corn for a touch of sweetness. Fresh cilantro adds brightness when served. A squeeze of lime juice at the end brings the dish to life. You will love how these ingredients blend into a delightful meal! - Sautéing onions and garlic Start by heating two tablespoons of olive oil in a skillet over medium heat. Add one chopped onion and two minced garlic cloves. Cook for about 3-4 minutes. You want them soft and fragrant. This step builds a strong flavor base for your chili. - Layering ingredients in the crockpot In your crockpot, add the sautéed onion and garlic. Next, layer in 1 pound of boneless, skinless chicken breasts. Add one can of drained white beans and one can of diced green chilies. Pour in 1 cup of chicken broth and 1 cup of corn. Then, sprinkle in 1 teaspoon of ground cumin, 1 teaspoon of chili powder, and 1 teaspoon of oregano. Add salt and pepper to taste. Stir to mix all the ingredients well. Make sure the chicken is submerged in the broth. - Covering and setting the crockpot Place the lid on your crockpot. Set it to low for 6-7 hours or high for 3-4 hours. The goal is to cook until the chicken is tender and cooked through. This slow cooking lets all the flavors meld nicely. - Shredding the chicken Once the cooking time is up, carefully remove the chicken breasts. Use two forks to shred the chicken. It's easy to do when the chicken is tender. After shredding, return the chicken to the crockpot and stir it back into the chili. - Adding cream and adjusting seasoning Next, stir in 1 cup of heavy cream. Let it cook on low for an additional 15-20 minutes. This step makes the chili creamy and rich. Taste the chili and adjust the seasoning if needed. - Serving suggestions Serve your creamy white chicken chili hot. Top each bowl with chopped fresh cilantro and a squeeze of lime juice. This adds a fresh kick. Enjoy this comforting meal with friends or family. To make your creamy white chicken chili even better, consider adding spices like smoked paprika or cayenne. A small pinch of these can boost the depth of flavor. You can also swap chicken for turkey or even add shrimp. Each option gives a different taste and texture. Sautéing the onion and garlic first is key. This step builds a strong base flavor. It only takes a few minutes, but it makes a big difference. When using a crockpot, make sure to layer the ingredients well. This ensures even cooking and rich flavor throughout the dish. Serve your chili with toppings like cheese, avocado, or tortilla strips for extra crunch. A squeeze of lime adds brightness. If you have leftovers, try making quesadillas or stuffed peppers. They are tasty and fun ways to enjoy your meal again. {{image_2}} You can make great gluten-free options by using gluten-free broth and spices. Most canned beans are gluten-free, so they work well too. For dairy-free substitutions, try coconut cream instead of heavy cream. This swap keeps the chili rich and creamy without dairy. If you want to try different flavors, you can use different beans. Great choices include black beans or kidney beans. For proteins, shredded turkey or tofu can work well. Add spices like smoked paprika for a unique twist. Consider adding diced bell peppers or zucchini for extra veggies. To adjust the recipe for larger servings, simply double the ingredients. This chili works well for gatherings. For smaller servings, cut the ingredients in half. You can store leftovers in the fridge for about three days. This makes meal prepping easy. Store leftover creamy white chicken chili in an airtight container. Make sure it cools to room temperature before sealing. This helps keep it fresh. You can keep it in the fridge for up to 3-4 days. If you plan to eat it later, label the container with the date. To freeze creamy white chicken chili, let it cool completely. Then, pour it into freezer-safe bags or containers. Squeeze out excess air to prevent freezer burn. It can stay frozen for up to 3 months. When you want to eat it, move the chili to the fridge overnight to thaw. You can also defrost it in the microwave if needed. Reheat your chili on the stovetop over medium heat. This way, it warms evenly and keeps its flavor. Stir it often to prevent sticking. You can also use the microwave. Heat it in short bursts, stirring in between. This will help warm it up without drying it out. Cooking white chicken chili in a crockpot takes time but is worth it. If you cook on low, it takes about 6 to 7 hours. Cooking on high speeds things up to about 3 to 4 hours. The key is to ensure the chicken is fully cooked and tender when you check it. Yes, you can use frozen chicken breasts in this recipe. Just place them in the crockpot without thawing. Cook on high for about 4 to 5 hours or low for 7 to 8 hours. Make sure to check that the chicken reaches a safe temperature of 165°F before serving. To add extra flavor to your chili, consider these ideas: - Top with fresh diced avocado for creaminess. - Sprinkle shredded cheese for a rich finish. - Add diced jalapeños for a spicy kick. - Serve with crispy tortilla strips for crunch. - Squeeze lime juice over the top to brighten flavors. These additions can make your creamy white chicken chili even more delicious! This blog post covered how to make a creamy white chicken chili in a crockpot. We discussed the key ingredients, step-by-step instructions, tips for flavor, and variations for different diets. You can adjust the recipe to suit your needs, whether you seek gluten-free or dairy-free options. Remember, making this dish is easy, and it can be a fun family meal. Use these tips to create a delicious, warming chili that everyone will love. Now, enjoy cooking and make it your own!

Creamy White Chicken Chili Crockpot Delightful Meal

PREV 1 … 38 39 40 … 86 NEXT
spicy fork kitchen

explore

DessertsDinnerAppetizersDrinks

Our Policies

  • Cookie Policy
  • Copyright Policy
  • Disclaimer
  • GDPR Policy
  • Terms Of Use
Back to Top
  • About
  • Contact Us
  • Privacy Policy
© 2026 spicy fork kitchen