FREE DINNER EBOOK! Get your copy!
  • Cookie Policy
  • GDPR Policy
  • Disclaimer
  • Terms Of Use
  • Visit my other site: Fun Cookie Recipes
spicy fork kitchen
  • Home
  • Dinner
  • Desserts
  • Drinks
  • Appetizers
  • Contact
  • About
  • Privacy Policy
  • Home
  • Dinner
  • Desserts
  • Drinks
  • Appetizers
  • Contact
  • About
  • Privacy Policy
  • Cookie Policy
  • GDPR Policy
  • Disclaimer
  • Terms Of Use
Visit my other site: Fun Cookie Recipes

HOME / CATEGORIES /

Latest

To make a delicious slow cooker pumpkin curry lentil stew, gather these key ingredients: - 1 cup dried green or brown lentils, rinsed - 1 can (15 oz) pumpkin puree (not pie filling) - 1 can (14 oz) coconut milk - 1 medium onion, diced - 2 garlic cloves, minced - 1 tablespoon fresh ginger, grated - 1 red bell pepper, chopped - 2 carrots, sliced - 2 cups vegetable broth - 2 tablespoons red curry paste (adjust to taste) - 1 tablespoon soy sauce (or tamari for gluten-free) - 1 teaspoon turmeric powder - 1 teaspoon cumin - 1 teaspoon cinnamon - Salt and pepper to taste These ingredients work together to create a rich, hearty stew that warms your soul. Lentils provide protein and fiber. Pumpkin puree adds creaminess and flavor. Coconut milk brings a touch of sweetness and richness. You can enhance the stew with some optional garnishes: - Fresh cilantro for garnish - Lime wedges for zest - Chopped green onions These garnishes bring freshness and a pop of color to your bowl. They also balance the flavors of the curry. If you do not have some ingredients, here are smart substitutions: - Use yellow lentils instead of green or brown. - Swap coconut milk for almond milk or cashew cream for a lighter touch. - Replace red bell pepper with yellow or green bell pepper. - For a spicy kick, use jalapeño or chili flakes instead of red curry paste. These substitutions can keep the stew tasty while fitting your pantry needs. Don't hesitate to experiment with what you have! Start by washing your hands. Clean vegetables are key. Dice the onion into small pieces. Chop the red bell pepper into bite-sized chunks. Slice the carrots into rounds. Mince the garlic and grate the ginger. All these flavors will blend well in the stew. Now, take your slow cooker. Add the rinsed lentils first. Then, pour in the pumpkin puree and coconut milk. Next, add the vegetable broth. Toss in the diced onion, minced garlic, grated ginger, chopped bell pepper, and sliced carrots. Mix everything together gently. Stir in the red curry paste. Add the soy sauce, turmeric, cumin, and cinnamon. Mix well to coat everything in those rich flavors. Season with salt and pepper, but remember, it's easier to add more later. Cover the slow cooker. Set it on low for 6 to 8 hours. If you're short on time, choose high for 3 to 4 hours. The lentils will become soft and tasty. Once cooking is done, stir the stew again. Taste and adjust the seasonings if needed. For a creamy touch, blend part of the stew with an immersion blender. Serve hot, and enjoy every bite! To get the best flavor, use fresh ingredients. Fresh garlic and ginger add zest. Always taste the stew before serving. You can adjust the seasonings to your liking. If you want a deeper flavor, add more red curry paste. This gives it a hearty kick. Let the stew cook low and slow. This helps the flavors blend well together. You can easily change the spice levels. If you like heat, add more red curry paste. Start with one tablespoon and taste. If it’s not spicy enough, add more little by little. For a milder stew, use less curry paste or skip it. Adding a bit of sugar helps balance the heat too. To make the stew creamier, blend part of it. Use an immersion blender for a smooth texture. You can also add more coconut milk. This makes it rich and velvety. If you want extra creaminess, stir in a dollop of yogurt before serving. This gives it a nice twist. {{image_2}} You can easily add more veggies to the stew. Try using sweet potatoes, spinach, or kale. These veggies boost the nutrition and add color. Just chop them up and toss them in the slow cooker with the other ingredients. They will soften and blend well with the stew. While I often use green or brown lentils, you can switch to red lentils. They cook faster and add a nice texture. Just remember, red lentils will break down more and make the stew thicker. If you prefer a chunkier stew, stick with green or brown lentils. This recipe is already vegan if you use soy sauce or tamari. For a gluten-free option, always check your curry paste and soy sauce labels. You can also replace coconut milk with another non-dairy milk if you want. Just make sure it is thick enough to give that creamy taste. Once your Slow Cooker Pumpkin Curry Lentil Stew cools, transfer it to a container. Make sure to seal it well. Store it in your fridge for up to five days. Always let the stew cool before you refrigerate it. This helps keep it fresh. You can freeze this stew for later use. First, let it cool completely. Then, pour it into a freezer-safe container. Leave some space at the top for expansion. Seal the container tightly. The stew can last in the freezer for up to three months. When you’re ready to enjoy it, thaw it in the fridge overnight. When you want to eat the stew again, you can reheat it easily. For the best results, use the stove. Pour the stew into a pot over medium heat. Stir it often until it warms up. You can also reheat it in the microwave. Just put it in a microwave-safe bowl and heat for a few minutes. Stir halfway through to warm it evenly. Add a splash of water or broth if it seems too thick. Enjoy your hearty stew! You can serve this stew with rice or quinoa for extra texture. Warm naan bread pairs well too. A simple side salad adds freshness and crunch. You might enjoy a dollop of yogurt on top. This enhances the flavor and adds creaminess. Store leftovers in an airtight container. They can last in the fridge for up to five days. If you want to keep it longer, freeze it. Frozen stew can last for three months. Just remember to thaw it overnight before reheating. Yes, you can make this stew on the stove. Start by sautéing the onion, garlic, and ginger in a pot. Then add the vegetables and lentils. Pour in the coconut milk and vegetable broth. Let it simmer for about 30 to 40 minutes. Stir occasionally until the lentils are tender. This blog post covered all you need for a tasty stew. We explored key ingredients, from main items to fun garnishes. You learned step-by-step instructions for cooking in the slow cooker. Tips and tricks helped enhance the flavor and texture. We also looked at different variations to match your taste. Proper storage info ensures your stew lasts. With these insights, you can make a delicious stew every time. Now, go try this recipe and enjoy!

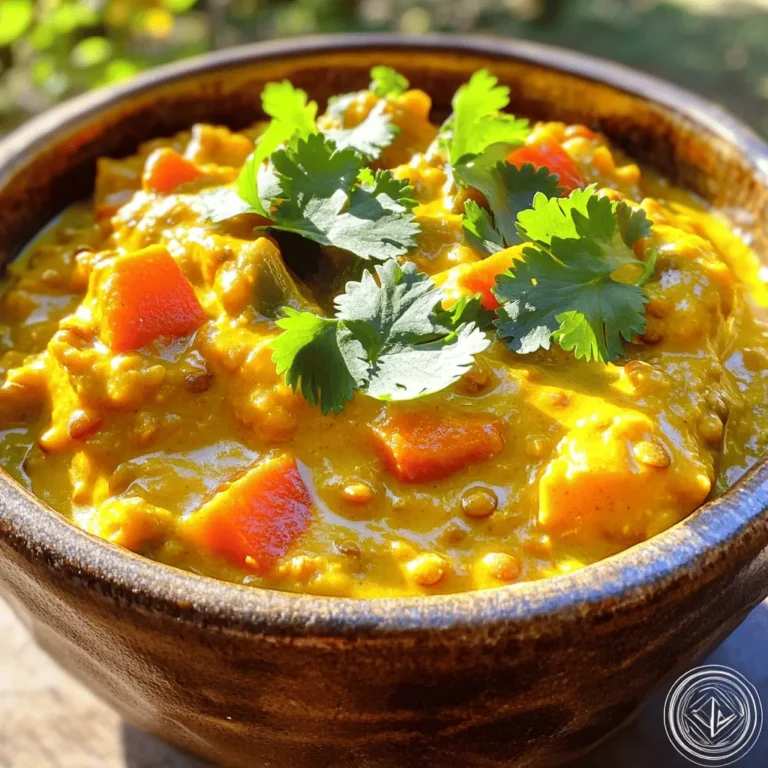
Slow Cooker Pumpkin Curry Lentil Stew Hearty Recipe

To create a perfect Pumpkin Spice Latte Tiramisu, we need some key ingredients. Here’s what you will need: - 1 cup brewed strong coffee (cooled to room temperature) - 1 cup pumpkin puree - 1 cup mascarpone cheese - 1/2 cup heavy cream - 1/2 cup sugar - 1 teaspoon vanilla extract - 1 teaspoon pumpkin pie spice - 12 ladyfinger cookies - Cocoa powder (for dusting) - Extra pumpkin pie spice (for garnish) These ingredients work together to create a rich and creamy dessert that captures fall's cozy flavors. You can add a little flair to your tiramisu with some garnishes. Here are some options: - Whipped cream dollops - Chocolate shavings - Crushed nuts like pecans or walnuts - Caramel drizzle These toppings can enhance the look and taste of your dessert. Feel free to mix and match! If you can't find certain ingredients, don’t worry! Here are some substitutions you can make: - Use instant coffee if you are short on brewed coffee. - Swap mascarpone cheese for cream cheese if needed. - Almond milk can replace heavy cream for a lighter option. - Use gluten-free ladyfingers for a gluten-free version. These swaps ensure you can still enjoy this tasty treat, no matter your pantry stock! To start, grab a medium bowl. Combine 1 cup of pumpkin puree, 1 cup of mascarpone cheese, and 1/2 cup of sugar. Add 1 teaspoon of vanilla extract and 1 teaspoon of pumpkin pie spice. Mix it well until the mixture is smooth and creamy, with no lumps. This filling is the heart of your tiramisu, so take your time to get it right. Next, take another bowl and pour in 1 cup of brewed strong coffee. Let it cool to room temperature. Dip each ladyfinger briefly into the coffee. Don’t soak them too long; they should be moist but not soggy. Too much coffee will make them fall apart. Now, it’s time to build your layers. In a rectangular or square dish, place a layer of soaked ladyfingers on the bottom. Spread half of your pumpkin mascarpone mixture over the ladyfingers. Then, add another layer of dipped ladyfingers. Finally, spread the rest of the pumpkin mascarpone mixture on top. Cover the dish with plastic wrap and refrigerate it for at least 4 hours. For best results, let it chill overnight. This helps all the flavors blend together. Before serving, dust the top with cocoa powder and a sprinkle of pumpkin pie spice for that festive touch. To make great whipped cream, start with cold heavy cream. Use a chilled bowl and whisk. Whip until stiff peaks form, but don’t overwhip. If you overwhip, it can turn to butter. This whipped cream adds lightness to the pumpkin mixture. Fold it gently into the pumpkin blend. This keeps the cream airy and fluffy. Layering is key to a good tiramisu. First, dip ladyfingers in cooled coffee. Dip them quickly, so they stay firm. A soggy ladyfinger ruins the texture. Place one layer of dipped ladyfingers in your dish. Spread half of the pumpkin mixture over them. Repeat this with another layer of ladyfingers. Finish with the remaining pumpkin mixture on top. Remember, the more layers, the better the flavor! To keep your tiramisu fresh, cover it well. Use plastic wrap to seal the dish. Store it in the fridge for up to three days. If you want to make it ahead, do so a day in advance. This allows the flavors to meld together. Avoid freezing this dessert, as it can change the texture. Enjoy it chilled for the best taste! {{image_2}} You can easily make a vegan version of this dessert. Substitute the mascarpone cheese with a vegan cream cheese or coconut cream. Use maple syrup instead of sugar. For the ladyfingers, choose a vegan brand or make your own. This way, you keep the flavor while enjoying a plant-based treat. If you need a gluten-free option, you can use gluten-free ladyfingers. Many brands offer gluten-free cookies that work well. You can also bake your own using gluten-free flour. This keeps your tiramisu tasty and safe for those with gluten allergies. To enhance the flavor, consider adding nutmeg or chocolate. A sprinkle of nutmeg gives a warm, spicy taste. For chocolate lovers, add cocoa powder to the pumpkin mixture or use chocolate ladyfingers. You can even drizzle melted chocolate on top for a sweet touch. To keep your pumpkin spice latte tiramisu fresh, cover it tightly with plastic wrap. Store it in the fridge. It will stay good for up to three days. The flavors will deepen over time, making it even tastier! If you want to store it for longer, you can freeze it. First, cut the tiramisu into portions. Wrap each piece in plastic wrap and then foil. This step helps protect the dessert from freezer burn. It can last up to one month in the freezer. To enjoy, thaw it in the fridge overnight before serving. Use an airtight container for storing tiramisu. If you don’t have one, a glass dish works well too. Just ensure it has a lid. Avoid using metal containers, as they can affect the flavor. Always keep it chilled to maintain the rich and creamy texture. Yes, you can make this tiramisu ahead of time. It tastes better if it sits in the fridge for a few hours or overnight. The flavors blend together nicely as it chills. This makes it a great dessert for gatherings or special occasions. Just be sure to cover it well with plastic wrap to keep it fresh. To serve tiramisu, cut it into squares. Use a sharp knife for clean edges. Place each piece on a plate. Dust with cocoa powder and a sprinkle of pumpkin spice for a nice touch. You can also add a dollop of whipped cream on top for extra creaminess. Serve it cold for the best taste. Yes, instant coffee works well in this recipe. Just mix it with hot water to make a strong coffee. Let it cool before dipping the ladyfingers. Instant coffee may give a different taste, but it will still be delicious. If you like a bolder flavor, make sure to use a bit more. This blog post covered how to make a delightful Pumpkin Spice Latte Tiramisu. We started with essential ingredients, then moved to step-by-step instructions for mixing, assembling, and customizing your dessert. I shared tips for perfect layers and whipped cream and provided storage information for leftovers. You can even explore variations like vegan or gluten-free options. With these insights, you can create a tasty treat that impresses everyone. Enjoy every bite of your Pumpkin Spice Latte Tiramisu!

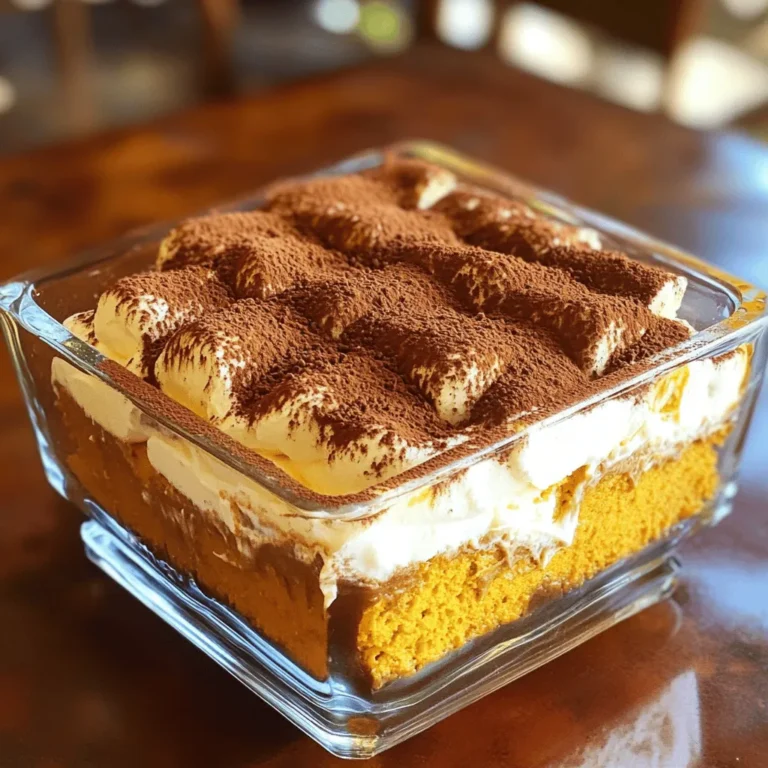
Pumpkin Spice Latte Tiramisu Festive and Flavorful Delight

- 1 pound fresh green beans, trimmed Green beans are the star of this dish. Choose crisp ones for the best texture. Trim their ends to prepare them for cooking. This step helps them fry evenly and look nice on a plate. - ½ cup grated Parmesan cheese - 1 cup panko breadcrumbs - 1 teaspoon garlic powder - 1 teaspoon onion powder - ½ teaspoon smoked paprika - ¼ teaspoon black pepper - ¼ teaspoon salt These dry ingredients add flavor and crunch. Grated Parmesan gives a rich, cheesy taste. Panko breadcrumbs offer a light and crispy texture. Garlic powder and onion powder add depth, while smoked paprika gives a hint of warmth. Salt and pepper enhance all the flavors. - 2 large eggs, beaten - Cooking spray (for air frying) Eggs act as a binding agent for the green beans. They help the breadcrumbs stick well. Cooking spray ensures the fries crisp up without sticking. Preheat your air fryer to 400°F (200°C) for perfect cooking. First, wash the green beans. Trim the ends to remove any tough parts. This keeps them tender. Make sure you have one pound of fresh green beans. Fresh beans make the fries taste better. Next, grab two bowls. In the first bowl, mix the dry ingredients. Combine panko breadcrumbs, grated Parmesan cheese, garlic powder, onion powder, smoked paprika, black pepper, and salt. Stir well until everything blends nicely. In the second bowl, beat two large eggs. Dip each green bean in the eggs. Let the extra egg drip off. Then, coat each bean with the breadcrumb mix. Press gently so it sticks well. Now, preheat your air fryer to 400°F (200°C) for about five minutes. Lightly spray the air fryer basket with cooking spray. Place the coated green beans in a single layer. Avoid overcrowding the basket. Air fry the beans for 8 to 10 minutes. Shake the basket halfway through. This helps them cook evenly. They should turn golden brown and crispy. Once done, take them out and enjoy! To get your green bean fries super crispy, follow a few key steps. Start by making sure your green beans are fresh. Trim off the ends and wash them well. Remove any excess water before you coat them. This helps the breading stick better. After coating, make sure you don’t overcrowd the air fryer basket. Leave space for air to flow. Finally, shake the basket halfway through cooking. This ensures even crispiness on all sides. Feel free to change the seasonings to match your taste. If you like a bit of heat, add some cayenne pepper or red pepper flakes. For a zesty twist, sprinkle in some lemon zest. You can also swap the Parmesan for another cheese, like cheddar or nutritional yeast for a vegan option. Remember, cooking is about fun and exploration, so play with flavors until you find your favorite mix. If you don’t have an air fryer, you can still enjoy these green bean fries. Bake them in the oven instead. Preheat your oven to 425°F (220°C) and spread the coated green beans on a baking sheet. Bake for about 15-20 minutes, turning them halfway through. Keep an eye on them to ensure they reach a golden brown. You can also pan-fry them in a little oil on the stove for a crispy finish. {{image_2}} You can change the flavor of your green bean fries with different coatings. Try using crushed cornflakes for a crunchier texture. Another option is to mix in some Italian seasoning with your breadcrumbs. This gives a nice herby taste. You could also use taco seasoning for a spicy kick. It adds great flavor and fun to your dish. To make your fries even better, add extra toppings. Try sprinkling some chopped herbs like parsley or basil when serving. You can also add a squeeze of lemon juice for freshness. If you love heat, a dash of cayenne pepper in the mix adds a nice zing. For a cheesy twist, toss on some extra Parmesan after cooking. These small changes can really elevate your dish! If you prefer a gluten-free option, use gluten-free breadcrumbs instead of panko. Many brands offer great substitutes that work well. You can also use almond flour or crushed nuts for coating. These options provide a unique taste and texture. Just make sure to check your labels for any hidden gluten. Enjoying crispy green bean fries can be safe and delicious for everyone! After enjoying your air fryer Parmesan green bean fries, you may have some left. To store them, let the fries cool down. Place them in an airtight container. Keep them in the fridge. They will stay fresh for up to three days. To reheat your green bean fries, use the air fryer again. Set it to 350°F (175°C). Air fry the fries for about 3-5 minutes. This helps them regain their crispiness. You can also use a microwave, but they may lose some crunch. If you want to freeze the fries, do so before cooking. Lay the coated green beans on a baking sheet. Make sure they are in a single layer. Freeze them for about two hours. Once frozen, transfer them to a freezer bag. They can stay in the freezer for up to a month. When ready to cook, air fry them straight from the freezer. Just add a few extra minutes to the cooking time. To make air fryer green bean fries crispy, follow these steps: - Use fresh green beans for the best texture. - Coat them well in the panko and Parmesan mix. This adds crunch. - Ensure the air fryer is hot before cooking. Preheat it to 400°F (200°C). - Space the green beans out in the basket. Avoid overcrowding to allow air to flow. Shaking the basket halfway through cooking helps them crisp up evenly. Aim for 8-10 minutes in the air fryer. Yes, you can use frozen green beans. However, they may not turn out as crispy as fresh ones. To prepare frozen beans: - Thaw them completely and pat them dry to remove excess water. - Proceed with the same coating and cooking steps. Keep in mind, cooking time may vary. Check for crispness before removing them from the air fryer. Green bean fries are great with a variety of dipping sauces. Here are some tasty options: - Marinara sauce offers a classic flavor. - Garlic aioli adds a creamy touch. - Ranch dressing gives a cool contrast. - Spicy mayo brings heat and zest. Feel free to explore different sauces to find your favorite pairing! You learned how to make air fryer green bean fries. We covered fresh and dry ingredients, plus important cooking tools. The step-by-step guide showed you how to prepare the green beans and perfect the breading process. Consider tips for added crispiness and how to adjust flavors. You also explored fun variations and learned smart storage practices. I hope these insights help you create a tasty dish that impresses. Enjoy your cooking!

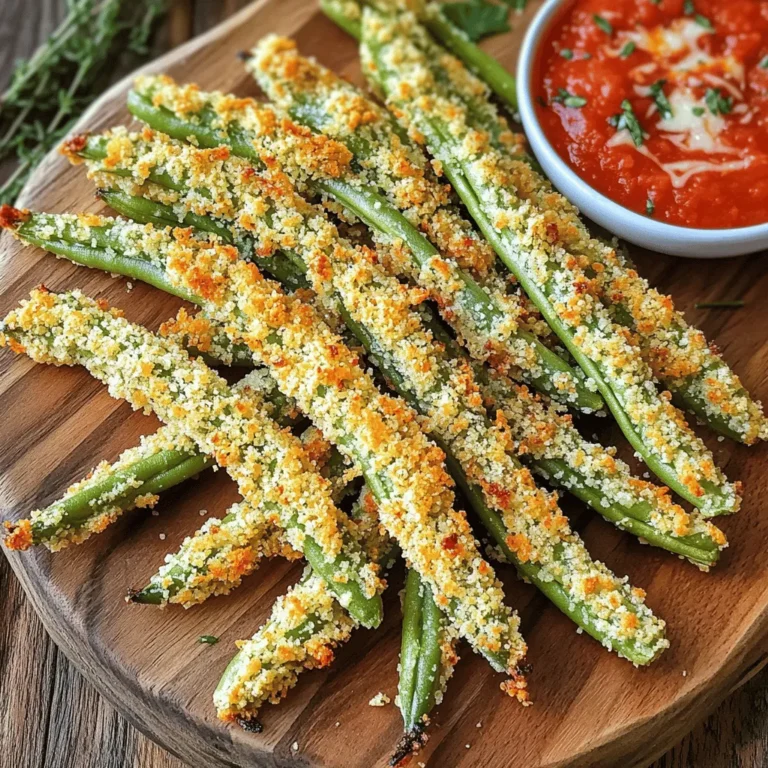
Air Fryer Parmesan Green Bean Fries Crispy Delight

To make these delightful Salted Caramel Pumpkin Cheesecake Cups, gather the following: - 1 cup graham cracker crumbs - 4 tablespoons unsalted butter, melted - 1 (8 oz) package cream cheese, softened - 1/2 cup powdered sugar - 1 cup pumpkin puree - 1 teaspoon vanilla extract - 1 teaspoon pumpkin pie spice - 1/2 cup heavy whipping cream - 1/4 cup salted caramel sauce (plus extra for drizzling) - Sea salt flakes for garnish You can easily swap some ingredients if needed: - Use gluten-free graham crackers for a gluten-free crust. - Swap cream cheese with dairy-free cream cheese for a vegan option. - Replace heavy cream with coconut cream for a dairy-free version. - Maple syrup can replace powdered sugar for a natural sweetener. Selecting the right ingredients makes a big difference: - Choose fresh pumpkin puree for the best flavor. Canned is okay, but fresh shines. - Look for high-quality cream cheese. A richer cream cheese makes the cheesecake smooth. - When picking graham crackers, look for ones with simple ingredients. This helps avoid added sugars. - For the salted caramel sauce, select a brand known for its rich flavor. Homemade sauce can also elevate your dish. To make the crust, start with graham cracker crumbs. In a medium bowl, mix 1 cup of crumbs with 4 tablespoons of melted butter. Use a fork to blend them well. This mixture should feel like wet sand. Next, take about 2 tablespoons of this mix and press it into the bottom of each serving cup. Make sure to press down firmly so it holds together. This forms a solid base for your cheesecake cups. For the cheesecake filling, grab a large mixing bowl. Beat 1 package of softened cream cheese until it’s creamy and smooth. Gradually add in 1/2 cup of powdered sugar, mixing until combined. Then, add 1 cup of pumpkin puree, 1 teaspoon of vanilla extract, and 1 teaspoon of pumpkin pie spice. Mix everything until it is all blended together. In a separate bowl, whip 1/2 cup of heavy cream until you see stiff peaks. Gently fold this whipped cream into the pumpkin mixture. Be careful not to deflate the whipped cream. This keeps your cheesecake light and fluffy. Now it's time to assemble! Spoon or pipe the pumpkin cheesecake mixture on top of the crust in each cup. Fill them to the brim for a nice presentation. Drizzle some salted caramel sauce over the top of each cup. For the final touch, sprinkle a few sea salt flakes on top. This adds a nice contrast to the sweetness. Finally, chill the cups in the refrigerator for at least 2 hours. This allows the cheesecake to set perfectly before serving. Enjoy your delicious salted caramel pumpkin cheesecake cups! To get a creamy filling, make sure your cream cheese is soft. Let it sit at room temperature for about 30 minutes. When mixing, beat it well until smooth. This helps to avoid lumps. When adding the whipped cream, fold gently. This keeps the mix light and fluffy. The goal is to have a light and airy cheesecake texture. You need a few simple tools for this recipe. A medium bowl works for the crust. Use a large bowl for the filling. A hand mixer or stand mixer is great for beating the cream cheese. You'll also need measuring cups and spoons. A spatula helps to fold the whipped cream. Lastly, grab serving cups or small glasses for the final assembly. One big mistake is not chilling the cups long enough. They need at least two hours in the fridge. This helps the layers set. Another error is over-mixing the whipped cream. If you mix too much, it can deflate. Lastly, don’t skip the sea salt on top. The salt enhances the sweetness and balances the flavor. {{image_2}} You can switch up the flavors in your salted caramel pumpkin cheesecake cups. For a rich twist, add chocolate. Use chocolate graham cracker crumbs for the crust. Mix melted chocolate into the cheesecake filling for a deep, creamy taste. Another great option is maple. Replace pumpkin pie spice with maple syrup. This adds a warm, sweet flavor that pairs nicely with the pumpkin. If you need a dairy-free version, swap out the cream cheese and heavy cream. Use a plant-based cream cheese and coconut cream. These options keep the texture creamy and rich while being dairy-free. For gluten-free needs, use gluten-free graham crackers. They work just as well for the crust, keeping it tasty and safe for everyone. These cheesecake cups shine on their own, but you can elevate them further. Serve them with a dollop of whipped cream on top. A sprinkle of crushed nuts adds a nice crunch. Pair these cups with a warm drink, like spiced apple cider or coffee. The flavors complement each other, making your dessert experience even more delightful. Store your salted caramel pumpkin cheesecake cups in the fridge. Use an airtight container to keep them fresh. This way, they stay cool and tasty. Avoid stacking them to keep the topping nice. If you have leftovers, eat them within three days for the best taste. You can freeze these cheesecake cups for a longer shelf life. First, let them chill completely in the fridge. Then, wrap each cup tightly in plastic wrap. Place them in a freezer-safe container or bag. They can last up to two months. When ready to eat, thaw them in the fridge overnight. These cheesecake cups are best enjoyed fresh. In the fridge, they last up to three days. If left out at room temperature, they only stay good for about two hours. To keep the flavors bright, store them as soon as you finish eating. Yes, you can make these cups ahead of time. They stay fresh in the fridge for up to three days. Just prepare them and chill. The flavors meld together nicely when they sit. You will enjoy the taste even more! If you don’t have heavy cream, try using coconut cream. It gives a nice texture and flavor. You can also use Greek yogurt as a lighter option. It may change the taste slightly, but it will still be delicious. You can customize the salted caramel topping in many ways. For a bolder flavor, add a pinch of cinnamon or nutmeg. You can also mix in a splash of bourbon for a fun twist. Try different types of caramel sauce for varied tastes. Drizzle extra caramel on each cup for a sweeter treat! This blog post covered how to make delicious cheesecake cups. We explored the best ingredients, how to prepare each layer, and tips for perfect texture. I shared popular flavor variations and storage tips to keep your treats fresh. Remember, good choices make a big difference. Experiment with flavors and toppings to find your favorite. With these steps and tips, you can enjoy making these treats for any occasion. Enjoy your baking adventure!

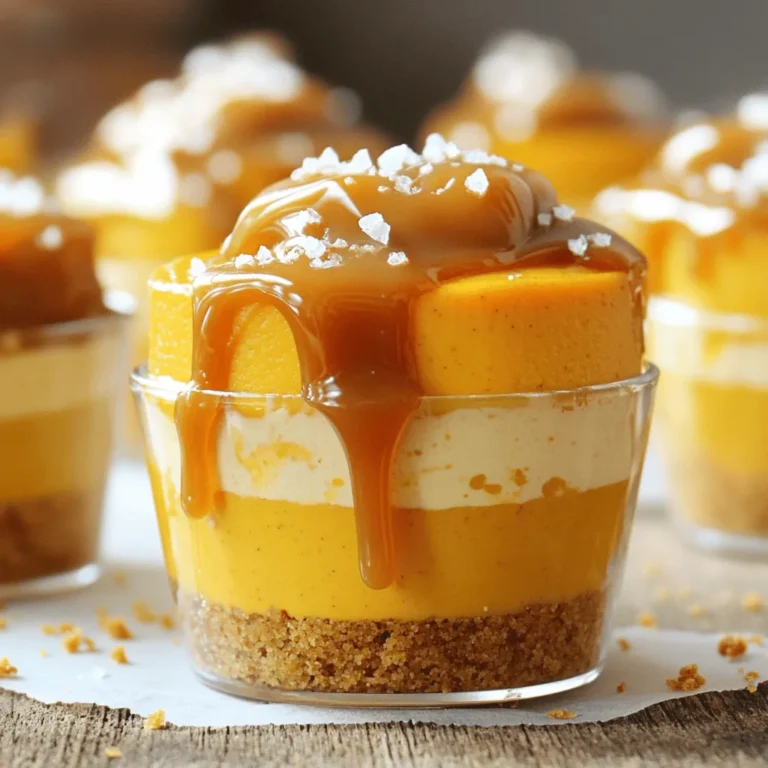
Salted Caramel Pumpkin Cheesecake Cups No Bake Delight

To make these tasty muffins, you’ll need the following ingredients: - 1 cup canned pumpkin puree - 1/2 cup granulated sugar - 1/2 cup brown sugar, packed - 1/2 cup vegetable oil - 2 large eggs - 1 teaspoon vanilla extract - 1 1/2 cups all-purpose flour - 1 teaspoon baking soda - 1/2 teaspoon baking powder - 1 teaspoon ground cinnamon - 1/2 teaspoon ground nutmeg - 1/4 teaspoon ground ginger - 1/2 teaspoon salt - 1 cup semi-sweet chocolate chips - 1/2 cup chopped walnuts (optional) These items blend together to create warm, sweet muffins that are perfect for fall. You can swap some ingredients if needed. Here are a few ideas: - Use applesauce instead of vegetable oil for a lighter muffin. - Swap granulated sugar for coconut sugar for a healthier option. - Use flax eggs instead of regular eggs for a vegan choice. - Substitute almond flour for all-purpose flour for a gluten-free muffin. Feel free to get creative and make it your own! Choosing the right ingredients makes a big difference. Here are some tips: - Look for bright orange pumpkin puree. This color means it’s fresh and flavorful. - Choose granulated sugar that feels dry and free of clumps. - For eggs, check the sell-by date on the carton. Fresh eggs will give you the best rise. - Pick chocolate chips that are semi-sweet for the best balance of sweet and rich. - If using walnuts, select nuts that smell fresh, not stale. Fresh ingredients lead to better muffins. Happy baking! Start by preheating your oven to 350°F (175°C). This step is key for baking. Next, line a 12-cup muffin tin with paper liners or spray it with non-stick cooking spray. In a large bowl, mix together the canned pumpkin puree, granulated sugar, brown sugar, vegetable oil, eggs, and vanilla extract. Use a whisk to blend everything until smooth. In another bowl, whisk the all-purpose flour, baking soda, baking powder, ground cinnamon, ground nutmeg, ground ginger, and salt. This blend adds flavor and helps the muffins rise. Now, slowly add the dry mix to the pumpkin mix. Stir gently until just combined. It’s okay if there are small lumps; avoid overmixing. Finally, fold in the semi-sweet chocolate chips and walnuts, if you choose to use them. Make sure they are evenly spread in the batter. Spoon the batter into the muffin cups, filling each about two-thirds full. This gives them space to rise. Place the muffin tin in the preheated oven. Bake for 18 to 22 minutes. To check if they are done, insert a toothpick into the center of a muffin. If it comes out clean, they are ready! Once baked, let the muffins cool in the pan for about 5 minutes. Then, transfer them to a wire rack to cool completely. For serving, enjoy them warm. A dusting of powdered sugar on top adds a nice touch. You can also serve them on a rustic wooden board for a bakery-style look. To get that perfect bakery-style texture, focus on your mixing. Combine wet and dry ingredients without overmixing. Lumps in the batter are okay. This keeps your muffins tender and fluffy. Also, fill your muffin cups about two-thirds full. This allows room for rising without overflowing. Many home bakers make the same mistakes. One big mistake is using cold ingredients. Always use room temperature eggs and oil. This helps the batter mix better. Another common error is overbaking. Keep an eye on your muffins. Check them at 18 minutes to avoid dryness. To boost the flavor of your muffins, try adding spices. A pinch of cloves or allspice can add warmth. If you like nuts, walnuts add crunch and richness. You can also swap semi-sweet chocolate chips for dark chocolate for a richer taste. A dash of sea salt on top before baking enhances sweetness too. {{image_2}} You can make these muffins gluten-free. Just swap the all-purpose flour for a gluten-free blend. Look for a blend that has xanthan gum. This helps keep the muffins fluffy. Use the same amount, 1.5 cups, for the gluten-free flour. The taste stays yummy, and you will enjoy the same great flavors. To make these muffins vegan, replace the eggs with flax eggs. Mix one tablespoon of flaxseed meal with three tablespoons of water for each egg. Let it sit for five minutes to thicken. Use vegetable oil as your fat. Keep the other ingredients the same. These muffins will still be moist and delicious! You can add more flavor to your muffins. Try spices like allspice or cloves for a warm kick. Adding 1/4 teaspoon of each works great. You can also mix in dried fruits like cranberries or raisins. Chopped pecans or almonds add a nice crunch too. Get creative and find what you love best! To keep your pumpkin chocolate chip muffins fresh, store them in an airtight container. This will help them stay soft and moist. You can keep them at room temperature for up to three days. If you want them to last longer, consider refrigerating them. Just make sure to wrap them well to avoid drying out. When you want to enjoy your muffins again, reheating is easy. You can use the microwave for quick warmth. Just place the muffin on a plate and heat it for 15 to 20 seconds. If you prefer a baked texture, use your oven. Preheat it to 350°F (175°C) and warm the muffins for about 5 to 10 minutes. This will bring back that fresh-baked taste. Freezing is a great way to store muffins for a long time. To freeze them, let the muffins cool completely. Wrap each muffin tightly in plastic wrap. Then place them in a freezer-safe bag or container. They can last up to three months in the freezer. When you're ready to eat one, just thaw it overnight in the fridge or heat it directly from the freezer. Enjoy fresh muffins any time! You can tell if your muffins are done by using a toothpick. Insert it into the center of a muffin. If it comes out clean, your muffins are ready. This usually takes about 18 to 22 minutes in the oven. The tops should look golden brown and spring back when touched lightly. You want soft, moist muffins, not dry ones. Yes, you can use fresh pumpkin. Start by cooking the pumpkin until it is soft. After that, blend it into a smooth puree. This will give your muffins a fresh taste. Just make sure to measure out one cup of the fresh puree. The texture may change slightly, but the flavor is worth it! If you need an egg substitute, you have options. Use 1/4 cup of unsweetened applesauce for each egg. Another option is to use a mashed banana. For a vegan choice, mix one tablespoon of flaxseed meal with three tablespoons of water. Let it sit for five minutes until it thickens. Each of these will help bind your muffins nicely. This article covers all you need for perfect pumpkin chocolate chip muffins. We explored ingredients, from fresh selections to substitutions. I shared step-by-step instructions for making batter and baking. You also learned tips for bakery-style texture and common mistakes to avoid. Don't forget the variations for gluten-free and vegan options. Finally, proper storage and reheating help keep your muffins fresh. Enjoy your baking and let your muffins shine!

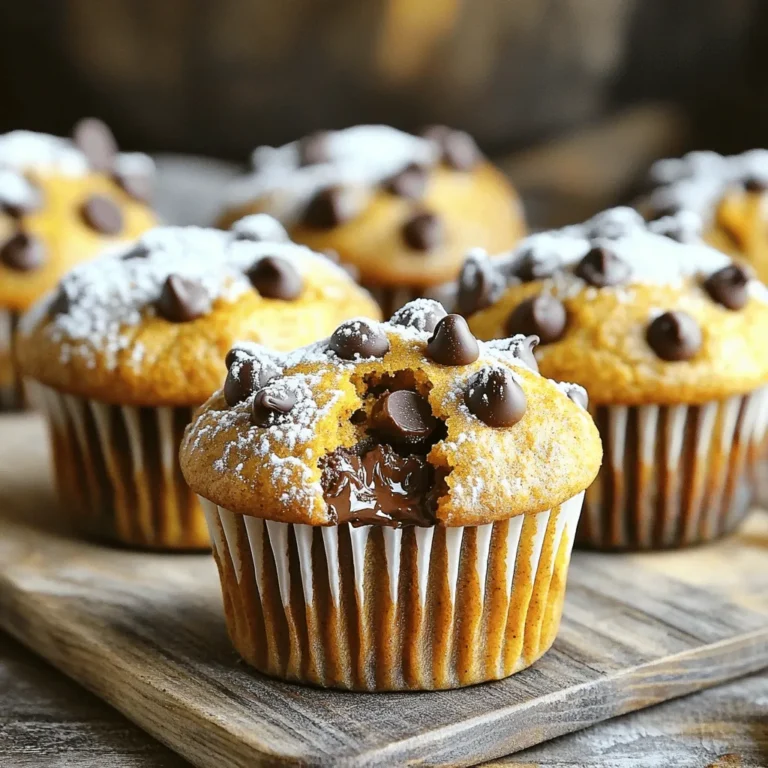
Pumpkin Chocolate Chip Muffins Bakery Style Delight

- 2 cups milk (dairy or non-dairy) - 2 tablespoons cocoa powder - 2 tablespoons sugar (adjustable) - 1/2 teaspoon ground cinnamon - 1/4 teaspoon ground ginger - 1/4 teaspoon ground cardamom - 1/4 teaspoon ground cloves - 1/4 teaspoon black pepper (optional for a spicier kick) - Whipped cream or marshmallows - Cinnamon sticks For my Chai Spiced Hot Cocoa, I use simple and easy ingredients. Start with milk, which can be dairy or non-dairy, depending on your taste. I recommend using 2 cups for a rich drink. Next, I add cocoa powder. You need 2 tablespoons to give it that nice chocolate flavor. Sweetness is key too, so I add 2 tablespoons of sugar. You can change this amount to suit your taste. The real magic happens with the spices. Ground cinnamon gives warmth. I use 1/2 teaspoon, but you can add more if you love cinnamon. Ground ginger and ground cardamom each get 1/4 teaspoon for a sweet, spicy kick. I also add 1/4 teaspoon of ground cloves for depth and richness. If you like a bit of heat, try 1/4 teaspoon of black pepper. It’s a bold choice, but I love it! Lastly, don't forget the toppings. Whipped cream or marshmallows make it fun. A cinnamon stick adds flair and flavor. These little touches make your drink special. Enjoy your cozy cup of Chai Spiced Hot Cocoa! To start, pour 2 cups of milk into a small saucepan. You can choose dairy or non-dairy milk, depending on your taste. Heat the milk over medium heat. Watch closely as it warms. The goal is to steam the milk without letting it boil. Once you see steam rising, you are ready to move on. Next, grab a bowl. In this bowl, mix 2 tablespoons of cocoa powder and 2 tablespoons of sugar. Adjust the sugar based on how sweet you want your drink. Now, add the spices: 1/2 teaspoon of ground cinnamon, 1/4 teaspoon of ground ginger, 1/4 teaspoon of ground cardamom, and 1/4 teaspoon of ground cloves. If you like a spicy kick, add 1/4 teaspoon of black pepper. Stir everything together until it blends well. Now that your milk is heated and your cocoa mix is ready, it's time to combine them. Pour the cocoa and spice mixture into the saucepan with the milk. Whisk continuously to dissolve the cocoa powder fully. This helps create a smooth drink. Add 1/2 teaspoon of vanilla extract for extra flavor. Keep heating until the mixture is steaming but not boiling. Finally, remove the saucepan from the heat. Pour the hot cocoa into mugs. You can top it with whipped cream or marshmallows. If you like, add a cinnamon stick for garnish. Enjoy your cozy drink! To make your chai spiced hot cocoa just right, start with sweetness. You can adjust the sugar to match your taste. If you like it sweeter, add more sugar. If you prefer less sweetness, just use a bit less. Remember, the spices also add flavor. So, taste as you mix! For that creamy finish, focus on your whipped cream. Whipping it well makes it light and fluffy. Use cold cream in a cold bowl. Whip until soft peaks form. This means the cream holds its shape but is still smooth. Add some sugar or vanilla to the cream for extra flavor. Presentation matters! Pour your hot cocoa into pretty mugs. Top with a generous dollop of whipped cream or a few marshmallows. If you want to impress, add a cinnamon stick for garnish. This not only looks great but adds a subtle spice as you sip. Enjoy your cozy drink with a cookie or a slice of cake for a perfect treat. {{image_2}} For a dairy-free Chai Spiced Hot Cocoa, you can use alternative milk. Almond milk, oat milk, or coconut milk all work well. Each option brings its unique flavor. Almond milk adds a nutty taste, while oat milk gives a creamy feel. Coconut milk offers a tropical twist. Choose what you enjoy most. You can add extracts or flavored syrups to boost the taste. A splash of peppermint extract can create a fun twist. Caramel or hazelnut syrups also add a sweet touch. Experiment with different flavors to find your favorite mix. Just remember to start with a small amount and adjust as needed. Playing with spice ratios can change the whole drink. If you like more warmth, add extra cinnamon or ginger. For a more complex flavor, try increasing cardamom or cloves. Just keep track of your changes. This way, you can recreate your favorite version again. Don't hesitate to get creative! To store your Chai Spiced Hot Cocoa, let it cool first. Pour it into an airtight container. You can use glass jars or plastic containers. Make sure to seal it tightly. Then, place it in the refrigerator. This helps keep the flavors fresh. When you want to enjoy your leftover cocoa, pour it into a saucepan. Heat it over low to medium heat. Stir it often to keep it from burning. You can also use the microwave. Heat it in short bursts, stirring between each burst. This helps maintain the rich flavor. Your Chai Spiced Hot Cocoa will stay good for about three days in the fridge. After that, the taste may fade. Always check for any changes in smell or texture before drinking. Enjoy it soon for the best flavor and warmth! Chai Spiced Hot Cocoa is a warm, rich drink that blends cocoa with chai spices. You get cozy flavors like cinnamon, ginger, and cardamom. This drink warms you up on chilly days. It has a sweet taste that pairs perfectly with the spices. The result is a comforting treat that makes you feel good inside. Yes, you can easily make this drink vegan. Simply use non-dairy milk instead of regular milk. Almond, oat, or soy milk works well. For sugar, make sure to choose a vegan-friendly option. You can also use maple syrup or agave nectar as sweeteners. This way, everyone can enjoy the drink without any animal products. To give your hot cocoa a kick, add more spices. You can increase the ground cinnamon or ginger for more heat. Try adding a pinch of extra black pepper for a bold flavor. You can also sprinkle in cayenne pepper if you like it really hot. Adjust the spices to fit your taste and enjoy the warmth! This blog post covered the essential ingredients for Chai Spiced Hot Cocoa, including milk, cocoa powder, and spices. We discussed tips for perfecting flavor and texture, plus variations for dietary preferences. You can store leftovers properly and reheat them without losing taste. Enjoy the warmth and comfort this drink brings. So, gather your ingredients and start making your own cozy cup today!

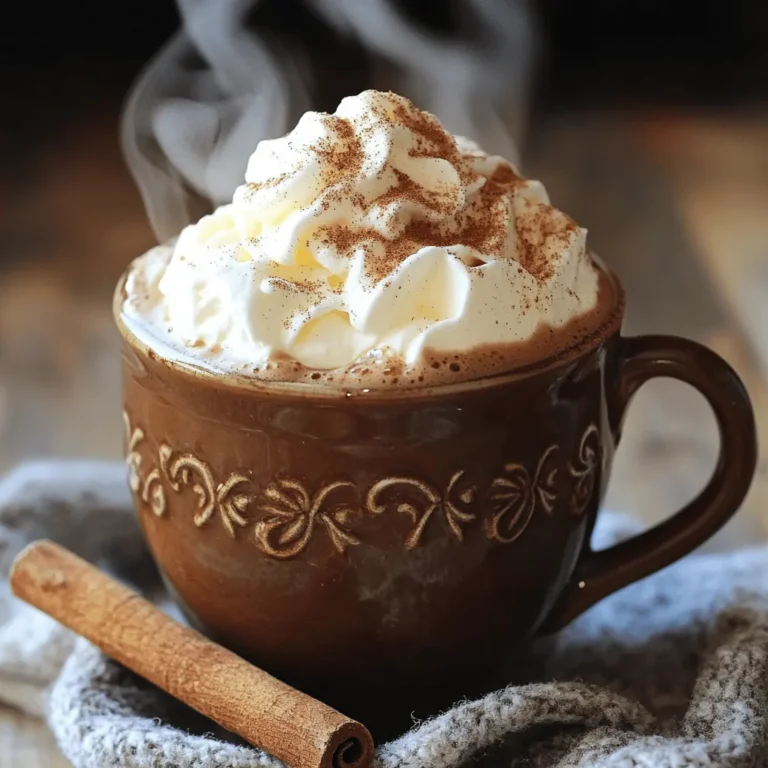
Chai Spiced Hot Cocoa Delightful and Cozy Drink

- 1 tablespoon olive oil - 1 medium onion, chopped - 2 cloves garlic, minced - 2 cups vegetable broth - 1 can (14 oz) crushed tomatoes - 1 can (15 oz) diced tomatoes - 1 teaspoon dried oregano - 1 teaspoon dried basil - Salt and black pepper to taste - 1 package (16 oz) potato gnocchi - 1 cup heavy cream (or coconut cream for a dairy-free option) - 1 cup fresh spinach, chopped - 1 cup grated Parmesan cheese (or nutritional yeast for a vegan option) - Fresh basil leaves for garnish Gathering the right ingredients is key for this creamy tomato basil gnocchi soup. I love using fresh produce and quality items, as they really boost the flavor. Olive oil is the base for this dish, adding richness. Onion and garlic create a sweet and savory aroma. The vegetable broth gives depth, while crushed and diced tomatoes add freshness. Dried oregano and basil bring the classic Italian taste. For the heart of the soup, potato gnocchi cooks quickly and adds a nice texture. Heavy cream makes the soup rich and velvety. If you prefer a lighter option, use coconut cream. Fresh spinach adds color and nutrients, while Parmesan cheese enhances the taste. Finally, fresh basil leaves are perfect for garnish, adding a pop of color and flavor. These ingredients come together to create a delightful meal. 1. Sautéing onion and garlic First, heat 1 tablespoon of olive oil in a large pot over medium heat. Add the chopped onion and sauté it for about 3 to 4 minutes. You want the onion to be soft and translucent. Then, add 2 cloves of minced garlic. Cook this for another minute, stirring often to prevent burning. 2. Combining broth and tomatoes Next, pour in 2 cups of vegetable broth along with a 14-ounce can of crushed tomatoes and a 15-ounce can of diced tomatoes. Stir everything together until well mixed. Season the mixture with 1 teaspoon of dried oregano, 1 teaspoon of dried basil, and add salt and black pepper to taste. Bring this to a gentle simmer. 3. Cooking gnocchi until floating Now, it’s time to add the potato gnocchi. Use a package that weighs 16 ounces. Cook them in the soup for about 3 to 4 minutes. You’ll know they are done when they start to float to the top. This step means they are ready for the next phase! 1. Adding cream and spinach Reduce the heat slightly. Now, stir in 1 cup of heavy cream or coconut cream if you prefer a dairy-free option. Let the soup simmer on low for another 5 minutes. This helps the flavors blend beautifully. Then, add in 1 cup of chopped fresh spinach. 2. Adjusting seasoning Finally, stir in 1 cup of grated Parmesan cheese. You can also use nutritional yeast for a vegan option. Mix until the cheese melts and the spinach wilts. Taste the soup and adjust the seasoning if needed, ensuring it’s perfect for you! - Recommended cooking times Start by cooking the onion for about 3-4 minutes. Then, add the garlic for one more minute. This helps them become soft and tasty. After adding the broth and tomatoes, let the soup simmer for 5-10 minutes. Cook the gnocchi for 3-4 minutes until they float. This shows they are done. - How to avoid burning garlic Garlic burns fast. To prevent this, always keep the heat low when cooking it. Stir it often. You can add garlic after the onion is soft. This gives it a nice flavor without burning. - Cream options for dietary needs If you want a dairy-free option, use coconut cream instead of heavy cream. It adds a nice sweetness. For a vegan option, swap Parmesan cheese for nutritional yeast. Both choices keep the soup creamy and delicious. - Serving ideas for a beautiful dish Serve your soup in deep bowls. This makes it look inviting. You can also pair it with crusty bread on the side. This adds a nice touch and makes the meal complete. - Garnishing tips with fresh basil Fresh basil leaves make your soup pop. Place them on top just before serving. You can also chop some basil and sprinkle it over the soup for extra color and flavor. It not only looks great but also adds a fresh taste. {{image_2}} You can easily change some ingredients to fit your needs. For a dairy-free option, swap heavy cream with coconut cream. This gives your soup a creamy texture without dairy. If you want to add more veggies, try including carrots or zucchini. They add great flavor and extra nutrition. Want to make your soup heartier? Add cooked chicken or sausage to the mix. This addition gives the dish more protein and flavor. If you like heat, sprinkle in some chili flakes. This will add a nice kick and make it even more exciting. To keep your creamy tomato basil gnocchi soup fresh, follow these tips: - Cool it down first. Let the soup reach room temperature before storing. - Use airtight containers. Glass or plastic containers with lids work well. - Portion it out. Store in smaller containers for easy access later. Consider placing a piece of plastic wrap directly on the soup before sealing. This helps reduce air and keeps it fresher longer. When you want to enjoy your soup again, here are some ways to reheat it: - Stovetop method. Pour the soup into a pot and heat over medium-low. Stir often until warm. - Microwave method. Place in a microwave-safe bowl. Heat in short bursts, stirring in between. If you want to freeze the soup, do this: - Freeze before adding cream. This helps keep the texture nice. - Use freezer-safe bags or containers. Leave some space for expansion. - Label and date. This makes it easy to use later. When ready to eat, thaw the soup in the fridge overnight. Reheat on the stove for the best texture. Can I use frozen gnocchi? Yes, you can use frozen gnocchi. Just add them directly to the soup. They will cook in the broth. This saves time and keeps your meal quick and easy. Is this recipe suitable for meal prep? Absolutely! This soup is great for meal prep. You can make it ahead and store it. It keeps well in the fridge for up to three days. Reheat it on the stove or in the microwave. What can I serve with creamy tomato basil gnocchi soup? Pair this soup with crusty bread or a fresh salad. Garlic bread also works well. A sprinkle of extra cheese on top adds a nice touch. Caloric details per serving Each serving has about 400 calories. This can vary based on the cream you choose. Using coconut cream may reduce calories slightly. Dietary considerations (vegan, gluten-free options) You can make this soup vegan by using coconut cream and nutritional yeast. For gluten-free options, look for gluten-free gnocchi. Always check labels to ensure all ingredients meet your needs. This creamy tomato basil gnocchi soup combines simple ingredients for a tasty meal. You start by sautéing onion and garlic, then add broth and tomatoes. Next, cook your gnocchi until they float and mix in cream and spinach for richness. Consider using fresh basil for garnish and explore variations to suit your taste. Remember to store leftovers properly and follow reheating tips for the best texture. Enjoy this delightful dish, and make it your own!

Creamy Tomato Basil Gnocchi Soup One Pot Delight

- 2 medium zucchini - 1 cup grated Parmesan cheese - 1/2 cup breadcrumbs - 1 large egg - Cooking spray or olive oil - 1 teaspoon garlic powder - 1 teaspoon onion powder - 1 teaspoon paprika - Salt and pepper - Gluten-free breadcrumbs - Fresh parsley for garnish When making crispy Parmesan zucchini chips, start with fresh zucchini. Choose medium-sized ones for the best texture. The Parmesan gives a nice flavor and a crunchy finish. I love mixing in breadcrumbs for extra crispness. You can use gluten-free breadcrumbs if needed. For seasoning, I recommend garlic powder, onion powder, and paprika. These spices add depth and flavor to your chips. Don't forget to add salt and pepper to taste. Using one large egg helps the coating stick well. It’s simple and effective. I also like to spray the air fryer with cooking spray or brush it with olive oil. This step ensures the chips won’t stick and helps them crisp up nicely. If you want to make your dish pop, try garnishing with fresh parsley. It adds color and a bit of freshness to the dish. Enjoy making these tasty chips! - Slice zucchini into thin rounds, about 1/4 inch thick. - Pat dry to remove moisture. This step helps make the chips crispy. - Combine 1 cup of grated Parmesan cheese, 1/2 cup of breadcrumbs, and seasonings. - Mix well to ensure even distribution. Use 1 teaspoon of garlic powder, 1 teaspoon of onion powder, 1 teaspoon of paprika, salt, and pepper to taste. - Dip each zucchini slice in a beaten egg. Let any extra drip off. - Coat with the breadcrumb mixture. Press gently to make sure it sticks well. Set your air fryer to 400°F (200°C). Preheat it for about 5 minutes. This step ensures even cooking and helps achieve that crispy texture we all love. Lightly spray the air fryer basket with cooking spray. This prevents the zucchini chips from sticking. Arrange the coated zucchini slices in a single layer. Make sure not to overcrowd the basket, as this can lead to uneven cooking. You may need to cook in batches if your air fryer is small. Cook the zucchini chips for 10 to 12 minutes. Remember to flip them halfway through cooking. This helps both sides get golden brown. Keep an eye on the color; you want them to be crispy and not burnt. The perfect chip is crunchy outside and tender inside. Enjoy the smell of your kitchen while they cook! {{image_2}} To get those perfect, crispy zucchini chips, start by drying the zucchini well. After slicing them, pat them dry with a paper towel. Removing moisture is key. If you skip this step, your chips may turn out soggy. For the coating, I recommend using fresh breadcrumbs. They offer better texture and flavor than store-bought. If you use store-bought, look for ones with no added preservatives. Fresh breadcrumbs will stick better and help achieve that crunch you crave. Every air fryer is a bit different. Some may cook faster than others. Keep an eye on your zucchini chips. Start with the recommended time of 10-12 minutes, but check them halfway. If they look golden brown, they're ready. Factors like the size of your zucchini slices and the air fryer model can affect cooking time too. Thinner slices will cook faster, while thicker ones will need a bit more time. Adjust as needed for your perfect chips. When serving, I love to arrange the crispy zucchini chips on a nice platter. Add a small bowl of marinara sauce or ranch dressing for dipping. This makes it fun and inviting. For a pop of color, sprinkle fresh parsley on top. It adds freshness and makes your dish visually appealing. People eat with their eyes first, so make it look great! You can change up the flavors of your crispy zucchini chips. Add Italian herbs like oregano or basil for a lovely taste. You can also use different cheese. Try blending mozzarella with Parmesan for a creamy touch. This mix gives a rich flavor that pairs well with the crunch of the chips. Don’t stop at zucchini! You can use other veggies too. Eggplant and sweet potatoes are great choices. Just remember, different veggies may need different cooking times. Eggplant slices might need a few more minutes, while sweet potatoes may cook quicker. Keep an eye on them to get that perfect crisp. If you want a vegan version, it's easy to swap ingredients. Use a flaxseed mixture instead of the egg. Mix one tablespoon of ground flaxseed with three tablespoons of water. Let it sit for a few minutes to thicken. You can also use vegan cheese options to keep the cheesy goodness. Nutritional yeast can add a nice flavor while keeping things plant-based. To keep zucchini chips fresh, store them in an airtight container. Place a paper towel inside to absorb moisture. This helps keep them crispy. You can also use a resealable bag. Squeeze out the air before sealing. Store them in the fridge for up to three days. To reheat, place the chips in the air fryer for about 3-5 minutes at 350°F (175°C). This will help them regain their crunch. Avoid using the microwave, as it makes them soggy. Yes! You can bake zucchini chips in the oven. Preheat your oven to 425°F (220°C). Prepare the zucchini as directed, then arrange them on a baking sheet lined with parchment paper. Make sure to leave space between each chip. Bake for 20-25 minutes, flipping halfway through. Watch closely, as ovens can vary. You want them golden brown and crispy. Cleaning your air fryer is easy. Start by unplugging it and letting it cool. Remove the basket and any accessories. Wash these parts with warm, soapy water. A soft sponge works best. For the main unit, wipe it down with a damp cloth. Avoid using harsh cleaners. To maintain your air fryer, clean it after each use. This will help it last longer and work better. In this blog post, we explored how to make crispy zucchini chips using simple ingredients. You learned about the main ingredients, step-by-step instructions, and helpful tips for the best outcome. I shared ideas for variations to keep your snacks fun and exciting. Remember, cooking is about experimenting, so don’t hesitate to add your twist. Enjoy your healthy snacks, and happy cooking!

Crispy Parmesan Zucchini Chips Air Fryer Delight

- 4 salmon fillets - 1 cup broccoli florets - 1/4 cup pure maple syrup - 2 tablespoons soy sauce (or tamari for gluten-free) - 1 tablespoon Dijon mustard - 1 tablespoon olive oil - 2 cloves garlic, minced - Salt and pepper to taste - 1 teaspoon sesame seeds (for garnish) - Lemon wedges (for serving) Gathering these ingredients makes cooking easy and fun. You can find fresh salmon at most grocery stores. Look for fillets that are bright in color and firm to the touch. Always choose broccoli that is bright green and firm. The maple syrup adds a sweet touch while the soy sauce brings depth. Dijon mustard gives it a nice tang. Fresh garlic adds great flavor, and sesame seeds make for a lovely garnish. I love using lemon wedges on the side. A squeeze of fresh lemon right before eating lifts the flavor. The brightness of lemon works perfectly with the rich salmon and sweet glaze. This simple yet delicious combination makes for a meal that is both healthy and satisfying. Enjoy cooking with these fresh ingredients! First, preheat your oven to 400°F (200°C). This heat helps cook the salmon and broccoli evenly. Next, line a baking sheet with parchment paper. This makes cleanup easy and keeps your food from sticking. In a small bowl, whisk together the following ingredients: - 1/4 cup pure maple syrup - 2 tablespoons soy sauce - 1 tablespoon Dijon mustard - 1 tablespoon olive oil - 2 cloves garlic, minced - Salt and pepper to taste Mix them until smooth. This glaze gives a sweet and savory flavor to the salmon. Now, place the salmon fillets in the middle of your baking sheet. Make sure they have space around them. Brush the salmon generously with the maple glaze. Then, add 1 cup of broccoli florets around the salmon. Drizzle some olive oil on the broccoli and sprinkle salt and pepper over it. This enhances the taste of the veggies. Roast everything in the oven for 12-15 minutes. The salmon should flake easily with a fork when done. Keep an eye on the broccoli; it should be tender but still bright green. For a nice caramelization, broil for an extra 2-3 minutes. Watch closely to avoid burning. This step adds a beautiful finish to your dish. How do I check for doneness? To check if your salmon is done, look for its color. It should turn from a bright pink to a pale orange. The fish should also feel firm to the touch. What does flaking easily with a fork mean? When salmon flakes easily with a fork, it indicates it is cooked. This means you can gently pull apart the fish with a fork. This is a great sign of perfect doneness. If it resists, it needs more time in the oven. Can I precook broccoli for extra tenderness? Yes, you can. Precooking the broccoli makes it softer. To do this, simply steam or blanch it for a few minutes before adding it to the sheet pan. This gives a nice bite and flavor. What alternative seasonings can I use? Try adding lemon zest, garlic powder, or chili flakes for a kick. You can also use Italian herbs like oregano or thyme. These will change the taste, making it fun and new. Why should I serve with lemon wedges? Serving lemon wedges adds freshness. A squeeze of lemon brightens each bite. It helps balance the sweetness of the maple glaze. How can I enhance the flavor with the remaining glaze? Drizzle any leftover glaze over the salmon and broccoli just before serving. This adds extra flavor and makes the dish look beautiful. It’s an easy way to impress your guests! {{image_2}} You can swap salmon for chicken fillets or tofu. Both options work well. If you choose chicken, use thin fillets. They will cook evenly with the broccoli. For tofu, press it first to remove extra water. Then, cut it into cubes. Use the same glaze on these proteins for a tasty meal. Feel free to add more vegetables. Carrots, bell peppers, or asparagus are great choices. Cut them into similar sizes as the broccoli. This way, they cook at the same time. You can also use green beans or zucchini for a fresh twist. Each veggie adds its own flavor and nutrition. Want to change the taste? You can add spices or herbs to the glaze. Try ginger for warmth or chili flakes for heat. Fresh herbs like parsley or cilantro can bring freshness. Even a splash of lime juice adds zing. Experiment with flavors to suit your taste. Each change can make the dish exciting and new! To keep your maple glazed salmon fresh, store leftovers in an airtight container. Make sure to let the salmon cool first. Place it in the fridge within two hours of cooking. This helps maintain its taste and texture. Leftovers are best eaten within three days for optimal flavor. When you reheat the salmon, aim for gentle heat. Use the oven for the best results. Preheat your oven to 350°F (175°C). Place the salmon on a baking sheet and cover it with foil. Heat for about 10 minutes or until warm. This method keeps the salmon moist and tasty. You can also use the microwave, but be cautious. Heat in short bursts to avoid drying it out. If you want to freeze your salmon, do so right away. Wrap each fillet in plastic wrap, then place it in a freezer bag. Remove as much air as possible. This helps prevent freezer burn. You can freeze the salmon for up to three months. To reheat, thaw it in the fridge overnight before cooking. Then, follow the reheating instructions for best results. It takes about 12 to 15 minutes to cook salmon on a sheet pan. You want the salmon to flake easily with a fork. The broccoli usually cooks at the same time, making this a quick meal. Yes, you can use other syrups like honey or agave. Each will change the flavor a bit. Honey gives a richer taste, while agave is milder. Try what you like best! Serve your salmon and broccoli with rice or quinoa. A fresh salad pairs nicely too. You can also add roasted potatoes for a heartier meal. Lemon wedges add a nice touch of flavor. Yes, this recipe can be gluten-free. Use tamari instead of soy sauce. Make sure to check all labels for hidden gluten. This way, everyone can enjoy this dish! This blog post covered a simple recipe for maple glazed salmon and broccoli. We discussed ingredients, step-by-step instructions, and tips for perfecting your dish. You learned how to make a glaze, roast your meal, and store leftovers. Keep experimenting with flavors, proteins, and veggies to find your favorite twist. Enjoy this healthy dish tonight, and make it your own! By following these tips, you can ensure a satisfying meal that’s both delicious and easy to prepare.

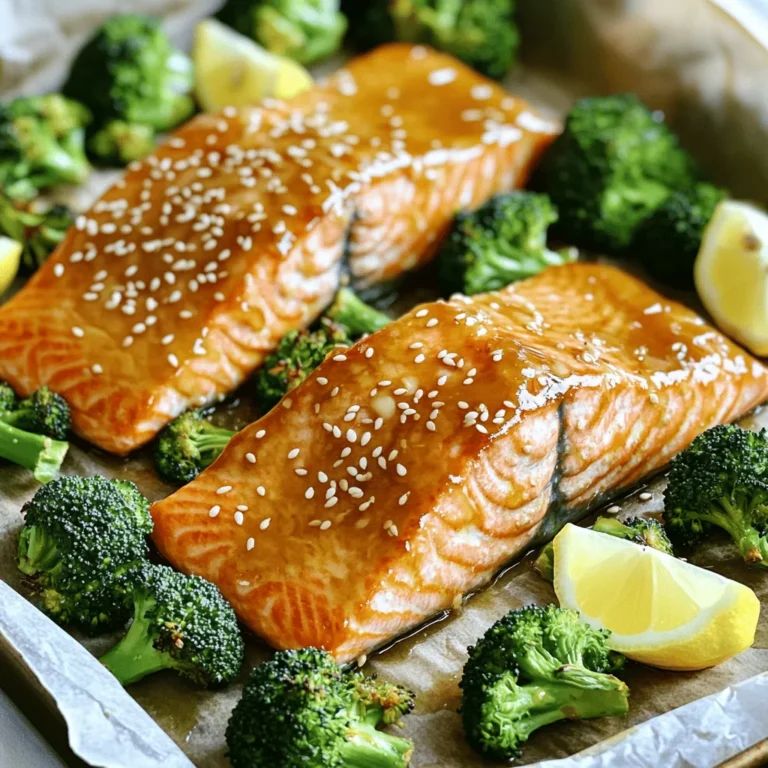
Maple Glazed Salmon with Broccoli Sheet Pan Recipe

- 1 lb boneless, skinless chicken breast, cut into bite-sized pieces - 1 cup raw cashews - 1 red bell pepper, sliced - 1 cup broccoli florets - 1 carrot, sliced thin - 2 tablespoons soy sauce (low sodium) - 1 tablespoon oyster sauce (or mushroom sauce for a vegetarian option) - 1 tablespoon sesame oil - Salt and pepper to taste - Optional: chili flakes for heat When making cashew chicken stir fry, fresh ingredients make a big difference. I always choose high-quality chicken. Skinless, boneless chicken breast works best. It cooks evenly and stays juicy. Cashews add crunch and richness. When buying cashews, look for raw ones for the best flavor. Toast them in a skillet for added depth. I love using colorful vegetables. Red bell pepper adds sweetness and a pop of color. Broccoli is packed with nutrients. Carrots bring a nice crunch. Slice them thin so they cook quickly and stay crisp. For the sauce, I stick with soy sauce for saltiness. Oyster sauce adds a touch of sweetness and umami. Sesame oil gives a lovely nutty aroma. This combination of sauces makes the dish come alive. Don't forget the seasoning! Salt and pepper bring out the flavors. If you like heat, add chili flakes. Just a pinch can take it to the next level. Gather all these ingredients, and you're ready to create a dish even better than takeout! Marinating Tips Start with fresh, boneless, skinless chicken breast. Cut it into small, bite-sized pieces. In a medium bowl, mix soy sauce, oyster sauce, salt, and pepper. Add the chicken to this mix. Stir well to coat every piece. This step adds deep flavor to your chicken. Ideal Marination Time Let the chicken marinate for at least 15 minutes. This will help it soak up the flavors. If you have more time, letting it sit for 30 minutes is even better. Important Toasting Techniques Use a dry skillet over medium heat. Add the raw cashews and toast them. Stir them often. This helps them brown evenly and avoid burning. Visual Cues for Doneness Watch for a golden color and a nutty smell. This usually takes about 3-4 minutes. When they look perfect, remove them from the skillet and set them aside. Cooking Time for Each Vegetable Use a large skillet or wok and heat 2 tablespoons of vegetable oil. First, add the sliced red bell pepper, then the broccoli florets, and finally the carrot slices. Cook them for about 5 minutes. They should be tender but still crisp. Maintaining Crispness To keep the veggies crisp, don’t overcook them. Stir them gently but often. Once done, take them out of the pan and set aside. Best Practices for Browning In the same skillet, add the marinated chicken pieces. Spread them out so they cook evenly. Stir frequently for about 6-8 minutes. Look for a nice golden-brown color. Ensuring Thorough Cooking Check that the chicken is no longer pink inside. This ensures it is fully cooked. Order of Combining Once the chicken is cooked, add the sautéed vegetables back into the skillet. Then, add minced garlic, ginger, and sesame oil. Finally, toss in the toasted cashews. Heating Through Tips Stir well to mix everything. Heat through for another 2-3 minutes. This allows flavors to blend nicely. Ideal Accompaniments Serve the cashew chicken stir fry over a bed of cooked rice or quinoa. This adds a nice base for the dish. Garnishing Options Top with chopped green onions for a fresh taste. You can also add chili flakes if you like some heat. This adds a nice kick to your meal. To make cashew chicken stir fry taste great, adjust the sauces. Start with the soy and oyster sauce. If you like it saltier, add more soy sauce. If you want a deeper flavor, add more oyster sauce. Always taste as you go. You can also enhance texture. For crunch, toast the cashews until golden. This adds a nice bite to the dish. Use a large skillet or a wok for best results. A non-stick surface helps with cooking. High heat is key. It cooks the chicken and veggies fast. This keeps them tender and crisp. If your pan is not hot enough, the food might steam instead of fry. Prep ingredients before cooking. Cut veggies and marinate chicken ahead of time. This makes cooking smoother. When you are ready to cook, everything will be within reach. Use high heat for fast cooking. It helps keep the food fresh and bright. Cook in batches if your pan is small. This way, everything gets cooked evenly. {{image_2}} You can switch the chicken for tofu or tempeh. Both options soak up flavor well. For tofu, choose firm or extra-firm. Press it to remove excess water. Cut it into bite-sized cubes and marinate it like chicken. For added flavor, mix in some soy sauce and a dash of sesame oil. This keeps the taste balanced and delicious. Feel free to add more veggies to your stir fry. Snap peas, bell peppers, or mushrooms work great. You can also use zucchini or baby corn. Just be mindful of cooking times. For most vegetables, aim for 3-5 minutes. This way, they stay crisp and bright in color. Do you like heat? You can easily turn up the spice! Add crushed red pepper or chili flakes during cooking. For more heat, try fresh chilies like jalapeños or Thai bird chilies. Start with a small amount and increase to your taste. Remember, you can always add more, but you can’t take it away! To keep your cashew chicken stir fry fresh, refrigerate it right away. Place it in a cool container. Glass or plastic containers with lids work best. Let the meal cool down before sealing. This helps prevent moisture build-up inside. You can freeze cashew chicken stir fry for later use. First, let it cool completely. Then, transfer it to a freezer-safe bag or container. Be sure to remove as much air as possible. When you want to enjoy it again, thaw it overnight in the fridge. Reheat it in a skillet over medium heat until hot. When stored in the fridge, your stir fry lasts about 3-4 days. If you freeze it, it can last up to 3 months. Always check for signs of spoilage. Look for off smells or changes in color. If anything seems off, it's best to throw it out. Yes, you can use frozen chicken. Just remember to thaw it first. You can do this in the fridge overnight or use the microwave. When cooking from frozen, add a few extra minutes to ensure it cooks through. Make sure to check the internal temperature. It should reach 165°F (75°C) for safe eating. If you don't have oyster sauce, you can use mushroom sauce. This option suits vegetarians. Soy sauce mixed with a bit of sugar also works well. It gives a similar sweet and salty flavor. You can try adding some hoisin sauce for a different twist. To make this dish gluten-free, swap soy sauce for tamari. Tamari is a great gluten-free alternative. Check that your oyster sauce or mushroom sauce is gluten-free too. Use fresh vegetables without any sauces that contain gluten. You can pre-cook this dish and store it. Cook the chicken and veggies, then cool them quickly. Store in an airtight container in the fridge for up to 3 days. When reheating, do it on the stove over low heat. This keeps the flavors fresh without overcooking. In this post, we explored the key ingredients for a delicious cashew chicken stir fry. We covered marinating chicken, toasting cashews, and sautéing vegetables effectively. I shared tips for perfecting flavor and storage methods for leftovers. Remember, cooking is about balance—adjusting tastes, trying new veggies, and exploring spice levels can elevate your dish. Enjoy making this recipe your own, and don't hesitate to test variations! It's a fun way to find flavors that you love.

Cashew Chicken Stir Fry Better Than Takeout Delight

PREV 1 … 36 37 38 … 86 NEXT
spicy fork kitchen

explore

DessertsDinnerAppetizersDrinks

Our Policies

  • Cookie Policy
  • Copyright Policy
  • Disclaimer
  • GDPR Policy
  • Terms Of Use
Back to Top
  • About
  • Contact Us
  • Privacy Policy
© 2026 spicy fork kitchen