FREE DINNER EBOOK! Get your copy!
  • Cookie Policy
  • GDPR Policy
  • Disclaimer
  • Terms Of Use
  • Visit my other site: Fun Cookie Recipes
spicy fork kitchen
  • Home
  • Dinner
  • Desserts
  • Drinks
  • Appetizers
  • Contact
  • About
  • Privacy Policy
  • Home
  • Dinner
  • Desserts
  • Drinks
  • Appetizers
  • Contact
  • About
  • Privacy Policy
  • Cookie Policy
  • GDPR Policy
  • Disclaimer
  • Terms Of Use
Visit my other site: Fun Cookie Recipes

HOME / CATEGORIES /

Latest

To make tasty triple berry muffins, you need some key ingredients. Here’s what you’ll need: - 1 cup all-purpose flour - 1 cup whole wheat flour - 1 tablespoon baking powder - ½ teaspoon baking soda - ½ teaspoon salt - ½ cup sugar (adjust for sweetness) - 1 teaspoon vanilla extract - 2 large eggs - ½ cup milk (or a non-dairy alternative) - ⅓ cup unsalted butter, melted (or coconut oil) - ½ cup fresh blueberries - ½ cup fresh raspberries - ½ cup chopped strawberries - Zest of 1 lemon - 2 tablespoons lemon juice These ingredients mix together to create a soft and fluffy muffin. The berries give it a bright flavor. The lemon zest adds a nice zing that balances the sweetness. You can change up your muffins with some optional ingredients. Here are a few ideas: - Chopped nuts for a crunchy texture - A sprinkle of cinnamon for warmth - A touch of honey instead of sugar for natural sweetness - Chocolate chips for a fun twist These additions can make each batch unique. Feel free to experiment based on your taste! Sometimes, you may not have all the ingredients. Here are some swaps you can make: - Use almond flour for a gluten-free option - Replace eggs with applesauce for a vegan version - Swap sugar with maple syrup for a different sweet flavor - Use yogurt instead of milk for extra moisture These substitutions keep your muffins delicious while fitting your diet. Remember, baking is all about creativity! Start by preheating your oven to 375°F (190°C). This step is key for great muffins. While the oven heats, line a muffin tin with paper liners. You can also grease the tin lightly with cooking spray. This helps the muffins release easily after baking. In a large bowl, combine the following dry ingredients: - 1 cup all-purpose flour - 1 cup whole wheat flour - 1 tablespoon baking powder - ½ teaspoon baking soda - ½ teaspoon salt - ½ cup sugar Mix these ingredients well, and then set the bowl aside. This blend creates a fluffy base for our muffins. In another bowl, whisk together these wet ingredients: - 2 large eggs - ½ cup milk (or a non-dairy alternative) - ⅓ cup unsalted butter, melted (or coconut oil) - 1 teaspoon vanilla extract - Zest of 1 lemon - 2 tablespoons lemon juice Mix until smooth. The eggs and milk add moisture, while the butter gives richness. Now, pour the wet mixture into the dry mix. Gently stir until just combined. The batter may be lumpy, and that's okay. Carefully fold in the fresh berries: - ½ cup fresh blueberries - ½ cup fresh raspberries - ½ cup chopped strawberries Be gentle to keep the berries whole. Spoon the batter into the muffin tin, filling each cavity about 2/3 full. This allows space for rising. Place the muffin tin in the preheated oven. Bake for 18-20 minutes. To check if they’re done, insert a toothpick into the center of a muffin. If it comes out clean, they’re ready! After baking, let the muffins cool in the tin for 5 minutes. This helps them set. Then, transfer them to a wire rack to cool completely. Enjoy them warm or at room temperature! To make your muffins light and fluffy, handle the batter gently. Mix until just combined. Overmixing can make them dense. You can also try using room-temperature ingredients. This helps them blend better. Fresh baking powder is key, too. Always check the date before using it. Store your muffins in an airtight container. This keeps them soft and moist. You can keep them at room temperature for a few days. For longer storage, freeze them. Wrap each muffin in plastic wrap, then place them in a freezer bag. They’ll stay fresh for about three months. Serve your muffins warm for the best taste. A light dusting of powdered sugar looks nice. Pair them with a cup of coffee or tea. You can also serve them with yogurt for a tasty breakfast. A small bowl of mixed berries adds color and flavor. {{image_2}} You can mix and match your berries to create unique flavors. Try blackberries or cranberries for a twist. Each berry offers a different taste and texture. Blueberries are sweet, while raspberries add a tart kick. Strawberries bring a juicy burst. Choose based on what you enjoy most. You can even use frozen berries if fresh ones aren't available. Just be sure to adjust the baking time slightly. Adjust the sugar based on your taste. You can use less sugar for a less sweet muffin. If you like it sweeter, add a bit more. You can also swap sugar for honey or maple syrup. Just remember to reduce the liquid in the recipe slightly. This change can enhance the berry flavors. Taste the batter to find your perfect balance. For a gluten-free version, switch all-purpose flour with a gluten-free blend. Many blends work well, but check for xanthan gum. This helps bind the muffins. You can also use almond flour or coconut flour. Keep in mind that these flours may change the texture. Adjust the liquid as needed, since gluten-free flours absorb more moisture. Enjoy your muffins without gluten! To keep your triple berry muffins fresh, store them in an airtight container. Place a paper towel at the bottom to absorb moisture. This helps prevent sogginess. You can keep them on the counter for up to three days. If you want to save them longer, move to the fridge. They will last about a week when chilled. Freezing muffins is a great way to save them for later. First, let the muffins cool completely. Then, wrap each muffin in plastic wrap. After that, place them in a freezer bag. Remove as much air as you can before sealing. Properly stored, these muffins can last up to three months in the freezer. When you want one, just thaw it at room temperature. To enjoy your muffins warm, preheat your oven to 350°F (175°C). Place the muffins on a baking sheet. Heat them for about 10 minutes. You can also use a microwave. Just warm them for 15-20 seconds. Enjoy your muffins fresh and fluffy again! These muffins can stay fresh for about three days at room temperature. To keep them longer, store them in an airtight container. If you freeze them, they last up to three months. Yes, you can use frozen berries. Just remember to thaw and drain them first. This way, the extra water won’t make your batter too wet. You can switch the all-purpose flour with gluten-free flour. If you want a fluffier muffin, stick to the original mix of all-purpose and whole wheat flour. To help your muffins rise well, ensure your baking powder is fresh. Whisk the wet and dry ingredients separately, then mix them gently. Overmixing can make muffins dense. Yes, you can! Replace the eggs with flax eggs or applesauce. Use almond milk instead of regular milk and coconut oil instead of butter. You can add spices like cinnamon or nutmeg. Adding lemon zest gives a fresh taste. Chopped nuts or a sprinkle of chocolate chips also works well. In this post, I covered key ingredients and steps for making triple berry muffins. You can customize with optional ingredients or substitutions. I shared tips for fluffiness and freshness. Plus, I explored variations and storage methods to keep your muffins tasty. Remember, baking is fun, so feel free to experiment. Enjoy making your muffins exciting and delicious!

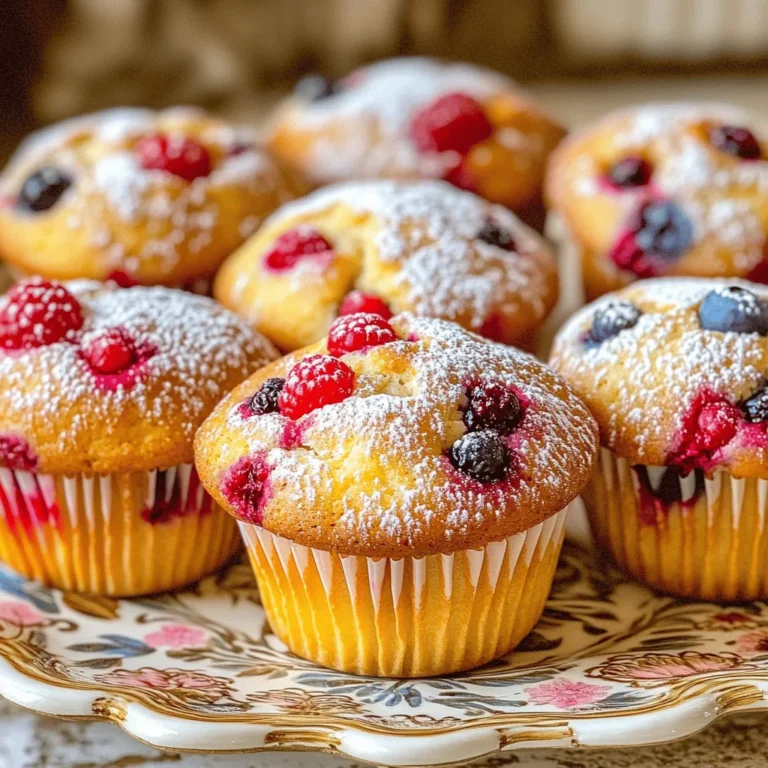
Triple Berry Muffins Bakery Fresh and Fluffy Treat

For these tasty chocolate mint cheesecake cups, you need some key ingredients. Here’s what you'll use: - 1 cup chocolate cookie crumbs (like Oreo or Graham crackers) - 4 tablespoons unsalted butter, melted - 16 oz cream cheese, softened - 1 cup powdered sugar - 1 teaspoon mint extract - 1 cup heavy whipping cream - 2 tablespoons cocoa powder These ingredients create the rich, creamy filling and a crunchy crust. The mint extract adds a nice burst of flavor that pairs perfectly with chocolate. To make your cheesecakes even more fun, consider these toppings: - 2 tablespoons mini chocolate chips (for topping) - Fresh mint leaves (for garnish) These toppings not only add flavor but also make your desserts look fancy. You can even drizzle some melted chocolate around the cups for extra flair. If you need to swap out some ingredients, here are a few ideas: - For cookie crumbs, use any chocolate cookie you like. - Instead of cream cheese, try a non-dairy cream cheese for a dairy-free option. - You can use a sugar substitute in place of powdered sugar if you want a lower sugar treat. These substitutions keep the recipe flexible and fun. Enjoy customizing your cheesecake cups! Start by gathering your chocolate cookie crumbs. You can use Oreo cookies or Graham crackers. In a medium bowl, mix the crumbs with melted butter. Stir until the mix looks like wet sand. This texture helps the crust hold together well. Next, divide the mixture into your serving cups. Press it down firmly to create a nice layer. This base is key to a great cheesecake cup. Now, let’s make the creamy filling. In a large mixing bowl, beat softened cream cheese with an electric mixer. Keep mixing until it’s smooth and creamy. Gradually add powdered sugar and mint extract. It should taste sweet and minty. In a separate bowl, whip heavy cream until stiff peaks form. This makes the filling light and fluffy. Now, gently fold the whipped cream into the cream cheese mix. Be careful not to deflate the whipped cream. This step creates a velvety texture. Next, it’s time to fill the cups. Scoop the cream cheese mixture onto the chocolate crust layer. Be sure to divide it evenly among all cups. For a fun touch, sprinkle a light layer of cocoa powder on top. This adds an extra chocolate layer. Refrigerate your cheesecake cups for at least four hours. This time allows them to set properly. The longer they chill, the firmer they become. For best results, cover the cups loosely with plastic wrap. This keeps them fresh without sticking. When ready to serve, add mini chocolate chips and a mint leaf on top. These last touches make each cup look beautiful and inviting. To get the best whipped cream, start with cold heavy cream. Cold cream whips faster and gets thicker. Use a clean bowl and beaters for the best results. Beat the cream until you see stiff peaks. This means the cream holds its shape. Be gentle when you mix it with the cream cheese. Folding helps keep the air in the whipped cream, making it light and fluffy. A smooth cheesecake is key to great flavor. Make sure your cream cheese is very soft before mixing. This helps it blend smoothly with the sugar and mint extract. Add powdered sugar slowly. Mixing too fast can cause lumps. If your mixture is grainy, try blending it a bit longer. Using an electric mixer helps break down any clumps. For a stunning look, serve the cheesecake cups on a pretty platter. You can drizzle melted chocolate around the cups for flair. Sprinkle crushed cookies on top for added texture. Each cup can use a mint leaf for garnish. This adds color and freshness. It makes your dessert even more tempting. {{image_2}} You can mix things up with different flavors! Instead of mint, try vanilla or raspberry. For vanilla, swap the mint extract with pure vanilla extract. This gives a smooth and rich taste. For raspberry, add fresh or frozen raspberries to the cream cheese. This adds a fruity twist. Each flavor brings its own fun, so get creative! Want a lighter option? Use low-fat cream cheese instead of regular cream cheese. It cuts some calories but keeps the flavor. You can also use sugar substitutes like stevia or erythritol. These sweeteners work well and lower the sugar content. Your cheesecake will still taste amazing, and you can enjoy it guilt-free. If you need a gluten-free crust, use gluten-free chocolate cookies. Brands like gluten-free Oreos or any chocolate gluten-free cookies work great. Just crush them and mix with melted butter like the recipe says. This way, everyone can enjoy these tasty cheesecake cups without worry. Store your chocolate mint cheesecake cups in the refrigerator. Use an airtight container to keep them fresh. Make sure the cups are covered well to prevent drying out. If you stack them, place a piece of parchment paper between layers. This will help keep the toppings intact. These cheesecake cups last about 3 to 5 days in the fridge. After that, they may lose their fresh taste. Always check for any signs of spoilage before eating. If they smell off or look strange, it’s best to toss them out. You can freeze these cheesecake cups for up to 2 months. To freeze, wrap each cup tightly in plastic wrap. Then, place them in a freezer-safe bag. When you're ready to enjoy them, thaw them in the fridge overnight. This keeps their taste and texture just right. Yes, you can use other cookies for the crust. Graham crackers work well if you want a milder taste. You can also try chocolate wafer cookies for a richer flavor. Just crush them into fine crumbs and mix with melted butter. The key is to get a nice, firm base for your cheesecake cups. You can make these cheesecake cups a day before you plan to serve them. Follow all the steps and then chill them in the fridge for at least four hours. This way, they set nicely and the flavors blend together. Just remember to add toppings right before serving for the best look. For a great presentation, arrange the cups on a colorful platter. Drizzling melted chocolate around the cups adds a nice touch. You can also sprinkle crushed cookies on top for extra crunch. Fresh mint leaves not only look good but also enhance the mint flavor. Yes, you can make these cheesecake cups dairy-free. Use dairy-free cream cheese and coconut cream instead of heavy cream. Check the labels to ensure they are free from dairy products. This way, everyone can enjoy these tasty treats without any worry. This blog post covered how to make chocolate mint cheesecake cups from start to finish. We explored essential ingredients, step-by-step instructions, and tips to ensure success. You now know fun variations and how to store these treats. Remember, with a few adjustments, you can customize this dessert for any taste. Enjoy making and sharing your delicious cheesecake cups!

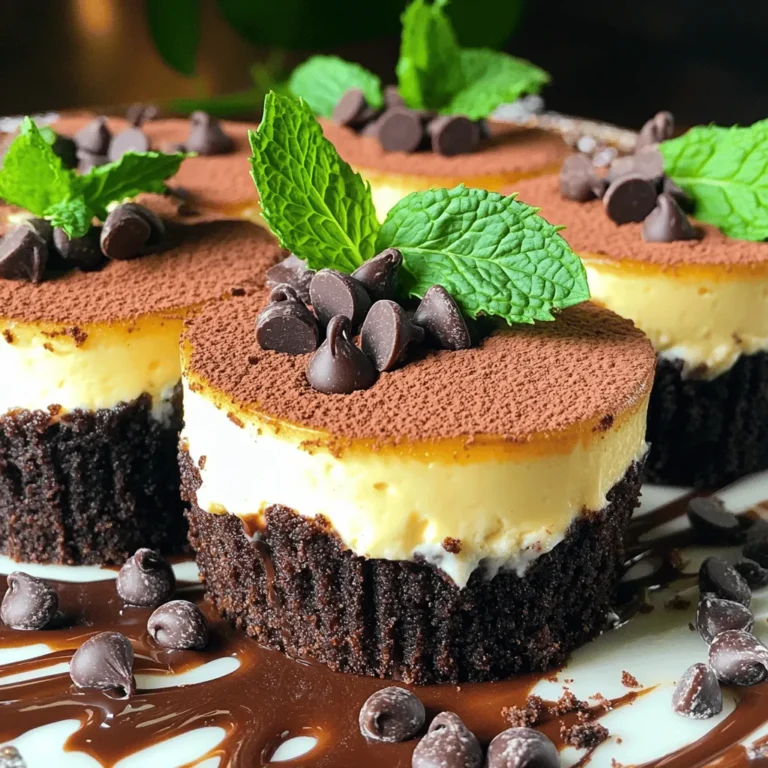
Chocolate Mint Cheesecake Cups Easy No Bake Delight

For this dish, you need fresh and quality ingredients. Here’s what you'll need: - 1 lb chicken breast, sliced into thin strips - 1 red bell pepper, sliced - 1 green bell pepper, sliced - 1 medium onion, sliced These ingredients bring bright colors and great flavors. The chicken gives protein, while the peppers and onion add crunch and sweetness. The right spices can transform your meal. Here’s a simple list of what you need: - 3 tablespoons olive oil - 2 tablespoons chipotle powder - 1 teaspoon cumin - 1 teaspoon garlic powder - 1 teaspoon onion powder - 1 teaspoon smoked paprika - Salt and pepper to taste These spices offer a smoky and spicy kick. Chipotle powder makes the dish exciting, while cumin adds warmth. To enjoy your fajitas, you’ll need some extras. Here’s what to have on hand: - 8 small flour tortillas - Fresh cilantro, chopped (for garnish) - Lime wedges (for serving) The tortillas wrap all the goodness. Fresh cilantro adds a burst of freshness, while lime juice brightens every bite. First, you need to get ready. Gather your ingredients. You will need: - 1 lb chicken breast, sliced into thin strips - 1 red bell pepper, sliced - 1 green bell pepper, sliced - 1 medium onion, sliced - 3 tablespoons olive oil - 2 tablespoons chipotle powder - 1 teaspoon cumin - 1 teaspoon garlic powder - 1 teaspoon onion powder - 1 teaspoon smoked paprika - Salt and pepper to taste - 8 small flour tortillas - Fresh cilantro, chopped (for garnish) - Lime wedges (for serving) Next, preheat your oven to 400°F (200°C). This step helps the chicken cook well. Now, take a large bowl. Add the sliced chicken, red bell pepper, green bell pepper, and onion. This mix brings color and flavor. In another small bowl, whisk together the olive oil, chipotle powder, cumin, garlic powder, onion powder, smoked paprika, salt, and pepper. This blend adds a spicy kick. Pour the spice mix over the chicken and vegetables. Toss everything until it’s all coated nicely. This gives your fajitas a rich flavor. Spread the chicken and veggies evenly on a large baking sheet. Make sure not to crowd them. This helps them roast nicely. Place the baking sheet in the preheated oven. Bake for 20 to 25 minutes. Stir halfway to ensure even cooking. The chicken should be cooked through, and the veggies tender. While the fajitas are baking, warm the flour tortillas. You can do this on a skillet or in the oven for a few minutes. Warm tortillas are soft and tasty. Once the baking time is up, take the sheet out of the oven. Let it cool slightly before serving. To serve, take a tortilla and add a generous portion of the chicken and veggie mix. Top it with fresh cilantro and a squeeze of lime juice. This adds brightness to each bite. For a vibrant presentation, arrange the fajitas on a platter. Add lime wedges and a sprinkle of cilantro. You can also serve salsa or guacamole on the side. Enjoy this flavorful feast with family and friends! To make the best fajitas, start with fresh ingredients. Use good-quality chicken breast. Slice it into thin strips for even cooking. Bell peppers add color and crunch. Use both red and green for a vibrant look. Slice them thin, just like the chicken. This helps everything cook at the same time. The spice blend makes a big difference. Measure each spice carefully. Chipotle powder gives heat and flavor. Cumin adds a warm, earthy taste. Garlic and onion powders boost the overall flavor. Smoked paprika adds a nice smokiness. Mix the spices well with the olive oil before pouring it over the chicken and veggies. This ensures every bite is tasty. One common mistake is overcrowding the pan. If you pile too much food on a sheet, it won't roast well. Instead, spread everything out in a single layer. This allows the chicken and veggies to brown nicely. Keep an eye on the cooking time. Overcooking can make the chicken dry. Aim for a tender and juicy finish. Another mistake is not tossing the chicken and veggies halfway through. Stirring helps them cook evenly. This way, you avoid burnt spots and ensure everything cooks just right. Want to take your fajitas to the next level? Try adding fresh lime juice. Squeeze some over the cooked fajitas for a zesty kick. Fresh cilantro also brightens the dish. It adds a fresh taste that complements the spices. Consider serving the fajitas with salsa or guacamole. These add more flavor and texture. You can also try different toppings like sour cream or cheese. Each will give a unique twist to your meal. Enjoy customizing and making the dish your own! {{image_2}} You can change up the protein in your fajitas. Instead of chicken, try beef or shrimp. Thinly slice beef sirloin or use large shrimp. Both cook quickly and soak up the spices well. You can even use turkey for a leaner option. Each protein brings its own taste, so feel free to experiment. For a vegetarian or vegan twist, skip the meat. Use a mix of hearty vegetables like mushrooms, zucchini, and eggplant. Firm tofu or tempeh works great too. Marinate and bake them just like the chicken. This option is colorful and full of flavor. Top it with fresh cilantro and lime for a bright finish. You can adjust the spice mix based on your taste. If you like more heat, add cayenne pepper or chili flakes. For a milder flavor, reduce the chipotle powder. You can also try taco seasoning or a mix of herbs like oregano and thyme. This way, your fajitas can match any mood or meal. Enjoy the process of finding your perfect blend! You can store leftover fajitas in the fridge. Place them in an airtight container. They stay fresh for up to three days. It’s best to keep chicken and veggies together. This helps maintain flavor and texture. If you want to store them longer, freezing is a great option. Allow the fajitas to cool completely. Next, transfer them into freezer-safe bags or containers. Squeeze out as much air as you can. They can last up to three months in the freezer. To reheat, first, thaw the fajitas overnight in the fridge. You can use an oven or a skillet. For the oven, preheat it to 350°F (175°C). Bake the fajitas for about 15 minutes. This keeps them juicy. If using a skillet, just warm them over medium heat. Add a splash of water to keep them moist. Enjoy your flavorful feast! Yes, you can prepare the chicken and vegetables a day in advance. Just slice the chicken and veggies, and mix them with the spices. Store them in the fridge in an airtight container. When you’re ready, just bake them. This saves time and makes dinner easy. You can pair these fajitas with many tasty sides. Consider serving them with: - Rice or quinoa - Refried beans or black beans - Salsa or guacamole - A fresh salad These sides add different flavors and textures to your meal. To keep leftovers fresh, let the fajitas cool down first. Place them in an airtight container. You can store them in the fridge for up to three days. For longer storage, freeze them in a freezer-safe bag. Just remember to label the bag with the date. When reheating, make sure they are hot all the way through. Understanding how to make delicious Chipotle Chicken Fajitas can elevate your cooking skills. We discussed key ingredients like chicken, veggies, and spices. I shared step-by-step instructions for prep, cooking, and serving. I covered tips for perfecting your fajitas and avoiding common mistakes. There are various tasty options to customize your dish, including vegetarian choices. Finally, I provided helpful storage and reheating tips. Use this knowledge to create flavorful meals. Enjoy experimenting and make fajitas your own!

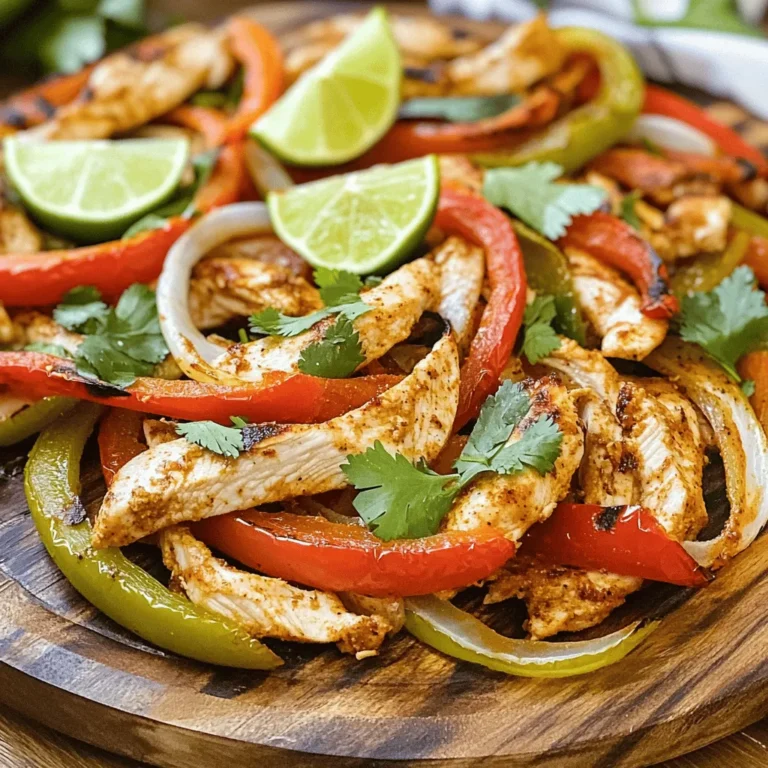
Chipotle Chicken Fajitas Sheet Pan Flavorful Feast

- 4 large russet potatoes - 1/4 cup unsalted butter - 4 cloves garlic - 1 teaspoon smoked paprika - 1 teaspoon dried oregano - 1 teaspoon onion powder - Salt and pepper - Fresh parsley Using these ingredients, you can create garlic butter steak fries that are crispy and full of flavor. The russet potatoes are perfect for fries. They give a nice texture. Unsalted butter adds rich flavor to the mix. Garlic is key here. It brings a beautiful aroma and taste. The smoked paprika gives a hint of warmth. Dried oregano adds a touch of earthiness. Onion powder rounds out the seasoning nicely. Don't forget salt and pepper! They enhance all the flavors. Fresh parsley is the final touch. It adds color and freshness to the dish. With these simple ingredients, you can make a delightful snack or side dish. Whether you're cooking for friends or just for yourself, these fries will impress. - Rinse and scrub the potatoes. Use cold water to remove dirt. - Cut into thick wedges. Aim for about one inch in thickness for even cooking. - Combine melted butter and minced garlic. Stir them in a bowl until smooth. - Add seasoning and mix. Include smoked paprika, oregano, onion powder, salt, and pepper. - Preheat air fryer. Set it to 400°F (200°C) for about 5 minutes. - Air fry the seasoned fries. Place the wedges in a single layer in the basket. - Shake basket for even cooking. Halfway through, give it a good shake to ensure crispness. - Best varieties for frying: I always choose russet potatoes for frying. They have a high starch content, which gives fries a fluffy inside and a crispy outside. - Importance of cutting thickness: Cut the potatoes into thick wedges, about 1-inch wide. This thickness helps them cook evenly and stay soft inside while getting crispy on the outside. - Cooking tips for air fryer: Preheat your air fryer to 400°F (200°C). This step is crucial as it helps the fries start cooking right away, giving them that perfect crunch. - Timing adjustments: Cook the fries for 15 minutes. At the halfway point, shake the basket to mix them up. This ensures all sides get that golden brown color. - Additional seasoning ideas: You can add cayenne pepper for heat or thyme for a herby twist. Experiment with your favorite spices to make the fries your own. - Optional dips for serving: Serve these fries with ranch dip or garlic aioli. These dips complement the garlic butter flavor and add extra richness. {{image_2}} You can change the flavor of your fries with different seasonings. For spicy garlic butter fries, add some cayenne pepper or chili powder to the garlic butter mix. This will give your fries a nice kick. Try herb-infused variations by adding fresh herbs. You might use thyme, rosemary, or basil. These add a fragrant twist to the garlic butter. Just chop the herbs finely and stir them into the mixture. If you don’t have an air fryer, you can still enjoy these fries. The oven-baked version is easy. Preheat your oven to 425°F (220°C). Spread the seasoned fries on a baking sheet in a single layer. Bake for about 25-30 minutes. Flip them halfway for even cooking. For a crunchy treat, use deep frying techniques. Heat oil in a deep pot to 350°F (175°C). Carefully add the fries in small batches. Fry them until golden brown, about 5-6 minutes. Drain on paper towels before serving. For a fun twist, load your fries with toppings. Cheese and bacon loaded fries are always a hit. Add shredded cheese and crispy bacon bits right after cooking. Place them back in the air fryer for a minute to melt the cheese. If you prefer vegan alternatives, try topping with nutritional yeast for a cheesy flavor. You can also add diced avocado or a drizzle of vegan ranch dressing. These toppings make the fries both tasty and unique. To keep your garlic butter steak fries fresh, place them in an airtight container. Line the container with paper towel to absorb any moisture. This helps keep them crispy. Store them in the fridge for up to 3 days. After three days, they may lose their flavor and texture. To reheat your fries without losing their crispiness, use your air fryer. Set it to 350°F (175°C). Place the fries in the basket in a single layer. Heat them for about 5 to 7 minutes. Check them often to avoid burning. For best results, shake the basket halfway through. Yes, you can freeze cooked fries. Allow them to cool completely before freezing. Place them in a single layer on a baking sheet and freeze for 1 to 2 hours. Once frozen, transfer them to a freezer bag. They will last up to 3 months. To thaw, just leave them in the fridge overnight before reheating. Yes, you can use different types of potatoes. Here are some great alternatives for steak fries: - Yukon Gold potatoes for a creamier texture - Sweet potatoes for a sweeter flavor - Red potatoes for a waxy bite Each type will give your fries a unique taste and texture. Just make sure they are cut thick enough to maintain that steak fry quality. To make these fries healthier, consider these tips for reducing fat content: - Use less butter or substitute with olive oil. - Air fry without any oils for a lighter option. - Add more herbs and spices for flavor instead of butter. These changes keep the taste while cutting down on calories and fat. Many sauces complement garlic butter steak fries. Here are some popular sauce recommendations: - Garlic aioli for a creamy kick - Ketchup for a classic choice - Ranch dressing for a cool, savory dip - Spicy mayo for a zesty twist These sauces will enhance your fries and make each bite even more enjoyable. This article covered how to make delicious garlic butter steak fries step-by-step. You learned about the key ingredients, easy cooking methods, and tips for optimal crispiness. Remember, using the right potatoes and seasonings can boost flavor. You can even try different cooking methods, like baking or frying. Lastly, don’t forget about storage options and reheating tips for the best results. Enjoy your tasty fries, made just the way you like!

Garlic Butter Steak Fries Air Fryer Delight Recipe

- 3/4 cup all-purpose flour - 1 teaspoon baking powder - 1/2 teaspoon baking soda - 1/2 teaspoon cinnamon - 1/4 teaspoon nutmeg - 1/4 teaspoon ginger powder - 1/4 teaspoon salt - 3 large eggs - 1 cup granulated sugar - 2/3 cup canned pumpkin puree - 1 teaspoon vanilla extract - 1 cup cream cheese, softened - 1/4 cup powdered sugar - 1 teaspoon lemon juice - 1/4 cup chopped nuts This recipe uses simple ingredients to create something special. The dry mix gives the roll shape and texture. The wet mix adds moisture and flavor. You can choose to add nuts for a little crunch, but they are not necessary. This mixture makes a lovely balance of taste and feel in each slice. {{ingredient_image_1}} First, you need to preheat your oven to 375°F (190°C). This step is crucial for even baking. Next, grab a 15x10-inch jelly roll pan. Grease it well with butter or cooking spray. After greasing, line the bottom with parchment paper. This makes it easy to remove the cake later. Now, let's mix the batter. In a medium bowl, add the dry ingredients. Combine 3/4 cup of all-purpose flour, 1 teaspoon of baking powder, and 1/2 teaspoon of baking soda. Add 1/2 teaspoon of cinnamon, 1/4 teaspoon of nutmeg, 1/4 teaspoon of ginger powder, and 1/4 teaspoon of salt. Whisk them together and set this bowl aside. In a large mixing bowl, beat 3 large eggs and 1 cup of granulated sugar. Use an electric mixer on high speed. Mix them for about 5 minutes. The mix should be thick and pale. Then, gently fold in 2/3 cup of canned pumpkin puree and 1 teaspoon of vanilla extract. Combine until it looks smooth. Next, take the dry mixture and gradually add it to the pumpkin mix. Fold the two together carefully. Your batter should be thick but pourable, with no streaks of flour visible. Spread the batter evenly into your prepared jelly roll pan. Bake for 15 to 20 minutes. To check if it’s done, insert a toothpick in the center. If it comes out clean, your cake is ready. While the cake bakes, prepare a clean kitchen towel. Dust it with powdered sugar. When the cake is done, immediately invert it onto the towel. Carefully remove the pan and peel off the parchment paper. Now, roll the cake tightly in the towel, starting from one short end. This helps shape the cake. Allow it to cool completely while rolled up. To make a perfect pumpkin cream cheese roll, avoid overmixing. Mixing too much can make the cake tough. Also, don't skip the parchment paper. It helps the cake come out easily. If you forget the towel dusted with sugar, the cake may stick. Finally, make sure your cake is cool before adding the filling. A warm cake can melt the cream cheese. For a smooth filling, use softened cream cheese. Cold cream cheese creates lumps, which is not what you want. Mix the cream cheese with powdered sugar and lemon juice until creamy. If you want extra crunch, add chopped nuts. Mix until everything blends well. Taste it to make sure it’s sweet enough for you. Rolling the cake is key to a great pumpkin cream cheese roll. After baking, invert the cake onto a sugared towel right away. This prevents it from sticking. Roll tightly from one end to the other. Keep the towel with the cake as it cools. When it’s cool, unroll gently. Spread the filling, then re-roll without the towel. This keeps the shape nice and tight. Pro Tips Use Fresh Spices: Freshly ground spices can enhance the flavor of your Pumpkin Cream Cheese Roll significantly. Consider grinding your own cinnamon, nutmeg, and ginger for a more aromatic experience. Cool Properly: After baking, allow the cake to cool completely in the towel. This helps retain moisture and makes it easier to roll without cracking. Experiment with Fillings: Feel free to personalize the cream cheese filling by adding spices or extracts, such as maple syrup or orange zest, to create unique flavor profiles. Chill Before Serving: Refrigerating the roll for at least 2 hours helps the filling set and makes slicing easier. Serve chilled for the best texture and flavor. {{image_2}} You can make a gluten-free pumpkin cream cheese roll. Use a 1:1 gluten-free flour blend instead of all-purpose flour. This blend often works well in most recipes. Make sure to check the label for any added ingredients. You may also need to add a bit of xanthan gum if your blend does not contain it. This helps mimic the texture of regular flour. You can change the flavor of your roll to keep things fresh. Try adding cocoa powder for a chocolate twist. Use 1/4 cup of cocoa powder to replace some flour. If you love spices, consider adding cloves or allspice. A dash or two will give your roll a warm, cozy taste. You can also add vanilla extract or almond extract for extra depth. If you want a vegan version, you can easily swap ingredients. Use flax eggs instead of real eggs. Mix 1 tablespoon of ground flaxseed with 3 tablespoons of water. Let it sit for 5 minutes to thicken. For the cream cheese filling, try using a vegan cream cheese. Coconut cream is another great option. Just make sure to sweeten it with powdered sugar to taste. These simple swaps make the dessert friendly for everyone! To store leftover Pumpkin Cream Cheese Roll, wrap it tightly in plastic wrap. Place it in the fridge for up to five days. Make sure it stays covered. This keeps it moist and fresh. If you have slices, store them in an airtight container. This helps prevent drying out. You can freeze this roll for up to three months. First, wrap it well in plastic wrap. Then, place it in a freezer-safe bag. When you're ready to eat, thaw it overnight in the fridge. It will taste just as good as when fresh. If you freeze slices, wrap each one individually for easy serving. Reheat slices in the microwave for 10 to 15 seconds. This warms them nicely without drying them out. You can also enjoy it cold if you prefer. If you want a warm treat, use an oven. Preheat it to 350°F (175°C) and heat the slices for about five minutes. This will bring back its fresh taste. Enjoy your delicious Pumpkin Cream Cheese Roll! The Pumpkin Cream Cheese Roll lasts about 3 to 5 days in the fridge. Wrap it tightly in plastic wrap. This keeps it fresh and moist. You can also store it in an airtight container. If you want to enjoy it later, you can freeze it. Just slice it first, and wrap each piece well. Yes, you can make this dessert ahead of time. Prepare the roll and fill it. Then, wrap it tightly and chill it in the fridge. This lets the flavors meld. You can also freeze the roll for up to a month. Just thaw it in the fridge overnight before serving. If you need a substitute for cream cheese, try using Greek yogurt. It has a similar texture. You can also use mascarpone cheese for a richer taste. Another option is to use a dairy-free cream cheese. This works well for those with dairy allergies. Adjust the sweetness based on your choice. You learned about the key ingredients for a pumpkin cream cheese roll, focusing on both dry and wet components, plus optional add-ins. I also shared step-by-step instructions for baking and cooling your cake. You learned tips to avoid common mistakes and how to perfect your filling. Variations let you adapt for gluten-free, vegan, or unique flavors. Lastly, I covered storage and reheating methods to keep your dessert fresh. Enjoy making your pumpkin cream cheese roll and share it with others. The joy of baking is in the details and the taste!

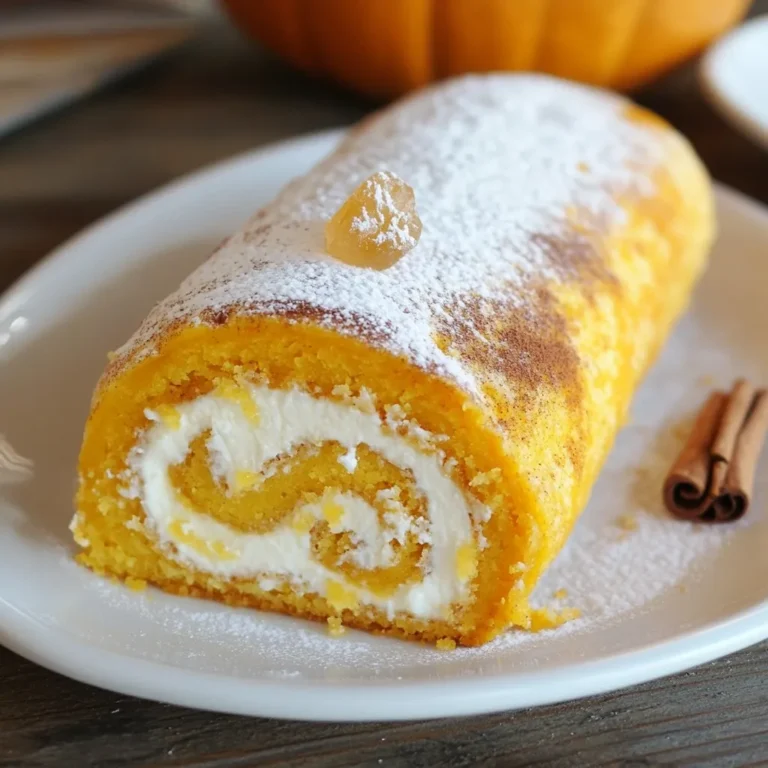
Pumpkin Cream Cheese Roll Tasty and Simple Dessert

To make bakery-style mocha chip muffins, you will need the following ingredients: - 1 ½ cups all-purpose flour - 1 cup granulated sugar - ½ cup dark cocoa powder - 1 tablespoon baking powder - ½ teaspoon baking soda - ¼ teaspoon salt - 1 cup brewed coffee, cooled - ½ cup vegetable oil - 2 large eggs - 1 teaspoon vanilla extract - 1 cup semi-sweet chocolate chips - ½ cup chopped walnuts (optional) These simple ingredients blend to create a rich and flavorful muffin. The flour gives the muffins body, while sugar adds sweetness. Dark cocoa powder provides that deep chocolate flavor, and baking powder helps them rise. The coffee adds a mocha twist and enhances the chocolate taste. You can choose to add walnuts for crunch. If you skip them, the muffins will still taste great. Make sure your coffee is cooled before mixing. This helps the batter combine without cooking the eggs. Gather these ingredients, and you are ready to start baking. The combination of these flavors will make your kitchen smell heavenly! First, set your oven to 375°F (190°C). While it heats, prepare your muffin tin. You can line it with paper liners or grease it well. This step helps the muffins come out easily later. Take a large bowl and sift together the following: - 1 ½ cups all-purpose flour - 1 cup granulated sugar - ½ cup dark cocoa powder - 1 tablespoon baking powder - ½ teaspoon baking soda - ¼ teaspoon salt Mix these ingredients well. You want them evenly combined for the best texture. In another bowl, whisk together: - 1 cup brewed coffee, cooled - ½ cup vegetable oil - 2 large eggs - 1 teaspoon vanilla extract Make sure these ingredients mix well. After that, pour the wet mix into the dry mix. Stir gently until combined. Avoid overmixing; it’s okay to have a few lumps. Now, fold in: - 1 cup semi-sweet chocolate chips - ½ cup chopped walnuts (optional) After that, divide the batter among the muffin cups. Fill each cup about ¾ full. Bake in the oven for 18-20 minutes. Check doneness by inserting a toothpick. If it comes out clean, they’re ready! Once baked, take the muffins out and let them cool in the pan for 5 minutes. Afterward, transfer them to a wire rack to cool completely. For serving, you can dust them with powdered sugar. Enjoy with a warm cup of coffee for a great treat! Baking can be tricky. Here are some mistakes to skip: - Overmixing the batter: This can make your muffins tough. Mix gently. - Wrong oven temperature: Always preheat your oven. A hot oven helps muffins rise. - Not measuring ingredients correctly: Use a kitchen scale for best results. - Skipping the liners: They help muffins come out clean. They also help with cleanup. To get that soft, fluffy texture, here’s what to do: - Use room temperature eggs: They mix better and help the batter blend well. - Don’t overmix: Mix until just combined. A few lumps are okay. - Add ingredients in the right order: Wet to dry helps keep air in the batter. - Check for doneness: A toothpick should come out clean, not wet. If you have extra muffins, store them right: - Cool completely before storing: This helps prevent sogginess. - Use an airtight container: This keeps them fresh longer. - Refrigerate for longer storage: Muffins can last about a week in the fridge. - Freeze for even longer: Wrap muffins tightly in plastic wrap, then in foil. They last up to three months. {{image_2}} To make gluten-free mocha chip muffins, swap all-purpose flour for gluten-free flour. Use a blend that works well for baking. I suggest using a 1:1 gluten-free flour mix. This keeps the muffins soft and moist. The other ingredients stay the same. Just follow the same steps, and you’ll get great results. You can change the flavor of your muffins easily. Try adding fresh raspberries for a fruity twist. They add a nice tartness. You can also mix in almond extract instead of vanilla. This gives a nice nutty flavor. Other fun options are hazelnuts or peanut butter chips. Each adds a unique taste that makes muffins exciting. To make these muffins vegan, replace eggs with flax eggs. Mix 1 tablespoon of ground flaxseed with 2.5 tablespoons of water. Let it sit for 5 minutes until it thickens. You can also swap vegetable oil for applesauce. This keeps the muffins moist. Use plant-based milk instead of brewed coffee if you want. Just remember, the taste will change a bit, but they will still be delicious! To keep your muffins fresh, store them in an airtight container. This will keep them moist and tasty. Make sure the muffins cool completely before sealing them. You can keep them at room temperature for up to three days. If you want to keep them longer, use the freezer. Freezing muffins is a smart way to enjoy them later. Wrap each muffin in plastic wrap. Then place them in a freezer bag. Label the bag with the date and type of muffin. They will stay good for about three months in the freezer. When you want a muffin, just take it out and let it thaw. To reheat your muffins, use an oven or a microwave. If you use the oven, preheat it to 350°F (175°C). Place the muffins on a baking sheet for about 5-7 minutes. If you're in a hurry, microwave the muffin for 10-15 seconds. Enjoy your warm, tasty muffin with a cup of coffee! To make muffins rise high, use fresh baking powder. This leavening agent helps create air pockets in the batter. Mix wet and dry ingredients separately before combining them. Stir just until mixed to avoid tough muffins. Fill the muffin cups three-quarters full, allowing room for rising. Yes, you can use different types of chocolate. Dark chocolate, white chocolate, or milk chocolate all work well. You can also mix various types for a fun twist. Just remember that different chocolates have different sweetness levels. Adjust the sugar in the recipe if needed. You can substitute brewed coffee with hot water, milk, or almond milk. For a deeper flavor, use espresso or coffee-flavored syrup. Choose a liquid that you enjoy, as it impacts the muffin's taste. Each option will give your muffins a unique twist. These muffins last about 3 to 5 days at room temperature. Store them in an airtight container to keep them fresh. You can also freeze them for up to three months. To enjoy later, thaw them overnight in the fridge. Reheat in the microwave for a warm treat! This blog post covered the key ingredients for making delicious muffins, from cocoa powder to chocolate chips. I shared step-by-step instructions and some tips to help avoid common pitfalls. Variations, like gluten-free and vegan options, allow for different tastes and diets. Storing muffins properly ensures you enjoy them longer. Remember, baking is both a science and an art. Try these recipes, and enjoy baking your perfect muffins!

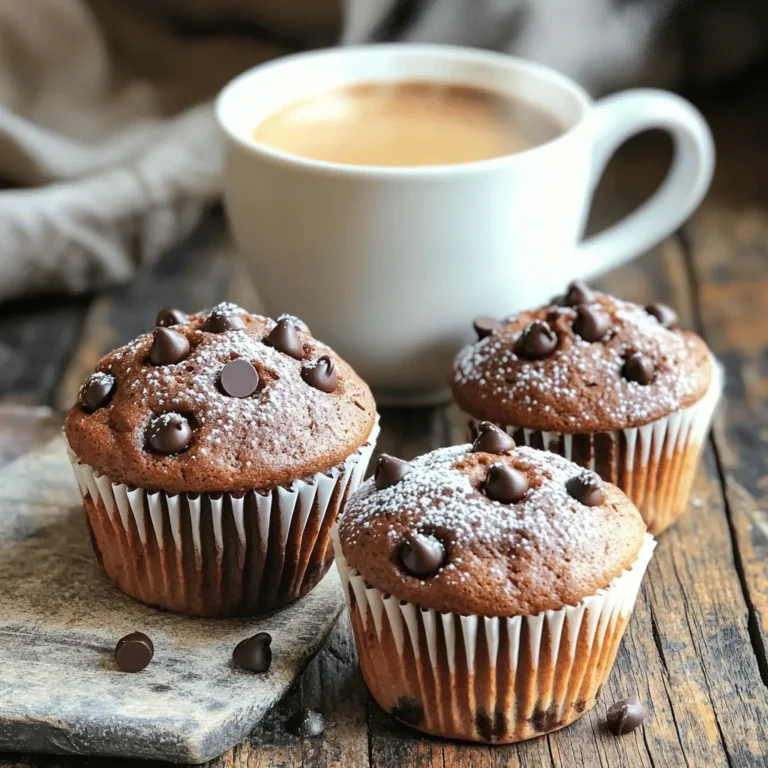
Bakery-Style Mocha Chip Muffins Easy and Delicious Recipe

- 2 cups broccoli florets (fresh or frozen) - 1 cup long-grain white rice - 3 cups vegetable broth The main stars of this dish are the broccoli, rice, and vegetable broth. Broccoli adds a nice crunch and color. You can use fresh or frozen, so it's easy to find. Long-grain white rice cooks well in the slow cooker and absorbs all the flavors. The vegetable broth gives a rich taste to the rice and broccoli. - 1 cup shredded cheddar cheese - 1/2 cup cream cheese, softened - 1/2 cup grated Parmesan cheese Cheese is key for this casserole. Cheddar cheese gives it a sharp flavor and melts nicely. Cream cheese makes the dish creamy and rich. Parmesan cheese adds a salty kick. Together, they create a cheesy goodness that makes this casserole irresistible. - 1 small onion, finely chopped - 2 cloves garlic, minced - 1 teaspoon garlic powder - 1 teaspoon onion powder - 1/2 teaspoon black pepper - Salt to taste Flavor is all about the details. Onions and garlic bring depth to every bite. Fresh garlic and garlic powder work together to boost that garlic flavor. Black pepper and salt enhance the taste and balance the dish. These little ingredients make a big difference in flavor. 1. Start by mixing the rice and broth. In a medium bowl, combine 1 cup of long-grain white rice with 3 cups of vegetable broth. Stir until well mixed. This step adds flavor to the rice as it cooks. 2. Next, layer the broccoli in the slow cooker. Place 2 cups of broccoli florets evenly at the bottom of the slow cooker. This creates a nice base for your casserole. 1. Now, prepare the cream cheese mix. In a separate bowl, mix 1/2 cup of softened cream cheese, 2 cloves of minced garlic, 1 small finely chopped onion, 1 teaspoon of garlic powder, 1 teaspoon of onion powder, 1/2 teaspoon of black pepper, and salt to taste. Blend until smooth. This creamy mix is key for flavor. 2. Spoon this mixture over the rice and broccoli layer in the slow cooker. Spread it out gently to cover everything. This helps create an even taste throughout the dish. 1. Cover the slow cooker and set it to low heat. Cook for 3 to 4 hours. Check the rice to ensure it is fully cooked and the liquid is absorbed. 2. Once cooked, add in 1 cup of shredded cheddar cheese and 1/2 cup of grated Parmesan cheese. Stir well to combine. This step makes the casserole cheesy and delicious. 3. Cover the slow cooker again for 10 to 15 minutes. This allows the cheese to melt and become ooey-gooey. 4. Finally, stir gently and taste for seasoning. Adjust with more salt or pepper if needed. Enjoy your warm, cheesy casserole! To ensure your rice is fully cooked, check it after 3 hours. The rice should be soft and fluffy. If you use brown rice, add an extra cup of broth and cook for 4 to 5 hours. This helps the rice absorb enough liquid. If you choose a different rice type, adjust the liquid. For basmati rice, use 2.5 cups of broth. For jasmine rice, stick with the original 3 cups. Each rice type has a unique water need, so this step is key! To boost flavor, add fresh herbs. Chopped parsley or thyme can brighten the dish. You can also sprinkle in some paprika for a warm taste. For a twist, try using smoked cheese instead of cheddar. This adds a rich depth. If you want a creamy alternative, swap out regular cheese for goat cheese. It adds a tangy note that pairs well with broccoli. Each option can change the casserole’s flavor and feel. Garnish your casserole with chopped fresh parsley. This adds color and freshness. You can also sprinkle some extra cheese on top right before serving for a gooey finish. Serve in large bowls for a cozy feel. For a fun twist, layer the casserole in small jars. This makes for a cute presentation at parties. You can even add a sprig of parsley on top for a pop of color! {{image_2}} You can make this dish even better by swapping some ingredients. Try using different cheeses. Gouda or mozzarella can add a nice twist. You can mix things up with vegetables too. Add bell peppers, carrots, or peas for extra color and taste. If you want a vegan version, use dairy-free cream cheese and cheese substitutes. There are many great vegan cheese options available now. Also, for gluten-free needs, make sure your broth is gluten-free. Use gluten-free rice if that’s your choice. Want to add a protein? Chicken, sausage, or even tofu works well. Just cook it first before adding it to the slow cooker. For a spicy kick, drizzle some hot sauce or add jalapeños. These changes can make your casserole exciting and new! To keep your Slow Cooker Cheesy Broccoli Rice Casserole fresh, follow these steps: - Refrigeration tips: Place leftovers in an airtight container. Store in the fridge for up to four days. - Freezing options for long-term storage: For longer storage, freeze in a freezer-safe container. It can last for up to three months. Make sure to label the container with the date. Reheating your casserole is simple. Here are the best methods: - Best methods for reheating: Microwave individual portions on medium heat. Stir every minute until hot. Alternatively, reheat in the oven at 350°F (175°C) for 20-30 minutes. - Maintaining texture and flavor after storage: To keep the creamy texture, add a splash of broth or milk when reheating. This helps restore moisture. Knowing how long your casserole lasts is key. Here’s what to expect: - Expected duration in the refrigerator: In the fridge, expect your casserole to last about four days. - Signs of spoilage to watch for: Look for off smells, mold, or changes in texture. If any signs appear, throw it away to stay safe. Yes, you can use brown rice. Brown rice takes longer to cook. You should increase the cooking time to about 5-6 hours on low heat. Also, add an extra cup of vegetable broth to help it cook through. You have many options here. You can use homemade broth made from veggies. You can also use water with a bit of added salt. Store-bought options include chicken broth or mushroom broth. Each will give a different flavor, so choose what you like best. You can tell it's done when the rice is tender and the liquid is absorbed. The casserole should look creamy and not soupy. To test the rice, take a spoonful and taste it. If it’s soft and cooked, you’re good to go! We covered a simple and tasty slow cooker broccoli cheese casserole. You learned about the main and dairy ingredients, plus all the flavorings. I shared easy cooking steps and key tips to boost taste and avoid mishaps. With fun variations, you can tailor the recipe to suit your needs. Lastly, I included storage tips to keep your leftovers fresh. Remember, this dish is all about creativity and comfort. Enjoy making your casserole, and let it bring smiles to your table!

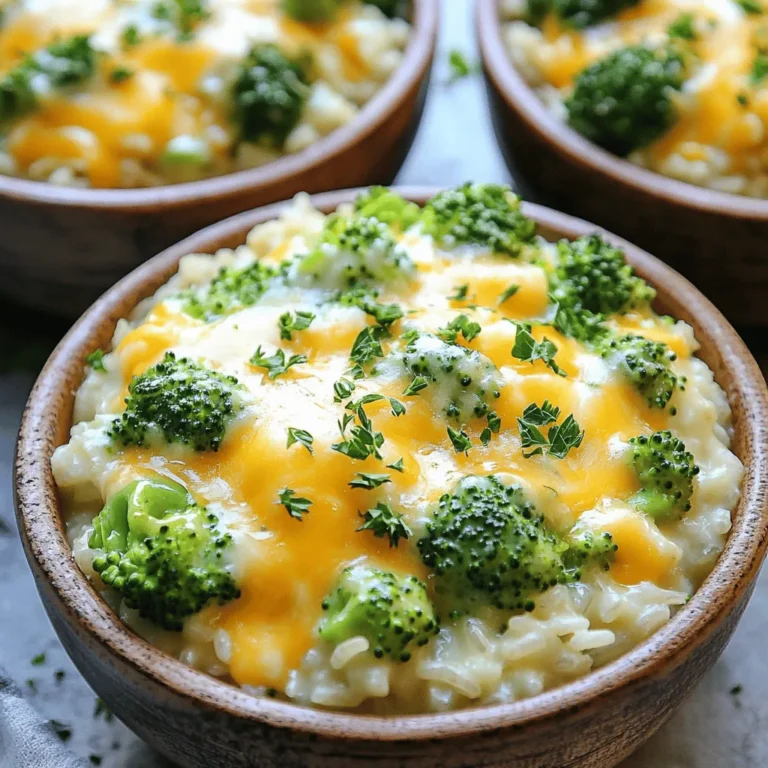
Slow Cooker Cheesy Broccoli Rice Casserole Delight

- 2 cups all-purpose flour - 1 teaspoon baking soda - 1 teaspoon baking powder - 1 teaspoon ground cinnamon - ½ teaspoon ground nutmeg - ½ teaspoon ground ginger - ½ teaspoon salt - 1 cup pumpkin puree (canned or fresh) - 1 cup granulated sugar - ½ cup vegetable oil - 2 large eggs - 1 teaspoon vanilla extract - 4 oz cream cheese, softened - ¼ cup powdered sugar - 1 tablespoon milk - Optional: Chopped pecans for topping In this recipe, we use a mix of dry and wet ingredients. Each part adds flavor and texture. The dry ingredients create the base of the bread. Flour gives it structure. Baking soda and baking powder help it rise. Spices like cinnamon, nutmeg, and ginger add warmth and depth. Salt balances the sweetness. For the wet ingredients, pumpkin puree gives moisture and a rich taste. Granulated sugar sweetens the bread. Vegetable oil keeps it soft and tender. Eggs bind everything together, while vanilla extract adds a lovely aroma. The cream cheese filling is the star. It brings richness and a tangy flavor. The powdered sugar sweetens it, and milk helps it blend smoothly. If you like, you can add chopped pecans on top for a nice crunch and earthy taste. Gather these ingredients, and you’re ready to bake a delicious loaf of Pumpkin Cream Cheese Swirl Bread! 1. First, preheat your oven to 350°F (175°C). Grease a 9x5-inch loaf pan. 2. In a medium bowl, whisk together the dry ingredients. This includes 2 cups of all-purpose flour, 1 teaspoon baking soda, 1 teaspoon baking powder, 1 teaspoon ground cinnamon, ½ teaspoon ground nutmeg, ½ teaspoon ground ginger, and ½ teaspoon salt. Mix well so there are no lumps. 3. In a large mixing bowl, combine the wet ingredients. Add 1 cup of pumpkin puree, 1 cup of granulated sugar, ½ cup of vegetable oil, 2 large eggs, and 1 teaspoon of vanilla extract. Mix until smooth and creamy. 1. Gradually add the dry mixture into the wet ingredients. Stir gently until just combined. Make sure not to overmix. A few small lumps are okay. 2. In another bowl, prepare the cream cheese filling. Beat together 4 oz of softened cream cheese, ¼ cup of powdered sugar, and 1 tablespoon of milk until creamy and smooth. 1. Pour half of the pumpkin batter into the prepared loaf pan. 2. Spoon dollops of the cream cheese mixture over the pumpkin batter. 3. Add the rest of the pumpkin batter on top of the cream cheese. 4. Using a knife or skewer, gently swirl the cream cheese mixture into the pumpkin batter. This creates a nice marbled effect. Be careful not to over-swirl; you want distinct layers. 1. Bake in the preheated oven for about 60-70 minutes. Check doneness by inserting a toothpick into the center. It should come out clean. 2. Once baked, allow the bread to cool in the pan for 10-15 minutes. After that, transfer it to a wire rack to cool completely. Enjoy the delightful aroma as it cools! - Avoiding overmixing the batter: Mix the pumpkin and dry ingredients until just combined. Overmixing can make the bread tough. You want it fluffy and light, so stop mixing as soon as you see no dry flour. - Ensuring proper oven temperature: Always preheat your oven to 350°F (175°C). An oven thermometer can help check the heat. If the oven is too hot, the outside will cook too fast, and the inside will stay raw. - Serving with powdered sugar and whipped cream: Once the bread cools, slice it and dust with powdered sugar. A dollop of whipped cream adds a creamy touch. This makes your bread look fancy and taste delicious! - Storing and freezing options for optimal freshness: Wrap any leftover bread tightly in plastic wrap. Store it in the fridge for up to a week. You can freeze it for up to three months. Just make sure to slice it first for easy thawing. {{image_2}} You can easily change this bread's flavor. Try adding chocolate chips for a sweet twist. They melt into the bread as it bakes. Chopped cranberries give a tart touch that contrasts well with the sweet pumpkin. Want a gluten-free version? Just swap the all-purpose flour for a gluten-free blend. Make sure the blend has a good binding agent like xanthan gum. This keeps the bread from crumbling. Pair this bread with warm drinks like coffee or tea. The spices in the bread complement the flavors in these drinks. For a fun twist, enjoy it with a hot chocolate topped with whipped cream. Serve with a side of fresh fruit for a light touch. Slices of apple or pear add a nice crunch. You can also spread a bit of cream cheese on top. This makes each bite extra creamy and rich. To keep your Pumpkin Cream Cheese Swirl Bread fresh, follow these tips: - Cool completely: Let the bread cool on a wire rack before storing. - Wrap tightly: Use plastic wrap or aluminum foil to cover the bread. This keeps moisture in and air out. - Use an airtight container: For extra protection, place the wrapped bread in a container. For refrigeration and freezing: - Refrigerate: Store in the fridge for up to a week. - Freeze: Wrap the bread well in plastic and then foil. This helps prevent freezer burn. The shelf life of your bread varies based on storage: - Room temperature: Enjoy it fresh for about 2 to 3 days. - Refrigerated: It stays tasty for about a week. - Frozen: You can keep it for 3 months. Just thaw in the fridge when ready to eat. This sweet bread is best enjoyed fresh, but these tips help you enjoy it longer! You can easily make this bread vegan. For the eggs, use flaxseed meal or applesauce. Mix 1 tablespoon of flaxseed meal with 2.5 tablespoons of water. Let it sit until it thickens. For the cream cheese, try vegan cream cheese. Use a plant-based milk, like almond or oat, instead of regular milk. These swaps keep the bread moist and tasty. Yes, you can use homemade pumpkin puree! To make it, roast a small pumpkin until soft. Scoop out the flesh and mash it until smooth. Fresh puree gives a lively flavor. Make sure to drain any excess water. This keeps your bread from getting too wet. To reheat leftovers, slice the bread and place it in a toaster or a warm oven. Set the oven to 300°F (150°C). Heat for about 10 minutes. This warms the bread without drying it out. You can also microwave slices for about 15 seconds for a quick treat. Yes, you can make muffins! Pour the pumpkin batter into a lined muffin tin. Fill each cup about two-thirds full. Bake for 20-25 minutes, or until a toothpick comes out clean. Enjoy your pumpkin cream cheese swirl muffins warm or at room temperature! This blog post covered how to make delicious Pumpkin Cream Cheese Swirl Bread. We discussed essential ingredients, step-by-step instructions, and tips for success. You can enhance the flavor and switch things up with different add-ins. Remember to store your bread properly for the best taste. Whether you enjoy it warm or cold, this recipe is perfect for any season. Give it a try, and you won’t be disappointed!

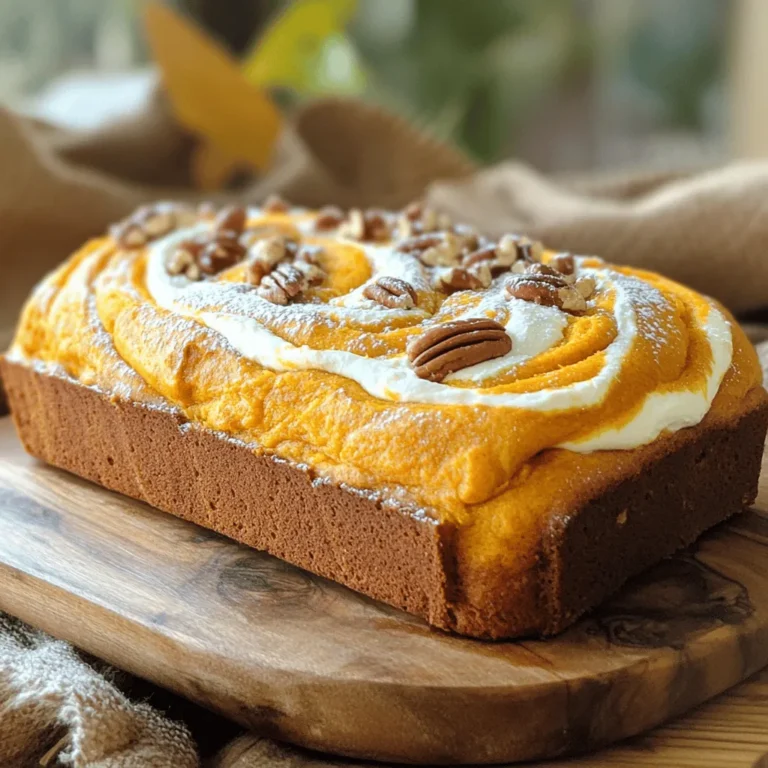
Pumpkin Cream Cheese Swirl Bread Irresistible Recipe

- 1 lb chicken tenderloins - 1 cup buttermilk - 4 cloves garlic, minced - 1 tablespoon hot sauce (adjust to taste) These main ingredients create a juicy and flavorful base. The chicken tenderloins are perfect for this recipe. They cook quickly and stay tender. Buttermilk adds moisture and depth, while garlic gives a rich taste. Hot sauce brings a kick, which you can adjust to your liking. - 1 teaspoon smoked paprika - 1 teaspoon cayenne pepper (adjust to taste) - 1 teaspoon onion powder - 1 teaspoon salt - 1/2 teaspoon black pepper Spices make this dish pop! Smoked paprika adds a subtle smokiness. Cayenne pepper gives you that heat, so feel free to adjust it. Onion powder adds flavor without being too strong. Salt and black pepper enhance everything, bringing out the best in your chicken. You can add extra flavors to make these chicken tenders your own. Try adding: - Fresh herbs like parsley or cilantro for brightness. - Grated Parmesan cheese mixed with the flour for a cheesy twist. - Lemon zest for a fresh citrus touch. These options allow you to play with the dish. Get creative and find what you love most! To start, I mix the marinade in a large bowl. I add 1 cup of buttermilk. Then I throw in 4 minced garlic cloves. Next, I add 1 tablespoon of hot sauce, 1 teaspoon of smoked paprika, and 1 teaspoon of cayenne pepper. I also include 1 teaspoon of onion powder, 1 teaspoon of salt, and 1/2 teaspoon of black pepper. I stir it all well to blend the flavors. I then add 1 pound of chicken tenderloins to the bowl. I make sure they are fully covered in the marinade. I cover the bowl and put it in the fridge. I let it marinate for at least 1 hour, but overnight makes it even better. After marinating, I take the chicken out of the fridge. I preheat the air fryer to 400°F (200°C) for about 5 minutes. While it heats, I grab a shallow dish. I put 1 cup of all-purpose flour in it. I season the flour with a pinch of salt and black pepper. Next, I take each chicken tenderloin and dredge it in the flour. I shake off any extra flour. This helps create a nice crust. I then lightly spray the air fryer basket with cooking spray. I place the coated chicken tenders in a single layer in the basket. I make sure they do not overlap. To make the chicken crispy, I spray the tops lightly with olive oil. I set the air fryer to cook the chicken for about 10 to 12 minutes. I flip the tenders halfway through cooking. I check that the internal temperature reaches 165°F (75°C). Once they are golden brown, I take them out of the air fryer. I let the chicken tenders rest for a few minutes before serving. This helps keep them juicy. For a great presentation, I serve them on a wooden platter. I add a side of ranch dipping sauce and fresh veggies. I also like to sprinkle some chopped parsley on top for color. To get great taste, marinate the chicken well. Mix buttermilk, garlic, and hot sauce in a bowl. This mix will soak into the chicken. Let the chicken sit in the fridge for at least one hour. For even better flavor, try marinating overnight. The longer you let it soak, the richer the taste. For crispy chicken tenders, the coating is key. Dredge the marinated chicken in seasoned flour. Be sure to shake off any excess flour. Lightly spray the air fryer basket and chicken tenders with cooking spray. This helps them get that golden brown color. Air fry at 400°F for 10-12 minutes. Flip them halfway for even cooking. If you have dietary needs, there are easy swaps. Use gluten-free flour instead of all-purpose flour. For dairy-free options, try almond milk in place of buttermilk. You can also use your favorite hot sauce to adjust spice levels. These changes keep the dish tasty while fitting your diet. {{image_2}} You can adjust the heat of your chicken tenders. If you love spice, add more cayenne pepper. For a milder taste, reduce the hot sauce and cayenne. You can even try different hot sauces. A sweet chili sauce gives a nice twist. For a smoky flavor, include extra smoked paprika. Experiment with flavors to find your perfect balance! The air fryer gives you crispy chicken tenders without much oil. Yet, you can also use your oven. Preheat your oven to 425°F (220°C). Place the chicken tenders on a baking sheet lined with parchment paper. Bake for about 15-20 minutes, flipping halfway. The result is still delicious, but the air fryer gives a crunchier finish. Choose what works best for you! These spicy garlic chicken tenders shine with the right sides. Serve them with ranch dipping sauce for a creamy contrast. Fresh veggies like carrots or celery add crunch and color. You can also pair them with a light salad or coleslaw. Want something heartier? Try serving with sweet potato fries or rice. Each side enhances the meal and makes it more satisfying! To keep your spicy garlic chicken tenders fresh, let them cool down. Place them in an airtight container. Make sure to store them in the fridge. They will last for about 3 to 4 days. If you want to keep them longer, consider freezing. To reheat, use the air fryer for the best results. Set it to 350°F (175°C). Heat the chicken tenders for 5 to 7 minutes. This will help them stay crispy. You can also use an oven if you prefer. Just place them on a baking sheet and heat at 350°F (175°C) for about 10 minutes. To freeze, wrap each tender in plastic wrap. Place them in a freezer bag or container. You can store them for up to 3 months. When ready to eat, let them thaw in the fridge overnight. Then, reheat as mentioned above for that crispy finish. Marinate the chicken for at least 1 hour. However, if you have time, let it sit overnight. This makes the chicken more juicy and flavorful. The longer it marinates, the better the taste gets. The buttermilk helps tenderize the meat. The garlic and spices soak in deeply, creating a bold flavor. Yes, you can use chicken breasts! Just cut them into strips to match the size of tenders. Chicken breasts will cook a bit longer, so check them at about 12-15 minutes. Ensure they reach an internal temperature of 165°F (75°C). The breading method stays the same, ensuring a crispy outside. I love serving these tenders with ranch dressing. The cool ranch balances the heat. Other great choices are honey mustard or blue cheese dressing. For something bolder, try a spicy sriracha mayo. Each sauce adds a fun twist to your meal. Enjoy experimenting with different flavors! In this article, we explored how to make Air Fryer Spicy Garlic Chicken Tenders. We covered key ingredients, step-by-step cooking instructions, and tips for best flavor. You learned how to customize the recipe and store leftovers. For the best results, remember to marinate the chicken well and choose your favorite spices. Enjoy experimenting with different cooking methods and flavors. With these tips, you can make tasty tenders anytime. Happy cooking!

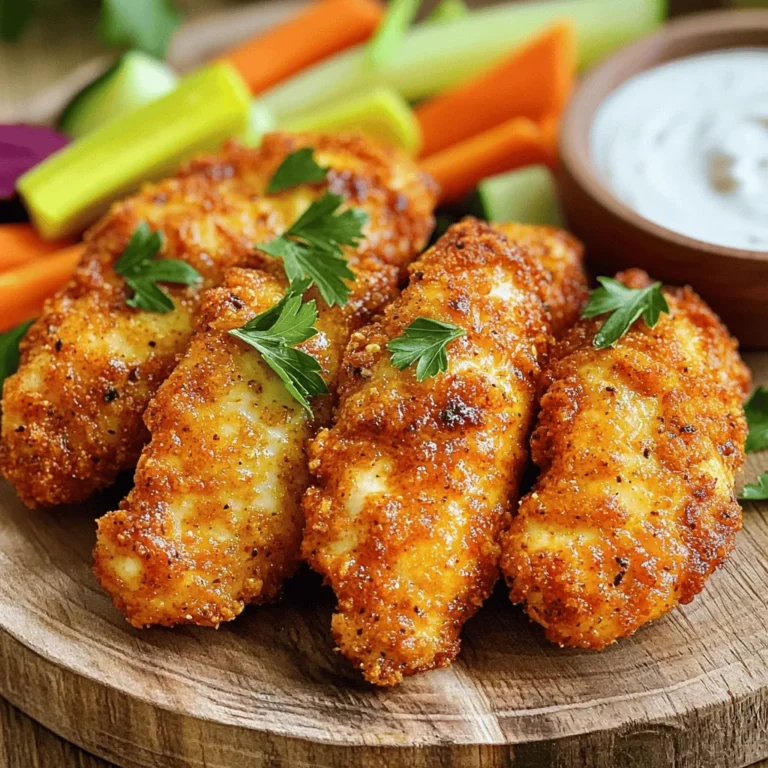
Air Fryer Spicy Garlic Chicken Tenders Crispy Delight

- 4 salmon fillets - 1 pound Brussels sprouts, trimmed and halved - 1/4 cup pure maple syrup - 2 tablespoons Dijon mustard - 2 tablespoons olive oil - 2 cloves garlic, minced - Salt and pepper to taste - 1 tablespoon fresh lemon juice - 1 teaspoon dried thyme - 1/4 cup chopped pecans (optional for garnish) When you gather these ingredients, you set the stage for a tasty dish. The salmon fillets are rich in flavor and healthy fats. Brussels sprouts add a nutty crunch that complements the salmon. Maple syrup brings a sweet touch that makes this meal shine. The Dijon mustard adds a tangy kick that balances the sweetness. Olive oil helps to roast the Brussels sprouts to perfection. Fresh garlic gives a warm aroma that fills your kitchen. Salt and pepper enhance all the flavors. Fresh lemon juice brightens the dish, making it lively. Dried thyme adds a fragrant note that rounds out the taste. If you want an extra crunch, sprinkle chopped pecans on top before serving. With these simple ingredients, you create a dish that is both easy and delicious. It’s perfect for a busy weeknight or a special meal. - Preheat your oven to 400°F (200°C). - In a large bowl, combine the halved Brussels sprouts with olive oil, minced garlic, salt, pepper, and dried thyme. Toss well to coat. - In a small bowl, mix together the maple syrup, Dijon mustard, lemon juice, salt, and pepper. - Use a whisk to blend until smooth. - On a large baking sheet lined with parchment paper, spread the Brussels sprouts on one side. - Place the salmon fillets on the other side of the sheet pan. - Brush the maple glaze generously over the salmon fillets. - Place the sheet pan in the preheated oven. Bake for 15 to 20 minutes. - The salmon should flake easily with a fork, and the Brussels sprouts should be tender and caramelized. To get a thick glaze, mix the maple syrup, Dijon mustard, and lemon juice well. This combo works best when you whisk it until smooth. If you want a sweeter glaze, add more maple syrup. For a tangy flavor, increase the Dijon mustard. Taste as you go to find your perfect balance. To ensure your salmon is perfectly cooked, bake it for 15-20 minutes. It should flake easily when done. For Brussels sprouts, toss them in olive oil and seasonings before baking. Spread them out on the pan to help them caramelize. This gives them a nice, crispy texture. Pair your dish with rice or a fresh salad. They add great flavor and texture. For a lovely presentation, serve right from the sheet pan. You can also sprinkle chopped pecans on top for extra crunch. This adds a nice touch and makes the meal look beautiful. {{image_2}} You can switch out the salmon for other proteins. Chicken works well. Tofu is a great choice for a plant-based option. Both will soak up the maple glaze nicely. For veggies, try green beans or carrots instead of Brussels sprouts. They add different flavors and textures to the dish. Want to spice things up? Add paprika or a pinch of cayenne for heat. These spices can elevate your glaze. Fresh herbs like parsley or dill also boost flavor. Just chop them finely and sprinkle over the salmon before serving. If you need a gluten-free meal, this recipe is simple. All the ingredients are already gluten-free. Just double-check your Dijon mustard label to be sure. For a dairy-free option, rest easy. This dish is naturally dairy-free. Enjoy it without worry! After enjoying your sheet-pan maple glazed salmon and Brussels sprouts, store leftovers in the fridge. Place the salmon and Brussels sprouts in an airtight container. Make sure they cool to room temperature before sealing. This keeps them fresh and safe to eat. I recommend using glass or BPA-free plastic containers. These materials help keep flavors intact. If you want to save your meal for later, freezing is a great choice. Wrap the salmon and Brussels sprouts tightly in plastic wrap or aluminum foil. Then, place them in a freezer-safe bag. Label the bag with the date. For best results, eat within three months. When you’re ready to enjoy, thaw them in the fridge overnight. This method helps maintain the texture and flavor. When it’s time to enjoy your meal again, you can use the microwave or oven. For the microwave, place the salmon and Brussels sprouts on a plate. Cover with a damp paper towel to keep moisture in. Heat for one to two minutes. If you prefer the oven, preheat it to 350°F (175°C). Place the food on a baking sheet and cover with foil. Heat for about 10-15 minutes. This keeps the salmon moist and the sprouts crisp. Enjoy every bite! Cooking salmon takes about 15-20 minutes at 400°F (200°C). The time may change based on the thickness of the fillets. For fillets that are about 1 inch thick, aim for 15 minutes. Thicker fillets may need 20 minutes. Always check for doneness. Salmon should flake easily with a fork when it is done. Yes, you can use frozen salmon. If you cook it straight from the freezer, add a few extra minutes to your cooking time. Make sure to check the fish for doneness. The glaze still works well and gives great flavor. Just remember that frozen salmon may not have the same texture as fresh. Brussels sprouts are a great side with the salmon. You can also add a fresh salad or quinoa for more texture. Roasted sweet potatoes or rice work well too. These sides balance the sweet and savory flavors of the meal perfectly. This blog post gives you a clear guide to making a delicious baked salmon dish. You learned about essential ingredients, step-by-step cooking instructions, and handy tips. We discussed variations and how to store leftovers properly. My final thought is that cooking can be fun and easy. Enjoy experimenting with flavors and making this dish your own. Happy cooking!

Sheet-Pan Maple Glazed Salmon and Brussels Sprouts Delight

PREV 1 … 34 35 36 … 86 NEXT
spicy fork kitchen

explore

DessertsDinnerAppetizersDrinks

Our Policies

  • Cookie Policy
  • Copyright Policy
  • Disclaimer
  • GDPR Policy
  • Terms Of Use
Back to Top
  • About
  • Contact Us
  • Privacy Policy
© 2026 spicy fork kitchen