FREE DINNER EBOOK! Get your copy!
  • Cookie Policy
  • GDPR Policy
  • Disclaimer
  • Terms Of Use
  • Visit my other site: Fun Cookie Recipes
spicy fork kitchen
  • Home
  • Dinner
  • Desserts
  • Drinks
  • Appetizers
  • Contact
  • About
  • Privacy Policy
  • Home
  • Dinner
  • Desserts
  • Drinks
  • Appetizers
  • Contact
  • About
  • Privacy Policy
  • Cookie Policy
  • GDPR Policy
  • Disclaimer
  • Terms Of Use
Visit my other site: Fun Cookie Recipes

HOME / CATEGORIES /

Latest

For this tasty dish, you'll need the following main ingredients: - 1 lb salmon fillet, skinless and cubed - 1/4 cup teriyaki sauce (homemade or store-bought) Salmon is rich in omega-3 fatty acids. It stays moist and tender when cooked. Teriyaki sauce adds a sweet and salty flavor. It makes the salmon bites truly special. The marinade brings out the best in the salmon. Here are the key components: - 1 tablespoon honey - 1 teaspoon sesame oil - 1 clove garlic, minced - 1 teaspoon ginger, grated Honey adds a touch of sweetness. Sesame oil gives a nutty flavor. Garlic and ginger add depth and warmth. These ingredients blend well in the marinade. Garnishes make your dish look great and add flavor. Consider these options: - 2 green onions, thinly sliced (for garnish) - Sesame seeds (for garnish) Green onions add a fresh crunch. Sesame seeds bring a nice texture and nuttiness. These garnishes make your salmon bites even better. Start by making the marinade. In a bowl, mix together the teriyaki sauce, honey, sesame oil, minced garlic, and grated ginger. Use a whisk to blend everything well. This marinade gives the salmon a sweet and savory flavor. You can use homemade teriyaki sauce or store-bought, whichever you prefer. Next, add the cubed salmon fillet to the marinade. Toss gently so every piece gets coated. Let the salmon sit in the marinade for 15 to 20 minutes. This soaking time lets the flavors seep into the fish. Before cooking, preheat your air fryer to 400°F (200°C) for about 5 minutes. While it heats up, lightly grease the air fryer basket with cooking spray or olive oil. This step helps prevent sticking. Place the marinated salmon bites in a single layer in the basket. Make sure not to overcrowd them. Cook for 8 to 10 minutes, shaking the basket halfway through. The salmon should turn crispy on the outside and flaky inside. Once cooked, take the salmon bites out and let them cool for a minute. For a nice touch, garnish with sliced green onions and a sprinkle of sesame seeds. These toppings add color and extra flavor. Serve the salmon bites warm for the best taste. Enjoy this dish as an appetizer or a main course! To ensure your salmon bites cook just right, use fresh salmon. Fresh fish has better flavor and texture. Cut the salmon into even cubes. This helps them cook evenly. Preheat your air fryer to 400°F. This step is key for a nice, crispy outside. Cook for 8-10 minutes, but check at 8 minutes. Salmon should flake easily with a fork when it’s done. To boost the flavor, let the salmon marinate longer. For best results, marinate for 20 minutes. This allows the teriyaki sauce to soak in well. Add a pinch of salt and pepper before cooking. This simple step enhances the dish's depth. You can also add a splash of lime juice. It brightens the teriyaki sauce nicely. Avoid overcrowding the air fryer basket. If you pack too much salmon in, it won’t cook evenly. Always leave space between each piece. Another mistake is skipping the preheating step. This can lead to uneven cooking. Finally, don't skip the garnishes. Green onions and sesame seeds add flavor and a nice touch! {{image_2}} You can switch up the salmon in this recipe. Try using shrimp or chicken instead. Both options work well with teriyaki sauce. You can even use firm tofu for a plant-based dish. Each ingredient brings different tastes and textures. If you want to change the flavor, consider using different sauces. Soy sauce can replace teriyaki sauce for a saltier taste. You could also use orange juice for a citrus twist. For a spicy kick, add some sriracha or chili paste to the marinade. These options will give your dish a new spin. While the air fryer is great, you can cook these bites in other ways. Grilling adds a smoky flavor that pairs well with teriyaki. Baking in the oven is another option; just keep an eye on the cooking time. Broiling will give you a nice charred finish. Each method changes the taste and texture, so feel free to experiment! To keep your teriyaki salmon bites fresh, store them in an airtight container. The salmon can last in the fridge for up to three days. Make sure it cools down before sealing the container. This helps keep the texture nice. If you want to keep it longer, consider freezing. To reheat, use the air fryer for the best results. Set it to 350°F (175°C) and heat for about 5 minutes. This method keeps the salmon crispy. You can also use a microwave, but it may lose some crispiness. Heat for about 30 seconds at a time until warm. You can freeze the marinated salmon before cooking. Place the salmon in a freezer-safe bag with the marinade. It will last up to three months in the freezer. When ready to cook, thaw it in the fridge overnight. Then, cook it straight in the air fryer as usual. You should cook salmon bites in the air fryer for 8 to 10 minutes. Start checking at 8 minutes. The salmon should be firm and opaque when done. Yes, you can use frozen salmon. However, thaw it fully before marinating. This helps the flavors soak in better. Teriyaki salmon bites pair well with rice or quinoa. You can also serve them with steamed veggies or a fresh salad. These sides balance the dish and add color. Air-frying is often healthier than baking. It uses less oil and still gives a crispy texture. You keep more nutrients in the fish, making it a great choice. Look for a few signs to tell if salmon is done. The flesh should flake easily with a fork. It should also turn from bright pink to a light pink or opaque color. If you have a food thermometer, it should read at least 145°F (63°C). This blog post gives you a simple guide to making the best air fryer salmon. We covered ingredients, from the marinade to optional garnishes. I shared step-by-step instructions, tips for perfect cooking, and fun variations. You also learned the best ways to store leftovers and answers to your FAQs. Cooking salmon can be easy and tasty. Use this knowledge to make your meals better! Enjoy cooking and experimenting with flavors.

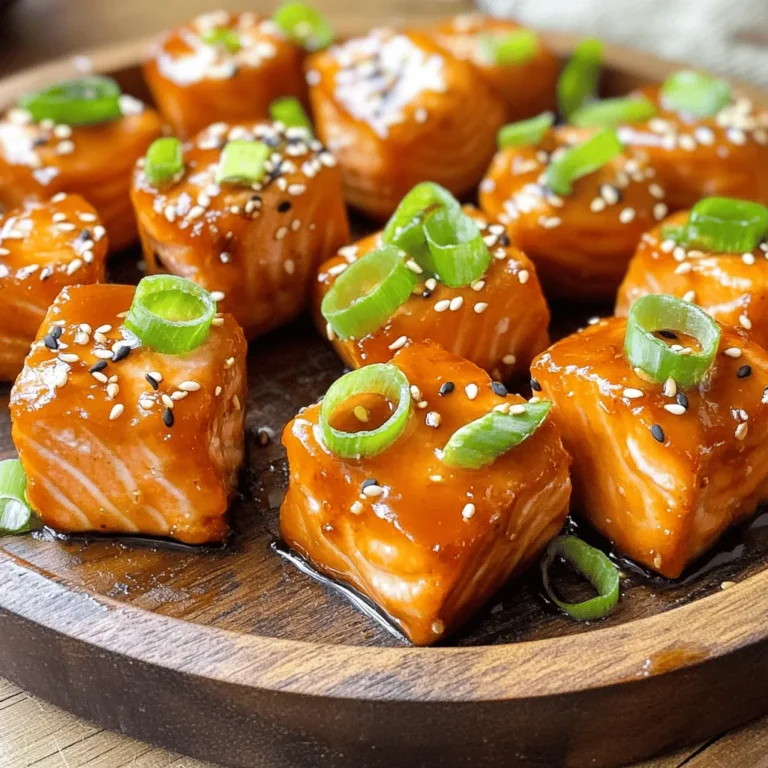
Air Fryer Teriyaki Salmon Bites Flavorful and Easy Meal

- 2 medium zucchinis, spiralized - Optional: vegetable peeler for ribbons - 1 pound large shrimp, peeled and deveined - 4 cloves garlic, minced - 2 tablespoons olive oil - 1 teaspoon red pepper flakes - Salt and pepper to taste - 2 tablespoons fresh lemon juice - 1/4 cup fresh parsley, chopped - Optional: lemon wedges for garnish When making Minute Garlic Shrimp Zoodle Noodles, gathering all your ingredients is key. You need two medium zucchinis. Spiralize them to create zoodles, or use a vegetable peeler for thin strips if you prefer. For the shrimp, choose one pound of large, peeled, and deveined shrimp. Fresh shrimp works best, but frozen can work too if you thaw it well. You’ll also need four cloves of garlic, minced. Garlic adds great flavor. Next, gather your cooking essentials. Olive oil is your base for frying. You will need two tablespoons. For a kick, add one teaspoon of red pepper flakes. Adjust this to your taste. Don’t forget salt and pepper for seasoning. The dish gets brightness from two tablespoons of fresh lemon juice. Finally, chop a quarter cup of fresh parsley for a fresh finish. If you like, serve with lemon wedges on the side. These ingredients come together to create a delightful meal in minutes! To start, you will need to prepare the zoodles. Take two medium zucchinis and spiralize them. If you don’t have a spiralizer, a vegetable peeler works too. Just peel thin ribbons from the zucchini. Once done, set the zoodles aside. This step is quick and easy. You will love how fresh and light they taste. Next, it’s time to cook the shrimp. Grab a large skillet and heat two tablespoons of olive oil over medium heat. Add four cloves of minced garlic and one teaspoon of red pepper flakes. Sauté this mixture for about thirty seconds. You want to smell the garlic, but do not burn it. Now, increase the heat to medium-high. Add one pound of large shrimp, which should be peeled and deveined. Cook the shrimp for two to three minutes on each side. They should turn pink and opaque. While cooking, season with salt and pepper to taste. This is where the magic begins! Once the shrimp is cooked, it’s time to add the zoodles. Toss the zoodles gently in the skillet with the shrimp. Let them heat for about two minutes. This step slightly softens the zoodles, making them perfect. Finish off by drizzling two tablespoons of fresh lemon juice over the mixture. Toss everything to combine well. Cook for an additional minute. The lemon juice adds brightness and flavor. Now, your dish is almost ready to serve! To know when shrimp is cooked, watch for two things: color and texture. Shrimp should turn from gray to pink. They should also feel firm but not hard. When you see the shrimp curl into a C shape, it's ready. This usually takes about 2-3 minutes on each side. Cooking shrimp too long makes them rubbery. So, keep an eye on the clock! You can boost the flavor of this dish with extra spices or fresh herbs. Consider adding a pinch of paprika for a smoky taste. Fresh basil or cilantro can add a nice twist too. If you like heat, try more red pepper flakes. A splash of soy sauce or a sprinkle of parmesan can also change the game. Don't be afraid to experiment! For a lovely presentation, serve the zoodle noodles in a wide bowl. Top with the cooked shrimp and sprinkle with fresh parsley. Add lemon wedges on the side for a pop of color. You can also place some zoodles on a plate and arrange shrimp on top. Drizzling a bit of lemon juice just before serving adds freshness. Enjoy the beauty of your meal before you dig in! {{image_2}} You can get creative with the veggies in this dish. Zoodles are great, but feel free to mix in other vegetables. Here are some tasty options: - Carrots: Use a spiralizer to add colorful, sweet carrot noodles. - Bell Peppers: Slice these thin for a crunchy bite. - Spinach: Add fresh spinach at the end for a healthy boost. - Broccoli: Toss in small broccoli florets for extra texture. These additions not only enhance flavor but also add more nutrients. The key is to keep the cooking time short so the veggies stay crisp. If shrimp isn't your thing, there are plenty of other proteins you can use. Here are some ideas: - Chicken: Cook diced chicken breast in the same way as shrimp. - Tofu: Use firm tofu for a plant-based option. Just sauté until golden. - Scallops: These are quick-cooking and add a touch of luxury. - Salmon: Flake cooked salmon into the dish for a rich taste. Each protein brings its unique flavor, so feel free to switch it up based on what you like or have on hand. This recipe is easy to adapt for different diets. Here are a few simple changes: - Gluten-Free: The dish is naturally gluten-free. Just ensure the shrimp and other ingredients are free from gluten. - Low-Carb: Zoodles are a low-carb alternative to pasta. You can keep it low-carb by avoiding any high-carb add-ins. - Dairy-Free: This recipe is already dairy-free. Just skip any cheese toppings to keep it that way. These adaptations help you enjoy a quick, tasty meal without straying from your dietary goals. Store your Minute Garlic Shrimp Zoodle Noodles in an airtight container. Refrigerate leftovers within two hours of cooking. They stay fresh for up to two days. Make sure to cool the dish completely before sealing. This helps keep moisture out and prevent soggy zoodles. To reheat, use a skillet over medium heat. Add a splash of olive oil to prevent sticking. Heat for about 3-4 minutes, stirring gently. You can also use a microwave. Place the dish in a microwave-safe bowl and cover it. Heat in short bursts, stirring in between, until warm. Avoid overcooking to keep the shrimp tender. Freezing this dish is not recommended. Zoodles lose their texture and become mushy when thawed. If you must freeze, consider storing the shrimp separately. Place it in a freezer-safe bag, removing air before sealing. When ready to eat, thaw shrimp in the fridge overnight. Then, quickly sauté fresh zoodles to enjoy the best flavor and texture. Yes, you can use frozen shrimp. Just make sure to thaw them first. Place them in the fridge overnight or run them under cold water. Pat them dry before cooking. This step helps keep your dish from becoming watery. Frozen shrimp can be a great option when you're short on time. They are often just as tasty as fresh shrimp. Plus, they last longer in your freezer. You can make zoodles ahead of time for quick meals. Spiralize your zucchinis and store them in a sealed container. Keep them in the fridge for up to three days. This saves time on busy days. To prevent zoodles from getting soggy, do not salt them before storing. You can also lightly sauté them before serving if you like them warm. Minute Garlic Shrimp Zoodle Noodles pair well with many sides. Consider a fresh salad for crunch. A simple green salad with lemon vinaigrette works well. You can also serve garlic bread on the side. It adds a nice touch and complements the garlic flavor. For a light dessert, try fresh fruit like berries. They balance the meal and add sweetness. This blog post covered a fresh and tasty dish: Minute Garlic Shrimp Zoodles. We went over the main ingredients, like zucchini and shrimp, and detailed easy cooking steps. You learned how to spice it up and serve it nicely. I also shared tips on storage and offered some fun variations to try. This dish is simple and healthy. You can enjoy it in many ways. Try these ideas, and you’ll make delicious meals that stand out. Dive into cooking and enjoy every bite!

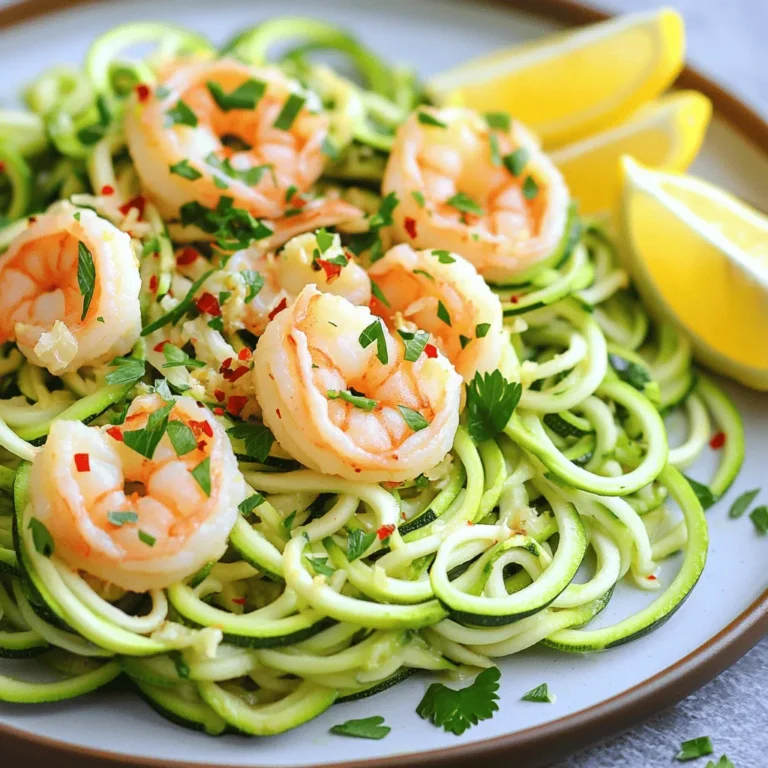
Minute Garlic Shrimp Zoodle Noodles Quick Meal Delight

To make a tasty chai latte coffee cake, you need these main items: - 2 cups all-purpose flour - 1 ½ teaspoons baking powder - 1 teaspoon baking soda - ½ teaspoon salt - 1 teaspoon ground cinnamon - ½ teaspoon ground ginger - ½ teaspoon ground cardamom - ¼ teaspoon ground cloves - ½ cup unsalted butter, softened - 1 cup granulated sugar - 2 large eggs - 1 teaspoon vanilla extract - 1 cup brewed chai tea (cooled) - ½ cup sour cream - ½ cup chopped nuts (walnuts or pecans) - ½ cup mini chocolate chips (optional) These ingredients create a rich flavor that blends spices with sweetness. You can swap some ingredients based on what you have: - Use whole wheat flour for a heartier cake. - Replace butter with coconut oil for a dairy-free option. - Use almond milk instead of sour cream for a lighter touch. - Maple syrup can replace granulated sugar for a natural sweetener. These swaps can change the taste but still keep the cake yummy. You can make your cake even better with these add-ins: - Add ½ cup of dried fruits like raisins or cranberries. - Try ½ cup of shredded coconut for a tropical twist. - Incorporate 1 teaspoon of espresso powder for a coffee boost. - Use ½ cup of white chocolate chips instead of mini chocolate chips. These options let you mix and match flavors based on your taste. First, set your oven to 350°F (175°C). This heat helps the cake bake evenly. While the oven heats, grease a 9x13 inch baking pan. You can use butter or cooking spray. This step keeps the cake from sticking to the pan. In a large bowl, beat ½ cup of softened butter and 1 cup of granulated sugar. Mix until it looks light and fluffy. Then, add 2 large eggs, one at a time. Make sure to mix well after each egg. Finally, stir in 1 teaspoon of vanilla extract. This adds a nice flavor to your cake. In another bowl, whisk together 2 cups of all-purpose flour, 1 ½ teaspoons of baking powder, 1 teaspoon of baking soda, and ½ teaspoon of salt. Now, add 1 teaspoon of ground cinnamon, ½ teaspoon of ground ginger, ½ teaspoon of ground cardamom, and ¼ teaspoon of ground cloves. These spices give your cake a warm chai flavor. Gradually add the dry mix to the wet mix. Alternate adding 1 cup of cooled brewed chai tea and ½ cup of sour cream. Mix until just combined. Next, fold in ½ cup of chopped nuts, like walnuts or pecans. If you want, add ½ cup of mini chocolate chips too. Pour the batter into the baking pan and spread it evenly. Bake the cake for 30-35 minutes. Check it by inserting a toothpick in the center. If it comes out clean, your cake is ready. Once done, let it cool in the pan for about 10 minutes. Then, transfer it to a wire rack to cool completely. For a special touch, dust the top with powdered sugar. Enjoy your delicious chai latte coffee cake! To make your cake light and fluffy, start with room-temperature butter. Softened butter mixes well with sugar, creating tiny air pockets. This adds lift. Mix until the mixture looks pale and fluffy. When adding eggs, do it one at a time. This helps the batter stay smooth. Next, alternate adding dry ingredients and wet ingredients. This keeps the batter airy. Don’t over-mix the batter; just blend until everything is combined. If your cake sinks in the middle, you might have mixed it too much. Check your oven's temperature, too. An oven that is too hot can cause problems. If the edges burn but the center is raw, try a lower temperature. If your cake is too dense, ensure you measured flour correctly. Too much flour can weigh down your cake. For a stronger chai flavor, use extra brewed chai tea. You can steep the tea longer for a bolder taste. Adding a bit of ground nutmeg can also enhance the spice profile. You may include a splash of milk to balance the flavors. Try using flavored nuts, like cinnamon or cardamom roasted walnuts. They add a delightful crunch and extra chai essence. {{image_2}} To make this cake gluten-free, swap the all-purpose flour for a gluten-free blend. Many blends work well, like almond or coconut flour. You may need to adjust the liquid since these flours absorb more moisture. Start with 1 3/4 cups of gluten-free flour and watch the batter. It should be thick but pourable. Keep baking time the same. If you want a quick treat, turn this recipe into muffins. Use the same batter and fill muffin cups about 2/3 full. Bake at 350°F for 18-20 minutes. Check for doneness with a toothpick. This method gives you individual servings and a fun twist on the original cake. To make a vegan version, replace the eggs with flax eggs. Mix 1 tablespoon of flaxseed meal with 2.5 tablespoons of water for each egg. Let it sit until it thickens. Use plant-based butter or oil instead of regular butter. Substitute sour cream with vegan yogurt. Make sure to check your chai tea for dairy, too. This way, everyone can enjoy the delightful flavors! To store your chai latte coffee cake, first let it cool completely. Once cooled, wrap it tightly in plastic wrap or place it in an airtight container. Store it at room temperature for up to three days. If you want to keep it longer, refrigeration is a good option. Just be aware that it may dry out a bit. You can freeze this cake for up to three months. To do this, slice the cake into pieces. Wrap each slice in plastic wrap, then place them in a freezer bag. Make sure to remove as much air as possible to prevent freezer burn. When you are ready to enjoy it, you can thaw it in the fridge overnight. To reheat your chai latte coffee cake, the oven works best. Preheat it to 350°F (175°C). Place the cake slices on a baking sheet and warm them for about 10-15 minutes. This will help restore some of the cake’s moisture. You can also use a microwave. Heat each slice for about 15-20 seconds. Just be careful not to overheat, as it can become tough. Enjoy your warm cake with a cup of chai! Chai latte coffee cake has a warm and cozy flavor. The spices like cinnamon and ginger blend well. You will taste the sweetness from the sugar and the richness from the butter. The chai tea adds a unique twist. When baked, it offers a soft and moist texture. If you add nuts or chocolate chips, you'll enjoy a nice crunch and extra sweetness. Yes, you can make this cake ahead of time. Bake it the day before you plan to serve it. Once it cools, store it in an airtight container. This way, it stays moist and fresh. You can also freeze it for up to three months. Just make sure to wrap it well before freezing. To make a glaze, mix powdered sugar with a few tablespoons of chai tea. Start with one cup of powdered sugar. Add the tea slowly until you reach a smooth consistency. Drizzle it over the cooled cake for a tasty finish. You can adjust the thickness by adding more sugar or tea. Absolutely! You can customize the spices in your chai latte coffee cake. Try adding nutmeg or allspice for a different taste. You can even use pumpkin spice if you want a fall flavor. Just remember to keep the balance of spices so it doesn’t overpower the cake. This post covers everything you need for a delicious Chai Latte Coffee Cake. You learned about key ingredients, easy substitutions, and fun add-ins. I shared step-by-step baking instructions and tips for a perfect cake. You also saw variations, like gluten-free and vegan options, plus storage advice. In baking, a little creativity goes a long way. Experiment with flavors and enjoy your cake fresh. Happy baking!

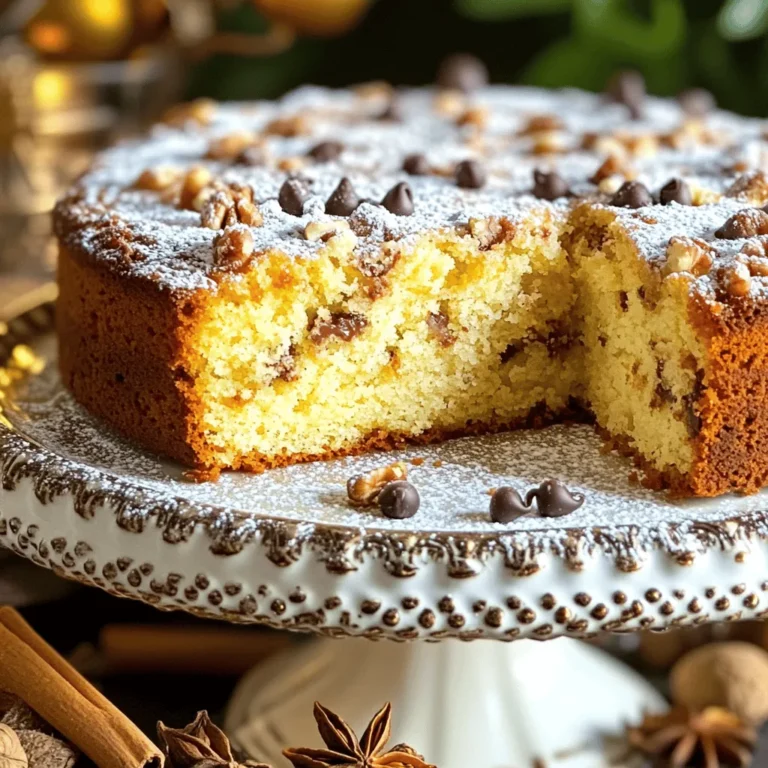
Chai Latte Coffee Cake Delightful and Simple Recipe

To make Peanut Butter Brownie Overnight Oats, you need simple and tasty ingredients. Here’s the list: - 1 cup rolled oats - 2 cups almond milk (or any milk of your choice) - 2 tablespoons unsweetened cocoa powder - 3 tablespoons peanut butter - 2 tablespoons maple syrup or honey - 1 banana, mashed - 1/4 teaspoon vanilla extract - A pinch of sea salt - Optional toppings: chopped walnuts, banana slices, or chocolate chips Each ingredient plays a key role in creating rich flavors. The rolled oats give the base a hearty texture. Almond milk makes it creamy, while cocoa powder adds that chocolatey taste we love. Peanut butter gives it a nutty flavor and richness. Maple syrup or honey adds sweetness, and the banana provides natural sugars and creaminess. You can also customize your dish with toppings like walnuts, banana slices, or chocolate chips. These add extra crunch and flavor. Each bite will be delicious and satisfying. - In a mixing bowl, combine: - 1 cup rolled oats - 2 tablespoons unsweetened cocoa powder - A pinch of sea salt Stir well to mix the dry ingredients. - In another bowl, mix: - 2 cups almond milk (or any milk you like) - 3 tablespoons peanut butter - 2 tablespoons maple syrup or honey - 1 banana, mashed - 1/4 teaspoon vanilla extract Whisk until it is smooth and creamy. - Pour the wet mixture into the bowl with dry ingredients. Mix until all oats are coated and well combined. - Divide the mixture evenly into two mason jars or airtight containers. - Seal the jars or containers. Refrigerate overnight. This lets the oats soften and soak up the flavor. - In the morning, give the oats a good stir. If you want a thinner mix, add a splash of milk. - Before serving, top your oats with: - Chopped walnuts - Banana slices - Chocolate chips Enjoy your delicious Peanut Butter Brownie Overnight Oats! To change how thick your overnight oats are, just add more milk. If you want them creamier, pour in a splash of almond milk. Stir well to mix. This makes them easier to eat. You can adjust until you find your perfect texture. If you don’t have peanut butter, try almond butter or cashew butter. Both options taste great in this recipe. They give your oats a different flavor but still keep them creamy. Plus, they add healthy fats and protein. You can change how sweet your oats are by adding more or less maple syrup or honey. If you like it sweeter, add more syrup. If you prefer it less sweet, use less. Tasting as you go helps you find what you enjoy most. {{image_2}} You can easily make this recipe healthier. To cut sugar, use unsweetened almond milk. Swap maple syrup for mashed dates. You can also try half the peanut butter. This gives you flavor with less fat. Want to spice it up? Add cinnamon or nutmeg to the oats. Just a pinch can boost the taste. You can also mix in vanilla for a sweet kick. If you want richer flavor, try adding a spoon of cocoa nibs. If you need gluten-free oats, look for certified gluten-free brands. They work just like regular oats. For vegan options, use plant-based milk and maple syrup. You can substitute peanut butter with almond or sunflower seed butter. These swaps keep the dish tasty for everyone. Store your Peanut Butter Brownie Overnight Oats in the fridge. Use airtight containers or mason jars. This keeps the oats fresh and tasty. These oats last about five days in the fridge. For the best taste and texture, eat them within three days. You can freeze these oats for up to three months. Just make sure to use freezer-safe containers. Thaw them in the fridge overnight before eating. Yes, you can make Peanut Butter Brownie Overnight Oats ahead of time. This recipe is perfect for meal prep. Make it the night before, or even a few days in advance. Just store it in the fridge in sealed jars. The oats soak up the flavors and get tasty! Leftovers of Peanut Butter Brownie Overnight Oats last about 3 to 5 days in the fridge. Just keep them in airtight containers. If you notice any change in smell or texture, it’s best to throw them away. Fresh is always best! You can use instant oats, but the texture will change. Instant oats cook faster and make a creamier mix. If you like that, go for it! Just reduce the soaking time since they absorb liquid quickly. You want them soft but not mushy. This blog post outlined a simple and tasty recipe for Peanut Butter Brownie Overnight Oats. You learned about key ingredients, preparation steps, and how to assemble your oats. I also shared tips for adjusting sweetness and consistency. Remember, you can customize this recipe to fit your tastes and needs. Now, grab your jars and start creating! Enjoy a healthy breakfast that you can prepare just once and savor all week.

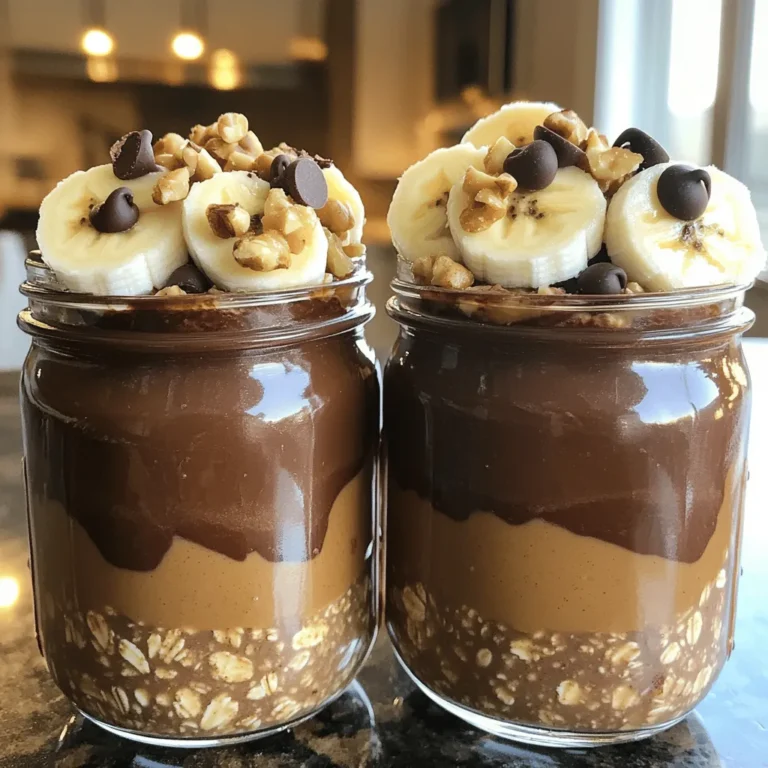
Peanut Butter Brownie Overnight Oats Easy Recipe

- 4 boneless, skinless chicken thighs - 2 medium sweet potatoes, peeled and cubed - 1 red bell pepper, sliced - 1 yellow onion, sliced - 1/4 cup pure maple syrup - 2 tablespoons olive oil - 2 teaspoons garlic powder - 1 teaspoon smoked paprika - 1 teaspoon dried thyme - Salt and pepper to taste - Fresh parsley, chopped (for garnish) Each ingredient plays a key role in this dish. The chicken thighs provide rich protein. They stay juicy and tender during cooking. Sweet potatoes add a natural sweetness and a creamy texture. The red bell pepper and yellow onion bring color and crunch. Maple syrup adds a delightful sweetness and depth. Olive oil helps with roasting, giving a nice crisp finish. Garlic powder and smoked paprika enhance the flavor profile. Thyme adds a warm, earthy note. Salt and pepper bring out all the flavors. Fresh parsley adds a pop of color and freshness when served. When choosing chicken, look for thighs that are plump and have a pink hue. Avoid any that seem dry or discolored. For sweet potatoes, select ones that are firm and smooth. They should feel heavy for their size. Look for bell peppers that are bright and free from wrinkled skin. Onions should feel heavy and solid, with no soft spots. Use pure maple syrup for the best flavor; avoid imitation syrups. When buying herbs, choose fresh parsley with vibrant green leaves. Always check the expiration date on spices to ensure freshness. Start by preheating your oven to 425°F (220°C). This heat helps the chicken and sweet potatoes cook evenly. While the oven warms, prepare your veggies. Peel and cube the sweet potatoes. Slice the red bell pepper and yellow onion. Put them in a large bowl. 1. Combine Veggies: Add the sweet potatoes, bell pepper, and onion to the bowl. Drizzle with 1 tablespoon of olive oil. Sprinkle with salt, pepper, garlic powder, and smoked paprika. Toss everything until the veggies are coated well. 2. Make Marinade: In a small bowl, mix 1/4 cup of maple syrup with the other tablespoon of olive oil. Add dried thyme, salt, and pepper. Stir until smooth. 3. Marinate Chicken: Place 4 chicken thighs in another dish. Pour half of the maple marinade over them. Make sure to coat the chicken well. Let this sit for about 10 minutes. 4. Arrange on Sheet Pan: Spread the veggie mix evenly on a large sheet pan. Nestle the marinated chicken thighs among the veggies. Drizzle the rest of the maple marinade over everything. 5. Roast: Put the sheet pan in the oven. Roast for 25-30 minutes. The chicken should reach 165°F (75°C) when it is done. The sweet potatoes should be soft. 6. Crispy Finish: For a nice crisp, broil on high for 2-3 minutes. Watch closely to prevent burning. 7. Serve: Remove from the oven and let it rest for a few minutes. Garnish with fresh parsley before serving. - Use even-sized sweet potato cubes. This helps them cook at the same rate. - Make sure the chicken is coated well with the marinade. This adds flavor and moisture. - For crispier skin, pat the chicken dry before marinating. This helps the skin crisp up nicely in the oven. - Broiling at the end adds a delicious finish, but keep an eye on it to prevent burning. To get juicy chicken thighs, start with marinating them. Use the maple marinade for at least 10 minutes. This adds flavor and keeps the meat moist. When cooking, make sure the oven is hot. Preheat it to 425°F (220°C). This helps to seal in the juices. Check the chicken's internal temperature. It should be 165°F (75°C) to ensure it's cooked through. For sweet potatoes, cut them into even cubes. This helps them cook evenly. Toss them in olive oil and seasonings. This ensures they roast well. Spread them in a single layer on the sheet pan. Overcrowding leads to steaming, not roasting. Roast them until fork-tender, about 25-30 minutes. If you want a crispy edge, broil them for a few minutes at the end. To boost the flavor, try adding fresh herbs. Rosemary and sage work well with this dish. You can also add a splash of balsamic vinegar for a tangy kick. For extra sweetness, drizzle more maple syrup before serving. Lastly, sprinkle some fresh parsley on top for a pop of color and taste. These small changes can make a big difference! {{image_2}} If you want to switch up the chicken, use bone-in thighs. They add great flavor. You can also try chicken breasts. They cook faster, so check for doneness early. For a plant-based option, use firm tofu. Press it to remove moisture for the best texture. You can add more veggies for color and taste. Broccoli florets work well and add crunch. Carrots give sweetness and a nice pop of orange. Brussels sprouts bring a savory depth. Feel free to mix in any seasonal veggies you enjoy. To lower the sugar, use less maple syrup. You can replace it with honey or agave syrup. For a different flavor, try a soy sauce-based marinade. Mix soy sauce, garlic, and ginger for a tasty twist. You can also add citrus juice for brightness. After enjoying your sheet-pan maple chicken and sweet potatoes, store leftovers in an airtight container. This keeps the meal fresh and flavorful. Allow the dish to cool completely before sealing it up. If you have a lot left, divide it into smaller portions. This makes it easier to reheat later. To reheat, use your oven for the best flavor. Preheat your oven to 350°F (175°C). Place the chicken and sweet potatoes on a baking sheet. Cover with foil to keep moisture in. Heat for about 15-20 minutes, or until warmed through. You can also use a microwave, but it may not keep the same crispness. You can freeze leftovers for up to three months. Use freezer-safe containers or bags. Be sure to label them with the date. When ready to eat, thaw in the fridge overnight. Reheat in the oven or microwave as mentioned above. This way, you can enjoy your dish again without losing taste. Yes, you can prepare this dish ahead of time. You can marinate the chicken thighs the night before. Just mix the chicken with the maple marinade and place it in the fridge. Chop the sweet potatoes and veggies too, but store them separately. On cooking day, just spread everything on the sheet pan and roast. This saves time and makes dinner a breeze. The internal temperature of the chicken should reach 165°F (75°C). This ensures the chicken is safe to eat. Use a meat thermometer to check this. If you don’t have one, cut into the chicken. The juices should run clear, and there should be no pink inside. Cooking to the right temperature keeps the chicken juicy and safe. To make this dish spicier, add red pepper flakes to the marinade. Start with 1/4 teaspoon and adjust to your taste. You can also use spicy smoked paprika instead of regular smoked paprika. For more heat, add sliced jalapeños to the veggies. These changes will bring a nice kick to the sweet and savory flavors of the dish. This blog post covered all the key points for a great dish. We looked at the right ingredients and their roles. I shared steps for preparation and cooking that lead to perfect results. You now have tips for juicy chicken, tasty sweet potatoes, and flavor boosts. I also discussed variations for healthier or personalized options. Lastly, I provided storage info to keep leftovers fresh. Remember, cooking is fun and you can always experiment to make it your own! Enjoy every bite and happy cooking!

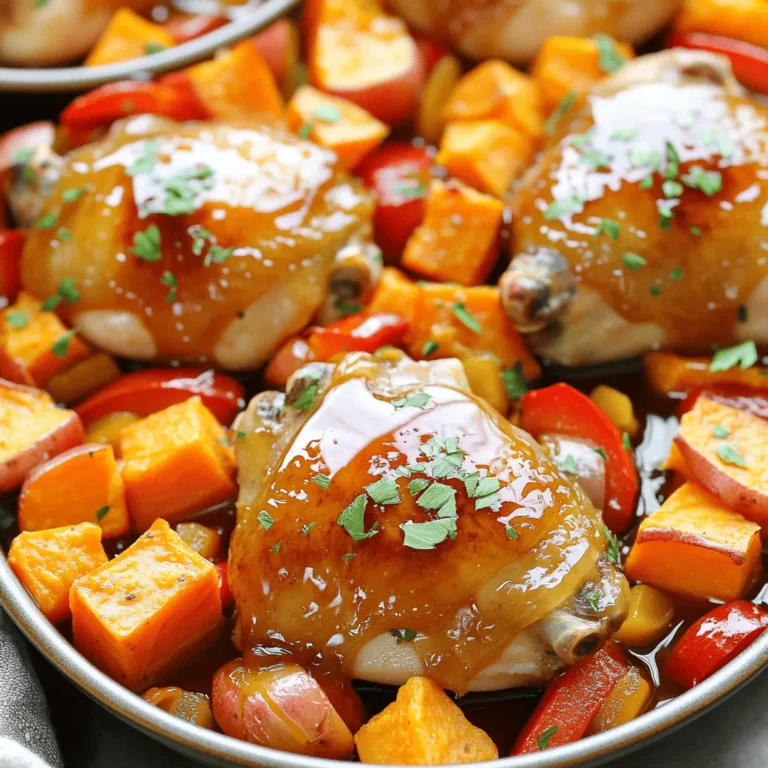
Sheet-Pan Maple Chicken & Sweet Potatoes Delight

- 2 pounds beef chuck roast - 1 tablespoon olive oil - 4 cloves garlic The main ingredients set the stage for rich flavor. The beef chuck roast is perfect for slow cooking. It breaks down, becoming tender and juicy. Olive oil helps sear the beef, adding depth. Garlic provides a robust aroma and taste. - 2 chipotle peppers in adobo sauce - 2 teaspoons ground cumin - 1 teaspoon smoked paprika The seasonings give these tacos their signature kick. Chipotle peppers add heat and smokiness. Ground cumin brings warmth and earthiness. Smoked paprika enhances the flavor with a hint of sweetness. Together, they create a perfect blend for the beef. - 12 corn tortillas - 1 cup shredded lettuce - Lime wedges for serving Corn tortillas are essential for authentic tacos. They hold the filling well and add texture. Shredded lettuce adds freshness and crunch. Lime wedges offer a zesty brightness when squeezed over the tacos. This combination elevates every bite. Start by searing the beef chunks. Heat one tablespoon of olive oil in a large skillet over medium-high heat. Add the beef chunks and cook until browned on all sides. This should take about 3 to 5 minutes. Browning the meat adds flavor and depth to your dish. Once browned, take the beef off the heat and transfer it directly into the slow cooker. Next, let’s build the flavor base. In the same skillet, add the diced onion and cook it until it turns translucent, which takes about 5 minutes. Then, stir in the minced garlic and cook for another minute until you smell the garlic's rich aroma. Now comes the fun part! Add the chopped chipotle peppers and the can of diced tomatoes. Mix in the ground cumin, smoked paprika, dried oregano, salt, and black pepper. Cook this mixture for about 2 more minutes to let the flavors blend nicely. Now it’s time to combine everything. Pour the tomato and chipotle mixture over the beef in the slow cooker. Add one cup of beef broth to keep everything moist. Make sure all ingredients are mixed well. Cover the slow cooker and set it to low heat. Let it cook for 8 hours, or until the beef is tender and easily shreds with a fork. When it's done, use two forks to shred the beef right in the slow cooker, mixing it with the delicious sauce. That's it! You are now ready to build your tacos and enjoy a flavorful meal. To make the beef taste even better, marinate it. Mix olive oil, garlic, and spices. Let the beef soak in this mix for a few hours or overnight. This step will deepen the flavor. If you like more heat, add extra chipotle peppers. You can also adjust the spices. For a milder taco, reduce the amount of chipotle or cumin. Shredding the beef is key for a great taco. Use two forks to pull apart the meat. This method works well and keeps the beef tender. You can also use a stand mixer with a paddle attachment for quick shredding. After shredding, mix in some sauce from the slow cooker. This keeps the meat moist and packed with flavor. Warming tortillas is simple but important. Heat them in a dry skillet for about 30 seconds on each side. This step makes them soft and easy to fold. If you want alternatives, try flour tortillas or lettuce wraps. They offer different textures and flavors for your tacos. Enjoy experimenting with these ideas! {{image_2}} You can swap the beef in these tacos. Chicken or pork works great. Just adjust cooking times a bit. Chicken thighs are juicy and tender. Pork shoulder adds nice flavor too. If you want a meat-free meal, try jackfruit or lentils. Both options soak up the sauce well. They also give a good texture in the taco. Try using different chili peppers for a unique taste. Ancho or poblano peppers add depth. They bring a mild heat and rich flavor. You can also add fresh herbs like cilantro. It brightens up the dish and adds freshness. Experiment with your favorite spices, too. A bit of cinnamon or allspice can give warmth to the tacos. To make your meal even better, serve sides with your tacos. Rice and beans are classic choices. You can also offer a fresh salad. It helps to balance the flavors. For toppings, get creative! Try pickled onions, sour cream, or hot sauce. Fresh lime juice is a must for that zing. Each bite should be a burst of flavor! To store leftovers, let the beef cool first. Place it in an airtight container. This keeps the meat fresh and tasty. You can store it in the fridge for up to three days. The best container types are glass or BPA-free plastic. These materials help keep the flavors locked in. You can freeze the cooked taco filling for later use. First, let the beef cool completely. Then, transfer it to a freezer-safe bag. Remove as much air as possible to prevent freezer burn. For reheating frozen tacos, thaw the filling overnight in the fridge. Heat it in a skillet over medium heat. Stir until it's warmed through. This keeps the beef juicy and flavorful. The beef mixture lasts up to four days in the fridge. If you store it properly, it stays fresh. Look for signs of spoilage like a sour smell or a change in color. If the beef looks off, it's best to toss it. Always trust your senses when it comes to food safety. Yes, you can use other cuts of beef for slow cooker tacos. The best cuts include: - Brisket - Round roast - Flank steak These cuts also become tender and flavorful when cooked slowly. Each cut has its own taste, so feel free to experiment. Just remember to adjust cooking times if needed. Chipotle peppers can vary in heat. They are made from smoked jalapeños. Here’s what you should know: - Mild to Medium Heat: Most chipotle peppers are mild to medium spicy. - Adobo Sauce: The sauce adds a smoky flavor but not too much heat. If you want less spice, use fewer peppers. You can also remove the seeds for a milder taste. Yes, you can make this recipe ahead of time. Here are some tips for preparing in advance: - Cook the Beef: You can cook the beef and store it in the fridge for up to three days. - Reheating: Reheat the beef in a slow cooker or on the stove. Add a splash of beef broth to keep it moist. Making it ahead of time saves you effort and makes meal time easier! In this blog post, you learned how to make delicious slow cooker tacos. You saw the main ingredients and the step-by-step instructions for perfecting flavor. I shared tips on shredding beef and warming tortillas. You can explore variations to suit your taste and find out how to store leftovers properly. Now, with these insights, you can create tacos that impress everyone. Enjoy your cooking, and happy eating!

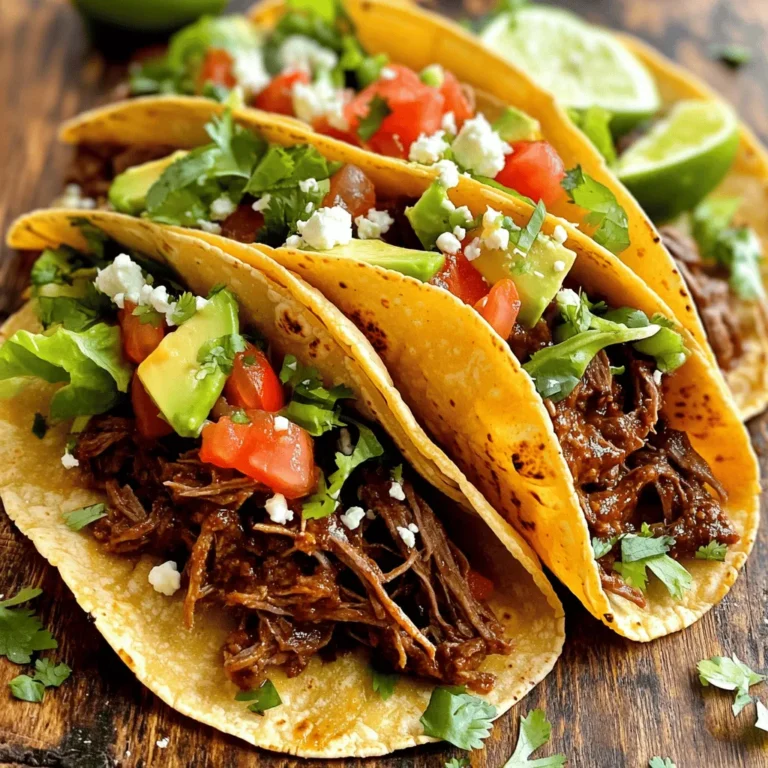
Chipotle Beef Tacos Slow Cooker Flavorful Meal

- 1 lb fresh salmon fillet, skinless and cubed - 1/4 cup soy sauce - 2 tablespoons honey - 1 tablespoon rice vinegar - 1 tablespoon sesame oil - 1 teaspoon grated ginger - 2 cloves garlic, minced Fresh salmon is the star of this dish. I always choose skinless fillets for easy cooking. The marinade is key to great taste. Soy sauce adds saltiness, while honey brings sweetness. Rice vinegar gives it a nice tang. Sesame oil adds a rich flavor. Ginger and garlic boost the taste with a warm kick. - 2 green onions, sliced - Sesame seeds, for garnish Green onions add crunch and freshness. I love using them as a topping. They brighten up the dish. Sesame seeds add a nice crunch and look great. You can toast them for extra flavor if you want. You can also use fresh herbs for garnish. Cilantro or parsley can add a pop of color. Lime or lemon wedges work well too. They add a zesty touch when squeezed over the salmon. Feel free to get creative with your garnishes! To make the marinade, grab a mixing bowl. In this bowl, combine: - 1/4 cup soy sauce - 2 tablespoons honey - 1 tablespoon rice vinegar - 1 tablespoon sesame oil - 1 teaspoon grated ginger - 2 cloves garlic, minced Whisk these ingredients together until they blend well. This mixture will give your salmon bites a savory and sweet taste. Now, take your 1 lb of fresh salmon fillet. Cut it into bite-sized cubes, about 1 inch each. Add these salmon pieces to the marinade. Toss well to coat each piece. Cover the bowl and place it in the fridge. Let the salmon sit for at least 30 minutes. If you have time, marinate for up to 2 hours. This step helps the flavors soak in deeply. Preheat your air fryer to 400°F (200°C). This usually takes about 5 minutes. After preheating, remove the salmon from the marinade. Let the excess marinade drip off. Arrange the salmon cubes in the air fryer basket. Be sure they don't touch each other. This helps them cook evenly. Cook for 8-10 minutes. Flip the salmon halfway through to get a nice golden color. Once done, take the salmon out and let it rest for a couple of minutes. Before serving, top with sliced green onions and sesame seeds for a nice touch. To get the best salmon bites, choose fresh salmon. Look for bright color and no strong smell. Cut the salmon into even cubes. This helps them cook at the same rate. For a tender bite, do not overcook. Salmon should be flaky but still moist. Marinating is key for flavor. I suggest at least 30 minutes in the fridge. For even richer taste, marinate up to 2 hours. This allows the soy sauce, honey, and ginger to soak in. Do not marinate too long; the fish can become mushy. Preheat your air fryer to 400°F (200°C). This helps the salmon cook evenly. Place the salmon cubes in a single layer. Avoid overcrowding the basket. Flip the pieces halfway through cooking for even browning. Rest the salmon for a few minutes before serving. This helps improve texture and flavor. {{image_2}} To add some heat, try spicy teriyaki salmon bites. Use the same recipe but add sriracha or red pepper flakes to the marinade. Start with one teaspoon of sriracha and adjust to your taste. This adds a nice kick without overpowering the dish. The sweet teriyaki flavor pairs well with the heat, making it a fun twist. You don’t have to stick to the same marinade. Experiment with new flavors! Instead of soy sauce, try tamari for a gluten-free option. You can also use maple syrup instead of honey for a different sweetness. For a citrus twist, add orange juice or lime juice to the mix. Each change gives the salmon a unique flavor profile. These teriyaki salmon bites are great on their own, but you can elevate them! Serve with steamed rice or quinoa to soak up the delicious sauce. A side of stir-fried vegetables adds color and crunch. You can also make a fresh salad with mixed greens and a light vinaigrette. This keeps the meal healthy and vibrant. To store leftovers, place them in an airtight container. Make sure to let the salmon cool first. Keep it in the fridge for up to three days. If you want to keep it longer, freezing is a good option. When reheating, use the air fryer for the best results. Preheat the air fryer to 350°F (175°C). Place the salmon bites in the basket. Heat them for about 4-5 minutes. This keeps them crispy and tasty. You can also use the microwave, but it may make them a bit soggy. To freeze the salmon bites, place them in a freezer-safe bag. Remove as much air as possible before sealing. They can be frozen for up to three months. When ready to eat, thaw them in the fridge overnight. Then, follow the reheating tips to enjoy them again. Yes, you can use frozen salmon. However, it’s best to thaw it first. Thawing helps the marinade soak in better. To thaw salmon, place it in the fridge overnight or put it in a sealed bag under cold water for about an hour. Once thawed, follow the same steps for marinating and cooking. The best air fryer temperature for salmon is 400°F (200°C). This high heat cooks the salmon quickly. It helps create a nice, crispy outside while keeping the inside moist. Preheating your air fryer for about 5 minutes at this temperature is key. Cook salmon bites in the air fryer for 8-10 minutes. Flip them halfway through to ensure even cooking. The salmon should be opaque and flaky when done. If you prefer it more golden, you can cook it for an extra minute or two. This blog covered how to make great salmon in an air fryer. We went through marinade basics, cooking steps, and tips for perfect salmon. You now have ways to mix flavors and serve your dish. Don’t forget how to store any leftovers too. Enjoy easy cooking while trying new recipes. I hope you feel ready to make delicious air fryer salmon tonight!

Teriyaki Salmon Bites Air Fryer Easy Flavorful Recipe

- Chicken breasts: You need 4 boneless, skinless chicken breasts. Choose fresh, high-quality chicken for the best taste. - Mushrooms: Use 2 cups of sliced mushrooms. Button or cremini mushrooms add great flavor. Clean them with a damp cloth before slicing. - Garlic: You will need 4 cloves of garlic. Fresh garlic gives the best taste. Mince it finely for strong flavor. - Cream and broth: One cup of heavy cream and one cup of chicken broth are key. The cream makes the sauce rich, while the broth adds depth. - Olive oil and butter: Use 2 tablespoons of olive oil and 1 tablespoon of butter. Olive oil helps cook the chicken, and butter adds a nice flavor. - Seasoning: You will use 1 teaspoon of dried thyme and 1 teaspoon of fresh parsley. Salt and pepper are also necessary for taste. Thyme adds warmth, and parsley brightens the dish. - Seasoning the chicken: Start by seasoning both sides of each chicken breast with salt and pepper. This step is key. It adds flavor and enhances the dish. - Searing chicken: Heat olive oil in a large skillet over medium-high heat. Once hot, add the chicken breasts. Sear them for about 5-6 minutes on each side. You want a perfect golden color. This browning creates a tasty crust. Remove the chicken and set it aside. - Cooking mushrooms: In the same skillet, melt butter. Add sliced mushrooms. Cook them for about 4-5 minutes. You want them tender. They should release their moisture and become golden. - Adding garlic: Next, add minced garlic to the mushrooms. Sauté for 1-2 minutes. Stir often to prevent burning. This timing ensures the garlic releases its flavor without becoming bitter. - Simmering the broth and cream: Pour in chicken broth and scrape the skillet’s bottom. This step lifts all the tasty bits stuck to the pan. Bring the mixture to a simmer. Then, stir in heavy cream and dried thyme. Let it simmer for 3-4 minutes, which thickens the sauce nicely. - Returning chicken to the skillet: Place the chicken back in the skillet. Spoon creamy sauce over it. Cover the skillet and let it simmer for an additional 5-7 minutes. This ensures the chicken cooks through. Check the internal temperature; it should reach 165°F. - Adjusting flavors: Once cooked, taste the sauce. Adjust the salt and pepper as needed. This final step is crucial for balancing the flavors. - To sear chicken well, start with a hot pan. Heat the olive oil on medium-high. - Place the chicken in the pan without crowding it. Leave space to brown evenly. - Cook for 5-6 minutes per side until golden brown. This gives flavor and texture. - To check if the chicken is done, use a meat thermometer. Aim for 165°F inside. - If you don’t have a thermometer, cut into the thickest part. Ensure the juices run clear. - For a creamier sauce, add more heavy cream. You can also mix in cream cheese. - Consider fresh herbs like basil or dill for new flavors. They add brightness. - For a spicy kick, try adding red pepper flakes. A little goes a long way. - Lemon zest can also boost flavor. It brings a fresh and tangy note. - To plate, slice the chicken for a beautiful look. Arrange it on a warm plate. - Spoon the creamy sauce over the chicken in an artful way. Let it flow naturally. - Use fresh parsley to garnish. Sprinkle it on top for a pop of color. - Consider serving with a side of green veggies. This adds color and balance to your meal. {{image_2}} You can make this dish your own by swapping ingredients. Want to try a different protein? Use turkey instead of chicken. Turkey has a similar texture and taste, so it works well. You can also use tofu for a vegetarian option. Tofu absorbs flavors, making it a great choice. Mushrooms are key to this recipe. You can experiment with various kinds. Shiitake mushrooms add a rich umami flavor. Portobello mushrooms bring a hearty texture. Mixing different mushrooms can create unique tastes. If you need a gluten-free sauce, use cornstarch. Mix it with a bit of cold water before adding it to the broth. This thickens the sauce without gluten. For a vegetarian dish, skip the chicken. Use vegetable broth instead of chicken broth. You can add more mushrooms for protein. This keeps the dish filling and delicious. Want to add depth to the flavor? Consider adding a splash of white wine during cooking. This gives the sauce a nice acidity. You can also include vegetables for extra nutrition. Spinach or peas blend well with the creamy sauce. Adding these will boost the meal’s health benefits while keeping it tasty. To keep your Creamy Garlic Mushroom Chicken fresh, follow these tips: - Refrigeration: Store leftovers in an airtight container. They last up to 3 days. - Freezing: You can freeze the chicken and sauce together. Use freezer-safe containers. They stay good for about 2 months. When it's time to enjoy your leftovers, reheating is key. - Best methods: Use a skillet over low heat. This keeps the creaminess intact. Stir often to ensure even heating. - Avoiding sauce separation: If the sauce starts to separate, add a splash of chicken broth. Stir gently and heat until combined. - How long does Creamy Garlic Mushroom Chicken last in the fridge? This dish lasts about 3 to 4 days in the fridge. Keep it in an airtight container. - Can I make this dish ahead of time? Yes, you can prepare the chicken and sauce ahead. Store them separately for best taste. - What can I serve with Creamy Garlic Mushroom Chicken? Serve it with rice, pasta, or a fresh salad. These sides balance the rich flavors. - How do I know when the chicken is cooked through? Check the internal temperature. It should reach 165°F. The meat will be no longer pink. - Can I use low-fat cream for this recipe? Low-fat cream can work, but it may change the sauce's texture. The sauce might be less rich. - What other sauces can I make for chicken? Try a lemon butter sauce, BBQ sauce, or a creamy pesto sauce. Each offers unique flavors. - Can I use dried mushrooms instead of fresh? Yes, you can use dried mushrooms. Just soak them in warm water first to rehydrate. This recipe for Creamy Garlic Mushroom Chicken brings together simple steps and fresh ingredients. You learned about the key roles of chicken, mushrooms, garlic, and seasonings. Each part of the process matters for great taste. Feel free to personalize it with variations for different diets. Proper storage keeps leftovers tasty for later. Try these tips, and enjoy creating delightful meals! You have the tools to impress family and friends with this dish.

Creamy Garlic Mushroom Chicken Savory and Simple Dish

To make these energy bars, you need simple and tasty items. Here’s what you will need: - 1 cup rolled oats - 1/2 cup creamy peanut butter - 1/4 cup honey or maple syrup - 1/2 cup almond flour - 1/4 cup mini chocolate chips or dried fruit (your choice) - 1/4 teaspoon salt - 1/2 teaspoon vanilla extract - Optional: 1/4 teaspoon cinnamon for added flavor These ingredients work well together. The oats give a nice chewy texture. The peanut butter adds creaminess and a rich taste. Honey or maple syrup offers sweetness. You can choose between chocolate chips or dried fruit to make them even better. If you don't have some of these ingredients, don't worry! Here are some easy swaps: - Rolled oats: You can use quick oats. They will still work but will change the texture slightly. - Creamy peanut butter: Chunky peanut butter is fine if you like more texture. - Honey or maple syrup: Agave syrup or brown rice syrup can replace these. - Almond flour: You can use regular flour or oat flour if you prefer. - Mini chocolate chips: Try nuts, seeds, or even coconut flakes for a fun twist. These swaps let you customize your bars based on what you have at home. Each bar is not just tasty but also packs a punch of nutrition. Here's what you can expect per serving (1 bar): - Calories: 150 - Protein: 4g - Carbohydrates: 20g - Fat: 7g - Fiber: 2g - Sugar: 5g These values may change based on your ingredient choices. Still, these bars offer a good balance of energy, making them great for snacks or post-workout fuel. Enjoy these delicious energy bars with confidence! First, gather your ingredients. You need rolled oats, creamy peanut butter, honey, almond flour, mini chocolate chips, salt, vanilla extract, and optional cinnamon. In a large mixing bowl, mix the rolled oats, almond flour, and salt. Make sure you mix well. This helps evenly spread out the flavors. Next, take a separate microwave-safe bowl. Add the peanut butter and honey, or maple syrup. Microwave this for about 20 to 30 seconds. Stir it until you get a smooth mix. Now, add the vanilla extract and cinnamon if you want. Stir again until blended. Now, pour this peanut butter mix into the bowl with the dry ingredients. Mix everything well. You want all the oats and flour to be coated in the peanut butter blend. After that, fold in the mini chocolate chips or dried fruit. Make sure they are well mixed in, too. When mixing, use a sturdy spatula. This will help you combine the ingredients without too much effort. Make sure to scrape down the sides of the bowl. This ensures nothing gets left behind. If the mix feels too dry, you can add a bit more honey or peanut butter. This will help everything stick together better. Another tip is to work quickly. The peanut butter mix can cool down and thicken, making it harder to mix with the dry ingredients. If you notice it getting thick, just microwave it for a few seconds to soften it again. After mixing, prepare an 8x8 inch baking dish. Line it with parchment paper, leaving some overhang. This will help you lift the bars out later. Transfer your mixture into the dish and press it down firmly. Packing it tightly helps the bars hold together. Now, refrigerate the dish for at least 2 hours. This allows the bars to set properly. Once they are set, lift them out using the parchment paper. Cut them into squares or rectangles. Store the bars in an airtight container in the fridge for up to one week. You can also freeze them for longer storage. Enjoy your tasty snack! To get the best texture for your bars, use rolled oats. They help add chewiness. Almond flour gives a nice crumb. If you want a softer bar, add more peanut butter. For a firmer bar, press the mixture down tightly. Refrigerate them well so they firm up nicely. Store your energy bars in an airtight container. This keeps them fresh for up to a week. If you want them to last longer, freeze them. Wrap each bar in plastic wrap before freezing. This way, you can grab one whenever you want a snack. Use a sharp knife to cut the bars. If they stick, run the knife under hot water. For easy serving, lift the bars out using the parchment paper. You can arrange them on a plate for a nice look. Enjoy them as a quick snack or a tasty treat! {{image_2}} You can change the flavor of your energy bars easily. Try adding chocolate, nuts, or fruit. For a chocolate twist, mix in 1/4 cup of mini chocolate chips. If you prefer fruit, dried cranberries or raisins work great. You can also add chopped nuts for crunch. Almonds, walnuts, or pecans are tasty. A pinch of cinnamon can enhance the overall flavor too. These bars can fit different diets. For gluten-free bars, swap the rolled oats with certified gluten-free oats. You can also use almond flour for a nutty taste. If you want vegan bars, replace honey with maple syrup. This keeps the sweetness without using animal products. You can also use a vegan chocolate chip option for a fully plant-based treat. These energy bars are perfect for snacks or meals. Pair them with a glass of almond milk or a smoothie for breakfast. You can also enjoy them with coffee as an afternoon treat. They are great for a quick energy boost before or after workouts. For a fun twist, try crumbling them over yogurt or oatmeal. This can add flavor and texture to your meals. To keep your peanut butter oatmeal energy bars fresh, store them in an airtight container. This helps prevent them from drying out. If you refrigerate, place the container on a shelf, not the door. For longer storage, freeze the bars. Wrap each bar in plastic wrap before placing them in a freezer bag. This keeps them safe from freezer burn. When stored in the fridge, these bars last up to one week. If you freeze them, they can last for three months. Make sure to label the bags with the date. This way, you know when to enjoy them! Check your energy bars for any changes in smell or appearance. If they smell off or have mold, it’s time to toss them. A change in texture can also be a bad sign. If they feel too hard or dry, they may not taste good anymore. Always trust your senses! Yes, you can use natural peanut butter. It has a fresh taste and less sugar. Just make sure it’s creamy. Stir it well to mix the oils back in. This helps keep the bars moist and tasty. You can use agave syrup or brown rice syrup. Both options add sweetness. If you want less sugar, try mashed bananas or unsweetened applesauce. These choices also add flavor and moisture to the bars. Yes, these energy bars are healthy. They have oats, peanut butter, and healthy fats. Oats provide fiber, which helps you feel full. Peanut butter offers protein for energy. Adding mini chocolate chips or dried fruit gives extra taste and nutrients. You now know how to make peanut butter oatmeal energy bars. We covered key ingredients, step-by-step instructions, and useful tips. You can customize flavors and adjust for dietary needs. Remember to store them properly to keep them fresh longer. These bars are not just tasty; they can fit into a healthy diet. I hope you enjoy making your energy bars as much as I enjoy sharing this recipe with you.

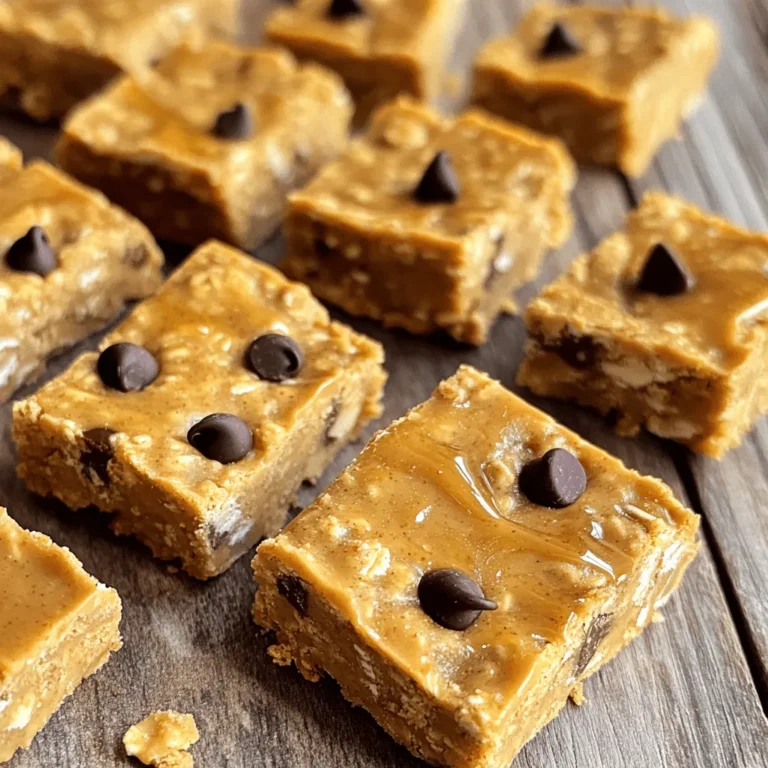
Peanut Butter Oatmeal Energy Bars Simple Snack Choice

To make tasty pumpkin protein cottage cheese waffles, gather these ingredients: - 1 cup cottage cheese - 1 cup pumpkin puree (canned or fresh) - 2 large eggs - 1 cup rolled oats - 1 scoop vanilla protein powder - 1 teaspoon baking powder - 1 teaspoon cinnamon - ½ teaspoon nutmeg - ¼ teaspoon salt - 1 tablespoon maple syrup (optional) - Cooking spray or oil for the waffle iron You can easily swap some ingredients to fit your needs: - Cottage Cheese: Use Greek yogurt for a dairy-free option. - Pumpkin Puree: Sweet potato puree works well too. - Eggs: Replace with flax eggs (1 tablespoon flaxseed meal + 2.5 tablespoons water) for vegan waffles. - Rolled Oats: Use almond flour for a gluten-free version. - Protein Powder: Choose plant-based protein for a dairy-free option. - Maple Syrup: Honey or agave syrup can replace maple syrup if you want a different sweetener. Each ingredient brings something special to your waffles: - Cottage Cheese: Adds protein and creaminess. - Pumpkin Puree: Provides vitamins A and C, plus fiber. - Eggs: Offer protein and help bind the batter. - Rolled Oats: Deliver whole grains and keep you full longer. - Protein Powder: Boosts protein content for muscle health. - Baking Powder: Makes the waffles light and fluffy. - Cinnamon: Adds flavor and may help regulate blood sugar. - Nutmeg: Gives a warm spice taste and may aid digestion. - Salt: Enhances all the flavors in your waffles. - Maple Syrup: Adds a touch of sweetness if you choose to use it. - Cooking Spray or Oil: Helps prevent sticking and ensures easy waffle removal. These ingredients work together to create a delicious, nutritious breakfast option. To make these delicious pumpkin protein cottage cheese waffles, start by preheating your waffle iron. Each brand has its own settings, so check the manual. Next, grab a large mixing bowl. Combine one cup of cottage cheese, one cup of pumpkin puree, and two large eggs. Mix these until the mixture is smooth. In a separate bowl, blend one cup of rolled oats using a food processor or blender. You want a flour-like texture. Add this oat flour to the pumpkin mixture. Then, add one scoop of vanilla protein powder, one teaspoon of baking powder, one teaspoon of cinnamon, half a teaspoon of nutmeg, and a quarter teaspoon of salt. Stir everything until it’s well mixed. If you like it sweeter, add one tablespoon of maple syrup. Lightly grease your waffle iron with cooking spray or a bit of oil. Pour about three-quarters of a cup of batter onto the hot iron, or follow your iron's guidelines. Close the lid and cook for about four to five minutes. Keep an eye on it! When the waffles turn golden brown, they are ready. Carefully remove them and repeat with the rest of the batter. Serve warm with your favorite toppings. For the best waffles, make sure your ingredients are fresh. Use room-temperature eggs for a smoother mix. If your batter is too thick, add a little water or milk to loosen it. This can help the waffles cook evenly. Don’t overfill your waffle iron. Too much batter can cause a mess. Also, let the waffles cool for a minute before serving. This helps them firm up and makes them easier to handle. Cooking time for these waffles is about four to five minutes. Each waffle iron can differ, so check your waffles a minute early. If they are not brown enough, give them another minute. The ideal temperature is medium to high heat. This will help them crisp on the outside while staying soft inside. Enjoy your waffles hot for the best taste! To get the best texture in your pumpkin protein cottage cheese waffles, focus on blending. First, make oat flour by blending rolled oats. This step creates a smooth base. Next, mix the cottage cheese, pumpkin puree, and eggs well. The more you blend, the creamier your waffles will be. If the batter seems too thick, add a splash of milk. This small change can make a big difference. One common mistake is not measuring the ingredients accurately. Use measuring cups for each item. Too much or too little can change the texture. Another mistake is cooking the waffles too long. Keep an eye on the time. If you wait too long, they may burn. Lastly, do not skip greasing the waffle iron. A little cooking spray or oil prevents sticking and helps with even cooking. You can enjoy these waffles in many ways. For a fresh touch, top them with Greek yogurt and berries. Add a drizzle of maple syrup for sweetness. Sliced bananas or chopped nuts also work well. If you want something fun, try adding a scoop of ice cream on top. These toppings not only taste great but also make your dish look beautiful. {{image_2}} You can easily switch up the taste of your pumpkin protein cottage cheese waffles. Here are some fun ideas: - Chocolate: Add 2 tablespoons of cocoa powder to the batter. This gives a rich chocolate kick. - Peanut Butter: Stir in 2 tablespoons of peanut butter. It adds creaminess and a nutty flavor. - Spices: Experiment with ginger or allspice for a different spice profile. - Fruits: Toss in blueberries or chopped bananas for extra sweetness and texture. Need a gluten-free or dairy-free option? Here’s how to adapt the recipe: - Gluten-Free: Substitute rolled oats with gluten-free oats or almond flour for the base. - Dairy-Free: Use a dairy-free cottage cheese or a plant-based yogurt. Check the consistency to ensure it mixes well. - Egg Replacement: Use flax eggs (1 tablespoon of flaxseed meal mixed with 2.5 tablespoons of water) as an egg substitute for a vegan option. Serving these waffles can be just as fun as making them. Here are some creative ideas: - With Ice Cream: Top warm waffles with a scoop of vanilla ice cream. The heat melts the ice cream, creating a delicious treat. - Yogurt Parfait: Layer sliced waffles with Greek yogurt and fresh fruits for a tasty parfait. - Breakfast Sandwich: Use waffles as bread for a breakfast sandwich. Add eggs, avocado, or bacon for a hearty meal. - Sweet Dips: Serve with maple syrup, honey, or a chocolate sauce for dipping. To keep your pumpkin protein cottage cheese waffles fresh, store them in an airtight container. Let the waffles cool first. This step helps prevent moisture buildup. Place parchment paper between layers if stacking. This keeps them from sticking together. You can store them in the fridge for up to three days. To reheat your waffles, use a toaster or an oven. For the toaster, set it to medium. Toast the waffles until they are warm and crisp. If using an oven, preheat it to 350°F. Place the waffles on a baking sheet and heat for about 10 minutes. This method keeps them nice and crispy. You can freeze waffles for easy snacks or meals. First, let them cool completely. Then, wrap each waffle in plastic wrap. Place wrapped waffles in a freezer bag or container. Label the bag with the date. You can freeze them for up to three months. To eat, thaw them overnight in the fridge, or pop them straight into the toaster. Yes, you can use fresh pumpkin! Start with a small pumpkin. Cut it in half, remove the seeds, and roast it until soft. Then, scoop out the flesh and blend it until smooth. This fresh pumpkin will add a nice, vibrant flavor to your waffles. To make these waffles vegan, replace the eggs with flaxseed meal. Mix one tablespoon of flaxseed meal with three tablespoons of water. Let it sit for a few minutes until it thickens. You can also swap cottage cheese with a plant-based yogurt. This keeps the texture creamy and delicious. You can top your waffles with many fun options! Greek yogurt is a great choice for creaminess. Fresh fruits like bananas or berries add color and sweetness. A drizzle of maple syrup brings extra flavor. You can even sprinkle nuts or seeds for crunch. Enjoy experimenting! In this blog post, we reviewed key ingredients for delicious waffles, including substitutions. We explored step-by-step instructions, tips for the best texture, and common mistakes to avoid. You learned about tasty variations and how to store leftovers. The FAQs section answered questions about using fresh pumpkin and vegan-friendly options. Enjoy making these waffles. With the right ingredients, simple steps, and fun toppings, you can create something special. Happy cooking!

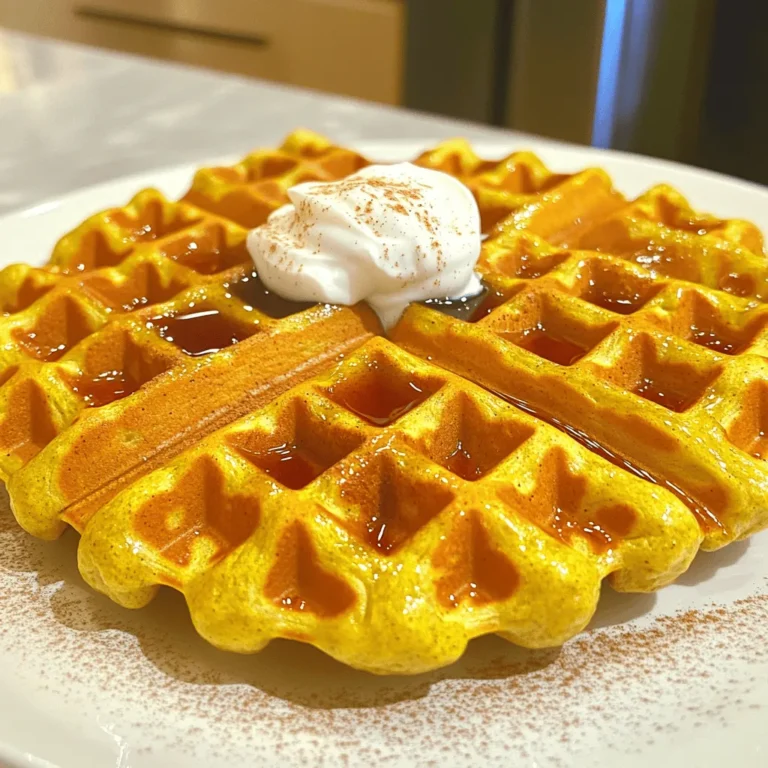
Pumpkin Protein Cottage Cheese Waffles Delightful Recipe

PREV 1 … 31 32 33 … 86 NEXT
spicy fork kitchen

explore

DessertsDinnerAppetizersDrinks

Our Policies

  • Cookie Policy
  • Copyright Policy
  • Disclaimer
  • GDPR Policy
  • Terms Of Use
Back to Top
  • About
  • Contact Us
  • Privacy Policy
© 2026 spicy fork kitchen