FREE DINNER EBOOK! Get your copy!
  • Cookie Policy
  • GDPR Policy
  • Disclaimer
  • Terms Of Use
  • Visit my other site: Fun Cookie Recipes
spicy fork kitchen
  • Home
  • Dinner
  • Desserts
  • Drinks
  • Appetizers
  • Contact
  • About
  • Privacy Policy
  • Home
  • Dinner
  • Desserts
  • Drinks
  • Appetizers
  • Contact
  • About
  • Privacy Policy
  • Cookie Policy
  • GDPR Policy
  • Disclaimer
  • Terms Of Use
Visit my other site: Fun Cookie Recipes

HOME / CATEGORIES /

Latest

- 1 ¾ cups all-purpose flour - ½ cup unsweetened cocoa powder - 1 teaspoon baking powder - ½ teaspoon baking soda - ¼ teaspoon salt - ¾ cup granulated sugar - ½ cup brown sugar, packed - 2 large eggs - 1 cup buttermilk (or milk with 1 tablespoon vinegar added) - ½ cup vegetable oil - 1 teaspoon vanilla extract - 1 cup semi-sweet chocolate chips - 1 cup white chocolate chips For these double chocolate chip muffins, you need simple yet rich ingredients. Start with all-purpose flour and cocoa powder for a deep chocolate flavor. Baking powder, baking soda, and salt help them rise and balance the taste. The sugars, both granulated and brown, add sweetness and moisture. You’ll also need eggs for structure and buttermilk for a tender crumb. Vegetable oil keeps the muffins moist, while vanilla extract adds warmth. Finally, the star ingredients: semi-sweet and white chocolate chips bring bursts of flavor in every bite. Gather these ingredients before you start. This will help you move smoothly through the recipe. Enjoy the process of mixing and baking. You are about to make a treat that everyone will love! First, preheat your oven to 350°F (175°C). This heat will help the muffins rise perfectly. While it warms up, line a 12-cup muffin tin with paper liners. If you don’t have liners, lightly grease each cup with oil or butter. This step keeps the muffins from sticking. In a medium bowl, whisk together the dry ingredients. Combine 1 ¾ cups of all-purpose flour, ½ cup of unsweetened cocoa powder, 1 teaspoon of baking powder, ½ teaspoon of baking soda, and ¼ teaspoon of salt. Mixing these well ensures an even flavor and helps the muffins rise. In a large mixing bowl, add ¾ cup of granulated sugar and ½ cup of packed brown sugar. Blend them together until smooth. Then, crack in 2 large eggs and whisk until they are fully mixed. Next, stir in 1 cup of buttermilk, ½ cup of vegetable oil, and 1 teaspoon of vanilla extract. This mixture brings moisture and flavor to your muffins. Now, it’s time to combine the two mixtures. Gradually add the dry ingredients to the wet mixture. Stir gently until just combined. Remember, do not overmix! A few lumps are okay. This keeps your muffins light and fluffy. Fold in 1 cup of semi-sweet chocolate chips and 1 cup of white chocolate chips. This adds a rich, sweet flavor. Divide the batter evenly among the 12 muffin cups, filling each about ¾ full. Bake in your preheated oven for 18-20 minutes. To check if they are done, insert a toothpick in the center. If it comes out clean, they are ready! Once baked, allow the muffins to cool in the pan for 5 minutes. Then, transfer them to a wire rack to cool completely. For serving, you can dust them with powdered sugar or drizzle some chocolate sauce on top. Enjoy your rich and decadent double chocolate chip muffins! To get the best texture, use room temperature ingredients. This helps your batter mix well. I like to sift the cocoa powder with the flour. It makes the muffins light and fluffy. A little baking soda gives them a nice rise. The mix of semi-sweet and white chocolate chips adds depth to the flavor. The white chocolate brings a creamy sweetness to balance the rich cocoa. Overmixing can make muffins tough. Mix just until you see no dry flour. It’s okay if the batter has some lumps. These lumps help keep the muffins soft. Use a spatula to fold in the chocolate chips gently. This keeps them from breaking apart. The goal is to keep the batter as airy as possible. For a fun touch, dust your muffins with powdered sugar. You can also drizzle melted chocolate on top. Serve them warm for the best taste. If you want to impress, add fresh berries or whipped cream on the side. These small details make your muffins look fancy. Choosing good chocolate is key. I recommend using high-quality semi-sweet and white chocolate chips. They melt beautifully and enhance the flavor. Look for chocolate with a high cocoa content. This can make your muffins even richer. Always check the label for pure ingredients to ensure the best taste. {{image_2}} To make gluten-free double chocolate muffins, swap the all-purpose flour with a gluten-free blend. Look for a blend with xanthan gum. This will help the muffins rise and keep a good texture. You can add nuts or dried fruit for extra flavor. Chopped walnuts or pecans work great. Dried cherries or cranberries add a nice touch too. Mix in about half a cup for a tasty twist. If you want less sweetness, cut back on the granulated sugar or brown sugar. You can use unsweetened cocoa powder to balance flavors. Taste the batter before baking to find the right sweetness for you. Try using different types of chocolate chips. Dark chocolate chips give a rich flavor. You can also use milk chocolate for a sweeter taste. Mixing in white chocolate chips adds a creamy texture too. Experiment with what you like best! To keep your double chocolate chip muffins fresh, store them in an airtight container. This keeps air out and moisture in. You can place a paper towel at the bottom to absorb any extra moisture. This helps prevent sogginess. Store them at room temperature for up to three days. For longer storage, use the freezer. Freezing muffins is simple! First, let them cool completely. Next, wrap each muffin in plastic wrap. After that, place them in a freezer-safe bag or container. Be sure to label the bag with the date. You can freeze them for up to three months. When you want one, just take it out and let it thaw at room temperature. To enjoy your muffins warm again, preheat your oven to 350°F (175°C). Place the muffins on a baking sheet and cover them with foil. Heat for about 10 minutes. You can also use the microwave. Just heat for 15 to 20 seconds on a microwave-safe plate. This will make them soft and delicious again! You can check if your muffins are done by using a toothpick. Insert it into the center of a muffin. If it comes out clean or with a few crumbs, your muffins are ready. This usually takes about 18 to 20 minutes of baking. If the toothpick has wet batter on it, bake for a few more minutes. Yes, you can substitute buttermilk with regular milk. Just add 1 tablespoon of vinegar to 1 cup of milk. Let it sit for about 5 minutes. This makes a similar tangy flavor, helping the muffins rise well. I love serving these muffins warm. You can add a light dusting of powdered sugar on top for a pretty touch. Another great idea is drizzling melted chocolate sauce over them. It makes them even more decadent! These muffins stay fresh for about 3 to 4 days at room temperature. To keep them longer, store them in an airtight container. You can also freeze them for up to 3 months. Just thaw them at room temperature when you want to enjoy one! We covered the key ingredients needed for double chocolate chip muffins and walked through each step. You learned tips to get perfect texture and flavor. We also explored storage methods and variations for every taste. Now, you have all the tools to bake these tasty treats. With this knowledge, your baking will impress friends and family. Enjoy the delicious results and share them with others!

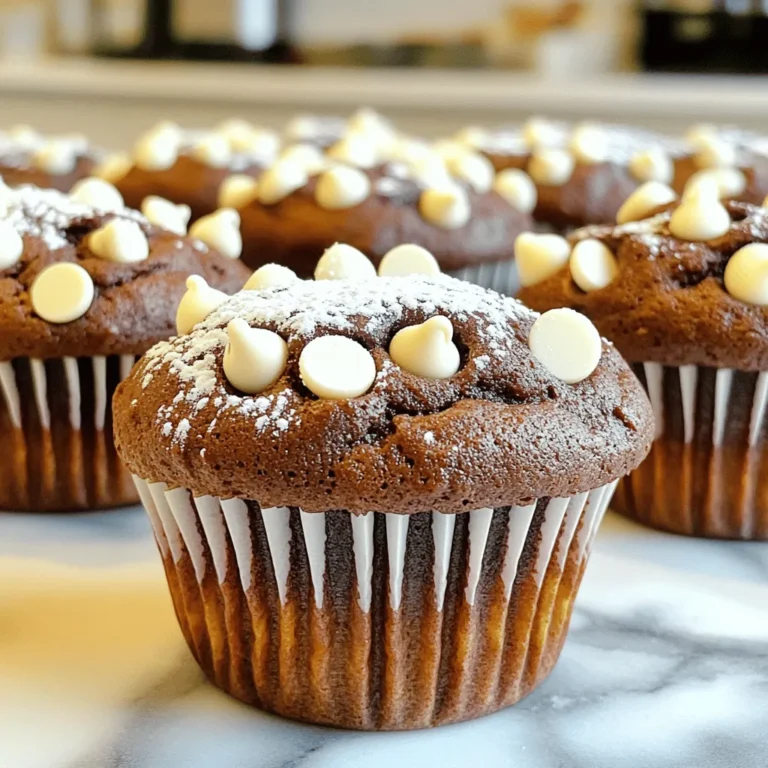
Double Chocolate Chip Muffins Rich and Decadent Treat

For this recipe, you need two medium zucchinis. Slice them into 1/4-inch thick rounds. Zucchini adds a nice crunch and a mild flavor. It also brings a lot of nutrients to this dish. You can find zucchinis at your local store or farmers’ market. Choose firm ones with smooth skin for the best taste. Cheese gives these bites their tasty and gooey texture. Use 1 cup of shredded mozzarella cheese for that melty goodness. It melts well and adds a rich taste. You also need 1/2 cup of grated Parmesan cheese. This cheese brings a sharp flavor and a nice golden color when baked. Together, they create a delicious cheese layer that pairs perfectly with zucchini. To spice things up, you need some seasonings! Use 1 teaspoon of Italian seasoning for that classic pizza taste. Add 1/2 teaspoon of garlic powder for a hint of warmth. If you like it spicy, sprinkle in 1/4 teaspoon of red pepper flakes. You can also drizzle olive oil over the zucchini for extra flavor. Finally, fresh basil leaves make a lovely garnish and add freshness to each bite. Start with two medium zucchinis. Cut them into 1/4-inch thick rounds. Make sure they are even for cooking. Place the slices on a baking sheet. Line it with parchment paper or grease it lightly. Drizzle olive oil over the zucchini rounds. This helps them crisp up. Then, season with salt, pepper, garlic powder, and Italian seasoning. Mix these well to give great flavor. Now, preheat your oven to 400°F (200°C). This step is key for cooking the zucchini properly. Bake the zucchini rounds for about 10 minutes. They should start to soften a bit. Keep an eye on them, as oven times can vary. Once done, take the baking sheet out of the oven. This is where the fun begins! Spoon marinara sauce onto each zucchini round. Don’t skimp on this step; it adds moisture and flavor. Next, sprinkle shredded mozzarella cheese on top. Follow it up with grated Parmesan cheese for a rich taste. If you like some heat, add red pepper flakes now. Place the baking sheet back in the oven. Bake for another 8-10 minutes. The cheese should be bubbly and golden brown. Once you take them out, let them cool for a minute. Add fresh basil leaves as a garnish for a nice touch. Enjoy your tasty Parmesan zucchini pizza bites! To make your Parmesan zucchini pizza bites crispy, start by slicing the zucchini evenly. Keep the rounds about 1/4-inch thick. This size helps them cook well. Before baking, drizzle olive oil on the zucchini and season with salt and pepper. Bake them for 10 minutes at 400°F (200°C) to get a good base. This step softens the zucchini but keeps it firm enough for toppings. For the best taste, choose a marinara sauce you love. A rich, flavorful sauce makes a big difference. You can use store-bought sauce or make your own. Look for sauces with no added sugars or fillers. A chunky sauce can add texture and flavor. Try adding some fresh herbs to your sauce for a personal touch. While mozzarella and Parmesan are classic choices, you can experiment with other cheeses. For a sharper taste, try adding aged Gouda or Gruyère. If you want a little heat, use pepper jack cheese. Mixing different cheeses can give your pizza bites a unique flavor. Always use the same amount to keep the balance right. {{image_2}} You can make Parmesan Zucchini Pizza Bites even more exciting with veggie swaps. Try adding sliced bell peppers or mushrooms on top of the marinara. They add flavor and color. You can even use spinach or kale for a fresh twist. These options keep the bites tasty and fun. If you want to cut carbs, consider using eggplant or portobello mushrooms instead of zucchini. Both have a great texture and soak up flavors well. You can prepare them just like the zucchini. They will still give you that pizza vibe without the extra carbs. To make the bites heartier, add sliced pepperoni or cooked chicken. Just place them on top of the cheese before baking. Pepperoni gives a classic pizza flavor. Chicken adds protein and makes the bites filling. Both options are simple and delicious! To keep your Parmesan zucchini pizza bites fresh, store them in an airtight container. Place a paper towel inside the container to absorb any moisture. This will help keep the bites crispy. You can store them in the fridge for up to three days. If you know you won’t eat them all, consider freezing some. When you want to enjoy your leftovers, the oven is the best choice. Preheat your oven to 350°F (175°C). Place the pizza bites on a baking sheet and reheat for about 10-12 minutes. This will make them warm and crispy again. Avoid using the microwave, as it can make the zucchini soggy. To freeze your pizza bites, let them cool completely first. Arrange them in a single layer on a baking sheet. Freeze them for about an hour until firm. After that, move them to a freezer bag or container. They will last for up to three months in the freezer. When you're ready to eat, bake them straight from frozen. Adjust the baking time to about 15-18 minutes. To make these pizza bites vegan, replace the cheeses with plant-based options. Use vegan mozzarella and nutritional yeast for a cheesy flavor. You can also swap marinara sauce for a homemade or store-bought vegan version. Make sure to check all labels for animal products. This way, you can enjoy a tasty snack without dairy. Yes, you can use other veggies! Eggplant, bell peppers, or even portobello mushrooms work well. Just cut them into rounds or slices. Keep in mind that cooking times may vary. Thicker veggies will need more time to bake. Experiment with different vegetables to find your favorite flavor combo. Zucchini is low in calories and high in water content. It provides vitamins A and C, which help your skin and immune system. Zucchini is also rich in antioxidants, which protect your cells. This vegetable offers fiber, supporting healthy digestion. Adding zucchini to your diet can help you feel full while keeping calories low. This blog post covers how to make delicious Parmesan Zucchini Pizza Bites. We discussed fresh ingredients like zucchini, mozzarella, and Parmesan, along with tasty seasonings. I shared easy steps for preparation and baking. Tips for crispiness and sauce choices help you perfect your dish. There are also variations to suit your diet. Remember, storing leftovers and reheating properly ensures you enjoy every bite. Whether you stick to the recipe or get creative, these bites are sure to impress you and your friends. Happy cooking!

Parmesan Zucchini Pizza Bites Flavorful and Easy Snack

For this soup, you need simple, fresh ingredients. Start with 1 tablespoon of olive oil. This adds a nice flavor. You will also need 1 small onion and 2 cloves of garlic. Dice the onion and mince the garlic. These two are the base for your soup. They add depth and richness to the taste. Next, we introduce the star ingredient: 1 cup of sun-dried tomatoes. Chop them into smaller pieces. They give the soup a tangy flavor. For the broth, use 4 cups of vegetable broth. This will create a warm, comforting base for your soup. Now, let’s make it creamy! You need 1 cup of heavy cream. If you want a dairy-free option, use coconut cream instead. You will also need 1 pound of gnocchi. You can buy it or make your own. The gnocchi will soak up the flavors and make the soup hearty. For added color and nutrition, include 2 cups of fresh spinach. Finally, season with 1 teaspoon of dried basil, salt, and pepper to taste. If you like, you can garnish with grated Parmesan cheese and fresh basil leaves. These will take your soup to the next level! Start by heating one tablespoon of olive oil in a large pot over medium heat. Add one small diced onion and sauté it until it softens, about five minutes. The onion adds sweetness to the soup. Next, stir in two cloves of minced garlic and one cup of chopped sun-dried tomatoes. Cook this mixture for two to three minutes until it smells great. This step builds the flavor base for your soup. Now, pour in four cups of vegetable broth. Bring the soup to a boil, then reduce the heat and let it simmer for ten minutes. This lets the flavors blend and creates a nice, rich broth. After the broth has simmered, it’s time to add the cream and gnocchi. Pour in one cup of heavy cream or coconut cream if you want a dairy-free option. Then, add one pound of gnocchi to the pot. Stir everything well to combine. Cook the gnocchi according to the package instructions, which usually takes about three to five minutes. You know the gnocchi is done when it floats to the surface. Once the gnocchi is cooked, add two cups of chopped fresh spinach, one teaspoon of dried basil, and salt and pepper to taste. Stir these ingredients in and cook for another two minutes. This step wilts the spinach and adds a fresh taste to the soup. Make sure to taste the soup and adjust the seasoning if needed. Serve it hot, and for a special touch, you can garnish with grated Parmesan cheese and fresh basil leaves. Enjoy your cozy bowl of sun-dried tomato gnocchi soup! To make your soup shine, use fresh herbs. Fresh basil adds a bright touch. You can also try thyme or oregano for depth. Add herbs early in the cooking. It helps their flavors mix well with the soup. If you use dried herbs, add them with the broth. This gives them time to release their flavors. The key to great gnocchi is not overcooking them. Follow the package instructions closely. Gnocchi should float when they are done. If they float, they are light and chewy. For homemade gnocchi, use a soft dough. Too much flour can make them heavy. Roll them gently and cut them small for even cooking. You can make this soup dairy-free with coconut cream. It gives a rich texture without dairy. Use the same amount as heavy cream. If you want a lighter option, use almond milk. Just remember, it will change the flavor a bit. Taste as you go to adjust the seasonings. Coconut cream and almond milk both work well! {{image_2}} You can easily add protein to your Sun Dried Tomato Gnocchi Soup. This soup pairs well with chicken or shrimp. Cook diced chicken in the pot before adding the onion. For shrimp, add them with the gnocchi. They cook quickly and add a nice texture. If you want a meatless option, try adding canned chickpeas. They are filling and packed with protein. This soup is easy to adapt for vegetarian or vegan diets. To make it vegetarian, keep the vegetable broth and skip any meat. For a vegan version, use coconut cream instead of heavy cream. This swap keeps the soup creamy without dairy. You can also add nutritional yeast for a cheesy flavor. It’s a great way to boost taste and nutrients. You can change the vegetables based on the season. In spring, add fresh peas or asparagus. In summer, zucchini or bell peppers work well. In fall, consider adding butternut squash or kale. Each swap brings new flavors and colors to your soup. This makes it fun and keeps it fresh! Store leftover sun dried tomato gnocchi soup in an airtight container. Let the soup cool to room temperature first. Place it in the fridge within two hours of cooking. The soup will stay fresh for about 3 to 4 days. When you want to eat it again, check for any changes in smell or texture. You can freeze this soup for longer storage. Use freezer-safe containers or bags. Make sure to leave some space at the top for expansion. The soup can last up to three months in the freezer. To make it easy to use later, consider freezing it in single portions. To reheat the soup, first thaw it in the fridge overnight. You can also use the microwave on low power. If using a pot, heat it on medium-low, stirring often. Add a splash of broth or cream if the soup seems too thick. Heat until it is hot throughout. Always taste and adjust the seasoning before serving. Yes, you can use homemade gnocchi. Fresh gnocchi adds a nice touch. It cooks quickly in the soup, so keep an eye on it. Once it floats, it’s ready. Just follow your dough recipe for best results. If you need a lighter option, try coconut cream. It gives a rich taste without dairy. You can also use half-and-half or whole milk. Each option changes the flavor a little, so choose what you like best. To spice up the soup, add red pepper flakes. Start with a pinch and taste as you go. You can also use fresh jalapeños for a kick. Add them with the onions for a deeper flavor. Adjust to your heat preference! This blog post covered how to make a creamy gnocchi soup with simple ingredients and steps. We discussed the important role that olive oil, sun-dried tomatoes, and broth play in bringing out flavor. You learned how to prepare the base, add gnocchi, and finish with seasoning. We also shared tips for enhancing flavor and making dairy-free swaps. Lastly, we explored variations and storage tips. Remember, cooking is about creativity, so feel free to adjust ingredients as you please. Enjoy your soup adventure!

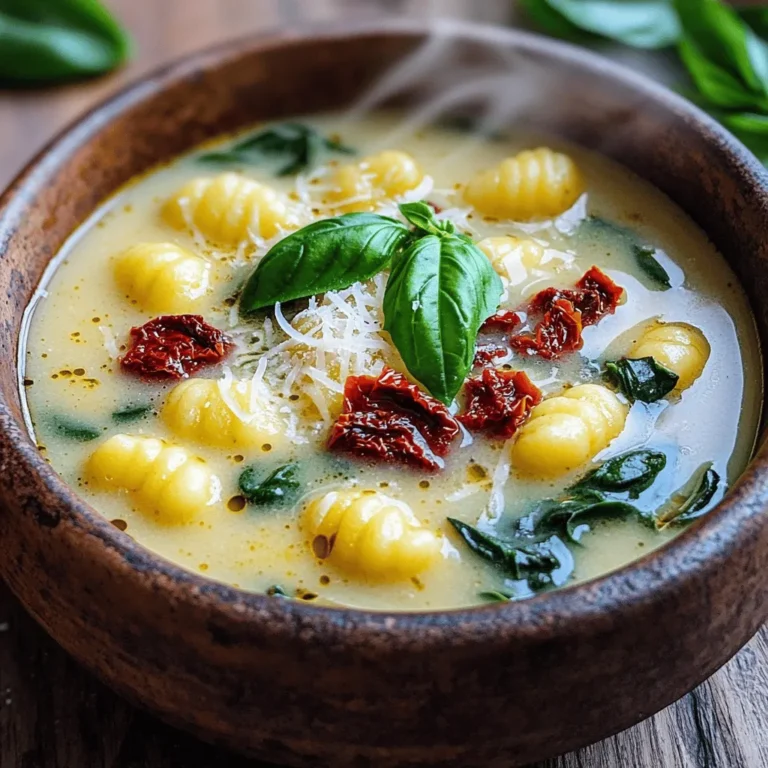
Sun Dried Tomato Gnocchi Soup Tasty and Cozy Recipe

To make these tasty apple cider cinnamon donuts, you will need: - 1 cup apple cider - 1/4 cup unsalted butter, melted - 1/2 cup granulated sugar - 1/2 cup brown sugar, packed - 1 large egg - 1 teaspoon vanilla extract - 2 cups all-purpose flour - 1 teaspoon baking powder - 1/2 teaspoon baking soda - 1 teaspoon ground cinnamon - 1/2 teaspoon nutmeg - 1/4 teaspoon salt - 1/4 cup granulated sugar (for coating) - 1 tablespoon ground cinnamon (for coating) These ingredients blend together to create a moist and flavorful donut. The apple cider gives a natural sweetness and a warm aroma. The butter adds richness, while the sugars create that perfect sweetness. If you need to make substitutions, here are some ideas: - Use light brown sugar instead of dark for a milder flavor. - Swap applesauce for the butter for a lower-fat version. - You can replace all-purpose flour with a gluten-free blend if needed. - If you don’t have apple cider, try using apple juice for a similar taste. These swaps can help you enjoy these donuts while catering to your dietary needs. For serving, you might want: - Extra granulated sugar and ground cinnamon for coating - Decorative plates to display the donuts - Fresh apple slices for a colorful touch These extras can enhance the visual appeal and add a fresh crunch alongside the soft donuts. Start by gathering all your ingredients. You will need: - 1 cup apple cider - 1/4 cup unsalted butter, melted - 1/2 cup granulated sugar - 1/2 cup brown sugar - 1 large egg - 1 teaspoon vanilla extract - 2 cups all-purpose flour - 1 teaspoon baking powder - 1/2 teaspoon baking soda - 1 teaspoon ground cinnamon - 1/2 teaspoon nutmeg - 1/4 teaspoon salt - 1/4 cup granulated sugar (for coating) - 1 tablespoon ground cinnamon (for coating) Next, preheat your oven to 375°F (190°C). Grease a donut pan with non-stick spray. This helps the donuts come out easily later. In a small saucepan, bring the apple cider to a boil over medium heat. Once it boils, reduce the heat and let it simmer. You want it to reduce to about 1/2 cup. This will take around 10 to 15 minutes. After it reduces, let it cool for a bit. In a large bowl, mix the melted butter, granulated sugar, brown sugar, egg, and vanilla extract. Whisk it until everything is combined. Slowly pour in the reduced apple cider, mixing until smooth. In another bowl, combine the flour, baking powder, baking soda, cinnamon, nutmeg, and salt. Gradually add this dry mix to the wet mix. Stir gently until just combined. Be cautious not to overmix. Use a piping bag or a zip-top bag with a cut corner to fill the donut pan halfway with the batter. Bake in the preheated oven for 10 to 12 minutes. A toothpick should come out clean when poked in the center. Once baked, let the donuts cool for a few minutes in the pan. Carefully transfer them to a wire rack to cool completely. While the donuts are still warm, prepare the cinnamon sugar coating. In a small bowl, mix 1/4 cup granulated sugar with 1 tablespoon ground cinnamon. Roll each warm donut in the cinnamon-sugar mix until evenly coated. Enjoy your delicious Apple Cider Cinnamon Donuts! To make the best apple cider cinnamon donuts, follow these tips: - Use fresh apple cider. It adds more flavor. - Measure ingredients accurately. Too much flour can make donuts dense. - Don’t overmix the batter. Mix until just combined for a light texture. - Fill the pan halfway. This allows room for the donuts to rise evenly. - Check doneness with a toothpick. It should come out clean when done. Avoid these common pitfalls for perfect donuts: - Skipping the reduction step. Reducing cider intensifies the flavor. - Using cold ingredients. Room temperature ingredients mix better. - Overbaking. Keep an eye on the time to prevent dryness. - Rolling in sugar too late. Coat the donuts while warm for better adhesion. - Not greasing the pan. This can lead to sticking and broken donuts. To impress your guests, consider these serving ideas: - Use a decorative plate. It makes your donuts look more inviting. - Sprinkle extra cinnamon sugar. A little around the base adds charm. - Add apple slices. They bring color and a fresh touch. - Serve with a warm beverage. Cider or coffee pairs perfectly with these donuts. - Stack the donuts. A tower of donuts looks appealing and fun. {{image_2}} You can change the flavor of these donuts easily. Try adding chocolate chips for a sweet twist. You could mix in chopped nuts like walnuts or pecans for crunch. For a zesty kick, add some orange or lemon zest. This gives your donuts a fresh taste. Dried fruits, such as cranberries or raisins, also work well. They add a chewy texture and natural sweetness. You could even use different spices like ginger or cardamom to switch things up. To make these donuts vegan, replace the egg with a flax egg. Mix one tablespoon of ground flaxseed with three tablespoons of water and let it sit until it thickens. Use a dairy-free butter substitute instead of regular butter. For gluten-free options, swap all-purpose flour with a gluten-free blend. Make sure the baking powder is gluten-free. These changes help keep the tasty flavor while meeting dietary needs. Coating your donuts can be fun and creative. The classic method is rolling them in cinnamon sugar. You can mix different spices into the sugar for a unique taste. Try using powdered sugar for a sweeter, softer coat. For a sticky glaze, mix powdered sugar with a little apple cider. Drizzle this glaze over the warm donuts for a delicious finish. You could also dip them in melted chocolate for an indulgent treat. Enjoy exploring these options to find your favorite! To keep your apple cider cinnamon donuts fresh, store them in an airtight container. This method helps keep them moist and tasty. You can leave them at room temperature for up to three days. If you want to keep them longer, use the fridge. Just make sure the container is sealed well. If you have extra donuts, freezing is a great option. First, let the donuts cool completely. Then, wrap each one in plastic wrap. Place the wrapped donuts in a freezer bag or airtight container. They can stay frozen for up to three months. When you’re ready to eat, just take them out and let them thaw. Reheating the donuts brings back their warmth and flavor. You can use an oven or microwave. For the oven, preheat it to 350°F (175°C). Place the donuts on a baking sheet for about 5-7 minutes. If using the microwave, heat each donut for 10-15 seconds. Enjoy them warm and fresh! You can use apple juice as a substitute. Use the same amount as the cider. To mimic the cider's flavor, add a splash of lemon juice. This will create a nice balance of sweetness and tartness. You may also boil the juice to reduce it for a richer taste. To keep your donuts fresh, store them in an airtight container. This helps keep moisture in and prevents them from getting hard. If you want them to last longer, place them in the fridge. Just remember to let them come to room temperature before serving. Yes, you can use a donut maker! Just fill the molds about halfway with batter. Cook according to the maker's instructions. The donuts will be smaller, but they will taste just as good. Enjoy the process and have fun with it! In this post, we delved into making delicious apple cider cinnamon donuts. We covered essential ingredients, measurement tips, and options for serving. You learned to prepare, bake, and coat your donuts perfectly. I shared best practices, common mistakes, and ways to present them nicely. Variations included alternative flavors and storage tips for freshness. Now, you can create these tasty treats at home with ease and confidence. Enjoy your baking!

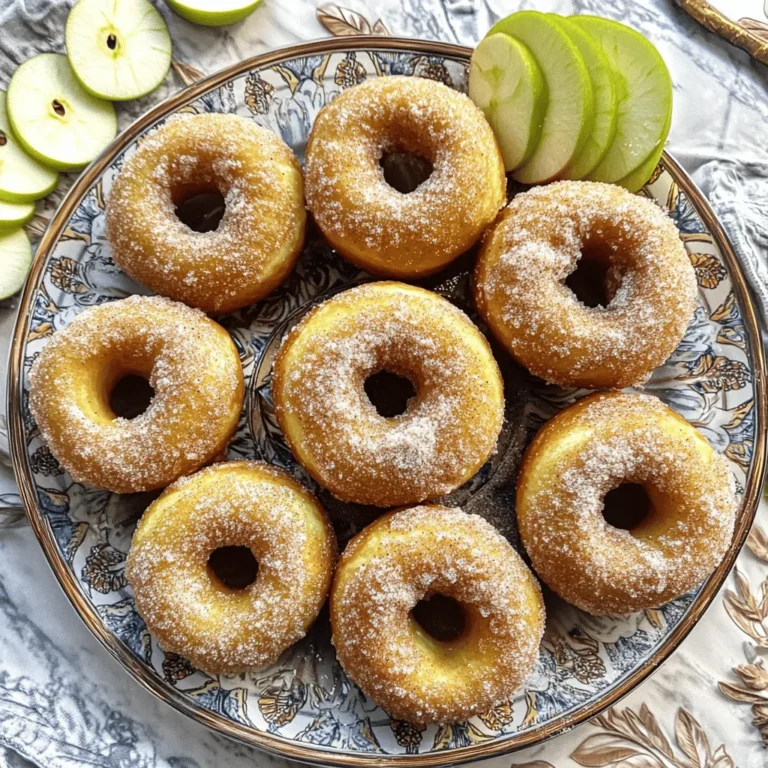
Savory Apple Cider Cinnamon Donuts You Will Love

To make Blueberry Cheesecake Overnight Oats, you'll need the following: - 1 cup rolled oats - 1 cup milk of choice (like almond, dairy, or coconut) - 1/2 cup plain Greek yogurt - 1/4 cup cream cheese, softened - 2 tablespoons honey or maple syrup - 1 teaspoon vanilla extract - 1 cup fresh blueberries - Dash of cinnamon and salt - Zest of 1 lemon (for a fresh twist) These simple ingredients come together to create a creamy and delicious breakfast. Each component adds flavor and texture. The oats provide a hearty base. The Greek yogurt and cream cheese make it rich and creamy. Fresh blueberries bring sweetness and color. Honey or maple syrup adds a touch of natural sweetness. Using lemon zest brightens the flavor, making each bite feel fresh. You can choose any milk you like, so it’s easy to make this recipe suit your taste. This mix of flavors creates a breakfast that feels like dessert, but it’s healthy too! 1. Mixing dry and wet ingredients Start by taking a medium bowl. Add 1 cup of rolled oats. Then pour in 1 cup of milk. You can choose almond, dairy, or coconut milk. Next, add 1/2 cup of plain Greek yogurt. Finally, mix in 1/4 cup of softened cream cheese. Stir until everything is creamy and well combined. 2. Incorporating sweeteners and flavors Now, it’s time to sweeten your mix. Add 2 tablespoons of honey or maple syrup. Then, include 1 teaspoon of vanilla extract. Don’t forget a pinch of salt to boost the flavors. For a fresh touch, add the zest of 1 lemon. Mix until all the ingredients are well blended. 3. Folding in blueberries Gently fold in 3/4 cup of fresh blueberries. Be careful not to mash them. Reserve the remaining blueberries for topping later. This step adds bursts of flavor throughout the oats. 1. Dividing the mixture into jars Take two jars or containers with lids. Scoop the oat mixture into each jar evenly. 2. Topping and sealing jars On top of each jar, add the leftover blueberries. If you like, sprinkle a little cinnamon for extra flavor. Seal each jar tightly with the lid. 3. Recommended refrigeration time Place the jars in the refrigerator. Let them chill overnight or for at least 4 hours. This soaking time lets the oats absorb the liquid and flavors. 1. How to enjoy In the morning, stir the oats well. You can eat them cold right from the jar. If you prefer, transfer them to a bowl. 2. Presentation tips Serve your oats in clear glass jars. This way, you can show off the layers and the beautiful blueberries. For a special touch, add a sprig of mint on top for freshness. Soaking oats overnight is key. This allows the oats to absorb the liquid and flavors. You get a smooth and tasty treat by letting them rest. For sweeteners, honey or maple syrup works well. You can also try agave or stevia for a different twist. To get perfect creaminess, use full-fat yogurt and cream cheese. These make your oats rich and smooth. Avoid a soggy texture by using the right milk amount. Too much liquid can ruin your oats. Stick to the recipe for best results. If you want dairy-free, swap regular milk for almond or coconut milk. You can also use dairy-free yogurt. For a low-calorie option, use low-fat cream cheese and yogurt. This keeps your oats tasty without too many calories. {{image_2}} You can easily change the taste of your blueberry cheesecake overnight oats. Here are a few ideas: - Adding nuts or seeds: Toss in chopped walnuts or sliced almonds for a crunch. You can also add chia or flaxseeds for some extra nutrition. - Incorporating other fruits: Mix in strawberries or raspberries for a fruity twist. You can even try tropical fruits like mango for a refreshing change. Get creative with different themes to make your oats fun: - Seasonal ideas: In fall, add pumpkin spice for a cozy touch. In winter, try cocoa powder for a chocolatey delight. - Fun twists for kids: Let kids choose their toppings. They can add mini chocolate chips or colorful sprinkles. It makes breakfast exciting! You can adapt the recipe to fit your diet: - Gluten-free options: Use gluten-free oats to make this dish safe for those with gluten sensitivities. - Vegan transformation: Swap the milk for almond milk and the yogurt for coconut yogurt. Replace cream cheese with cashew cream for a creamy texture. Your blueberry cheesecake overnight oats will stay fresh in the fridge for up to five days. Store them in airtight jars or containers. Check for spoilage if they look dry or smell sour. If you see mold, throw them away immediately. Yes, you can freeze overnight oats! This is a great way to save time. Use freezer-safe containers or jars. Make sure they are sealed tight to avoid freezer burn. To thaw overnight oats, move them from the freezer to the fridge. Let them sit overnight. If you need them sooner, you can leave them at room temperature for a couple of hours. For serving, give them a good stir. You can enjoy them cold or warm them in the microwave for about 30 seconds. Can I use quick oats instead of rolled oats? Yes, you can use quick oats. They will soften faster than rolled oats. This means your oats may be creamier. However, the texture will be a bit different. Rolled oats give a nice chew that many people enjoy. How can I make it less sweet? To lower the sweetness, reduce the honey or maple syrup. You can also skip the sweeteners. The natural flavor of the blueberries will shine through. Adding more yogurt can also balance out the sweetness. Caloric content per serving Each serving has about 300 calories. This includes the oats, yogurt, and cream cheese. The blueberries add minimal calories but a lot of flavor. Health benefits of ingredients - Rolled oats are great for fiber. They help with digestion. - Greek yogurt adds protein and probiotics. This is good for gut health. - Blueberries are full of antioxidants. They help fight free radicals in the body. - Cream cheese gives a creamy texture and adds calcium. How far in advance can I prepare these? You can make these up to three days in advance. They store well in the fridge. Just keep them sealed in jars or containers. Can I double the recipe? Yes, you can easily double the recipe. Just make sure you have enough jars. This way, you can enjoy them for more days! This blog post covered how to make overnight oats easily. We looked at the ingredients you need, like oats, yogurt, and fruit. I shared step-by-step instructions and tips for the best flavor and texture. You can even try fun variations and dietary changes. Now you can enjoy a healthy, tasty meal ready when you wake up. With these recipes and ideas, breakfast becomes fun and quick! Enjoy your oats your way!

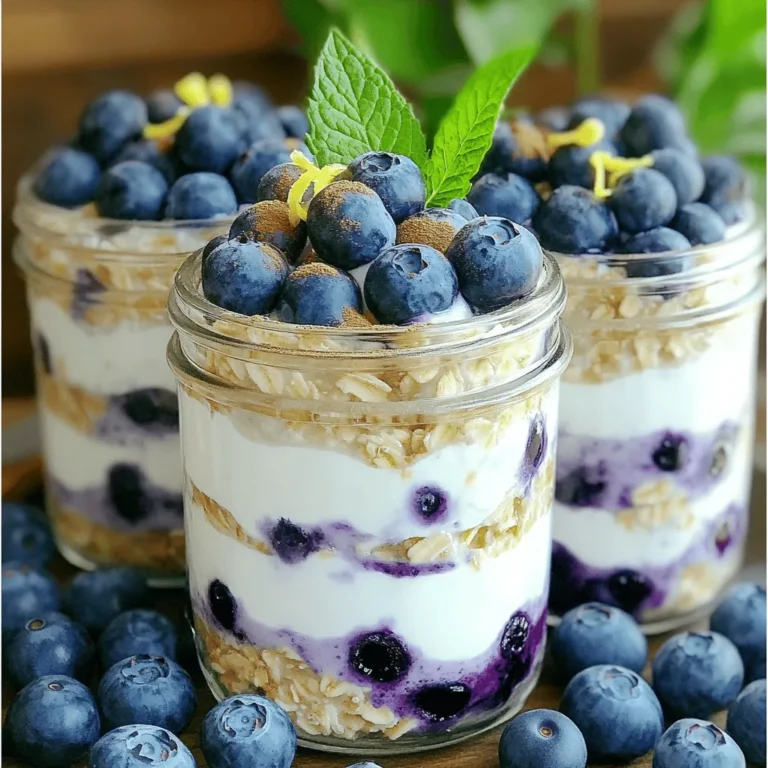
Blueberry Cheesecake Overnight Oats Simple Delight

To make garlic butter chicken bites, you need: - 1 lb (450g) boneless, skinless chicken breasts, cut into bite-sized pieces - 4 tablespoons unsalted butter - 4 cloves garlic, minced - 2 tablespoons fresh parsley, chopped - 1 teaspoon dried oregano - 1 teaspoon paprika - Salt and pepper to taste - Juice of 1 lemon These ingredients come together to create a rich and tasty dish. The garlic and butter blend makes the chicken so delicious. The herbs add a fresh touch, and lemon brightens the flavor. You can add a bit of heat with: - 1/4 teaspoon red pepper flakes This optional ingredient gives the dish some spice. If you like heat, try it out! You can swap ingredients if needed. Here are some ideas: - Use chicken thighs instead of breasts for a juicier bite. - Swap fresh parsley for fresh basil or cilantro. - If you don’t have paprika, use smoked paprika for a deeper flavor. These changes can help you use what you have and still enjoy this tasty meal. Start by cutting the chicken breasts into small, bite-sized pieces. Place these pieces in a large bowl. Season the chicken with paprika, oregano, salt, and pepper. Use your hands to toss the chicken until it is well-coated. This step adds great flavor. Next, heat a large skillet over medium heat. Add the unsalted butter and let it melt. Once the butter is melted, add the minced garlic. Sauté the garlic for about 30 seconds until it smells great. Be careful not to let it burn. Increase the heat to medium-high. Now, add the seasoned chicken bites to the skillet. Cook the chicken for 5-7 minutes. Stir occasionally to cook it evenly. The chicken should turn golden brown and be fully cooked. When the chicken is done, squeeze fresh lemon juice over it. Stir well to mix the flavors. Add the chopped parsley and red pepper flakes if you like a bit of heat. Toss everything together until well combined. Remove the skillet from the heat and let it sit for one minute. This helps the chicken absorb all the tasty flavors. Enjoy your garlic butter chicken bites! To get the best chicken bites, cut the chicken into even pieces. This helps them cook evenly. Season the chicken well with salt, pepper, paprika, and oregano. Allow the chicken to sit for a few minutes after seasoning. This lets the flavors soak in better. When cooking, make sure your skillet is hot. This helps to give your chicken a nice golden color. Want to boost the flavor? Add some lemon zest along with the juice. The zest gives a bright taste. You can also try adding more garlic if you love its flavor. For some heat, sprinkle in red pepper flakes. Fresh herbs like thyme or basil can also add depth. If you want a creamier sauce, stir in some heavy cream at the end. Presentation matters, even for simple meals. Serve the chicken bites on a large platter. Garnish with extra parsley for color. Lemon wedges not only look great but add freshness. You can also sprinkle a bit of paprika on top for visual appeal. Serve with toothpicks for easy eating at parties or gatherings. {{image_2}} To give your garlic butter chicken bites some heat, add red pepper flakes. Start with 1/4 teaspoon. This small amount brings a nice kick without overpowering the dish. If you like it spicier, you can add more. You can also try adding hot sauce. Just mix a tablespoon into the garlic butter. This adds flavor and heat at the same time. For a fresh twist, use different herbs. Basil, thyme, or rosemary can change the taste. You can mix in one tablespoon of chopped fresh herbs into the butter. This adds a new layer of flavor. For a more fragrant dish, try adding lemon zest. This will brighten up the chicken bites. To make this dish gluten-free, ensure your chicken broth is gluten-free. Many brands offer gluten-free options. You can also serve these bites with gluten-free sides. Try rice or quinoa to keep it healthy and tasty. Just check the labels to ensure everything is gluten-free. This way, everyone can enjoy these delicious bites! Store your garlic butter chicken bites in an airtight container. Make sure they cool down first. They will stay fresh in the fridge for up to three days. When ready to eat, check for any off smells or changes in texture. To freeze, place the chicken bites in a single layer on a baking sheet. Once frozen, transfer them to a freezer-safe bag. They can last for up to three months in the freezer. Label the bag with the date for easy tracking. To reheat, you can use a skillet or microwave. For the skillet, add a splash of water and heat over low heat. Stir often until warm. If using a microwave, cover the dish to keep moisture in. Heat in short bursts, checking often, until hot. Enjoy your tasty bites without losing flavor! To make garlic butter chicken bites more tender, start by marinating them. Use a mix of lemon juice, olive oil, and salt. Let the chicken sit for at least 30 minutes. This helps break down the meat and adds flavor. Cook carefully over medium heat. Avoid overcooking, which can dry out the chicken. A good rule is to cook until the chicken reaches 165°F. You can also pound the chicken pieces slightly for even cooking. Yes, you can use chicken thighs instead of breasts. Chicken thighs have more fat, which makes them juicier and more flavorful. This change is perfect if you want a richer taste. Just cut the thighs into bite-sized pieces like you would with breasts. Keep an eye on cooking times, as thighs may take a bit longer to cook through. Garlic butter chicken bites pair well with many sides. Here are some ideas: - Steamed vegetables: Broccoli or green beans add color and crunch. - Rice or quinoa: These grains soak up the garlic butter sauce. - Salad: A fresh green salad balances the richness of the chicken. - Pasta: Toss cooked pasta with the chicken for a hearty meal. Feel free to mix and match these sides based on your taste! We covered the key ingredients and steps to make delicious garlic butter chicken bites. You learned about options for different flavors and how to store your leftovers. I shared tips to make your dish pop, showing you how to impress with presentation. With these simple variations, you can enjoy diverse tastes all week. Remember, cooking is about fun and creativity. Now, go and try making these bites for your next meal!

Garlic Butter Chicken Bites Flavorful and Easy Recipe

- 1 lb large shrimp, peeled and deveined - 2 cups broccoli florets - 1 red bell pepper, sliced - 1/4 cup sweet chili sauce - 2 tablespoons soy sauce - 1 tablespoon sesame oil - 2 garlic cloves, minced - 1 teaspoon ginger, grated - Salt and pepper to taste - Cooked jasmine rice (for serving) - Sesame seeds (for garnish) - Green onions, sliced (for garnish) The main ingredients in this dish are fresh and vibrant. Large shrimp bring a sweet taste and firm texture. Broccoli florets add a pop of color and crunch. Red bell pepper gives it a sweet, fruity flavor. Together, these ingredients create a beautiful base. Next, we have the sauces and seasonings. Sweet chili sauce is the star of this dish. It adds a nice balance of sweet and spicy. Soy sauce enhances the umami flavors of the shrimp. Sesame oil adds a rich, nutty taste that ties everything together. Don’t forget the aromatic elements! Garlic and ginger provide a flavorful kick. They add depth and warmth to the dish. For garnishes, sesame seeds and green onions add a lovely visual touch. They also give a bit of extra flavor. This dish is not just tasty; it’s also colorful and appealing. Enjoy the mix of flavors and textures in every bite! To start, grab a medium bowl. In it, combine 2 tablespoons of soy sauce, 1 tablespoon of cornstarch, and a pinch of salt and pepper. Stir until mixed well. Then, toss in 1 pound of large shrimp that are peeled and deveined. Make sure each shrimp gets coated. Let them marinate for about 10 minutes. This step adds flavor and helps the shrimp stay juicy. Next, I move on to the broccoli. Bring a pot of water to a boil. Once boiling, add 2 cups of broccoli florets. Blanch them for just 2 to 3 minutes. You want them bright green but still crisp. After that, drain the broccoli and set it aside. This keeps the broccoli vibrant and fresh. Now for the fun part—cooking! Heat 1 tablespoon of sesame oil in a large skillet or wok over medium-high heat. Once hot, add 2 minced garlic cloves and 1 teaspoon of grated ginger. Sauté for about 30 seconds until you smell their aroma. This step wakes up the flavors. Next, add the marinated shrimp to the skillet. Cook them for 2 to 3 minutes until they turn pink and opaque. After the shrimp is ready, toss in the blanched broccoli and sliced red bell pepper. Stir-fry this mix for another 2 to 3 minutes. You want the veggies to be tender yet crisp. Finally, pour in 1/4 cup of sweet chili sauce over the shrimp and veggies. Stir everything to coat well. Cook for an additional minute to heat through. Now you have a beautiful dish ready to serve! To sauté shrimp well, keep a few things in mind. First, ensure your shrimp are dry. Pat them with a paper towel. This helps them sear nicely. Use medium-high heat for quick cooking. Cook shrimp for 2-3 minutes until they turn pink. Do not crowd the pan; cook in batches if needed. For crisp-tender vegetables, blanch the broccoli first. Boil water and add broccoli for 2-3 minutes. This keeps it bright green and crunchy. After blanching, drain and rinse with cold water. This stops the cooking process. When you stir-fry, add them last with the shrimp. This keeps them crisp. To customize the sauce, try adding lime juice or fresh herbs. A splash of rice vinegar brightens the flavor. You can also mix in a bit of honey for extra sweetness. This balances the heat from the sweet chili sauce. Consider adding spices like red pepper flakes for more heat. A dash of black pepper adds depth. You can also try sesame seeds in the sauce for nuttiness. Serve your shrimp and broccoli over jasmine rice. This adds a nice base and absorbs the sauce. For a colorful plate, arrange the shrimp and veggies on top. Garnish with sesame seeds and sliced green onions. This adds a fresh crunch and a pop of color. To make it even more appealing, drizzle some extra sweet chili sauce on top before serving. {{image_2}} If you want to switch things up, try using chicken or tofu instead of shrimp. Both options cook well with the same flavors. For chicken, use boneless breast or thighs, cut into bite-sized pieces. Marinate them as you would the shrimp. Cook them until they are no longer pink. If you choose tofu, use firm or extra-firm tofu. Press it to remove excess water, then cut it into cubes. Sauté it until golden brown for a satisfying texture. Feel free to mix in other vegetables. Snap peas, carrots, or bell peppers work great. Zucchini or mushrooms also add nice flavors. Just make sure to cut them into similar sizes for even cooking. You can also add baby corn or bok choy for a fun twist. The more colors, the more beautiful your dish will be! If you want to make your own sweet chili sauce, it's easy! Here’s a simple recipe. - Ingredients: - 1/2 cup sugar - 1/2 cup water - 1/4 cup rice vinegar - 2 tablespoons chili flakes - 1 tablespoon cornstarch (mixed with 1 tablespoon water) Instructions: 1. In a small pot, combine sugar, water, and rice vinegar. 2. Heat over medium heat until the sugar dissolves. 3. Add the chili flakes and bring to a simmer. 4. Stir in the cornstarch mixture to thicken. 5. Allow it to cool and store in the fridge. This homemade sweet chili sauce adds a personal touch to your meal! Store your leftovers in an airtight container. This keeps the shrimp and broccoli fresh. Make sure to cool the dish to room temperature first. Then, place it in the fridge. Your leftovers will stay good for up to three days. When you reheat the dish, do it gently. Use a skillet over low heat. This helps maintain the shrimp's soft texture. Add a splash of water or broth to prevent sticking. Stir often until heated through. You can also use a microwave. Heat it in short bursts, checking every 30 seconds. This way, you avoid overcooking. You can freeze leftovers for later. Use a freezer-safe container and label it with the date. It’s best to freeze the dish without the rice. Store it for up to three months. To use, thaw it overnight in the fridge. Then, reheat as mentioned. Enjoy your sweet chili shrimp and broccoli anytime! Yes, you can prepare Sweet Chili Shrimp and Broccoli ahead. Here are some tips: - Marinate the shrimp: You can marinate the shrimp earlier in the day. Keep it in the fridge until you cook it. - Blanch the broccoli: Blanch the broccoli and store it in an airtight container. This keeps it fresh. - Store cooked dish: If you cook it all, let it cool. Store it in the fridge for up to three days. If you don’t eat shrimp, there are many great options: - Chicken: Use diced chicken breast. Cook it until it’s no longer pink. - Tofu: Firm tofu works well. Press it, cube it, and add it at the same time as the shrimp. - Fish: White fish, like tilapia, can be a tasty swap. Cook it until flaky. To add some heat, try these ideas: - Chili flakes: Sprinkle red chili flakes into the dish while cooking. - Fresh chili: Dice fresh chili peppers and add them with garlic and ginger. - Spicy sauce: Mix a bit of Sriracha or another hot sauce into the sweet chili sauce. Each of these options lets you customize the heat level to your taste! This blog post covered key ingredients, step-by-step cooking, and helpful tips. You learned about marinating shrimp, preparing vegetables, and enhancing flavors. Trying variations can make each meal unique. Don’t forget to store leftovers properly and explore quick reheating methods. Cooking is meant to be fun and creative. Enjoy making this dish your own and share it with others. Your kitchen is now a place for tasty, easy meals that everyone will love. Happy cooking!

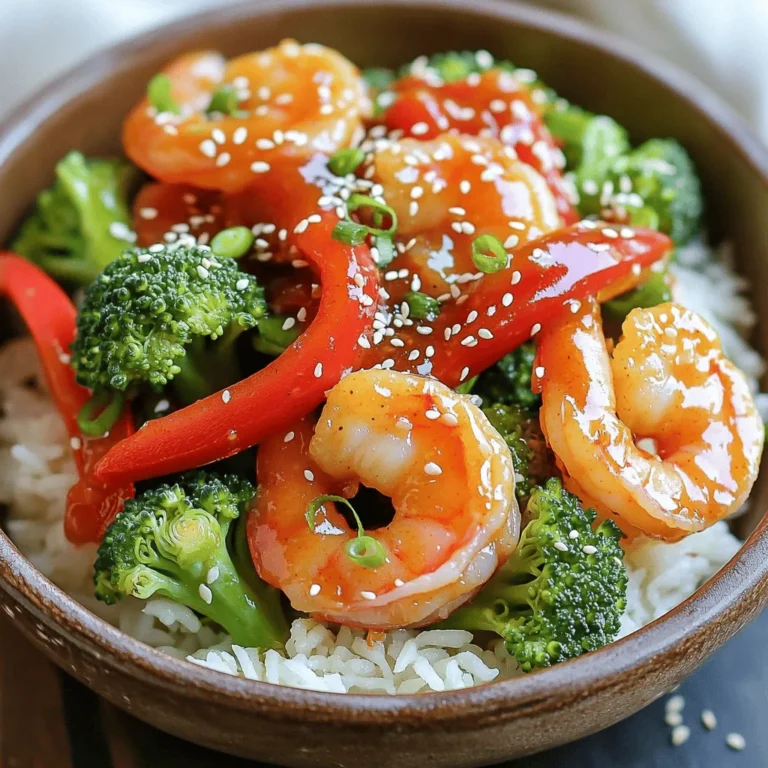
Sweet Chili Shrimp and Broccoli Flavorful Dinner Delight

- 4 boneless, skinless chicken breasts - 1 tablespoon olive oil - 3 cloves garlic, minced - 1 cup heavy cream - 1 cup fresh basil leaves, chopped - 1 tablespoon lemon juice - 1 teaspoon salt - 1/2 teaspoon black pepper - 1/2 teaspoon red pepper flakes (optional for heat) - 1/4 cup grated Parmesan cheese - Cooked pasta or rice (for serving) You can swap chicken breasts for thighs. They add richer flavor. Use coconut milk instead of heavy cream for a lighter option. If you don’t have fresh basil, use 2 teaspoons of dried basil. For a dairy-free version, try nutritional yeast instead of Parmesan cheese. When measuring basil, pack the leaves for a stronger taste. If you use a liquid measuring cup for cream, pour slowly to avoid spills. A kitchen scale can help if you want precise weights. For lemon juice, roll the lemon on the counter to get more juice out. {{ingredient_image_1}} First, grab a large skillet. Heat one tablespoon of olive oil over medium heat. Place the four chicken breasts in the skillet. Season them with one teaspoon of salt, half a teaspoon of black pepper, and red pepper flakes if you like some heat. Cook the chicken for about five to seven minutes on each side. Look for a nice golden brown color. Make sure the chicken is cooked through. Once done, take the chicken out and set it aside. In the same skillet, add three minced garlic cloves. Sauté them for about one minute until they smell great. Next, pour in one cup of heavy cream. Bring it to a gentle simmer. Stir in one cup of chopped fresh basil leaves, one tablespoon of lemon juice, and a quarter cup of grated Parmesan cheese. Mix well and let it simmer for three to four minutes. You want the sauce to thicken a little. Now, return the cooked chicken to the skillet. Coat the chicken in the creamy basil sauce. Cook it for two to three more minutes to heat everything through. This step packs flavor into the chicken. Serve the chicken over cooked pasta or rice. Don’t forget to spoon some extra sauce on top! To cook chicken perfectly, start with even-sized pieces. This helps them cook evenly. I recommend using boneless, skinless chicken breasts. They stay juicy and tender. Season the chicken well with salt and pepper. Heat olive oil in a skillet over medium heat. Cook the chicken for about 5-7 minutes on each side. Look for a golden-brown color. Use a meat thermometer to check for doneness. The internal temperature should reach 165°F. This ensures your chicken is safe and delicious. A creamy basil sauce should be smooth and rich. Start by sautéing garlic in the same skillet. This adds flavor to the sauce. When you pour in the heavy cream, bring it to a gentle simmer. Stir often to prevent burning. Add chopped basil and lemon juice to enhance the taste. If the sauce is too thick, add a splash of chicken broth or pasta water. If it’s too thin, let it simmer longer. The sauce will thicken as the cheese melts in. Aim for a velvety texture that clings to the chicken. Presentation matters when serving chicken in basil cream sauce. Serve it over a bed of cooked pasta or rice. This adds color and texture to your plate. Spoon extra sauce over the chicken for a tasty touch. Garnish with fresh basil leaves for a pop of color. A sprinkle of Parmesan cheese adds a nice finishing touch. For a zesty kick, add lemon wedges on the side. This dish looks beautiful and tastes even better! Pro Tips Use Fresh Basil: Fresh basil adds a vibrant flavor to the dish. If you can, use it instead of dried basil for the best results. Adjust Creaminess: If you prefer a lighter sauce, you can substitute half of the heavy cream with chicken broth for a delicious balance. Perfectly Cooked Chicken: Use a meat thermometer to ensure your chicken reaches an internal temperature of 165°F (75°C) for safety and moisture. Garnishing Ideas: For an extra pop of flavor, consider garnishing your dish with toasted pine nuts or a drizzle of balsamic reduction. {{image_2}} You can add vegetables to this dish for more taste. Try adding spinach, tomatoes, or bell peppers. These veggies pair well with the creamy sauce. Just sauté them in the skillet before adding the cream. They add color and nutrition. You can also use zucchini or asparagus for a fresh twist. If you want a change from chicken, swap in shrimp or tofu. Shrimp cooks quickly and adds a seafood touch. Tofu is a great plant-based option. Just make sure to press the tofu to remove extra water. This way, it absorbs the sauce better. Both options work well with the creamy basil flavor. To change the heat level, play with spices. If you like it spicy, add more red pepper flakes. For a milder dish, skip the flakes. You can also use a pinch of cayenne pepper for extra heat. Alternatively, adding a touch of smoked paprika gives a nice flavor without much heat. Customize it to suit your taste! To store leftovers, let the chicken cool down first. Place the chicken and sauce in an airtight container. This keeps it fresh longer. You can store it in the fridge for up to three days. Be sure to cover it well to prevent drying out. When you want to reheat, use a skillet. Heat it over medium-low heat. Add the chicken with sauce and warm it gently. Stir often to avoid burning. You can also microwave it. Place it in a microwave-safe dish and cover it. Heat in short bursts until it's hot. Always check the center is warm. To freeze the dish, let it cool completely. Transfer the chicken and sauce to a freezer-safe container. Seal it tightly to prevent freezer burn. It can last up to three months in the freezer. When ready to eat, thaw it overnight in the fridge. Then, reheat as above before serving. Yes, you can use dried basil. It will change the flavor a bit. Use about one teaspoon of dried basil for every tablespoon of fresh. Dried herbs are stronger, so start small. Add it to the cream sauce early, so it has time to soften. Fresh basil gives a bright taste, but dried works in a pinch. This dish pairs well with pasta or rice. These sides soak up the creamy sauce. You can also serve it with a fresh salad. Garlic bread is a nice touch too. Roasted veggies add crunch and color. Choose sides that balance the creamy sauce for a full meal. Chicken in Basil Cream Sauce lasts about three to four days in the fridge. Store it in an airtight container to keep it fresh. If you want to enjoy it later, make sure to reheat it well. Just heat it on low to avoid drying it out. This post covered the key ingredients, cooking steps, and tips for a delicious Chicken in Basil Cream Sauce. I shared ways to swap ingredients and enhance flavor with optional veggies or proteins. You also learned how to store and reheat leftovers. My final thought: with simple steps and a few tweaks, you can make this dish your own. Enjoy cooking and sharing this tasty meal with others!

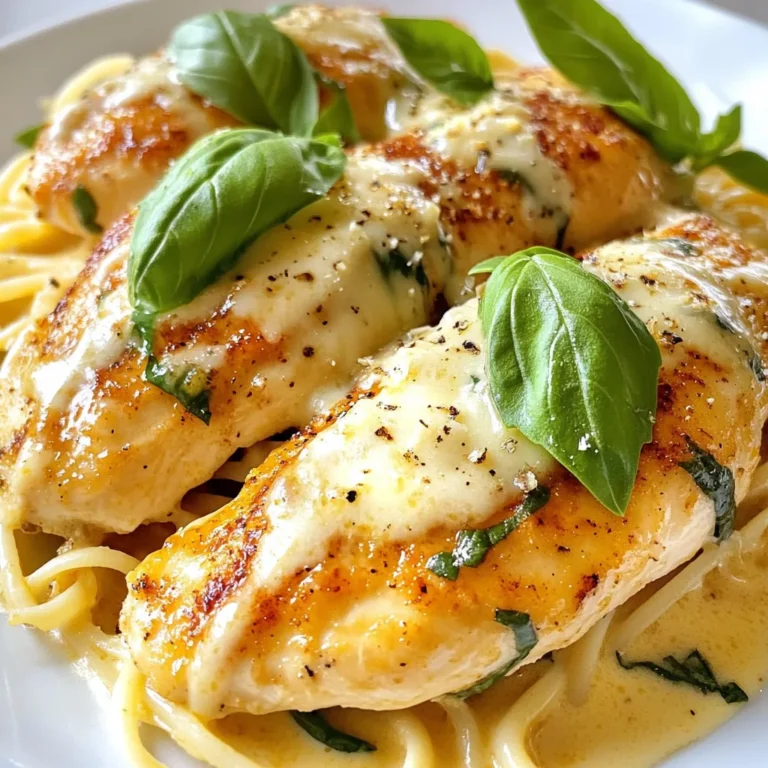
Chicken in Basil Cream Sauce Flavorful Dinner Recipe

- 200g unsalted butter - 200g brown sugar - 4 large eggs - 250g all-purpose flour - 1 teaspoon baking powder - 1 teaspoon mixed spice powder - 150g mixed dried fruits - 100g candied orange peel - 50g sliced almonds - 100g cream cheese - 50g icing sugar - Zest of 1 orange - 2 tablespoons orange juice When making a Christmas Cake Traybake, the ingredients are key to great flavor. I start with unsalted butter for a rich base. The brown sugar adds warmth and depth. I use four large eggs to bind everything together. Next, I mix in all-purpose flour, baking powder, and mixed spice powder. The spice blend usually has cinnamon, nutmeg, and ginger. It gives a warm, festive taste. For texture and flavor, I add mixed dried fruits like raisins and chopped apricots. They bring a sweet chewiness. Candied orange peel adds a bright, zesty note. I also toss in sliced almonds for a crunchy bite. Finally, I make a simple frosting. I whip cream cheese with icing sugar for sweetness. Adding orange zest and orange juice gives the frosting a fresh twist. This combination makes each bite a delightful treat during the holidays! {{ingredient_image_1}} - Preheat oven to 180°C (350°F). - Grease a 9x13 inch baking tray. Start by heating your oven. This helps the cake bake evenly. Greasing the tray keeps the cake from sticking. Use butter or cooking spray for best results. - Cream butter and brown sugar. - Incorporate eggs one at a time. In a large bowl, mix the softened butter and brown sugar. Beat them until light and fluffy. This adds air and makes your cake soft. Next, add the eggs one at a time. Mix well after each egg. This step helps blend the flavors nicely. - Sift flour, baking powder, and mixed spice powder. - Fold dry ingredients into wet mix. In another bowl, sift together the flour, baking powder, and mixed spice powder. Sifting helps remove lumps and adds air. Gradually fold the dry mix into the wet mix. Be gentle to avoid overmixing. This keeps your cake light and fluffy. - Add dried fruits, candied peel, and almonds. - Pour batter into the baking tray and smooth top. Now, gently fold in the mixed dried fruits, candied peel, and sliced almonds. These add great flavor and texture. Once mixed, pour the batter into your greased tray. Use a spatula to smooth the top. - Bake for 25-30 minutes. - Check doneness with a toothpick. Place the tray in your preheated oven. Bake for about 25 to 30 minutes. To check if it’s done, insert a toothpick into the center. If it comes out clean, your cake is ready. - Allow to cool before transferring to a wire rack. - Prepare the cream cheese frosting. After baking, let the cake cool in the tray for about 10 minutes. Then, transfer it to a wire rack to cool completely. For the frosting, beat the cream cheese until smooth. Gradually add icing sugar, orange zest, and orange juice. Mix until creamy. Once the cake is cool, spread the frosting evenly on top. - Avoid overmixing the batter: Mix just until smooth. Overmixing can make the cake tough. - Ensure even distribution of fruits and nuts: Fold in the mix gently. This helps every bite taste great. - Beat cream cheese until smooth: Start with softened cream cheese. This makes it easier to blend. - Gradually mix in other frosting ingredients: Add icing sugar, zest, and juice slowly. This gives a creamy texture. - Cut into squares for serving: Use a sharp knife for clean edges. This makes it look neat. - Garnish with sliced almonds and edible glitter: Add these for a festive touch. It makes your traybake pop! Pro Tips Butter Temperature: Ensure your butter is at room temperature for easier creaming with the sugar, resulting in a lighter texture. Mixing Dried Fruits: Toss the dried fruits and nuts in a little flour before folding them into the batter to prevent them from sinking to the bottom while baking. Cooling Time: Allow the traybake to cool completely before frosting; this prevents the cream cheese frosting from melting and ensures a beautiful finish. Flavor Enhancer: For an extra burst of flavor, add a splash of brandy or rum to the batter or the frosting for a festive touch. {{image_2}} You can make this traybake even more fun by swapping dried fruits for chocolate chips. This change adds a rich and sweet twist. Imagine biting into a soft cake with gooey, melted chocolate. You can also play with spices. Try adding a bit of cardamom or allspice for a unique flavor. Different spices bring new tastes and smells to your kitchen. If you need a gluten-free option, use a gluten-free flour blend. This helps everyone enjoy the cake without worry. For those avoiding dairy, try using a dairy-free cream cheese for the frosting. You can also use coconut cream for a rich, creamy texture. These simple swaps keep the cake tasty while meeting dietary needs. For a festive look, decorate the cake with seasonal fruits. Think about oranges, cranberries, or pomegranate seeds. These colors make the cake pop and feel special for the holidays. You can also add edible glitter or a sprinkle of icing sugar on top. This adds a touch of magic and makes your traybake shine on the table. To keep your Christmas cake traybake fresh, store it in an airtight container. This helps to lock in moisture and flavor. Place the container in a cool, dry place. Avoid direct sunlight and heat sources, as they can dry out your treat. If you want to freeze the traybake, first let it cool completely. Wrap it well in plastic wrap. Then, place it in a freezer-safe container. This will protect it from freezer burn. For thawing, take it out and leave it in the fridge overnight. You can also thaw it at room temperature for a few hours. The traybake stays fresh for about five days at room temperature. If you store it in the fridge, it may last up to seven days. Check for signs of spoilage, like mold or an off smell. If it looks or smells strange, it's best to toss it. Enjoy your delicious Christmas cake traybake while it's fresh! To make this Christmas cake traybake vegan, you can replace eggs and butter. Use flaxseed meal as an egg substitute. Mix 1 tablespoon of flaxseed meal with 2.5 tablespoons of water for each egg. For butter, use coconut oil or a plant-based butter. These swaps keep the texture rich and moist. Yes, you can use fresh fruits! Choose fruits like berries, apples, or pears. Chop them into small pieces. Reduce the amount of liquid in the recipe slightly. Fresh fruits add a juicy, bright flavor to your traybake. To reheat leftovers, use the oven or microwave. In the oven, set it to 160°C (320°F) and warm for 10-15 minutes. Cover with foil to keep moisture in. In the microwave, heat in short bursts. Check every 15 seconds to avoid drying it out. You now have a complete guide to create a delicious traybake. We covered the key ingredients, wet and dry mixing, and baking steps. I included tips for perfecting the treat and ways to customize it. Remember to store it properly to keep it fresh. Explore variations and dietary adaptations to make it your own. With these tips, you can bake with confidence. Enjoy sharing your tasty creation with friends and family.

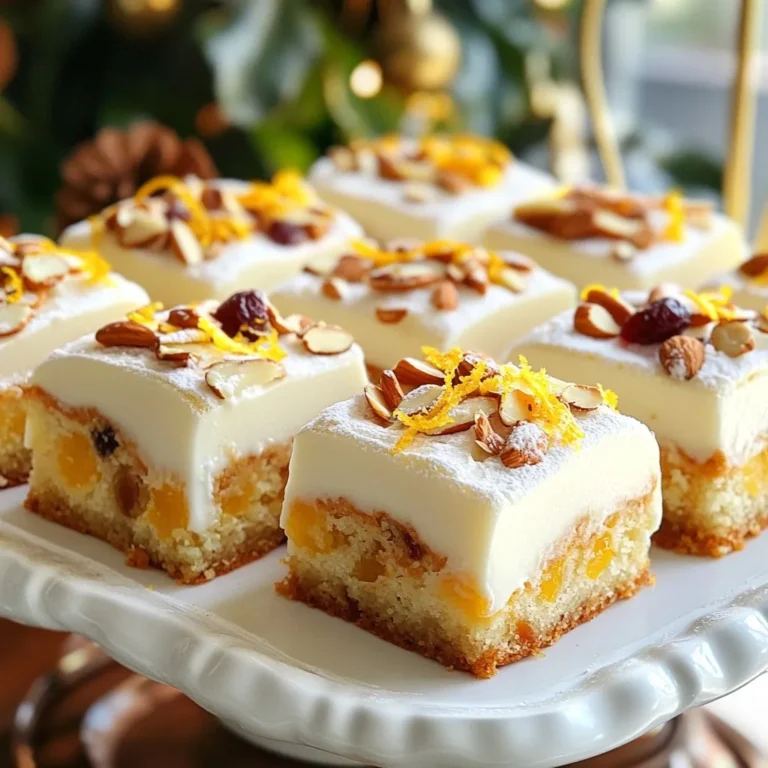
Christmas Cake Traybake Delightful Flavor Treat

To make Caramel Apple Shortbread Bars, you need: - 2 cups all-purpose flour - 1 cup unsalted butter, softened - 1/2 cup powdered sugar - 1/4 teaspoon salt - 1/2 teaspoon vanilla extract - 3 medium apples, peeled, cored, and diced - 1 teaspoon cinnamon - 1/2 cup granulated sugar - 1/2 cup caramel sauce - 1/2 cup oats You can change a few ingredients for different flavors: - Use brown sugar instead of granulated sugar for a richer taste. - Swap out the apples for pears or peaches if you want. - Try using almond flour for a gluten-free option. - Replace butter with coconut oil for a dairy-free treat. Gather these tools before you start: - 9x13 inch baking pan - Mixing bowls - Electric mixer or whisk - Spatula - Parchment paper (optional for easy removal) - Knife for dicing apples - Measuring cups and spoons These ingredients and tools will help you make the best Caramel Apple Shortbread Bars. Enjoy the sweet process of baking! Start by preheating your oven to 350°F (175°C). Grease a 9x13 inch baking pan or line it with parchment paper. This will help you remove the bars easily later. In a large bowl, mix softened butter, powdered sugar, salt, and vanilla extract. Use an electric mixer to beat this mixture until it is light and fluffy. Slowly add the flour to the bowl. Mix until just combined. Next, take about two-thirds of the shortbread mixture and press it into the bottom of the prepared pan. Use a spatula to smooth it out evenly. For the apple filling, peel, core, and dice three medium apples. Toss the apple pieces with granulated sugar and cinnamon in another bowl. Make sure they are evenly coated. Spread this apple mixture over the shortbread base in the pan. Now, drizzle half of the caramel sauce over the apples. This adds a rich flavor. In a separate bowl, mix the remaining shortbread with oats. This will be your crumbly topping. Scatter this topping evenly over the apples and caramel. Place the pan in the preheated oven and bake for 25-30 minutes. Watch for a golden brown top and tender apples. Once baked, remove the pan from the oven. Let the bars cool in the pan for about 15 minutes. Drizzle the remaining caramel sauce on top. For serving, slice the bars into squares. You can serve them warm or at room temperature. A sprinkle of sea salt on top adds a great touch. For a special treat, add a dollop of whipped cream or a scoop of vanilla ice cream! When making Caramel Apple Shortbread Bars, avoid overmixing the dough. This can make your shortbread tough. Also, make sure your butter is softened, not melted. Using melted butter will change the texture of the bars. Don’t skip the cooling step. If you cut them too soon, they may fall apart. To get a great shortbread base, use cold butter. This helps create a nice crumb. Mix the butter with powdered sugar until fluffy. Add the flour slowly, just until combined. Press it firmly into the pan. A flat, even layer will bake better. Add a pinch of nutmeg for warmth. You can also mix in chopped nuts, like pecans or walnuts, for crunch. If you love coconut, shredded coconut adds a nice twist. For a caramel kick, try using caramel bits in the topping. Each of these extras brings a new flavor that makes your bars stand out. {{image_2}} You can use many kinds of apples for these bars. Sweet apples like Fuji or Honeycrisp work well. If you prefer a tart flavor, try Granny Smith apples. Each type of apple adds its unique taste. Mixing different apples can create a fun flavor blend. Aim for three medium apples, peeled, cored, and diced. If you need a gluten-free option, swap the all-purpose flour. Use a gluten-free flour blend instead. Make sure it has a good binding agent, like xanthan gum. This will help maintain the shortbread's texture. The taste will still be rich and delightful. Your friends won’t even know it’s gluten-free! To make these bars vegan, you can replace the butter. Use coconut oil or a vegan butter substitute. For the caramel sauce, find a vegan option at the store or make it at home. Use coconut cream and brown sugar for a quick recipe. These swaps will keep the bars creamy and satisfying. To keep your caramel apple shortbread bars fresh, store them in an airtight container. Place a piece of parchment paper between layers to prevent sticking. These bars stay good for about five days at room temperature. If you want to keep them longer, consider refrigerating them. The cold can help preserve their flavor and texture. If you want to enjoy your caramel apple bars warm, reheat them in the oven. Preheat the oven to 300°F (150°C). Place the bars on a baking sheet and warm them for about 10-15 minutes. This method helps keep the shortbread crisp and the caramel gooey. You can also microwave a single bar for 10-15 seconds if you're in a hurry. You can freeze these bars for up to three months. First, let them cool completely. Then, wrap each bar tightly in plastic wrap. Place them in a freezer-safe bag or container. When you're ready to eat, thaw them in the fridge overnight. You can reheat them for a warm treat, just like fresh from the oven! You can tell when the bars are done by looking at the color. The top should be golden brown. You can also poke the bars with a toothpick. If it comes out clean, they are ready. The apples should be tender, but not mushy. If they look set and firm, you’re good to go! Yes, you can make these bars ahead of time. They store well for a few days. Just let them cool completely before you cover them. Keep them in an airtight container at room temperature. If you want to keep them longer, you can freeze them. Just thaw them in the fridge before serving. These bars taste great on their own. But you can add fun extras! Try serving them warm with a scoop of vanilla ice cream. Whipped cream also makes a nice touch. A drizzle of extra caramel sauce adds sweetness. You can even sprinkle some sea salt for a flavor boost! This blog post covered the key steps to making delicious caramel apple shortbread bars. We discussed the ingredients, substitutions, and necessary equipment for your baking journey. I provided tips to avoid common mistakes and detailed different variations, including gluten-free and vegan options. Remember, with the right storage, you can enjoy these tasty treats longer. Explore these ideas and create your perfect batch. Happy baking!

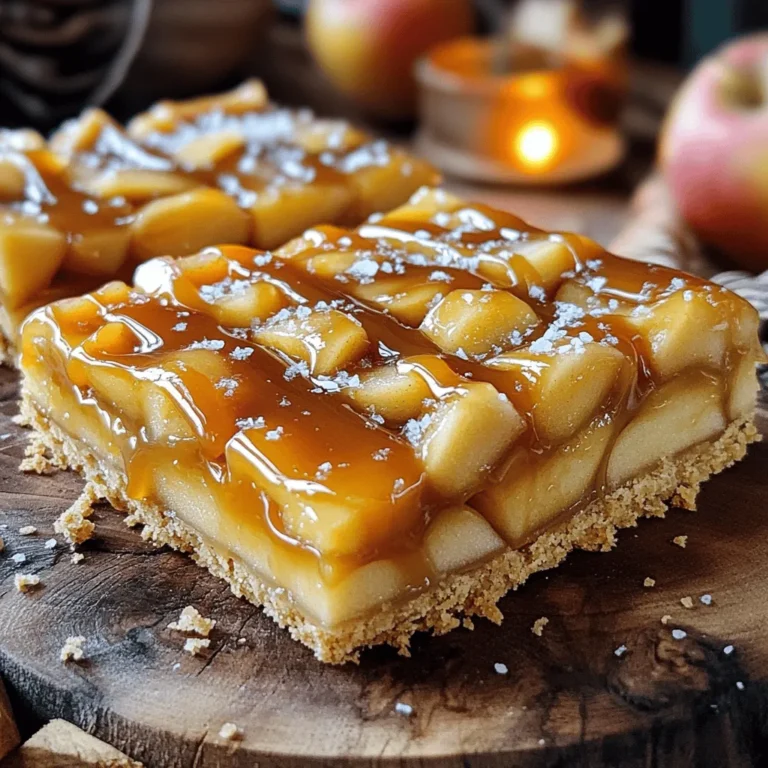
Caramel Apple Shortbread Bars Simple and Sweet Treat

PREV 1 … 27 28 29 … 86 NEXT
spicy fork kitchen

explore

DessertsDinnerAppetizersDrinks

Our Policies

  • Cookie Policy
  • Copyright Policy
  • Disclaimer
  • GDPR Policy
  • Terms Of Use
Back to Top
  • About
  • Contact Us
  • Privacy Policy
© 2026 spicy fork kitchen