FREE DINNER EBOOK! Get your copy!
  • Cookie Policy
  • GDPR Policy
  • Disclaimer
  • Terms Of Use
  • Visit my other site: Fun Cookie Recipes
spicy fork kitchen
  • Home
  • Dinner
  • Desserts
  • Drinks
  • Appetizers
  • Contact
  • About
  • Privacy Policy
  • Home
  • Dinner
  • Desserts
  • Drinks
  • Appetizers
  • Contact
  • About
  • Privacy Policy
  • Cookie Policy
  • GDPR Policy
  • Disclaimer
  • Terms Of Use
Visit my other site: Fun Cookie Recipes

HOME / CATEGORIES /

Latest

To create these rich and decadent Caramel Pecan Turtle Brownies, you will need the following ingredients: - 1 cup unsalted butter (2 sticks) - 1 ½ cups granulated sugar - 1 cup brown sugar, packed - 4 large eggs - 1 teaspoon vanilla extract - 1 ½ cups all-purpose flour - 1 cup unsweetened cocoa powder - ½ teaspoon baking powder - ½ teaspoon salt - 1 cup semi-sweet chocolate chips - 1 cup chopped pecans - 1 cup caramel sauce (store-bought or homemade) These ingredients will work together to create layers of flavor and texture. The butter adds richness, while the sugars provide sweetness. The eggs bind everything and give the brownies their nice texture. The flour and cocoa powder form the base, making them soft and fudgy. Chopped pecans add a delightful crunch, and the caramel sauce brings that gooey, sweet element that makes these brownies truly special. You can choose to use store-bought caramel for convenience or make your own for a personal touch. This combination of ingredients guarantees a treat that is both indulgent and satisfying. - Preheat your oven to 350°F (175°C). - Grease and line a 9x13-inch baking pan with parchment paper. - In a saucepan, melt 1 cup of unsalted butter over low heat. - Stir in 1 ½ cups of granulated sugar and 1 cup of packed brown sugar until smooth. - Remove from heat and let it cool slightly. - Add 4 large eggs, one at a time, whisking well after each addition. - Stir in 1 teaspoon of vanilla extract. - In a separate bowl, whisk together 1 ½ cups of all-purpose flour, 1 cup of unsweetened cocoa powder, ½ teaspoon of baking powder, and ½ teaspoon of salt. - Gradually add this dry mixture to the wet ingredients. Mix just until combined. - Pour half of the brownie batter into the prepared pan, spreading it evenly. - Drizzle half of the 1 cup of caramel sauce over the batter. - Carefully spoon the remaining brownie batter over the caramel layer. - Finish by drizzling the top with the remaining caramel sauce and sprinkling reserved pecans on top. - Bake in the preheated oven for 25-30 minutes. - Check doneness by inserting a toothpick into the center; it should come out with a few moist crumbs. - Allow the brownies to cool in the pan for about 15 minutes. - Use the parchment overhang to lift them out and cool completely on a wire rack before cutting into squares. To get the ideal brownie texture, start with room temperature ingredients. This helps them mix smoothly. Always measure your ingredients accurately. Too much flour can make brownies dry. Use a kitchen scale for the best results. Mix the batter gently. Overmixing can lead to tough brownies. When you add the dry ingredients, stop mixing as soon as you see no dry flour. The batter should be thick and fudgy, not runny. For fun flavor twists, add a pinch of sea salt on top. This enhances the sweetness and adds depth. You can also use flavored caramel, like vanilla or salted caramel, to change the taste. Consider adding toppings like chocolate chips or crushed toffee. You can mix in extra nuts, too. Try walnuts or almonds for a different crunch. These small tweaks can elevate your brownies to a new level of yum! {{image_2}} You can easily switch up the nuts in your Caramel Pecan Turtle Brownies. If you want a different flavor, try using walnuts or almonds. Walnuts add a rich taste and a nice crunch. Almonds bring a sweet and nutty touch. Both options will still give you that great texture and flavor. The type of chocolate you use can change the taste of your brownies. For a creamier flavor, use milk chocolate instead of semi-sweet. Dark chocolate gives a more intense taste, perfect for chocolate lovers. Feel free to mix and match chocolate types to find your favorite blend. You can make these brownies gluten-free with a simple swap. Replace all-purpose flour with a gluten-free flour blend. Make sure the blend has a good mix of starches and flours. This way, you can enjoy delicious brownies without gluten. To keep your Caramel Pecan Turtle Brownies fresh, store them at room temperature. Place them in an airtight container. This helps prevent them from drying out. You can also cover the container with plastic wrap for extra protection. You can freeze these brownies for later enjoyment. First, let them cool completely. Then, cut them into squares. Wrap each square tightly in plastic wrap. Place the wrapped brownies in a freezer-safe bag or container. When you want to eat them, take them out and thaw overnight in the fridge. You can also warm them in the microwave for a few seconds to enjoy a freshly baked taste. Caramel Pecan Turtle Brownies stay fresh for about 3 to 5 days at room temperature. Keep them in an airtight container to maintain their softness. If you want them to last longer, you can refrigerate them for up to a week. Just remember, chilling can change the texture a bit. For the best taste, I recommend enjoying them fresh! Absolutely! Homemade caramel sauce adds a rich, fresh flavor to your brownies. Making your own allows you to control the sweetness and texture. To make it, cook sugar, butter, and cream until it thickens. Just let it cool before adding it to the brownies. This extra step makes your treats even more special! If your brownies are too gooey, they may need more baking time. Check them a few minutes before the timer goes off. Insert a toothpick into the center. If it comes out with wet batter, bake for a few more minutes. If they are too gooey after cooling, try putting them in the fridge for a bit. This can help them firm up. You learned how to make delicious Caramel Pecan Turtle Brownies with simple steps. We discussed key ingredients, preparation, and tips for perfect texture. You can customize these brownies using different nuts and chocolate types. Storing your brownies properly will keep them fresh. Enjoy experimenting with flavors and techniques. These brownies are sure to impress and satisfy any sweet tooth! Happy baking!

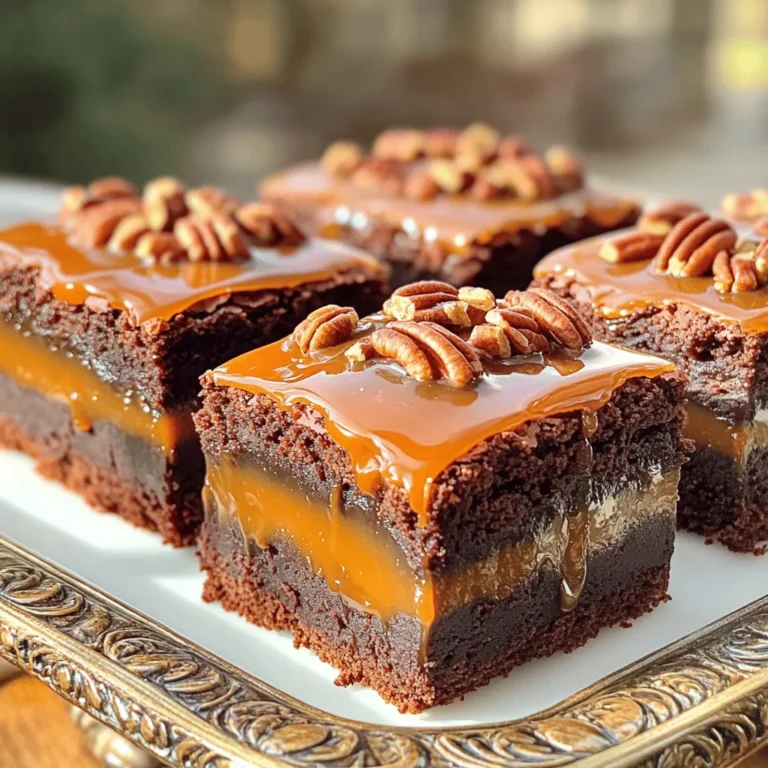
Caramel Pecan Turtle Brownies Rich and Decadent Treat

- 2 cups all-purpose flour - 1 cup granulated sugar - ½ cup unsalted butter, softened - 1 cup sour cream - 2 large eggs - 2 teaspoons baking powder - 1 teaspoon baking soda - ½ teaspoon salt - 1 teaspoon vanilla extract - ½ cup maple syrup - 1 cup walnuts, chopped - 1 tablespoon cinnamon - ½ cup brown sugar Each ingredient plays a key role in creating the perfect bakery-style coffee cake. Flour: Use all-purpose flour for a light and fluffy texture. Look for a brand that feels soft and has a fine texture. Sugar: Granulated sugar adds sweetness and helps the cake rise. High-quality sugar will dissolve well and create a smooth batter. Unsalted Butter: Choose a fresh, high-fat butter. It adds richness and flavor. Softening it helps in creaming with sugar easily. Sour Cream: This ingredient adds moisture and tang. A full-fat version works best for creaminess. Eggs: Use large eggs for the best results. They bind the ingredients and help the cake rise. Baking Powder and Baking Soda: These leavening agents create a light cake. Check the expiration date for freshness. Salt: A small amount enhances flavor. Use fine salt for even distribution. Vanilla Extract: Pure vanilla adds depth. Avoid imitation extracts for better flavor. Maple Syrup: Look for pure maple syrup, not imitation. It adds sweetness and a unique flavor. Walnuts: Freshly chopped walnuts give crunch. Choose unsalted nuts for better control of flavor. Cinnamon: Ground cinnamon enhances warmth. Fresh cinnamon has a stronger flavor. Brown Sugar: Light or dark brown sugar adds moisture and a slight caramel flavor. Choose what you prefer. When selecting ingredients, freshness matters. Always check for quality to ensure a successful bake. 1. Preparing the cake pan: Start by preheating your oven to 350°F (175°C). Grease a 9-inch round cake pan with butter. You can also line it with parchment paper for easy removal. 2. Mixing wet ingredients: In a large mixing bowl, cream together ½ cup of softened butter and 1 cup of granulated sugar. Mix until it’s light and fluffy, which takes about 3-4 minutes. Then, add 2 large eggs, one at a time, mixing well after each. Finally, stir in 1 teaspoon of vanilla extract and ½ cup of maple syrup. 3. Combining dry ingredients: In another bowl, mix 2 cups of all-purpose flour, 2 teaspoons of baking powder, 1 teaspoon of baking soda, and ½ teaspoon of salt. Gradually add this dry mix to your wet ingredients, alternating with 1 cup of sour cream. Mix until just combined. Be careful not to overmix. 1. Preparing the streusel or walnut topping: In a small bowl, combine 1 cup of chopped walnuts, ½ cup of brown sugar, and 1 tablespoon of cinnamon. This mix adds a sweet crunch to your cake. 2. Layering technique for the batter and topping: Spread half of the cake batter into the prepared pan. Evenly sprinkle half of the walnut mixture over the batter. Add the remaining cake batter and top it with the rest of the walnut mix, gently pressing it in for a lovely texture. 1. Oven settings and timing: Place the cake in the preheated oven and bake for 40-45 minutes. The cake should be golden brown and rise nicely. 2. How to check for doneness: To check if your cake is done, insert a toothpick into the center. If it comes out clean, your cake is ready. If it has batter on it, give it a few more minutes. This step-by-step guide ensures your Bakery Style Maple Walnut Coffee Cake turns out perfectly. Enjoy the process, and savor the delightful flavors! To make your coffee cake taste great, start by creaming the butter and sugar. This step adds air and makes your cake fluffy. Mix them together until light and fluffy for about 3-4 minutes. This is key! Next, remember not to overmix your batter. Once you add the dry ingredients, mix just until combined. Overmixing can make the cake tough. Keep it gentle, and you’ll have a soft, tender cake. You can boost flavors in your cake by adding spices. Consider a pinch of nutmeg or some ginger. These spices blend well with the maple and walnuts. Always choose fresh ingredients when you can. Fresh eggs and high-quality maple syrup make a big difference. Packaged items are convenient, but fresh ones give better flavor. Trust me, it’s worth it! Make your coffee cake look special by dusting it with powdered sugar. This adds a nice touch and makes it look fancy. Serve your cake with a drizzle of maple syrup on the side. It makes every bite sweeter and adds a lovely shine. You can even add a few whole walnuts on top for a rustic look. Enjoy! {{image_2}} You can easily adjust this recipe to fit different diets. - Gluten-free options: Use gluten-free all-purpose flour instead of regular flour. This swap keeps the cake soft and tasty. Ensure your baking powder is gluten-free too. - Vegan adaptations: Replace eggs with flax eggs. Mix 1 tablespoon of flaxseed meal with 2.5 tablespoons of water. Let it sit for a few minutes until it thickens. Use plant-based butter and non-dairy sour cream for a vegan treat. Get creative with flavors to make this coffee cake your own. - Alternative nuts or fruit: Swap walnuts for pecans or almonds. You can also add dried fruits like cranberries or raisins for a fruity twist. - Incorporating chocolate or other flavorings: Fold in chocolate chips for a sweet surprise. You might also try adding orange zest for a zesty flavor boost. Pair this coffee cake with your favorite drinks or toppings. - Pairing with coffee or tea: This cake goes perfectly with a hot cup of coffee or herbal tea. The rich maple flavor shines with each sip. - Serving with ice cream or whipped cream: For a special treat, serve slices with ice cream or a dollop of whipped cream. Drizzle some maple syrup on top for added sweetness. To keep your maple walnut coffee cake fresh, store it properly. First, let the cake cool completely. Once cooled, wrap it with plastic wrap or aluminum foil. This keeps moisture in and prevents the cake from drying out. Place it in the fridge if you want to keep it for a longer time. It stays fresh in the fridge for about a week. If you have more cake than you can eat, freezing is a great option. Slice the cake into portions. Wrap each slice tightly in plastic wrap. Then, place the slices in a freezer-safe bag. Make sure to label the bag with the date. This way, you can enjoy your cake for up to three months. At room temperature, your coffee cake lasts about two to three days. Keep it in a cool, dry place. If it’s hot or humid, the cake may spoil faster. Look for signs of spoilage. If you see mold or a strange smell, it’s time to toss it. A dry texture can also mean it’s past its prime. When you store it well, you can savor every slice of this delightful treat! Can I use different types of nuts? Yes, you can. If you want a different taste, try pecans or almonds. Each nut adds a unique flavor. Just chop them up like you would walnuts. What’s the best way to serve this coffee cake? Serve it warm or at room temperature. A light dusting of powdered sugar adds charm. You can drizzle maple syrup on top for more sweetness. Pair it with coffee or tea for a cozy treat. Can I make the batter ahead of time? Yes, you can make the batter ahead. Just store it in the fridge for a few hours. This will keep it fresh. When ready to bake, let it sit at room temp for about 30 minutes. How do I know when the cake is done baking? Check it with a toothpick. Insert it into the center. If it comes out clean, the cake is ready. If there’s batter on the toothpick, bake it a little longer. This blog post covered the key elements for making a maple walnut coffee cake. We detailed the best ingredients, preparation steps, and baking tips. I shared tricks for achieving that bakery-style taste and offered variations to suit different diets. Proper storage practices ensure your cake stays fresh. Remember, experimenting with flavors can keep it exciting, and serving it warm enhances its taste. Enjoy this delicious treat with friends or family, and happy baking!

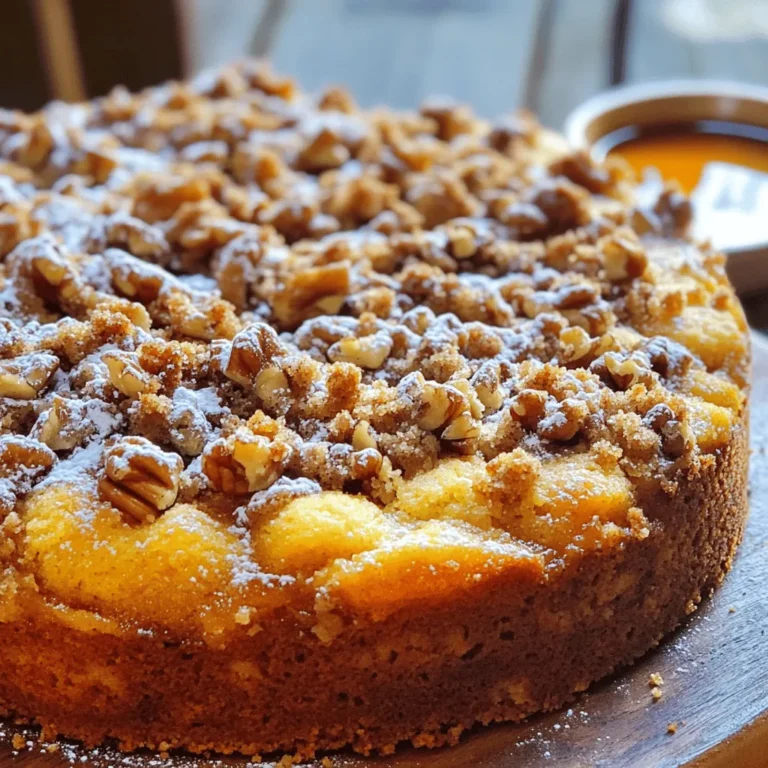
Bakery Style Maple Walnut Coffee Cake Delightful Recipe

- 1 pound beef chuck, cut into bite-sized pieces - 1 tablespoon olive oil - 1 medium onion, diced - 2 carrots, chopped - 2 celery stalks, chopped - 3 cloves garlic, minced - 6 cups beef broth (low sodium) - 1 cup pearl barley, rinsed - 1 cup frozen peas - Fresh parsley for garnish Beef chuck is the star of this dish. It brings great flavor and tenderness. I prefer this cut because it cooks well and becomes soft in the slow cooker. The vegetables add sweetness and texture. Onions, carrots, celery, and garlic build the base of flavor. The broth and barley create a thick, hearty soup. - 2 bay leaves - 1 teaspoon dried thyme - 1 teaspoon dried rosemary - Salt and pepper to taste Herbs make this soup aromatic and tasty. Bay leaves add depth, while thyme and rosemary give it a fresh taste. I always use salt and pepper to balance the flavors. You can adjust these to suit your taste. Fresh parsley is a great garnish. It adds color and a hint of freshness when serving. - Searing the Beef Chuck: First, I heat one tablespoon of olive oil in a large skillet over medium-high heat. Once hot, I add one pound of beef chuck, cut into bite-sized pieces. I sear the beef until it is browned on all sides. This step adds flavor to the soup and makes it taste rich. - Transferring to the Slow Cooker: After browning, I carefully transfer the beef into my slow cooker. This sets the stage for a hearty soup. - Cooking Onions, Carrots, Celery, and Garlic: In the same skillet, I add a medium diced onion, two chopped carrots, two chopped celery stalks, and three cloves of minced garlic. I sauté these for about five minutes until they soften a bit. This step builds more depth in flavor. - Adding to the Slow Cooker: Once the veggies are ready, I add them to the slow cooker with the beef. The smell is amazing! - Adding Broth and Barley: Next, I pour in six cups of low-sodium beef broth. I also add one cup of rinsed pearl barley, two bay leaves, one teaspoon of dried thyme, and one teaspoon of dried rosemary. - Incorporating Seasonings: I give everything a good stir to mix it well. Season with salt and pepper to taste. - Setting Cooker Temperature (Low vs. High): I can choose to cook on low for seven to eight hours or on high for four to five hours. Low gives a richer flavor, but high works well if I’m short on time. - Cooking Times and Tips: I check the beef for tenderness and the barley to ensure they are cooked through. - Adding Frozen Peas: About thirty minutes before serving, I toss in one cup of frozen peas. They add color and sweetness to the soup. - Adjusting Seasoning: Before serving, I taste the soup and adjust the seasoning as needed. A little more salt or pepper can elevate the flavor. This slow cooker beef barley soup is now ready to enjoy! To make this soup even better, I suggest adding some fun extras. You can toss in mushrooms or green beans for more taste and texture. These add-ins blend well with the beef and barley. You can also try different herbs and spices. Adjusting seasonings over time helps you find the right balance. Taste your soup at different stages. If it needs more flavor, add salt, pepper, or herbs. Present your soup in warm bowls. A sprinkle of fresh parsley adds a nice touch. The green color makes it look appetizing. Serve it with crusty bread for a hearty meal. A fresh salad on the side gives a nice crunch. This combination makes your dinner feel special. Freezing this soup is easy. Let it cool before you pack it away. Use airtight containers to keep it fresh. This soup can last in the freezer for up to three months. When you’re ready to eat, take it out and thaw it in the fridge overnight. To reheat, pour the soup into a pot. Heat over low until warm, stirring often. You can also use the microwave. Just heat in short bursts, stirring in between. This way, you keep all the great flavors! {{image_2}} Gluten-Free Alternatives If you need a gluten-free version, you can swap pearl barley with quinoa or rice. Both will still give you a nice texture. Make sure to check your broth. Some broths may contain gluten. Low-Sodium Options To cut down on salt, choose low-sodium broth. You can also add fresh herbs instead of salt for flavor. A squeeze of lemon juice can brighten the taste too. Different Types of Meat Beef chuck works great, but you can use chicken or turkey. These options will change the flavor but still give you a hearty soup. Just adjust the cooking time if you use chicken, as it cooks faster. Vegetable Variations Feel free to add more veggies. Potatoes, green beans, or corn can add good flavor. You can also use whatever veggies you have on hand. Just chop them into bite-sized pieces so they cook evenly. Adding Spices for Different Flavor Profiles Want to spice it up? Add some cumin or paprika for a warm flavor. A dash of soy sauce can bring in umami. Experiment with herbs like cilantro or dill for a fresh twist. Cultural Variations of Beef Barley Soup Many cultures have their own version of beef barley soup. In some places, they add beans or lentils. In others, they might use different spices. Trying these variations can make your soup unique and fun. Store your beef barley soup in the fridge for up to 3 days. Use a tight container to keep it fresh. Glass containers work well, but plastic ones are also fine. Make sure to let the soup cool before sealing it up. To freeze soup safely, let it cool first. Then, pour it into freezer-safe bags or containers. Leave some space at the top, as soup expands when it freezes. It can last for about 3 months in the freezer. For thawing, move the soup to the fridge overnight. If you need it fast, you can thaw it in a bowl of cold water. Reheat soup on the stovetop or in the microwave. For the stovetop, heat over medium-low until hot. Stir often to avoid burning it. If you use the microwave, heat in short bursts, stirring in between. To keep flavors strong, taste and adjust seasonings as you reheat. Add a splash of broth or water if it seems thick. Remember, a good soup deserves a careful reheating! Beef barley soup lasts about 3 to 4 days in the fridge. Store it in an airtight container to keep it fresh. If you want to enjoy it later, consider freezing it. Yes, you can cook this soup on the stovetop. Start by browning the beef in a pot. Remove the beef and sauté the onions, carrots, celery, and garlic. Then add everything back to the pot with the broth and barley. Simmer for about 1.5 to 2 hours on low heat until the beef is tender. No, barley is not gluten-free. It contains gluten, which may cause issues for those with celiac disease or gluten intolerance. If you need a gluten-free option, try using quinoa or rice instead of barley. Yes, you can use quick cooking barley. Just note that it cooks faster than pearl barley. Reduce the cooking time in the slow cooker to about 30 minutes on high or 1 hour on low. This helps keep the texture just right. In this post, we explored the rich flavors of beef barley soup. We covered the key ingredients, including tender beef chuck, fresh vegetables, and hearty barley. I shared step-by-step instructions to make cooking easy. Tips and variations added fun twists, and storage info ensured your soup lasts. This soup is simple to prepare and perfect for any meal. Enjoy experimenting with different ingredients. A warm bowl of beef barley soup can bring comfort and joy to any day.

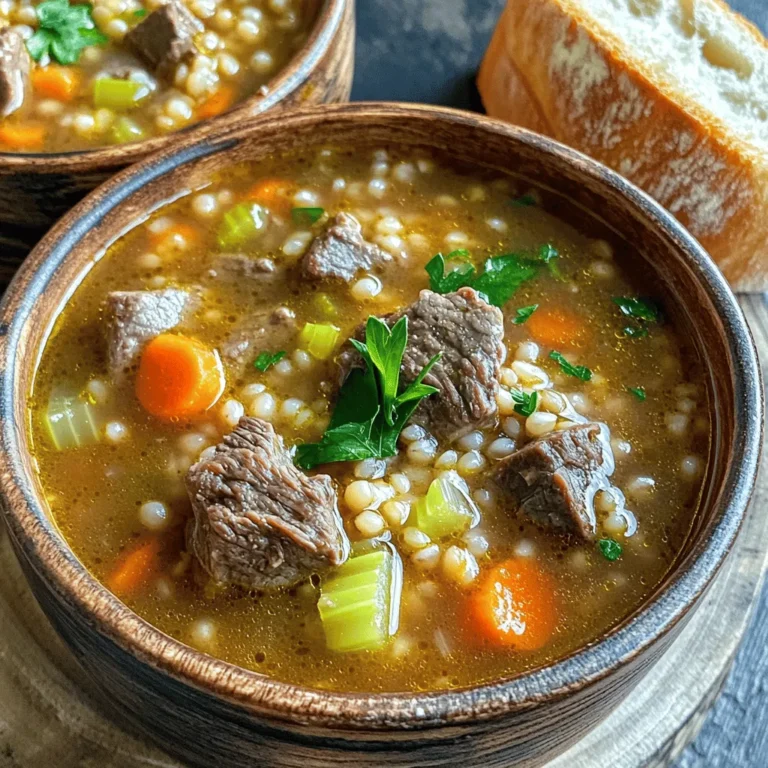
Satisfying Slow Cooker Beef Barley Soup Recipe

To make crispy air fryer coconut shrimp, gather these key ingredients: - 1 lb large shrimp, peeled and deveined - ½ cup all-purpose flour - 2 large eggs - 1 cup shredded coconut (choose sweetened or unsweetened) - ½ cup panko breadcrumbs - 1 teaspoon garlic powder - 1 teaspoon paprika - Salt and pepper to taste - Cooking spray or oil for frying These ingredients create the perfect blend for crunchy, flavorful shrimp. You can change some ingredients to suit your taste. - Coconut: Use sweetened coconut for a sweeter bite or unsweetened for a more classic taste. - Breadcrumbs: Swap panko for regular breadcrumbs if needed, but panko gives a better crunch. - Spices: Add cayenne pepper for heat or change garlic powder to onion powder for a different flavor. These swaps keep the recipe fun and unique! When selecting shrimp, pay attention to size and quality. - Size: Go for large shrimp for the best texture. They hold up well when cooking. - Quality: Fresh shrimp is always best. If using frozen, ensure they are fully thawed before cooking. Choosing quality shrimp makes all the difference in taste and enjoyment! Start by taking 1 pound of shrimp. Peel and devein them if needed. Pat them dry with paper towels. This step is key. Dry shrimp will become crispier. If they are wet, they can turn soggy. Now, it’s time to set up your breading station. Grab three shallow bowls. In the first bowl, add ½ cup of all-purpose flour. In the second bowl, beat 2 large eggs. In the last bowl, mix together 1 cup of shredded coconut, ½ cup of panko breadcrumbs, 1 teaspoon of garlic powder, 1 teaspoon of paprika, and salt and pepper to taste. This mix adds flavor and crunch. Preheat your air fryer to 400°F (200°C). This takes about 5 minutes. While it heats, bread the shrimp. Coat each shrimp in flour first, shaking off the extra. Next, dip it in the eggs. Let any excess egg drip off. Finally, roll it in the coconut and breadcrumb mix. Press lightly so it sticks well. Lightly spray the air fryer basket with cooking spray or oil. Place the shrimp in a single layer. Don’t overcrowd them. Spray the tops lightly with cooking spray. Cook the shrimp for 8-10 minutes. Flip them halfway through. They should turn golden brown. Make sure they reach an internal temp of 120°F (49°C). When done, take them out and serve right away. Enjoy your crunchy and flavorful snack! To get that perfect crunch on your coconut shrimp, start by drying the shrimp well. Wet shrimp won’t crisp up nicely. Use paper towels to absorb moisture. When breading, coat each shrimp evenly with flour first. This helps the egg stick better. Next, dip in the egg, letting excess drip off. Finally, roll it in the coconut and breadcrumb mix. Press gently to make it stick. A light spray of oil on top before cooking helps too. This gives you that golden brown color you want. Don’t overcrowd the fryer; give each piece space to breathe. If you have leftovers, let the shrimp cool down before storing. Place them in an airtight container. They can last in the fridge for about two days. For best results, try not to stack the shrimp. This keeps them from getting soggy. If you want to enjoy them later, you can freeze them too. Just make sure they are in a freezer-safe bag. They can stay fresh for up to three months. When ready, you can reheat them in the air fryer for that crispy texture again. Dips can really boost the flavor of your coconut shrimp. A sweet chili sauce is a classic choice. It adds a nice balance to the shrimp's crunch. You might also enjoy a tangy lime dip. Just mix sour cream with lime juice and zest for a refreshing twist. If you like spice, try adding some sriracha to your dips. This gives a nice kick. Don’t be afraid to get creative! Mix and match different dips to find your favorite combination. {{image_2}} You can choose between sweetened and unsweetened coconut for this recipe. Sweetened coconut adds a hint of sugar, making your shrimp a little sweeter. Unsweetened coconut gives a more natural, nutty taste. Both options work well! If you like a balance, try mixing both types together. Want to spice things up? Add some heat! You can mix cayenne pepper or crushed red pepper flakes into the coconut coating. Start with a small amount, like ¼ teaspoon, to keep it mild. You can always add more if you like it hotter. This gives your shrimp a fun kick! You don’t have to stick to panko breadcrumbs. Try using crushed cornflakes or even crushed tortilla chips for a different crunch. You can also add seasonings to the breadcrumbs. For example, try adding Italian herbs or a bit of Parmesan cheese for extra flavor. Get creative and find a mix you love! You can store leftover coconut shrimp in an airtight container. Make sure they cool down first. They stay fresh for up to two days in the fridge. To keep them crispy, place a paper towel in the container. This helps absorb any moisture. When reheating, I suggest using the air fryer again. Set it to 350°F (175°C) and heat for about 5 minutes. This method keeps the shrimp crunchy. You can also use an oven. Bake at 350°F (175°C) for 8-10 minutes. Avoid using the microwave, as it can make the shrimp soggy. You can freeze coconut shrimp for later use. First, let them cool completely. Then, place them in a single layer on a baking sheet. Freeze for about an hour. After they are firm, transfer them to a freezer bag. They can last up to three months in the freezer. To cook from frozen, add a few extra minutes to the air frying time. The best temperature for cooking coconut shrimp in an air fryer is 400°F (200°C). This high heat helps the shrimp crisp up nicely. Preheating your air fryer for about 5 minutes before cooking ensures even heat. This step is key for getting that perfect golden brown color. You can tell the shrimp are fully cooked when they turn pink and opaque. The internal temperature should reach 120°F (49°C). Use a food thermometer for accuracy. If you don't have one, just check that they look nice and firm. Flipping the shrimp halfway through cooking helps them cook evenly. Yes, you can use frozen shrimp for this recipe. However, you need to thaw them first. Place the shrimp in the fridge overnight or run them under cold water for a quick defrost. Make sure to pat them dry before breading. This helps the coating stick better and keeps the shrimp crispy. This blog covered the key ingredients for making tasty air fryer coconut shrimp. It walked through each step, from prepping the shrimp to the cooking process. I shared tips for getting the perfect crisp, storing leftovers, and even some fun variations. Remember, using fresh shrimp and the right dip can make your dish shine. With these insights, you can impress your friends and family with a delicious meal. Happy cooking!

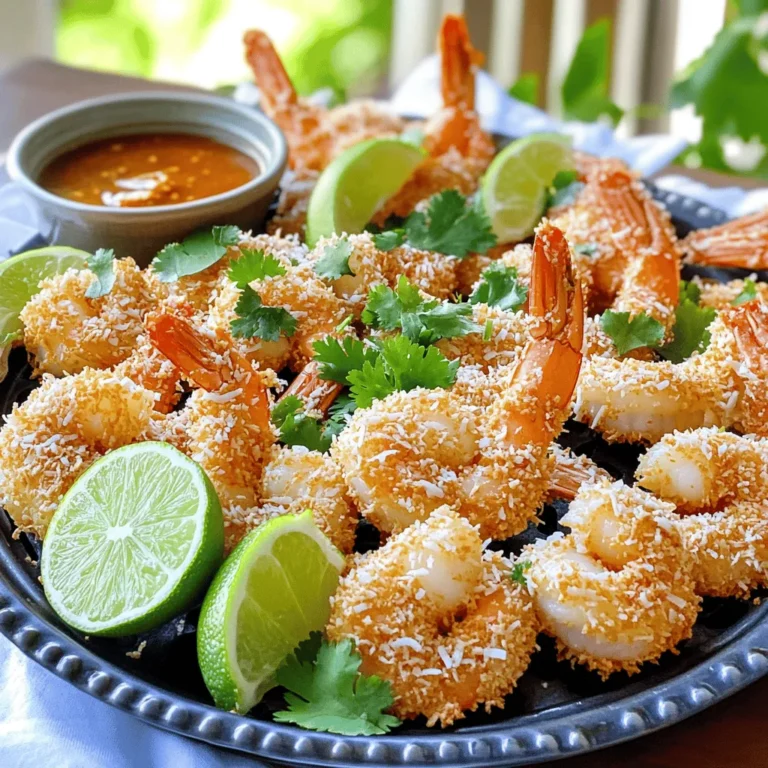
Air Fryer Coconut Shrimp Crunchy and Flavorful Snack

- 2 cups all-purpose flour - 1 tablespoon baking powder - 1/2 teaspoon salt - 1 teaspoon ground cinnamon - 1/2 teaspoon ground nutmeg - 1 cup brown sugar, packed - 1/2 cup granulated sugar - 1/2 cup unsalted butter, softened - 2 large eggs - 1 cup canned pumpkin puree - 1 tablespoon vanilla extract - 1 teaspoon ground ginger - 1/2 cup milk - For the topping: - 1/4 cup white sugar - 1 teaspoon cinnamon - 1/4 cup chopped pecans (optional) - For the glaze: - 1 cup powdered sugar - 2 tablespoons milk - 1/2 teaspoon vanilla extract The key to a great pumpkin pie cinnamon roll cake starts with the right ingredients. First, gather your dry ingredients. The flour gives the cake its structure. Baking powder helps the cake rise. Salt enhances the flavors. Ground cinnamon and nutmeg add warmth and spice, making it perfect for fall. Next, focus on the wet ingredients. Brown sugar adds a rich, caramel flavor. Granulated sugar balances the sweetness. Softened butter makes the cake moist. Eggs bind everything together. Canned pumpkin puree gives that lovely pumpkin taste. Vanilla extract adds depth, while ground ginger brings a zing. Milk keeps the batter smooth and creamy. For the topping, you will mix white sugar and cinnamon. This adds a sweet crunch on top. If you like nuts, add chopped pecans for a nice texture. Lastly, for the glaze, whisk powdered sugar with milk and vanilla. This sweet drizzle will finish off your cake beautifully. - Preheat your oven to 350°F (175°C). - Grease a 9x13 inch baking dish. - In a medium bowl, whisk together the flour, baking powder, salt, cinnamon, and nutmeg. Set it aside. - In a large bowl, cream the softened butter and brown sugar until fluffy. - Then, add the granulated sugar. Mix in the eggs one at a time. - Next, add the pumpkin puree and vanilla extract. Mix until everything is combined. - Gradually add the dry mixture into the wet ingredients. Mix until just combined. - Pour half of the cake batter into your greased baking dish. Spread it evenly. - Sprinkle half of the cinnamon-sugar mixture over the batter. - Pour the remaining batter on top, then finish with the rest of the cinnamon-sugar mixture. - Use a knife to swirl the layers gently for a marble effect. - Bake in the preheated oven for 30-35 minutes. Check for doneness with a toothpick. - While the cake bakes, make the glaze by whisking together the powdered sugar, milk, and vanilla extract until smooth. - Once baked, let the cake cool for 10 minutes. Drizzle the glaze over the warm cake. How to check for doneness: To check if your cake is done, stick a toothpick in the center. If it comes out clean, the cake is ready. If it has wet batter on it, bake for a few more minutes. Keep checking until it’s done. This helps ensure a fluffy cake. Best methods for swirling batter: For the best swirl, use a knife or skewer. Gently drag it through the batter in a figure-eight motion. Do not over-swirling. You want a nice marble effect, not a mixed batter. A light touch creates beautiful patterns. Pairing with whipped cream: Serve slices with a dollop of whipped cream on top. The cream adds a nice smoothness to the cake. It also balances the spices well. You can sweeten the cream with a little sugar if you like. Garnishing tips for presentation: Sprinkle a bit of cinnamon on top for a festive touch. You can also add chopped pecans for crunch. This makes the cake look fancy and inviting. A little garnish goes a long way in presentation. Using fresh spices vs. dried: Fresh spices can boost flavor. Try using fresh ground cinnamon, nutmeg, or ginger. They give a brighter taste than dried. If fresh is not available, dried spices work well too. Just use good quality ones for best results. Experimenting with add-ins like chocolate chips or raisins: You can make this cake even more fun. Add chocolate chips for sweetness or raisins for chewiness. Both options add texture and flavor. Feel free to get creative with your mix-ins! {{image_2}} You can make Pumpkin Pie Cinnamon Roll Cake fit different diets. For a gluten-free version, use gluten-free flour. This swap keeps the cake light and tasty. It works well in most recipes. If you need a dairy-free option, replace butter with coconut oil. Use almond milk or oat milk instead of regular milk. These changes keep the cake moist and flavorful. You won’t miss the dairy at all. Want to add a twist? Try adding chocolate or caramel flavors. You can mix in chocolate chips or drizzle caramel on top. This adds a rich taste that pairs well with pumpkin. You can also incorporate different nuts or seeds. Chopped walnuts or sunflower seeds add crunch. Try mixing in a few of these for extra texture and flavor. This cake is perfect for Thanksgiving and holiday gatherings. You can serve it as a festive dessert. It fits right in with holiday flavors and traditions. You can also transform this cake into muffins or cupcakes. Just pour the batter into muffin tins. Adjust the baking time to about 20 minutes. These treats make great snacks or gifts too. After baking, let the Pumpkin Pie Cinnamon Roll Cake cool in the pan. Leave it at room temperature for about 10 minutes. This step helps it set. Next, transfer the cake to a wire rack. Place it on the rack for at least 30 minutes. This will cool the cake evenly. For storage, use an airtight container. A glass or plastic container with a lid works well. If you don't have one, cover the cake tightly with plastic wrap. This keeps it fresh for longer. To refrigerate leftovers, first, cool the cake completely. Then, cover it with plastic wrap or foil. Store it in the fridge for up to a week. If you want to keep it longer, freezing is a great option. To freeze, slice the cake into pieces. Wrap each slice in plastic wrap. Place them in a freezer-safe container or bag. This keeps the cake fresh for up to three months. Label the container with the date to track freshness. To reheat slices, use the microwave or oven. For the microwave, place a slice on a plate. Heat it for about 15-20 seconds. Check if it’s warm enough. For the oven, preheat to 350°F (175°C). Place the slices on a baking sheet. Heat for about 10-15 minutes. This method keeps the cake's texture nice. Always cover the slices with foil to avoid drying out. Enjoy your delicious treat warm! Can I make this ahead of time? Yes, you can make this cake ahead of time. Prepare it, bake it, and let it cool. Store it in an airtight container at room temperature for up to two days. For longer storage, keep it in the fridge for up to a week. Just warm it up before serving to enjoy the fresh taste. What if I don’t have pumpkin puree? If you lack pumpkin puree, you can use mashed sweet potatoes or butternut squash instead. Both give a similar flavor and texture. You can also use applesauce for a fruity twist, but this will change the taste a bit. Can I replace sugar with a sugar substitute? Yes, you can use sugar substitutes like stevia or erythritol. Follow the package instructions for the right amount to use. Keep in mind that some substitutes may alter the cake's texture or taste. What can I use instead of eggs for a vegan version? For a vegan version, you can use flaxseed meal or applesauce. Mix one tablespoon of flaxseed meal with two and a half tablespoons of water for each egg. For applesauce, use a quarter cup per egg. Both work well to bind the ingredients. What drinks pair well with pumpkin pie cinnamon roll cake? I recommend pairing this cake with warm apple cider or a rich coffee. Both drinks enhance the spices in the cake. A spiced chai tea also makes a great match for a cozy feel. How should I serve this dessert for a party? Serve the cake warm, drizzled with glaze, and topped with whipped cream. For a festive touch, sprinkle some cinnamon on top. This makes it look and taste amazing, sure to impress your guests! This blog post covered all you need to bake a delicious pumpkin pie cinnamon roll cake. We discussed the key dry and wet ingredients, including spices and sugars. I shared effective steps for mixing and baking, plus tips for serving and storing your cake. Remember, you can customize flavors and adapt recipes to fit dietary needs. Enjoy the fun of baking with loved ones and make it your own. This cake will surely impress!

Pumpkin Pie Cinnamon Roll Cake Delicious Fall Treat

- 1 cup low-fat cottage cheese - 1/2 cup Greek yogurt - 1/4 cup roasted red peppers, finely chopped - 1/4 cup fresh parsley, chopped - 1 tablespoon lemon juice - 1 teaspoon garlic powder - 1 teaspoon onion powder - Salt and pepper to taste - A pinch of smoked paprika - Fresh vegetable sticks (carrot, cucumber, bell pepper) Cottage cheese is a star in this dip. It gives a creamy base while adding protein. Greek yogurt adds tang and creaminess. Roasted red peppers bring a sweet and smoky touch. Fresh parsley brightens the flavor and adds color. For seasoning, lemon juice gives a fresh kick. Garlic powder and onion powder add depth. A pinch of smoked paprika adds a nice smoky flavor. Don’t forget salt and pepper to taste; they enhance all the other flavors. I love serving this dip with fresh veggie sticks. Crunchy carrots, cucumbers, and bell peppers work well. They add freshness and make for a healthy snack. You can also use this dip as a spread on whole-grain bread or crackers. Enjoy the flavors and the health benefits! 1. Start by taking a medium mixing bowl. 2. First, combine 1 cup of low-fat cottage cheese and 1/2 cup of Greek yogurt. 3. Mix them well until they are creamy and fully blended. 1. Next, add in 1/4 cup of finely chopped roasted red peppers. 2. Then, throw in 1/4 cup of chopped fresh parsley. 3. Now, season your mix with 1 tablespoon of lemon juice, 1 teaspoon of garlic powder, and 1 teaspoon of onion powder. 4. Don’t forget to add salt and pepper to taste, plus a pinch of smoked paprika for that smoky hint. 1. Mix everything thoroughly until your dip is smooth and all the ingredients are well combined. 2. Adjust the seasoning to match your taste. 3. Cover the bowl with plastic wrap or transfer the dip to an airtight container. 4. Place it in the fridge for at least 30 minutes. This helps the flavors blend and become even tastier. To get a nice, creamy dip, always use low-fat cottage cheese. This choice gives a better consistency. If you want it even smoother, try blending the dip in a food processor. This step makes it silky and easy to spread. You can change the taste to suit your liking. Start with the basics and then add more seasoning. If you enjoy heat, sprinkle in some chili powder or cayenne pepper. These spices will give the dip a fun kick that enhances the flavor. If you're planning a party, make this dip ahead of time. It tastes even better after sitting in the fridge for a while. For easy cleanup, use a mixing bowl that you can cover. This way, you can refrigerate the dip right in the bowl. Plus, it cuts down on dishes! {{image_2}} You can spice up your protein cottage cheese dip in fun ways. Try a Mediterranean twist. For this, add chopped olives and feta cheese. The briny olives and creamy feta give it a rich flavor. You can also go for a Southwest style. Mix in black beans and jalapeños for a kick. This version adds a nice texture and heat. Both options make your dip exciting and tasty. If you want a dairy-free dip, there are great substitutes. Use silken tofu instead of cottage cheese. Blend it until smooth for a creamy base. For the Greek yogurt, try unsweetened coconut yogurt. It adds a slight sweetness and is creamy too. These options keep the dip rich while being vegan-friendly. Pair your cottage cheese dip with fresh snacks. Raw vegetable sticks work best. Carrots, cucumbers, and bell peppers are great choices. They add crunch and freshness. You could also use this dip in other dishes. Spread it on a wrap or use it as a topping for baked potatoes. The versatility of this dip makes it a favorite! To keep your Protein Cottage Cheese Dip fresh, store it in the fridge. Use an airtight container to prevent any air from getting in. This dip stays good for about 3 to 5 days. Always check for freshness before enjoying. You can freeze this dip if you want to save some for later. Just scoop it into a freezer-safe container. Make sure to leave some space at the top, as it will expand when frozen. When you're ready to eat it, move it to the fridge to thaw overnight. Before eating any leftovers, look for changes in color or smell. If it smells sour or looks off, do not eat it. Always trust your senses. When in doubt, throw it out. This keeps you safe and healthy. To add heat, you can mix in diced jalapeños or crushed red pepper flakes. If you like a smoky taste, try adding a bit more smoked paprika. You can also use hot sauce for a kick. Just start with a little, then taste it. Adjust until it’s just right for you. Yes, you can use sour cream or even a plant-based yogurt if you prefer. Each option will change the taste slightly. Sour cream will make it rich, while a plant-based yogurt can keep it dairy-free. Experiment to see what you like best. This dip is indeed healthy! It contains low-fat cottage cheese, which is high in protein and calcium. Greek yogurt also adds protein and probiotics. Roasted red peppers give vitamins and antioxidants. Fresh parsley packs in nutrients, too. Overall, it’s a tasty way to fuel your body. You can store the dip in the fridge for up to five days. Just keep it in an airtight container. If you want to freeze it, it can last for about three months. To use it again, thaw it in the fridge overnight. Always check for any off smell before eating. This protein cottage cheese dip is easy to make and tasty. We covered the key ingredients, simple steps, and tips to enhance your dip. You can vary flavors and find the best serving ideas too. Remember, creamy texture is key. Whether you’re at a party or just snacking, this dip is a winner. Make it your own and enjoy!

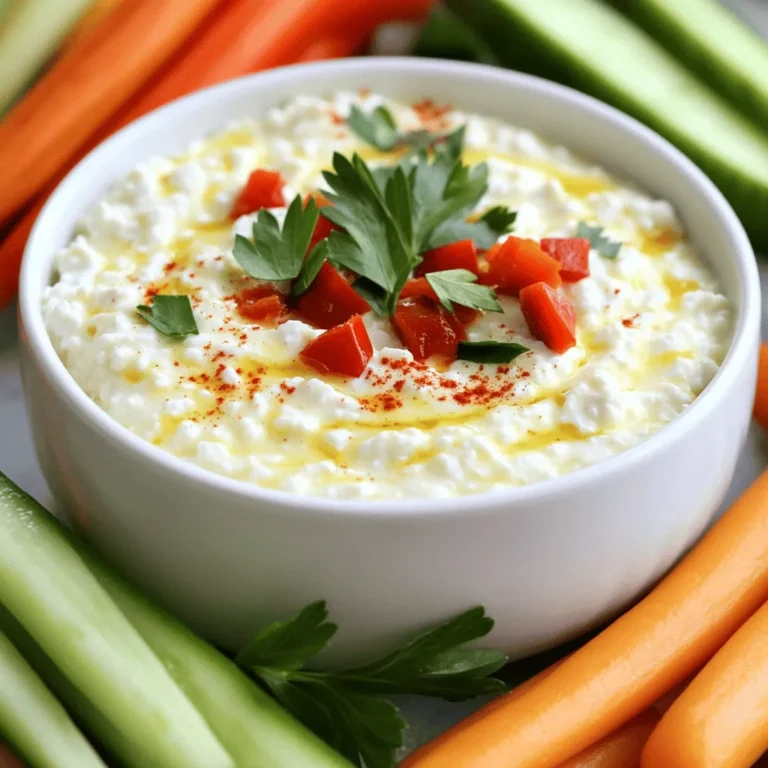
Protein Cottage Cheese Dip Healthy and Flavorful Snack

- 1 lb large shrimp, peeled and deveined - 8 oz linguine or spaghetti - 1/4 cup unsalted butter - 4 cloves garlic, minced - 1 lemon, zested and juiced - 1/4 teaspoon red pepper flakes (or to taste) - 1/2 cup cherry tomatoes, halved - 1/4 cup fresh parsley, chopped - Salt and pepper to taste - Lemon wedges for serving The key to a great Sheet Pan Garlic Butter Shrimp Scampi lies in the fresh ingredients. Large shrimp bring a sweet flavor and firm texture. Linguine or spaghetti adds heartiness. Unsalted butter provides richness, while garlic adds a sharp kick. Lemon zest and juice brighten the dish. Red pepper flakes give a bit of heat, which you can adjust. Cherry tomatoes offer a burst of sweetness, while parsley adds freshness. Season with salt and pepper to enhance all the flavors. Don't forget the lemon wedges for extra zing when serving! Gather these ingredients, and you will be on your way to a delightful meal. Each item plays a role in creating a tasty dish. Enjoy the process of cooking and savor the delicious results. 1. Preheat the oven and prepare the sheet pan Start by preheating your oven to 400°F (200°C). This step is key for getting the shrimp just right. Line a large sheet pan with parchment paper. This helps with easy cleanup later. 2. Cook the linguine or spaghetti In a big pot of salted boiling water, cook 8 ounces of linguine or spaghetti. Follow the package instructions until the pasta is al dente. Once done, drain the pasta and set it aside. 1. Melt butter and sauté garlic and seasonings In a small saucepan, melt 1/4 cup of unsalted butter over medium heat. Once melted, add 4 cloves of minced garlic, lemon zest, and 1/4 teaspoon of red pepper flakes. Season with salt and pepper to taste. Sauté the mixture for 1-2 minutes. You want it fragrant and flavorful. Remove it from heat and stir in the lemon juice. 1. Arrange shrimp and tomatoes on the sheet pan On your prepared sheet pan, spread out 1 pound of peeled and deveined shrimp. Add 1/2 cup of halved cherry tomatoes. Drizzle the garlic butter mixture over everything. Toss gently to coat the shrimp and tomatoes evenly. 2. Bake instructions and timing Place the sheet pan in your preheated oven. Bake for about 8-10 minutes. The shrimp should turn pink and opaque when done. This is when they are at their best. 1. Toss cooked linguine with shrimp and garnish After baking, remove the sheet pan from the oven. Add the cooked linguine to the pan. Toss gently to mix all the ingredients. For a fresh touch, garnish with 1/4 cup of chopped parsley. Serve with lemon wedges on the side for an extra burst of flavor. Enjoy your dish! - How to ensure shrimp is perfectly cooked Cook shrimp for just 8-10 minutes. Shrimp turn pink when done. They should be opaque, not rubbery. Overcooking makes shrimp tough. Keep an eye on them! - Adjusting spice levels for your taste Start with 1/4 teaspoon of red pepper flakes. If you like heat, add more. For less spice, reduce the amount. Taste before serving to find the right balance. - Ideal pairings with side dishes or salads Serve this dish with a fresh green salad. A simple Caesar or mixed greens works well. Garlic bread complements the meal nicely. It soaks up the buttery sauce! - Best wine or beverage complements A chilled white wine suits this dish best. Try Sauvignon Blanc or Pinot Grigio. For non-alcoholic options, serve sparkling water with lemon. It refreshes the palate. {{image_2}} For a fun twist, try different pasta types. You can use penne or fusilli instead of linguine or spaghetti. These shapes hold sauce well and add variety. If shrimp isn’t your thing, you have options. You can substitute shrimp with scallops or even chicken. Both options will give you a tasty dish. Using seasonal veggies can elevate your dish. In summer, add zucchini or bell peppers. In fall, try butternut squash or kale. These veggies add flavor and color. You can also change flavors to fit different cuisines. For a spicy kick, use a dash of curry powder or smoked paprika. To make it Italian, add basil or oregano in place of parsley. Adjust these flavors to match your mood or the season. To store leftovers, let the dish cool completely. Use an airtight container. Place the shrimp scampi and pasta together. This keeps the flavors mixed and fresh. Store it in the fridge. It will stay good for up to three days. Make sure to label the container with the date. If you want to keep it longer, freezing is a good option. To reheat shrimp scampi, you have a few great options. The best way is to use a stovetop pan. Heat it on low with a splash of water or broth. This helps keep the shrimp moist. Stir gently until warmed through. You can also use a microwave. Place the dish in a microwave-safe bowl. Add a bit of water. Cover it with a damp paper towel. Heat in short bursts, stirring in between. This helps avoid overcooking the shrimp. Enjoy your meal just as delicious as the first time! To make this dish gluten-free, swap regular pasta for gluten-free pasta. Many brands offer options that taste great. Ensure your butter and other ingredients are also gluten-free. Yes, you can use frozen shrimp! Just make sure to thaw them first. Place them in cold water for about 20 minutes. This will help them cook evenly. You can use any pasta you like! Some good choices are fettuccine, penne, or even zoodles. Just adjust the cooking time based on the pasta type you use. To make this dish dairy-free or vegan, use olive oil in place of butter. You can also use a vegan butter substitute. For added flavor, try using nutritional yeast. This blog post covered a simple yet tasty shrimp dish. We explored the key ingredients, step-by-step instructions, and helpful tips. You can adjust spice levels and try different pasta types. Seasonal swaps can also enhance your meal. With the right storage and reheating tips, leftovers stay fresh. Enjoy cooking this dish and make it your own. Try new variations and impress your friends and family!

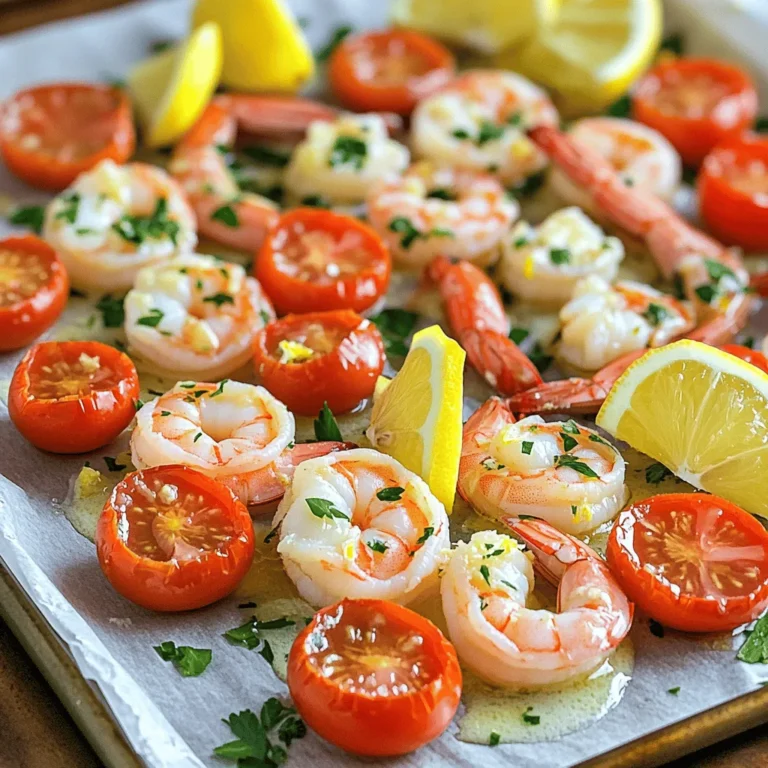
Sheet Pan Garlic Butter Shrimp Scampi Delight

For this creamy Tuscan meatballs dish, you need: - 1 lb ground beef or turkey - 1/2 cup breadcrumbs (preferably Italian seasoned) - 1/4 cup grated Parmesan cheese - 1 egg - 2 cloves garlic, minced - 1 tablespoon Italian seasoning - Salt and pepper to taste - 2 tablespoons olive oil - 1 cup cherry tomatoes, halved - 1 cup fresh spinach - 1 cup heavy cream - 1/2 cup chicken broth - 1/2 teaspoon crushed red pepper flakes (optional) - Fresh parsley, chopped for garnish These ingredients come together to create a rich and flavorful dish. The meatballs are the star, made tender with ground meat and seasoned with Italian herbs. The sauce brings in creamy goodness with heavy cream and broth. You can play with this recipe by adding or changing some ingredients. Here are a few ideas: - Add mushrooms for extra flavor and texture. - Try using ground chicken or pork instead of beef or turkey. - Mix in other greens like kale or arugula. - For a tangy kick, add a splash of lemon juice. - Consider using vegan cream and meat substitutes for a plant-based option. These variations keep the dish exciting and allow you to tailor it to your taste. To make cooking smooth, gather these tools: - Large mixing bowl - Skillet or frying pan - Wooden spoon or spatula - Measuring cups and spoons - Meat thermometer (for checking doneness) - Serving dish for presentation Having the right tools makes the cooking process easier and more fun. Enjoy making this creamy Tuscan meatballs recipe! {{ingredient_image_1}} To start, grab a large mixing bowl. In this bowl, combine 1 pound of ground beef or turkey. Next, add 1/2 cup of Italian seasoned breadcrumbs and 1/4 cup of grated Parmesan cheese. Crack in 1 egg, then toss in 2 minced garlic cloves, 1 tablespoon of Italian seasoning, and a pinch of salt and pepper. Use your hands to mix it all together until it feels smooth and even. Shape this mixture into small meatballs, about 1 inch wide. Place them on a plate as you work. Now, it’s time to cook. Heat 2 tablespoons of olive oil in a large skillet over medium heat. Once the oil is warm, add the meatballs in batches. Cook each side for about 4-5 minutes until they turn a nice brown color. After that, remove the meatballs from the skillet and set them aside. This step is key because it gives them a delicious crust. In the same skillet, toss in 1 cup of halved cherry tomatoes. Sauté them for 3-4 minutes until they soften. Then, add 1 cup of fresh spinach and stir until it wilts, which takes about 2 minutes. Next, pour in 1 cup of heavy cream and 1/2 cup of chicken broth. Stir the mix well and bring it to a gentle simmer. Now, add the cooked meatballs back into the skillet. Let them simmer in the creamy sauce for about 10 minutes. If you like a bit of heat, sprinkle in 1/2 teaspoon of crushed red pepper flakes. Taste and adjust the salt and pepper as needed. Serve hot, and don’t forget to garnish with fresh chopped parsley! To make great meatballs, mix your ingredients well. Use your hands to combine ground beef or turkey, breadcrumbs, Parmesan cheese, egg, garlic, Italian seasoning, salt, and pepper. Shape them into balls about one inch wide. Cook them in batches to avoid overcrowding. Brown each side for about 4 to 5 minutes. This gives them a nice crust and keeps them juicy. For a creamy sauce, use heavy cream and chicken broth. Start with sautéing cherry tomatoes and fresh spinach in the same skillet. Then, pour in the heavy cream and chicken broth. Stir well and let it simmer. This helps the sauce thicken and get rich flavors. If it seems too thick, add a bit more broth or cream to get your desired texture. To elevate the flavor, don’t skip the Italian seasoning. It adds depth to the meatballs. Consider adding crushed red pepper flakes for a little heat. Taste your sauce before serving. Adjust the seasoning with salt and pepper. Fresh parsley on top gives a nice pop of flavor and color. Pro Tips Use Fresh Ingredients: Fresh spinach and ripe cherry tomatoes will enhance the flavor of your sauce significantly. Don’t Overcook the Meatballs: Aim for a golden brown exterior while keeping them juicy inside. They’ll finish cooking in the sauce. Adjust Creaminess: For a lighter sauce, reduce the amount of heavy cream or substitute with half-and-half. Garnish Wisely: Fresh parsley not only adds color but also a fresh flavor that complements the dish beautifully. {{image_2}} You can switch up the protein in this dish. Ground turkey or chicken works well. They give a lighter taste. If you want beef, use lean ground beef for less fat. You can even try pork for a different flavor. Each choice brings its own twist. For a vegetarian option, use plant-based ground meat. It mimics the taste and texture well. You can also use chickpeas or lentils as the base. This adds protein and fiber. If you want a vegan sauce, swap heavy cream for coconut milk. It adds a nice sweetness. You can still use spinach and tomatoes to keep it fresh. To make this dish gluten-free, use gluten-free breadcrumbs. They work just as well as regular ones. Check the labels on all ingredients. Some sauces or broths may contain gluten. You can also use zucchini noodles instead of pasta if you want a lower-carb option. This keeps the meal light and healthy. To keep your creamy Tuscan meatballs fresh, store them in an airtight container. Make sure they cool down before sealing. This keeps moisture out and preserves the flavor. You can store them in the fridge for up to three days. If you want to keep them longer, consider freezing. To freeze your meatballs, place them in a single layer on a baking sheet. Let them freeze for about two hours. After that, transfer them to a freezer-safe bag or container. Label the bag with the date. Frozen meatballs can last up to three months. When you're ready to eat, just thaw them in the fridge overnight. To reheat, you can use the stove or the microwave. If using the stove, place the meatballs in a skillet with a splash of chicken broth. Heat them over medium heat until warm. If using the microwave, cover the meatballs with a damp paper towel. Heat them in short bursts, checking often to avoid overcooking. This helps keep the sauce creamy and delicious. You can serve Creamy Tuscan Meatballs with many tasty sides. Here are some great options: - Pasta: Spaghetti or fettuccine works well. - Rice: Creamy meatballs pair nicely with white or brown rice. - Bread: Garlic bread or crusty rolls soak up the sauce well. - Salad: A fresh green salad adds a nice crunch. - Vegetables: Steamed broccoli or roasted veggies complement the dish. Each of these sides will enhance your meal and make it even more delicious! Yes, you can make Creamy Tuscan Meatballs ahead of time. Here’s how: 1. Prepare the meatballs and cook them as directed. 2. Let them cool completely. 3. Store them in an airtight container in the fridge for up to three days. 4. To reheat, warm them in the sauce on the stove or in the microwave. Making them ahead saves time on busy days. Just enjoy the same great flavor! You can easily spice up Creamy Tuscan Meatballs. Here are a few tips: - Crushed Red Pepper: Add more crushed red pepper flakes to your sauce. - Hot Sauce: Mix in some of your favorite hot sauce when cooking. - Spicy Italian Sausage: Use spicy sausage instead of ground beef or turkey. These options will give your dish a nice kick while keeping it creamy and tasty! This guide shows you how to make tasty Creamy Tuscan Meatballs. We covered key ingredients and helpful tools. Then, I shared steps for mixing, cooking, and making the sauce. You learned tips for perfect meatballs and a smooth sauce. We explored variations for different diets and storage tips for leftovers. In short, these meatballs are easy and fun to make! Enjoy this dish any time you want something delicious.

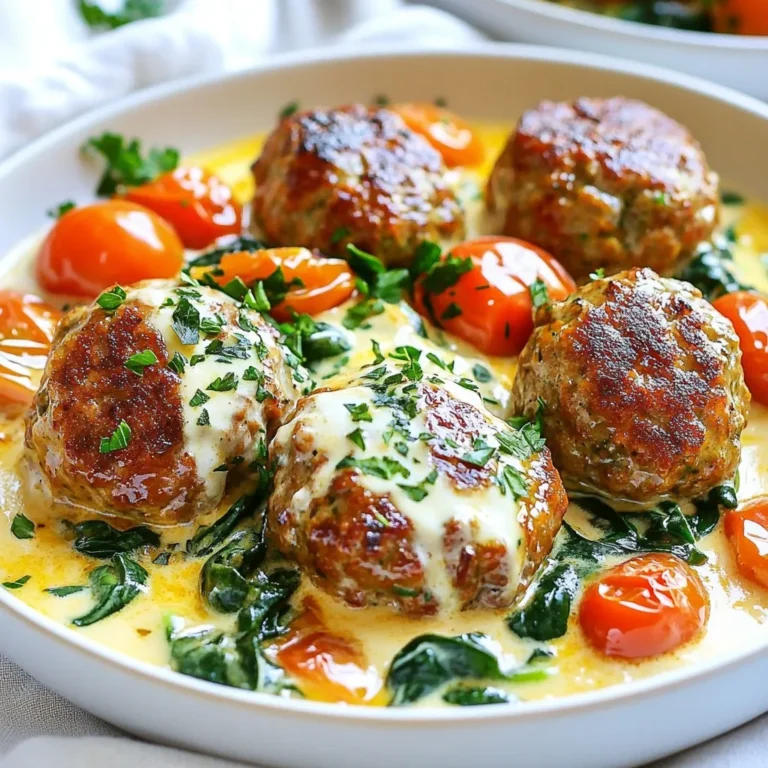
Creamy Tuscan Meatballs Flavorful Italian Dish Recipe

- 8 oz fettuccine pasta - 1 lb large shrimp, peeled and deveined - 2 tablespoons Cajun seasoning - 2 tablespoons olive oil - 1 cup heavy cream - 1 cup freshly grated Parmesan cheese - 3 cloves garlic, minced - 1/2 cup sun-dried tomatoes, chopped - 1 cup baby spinach - Salt and pepper to taste - Fresh parsley, chopped (for garnish) To make a great Creamy Cajun Shrimp Alfredo, you need the right ingredients. First, fettuccine pasta is key. Its wide shape holds the sauce well. You will also need large shrimp, peeled and deveined. The shrimp add a nice texture and taste. Cajun seasoning gives the dish its bold flavor. Next, for the sauce, heavy cream makes it rich and creamy. Freshly grated Parmesan cheese adds depth. Garlic brings in a lovely aroma and taste. Sun-dried tomatoes add a sweet and tangy twist. Baby spinach not only adds color but also nutrition. Always season with salt and pepper to balance the flavors. Finally, fresh parsley is perfect for garnish. It brightens up the dish and adds a fresh note. Gather these ingredients, and you’ll be on your way to a delightful dinner. Enjoy the process and make it your own! - Start by bringing a large pot of salted water to a boil. - Use about 1 tablespoon of salt per quart of water. - Once boiling, add the fettuccine. - Cook it according to the package instructions, usually about 8-10 minutes. - Stir gently to prevent sticking. - Check for doneness; it should be al dente. - Drain the pasta and set it aside. - In a bowl, toss the shrimp with Cajun seasoning. - Use 2 tablespoons of seasoning for 1 pound of shrimp. - Make sure every shrimp gets a nice coating. - This gives the shrimp great flavor. - In the same skillet, heat 2 tablespoons of olive oil over medium heat. - Add 3 minced garlic cloves and sauté for 1 minute. - This step makes the kitchen smell amazing! - Next, pour in 1 cup of heavy cream slowly. - Bring it to a gentle simmer, stirring occasionally for about 2-3 minutes. - Gradually whisk in 1 cup of freshly grated Parmesan cheese until smooth. - Taste and adjust with salt and pepper if needed. - Add the drained fettuccine to the skillet. - Toss in 1/2 cup of chopped sun-dried tomatoes and 1 cup of baby spinach. - Mix everything gently, allowing the spinach to wilt slightly. - After 1-2 minutes, return the shrimp to the pan. - Stir to coat the shrimp in the creamy sauce. - Serve it in bowls, and garnish with chopped fresh parsley. Fettuccine is the best pasta for Alfredo. Its wide shape holds the creamy sauce well. This makes every bite rich and flavorful. If you don't have fettuccine, you can use linguine or penne. Both options work nicely with the sauce. You can boost the flavor of your Alfredo with extra spices. Consider adding a pinch of smoked paprika or cayenne for a kick. Fresh herbs like basil or thyme also add depth. Always taste your dish as you cook. Adjust salt and pepper to make it just right. To cook shrimp perfectly, avoid overcooking. Cook them until they turn pink and firm, which takes about 2-3 minutes per side. Overcooked shrimp can become rubbery, ruining your dish. When selecting shrimp, look for large, firm ones that smell fresh. Avoid shrimp that smell fishy or have a dull color. {{image_2}} You can add many vegetables to this dish. Beyond baby spinach, consider these options: - Zucchini, sliced thin - Bell peppers, chopped - Broccoli florets - Asparagus, cut into pieces Seasonal vegetables also work well. In summer, use fresh tomatoes or corn. In fall, try pumpkin or butternut squash. Each adds flavor and color. While shrimp shines in this dish, you can switch proteins easily. Chicken is a great choice. Just cook it until golden, then add it to the sauce. Scallops offer a sweet and delicate taste. Sear them just like shrimp. If you prefer vegetarian options, use mushrooms or tofu. Both soak up the sauce well. Want to spice things up? Add more Cajun seasoning for a kick. You can also explore other cuisines. Try adding a splash of soy sauce for an Asian twist. For a Mediterranean flair, mix in olives and capers. Each variation gives you a new dish to enjoy. To keep your Creamy Cajun Shrimp Alfredo fresh, follow these steps: - Cool Down: Let the dish cool at room temperature. Do not leave it out for more than two hours. - Refrigerate: Place the pasta in an airtight container. This keeps moisture in and prevents odors from the fridge. - Best Containers: Glass or plastic containers work well. Make sure the lid seals tightly. When you want to enjoy your leftovers, you can reheat easily: - Microwave: This is quick. Heat in short bursts of 30 seconds. Stir in between to avoid hot spots. - Stove: For the best taste, use a skillet. Add a splash of cream or milk to keep it creamy. Heat on low, stirring gently. If you want to save your dish for later, freezing is a good choice: - Best Practices: Use freezer-safe containers. Leave some space at the top for expansion. Avoid freezing if you added spinach, as it may lose texture. - Thawing and Reheating Tips: Thaw in the fridge overnight. Reheat on the stove with a bit of cream to get that creamy texture back. Yes, you can make this dish ahead. Cook the fettuccine and shrimp first. Store them separately in airtight containers. You can make the sauce too, but wait to add the pasta and shrimp until you are ready to serve. This keeps everything fresh. When you're ready to eat, just reheat the sauce. Toss in the pasta and shrimp, and warm them up. If you want a lighter version, use half-and-half or whole milk. You can also try coconut milk for a dairy-free option. Just remember that using lighter cream will change the sauce's thickness and richness. Adjust the cheese to get a nice, creamy texture. Yes, this recipe has a kick from Cajun seasoning. If you want less heat, use less Cajun seasoning. You can also add more cream or cheese to soften the spice. Tasting as you go helps to find the right balance for your palate. To make a gluten-free version, use gluten-free fettuccine. Many brands offer pasta made from rice or corn. Just follow the package instructions for cooking time. The sauce remains gluten-free as long as your other ingredients are safe. Creamy Cajun Shrimp Alfredo is a dish full of flavor and texture. You need just a few basic ingredients like fettuccine, shrimp, and Cajun seasoning. The steps are simple, making this meal great for any night. Remember to cook shrimp just right and choose your fresh veggies wisely. Experimenting with proteins and spices keeps the dish exciting. Store leftovers correctly for quick meals later. With a few tweaks, you can make it your own. Enjoy making this tasty meal, and share it with family and friends!

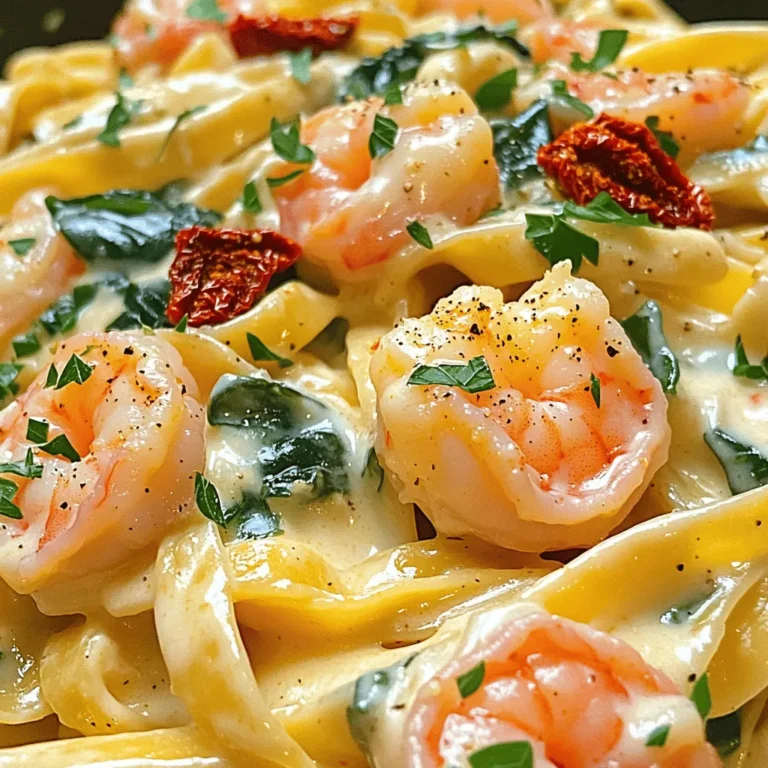
Creamy Cajun Shrimp Alfredo Flavorful Dinner Delight

- 1 can (15 oz) chickpeas, rinsed and drained - 1 cup cooked quinoa - 1 cup cherry tomatoes, halved - 1 cucumber, diced - 1 bell pepper, diced (red or yellow) - 1/4 cup red onion, finely chopped - 1/4 cup Kalamata olives, pitted and sliced The main ingredients are simple yet packed with nutrients. Chickpeas add protein and fiber. Quinoa is a great grain that is gluten-free. Fresh vegetables bring color and crunch. Cherry tomatoes add sweetness, while cucumbers and bell peppers add freshness. Red onions give a nice bite, and Kalamata olives add a salty kick. - 2 tablespoons olive oil - 2 tablespoons lemon juice - 1 teaspoon dried oregano - Salt and pepper to taste For the dressing, olive oil is a healthy fat that makes everything taste great. Lemon juice adds a burst of brightness. Dried oregano gives a classic Mediterranean flavor. Don’t forget salt and pepper to bring out all the flavors! - 1/4 cup feta cheese, crumbled - 2 tablespoons fresh parsley, chopped Optional toppings can elevate your bowl. Feta cheese adds creaminess and tang. Fresh parsley adds a vibrant touch. You can mix and match toppings based on your taste! - Combine 1 can of rinsed chickpeas and 1 cup of cooked quinoa in a large bowl. - This mix gives you a protein-rich base that fills you up. - Toss in 1 cup of halved cherry tomatoes, 1 diced cucumber, and 1 diced bell pepper. - Also, add 1/4 cup of finely chopped red onion and 1/4 cup of sliced Kalamata olives. - These veggies add color, crunch, and great taste. - In a small bowl, whisk together 2 tablespoons of olive oil and 2 tablespoons of lemon juice. - Add 1 teaspoon of dried oregano, salt, and pepper to taste. - Mix until well combined for a bright, tangy dressing. - Drizzle the dressing over the chickpea and veggie mixture. - Toss everything gently until all ingredients are coated evenly. - Fold in 1/4 cup of crumbled feta cheese and 2 tablespoons of chopped fresh parsley. - Taste the bowl and adjust the salt and pepper if needed. - Spoon the mixture into bowls and garnish with extra parsley or a lemon wedge. - Serve chilled or at room temperature for the best flavor. To make your Mediterranean chickpea bowl even better, consider these tips: - Add a pinch of smoked paprika. It brings warmth. - Try cumin for a slight earthiness. - Swap the oregano for fresh basil or dill for a new twist. - Use garlic powder for a stronger flavor kick. Make your bowl look as good as it tastes! Here are some ideas: - Sprinkle extra parsley on top for color. - Add a lemon wedge for a fresh touch. - Serve in clear bowls to show off the layers. - Use colorful plates to make each meal pop. Preparation makes cooking easier and faster. Here’s how: - Cook quinoa ahead of time and store it in the fridge. - Chop veggies and keep them in airtight containers. - Make your dressing in advance and shake before use. - Combine chickpeas and quinoa, but add veggies fresh to keep them crisp. {{image_2}} You can change chickpeas and quinoa if you want. White beans or lentils work great as substitutes for chickpeas. For quinoa, try brown rice or farro. These swaps still give you protein and fiber. For veggies, you can use whatever you have. Try adding spinach, kale, or roasted zucchini. These options boost flavor and nutrition. Don't be afraid to mix and match! This bowl is easy to fit many diets. It’s naturally vegan and gluten-free. To make it low-carb, swap quinoa for cauliflower rice. This gives you a lighter option without losing taste. If you need dairy-free, simply leave out the feta cheese. You can also use a dairy-free cheese if you like. This keeps the bowl yummy and friendly for everyone. You can change the bowl with seasonal produce. In spring, add asparagus or peas. Summer calls for grilled corn or eggplant. In fall, roasted butternut squash brings warmth. Winter veggies like Brussels sprouts or carrots add a hearty touch. Using seasonal produce not only tastes better, but it also helps support local farms. Enjoy the fresh flavors of each season! To keep your Mediterranean Chickpea Bowl fresh, store it in the fridge. Use an airtight container. This helps prevent the dish from drying out or absorbing other odors. If you have separate ingredients, store them apart. This keeps the veggies crisp and the flavors bright. Your bowl stays fresh in the fridge for about 3 to 5 days. Check for any off smells or changes in texture before eating. If it looks or smells odd, it's best to toss it. For longer storage, consider freezing it. To reheat, use the microwave or stovetop. For the microwave, heat in short bursts of 30 seconds. Stir between bursts for even heating. On the stovetop, warm gently over low heat. Add a splash of olive oil or lemon juice to revive the flavors. Avoid overheating to keep the veggies crisp and fresh. To make this bowl vegan, simply remove the feta cheese. You can replace it with a dairy-free cheese or skip it entirely. Nutritional yeast adds a cheesy flavor too. This keeps the dish creamy and flavorful. Yes, you can make this bowl ahead of time. Prepare the chickpeas and quinoa base, then chop your veggies. Store them separately to keep them fresh. You can mix everything just before serving. This way, your bowl stays crisp and tasty. This bowl pairs well with several sides. Try serving it with pita bread or hummus for extra flavor. A light salad with greens and lemon dressing complements it nicely. Roasted vegetables add great texture and taste too. This article covered a tasty, protein-rich bowl made with chickpeas, quinoa, and fresh veggies. We explored how to prepare the base, dress it, and add optional toppings like feta and herbs. I shared tips to boost flavor, ideas for presentation, and meal prep advice. You can tailor this dish to fit your diet and enjoy it year-round. Remember, storing leftovers properly keeps them fresh. I hope you feel inspired to create your own delicious bowl!

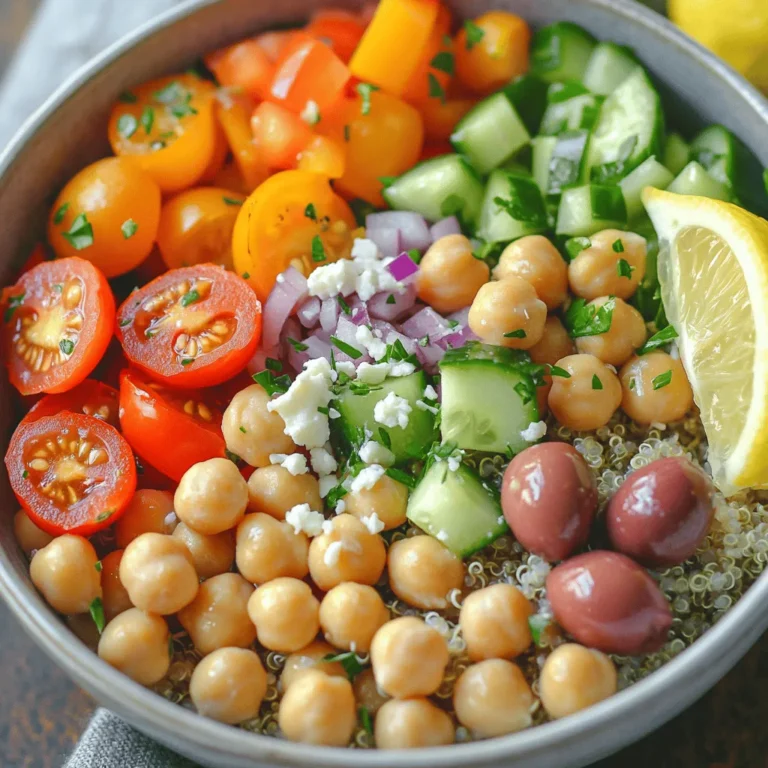
Min Mediterranean Chickpea Bowl Flavorful and Nutritious

PREV 1 … 23 24 25 … 86 NEXT
spicy fork kitchen

explore

DessertsDinnerAppetizersDrinks

Our Policies

  • Cookie Policy
  • Copyright Policy
  • Disclaimer
  • GDPR Policy
  • Terms Of Use
Back to Top
  • About
  • Contact Us
  • Privacy Policy
© 2026 spicy fork kitchen