FREE DINNER EBOOK! Get your copy!
  • Cookie Policy
  • GDPR Policy
  • Disclaimer
  • Terms Of Use
  • Visit my other site: Fun Cookie Recipes
spicy fork kitchen
  • Home
  • Dinner
  • Desserts
  • Drinks
  • Appetizers
  • Contact
  • About
  • Privacy Policy
  • Home
  • Dinner
  • Desserts
  • Drinks
  • Appetizers
  • Contact
  • About
  • Privacy Policy
  • Cookie Policy
  • GDPR Policy
  • Disclaimer
  • Terms Of Use
Visit my other site: Fun Cookie Recipes

HOME / CATEGORIES /

Latest

- 2 large sweet potatoes - 3 tablespoons pure maple syrup - 2 tablespoons olive oil - 1 teaspoon ground cinnamon - 1 teaspoon smoked paprika - ½ teaspoon sea salt - ¼ teaspoon black pepper - Fresh parsley for garnish To make maple glazed sweet potato wedges, you'll need just a few simple ingredients. Start with the sweet potatoes. Their natural sweetness pairs beautifully with maple syrup. I choose large sweet potatoes for this recipe because they provide a good amount of wedges. Next, grab pure maple syrup. This ingredient gives the wedges a rich, sweet flavor. You can find it in most grocery stores. Look for pure syrup, not imitation, for the best taste. Olive oil is essential too. It helps the seasoning stick and adds a nice texture. Now, let's talk seasoning. Ground cinnamon brings warmth, while smoked paprika adds depth. Sea salt and black pepper balance the sweetness and enhance the flavors. Finally, finish with fresh parsley. It adds a pop of color and freshness. This simple combination of ingredients creates a dish that’s both tasty and easy to make. - Preheat oven to 425°F (220°C). - Line the baking sheet with parchment paper. This makes cleanup easy. - Combine 3 tablespoons of pure maple syrup, 2 tablespoons of olive oil, 1 teaspoon of ground cinnamon, 1 teaspoon of smoked paprika, ½ teaspoon of sea salt, and ¼ teaspoon of black pepper in a bowl. - Whisk until well combined. The glaze should be smooth and fragrant. - Toss 2 large sweet potatoes, cut into wedges, in the glaze mixture. - Ensure even coating on all sides. Each wedge needs to shine with that sweet glaze. - Spread the wedges in a single layer on the baking sheet. - Roast for 25-30 minutes, flipping halfway through. This helps them cook evenly and get crispy. - Cool the wedges for a few minutes after roasting. - Garnish with chopped parsley before serving. This adds a fresh touch and bright color. To avoid soggy sweet potatoes, follow a few simple steps. First, slice the sweet potatoes into wedges of equal size. This helps them cook evenly. If some pieces are larger, they may take longer to cook. Next, make sure to spread the wedges in a single layer on the baking sheet. Overcrowding traps steam, which leads to sogginess. Give each wedge space to roast properly. For extra flavor, consider adding spices like cayenne pepper or garlic powder. Just a pinch can elevate the taste. You can also try different oils for varied flavor. Instead of olive oil, use coconut or avocado oil for a unique twist. Pair your maple glazed sweet potato wedges with grilled chicken or fish. They also go well with a fresh salad. To elevate the dish presentation, serve the wedges on a colorful platter. A sprinkle of fresh parsley on top adds a pop of green. Consider drizzling extra maple syrup for a sweet touch. {{image_2}} You can use different types of sweet potatoes for this recipe. White or purple sweet potatoes add unique flavors and colors. White sweet potatoes are less sweet and have a creamy texture. Purple sweet potatoes are nutty and vibrant. Both options work well with the maple glaze. Feel free to experiment with what you have on hand. You can change the sweetener in the glaze. Try using honey or agave syrup for a different taste. If you like some heat, adding chili powder or cayenne pepper gives a nice kick. Just a pinch can enhance the sweet and savory mix. These tweaks keep the dish exciting. You don’t have to roast your wedges. Air frying is a quick option. It makes the wedges crispy without much oil. Grilling is another fun method. It adds a smoky flavor that pairs well with the glaze. Both methods offer a tasty twist on the classic recipe. To keep your maple glazed sweet potato wedges fresh, store them in an airtight container. This helps prevent moisture loss and keeps them from drying out. Place the container in the fridge right after they cool down. Leftovers can last up to four days in the refrigerator. When you want to enjoy the wedges again, the best method is to use the oven. Preheat your oven to 375°F (190°C). Spread the wedges on a baking sheet and bake for about 10-15 minutes. This method helps maintain their crispy texture and sweet flavor. You can also reheat them in an air fryer for a few minutes. This keeps them nice and crunchy! Yes, you can prep sweet potato wedges ahead. - Cut and soak: Cut the sweet potatoes and soak them in water. This keeps them from browning. - Store: Keep them in a sealed bag or container in the fridge for up to 24 hours. - Coat before baking: Add the maple glaze just before roasting for the best flavor. If you don’t have maple syrup, you can use honey or agave nectar. - Honey: This adds a floral note and sweetness. Use the same amount as maple syrup. - Agave nectar: This is sweeter than maple syrup. Use about 2 tablespoons for 3 tablespoons of syrup. Sweet potatoes are very healthy and packed with nutrients. - Rich in vitamins: They contain vitamin A, which is good for your eyes. - High in fiber: Fiber helps digestion and keeps you full. - Low in calories: They are a great option for a healthy snack or side dish. You can freeze sweet potato wedges, but they are best fresh. - Freezing: Cook the wedges first, then cool them completely. Place them in a single layer on a baking sheet to freeze. - Transfer: Once frozen, put them in a freezer bag. They can last up to three months. - Thawing: To thaw, place the bag in the fridge overnight. Bake them again to warm up and crisp. This blog post offered a complete guide to making delicious maple-glazed sweet potato wedges. We covered ingredients, step-by-step instructions, and useful tips to ensure perfect results. You learned about variations, storage, and even answers to common questions. In closing, enjoy these tasty wedges alongside your favorite meals. They are simple to make and pack a punch of flavor. Try making them soon for a healthy treat!

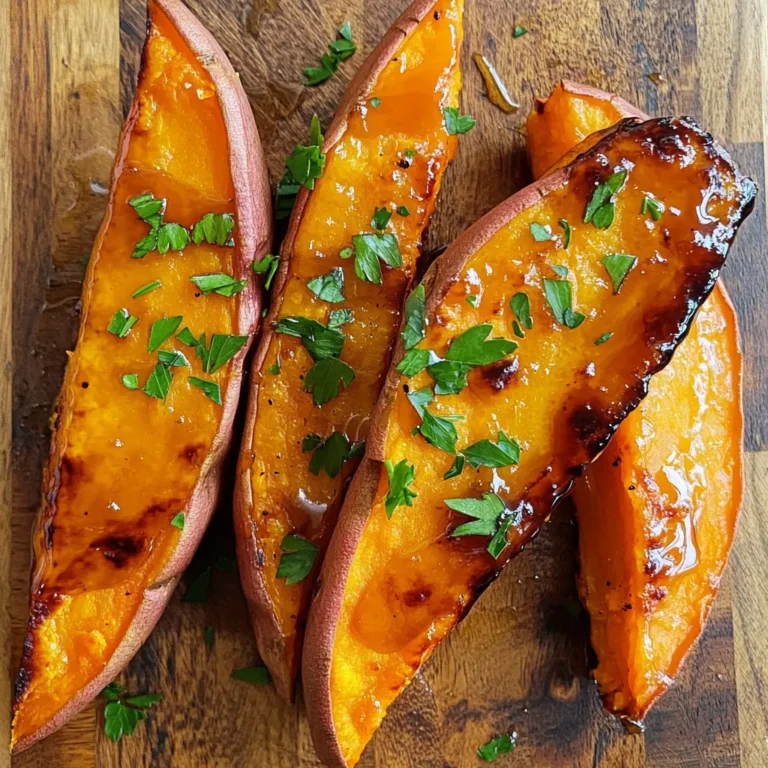
Maple Glazed Sweet Potato Wedges Flavorful and Easy Recipe

- 1 tablespoon olive oil - 1 medium onion, diced - 3 cloves garlic, minced - 2 medium carrots, diced - 2 celery stalks, diced - 6 cups vegetable broth - 1 cup orzo pasta - 1 cup frozen peas - 1 lemon (zest and juice) - 1 teaspoon dried thyme - Salt and pepper to taste - Fresh parsley, chopped (for garnish) When you cook, each ingredient has a specific role. The olive oil gives a rich base. The onion adds sweetness, and the garlic brings strong flavor. Carrots and celery add crunch and nutrition. The vegetable broth serves as the soup's heart, while orzo acts as the filling star. Peas add bright color and sweetness. Lemon zest and juice brighten the dish. Thyme adds a warm note, and salt and pepper balance all the tastes. Fresh parsley is for that pretty finish. You can swap out some ingredients if needed. Use any oil instead of olive oil if you like. For the onion, shallots or leeks work well. Garlic powder can replace fresh garlic in a pinch. If you don’t have carrots or celery, try bell peppers or zucchini. Any broth can work, even chicken broth if you want. For a gluten-free dish, choose gluten-free pasta. If you don’t have peas, try corn or green beans. Just remember, use what you have and make it yours! Start by gathering your ingredients. You will need olive oil, onion, garlic, carrots, and celery. Heat one tablespoon of olive oil in a large pot over medium heat. Once hot, add the diced onion. Sauté for about three to four minutes until it looks clear. Then, add three cloves of minced garlic, two diced carrots, and two diced celery stalks. Cook these together for another three to four minutes. The veggies should start to soften and smell great. Next, pour in six cups of vegetable broth. Stir well and bring it to a boil. Once it is bubbling, add one cup of orzo pasta, one teaspoon of dried thyme, salt, and pepper. Reduce the heat to a simmer. Cook for about eight to ten minutes, stirring now and then. The orzo should be tender but still firm when you bite into it. Now, it’s time for the fun part! Add one cup of frozen peas, the zest, and juice of one lemon. Stir everything together and let it cook for an extra two to three minutes. This brightens up the soup. Taste it to see if it needs more salt or pepper. Remove the pot from heat and let it sit for a few minutes. This helps the flavors blend nicely. When you serve, ladle the soup into bowls and sprinkle fresh parsley on top. Enjoy the zesty goodness! To make your One Pot Lemon Garlic Orzo Soup shine, focus on fresh ingredients. Use fresh herbs like parsley for garnish. Adding them at the end keeps their flavor bright. For a bit of heat, try adding a pinch of red pepper flakes. This will give your soup a warm kick. Also, squeeze extra lemon juice right before serving. This will give it a refreshing boost. Orzo cooks fast, so keep an eye on it. Stir it often to prevent sticking. Cook it until it is just al dente. This keeps it firm and tasty in the soup. If you overcook it, it can get mushy. Always taste the orzo a minute or two before the time is up. Adjust the cooking time based on your stove and pot type. Serve your soup hot in a bowl. Top it with chopped parsley for color and taste. Lemon wedges on the side add a nice touch. Pair the soup with crusty bread or a light salad for a full meal. You can also add a sprinkle of grated cheese for extra flavor. Enjoy this soup as a cozy meal any time of year! {{image_2}} You can easily boost this soup with proteins. Adding chicken makes it heartier. Use cooked, shredded chicken for quick meals. If you prefer beans, chickpeas work well. Just add them near the end of cooking. This choice keeps them firm. If you need a gluten-free soup, swap the orzo for rice or gluten-free pasta. Both options fit nicely and keep the soup tasty. Just adjust the cooking time as needed. Remember, rice takes longer, so add it earlier. Feel free to mix in different veggies based on your taste. Spinach or kale adds great color and nutrients. You can also use zucchini or bell peppers for a crunchy bite. Just chop them small so they cook evenly. Store your One Pot Lemon Garlic Orzo Soup in an airtight container. This keeps it fresh. Let the soup cool down before sealing it. Place it in the fridge within two hours of cooking. It stays good for about 3-4 days. If you want, you can also divide it into smaller portions. This makes it easy to grab for lunches or quick meals. You can freeze the soup if you have leftovers. Pour it into freezer-safe containers. Leave some space at the top. This allows the soup to expand when frozen. Seal the containers tightly and label them with the date. The soup can last for up to 3 months in the freezer. When you're ready to eat, just thaw it in the fridge overnight. Reheat your soup on the stove for the best taste. Pour it into a pot over medium heat. Stir it often to ensure even warmth. If the soup seems thick, add a splash of broth or water. You can also use a microwave. Place it in a microwave-safe bowl. Heat in short bursts of 1-2 minutes, stirring in between. Enjoy your warm, zesty soup! Yes, you can make this soup ahead of time. It tastes even better after the flavors meld. Just follow the recipe as usual. Let it cool down before storing it in the fridge. It stays fresh for up to three days. When you're ready to eat, reheat it on the stove. Stir in a bit of broth if it thickens too much. To store leftovers, first let the soup cool. Pour it into an airtight container. Make sure to leave some space at the top for expansion. Seal it tightly and place it in the fridge. You can also freeze it for longer storage. Just use freezer-safe containers. The soup can last up to three months in the freezer. This soup pairs well with many sides. Try crusty bread for dipping. A fresh salad adds a nice crunch. You could also serve it with grilled cheese for a cozy meal. For a light touch, pair it with lemon wedges. They enhance the soup's zesty flavor. In this article, we explored how to make One Pot Lemon Garlic Orzo Soup. You learned the key ingredients and how to measure them. We discussed how to prepare the veggies and cook the orzo step-by-step. I shared tips for adding flavors and what to serve with this dish. You can even vary the soup by adding proteins or gluten-free options. By following these guidelines, you can enjoy a tasty and easy soup!

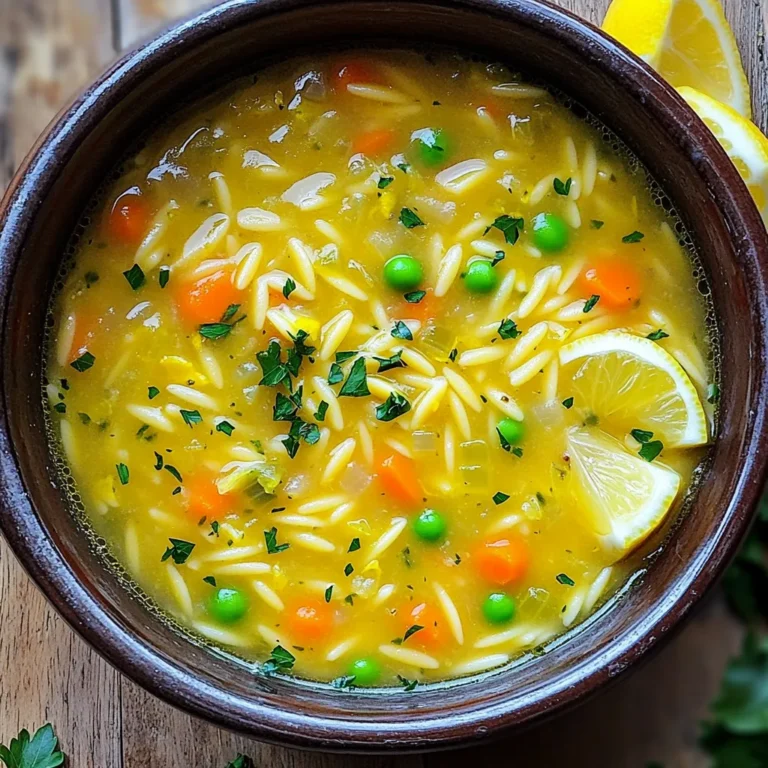
One Pot Lemon Garlic Orzo Soup Easy Comfort Meal

- 1 lb brussel sprouts, trimmed and halved - 3 tablespoons olive oil - 1 teaspoon garlic powder - 1 teaspoon onion powder - 1/2 teaspoon smoked paprika - 1/4 teaspoon red pepper flakes (optional) - Salt and black pepper, to taste - 2 tablespoons balsamic vinegar (for drizzling) - Fresh parsley, chopped (for garnish) Fresh brussel sprouts are the heart of this dish. I love trimming and halving them for even cooking. The olive oil helps to coat the sprouts and adds flavor. Garlic powder and onion powder enhance the savory taste. Smoked paprika gives a warm, rich flavor. If you like heat, add red pepper flakes. Finally, season with salt and black pepper to taste. For finishing touches, balsamic vinegar adds a sweet tang. Chopped parsley adds color and freshness. Each bite bursts with flavors that make brussel sprouts shine. This dish is not just healthy; it's a true delight! First, you need to preheat your air fryer. Set the temperature to 375°F (190°C). Let it heat for about 5 minutes. This step helps cook the brussel sprouts evenly. Grab a large bowl and add the trimmed and halved brussel sprouts. Next, drizzle in 3 tablespoons of olive oil. Sprinkle in 1 teaspoon of garlic powder, 1 teaspoon of onion powder, 1/2 teaspoon of smoked paprika, and a pinch of red pepper flakes if you want a little heat. Add salt and black pepper to taste. Toss everything well. You want each sprout coated in oil and spices. Now, it’s time for the air fryer! Place the seasoned brussel sprouts in the basket. Make sure they are in a single layer. You might need to cook them in batches if your basket is small. Air fry for 15-18 minutes. Shake the basket halfway through. This helps them brown and get crispy all over. When they are done, carefully take them out of the air fryer. Drizzle 2 tablespoons of balsamic vinegar over the brussel sprouts. Toss them gently to coat. For a pop of color, garnish with fresh chopped parsley. Serve them hot for the best taste! To get that perfect crispiness, you need to coat the brussel sprouts well. Start with 1 lb of trimmed and halved brussel sprouts. Pour 3 tablespoons of olive oil over them. Add 1 teaspoon each of garlic powder and onion powder. Mix in 1/2 teaspoon of smoked paprika and, if you like heat, 1/4 teaspoon of red pepper flakes. Don’t forget salt and black pepper to taste. Toss everything together until each sprout is coated evenly. This helps them crisp up nicely in the air fryer. When cooking, avoid overcrowding the air fryer. Spread the brussel sprouts in a single layer. If you pile them up, they won’t cook evenly. Cook in batches if needed. This keeps them crispy and prevents steaming. You want that nice, golden brown look. Air fryers can vary in cook time. If your brussel sprouts are not crispy after 15-18 minutes, you may need to adjust the time. Check your air fryer’s manual for specifics. Every model is a bit different. If they need more time, add a few minutes. Just keep an eye on them to avoid burning. {{image_2}} You can make your crispy brussel sprouts even tastier. Try adding parmesan cheese or fresh lemon zest. Both ingredients add a nice twist. The cheese gives a salty flavor, while lemon adds brightness. Just sprinkle them on top after cooking. Want to change the flavor? Use different spices! Italian herbs, like oregano or basil, work great. You can also try a curry blend for a warm, spicy kick. Mix these spices in with your oil and brussel sprouts. Experiment to find your favorite blend. Brussel sprouts pair well with other veggies. Try mixing in carrots or bell peppers. These add color and sweetness. Just cut them into similar sizes as the brussel sprouts. Toss everything together for a tasty mix. This not only enhances the flavor but also makes your dish more vibrant. After you enjoy the crispy brussel sprouts, let them cool. Place them in an airtight container. Keep them in the fridge for up to three days. Make sure the container seals well to keep moisture out. To bring back that crispy texture, use the air fryer. Set it to 375°F (190°C). Place the brussel sprouts in the basket. Heat for about 5-7 minutes. If you prefer the oven, preheat to 400°F (200°C) and bake for 10 minutes. Both methods work well to re-crisp your sprouts. Yes, you can freeze air-fried brussel sprouts! Allow them to cool completely. Spread them on a baking sheet in a single layer. Freeze for an hour before transferring to a freezer bag. This way, they won’t stick together. You can keep them frozen for up to three months. To make brussel sprouts crispy, start by trimming and halving them. Use fresh brussel sprouts for the best texture. Next, coat them evenly with olive oil. This helps them crisp up nicely. Then, add seasonings like garlic powder, onion powder, smoked paprika, salt, and black pepper. Toss well to cover all sides. It's key to place them in a single layer in the air fryer basket. Do not overcrowd them; this can lead to steaming instead of crisping. Air fry at 375°F (190°C) for 15-18 minutes. Shake the basket halfway through for even cooking. Yes, you can use frozen brussel sprouts, but adjustments are needed. Frozen sprouts may not crisp as well as fresh ones. To help, increase the air frying time by a few minutes. You may also want to thaw them first. Pat them dry with a paper towel to remove excess moisture. This helps avoid sogginess. Always coat them with oil and seasonings like fresh sprouts. Crispy brussel sprouts pair well with many dishes. They make a great side for roasted chicken or grilled fish. You can also serve them with pasta for a hearty meal. Try them with a grain salad or on top of a pizza. For a tasty snack, serve them with a dip like ranch or aioli. They add a crunchy bite to any plate! This blog post guides you on how to make crispy air-fried brussel sprouts. You learned about the ingredients, easy steps, and tips for the best results. Remember to coat the sprouts well with oil and seasoning. You can mix in different veggies and spices to suit your taste. Don't forget to drizzle balsamic vinegar before serving. With these steps, your brussel sprouts will impress anyone at your table. Enjoy this healthy and tasty side dish on your next meal!

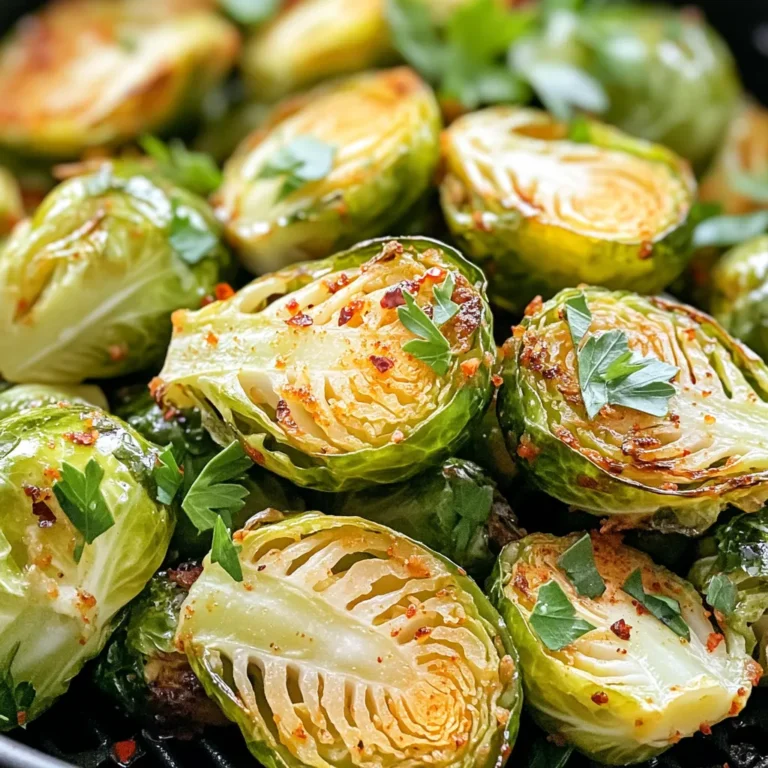
Air Fryer Crispy Brussel Sprouts Flavorful Delight

For these meatballs, I use a mix of ground beef and pork. The beef gives a strong flavor, while the pork adds juiciness. If you prefer, you can skip the pork and use just beef. You need one pound of ground beef and half a pound of ground pork. This combo makes the meatballs tender and tasty. Next, we add breadcrumbs and cheese. Use half a cup of breadcrumbs to bind the meat together. It helps keep the meatballs from falling apart. For cheese, I like to add a quarter cup of grated Parmesan. This cheese adds a rich flavor that pairs well with the meat and pesto. Now, let’s talk about flavor. I use fresh basil pesto, garlic powder, onion powder, salt, and black pepper. The pesto adds a unique taste that makes these meatballs stand out. One-fourth cup of pesto gives the meatballs a fresh herb flavor. I add one teaspoon each of garlic and onion powder for extra depth. Plus, half a teaspoon each of salt and pepper brings all the flavors together. {{ingredient_image_1}} First, you need to get your oven ready. Preheat it to 375°F (190°C). This step helps cook the meatballs evenly. A hot oven makes for a nice, crispy outside. Grab a large mixing bowl. Now, add these ingredients: - 1 lb ground beef - 1/2 lb ground pork (optional) - 1/2 cup breadcrumbs - 1/4 cup grated Parmesan cheese - 1/4 cup fresh basil pesto - 1 tsp garlic powder - 1 tsp onion powder - 1/2 tsp salt - 1/2 tsp black pepper - 1 egg, lightly beaten Mix everything together with your hands. Make sure all the ingredients blend well. This mix gives your meatballs great flavor. Now it's time to shape the meatballs. Take a small amount of the meat mixture, about the size of a golf ball. Flatten it in your palm. Place a mozzarella ball in the center. Fold the meat around the cheese, making sure it is all covered. Shape it back into a ball. Repeat this until you use all the meat mixture. Place your stuffed meatballs on a baking sheet lined with parchment paper. This keeps them from sticking. Bake them in the oven for 20-25 minutes. They should be brown and cooked through. While the meatballs bake, heat 1 cup of marinara sauce in a small saucepan on low. When the meatballs are done, let them sit for a couple of minutes. Serve the meatballs with warm marinara sauce on top. Add fresh basil leaves for a nice touch. Enjoy your tasty meal! To stop the cheese from leaking, make sure you seal the meat well. When you flatten the meat, use enough to cover the cheese fully. Pinch the seams tightly. This keeps the cheese inside while the meat cooks. If you notice a small tear, reshape it gently. For a good meatball texture, mix the ingredients but don’t overwork them. Overmixing makes the meat tough. Use your hands to combine the meat, breadcrumbs, and seasonings gently. Adding the egg helps bind everything together. If the mix feels too wet, add a bit more breadcrumbs. A simple marinara sauce works best with these meatballs. You can make your own or use store-bought. Look for one with fresh flavors. Pair it with fresh basil for extra taste. You can also try a spicy marinara for a kick. A creamy sauce can add a nice twist too! Pro Tips Use Fresh Ingredients: For the best flavor, use fresh basil and high-quality mozzarella. Fresh ingredients will enhance the overall taste of the meatballs. Mix Gently: When combining the meat mixture, mix gently to avoid overworking the meat, which can make the meatballs tough. Don’t Overcook: Keep an eye on the baking time. Overcooking can lead to dry meatballs. Aim for a juicy, tender texture. Experiment with Flavors: Feel free to add other herbs or spices to the meat mixture to customize the flavor profile according to your taste. {{image_2}} You can switch up the cheese in these meatballs. Instead of mozzarella, try using provolone or gouda. These cheeses melt well and add rich flavors. You could even mix in a bit of ricotta for creaminess. Each cheese will give a unique taste and texture to your dish. Feel free to change the meat blend. Ground turkey or chicken works great for a lighter option. If you want more flavor, try lamb or a mix with beef. Just keep the same ratios of meat and other ingredients. This way, your meatballs will stay tasty and juicy. If you prefer a meat-free meal, make veggie meatballs. Use lentils, chickpeas, or black beans as a base. Combine these with breadcrumbs, pesto, and your favorite spices. You can still stuff them with cheese or vegan cheese. This option keeps the dish fun and fills it with flavor. After you enjoy your delicious meatballs, let them cool down. Place them in an airtight container. You can store them in the fridge for up to three days. This keeps them fresh and ready for your next meal. If you want to keep them longer, freezing is a great option. To freeze your meatballs, first, let them cool. Then, place the meatballs in a single layer on a baking sheet. Freeze them for about an hour. Once frozen, transfer them to a freezer-safe bag. This helps prevent them from sticking together. You can keep them in the freezer for up to three months. When you’re ready to eat, just thaw and reheat. When reheating, you have a few options. You can use the microwave for quick heating. Place the meatballs on a plate and cover them with a damp paper towel. Heat for one to two minutes. You can also use the oven. Preheat it to 350°F (175°C) and bake for about 10-15 minutes. If you want them saucy, heat them in marinara sauce on the stove. This adds flavor and moisture back into the meatballs. Pesto Mozzarella Stuffed Meatballs last about 3 to 4 days in the fridge. Store them in an airtight container. Make sure they cool before sealing. This helps keep them fresh and tasty. Yes, you can make meatballs ahead of time. You can prepare them a day in advance. Just shape the meatballs and store them in the fridge. This allows flavors to blend. Bake them just before serving for the best taste. You can serve these meatballs with many sides. Here are some great ideas: - Spaghetti or other pasta - Garlic bread - A fresh salad - Steamed veggies - Risotto Pairing these sides will make your meal more filling and fun. Yes, jarred pesto works just fine. It saves time and adds flavor. Look for high-quality brands for the best taste. Homemade pesto can be amazing, but jarred is a great option too. This blog post covered the essentials of making Pesto Mozzarella Stuffed Meatballs. We explored the key ingredients, from the right ground meat to flavorful cheese. Step-by-step instructions guided you through prepping, mixing, stuffing, and baking. I shared tips to improve texture and prevent messes. You also learned about variations and how to store leftovers. In conclusion, making these meatballs can be fun and rewarding. With the right steps and ingredients, you’ll impress your family and friends. Enjoy experimenting in your kitchen!

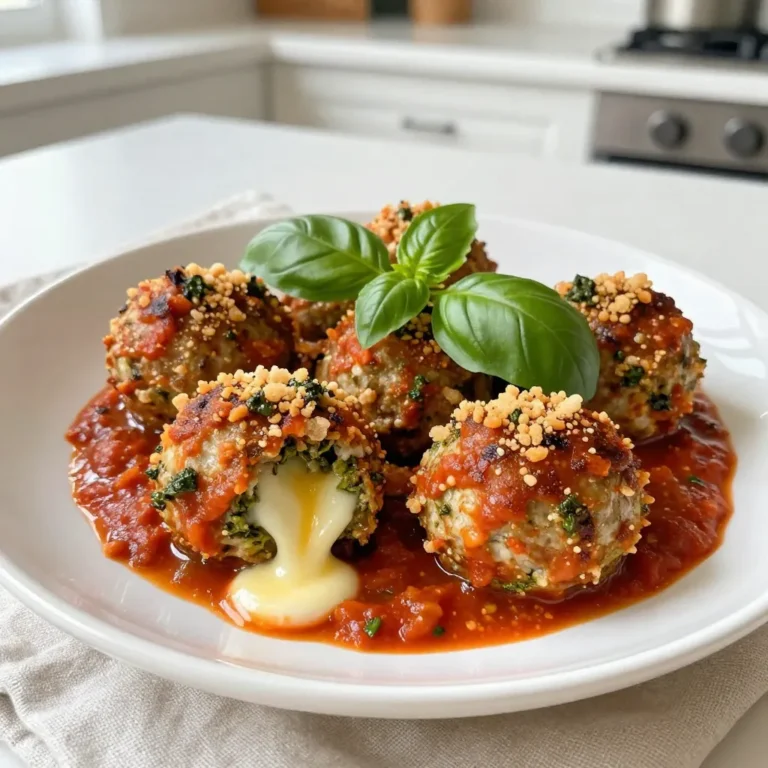
Pesto Mozzarella Stuffed Meatballs Simple and Tasty

- 8 oz (225g) fettuccine pasta - 2 boneless, skinless chicken breasts, sliced into strips - 4 tablespoons unsalted butter - 4 cloves garlic, minced - 1/2 teaspoon red pepper flakes - Fresh parsley, chopped - Zest of 1 lemon - Salt and pepper - 1/2 cup grated Parmesan cheese When making Garlic Butter Chicken Pasta, the right ingredients make all the difference. Start with fettuccine pasta, which has a nice shape for holding sauce. Chicken breasts are a great choice because they cook quickly and stay juicy. Unsalted butter gives a rich flavor, while minced garlic adds that lovely aroma. You can spice things up with red pepper flakes for a slight kick. Fresh parsley brightens the dish, while lemon zest adds a fresh twist. Don’t forget salt and pepper to enhance the taste. The grated Parmesan cheese is key for a creamy finish. This dish is simple yet full of flavor. Gather these ingredients, and you’re ready to create a meal that feels gourmet without the fuss. {{ingredient_image_1}} - Boil 8 oz of fettuccine pasta until al dente. - Drain the pasta and reserve 1/2 cup of the pasta water. - In a large skillet, melt 2 tablespoons of butter over medium heat. - Add 2 sliced chicken breasts, seasoned with salt and pepper. - Sauté the chicken for 5-7 minutes until golden brown. - Remove the chicken from the skillet and set it aside. - In the same skillet, add 2 more tablespoons of butter. - Once melted, add 4 minced garlic cloves and red pepper flakes if you like heat. - Sauté for 1 minute until the garlic is fragrant but not burnt. - Pour in 1 cup of heavy cream and bring to a gentle simmer. - Stir in 1/2 cup of grated Parmesan cheese until it melts, forming a creamy sauce. - Add the cooked chicken back to the skillet, along with the drained fettuccine. - Toss everything together until the pasta is well coated in the sauce. - If the sauce is too thick, add a bit of the reserved pasta water to reach your desired consistency. To get juicy chicken breast, use boneless, skinless chicken. Slice them into strips. This helps them cook faster. Season with salt and pepper before cooking. Cook them for about 5-7 minutes until golden brown. Check that the chicken is no longer pink inside. Avoid overcooking. If chicken cooks too long, it gets dry. Use a meat thermometer; aim for 165°F (75°C) for safety. For a creamy sauce, use heavy cream and Parmesan cheese. If your sauce is too thick, add reserved pasta water. Start with a little, then mix well. This helps reach your desired thickness. To enhance flavor, add lemon zest or red pepper flakes. These give a fresh kick. Stir these in just before serving for the best taste. Cook the fettuccine until it is al dente. This means it should be firm to the bite. Follow package instructions carefully. Drain but save some pasta water. This helps with the sauce later. To time everything right, start boiling the pasta first. Once the pasta is cooking, you can begin cooking the chicken and making the sauce. This way, everything is hot and fresh when you mix it together. Pro Tips Choose the Right Pasta: For this dish, fettuccine is ideal as its flat shape holds the creamy sauce well. You can use other types like linguine or spaghetti, but adjust cooking times accordingly. Perfectly Cooked Chicken: To ensure your chicken stays juicy, avoid overcrowding the skillet. Cook in batches if necessary, and let the chicken rest for a few minutes after cooking before slicing. Fresh Garlic Matters: Use fresh garlic for the best flavor. If you can, avoid pre-minced garlic, as it tends to lose its vibrant taste and aroma. Adjusting Sauce Consistency: If your sauce is too thick, gradually add the reserved pasta water until you reach your desired creaminess. Start with a tablespoon at a time to avoid making it too watery. {{image_2}} You can make your Garlic Butter Chicken Pasta even better by adding veggies. Spinach is a great choice. It wilts quickly and adds color. Broccoli adds crunch and nutrients. Just steam it and toss it in. You can also roast your vegetables. Roasting brings out sweet flavors. Try bell peppers, zucchini, or asparagus for a tasty twist. Want to switch up the protein? Shrimp works well in this dish. Cook shrimp for about 3-4 minutes until pink. Tofu is another great option for a plant-based meal. Just cube it and sauté it until golden. Adjust cooking times as needed to ensure everything cooks perfectly. You can play with spices to boost flavor. Add Italian herbs like basil or oregano for an extra kick. A pinch of smoked paprika can add depth too. Don’t forget different cheeses! Try feta or goat cheese for a tangy twist. Each change creates a new taste experience. To store leftover Garlic Butter Chicken Pasta, place it in an airtight container. This keeps it fresh. The pasta can last in the fridge for up to three days. When ready to eat, check for any signs of spoilage. Always reheat until hot. You can freeze Garlic Butter Chicken Pasta for later. Use a freezer-safe container or bag. It stays good for up to two months. For reheating, let it thaw in the fridge overnight. Heat it in a skillet with a splash of cream or water to revive the sauce. If you have a busy week, meal prep is a great idea. Cook the pasta and chicken ahead of time. Store them separately to keep them fresh. You can mix them before serving. This way, you enjoy a quick and tasty meal any day! It takes about 10 minutes to prep and 20 minutes to cook. So, the total time is 30 minutes. This quick meal is perfect for busy nights. Yes, you can use different pasta. Some good options are penne, spaghetti, or even gluten-free pasta. Just adjust the cooking time based on the type you choose. You can serve this dish with a fresh salad or garlic bread. Roasted veggies like broccoli or zucchini also make great sides. They add color and flavor. Yes, you can make this dish lighter. Use less butter and cream. You can swap heavy cream for Greek yogurt or a low-fat option. This keeps it creamy without the extra calories. Absolutely! Use gluten-free pasta like rice or corn pasta. This keeps the dish tasty while meeting your dietary needs. Just cook the gluten-free pasta according to the package instructions. This post covered key ingredients for Garlic Butter Chicken Pasta, from fettuccine to chicken. I included steps to cook the dish perfectly and tips for juicy chicken. We explored options for veggies, proteins, and flavor boosts. Additionally, I shared storage and meal prep advice to help you get ahead. Cooking this dish can be fun and rewarding. You can make it your own with simple changes. Enjoy your time in the kitchen and the delicious meals you create!

Garlic Butter Chicken Pasta Quick and Flavorful Meal

- 1 ½ cups all-purpose flour - 1 teaspoon baking powder - ½ teaspoon baking soda - ½ teaspoon salt - ¾ cup granulated sugar - ½ cup plain Greek yogurt - 3 large eggs - ¼ cup vegetable oil - 2 tablespoons fresh lemon juice - Zest of 1 lemon - 1 cup fresh blueberries (plus extra for topping) - 1 teaspoon vanilla extract You can swap all-purpose flour for whole wheat flour for added fiber. If you want less sugar, try using honey or maple syrup. Plain yogurt can be replaced with flavored yogurt for a twist. Eggs can be replaced with flax eggs for a vegan option. To make this loaf, you will need: - A 9x5-inch loaf pan - Mixing bowls (medium and large) - Whisk - Spatula - Measuring cups and spoons - Wire rack for cooling These tools will help you create a moist and flavorful Lemon Blueberry Yogurt Loaf. {{ingredient_image_1}} First, preheat your oven to 350°F (175°C). Grease a 9x5-inch loaf pan or line it with parchment paper. This helps the loaf come out easily. Next, in a medium bowl, whisk together 1 ½ cups of all-purpose flour, 1 teaspoon of baking powder, ½ teaspoon of baking soda, and ½ teaspoon of salt. Set this bowl aside for now. In a large mixing bowl, combine ¾ cup of granulated sugar, ½ cup of plain Greek yogurt, 3 large eggs, ¼ cup of vegetable oil, 2 tablespoons of fresh lemon juice, the zest of 1 lemon, and 1 teaspoon of vanilla extract. Whisk these ingredients until smooth. Gradually add the dry mix into the wet mix. Stir gently until just combined. Be careful here; overmixing can make the loaf tough. Now it’s time to fold in 1 cup of fresh blueberries. Make sure they are evenly spread throughout the batter. Pour the batter into your prepared loaf pan. Smooth the top with a spatula and sprinkle a few extra blueberries on top for a nice finish. Place the loaf pan in your preheated oven. Bake for 50-60 minutes. To check if it is done, insert a toothpick into the center. If it comes out clean, your loaf is ready! Once baked, allow the loaf to cool in the pan for about 10 minutes. After that, transfer it to a wire rack to cool completely. For serving, slice the loaf and place it on a decorative platter. You can dust the top with powdered sugar and add lemon slices or a few fresh blueberries for a beautiful look. Enjoy your fresh and moist treat! To get a moist and soft loaf, use fresh blueberries. They add moisture and sweetness. Greek yogurt is key for a tender crumb. It keeps the loaf from being too dry. Don't mix the batter too much. Just stir until the dry ingredients blend in. This will help your loaf rise nicely. Avoid overmixing your batter. This can make the loaf dense and tough. Also, do not skip the lemon zest. It gives a bright flavor that makes the loaf special. Make sure to check your oven's temperature. An oven that is too hot can dry out your loaf. This loaf shines on its own, but you can add a twist. Serve it with a dollop of whipped cream for a treat. You can also pair it with a cup of tea or coffee. For a fun touch, dust the top with powdered sugar. Add extra blueberries or lemon slices for a pop of color. Pro Tips Use Fresh Blueberries: Fresh blueberries will provide the best flavor and texture. If using frozen, make sure to thaw and drain them well to avoid excess moisture in the batter. Check for Doneness: Ovens can vary, so start checking your loaf a few minutes before the time indicated. A toothpick should come out clean or with just a few crumbs when inserted into the center. Let it Cool: Allow the loaf to cool in the pan for a few minutes before transferring it to a wire rack. This helps maintain its shape and prevents it from breaking apart. Flavor Boost: For an extra lemony kick, consider adding a lemon glaze on top after the loaf has cooled. Simply mix powdered sugar with lemon juice until smooth and drizzle over the loaf. {{image_2}} You can change the taste by adding other fruits. Try raspberries, strawberries, or peaches. Each fruit brings its own flavor. You can mix and match. Just replace the blueberries with your choice. Keep the amount the same for best results. Want a lighter version? You can use whole wheat flour instead of all-purpose flour. This adds fiber and nutrients. You can also swap out the sugar for honey or maple syrup. Use the same amount to keep the sweetness. Greek yogurt can be replaced with a plant-based yogurt for a dairy-free option. Glaze your loaf for extra flavor. A simple lemon glaze works well. Just mix powdered sugar with lemon juice. Drizzle it over the top after cooling. You can also top the loaf with fresh fruits or nuts. Chopped almonds or shredded coconut add a nice crunch. Dusting with powdered sugar is another easy way to make it look pretty. To keep your Lemon Blueberry Yogurt Loaf fresh, wrap it tightly in plastic wrap. You can also store it in an airtight container. This helps prevent it from drying out. Place the loaf in a cool, dry place, away from direct sunlight. When stored properly, it can last for about three days. If you want to save some for later, freezing is a great option. First, cool the loaf completely. Next, wrap it in plastic wrap and then in aluminum foil. This double layer will help protect it from freezer burn. Label it with the date. You can freeze it for up to three months. When you are ready to eat it, thaw it in the fridge overnight. To enjoy your loaf warm, slice it and place it in the microwave. Heat it for about 10-15 seconds. If you prefer using the oven, preheat it to 350°F (175°C). Place the slices on a baking sheet and warm them for about 5-10 minutes. This will help revive the flavors and make it taste fresh again. Yes, you can use frozen blueberries. Just add them directly to the batter. Do not thaw them first. They will help keep your loaf moist. Frozen blueberries may bleed a bit, making the batter look blue. This won’t affect the taste, though. To check if the loaf is done, insert a toothpick in the center. If it comes out clean, the loaf is done. You should also look for a golden-brown color on the top. The edges will pull away slightly from the pan. You can serve this loaf with a dollop of whipped cream. A side of fresh berries also works great. For a twist, try it with a lemon glaze. This adds a sweet and tangy flavor. A nice cup of tea or coffee pairs well, too! This blog post detailed a simple way to make a Lemon Blueberry Yogurt Loaf. You learned about the ingredients and tools needed. I shared step-by-step baking instructions and tips for texture. We explored tasty variations and smart storage methods. Finally, I answered common questions to help you. Now, you can bake confidently, serve delicious slices, and enjoy every bite. Happy baking!

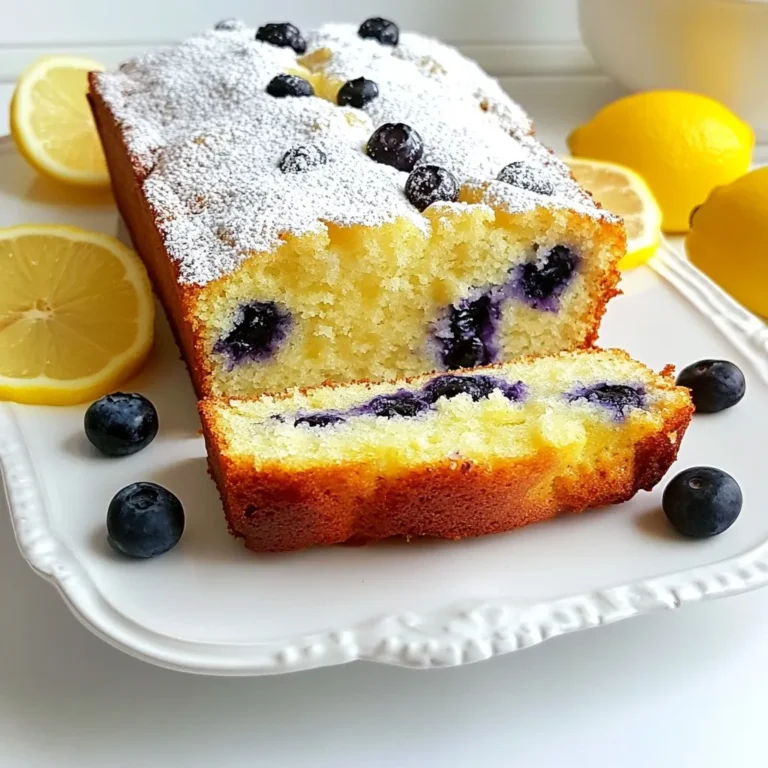
Lemon Blueberry Yogurt Loaf Fresh and Moist Treat

To make these tasty wings, you'll need the following: - 2 lbs chicken wings - 4 cloves garlic, minced - 1/4 cup hot sauce (your favorite) - 2 tablespoons olive oil - 1 tablespoon honey - 1 teaspoon smoked paprika - 1 teaspoon cayenne pepper - Salt and pepper to taste - Fresh chopped parsley for garnish These ingredients create a mix of flavors that excite your taste buds. The garlic adds a nice punch, while the hot sauce brings the heat. Honey balances everything out with a touch of sweetness. Want to add more flair to your wings? Consider these optional ingredients: - 1 teaspoon onion powder - 1 tablespoon soy sauce - 1 tablespoon lime juice Onion powder gives more depth, while soy sauce adds umami. Lime juice adds a zesty kick that brightens the dish. Choose what fits your taste! Dipping sauces enhance the flavor of your wings. Here are some great options: - Ranch dressing - Blue cheese dressing - Honey mustard Ranch dressing is creamy and cool, while blue cheese has a strong, tangy flavor. Honey mustard combines sweetness with tanginess. Pick your favorite or serve them all for variety! To get started, preheat your oven to 400°F (200°C). This heat will help the wings crisp up nicely. Next, take a baking sheet and line it with aluminum foil. This makes cleanup easy. Place a wire rack on top of the foil. The rack lets air flow around the wings, ensuring they bake evenly and become crispy. Now, let’s create the spicy garlic marinade. In a large bowl, mix together 4 cloves of minced garlic, 1/4 cup of your favorite hot sauce, 2 tablespoons of olive oil, and 1 tablespoon of honey. Add in 1 teaspoon of smoked paprika and 1 teaspoon of cayenne pepper for that extra kick. Don’t forget to season with salt and pepper to taste. Stir everything until well combined. You want a thick, flavorful marinade that will coat the wings perfectly. Take your 2 pounds of chicken wings and place them in the bowl with the marinade. Toss them well to ensure every wing gets coated. For the best flavor, let them marinate for at least 30 minutes. If you have time, you can refrigerate them for up to 2 hours. This step really allows the flavors to seep into the chicken, making them delicious. Once marinated, arrange the wings in a single layer on the wire rack. This helps them cook evenly. Bake the wings in your preheated oven for 40-45 minutes. Flip them halfway through to ensure both sides get crispy. Keep an eye on them near the end; you want them golden and cooked through. After baking, let the wings cool for a couple of minutes. Toss them in any leftover marinade before serving. Garnish with fresh chopped parsley for a burst of color and flavor. Enjoy your spicy garlic chicken wings! To get crispy chicken wings, start by using a wire rack. This keeps air flowing around the wings, which helps them crisp up. Make sure to pat the wings dry before marinating. Remove excess moisture for better texture. Baking at a high temperature, around 400°F (200°C), also helps achieve that perfect crunch. Flipping the wings halfway through cooking ensures even crispiness. You can easily adjust the heat in this recipe. If you like it milder, use less cayenne pepper or skip it entirely. You can also choose a milder hot sauce. If you crave more heat, add extra cayenne or a spicier hot sauce. Taste the marinade before adding the wings to find the right balance for you. Letting the chicken wings marinate is key for flavor. Aim for at least 30 minutes, but two hours is better. This allows the spices and garlic to soak into the meat. For even more flavor, marinate overnight in the fridge. Just remember to bring the wings back to room temperature before cooking for the best results. {{image_2}} You can swap some ingredients to create new flavors. Try using different hot sauces for various heat levels. For example, use a sweet chili sauce for a milder kick. You can also add lemon juice for a fresh, zesty touch. Using fresh herbs like thyme or rosemary can give a nice twist as well. If you like smoky flavors, consider adding smoked chipotle powder instead of smoked paprika. Grilling these wings gives them a great char and smoky taste. Start by preparing the marinade as usual. Then, let the wings soak up those flavors. Preheat your grill to medium heat. Place the wings on the grill and cook for about 20-25 minutes. Flip them often to avoid burning. Grill until they are crispy and cooked through. This method adds a lovely flavor that you will enjoy. Using an air fryer is a fast way to make these wings. Mix your marinade as before. Coat the wings in the spicy mix, then let them sit for a bit. Preheat the air fryer to 380°F (193°C). Place the wings in a single layer in the basket. Cook for about 25-30 minutes, shaking the basket halfway through. This method keeps the wings crispy and reduces cooking time. You’ll love how easy it is! After enjoying your spicy garlic chicken wings, you may have some left. To store them, let the wings cool first. Place them in an airtight container. Keep them in the fridge. They will stay fresh for up to three days. If you want to keep them longer, freezing is a great option. When you're ready to eat the leftover wings, reheat them for the best taste. Preheat your oven to 350°F (175°C). Place the wings on a baking sheet. Bake for about 10-15 minutes. This helps them regain their crispiness. You can also use an air fryer if you have one. This method makes them crispy without drying them out. To freeze your spicy garlic chicken wings, first, let them cool completely. Wrap each wing in plastic wrap. Then, place them in a freezer bag. Remove as much air as possible before sealing. You can freeze them for up to three months. When you're ready to enjoy them, thaw them overnight in the fridge. Then, reheat as described above. This keeps the flavor and texture nice. Yes, you can make these wings ahead of time. Marinate the wings and store them in the fridge. You can prepare them a day in advance. This will help the flavors soak in more. Choose a hot sauce you like. I recommend using a classic like Frank's RedHot. It gives a great balance of heat and flavor. You can also try Sriracha for a unique twist. To make the wings less spicy, use less cayenne pepper. You can also mix in some honey to balance the heat. Another option is to use a milder hot sauce, which will keep the flavor without too much heat. Yes, frozen wings work well. Just be sure to thaw them completely before marinating. This helps the marinade stick better and gives you a great flavor. These wings go great with celery sticks and ranch or blue cheese dressing. You can also serve them with a fresh salad. French fries or potato wedges are tasty options too! You learned how to make delicious Spicy Garlic Chicken Wings using simple steps. We covered key ingredients, easy cooking methods, and tips for perfect results. Remember to adjust heat levels to your taste and try different sauces. You can even grill or air fry for more options. With these tips and tricks, you’ll impress your friends and family. Enjoy your wings and share your cooking joy with others!

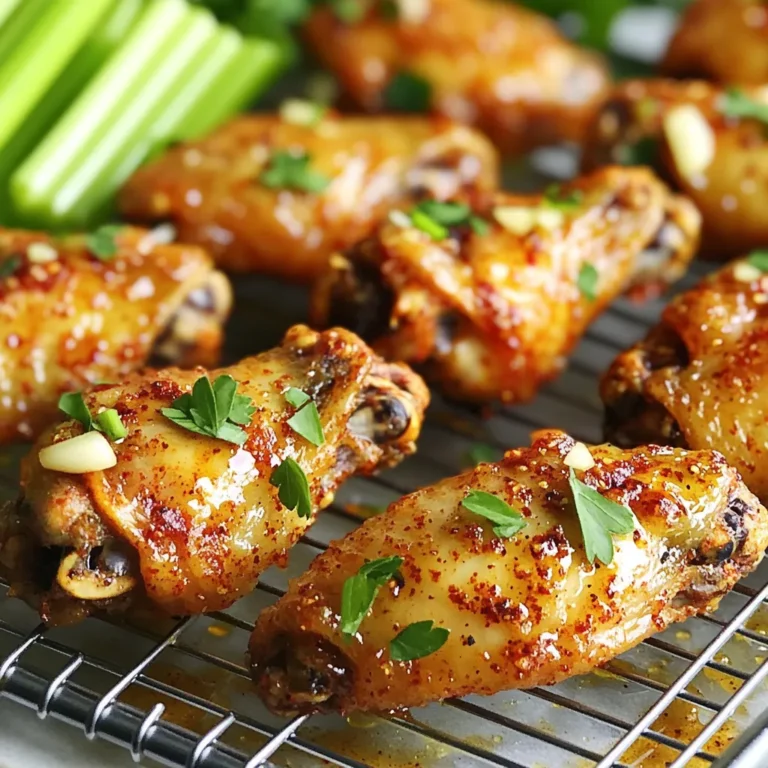
Spicy Garlic Chicken Wings Crispy and Flavorful Treat

- 2 cups semi-sweet chocolate chips - 1 can (14 oz) sweetened condensed milk - 1 cup crushed pretzels - 1 cup caramel sauce (store-bought or homemade) - 1 tsp sea salt (plus extra for topping) - 1/2 cup chopped pecans (optional) You need simple ingredients to make this treat. Start with semi-sweet chocolate chips for a rich base. The sweetened condensed milk adds creaminess and sweetness. Next, crushed pretzels give that perfect salty crunch. You can use store-bought or homemade caramel sauce for a sweet touch. A sprinkle of sea salt on top brings all the flavors together. If you want extra nutty flavor, add chopped pecans. These ingredients create a delicious mix of sweet and salty. This balance makes the fudge hard to resist. Start by lining an 8x8 inch baking pan with parchment paper. This helps prevent sticking. Make sure to leave some overhang. This overhang lets you lift the fudge out easily later. In a medium saucepan, combine 2 cups of semi-sweet chocolate chips and one can of sweetened condensed milk. Heat this mixture on low. Stir constantly until the chocolate melts and the mix is smooth. This step is key, so don’t walk away! Once the chocolate is melted, take the saucepan off the heat. Fold in 1 cup of crushed pretzels and 1/2 cup of chopped pecans, if you like them. Mix well to ensure everything is evenly combined. Pour half of the chocolate-pretzel mixture into your prepared pan. Spread it out evenly. Next, drizzle half of the caramel sauce over this layer. Use a spatula to gently swirl the caramel into the chocolate. Now, spoon the rest of the chocolate-pretzel mixture on top. Spread it evenly again. Drizzle the remaining caramel sauce over this layer and swirl it in for a marbled look. Finish by sprinkling sea salt on top. After chilling the fudge in the fridge for at least 3 hours, it's time to cut. Lift the fudge out using the parchment paper. Cut it into squares for serving. For a nice touch, serve on a decorative plate with extra pretzel pieces or a caramel drizzle on top. Enjoy your treat! To get the best fudge, chilling time matters. You need to chill the fudge for at least three hours. This allows it to firm up nicely. If you skip this step, your fudge may be too soft. Adjusting caramel thickness is also key. If your caramel is too thick, it won’t swirl well. You can warm it slightly in the microwave. This will make it easier to drizzle and swirl in the fudge. For parties, make the fudge pop with presentation. Serve it on a decorative plate. Add extra pretzel pieces on top for fun. A drizzle of caramel adds a nice touch too. Pair the fudge with ice cream or coffee. The creaminess of ice cream goes great with the salty fudge. A cup of coffee can balance the sweetness. You can swap ingredients to make the fudge your own. For nuts, try almonds or walnuts instead of pecans. Each nut adds a different taste. You can also change the sweetness level. If you like a less sweet fudge, use dark chocolate chips. You can even cut back on caramel sauce. Adjust it to fit your taste! {{image_2}} You can make your salted caramel pretzel fudge even more delicious by changing the chocolate. Try using dark chocolate or white chocolate for different tastes. Each type adds its own unique flavor. You can also add extracts like vanilla or almond. Just a teaspoon can change everything. These small changes can make a big difference in flavor. Want to switch up the crunch? Use different types of pretzels. Thin pretzel sticks or chocolate-covered pretzels can add a fun twist. You might also explore other crunchy toppings. Toffee bits or crushed nuts can bring extra texture. Each option offers a new taste experience, making your fudge even more fun to eat. If you need gluten-free options, use gluten-free pretzels. They work just as well and keep the flavor intact. For vegan options, choose dairy-free chocolate and coconut milk instead of sweetened condensed milk. This way, you can enjoy fudge that fits your diet without losing taste. These substitutions let everyone enjoy this treat. To keep your salted caramel pretzel fudge fresh, use an airtight container. Glass or plastic containers work best. Make sure it's clean and dry before adding the fudge. If you stack pieces, place parchment paper between layers. This prevents sticking and keeps them neat. Freezing fudge is simple. First, let it cool completely. Cut it into squares. Wrap each piece tightly in plastic wrap. Then, place them in a freezer-safe bag or container. Label it with the date. When you want to serve, take out the fudge and let it thaw in the fridge overnight. This keeps the texture nice. When stored properly, salted caramel pretzel fudge can last up to two weeks at room temperature. If you refrigerate it, it can last even longer, about three weeks. Watch for changes in smell or texture. If it feels hard or crumbly, it’s time to toss it. Salted caramel pretzel fudge is a sweet and salty treat. It combines creamy chocolate and caramel with crunchy pretzels. The sweet chocolate melts in your mouth, while the salty pretzels add a fun crunch. The sea salt on top enhances all the flavors, making each bite a delight. Yes, you can use homemade caramel sauce. To make your own, heat sugar in a pan until it melts. Add butter and cream, stirring until smooth. Be careful, as hot sugar can burn you. Homemade caramel can taste richer and fresher than store-bought. Chilling the fudge is important for setting the texture. When you chill it, the mixture firms up, making it easier to cut. If you skip this step, the fudge may be too soft and messy. Aim to chill for at least three hours for the best results. Absolutely! You can add nuts, sprinkles, or even crushed cookies. Try using toffee bits or a drizzle of chocolate. The toppings can change the taste and look of your fudge. Get creative and make it your own! You can find pre-made fudge at local bakeries or specialty shops. Some grocery stores also carry it in their dessert section. If you're short on time, check online for delivery options. Many local makers sell delicious fudge on their websites. Yes, this fudge makes a great gift! To package it, cut it into squares and place them in a pretty box. You can wrap the box with ribbon to make it special. Add a card with a personal note for a lovely touch. Your friends will love it! You learned how to make delicious Salted Caramel Pretzel Fudge. We covered the best ingredients, easy steps, and fun ways to customize your fudge. Remember to chill it for the perfect texture and explore various flavors. This fudge is not only tasty but also great for sharing or gifting. Enjoy your sweet treat, and have fun experimenting with different toppings. You now have the skills to impress at any gathering!

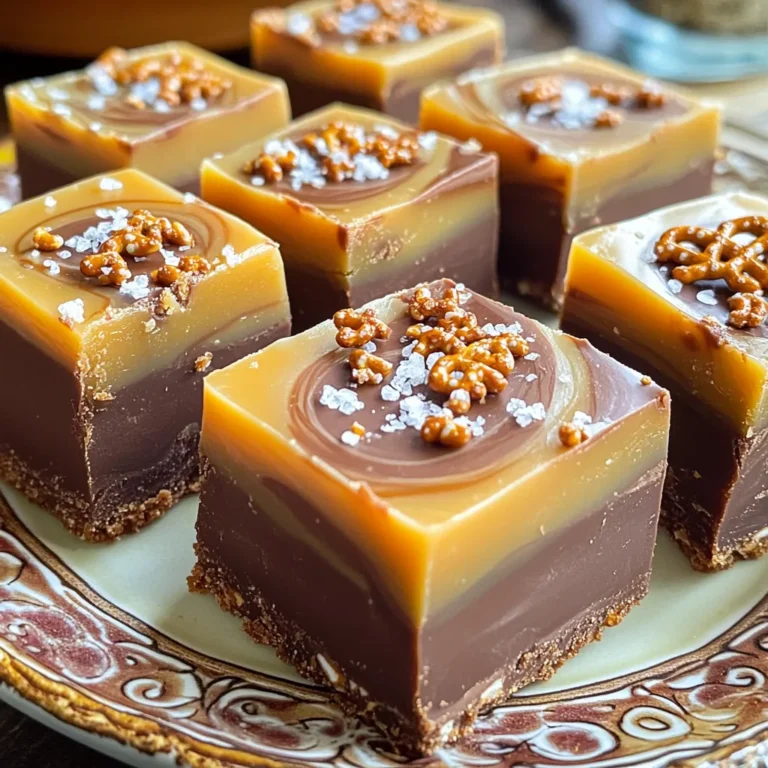
Salted Caramel Pretzel Fudge Irresistible and Easy Treat

- 1 ½ cups all-purpose flour - 1 cup granulated sugar - ½ cup brown sugar, packed - 1 cup canned pumpkin puree - ½ cup vegetable oil - 2 large eggs - 1 teaspoon vanilla extract - 1 teaspoon baking powder - ½ teaspoon baking soda - ½ teaspoon salt - 1 teaspoon ground cinnamon - ½ teaspoon ground nutmeg - ½ teaspoon ground ginger - ½ cup chopped pecans or walnuts - ½ cup crumb topping To create this delightful Pumpkin Crumb Cake, gather all the ingredients listed. Each ingredient plays a key role in bringing flavor and texture to your cake. The main ingredients form a moist base. The pumpkin puree ensures a rich taste and keeps the cake soft. The sugars add sweetness, while the oil helps it stay tender. Don’t forget the eggs; they bind everything together. The vanilla extract rounds out the flavor profile. Next, the dry ingredients add lift and spice. Baking powder and baking soda create that perfect rise. Salt enhances the flavors, and the spices fill your kitchen with fall aromas. Ground cinnamon, nutmeg, and ginger bring warmth and depth. Finally, you can add optional ingredients for extra texture. Chopped nuts add crunch, while the crumb topping gives a sweet, crispy finish. Together, these ingredients create a cake that is both comforting and festive. It’s perfect for gatherings or a quiet night in! - Preheat the Oven: Set your oven to 350°F (175°C). - Grease the 9x9 inch baking pan with butter or oil. - Combine flour, brown sugar, and cinnamon in a small bowl. - Add melted butter to the mix. - Stir until the mixture looks crumbly, then set it aside. - In a large bowl, whisk the pumpkin puree, vegetable oil, eggs, and vanilla extract. - In another bowl, sift together the dry ingredients: flour, granulated sugar, brown sugar, baking powder, baking soda, salt, cinnamon, nutmeg, and ginger. - Gradually add the dry mix to the wet mixture. - Stir gently until everything is just combined. - If you want, fold in chopped pecans or walnuts for added crunch. - Pour the batter into your prepared pan and spread it evenly. - Sprinkle the crumb topping over the batter. - Bake for 30-35 minutes. Check if it’s done by sticking a toothpick in the center. If it comes out clean, your cake is ready! How to know when the cake is done: You can test if the cake is done by inserting a toothpick into the center. If it comes out clean, the cake is ready. The edges should also pull away from the pan slightly. This method helps ensure a moist, fluffy cake. Importance of cooling before slicing: Let the cake cool in the pan for about 10 minutes. Then, transfer it to a wire rack to cool completely. Cooling helps the cake set. If you slice it too soon, it may crumble and fall apart. Serving suggestions and embellishments: Cut the cake into squares and place them on a decorative plate. Dust them lightly with powdered sugar for a lovely touch. You can also sprinkle some cinnamon on top for extra flavor. Ideal accompaniments: Serve the cake with a dollop of whipped cream. This adds a creamy texture that pairs well with the soft cake. You can also add a scoop of vanilla ice cream for a delightful contrast. How to prepare in advance for gatherings: You can make this cake a day ahead. Just bake it, let it cool completely, and store it in an airtight container. This saves time and keeps the cake fresh for your guests. Best practices for reheating: To reheat the cake, you can use a microwave or an oven. If using a microwave, heat for about 10-15 seconds per slice. For the oven, preheat to 350°F (175°C) and heat wrapped in foil for about 10 minutes. This keeps the cake moist and warm. {{image_2}} You can make your pumpkin crumb cake even better! Try adding spices like cloves or allspice. These spices give the cake a warm, cozy flavor. You might also want to mix in some chocolate chips. The sweet chocolate pairs well with pumpkin. It adds a fun twist to each bite. If you need a gluten-free version, it’s easy! You can use gluten-free flour instead of regular flour. Just make sure to check the package for the right amount. Some gluten-free flours absorb more liquid. You may need to adjust the liquid in the recipe slightly. Want to make this cake vegan? You can replace the eggs with flaxseed meal or applesauce. Use one tablespoon of flaxseed meal mixed with three tablespoons of water for each egg. For the dairy, swap regular milk with almond or oat milk. These changes keep the flavor while making it plant-based. Each of these variations lets you enjoy pumpkin crumb cake your way! To keep your Pumpkin Crumb Cake fresh, store it in an airtight container. Place it in the fridge. The cake will stay good for about five days. The flavors may deepen over time, making each slice even better. If you want to save some for later, freezing is a great option. First, let the cake cool completely. Then, wrap it tightly in plastic wrap. After that, put it in a freezer-safe bag or container. This keeps out air and prevents freezer burn. You can freeze it for up to three months. To thaw, move the cake to the fridge overnight. When you're ready to enjoy your cake again, you can reheat it. The microwave is quick, but it can make the cake a bit soggy. Instead, try reheating in the oven. Preheat your oven to 350°F (175°C). Place the cake on a baking sheet and heat for about 10-15 minutes. This way, the crumb topping stays crisp, and the cake warms evenly. Enjoy each bite as if it were fresh out of the oven! I love serving Pumpkin Crumb Cake in a fun way. Cut it into squares and place them on a decorative plate. A light dusting of powdered sugar adds a nice touch. You can also sprinkle some cinnamon on top for extra flavor. For a special treat, add a dollop of whipped cream on the side. This makes it look fancy and tastes great. Yes, you can use fresh pumpkin! Start by roasting a small pumpkin. Cut it in half, scoop out the seeds, and place it cut-side down on a baking sheet. Roast it at 350°F for about 45 minutes. Once cooled, scoop out the flesh and mash it until smooth. This fresh pumpkin puree works well in the recipe and adds a nice flavor. To keep your Pumpkin Crumb Cake fresh, first let it cool completely. Then, wrap it tightly in plastic wrap or foil. Store it in the fridge for up to five days. If you want to keep it longer, you can freeze it. Just cut it into squares and place them in an airtight container. It will last for about three months in the freezer. Thaw it in the fridge when you're ready to enjoy! This Pumpkin Crumb Cake is a simple yet delicious treat you can make today. We covered the key ingredients, from the main components to optional add-ins that add crunch. You learned step-by-step instructions for baking and tips for perfecting your cake. Remember, you can customize flavors and make it gluten-free or vegan too. Enjoy your cake warm with whipped cream or at room temperature. Making this cake is fun and rewards you with tasty bites. Let's get baking!

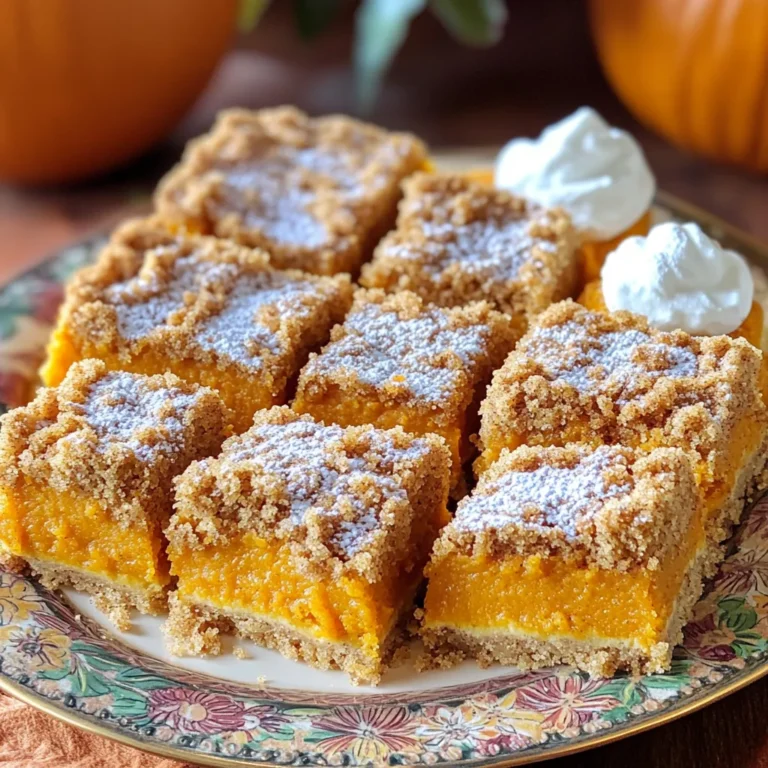
Pumpkin Crumb Cake Irresistible Fall Dessert Recipe

- 300g pasta (fettuccine or linguine works well) - 2 tablespoons olive oil - 4 cloves garlic, minced - 200g fresh spinach, washed and roughly chopped - 1 cup heavy cream or coconut cream for a dairy-free option - 1/2 cup grated Parmesan cheese (or nutritional yeast for a vegan option) - Salt and pepper to taste - Pinch of nutmeg - 1/4 teaspoon red pepper flakes (optional for heat) - Fresh basil leaves for garnish I love how simple yet delicious this dish is. The garlic adds a rich flavor. Spinach gives a nice color and healthy touch. Cream makes it all creamy and smooth. Parmesan cheese melts perfectly into the sauce, giving it a savory kick. I recommend using fettuccine or linguine for this dish. They hold the sauce well. You can also try penne or farfalle if you like. Just make sure to cook them until al dente. This way, they stay firm and tasty. If you want a dairy-free option, coconut cream works great. It keeps the richness while being vegan. For a gluten-free meal, use gluten-free pasta. Nutritional yeast is a fantastic choice instead of Parmesan for vegans. These substitutions keep the dish flavorful while meeting dietary needs. Start by boiling salted water in a large pot. Add 300 grams of pasta, like fettuccine or linguine. Cook it according to package instructions until it is al dente. Once cooked, drain the pasta but save about half a cup of the water. Set the pasta aside for now. In a big skillet, heat 2 tablespoons of olive oil over medium heat. Once hot, add 4 minced garlic cloves. Sauté the garlic for 1-2 minutes until it smells great. Be careful not to let it burn. Next, add 200 grams of chopped spinach. Cook it for 3-4 minutes while stirring often. The spinach will wilt and shrink down in size. Pour in 1 cup of heavy cream or coconut cream if you prefer dairy-free. Stir it well to mix with the garlic and spinach. Let the mixture simmer for a couple of minutes. After that, add in 1/2 cup of grated Parmesan cheese. Stir until the cheese melts and the sauce becomes creamy and smooth. Now it's time to add the cooked pasta to the skillet. Toss everything together until the pasta is evenly coated with the creamy sauce. If the sauce looks too thick, add a small amount of the reserved pasta water. Keep mixing until you reach the perfect consistency. When serving, use deep bowls for the pasta. Garnish with fresh basil leaves and an extra sprinkle of Parmesan cheese. For some crunch, you can top it with crushed walnuts or pine nuts. Enjoy your creamy garlic spinach pasta! To get that nice creamy feel, use heavy cream. If you want a dairy-free option, coconut cream works great. Always add the cream slowly while mixing. This helps keep the sauce smooth. If it feels too thick, add some pasta water. This will loosen it up without losing flavor. Seasoning makes a big difference. Start with salt and pepper. Add a pinch of nutmeg for warmth. If you like heat, sprinkle in red pepper flakes. Taste as you go to find your perfect balance. Fresh basil on top adds a wonderful aroma and taste. Don’t rush the garlic. Sauté it slowly to avoid burning. Always use a large skillet. This gives you space to mix the pasta and sauce well. When cooking the spinach, stir often. You want it to wilt but not lose its bright color. Remember to save your pasta water! It’s a secret tool for making sauces creamy. {{image_2}} To make vegan creamy garlic spinach pasta, swap heavy cream for coconut cream. Use nutritional yeast instead of Parmesan cheese. This keeps the dish rich and creamy without any animal products. You still get that lovely garlic flavor and fresh spinach. You will love how simple it is to adjust! You can add proteins to this dish for more heartiness. Grilled chicken or sautéed shrimp works great. Just cook them in the skillet before adding garlic. Toss them in with the pasta and creamy sauce. This adds flavor and makes the meal more filling. If you need a gluten-free option, choose pasta made from rice or quinoa. Many brands offer gluten-free fettuccine or linguine. Cook them as you would regular pasta. The sauce will still taste amazing, and you won’t miss the gluten. To store your creamy garlic spinach pasta, let it cool first. Place the pasta in an airtight container. Keep it in the fridge. It will stay fresh for up to three days. Make sure to keep the sauce with the pasta to keep it creamy. When you are ready to eat, reheat the pasta on the stove. Use a low heat setting. Add a splash of water or cream to help the sauce stay smooth. Stir it often until it is warm. You can also use a microwave. Heat in short bursts, stirring in between. If you want to freeze it, use a freezer-safe container. Let the pasta cool completely before you pack it. It can last up to three months in the freezer. To eat, thaw it in the fridge overnight. Reheat as described above for the best taste and texture. Yes, you can use other vegetables. Broccoli, kale, or bell peppers work great. Just chop them small and add them when you sauté the garlic. They will cook quickly and add more flavor and color. You can mix and match to fit your taste. You have options! Coconut cream is a great dairy-free choice. You can also use cashew cream or even silken tofu blended until smooth. These substitutes still give a creamy texture without the dairy. If you want a lighter option, try Greek yogurt mixed with a bit of milk. To add heat, use more red pepper flakes. You can also add chopped fresh chili peppers or a dash of hot sauce. For a smoky flavor, try adding some smoked paprika. Just remember to start small, so you can adjust to your heat preference. This pasta goes well with a fresh salad or garlic bread. A simple side salad with mixed greens and a lemon vinaigrette works perfectly. You can also serve it with roasted veggies or a light soup to complete your meal. This blog post covered how to make creamy garlic spinach pasta. We looked at the best ingredients, cooking steps, and useful tips. You also learned tasty variations and how to store leftovers. In conclusion, this pasta dish is simple and fun to make. Adjust it to fit your needs, whether you want it vegan or gluten-free. Enjoy your creamy garlic spinach pasta and share it with friends!

Creamy Garlic Spinach Pasta Delectable Weeknight Meal

PREV 1 … 15 16 17 … 86 NEXT
spicy fork kitchen

explore

DessertsDinnerAppetizersDrinks

Our Policies

  • Cookie Policy
  • Copyright Policy
  • Disclaimer
  • GDPR Policy
  • Terms Of Use
Back to Top
  • About
  • Contact Us
  • Privacy Policy
© 2026 spicy fork kitchen